
Someone I know spent months bookmarking sleeve photos before realizing the real problem was not finding pretty pictures. It was picking motifs that move with the arm and that still read after a few years. These twelve Japanese sleeve directions keep coming up in portfolios I visited across five shops, and they each show a reliable way to plan flow, sessions, and future touch-ups.
1. Full Dragon Nagasode with Wind Bars
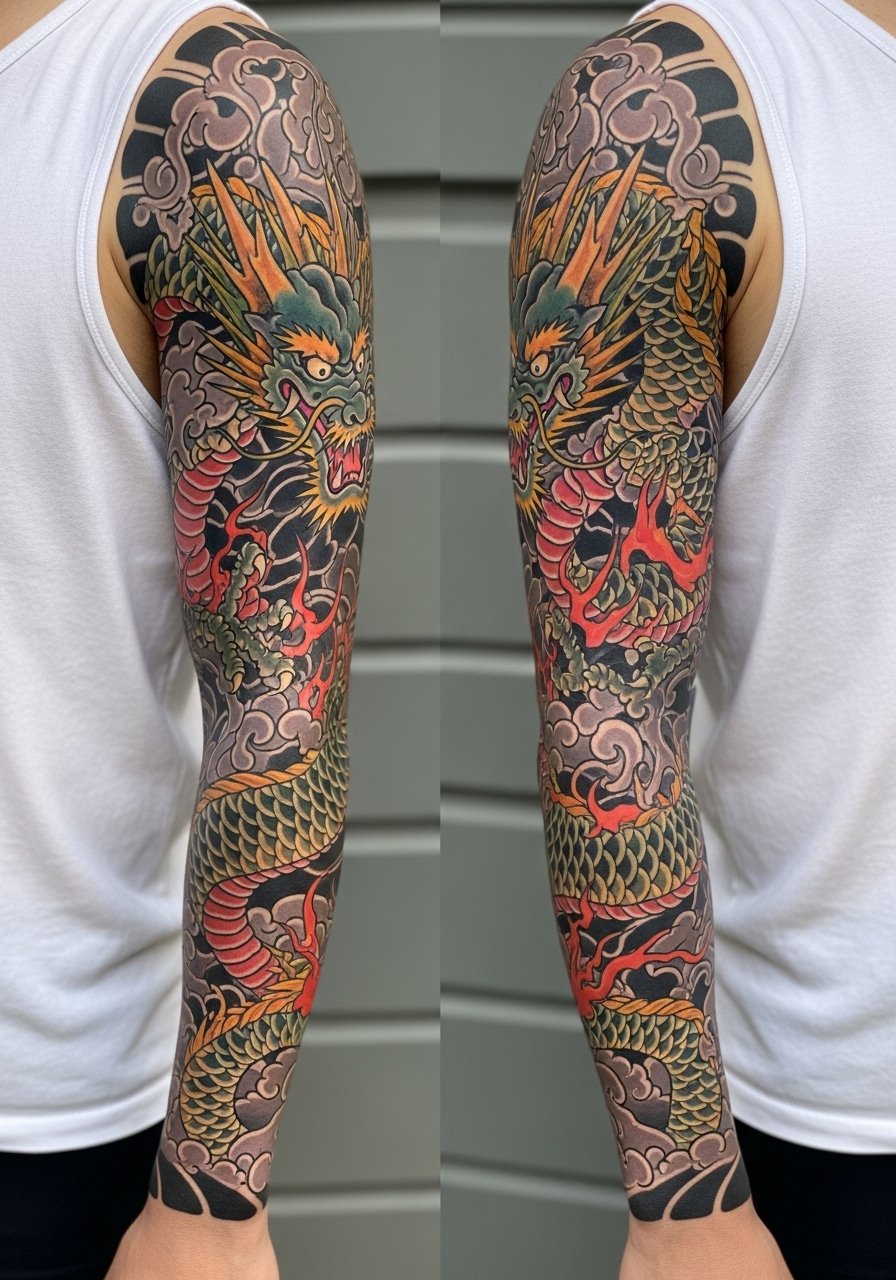
Someone I know booked this after seeing a nagasode that wrapped onto the chest. Expect long sessions on the shoulder cap and forearm, each four to six hours. Tell your artist you want bold outlines and heavy saturation rather than micro detail so the scales keep shape at five years healed. A common mistake is asking for tiny scale work near the wrist. That compresses on thicker arms and risks blowout. Pain is moderate to high on inner forearm and elbow areas. Longevity note, bold linework holds color longer than delicate realism. Plan touch-ups around year three to five depending on sun exposure.
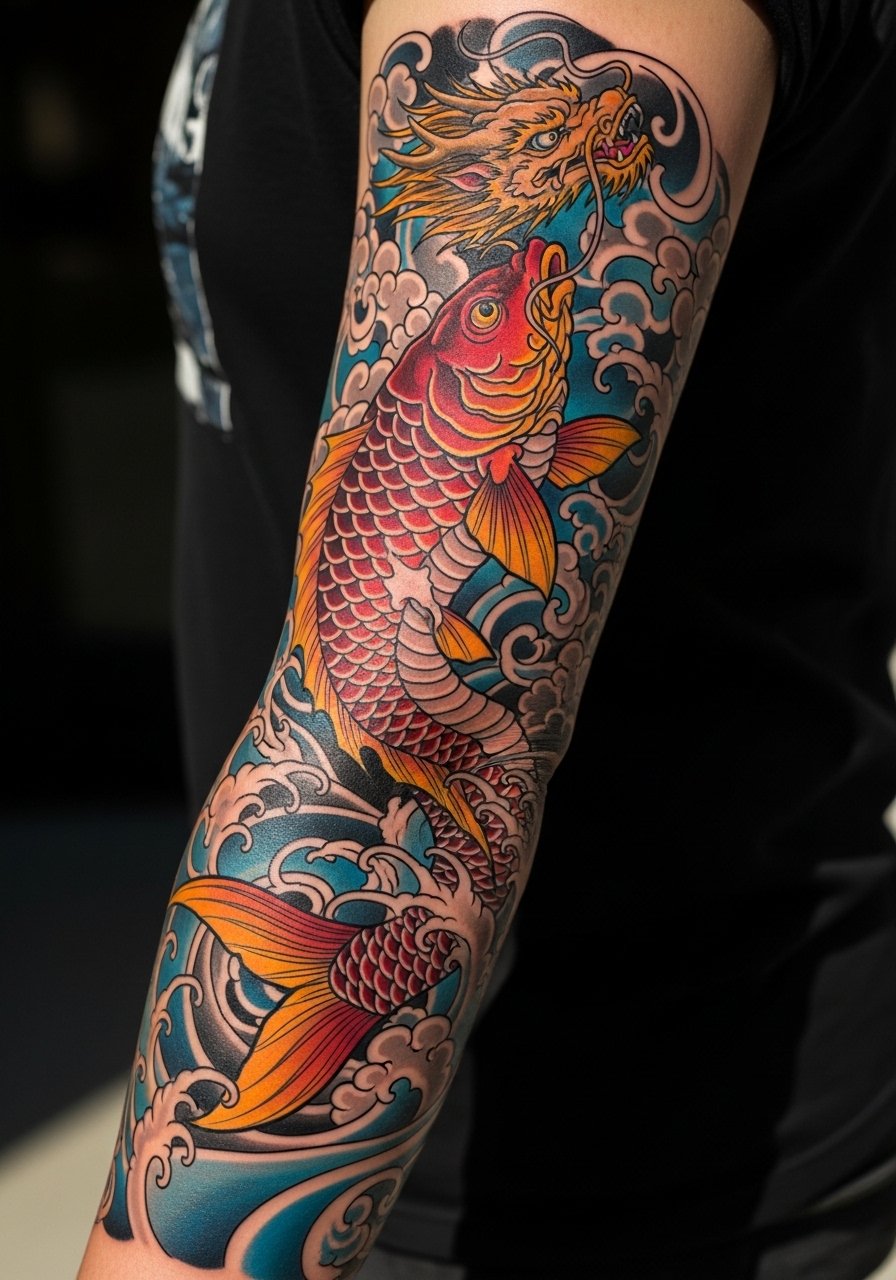
2. Koi Climbing Waves on the Outer Forearm
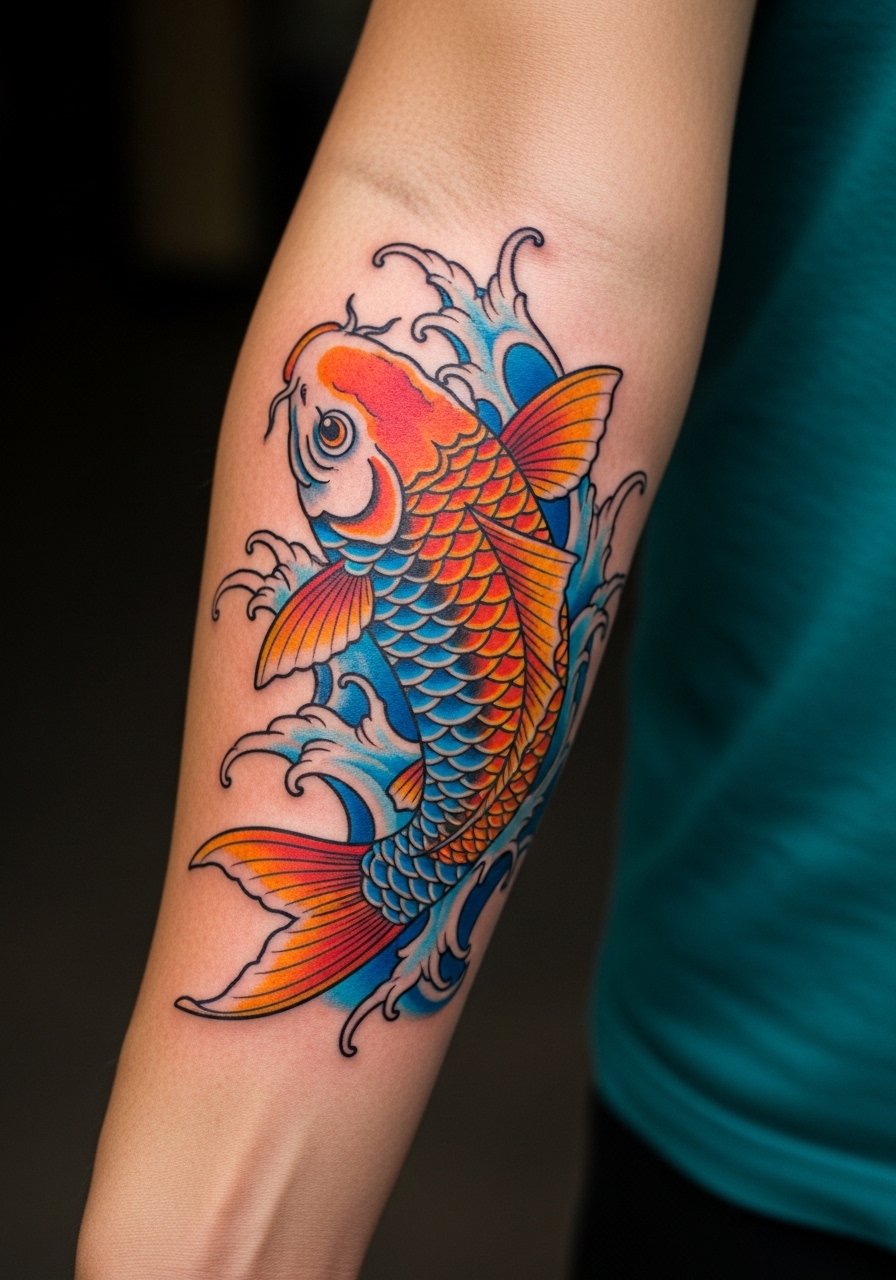
If you want a half sleeve that reads from a distance, this is it. Forearm placement keeps sessions shorter, often three to five hours, and healing is easier than full-arm work. During consults ask for directional flow so the koi moves with muscle contours. The usual version that ages poorly shrinks scales into a mudded patch because artists packed too many tiny details. Ask for fewer, larger scales and stronger outlines. Expect lighter pain on the outer forearm and a likely touch-up at year two to refresh saturation. This design suits someone who wants a wearable narrative without committing to a full nagasode.
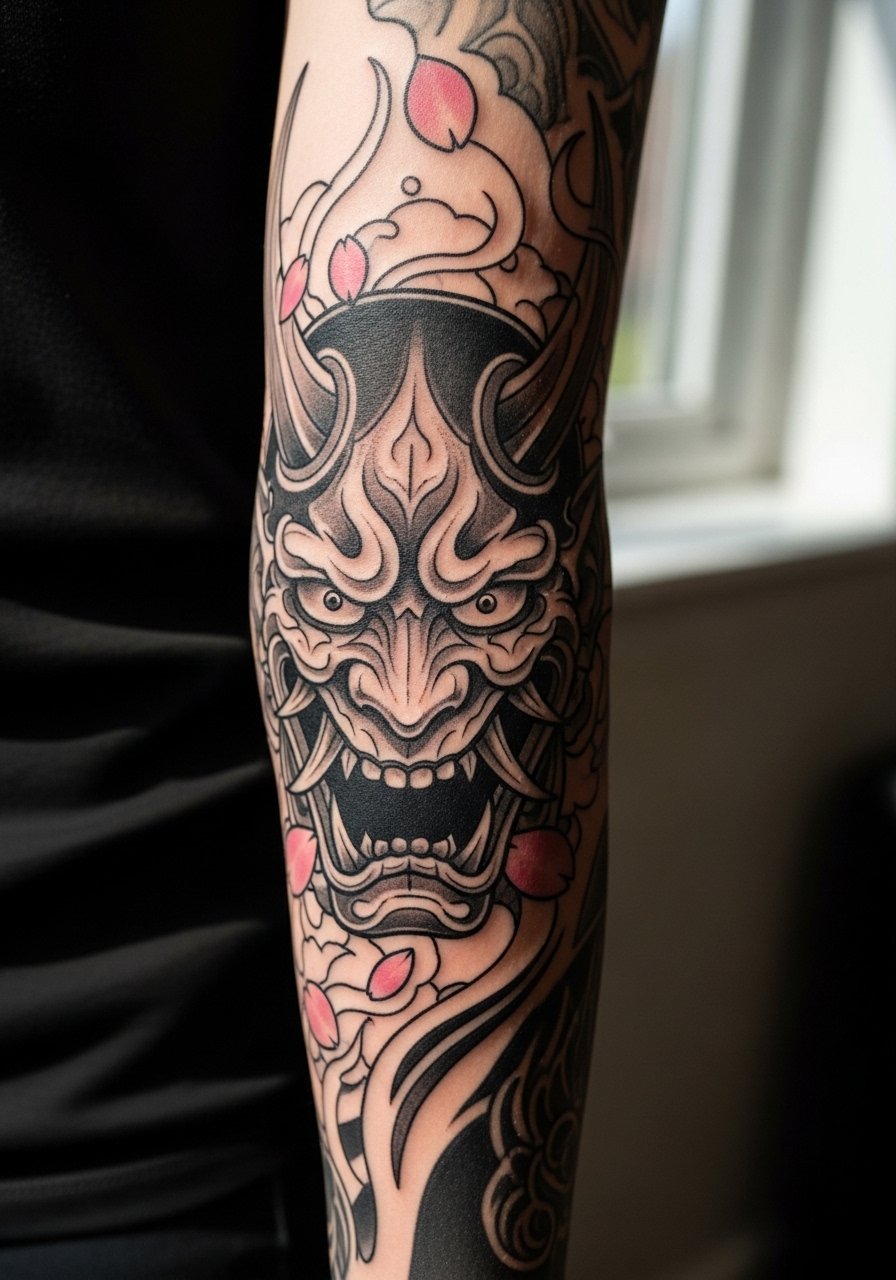
3. Hannya Mask with Cherry Blossoms, Shichibu Wrap
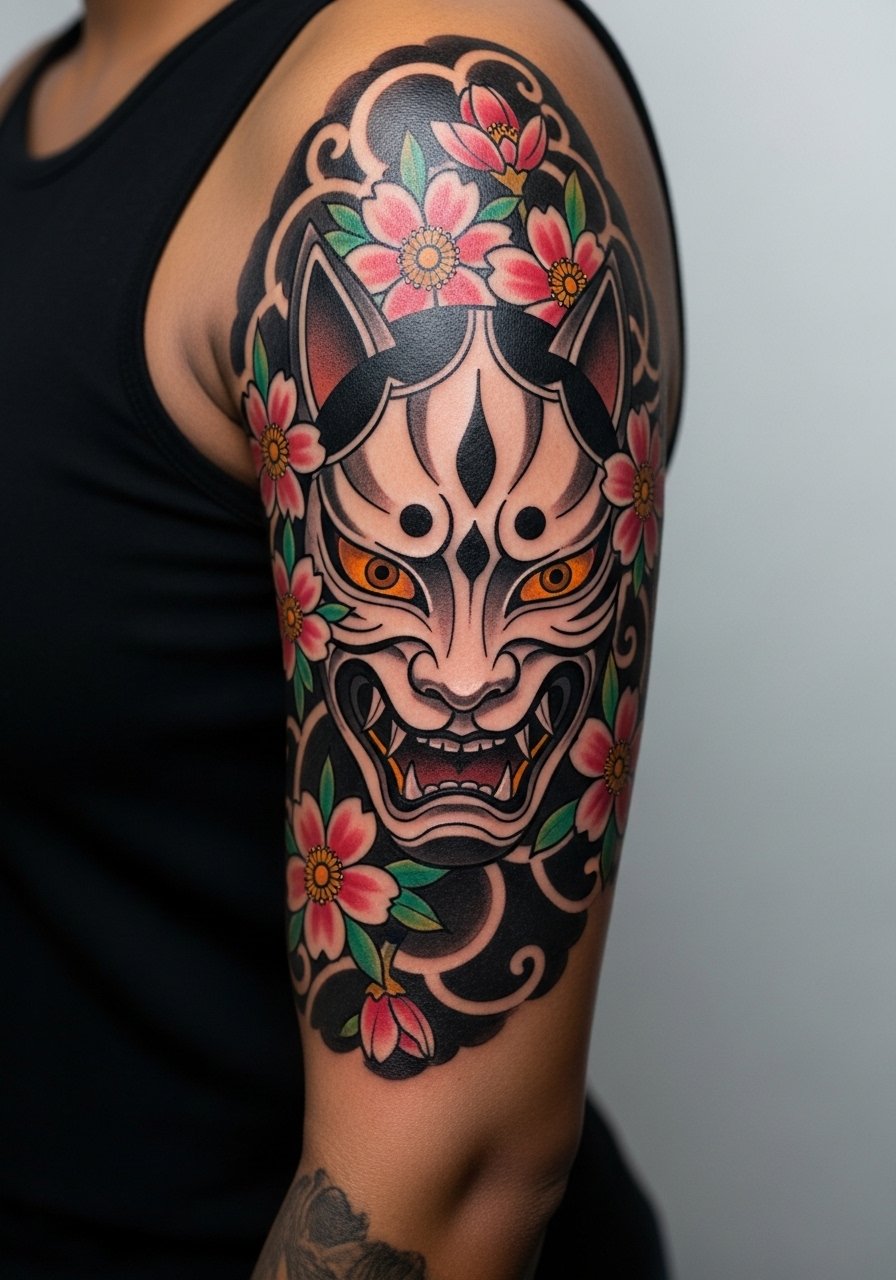
This three-quarter sleeve trades softness and menace in the same panel. Artists split over how delicate the blossoms should be. One camp says keep petals bold so they last. The other camp says fine filigree keeps contrast around the mask. Name both options in your consult and ask which their portfolios show healed at two years. A common error is overloading the cheek area of the mask with tiny shading. That area can blur and eat detail. Pain is moderate on the inner bicep. For balance insist on a wind or cloud background to help motifs breathe and adapt if your weight shifts later.
4. Dragon Pursuing Pearl with Hikae Extension
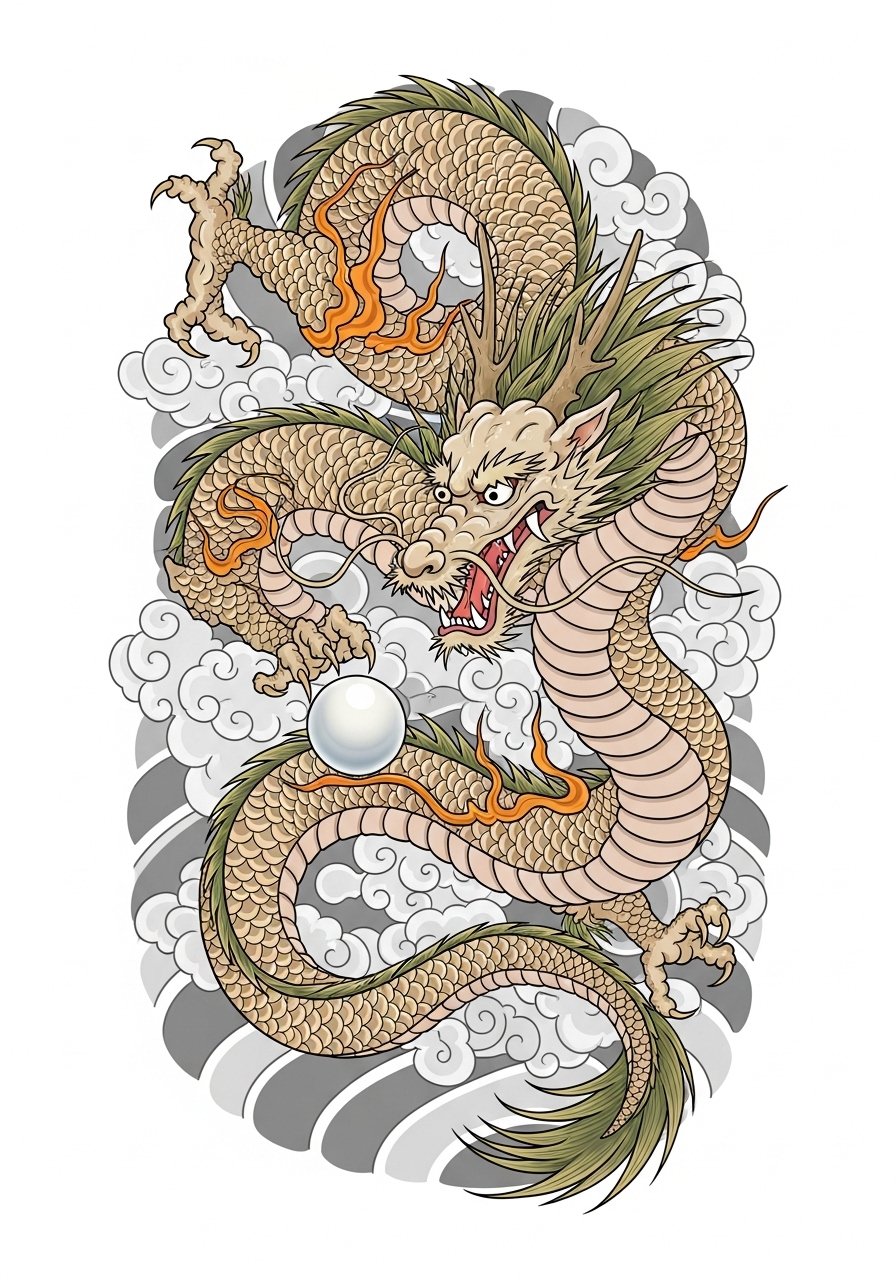
Want dramatic vertical flow that reads from chest to wrist, not just along the arm. This one needs planning for a chest panel and careful stenciling so the dragon’s body conforms to pectoral and bicep curves. Tell the artist you want the pearl to sit on a flat plane so highlights stay crisp after healing. People often skip the hikae and end up with a dragon that stops short at the shoulder. Sessions commonly run six to ten hours across multiple visits. Expect higher touch-up likelihood where the chest moves most. This is best for collectors who plan ahead for continuity.
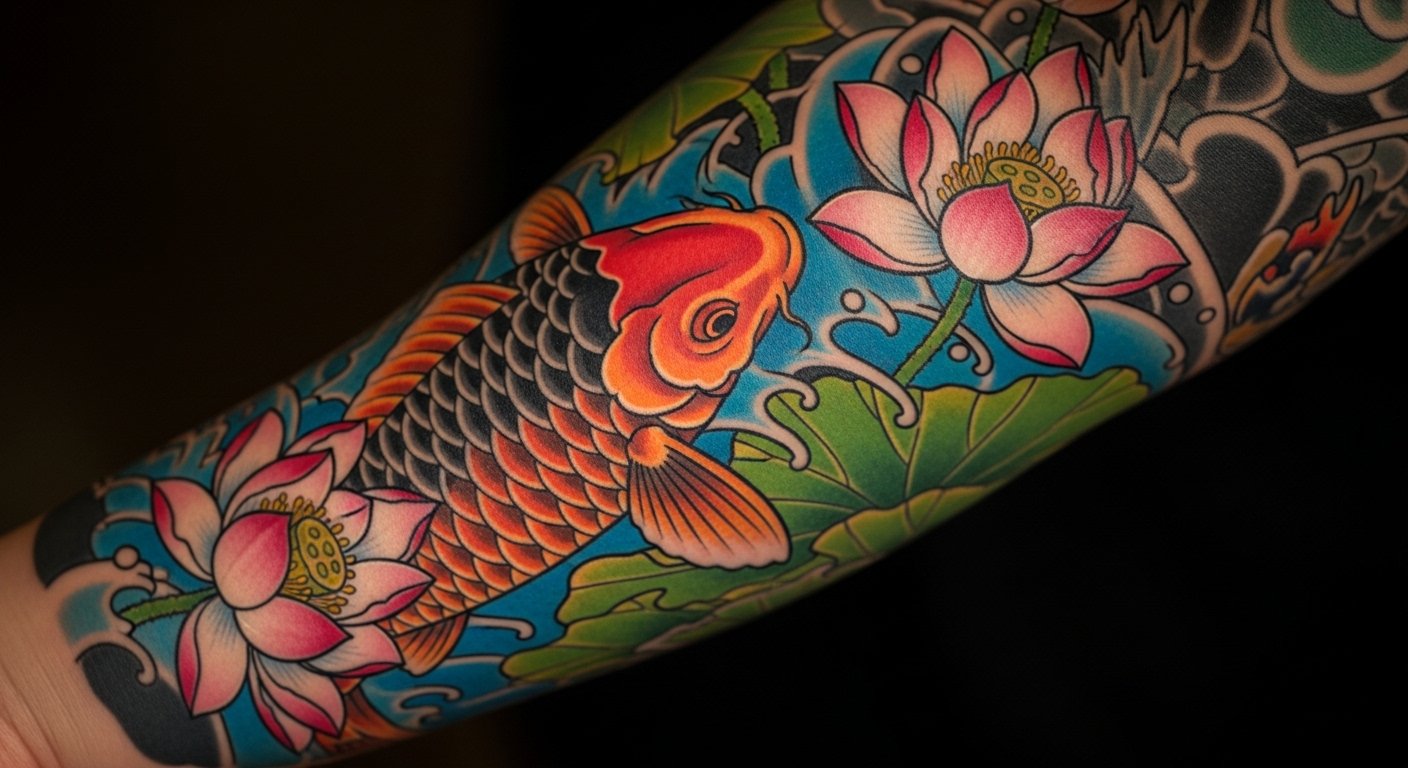
5. Koi and Lotus Inner Arm Pond Sleeve
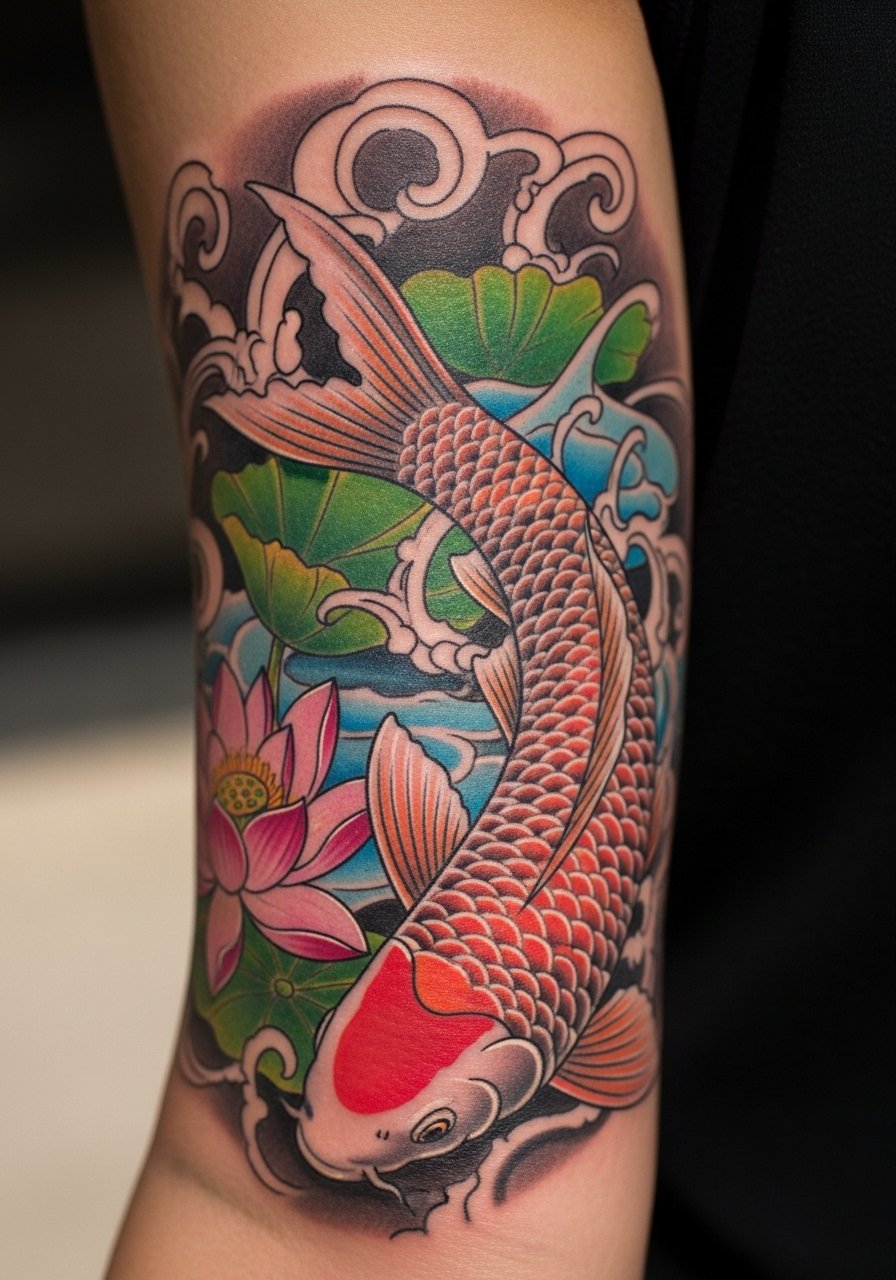
Inner arm pieces read intimate and require careful technique because skin there reacts differently when healing. Tell your artist you want stipple shading and layered backgrounds rather than tiny dots packed tight. The common version that ages poorly uses light gray wash alone which fades into patchy tones. If you pick solid outlines with controlled saturation the design stays readable at two years. Pain here can be higher, especially near the inner elbow. Ask about shorter initial sessions to build tolerance. Expect a touch-up window at year two to refresh delicate color spots.
6. Phoenix Rising with Wave Background Full Sleeve
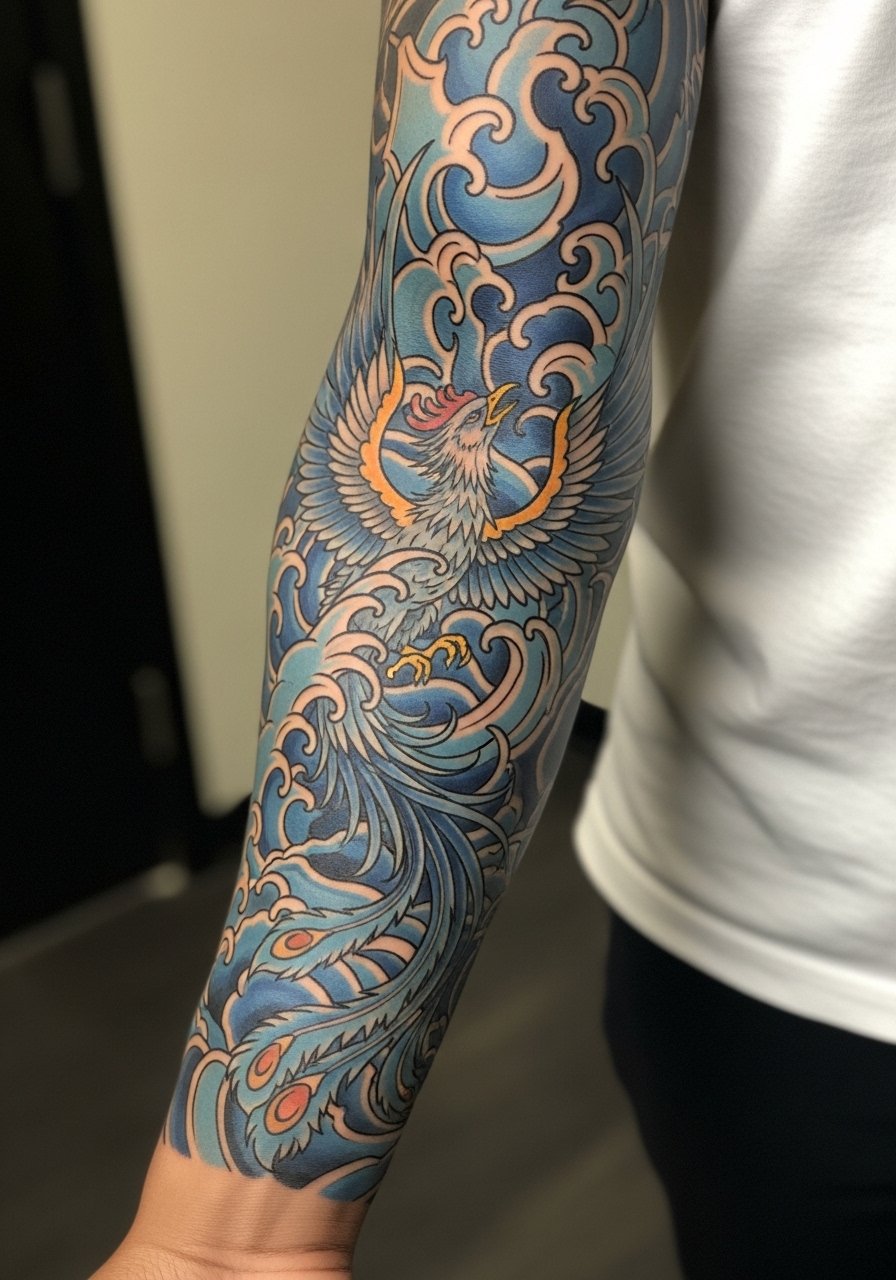
Phoenix sleeves are about motion. For a full sleeve ask for sweeping wing lines and contrast against cool wave backgrounds so flames hold shape. A common mistake is using too much tonal blending inside the wings which flattens after a year. Request high saturation in the flames and clear bordering linework. Sessions are similar to large dragons, often several long visits. Pain will peak on the inner arm and shoulder cap. Over time the red-orange palette can dull faster than blues so plan a mid-term touch-up. This one reads well from across a room thanks to bold shapes.
7. Oni Demon and Petals, Blackwork Half Sleeve
Blackwork suits people who want dramatic contrast that endures. Ask for dense black fills with clean edges and limited tiny detail inside the demon face. The mistake I see most is leaving large unplanned negative spaces that look empty once healed. Tell your artist where you want color pops so they place them for longevity. Elbow and wrist sections can be painful, especially over bone. Blowout risk is lower with bold fills but higher when artists try to micro-shade inside dense blacks. Expect a solid three to five year read before a touch-up.
8. Carp-to-Dragon Transformation Nagasode
This is narrative work that needs transitions, not separate fish panels. During your consult show examples of staged evolution so the artist maps scales into dragon scales across the elbow and forearm. A common error is treating each section like a standalone tattoo which reads disjointed. Sessions run long because of complexity, plan for seven to ten hours total across visits. Pain varies as the design crosses bones. Over five years expect the transition zone to need touch-up if shading was too soft. This works best for someone who wants a sleeve that literally changes shape as it climbs the arm.
9. Hannya Mask Framed by Peonies Three-Quarter Sleeve
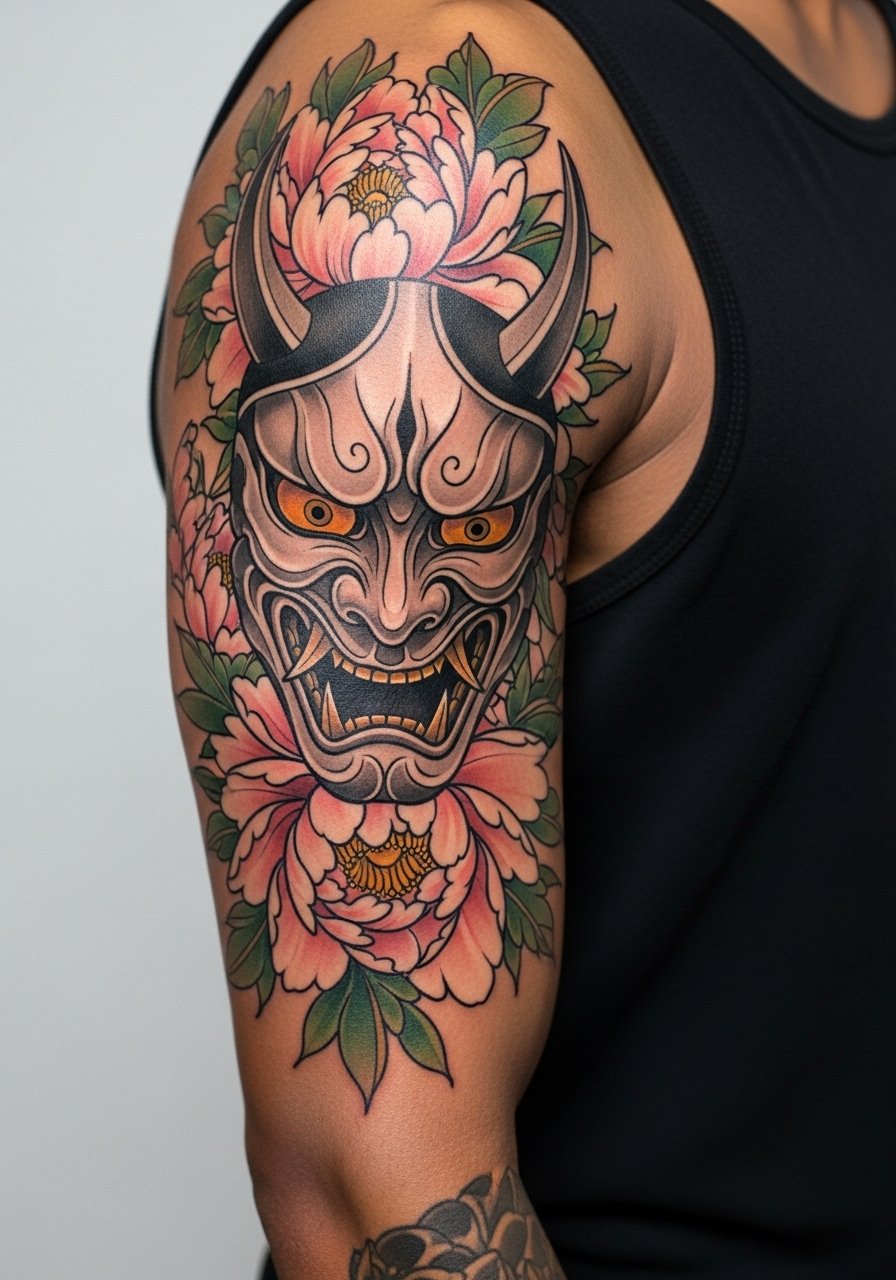
Peonies provide strong counterweight to masks and they age well when rendered with bold petals. Artists disagree on petal detail. One camp says heavy outlines and color blocking keeps peonies readable after years. The other camp prefers softer edge work and layered color. Ask which approach the artist photographs healed at two years. A common misstep is tiny vein work on petals that blurs. Pain is moderate on deltoid areas and easier near the outer forearm. Peonies also help hide touch-ups later so plan composition with flower placement that can be updated without reworking the mask.
10. Wind-Swept Dragon Across Full Arm Clouds
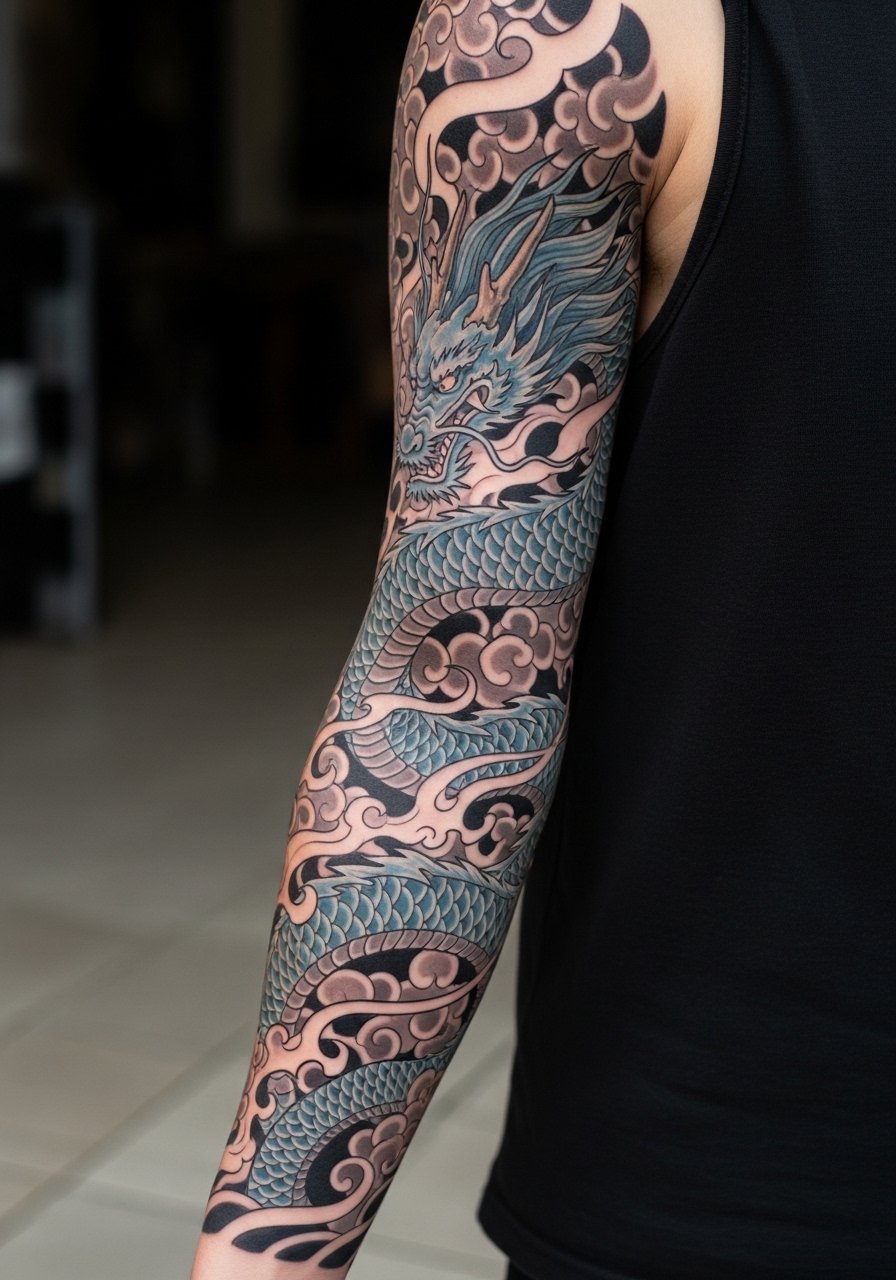
Wind bars and cloud bands make motifs feel alive when you move. If your arm shape is thicker scale up the dragon elements so they do not compress visually. A typical mistake is asking for too many small cloud wisps that vanish after healing. Tell your artist to use broad cloud shapes and defined wind bars so the dragon reads at distance. Sessions are long and require planning for chest tie-ins if you want a hikae later. Blowout risk increases where linework crosses thin skin near the inner elbow. Expect clarity to hold if outlines and saturation are prioritized.
11. Koi Pond with Lanterns Forearm Sleeve

Lantern accents add a nighttime mood that photographs nicely. For forearm placement request high-contrast lantern highlights so they do not wash out under ambient light. The version that ages badly tends to place lanterns behind too much wash which makes them vanish. Sessions are usually three to six hours. Pain is moderate and healing is straightforward with breathable covers. Tell your artist if you want glow effects so they plan for white highlights that hold up only when used sparingly. Expect a small touch-up window if white highlights lose brightness.
12. Samurai with Wind Bars Vertical Shichibu Sleeve
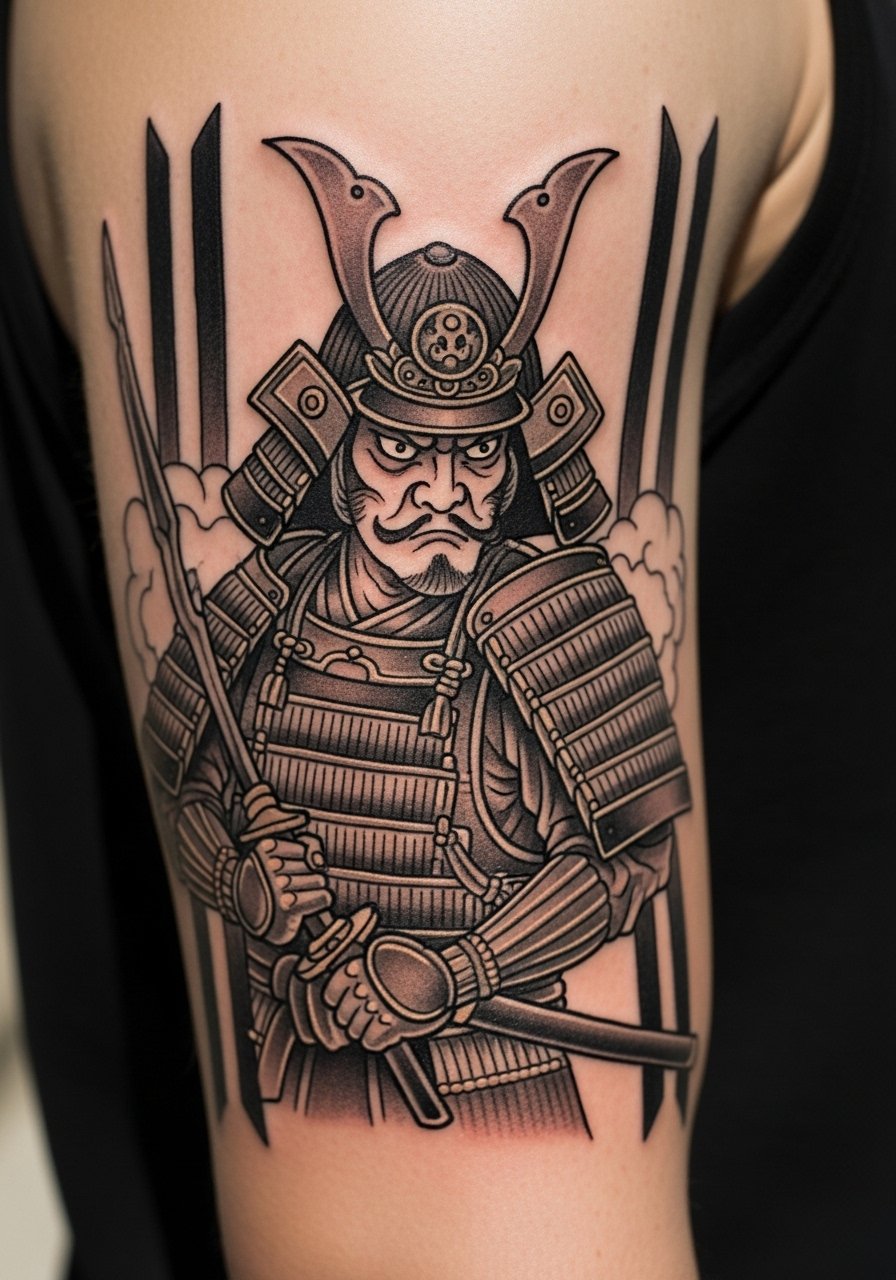
This vertical composition honors posture and reads like a portrait in motion. If you plan a half or three-quarter sleeve insist the artist map the samurai’s stance around the arm’s natural twist. A common mistake is a cramped helmet or face which loses expression after healing. Sessions tend to be four to seven hours. Pain is higher on inner arm panels under the bicep. For longevity pick controlled shading and strong contour lines rather than thin cross-hatching. If you work in a formal environment consider placement visibility because hand and lower forearm tattoos can still affect hiring in some industries.
Tattoo Prep and Aftercare Essentials
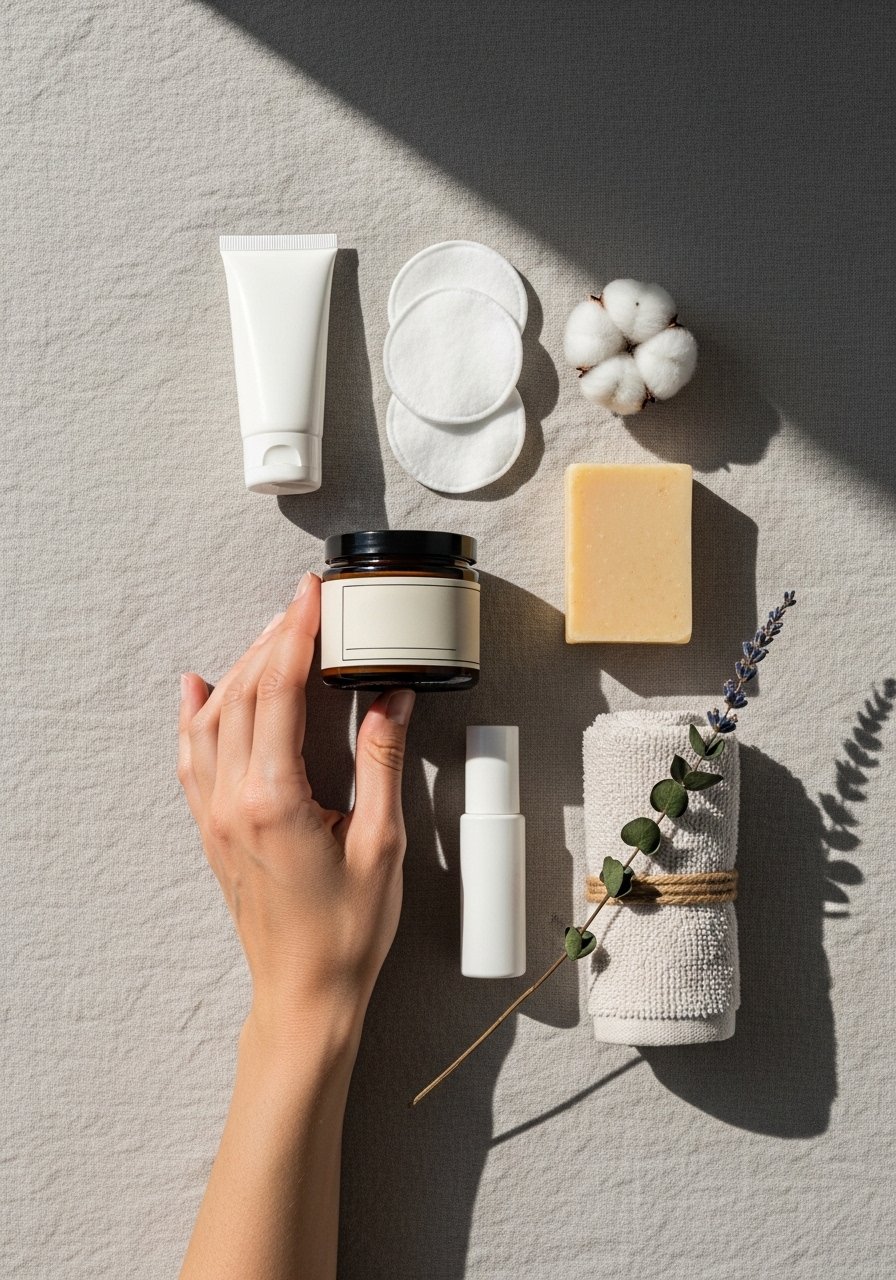
Plan sessions with healing in mind. From what I have gathered artists recommend spacing long visits by four to six weeks so skin fully heals. There is a real split in aftercare methods. One camp favors occlusive bandages to protect the fresh work. The other camp prefers open-air dry healing for color packing. Ask your artist which approach they use and why before your first slot. Below is a practical shopping list that covers pre-appointment prep, immediate healing, and long-term maintenance.
Healing and aftercare (3-4 items)
Fragrance-free healing balm for daily application. Use this during the moist healing window to prevent excessive crusting. Apply thinly and only after cleaning.
Medical-grade second skin bandage, 6-inch roll. Useful for the first 24 to 72 hours if your artist recommends occlusive protection.
Antimicrobial gentle foaming cleanser. A soap-free foam keeps the area clean without stripping saturation.
Lightweight fragrance-free moisturizing lotion. Good for long-term skin health after initial healing.
Pre-appointment prep (1-2 items)
Breathable compression sleeve for travel and swelling control. Wear to the shop if advised to reduce swelling during long sessions.
Cooling gel packs in a soft sleeve. Useful for soreness after the session when used without direct pressure on fresh ink.
Long-term maintenance (2-3 items)
SPF 50 mineral sunscreen stick. Sun protection is the best way to preserve saturation over years.
Silicone scar management sheet, small size. Handy after touch-ups or for thicker raised areas.
Every tattoo is different. Always follow your artist's specific aftercare instructions. Consult a dermatologist if you have skin concerns or unusual healing issues.
Frequently Asked Questions
Q: Will fine line elements in a Japanese sleeve blur into surrounding designs over time?
A: It depends on placement and line spacing. Fine line near the inner arm and wrist is likelier to soften than bold outlines. If you want details to last ask for slightly thicker linework or deliberate spacing so surrounding shading does not fill narrow gaps. Expect possible touch-ups around year two to three for very delicate linework.
Q: Should I use an occlusive bandage or dry heal for a color-packed dragon sleeve?
A: Artists are split. One group favors occlusive bandages for the first 24 to 72 hours to prevent scabbing. The other group prefers open-air dry healing to avoid trapped moisture. Ask your artist which method they use and why, and follow that plan for the best color packing results.
Q: How many sessions will a nagasode dragon usually need and how should I budget time?
A: Large nagasode pieces commonly break into five to ten sessions that range from three to six hours each. Plan sessions around healing windows of four to six weeks. Spread sessions out to avoid overworking the skin and to let you evaluate how color settles between visits.
Q: Do peonies or cherry blossoms need different aftercare than heavy blackwork?
A: Not fundamentally, but small color spots like blossoms can show fading sooner. Keep those areas out of direct sun during the first months and use light moisturizing. Heavy black fills are more resilient but can still soften if exposed to UV. The same sunscreen and hydration routine protects both.
Q: If I have a thicker upper arm should my motifs be scaled differently?
A: Yes, scale matters. Thicker arms compress small motifs visually. For that reason ask the artist to scale motifs up and widen negative space so the composition breathes. That approach reduces the chance of elements looking crowded or distorted after weight changes.
Q: When should I plan a touch-up for a koi-and-lotus inner arm sleeve?
A: From what I have seen a realistic touch-up window is around two to four years, especially for delicate color transitions. Monitor how whites and pale highlights settle and schedule a touch-up when contrast blurs or when small color pockets lighten noticeably.
