
Someone I know spent months choosing a design only to realize the real problem was picking a style that would hold up on their skin. I have spent time in five shops across Brooklyn and plenty of forums, and the same trends keep coming up this year. Below are 15 angel tattoo directions that look great fresh and give you realistic notes about aging, placement, and what to say on booking.
1. Neo-traditional guardian on outer forearm
Someone I know picked neo-traditional for the forearm because it reads well from a distance. Expect moderate pain and a one to two hour session for a four to six inch piece. Tell your artist you want slightly thicker outlines around the contour and lighter inner saturation so the tonal contrasts survive sun exposure. Fine line forearm wings look ethereal at first but often blur into a soft wash after a year. This version trades fragile detail for defined linework and layered color. Plan a touch-up at six to twelve months to restore saturation if you work outside frequently. Blowout risk here is low with balanced spacing and avoiding overly thin lines near the elbow crease.
2. Watercolor cherub in flight on the ribcage
Fair warning: ribs hurt more than most spots, but watercolor on the rib suits people chasing a soft memorial vibe. Session time depends on color layering and stencil placement, often a single long sitting for a 3 to 5 inch piece. Tell your artist you want color glazing rather than dense saturation so the pastel tones sit lighter on melanin-rich skin. The common mistake is placing ultra-fine line faces on ribs, which can blur with stretch. Expect the washes to fade faster than blackwork, so factor in touch-ups at year two if you want the original hues back. Summer healing needs extra care with sweat and friction from clothing.
3. Bold blackwork fallen figure across the upper back
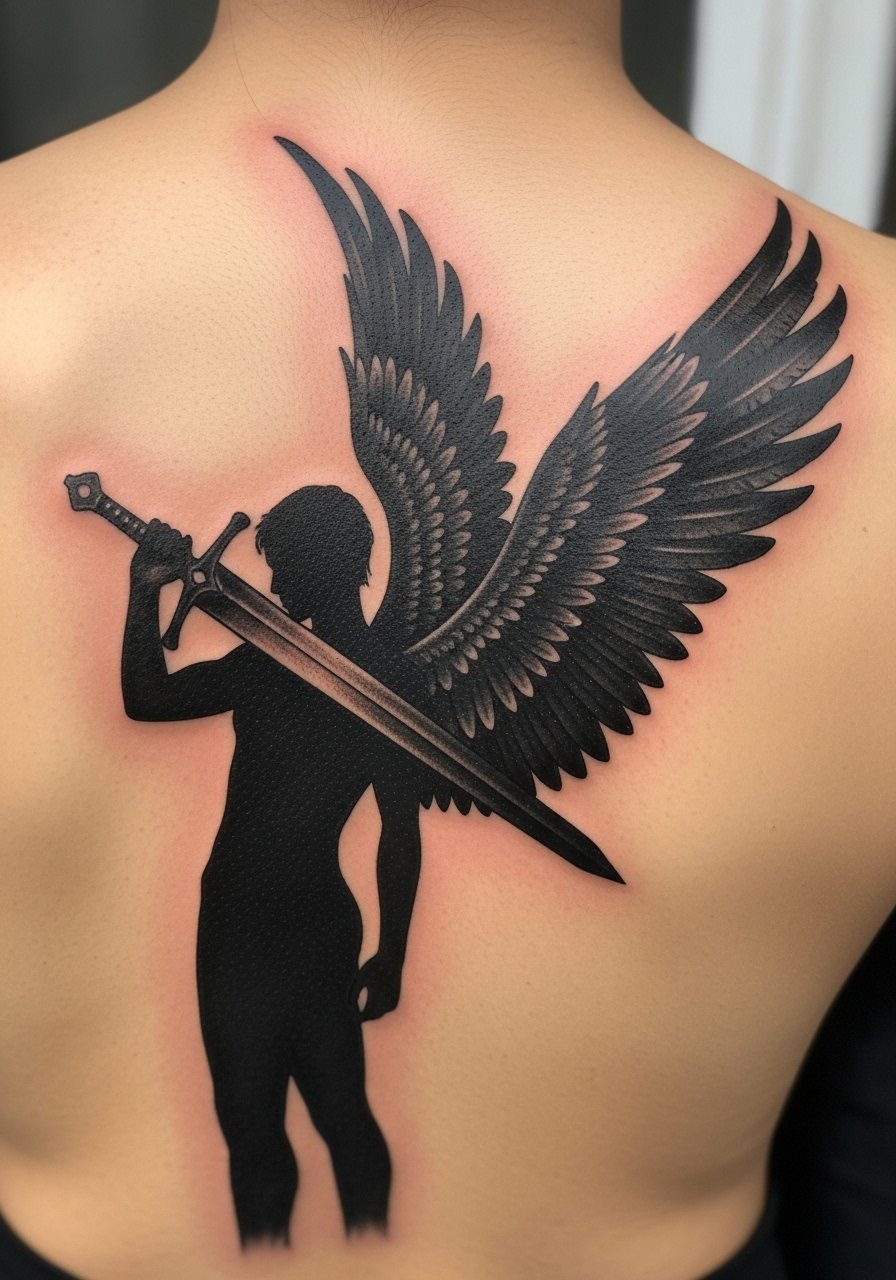
There is a clear visual impact with large-scale blackwork on the back. This is for people who want an edgier interpretation rather than traditional religious portraiture. Three-session projects are common for 8 to 12 inch pieces. During your consultation ask about saturation passes and how the artist plans to keep the negative space crisp between feathers and armor. Some clients regret tiny cross-hatching in large black fields since it can patch unevenly when healed. Expect a heavy initial scab phase but long-term stability once saturated. If you gain or lose a lot of weight the overall composition can warp, so discuss placement relative to shoulder blades.
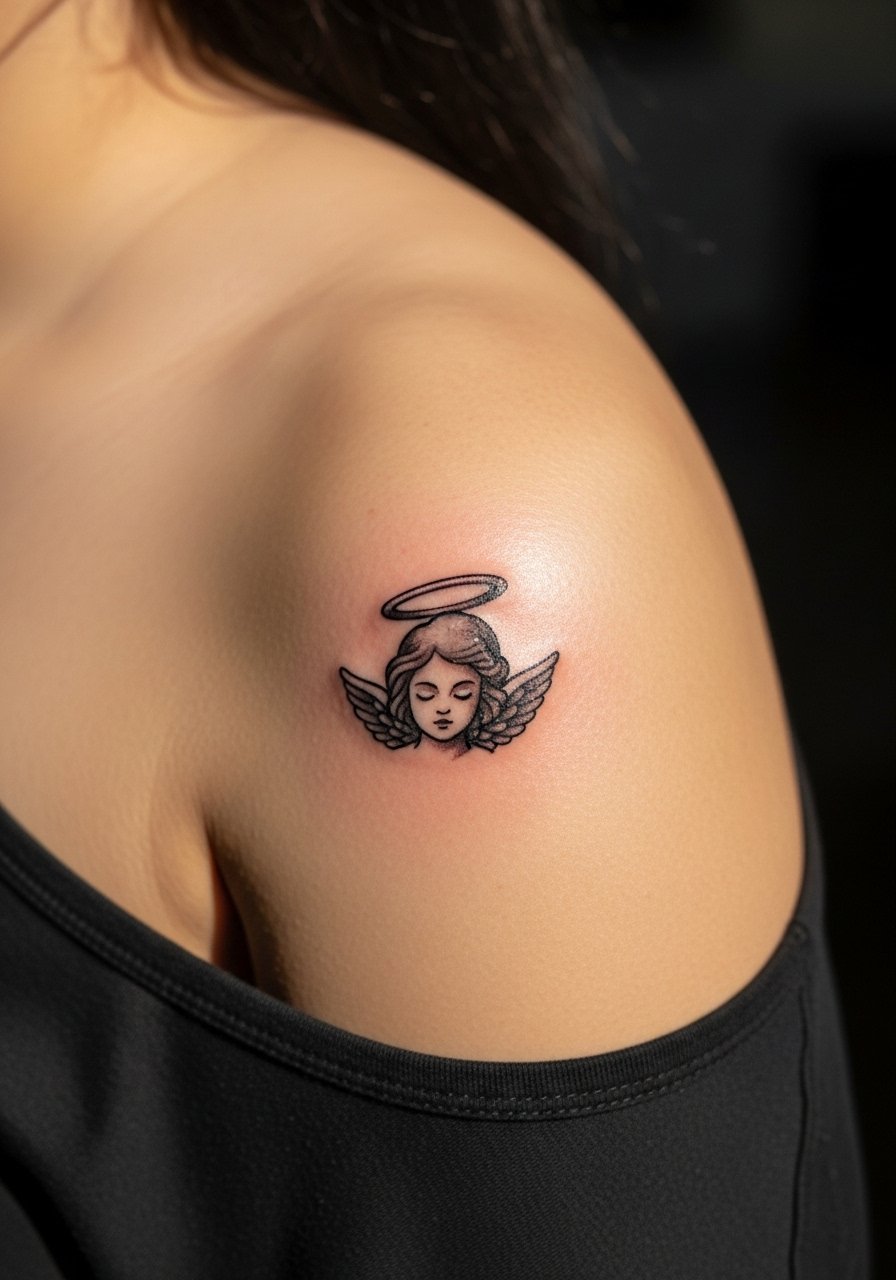
4. Fine line wing outline on the shoulder blade
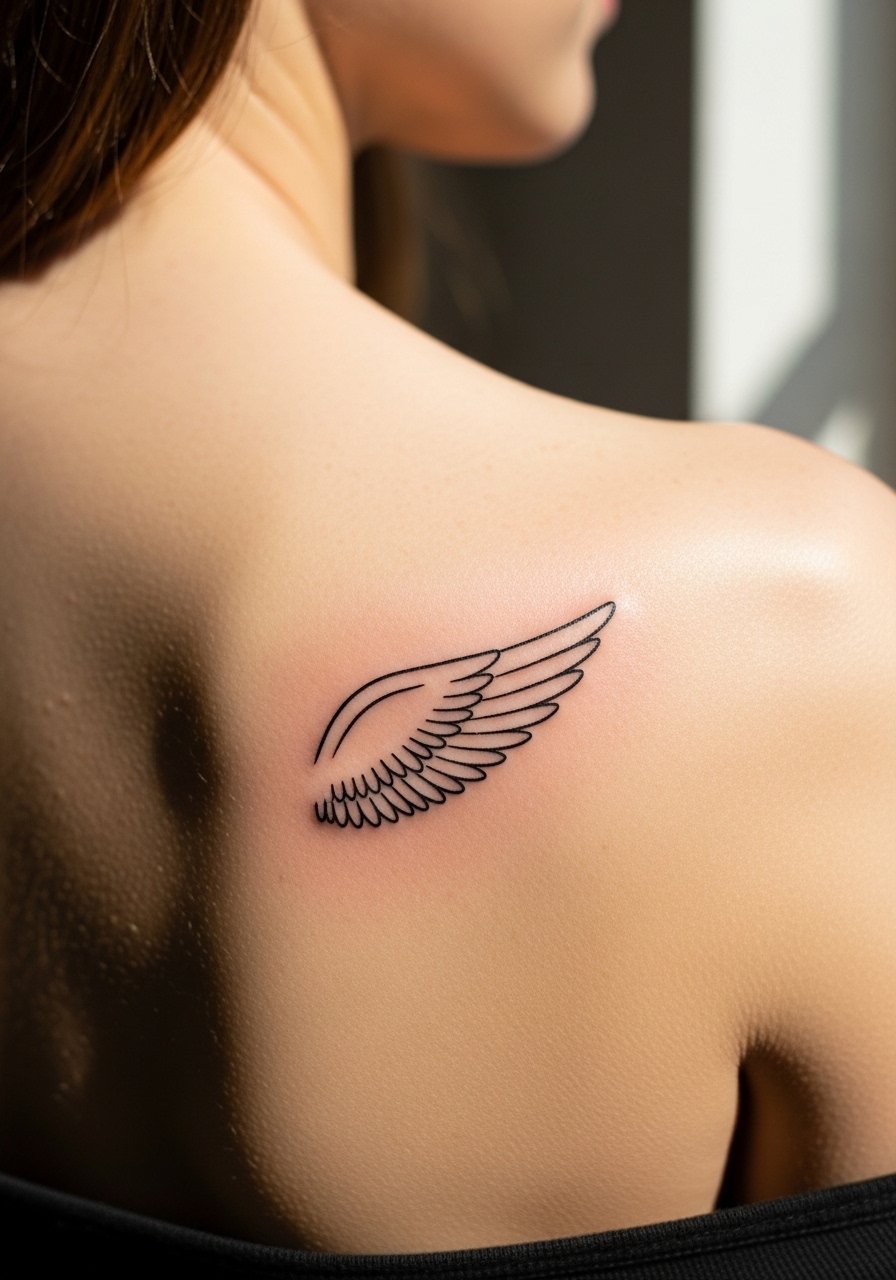
Most people choose this for subtlety and easy concealment under shirts. Pain is low and sessions are short for a four inch outline. Artists split on whether fine line holds on shoulder blade skin. One camp says the area is ideal because it sees less friction. The other camp points out that thin lines can feather over time without solid negative space. Ask an artist to preview a healed-stencil photo on you and request slightly heavier line weight if you want longevity. Common mistakes include requesting feather-detail too fine for the area. Plan a possible touch-up at year two for crispness.
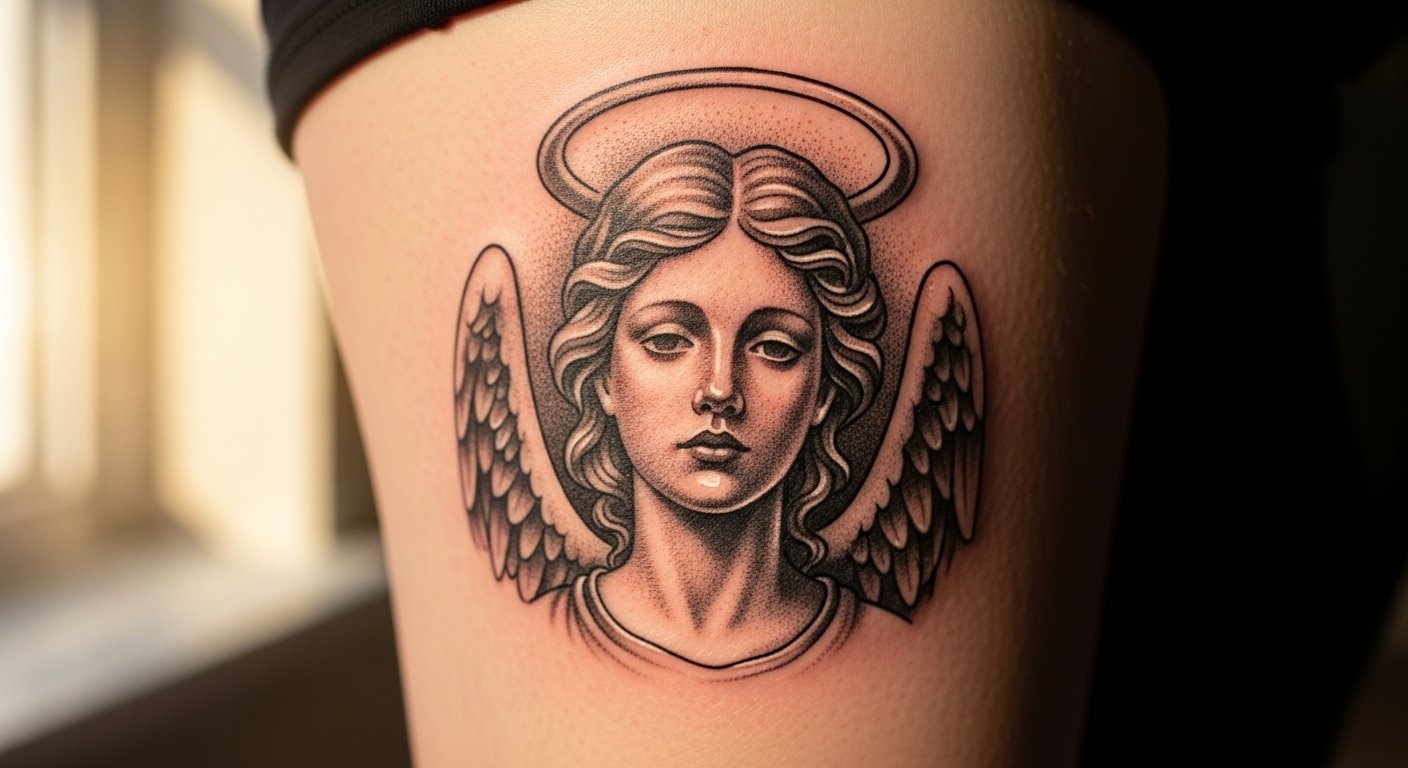
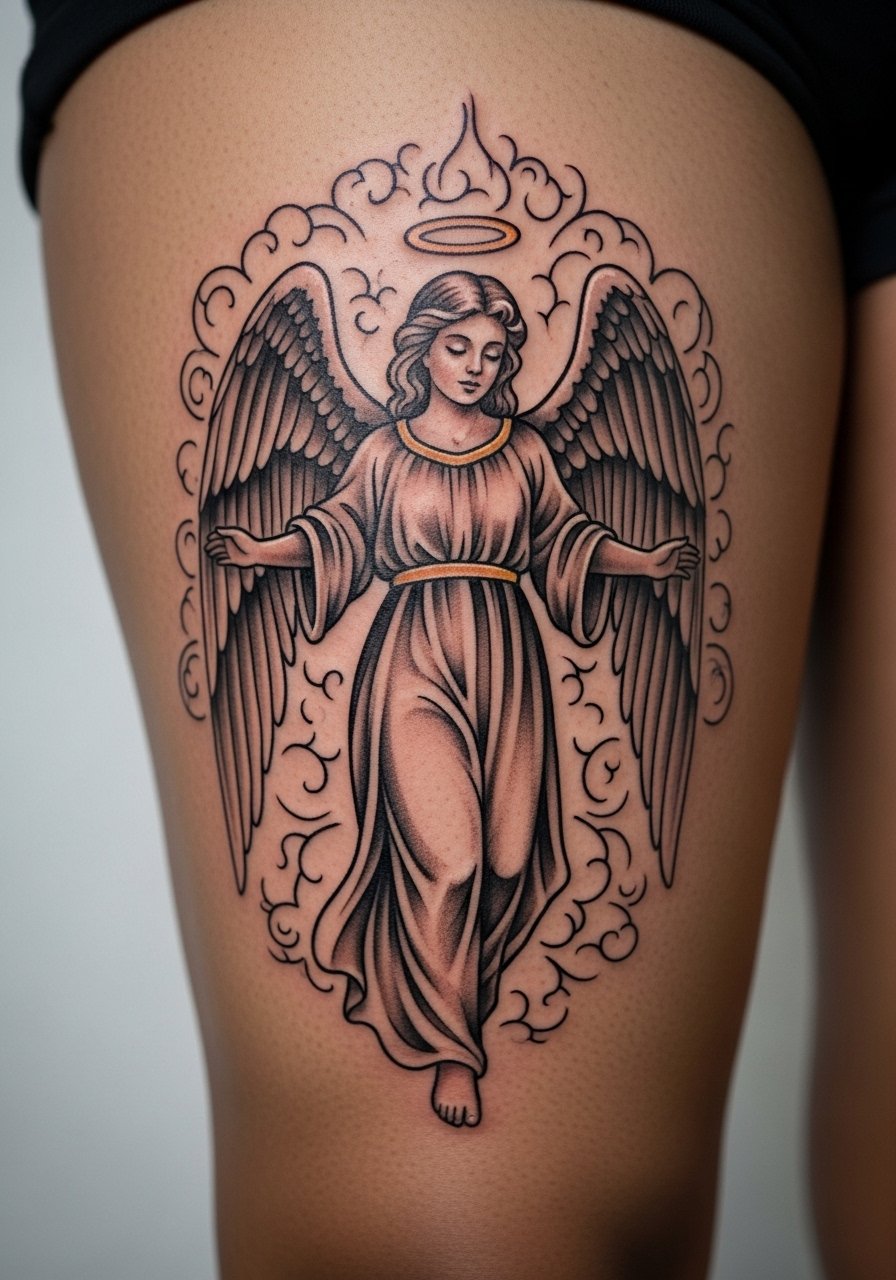
5. Realism halo portrait on outer thigh
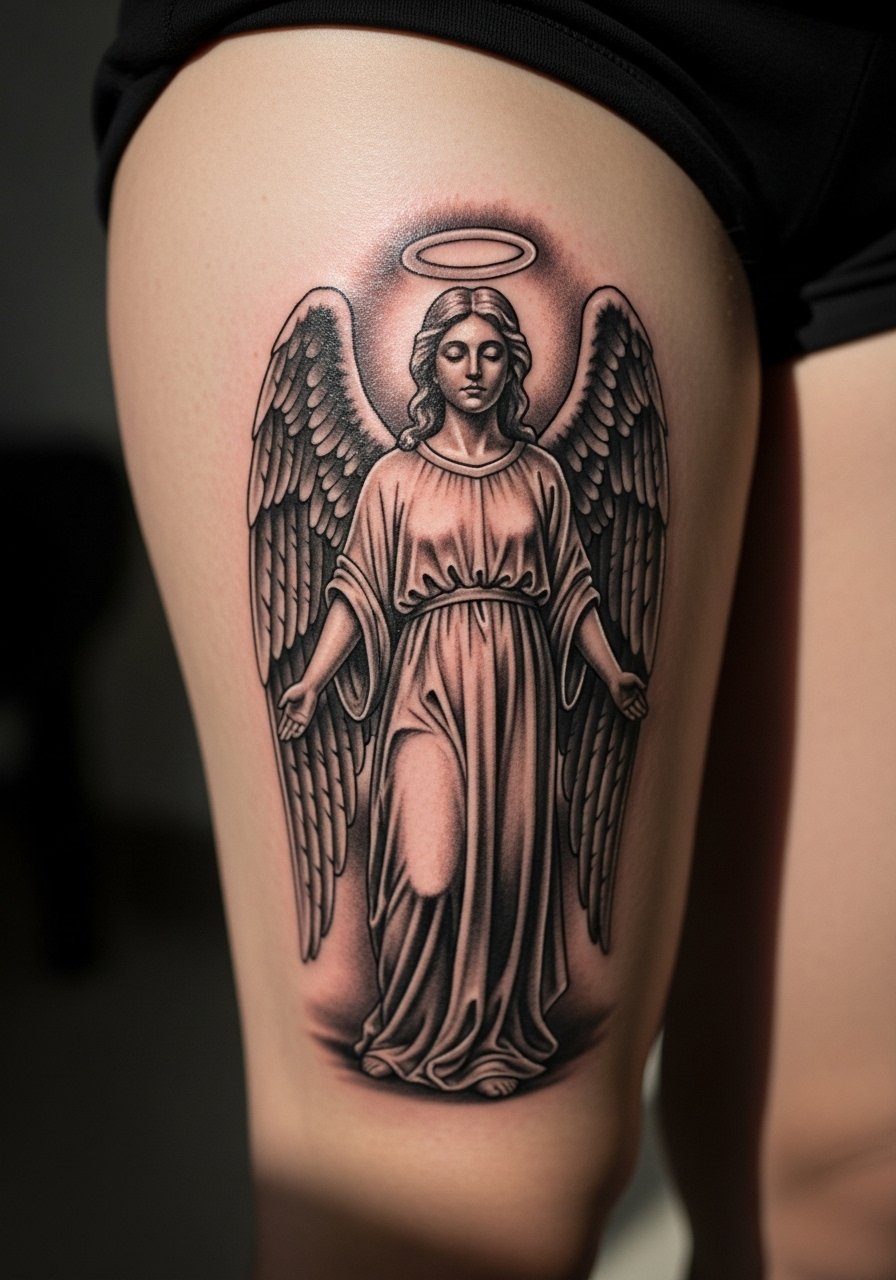
Thigh pieces age predictably because the area experiences less sun and abrasion. This is a two-session project for a six inch portrait and feels like moderate pain in places where the skin is thinner. Tell your artist you want reference photos that show the exact facial expression and halo placement you prefer. The mistake people make is demanding micro-details without room; portraits need breathing space. On curvier bodies ask for mockups to see how contours will interact with muscle and clothing. Expect steady aging with touch-ups every three to five years, depending on exposure and body changes.
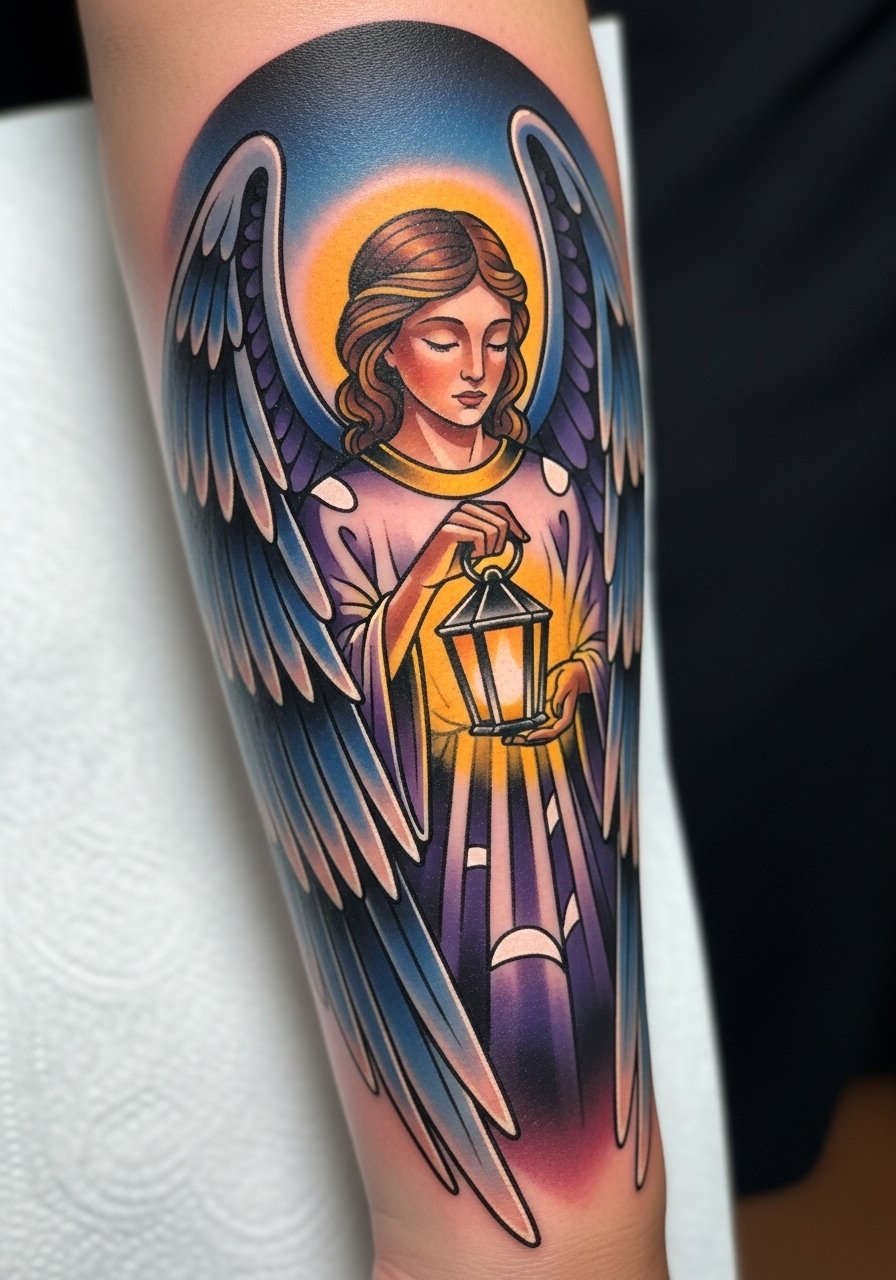
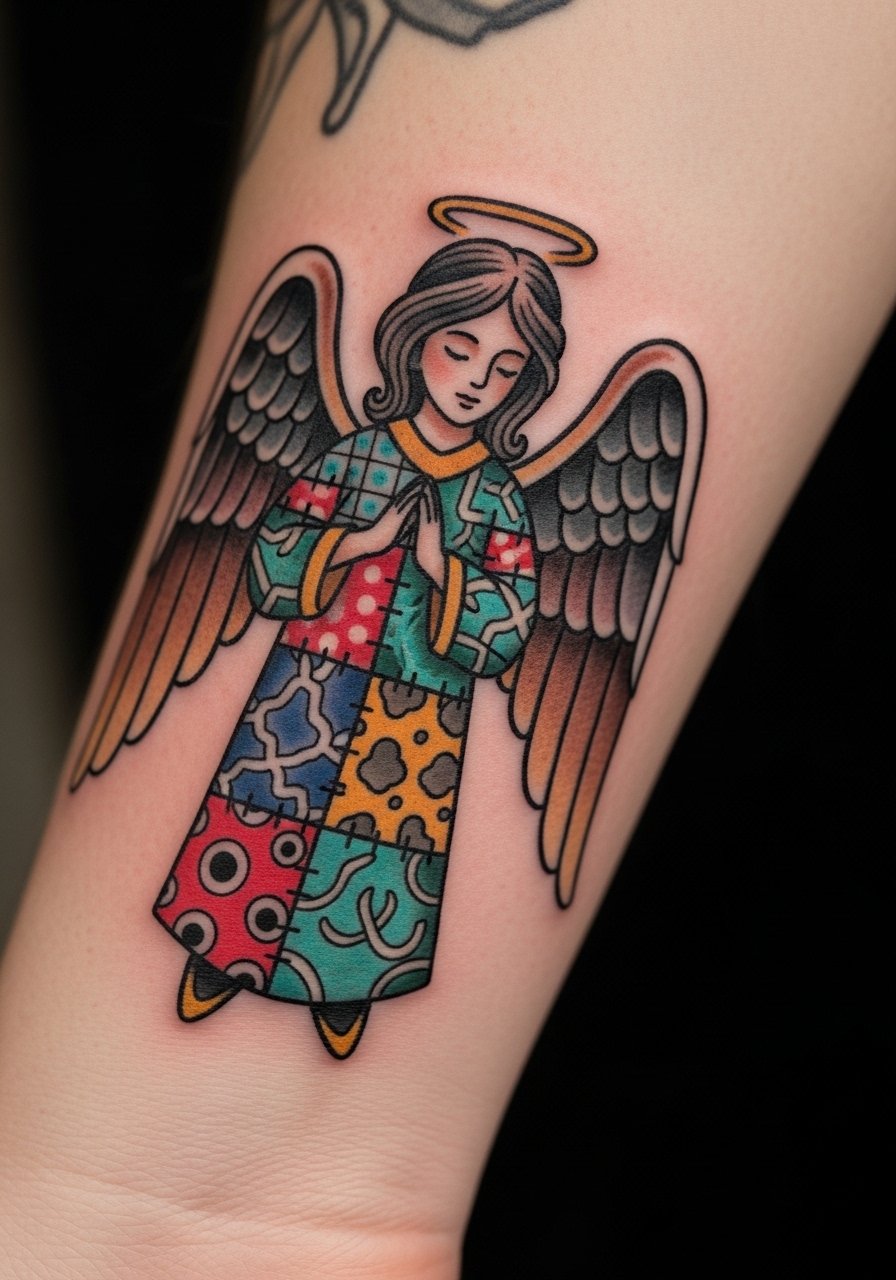
6. Old school angel with banner on the chest
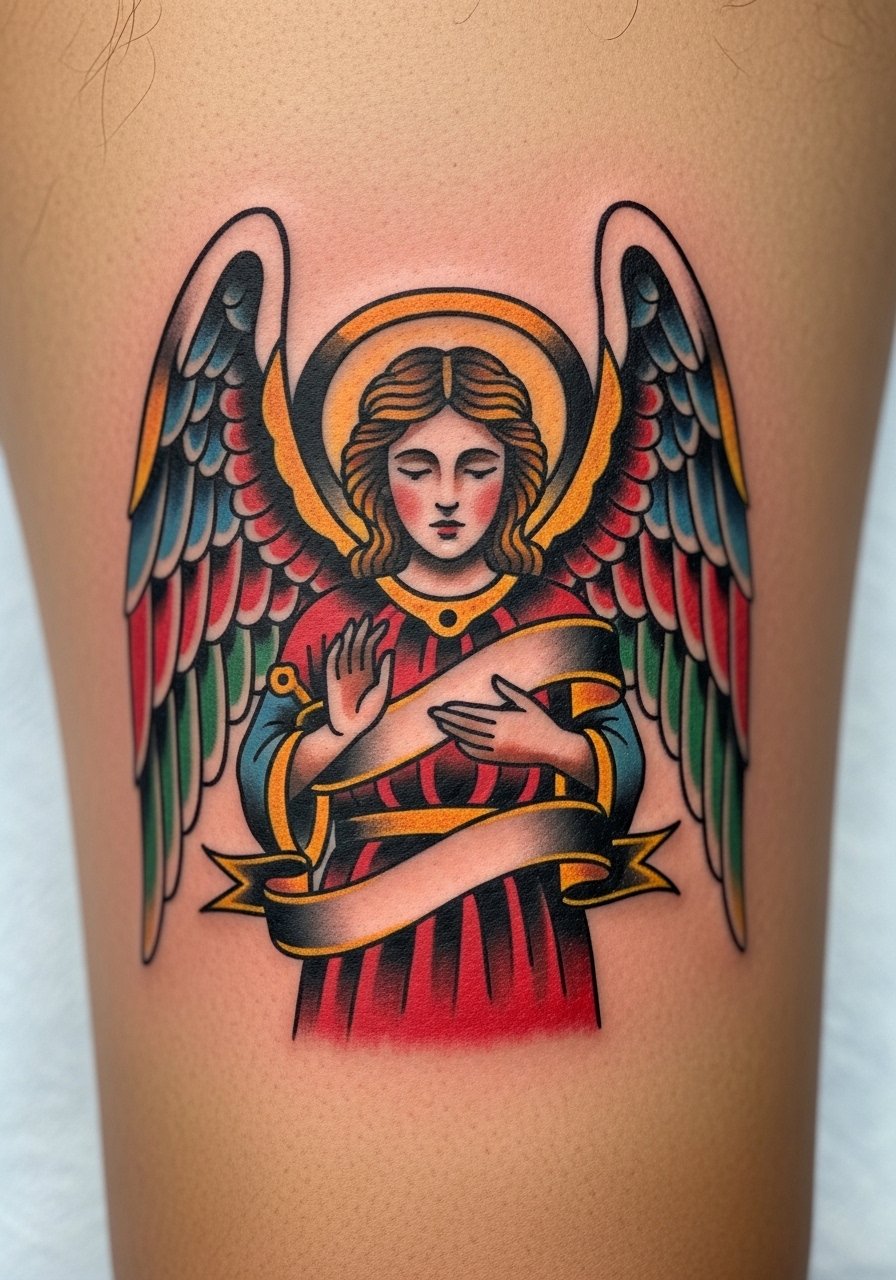
The chest gives old school color room to breathe and keeps saturation vibrant for years. A single to two session piece around five inches is typical and chest pain varies by sternum proximity. When booking, bring examples of the banner font and exact color swatches so the artist matches your vision. A common regret is tiny script in the banner that becomes unreadable; choose bold lettering for durability. This style tolerates sun exposure better than watercolor but still needs sunscreen long term. For workplace considerations test how visible it will be under shirts before committing.
7. Micro silhouette behind the wrist
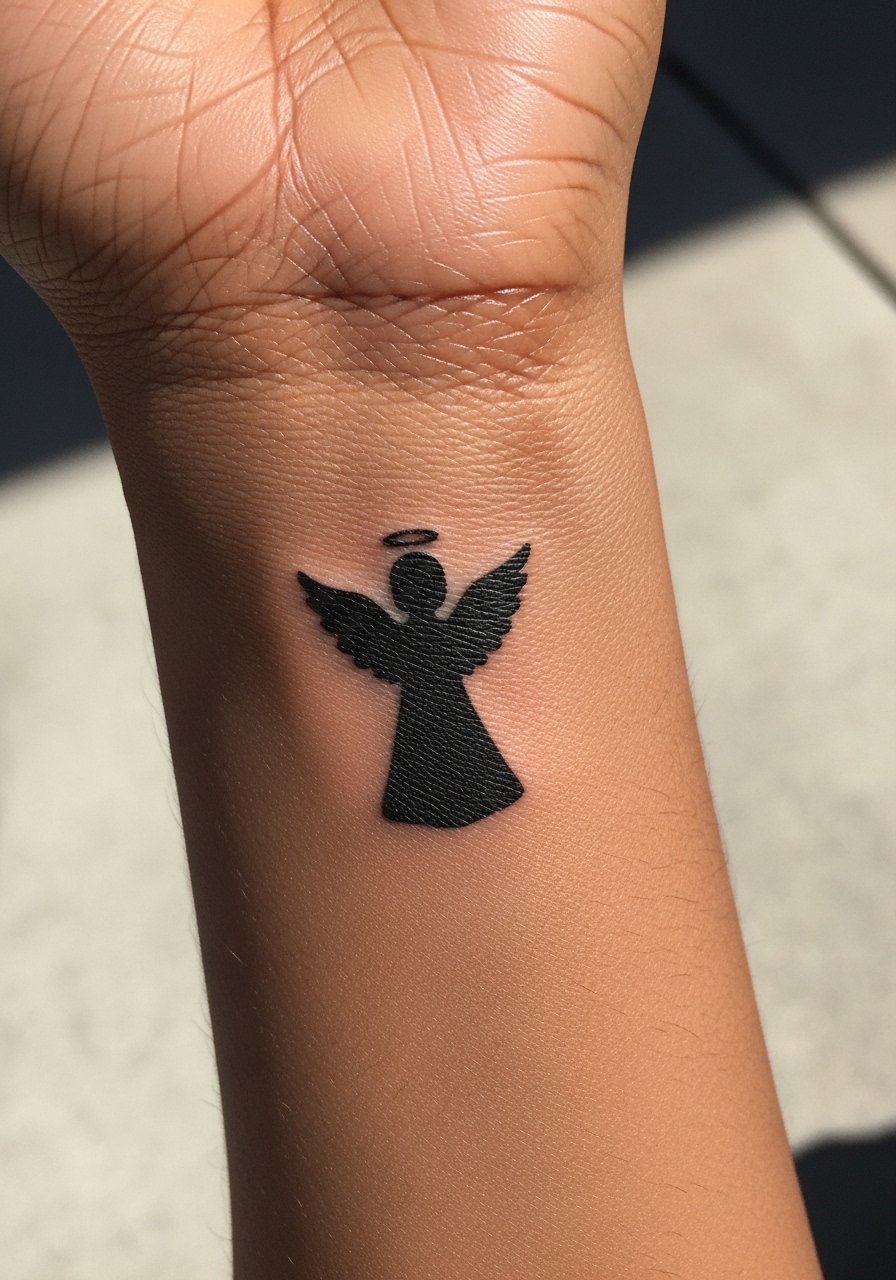
If you need something easy to hide this tiny placement is ideal and quick to finish. Pain is low and sessions are minutes rather than hours. Tell the artist you want stronger contrast and slightly thicker edge so the silhouette does not diffuse into the wrist creases. The common pitfall is going too small; lines that are under 1 inch often blend into a smudge after a year. Expect a touch-up at six to twelve months to sharpen edges if you wash hands often or work with friction. Hand and wrist placements face more external abrasion, so long-term maintenance matters.
8. Ornamental angel mandala wrapping the ankle
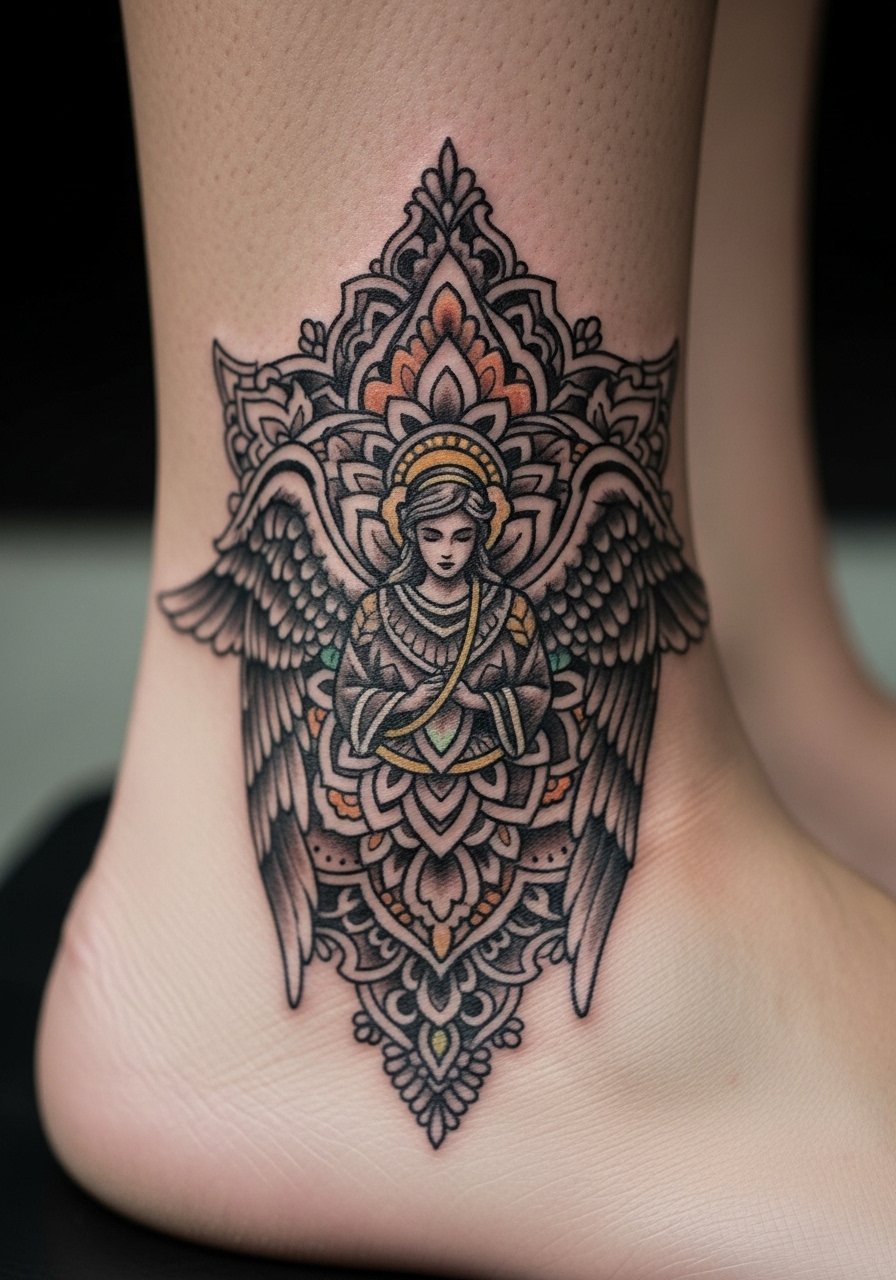
There is a tricky part about ankles: shoes and socks can rub the tattoo raw while healing. This style benefits from the ankle wrap because the circular composition sits well with shoe lines. Sessions often span two shorter sittings for a four inch diameter. Tell the artist you want negative space to protect the dot work from filling in over time. Many people forget heel friction and choose placements that hit shoe edges. For anyone with an active shoe-wearing routine expect a longer initial scab phase and plan sock-free recovery time. Consider touch-ups after six months if dots soften.
9. Patchwork sleeve elements starting with a micro wrist piece
Someone I know started a sleeve with a tiny wrist angel and added elements yearly to avoid full-commitment shock. Session time for each element varies, but planning matters more than one long booking. Tell your artist you plan to expand so they can match color palettes and negative spaces for future integration. A common mistake is picking contradictory styles for initial pieces. If you start neo-traditional, keep shading and line logic consistent for smoother blending later. Sleeve projects can span years and multiple touch-ups as pieces merge and age together. Booking guest spots and conventions can speed progress.
10. Micro-realism angel with harp on the calf

Calf placements are forgiving for micro-realism because the skin is stable and sees less sun. Expect two sessions for a six inch micro-realism figure and moderate pain near the shin. When consulting bring close-up references of the harp and any facial expression you want preserved. A major mistake is asking for ultra-fine hairline strokes too close together. Micro-realism holds if the artist uses contrast and selective saturation instead of endless tiny lines. Touch-ups are less frequent here but plan for one at year three if you wear shorts a lot.
11. Fine line winged heart along the collarbone
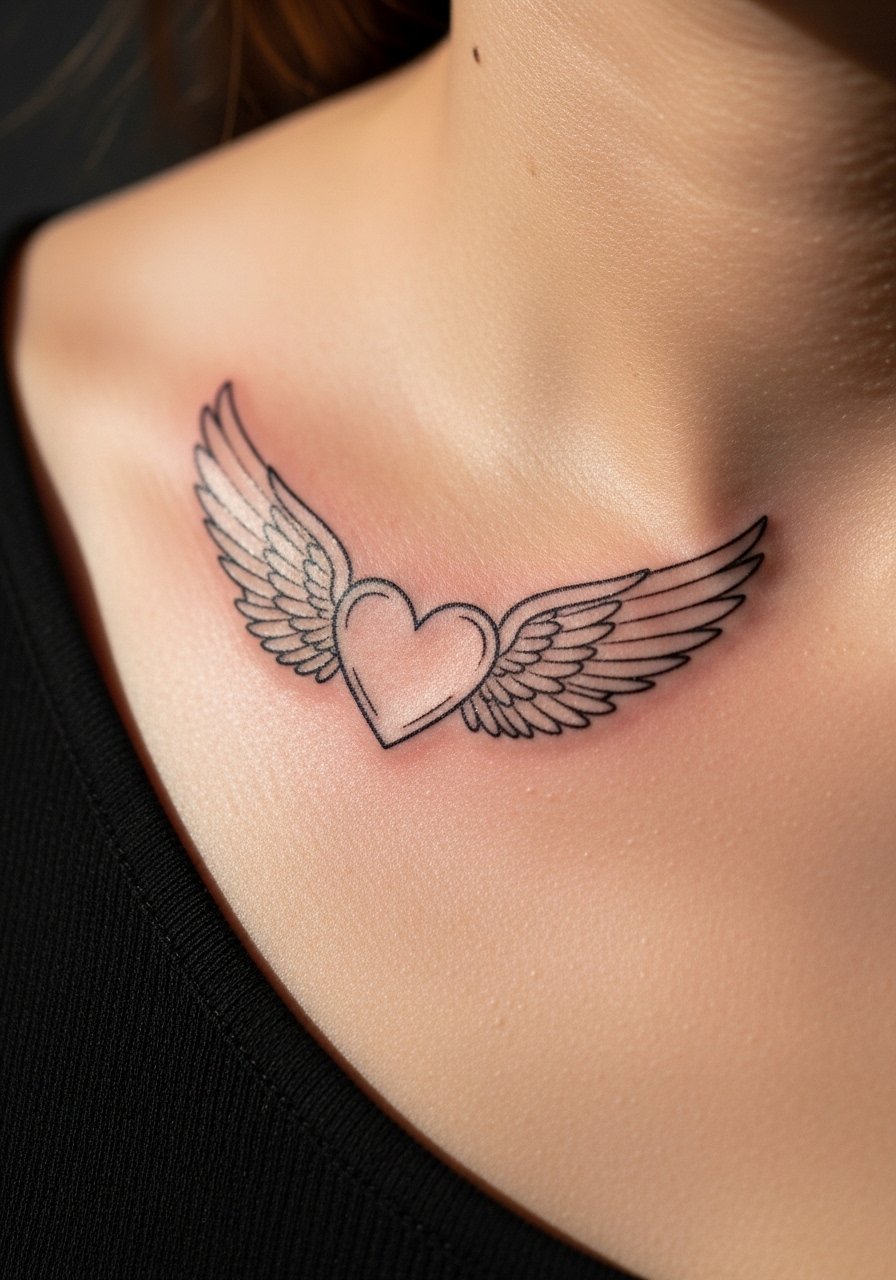
Visual impact here depends on curve alignment with your collarbone. Sessions are short for a three inch piece but the area can sting near bone. Tell your artist you want slightly bolder contour near the extreme points so the heart reads at two years. The debate over fine line longevity shows up here. One camp says collarbone lines blur faster because of movement. The other camp believes careful needle depth and spacing keep lines crisp. Ask which approach your artist recommends and plan a touch-up around year two. Avoid asking for ultra-fine feather textures right on the bone.
12. Ignorant style skull with angel motif on the hand
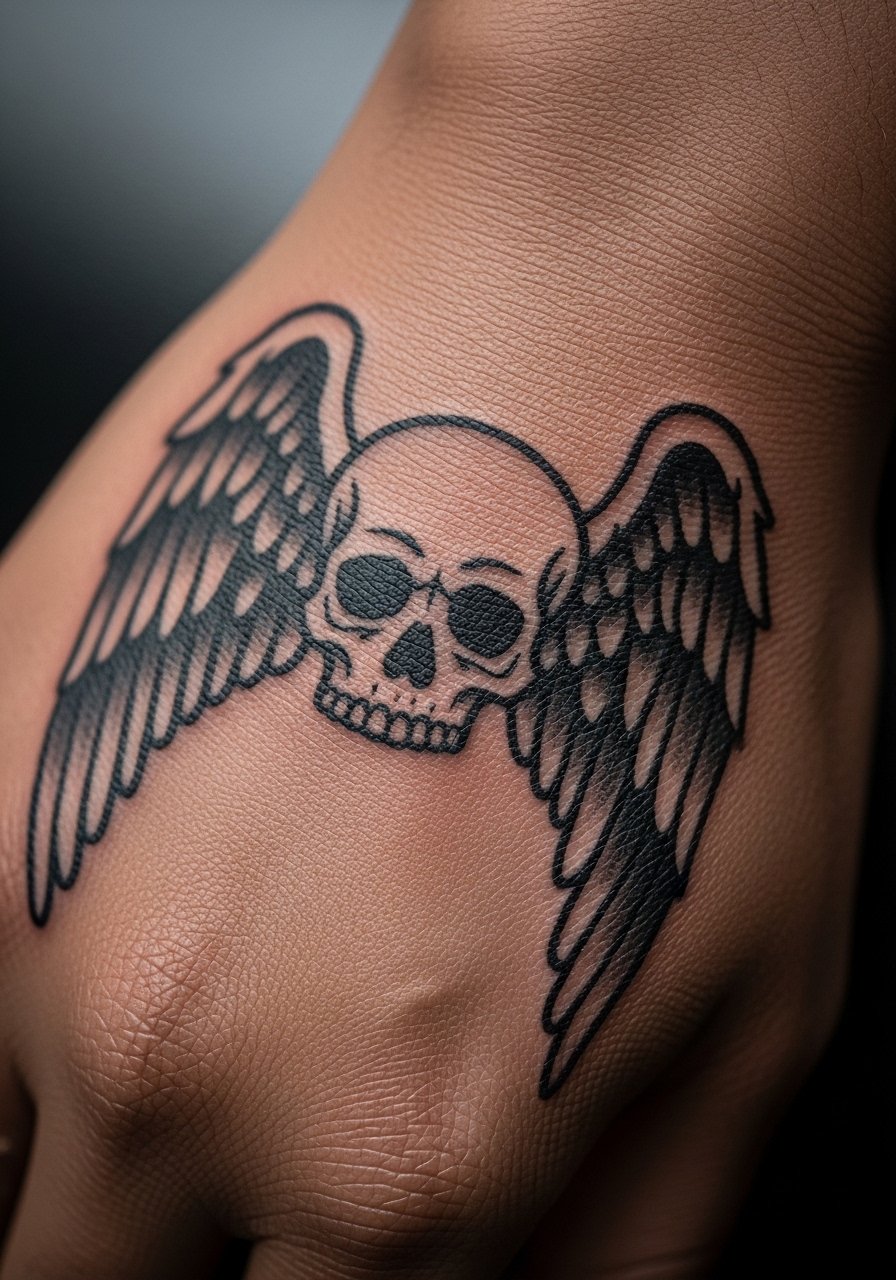
Hand tattoos still affect hiring in some industries so think about career implications before committing. Back-of-hand placement is short sessions but heals differently because of constant use. Tell your artist you want bold shapes and flat fills rather than tiny shading to help longevity. The biggest mistake is asking for fine detail in a spot that endures soap, sanitizer, and sun. Expect color to soften quickly and plan a touch-up at six to nine months. Some artists limit hand work to experienced clients, so be prepared to show prior tattoos or a steady appointment history.
13. Birthstone halo detail in small shoulder tattoo
This under-covered idea adds a personal color accent that works well on darker skin when adjusted for saturation. Sessions are short for one to two inch pieces and pain is mild. Tell your artist the exact color and placement you envision, and ask to see healed photos with similar skin tone. Many designs underplay how pigments look on melanin-rich skin, so request a slightly stronger initial saturation for the halo. Expect the halo color to soften faster than black outlines. A small touch-up at year one keeps the stone vivid without overworking surrounding linework.
14. UV-reactive wing accents for nightlife on the hand
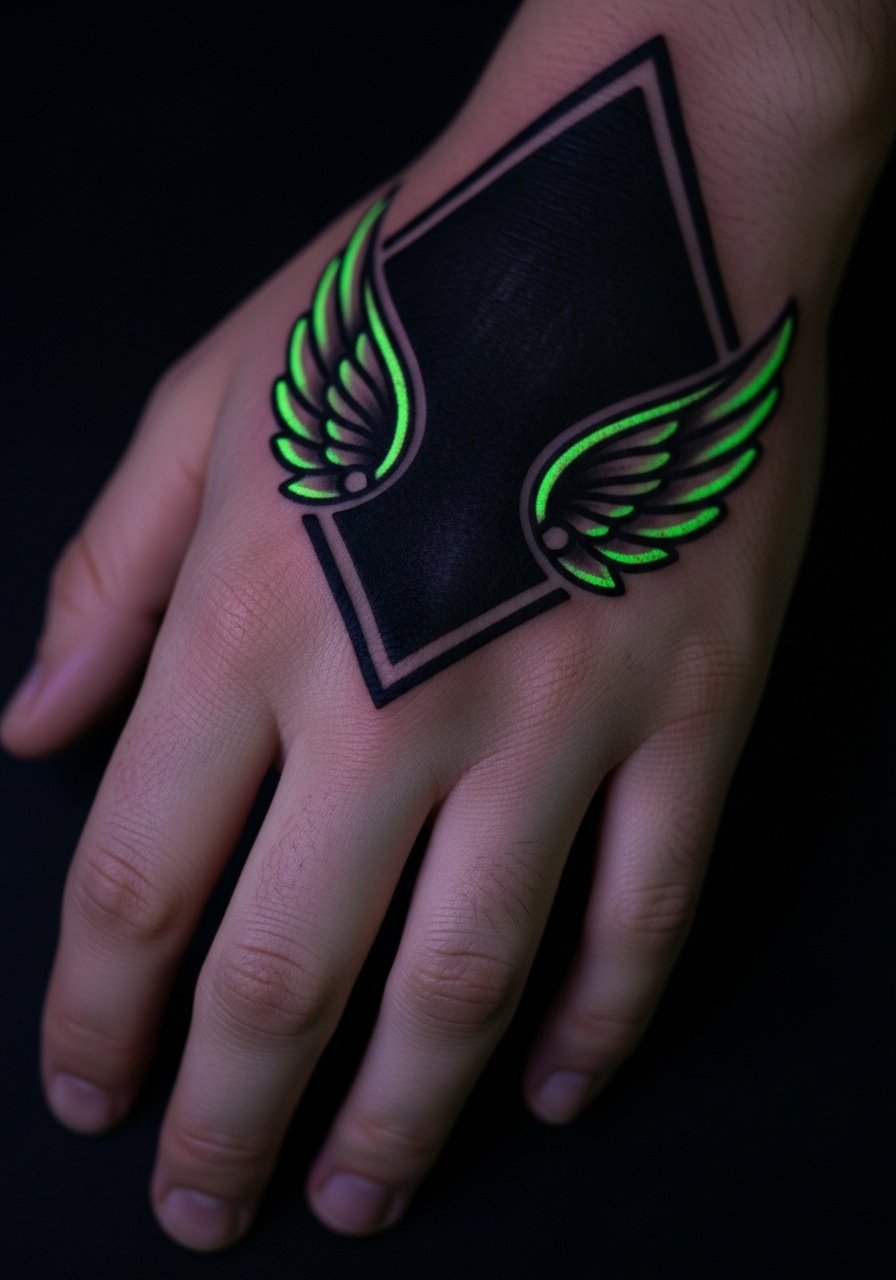
This is a niche option for nightlife lovers who want a secret pop under blacklight. Hands are high-wear areas so keep most of the design in strong black outlines and use UV as an accent rather than the only pigment. One session can add UV highlights to an existing hand piece or to new work. Discuss safety, visibility, and fading expectations with the artist, because UV pigments vary in longevity. The mistake is relying on UV only; it can fade fast and look patchy in daylight. Expect more frequent maintenance and confirm your artist has experience with UV inks.
15. Scaled angel compositions for plus-size thigh placements
Most galleries forget to show how pieces look across body shapes, and that's a real gap. For thigh work plan for two sessions and expect variable pain where skin thins near inner thigh. Tell your artist you want to see mockups on body templates that match your curves so composition avoids odd warping. The common error is scaling a straight reference without accounting for muscle and movement. Artists who pledge free touch-ups for shifting areas are worth considering. Over several years expect layout tweaks rather than a single permanent change.
Tattoo Prep and Aftercare Essentials
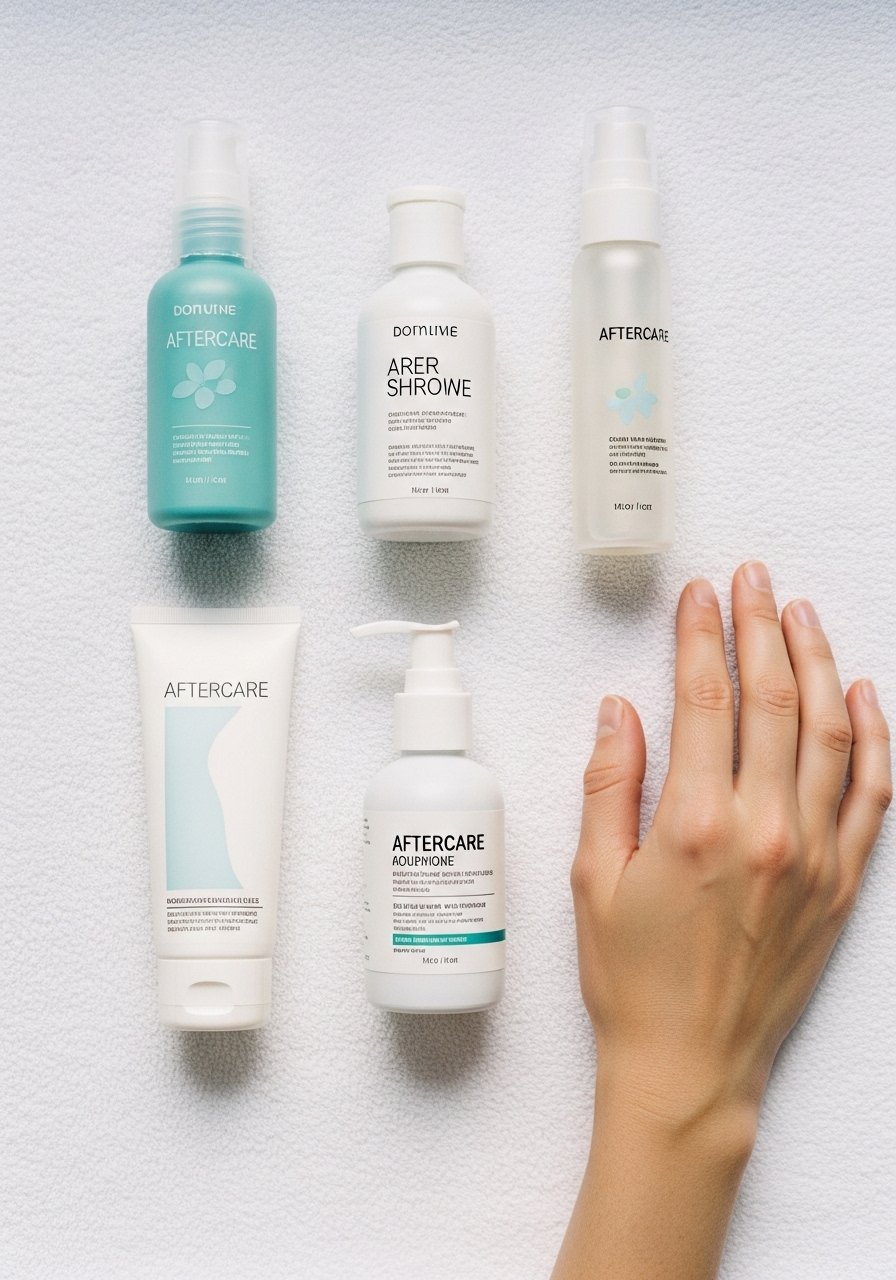
For most of these angel directions you will need a small kit that covers pre-appointment prep, fresh healing, and long-term maintenance. Pack a soft bandage for travel to the shop, comfortable clothing that avoids rubbing the new piece, and a gentle cleanser for initial wash. I recommend lightweight breathable options rather than heavy occlusives for color-heavy pieces, and plan for touch-up balm on hand and wrist tattoos that see friction. Below is a practical shopping list with items I see recommended in community threads and forum discussions. Each item links to a search that helps you compare options.
InkSafe Tea Tree Balm (breathable, low-grease healing balm). Good for hand and knuckle work where greasiness leads to yellowing. Use sparingly after the first few days.
H2Ocean Aftercare Spray (gentle saline spray popular for dry-healing blackwork). Helps with flaky healing in winter without heavy lotions.
Tatsu Care Japanese Aftercare Soap (non-drying cleansing bar). Useful for fine line pieces to avoid over-stripping oils.
Indie Raven Balm (non-yellowing moisturizing balm favored in advice threads). Apply thin layers after day three for color retention.
Medical-grade second skin bandage, 6-inch roll. Use for initial protection on ribs and chest or to cover during flights.
Fragrance-free lightweight balm for daytime maintenance. Keeps the area supple without clogging pores.
Hustle Butter Original (single mainstream option, fast-absorbing balm). A lot of people like this for the first week because it absorbs quickly and does not leave a heavy film.
Non-irritating sunscreen, broad spectrum, SPF 30 or higher. Essential once the skin is fully healed to protect color and contrast.
Every tattoo is different. Always follow your artist's specific aftercare instructions. Consult a dermatologist if you have skin concerns or unusual healing issues.
Frequently Asked Questions
Q: Will fine line wings blur faster on forearms than bold neo-traditional wings?
A: From what I have seen fine line does tend to soften faster on the forearm due to sun and constant movement. Bold neo-traditional outlines and slightly heavier inner shading usually keep definition longer. If you want a delicate look but better longevity, ask for controlled line weight and schedule a touch-up at six to twelve months.
Q: Do watercolor cherubs on ribs need a different healing routine than blackwork on the back?
A: Yes, watercolor tends to rely on softer pigment layers so you want minimal heavy ointments and less friction. Rib work also sweats more in summer, so consider a three-day occlusive approach only if your artist recommends it, and otherwise a gentle saline spray and light balm. Blackwork benefits from careful moisturizing to preserve saturation.
Q: How should I phrase a request for a birthstone halo so the color shows up on darker skin tones?
A: Ask your artist to show healed photos on similar skin tones and request slightly stronger saturation for the halo. Mention that you prefer a crisp outline around the color so the hue reads as a pop rather than a wash. Bringing a physical swatch can help too.
Q: Is Saniderm better than dry healing for a rib tattoo with lots of color?
A: Artists and community members are split on this. One camp reports faster color settling with a short Saniderm wear period, while the other warns about maceration if left too long in detail-heavy areas. Follow the artist's plan, and if they suggest a film dressing, confirm the exact removal time for delicate wings or pastel work.
Q: How often should I expect to touch up a hand or wrist angel versus a thigh portrait?
A: Hands and wrists usually need touch-ups sooner because of constant exposure and washing. Plan for a touch-up at six to twelve months for hand pieces. Thigh portraits often hold longer, with touch-ups every three to five years depending on sun exposure and body changes.
