
A tiny travel mark can feel safe the day you get it and vague five years later. The trick is choosing a symbol and placement that keep crisp linework and readable shape as skin shifts and life moves. These ideas mix small, buildable projects and medium pieces with clear aging logic, real session notes, and wardrobe tips that help each design look intentional now and later.
1. Minimal Airplane Outline on the Wrist
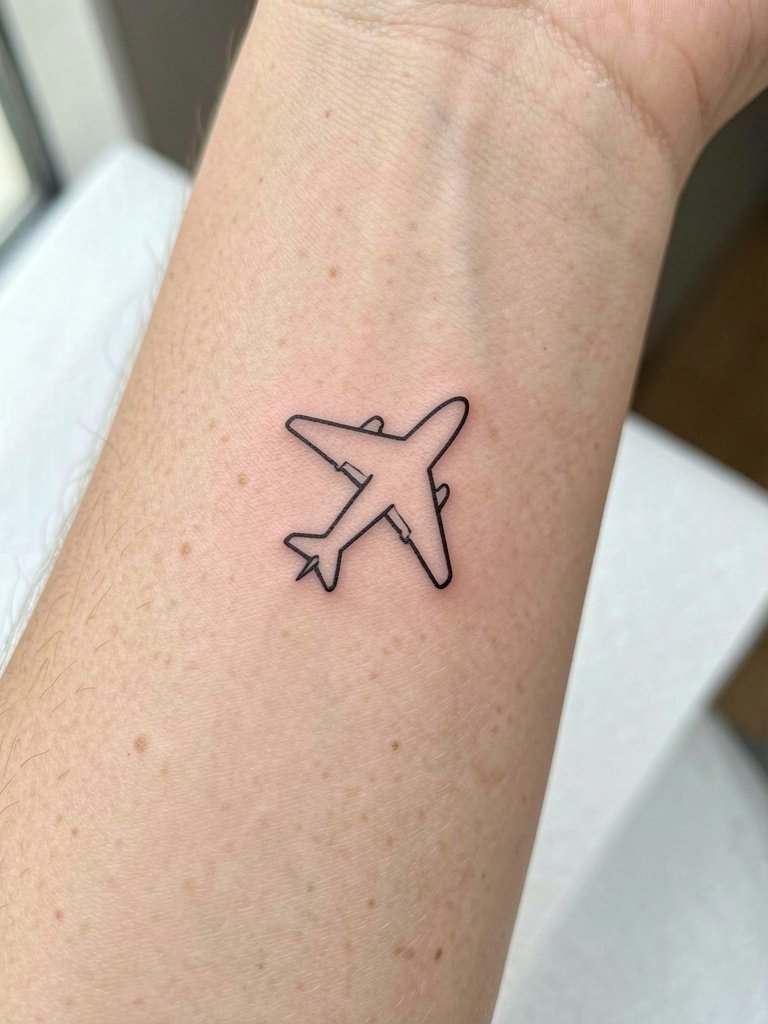
A tiny airplane on the inner wrist reads playful and literal. Expect a short session, often under an hour, and a sharp sting because the wrist has thin skin and lots of motion. The common mistake is asking for a hairline single-needle plane at too small a scale which softens into a blur by year two. Ask for slightly heavier linework and a simple silhouette so the linework holds. Wear a short sleeve tee the day of the session so the artist can access the wrist easily. Touch-ups are typically needed within two to four years for tiny pieces.
2. Classic Compass on the Inner Forearm
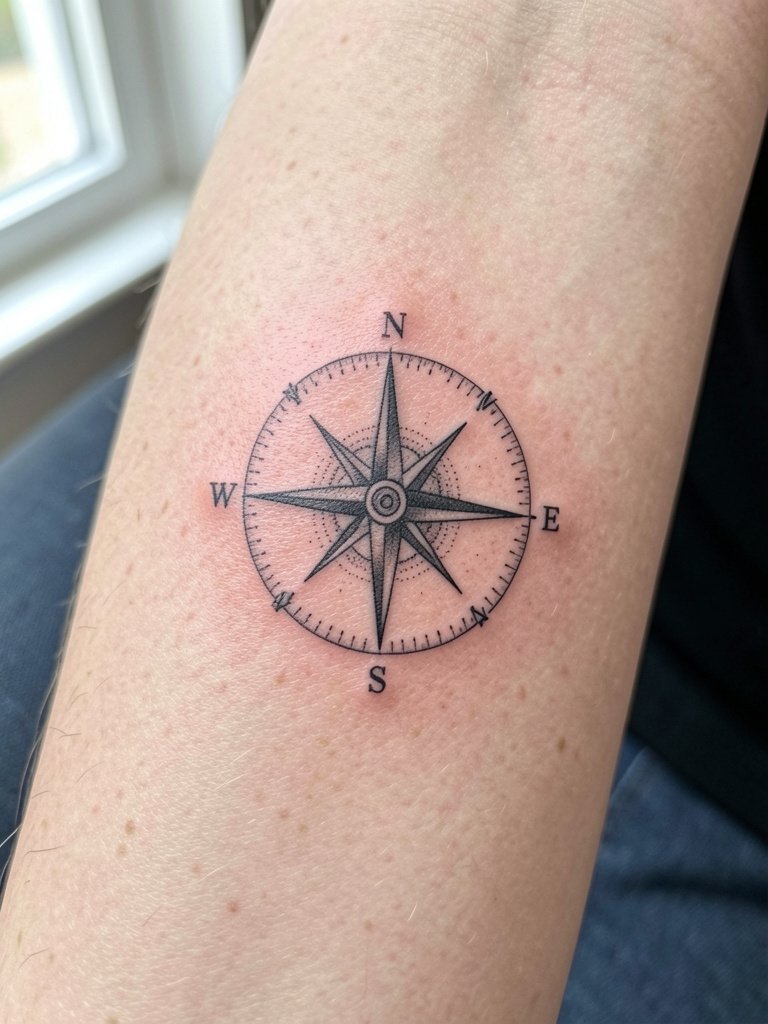
A compass on the palm-up forearm gives room for detail without overcrowding. One camp favors the classic compass because the symbol stays legible and feels timeless. Another camp thinks compasses are overused and prefers coordinates or skyline work for a specific memory. The practical takeaway is to pick which idea you want a decade from now. During consultation, show two compass scales so the artist can suggest spacing that keeps the needle and points distinct. For style, roll a linen button down sleeve when you show the piece off.
3. Tiny World Map Silhouette on the Upper Arm
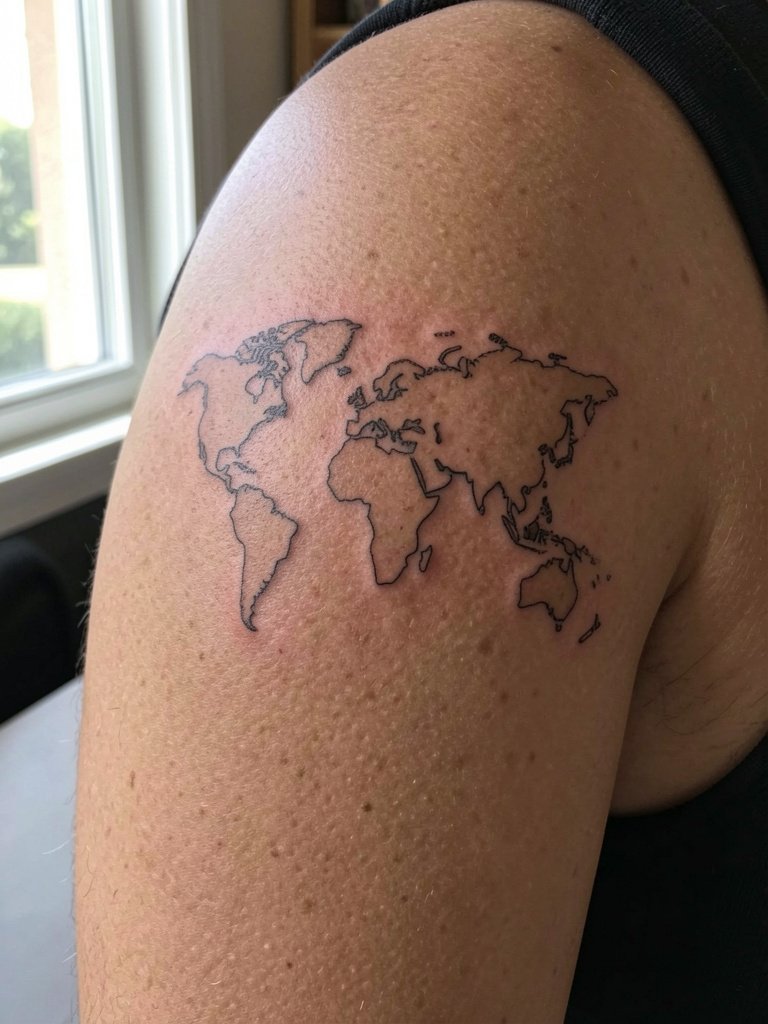
A reduced world map reads instantly as travel while giving you options to add pins or color later. Common mistakes include cramming too much geographic detail into a small area. Ask the artist to simplify continents into bold shapes and to leave breathing room between landmasses. On the upper arm the session feels moderate with comfortable positioning. Wear a plain tee to reveal the shoulder and make the map visible when you roll the sleeve. Expect a touch-up window around two to three years for micro edges.
4. Passport Stamp Collage on the Forearm
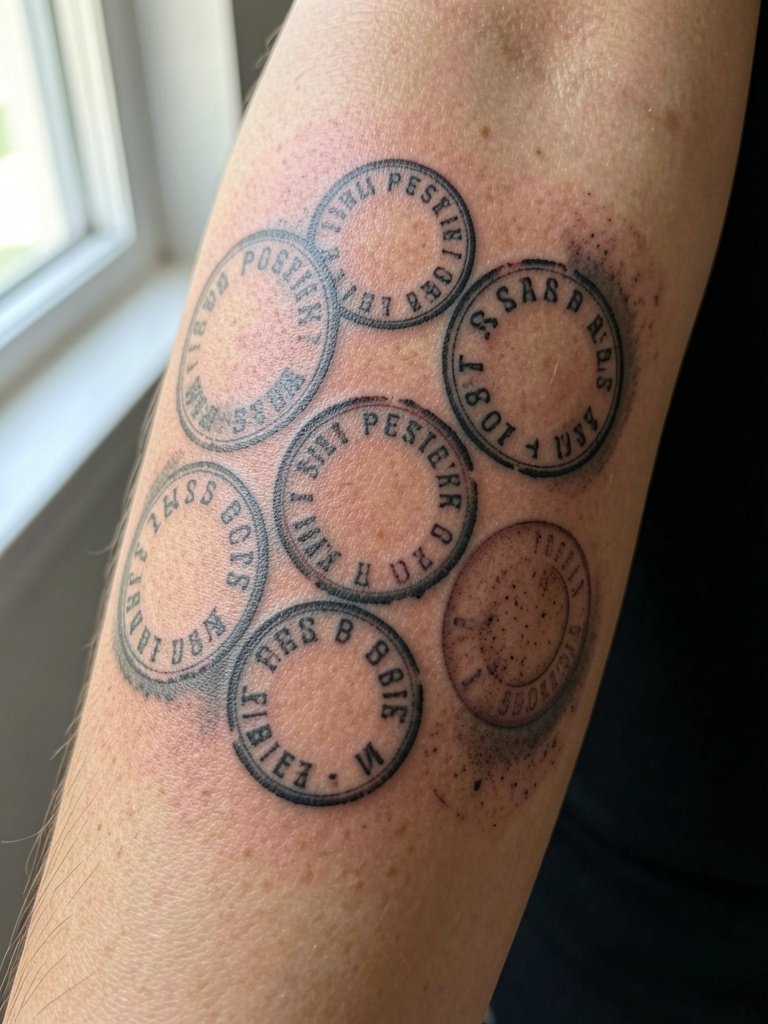
Passport stamps make a buildable travel sleeve you can add to over time. A practical mistake is starting with too-small stamps that look busy when stacked. Start with a few medium-size stamps spaced intentionally so new ones can be added later. Discuss stamp edge distress and light color washes in the first session so future additions match. The forearm is forgiving for touch-ups and shows healed saturation well. For showing the collage, cropped jackets or rolled sleeves work best. Try a cropped denim jacket to frame the forearm.
5. Vintage Suitcase Illustration on the Outer Forearm
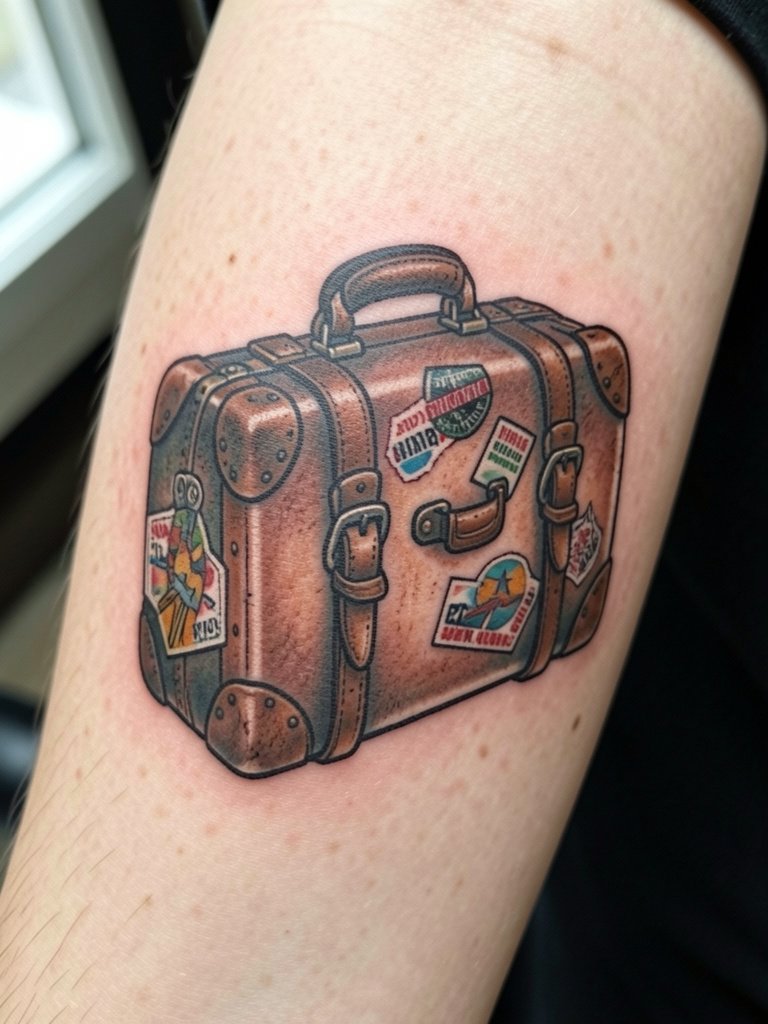
A suitcase motif reads nostalgic and literal without being a tiny symbol. The outer forearm gives display space for illustrative detail. A common error is asking for thin decorative lines in areas that get frequent sun exposure, which results in faster fade. Ask about saturated flat fills and bold outlines so stickers and straps keep contrast. Session time is moderate, and pain is low on the outer arm. Pair this look with a plain tee or a watch on the opposite wrist to balance the visual weight.
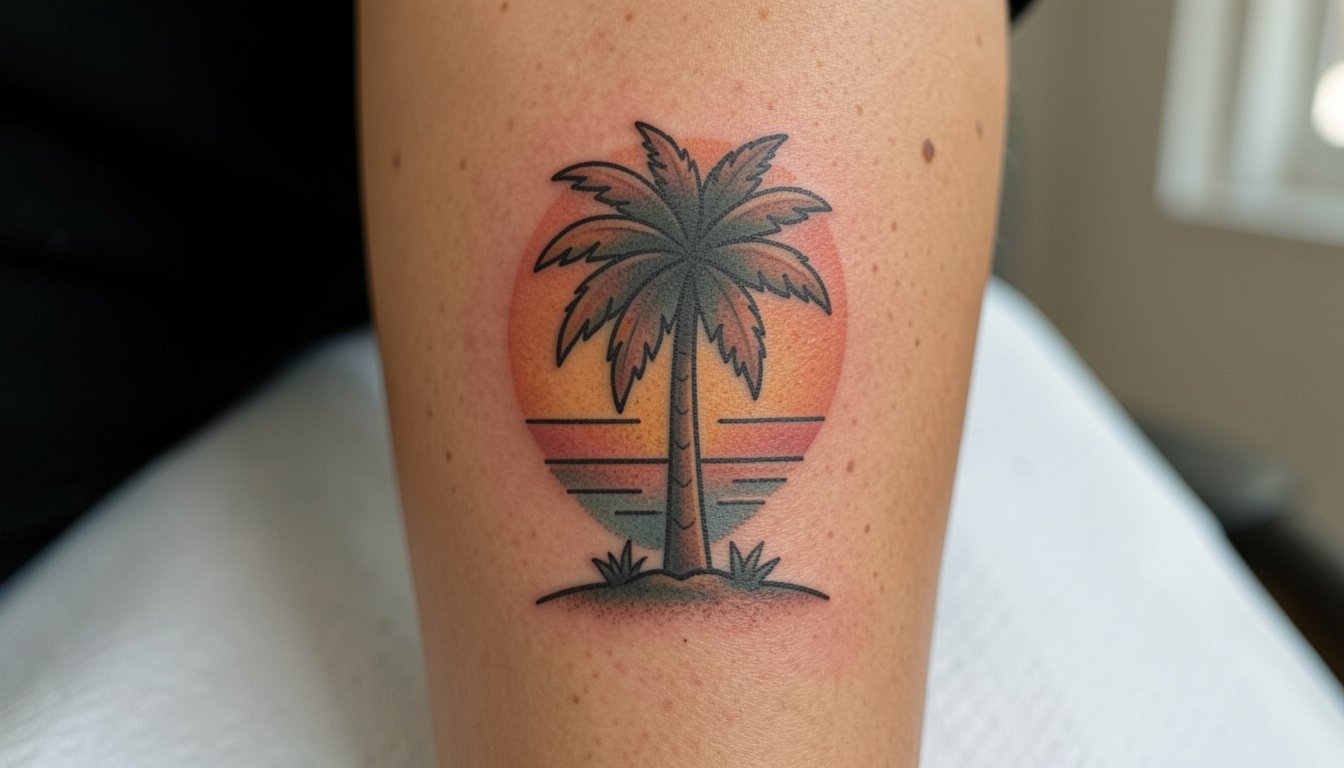
6. Palm Tree with Sunset on the Calf
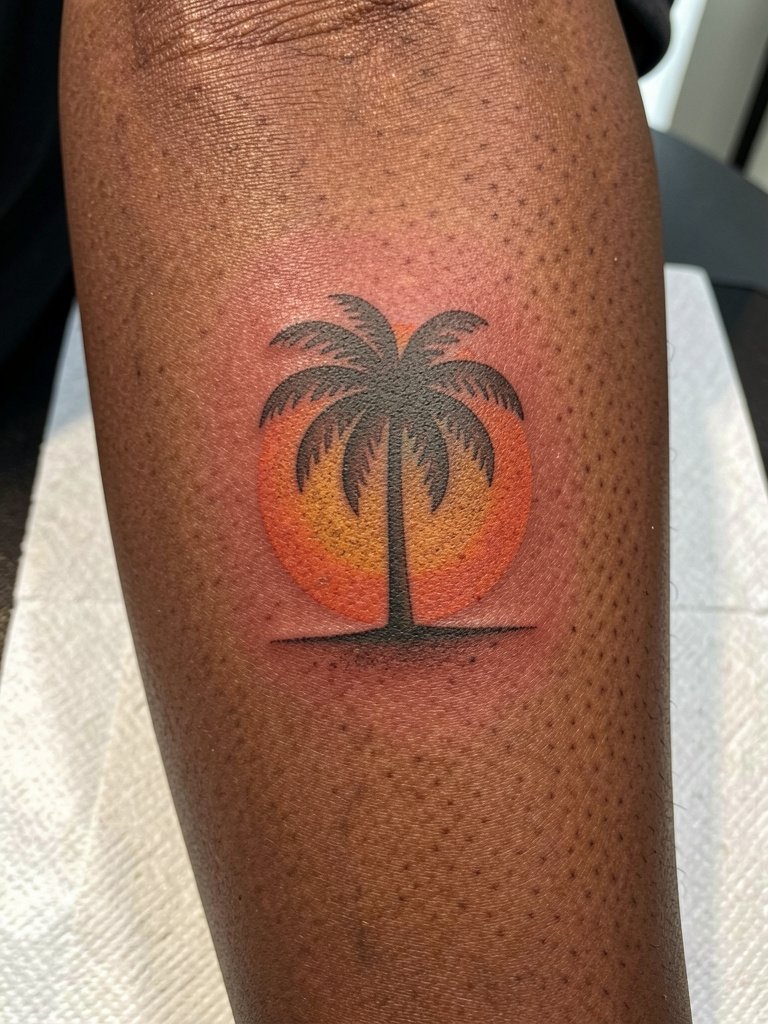
Colorful palm scenes are a classic vacation badge for the calf. One common regret is choosing extremely soft watercolors at a small scale; they can bleed into a mottled patch as the ink settles. Choose a design with clear contrast and midtone saturation so the sunset reads from a short distance. Calf sessions are steady and less painful than ribs, but expect two sessions if you want smooth gradients. For showing it off, cropped pants or midi skirts are perfect. Slip into linen shorts after healing to let the piece show.
Session Essentials
The wrist and forearm ideas above have different healing rhythms than the calf and upper arm, so a few small items help the session and the first week.
-
Stencil transfer paper kit. Lets you preview exact placement and scale on skin before the first pass, especially useful for small airplane and compass designs.
-
Topical numbing cream. Applied per instructions about 45 minutes before can reduce wrist and rib sensitivity for people who need it.
-
Thin protective film roll. Useful for fingertip and wrist tattoos during the first few days of heavy hand washing.
-
Fragrance-free gentle body wash. Mild cleansers are kinder to new ink than scented soaps during showers.
-
Aquaphor Healing Ointment. A thin layer in the first 48 hours locks in moisture for fine line work without clogging channels.
7. Mountain Range Linework Across the Collarbone
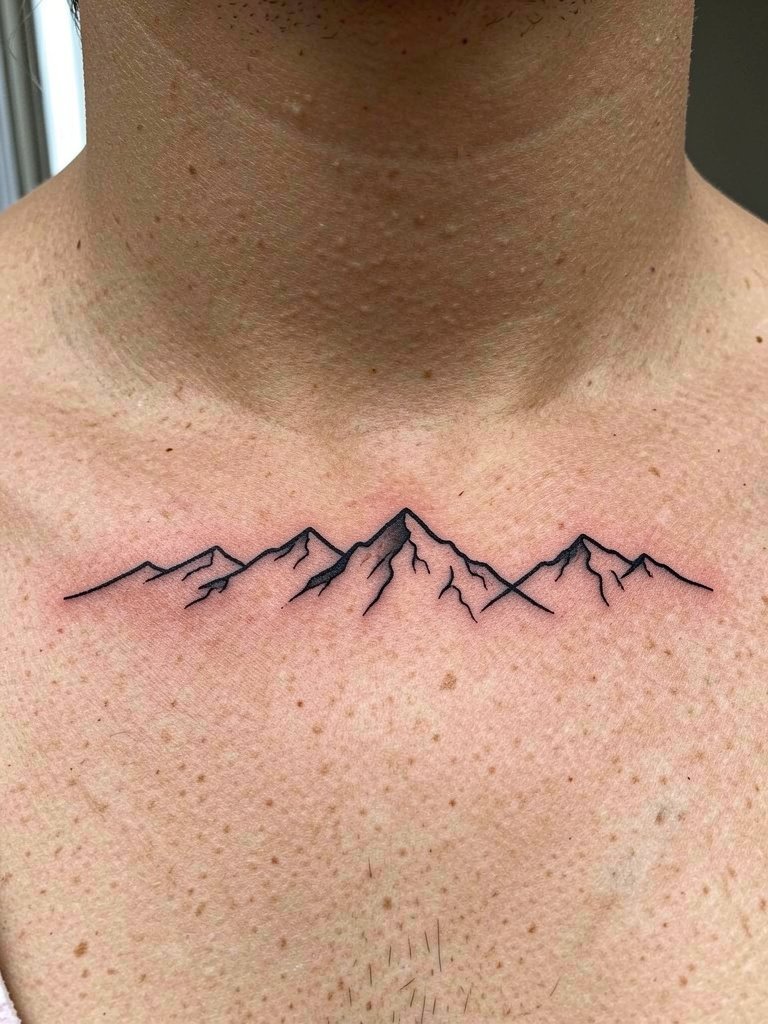
A simple horizon of peaks on the collarbone looks elegant and sits well with necklaces. The collarbone sees stretch from movement, so extremely thin single-needle work can blur. Ask for slightly bolder linework and spacing that keeps peaks separated. Pain here is moderate with bone proximity that can make sessions crisp. Show-off pairing includes off-shoulder tops. Try an off shoulder top to frame the line. Expect a touch-up at two to five years depending on sun exposure.
8. Paper Airplane Behind the Ear
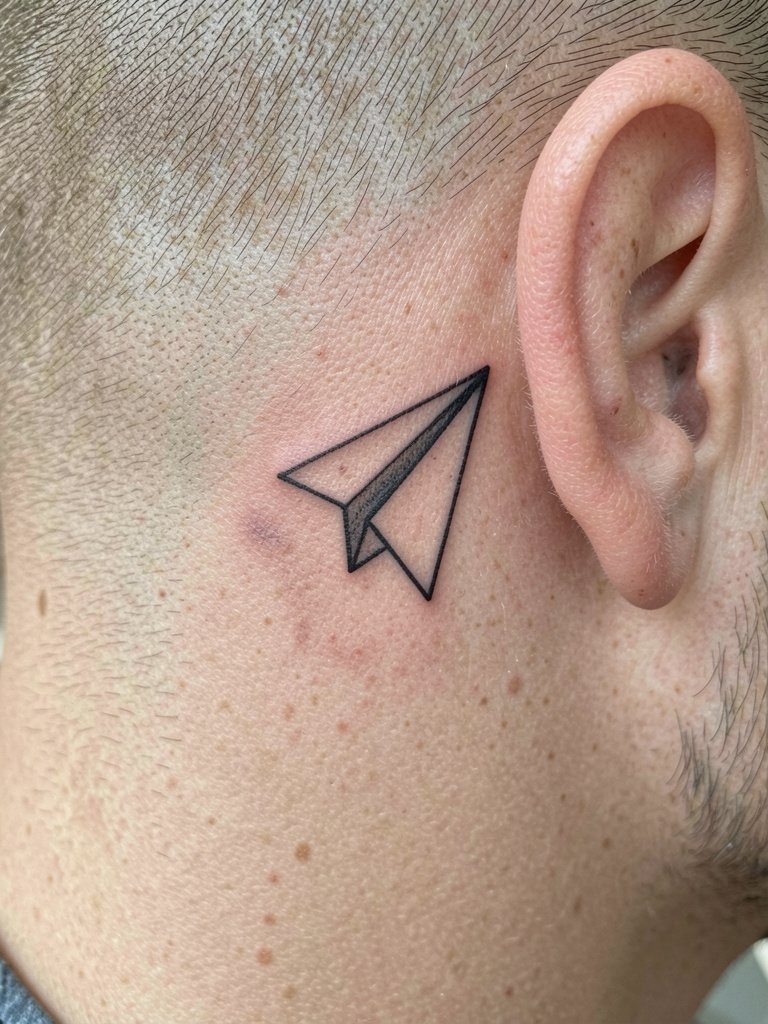
The mastoid area is ideal for tiny, playful marks and easy to hide with hair. The main technical concern is scale. A paper plane drawn too thin loses its wing angle as the ink spreads. Ask for a clear silhouette and tiny negative-space trail to make the motion readable. Behind-ear sessions are quick but can sting because the skin is thin. Tuck hair back or wear it up for the appointment. Healed color holds well and usually needs only occasional linework touch-ups.
9. Coordinates on the Inner Forearm
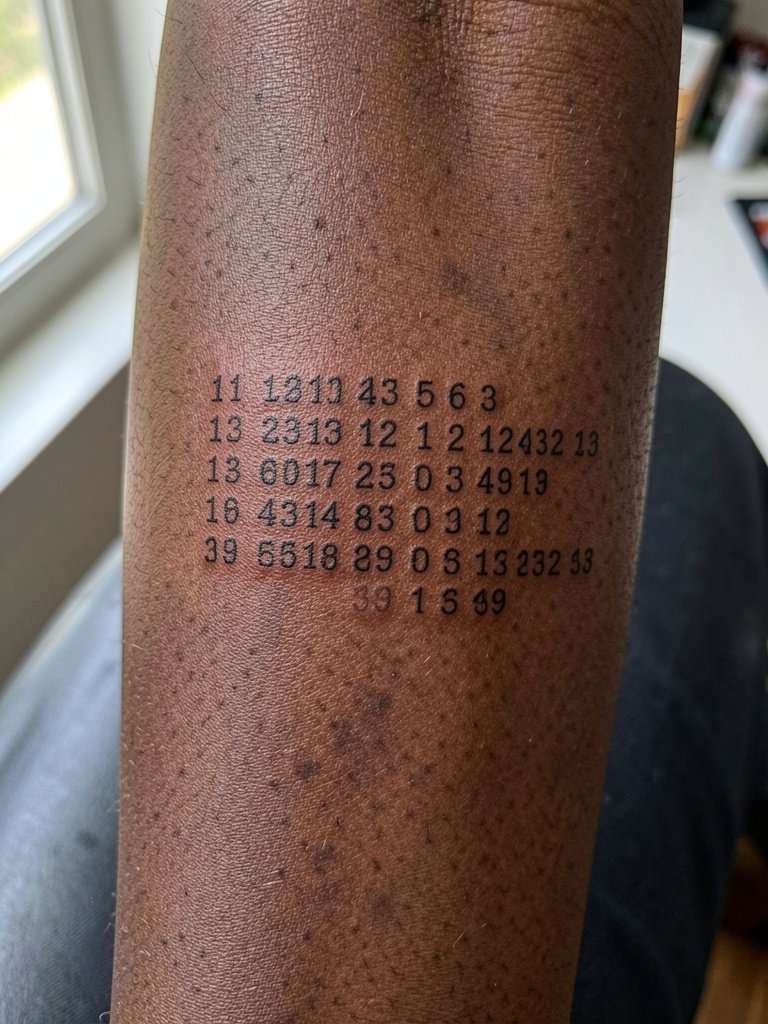
Coordinates are a discreet way to lock a place into ink without a literal landmark. The key is font choice and spacing. A common mistake is tiny, ornate script that becomes unreadable. Bring the exact coordinate string at the size you expect so the artist can show scale options and line spacing. Inner forearm sessions are comfortable and let artists check symmetry. To show off a forearm script, roll sleeves and wear a stacked bracelet set on the opposite wrist for balance.
10. Globe Sphere on the Shoulder
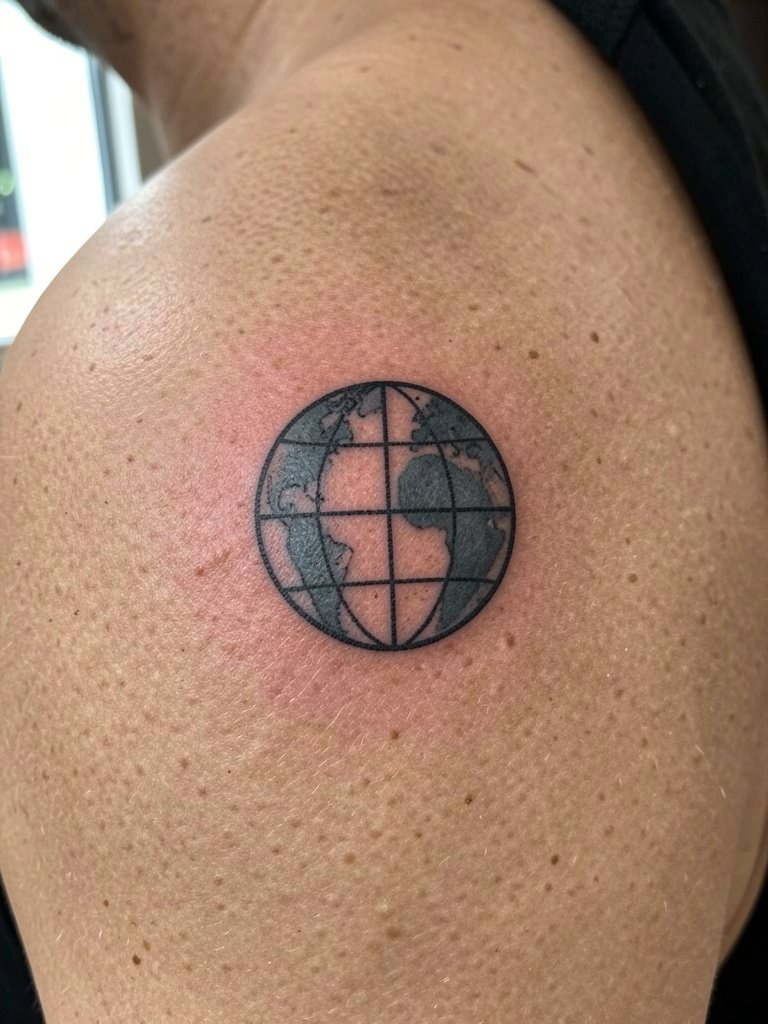
A shoulder globe can be compact and still detailed when the lines have room. Shoulders tolerate slightly higher saturation which helps longevity. A common misstep is tiny internal landmasses that blur into the meridian lines. Ask for a clear separation between grid lines and any interior shading so the sphere reads as a globe. Sessions on the outer shoulder are comfortable and allow for heavy handed shading if desired. Tanks and muscle tees show off the curve. Expect low blowout risk here if linework has room.
11. Desert Scene on the Ribcage
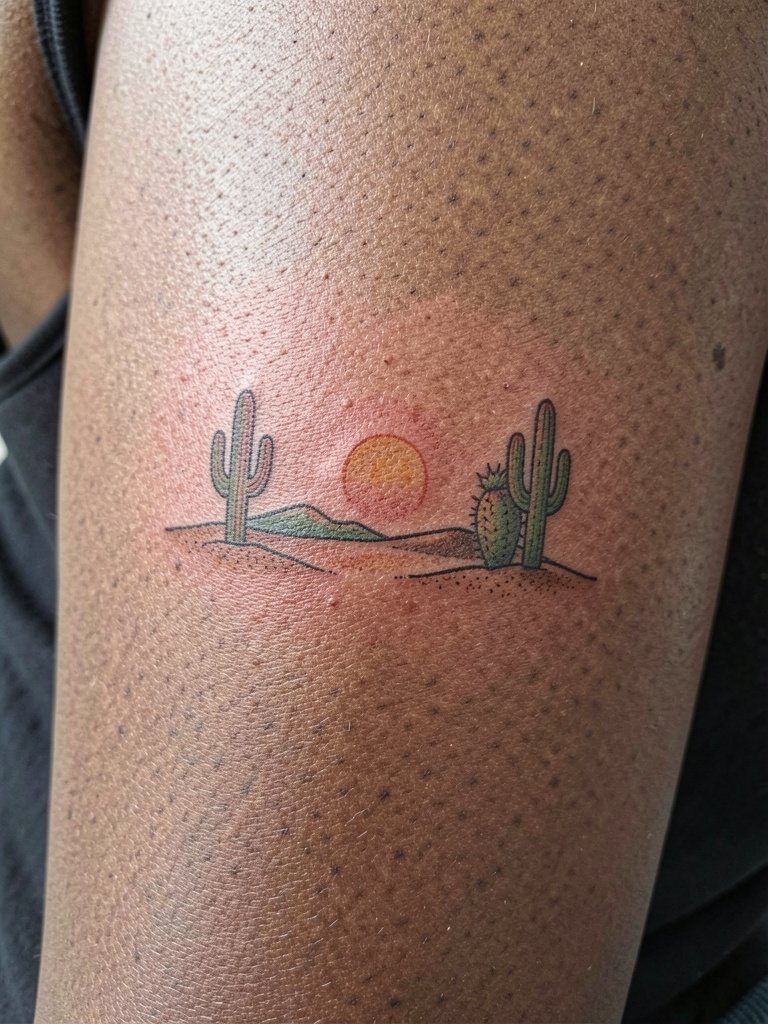
Ribcage scenes carry atmosphere but come with higher pain and healing complexity. One camp says fine line here blurs because the area stretches and moves with breathing. Another camp claims careful needle depth and slightly wider spacing solve that. If you want a scene, plan for slightly larger line weights and possible two sessions. The ribcage can age unpredictably with weight fluctuation. For sessions, wear a loose top that opens at the side. Consider a loose button up shirt to keep the area accessible while staying comfortable.
12. Landmark Skyline on the Outer Forearm
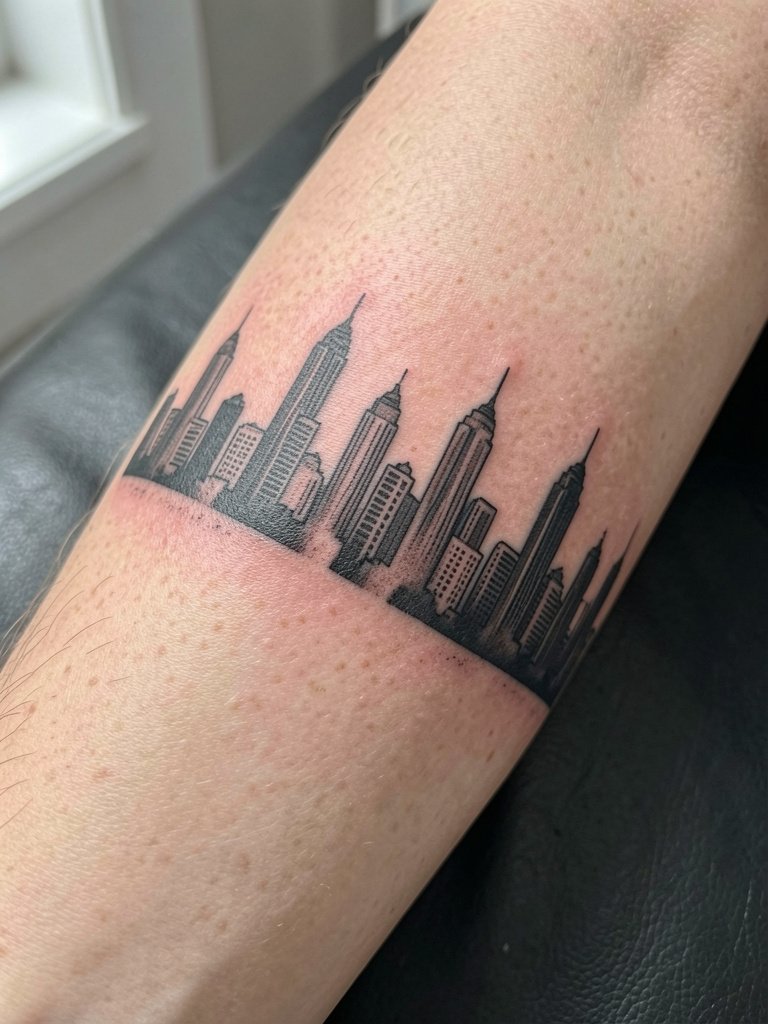
A skyline lets you commemorate a city without large scenic work. Keep the composition linear and avoid tiny windows or ornate details. The outer forearm placement gives a readable strip that is easy to show off. Common mistakes include packing too many tiny elements that blend at six months. Bring skyline references at the width you want and ask the artist to block in silhouettes first. Pair the piece with a cropped jacket for evenings out.
13. Avionics Flight Path on the Calf
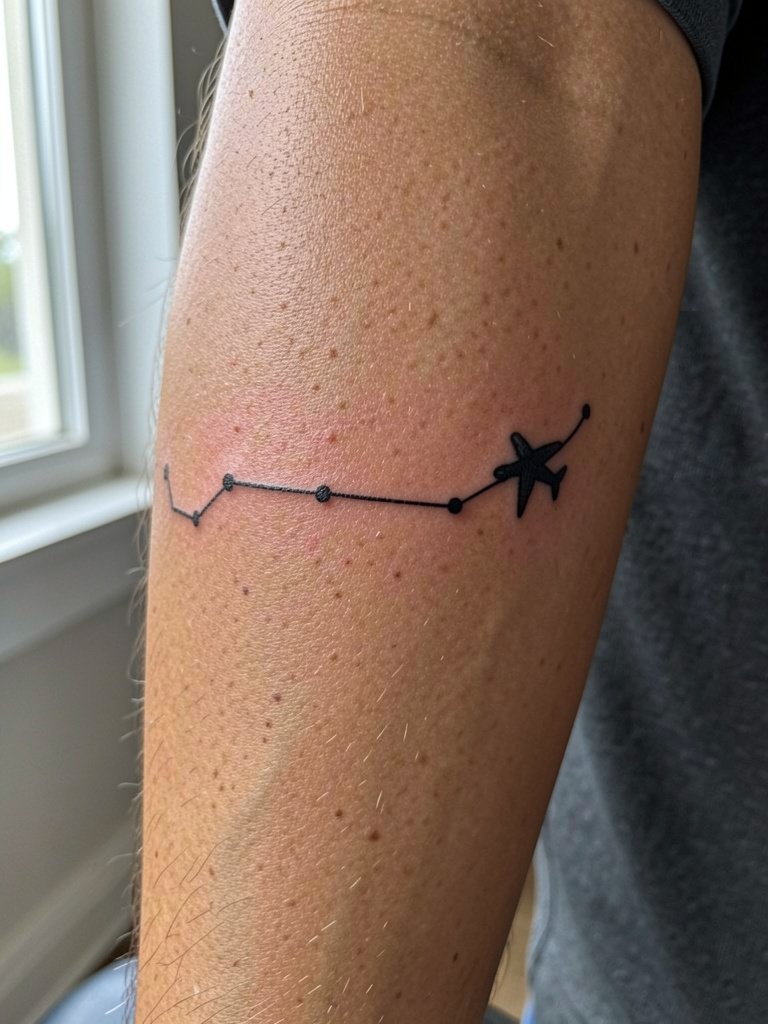
A flight-path design translates movement into a graphic composition. The calf is an ideal canvas for a single flowing line. A mistake is overcomplicating the path with tiny text that becomes illegible. Discuss the length and dot scale so the path keeps its rhythm. Calf sessions are tolerable and let the artist work in one pass for simple routes. Show it with cropped pants or sandals. Try a midi skirt for a summer reveal.
14. Travel Quote Script on the Wrist
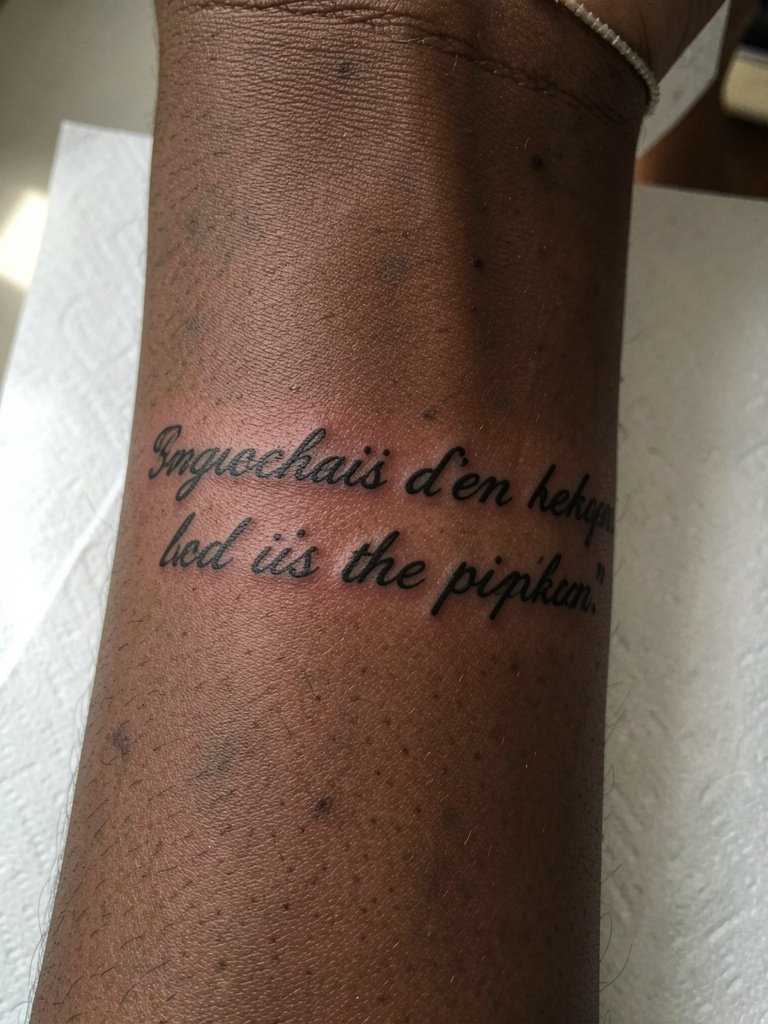
Short travel quotes on the wrist feel intimate. The mistake is picking a dense font that blocks readability when scaled down. Bring the exact phrase and request a mockup at the wrist width you want so spacing is accurate. Wrist skin moves and the word edges soften, so slightly bolder strokes help longevity. Session feels quick but the wrist is sensitive. For daily wear, a slim cuff or bracelet opposite the new script complements the look. Try a thin chain bracelet.
15. Minimal Mountain Silhouette on the Collarbone Edge
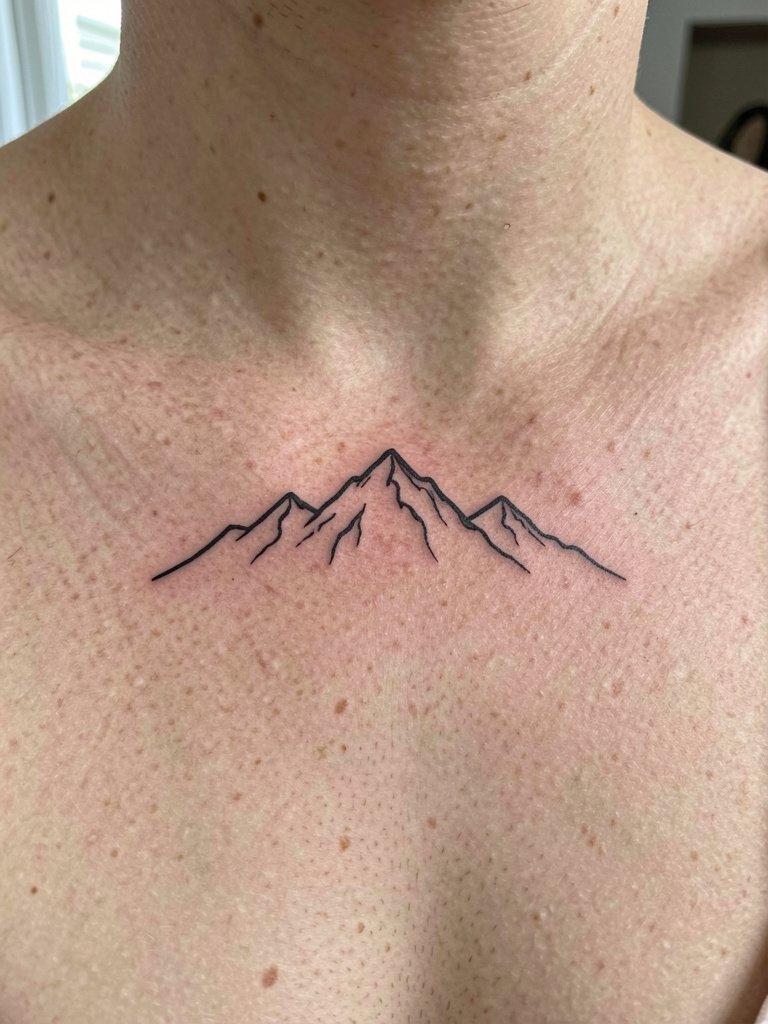
A condensed mountain silhouette is subtle but evocative. Mistakes include overly small peaks that merge with time. Get a template showing how peaks read at the collar width you prefer. The area sits near bone so expect a crisp sensation during the session. Off-shoulder tops highlight this placement without exposing much. Healed contrast lasts best when you avoid heavy sun exposure and schedule a touch-up if lines soften.
16. Paper Map Fold as a Tiny Chest Tattoo
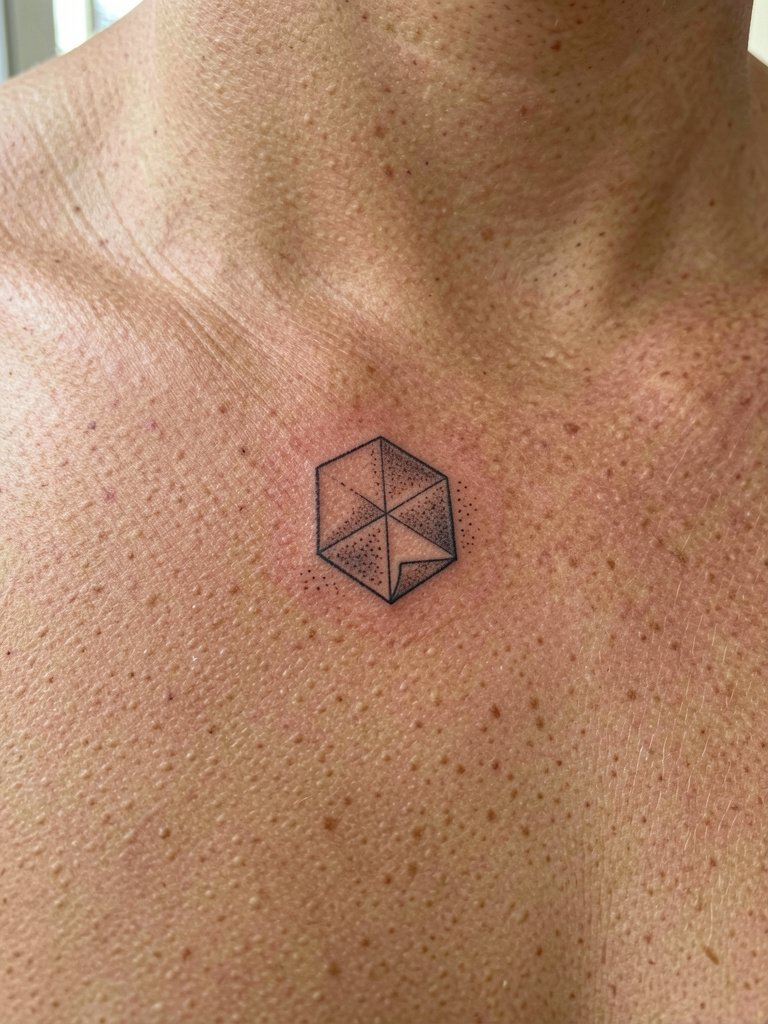
A small folded-map symbol near the sternum reads intimate and personal. The sternum can be sensitive and the skin there moves with breathing. Ask the artist for slightly thicker main contour lines and soft stipple shading for texture that holds. Sessions can be brief but intense. For the appointment, wear a strapless or wide-neck top so the artist can access the area easily. After healing, a delicate pendant can frame the piece nicely. Consider a layered necklace set for evenings out.
17. Compass Rose Ankle Band
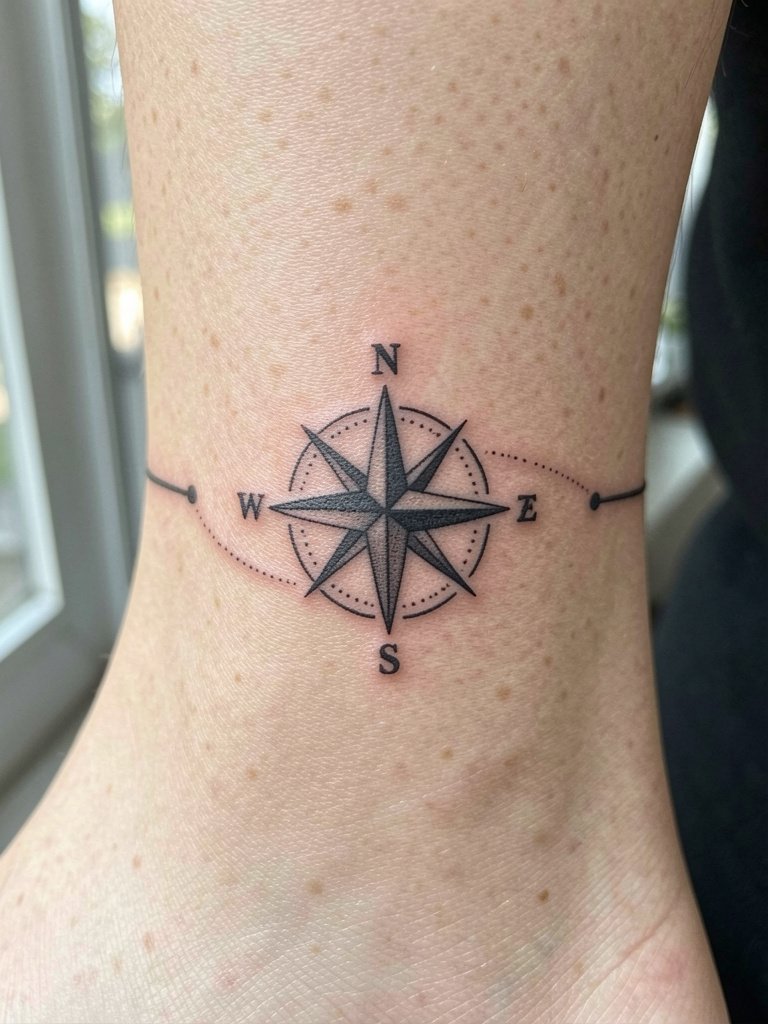
An ankle compass balances visibility and concealability. The ankle sees friction from socks and shoes so thin linework can fade faster. Request sheltering negative space and slightly bolder guide points to prevent softening. Sessions are short but the thin skin can sting. For showing, roll up jeans or wear sandals. A simple anklet complements the design without stealing focus. Expect a minor touch-up once healed if the outermost points thin.
18. Tiny Sailboat Near the Wrist
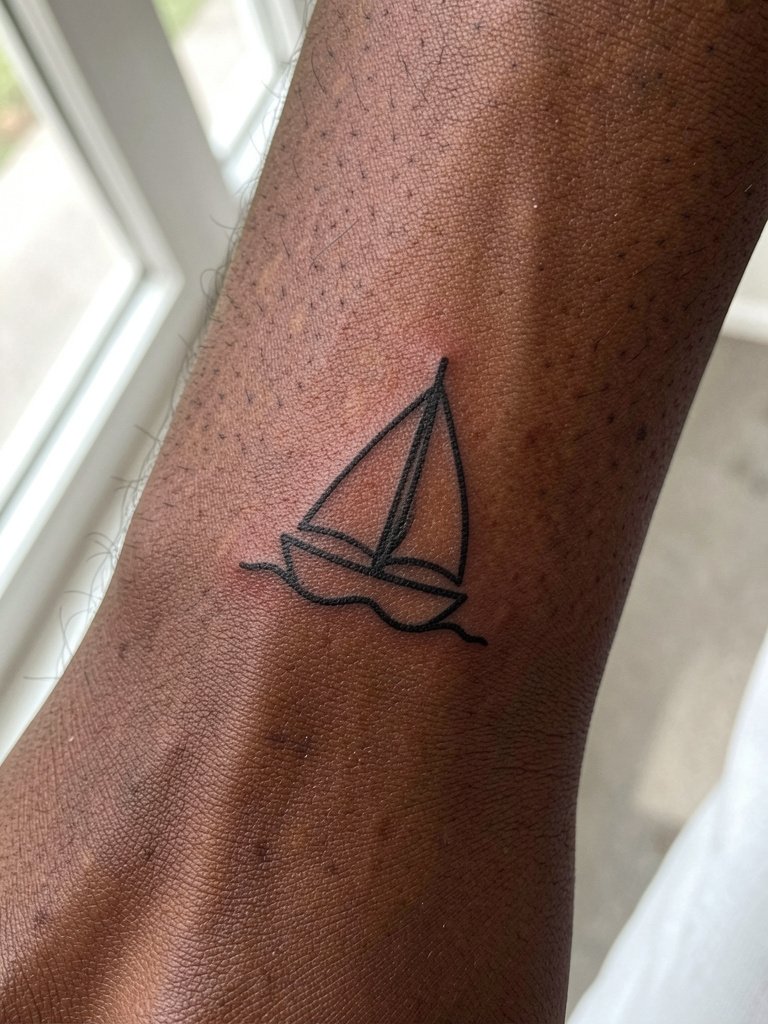
A small sailboat feels travel-adjacent without being literal. The wrist and distal forearm act like high-motion zones. A common error is requesting ultra-fine mast lines that disappear as the skin settles. Ask for a solid hull silhouette and a slightly heavier mast so the motif keeps its shape. Sessions here are quick but sensitive. Wear a minimalist watch band on the opposite wrist to frame the new piece.
19. Passport Stamp on the Bicep Patch
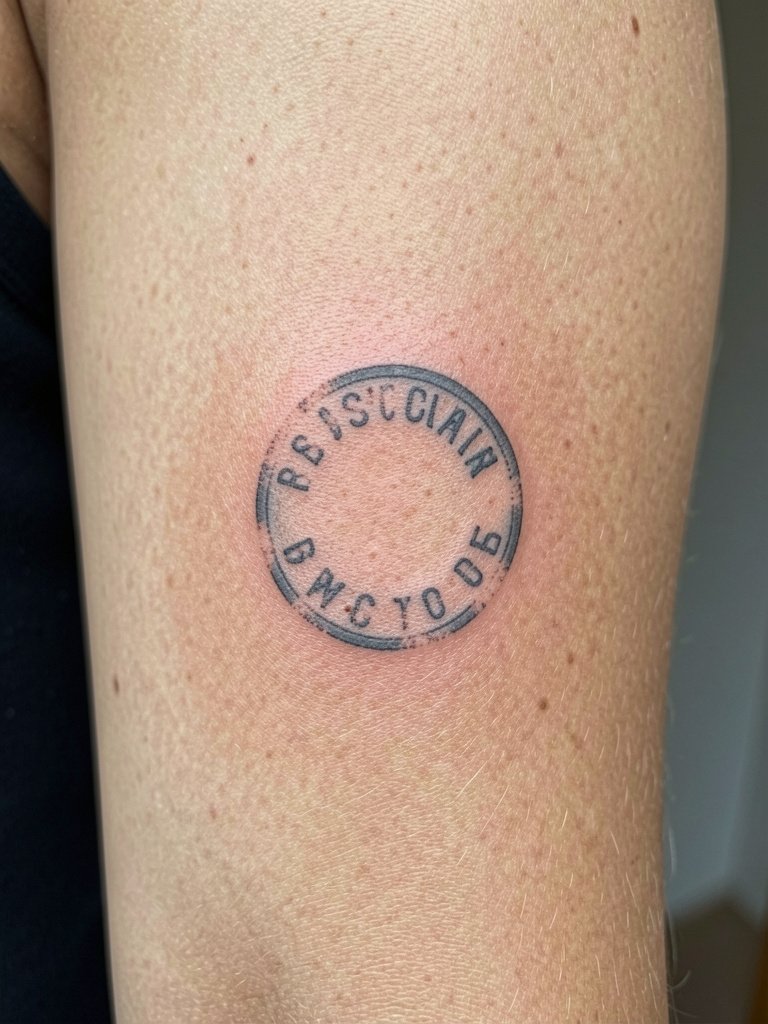
A bicep stamp sits out of constant sun and friction so it ages more predictably. The inner upper arm has slightly softer flesh which helps with saturation. Avoid tiny fine details inside the stamp ring. Ask for a clear distressed edge and modest interior shading to mimic ink stamp texture. Sessions are comfortable when the arm is relaxed at the side. A loose button-down shirt rolled at the sleeve reveals the stamp without force.
20. Tiny Palm Horizon on the Outer Thigh
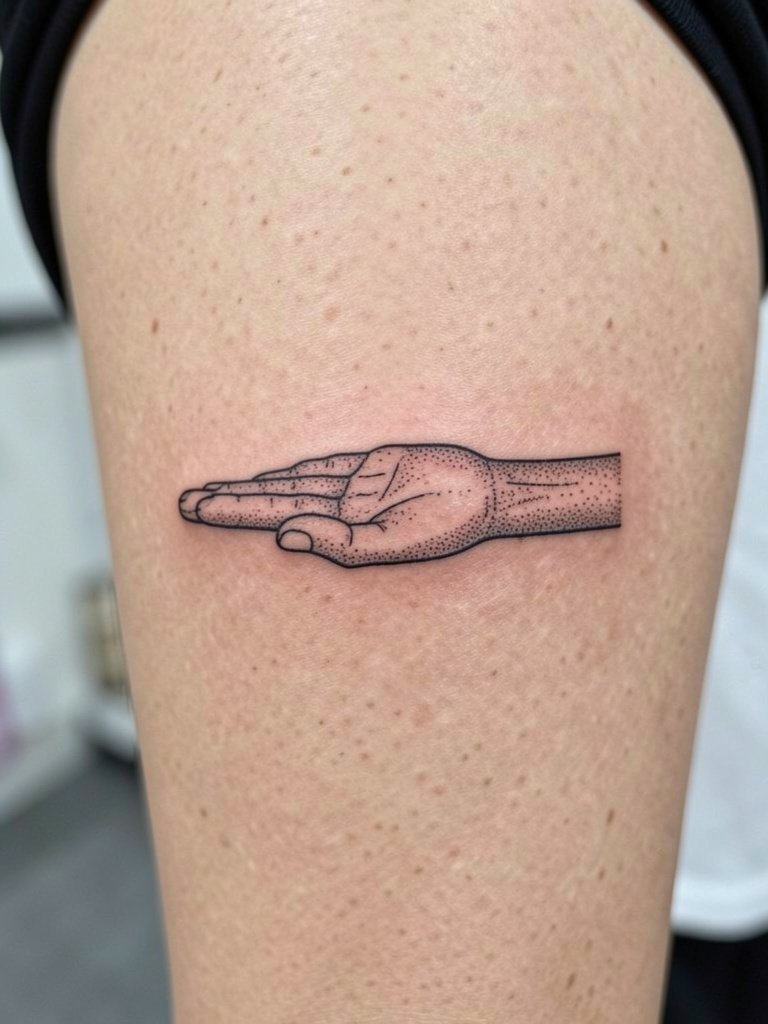
Thigh tattoos offer privacy and space but see occasional friction from clothing. Keep tiny horizons bold enough to survive fabric contact. A common mistake is choosing delicate gradients that dull quickly. When booking, ask the artist to map how the piece sits under shorts so the horizon stays visible when you wear skirts. Sessions are tolerable and heal well with less sun exposure. For post-healing display, a swim cover up shows the area selectively.
21. Mini Compass inside a Vintage Circle on the Shoulder
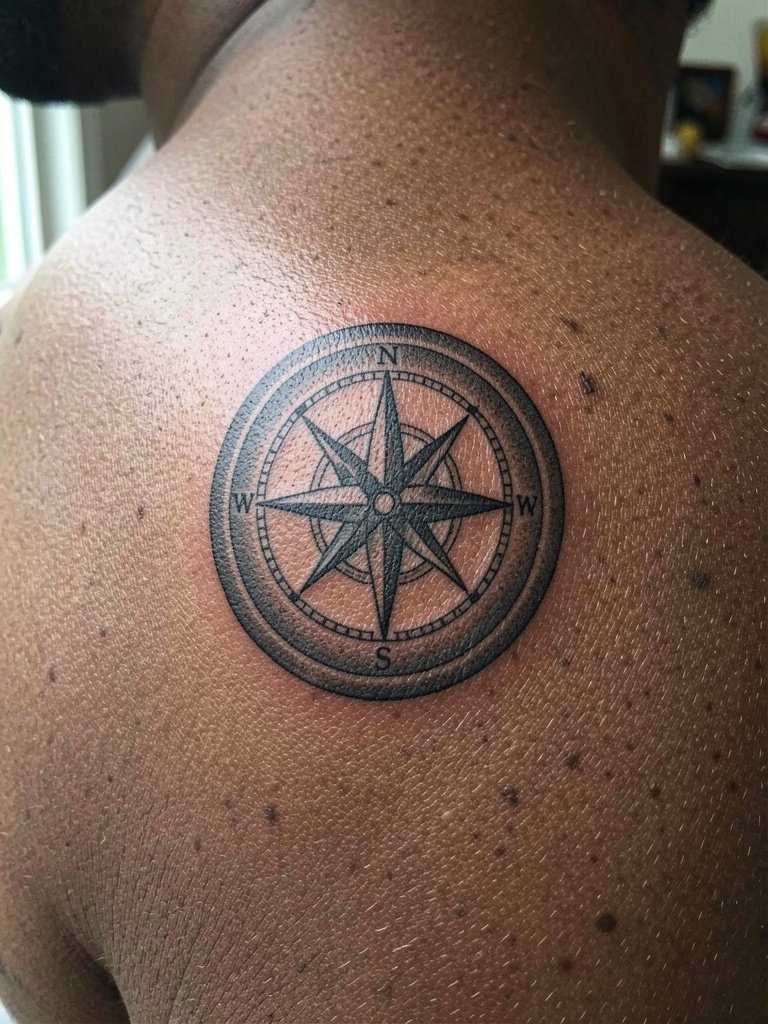
A compact compass seal on the shoulder gives a strong silhouette and low blowout risk. The shoulder takes saturation well so the outer ring ages into a solid shape. Avoid asking for micro-detail inside the compass that competes with the ring. Sessions are easy to position and usually finish in one pass. Show it with tank tops or open-back pieces for evenings out. An open back top pairs well and highlights the rounded shoulder composition.
22. Micro-Realism Plane Over a Palm Line on the Wrist
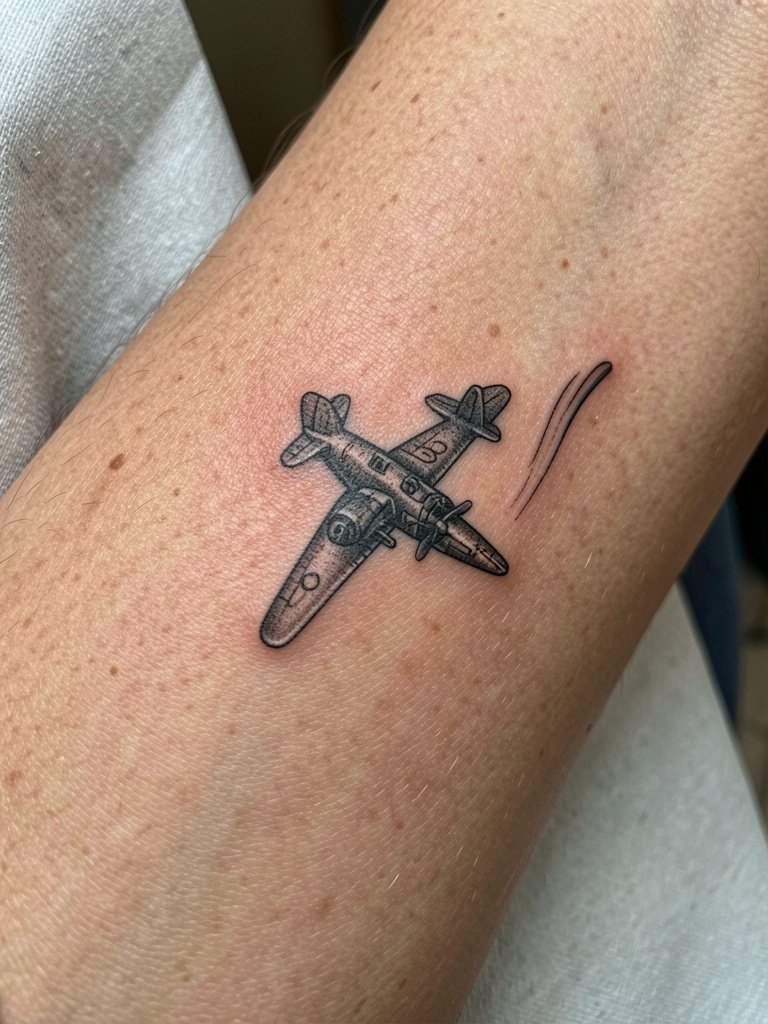
Micro-realism works well when you give the artist space. The wrist is unforgiving of packed detail. If you like realism, widen the motif slightly and accept a short session with careful shading. Ask to see a healed photo of similar scale so you get a sense of long-term legibility. Sessions feel sharp near the bone. Wear a sleeve you can roll or a short sleeve tee for access.
23. Stitched Map Patch on the Upper Arm
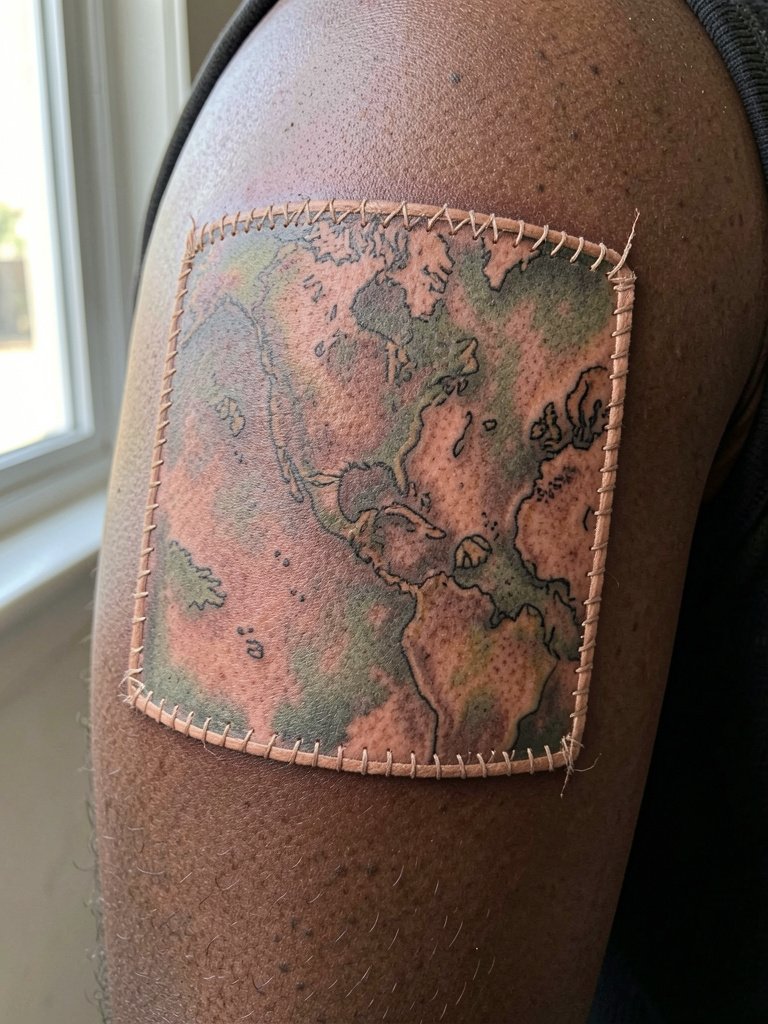
Patch-style tattoos read like travel badges and translate well into sleeves. The outer upper arm supports moderate detail and color. The usual error is tiny stitch marks that lose contrast; ask for slightly thicker seam lines and solid color fills for durability. Sessions run moderate in time. Pair the patch with a plain tee and short sleeves for a casual reveal.
24. Tiny Desert Moon on the Rib Edge
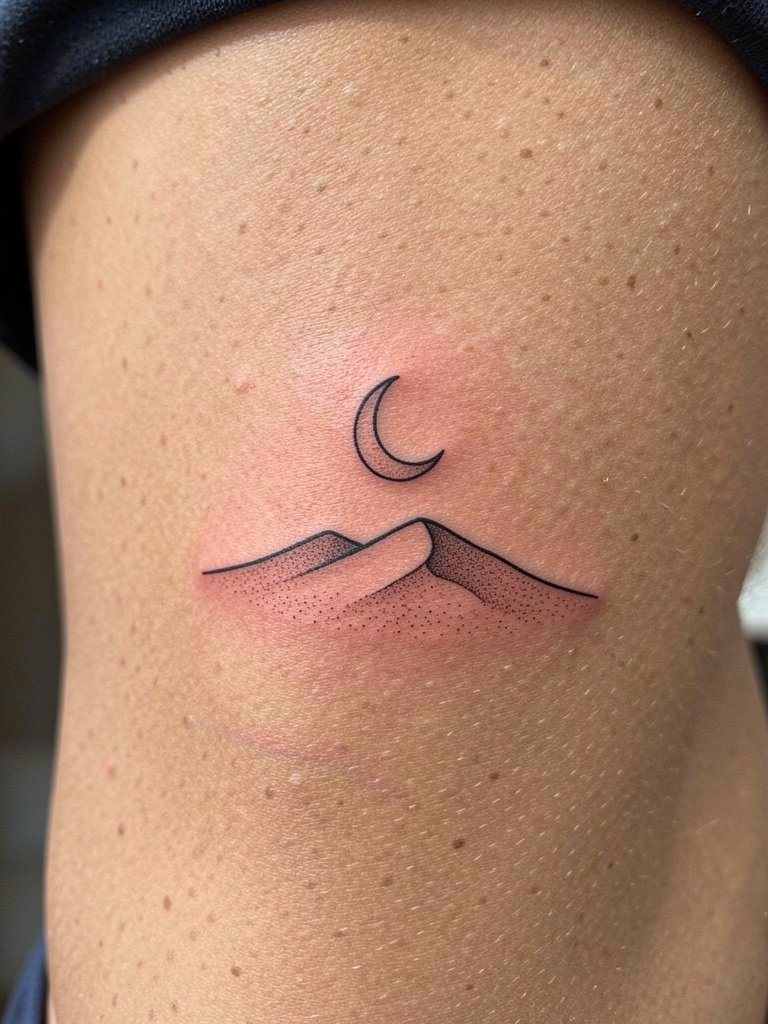
Rib-edge designs are intimate and atmospheric. The rib area moves with breath which can shift very thin lines. Prefer slightly bolder crescent contours and soft stipple shading to retain contrast. Sessions here demand patience and a calm breathing rhythm. For the appointment, bring a loose top that opens at the side so the artist can work without fabric interference. Expect a touch-up window where dotted shading may need reinforcement.
25. Folded Paper Plane on the Hip
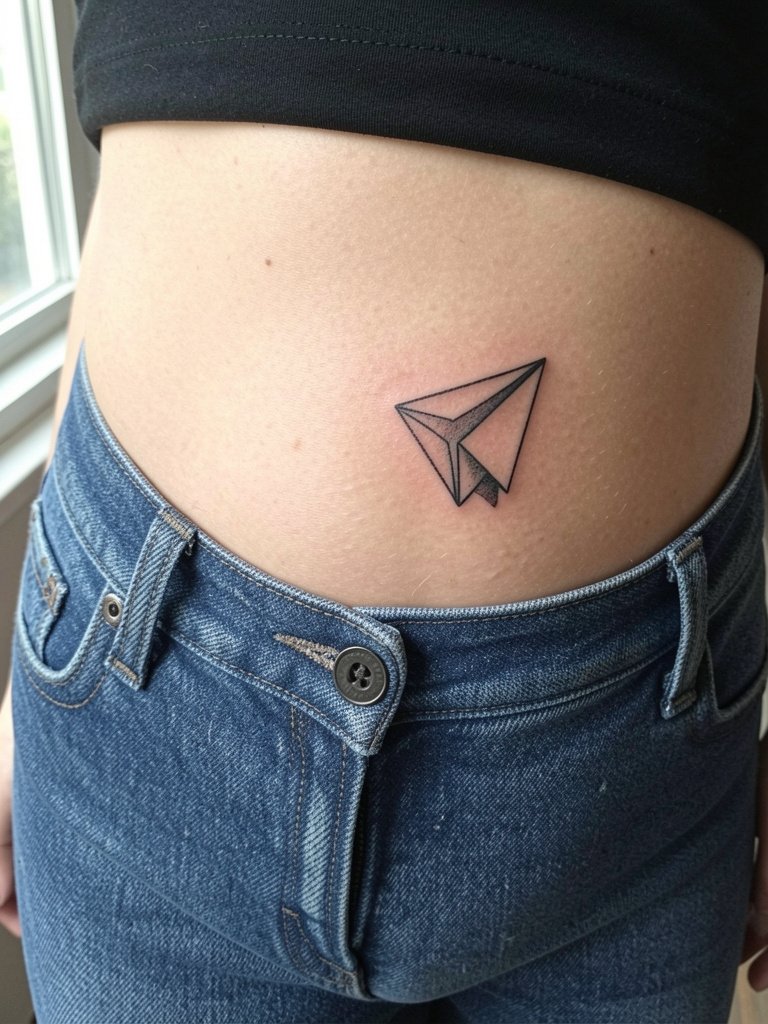
Hip placements are private and flattering but need thoughtful sizing because clothing rubs the area. Keep the paper plane bold enough to survive waistband contact during daily wear. A frequent mistake is placing the design too low near the elastic where friction accelerates fading. For the session, wear low-rise bottoms that reveal the hip naturally so the artist can confirm placement. After healing, cropped tops and low-waist jeans frame the piece. A low-rise denim look pairs well.
26. Tiny Compass in the Web of the Hand
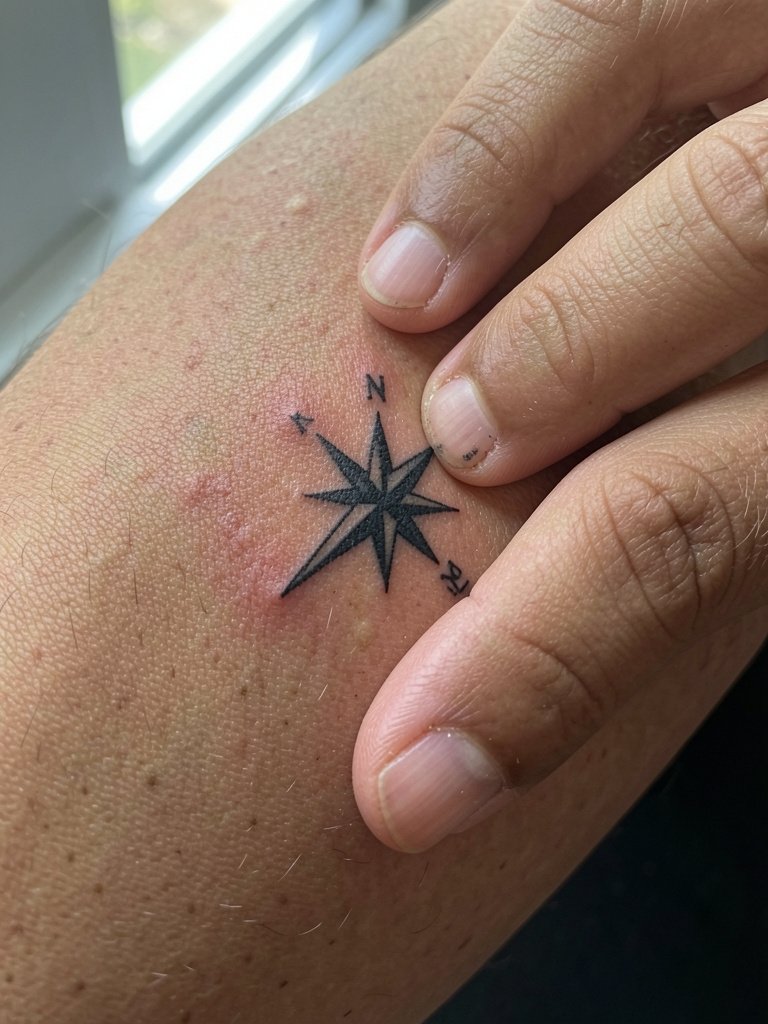
Hand tattoos age differently because of constant washing and abrasion. For webbed hand placements, heavier linework and strong contrast improve longevity. The mistake is choosing single-needle filigree that disappears within months. Discuss anticipated lifestyle wear so the artist can suggest durable placement and bold anchor points. Sessions on the hand feel sharp and the area heals with scabbing that needs careful care. Expect touch-ups sooner than arm work.
27. Travel Collage Behind the Shoulder Blade
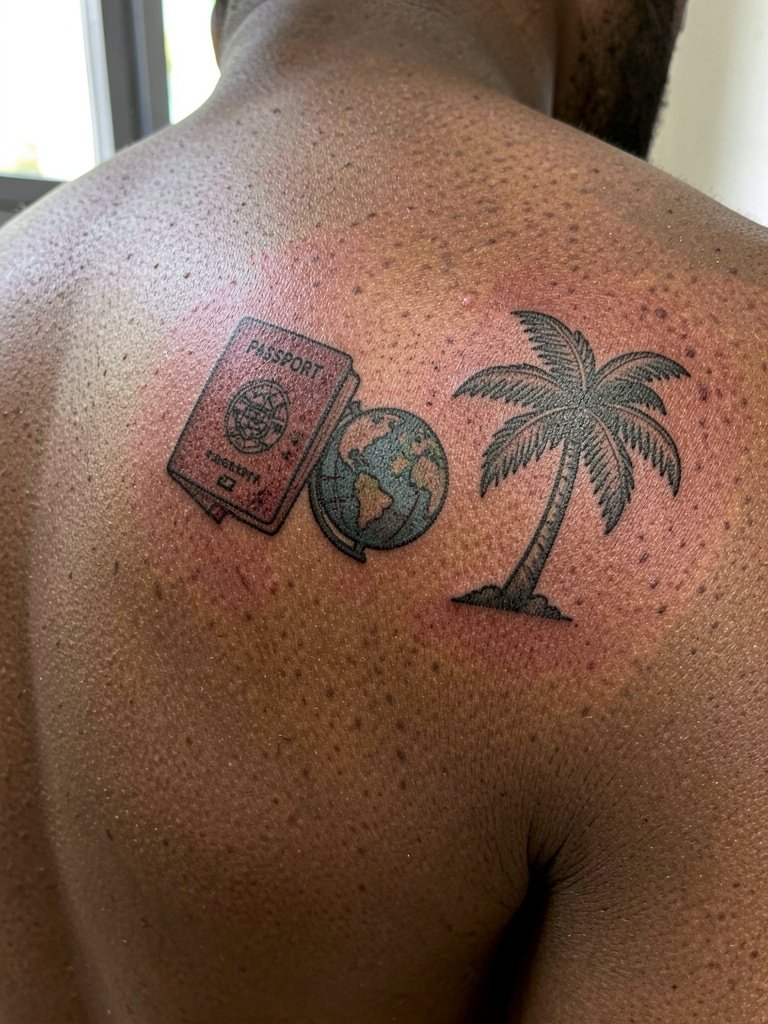
A shoulder blade collage gives a neat private canvas that reads as a collection when you want it to. The usual error is cramming too many tiny symbols into a compact patch. Start with three motifs and space them like visual islands so each preserves its linework. The shoulder blade is forgiving and the skin holds saturation. For the session, wear a tank top you can remove if needed. Layered backs and open straps show the piece without exposing too much. A light touch-up after two years keeps the elements crisp.
Frequently Asked Questions
Q: How do I pick between a generic travel symbol and a location-specific tattoo?
A: Some people prefer classic symbols like airplanes, compasses, or globes because they remain legible and feel broadly travel-related. Others prefer coordinates, skyline outlines, or passport stamps because those options lock a specific place into ink. Consider whether you want a design that represents a lifelong travel vibe or a single important trip, and then choose scale and spacing so your idea keeps clarity over time.
Q: Which placements hurt the most for these travel designs and how long do sessions last?
A: Ribs and sternum are usually the most painful for the styles here, collarbone and wrist are moderate, and outer arm and calf are among the least painful. Tiny wrist or hand pieces can be under an hour. Scenic patches and collages often take one to three sessions depending on color and detail. Plan for short breaks during longer sessions and bring comfortable, easy-to-remove clothing for the area.
Q: Where can I find healed examples and local portfolios without naming artists?
A: Search hashtags like #traveltattoo, #compasstattoo, and #finelinetattoo on Instagram and TikTok and use location filters to narrow to your city. Browse portfolio keywords on platforms that focus on tattoo work for style matches. Reddit threads in r/tattoos and r/tattooadvice often show healed photos and honest placement feedback. Always look for healed images, not just fresh sessions.
Q: How do color and black-and-gray hold up for travel scenes like sunsets or palm trees?
A: Color can make palm trees and sunsets feel vivid, but softer washes fade faster on highly exposed areas. Black-and-gray tends to age more predictably and maintains readable contrast. For small color pieces pick saturated fills and outline anchors so the color has structure. Expect more frequent touch-ups for small color gradients than for solid blackwork.
Q: What should I wear to the appointment for specific placements like the ribcage or shoulder?
A: For ribcage sessions wear a loose top or a button-down that opens fully at the side. For shoulder or upper arm work choose a tank top or sleeveless tee that you can remove. For hip or thigh pieces pick low-rise bottoms that remain zipped and buttoned but sit below the placement so the artist can confirm exact location. A loose tank top is a reliable option to bring.
