

The top of the back is one of the few spots where a design can read like jewelry or a quiet panel of art. Small motifs photograph well on social apps, but the pieces that keep an elegant edge are the ones planned for movement, bra straps, and real-life wear. Below are varied ideas that respect scale and healed visibility, with practical notes on consultation, wardrobe, and what to avoid at booking time.
1. Upper-Spine Floral Vine
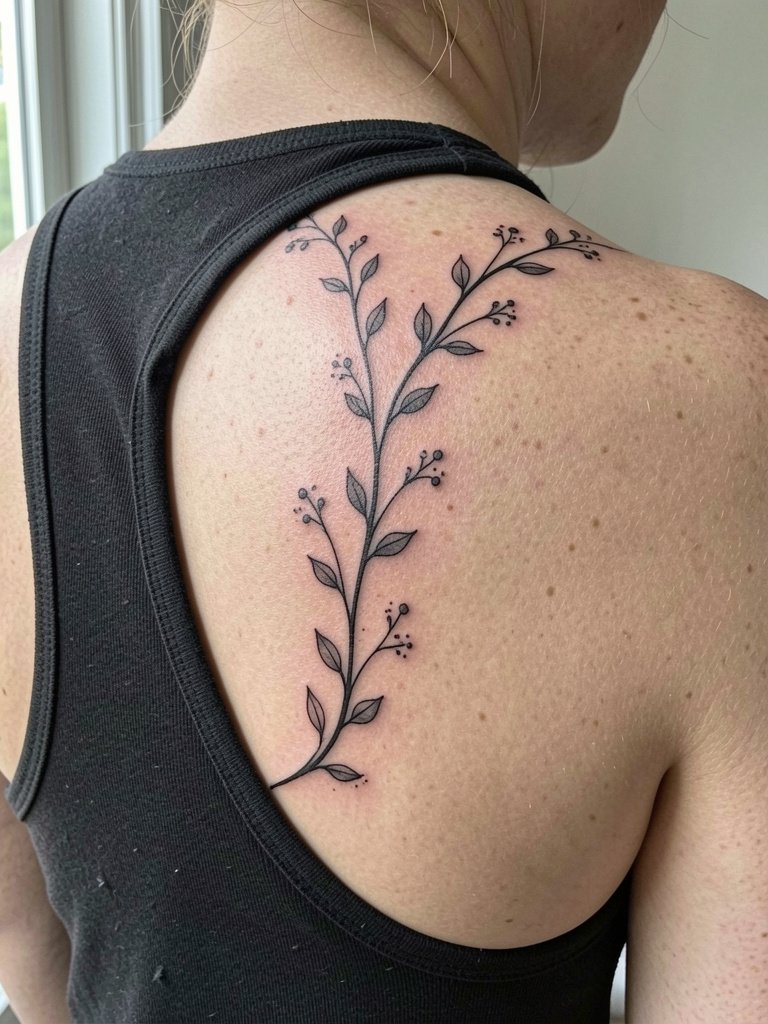
A vertical floral vine suits the upper spine because it follows the natural line of the back and elongates the torso. Recommend it when you want something that reads centered and still peeks out under halter or racerback tops. Bring reference photos that show scale at three inches and five inches so the artist can map the spacing and lineweight. Tiny single-needle leaves look lovely at day one but often blur into a grey wash by year three if placed too close together. For the session wear, choose a racerback tank so the artist can access the spine without tugging fabric. Expect light soreness across the spine for a couple of days and a likely touch-up at 12 to 18 months for crisp leaf tips.
2. Ornamental Shoulder-Blade Panel
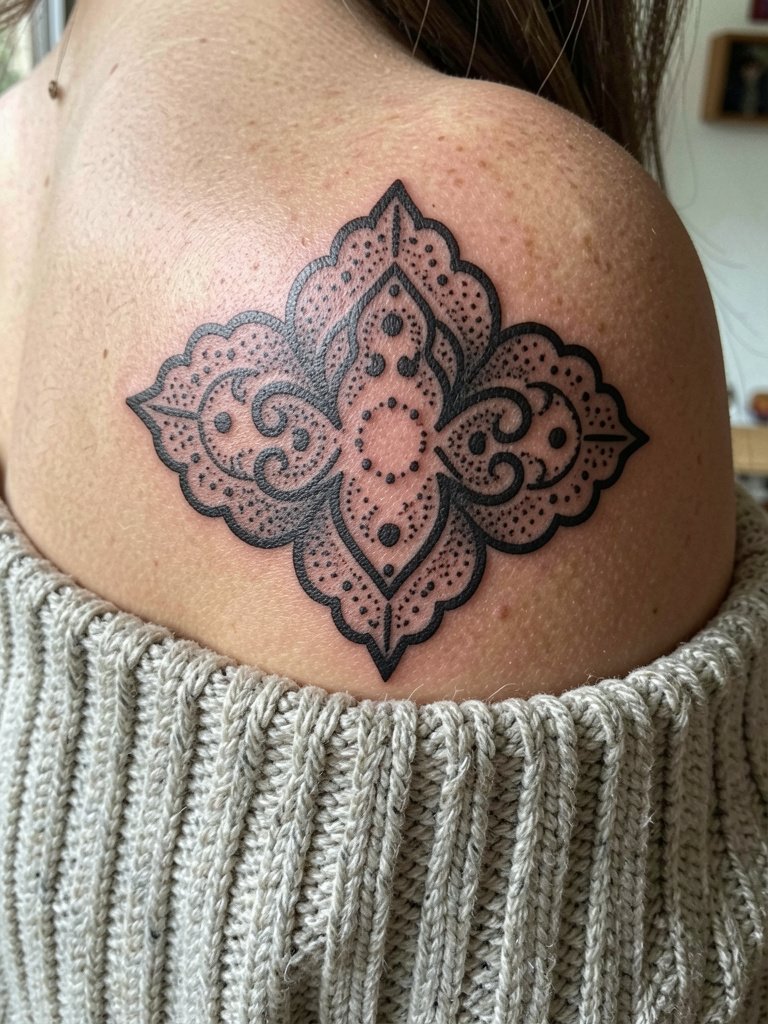
A decorative panel on one scapula reads like a brooch across casual or dressy outfits. Choose heavier black outlines if you want longevity on textured skin, because saturation and linework hold clearer than hair-thin single-needle work. During consultation, have the artist show stencil placement while you wear the exact top you plan to show off the piece with, so you can check the bra-strap interaction. For evenings out, pair the piece with off-shoulder tops that naturally frame the panel. The session feels moderate for most people, and the surrounding muscle movement means a six- to eight-week healed photo is the best reference for how the stipple shading will settle.
3. Fine-Line Script under the Nape
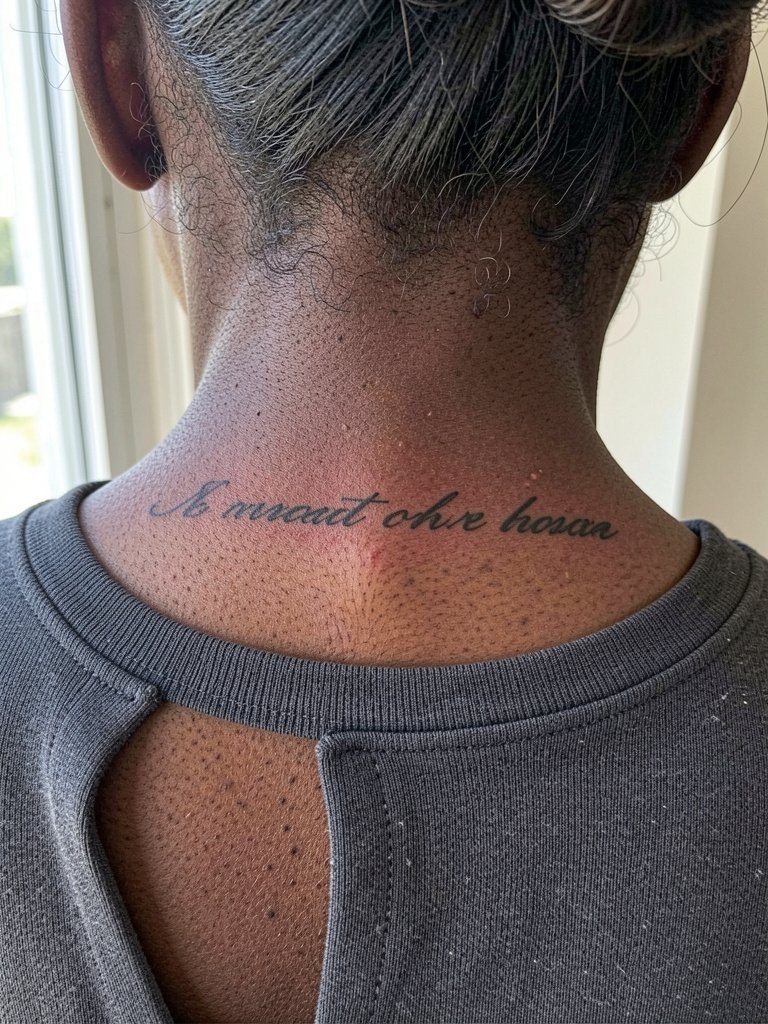
Script near the nape is an elegant, low-profile choice that can peek out when hair is up. This placement tests the fine-line durability debate directly. One camp says fine line holds up on the upper back because the skin there is broad and flat and the lines can be spaced to avoid blowout. The other camp warns that tiny single-needle scripts fade or feather when the letters are too close, especially if placed under straps. Specify exact letter height and spacing during the consult and bring two type samples at different sizes so the artist can scale up if needed. For showing it off, a crew-neck top with a low back cutout keeps the lettering subtle and wearable. Expect a touch-up window after year one if you want the cursive to remain crisp.
4. Paired Butterflies Between the Scapulae
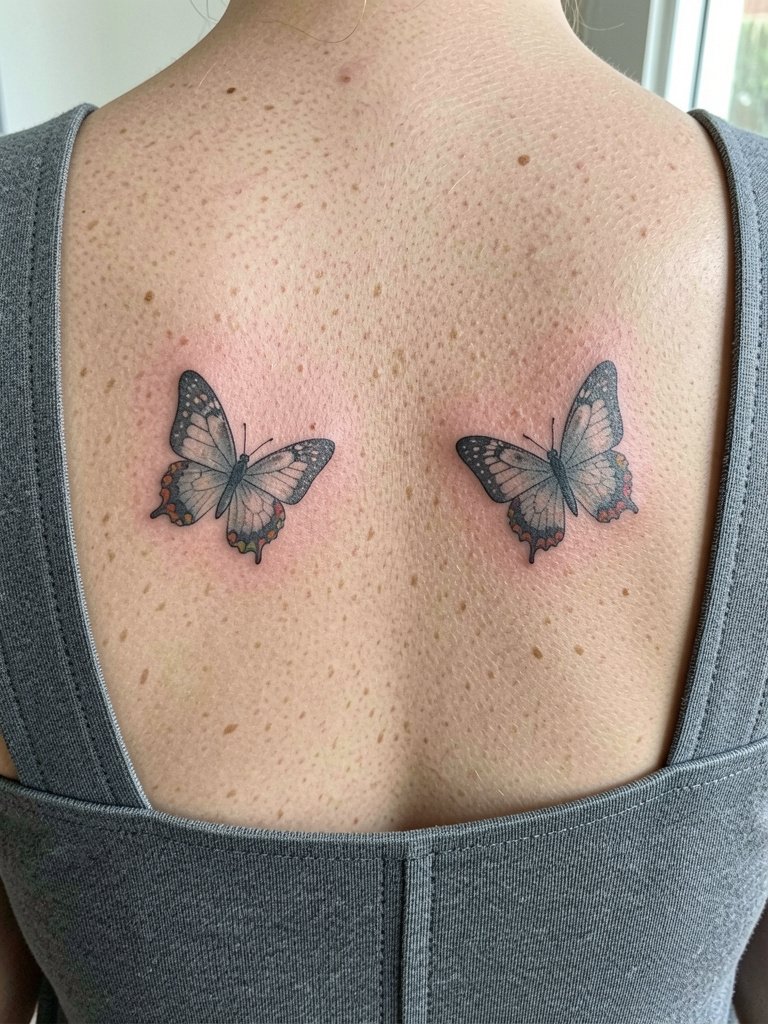
A pair of butterflies gives a nostalgic, delicate feel while keeping scale flexible. For a design that lasts, ask for a slightly bolder outer contour and subtle internal detail rather than ultra-fine filigree wings. A common mistake is picking Pinterest micro-wings and expecting them to read at three years; wider outer lines prevent early softening. For day-of ease and after-session comfort, wear a square-neck tank with wide straps that do not rub the fresh work. If you want color, limit palettes to two or three muted tones to reduce touch-up needs over time.
5. Feathered Wing Spread
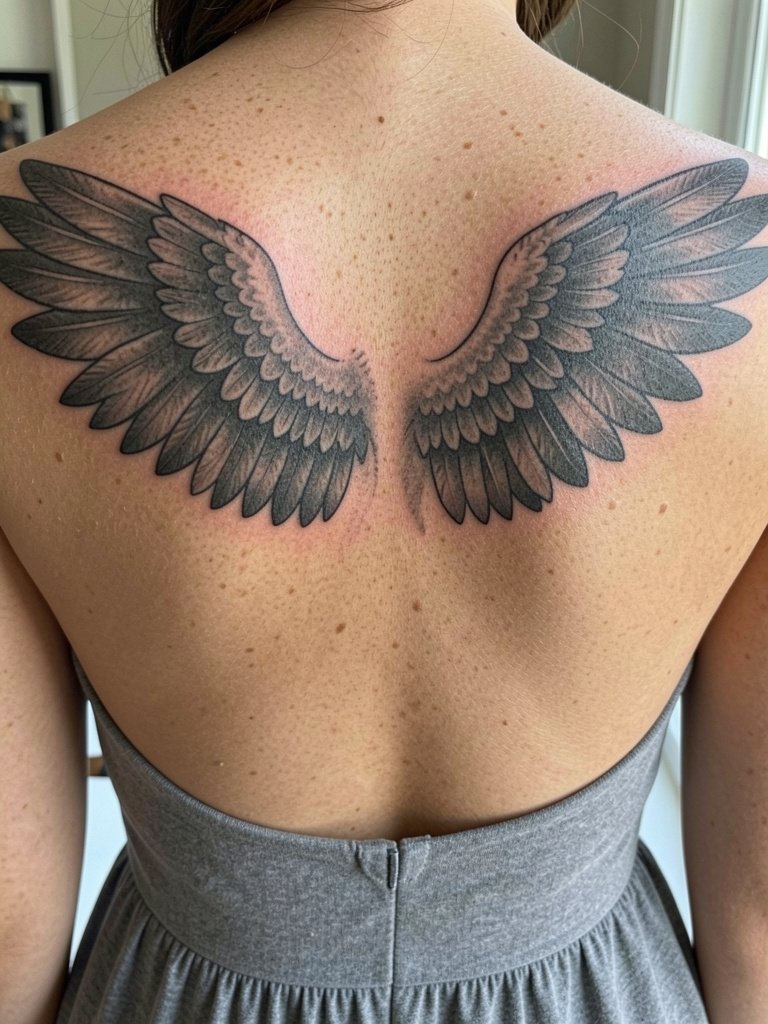
Full upper-back wings are dramatic yet classic because the anatomy supports the spread. This style favors heavier contrast and solid saturation in feather stems so the piece keeps its structure as it heals. During the consult, have the artist draw the wing root to align with your shoulder blades while you stand in the exact dress or top you plan to wear. For formal wear, a backless dress highlights the symmetry without adding friction. Expect at least one long session or two shorter sittings depending on shading density, and budget for a touch-up if you plan bright color fills later.
6. Centered Rose Cluster
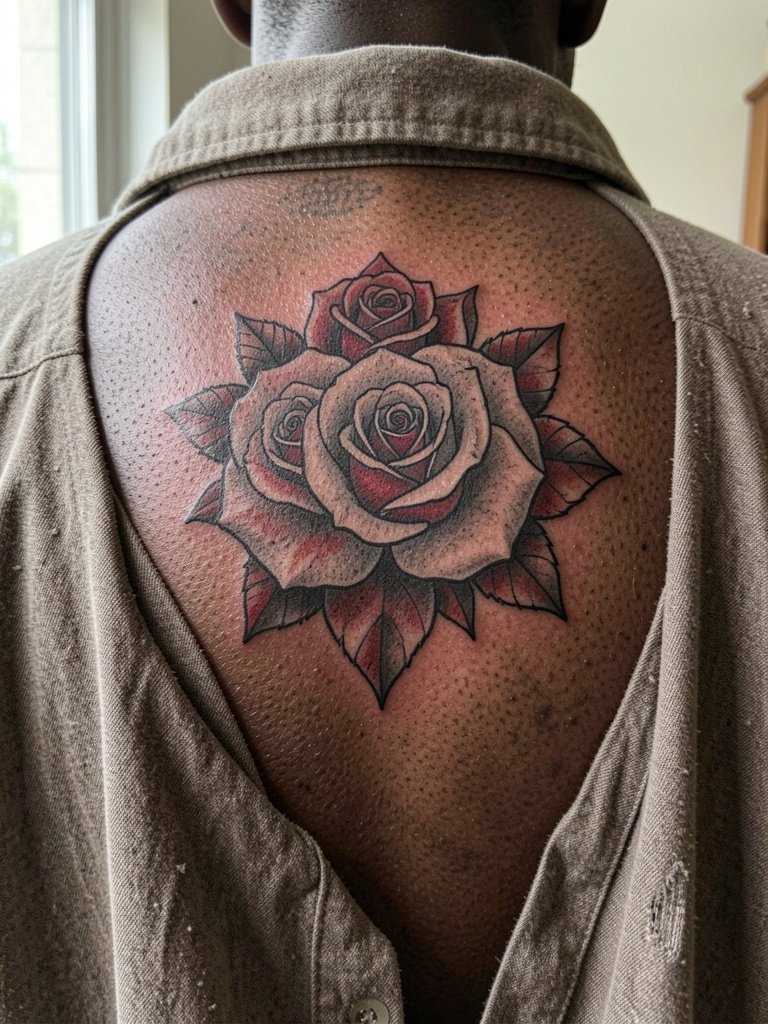
A rose cluster centered between the shoulder blades reads ornamental and pairs well with symmetrical necklines. The color-versus-black debate applies here. One camp prefers black and grey for upper-back florals because it ages predictably and reads on a wider range of skin tones. The other camp favors color to give roses visual punch, arguing that careful palette choices and saturation keep the look fresh. If you want color, request muted tones and plan for periodic color maintenance. For session comfort, a button-down shirt makes it easy to change without sliding a tee over the fresh work. Expect deeper shading work to need two sessions for the layered petals.
Session Day Picks
The first six ideas above share practical needs like access and low rubbing, so these products smooth the appointment and first week.
- Second-skin protective film roll. Used by many clients for the initial healing window, it shields the upper back from friction with straps and bedding while letting the artist cover a broad panel cleanly.
- Unscented gentle body wash. A non-irritating wash helps when you shower the first week and reduces the chance of stinging that can affect delicate linework.
- Natural healing balm, fragrance free. Lightweight balms that are not heavily occlusive can soothe dry scabs on larger ornamental pieces without trapping moisture.
- Thin disposable cast-style film strips. Handy for securing large panels during sleep and avoiding bra-strap rubbing on the first night.
- Aquaphor healing ointment. A mainstream go-to for many studios, useful as a very thin first-day layer when your artist permits it and the piece needs extra protection.
7. Crescent Moon and Star Cluster
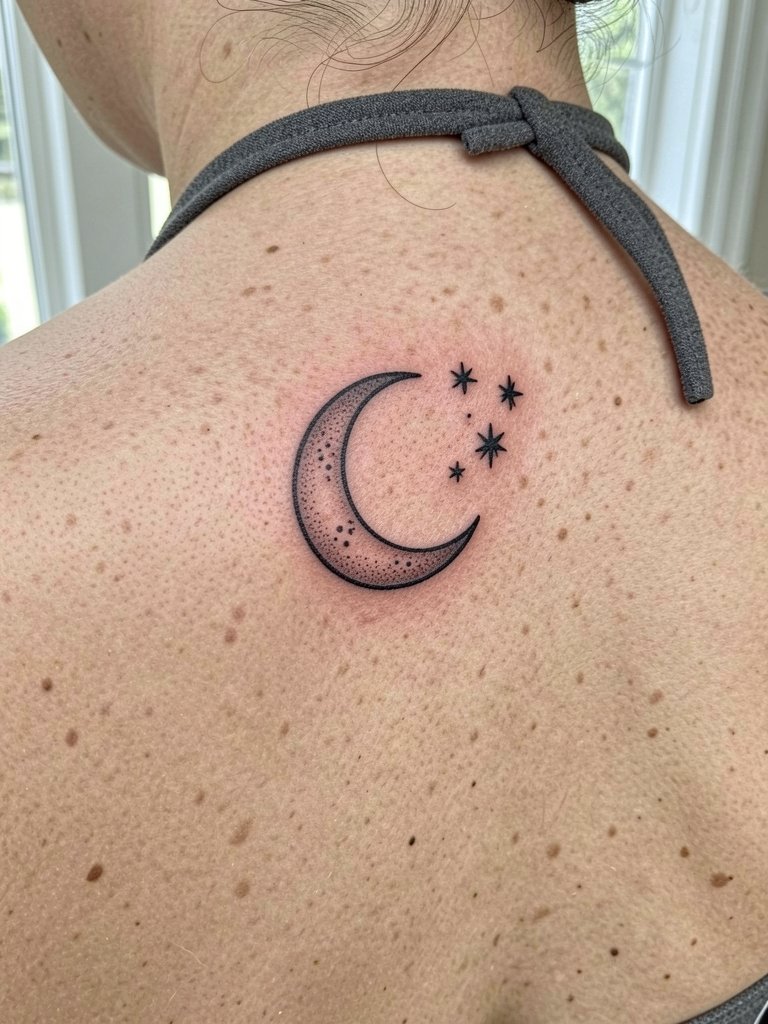
Celestial motifs at the nape are subtle and versatile. Recommend this when you want minimal presence that still photographs well on hair-up days. A common mistake is making the moon too thin or the star dots too small; slightly heavier dots and a modest crescent arc hold better long term. For nights when you want to reveal the motif, choose halter tops or halter tops that lift the shoulders and draw the eye to the center. Healed photos at three months give the best sense of how dot work will look on your skin tone.
8. Spine-Adjacent Lotus Chain
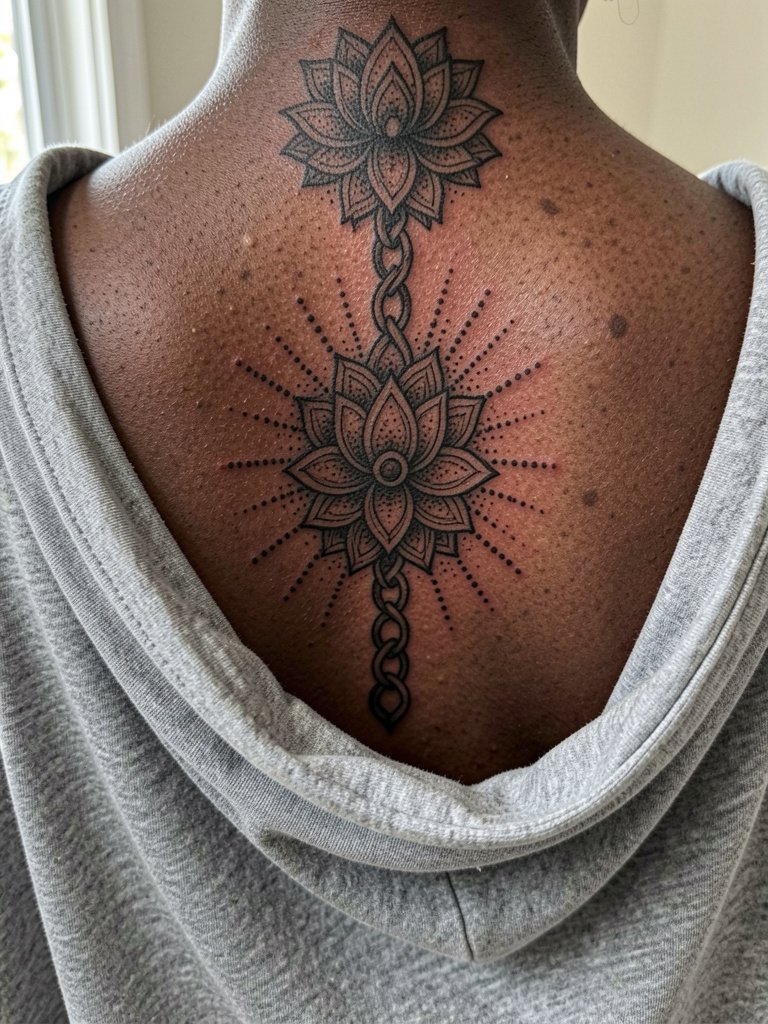
A lotus chain down the spine creates a meditative vertical center that can act as the anchor for future additions. This is a good pick if you are thinking of building a patchwork back over time because the medallion reads well at different scales. During the consult, bring photos of the exact vertical length you want so the artist can map vertebra spacing and avoid kuzshing the petals into strap lines. For session ease and aftercare, wear a loose button-front shirt that you can open without tugging over the head. Expect dot work to appear darker fresh and then soften into texture at six months.
9. Small Dragonfly Offset
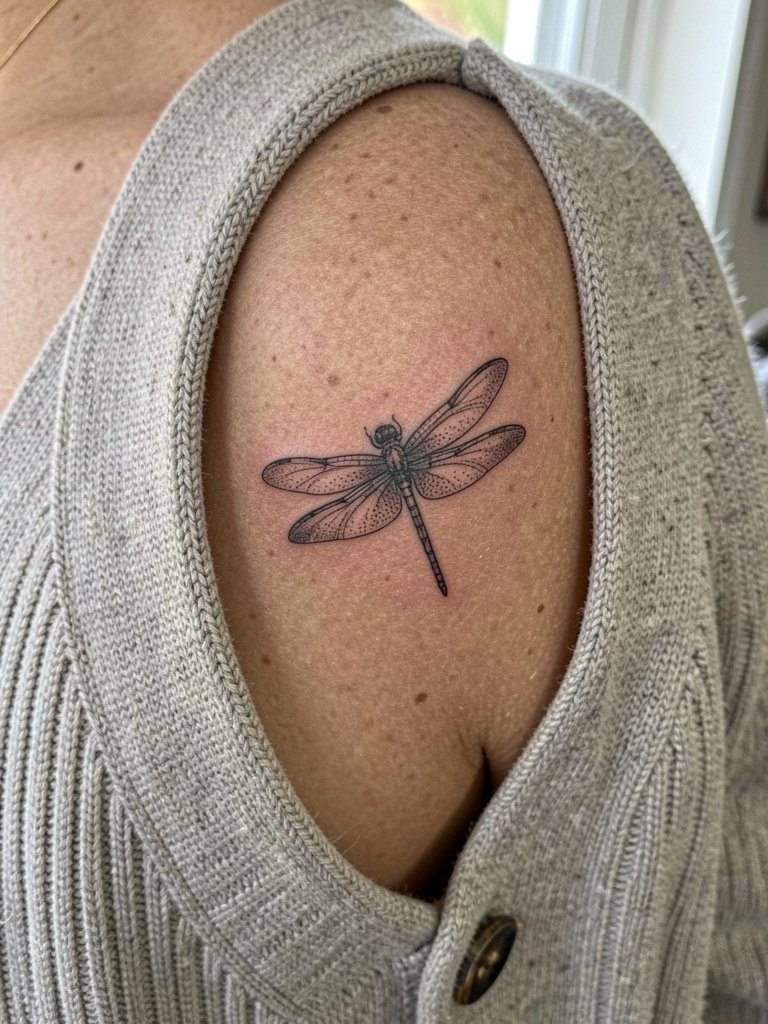
An offset dragonfly is airy and works particularly well for first-timers who want a medium-sized accent rather than a full panel. Ask the artist to show the stencil while you mimic bra-strap positions so you can be sure the wings do not sit directly under a regular strap. Styling-wise, square-neck tops and cropped cardigans frame the piece without covering it. The area has low blowout risk compared with high-movement zones, but expect some softening of very fine veins in the wings over several years.
10. Butterfly Wing Half-Panel
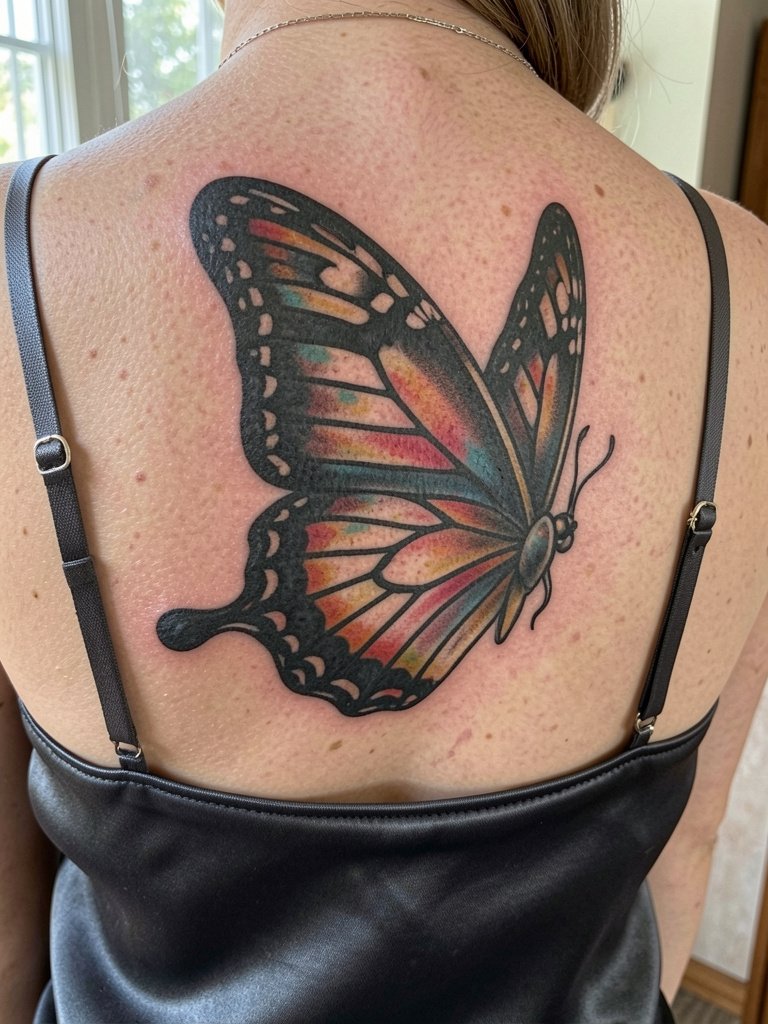
A half-panel wing gives motion while keeping one side of the back open for future work. If you want longevity and impact, prioritize bold outer lines and medium saturation over tiny internal detail. A common error is overloading the wing with micro-shading that blurs into the surrounding skin. For outfit pairings, a satin camisole highlights the sheen of the tattoo without rubbing. The session can be longer because this design often needs layered shading to create the wing texture.
11. Constellation Map
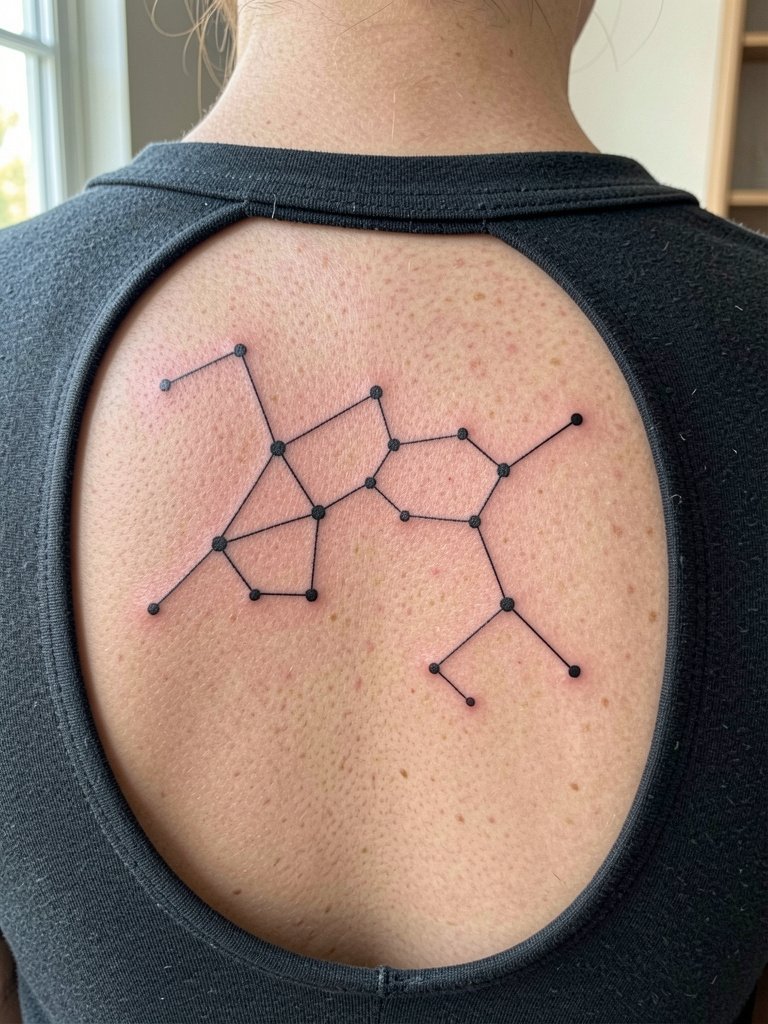
A constellation-style map is subtle and highly customizable by spacing, which makes it ideal for upper-back symmetry tests. Specify the dot sizes you want and insist the artist shows you a scaled stencil so the pattern maintains negative space. For wearability, a crew-neck top with a low back cutout lets the pattern peek through without exposing the whole back. Micro dot work can fade into indistinct marks if placed too tightly, so plan spacing for long-term readability and a likely touch-up after year one for the smallest stars.
12. Decorative Filigree Band
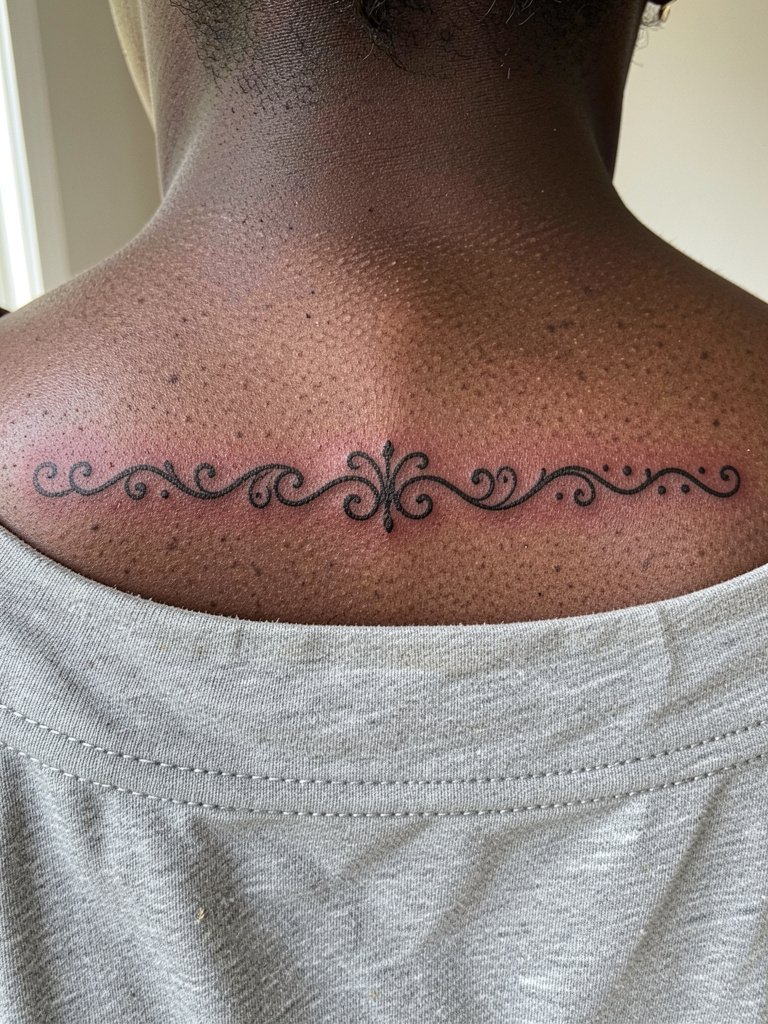
A filigree band mimics jewelry and sits neatly under many necklines. The trick is to avoid single-needle loops that are too tight. Request slightly thicker outer contours so the scrollwork keeps its silhouette as the skin moves. For session comfort, wear a button-down oversized shirt that you can open or remove without pulling fabric over the fresh ink. Expect this type of linear ornamental work to need precise placement checks while standing and sitting so it reads even when your posture changes.
13. Minimalist Bird Silhouette
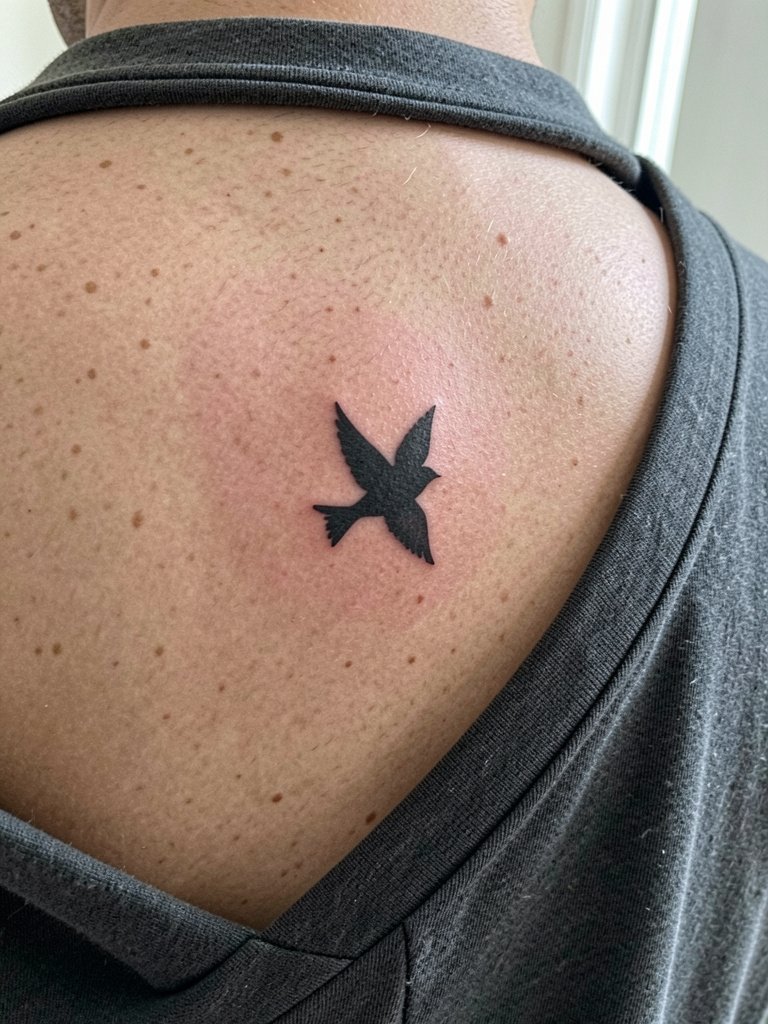
A bold silhouette bird keeps scale readable and resists the softening that tiny internal detail can suffer from. Choose this style if you want a clean graphic mark rather than ornate linework. The main consultation point is exact placement relative to the shoulder blade so the wing does not sit under common straps. For casual styling, a wide-neck shirt frames the motif without covering it. Because silhouettes rely on strong edges, a single session often suffices and touch-ups are usually minimal if the outline was saturated properly.
14. Lace-Inspired Backlet
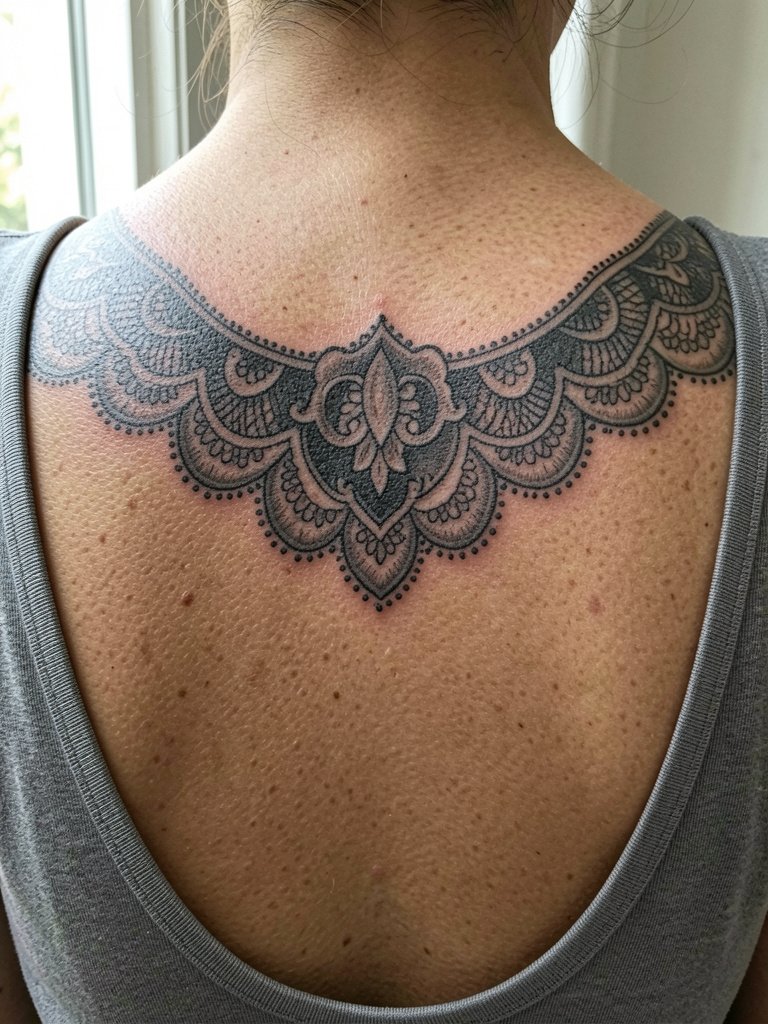
A lace backlet reads feminine and pairs beautifully with occasionwear that leaves the upper back exposed. Ask for references of healed lace work on similar skin tones because the detail can blur if placed too small. For show-off pairings, a selection of open-back tops highlights the scalloped edges. The session requires patience from both artist and client because precise dot work takes time to place and requires careful hand speed to avoid over-saturation.
15. Geometric Mandala Quarter
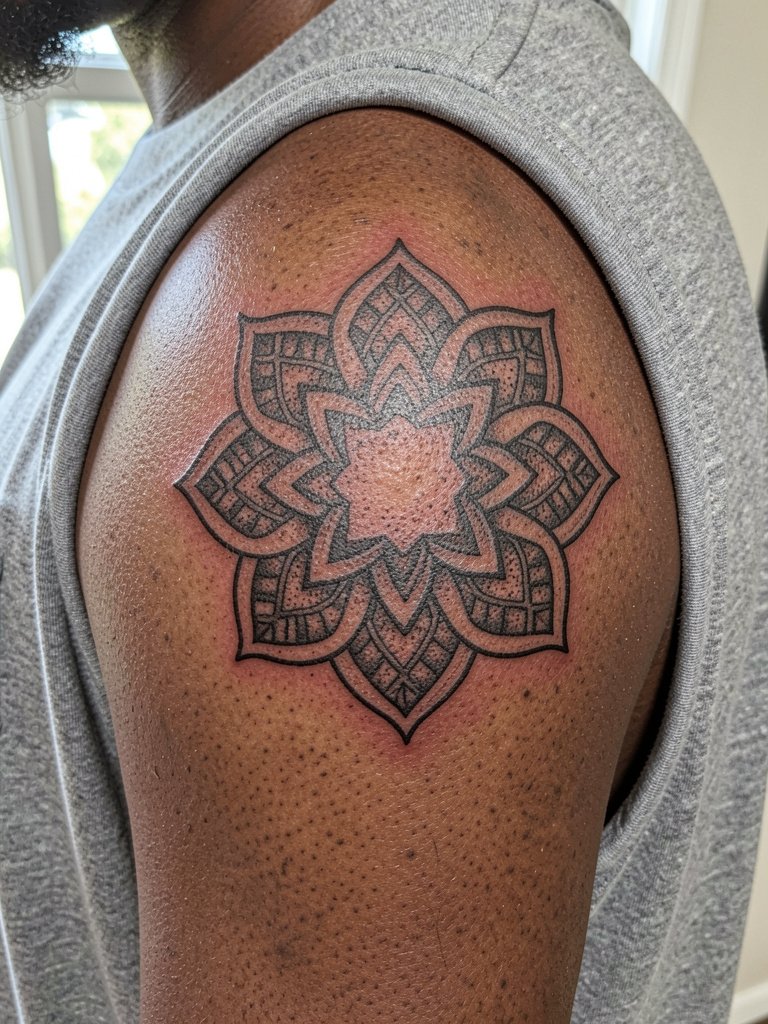
A geometric quarter-mandala is a smart choice if you like symmetry but do not want full back coverage. The lattice work depends on negative space, so insist on proofs of the stencil at final scale. A common mistake is shrinking the pattern for economy and losing the visual balance, which causes the piece to look crowded. This placement pairs well with casual tank styles and layered jewelry for contrast. Expect a calm session with intermittent breaks to check symmetry while you sit or stand.
16. Watercolor Petal Wash
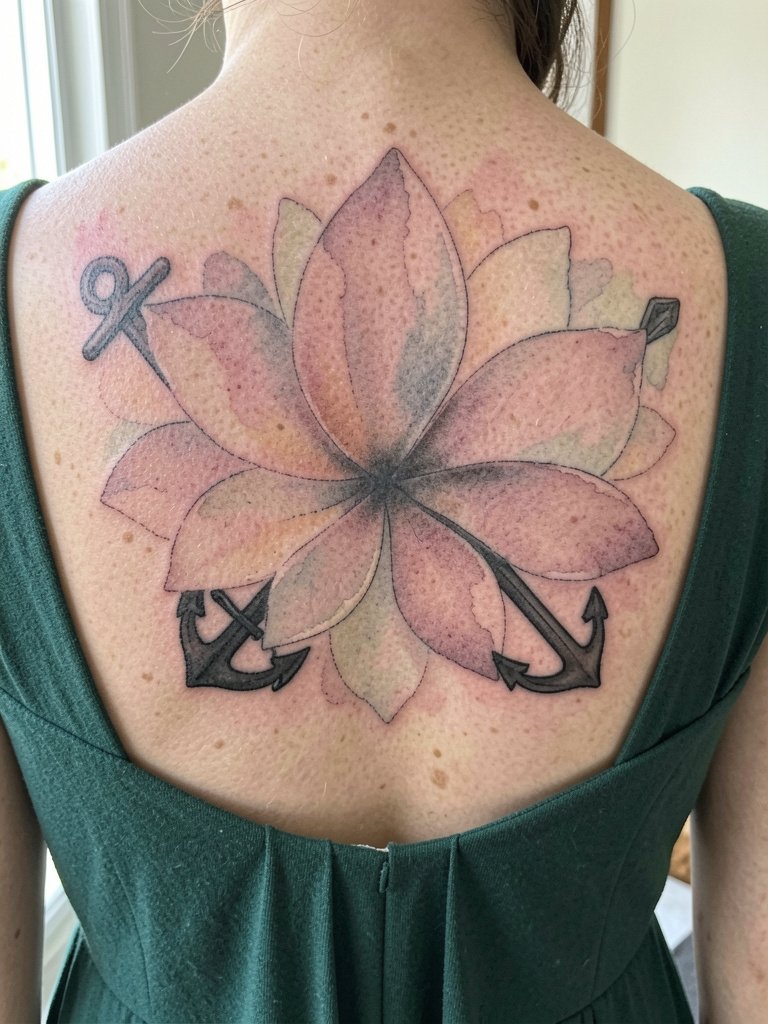
Watercolor techniques can be beautiful on the upper back but they require a conversation about longevity and touch-up plans. Artists split on whether soft washes sustain on this canvas without bolstering black anchors. If you prefer this look, ask for a muted palette and for the artist to place stronger line anchors where friction might occur. For events, a low-back dress shows the color fields without tugging at the fresh skin. Plan for a possible color refresh after a couple of years if you choose pale pigments.
17. Single-Needle Vine Along the Shoulder Ridge
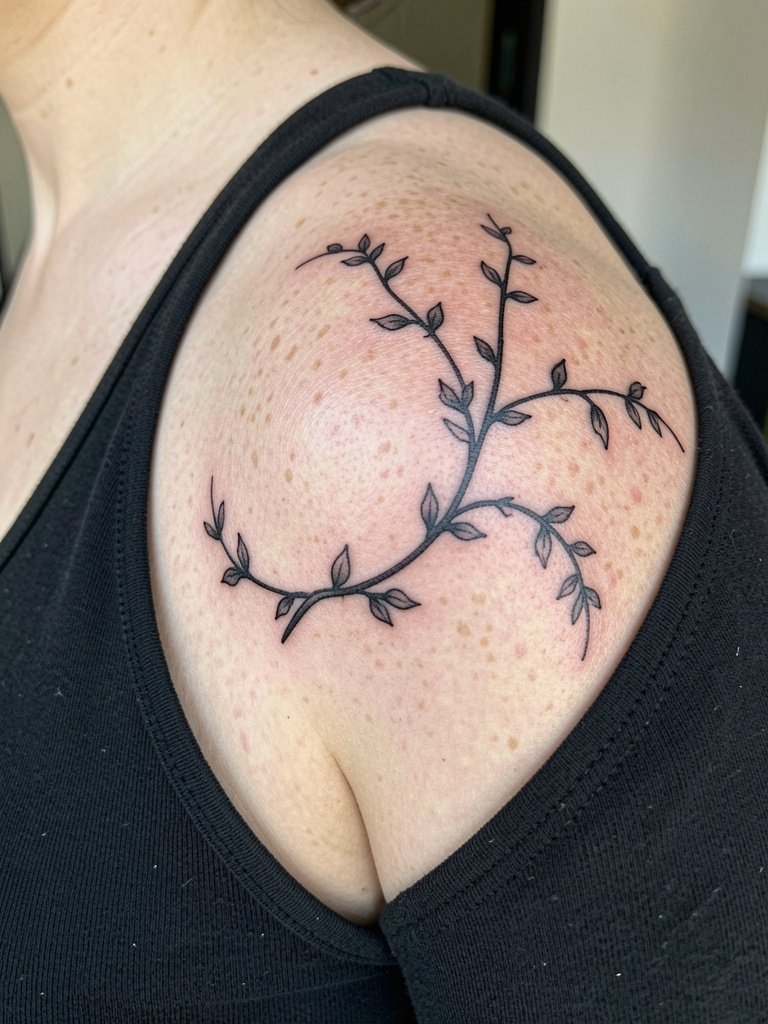
A single-needle vine along the ridge is refined and elegant for those who want minimalism with flow. The longevity debate about single-needle on the upper back applies here too. One viewpoint trusts single-needle work if spacing and depth are precise. Another viewpoint recommends a slightly heavier line because the area sees clothing friction and the hair-thin marks can fade into indistinct grey. Bring multiple references showing line weight and spacing and request a slightly increased line weight if you sleep on your back. For session comfort wear a scoop-neck tee you can lift without dragging across the back.
18. Small Phoenix Motif
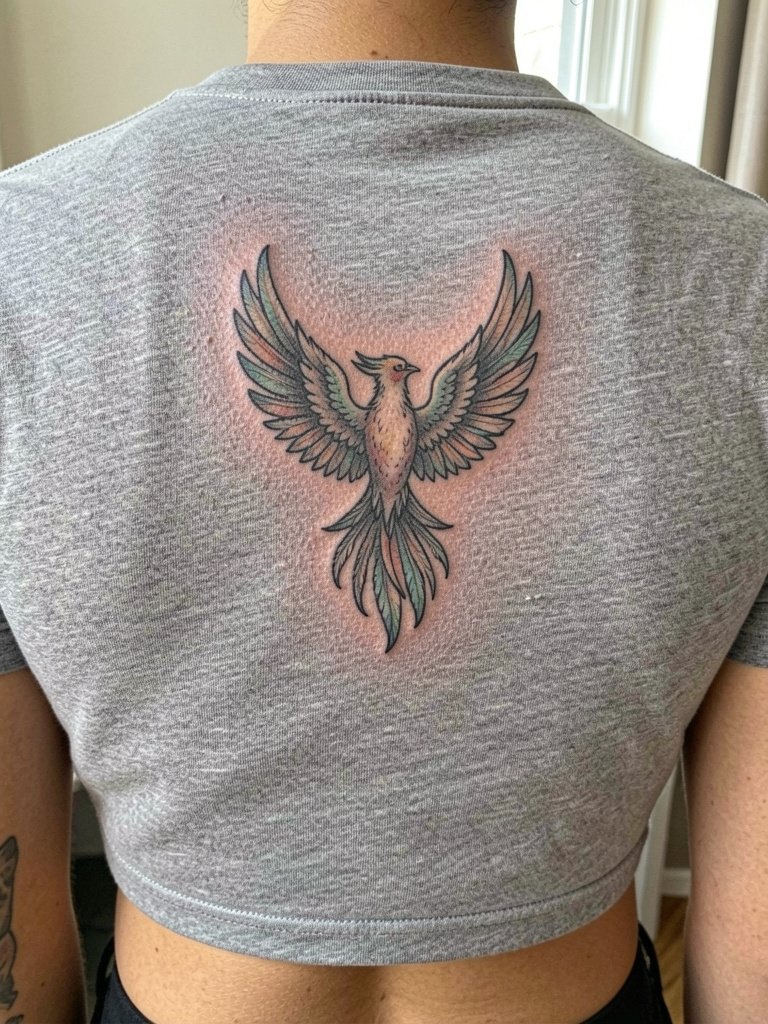
A compact phoenix gives symbolic motion while staying contained in scale that photographs beautifully. Ask for strong primary feather contours so the silhouette reads even as the fine color softens. Avoid insisting on micro-feather detail that may not survive five years without touch-ups. For styling, a fitted cropped tee displays the motif casually. The session may include a pause halfway through shading to re-evaluate saturation and avoid overworking the skin.
19. Asymmetric Floral Spray
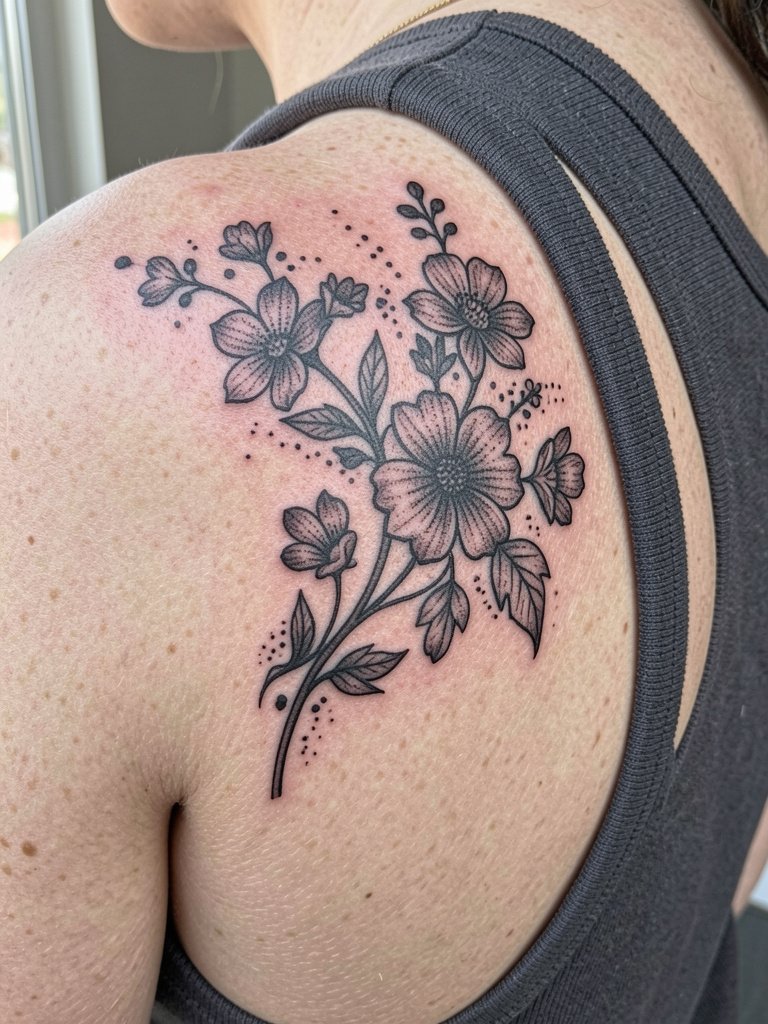
A spray composition that favors one side can look custom and intentional when scaled correctly. The key consultation item is where the spray starts relative to your bra line so the main bloom avoids constant friction. For a weekend look, wear tank tops with wider straps that keep the piece visible without dragging. The aging profile tends to be forgiving if the artist spaces the petals, but expect denser shaded areas to settle darker once healed.
20. Small Heraldic Crest
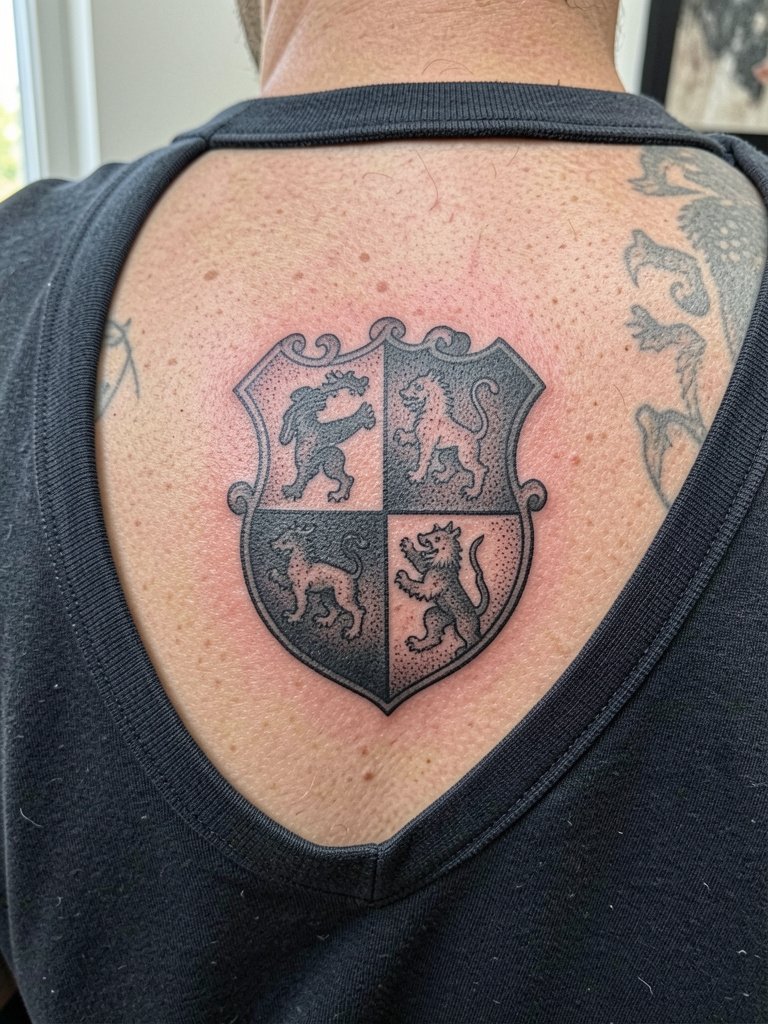
A compact crest reads like an emblem and adapts well to the upper-back center. Ask the artist to simplify tiny emblem details into readable shapes rather than micro-lines that will blur. A practical appointment tip is to bring a reference of the crest at actual scale so the shading density is tuned correctly. For showing off, a scoop-neck top with the back slightly lower draws attention to the emblem without exposing the whole back. Crests age predictably if the panels use bold separations and medium saturation.
21. Tiny Anchor with Flourish
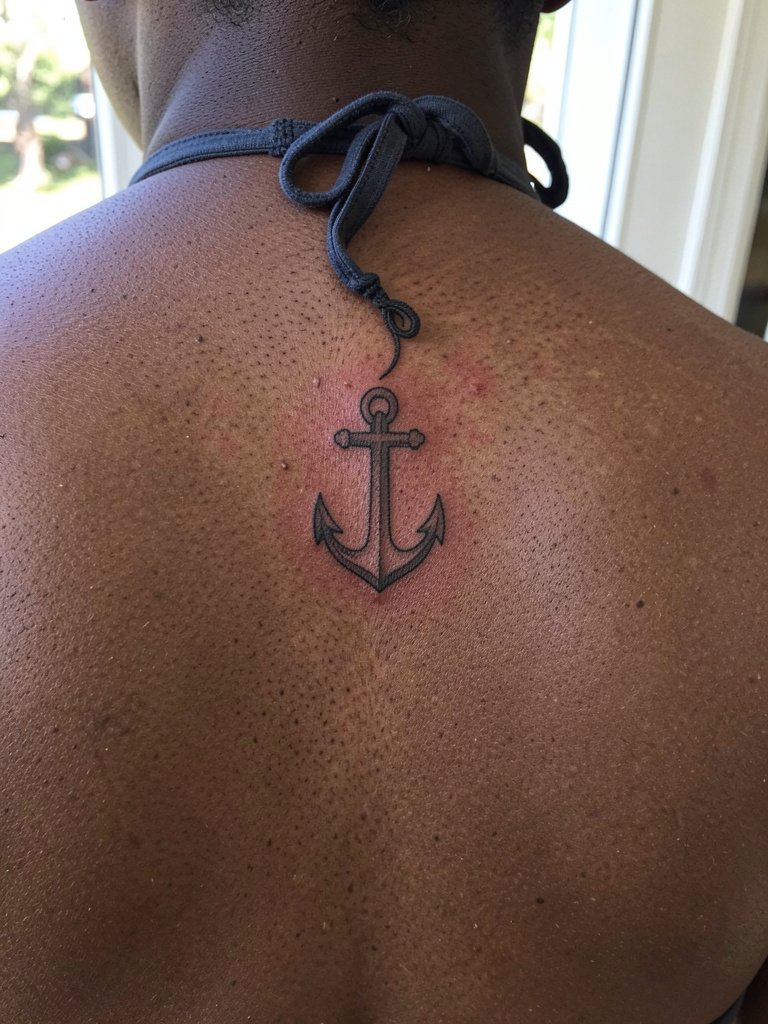
A tiny anchor with a tasteful flourish is low-commitment and photographs well when you want something petite. To avoid early feathering, ask the artist to increase the anchor's outer line slightly compared with the reference. For day-of comfort, halter tops work because they lift the shoulders and make the nape area accessible. Tiny black pieces often need a single touch-up to restore crisp edges after the first year.
22. Script with Floral Accent Over One Scapula
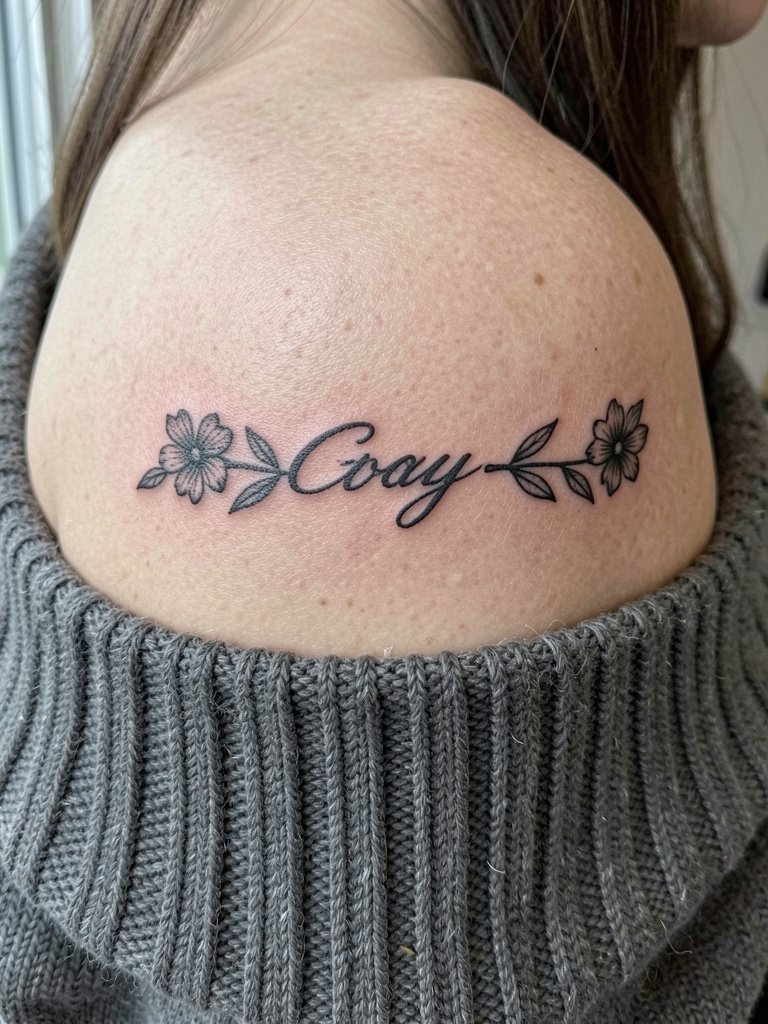
A script across one scapula merges text with floral framing for a softer look. Specify absolute letter height and spacing during the consultation so the phrase reads at normal viewing distances. Off-shoulder tops and off-shoulder knits make this placement feel intentional. Scripts placed over mobile areas like the scapula can require a touch-up if the original line weight was exceptionally thin.
23. Stylized Bird Pair with Negative Space
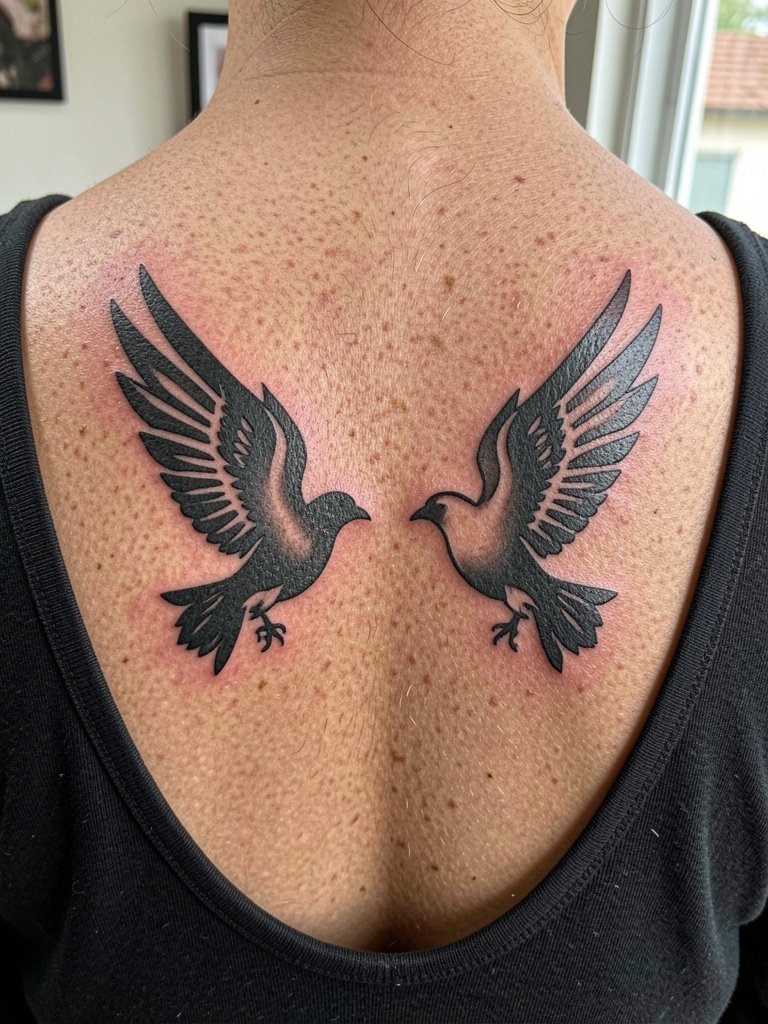
Negative-space bird pairs can feel sculptural and hold up well because the visual contrast comes from the absence of ink as much as the ink itself. A good consult includes a stencil mockup to confirm the negative cuts do not disappear into skin texture. For casual wear, a wide-neck top keeps the balance visible. Because negative space depends on crisp edges, a light touch-up several months after healing is often recommended to preserve the contrasts.
24. Ornamental Frame for a Midline Piece
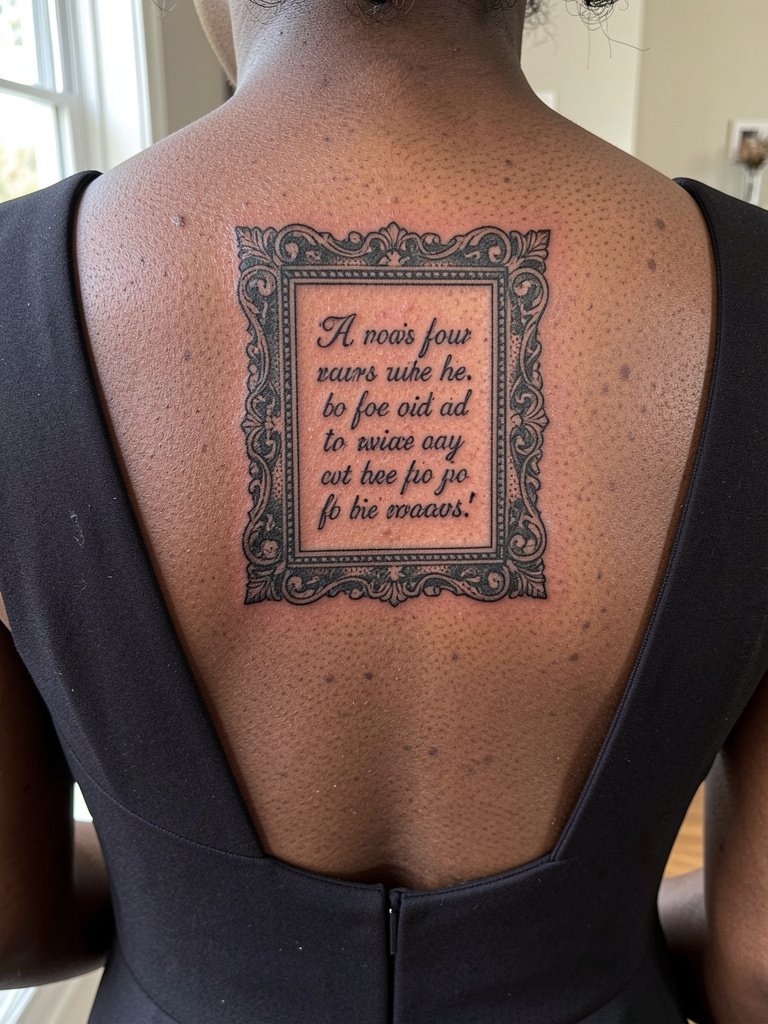
An ornamental frame creates a ready-made anchor if you might add a central element later. Check how the frame sits under different neckline fabrics during the consult to avoid awkward cropping by straps. For evening wear, a backless formal dress presents the frame like jewelry. The frame style requires careful line spacing so that the interior negative space does not close up as the skin moves.
25. Tiny Conch Shell Near the Upper Hip Line
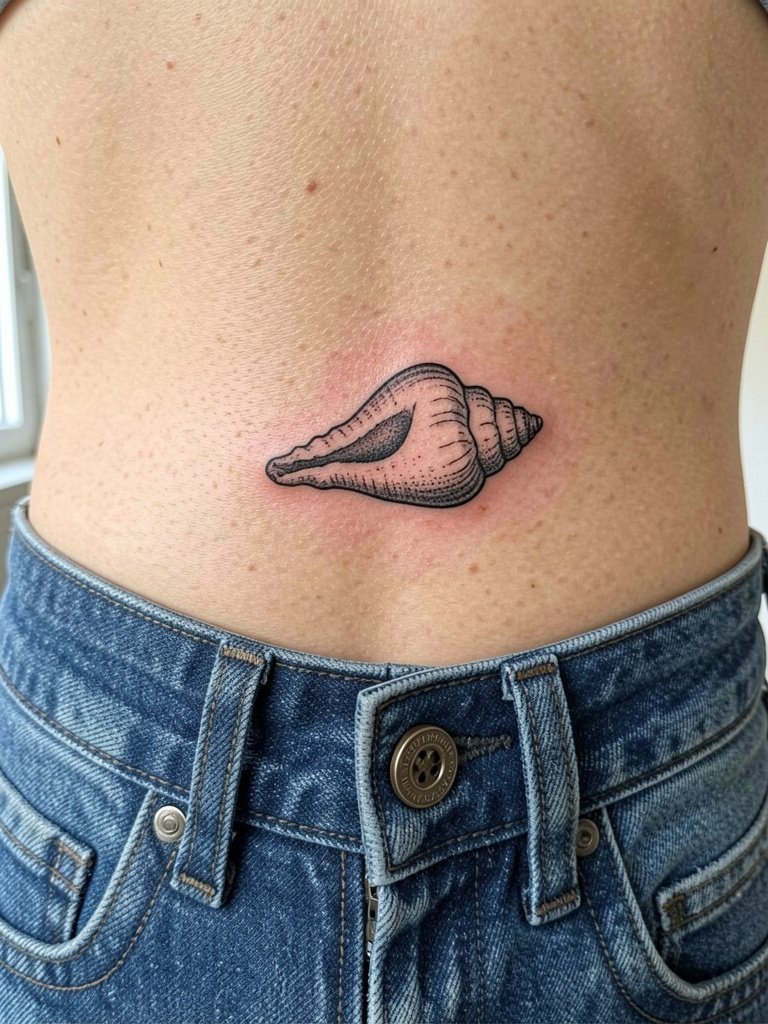
A tiny decorative shell at the upper hip line works if you want a low-profile element that can peek above low-rise waistlines. Make sure the artist maps the exact distance to your normal waistband before committing because clothing movement can rub the area. For casual looks, pair with low-rise jeans worn in their normal state, not pulled. Small motifs near the waistband may need protection for the first week against friction from jeans.
26. Patchwork Floral That Bridges Shoulder-Blades
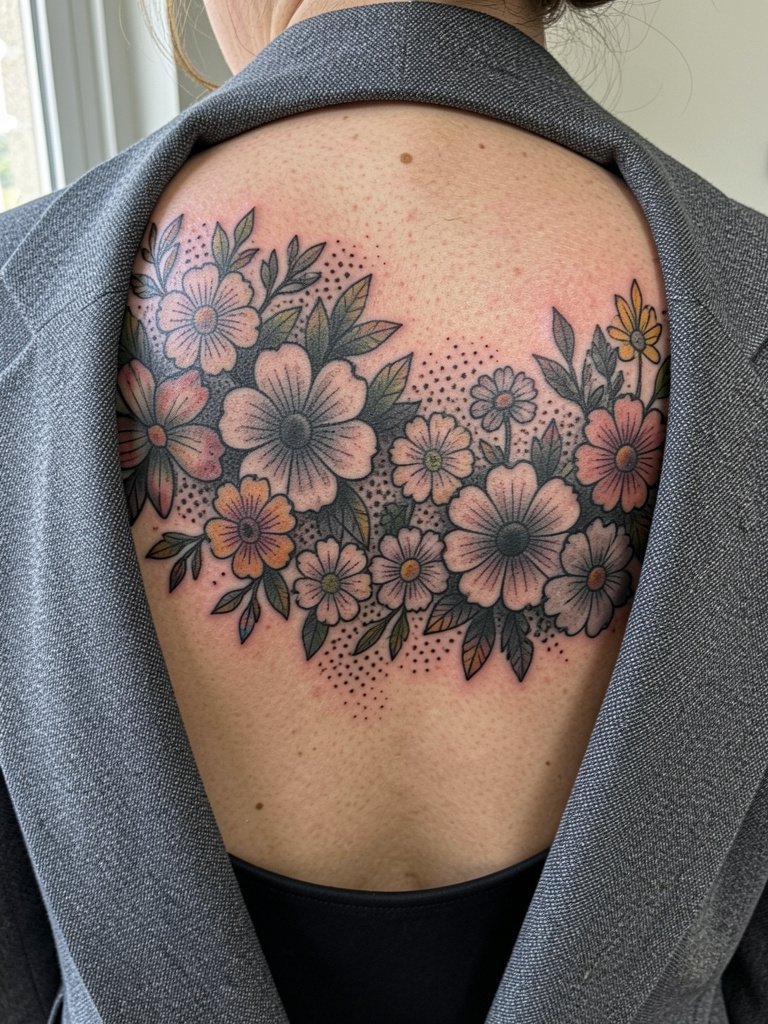
A patchwork floral composition gives texture and makes a statement while still leaving room to grow into a larger back piece. When building a patchwork, plan ink density so future pieces can harmonize rather than overwrite. For smart layering with jackets, a structured blazer or open back formalwear places the tattoo as the focal element. Sessions for patchwork usually come as multiple appointments, and artists will often reserve darker fills for later passes.
27. Small Decorative Anchor at the Nape Edge
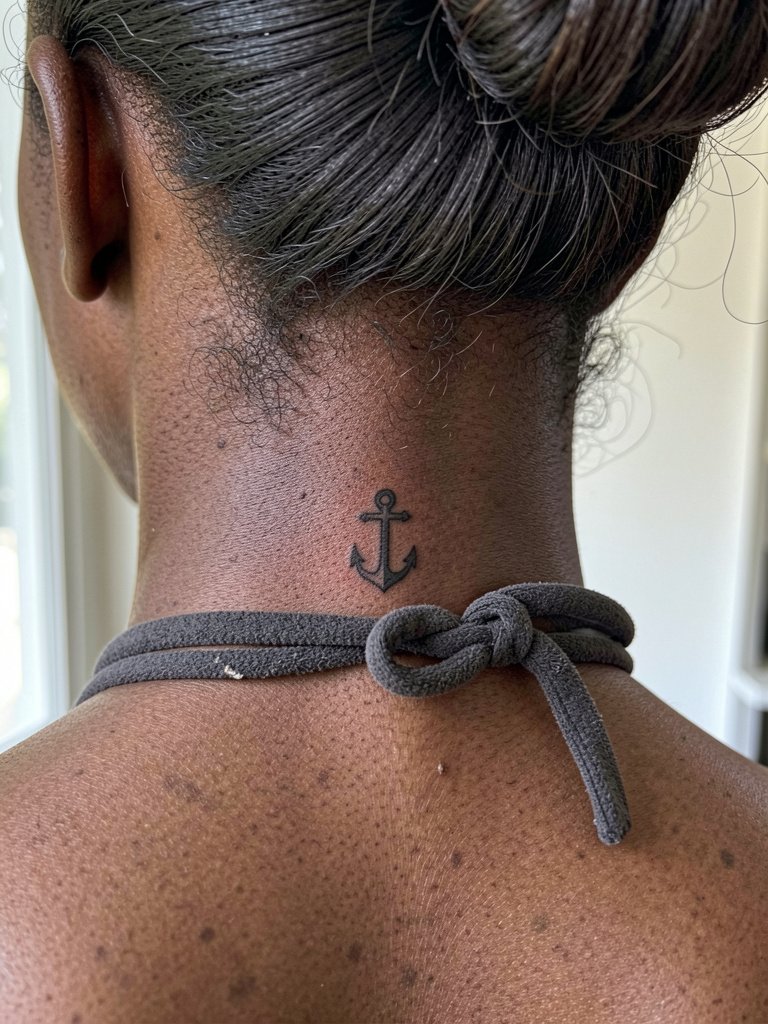
A small anchor or symbol at the nape is discreet and excellent when you want the option to conceal with hair. Be specific about line weight because tiny marks at the hairline can blur faster if they were single-needle fine. For appointment wear, tie your hair up and bring a hair claw clip so the artist can access the exact area without tugging. Expect a short session and a possible touch-up if you prefer very tight lettering or micro-lines.
Frequently Asked Questions
Q: How do I make sure an upper-back design will not sit under my bra strap?
A: Before you book, try the stencil while wearing the exact bras and tops you use daily so the artist can move the piece slightly up or down. Have the artist mark the bra strap line on your back and show you the stencil overlay. This practical check prevents much of the post-healing annoyance people mention in aftercare threads.
Q: What healing approach is best for upper-back tattoos, Saniderm or dry healing?
A: Opinion splits into two camps. One camp finds second-skin film helpful because it buffers the tattoo from rubbing against straps and bedding in the first days. The other camp favors traditional dry healing for some skin types because film can trap moisture or irritate sensitive skin. Keep in mind that skin sensitivity, sweating, and daily clothing choices change which option works best for you.
Q: Where can I find healed upper-back portfolios and style-specific examples?
A: Search Instagram and TikTok hashtags like #upperbacktattoo, #backtattooideas, #finelinetattoo, and #ornamentaltattoo, then use location filters to narrow to studios in your city. Reddit communities such as r/tattoos and r/tattooadvice often show healed photos in comment threads and can point to different skin-tone examples. Directories that allow style keywords will also surface portfolios focused on ornamental or fine-line back work.
Q: How much will fine-line versus blackwork on the upper back need touch-ups?
A: Fine-line pieces can need touch-ups sooner because the ultra-thin lines soften over time, especially where clothing rubs. Heavier blackwork tends to hold its silhouette longer, though it may require color or saturation refreshes. Plan for at least one possible touch-up within the first two years for very delicate work.
Q: What should I wear to the appointment for an upper-back tattoo?
A: Choose a garment that gives easy access and does not need to be pulled over your head. Loose button-front shirts, racerback tanks, or oversized button-downs make the process simple and reduce friction on fresh work. If your design is near the neckline, pick a top that can be lifted without rubbing the new tattoo.
Q: Are there design types that photographers or stylists avoid for upper-back placement?
A: Many stylists say ultra-tiny micro-detail pieces can disappear in photos on textured fabrics and under bright studio lights. For shoots, motifs with clear silhouettes or medium-contrast shading photograph more reliably. If you plan on frequent photographed reveals, prioritize designs that balance detail with bold outlines.
Q: How do I check an artist's healed work and not just fresh pictures?
A: Look specifically for images labeled "healed" in portfolios, and ask the artist for a healed shot from six months or more. If the studio does not provide healed photos, request to see before-and-after sequences of similar placement and linework. Healed examples across multiple skin tones are the strongest indicator of how a style will age.
