
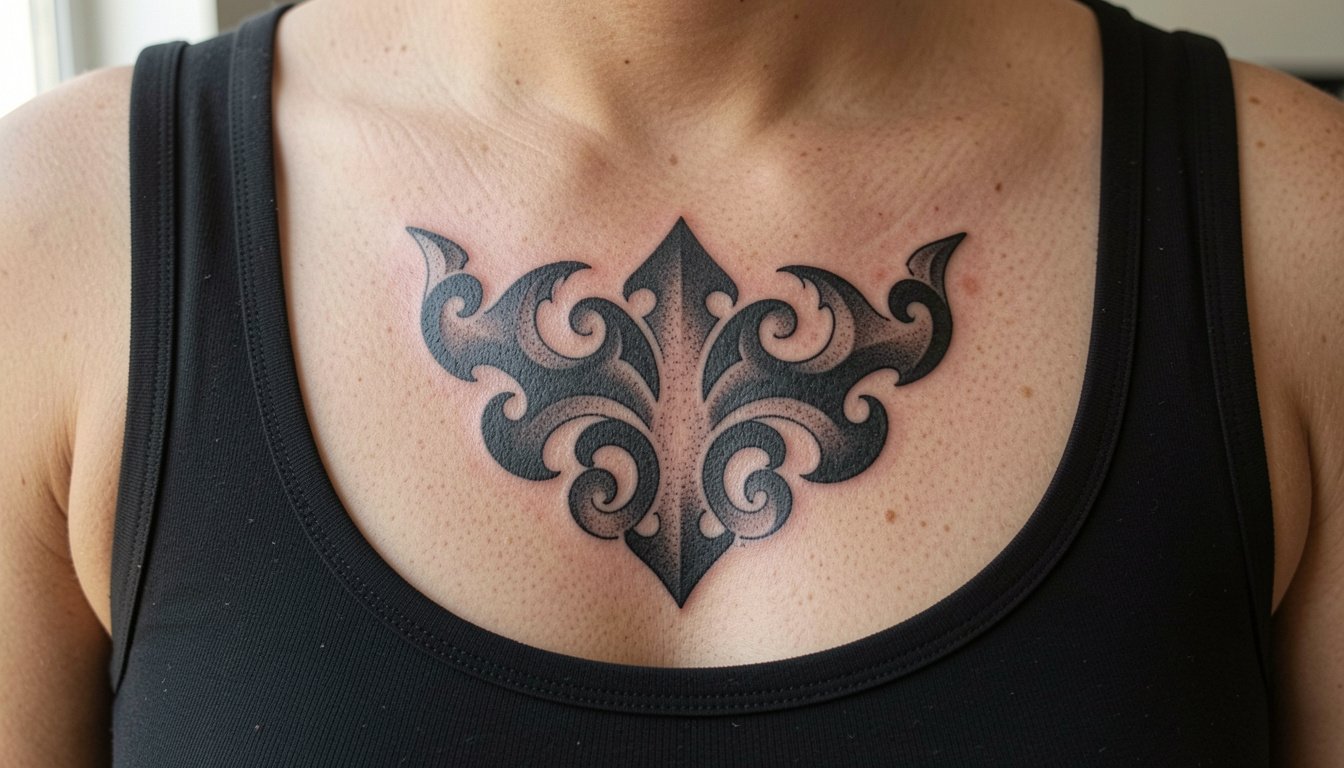
Studio trends promise delicate single-needle florals everywhere, but the tattoos that actually look reliable in the long run are the ones designed around placement, movement, and healed contrast. I write from time spent in shop lobbies and from looking at healed portfolios across skin tones. These 27 studio-ready ideas focus on what photographs clean, what survives touch-ups, and how to plan the appointment so the piece reads well for years.
1. Fine Line Floral on Inner Forearm
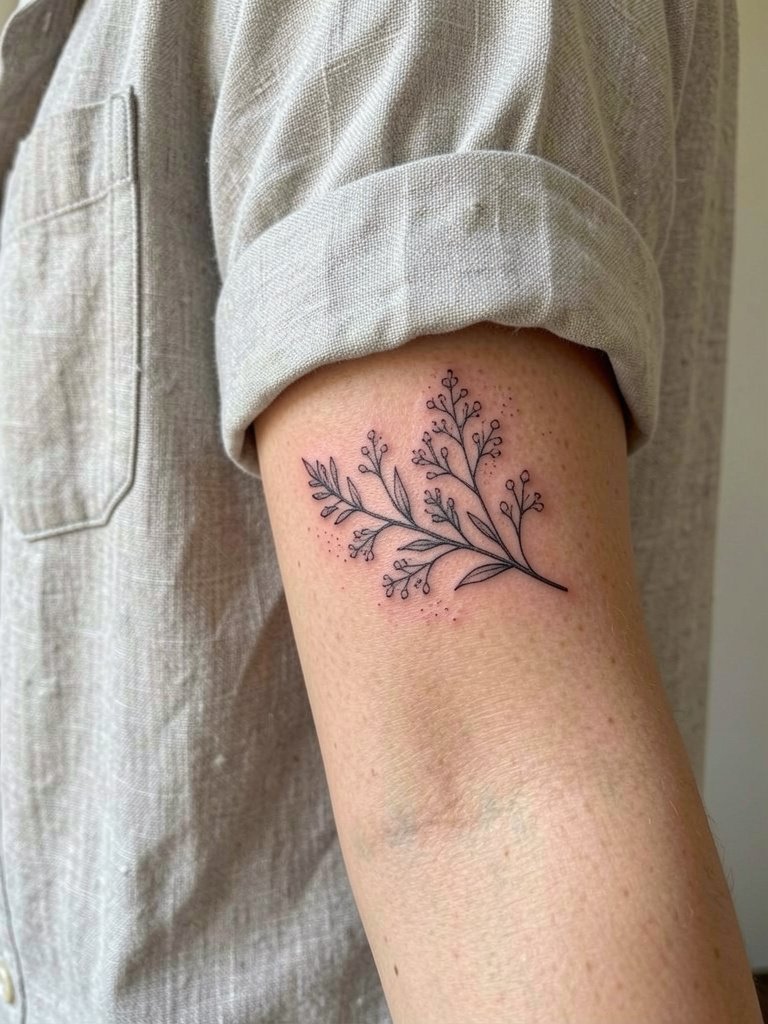
Fine line botanicals read elegant on the inner forearm but the common mistake is starting too thin for high-use zones. I recommend a slightly heavier single-needle width for forearms that see daily rubbing from sleeves and watches. Expect a one-session piece that most shops will touch up after healing if lines soften. For the appointment, wear a linen button-down shirt or a short sleeve so the artist can place the stencil without stretching the skin. After one year healed, contrast depends on spacing more than detail.
2. Healed vs Fresh Cover-Up Comparison Sleeve Patch
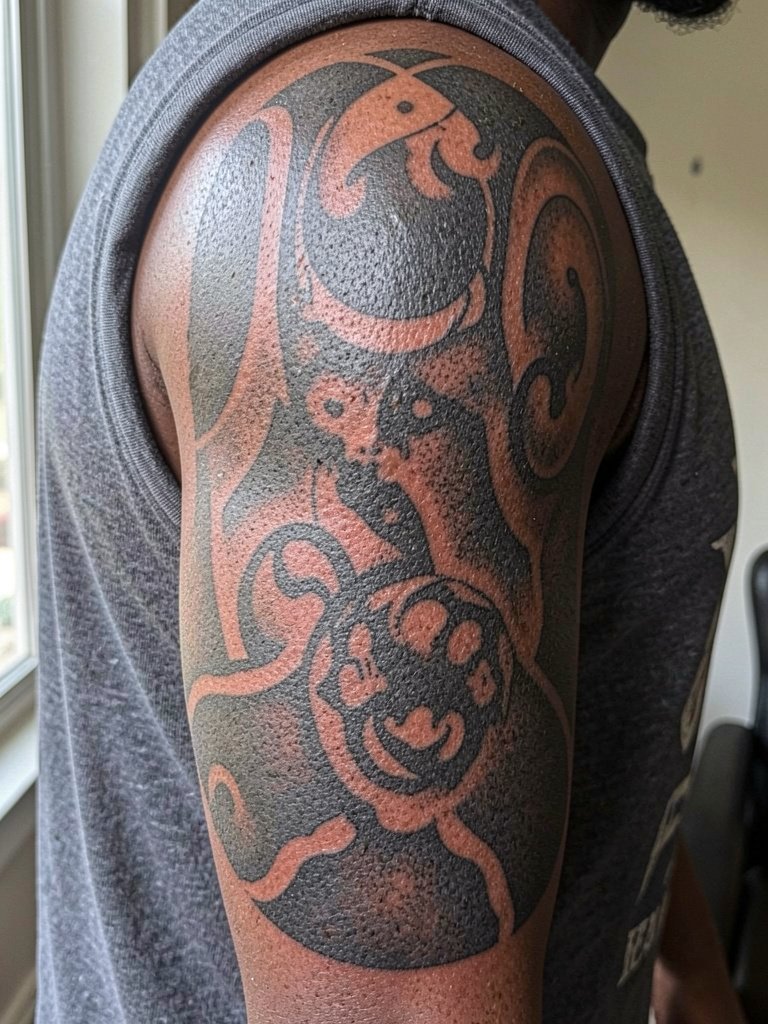
Cover-ups are a strategy, not a guarantee. The usual error is picking a light, airy motif over stubborn old color. Choose designs with heavy blacks and texture to absorb previous lines. Expect multiple sessions for saturation and staged touch-ups. During the consult bring a clear photo of the healed old tattoo and a photo of how the new concept sits on the same arm so the artist can plan coverage and negative space. For session wear, a sleeveless muscle tee keeps the area accessible without seam friction.
3. Micro-Realism Portrait or Symbol on Wrist
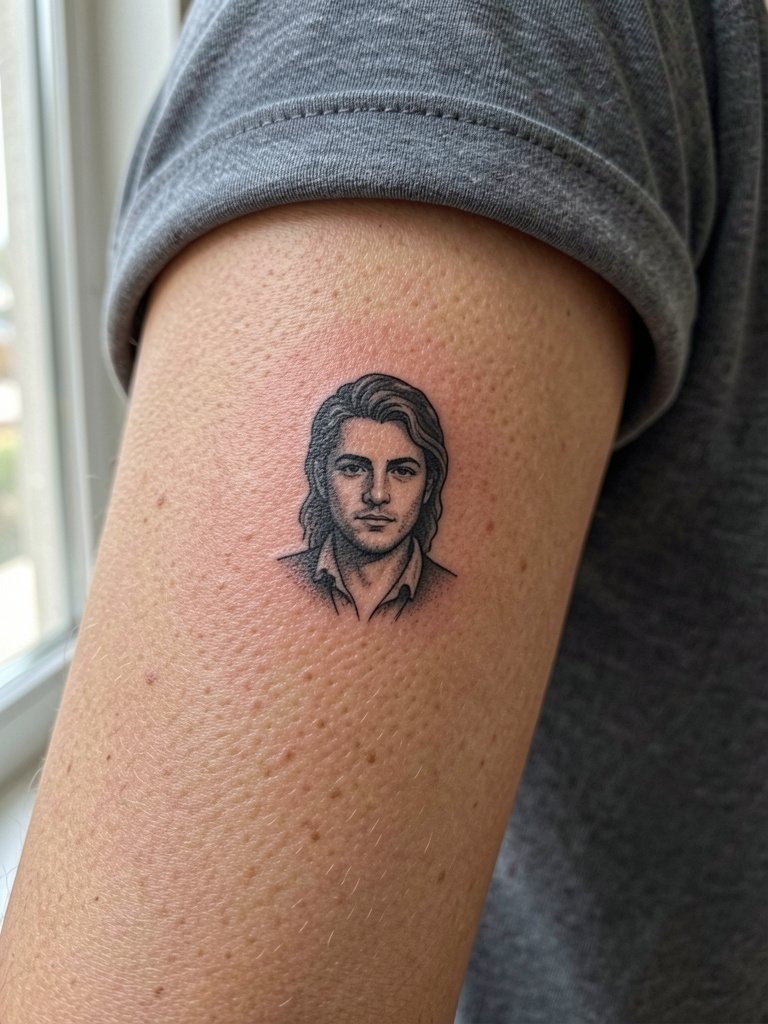
Micro-realism on the wrist can be striking the day of the session and thin by year three if spacing is tight. A common mistake is asking for extreme detail at two inches. Ask the artist to show a mockup at both two and three inches so you can see how shadow and highlight simplify. The wrist sees frequent sun exposure and washing. For showing it off, pair with a minimal bracelet on the opposite wrist or a thin chain bracelet so the tattoo remains visible and unobstructed. Expect a single session with a likely touch-up at six months.
4. Black and Gray Memorial on Upper Arm
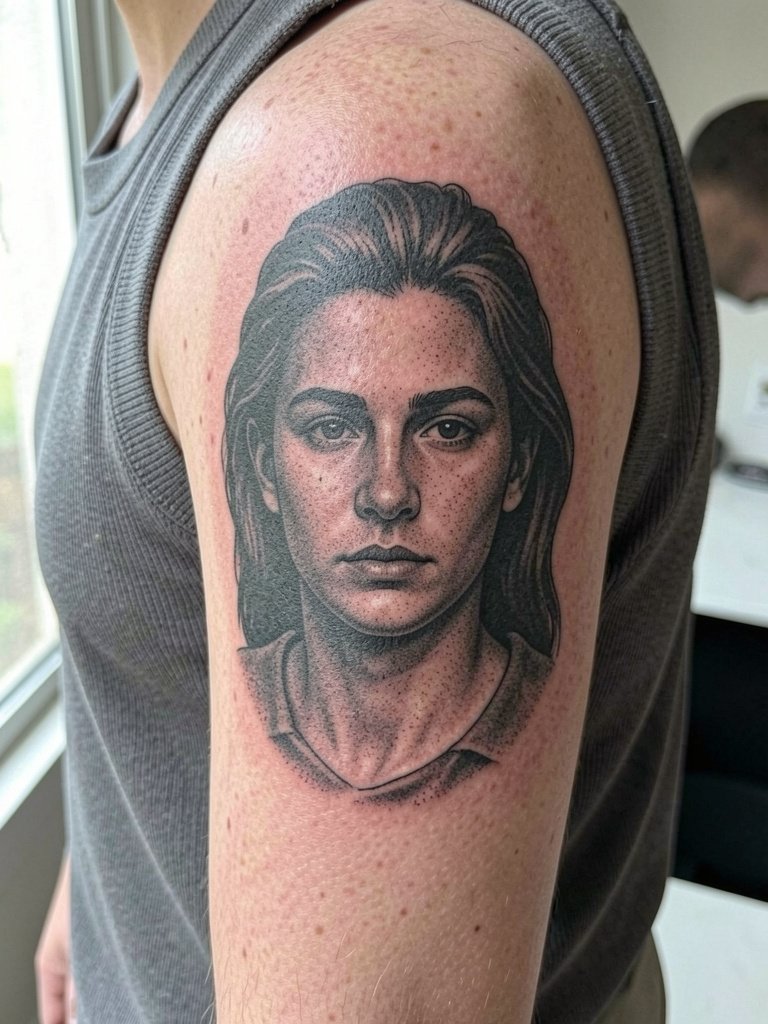
Large black-and-gray memorials age dependably when composition uses contrast and negative space. The error is packing details without dark framing which causes features to wash out over time. Plan for multiple sessions and ask for staged photos of the work healed at two months then at a year so you know how the skin settled. Sleeve-friendly clothing like a boxy tank top is ideal for session access. In many shops the first long session will be about placement and outline, with shading scheduled later.
5. Flash Sheet Pieces for Quick Walk-Ins
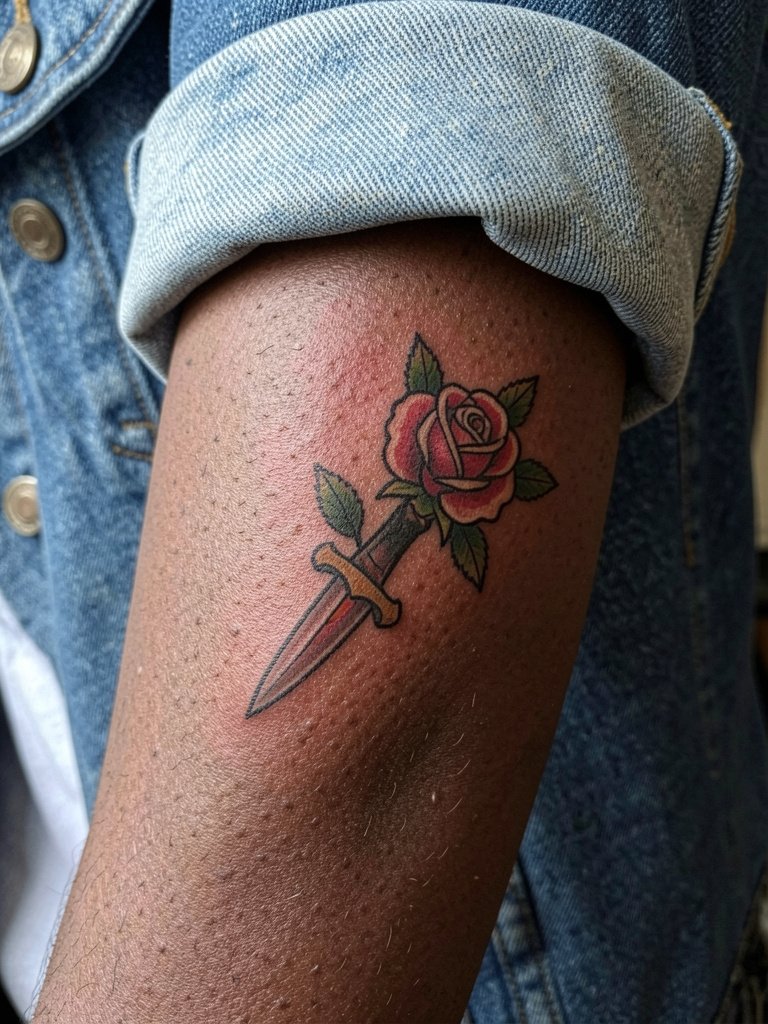
Flash is smart when you want a fast, affordable result that still photographs well. The usual trap is resizing a bold flash down too small, which loses the flat color impact. If you like the artist's flash, ask for the designer to show the piece scaled to the exact spot and confirm color blocks will remain bold at that size. Flash works great with rolled sleeves and boxy tees when showing off. For a quick session, come in a denim jacket you can quickly pull off without rubbing the new ink.
6. Minimalist Script or Date on Collarbone
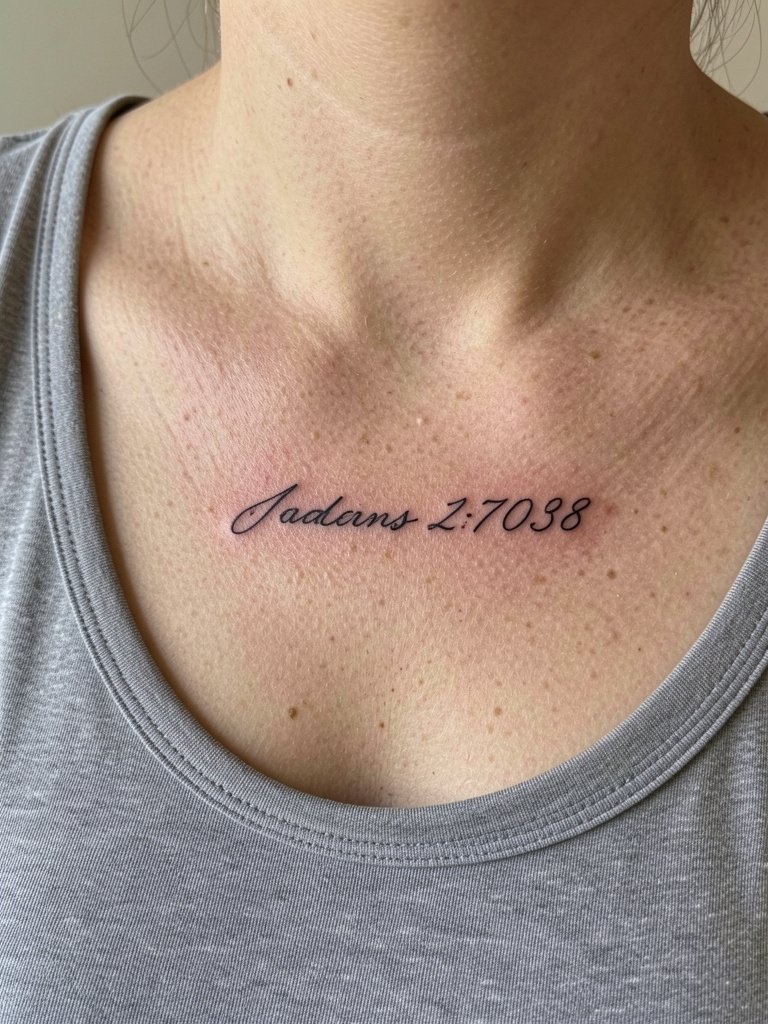
Collarbone scripts photograph beautifully but can blur if letters are too tight or too small. Instead of a generic request, bring two reference fonts and ask for spacing scaled to the collar span. For the session wear a square neck top or an open blazer so the artist can place the stencil accurately and you avoid fabric rubbing. Note that collarbone skin moves with shoulders, so expect a light touch-up if letters soften after the first year.
7. Patchwork Sleeve Starter on Outer Arm
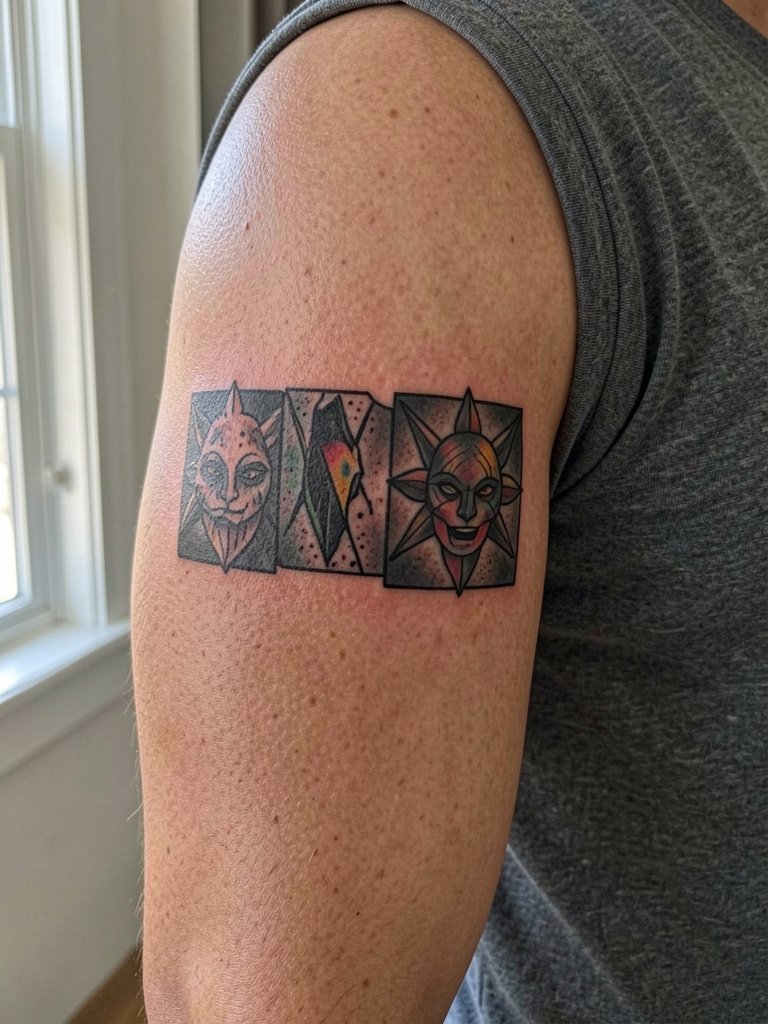
Patchwork sleeves let collectors build over time but the mistake is failing to plan negative space. Have the artist map where future pieces could sit and show a mockup with gaps. Session lengths vary, many shops will do small pieces in one hour blocks. For showing off between sessions, a denim vest or a rolled-sleeve tee frames outer arm tattoos well. Bring clear photos of existing ink so the artist can match saturation and linework during the first booking.
8. Blackwork Ornamental on Ribcage
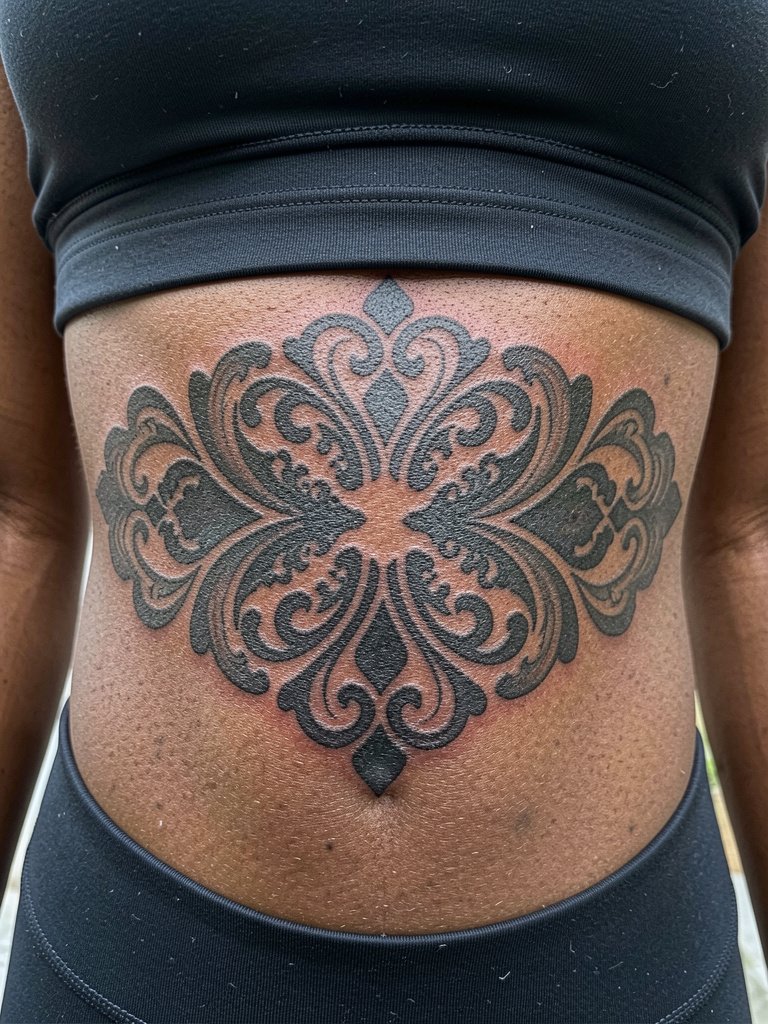
Fine line work on ribs splits artists into two camps. One camp argues thin lines on the ribs blur within two years because the skin stretches and shifts. The other camp says a slightly heavier line weight and careful depth make fine line hold up, and they will show healed photos as proof. If you choose ornamental blackwork here, expect longer sessions and plan breaks. For comfort, wear a front-closing top or a loose zip hoodie so the artist can access the side without fabric pressure.
9. Botanical Sweep on Upper Thigh
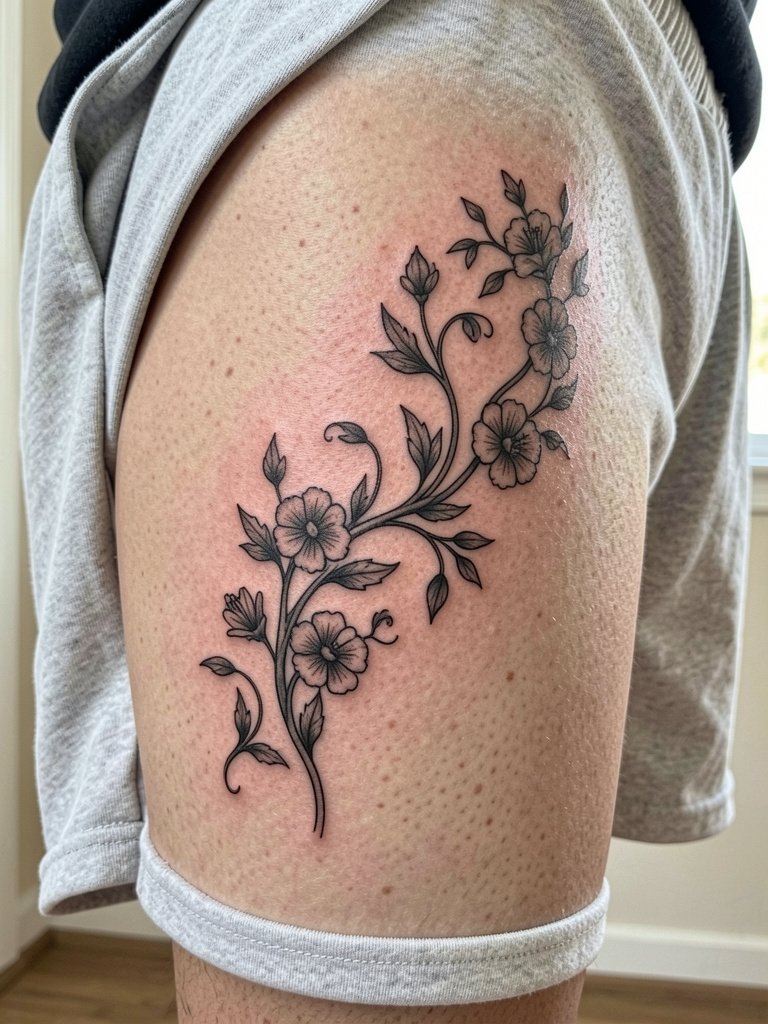
Thigh pieces allow scale and curve work that forearms cannot match. A common mistake is forcing a linear motif to sit across a rounded surface. Ask the artist to sketch the design while you stand and sit so they can show how the vine follows musculature. For the session, choose loose cotton shorts that can be rolled or lifted without pressure on the area. Healed photos at two months give the best sense of how the piece settles on thigh skin.
10. Healed Micro Tattoos on the Wrist
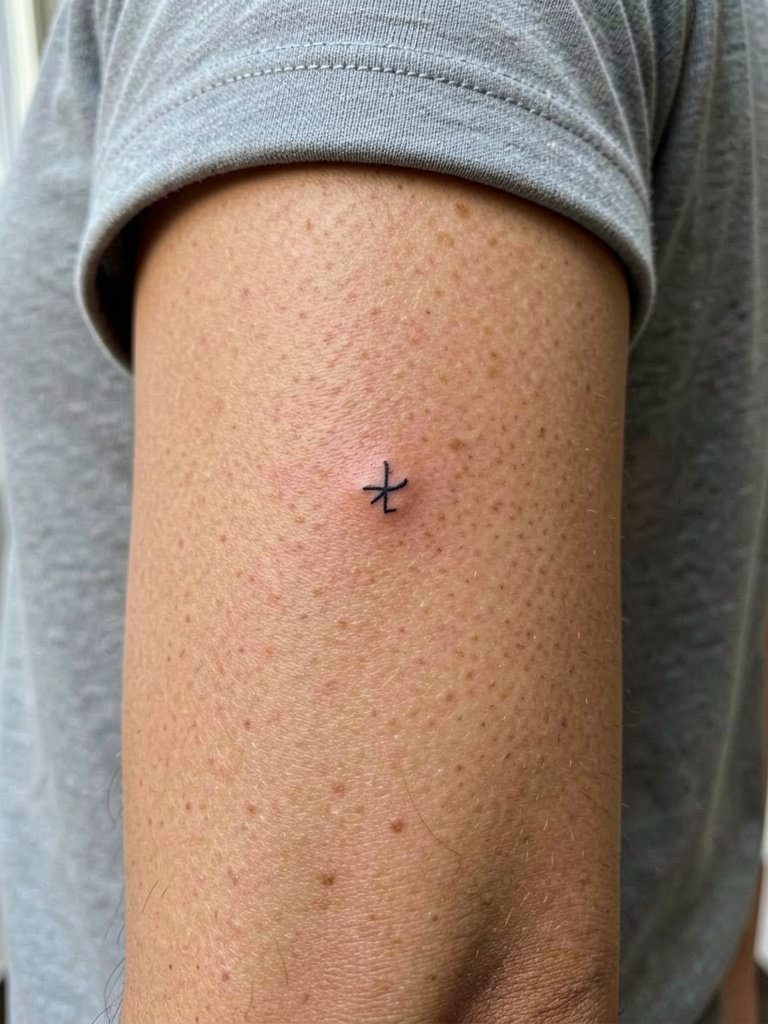
Micro wrist tattoos can look delicate on fresh photos and then fade into faint marks if placed too close to the wrist crease. The practical step is to place the design slightly above the crease where skin is flatter. For the session remove bracelets and watches and wear a sleeveless ribbed tank or short sleeve. Expect one short session plus a possible touch-up at six to twelve months for crispness.
11. Full Back or Spine Panel Project
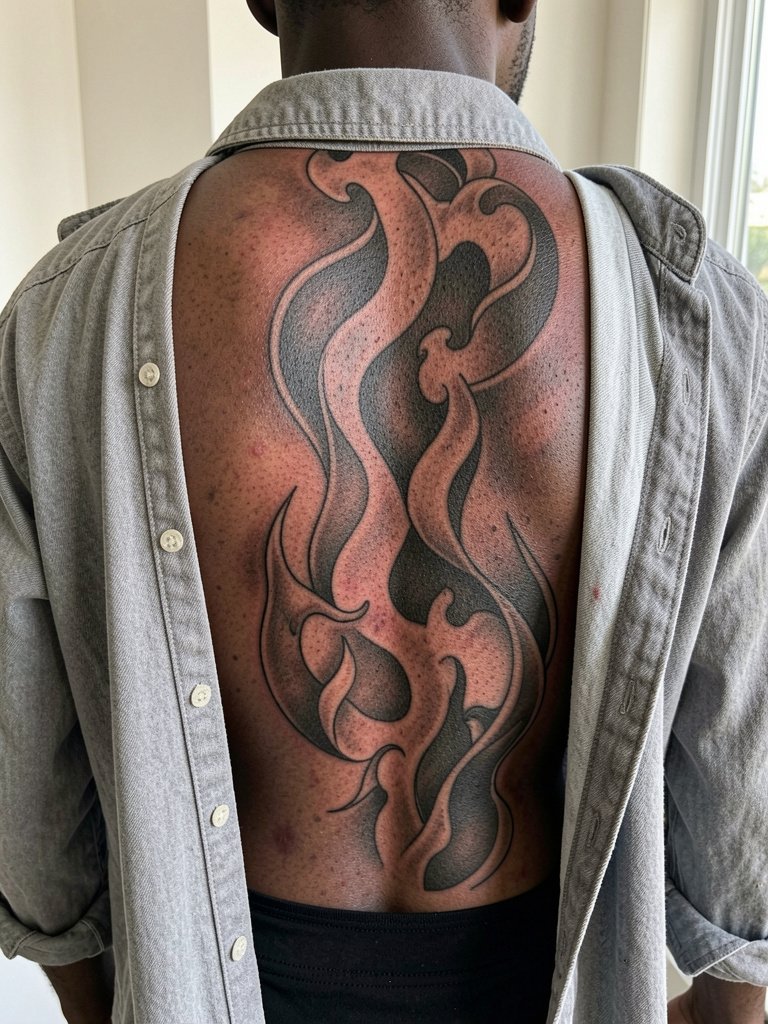
Large back or spine projects require staged planning and tolerance for long sessions. A common error is starting too many small motifs without a plan for composition which makes the back feel fragmented. Arrange a consult to map the panels and establish session pacing. For the appointment wear a button-down shirt or zip-front hoodie so you can lower fabric without rubbing the fresh work. Expect multiple sessions and a structured touch-up schedule for the whole panel.
12. Color vs Black-and-Gray Side-by-Side Comparison
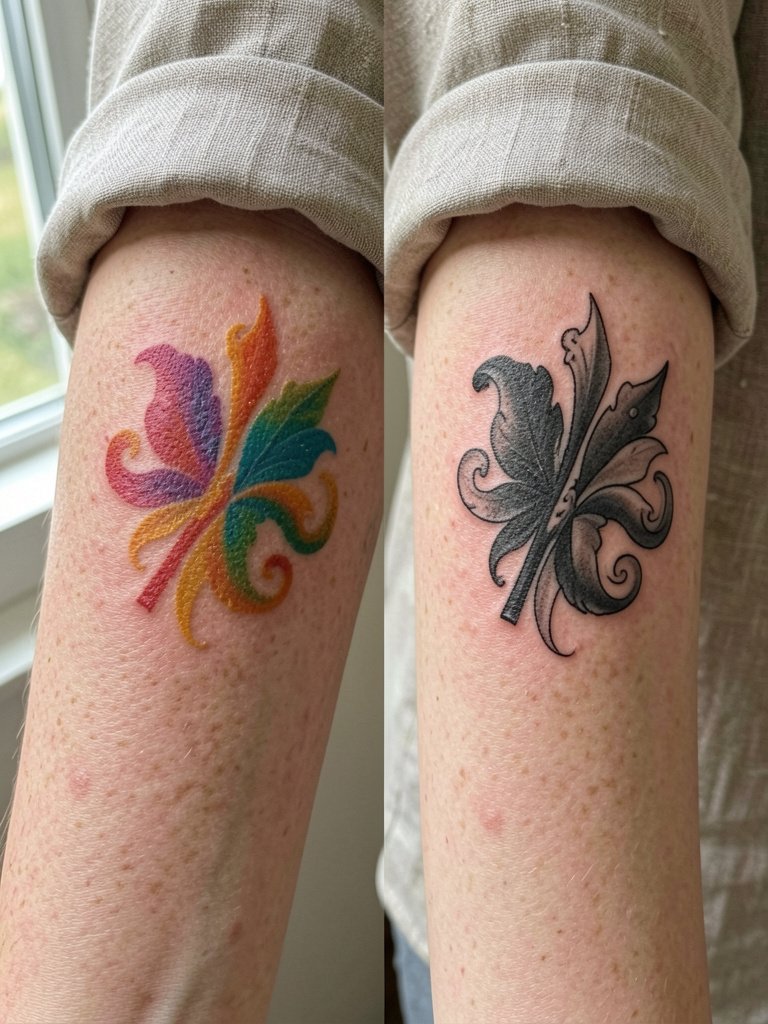
Color versus black-and-gray invites a clear split of opinions. One camp favors black-and-gray because high contrast survives sun exposure and aging more predictably over a decade. The other camp believes color, when saturated and cared for, can remain vibrant and is worth the trade-off for the visual result. Decide by asking the artist to show healed examples in your skin tone and in similar placements so you can compare long-term results. If you choose color, plan for stronger saturation and a likely touch-up schedule.
13. Small Ankle Symbol
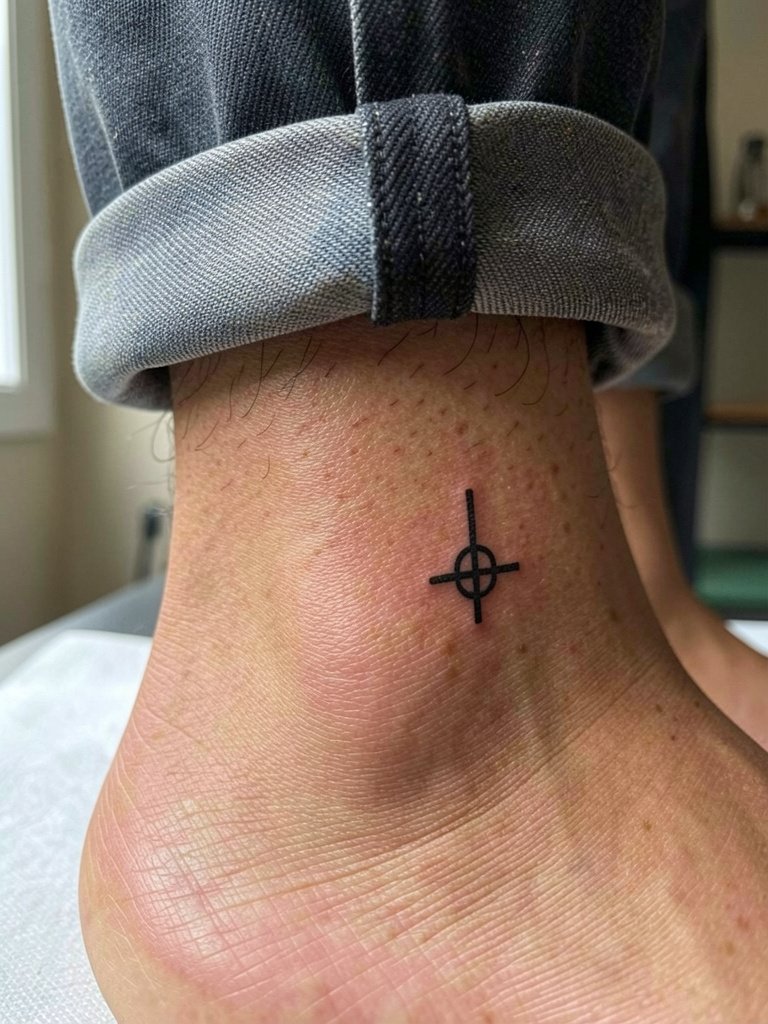
Ankle tattoos face friction from socks and shoes which can dull fine detail. A mistake is requesting ultra-fine linework that will disappear under constant abrasion. Choose a slightly bolder contour and avoid placing the design directly where shoe collars rub. For the session wear cropped trousers or shorts so the artist has clear access and your footwear does not press on fresh ink. When showing the tattoo off, no-show socks or low-profile sandals help keep the ankle visible.
14. Client Reaction and Transformation Post Setup
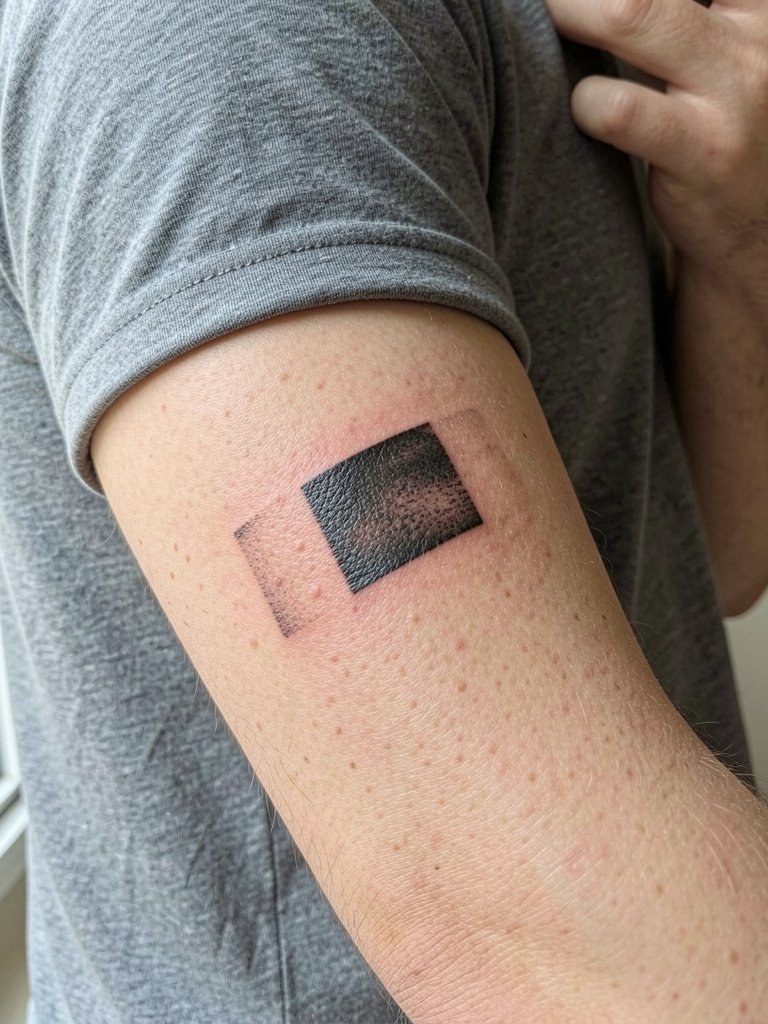
Real client reaction shots build trust because viewers see how the piece lives with the person. Plan to photograph the healed tattoo and a candid reaction shot after the session. A common mistake is only posting immediate fresh photos which hide how the piece settles. For an editorial reveal, choose wardrobe that complements the work like a neutral rolled-cuff shirt or a simple bracelet on the opposite wrist. Keep the session short and focused if you want an immediate transformation post without long studio time.
Session Day Picks
These items smooth the session and the first week of healing for the forearm, wrist, and collarbone pieces above.
-
Natural tattoo balm. A lightweight tattoo-specific balm from smaller brands helps clients who dislike greasy ointments keep healed linework moisturized without heavy residue.
-
Gentle glide lubricant for tattooing. Used sparingly by artists to reduce drag, this can make long sessions on the thigh and back more comfortable while preserving crisp saturation.
-
Fragrance-free gentle body wash. Good for showering during the first week without irritating fresh ink, especially for forearm and calf work.
-
Second-skin tattoo bandages. A protective film option that some clients prefer for high-friction placements like ankles and hands during the initial messy days.
-
Unscented antibacterial soap. For gentle washing in the first week when the shop recommends soap and water, this reduces irritation while keeping the area clean.
15. Minimalist Geometric Mandala on Sternum
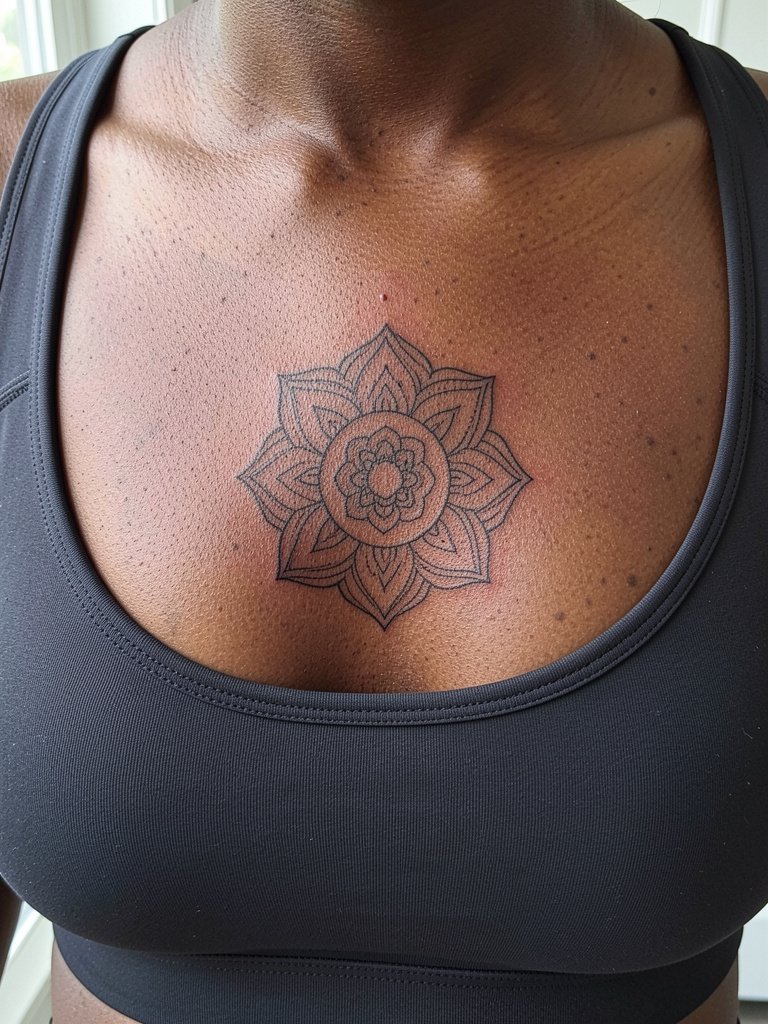
Sternum work needs a specialist touch and careful placement because the area moves with breathing and garment pressure. A frequent misstep is asking for dense detail without considering how bras and clothing will rub during healing. Discuss how the stencil will sit relative to undergarment lines and plan a session with breaks. For session wear bring a front-closing bra or a bandeau top so fabric can be lowered without tight seams. Expect moderate pain and consider splitting the session into two if needed.
16. Front Thigh Neo-Traditional Panel
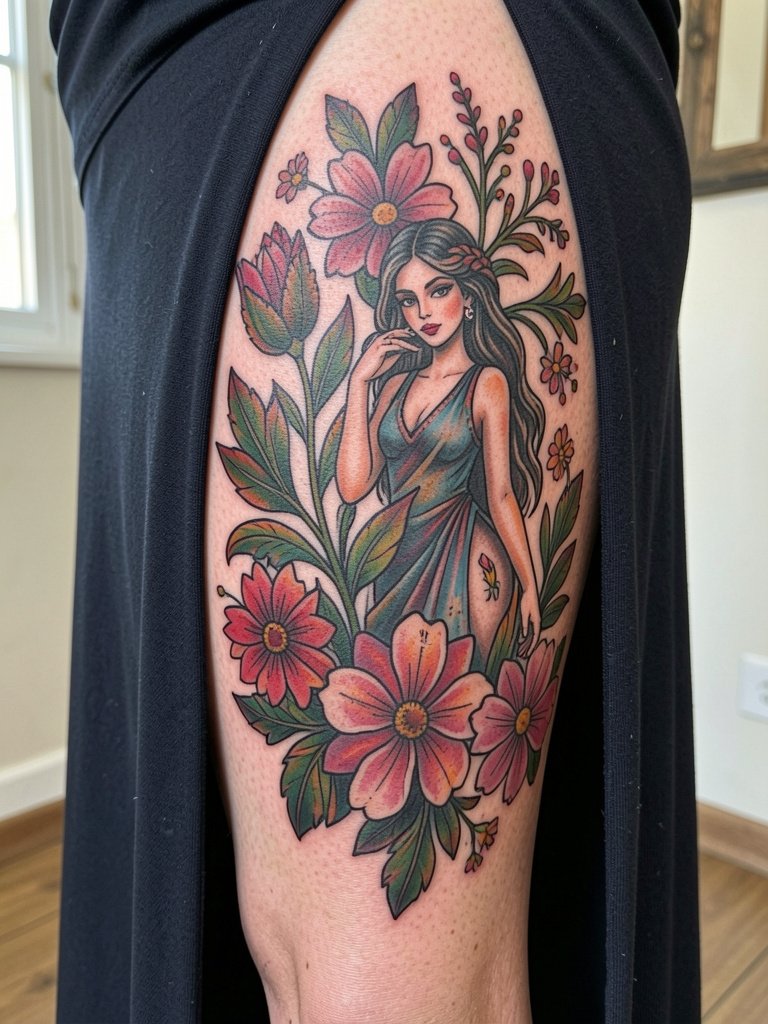
Large thigh pieces let color and scale shine. The usual mistake is underestimating how clothing will sit over the area during healing. Choose session wear like longline skirts with a side slit or loose shorts so the artist can access the panel without fabric rubbing. Neo-traditional color needs good saturation to last, so plan a touch-up schedule and ask to see healed color examples on similar skin tones before booking.
17. Calf Traditional Flash
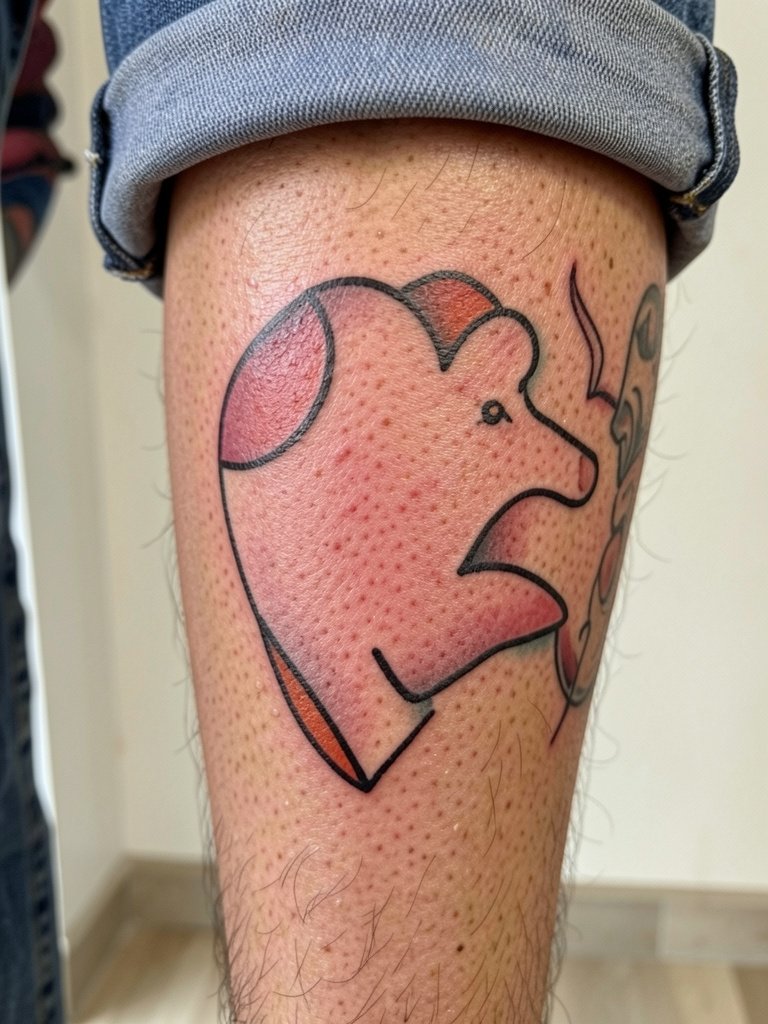
Calf placements are durable and photograph clean with the right scale. Common errors include going too small for the muscle mass which makes the piece look lost from a distance. For session wear, pull up cropped trousers or a midi skirt so the calf is exposed without tight bands. Traditional flash usually fits a single-session slot and ages predictably because bold outlines and solid fills keep contrast over time.
18. Lateral Hip Botanical Sprig
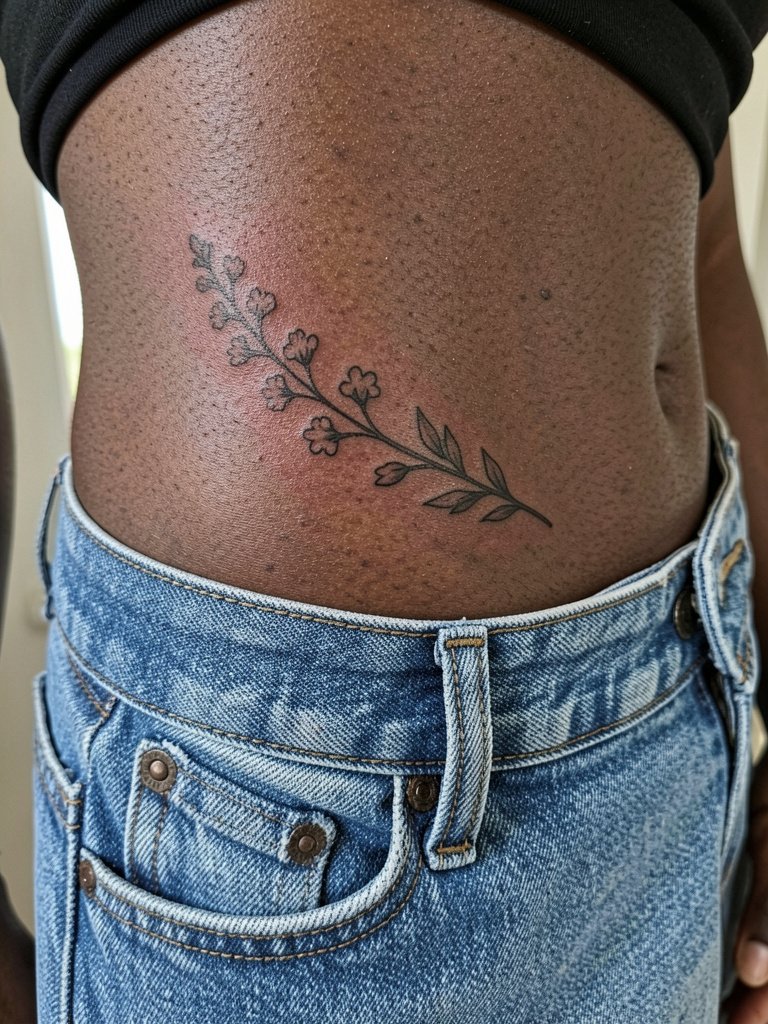
Hip pieces are easily hidden and flattering with certain outfits. The common mistake is placing the design where waistbands will constantly rub during the first weeks. Wear loose drawstring shorts or high-waisted pieces that sit below the design for the session. For after photos, high-waisted denim with a cropped tee is an ideal pairing. Ask the artist to show how the design sits when both standing and sitting so curvature is accounted for.
19. Stipple-Shaded Geometric on Back of Neck
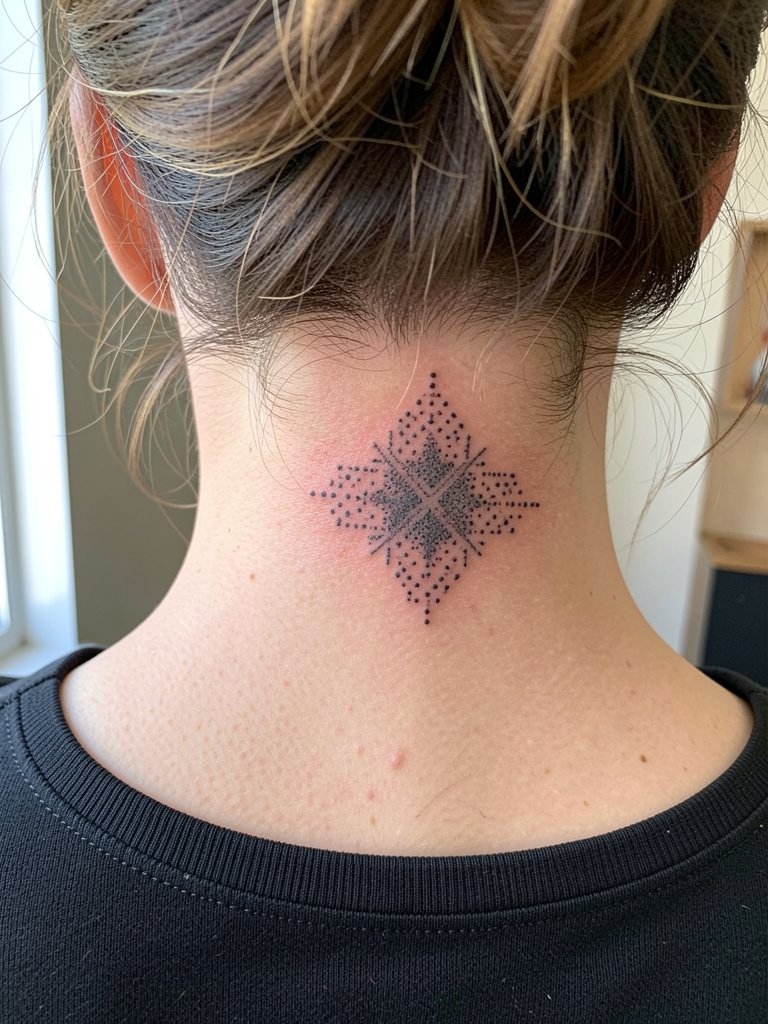
Back-of-neck tattoos are subtle and ideal for small geometric marks. A frequent error is expecting very fine stipple to remain perfectly crisp, when hairline growth and friction can soften edges. Discuss placement relative to the hairline so growth will not obscure the piece. For the session wear a wide-neck top you can remove without disturbing hair. Healed photos at two months show how the dot work read on this sensitive area.
20. Ribcage Fine Line Sprig
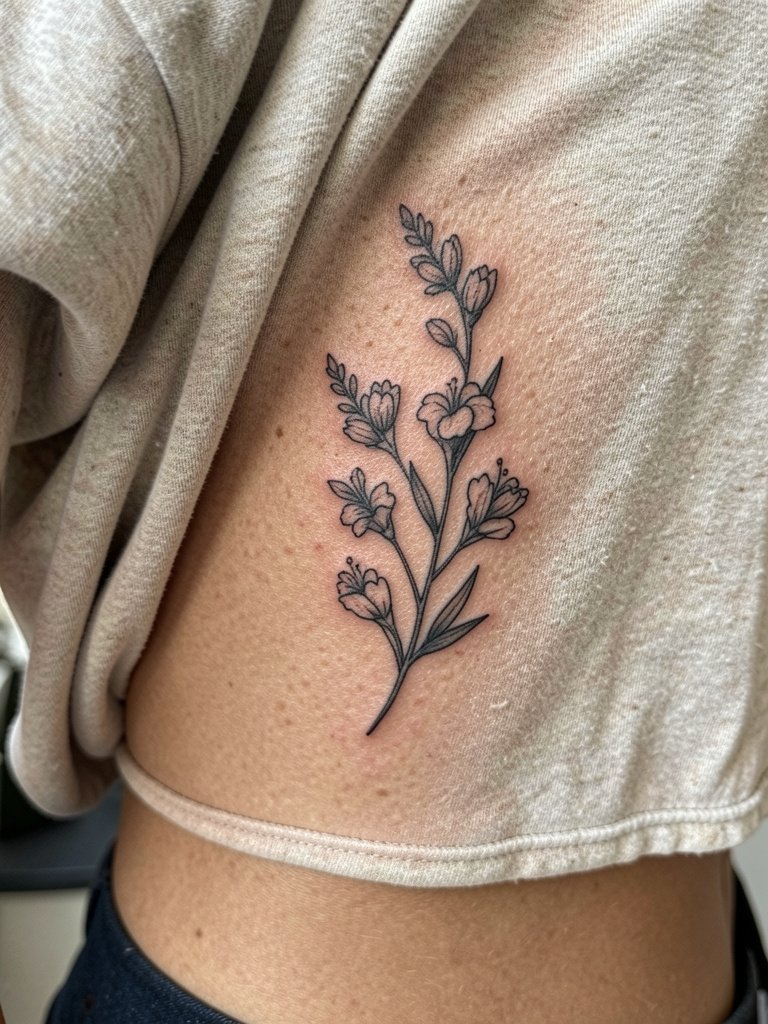
Fine line on ribs is controversial across the community. One side says the thin lines blur because the skin stretches and the area is high movement. The opposing side counters that with slightly wider spacing and careful depth, fine line can settle well and they cite healed examples to support it. If you want a rib sprig, ask the artist to widen the smallest stems slightly and to show healed ribs photos on similar skin tone. For the session, wear a loose crop top or open shirt so access is easy and fabric does not rub during healing.
21. Ornamental Sternum Panel
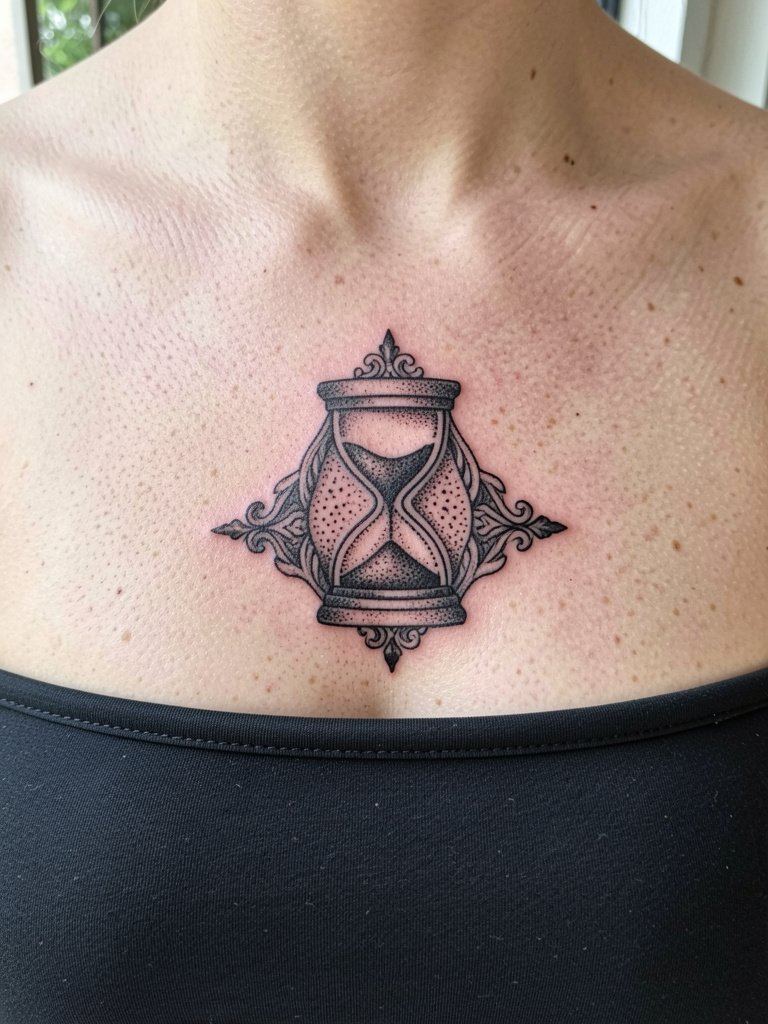
Sternum panels require experienced hands for symmetry and for avoiding excessive friction from clothing. A mistake is asking for micro filigree on the center line which will likely need touch-ups. Bring references and request a mirrored stencil test so you see how the design aligns with your body. For session comfort choose a front-closing bra or strap-friendly top that can be lowered without tight bands. Expect moderate pain and plan appointment length with a break schedule.
22. Small Collarbone Symbol with Layered Necklace Pairing
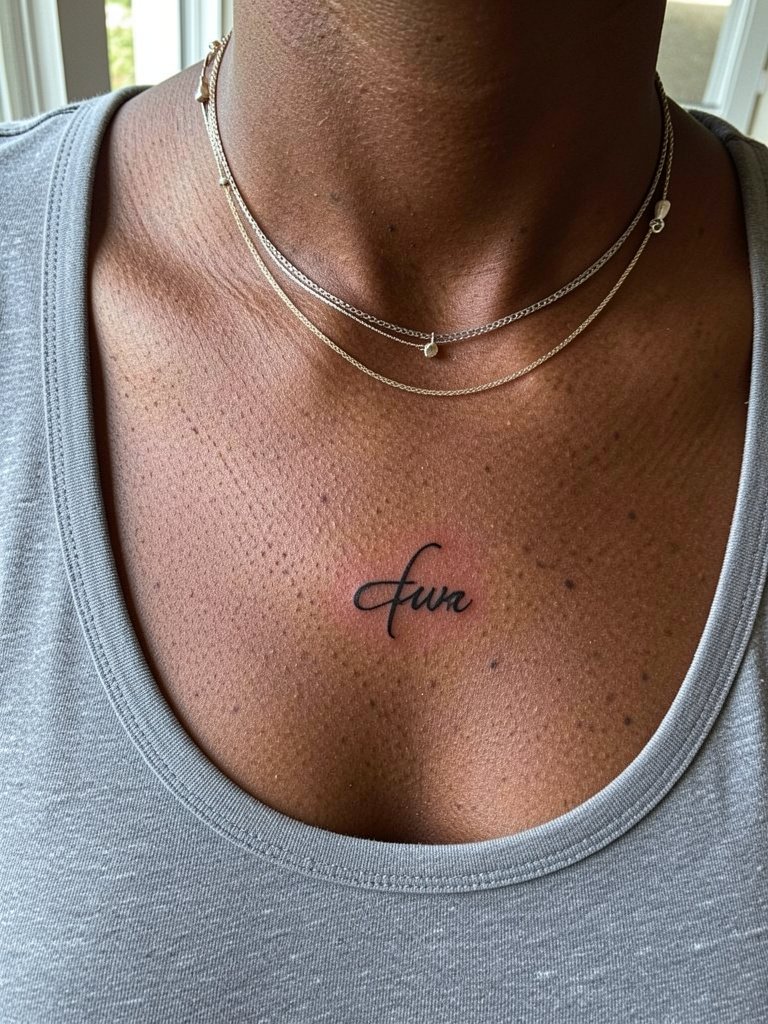
Small collarbone symbols pair well with layered dainty necklaces when the placement sits slightly off-center. Avoid placing the design where pendants will sit directly over fresh ink. For show-off styling try a layered necklace set and a scoop-neck shirt to frame the piece. During the session wear something easy to lower without extra fabric friction so the artist can stencil and tattoo precisely.
23. Inner Bicep Small Portrait
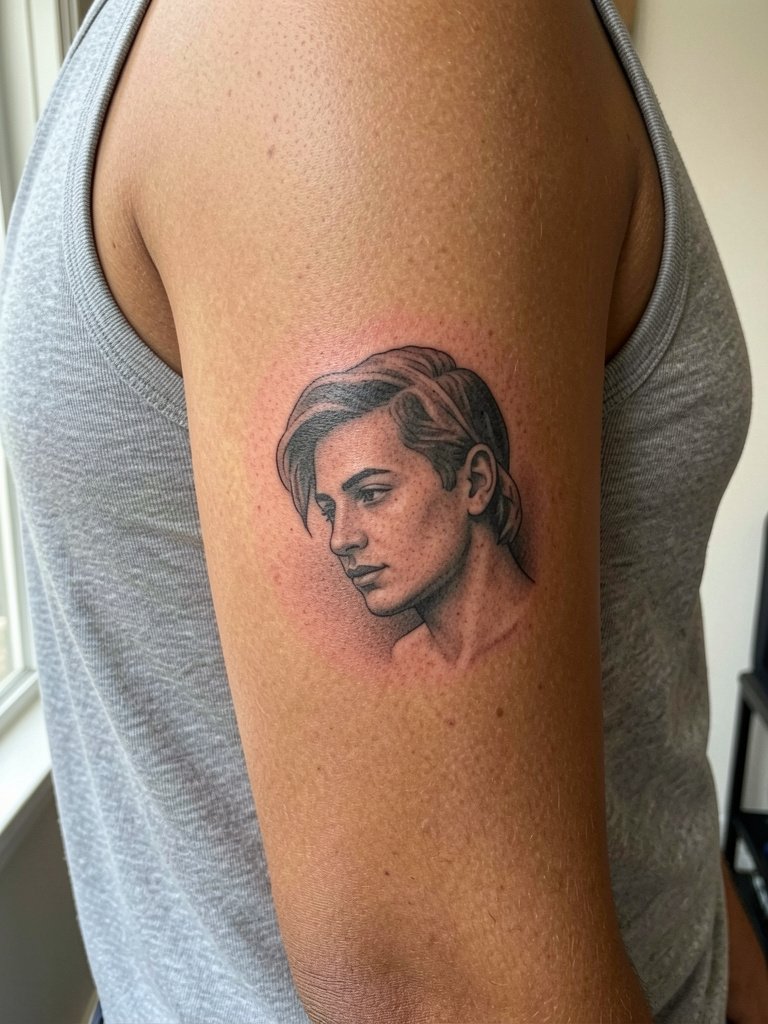
Inner bicep pieces show intimate detail but the typical mistake is requesting ultra-thin lines that the inner arm will not hold. Ask for slightly bolder line weight and check healed photos from the artist for inner arm examples. For the session choose a sleeveless or loose button-down so the artist has unobstructed access and you avoid arm-raising that exposes armpit tissue. Inner bicep healing is sheltered but watch friction from close clothing.
24. Ankle Flash with Cropped Trouser Styling
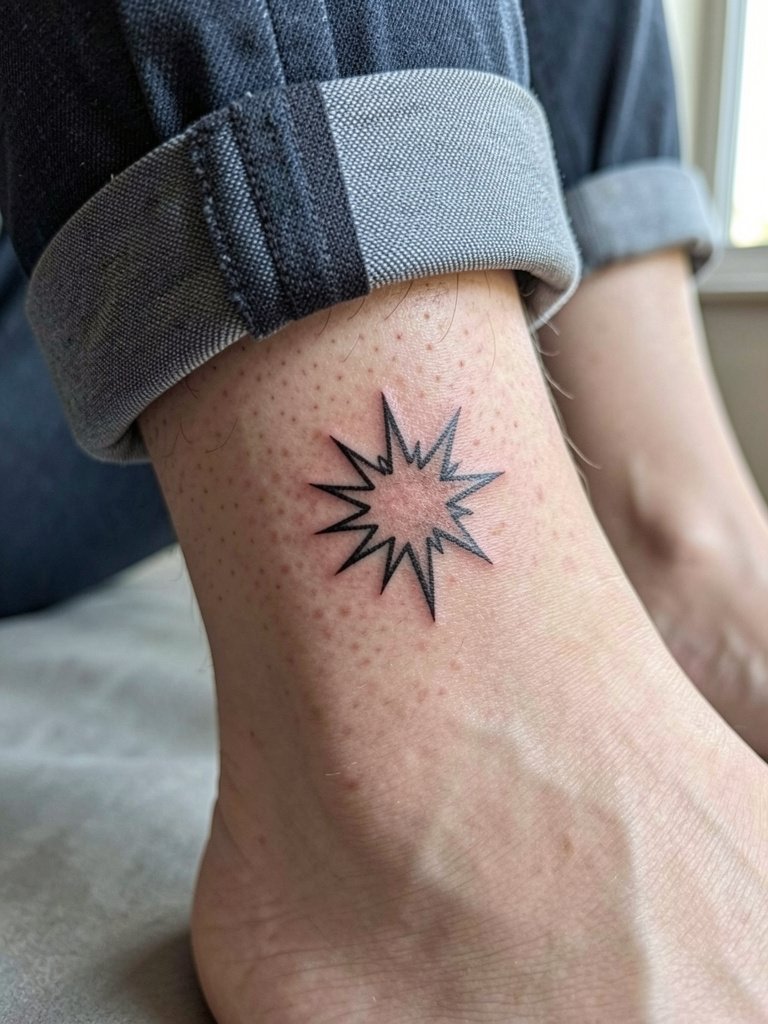
Ankle flash reads best when sized to hold up under sock and shoe friction. The common error is shrinking a bold flash down to dainty lines that disappear. Keep outlines sturdy and plan for a touch-up if you wear boots often. For showing the ankle off, choose cropped straight pants or ankle-strap sandals that let the work breathe. During the session avoid tight socks or footwear that will press on fresh ink.
25. Chest Symmetrical Blackwork
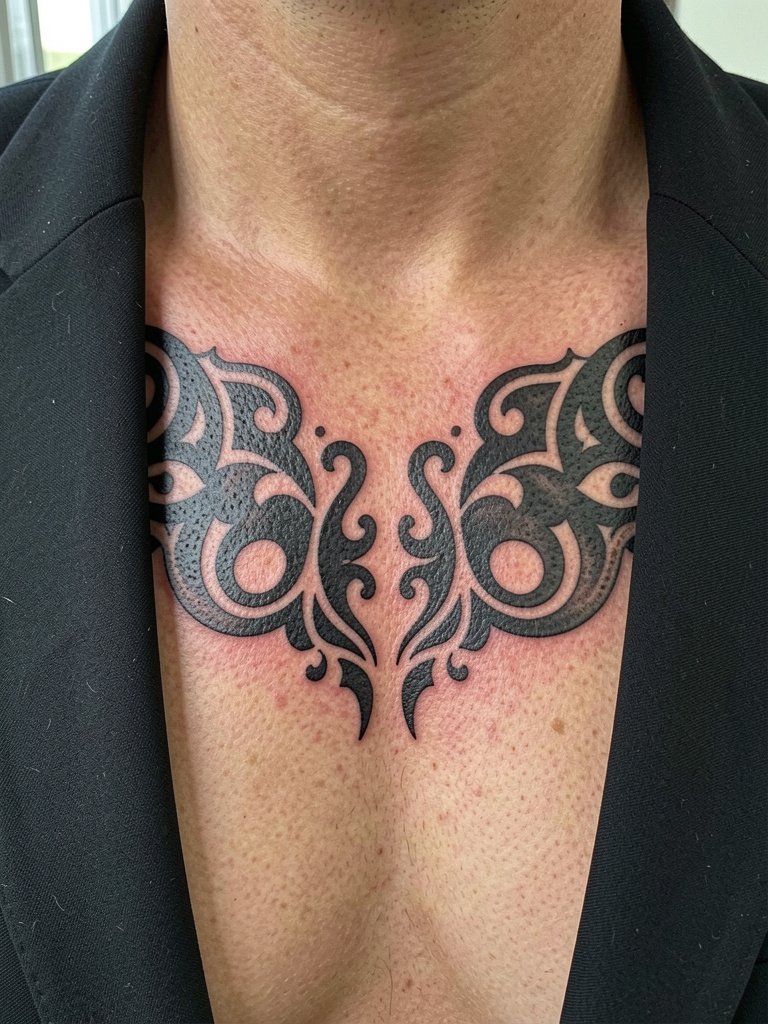
Large symmetrical chest work benefits from strong contrast and careful negative space planning. The mistake is crowding fine detail into the center which ages into a muddy block. Request a balanced layout that preserves the chest contours and ask the artist to show a mockup with the neckline you typically wear. For show-off wardrobe, an open front blazer or scoop-neck tee frames the piece without rubbing the tattoo during healing.
26. Calf Micro-Realism Panel with Cropped Pants
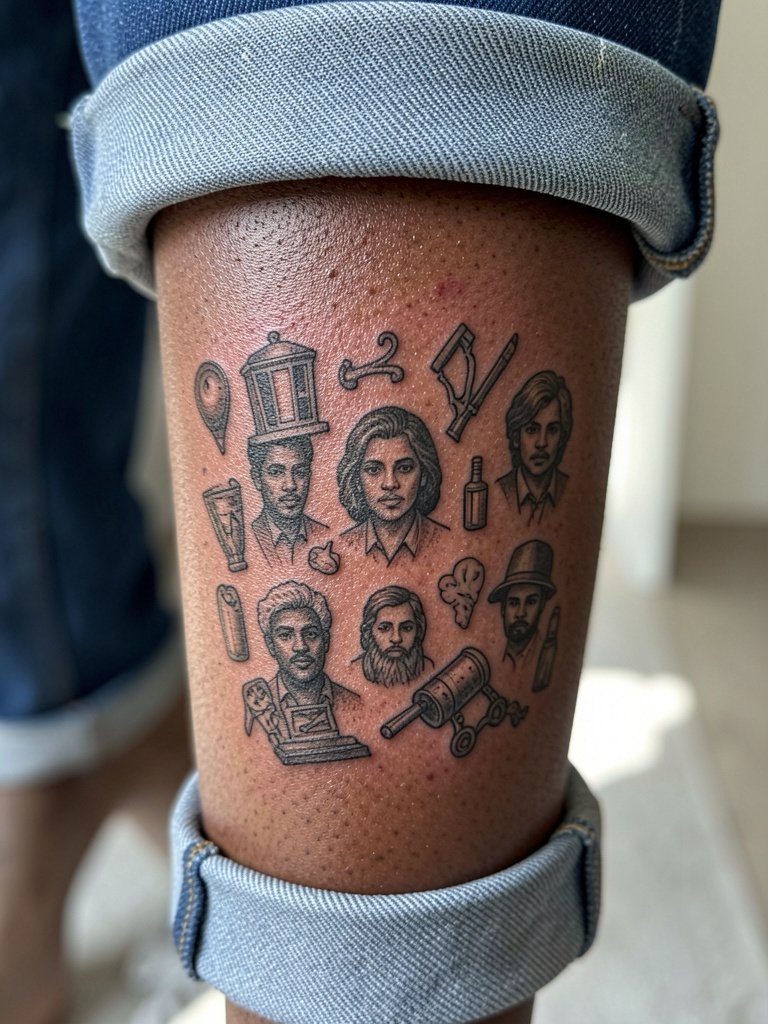
Calf micro pieces need scale that reads from a short distance. A frequent slip is packing too many tiny motifs into a small vertical strip. Ask the artist to space items so each one has breathing room and to show a healed mockup. For session comfort and reveal wear rolled-up jeans or cropped pants. Calf work generally tolerates sun exposure better than inner arms but still needs sun protection long term.
27. Patchwork Back Shoulder Cap
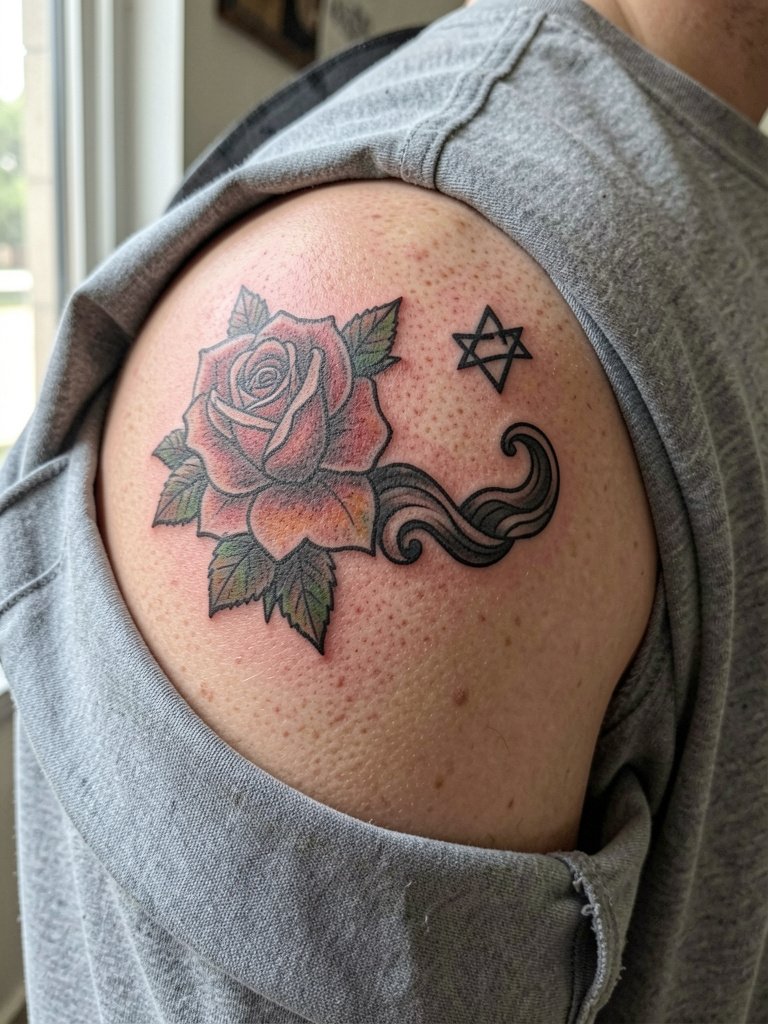
Shoulder-cap patchwork is a great way to mix styles without committing to a full sleeve. The common error is ignoring flow lines which makes individual pieces look like stickers. Ask the artist for a composition sketch showing how each element sits when you move your arm. For session access wear a boxy tee with rolled sleeves that exposes the shoulder without tight seams. Expect one to three sessions depending on color and size.
Frequently Asked Questions
Q: How do I find local artists with healed portfolios without endless Instagram scrolling?
A: Use combined search terms like "fine line botanical forearm" plus your city name. Apply Instagram location filters and search city-specific hashtags to narrow results. Reddit threads in local tattoo communities are useful for real-world recommendations and for seeing healed photo posts.
Q: How should I budget for a small fine line tattoo versus a patchwork piece?
A: Shops often have a minimum hourly or flat rate even for small work. Tiny fine line wrist or ankle tattoos can still fall under a minimum session cost because of setup time. Think in price ranges for sessions rather than per-line costs and plan for possible touch-ups after a year.
Q: When should I choose second-skin bandaging versus traditional wash and balm?
A: Some clients and artist teams prefer a second-skin film for high-friction zones because it reduces rubbing and keeps contaminants off. Others favor traditional washing and thin balm to avoid adhesive irritation. If you have sensitive skin, mention reactions to adhesives and request a trial patch or the studio's healed examples using each method.
Q: Will a fine line on the ribs last compared to a thicker ornamental design?
A: Ribskin is high movement and thin lines can soften faster there. A thicker single-needle or slightly heavier line weight with extra spacing often lasts longer. Ask for healed rib photos from the artist so you can compare outcomes on similar placements.
Q: What should I wear to a sternum or rib session to keep the area accessible and comfortable?
A: Choose front-closing bras, bandeaus, or loose button-ups that can be lowered without pulling over the head. Avoid tight sports bras that compress the area. Session wear that exposes the area without rubbing will reduce unnecessary irritation while the tattoo sets.
Q: How many sessions should I expect for a large back or spine project?
A: Large panels are typically done in staged sessions that focus on outline, then shading, then color saturation. Sessions can range from three to ten depending on scale and detail. Plan realistic pacing and check with the studio for a proposed session timeline.
