
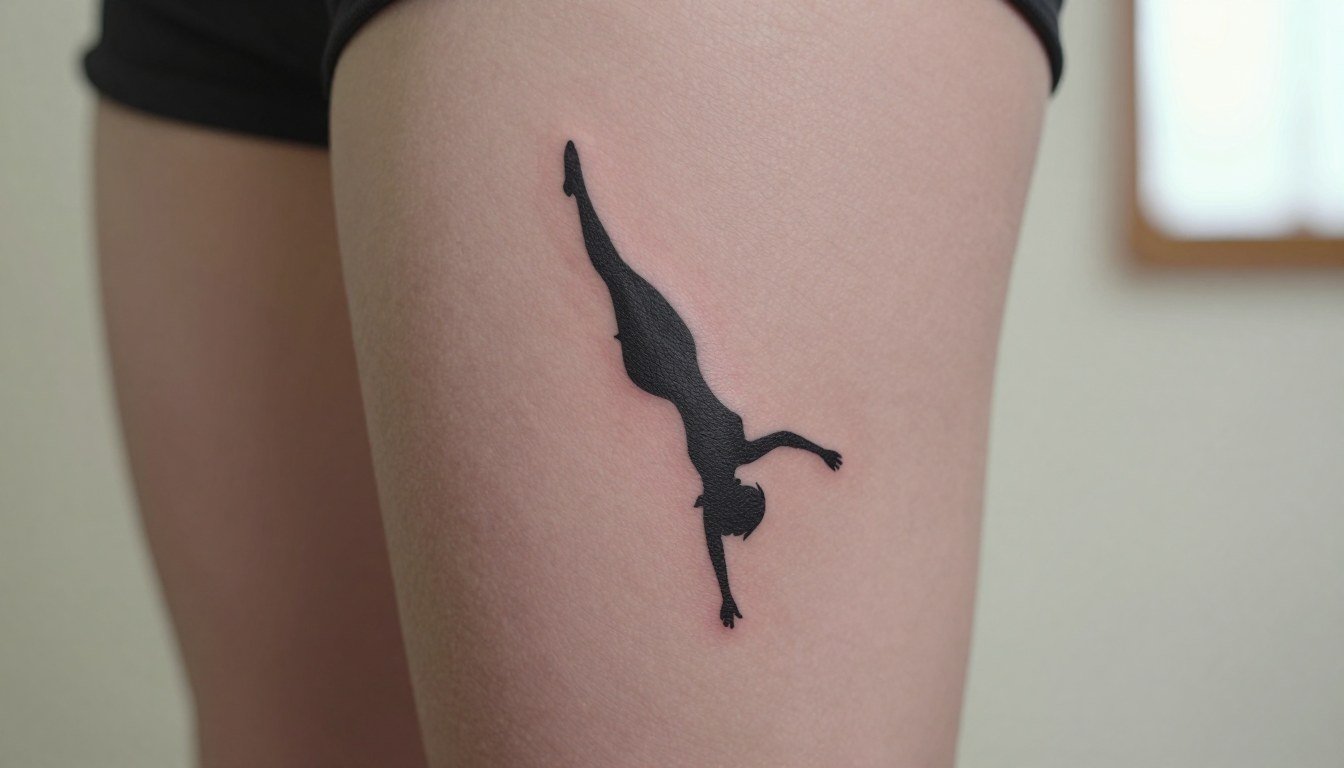
The quietest Spider-Man tattoos are the ones that still read after a few years. If you want a little nod to the character without a full-page comic panel, focus on one clear visual cue and a size that gives the linework room to settle. Think eye shapes, a single web curve, or a split-mask pop of red, not a dozen tiny details that will blur. Below the first idea is a real healed-photo prompt so you can picture how these hold up on skin.
1. Minimalist Spider-Man Mask Outline on Inner Forearm
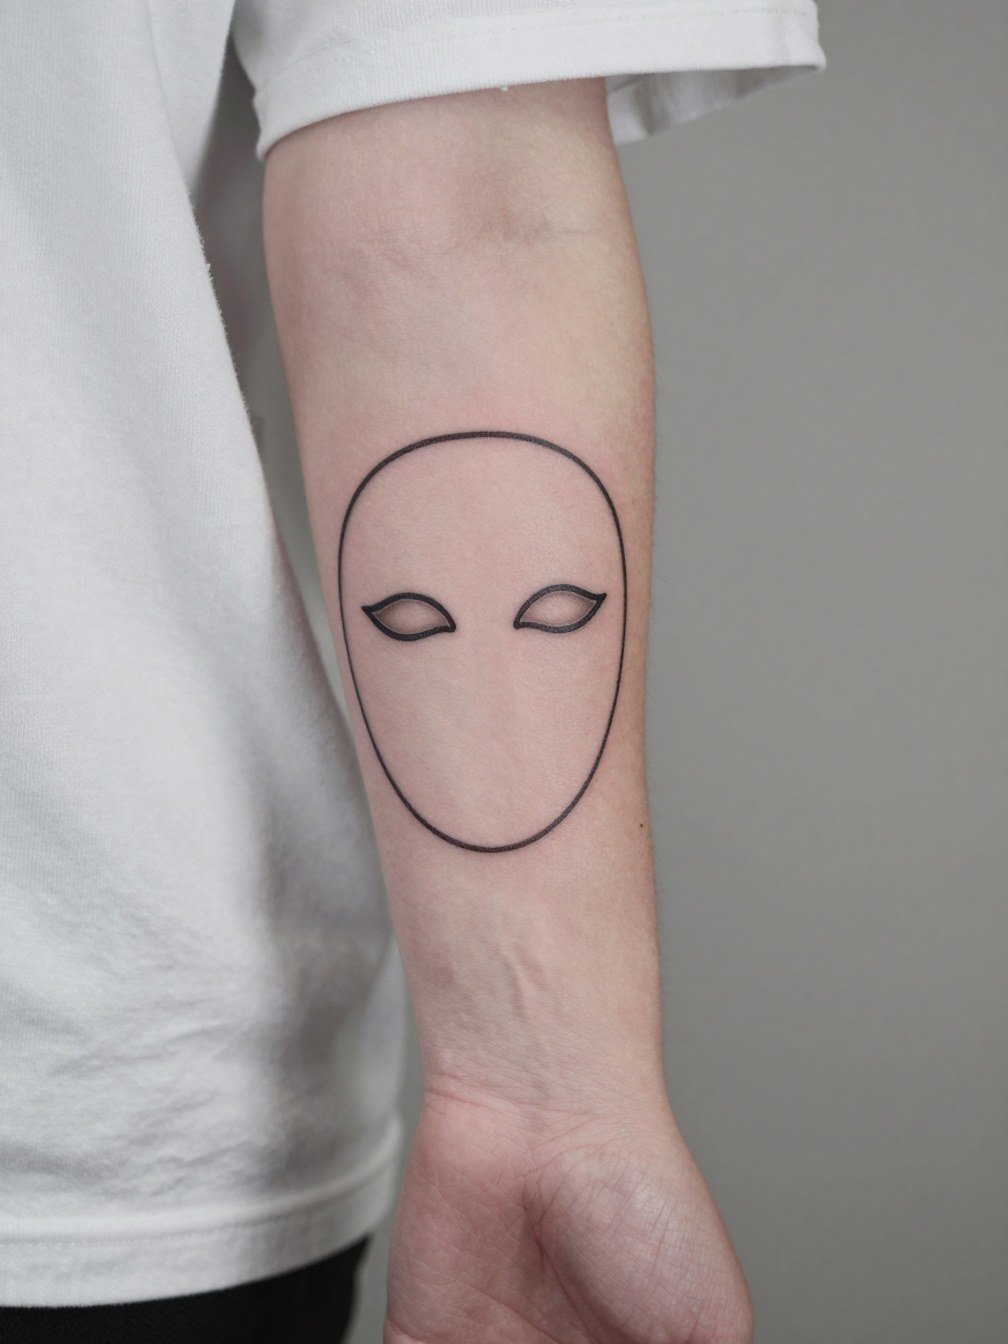
A clean mask outline reads as fandom shorthand while staying subtle. For this inner-forearm placement plan on a single session that lasts about 20 to 45 minutes depending on size. Pain is low to medium because the underside of the forearm has decent padding. A common mistake is asking for ultra-thin single-needle lines at a size under 1.5 inches, which often lose separation by year two. Instead specify slightly heavier linework and test a 1.5 to 2 inch stencil on your arm so the eye shapes keep negative space over time. Healed at six months the lines should look crisp, at two years the edges may soften slightly, and at five years touch-up is a normal expectation for fine work. For showing it off, rolled-sleeve tees and a neutral overshirt frame the mask well, try a rolled sleeve shirt when you want it visible.
2. Tiny Simplified Spider Emblem on the Wrist

Wrist emblems are great for tiny fandom cues, but size matters for readability. One camp prefers very small emblems because that preserves the discreet, minimalist vibe. The other camp says slightly larger emblems avoid turning into an indistinguishable dark spot once healed. If you want the emblem to read as Spider-Man and not a generic spider, add a tiny, unmistakable cue such as a specific eye curve or a restrained red dot. Because wrists take daily friction from clothing and watches, plan for a 15 to 30 minute session and expect a possible touch-up at the one to two year mark. For styling, a thin bracelet stack or a minimalist watch on the opposite wrist keeps attention on the emblem, try a minimalist watch to balance the look.
3. Thin Web Line Accent at the Ankle
A single web strand gives the fandom hint without turning the tattoo into a patch or logo. The ankle has a higher risk of slight fading because of shoe friction and repeated movement. Practically, sessions are short, often under 30 minutes, and pain is medium because the area sits over bone. The typical error is asking for intricate filigree at a very small scale, which the skin there cannot hold. For longevity, keep the web geometry simple with 2 to 4 intersections and a modest line weight. For wardrobe, cropped denim or sandals make the line peek out naturally, try cuffed jeans for summer looks with a cuffed jeans silhouette.
4. Crouching Silhouette on Outer Forearm
Silhouettes carry more personality than the emblem-only approach because pose conveys energy. One real mistake is packing too many interior details into a silhouette and expecting them to last. For this outer forearm placement the skin holds contrast well so you can keep the silhouette compact while preserving the pose language. Plan for a 30 to 60 minute session and a touch-up window around year two for small silhouette edges. If you want the silhouette to read as a known hero without explicit color, choose a distinctive posture or a sharp eye curve in the negative space. This placement pairs nicely with streetwear layers and rolled jackets, and wearing an oversized tee pushed back at the sleeve frames the piece when you want it visible.
5. Leap-of-Faith Silhouette on the Calf
A calf gives room to keep pose detail while staying minimalist. The longer vertical canvas suits leaping poses because the lines run with muscle and look intentional when you walk. Expect medium pain and a single session of 30 to 75 minutes depending on scale. A common planning mistake is compressing a full pose into too narrow a vertical band; instead allow 3 to 4 inches of height for clear negative space. Over time the silhouette holds better on the calf than on thin-walled areas, so this is a smart option if you want readable pose work without going full color. For summer showing, straight-leg or cuffed shorts reveal the piece, consider straight leg shorts so it has room to breathe.
6. Miles Morales Style Mask Split on Upper Arm
Color choices split opinions in fandom circles. One camp argues black-only holds up best over time because saturation and contrast remain consistent as skin ages. The other camp says a single red accent is worth the trade-off because it removes ambiguity and reads instantly as the hero. If you lean red, keep the accent minimal and dominant in black otherwise so longevity stays reasonable. Upper arm skin tolerates small accents well, and a 30 to 60 minute session usually covers a compact split-mask. Mention explicitly that the red should be a tiny eye accent and not a large fill, and plan a possible color touch-up after two to three years.
Session Day Picks
The wrist and forearm pieces above need small session and first-week supplies to stay comfortable and clean.
-
Stencil transfer paper kit. Lets you preview placement on skin and check eye and mask spacing before needles touch the skin.
-
Topical numbing cream. Useful for ankle and sternum nerves when you want a calmer first hour without compromising linework.
-
Thin protective film roll. Keeps wrist and finger tattoos protected during the first few days of heavy washing and typing.
-
Fragrance-free gentle body wash. Cleans the area without irritating fine lines or color accents while you shower.
-
Aquaphor Healing Ointment. A thin layer for the initial healing window so fine line channels do not crust excessively and remain ready for a touch-up if needed.
7. Peter Parker Classic Spider Mark on the Shoulder
The classic spider mark is the most straightforward fandom cue and looks clean on rounded shoulder anatomy. Expect low to medium pain for the fleshy shoulder cap and a session under 30 minutes for a compact emblem. A common mistake is cramming legs into too tight a space which makes the emblem read as a blur later. For placement, the shoulder lets you scale from tiny to small without losing shape. Stylistically this works with scoop-neck tees or layered chains that echo the horizontal line of the collar, try a scoop neck tee when you want selective reveal. Plan to check a stencil while standing and moving the arm to ensure the spider mark sits correctly on the muscle curve.
8. Subtle Chest or Collarbone Web Accent
Collarbone web accents read like jewelry because they follow the bone line. The sternum and collarbone areas can be more sensitive, so expect higher pain and a session that may be split into shorter passes if needed. The usual error is adding tiny web filigree that crowds the clavicle and fails to read after healing. Keep the strands simple and let negative space do the work. For session comfort wear an open-collar shirt or a fitted tank so the artist has stable access. A properly scaled collarbone web tends to age predictably, but thin single-needle strands near the bone can blur faster than the thicker connecting lines.
9. Inner Bicep Spider Head Icon
The inner bicep is private by default and suits a head icon that is meaningful to the wearer. Fair warning, inner biceps can shift with muscle use so ask for slightly bolder line weight than the reference art to keep eye shapes intact. A typical session is 20 to 40 minutes and pain ranges medium due to thinner skin while the arm is relaxed. A common mistake is over-detailing inside the head at a tiny scale. For session wear pull on a sleeveless top so the artist can work with a relaxed arm. Because this placement is mostly hidden, it is a favorite for people who want a quiet fandom signal that only shows when they lift their arm.
10. Small Thigh Panel Minimalist Scene
Thigh panels give you room to keep minimalist storytelling without tiny losses in detail. This placement allows a slightly larger minimalist panel that preserves negative space and pose clarity. Sessions run 30 to 90 minutes depending on the panel size, and pain varies by individual. A frequent planning error is choosing thigh placement for a tiny, detail-heavy image that would be better as a larger design on the same thigh. For showing off the piece wear bike shorts or high-cut summer shorts so the panel reads cleanly, try biker shorts that sit high enough to reveal the upper thigh edge. Thigh skin usually keeps crisp edges longer than wrist or fingers, but expect a possible color or line touch-up after a few years.
11. Forearm Spider-Sense Motion Lines
Motion-line concepts let you hint at the character without literal depiction. Outer forearm motion marks are low to medium pain and take about 15 to 45 minutes. A real mistake is placing tiny motion strokes too close together so they merge during healing. Ask for clear spacing between strokes and a slightly heavier line on the primary pulse to preserve rhythm at the one and two year marks. For outfit pairing this design looks great with layered streetwear or a lightweight jacket sleeve pushed back, try a lightweight jacket for an easy peek.
Frequently Asked Questions
Q: How small can a Spider-Man minimal tattoo be and still read after healing?
A: Aim for a size floor of about 1.5 inches for mask or head shapes and slightly larger for pose silhouettes. Tiny wrist or finger emblems under one inch often lose internal separation as the skin settles, so test a printed stencil at the exact size on your body before committing.
Q: Should I go black-only or add a red accent for character recognition?
A: Black-only is the safest path for long-term crispness because saturation and contrast tend to remain steadier. A single restrained red accent can make the design read instantly as the hero, but plan for color touch-ups later and keep the red small so it does not dominate the black linework.
Q: Where can I find healed portfolio examples and local artists without naming individuals?
A: Search hashtags like #spidermantattoo, #minimalisttattoo, and #spiderverseink on Instagram and TikTok with location filters to narrow to nearby studios. Reddit threads in r/Spiderman and r/TattooDesigns are good for peer-shared healed photos and sizing debates. Focus on portfolios that show healed shots rather than only fresh stencil or new-ink photos.
Q: What should I wear to the appointment for a collarbone or shoulder placement?
A: For collarbone work wear a fitted scoop-neck or a button-up that you can easily pull down to expose the clavicle in its normal worn state. For upper-arm or shoulder pieces a tank top or sleeveless tee gives the artist unobstructed access and keeps the fabric from rubbing during the session.
Q: How often will minimalist Spider-Man tattoos need a touch-up?
A: Expect some touch-up likelihood around year two to three for very fine-line work, and possibly sooner for finger or hand placements because of friction. Simpler blackwork emblems may go longer without correction, but plan on a realistic touch-up conversation as part of your appointment follow-up.
Q: Does placement change the pain a lot for these ideas?
A: Yes. Areas over bone like the ankle and collarbone are higher on the pain scale than fleshy zones like the calf and shoulder. Inner bicep and ribs can be more sensitive too, so short passes or numbing strategies are common for those spots.
Q: Will a minimalist design look generic instead of Spider-Man?
A: Add one unmistakable cue such as the eye contour, a single red eye accent, or a specific web curve so the piece reads as the hero rather than as a generic spider. That single focal choice preserves the minimalist intent while keeping the fandom signal obvious over time.
