
A lot of the tiny ladybug posts online look perfect in the fresh photos and worry people later when the ink softens. Popular micro bugs can still read clean if you size the spots, pick the right line weight, and accept that studio minimums mean a small piece still often costs in the $150 to $300 range. First up is a minimalist red ladybug for a wrist or ankle that reads instantly and shows how scale and spacing prevent the classic "dot that turns into a mole" problem.
1. Minimal red ladybug on the wrist
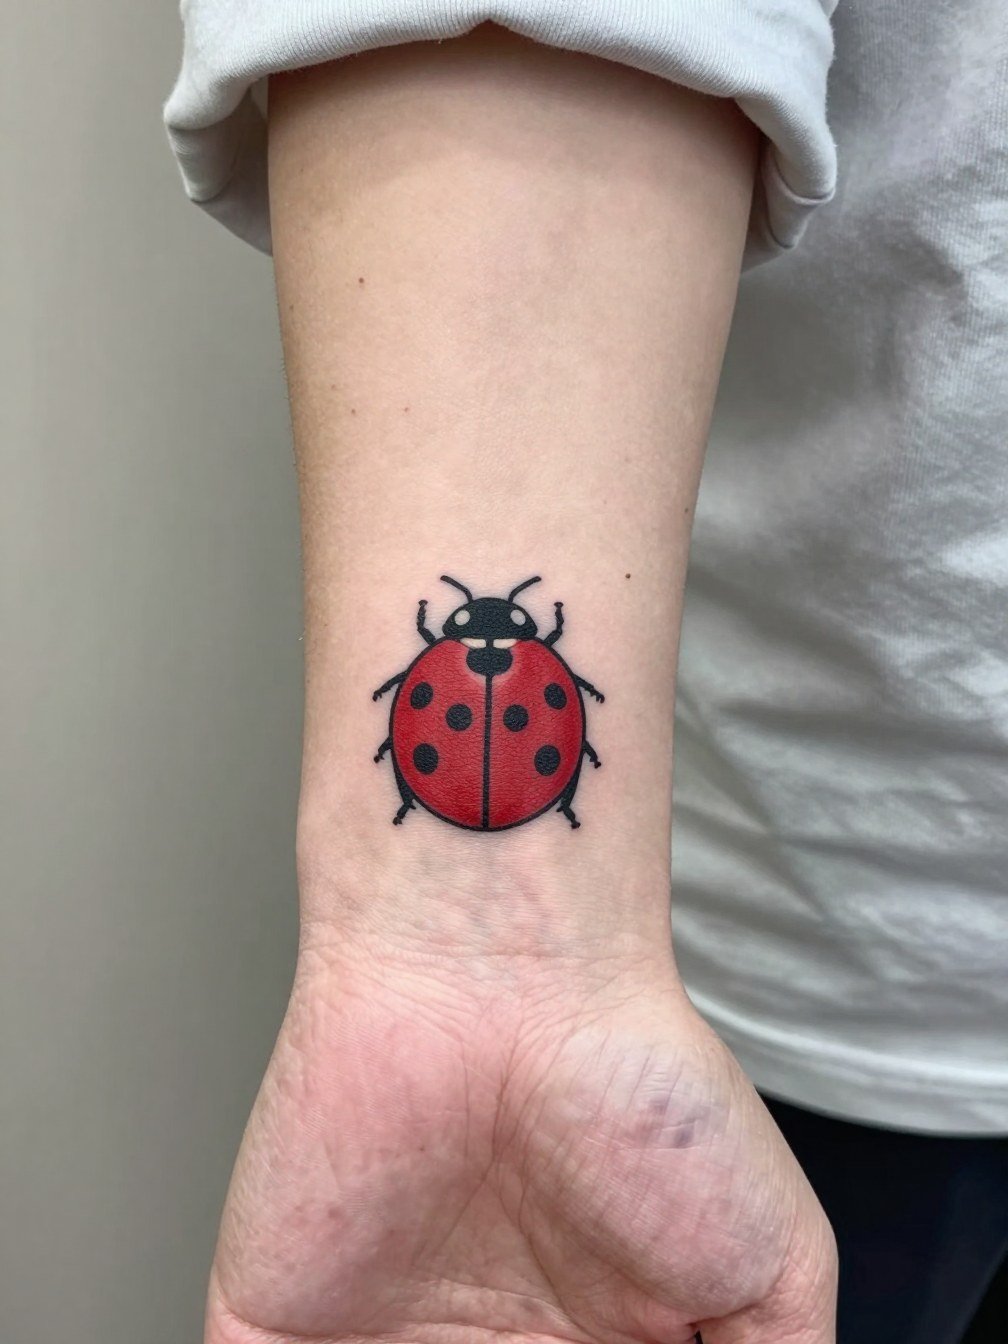
A tiny red ladybug on the inner wrist reads immediately because the color contrast separates the insect from skin at a glance. I recommend asking for clearly spaced black spots and a slightly thicker outline than you see in single-needle flash so the shapes do not merge as the tattoo settles. Common mistakes are making the bug so small the red fills and the spots blur into a single dark dot at year two. Plan for a one-session piece that is quick but sensitive on the wrist because the skin is thin. For showing it off, pair with a thin gold bracelet on the opposite wrist so the tattoo remains the focal point.
2. Ladybug perched on a leaf for the outer forearm
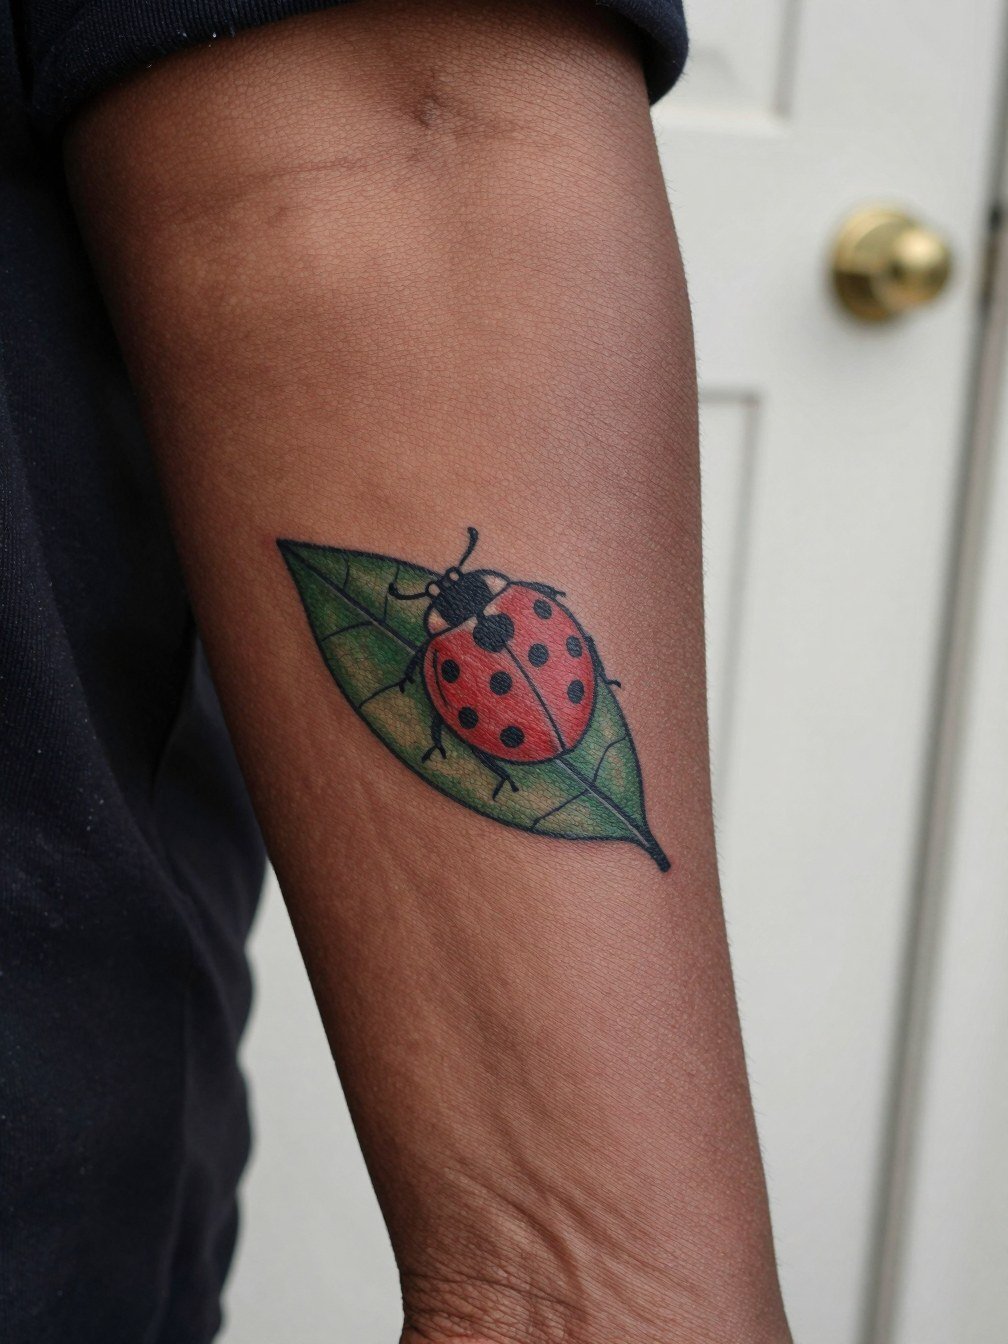
The leaf gives a tiny scene that keeps the ladybug from feeling like a standalone dot. Ask for the leaf veins to be done in fine line stipple rather than heavy shading to keep the composition airy. A version that ages poorly is one with tiny closely packed details in the leaf; those can clump into a muddy patch after a few years. On the outer forearm the piece gets sun exposure, so expect some early softening of color and a likely touch-up at one to three years if you want the red fully saturated. For outfits, this spot pairs well with a linen button down with rolled sleeves so the forearm sits front and center.
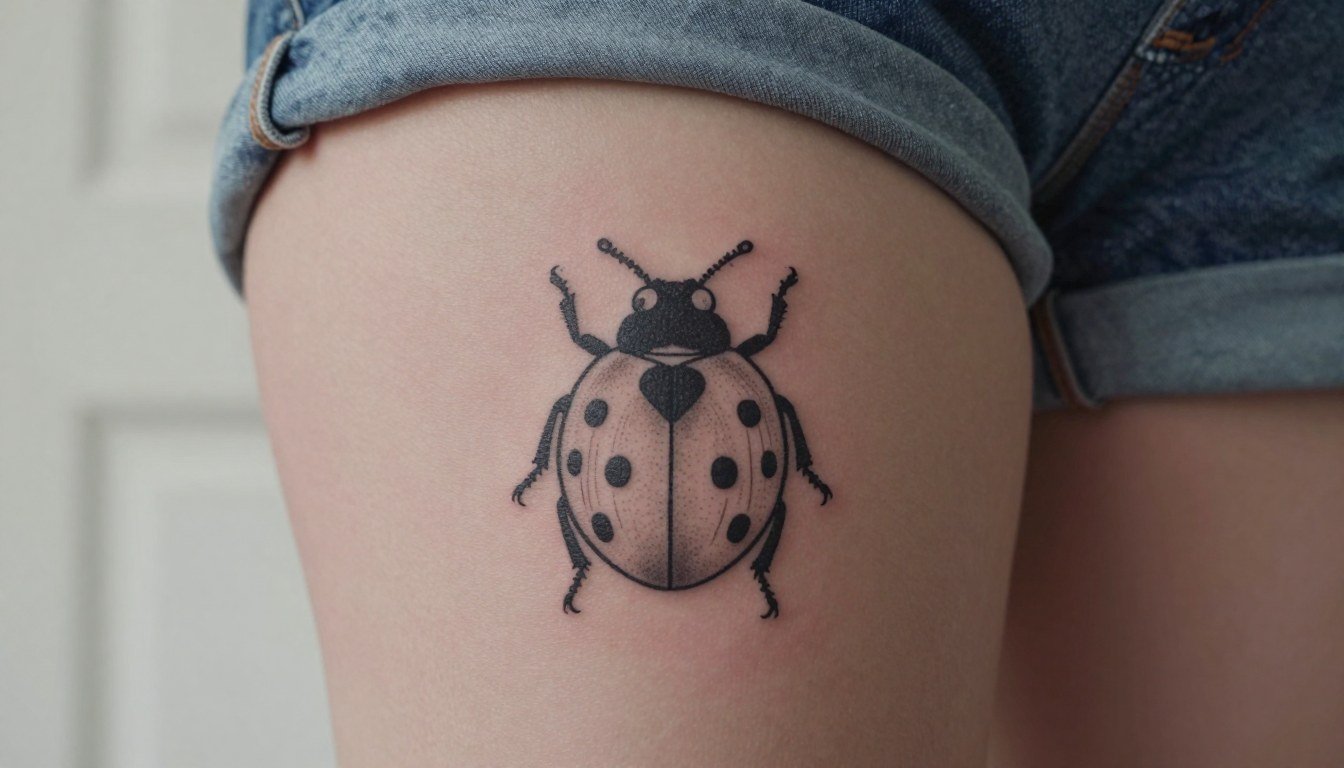
3. Delicate fine-line ladybug in black and gray on the thigh
Fine-line black and gray looks mature and low-key when executed at the right scale. One camp favors ultra-thin single-needle work because it reads elegant and subtle. Another camp recommends a hair heavier line weight because it holds readability better over five years. If you like the quiet look but fear blur, request slightly wider spacing between spots and a gentle stipple instead of solid black fills so the design keeps texture as it heals. On the thigh the session is comfortable with low pain and a one-hour appointment is typical. Pair with high waisted shorts when you want to show the piece selectively.
4. Traditional bold-outline ladybug for readability
Traditional lines give a graphic silhouette that stays legible from a distance and ages more predictably than ultra-fine work. This style is ideal if you want the ladybug to remain readable as a small motif. A common mistake is asking for heavy saturation without clear spot spacing, which adds bulk and can look like a blob later. Expect low pain on the outer forearm and a one-session timing. For a casual show-off look, roll your sleeves or pick a sleeveless top to keep the arm visible without covering the tattoo.
5. Tiny stick-and-poke ladybug on the ankle
Stick-and-poke achieves a handmade charm but the dot work needs care on placement. On the ankle expect more friction from socks and shoes during the first two weeks, so bring shoes that do not rub the design. The common mistake is choosing ultra-micro dot clusters that fade unevenly because the ankle moves and the skin there is thin. Session time is short and the pain is moderate. For showing the tattoo, pair it with strappy sandals once healed so the ankle is visible with minimal distraction.
6. Ornamental ladybug with decorative framing on the calf
Ornamental framing raises a small ladybug into a piece that feels deliberate rather than playful. This is a good pick if you want decorative linework without bright color. Tell the artist you want negative space between the bug and the filigree so both elements age separately. Overworking the filigree too tight is a common error because the tiny lines can fill in. Calf placements tolerate thicker lines and will likely need one to two sessions if the pattern is dense. For outfits, wear mid-length skirts or cropped pants that let the calf show, and consider strappy sandals to complete the look.
Pre-Session Picks
The wrist, ankle, and calf pieces above face different session needs and aftercare realities. A few small items make the appointment and the first week easier.
-
Stencil transfer paper kit. Helps you preview placement on skin before the needle touches down, which matters for micro designs that rely on precise spacing.
-
Topical numbing cream. Applied about 45 minutes before short sessions can reduce wrist and ankle sensitivity without affecting linework.
-
Thin protective film roll. Useful for keeping ankle and wrist tattoos clean when socks and sleeves would otherwise rub the fresh ink.
-
Fragrance free gentle body wash. Soothes skin during showers in the first week without added perfumes that can irritate.
-
Aquaphor healing ointment. A thin coat for the first few days helps retain moisture on delicate linework while the skin closes.
7. Minimal symbolic ladybug with tiny initials on the inner forearm
A small ladybug next to tiny initials can read like a private tribute without text shouting the meaning. Place the initials outside the bug outline so ink migration does not merge the two elements over time. Common mistakes are cramming lettering underneath the bug or choosing script that is too thin. Inner forearm healing is straightforward and the area tolerates fine detail if the line weight is a hair stronger than single-needle. For showing the tattoo, soft neutral knits work well, and wearing a cuffed knit sweater on cooler days frames the inner forearm without covering it.
8. Scar-cover ladybug on the elbow
Covering a scar requires adapting linework and fill to the scar topology so the ladybug reads on uneven skin. Tell the artist the scar age and whether the tissue is raised or indented because healing can be different over scarred areas. One common error is treating the scar like normal skin and using ultra-thin lines that do not penetrate consistently. Expect slightly longer sessions and sometimes two passes to get saturation even. For comfort during the appointment, wear a shirt with sleeves you can roll easily, like a rolled sleeve shirt.
9. Micro 1 cm ladybug behind the ear
Behind-the-ear micro pieces are nearly invisible until you want them to be. The skin here is delicate, so ask for an outline that is a touch bolder than reference to keep the bug readable as it settles. A mistake is insisting on the absolute smallest version with no room for negative space between spots. Pain is low and appointments are quick. Because the location hides easily, it is a strong option for workplace discretion. For session comfort, pin your hair up and bring a lightweight top with an open neckline so the artist can work without fabric interference.
10. Micro patchwork ladybug cluster for arm or leg patchwork
Adding a ladybug to a patchwork cluster keeps it from dominating and lets you build toward a larger sleeve or leg piece. Specify spacing so the shapes age independently rather than merging together in five years. A frequent mistake is duplicating nearly identical motifs close together, which creates a blotch as the inks settle. These run quickly and tolerate touch-ups well if you plan a follow-up session to clean crisp edges. Wear short sleeves for the appointment and style with cropped jeans or skirts to display arm or leg placements.
11. Quirky ladybug with extra legs for personality
Custom variations like extra legs make a standard motif feel personal and less likely to read as flash. Tell the artist how much quirk you want and show scale comparisons so they adjust line weight accordingly. A real error is asking for whimsical detailing at micro scale without accepting larger sizing, which can lose the character as the tattoo ages. Forearms handle this style well and the session is comfortable. For outfits, rolled-up linen shirts create a laid-back frame that complements the playful vibe, and pairing with a rolled sleeve shirt keeps the arm visible.
12. Slightly larger ladybug to avoid the "mole" effect on the wrist
If your top worry is the design turning into a dot, choose a slightly larger scale and ask for spot spacing that leaves healthy skin breaks. The common debate here splits into two camps. One camp likes micro scale because it is discreet and discovery-based. The other camp prefers larger sizing because it preserves spot definition and prevents the tattoo from resembling a mole after a few years. Sizing up by a few millimeters changes how the piece reads at a glance and reduces the need for touch-ups down the line. For showing it off, wear a clean watch-free look and a short sleeve tee.
13. Feminine-leaning delicate ladybug for ankle or inner forearm
A softer, rounded ladybug reads cute without being juvenile when done with restrained shapes and limited color. If you do not want the design to skew overtly feminine, ask for slightly more geometric spots or a less rounded body silhouette to neutralize the mascot feel. Fine-line feminine versions can look refined but require a touch-up sooner than traditional work. Inner forearm placement offers low pain and visibility control. Soft knits and slim bracelets on the opposite arm pair well with this aesthetic, and a dainty bracelet stack complements the look without competing.
14. Blackwork ladybug for a more neutral, graphic silhouette
If you want a neutral or less "cute" feel, blackwork gives the ladybug a graphic identity that reads like a design element more than a mascot. A pitfall is filling too much black without clear spot separation, which can flatten the bug into an ambiguous dark shape. Blackwork ages predictably and often needs fewer color touch-ups. Calf placements let you go slightly larger without losing the subtlety. Pair with cropped pants or skirts and consider strappy sandals to show the piece when you want it visible.
15. Micro realism ladybug with tiny highlight for detail
Micro realism can give the ladybug a three-dimensional look, but that white highlight must be carefully placed and sized. Realistic tiny highlights are lost when placed on very small pieces that then blur. Ask for a scaled mockup so you can see how the highlight holds at actual size. Expect moderate pain on the ankle and a short session. For visibility, low-profile sneakers or cropped jeans work well with this approach, and choosing cropped straight jeans makes the ankle easy to display.
16. Neo-traditional ladybug with muted palette for a grown-up vibe
Neo-traditional styling brings control and color choice that can read less overtly feminine. Pick muted reds or warm browns instead of candy red to get a toned-down palette. A mistake is overcrowding the small canvas with too many decorative elements. Neo-traditional lines age nicely if they are not too fine. For sessions, forearm work is straightforward. Roll up a linen shirt for the appointment and for show-off looks, choose a linen button down.
17. Ladybug as a filler piece between larger tattoos
Using a ladybug as a filler lets you tie together larger pieces while keeping the motif small. Ask for intentional negative space so the bug does not visually compete with nearby work. A frequent mistake is placing fillers too close to bold pieces, which leads to visual crowding as edges soften. Sessions are quick and placement is flexible. Styling choices should consider the surrounding art, and cropped sleeves or rolled shirts work well when you want to show the combined layout.
18. Tiny compass-style ladybug that doubles as a subtle symbol
Combining a compass motif with a ladybug gives quiet symbolism without explicit text. Be specific about the exact geometry you want so the artist can scale line weight appropriately. Tiny geometric lines that are too fine will break up and blur, so request slightly wider single-needle lines for the compass points. Inner forearm sessions are comfortable and the area shows healed detail well. For a subtle show-off, use cuffed shirts or soft neutral knits to frame the design and consider a neutral crew tee.
19. Ladybug on a tiny flower for memorial subtlety
A ladybug paired with a tiny flower creates a private tribute without explicit wording. Keep the emblem small and avoid adding large text because that changes the balance. People sometimes add too many elements trying to make the meaning obvious, which ends up cluttering the composition. For a memorial piece, ask the artist to put initials in negative space rather than next to the bug to preserve clarity. Ankle placements are discreet and pair well with low-profile sneakers or sandals once healed.
20. Geometric silhouette ladybug for a modern, neutral look
Geometric approaches strip the motif down to shapes that read as design elements. This helps make the ladybug feel less feminine and more modern. A common mistake is overusing fine lines in small geometry, so ask for modest line thickness to preserve crispness at one and three years healed. Inner bicep work is sensitive but hides easily for professional settings. For session wear, bring a tank top so the artist has full access and the area is free of friction during healing.
21. Tiny ladybug on the collarbone for selective visibility
Collarbone placement looks delicate but the area moves and gets sun exposure, so spacing and line weight matter. If you want subtle visibility, place the bug slightly off-center and request a stable outline so the piece does not smear into nearby skin texture. One error people make is picking single-needle outlines that soften too quickly in this exposed area. Sessions on the upper chest are short but can be slightly more painful. Wear a scoop or V-neck top for the session so the artist can reach the area without fabric shifting.
22. Tiny ladybug as a thumb or finger accent
Hand and finger tattoos are highly visible and subject to faster fading because of washing and movement. For a lasting result, ask the artist to thicken key lines slightly and accept that periodic touch-ups may be needed. Underestimating how the skin there renews is the most common mistake. Expect higher discomfort and a brief session. For initial healing, avoid tight gloves and for showing the piece, consider minimal accessory choices so the tattoo is not obscured.
23. Subtle dot-work ladybug for a soft, textured look
Dot-work gives a soft texture that reads differently from solid fills and can feel more like a mark of craft. Discuss the density of stippling with the artist because tight dots can migrate into a mushy tone if placed too small. A mistake is asking for heavy stippled shading on a tiny canvas without room for negative space. Calf placements tolerate dot-work well and the session is comfortable. Pair with midi skirts or cropped trousers to display the textured effect.
24. Tiny ladybug with a geometric halo for modern contrast
A halo circle frames the ladybug and keeps it legible as a design element rather than a literal insect. If the halo line is too fine, it will blur into a ghost ring later, so request modest thickness. The usual error is using a micro circle with single-needle line that disappears quickly. Inner forearm placement makes the halo visible and the session is low discomfort. Opt for cuffed shirts or rolled sleeves to let the geometric contrast be seen.
25. Large-enough, readable ladybug to avoid blur over time
If longevity is your top priority, size the ladybug so the spots have breathing room and the outline is crisp. People often try to minimize scale to hide the tattoo, and that makes the piece vulnerable to blurring into a spot. Choosing a slightly larger size prevents that and reduces the need for early touch-ups. Wrist placements can be sensitive but are easy to heal with careful aftercare. For a simple show-off, remove bracelets from that wrist during the first few weeks and later choose a clean, watch-free look.
Frequently Asked Questions
Q: Will a tiny ladybug look like a mole after a few years?
A: It depends on the scale and the spacing. If the design is ultra-micro with tiny filled spots and ultra-thin outlines it can soften into a single dark mark over time. Choosing a slightly larger size, clearer negative space between spots, and modestly heavier line weight improves long-term readability.
Q: How much should I expect to pay for a simple ladybug tattoo?
A: Prices vary by studio and region, but small simple pieces commonly fall in a range around $150 to $300 because many shops have minimums that cover setup and sterilization. Expect that tiny size alone does not guarantee a tiny price because labor and studio standards factor into the final quote.
Q: Should I pick red color or black and gray for a tiny ladybug?
A: Red reads instantly and gives the classic look, while black and gray is quieter and may age more subtly. If you want a bright, recognizable insect choose red. If your priority is a toned-down, mature look, choose black and gray and ask for higher contrast in the spot spacing so the motif remains legible.
Q: Where can I find healed ladybug examples and local portfolios?
A: Search Instagram and TikTok with phrases like "ladybug tattoo," "fine line ladybug," "traditional ladybug tattoo," and "small bug tattoo" while using location filters. Browse Reddit threads in relevant tattoo communities to see conversations about how pieces aged. Focus on portfolios that include healed photos or posts labeled with weeks or months healed.
Q: What placement hides a ladybug for work but still lets me show it on weekends?
A: Inner forearm and upper thigh offer selective visibility. The inner forearm can be covered with long sleeves and shown with rolled cuffs. The upper thigh remains private until you choose to reveal it. Both have manageable pain and typically heal cleanly when you follow normal care.
Q: How often will a tiny ladybug need touch-ups?
A: Touch-up timelines depend on line weight, color saturation, and placement. Many small fine-line pieces may benefit from a minor touch-up within one to three years if you want the color and edges to remain crisp. Expect that hands, fingers, and ankles commonly need touch-ups sooner because of friction and washing.
