
Shops that book first-timers see the same pattern. People want something simple, black, and easy to hide, but small choices like line weight and placement decide whether a piece reads clearly at year three. This piece walks through small, beginner-friendly designs and the practical tweaks that keep them legible, plus the aftercare splits new clients argue about in waiting rooms so you can choose a design that still looks crisp after a few summers.
1. Fine Line Word on Inner Forearm
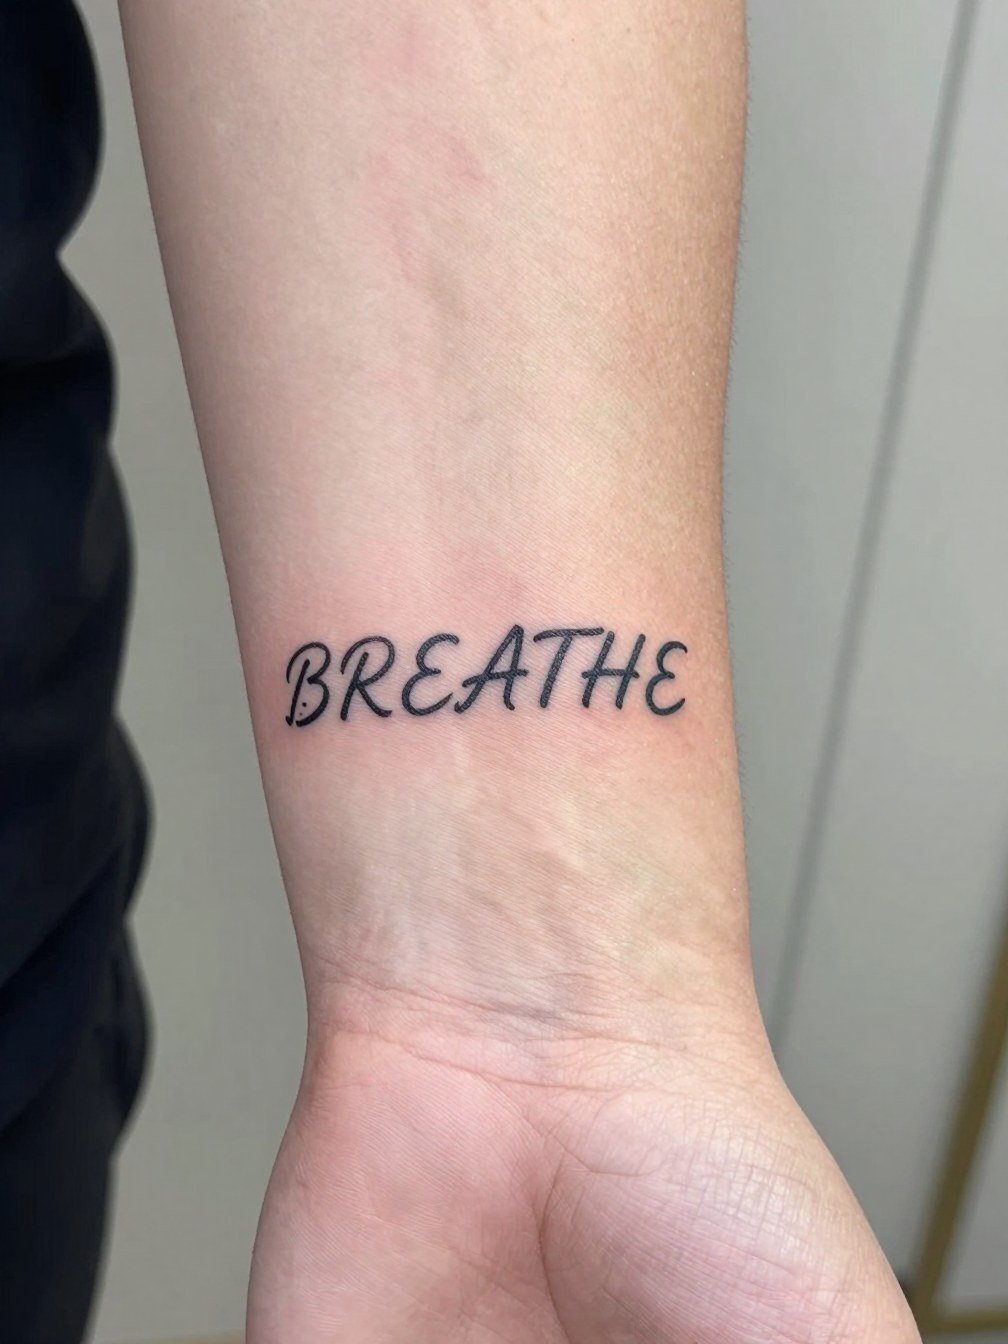
A short script on the inner forearm is a classic starter choice because it reads easily and sits flat on a low-motion surface. Request slightly heavier line weight than the faint single-needle sample you saved so the letters do not blur into a thin grey line after a couple of years. The session feels mild, a steady five to seven out of ten on most pain charts for this spot, and it usually wraps in under an hour. Common mistakes are asking for letters too small or squished together. Wear a rolled cuff shirt to show it off, and bring a short sleeve tee for the session so the artist can work with the palm-up surface exposed.
2. Tiny Cross on the Wrist
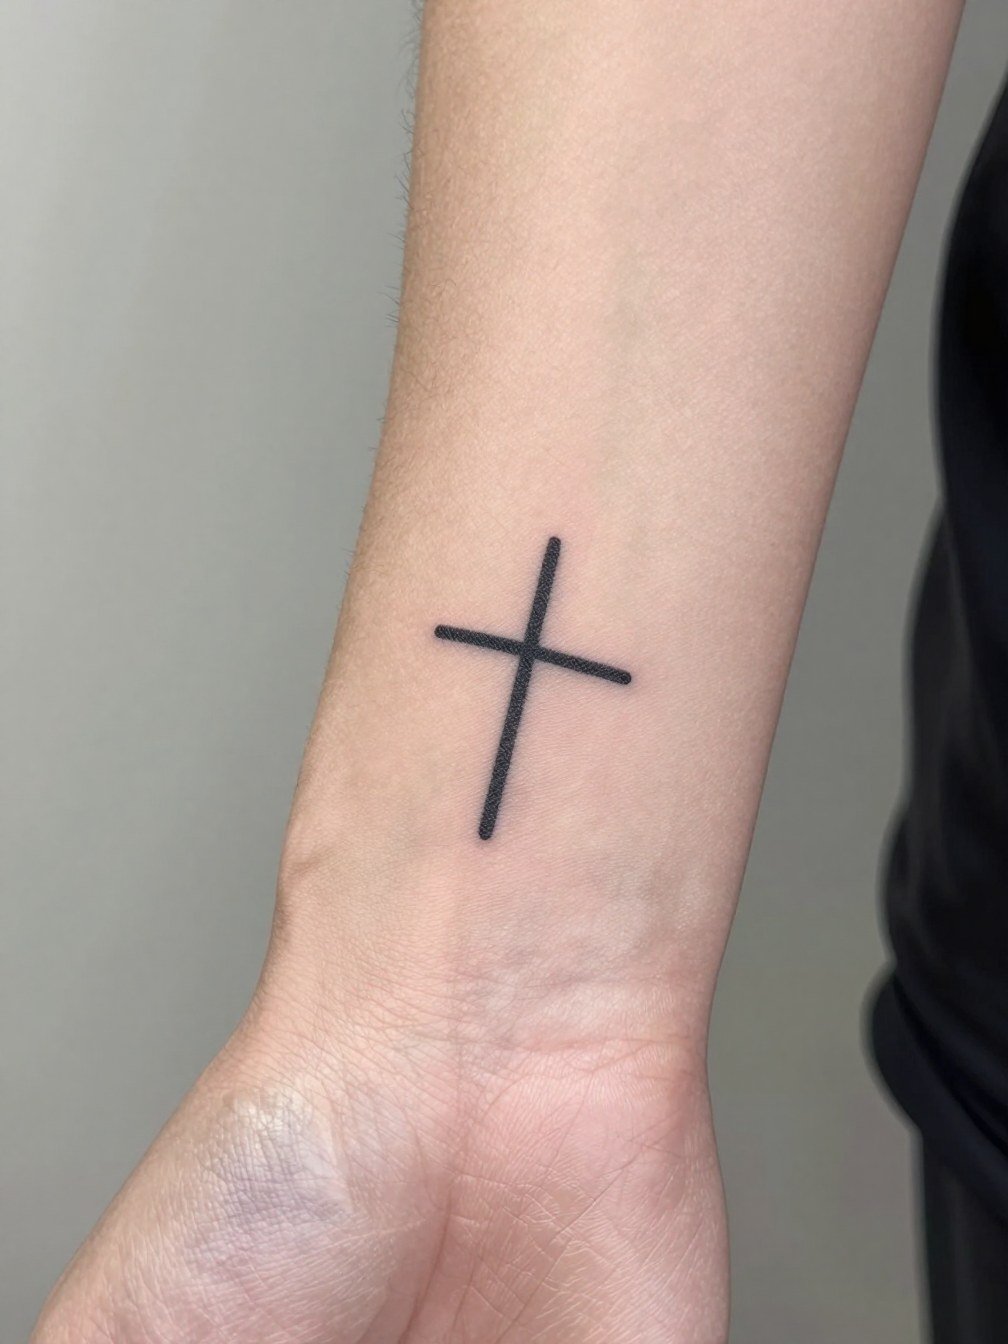
A wrist cross is micro and immediate visibility makes it useful for daily reminders. Ask for a compact, balanced proportion so the arms of the cross do not become indistinct as the skin moves. The wrist can be a three to five out of ten pain spot because of the thin skin and bone close to the surface. Session time is quick, often under 30 minutes. Watch for overfiddly filigree which ages poorly on this high-motion spot. Pair it with a thin bracelet on the opposite wrist to keep the look intentional, and wear a short sleeve tee to the appointment so the artist has clear access. Thin bracelet
3. Minimal Mountain Line on Inner Forearm
A thin mountain horizon reads modern without requiring heavy shading. Make sure the peaks have room. Ask the artist to preview the negative space and increase peak spacing slightly so the silhouette does not blur at two years. The inner forearm heals predictably and usually needs a single short session. A common mistake is chaining tiny peaks too close together. For session wear, bring a loose button-down you can roll up so the artist can place the stencil with minimal skin movement.
4. Roman Numerals on the Wrist
Roman numerals are compact and discrete, but the font matters more than people think. Choose a slightly wider serif or monospaced type so numerals do not blend into a thin grey bar as the skin ages. The wrist can ache during the session because of bone proximity, but the work is short. A frequent mistake is shrinking the numerals to fit under a watchband. If you want to show it, use a short sleeve or no watch on that side during the first two weeks. For the appointment pick a short sleeve tee rather than a tight long sleeve so the artist can see the placement while you stay comfortable. Short sleeve tee
5. Small Geometric Symbol on Forearm
Geometric marks look deliberate when they have breathing room. Ask the artist to scale the symbol so lines are at least one to two millimeters thick. Thin hairline geometry on textured skin often softens into a blur. The outer forearm tolerates clean straight-line work and usually finishes in one short session. If you plan future pieces, place the symbol in a spot that can later be framed rather than boxed in by clothing curves. For showing it, push sleeves up on fitted crewnecks or use a rolled sleeve tee to highlight the crisp shape. Fitted crewneck
6. Tiny Memorial Initial on Inner Forearm
A single initial is discreet and meaningful without overcomplication. Request a slight increase in line thickness relative to the reference so the letter retains shape during the peel and first year. Expect light to moderate discomfort on the inner forearm and a session that usually finishes quickly. Scabs and peeling are normal, so avoid picking. Pair the piece with a rolled cuff shirt and a minimal watch on the opposite wrist to keep attention balanced. Rolled cuff shirt
Heal Smart
The tiny wrist and forearm pieces above share two practical needs: clean gentle washing and thin, breathable moisture for the first week.
- Stencil transfer paper kit. Handy if you want a preview of line weight and spacing on the skin before committing, especially useful for scripts and numerals in ideas above.
- Topical numbing cream. Applied about 45 minutes before eases edge sensitivity on wrists without changing how the artist works.
- Thin protective film roll. Useful for tiny placements that rub against clothing in the first 48 hours.
- Fragrance free body wash. Cleans the area without irritating fresh linework during daily showers.
- Aquaphor healing ointment. A thin coat during the very first 48 hours can soften tightness before switching to a light lotion.
7. Black Rose Outline on Outer Forearm
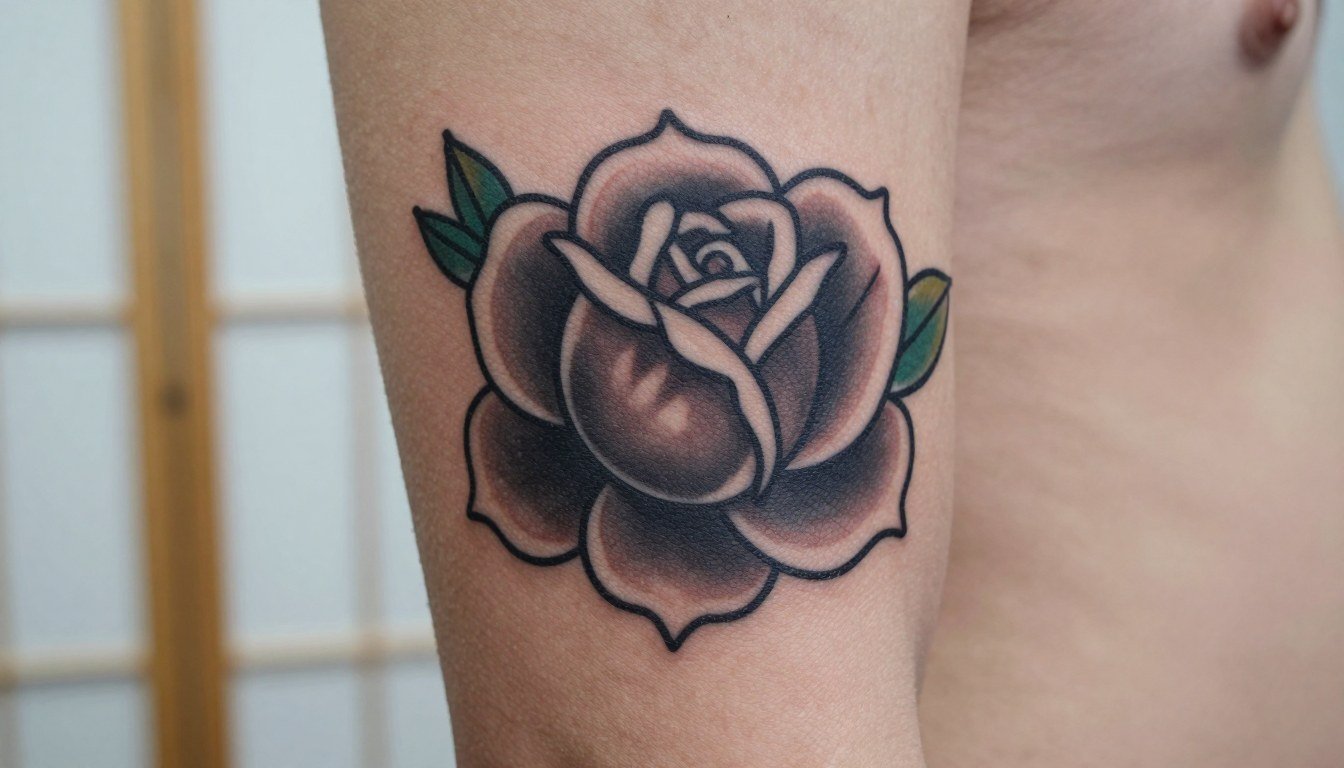
A compact black rose balances masculinity and age resistance because the main shapes are bold rather than hairline detail. Ask for solid black outlines and orderly stipple shading instead of ultrafine leaf veins which tend to blur. The outer forearm is forgiving and sessions for this size usually finish in under two hours. Common errors include tiny petal veins that vanish after a touch-up. For showing this piece, fitted tees or rolled sleeves keep the silhouette readable.
8. Minimal Compass on Forearm
A minimalist compass reads as travel-suggestive without excess detail. Have the artist increase spacing between the cardinal points and use a slightly heavier needle for the primary marks so the compass keeps shape when healed. Outer forearm sessions are straightforward and pain is usually low. Avoid tiny directional ticks that get lost. When you want the piece visible, wear rolled sleeve tees or a lightweight overshirt to frame the symbol. Lightweight overshirt
9. Micro Heartbeat Line on the Wrist
Heartbeat motifs are concise and read well when the line peaks are clean. Ask for slightly bolder peaks rather than whisper-thin lines so the waveform remains distinct at six months. The wrist can sting but the session is brief. A typical mistake is stretching the waveform too long which makes it vulnerable to blurring at the ends. For a clean reveal, avoid bracelets on that wrist during the first two weeks and wear a short sleeve top to your appointment.
10. Simple Animal Outline on Upper Arm
A small animal outline on the upper arm is classic for first-timers who want symbolism without commitment. Ask for a simple silhouette rather than internal micro detail. The upper arm is one of the easiest healing spots and sessions are short. Mistakes include requesting a tiny internal eye or whisker lines that disappear with time. For showing off, sleeveless tanks frame the piece and make the curve of the deltoid part of the composition. Muscle tank top
11. Single Word Collarbone Script
Collarbone scripts sit in a low-motion zone that photographs well when spaced right. Request letter spacing that keeps each character legible at three inches rather than trying to cram the word into a smaller band. The area can feel sensitive depending on lean tissue but the session time is short. A common regret is lettering pressed too close to the clavicle line which fades into a shadow over time. Wear an open-collar shirt or a lightweight overshirt to reveal the piece naturally. Open collar shirt
12. Tiny Nape Symbol
A nape symbol is excellent for discretion because hair covers it most of the time. Make sure the mark sits a centimeter below the hairline and has bold primary strokes so the design retains its silhouette. The nape can be sore if you have lots of hair pulled tight during the session, so tie hair loosely. A mistake is tiny inward detail that the skin can obscure. Short hair or an easy updo shows the piece, and wear a crew neck you can lower and lift without pulling at the hair during the session. Crew neck shirt
13. Thick-Outline Anchor on Wrist
An anchor with a solid outline will age better than a filigreed version because the main silhouette stays readable. Ask for slightly heavier outlines and avoid tiny rope details. The wrist is a delicate spot but the bold work usually needs only one short session. People often request micro shading inside the anchor which can grey out and look muddy. Keep the design compact and wear a short sleeve top for your appointment.
14. Single-Line Wave on Inner Forearm
Continuous single-line designs look neat on smooth palm-up skin when the line thickness is slightly bolder than the hairline reference. Ask for a one to two millimeter baseline so the curve keeps crisp edges as it heals. Inner forearm sessions are comfortable and quick. A common issue is running the line too close to the wrist crease where motion and friction blur it. For the session wear a loose button-down you can roll up with minimal tugging. Loose button-down
15. Micro Geometric Dot Work on Forearm
Dot-work looks crisp when the dots are spaced and not condensed into a solid. Request the artist keep the pattern airy and avoid over-densifying. Outer forearm dot-work can need touch-ups in two to three years if dots soften into lines. Touch-up timelines vary by skin and sun exposure. For showing it, a rolled sleeve tee keeps the repeating pattern visible without crowding. Rolled sleeve tee
16. Narrow Arrow on the Forearm
Arrows need a distinct head and tail so they read across time. Ask for a heavier arrowhead and a slightly bolder shaft so the whole mark holds shape. The forearm is tolerant and sessions are short. A mistake is asking for feather-level detail that becomes muddled after a year. For the session wear a t-shirt you can push up without riding up the torso.
17. Small Palm-Side Knot (Inner Wrist)
Knots work when simplified into bold shapes on the wrist so the interlocking lines do not collapse. Ask the artist to thicken the main strands just enough to preserve the weave. The wrist can be sensitive but small work is fast. A common mistake is packing too much interlacing into a tiny footprint. For the appointment wear a short sleeve tee and keep that wrist bare for stencil placement.
18. Minimal Bar Code Style on Outer Forearm
Graphic barcode motifs stay readable if the bars are spaced to avoid merging. Ask the artist to preview how two or three different spacings read at the size you want. The outer forearm is low risk for blowout here but very tight bars can soften. Sessions are brief and most people need one visit. Wear a fitted crewneck or tee so the artist can place the stencil against flat skin. Fitted crewneck
19. Tiny Crescent on the Wrist
A crescent needs a clean negative-space edge to keep the curve legible. Request a slightly bolder body instead of a whisper-thin crescent so the arc does not fade into a faint shadow. Wrist anatomy can make the outer edge blur if the tattoo sits too close to a crease. For the session wear a short sleeve top and avoid watches or bands on the tattoo side until healed.
20. Simple Wave Ankle Mark
Ankle work needs a design that can handle regular rubbing from socks and shoes. Choose a design with a durable main stroke rather than thin filigree. The ankle can be more painful because of bone, and the session is quick for a tiny mark. People sometimes pick delicate scrollwork that the footwear wears into. Wear jeans with cuffs rolled or ankle-exposing footwear to the appointment so the artist can place the stencil without moving the leg. Rolled cuff jeans
21. Simple Palm-Edge Micro Slash
Palmar-edge tattoos are visible but the skin there heals differently because of frequent washing. Expect more fading over time and plan for a touch-up in 12 to 18 months. Ask the artist for slightly stronger saturation at the initial session to compensate for friction. The sensation can be intense since palm tissue is sensitive. For the session keep the hand relaxed on a flat surface and avoid heavy lotion for the first week.
22. Small Lock Symbol on Upper Arm
The upper arm gives room for simple icons to breathe. Ask for a solid outline and minimal internal detail so the lock remains readable as the arm moves. Pain tends to be low in this area and the session is short. A common mistake is asking for intricate keywork inside the lock which becomes a grey patch over time. For the session wear a sleeveless tank so the artist has clear, unobstructed access. Sleeveless shirt men
23. Tiny Arrow Behind the Ear
Behind-the-ear marks are discreet and heal quickly when the lines are bold enough. Confirm placement a finger-width below the hairline so it shows when hair is up. The area can be tender because of thin tissue. Avoid super fine details since this skin shifts when you move. For the appointment tie hair back in a loose updo that does not pull at the scalp.
24. Clean Geometric Ring on the Bicep
A narrow bicep ring works when the line is a touch heavier than a hairline so it keeps shape around the muscle. Ask the artist to test how the band looks at rest and flexed so the ring reads circular at natural positions. Bicep skin is forgiving and sessions are quick. Avoid micro-dot shading along the band that fills in over time. For a strong presentation, wear a short sleeve that sits right at the rolled cuff to frame the ring. Loose short sleeve
25. Tiny Chevron on the Collarbone Edge
Chevron marks read best when the angle is clear and the ends are slightly reinforced in thickness. Confirm spacing so the chevron does not sit in the clavicle crease. Sensation is variable but sessions are brief. A common regret is placing the mark too close to the neckline of shirts. For showing it wear a wide V-neck or unbuttoned collar so the clean angle sits in view.
26. Small Geometric Solar Symbol on Forearm
Solar symbols work when the center and primary rays are clear and not over-detailed. Ask for a solid center and slightly shorter rays than your reference so they do not blend into a dotted halo later. The outer forearm is low risk for blowout on this scale and will likely only need one session. Avoid tiny inner rays that grey out. For the session wear a rolled sleeve tee and consider a minimal watch on the opposite wrist for balance. Minimal watch
27. Clean Single Dot at the Nape
A single dot is the ultimate micro choice and it ages simply because its negative space is the primary element. Ask the artist to confirm exact millimeter size so it sits bold enough to be seen but not overpowering. The nape can be tender depending on hair position during the session. A regret is requesting a dot so tiny it looks like a freckle at six months. For showing it, wear short hair or tie the hair up loosely so the dot peeks into view without effort.
Frequently Asked Questions
Q: Which aftercare path should I pick, second-skin bandage or dry healing?
A: The community is split on this. One camp favors second-skin wraps because they protect the fresh ink from friction, dirt, and accidental rubbing for the first few days and can simplify day-to-day care. The other camp prefers traditional dry healing or short open-care windows because wraps can tear, trap moisture, or confuse first-timers who are unsure when to remove them. The safest approach is to follow the studio's specific instructions then use a thin, fragrance-free lotion routine once the artist says the initial barrier should come off.
Q: How much moisturizer is too much while a small tattoo heals?
A: Opinions fall into two camps here. One group recommends applying lotion or balm several times a day to prevent cracking, tightness, and itch, especially on drier skin. The other group warns that heavy product layers can suffocate the skin and slow healing and recommends a very thin application once or twice daily. A practical middle way is ointment for the first 24 to 48 hours if advised, then very thin layers of unscented lotion as the tattoo starts to peel.
Q: How long should I avoid sun, pools, and workouts after a wrist or forearm piece?
A: Avoid direct sun and submersion for at least two weeks and preferably longer for public swimming or hot tubs. Do not let the piece sit in chlorinated water or the ocean until the skin is fully closed, which can take two to four weeks depending on location. Light workouts that do not soak or rub the area are usually fine after three to five days if the bandage has been removed and the skin is not weeping.
Q: Where can I find small, healed portfolio examples and local artists who do fine line work?
A: Search hashtags like #firsttattoo, #smalltattoo, #finelinetattoo, and #minimalisttattoo and then filter results by your city on Instagram and TikTok to find portfolios with healed shots. Reddit threads in r/tattoos and r/tattooadvice are also useful for real healing photos and shop feedback, especially for small pieces on wrists and forearms. When you compare shops, prefer portfolios that show healed images at multiple time points rather than only fresh work.
Q: What should I wear to the shop for a forearm or wrist session?
A: For inner and outer forearm work wear a short sleeve tee or a loose button-down you can roll up easily so the artist has unobstructed access. For wrist pieces keep that wrist free of bracelets and watches and wear a short sleeve top. For upper arm work choose a sleeveless tank or something you can slide off without tugging. Loose button-down
Q: How often will small fine line pieces need a touch-up?
A: Expect touch-ups in two to five years for very fine work, often sooner in high-friction areas like the wrist, palm edge, or fingers. Bold silhouettes and slightly heavier line weights will generally need fewer touch-ups. Plan for a follow-up conversation at your six to twelve month mark so the artist can assess settling and recommend any small corrections.
