

Someone I know spent six months bookmarking sacred geometry tattoo photos but still felt lost at booking. The real issue was knowing which style will hold its detail where on your body and what to ask at the consult. I spent time in five shops across Brooklyn and in online threads to see what actually heals well, and what needs touch-ups. Below are 20 design ideas, how they age, and precise notes to bring to your artist.
1. Flower of Life Mandala on Outer Forearm
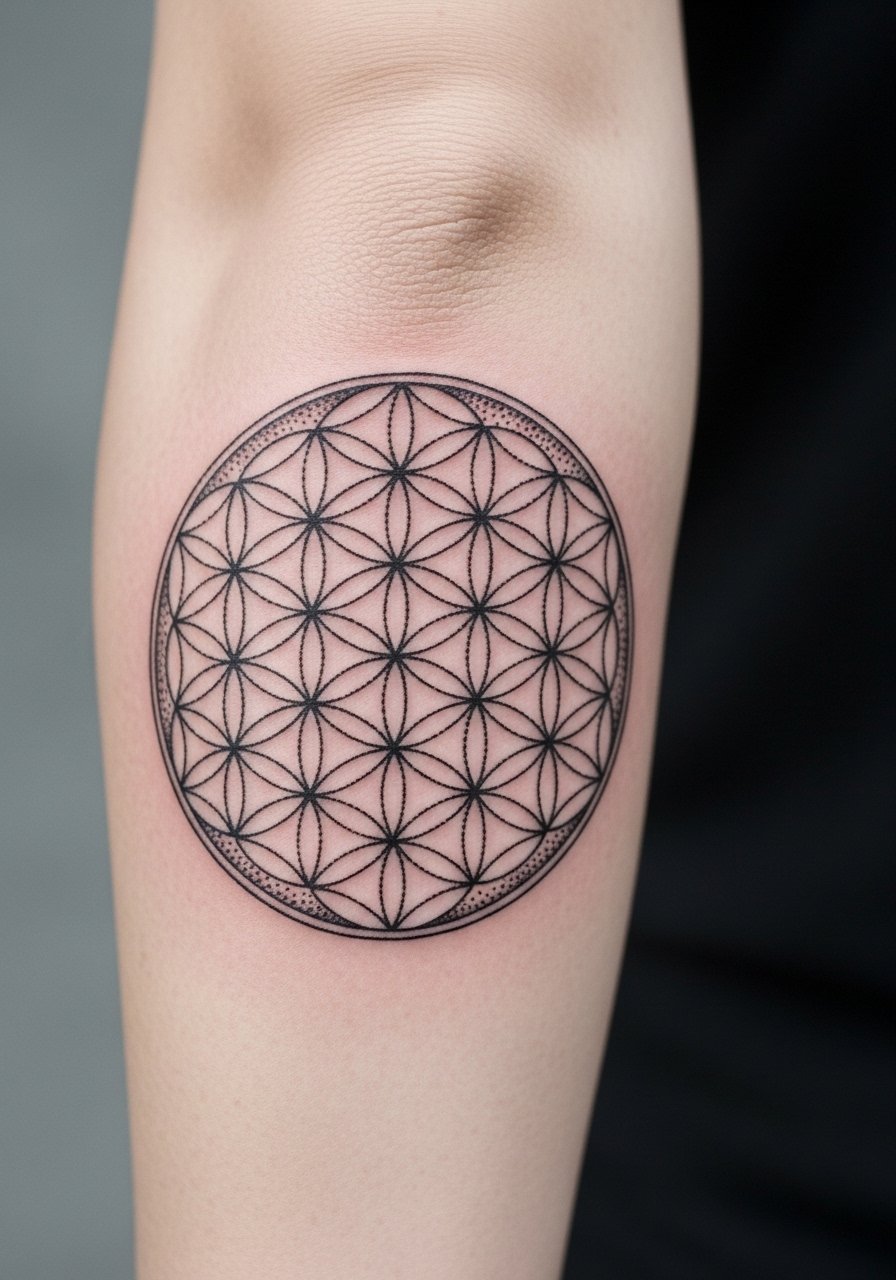
Someone I know first saw this on a friend's forearm and booked it for its compact symmetry. Recommend dot work with slightly heavier linework than a fine-line mandala. Tell your artist you want spaced dots and 1.5 mm line weight so the pattern keeps clarity at 6 months, 2 years, and beyond. Expect mild pain and a typical 90-120 minute session for a medium piece. Common mistake is asking for everything hairline thin, which blurs on active forearms. If you want the same motif on a bicep, ask about scaling the circles so the geometry keeps its proportions.
2. Metatron's Cube Center Chest Sternum
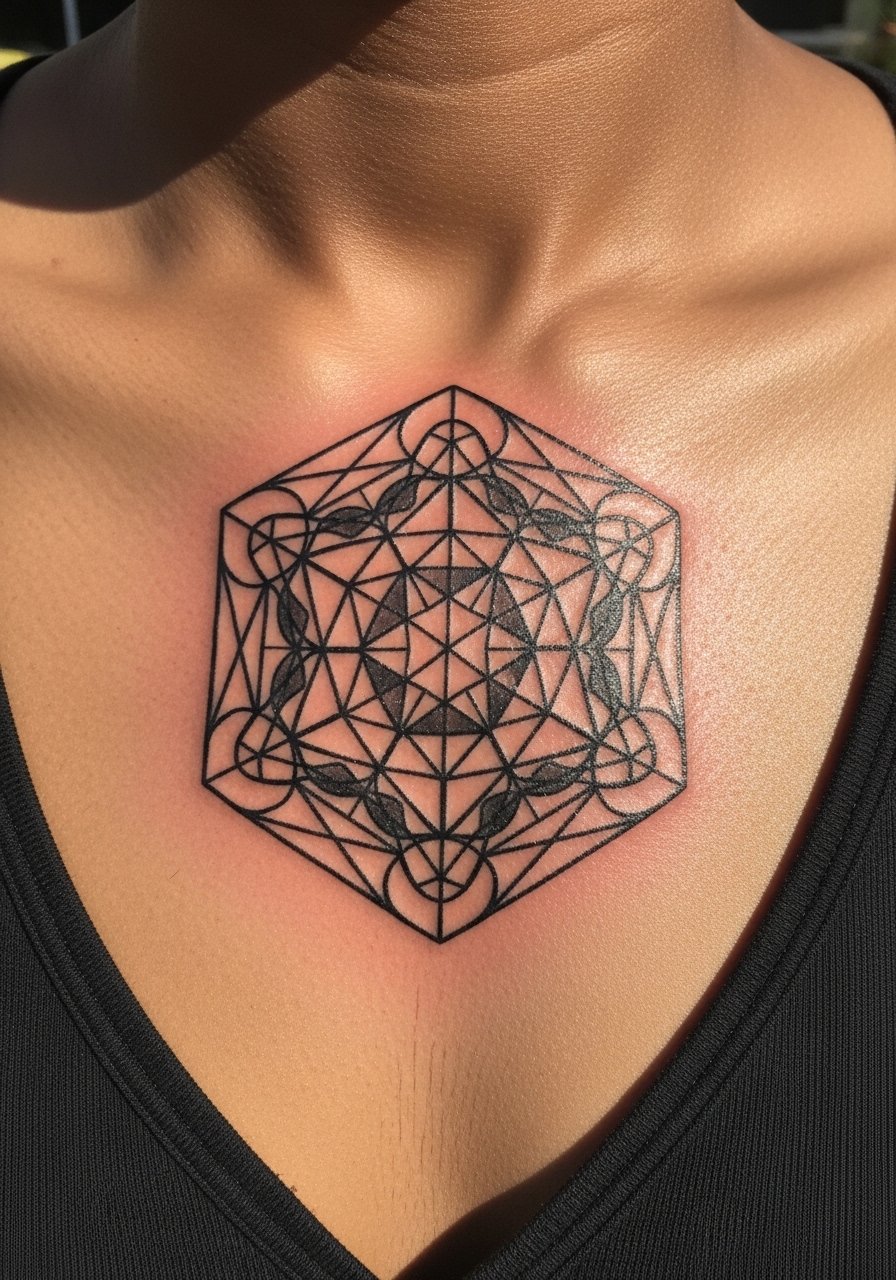
Fair warning, the sternum feels raw especially near the bone. Artists split on whether to keep every tiny connector line or simplify them for longevity. One camp says compact fine connectors blur quickly. The other camp says with precise needle depth and spacing the geometry holds. Tell your artist you want strong primary lines with lighter secondary lines and ask about touch-up timing. This piece often needs 2-3 short sessions. For those who wear low necklines, this reads as a centered, architectural composition. Note that for chest pieces with spiritual roots you may want to adjust direct religious symbols out of respect.
3. Sri Yantra Flowing Thigh Design
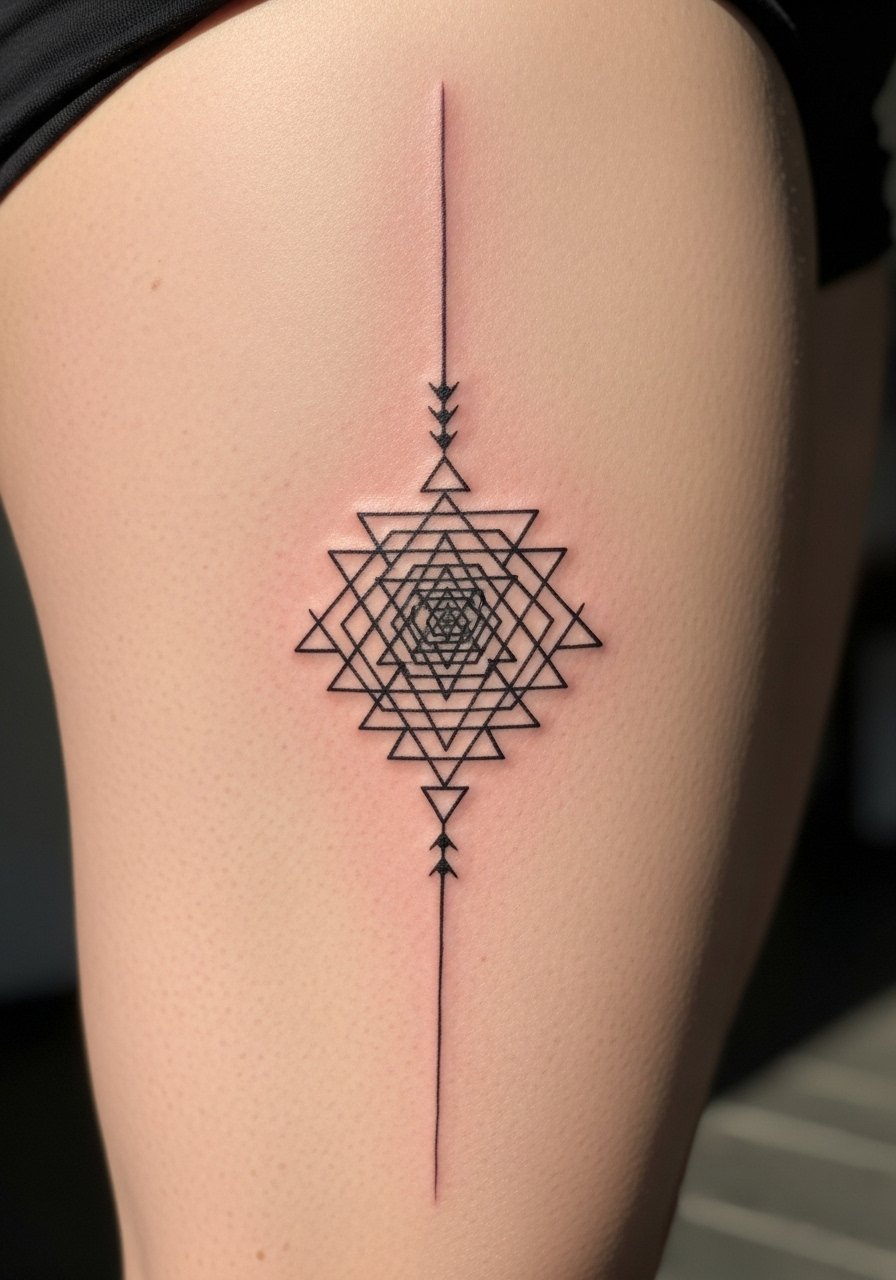
When you book this for the thigh pick references that show the design curving with the muscle. I recommend fine line geometric with measured spacing so the triangles breathe as the leg moves. Expect medium pain and two sessions if you want internal shading. A common misstep is forcing a flat diagram onto a curved canvas. During consult say, "I want the baseline to follow my femur contour" and the artist can map it directly. On darker skin tones ask about dot work contrast to keep the triangles readable over time.
4. Seed of Life Minimal Wrist Cluster
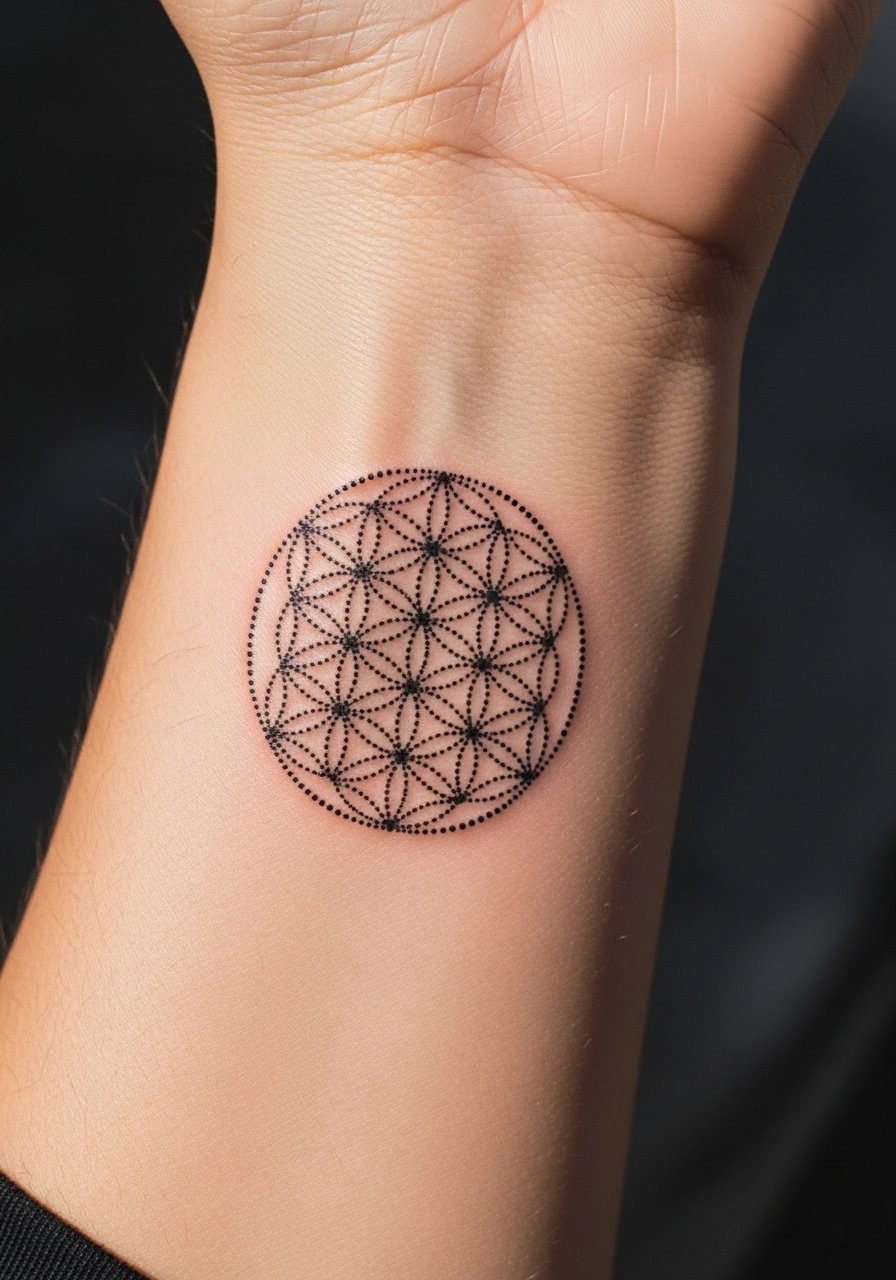
The wrist is a high-movement spot so expect some early fading. Artists are divided about hairline dots here. One side recommends bold dots, the other side says careful spacing with shallow depth keeps the motif delicate. For a wrist cluster ask for slightly larger dots and ask whether the artist prefers a 30-45 minute touch-up at six months. The usual mistake is making the pattern too small. If you want discretion, position the cluster on the inner wrist rather than the outer wrist for easier concealment with sleeves.
5. Fibonacci Spiral Shoulder Cap
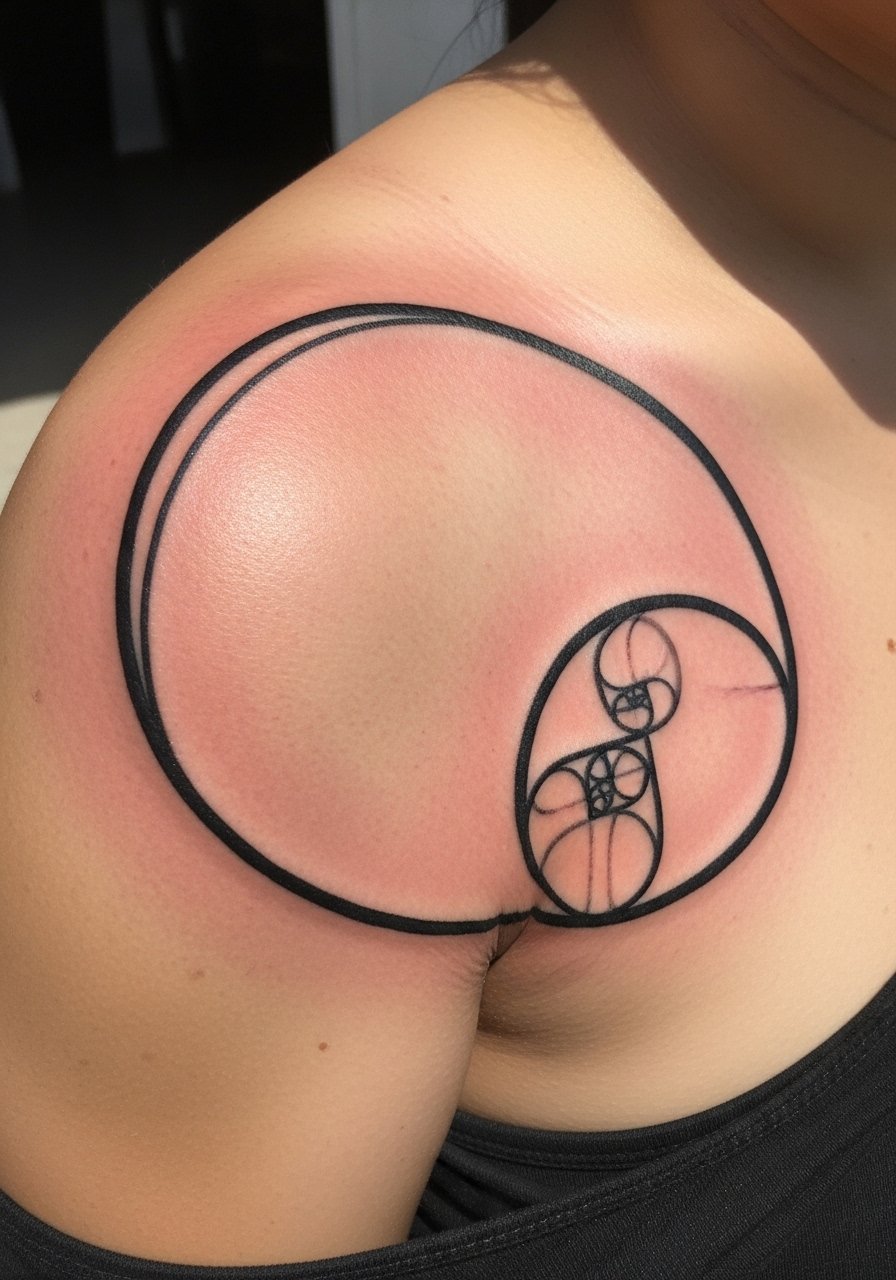
There's a visual impact to a spiral that follows your shoulder cap. Ask for continuous linework that stops before the joint so movement does not distort the curve. This placement feels medium on pain and can be done in a single two-hour session if kept to one color. At six months the spiral should still read clean if the lines had room to breathe. A frequent error is squeezing too many coils into a small area which congests the composition and forces an early touch-up.
6. Platonic Solids Cube Along the Ribcage
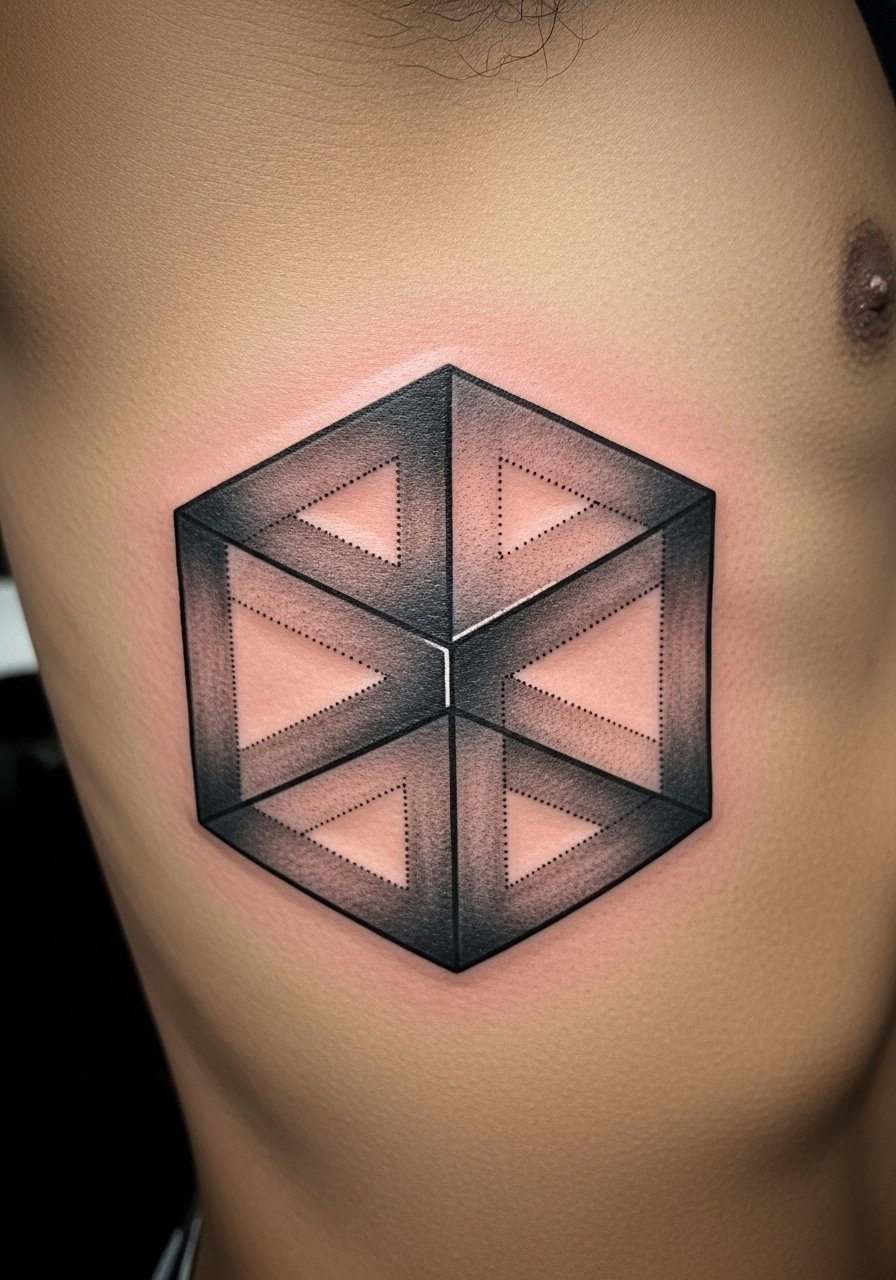
Fair warning, the ribcage is a 7 out of 10 on most pain scales. Artists are split on fine line here. One camp says the skin stretch on ribs blurs thin lines within two years. The other camp argues that with correct needle depth and spacing, fine geometry settles fine. Tell your artist whether you want crisp edges or soft gray shading. This design usually needs three sessions for depth and shading. Common mistakes include asking for ultra-fine connectors without considering aftercare and touch-up timelines.
7. Hexagon Harmony Upper Back Piece
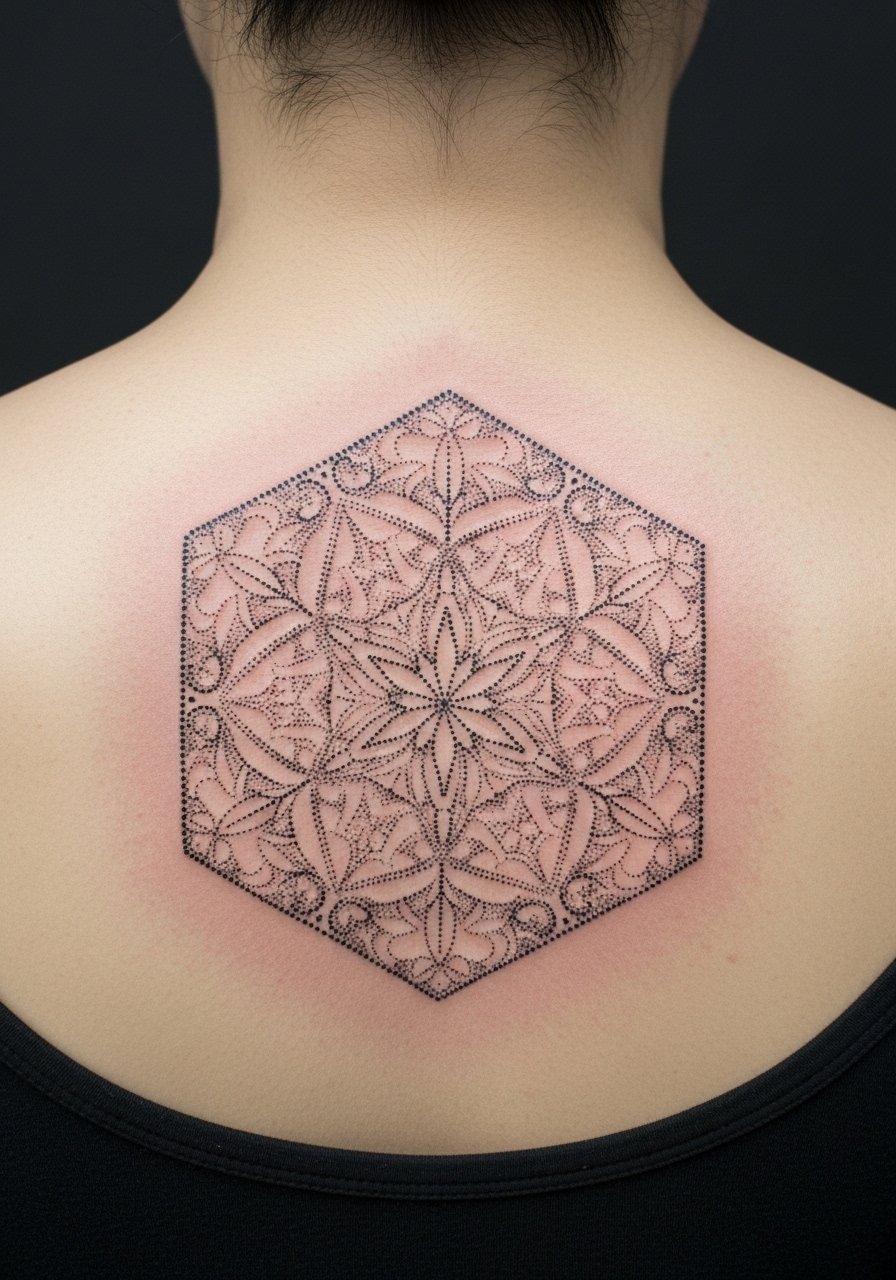
When you want scale and meditative repetition the upper back is perfect because it gives the artist room for detail. Expect multiple sessions, often four or more, and bring photos of healed dot work you like. Tell the artist you prefer dense stippling in the center that feathers outward so the piece keeps depth at two years. A common mistake is rushing a big dotwork piece into one long session which raises swelling and affects stipple saturation. For body changes think about how a high back piece moves with shoulder blades.
8. Triangle-in-Circle Divine Feminine at Ankle
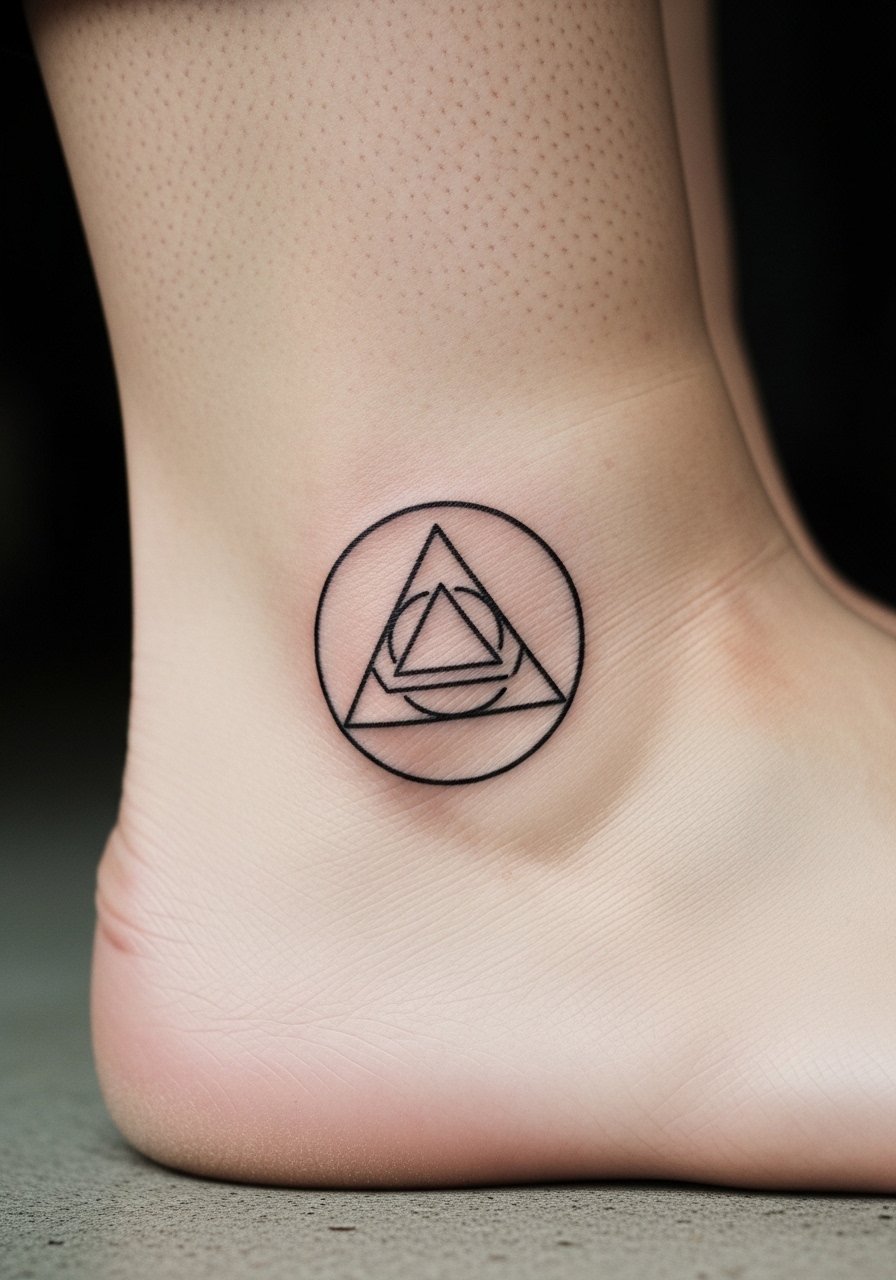
Ankle bone placements are discrete and easy to hide but they scuff during healing. Ask for a bold outline rather than whisper-thin lines so the geometry keeps proportion on the bone. This usually fits into one short session. People often make the design too tiny and regret it when connectors blur. If you work in a setting where visible ankle tattoos matter, consider placement closer to the inner ankle for quieter visibility.
9. Interlocking Star Collarbone Accent
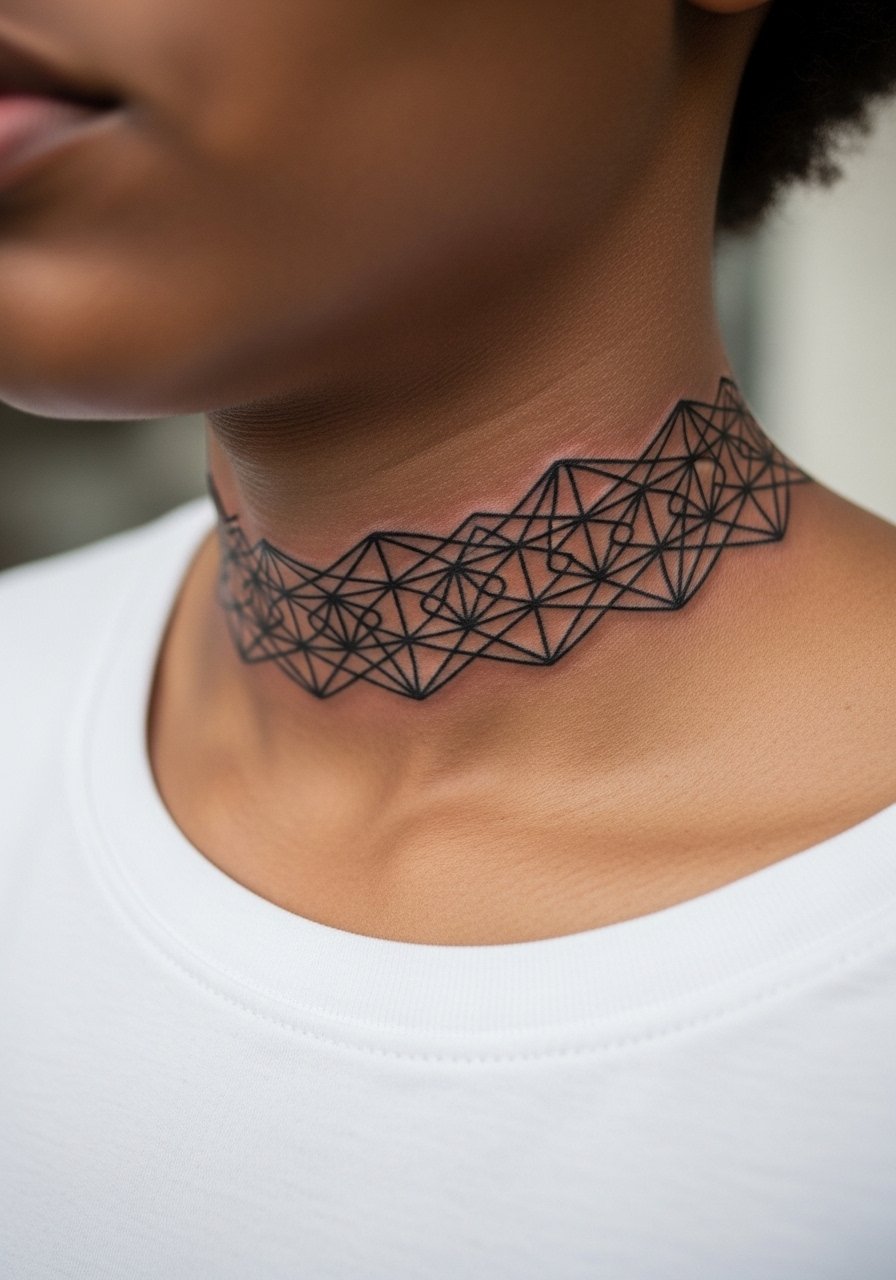
There's an elegant flow to geometry that hugs the collar line. Mention to your artist that the top and bottom points should align with your clavicle so it follows the natural bone rhythm. Expect mild-to-moderate pain and two shorter sessions for precise symmetry. A mistake I see is starting the motif too close to the neck which can make clothing catch during healing. For collarbone designs bring photos that show scale on similar body types.
10. Fruit of Life Multisphere Forearm Sleeve Starter
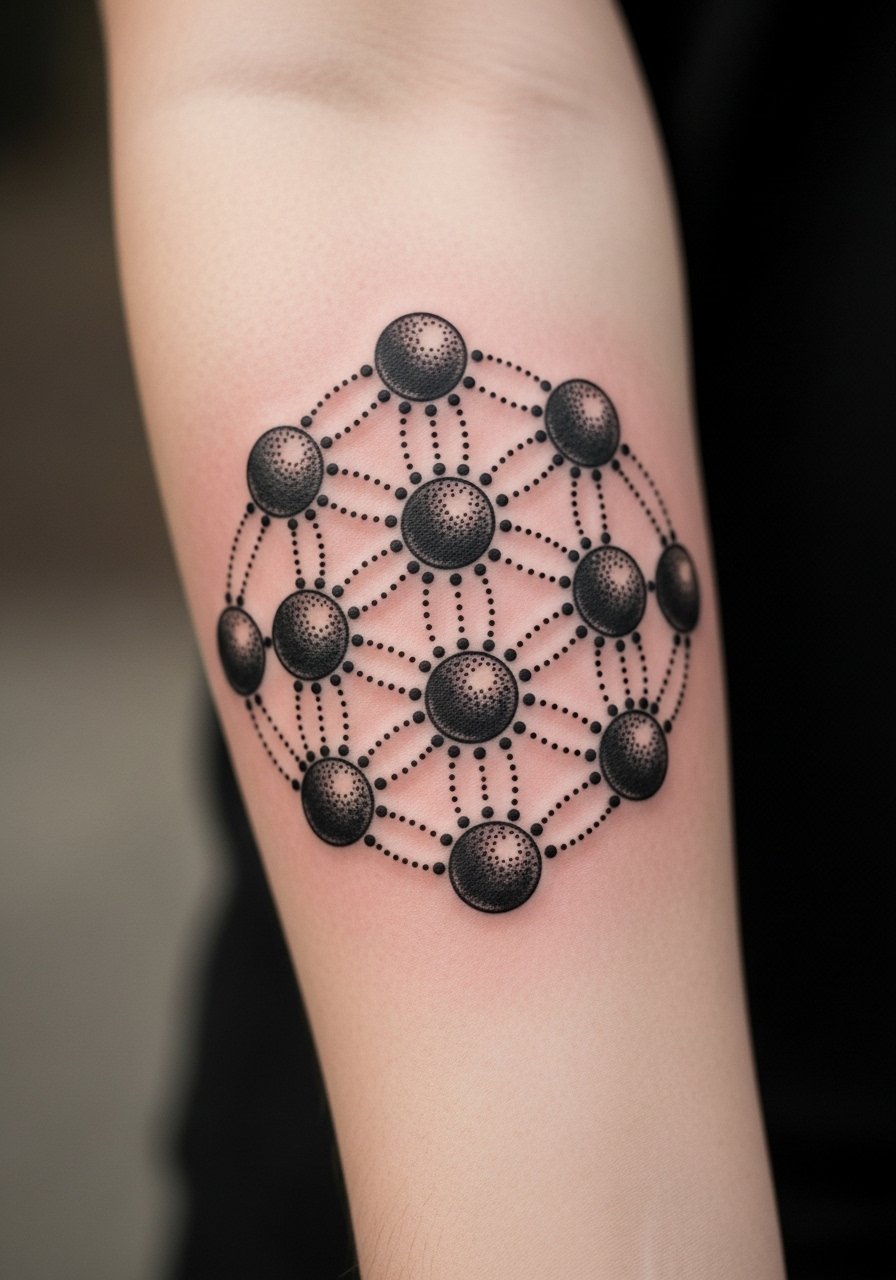
If you plan a sleeve start here because the Fruit of Life nests well into larger compositions. During consult ask your artist how the spheres will flow into additional panels so the forearm reads cohesive. Expect three sessions for a detailed 5 inch start. A real mistake is treating this as a standalone tiny piece; it performs better with planned negative space for future elements. At two years stipple and spheres should keep contrast if placement avoided hotspot areas that rub against wrists.
11. Mandala Spine Cascade
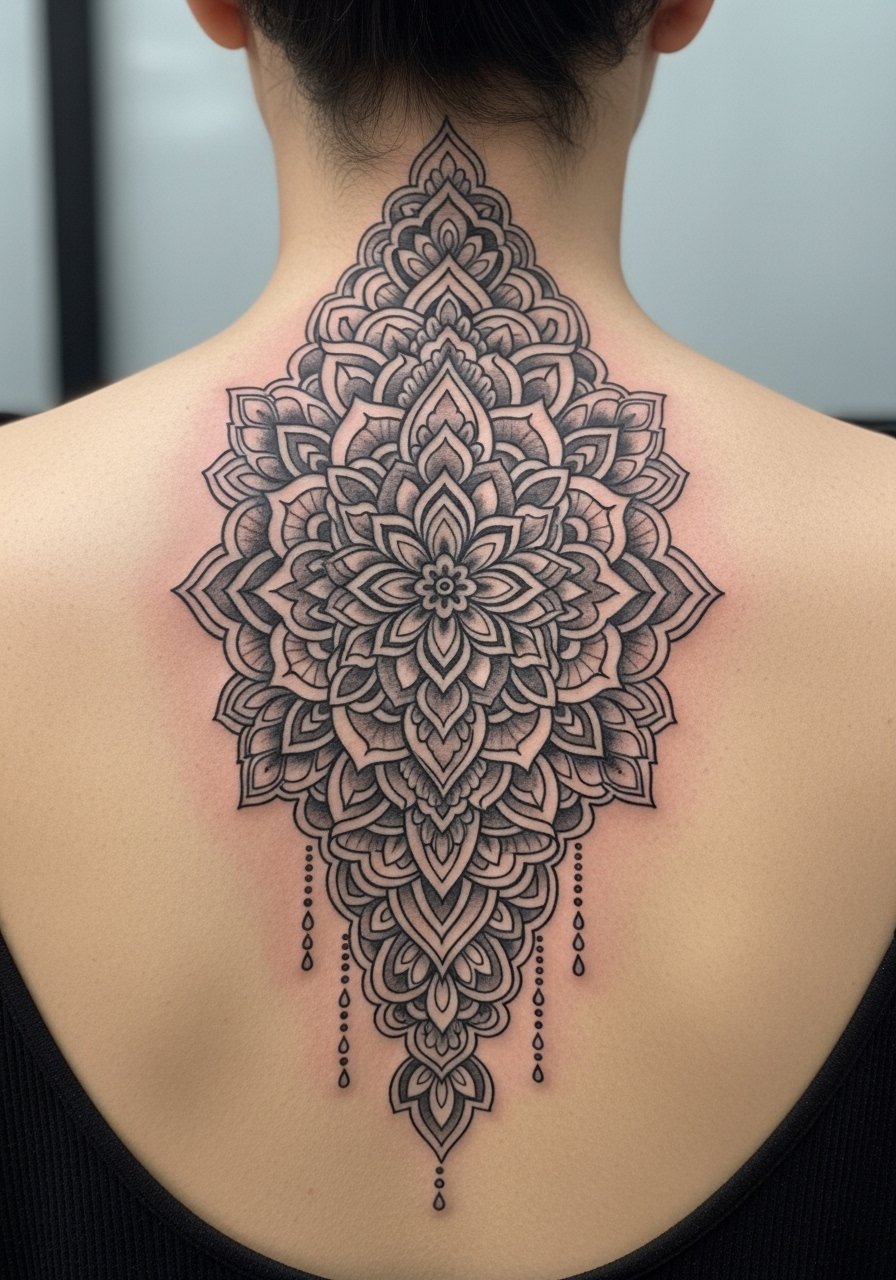
There is a calm rhythm to a mandala down the spine that reads well in fitted tops. Tell the artist you want the centerline to align with the vertebrae for perfect symmetry. Expect multiple sessions and medium-to-high pain where the bone is close. People often ask for too many tiny elements which become indistinct after a year. Plan for a touch-up at year two if you want crisp contrast along the central axis.
12. Metatron Cube Variant on Quadriceps
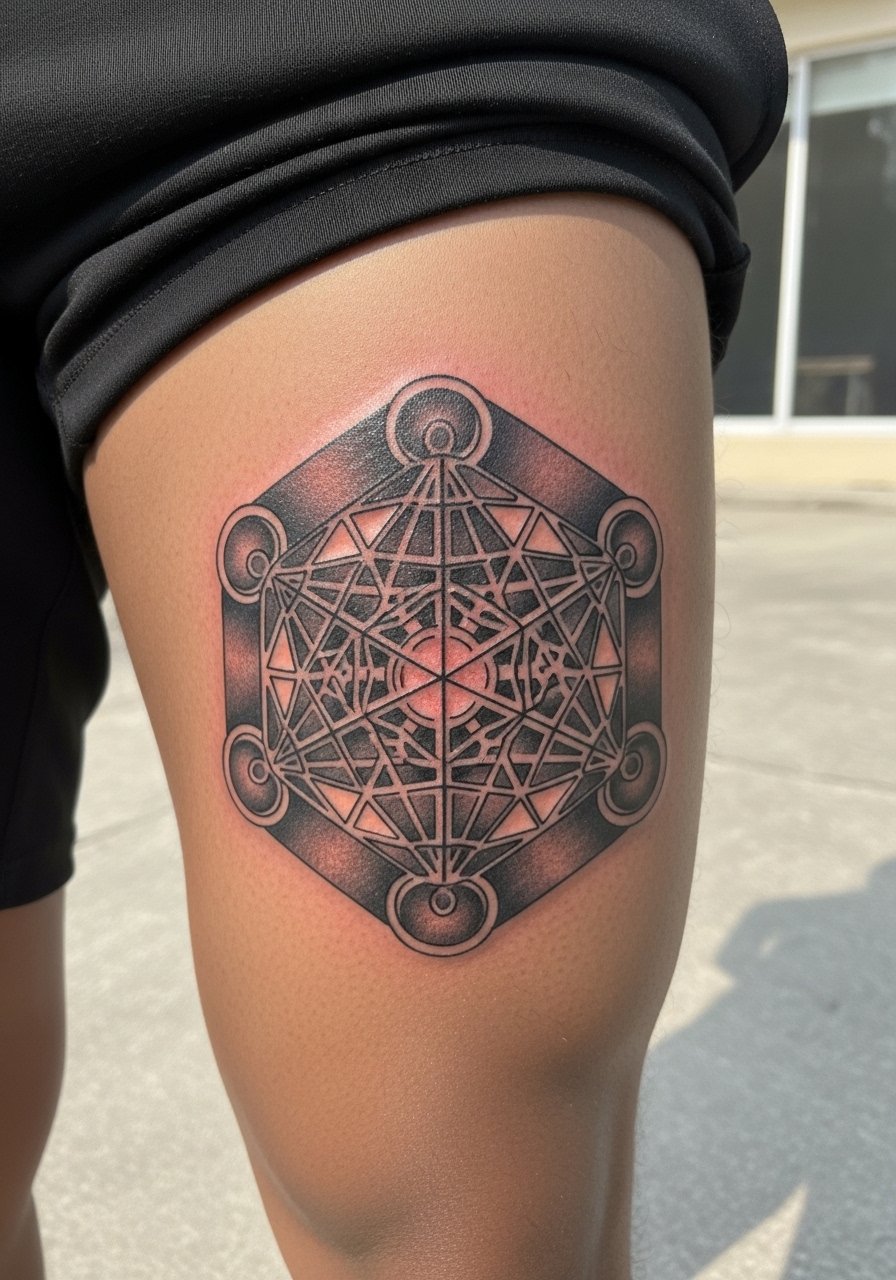
If you train legs this placement follows muscle and looks architectural in motion. A consultation note to bring is "map the cube to my outer quad line" so the form sits with movement. Expect three sessions for full shading and depth. Common mistakes include placing the cube too low near the knee where movement distorts angles. For athletic bodies ask about how muscle gain or tone changes will affect line spacing.
13. Mini Concentric Orb Behind Ear
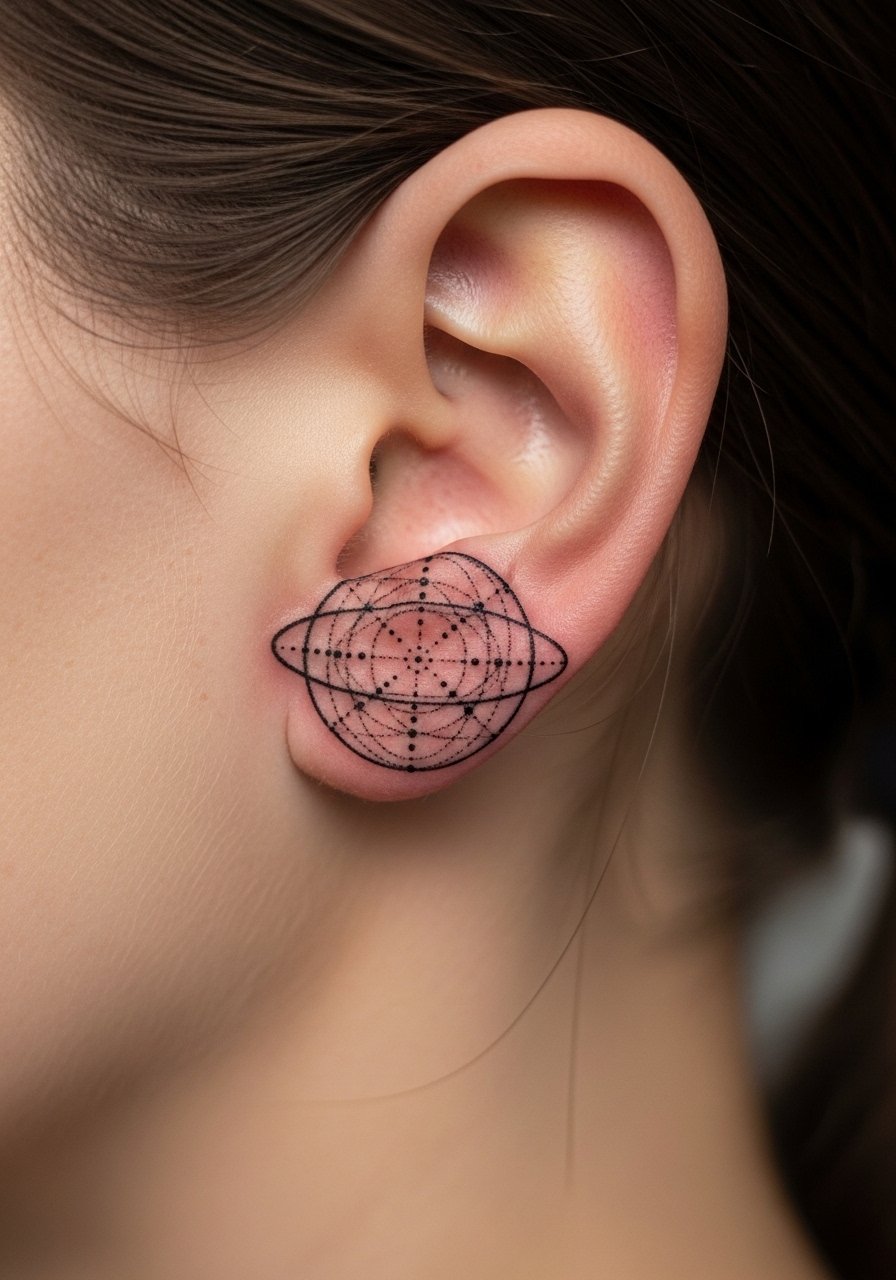
This is an intimate, small-scale option that reads like a discrete symbol. The area is sensitive and requires a precise, steady hand. Tell your artist you want a 1 to 1.2 inch diameter so the concentric rings maintain space. Healing is quick but the skin is thin so expect a tiny touch-up within a year. For behind-ear placements avoid heavy black fills that can look patchy as hair grows and skin oils interact. Note that visibility depends on hairstyle.
14. Rib-Contour Wave Geometry That Follows the Ribs
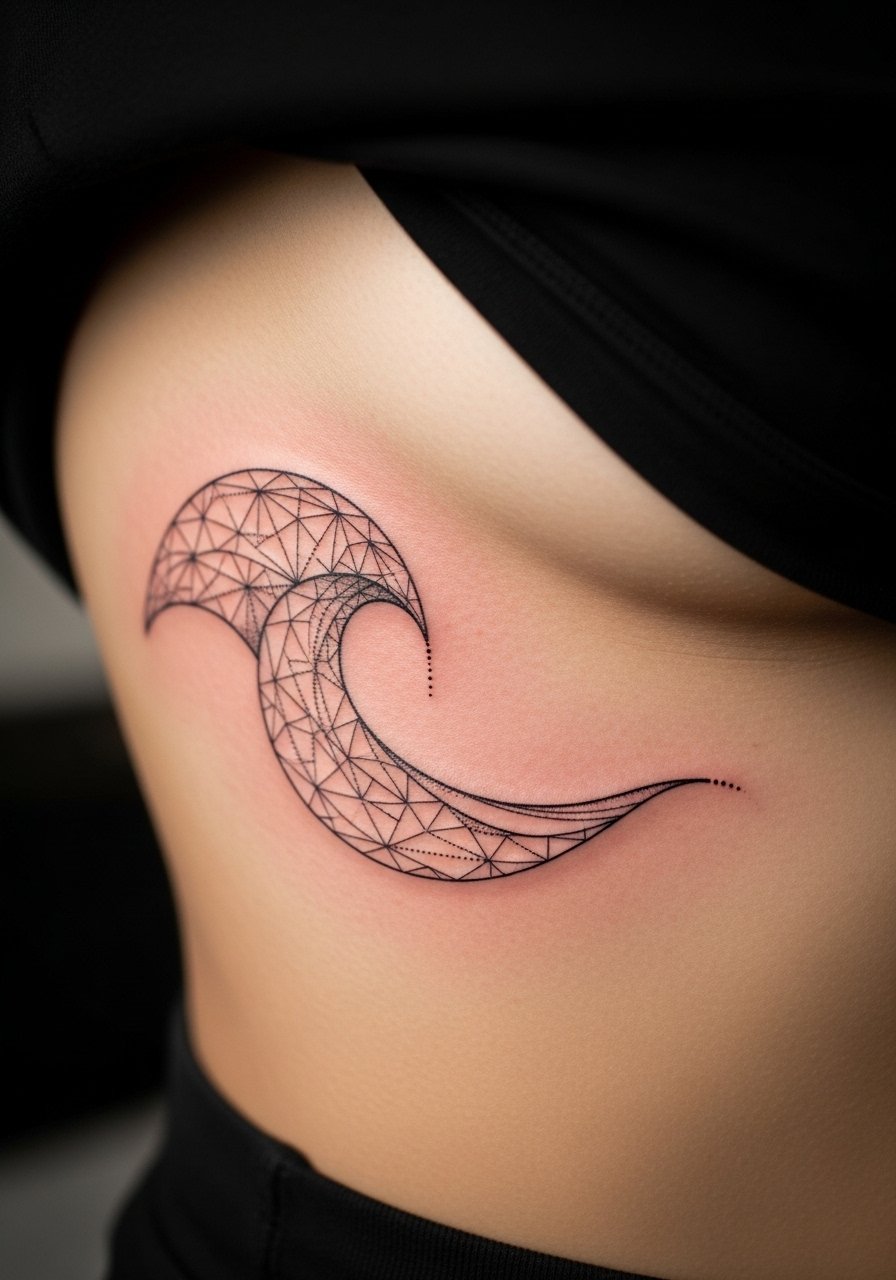
Most competitors ignore designs that truly follow ribs but when done right the pattern flows with breathing. Fair warning, ribs are painful. At consult ask for a mapped stencil while standing and breathing so the artist positions anchors on your anatomy. This design benefits from alternating line weight and stipple to avoid a flat appearance as the torso moves. A common error is applying a flat template with no contour adjustments, which produces distortion after healing.
15. Pectoral Polygon Accent Over Muscle
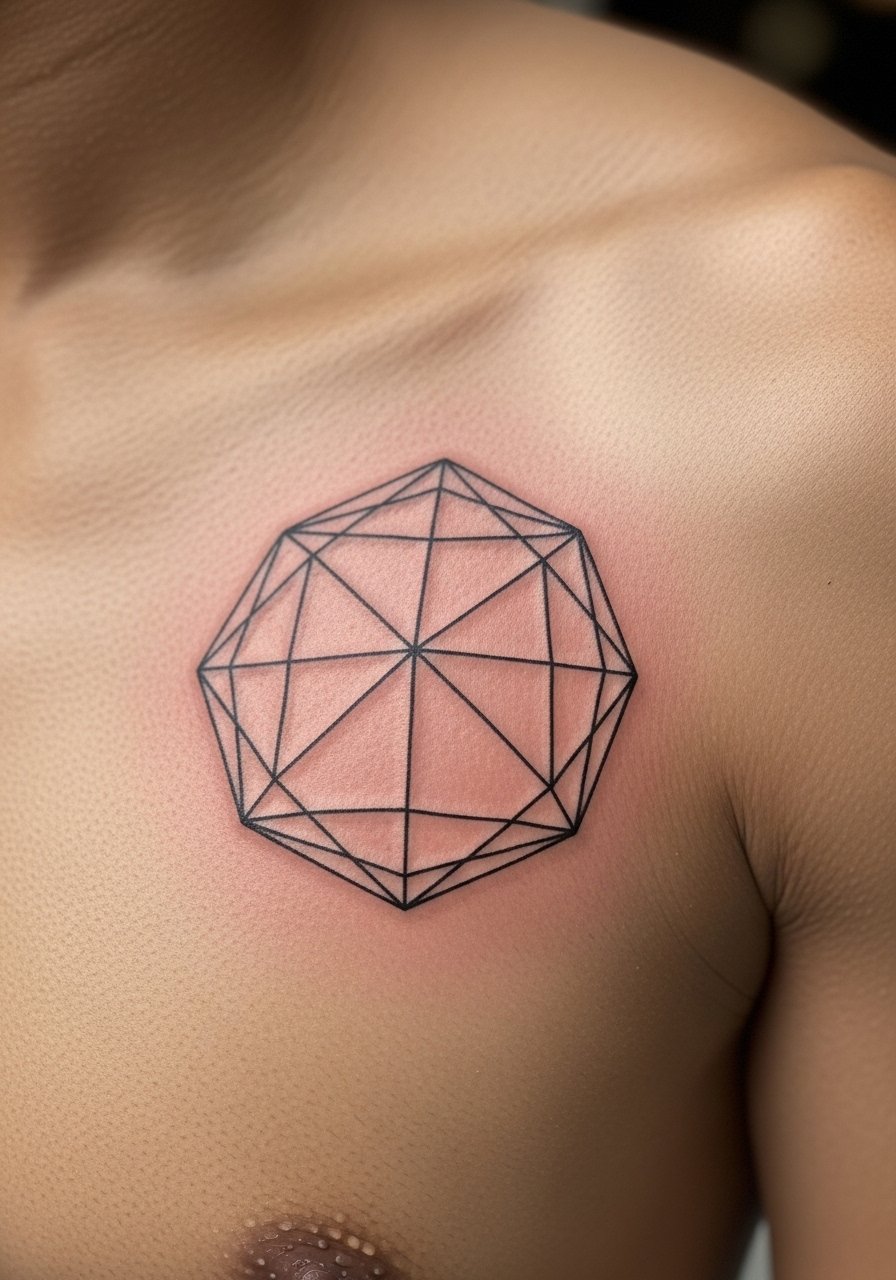
When you want a design that complements muscle shape this one is subtle and strong. Tell the artist to align the polygon edge with the upper pectoral to emphasize existing lines. Expect moderate pain and two sessions for shading and edge crispness. Common mistakes are symmetric transfers that ignore muscle asymmetry. If you are exploring this for the first time bring photos of athletes with similar anatomy so the artist can plan proportion and saturation.
16. Lace-style Sternum Geometry with Filigree
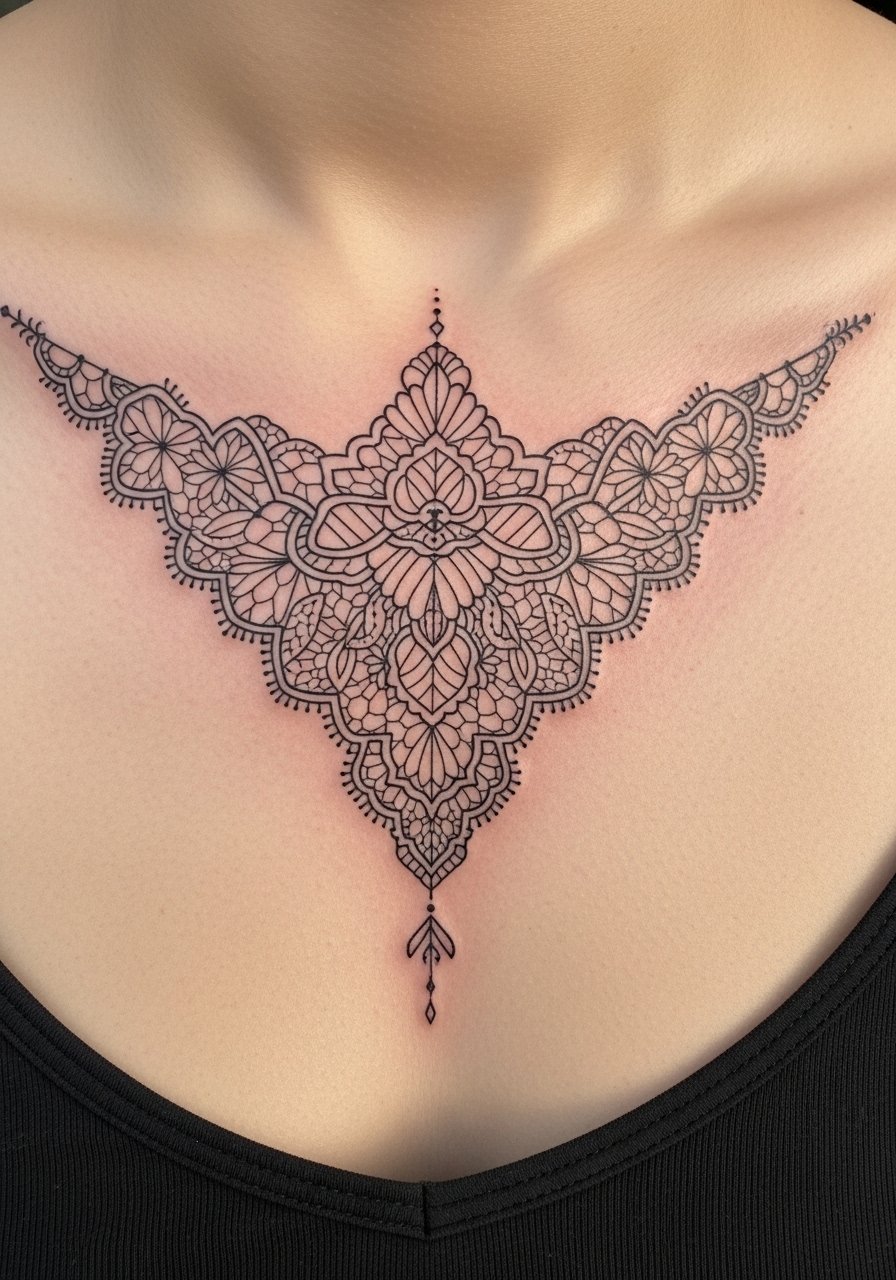
A lace-style sternum needs careful spacing to avoid blurring in high-motion chests. Mention to your artist you want open negative space between filigree elements. This usually takes two to three sessions. The main mistake is packing too many tiny elements which merge as the skin moves. For designs with cultural or ceremonial motifs mention origin respect and consider variations rather than exact replicas.
17. Finger-side Micro Hexagon Stack
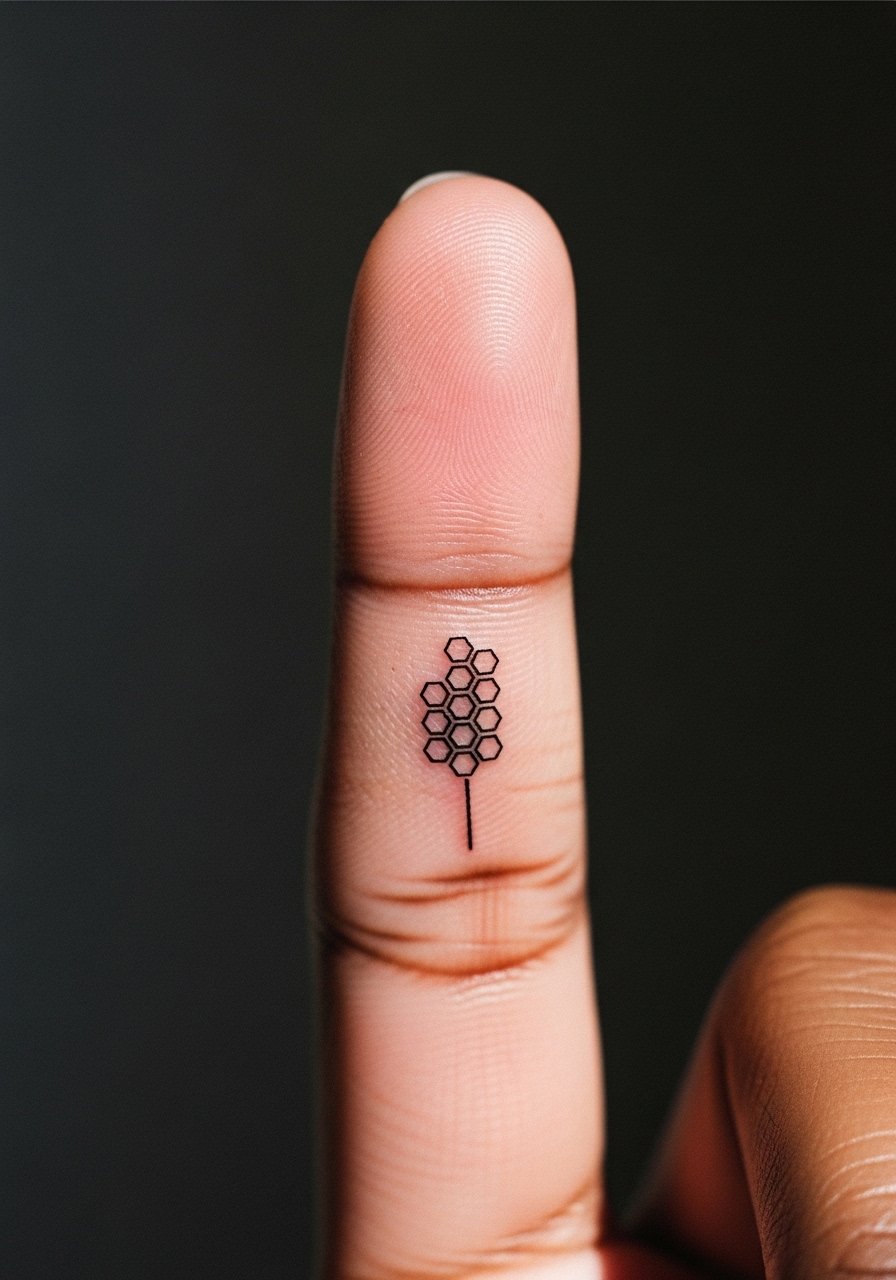
Finger tattoos are notorious for fast fading. If you want micro hexagons ask for slightly bolder linework and accept likely touch-ups at year one. The area feels sharp but quick. A common error is choosing extremely narrow line weights that disappear within months. For finger placements confirm your artist has healed finger photos in their portfolio and ask about projected touch-up schedules.
18. Full Thigh Stippled Mandala Panel
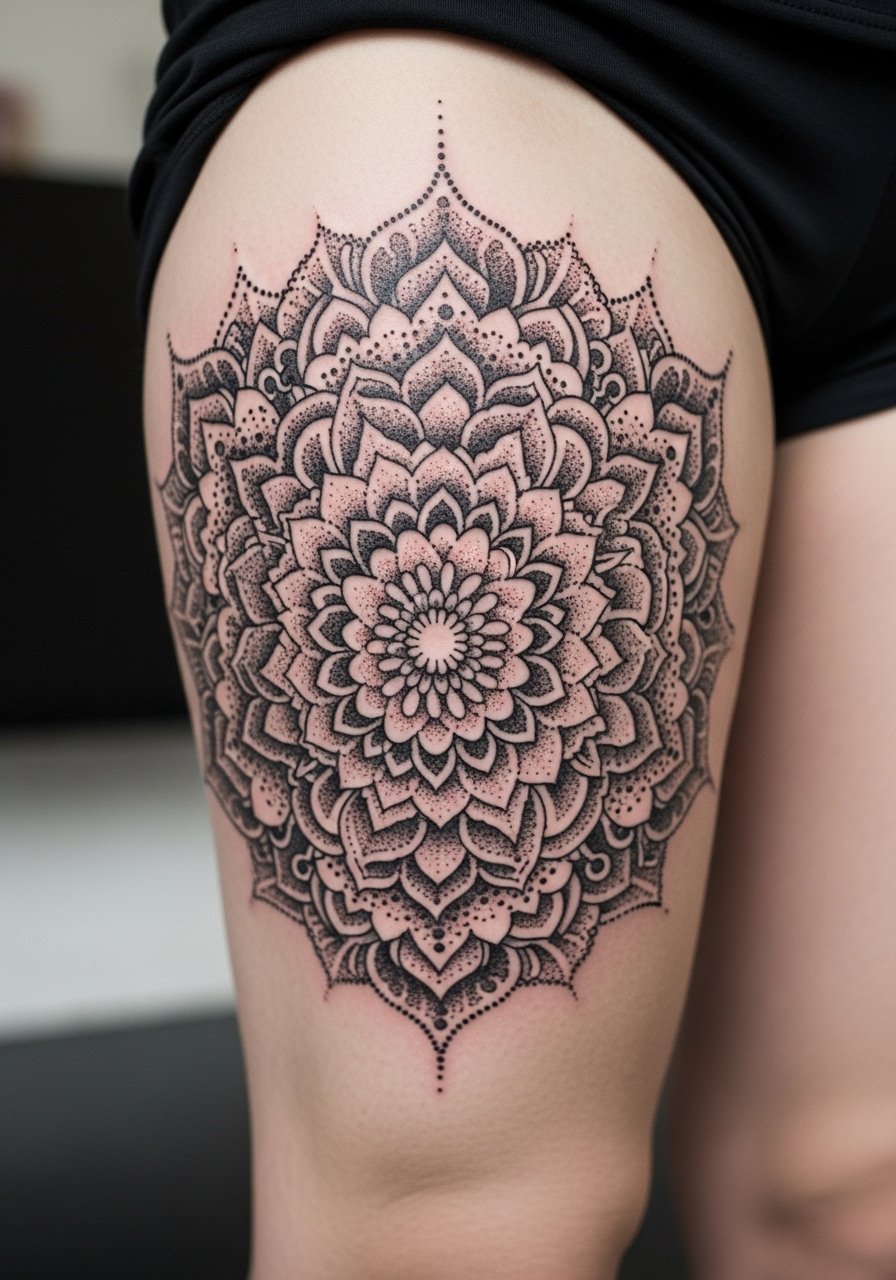
The thigh is forgiving for scale and keeps stipple detail intact longer than limbs. Tell your artist you plan a multi-session panel and ask for a mapped progression so spacing remains consistent across sessions. Expect 3-5 sessions depending on size. A frequent mistake is compressing too much detail into a single session which shortchanges stipple saturation. Thigh pieces often age predictably and hold contrast well with basic maintenance.
19. Orbital Rings Around Knee Cap
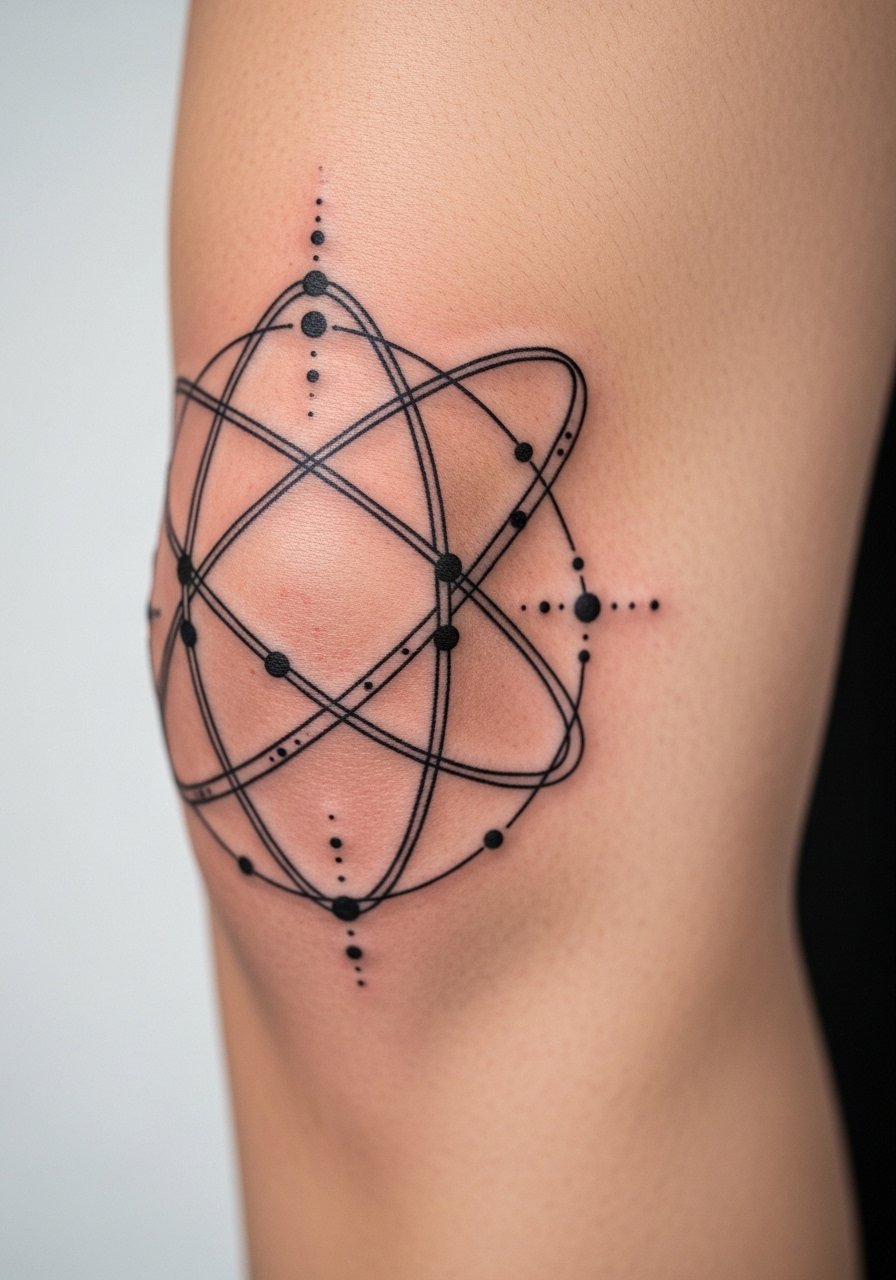
Knee placements require an artist experienced with joint movement. Expect sharp discomfort when tattooing near the patella. During consult ask how the ink will sit when the knee is bent and extended. Small rings can blur at creases so spacing is key. People often assume knee tattoos heal like flat areas which is not true. If you play sports discuss scabbing risks and potential friction during recovery.
20. Minimal Compass-style Sacred Marker on Ankle
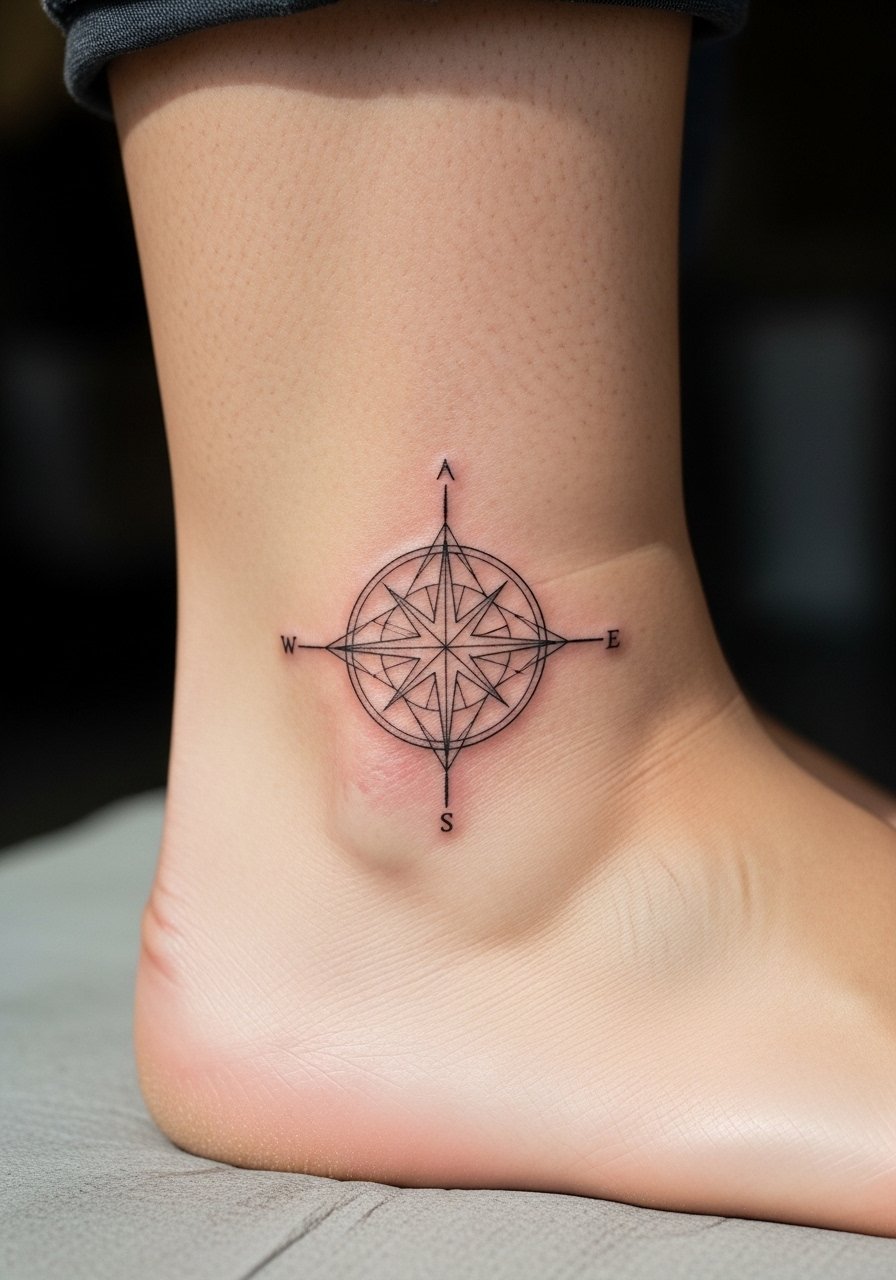
There is a quiet usefulness to a small compass-style marker at the ankle for people who want symbolism without scale. Ask for slightly heavier primary points and finer internal markers so the piece reads clean after six months. This is a short session and low-to-moderate pain. A common misstep is too small a central point which becomes a smudge over time. For ankle designs consider footwear and sock irritation during the first two weeks.
Tattoo Prep and Aftercare Essentials
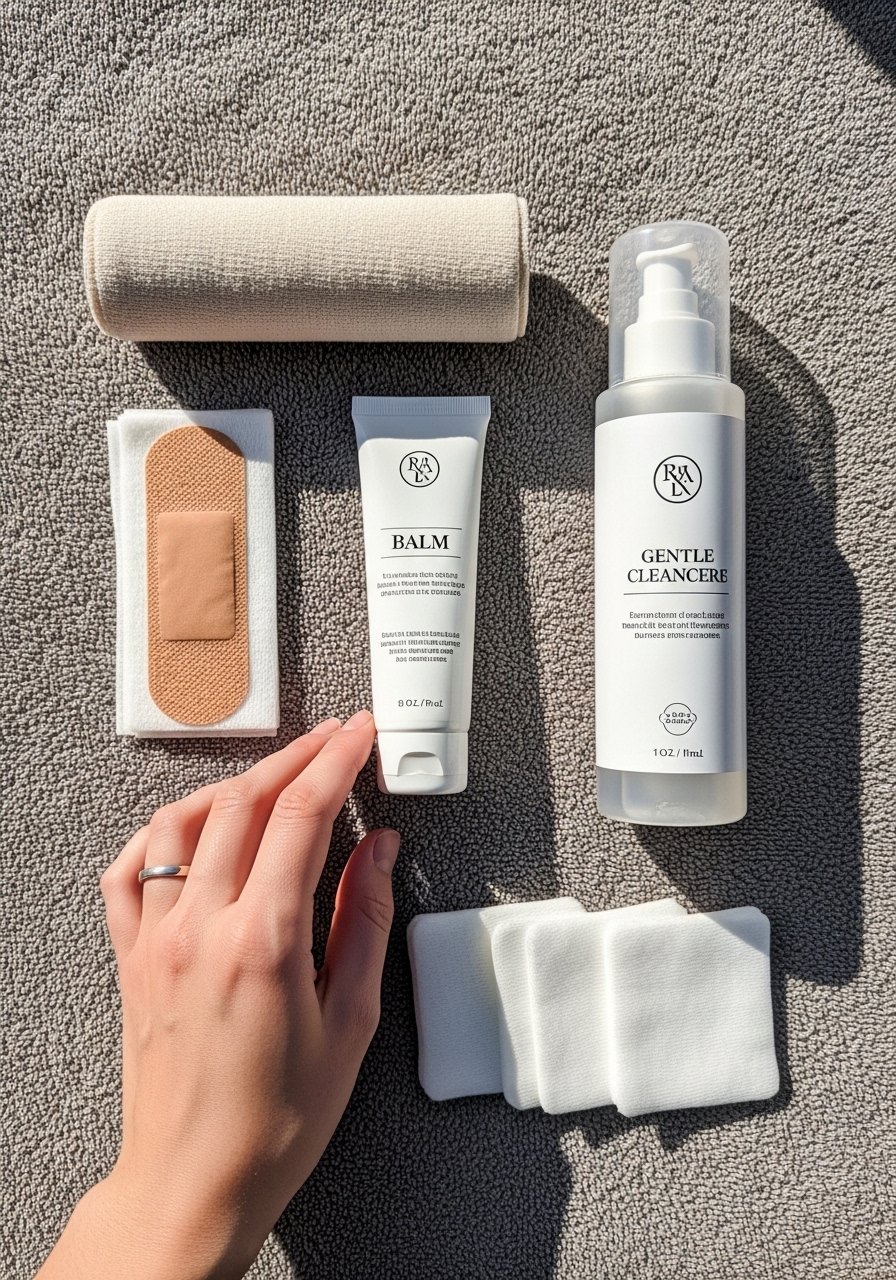
Fragrance-free gentle foaming cleanser. Use this for the first 48 hours to keep the area clean without stripping ink, gentle enough for sensitive skin.
Medical-grade second skin bandage, 4×6 inch. Good for protecting larger or public-exposed pieces during the first day or two.
Lightweight fragrance-free balm. Apply a thin layer after washing once the scab phase begins to prevent cracking.
Breathable sterile non-stick gauze pads. Useful during the first 48 hours if your artist does not use an occlusive.
Aquaphor Healing Ointment. This is the one mainstream product I mention. Use sparingly for initial moisture if your artist approves.
Silicone scar management sheets, small pack. For long-term smoothing after full healing if raised scarring appears.
Sun-blocking physical mineral SPF stick. Once healed, use this on exposed tattoos to slow fading.
Lightweight breathable clothing for the area. Avoid tight fabrics that rub during the first two weeks.
Every tattoo is different. Always follow your artist's specific aftercare instructions. Consult a dermatologist if you have skin concerns or unusual healing issues.
Frequently Asked Questions
Q: Will fine line mandalas blur faster on the forearm than on the back?
A: In my experience fine line mandalas on forearms are more at risk because of frequent movement and sun exposure. The back provides a flatter canvas and less friction so lines usually hold longer. Ask your artist about slightly increasing line weight for forearm pieces if you want longevity.
Q: How often do dot work back pieces need a touch-up?
A: For dense dot work on the upper back I usually tell people to expect a possible touch-up around year two to three, depending on sun exposure and how the skin ages. Good mapping and layered sessions reduce the need for early touch-ups.
Q: Are ribcage geometry tattoos worth the pain given the blurring risk?
A: The ribs are painful but they offer a canvas few placements do. Artists split on whether fine line lasts there. The right approach is to discuss depth and spacing with the artist and accept a potential touch-up at year two. If you want maximum longevity choose bolder lines or dot work variants.
Q: What should I bring to a consult for a thigh Sri Yantra so it follows my curves?
A: Bring photos of your thigh in both relaxed and flexed positions and reference images that show the design following a leg curve. Ask the artist to mark the stencil while you stand and breathe so they can anchor the main axes correctly.
Q: Do finger and ankle sacred geometry tattoos need different aftercare than a thigh piece?
A: Yes. Fingers and ankles rub against clothing and are exposed to more movement, so keep them protected and expect faster fading. Thigh pieces are easier to shield and usually tolerate a longer healing window. Follow your artist's timeline for washing and moisturizing specific to those spots.
