
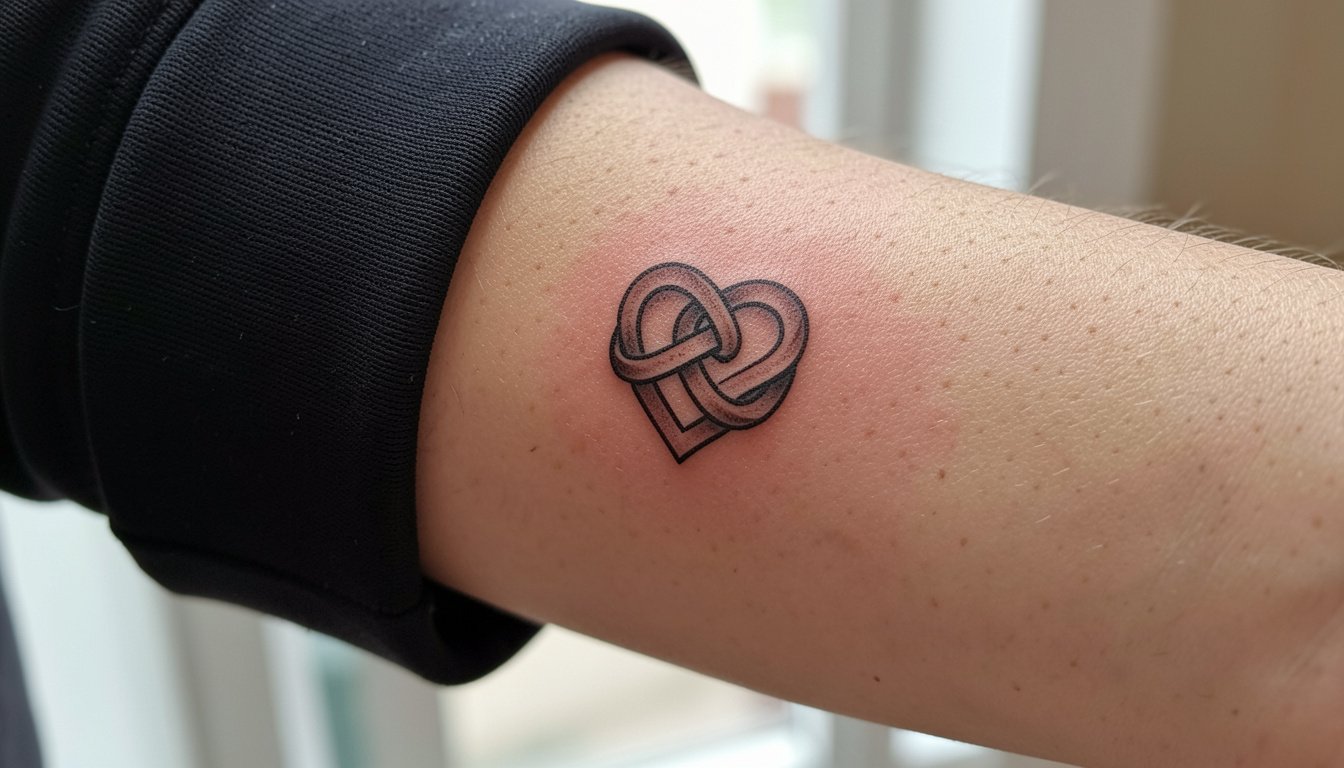
Matching tiny scripts often look great in photos and then blur into soft smudges after a few years. Couples who plan for long-term readability pick placement, line weight, and spacing with the healed decade in mind, not the saved Instagram post. Below are ideas that balance intimacy with longevity, practical session notes, what to request in the consultation, and outfit pairings that actually showcase the work.
1. Paired Coordinates on Inner Wrist
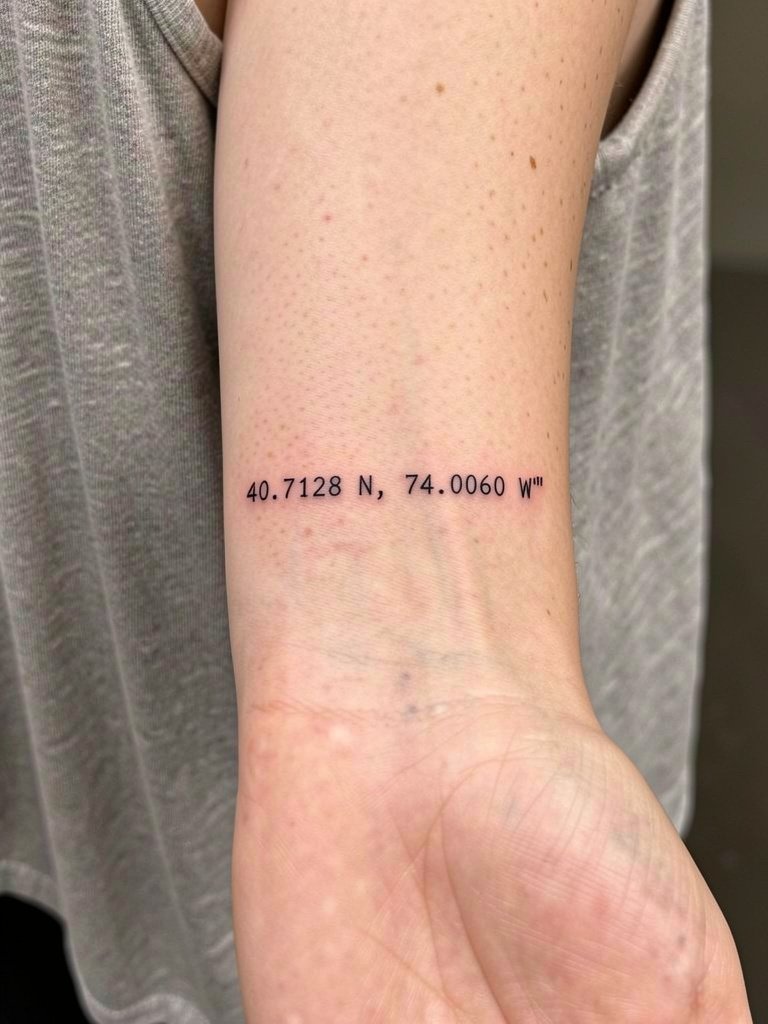
A pair of matching geographic coordinates reads private and precise. I recommend scaling the numerals to three to four millimeters high so the numbers keep their spacing at year three. Discuss exact font width and intercharacter spacing during the consultation, and bring a printed template at three sizes so you and the artist can agree. On the inner wrist the session is short and mildly sensitive, about 30 to 60 minutes depending on complexity. Tiny numbers that try to be micro will blur; aim for slightly bolder single-needle work that still looks delicate at arm’s length. For nights out, let the coordinates peek from a cuffed shirt and wear a fine silver chain bracelet that frames the wrist.
2. Matching Minimalist Rings Around Fingers
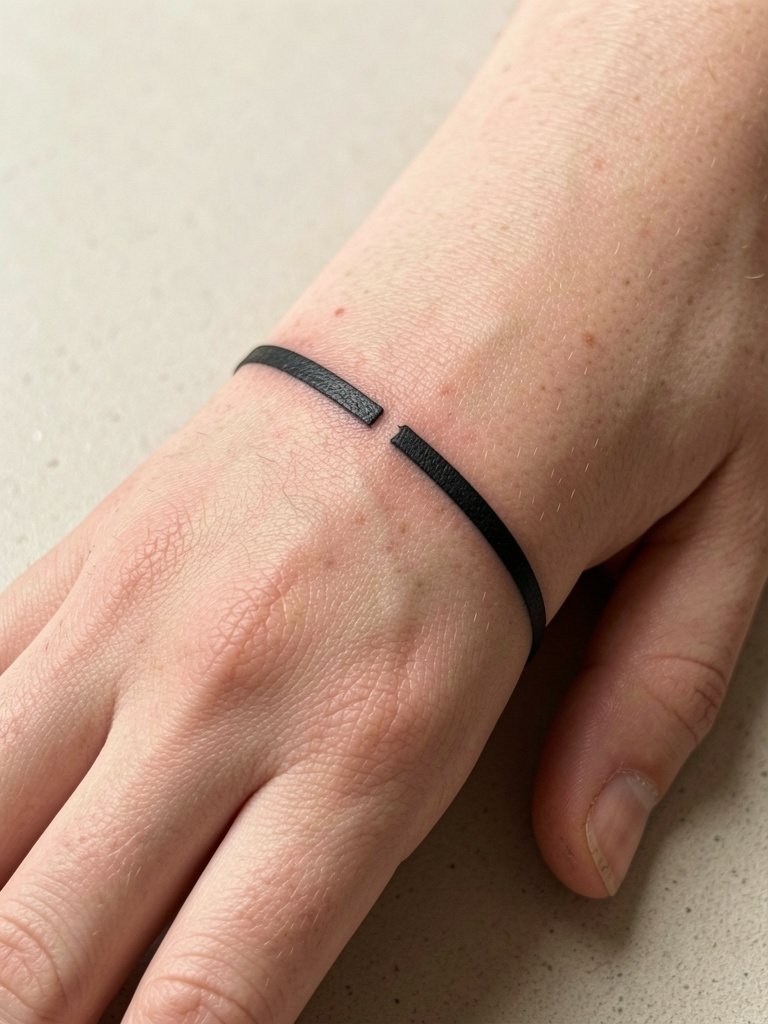
Finger bands are intimate and read like jewelry. Expect faster fading because hands wash often and the skin moves, so a one-hour touch-up at three to six months is common. When planning, widen the band slightly compared with a metal ring sketch so the ink does not break apart in two years. For comfort during the session, wear a sleeve you can roll up easily and avoid tight rings on that hand. A common mistake is matching ultra-thin lines to mimic metal; those disappear. If you want a polished look while you heal, try stacking with a slim oxidized ring that matches the band width and keeps the area visible without excessive rubbing.
3. Tiny Complementary Moon Phases Behind the Ear
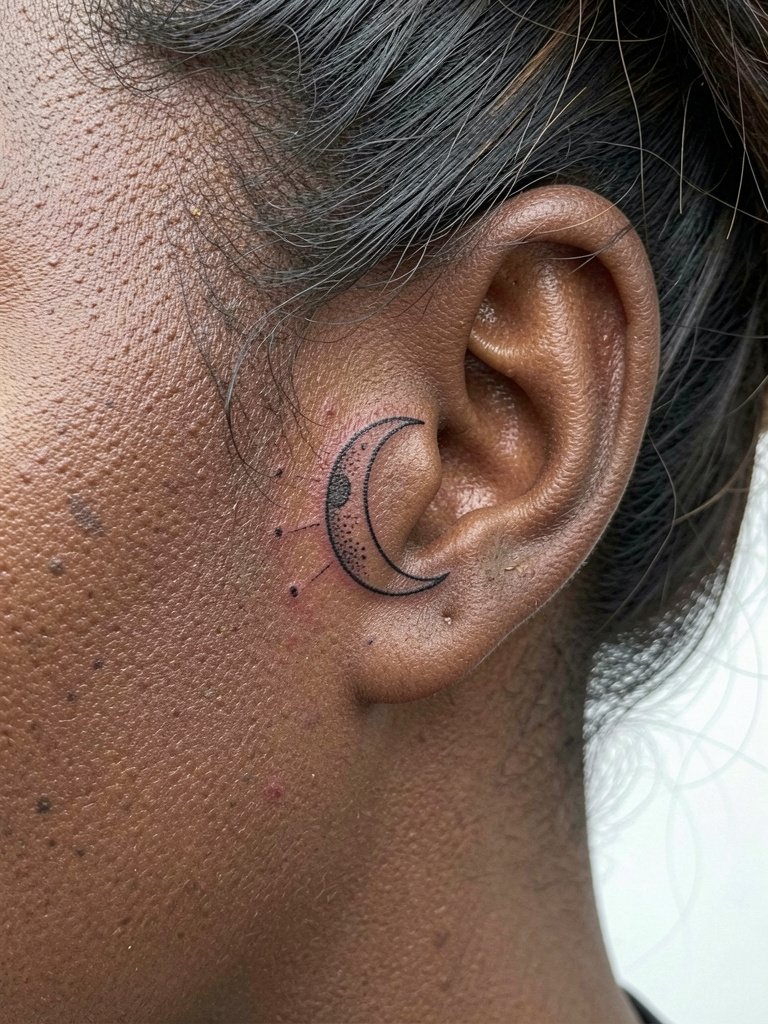
Behind-the-ear marks are private but viewable when hair is up. They heal quickly and tend to lose the tiniest interior dots first. Ask for slightly heavier single-needle weight for the tiny crescents so the silhouette stays defined after one year. Pain is low to moderate and the session is under an hour. Because the location is more visible with certain hairstyles, plan how you will style your hair during work or events. For a neat reveal, pair this with small hoop earrings or a gold-filled hair claw that pulls hair into an updo without rubbing the area.
4. Matching Minimal Script on the Collarbone
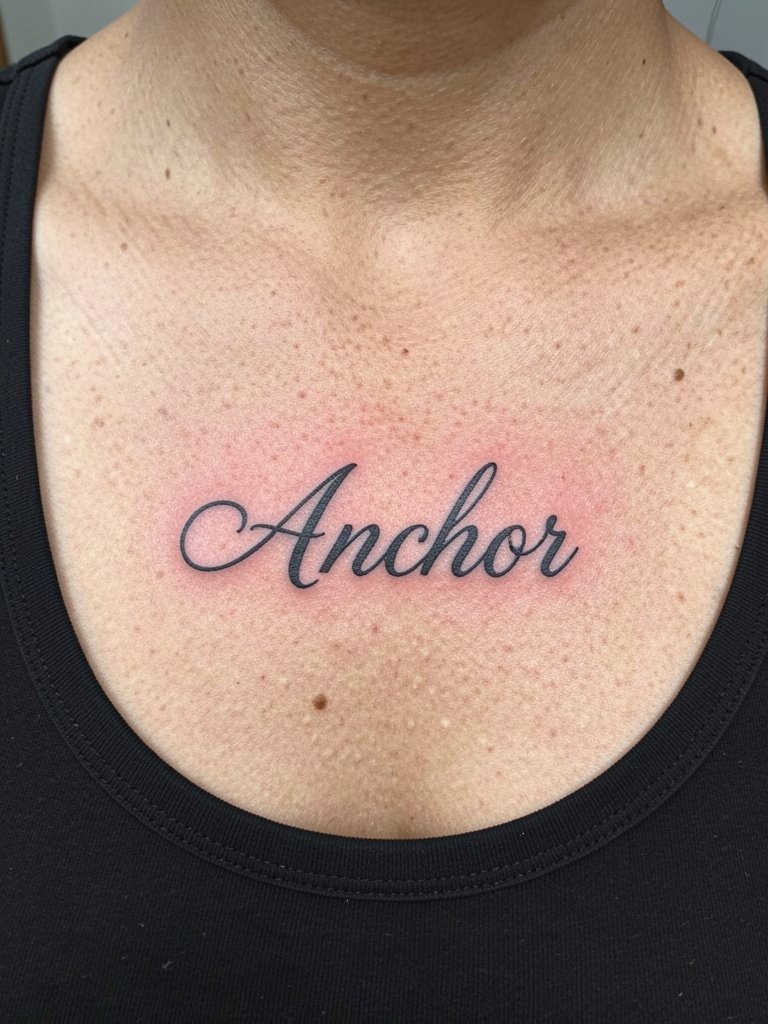
Collarbone placements show when you want them to and hide easily under shirts. The trick is not to place very thin curls directly over the bony edge because those lines tend to blur where movement is constant. Ask for slight spacing and a modest baseline so letters do not compress after healing. Sessions are short and the area is sensitive but tolerable for most people. A frequent misstep is copying tiny script from a phone screen; instead bring a scaled mockup at actual size. Pairing tip, wear open-neck tops or scoop-neck camisoles that frame the collarbone and let the script read in evening light.
5. Split Heart Halves on the Inner Forearms
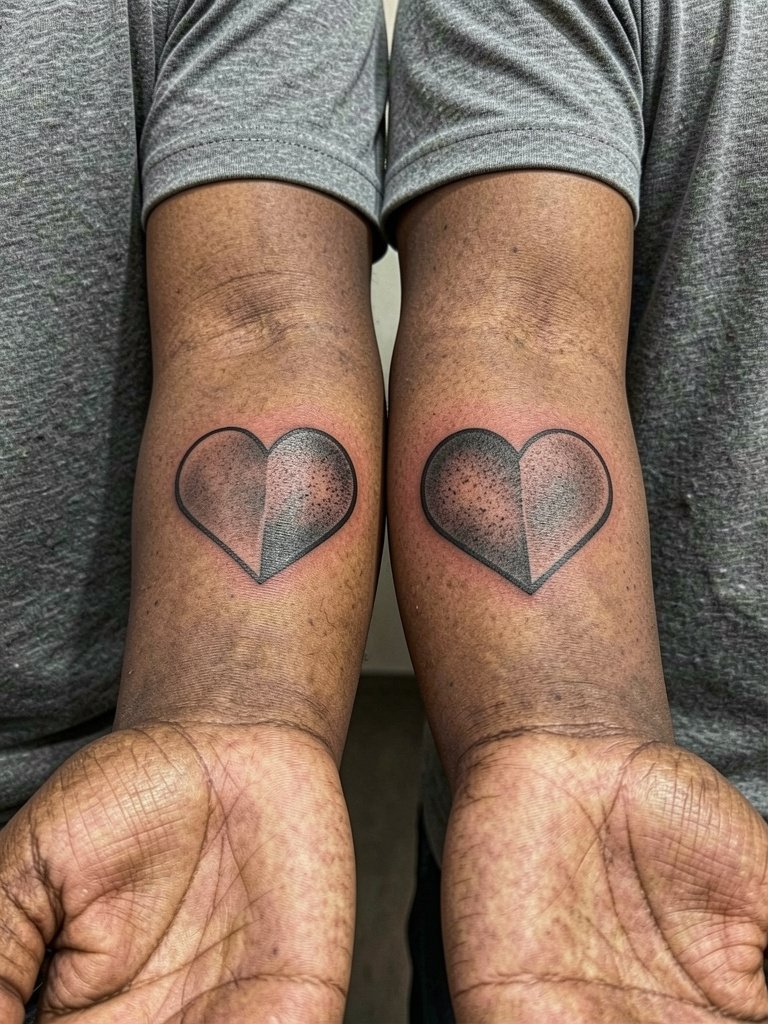
Halved motifs are literal and visually satisfying. I suggest slight scale asymmetry so each half reads on its own when arms are apart, and thicker outlines to resist early blurring. Talk through placement landmarks with the artist using a ruler and skin-safe marker so the halves align when you want them to. Inner forearms are moderate pain and sit around 1.5 to 3 hours for this scale. Avoid tiny interior filigree that blurs; solid silhouettes last longer. For showing them off on casual days, roll up sleeves and add a linen boyfriend shirt that leaves the inner arm visible.
6. Tiny Lock and Key on Ribcage and Sternum
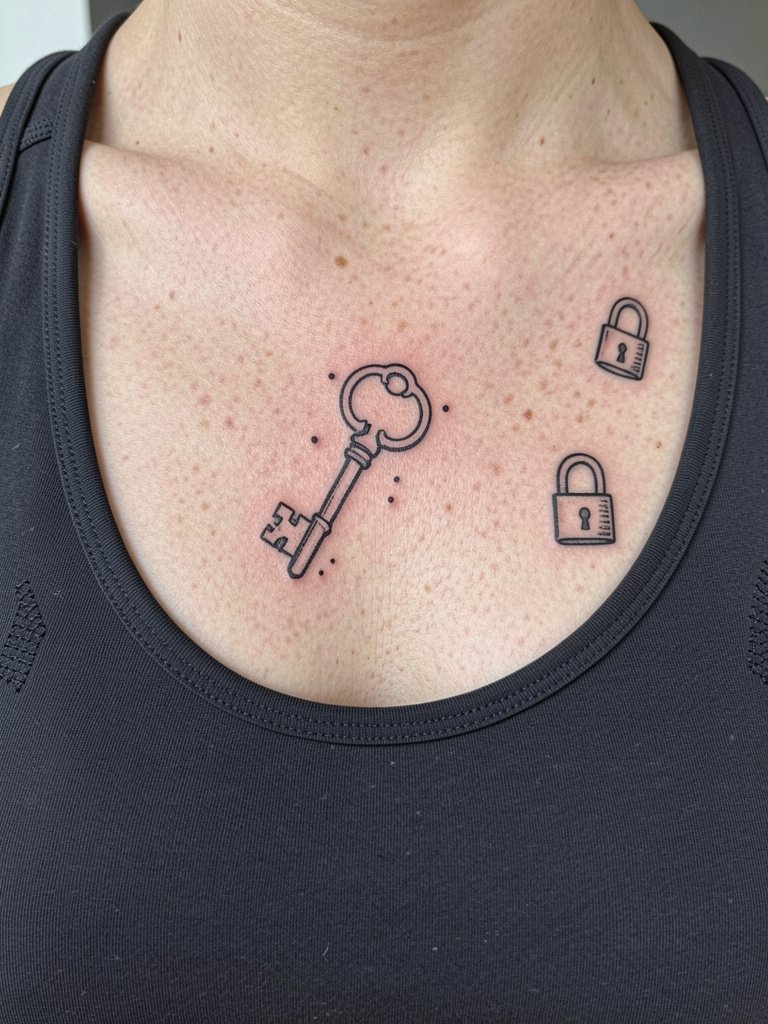
Sternum and rib placements are intimate and higher on the pain scale. Fine-line fans split into two camps about ribs. One camp says the skin stretch and movement causes fine lines to blur within two years, especially near the breast crease. The other camp argues that with careful needle depth, slightly wider spacing, and experienced placement the lines settle clean and stay legible. For this pairing, ask for a proportionally stronger single-needle weight and mark both pieces while standing so gravity and body shape are accounted for. Expect a longer session with breaks and a likely touch-up at six to twelve months.
Pre-Session Essentials
The small placements above respond well to a few targeted products that smooth the session and early healing.
- Transfer paper stencil kit. Makes full-size test prints so you can see exact scale of wrist and collarbone scripts before the needle touches skin.
- Topical numbing cream. Use as directed for short ribcage or sternum sessions to help you sit longer through sensitive areas.
- Thin protective film roll. Useful on finger and wrist work where friction from handwashing is inevitable.
- Fragrance free gentle body wash. Cleanses without irritating fresh linework during the first week.
- Aquaphor healing ointment. A widely used healing ointment for initial moisture control and barrier care.
7. Complementary Sun and Cloud on Shoulder Blades
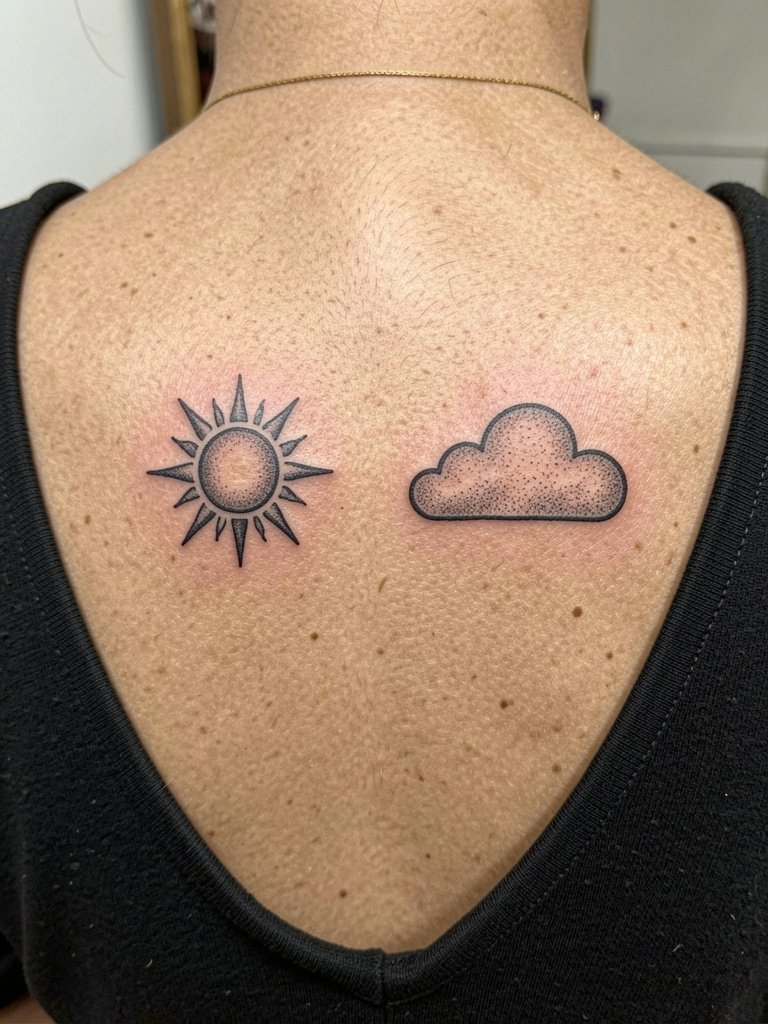
Shoulder blade designs offer privacy and a larger canvas that still reads when you want to show it. I recommend contrasting motifs like sun and cloud because each holds as a tiny standalone across time. On the shoulder blade the skin is sturdy and sessions are moderate pain with good saturation. Discuss how the piece looks under a bra strap and plan placement to avoid constant abrasion. For display, back-baring tops or open-back dresses showcase them. Pair with an open-back slip dress when you want the art visible.
8. Interlocking Roman Numeral Bands on the Bicep
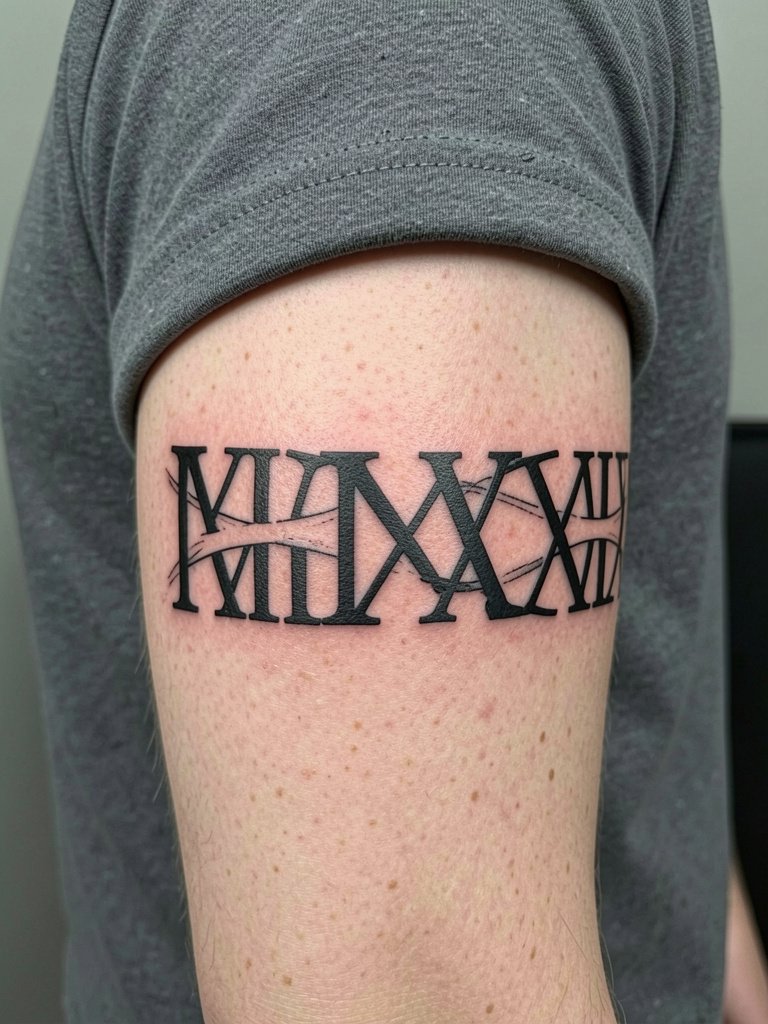
Outer bicep bands are visible and hold bold lines well. This placement is lower pain and a good fit for thicker numeral work that ages cleanly. Ask for the numerals to have small gaps between characters so the shapes do not merge when the arm rests. A common mistake is wrapping too far toward the inner arm where skin stretch is greater. Session time is typically one to two hours for paired bands. For casual shows, rolled sleeves or a fitted tee with cuffed sleeves let the bands peek without full exposure.
9. Matching Tiny Botanical Sprigs on Ankle
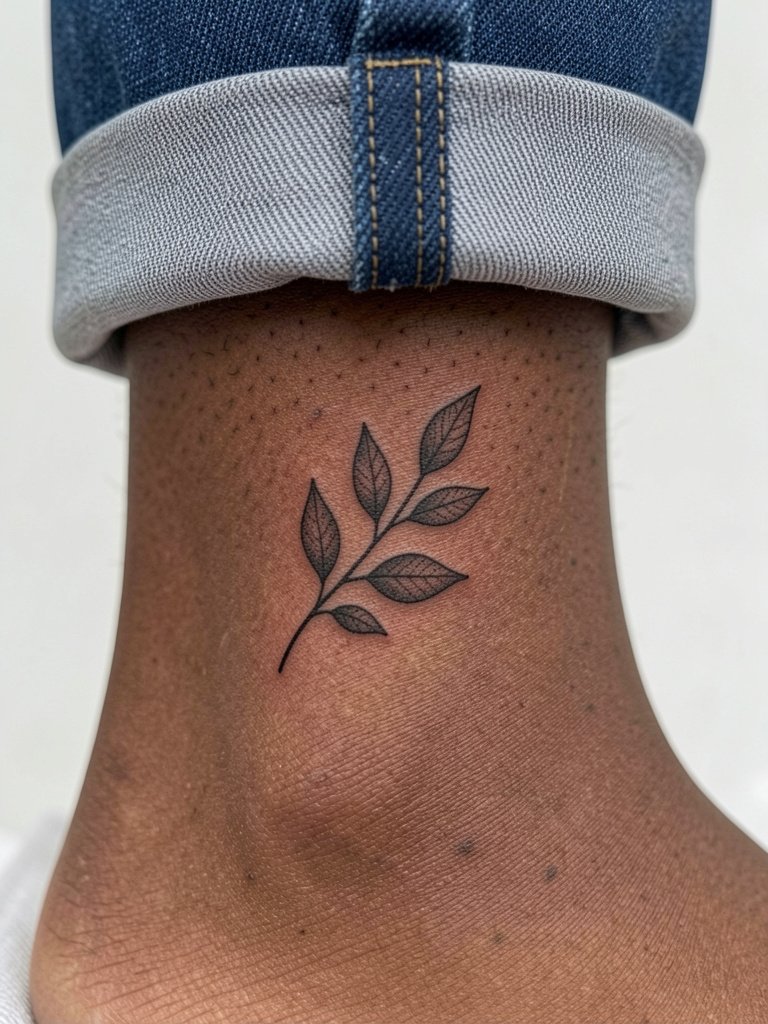
Ankle sprigs are feminine and subtle but get rubbed by socks and shoes. Plan a slightly thicker stem and a touch of negative space inside the leaves so details survive frequent friction. The session is short and low to moderate pain. A mistake I see is placing the main detail too close to the ankle bone where movement wears edges down. During the appointment wear slip-on shoes or pants with cuffs so you can show the area easily. For styling, pair the ankle piece with open sandals or a minimal leather ankle strap sandal to highlight the sprig once healed.
10. Mirrored Minimalist Mountains on Upper Arm
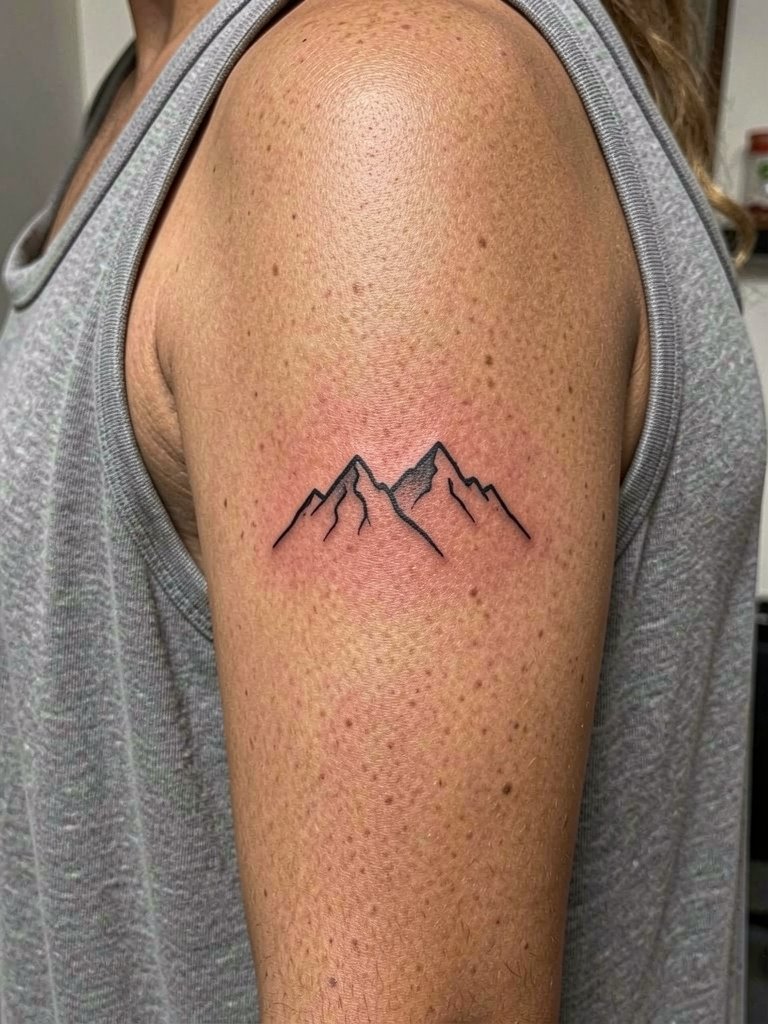
Upper arm mountain pairs read like shared values and are great for people who want visible matching work without the wrist or hand commitment. The outer upper arm tolerates slightly wider linework which can age well for years. Bring photos of how the peaks should angle relative to muscle lines so the artist can flow the design with your anatomy. Expect a one-hour session and a touch-up at 12 months if you prefer crisp peaks. For showing the motif, sleeveless tees or a classic muscle tank work well.
11. Minimal Wave Line on the Side Rib
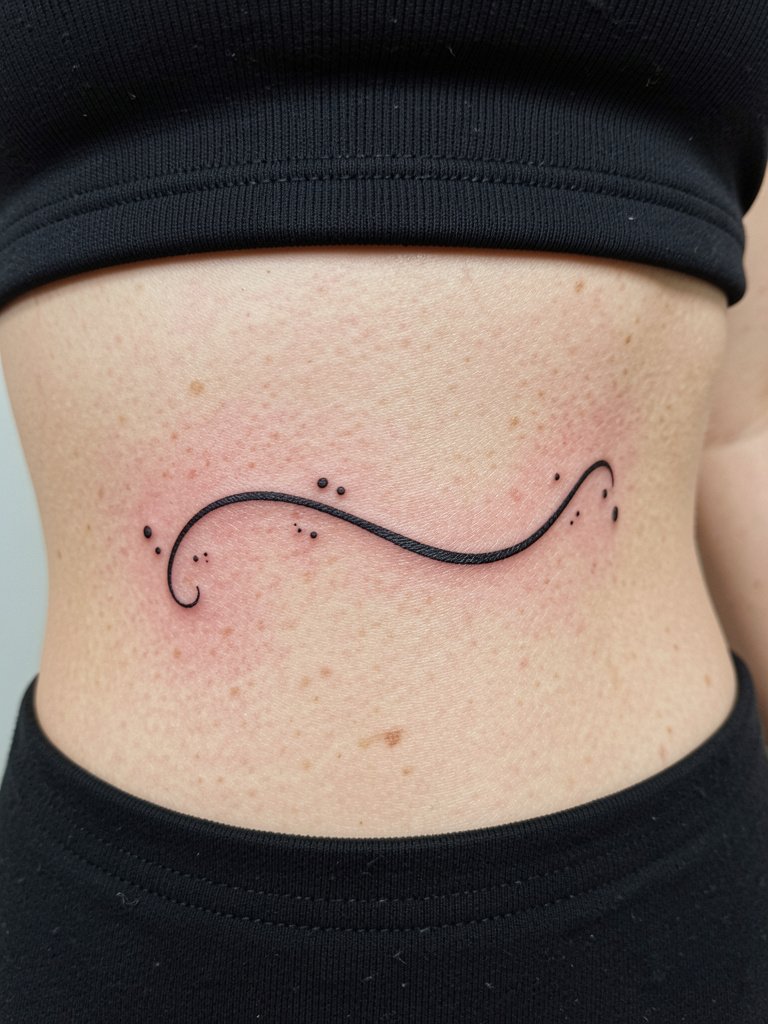
Rib-side lines are sensual but painful and prone to blur when too thin. Artists differ on fine-line rib work. One camp warns that fine single-needle lines on ribs lose clarity within two years because of skin stretch and movement. The other camp shows healed examples arguing that slightly wider single-needle weight and planned spacing can keep lines legible for years. For this wave, plan for a slightly stronger line and allow breaks in the rhythm so the curve reads even when skin shifts. Session length varies and you should schedule breaks. For covers and reveals, cropped tops and high-waisted jeans frame the rib area nicely.
12. Small Lockstep Puzzle Pieces on Forearm
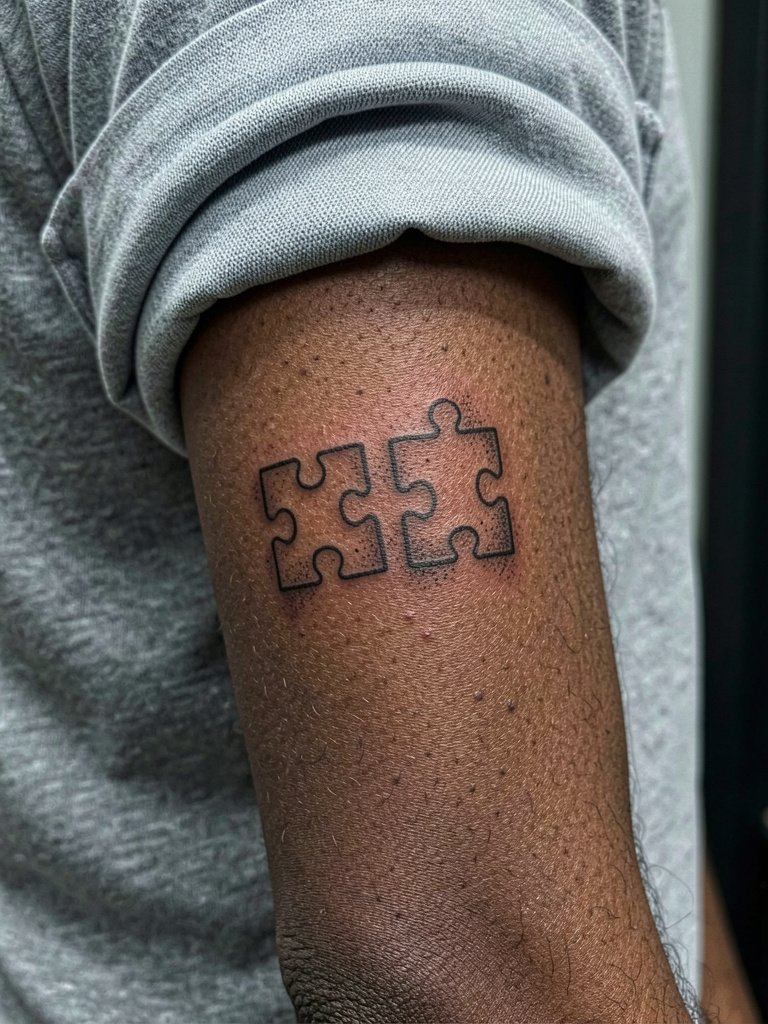
Puzzle piece motifs are playful and symbolic. They age well when the edges are drawn with modest line weight and small negative-space tabs rather than ultra-fine connectors. Forearm skin is forgiving and touch-ups are a low-lift fix after the first year. Avoid insisting the tabs be minuscule because they will merge. Discuss slight spacing and a scaled mockup to preview how the tabs sit on curved forearm skin. For casual display try rolled sleeves and a simple canvas slip-on shoe that keeps the forearm visible in streetwear looks.
13. Matching Tiny Stag Silhouettes on Calves
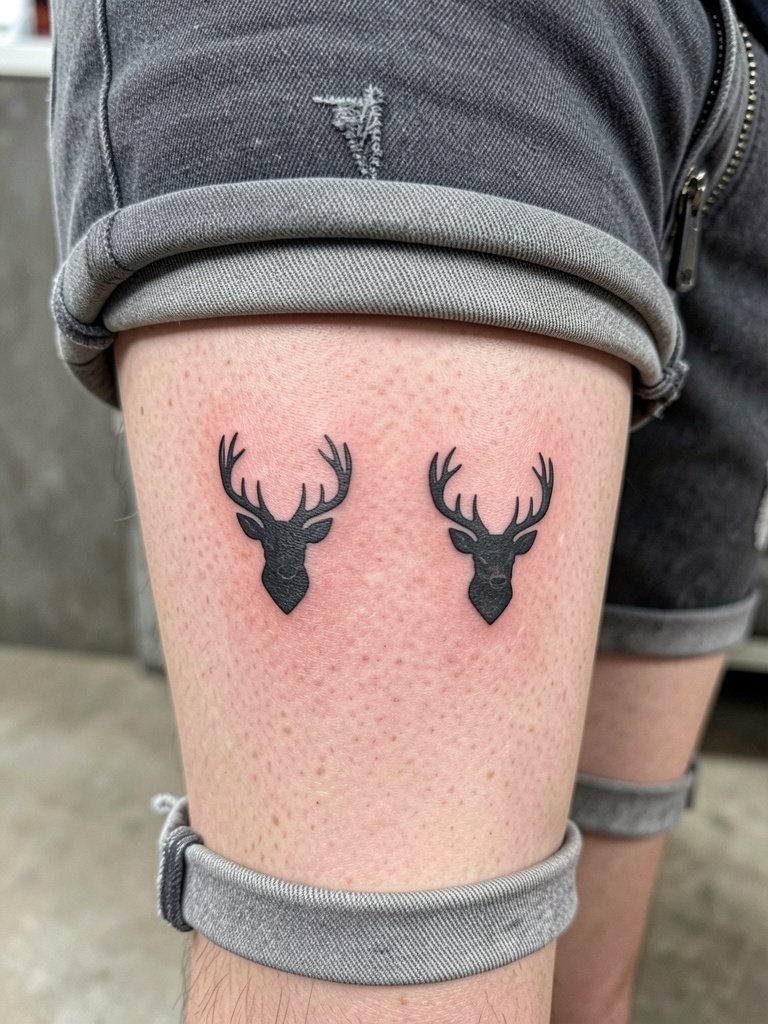
Calf pieces are low pain and durable. A small silhouette like a stag holds its shape well if the antler tines are given space rather than being delicate filigree. Discuss exact height from the ankle and how the antlers should avoid muscle creases so they do not warp with movement. Sessions run about an hour for this scale. For styling, cropped trousers and boots frame the calf. Try a straight leg cropped jean to let the silhouette read.
14. Tiny Constellation Line on the Inner Arm
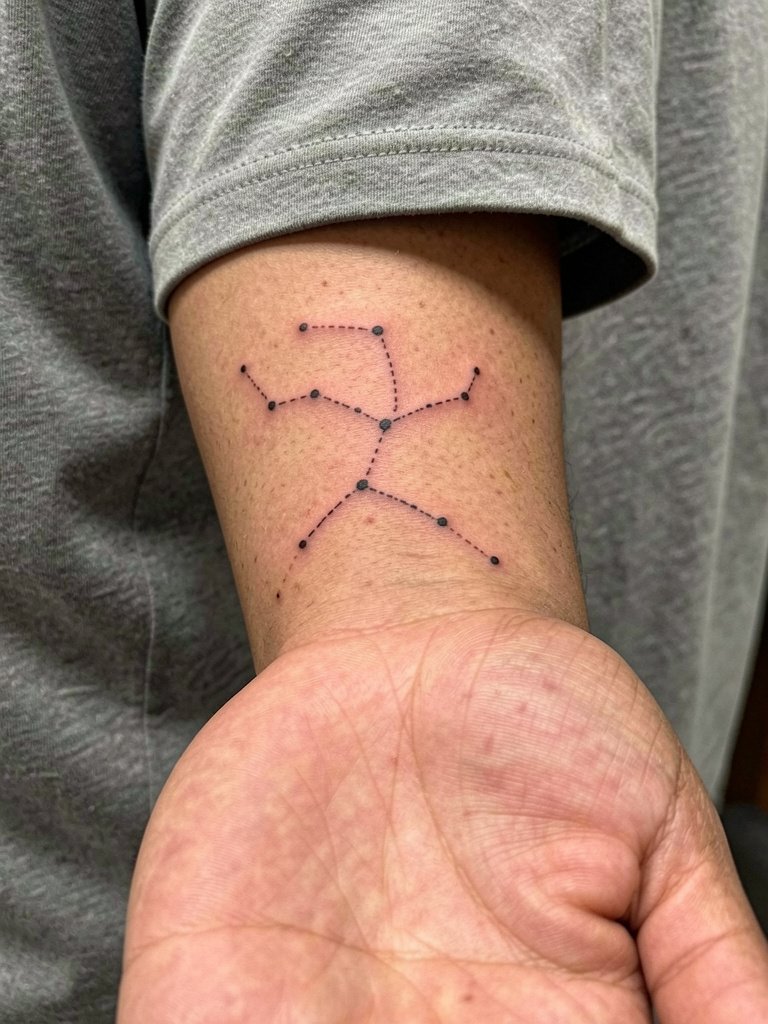
Constellation motifs are delicate and depend on dot spacing. The inner forearm eats fine detail if dots are too small and too close. Request slightly larger dots and explicit spacing guidelines so the pattern keeps its shape at one and three years. Pain is low to moderate and sessions are typically under an hour. A common error is expecting full micro-dot fidelity; plan for scaling up by about 10 to 20 percent from your phone mockup. For display, roll sleeves and pick a thin woven bracelet that echoes the dotted rhythm.
15. Complementary Small Anchor and Wheel on the Wrist
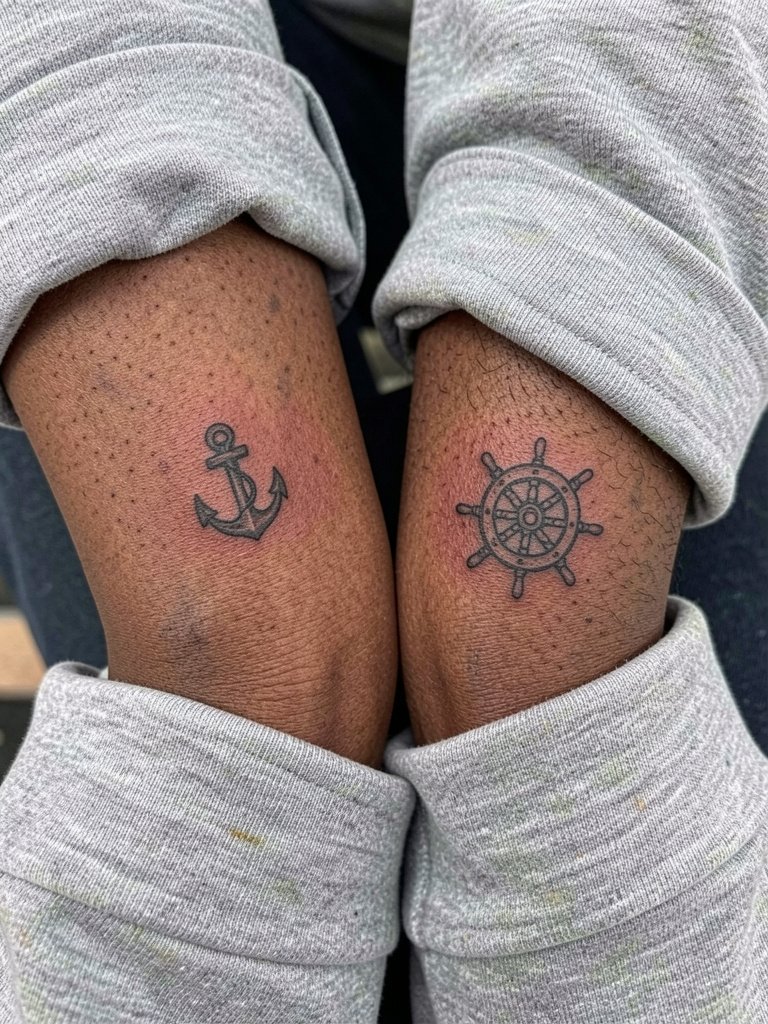
Wrist motifs are classic but face constant washing and sun exposure. Choose slightly bolder outlines and small internal line breaks so the anchor and wheel remain legible. A two-person session can be coordinated so both wrists are done on the same day. The pain level is moderate and session times are short. Common mistakes include placing designs too close to the wrist crease where movement distorts edges. For showing them off, wear rolled sleeves or a navy linen shirt with rolled cuffs that frames the wrist.
16. Tiny Morse Code Pairs on the Rib Side
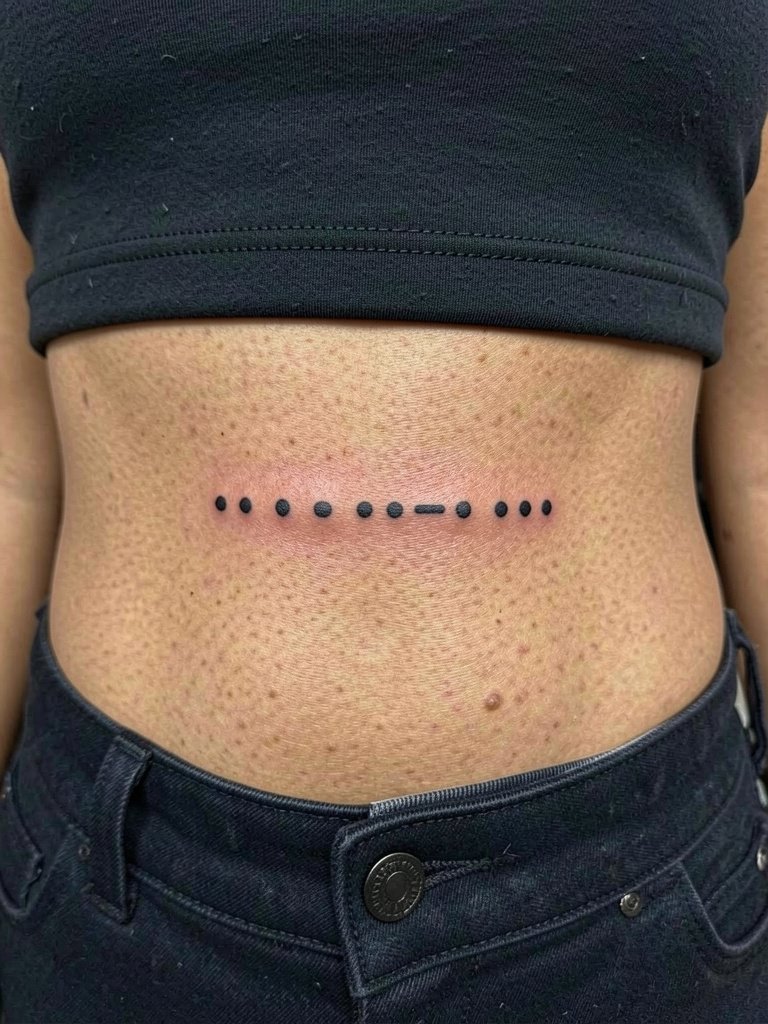
Rib-side Morse code is private and geometric. Make sure you specify exact dot and dash dimensions in millimeters so the sequence reads as intended after healing. The ribs are high in pain and often require breaks. Dots tend to soften first so plan for touch-up at six to twelve months. If you want the code to remain secret but durable, pick slightly larger dots and equal dash spacing. For recovery, choose loose tops that do not press on the ribcage, like a soft modal tee to avoid irritation.
17. Whispered Quote in Fine Line on the Side Neck
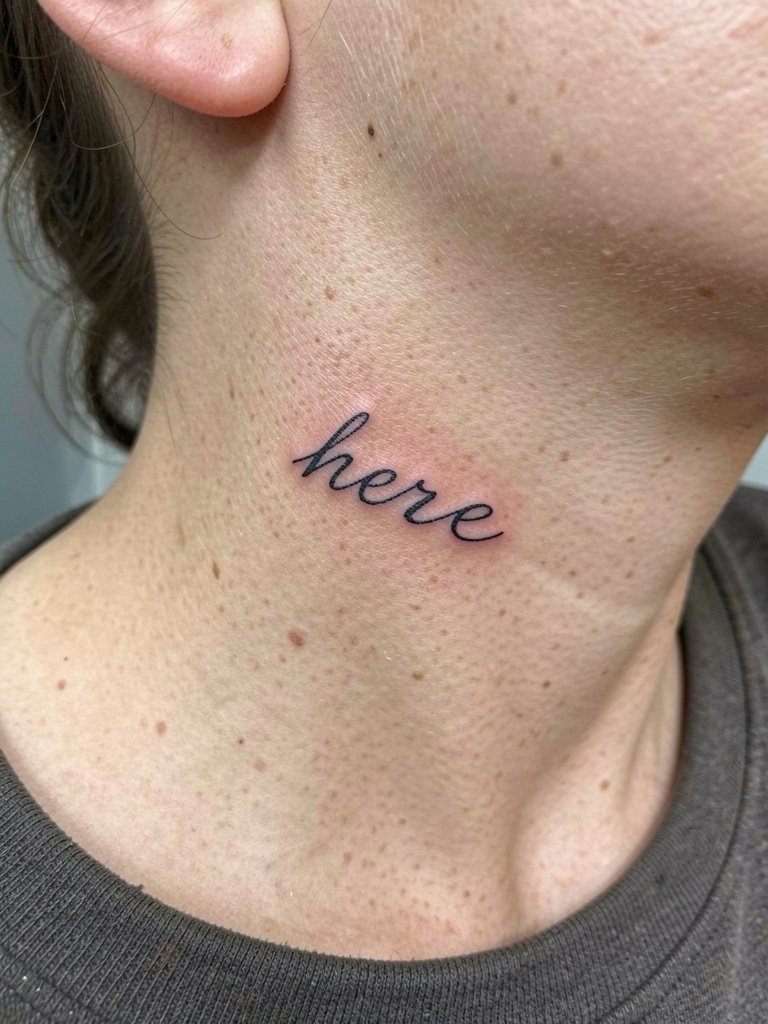
Side-of-neck script is visible and can affect work or social impressions. That placement needs an experienced hand because the skin is thin and mobile. Expect moderate to high pain and shorter sessions for single words. A typical error is choosing ultra-fine flourishes that blur into a smudge along natural neck folds. For showing the piece without making it constant face time, wear wide-neck tops and delicate chain necklaces. Try a delicate short chain necklace that frames the area without covering the piece. Note that neck work often requires an artist who has specific experience with nape and side neck healing.
18. Tiny Matching Feather on the Inner Thigh
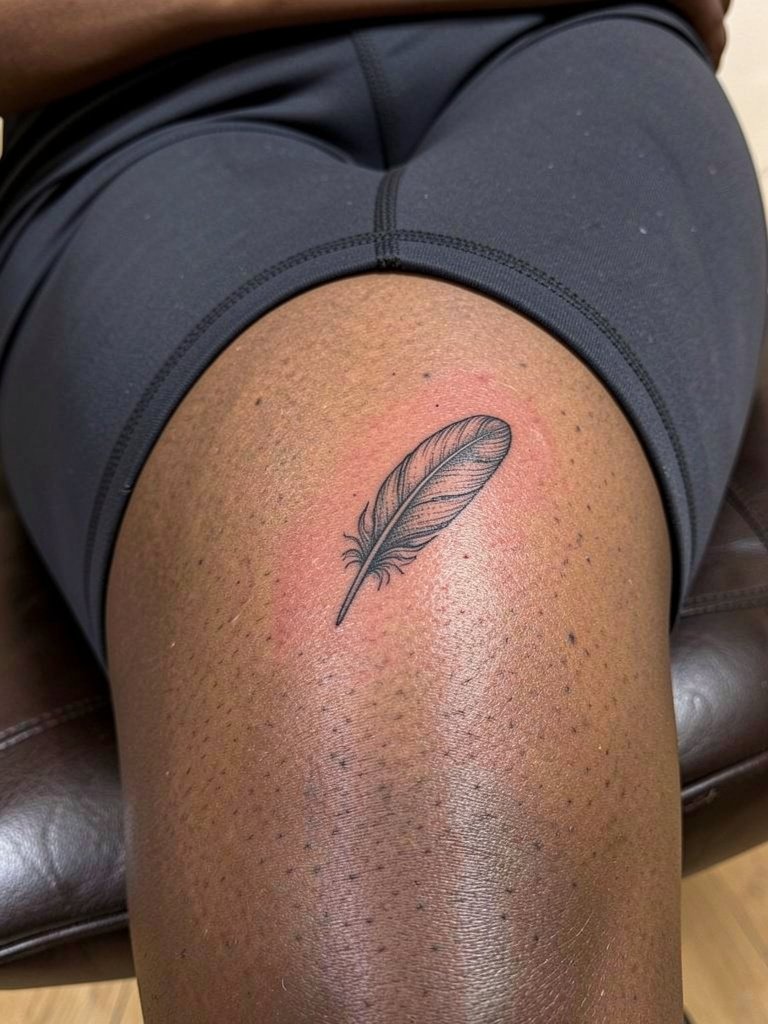
Inner thigh placements are intimate and need careful planning. The skin there can be softer and more prone to movement so line weight should be slightly stronger than your phone mockup. Sessions are sensitive and privacy in the studio is a reasonable request. Avoid tiny internal details that will disappear in two years. For the appointment wear shorts or similar session wear that lets the artist access the area while keeping you comfortable. The session feel is often low to moderate pain with warmth and pressure rather than sharpness. Respect studio policies on modesty and bring a comfortable pair of loose shorts like high-rise bike shorts.
19. Matching Micro-Realism Eye on the Wrist
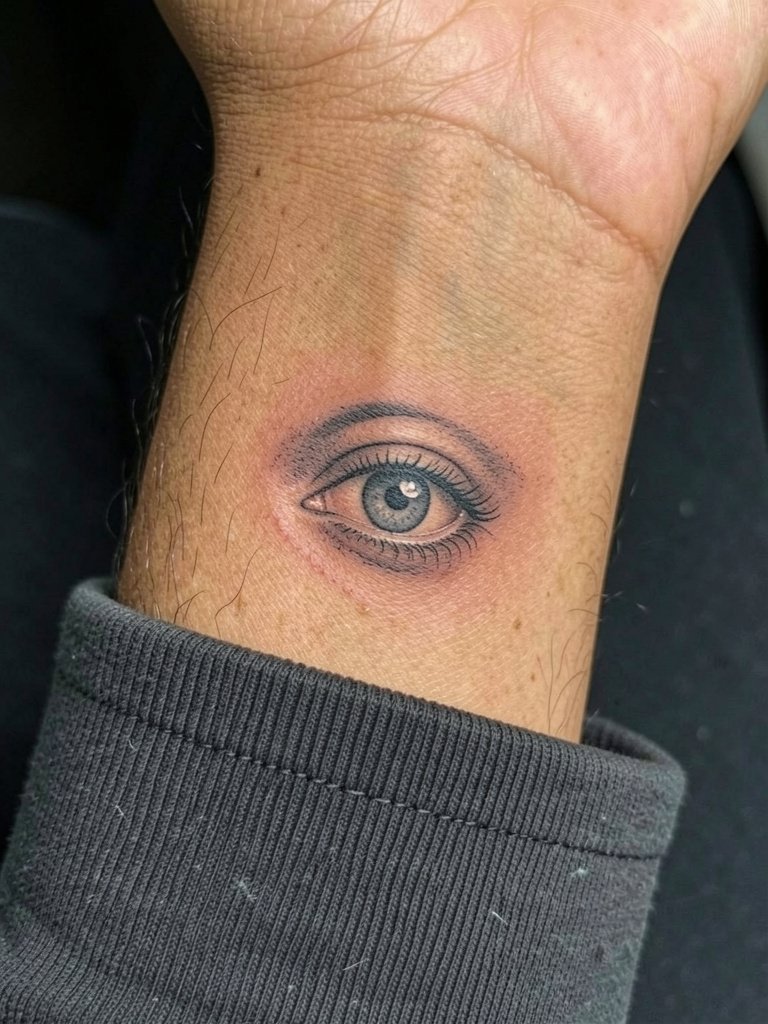
Micro-realism can look arresting but is high risk on small wrists. Fine shading in a tiny eye may lose contrast quickly. For this wrist piece request a slightly higher contrast between pupil and surrounding grey and plan a touched-up contrast session at around 12 months. Wrist movement makes crisp highlights fade. Session time is moderate and touch-up is likely. If you want to protect early shading bring non-irritating sleeves and avoid tight watches. When you wear short cuffed shirts consider a neutral fabric watch strap that does not chafe the area.
20. Minimalist Crescent and Dot on the Cheekbone
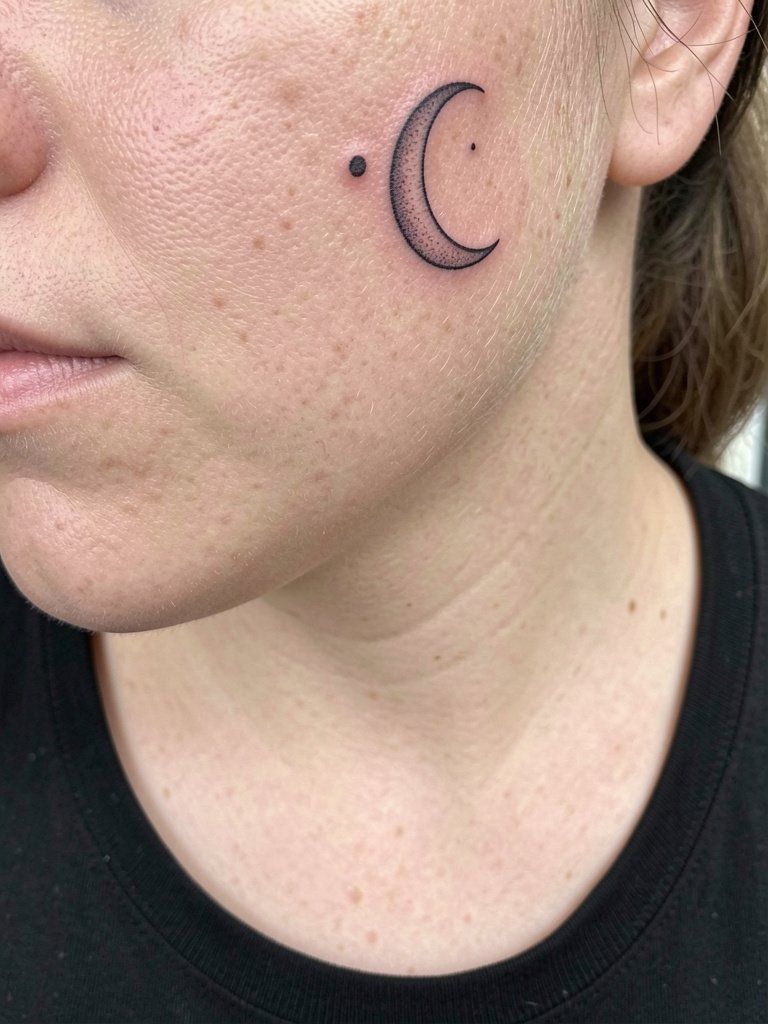
Face placements are visible and require an artist with experience in facial skin and social considerations. The cheekbone holds small symbols reasonably well but the skin is thin and highlights can disperse. Plan the symbol slightly larger than your phone mockup and expect elevated attention during heal. A cautious approach is to test with a temporary stencil in the same spot for a week so you can see how it sits with facial expressions. For makeup and styling, consider minimal coverage that lets the piece breathe and avoid heavy creams while healing.
21. Tiny Matching Paper Airplanes on the Shoulder Top
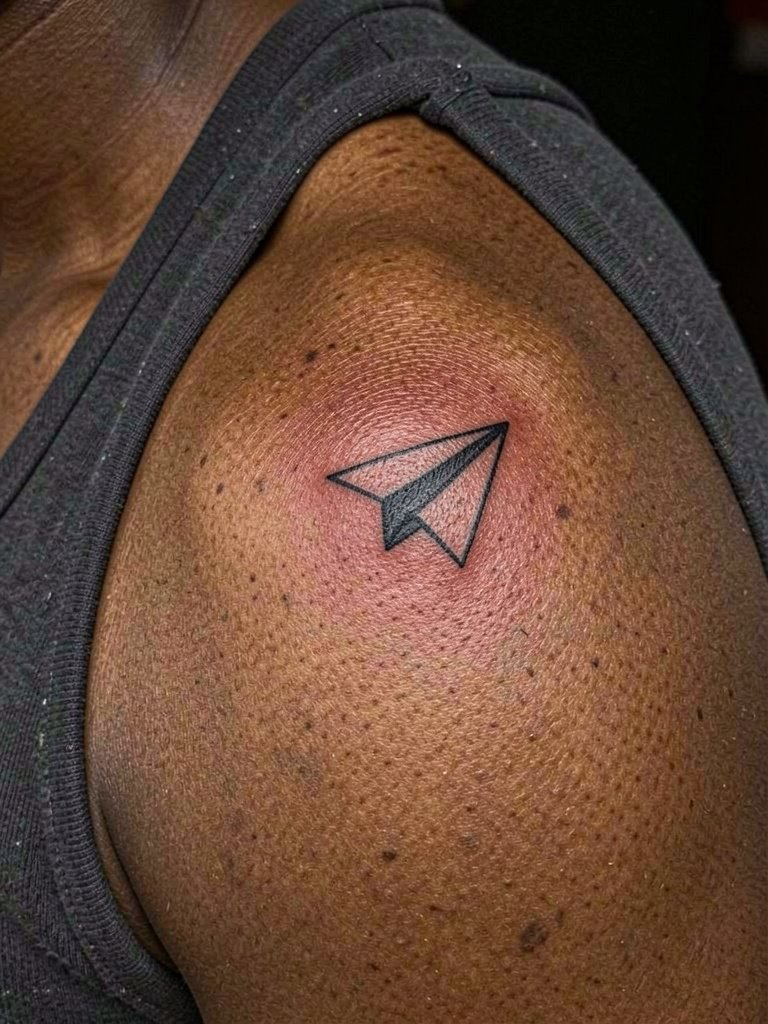
Top-shoulder pieces are low pain and easy to show. Tiny motifs like a paper airplane are durable when the silhouette is kept simple and not overloaded with interior detail. The shoulder tolerates solid outlines that age well. Discuss how the plane angles with shoulder movement so the trajectory looks intentional. Session time is short and touch-ups are uncommon if you pick bold enough outlines. For summer wear, try a cross-back tank that leaves the top shoulder visible.
22. Matching Tiny Keyhole on the Back of the Neck
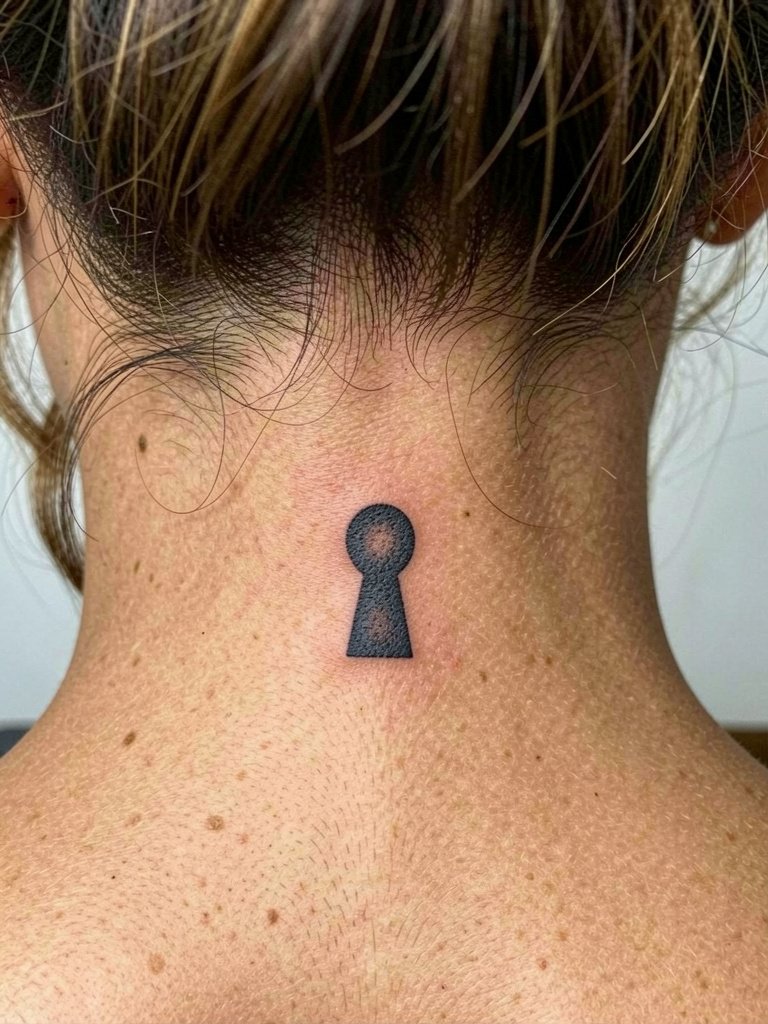
Nape pieces are subtle and can be shown or hidden by hair. The back of the neck heals well when the piece is kept compact and the lines are slightly thicker than micro-delicate. Plan exact distance from the hairline so growth does not obscure the work. Sessions are quick but require a steady hand because the area is small. For studio preparation, wear your hair up or bring a hair tie. For shows pick hairstyles that lift the hair, and consider a simple claw clip that keeps the nape revealed without rubbing.
23. Coordinated Crescent Moon Anklet on the Foot Arch
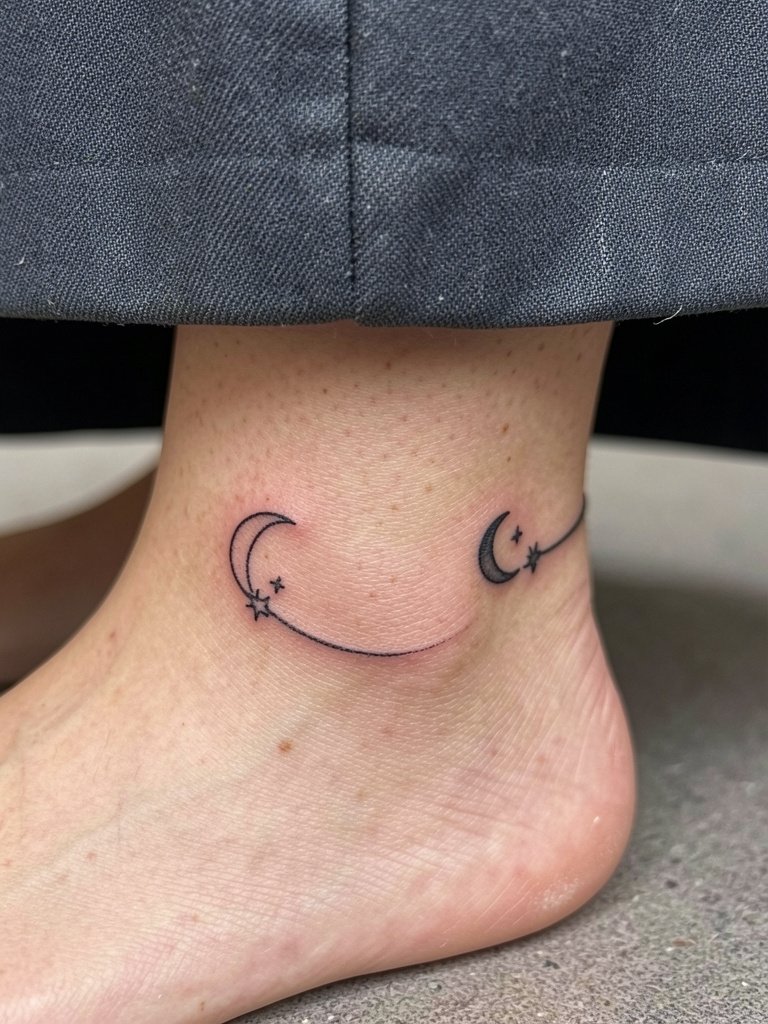
Foot arch and anklet placements face friction from shoes and pressure from walking so choose bolder line that can resist early wear. Expect slower healing and be prepared for potential touch-up at six to twelve months because the skin on the foot is unique. The session feels like steady pressure and can be painful for long runs. In the studio wear shoes you can slip on that do not press the newly inked area. For display, sandals or barefoot moments with a minimal slide sandal work best.
Frequently Asked Questions
Q: How do I choose between matching identical tattoos and complementary pieces?
A: Identical tattoos read as deliberate symmetry and are great if you want the same visual trigger. Complementary pieces let each person keep individuality while sharing meaning. Think about how often you want the visual cue present, where you both will wear it, and whether you prefer the graphic to stand alone. A simple way to decide is to mock up both options in scale and compare how each reads at arm’s length.
Q: Are tiny fine-line scripts safe for ribs and fingers long term?
A: Tiny fine-line scripts are a trade-off. On fingers the constant washing and thin skin mean lines thin fastest. On ribs the skin movement can blur very delicate work. If you prefer clean long-term legibility, request slightly heavier single-needle line weight and ask for spacing adjustments in millimeters so letters do not compress. Plan for a touch-up at six to twelve months for either placement.
Q: Where can I find portfolios and healed examples without naming specific artists?
A: Search platform tags and location filters to find healed photos. Try targeted hashtags and keywords on image-first platforms, use location search on short video apps, and browse portfolio aggregators that let you filter by placement terms. Examples of search queries are platform hashtags like #couplestattoohealed and keywords such as "matching wrist healed tattoo" in portfolio sites. Reddit threads also surface long-term healed shots from many skin tones.
Q: What should I wear to the appointment for sensitive placements like the inner thigh or sternum?
A: Choose session wear that grants clear access while keeping you comfortable. For inner thigh bring fitted bike shorts or loose shorts you can shift without exposing too much. For sternum or ribs a fitted sports bra or bandeau works because it sits in a natural position and can be lowered slightly without major adjustment. Loose garments that you can step into or pull down without hands on the work area make the session smoother.
Q: How often do couple tattoos need touch-ups?
A: Touch-up frequency depends on placement and style. Visible high-friction areas like fingers and feet may need a touch-up within the first year. Stable areas like outer biceps and shoulder blades often hold for several years before a refresh. My practical rule is expect one minor touch-up in the first 12 months and then evaluate every few years based on how the saturation and linework are holding.
Q: Can we get color together if one partner wants blackwork only?
A: Yes, you can pair color with blackwork but plan a cohesive palette so the pieces read as connected even with different approaches. Discuss saturation and contrast in the consultation and bring color references. Keep in mind that color fades differently across skin tones and placements, so sequence sessions or plan touch-ups to maintain parity over time.
