
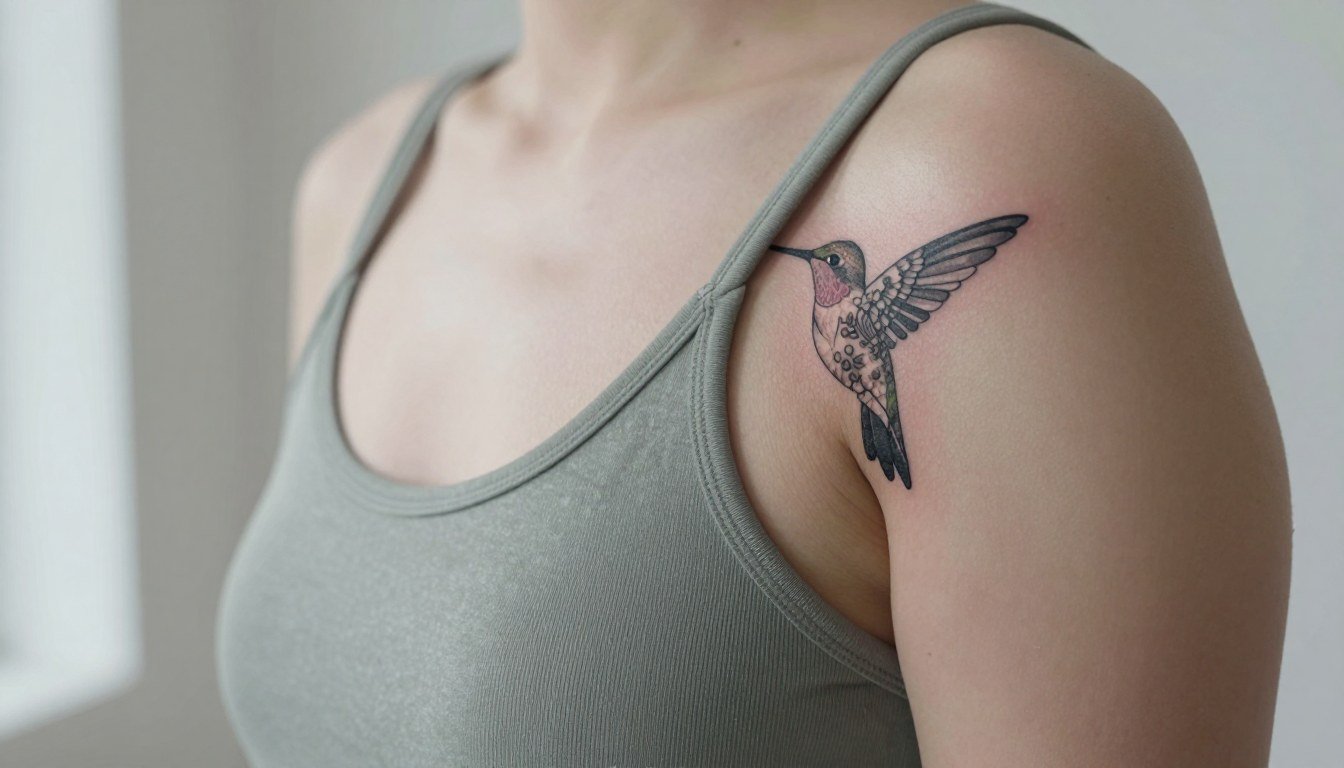
Black-only hummingbird tattoos often outlast the colorful versions people post on day-one reels. I say that because I have followed healed photos across threads where simple black silhouettes and saturated blackwork kept shape far longer than tiny multicolor picks. Read on for practical black hummingbird approaches, what holds up at year one and year five, and first-step placement picks that keep the bird recognizably a hummingbird as it ages.
1. Black hummingbird silhouette with negative-space wing beat
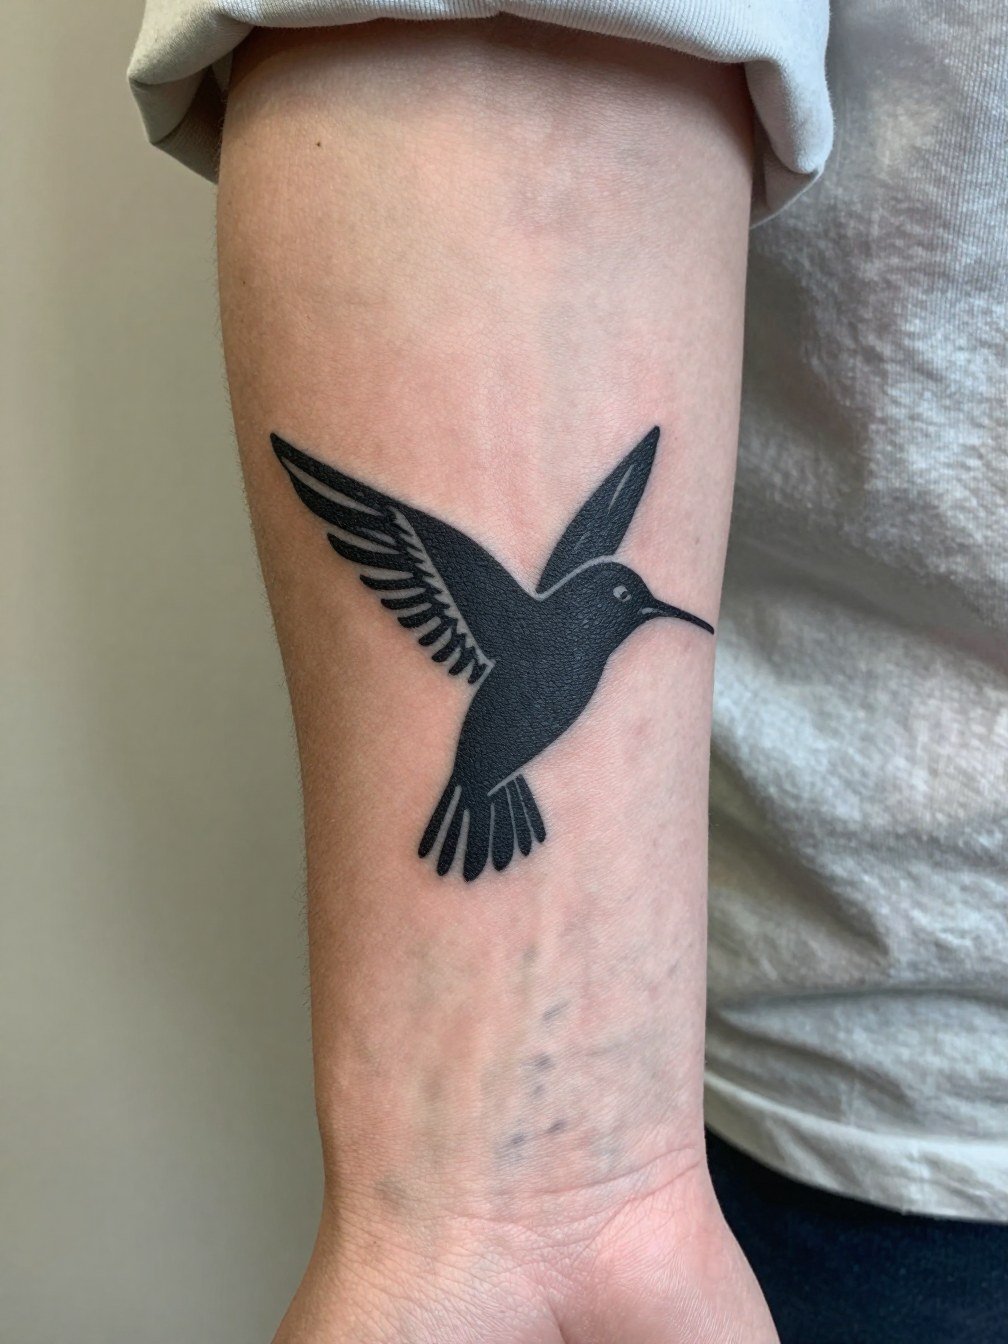
Clean silhouettes are the safest route for tiny wrist birds because the skin there moves and rubs against cuffs. Recommend a small negative-space wing to show motion without relying on micro-feather detail. For consultation bring a stencil at different scales so you can see the silhouette at two and three inches. Expect one short session and a low to moderate pain level. Common mistake is asking for too many tiny feather lines, which blur by year two. For showing the wrist, rolled sleeves and a minimalist watch keep attention on the silhouette.
2. Fine line hummingbird with a single flower accent

Fine line captures wing motion elegantly but it divides artists into two camps. One camp argues fine single-needle lines on small hummingbirds soften too quickly, especially on high-movement surfaces. The other camp says slightly wider spacing and careful depth lets fine line settle and still feel airy. For this placement plan for a 60 to 90 minute session and ask for slightly bolder contour lines around the flower so the bird reads at arm's length. Wear a linen button down that rolls up easily for the appointment.
3. Traditional hummingbird with bold outline and simplified feathers
Traditional linework holds up better than fragile detail when you want a hummingbird that reads from a distance. For a medium upper-arm piece expect one session of 90 to 150 minutes and moderate pain. A common error is overfilling small feather areas; simplified feathers keep the silhouette crisp as saturation ages. Discuss line weight specifics with reference images so the artist knows you want bold contour and controlled saturation. Show-off pairing includes sleeveless tanks and muscle tees, and a muscle tank top makes the placement pop.
4. Black and gray hummingbird with floral frame
This style is a go-to for memorial or tribute pieces because the frame supports a readable bird. Expect 1 to 2 sessions depending on size, and plan for touch-up risk on high-movement shoulders. A typical mistake is over-detailing the floral fill at the same scale as the bird, which competes visually and risks blurring. For a memorial script, ask for the lettering at a slightly larger size than you think to stay legible. To show it off pair with racerback tanks for summer wear. Sternum and rib controversies are separate, but here the shoulder gives similar visual impact without the same pain.
5. Stained-glass style hummingbird in blackwork
Stained-glass geometry gives the hummingbird structure and prevents the bird from reading as just a blob. This design benefits from firm black fills and clear panel lines, which helps longevity at the calf where skin is steady. Common mistake is over-fragmenting the panels; keep larger panels to preserve contrast years out. Expect 1 to 2 sessions depending on scale and a low to moderate pain level. For warm-weather showing pair it with biker shorts and low socks to frame the calf.
6. Armored hummingbird with heavy blacks
Armored blackwork takes an originally delicate subject into a darker, more graphic direction and is ideal for outer forearm placements that take the visual weight. Plan for 1 to 2 sessions of heavier saturation and discuss contrast zones so the bird keeps its silhouette. Mistakes include under-planned negative-space which makes the heavy black areas merge into a blob. For showing this design roll denim sleeves up and wear oversized t shirts to emphasize the forearm canvas.
Session Essentials
The six styles above cover small wrist silhouettes through heavy forearm blackwork, and those placements face different session and first-week needs.
-
Paper tape and nonstick pads. A low-irritation backup when second-skin products do not suit your skin, helpful for wrist and ankle pieces that rub against clothing.
-
Fragrance-free lightweight lotion. Lighter balms avoid clogging tiny single-needle channels on fine-line forearm work while keeping the surface comfortable.
-
Barrier film remover and adhesive-safe wash. Practical when a second-skin needs clean removal after the first 48 to 72 hours.
-
Unscented gentle cleanser bar. A gentle, low-foam option for the first full shower window that avoids fragrance irritation near detailed linework.
-
Saniderm second-skin bandages. Many people and artists favor second-skin on high-friction spots like wrists and ankles for a cleaner first 24 to 72 hours.
7. Micro hummingbird in black ink only
Micro pieces are low-commitment visually but demand scale discipline. If you want the bird to stay legible, size it slightly larger than your first instinct and reduce feather detail to a few key strokes. One session, low pain at the ankle, but watch friction from socks and shoes. A typical mistake is squeezing script or floral details into micro scale. For a clean reveal, pair with cropped pants or ankle socks when you want the ankle exposure.
8. Hummingbird and memorial script combo
Sternum placements read as intimate landmarks and come with higher pain and higher touch-up risk. People split on whether the added pain is worth it. One group says sternum designs feel more personal and photograph well. The other group points out identical designs look nearly as good on the forearm with much less discomfort. If you choose sternum, keep lettering bold and allow slightly more size for the script so it remains legible after healing. Session wear: a front-open shirt or sports bra that gives clean access for the artist.
9. Side-profile hummingbird in flight with no flowers
A side-profile bird keeps the design cleaner and avoids the cliché flower combo. Inner forearm is forgiving for motion so linework reads well for several years. Common mistake is trying to compress full wing span into too narrow an arm space. Ask for a mockup at actual scale to see the motion. Expect a one-session design with moderate pain. Style pairing: linen button-downs and cropped sleeves help the inner forearm read like a deliberate canvas. Try a linen button down for session comfort.
10. Hummingbird with thin white highlight outlines over black ink
A thin white outline can help edge separation on dense black areas but it is a technique that requires careful contrast planning. One camp says white highlights keep edges readable as black fades. Another camp warns white can yellow or disappear on certain skin tones. If you want highlights, ask for healed examples on similar skin tones and expect a 1 to 2 session plan. Wearing racerback tops or open-back dresses showcases the shoulder blade treatment.
11. Hummingbird perched near a branch or feeder
A perched scene turns the bird into a miniature narrative and works well on outer upper arm where space lets the branch breathe. Plan for shading that ages into soft contrast by year two and allow room in the composition so the bird does not disappear into the branch. Session estimate is one long appointment or two short ones depending on shading complexity. For wardrobe, fitted tees and rolled denim sleeves frame the outer arm and make the scene readable. Try a rolled sleeve jacket for casual show-off.
12. Small black hummingbird behind the ear
Behind-the-ear placements are discreet and heal fast but require a steady hand because skin there is thin. Expect a short session and a sharp sting. The main mistake is making the tattoo too detailed for that tiny canvas. If you want it subtle, keep the shape bold enough to survive hairstyling and shampooing. For appointment day, pin your hair up or wear an accessible updo so the area is exposed easily.
13. Hummingbird with botanical linework on the ribcage
Ribcage pieces suit flowing compositions but carry higher pain and higher movement-induced touch-up risk. Fine line here splits opinion; one camp says the stretch and breathing blur thin lines, and the other camp says careful spacing and needle depth let it settle. If you choose ribs, increase spacing and size slightly and plan for a possible touch-up at 12 months. Wear a loose top or sports bra to the session so the artist can reach the area without fabric tugging.
14. Black hummingbird with abstract motion lines
Suggest this for anyone wanting implied speed without lots of detail. Motion lines read well on forearm where movement supports the concept. Common mistake is over-layering motion strokes, which creates visual noise. One session gets most small to medium forearm versions done. For clothing, cropped sleeves and neutral tops help the motion read; try a neutral linen top for session comfort and show-off.
15. Minimalist geometric hummingbird silhouette
Geometric silhouettes are forgiving because the shapes are large and bold. They are a good compromise when you want minimalism without risking a blob. Avoid cramming micro-texture inside small shapes. One session, low to moderate pain on the inner forearm. For wardrobe, linen button-downs and cropped sleeves frame the piece elegantly. Consider a cropped sleeve shirt for the appointment.
16. Hummingbird in negative-space circle badge
Badge-style motifs age predictably because the negative-space shape is what reads, not micro-feather detail. This works well on upper arm where the skin is steady. Plan for a single heavier session and discuss the circle diameter so the bird keeps breathing room. A common error is making the circle too thin which reduces contrast as it fades. Show-off pairing: loose tanks and open sleeves. Try a loose sleeveless tee for easy session access.
17. Bold black hummingbird with stipple shadow
Add stipple shading for depth without soft gradients that age unpredictably. Stipple holds better than blended gray washes on some skin textures. Discuss stipple density with the artist so the shadow supports shape, not competes with it. Expect a moderate session time and limited touch-up needs. For evenings out, off-shoulder tops and wide-neck tees help the piece show. Consider an off shoulder top for styling.
18. Single-stroke contour hummingbird
This graphic approach reads as modern and scales well across collarbone or wrist. The challenge is keeping the single stroke at a steady thickness to avoid weak points that blur over time. Bring references showing exact line weight so the artist matches your intent. Session time is short and pain is low on the collarbone. Layered necklaces and delicate chokers frame collarbone placement, and a layered necklace set complements the look.
19. Blackwork hummingbird with dot-work background
Dot-work halos create atmosphere and keep the main bird readable. The calf is a good canvas for dot gradients because the skin remains stable with lower friction. Common mistake is overdoing dots close to the bird which can soften its edges. Expect medium session length and low pain. For show-off outfits, midi skirts and shorts work best. Try wide leg pants rolled for a casual reveal.
20. Hummingbird with thin script date underwing
If adding numbers or dates, size matters as much as font. Small fine script under the wing must be larger than you imagine to avoid blurring. Bring exact text so the artist can font-test it at scale. One session, moderate pain depending on arm tissue. For easy access wear a short sleeve tee to the appointment.
21. Hummingbird with negative-space feather layering
Layered negative-space details read strongly on broader flat skin like the upper chest but demand solid black saturation and crisp line edges. The common mistake is too-thin bridge lines between negative cuts which blur into one shape. Expect one longer session and plan for a possible touch-up at one year. Style pairing: low-neck tops and chokers emphasize placement. Try a low neckline top for special occasions.
22. Micro realism hovering over a tiny bloom
Micro-realism is gorgeous when done at a safety size that holds detail. On the ankle choose simplified petals and restrict featherwork to a few strokes to avoid blur. Expect a short session and plan the piece slightly larger than your sketch. For shoes and clothing, low-profile sandals and cropped pants showcase the ankle. A cropped ankle pants style pairs well.
23. Hummingbird with bold baroque framing
Baroque frames give a dramatic backdrop to a black bird and are best placed where scale lets the ornament breathe, such as the upper back. The risk is overcrowding the bird with too much filigree. Discuss where negative space will be preserved to keep the hummingbird legible at distance. Sessions may span two appointments for larger pieces. For evening wear, choose open-back dresses to show the composition and consider an open back dress.
24. Minimal hummingbird silhouette on the thumb side of the wrist
Wrist-side placements face constant washing and friction, so a bold silhouette with minimal internal detail will survive best. Watch bands and bracelets can cover or accent the piece. The main mistake is tiny script or lashes that vanishes over a year. Wear a slim watch or thin chain bracelets to coordinate, and bring a minimalist watch if you plan wardrobe around the tattoo.
25. Arm sleeve vignette with hummingbird cameo
If the bird is part of a larger sleeve vignette, plan its scale early so adjacent pieces do not overwhelm it. Sleeve integration needs composition planning so the hummingbird remains a focal cameo rather than a lost detail. Sessions will be multiple and higher in duration. For streetwear looks, rolled denim jackets highlight forearm work well. Try a rolled sleeve jacket for a pulled-back reveal.
26. Hummingbird with crescent moon backdrop
Crescent backdrops near the sternum add symbolism and frame the bird but expect a more painful session. Size the moon so it does not encroach on the bird shape as lines soften with time. A mistake is tiny filigree inside the moon which can become indistinct. Wear a front-open shirt to the session for easy access.
27. Split-wing mirrored hummingbird across the collarbone
Mirrored collarbone pieces rely on precise placement so the symmetry matches bone landmarks. A common error is uneven spacing relative to the clavicle which becomes obvious as the area settles. One session usually suffices for medium-scale mirrored designs. For outfit pairings, wide-neck tees and scoop necks frame the symmetry. A wide neck tee keeps the collarbone visible without fuss.
28. Hummingbird with anchor-style bold negative bar
Anchored motifs read well across time because they rely on bold geometry rather than tiny texture. Keep bar thickness large enough to prevent line migration from reducing clarity. Plan for a single heavy session and discuss negative-space bridges so the bird silhouette stays distinct. Pair with muscle tees or tank tops for a strong visual.
29. Abstract tribal-inspired hummingbird silhouette
If drawing from decorative or tribal motifs, be mindful of cultural origins and avoid sacred symbols unless you have personal ties or explicit permission. Abstract tribal lines give a graphic identity without borrowing specific iconography. The calf is a forgiving site for this bold approach. One or two sessions with heavy black saturation will get the job done. For warm-weather wear, pair with shorts and low sock sneakers for easy showing. Try crew socks when styling the calf reveal.
Frequently Asked Questions
Q: How much should I expect to pay for a small black hummingbird wrist piece?
A: Prices vary by city and studio, but small, one-session black silhouettes typically fall under the same-local-market range. In practice plan for a modest budget that reflects studio minimums and the artist’s hourly rate. Size up slightly instead of cramming detail to avoid early touch-ups.
Q: Where can I find healed-photo examples and artists who post real aftercare results?
A: Search Instagram and TikTok hashtags like #hummingbirdtattoo, #blackworktattoo, and #finelinetattoo with your city appended to find local portfolios. Reddit tattoo communities are especially useful for healed photos and candid comments about aging. Tattoo booking sites and studio directories with filter options for blackwork or fine line also surface portfolios that include healed shots.
Q: Does black-only really age better than color for hummingbirds?
A: Many people report black-only and black-and-gray pieces hold shape longer at small scales because contrast endures as saturation spreads. Others say color is essential to the hummingbird identity and prefer a careful black-and-color plan. If longevity is the priority, favor bold silhouettes or well-spaced fine lines rather than tiny multicolor feathers.
Q: What should I wear to the studio for a shoulder or ribcage hummingbird?
A: For shoulder work choose a loose tank or a zip/button layer that you can slide off one side without tugging the skin. For ribcage pieces bring a front-open shirt or sports bra that the artist can move without pulling. A front button shirt is a practical session option for chest and sternum access.
Q: How do I reduce blowout risk on small forearm hummingbirds?
A: Ask for slightly wider line weight and more negative space around key shapes so the ink has room to settle. Also request the artist show healed examples of similar-size work on comparable skin. Avoid single-needle contours that reach across high-motion zones unless the artist demonstrates long-term success.
Q: Are touch-ups common for hummingbirds on ribs and sternum?
A: Yes, those areas see more movement and friction so touch-ups are more likely. Expect possible touch-ups at the 6 to 12 month mark especially for fine-line work. Larger black fills tend to need fewer corrections than tiny script or micro-feather details.
Q: Can a black hummingbird be combined with a personal date or script without losing clarity?
A: It can if the script or date is scaled up and spaced deliberately from the bird so both elements breathe. Tiny script under a wing often blurs; make the letters a hair larger than your initial sketch and keep the ink density consistent.
