
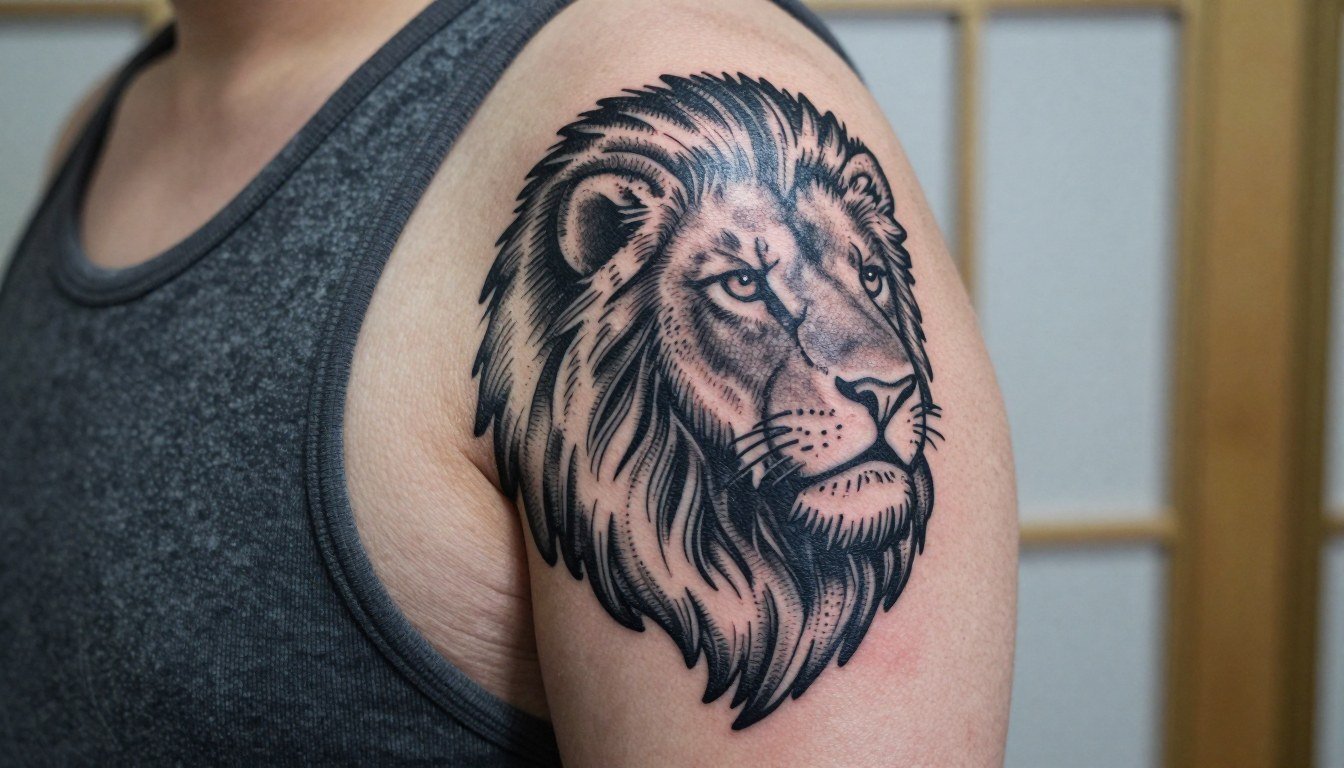
Heavy, saturated blackwork and simple script often outlast delicate single-needle pieces on training bodies. If you train five days a week, sweat and friction change how lines sit and how saturation ages. Pick placements and line weights that survive heavy movement, and plan healing around real workouts so the ink marks the milestones, not the mistakes. The first idea below starts with a forearm piece built for frequent lifts.
1. Bold Barbell on Outer Forearm

A thick-bar barbell on the outer forearm reads as strength iconography and holds up on muscular arms. Recommend heavier linework so the piece keeps contrast as skin texture and veins shift when you bulk or cut. Before the session bring a three-inch stencil mockup so you can see how the width sits along the forearm. Common mistake is asking for razor-thin detail that blurs after a year. Plan a touch-up at 12 to 18 months if you train daily. For showing it off, roll the sleeve and pair with a muscle tank for gym selfies.
2. Roman Numeral Plate on Inner Bicep

Inner biceps have moderate pain and camouflage under shirts when you need to hide ink. The trick is spacing. Ask for slightly wider character gaps than a flat reference so the numerals do not merge as the skin stretches. A mistake is single-needle thin numerals that disappear into texture after two years. Session time runs shorter than chest work, often under an hour. During the appointment wear a loose sleeveless shirt so the arm stays relaxed. For after the healing window this spot pairs well with a rolled-sleeve chambray shirt for casual evenings.
3. Minimalist Plate with Coordinates on Outer Wrist
Wrist text is high-visibility and high-maintenance because of constant washing and friction. Use bolder type rather than ultra-fine script so it stays legible. Tell the artist to set the characters just above the wrist crease to reduce distortion. The common error is placing thin script on the crease itself which fades quickly. Expect a quick session under 45 minutes and a likely touch-up at year two. When you want to showcase this, a clean minimalist watch frames the linework without covering it.
4. Stacked Plate and Crown on Outer Shoulder
Shoulder caps handle saturation well and take longer sessions. This placement reads big even when relatively small because of the curve of the deltoid. Ask for the crown to have negative-space highlights so it reads from a distance. People often ask for too much tiny detail inside the crown and then lose clarity after a year. A typical session runs 90 to 150 minutes and may need a touch-up at one year if you train shoulders heavily. For gym days the design looks intentional with a sleeveless performance tank.
5. Geometric Plate on the Calf
Calf pieces age predictably because the skin there has less friction than forearms. Recommend bold line spacing and alternating solid fill with stipple shading for longevity. Discuss how the design wraps slightly around the muscle so it reads even when you shift stance. A common mistake is making the lines too close which causes blur as the calf moves. Session time is moderate and healing tolerates light cardio earlier than chest or ribs. For evenings out show this with low-cut ankle boots that let the calf peek.
6. Script Mantra Along the Collarbone
Collarbone script can look refined or fragile depending on the line weight. For training bodies go with a slightly bolder single-needle that keeps the rhythm of cursive without collapsing. Specify the exact word spacing and have the artist show stencil placement while standing. The mistake is tiny flowing script placed too close to the bone which can scar and blur. This area is sensitive and may need a numbed session for comfort. Pair this with open-neck shirts and a lightweight henley for casual nights.
Pre-Session Essentials
The forearm, wrist, and collarbone pieces above are vulnerable to sweat and friction during the first week, so choose a few practical items that make the session and early healing easier.
-
Disposable stencil transfer paper. Helps you preview exact placement on the forearm and collarbone before the first line goes in.
-
Topical numbing cream. Apply as directed 30 to 45 minutes before a collarbone or rib session for a more tolerable experience.
-
Thin breathable protective film roll. Useful for small wrist pieces and outer forearm work during the initial 24 to 48 hours.
-
Unscented gentle body wash. Cleans healing areas without irritation after light sweat exposure.
-
Aquaphor healing ointment. A mainstream option for thin layers during the earliest healing days to protect fine line and small script work.
7. Classic Eagle Crest on Upper Back
Upper back pieces tolerate large sessions and heavy saturation. Ask for central placement relative to the spine and shoulder blades so the crest stays symmetrical as your traps develop. A mistake is under-saturating the background which makes the crest look flat on muscular backs. Expect a longer session or two segments. Healing allows lower-body training earlier than heavy upper-body lifts if you keep the area dry and avoid bench pads. For cover-ups or showing off, crewneck tees with a wide-back cut highlight the piece.
8. Micro-Realism Wolf on the Bicep
Micro-realism can look striking on curved biceps but it needs space and contrast. Ask for high-contrast reference and slightly more saturation than similar portrait work so the fur texture keeps shape as the skin moves. The common error is attempting extreme tiny detail on thick hair follicles which softens with healing. Session time is moderate and might include short breaks to maintain precision. Pair this with fitted gym tees and a sleeveless hoodie to show the bicep without restricting motion.
9. North Star and Compass on Inner Forearm
Inner forearm is versatile and visible during training so choose a scale that reads during movement. Request slightly thicker main points on the compass so the central star keeps definition after a year. Many people request super-thin needles and regret the softness after heavy sweat periods. Touch-up at 12 months is common for high-use arms. For workout days this design pairs cleanly with a performance wristband that frames the compass without hiding it.
10. Chain Link Blackwork Around the Wrist
Wrist bands face constant washing and contact, so heavy saturation and wider links prevent early break-up. Ask for even spacing and confirm the band sits a finger-width above the wrist crease. A common mistake is taking a thin ornamental approach that fades first. Sessions are short but may sting more because of thinner skin. For daily wear show it with a minimal bracelet or a leather cuff that complements the band without rubbing the healing skin.
11. Anatomical Heart with Barbell Accent on Pectoral
Chest placements are intimate and sensitive, so expect stronger pain and slower healing. Discuss depth and shading so the anatomical detail keeps contrast without overworking the area. One mistake is cramming intricate veins into a small piece which loses legibility on moving muscle. Plan lighter chest training during the first week and avoid benching on textured pads. For showing this subtly under gym wear try a low-cut compression top.
12. Wolf Paw Micro-Sigil on the Side of the Hand
Hand and finger tattoos are high-commitment and high-fade due to constant washing and grip friction. If you want durability choose bold simplified shapes rather than intricate shading. Ask for dense packing and minimal tiny lines so the paw reads after a year. Many first-timers are surprised by how often touch-ups are needed. Healing here requires careful moisturization and avoiding weight training that presses the hand into bars for the first week. For style, a slim sport ring keeps the hand looking intentional without rubbing the area.
13. Spear and Laurel on Outer Thigh
Outer thigh works for larger motifs and ages well because it avoids daily abrasion. Request spacing between laurel leaves so the detail holds even if you gain muscle. A common mistake is using too-fine leaf veins which merge with time. Session time can be comfortable if you wear loose-fitting shorts to the appointment. This area is less affected by upper-body sweat so you can resume leg days sooner. Show it off with athletic shorts that sit normally above the tattoo.
14. Geometric Plate Across the Sternum
Sternum work is high on the pain scale and controversial among artists for single-needle placements. One camp says the sternum and breast-adjacent skin stretches and blurs thin lines within two years. The other camp argues that slightly wider spacing and controlled needle depth makes geometric sternum work settle well, and they will point to healed portfolios to support that view. If you pick a geometric panel, insist on bold outlines and reserve fine detail for later expansions. Plan two shorter sessions rather than a single long push.
15. Minimalist Plate Behind the Ear
Behind-the-ear pieces are discreet and quick. Ask for compact, bold dots rather than tiny pinprick lines because the area loses detail quickly. The error is asking for micro script or tiny filigree which blurs and looks patchy. Session time is brief and healing is fast if you avoid hair products on the spot. For discreet show-off pair this with a short updo or a baseball cap worn normally.
16. Traditional Dagger on Outer Forearm
Traditional daggers use bold linework that survives frequent gym contact. Request solid black fills and ask for the design length to follow the forearm's long axis to complement muscle lines. A classic mistake is over-detailing the handle which distracts from the silhouette. Forearm pieces can be done in a single long session and often need only minimal touch-up. For a look that reads around weights pair it with a rolled-sleeve oxford.
17. Atlas Plate with Roman Map Lines on Upper Arm
Upper-arm canvases are forgiving. For map work pick midline spacing and avoid micro-labels that will blur. Have the artist map the piece to your bicep curve so it sits naturally when you flex. People who want too many tiny place names often see the detail collapse. Session time is usually comfortable with one break. For showing a larger arm piece wear a short-sleeve button-up with sleeves rolled to the mid-bicep.
18. Blackwork Wolf Shoulder Cap
A saturated shoulder cap reads bold and ages reliably if the saturation is even. Ask for clear negative-space highlights so the silhouette keeps its edge. The error is trying to cram in excessive inner detail that conflicts with heavy black fills. Sessions can be long so plan rest and hydration. Given the placement, benching and overhead presses need spacing out during the first week. For gym and street looks this pairs well with a cutaway tank.
19. Anchor and Rope on Outer Calf
Calf anchors stay visible and withstand abrasion if you avoid tiny rope details. Specify thicker rope linework and ask for the knot to be simple so the silhouette is strong. A mistake is adding micro-lettering in the rope which disappears. Session time falls in the moderate range. If you run frequently keep socks off during the first two weeks to prevent friction. To display the piece casually choose low-cut sneakers.
20. Lion Rampant on Outer Thigh
Large outer-thigh heraldry looks commanding and handles saturation well. Discuss the scale so the mane flows with quad movement. A common mistake is making the piece too narrow which loses presence when the thigh expands. This placement allows more aggressive shading without early blowout risk. Sessions can be long so bring comfortable shorts to the appointment. When you want to reveal the work use mid-thigh training shorts.
21. Micro Script Recovery Date on Inner Wrist
Inner wrist script is visible and meaningful, but thin script fades fast with frequent hand washing. Ask for slightly heavier single-needle work and preview a printed mockup on your wrist. The misstep is choosing cursive so thin that letters blur into a smudge. Expect a small session and possibly a touch-up at twelve months. For subtle display try pairing with a slim fitness tracker band that frames the wrist without covering the text.
22. Spartan Helmet on Upper Arm
Helmet motifs demand strong silhouettes so they remain iconic as muscles change. Ask the artist to map the crest to your bicep peak so the shape reads when you flex. The error is using too-light interior shading which disappears. Sessions are straightforward and can be combined with other upper-arm work. For gym wear show this with a drop-arm tank.
23. Minimal Plate Behind the Knee
Behind-knee placements are sensitive to movement and can stretch, so bold simple forms win. Specify uninterrupted outlines and avoid tiny interior lines that will warp. Many clients try ornate detail here and are disappointed as the skin flexes. Sessions are shorter but expect some soreness when bending. For sessions wear shorts and breathable fabrics to keep the area dry. A sporty pair of trainer socks that stop below the tattoo keeps rubbing minimal during exercise.
24. Blackwork Cross on the Sternum Edge
Small sternum-edge pieces are intimate and require planning because of movement and breathing. Ask the artist to test position while you stand and sit so the cross keeps vertical alignment. The mistake is assuming symmetry from a lying stencil without checking movement. Because the area is sensitive expect more discomfort and slower sessions. For show-off moments a deep V-neck or a cutout tee worn normally highlights the placement.
25. Clock Face with Plate Hands on Outer Forearm
Clock motifs need simple numerals or none at all for durability. Request bold hands and avoid tick marks that are too close to each other. People sometimes insist on ornate roman numerals that compress and blur. Sessions are moderate and forearm clocks take regular contact so expect minor touch-ups. For consistent display a canvas strap watch sits near but does not cover the face.
26. Spartan Shield Over the Scapula
Scapula placements let you scale up while keeping clarity. Ask the artist to contour the shield to the shoulder blade curve and confirm symmetry when you flex. The mistake is tiny ornamentation near the rim which flattens when the back moves. Sessions can be long and require you to bring a comfortable top that allows access. For a subtle reveal choose a wide-back gym tee.
27. Bold Script "Consistency" Along the Side Rib
Rib and side-torso script is painful and needs careful spacing because the skin flexes with breathing. One camp warns that fine-line ribs blur quickly under the stretch and recommends bolder spacing and slightly heavier line weight. The other camp believes precise needle depth and conservative spacing lets fine script settle nicely, and they will show healed images to back that claim. If you want this spot, prepare for numbing and two shorter sessions. For covering during heavy lifts pick a tight-fitting base layer and a loose training tee worn normally.
Frequently Asked Questions
Q: How long should I avoid the gym after getting a tattoo if I train regularly?
A: Opinions split into two clear camps. One camp recommends avoiding heavy sweating and direct gym contact for at least seven days to reduce infection risk and friction on new ink. The other camp allows light cardio and non-contact sessions after three to five days if the area is clean, covered when necessary, and not irritated. Choose the timing that matches the placement and follow the specific wound-care method given at your appointment.
Q: Are second-skin bandages safe if I sweat while training?
A: Artists and gym-goers disagree. Some argue second-skin protects against surface bacteria and keeps friction down during the first 24 to 48 hours. The opposing view notes trapped sweat under film can macerate the skin and lift edges, so they recommend only short, monitored use. If you use a protective film, check it frequently for edge lifting and replace it immediately if fluid accumulates.
Q: Where can I find healed examples and portfolios for these gym-ready styles without naming artists?
A: Search social platforms with targeted tags like #blackworkforearm, #shouldertattoo, and #musclearmink and filter by location to find studio portfolios in your city. Reddit tattoo threads and TikTok reels often show healed timelines which help more than fresh photos. Look specifically for "healed" or "6 months healed" shots in portfolio descriptions to see how the style ages on muscular bodies.
Q: How do I pick line weight and spacing for an active lifestyle design?
A: Ask for slightly heavier main lines and avoid ultra-fine interior detail when you train often. Request the stencil scaled up on the skin so you can judge spacing while standing and flexing. The artist should show how the piece reads at three sizes so you can pick the version that balances detail and longevity.
Q: What should I wear to the studio for a shoulder, bicep, or rib session?
A: Wear clothing that gives the artist easy access with no fabric shifting or pulling. For shoulders and biceps a loose tank or sleeveless tee keeps the arm relaxed. For ribs and sternum pick a fitted sports bra or bandeau so the artist can work without you adjusting clothing. Bring a lightweight zip-up hoodie to wear home that does not rub the fresh area.
