

Bold sleeves are still the easiest way to read a tattoo from across a room, but what holds up over time is rarely the prettiest thing on your saved boards. Many guys want to build a sleeve in stages, worry about cost, and fear trendy fine-line pieces fading into mush. These 23 ideas balance longevity, placement, and wardrobe so the arm grows into something intentional.
1. Skull and Roses Full Sleeve, Black and Gray Anchor
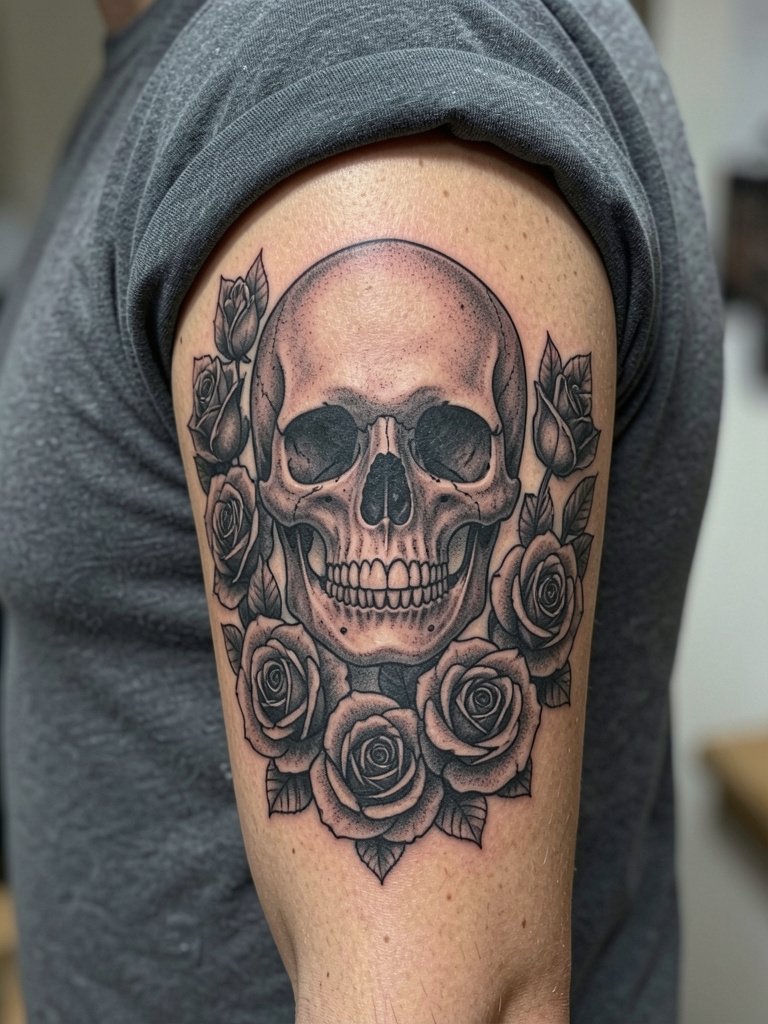
Start this as a large anchor on the shoulder cap so the skull reads from a distance and the roses flow down to the forearm. In the consult bring two scale references so the artist can place the skull at the size that still shows teeth detail after a few years. A common mistake is shrinking the skull too small to "fit" other pieces. Expect longer sessions for the shoulder cap and touch-up needs at the wrist where skin moves more. For showing it off, a short-sleeve fitted tee highlights the contrast, try fitted+plain+t+shirt.
2. Norse Mythology Narrative Sleeve with Yggdrasil Motif
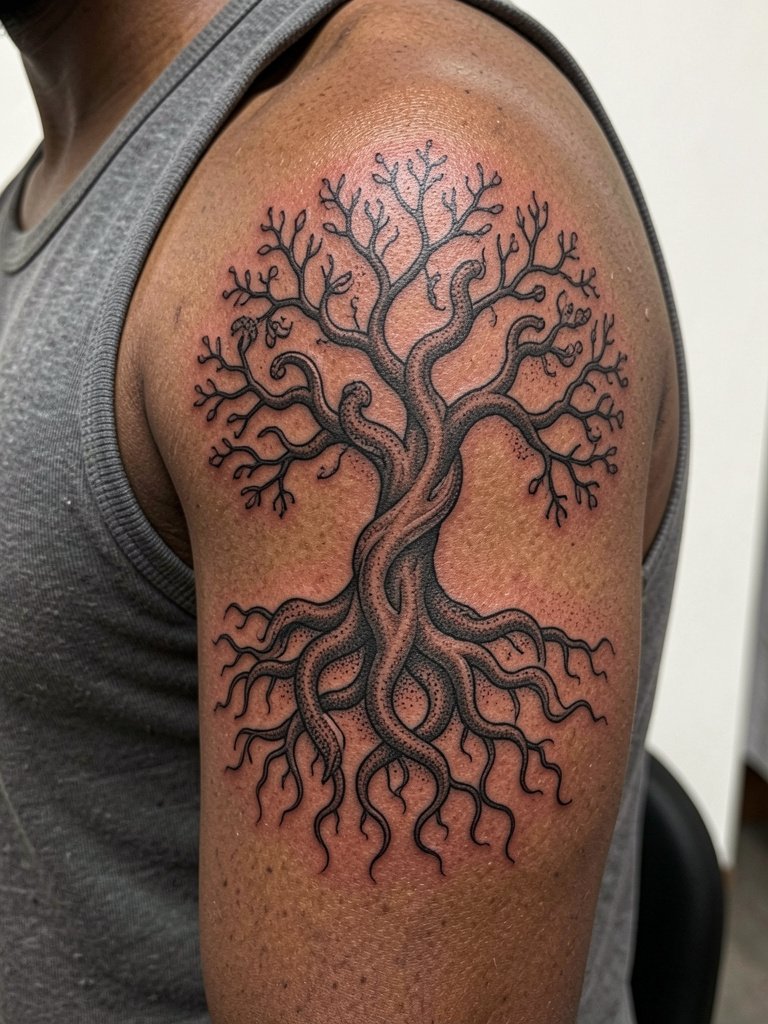
This sleeve works when you commit to a single visual language, in this case heavy black linework and scale. Ask the artist for large negative-space branches that separate future motifs, and bring mythology reference panels showing composition rather than tiny symbols. The biggest mistake is overloading the trunk with tiny details that blur. Expect multiple long sessions and plan filler mandala or knotwork between roots to keep the arm cohesive. Wear a sleeveless tank on show days and try sleeveless+tank+men.
3. Chinese Dragon and Phoenix Flowing Sleeve, Color or Monochrome Option
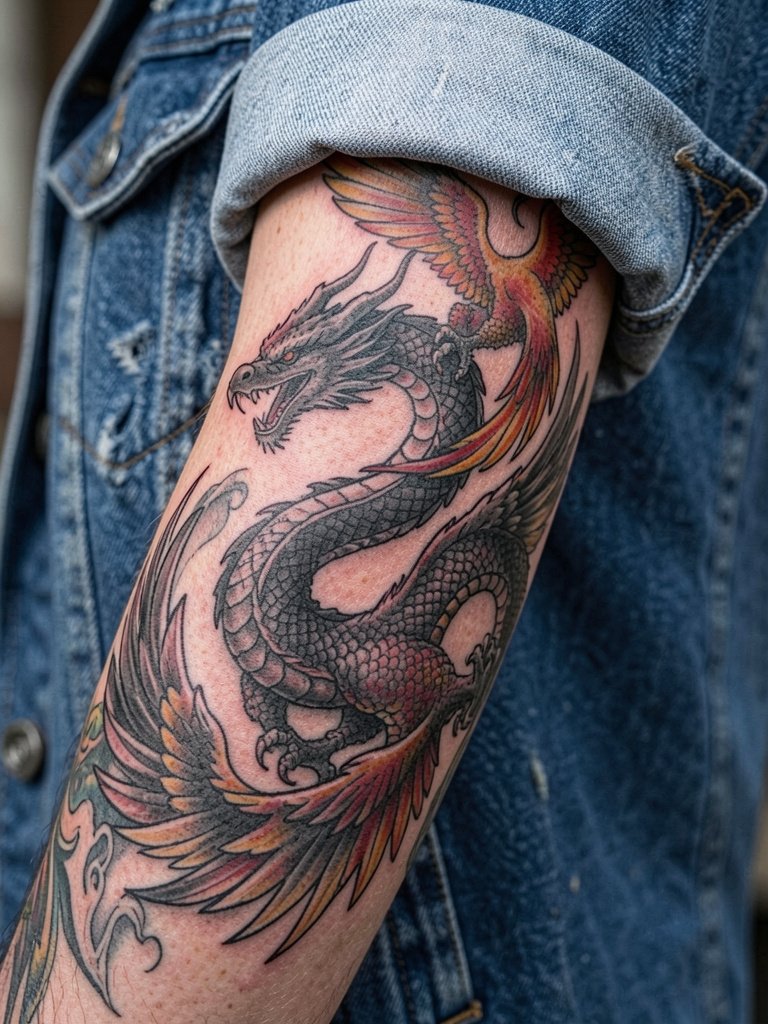
This composition reads best when the dragon and phoenix are drawn as long shapes that take advantage of the arm's curvature. Decide early whether you want color or black and gray. One camp prefers black and gray for predictable aging, while the other camp opts for color for present-day impact. Name both choices during the consultation and ask to see healed color work from year two to judge saturation. A common error is cramming both creatures into a small forearm panel. For evenings out, neutral basics like a plain white tee make colored scales pop, try plain+white+tee+men.
4. Roman Statues and Columns Sleeve, Tonal Realism
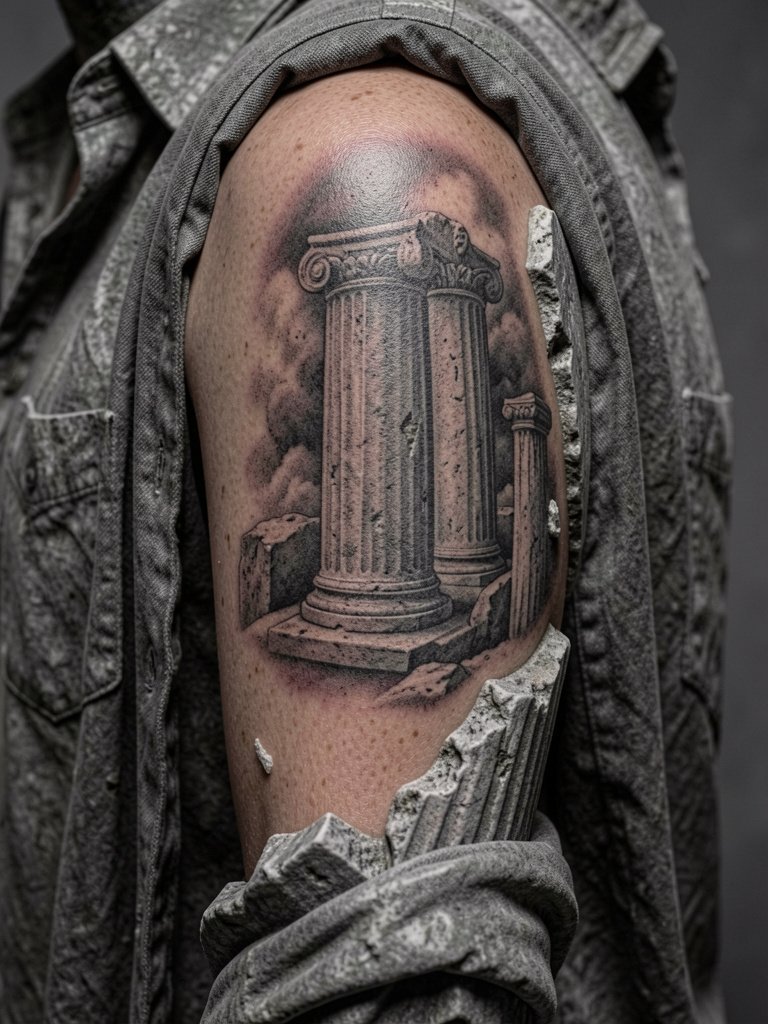
Use large panels for statues so the shading reads at six months and beyond. Bring printed photos showing the exact facial angle and the grain of the stone you want emulated. The common mistake is shrinking portraits too small. Expect steady shading sessions that can last multiple hours. Pair the finished work with rolled sleeves or an open overshirt to reveal helmet and column elements, try button+up+shirt+men.
5. Patchwork Sleeve with Skulls, Chains, Clouds, and Floral Fillers
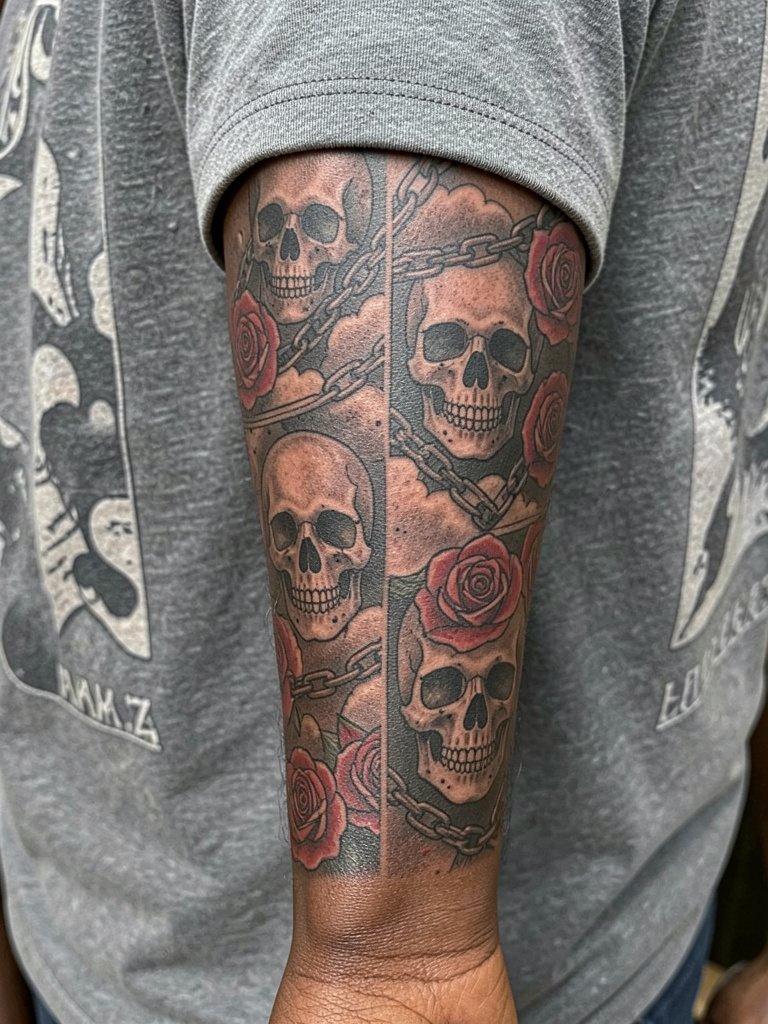
Patchwork lets you build a sleeve over years without locking into one scene. One camp argues a fully mapped sleeve avoids awkward filler gaps later. The other camp prefers patchwork for personal flexibility and collecting meaningful pieces over time. Spell out to your artist how much negative space you want reserved for future additions, and bring a loose map sketch so panels sit well with the elbow transition. A frequent misstep is inconsistent lineweight between early and later pieces. For session comfort, wear a loose short-sleeve shirt and try loose+short+sleeve+shirt.
Pre-Session Essentials
The shoulder and forearm pieces above each handle sweating and friction differently, so a small kit smooths the chair day and the first week.
-
Second-skin bandage Saniderm roll. Helpful for the first 24 to 72 hours on larger blackwork panels to reduce friction and protect newly packed ink.
-
Fragrance-free gentle body wash. Cleans the area during showers without stripping ink or irritating healing skin.
-
Thin protective film roll for clothing abrasion. Useful for ankle or wrist work where fabric rub is constant while commuting.
-
Topical numbing cream. Applied per product instructions before longer sessions eases sensitivity on ribs and inner forearm panels.
-
Lightweight tattoo balm option. A thin, non-greasy balm helps with initial moisture balance for detailed linework.
6. Flock of Birds Flying Out of a Tree, Directional Movement Sleeve
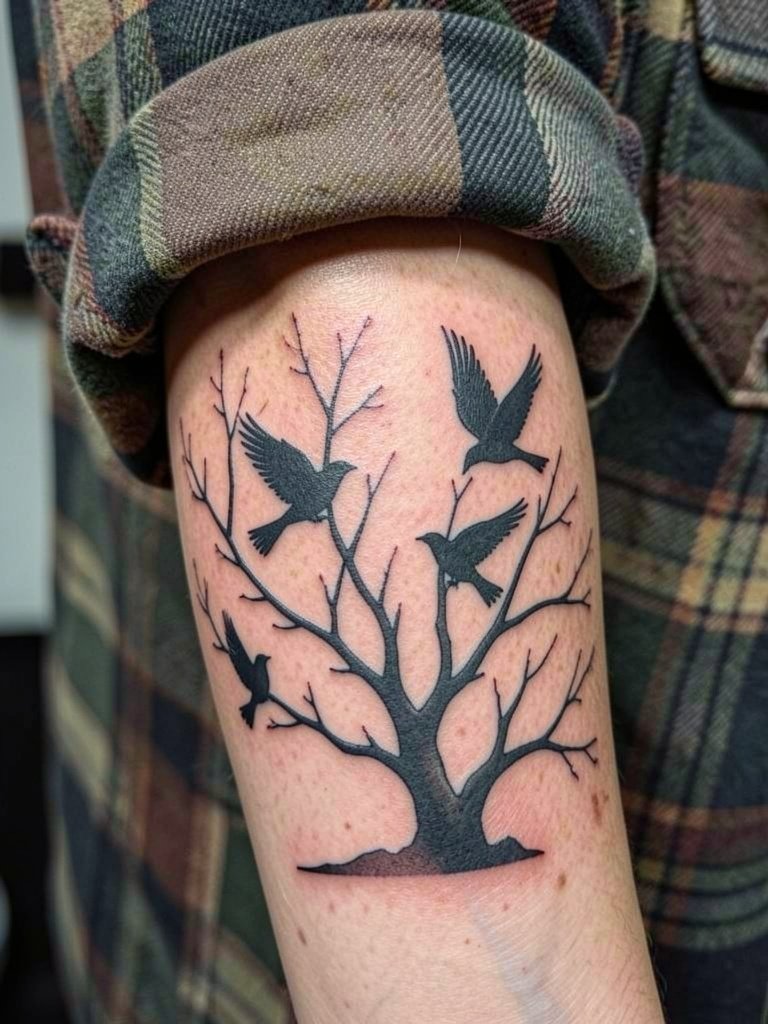
This idea relies on negative space to create motion. For readability ask the artist to make bird silhouettes larger toward the wrist so perspective reads properly. The usual error is tiny birds that blend together after a year. Expect quicker sessions for the larger bird silhouettes and a touch-up in year two to crisp edges. For daily wear, rolled-sleeve tees or lightweight flannels frame the wing motion well, try rolled+sleeve+shirt.
7. Full Blackwork Sleeve with Geometric Negative Space
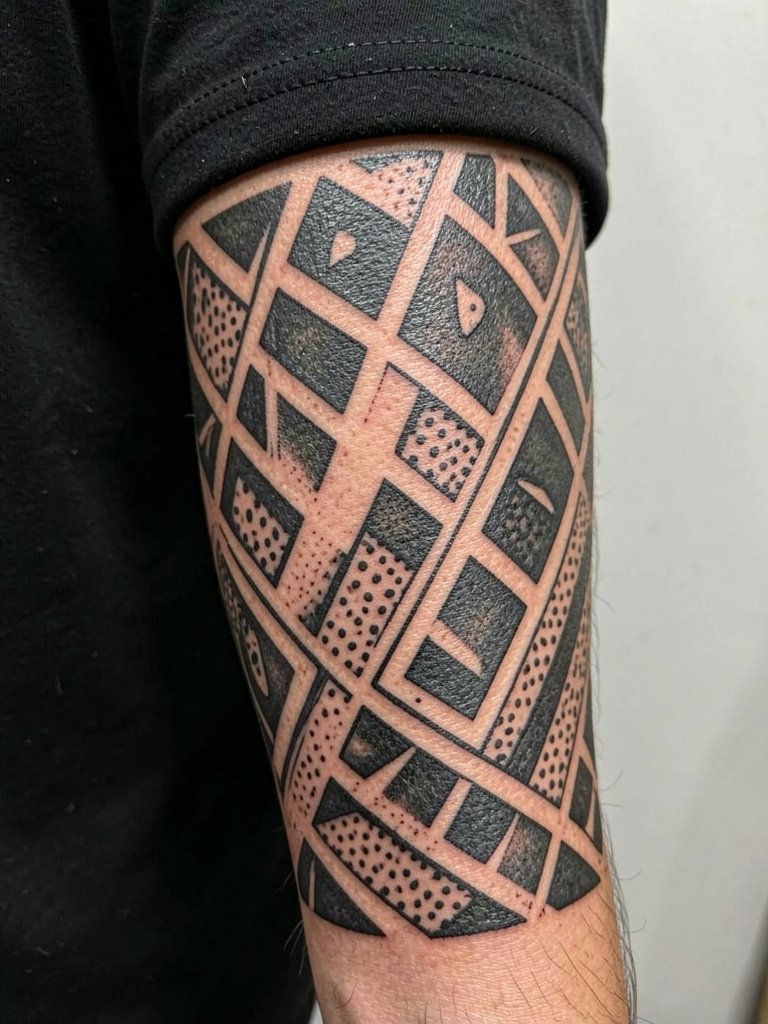
Blackwork is one of the most durable visual languages for a sleeve because saturation and high contrast maintain legibility. Some people prefer black and gray for longevity and predictability. Others choose color for immediate visual impact and accept more frequent touch-ups. Talk through the long-term maintenance plan with the artist and plan the black fields around the elbow to avoid early scabbing. Session-wise expect many short packing passes to build saturated blocks. For a graphic look pair the sleeve with monochrome tees and straight-fit jeans, try black+t+shirt+men.
8. Geometric and Abstract Sleeve with Dotwork Transitions
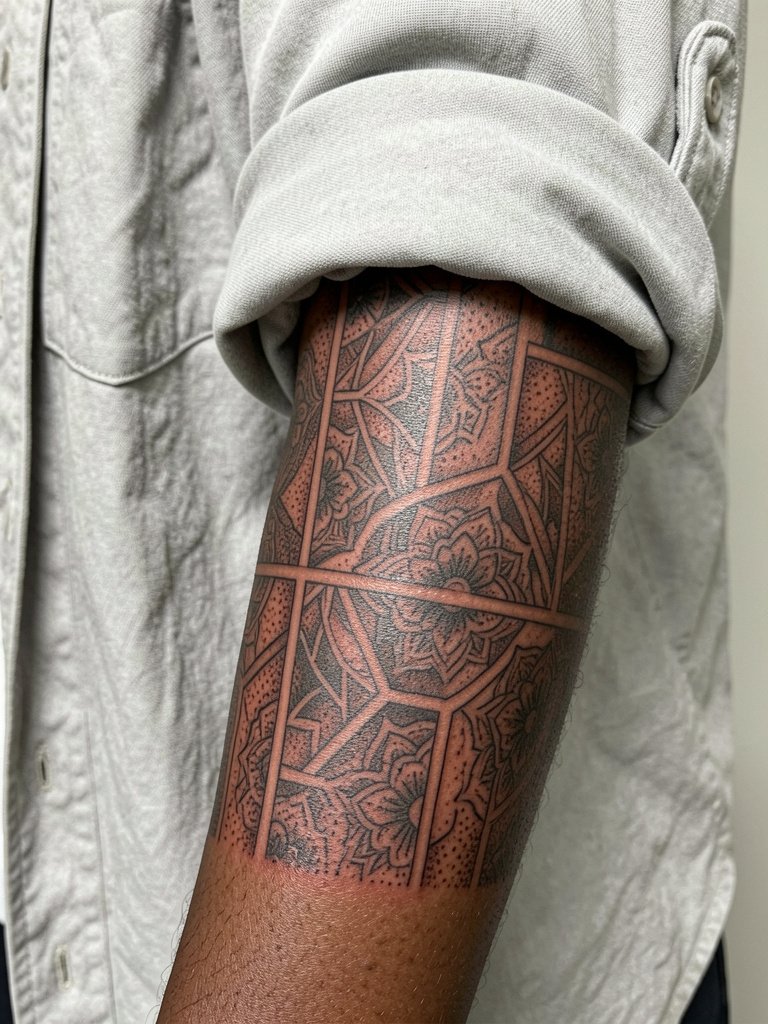
Geometric sleeves demand scale. Small, dense geometry can blur into a texture that looks muddy. Specify pattern scale to the artist and request a mockup showing how repeat units look at arm circumference. A common error is trying to force symmetry across a curved joint. Dotwork takes time and multiple sessions, and these sections often need a two-year touch-up to restore crisp stippling. Wear a dark overshirt or clean denim to keep the shapes graphic, try dark+overshirt+men.
9. Mandala and Ornamental Fillers for Cohesion
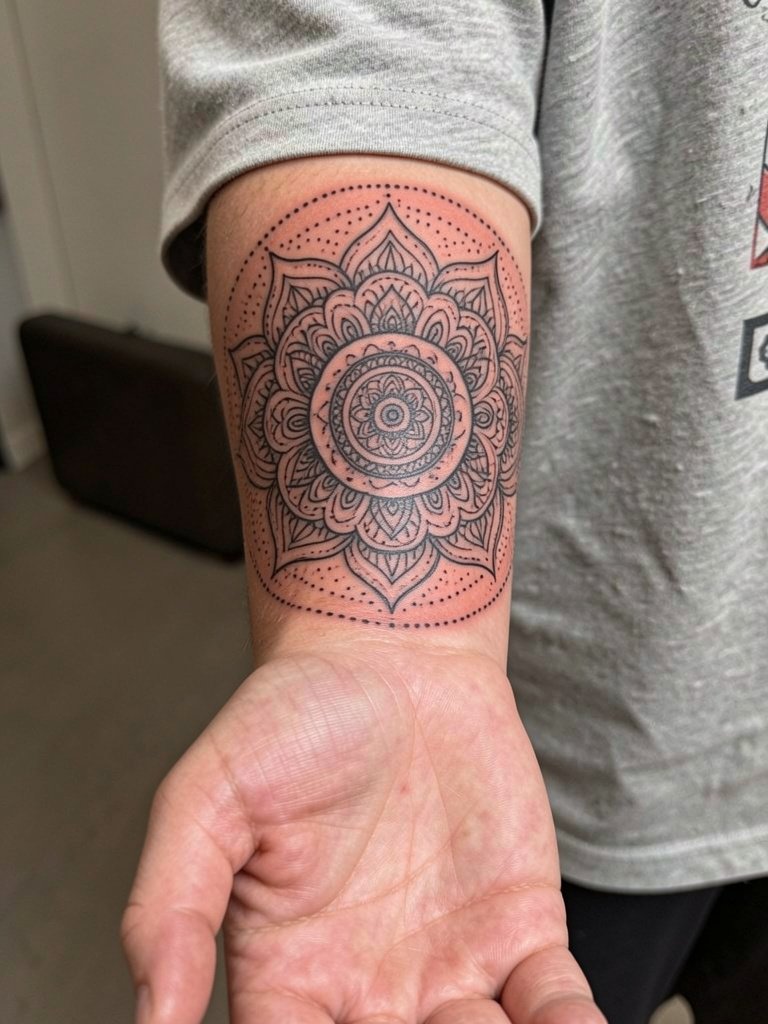
Use mandalas and ornamental bands to bridge unrelated panels so the sleeve reads as one piece. Ask for variations in density so the mandala can sit lighter on the inner forearm and heavier near the outer arm. A mistake is forcing identical filler across different skin textures. These fillers age gracefully if linework is purposely bold for distance and slightly finer toward detailed areas. For a subtle reveal, pair with a soft cotton tee or open button-down, try soft+cotton+tee.
10. Traditional American Sleeve with Eagles, Roses, and Ships
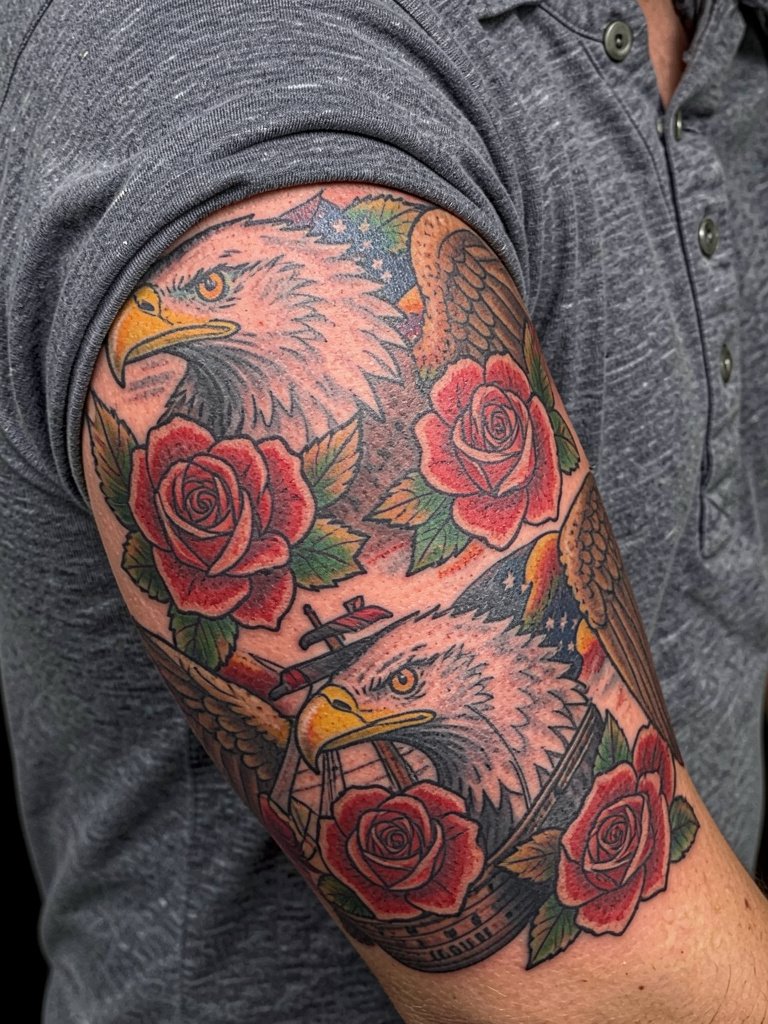
Traditional American hold their contrast because of bold outlines and saturated flats. When planning, ask for slightly larger spacing around the wrist so the ship and rope read after movement and time. A typical mistake is overworking small shading inside bold outlines which softens faster. These pieces usually need routine touch-ups every few years to restore saturated color on sun-exposed forearms. Show it off with a solid-color henley or rolled sleeves, try solid+henley+shirt.
11. Nature-Inspired Sleeve with Forest, Mountains, and Celestial Details
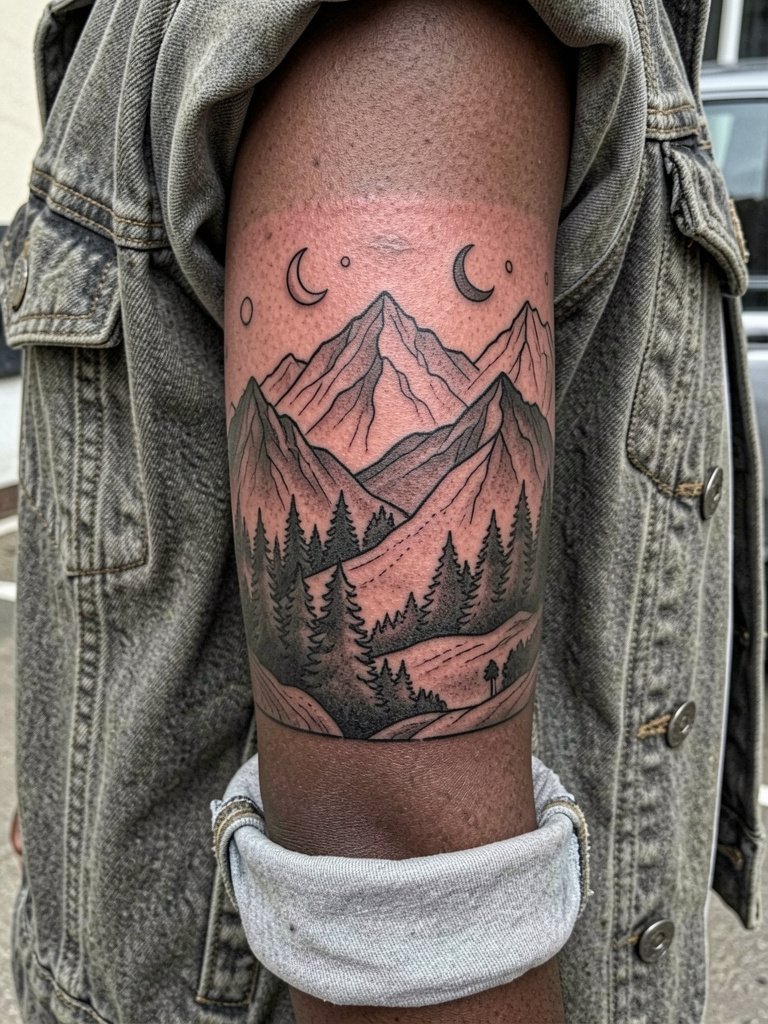
Landscape sleeves work when layers have clear depth cues. Ask for value breaks between foreground trees and background mountains so the eye can read the panels at three distances. People often pack too many tiny details into the mid-bicep, which then muddles. Expect several medium sessions and a two-year touch-up for shaded gradients on the forearm. For casual outings, a lightweight flannel or relaxed jacket frames the layered scenes well, try light+flannel+shirt.
12. Micro-Realism Portrait Panels as Focal Points
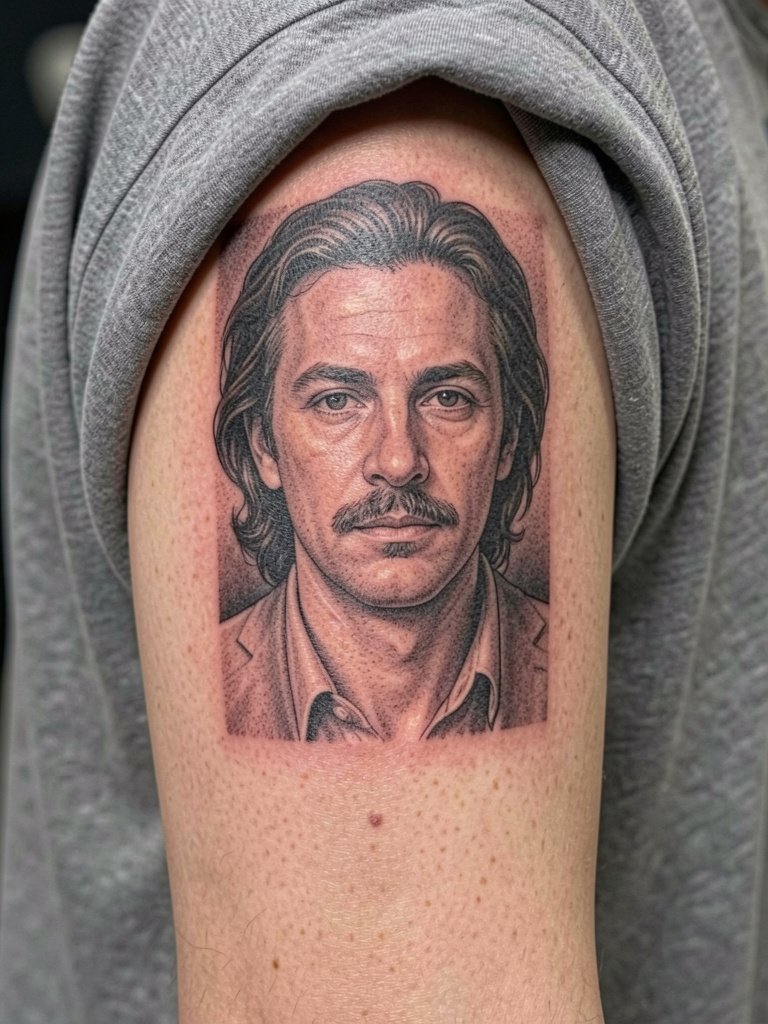
Portraiture for sleeves is high-stakes and polarizing. One camp warns that micro-realism needs larger panels to avoid losing identity over time. The other camp says a skilled artist can scale details and still deliver a portrait that reads at arm distance. Be explicit about the minimum panel size and ask to see three-year healed portraits from similar skin tones. The usual mistake is forcing a tiny portrait into a narrow forearm band. Expect long sessions and a likely touch-up in year two to keep subtleties readable.
13. Nautical Sleeve with Compass, Waves, and Rope Bands
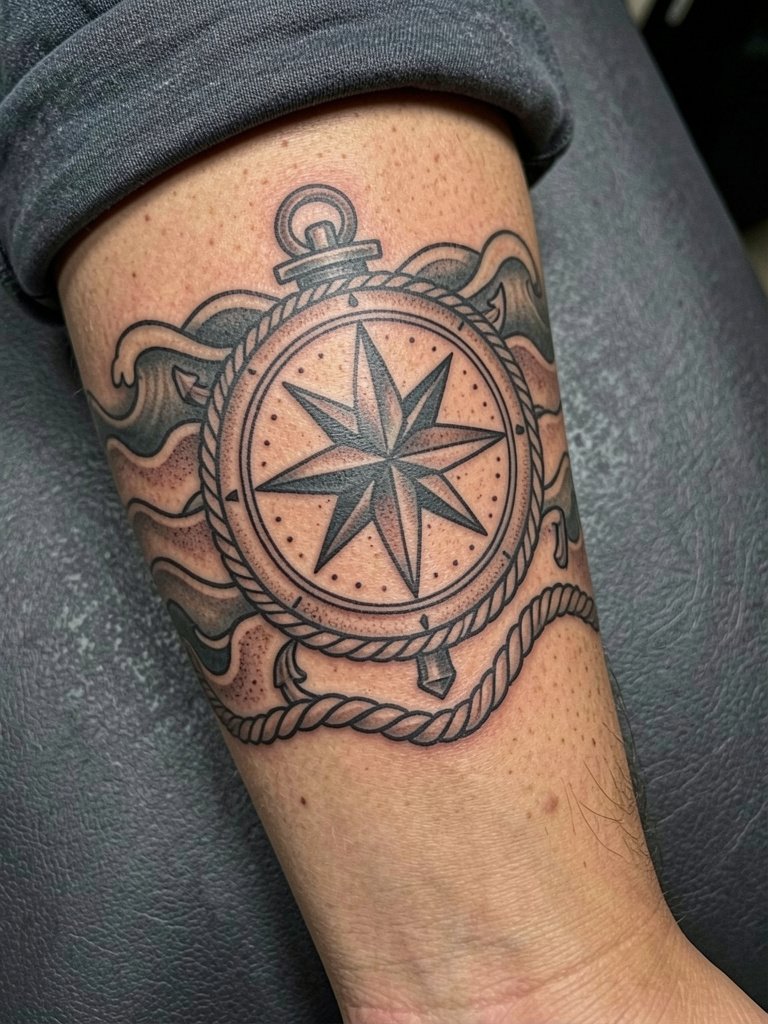
Nautical themes need clear iconography and strong outlines to resist washout. Bring precise compass face references and decide on scripted coordinates if you want text, since lettering must be large enough to heal legibly. Avoid tiny rope twists that can blur into a textured band. These pieces heal predictably on the forearm and look great with rolled sleeve styles and a minimal watch, try minimal+watch+men.
14. Animal Totem Sleeve with Wolves, Bears, or Raptors
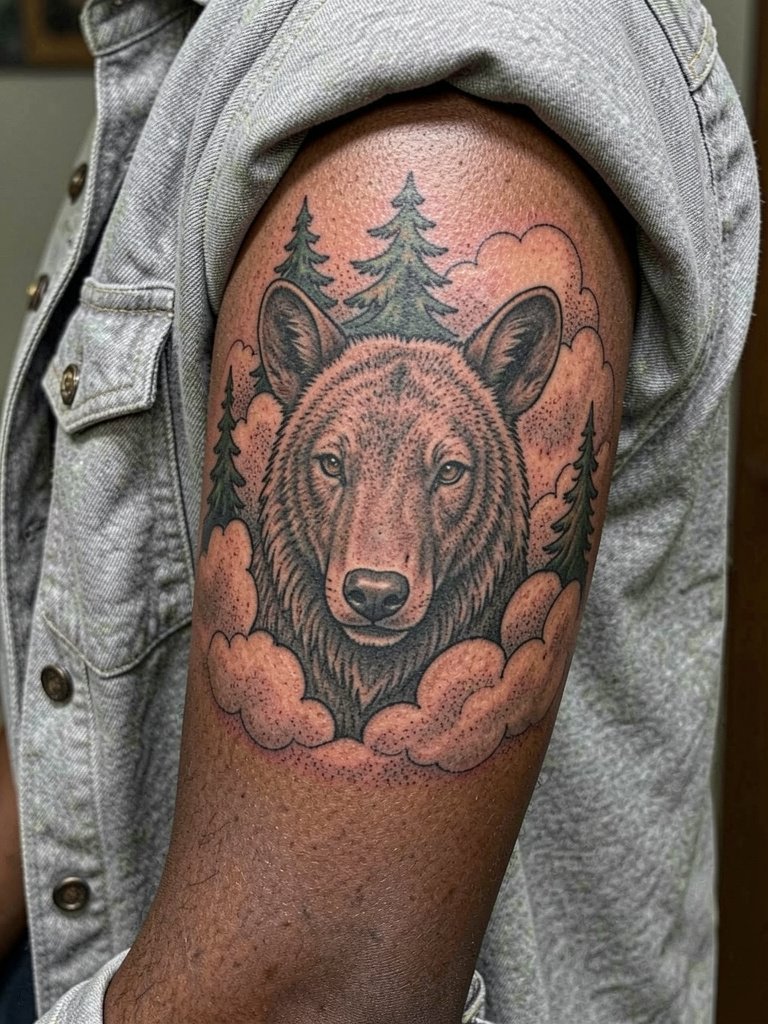
Animal totem sleeves read well when the focal point is placed on the outer bicep and the supporting environment wraps around. Specify eye direction so the animal face points toward the forearm or shoulder for flow. A mistake is matching different animal scales so the wolf appears tiny beside a bear. Expect medium-length shading sessions and a touch-up timeline of two to five years depending on sun exposure. For a session wear an open overshirt and consider a neutral palette in your wardrobe to accent fur detail, try open+overshirt+men.
15. Sleeve with Memorial Symbolism and Personal Objects
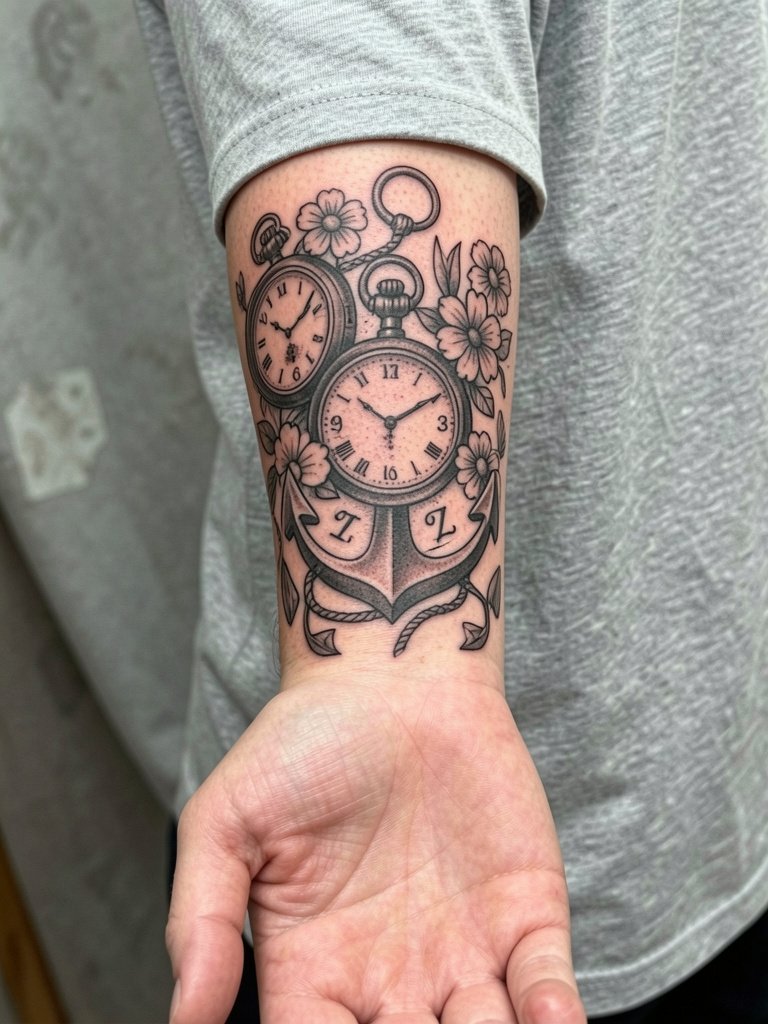
Memorial sleeves feel personal but thrive when treated as design problems rather than scrapbook pages. One practical route is to render small objects in a slightly bolder style than you might want so detail survives. Bring clear photos of each object and specify the exact dates or lettering you want in plain text so the artist can scale type. A frequent error is letting text sit in narrow wrist bands where it blurs. For session comfort wear a loose short-sleeve shirt and consider a layered top for post-session warmth, try loose+short+sleeve+shirt.
16. Full Sleeve with Mythic Creatures and Heraldic Panels
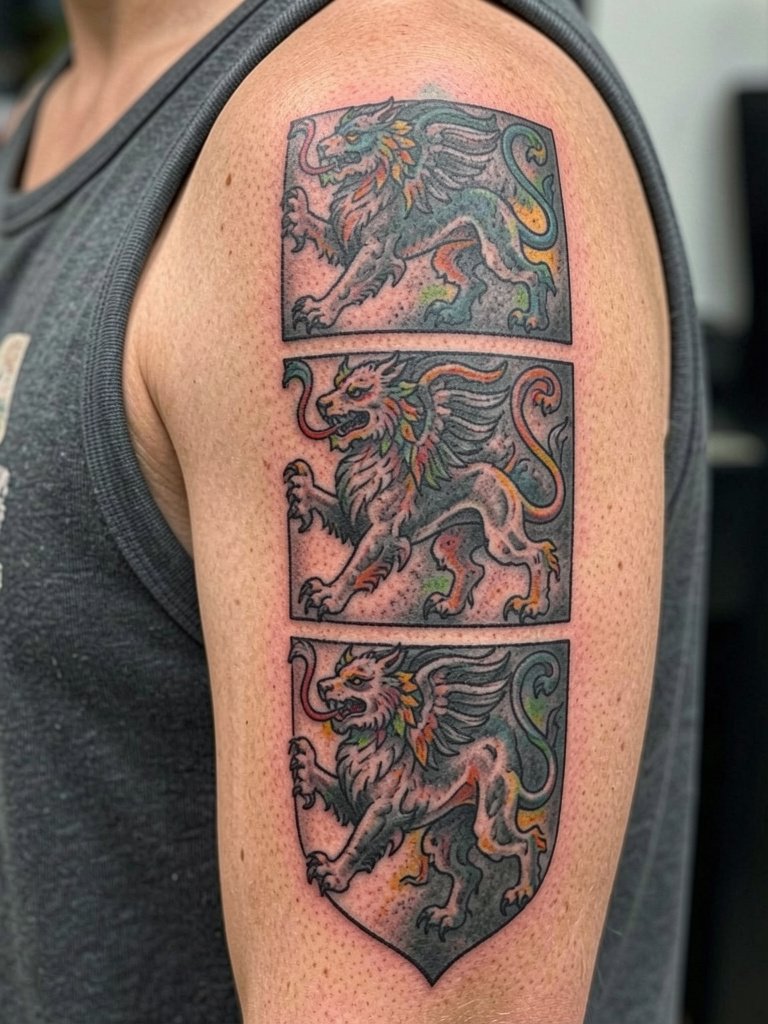
Mythic creature sleeves are strong when each panel reads as its own emblem with breathing room between panels. Ask for consistent contour weight across the panels so the heraldry reads as a set. Avoid mixing too many different shading techniques, which makes the sleeve feel patched instead of curated. Sessions will vary widely depending on color use, and touch-ups are common on colorful accents. Show it off with athletic cuts or sleeveless tops, try sleeveless+tank+men.
17. Botanical Sleeve with Large-Scale Florals and Vines
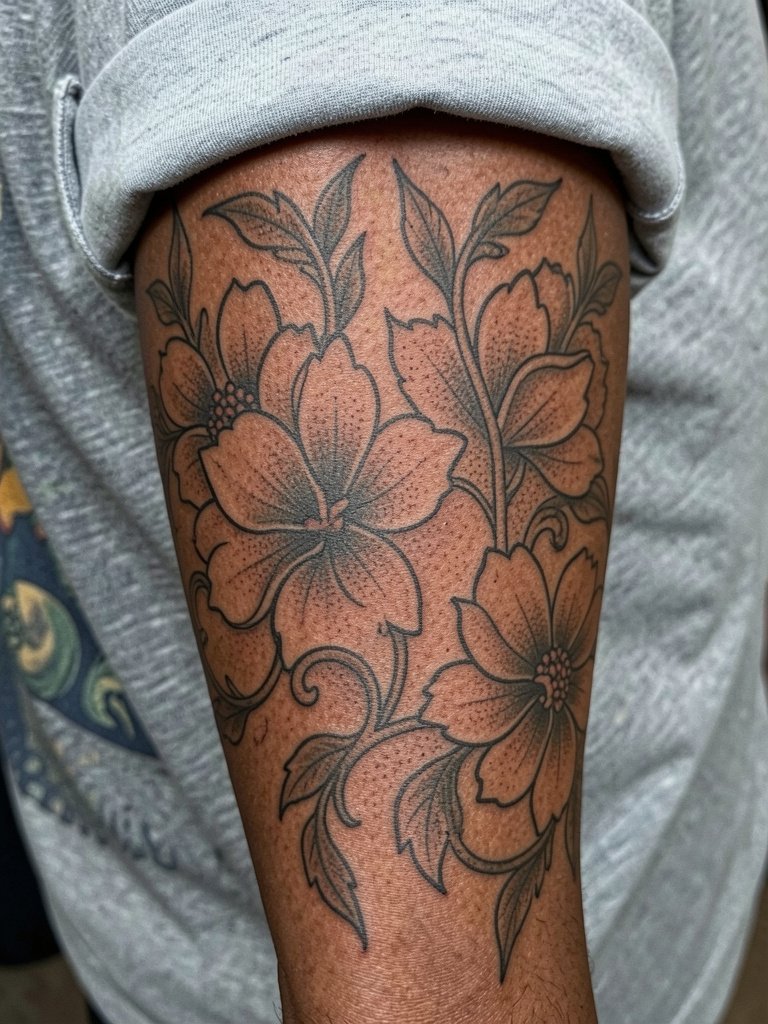
Large botanical elements age well because petals and negative space keep form as saturation softens. Ask the artist to simplify petal edges so they do not turn into feathered texture in five years. The common mistake is over-detailing small buds that disappear. Florals usually heal faster on the outer arm than on the inner arm and need lighter touch-ups. For showing off, try linen shirts in cream or olive to let the linework pop, try fitted+linen+shirt+men.
18. Surreal Collage Sleeve with Abstract Faces and Shapes
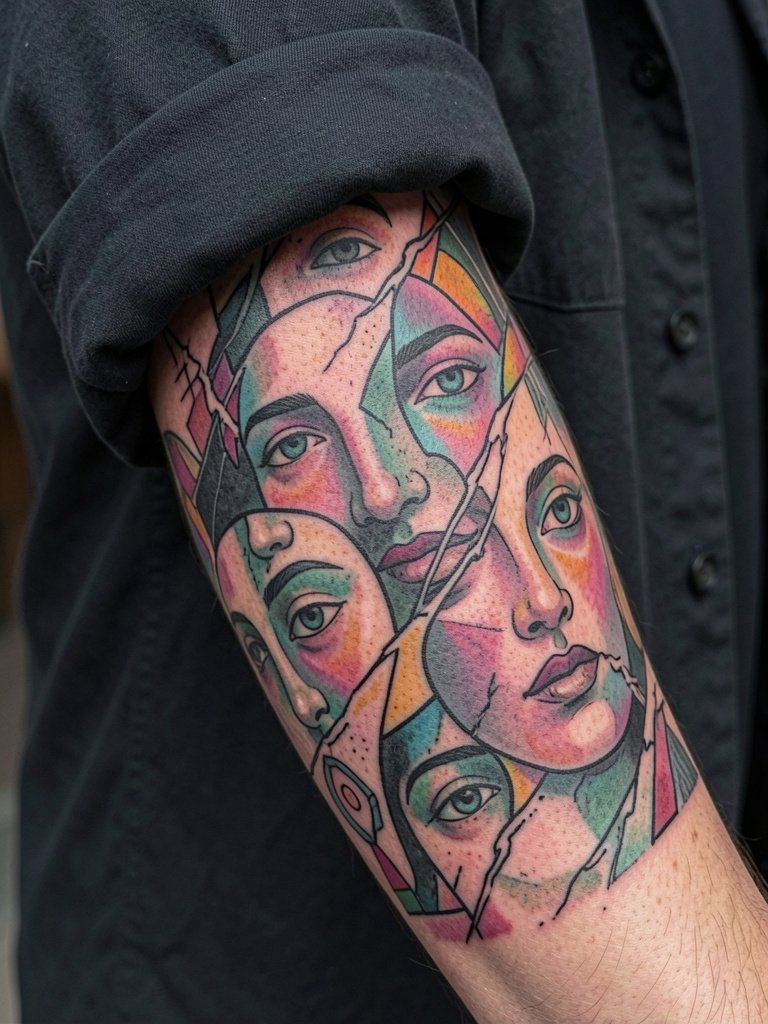
Surreal collage sleeves need a controlled palette to prevent visual noise. When you want eclectic symbols, ask the artist for a unifying motif such as a repeating texture or shared line weight. A common error is mixing pictorial realism and cartoonish motifs without a bridge. These sleeves often feel great paired with monochrome outfits for a deliberate contrast, try black+tee+men.
19. Abstract Black-and-Gray Sleeve with Brushstroke Shading
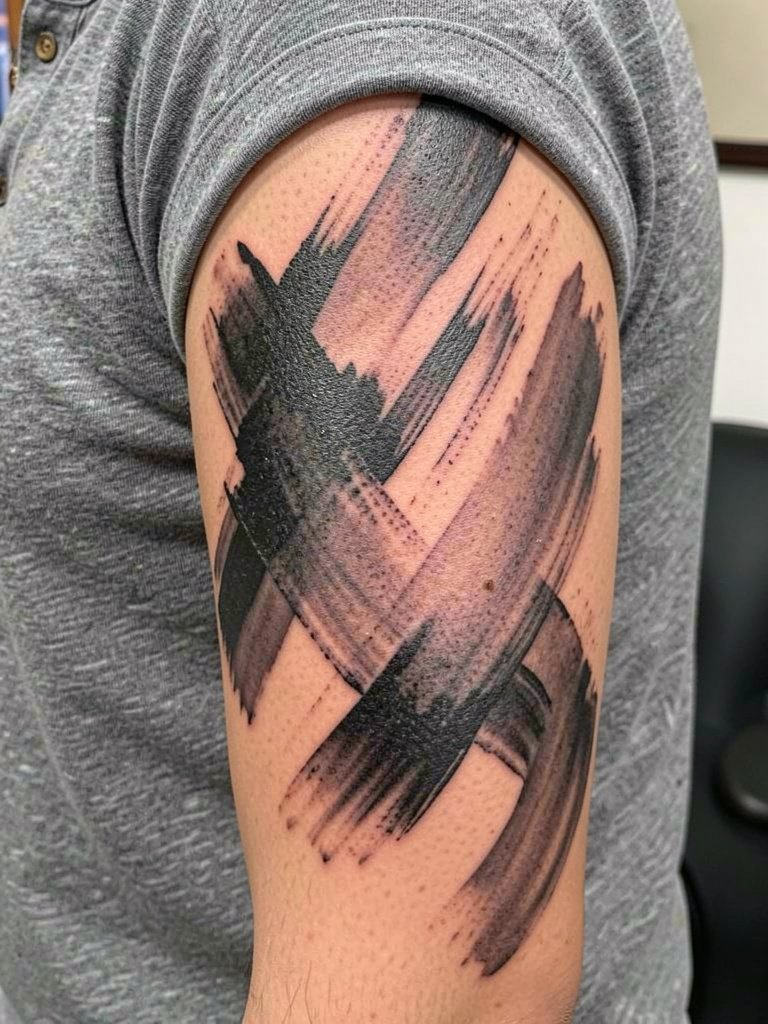
Painterly sleeves are modern and bold, but they need intentional planning so brush marks read as designed, not accidental. Ask for stenciled mockups that show primary brush paths, and request larger fields so feathered edges do not dissolve into skin texture. Many people underestimate how much touch-up is required to keep soft gradients visible in high-movement zones. Pair this look with monochrome outfits for a gallery-ready statement, try plain+henley+shirt.
20. Sleeve Built as a Timeline, Panels Marking Life Events
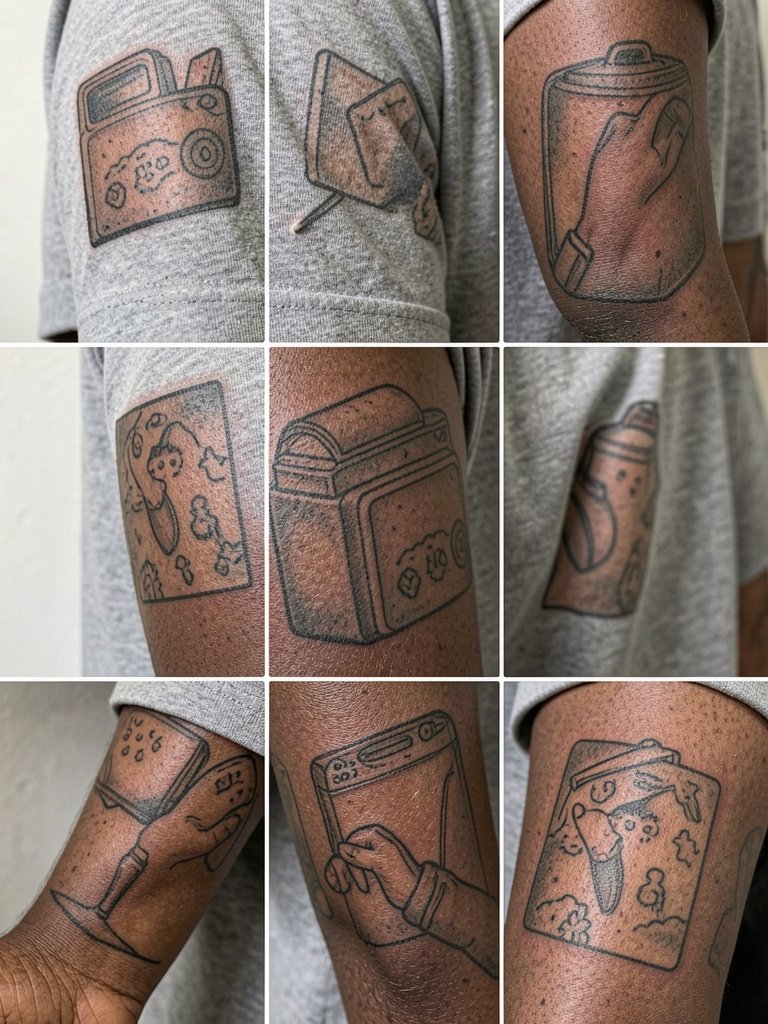
A timeline sleeve feels curated when each panel has similar linework and shared filler. Bring a list of events and decide which objects best represent them visually. The mistake is mixing too many tiny captions or dates that get lost. Request consistent background texture so the sleeve does not read like disconnected snapshots. Wear a layered top to show or hide sections depending on the occasion, try relaxed+fit+pants.
21. Full Sleeve with Integrated Script and Large Lettering Panels
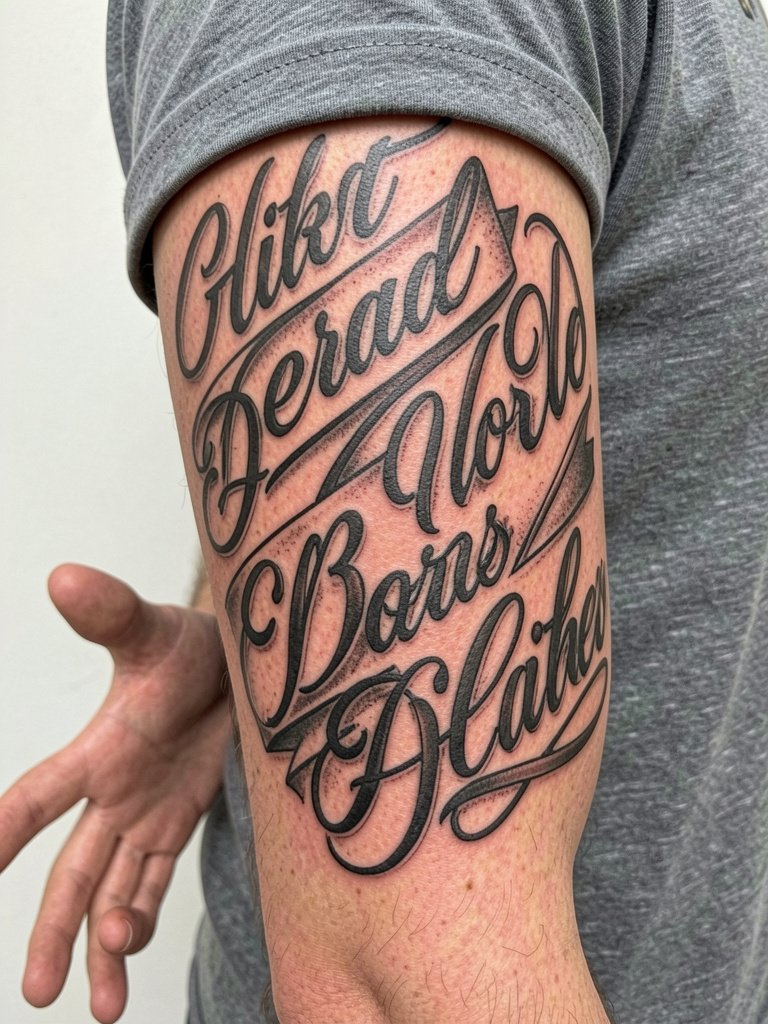
When lettering is part of a sleeve, size and spacing rule the outcome. Request mockups that show the phrase at actual arm width and test legibility at three distances. A frequent issue is fine-script on the wrist that blurs into a smudge. Larger block lettering or bold scripts survive better. Pair with accessories like a watch on the opposite wrist for framing, try minimal+watch+men.
22. Fine Line Sleeve with Stipple and Micro Patterns
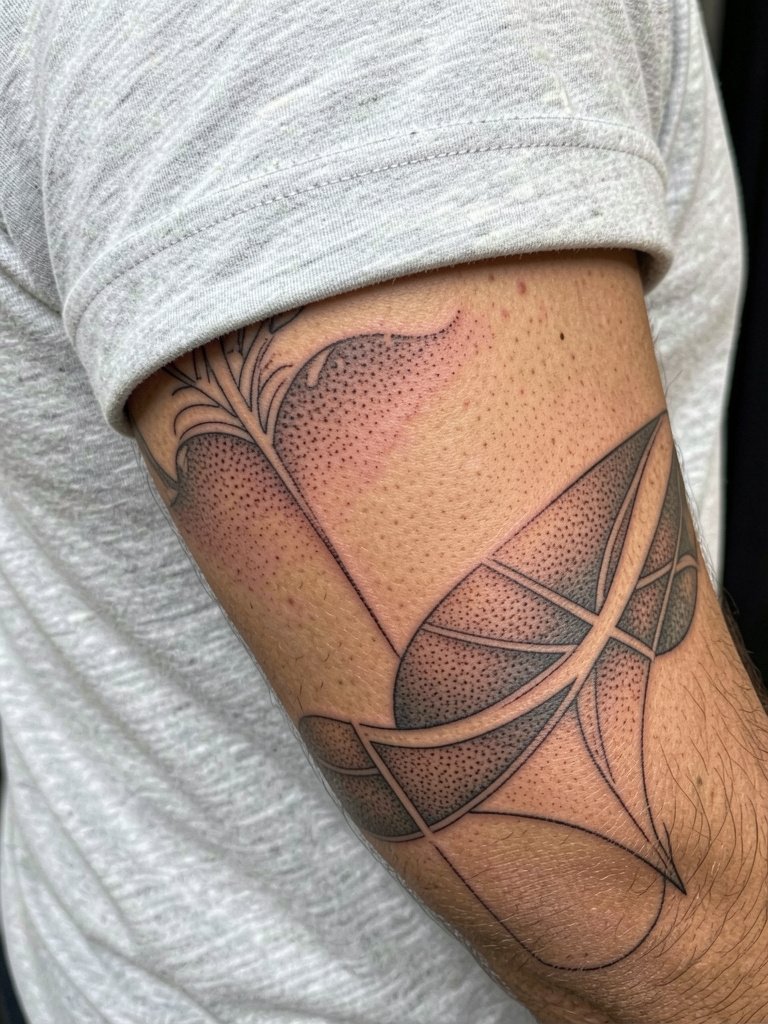
Fine line sleeves are elegant when scaled properly. One group of artists warns that extremely fine single-needle work can blur within a couple of years on high-movement skin. Another group counters that with slightly wider spacing and careful depth it can hold well. Name both views during the consult and ask to see healed photos on similar skin tones at two to three years. A common error is asking for single-needle detail in tight wrist bands. For session wear bring a loose tank so the artist can access the inner forearm easily, try loose+tank+top+men.
23. Collector Patchwork Sleeve: Build Over Time Strategy
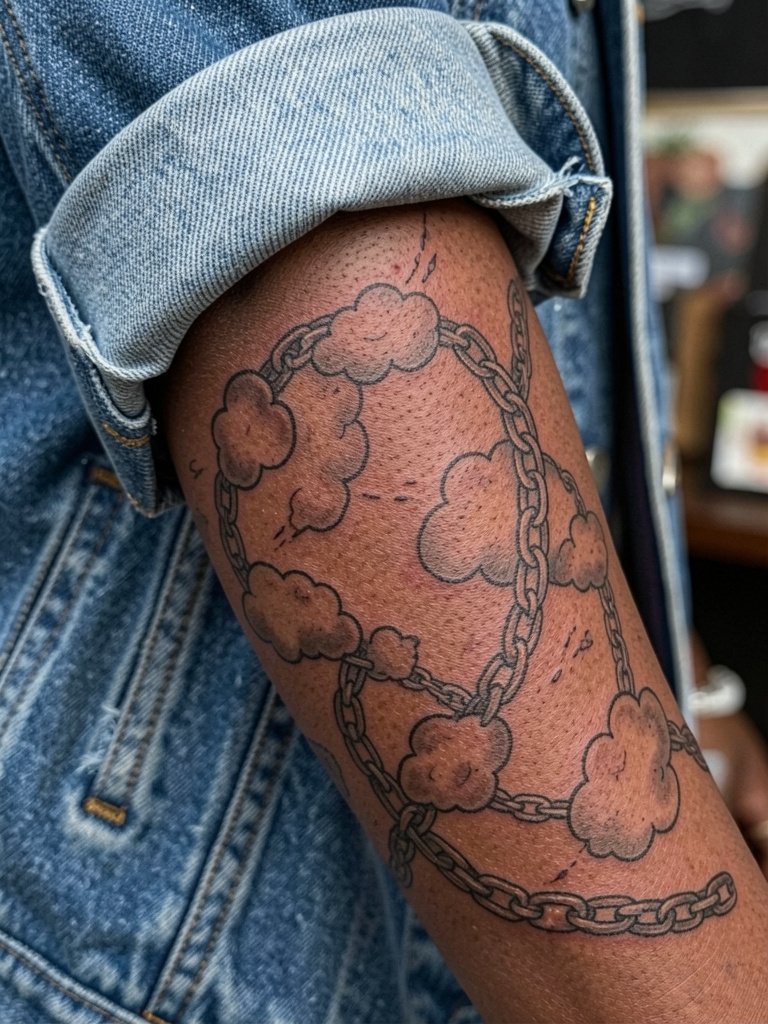
If you plan to collect pieces over years, the priority is a unifying filler strategy. Bring examples of the filler you want and ask the artist to reserve negative space for future panels. The main mistake collectors make is not setting a visual rule set early, which forces later artists to match someone else. Schedule one block of design time for the connecting elements so the sleeve reads deliberately. For session comfort and post-session layering try a denim jacket with sleeves you can roll, try denim+jacket+men.
Frequently Asked Questions
Q: How much does a full sleeve typically cost?
A: Expect a wide range based on artist experience, location, and complexity. A common range for a full custom sleeve is roughly 1,500 to 5,000 USD, with blackwork and simple traditional sleeves toward the lower end and high-detail realism or color projects toward the higher end. Budget for multiple sessions and occasional touch-ups.
Q: How do I find portfolios and healed photos without naming specific artists?
A: Search hashtags by style plus location and filter for studio portfolios that show healed shots. Use style keywords like "full sleeve blackwork" or "mythology sleeve" on Instagram and TikTok and apply a city filter. Reddit threads and tattoo forums are good for seeing user-posted healed photos and for practical tips on artist consistency. Focus on portfolios with multiple full-arm examples rather than single flash pieces.
Q: How should I dress for a long sleeve session and what should I wear to show the finished work?
A: For shoulder and upper arm work wear a loose tank or button-up that you can remove and replace without rubbing the fresh area. For forearm and wrist sessions wear short sleeves or a shirt with cuffs you can roll up fully. To show off a finished sleeve, simple fitted tees, rolled-sleeve shirts, and neutral henleys keep attention on linework and saturation. If you buy session wear, prioritize items that slip on and off without pulling across the tattoo.
Q: Will a color sleeve fade faster than black and gray?
A: Color and black-and-gray follow different aging paths. One camp values black-and-gray for predictable longevity and contrast retention. The other camp prefers color for immediate visual impact and accepts more frequent refreshes. Protection from sun and proper healed-photo review are the practical variables that determine which route fits your priorities.
Q: How do I plan a sleeve if I can only afford to do it over several sessions?
A: Start with anchor pieces on the shoulder cap or a large forearm panel that define scale and lineweight. Reserve filler zones and negative space so later sessions can slot in without visual conflict. Ask for a rough sleeve map in the initial consult showing planned anchor positions and filler options. Scheduling design time to connect panels later saves money compared with retrofitting awkward gaps.
Q: How often do sleeves need touch-ups and what areas wear fastest?
A: Touch-up frequency depends on style and placement. High-motion zones like the wrist and elbow usually need the earliest attention. Fine-line and micro-realism often require touch-ups within two years to restore crisp detail. Bold blackwork can go longer without intervention. Expect at least a consult-style touch-up every few years for heavily exposed arms.
Q: Are there placements I should avoid because of blowout risk or healing problems?
A: Areas with very thin skin or lots of movement such as the inner wrist, elbow crease, and near the ribs have higher blowout risk and may soften detail faster. For fragile placements ask for slightly bolder lineweight and larger spacing. If you have sensitive skin discuss adhesive reactions and bandage options before booking.
