
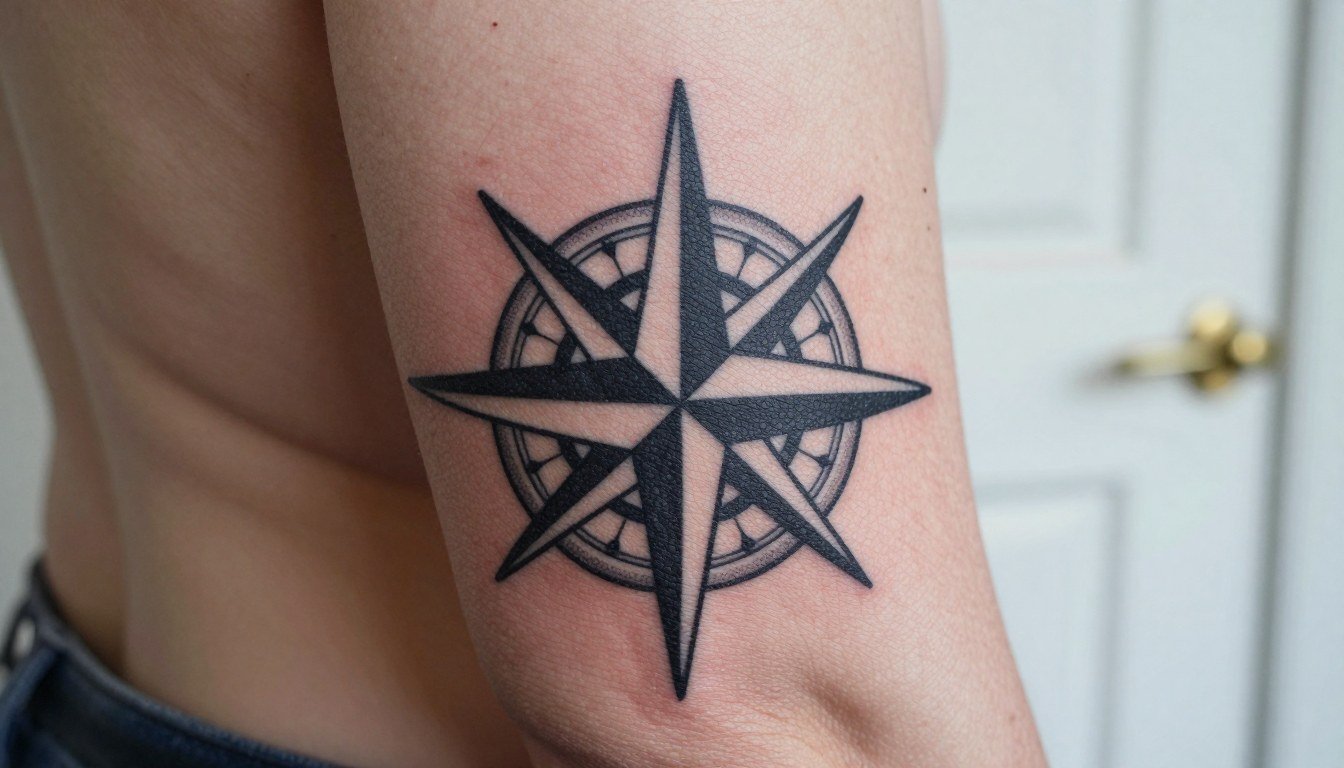
Fine-line matching symbols can look delicate the day you leave the shop and fall flat a few years later. For groups of four, the smartest sets balance shared meaning with individual scale so each piece reads alone and as a group. Below are compact, practical ideas that prioritize how the ink will age, where to place it on the body, and what to wear the day of the session.
1. Quartered Crest on Upper Arm

A quartered crest gives each friend one panel that becomes part of a whole when you line arms up. I recommend bold outlines and simplified silhouettes over tiny interior detail. Small heraldic details blur if done single-needle and too tight, so plan for the crest at a size that lets each symbol breathe. For the session, expect a one-hour block for stencil placement and linework. This placement handles moderate sun exposure, so plan touch-ups around year three if you spend a lot of time outdoors. A common mistake is asking for too many internal emblems. Bring clean reference art of the simplified animal or symbol so the artist knows you mean readable shapes, not micro-etching.
2. Four-Card Suits on Inner Forearm
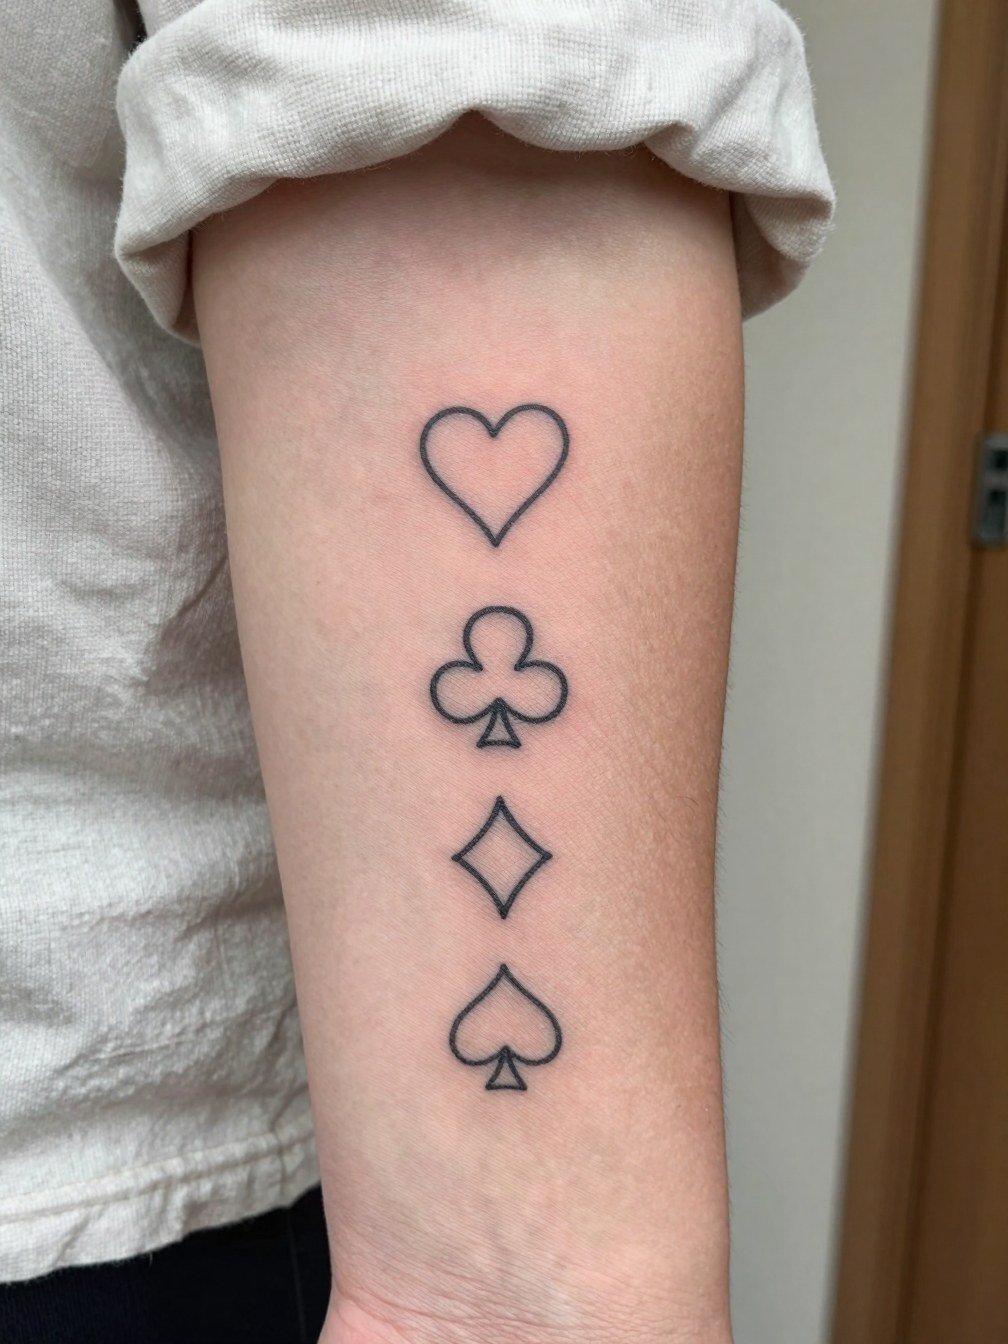
A vertical row of suits makes it easy for four friends to get matching pieces that read individually. The inner forearm is forgiving for medium linework, but very thin single-needle detail will soften by year two. If you want crisp separation over time, go slightly heavier on the outline and ask the artist to keep interiors open. The session feels mild, like a steady buzz rather than sharp jolts. Wear a rolled-sleeve linen shirt to the appointment so the artist has access and you stay comfortable. Avoid asking for micro-shading inside each suit unless you accept periodic touch-ups.
3. Linked Semicircles That Form a Whole on the Wrist
Wrist pieces are visible and social, but wrists endure frequent washing and friction, which eats fine detail. For a four-person linking design, pick clean negative-space areas rather than dense filigree. The session is short, often under 45 minutes, but expect the first week to require careful care because of constant hand use. Wear a loose drawstring linen pant or comfortable sleeves to keep your arm steady during the session. The biggest mistake is making each semicircle too small. Scale up so the shape maintains contrast after a year or two.
4. Minimalist Coordinates on the Ribcage
Rib tattoos provoke a controversy among artists about fine line longevity. One camp argues that ribs stretch and compress so thin script and single-needle numerals blur within two years. The other camp contends that with slightly wider spacing and confident depth the lines settle well and remain legible. If you lean into the second approach, discuss exact spacing and how the words will sit when you stand normally so the four segments align visually. Expect a higher pain level here. Numbing protocols and short breaks help many people complete the session in one appointment.
5. Four Elements Dot Cluster on the Calf
Calf placements are great when you want pieces that show with shorts and stay private with pants. Dot work and stippling read beautifully here because the skin is thicker than the wrist and less prone to blowout. Plan for a session of around 60 to 90 minutes depending on the density of dots. A common mistake is cramming too many tiny glyphs into a small footprint. Scale the icons so the stipple retains texture after two years. For show-off styling, the cluster pairs well with mid-calf boots and cropped denim during warmer months.
6. Split Geometric Mandala on Back of Shoulder
A mandala split into four quadrants reads beautifully when you stand shoulder to shoulder. For this placement, thicker outer rings and open negative space protect the radial patterns from merging over time. Discuss curvature with your artist so each quadrant looks balanced on different shoulder shapes. The session feels moderate, a steady rhythm across the curved deltoid. If you plan to show it off, pair with open-back midi dresses that frame the shoulder without rubbing the area.
Session Day Picks
These small items smooth the session and the first week for visible placements like wrist, forearm, and shoulder.
-
Tattoo stencil transfer paper kit. Lets you check exact placement and line weight on skin before the needle starts, which is especially useful for the linked semicircle and quartered crest designs above.
-
Medical-grade waterproof film roll. Protects small wrist and hand pieces from shower spray and friction in the first 24 to 48 hours.
-
Numbing topical gel 5% lidocaine. Applied as directed about 30 to 45 minutes before a sensitive rib or sternum session can reduce the intensity without altering the artist's linework.
-
Non-slip compression sleeve. Keeps the forearm or calf steady during dot work and stippling sessions when small movements change the stipple rhythm.
-
Aquaphor healing ointment. A thin layer for the first few days helps protect bold outlines and can prevent scabbing that obscures fine detail on small symbols.
7. Constellation Split on Collarbone
Collarbone placements are delicate and visible when you wear open necklines. Tiny dots and short lines can blur if packed too close. For four friends, give each person a subtle segment that connects visually when you stand together. The biggest mistake is wanting pinhead dots in a high-motion area. Instead, ask for slightly larger dot sizes and brief connector lines so the pattern keeps its constellation look at six months. Session time is short and pain is moderate. Pair the finished work with wide V-neck tops that frame the collarbone without rubbing the tattoo.
8. Tiny Botanical Sprig Behind the Ear
Behind-the-ear tattoos demand a specialist who understands the thin skin and curved surface. Most artists split into two camps about single-needle detail in that spot. One camp warns that ultra-fine botanical lines often migrate and blur within a couple of years. The other camp argues that a conservative single-line sketch with slight spacing holds if the artist places ink at consistent depth. If you choose this spot, keep the sprig simple and plan for a small touch-up at year two. Wear your hair up on appointment day so the artist has a clear view.
9. Matching Morse Code on the Ankle
Ankle placements take daily friction from shoes and socks. Morse code reads well because the dots and dashes are high-contrast shapes, but tiny dots can blur if placed too shallow. Ask the artist to space beats slightly farther apart than you think you need. Session time is short, but healing needs attention for the first week. For showing off the ink, cuffed jeans and low-top sneakers work well. Bring clean references for the exact dot-dash spacing so the encoding stays legible long term.
10. Tiny Portrait Silhouettes on the Inner Thigh
Inner-thigh placements are intimate and private. The flesh is softer, so silhouettes tend to hold better than intricate facial detail. Opt for a bold simplified profile rather than micro realism to avoid muddied features after healing. The session may feel more tender than a limb piece, so plan a calm environment and short breaks. For the appointment, wear fitted bike shorts so the artist can access the area without compromising modesty. Expect that touch-ups might be needed once the piece has fully settled.
11. Four-Pointed North Star on the Chest
Small chest stars read as sharp when given a confident outline and a tiny dot halo. The chest moves with breathing, which can stretch very fine details, so keep the halo sparse. A typical session is quick, but sternum-adjacent work increases sensitivity. If you plan a visible set that shows with low necklines, think about wardrobe that won’t rub the area as it heals. For balance, each friend can vary rotation so the group forms an implied compass when you stand together.
12. Matching Matchstick Flame on the Wrist Crease
Tiny motifs on the wrist are tempting, but that area is prone to fading and scabbing due to hand use. For a lasting matchstick, give the flame a slightly thicker outline and keep the stick simple. The session is short, but you must protect the wrist from friction the first week. Wear a loose drawstring linen pant or sleeves that let your wrist rest comfortably during healing. The common error is over-detailing the flame. Simplify now and you will preserve the image years down the line.
13. Shared Phrase Split into Four Words Across Ribs
Text on ribs carries the same debate about fine type as other thin-skin areas. One camp cautions that thin serif scripts blur with skin movement and body changes. The other camp says a slightly larger letter spacing and confident needle depth maintains legibility long term. If you choose a split phrase, pick a font with open counters and ask the artist to test a stencil on the standing body so alignment reads natural when you are together. Plan for a longer session and more active aftercare because scabbing and movement can alter stroke edges.
Frequently Asked Questions
Q: How do we find healed portfolio examples for four-person pieces without naming artists?
A: Try searching platform tags like #GroupTattoo, #MatchingQuartet, and #HealedTattoo on image and video platforms while using location filters for your city. Browse portfolio platforms with keywords such as "split mandala" or "quarter crest" to see how designs age on different skin tones. Reddit threads about group tattoos often include multiple healed shots and placement notes that help you judge scale.
Q: Which designs need the heaviest touch-up timeline and why?
A: Tiny single-needle scripts and ultra-fine dot work on high-motion zones like wrists and hands usually need touch-ups first because those areas experience the most friction. Bold black outlines on the arm or calf tend to hold longer and only need minor refreshes around year three. Plan touch-ups realistically for small visible pieces rather than assuming one session is forever.
Q: What should we wear to a group session for mixed placements like ribs, forearms, and shoulders?
A: Coordinate outfits that allow each placement to be accessed without removing clothing. Bring a loose tank top for shoulders, a fitted cropped top for ribs, and a rolled-sleeve shirt for forearms. For convenience, pack a lightweight zip-up hoodie to stay warm between friends. A simple rolled-sleeve linen shirt is a good versatile piece for after the session.
Q: Are there cultural sensitivity concerns for shared motifs like mandalas or tribal patterns?
A: Yes. If your chosen motif comes from a specific cultural or religious tradition, acknowledge its origin and consider working with an artist who respects that lineage. Using stylized or abstract elements that reference the aesthetic rather than copying sacred symbols reduces the risk of appropriation and keeps the design respectful.
Q: How do we split cost and tipping expectations fairly for a four-person group booking?
A: Many shops charge per person for custom or flash work, and tipping in the U.S. commonly falls between 15 and 25 percent of each individual's cost. If one design is larger or more complicated for one person, adjust the split so each pays for their session time and the communal tip. Talk openly before booking so expectations match.
Q: Can we mix styles so each friend has a personal twist while still reading as a set?
A: Yes. A shared motif with consistent scale and lineweight unifies the set even if one person adds a small personal element like a color accent or an extra dot. Keep the core design language consistent, such as matching outline thickness and overall size, so the pieces read as a group from a distance.
