

The tiniest matching tattoo can feel like a shared secret, but the trick is choosing one that still reads clean after years of life, sun, and sleeves. Thicker linework and a little breathing room inside the design often preserve clarity better than the skinniest single-needle trend pieces. The ideas below favor wearable matching looks that keep their shape through touch-ups and everyday wear.
1. Micro Lightning Bolt on the Inner Wrist
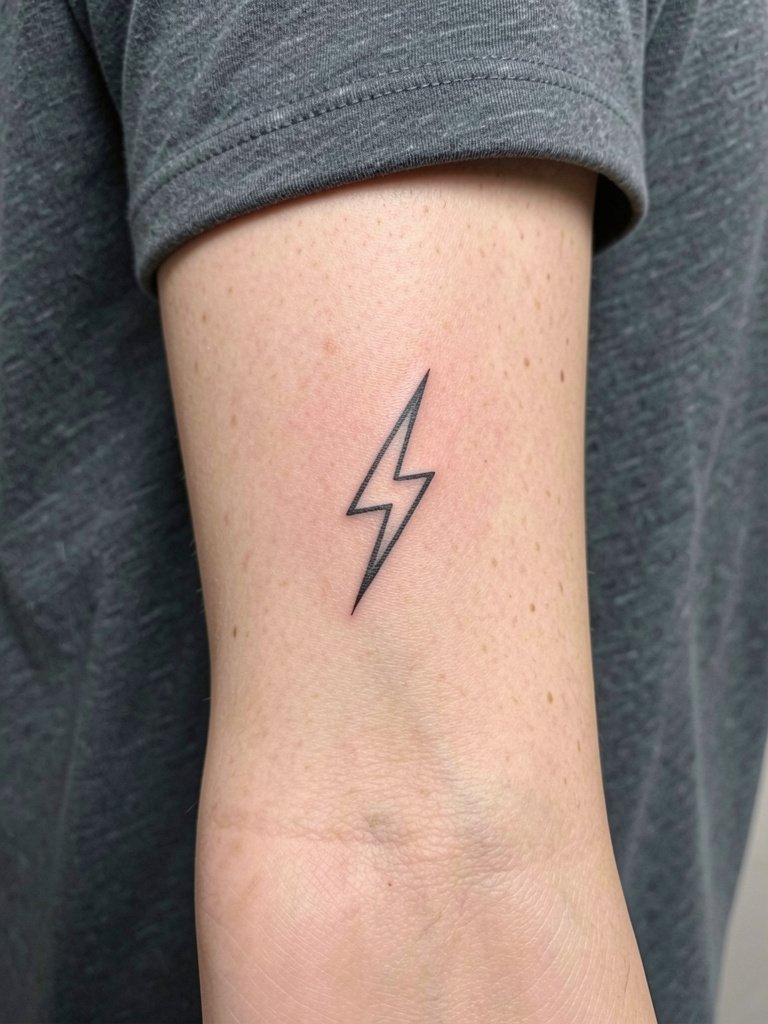
A micro lightning bolt is a fast-read symbol that still reads across outfits. Recommend a hair heavier lineweight than the ultra-thin reference so the bolt keeps its sharp points at two and five years healed. For a wrist placement expect a 30 to 45 minute session and moderate sensitivity where the bone sits close to skin. Common mistake is putting the bolt too small and with no inner spacing, which causes the tip to blur into a dot. For the appointment wear a cropped sleeve tee so the artist can access the inner wrist without fabric tugging.
2. Matching Tiny Script Single Word on Collarbone
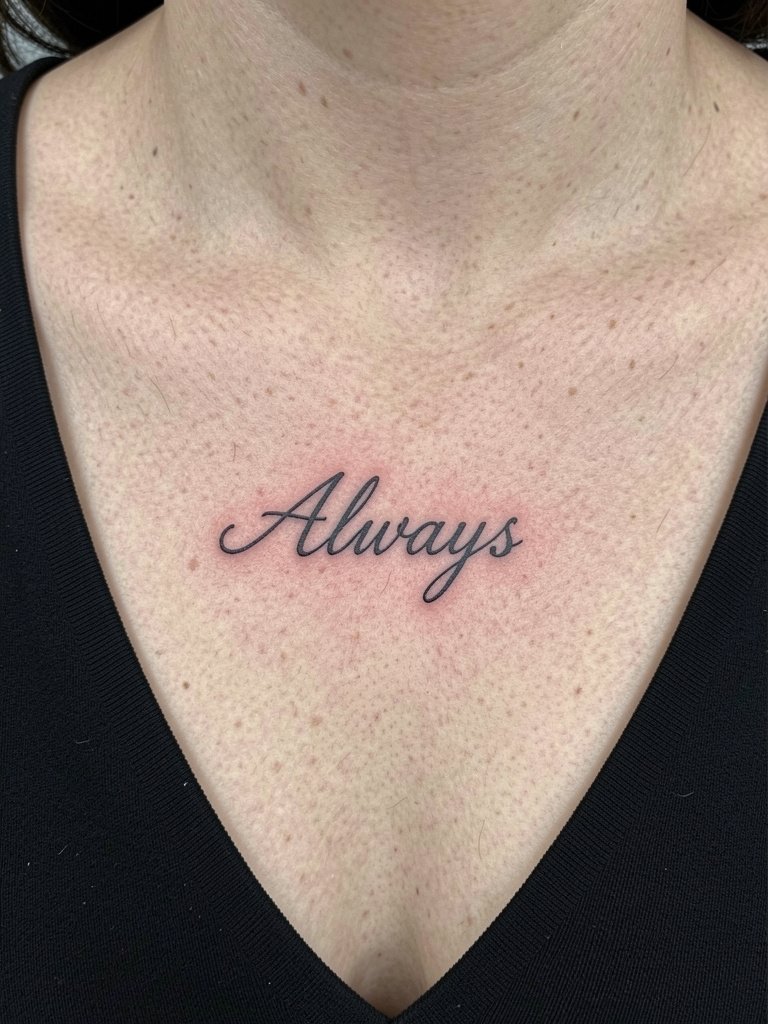
A single-word script on the collarbone reads intimate but still shows when you want it to. Ask for slightly larger letter spacing than a purely decorative sample so letters do not merge over time. The sternum and upper chest see movement from breathing, so expect some softening at the edges by year three if spacing is tight. Session feels like steady vibration rather than sharp stabs. For outfits that highlight this area try an off-shoulder top to frame the word without covering it.
3. Complementary Puzzle Halves on Inner Forearms
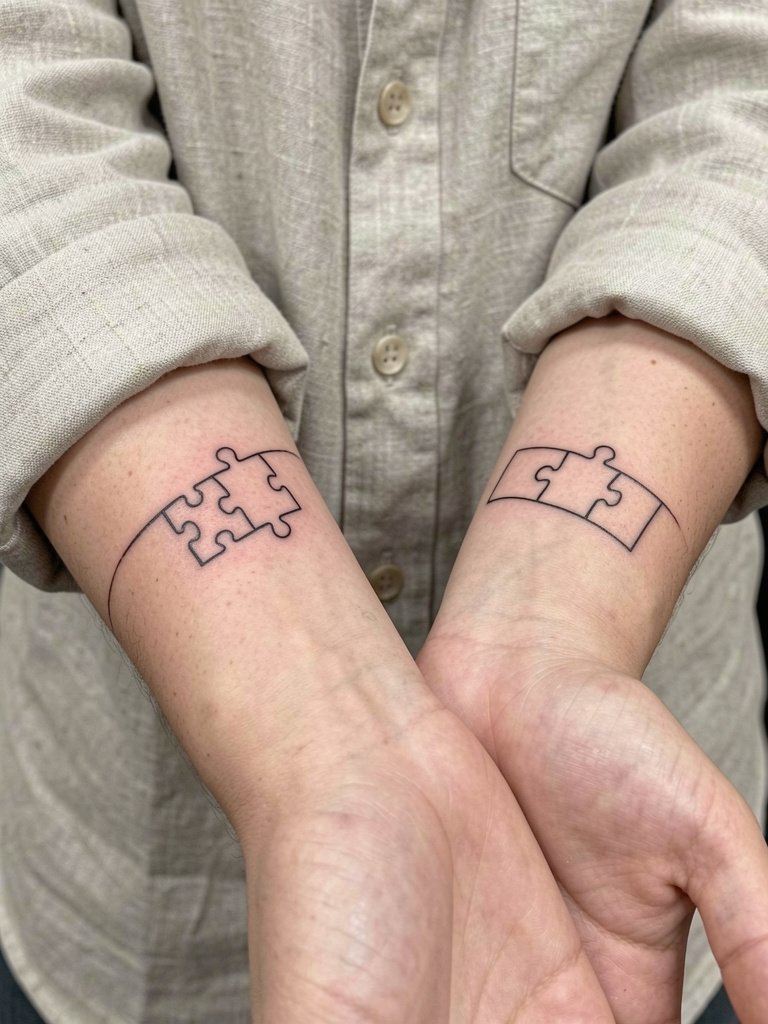
Puzzle halves are a classic complementary idea that keeps individuality while signaling fit. Place them on the inner forearm so both friends see their half easily. Discuss with the artist exact edge curvature because uneven spacing is the most common mistake. Forearm skin moves and tans, so plan for a small touch-up around year two. For showing this design off, rolled sleeves and a linen button-down make the symmetry feel intentional when you bring your forearms together.
4. Matching Tiny Butterflies Behind the Ankle
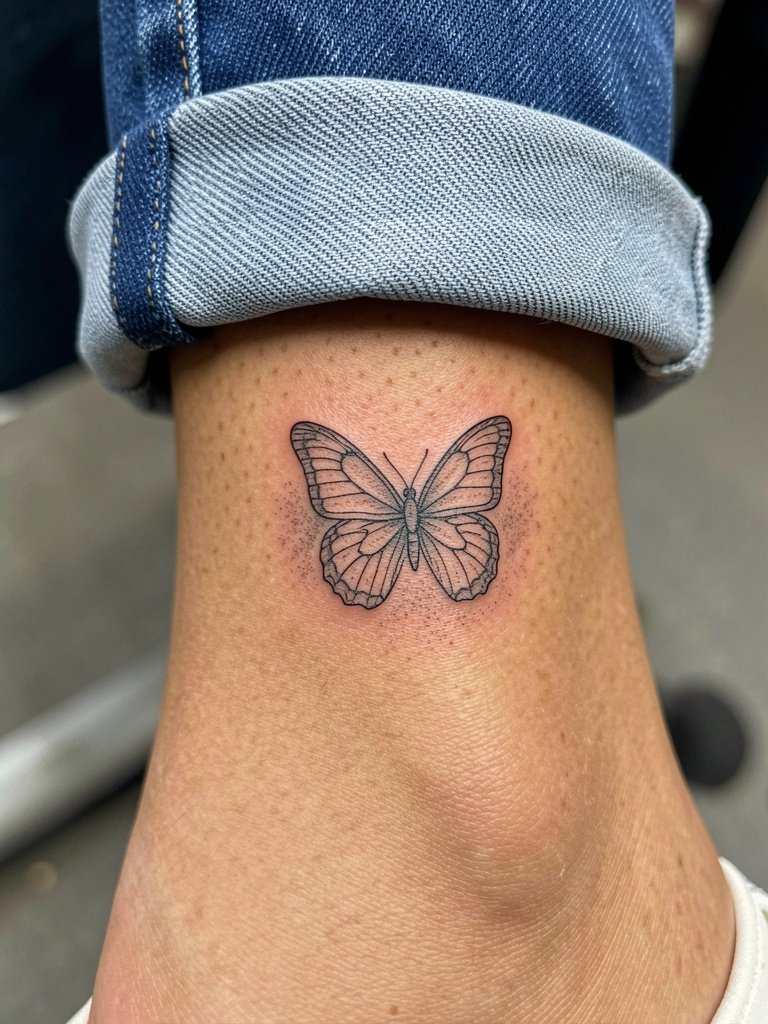
Ankle butterflies are small, wearable, and weather well if given modest lineweight and a bit of shading to maintain form. The biggest mistake is using single-needle only on the wing veins. A slightly bolder outline keeps the wing silhouette readable after repeated friction from socks and shoes. Sessions last about 25 to 40 minutes and the ankle is low to moderate in pain. Pair with cropped jeans and ankle strap sandals to show the piece in warmer months.
5. Matching Stars on the Outer Wrist
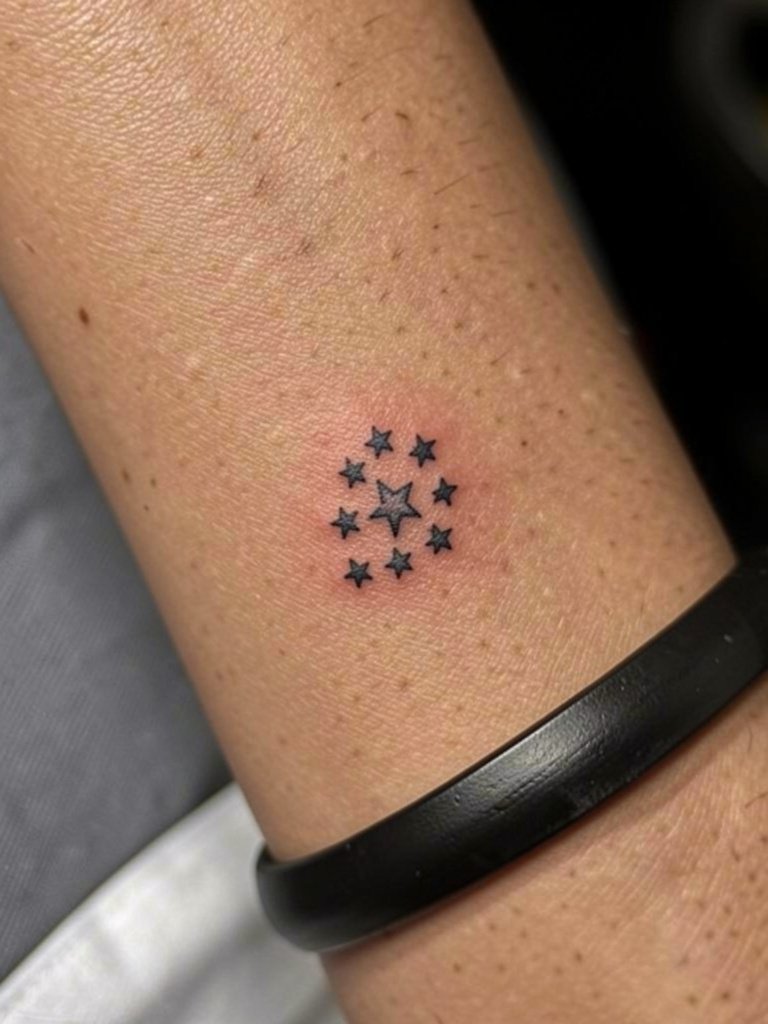
Star motifs are micro and flexible across placements. Use a tiny cluster rather than a single dot to avoid the dot merging into a blur at two years. Outer wrist sees more sun exposure than inner wrist so plan minimal shading and stronger outlines if you want longevity. A common error is asking for white ink highlights that fade to pale scarring; skip heavy white in micro work. Styling tip, show the tattoo with a thin cuff on the other wrist or a minimalist watch to balance both arms, like this minimal watch.
6. Tiny Matching Floral Sprig on the Side of the Finger
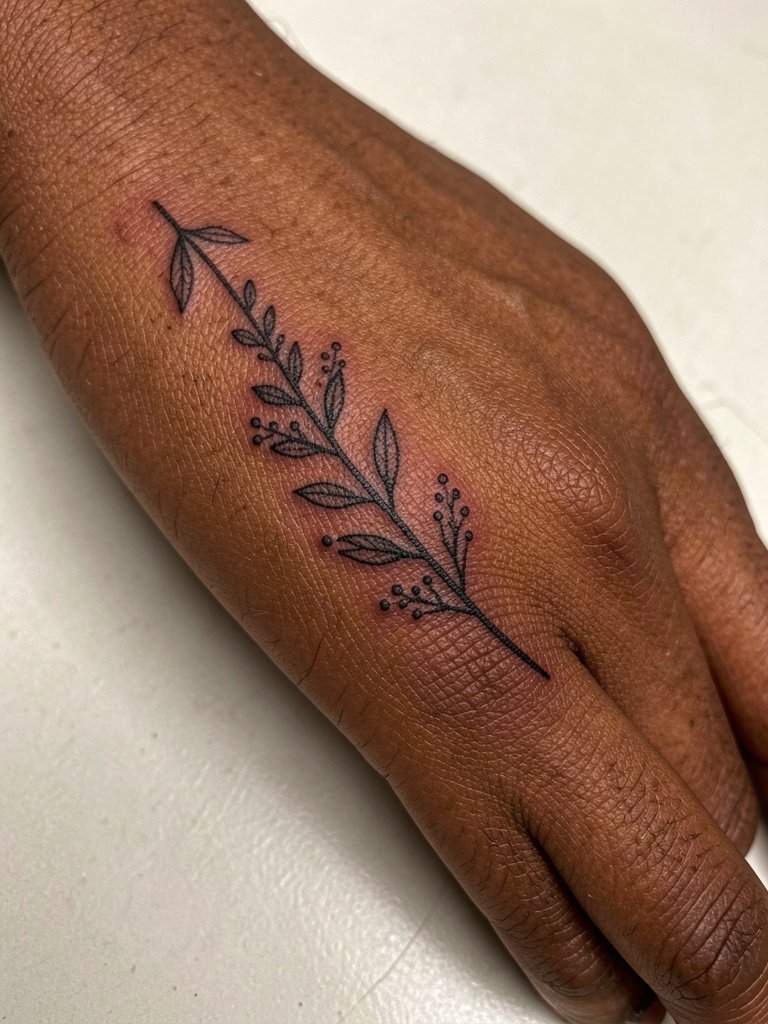
Finger placements are intimate and high-wear. The side of the finger avoids fingertip friction so it lasts longer. Expect a tougher healing window and a touch-up often within 12 months. The common mistake is asking for single-needle veins across the pad, which vanish quickly. For the session wear short sleeves so the artist can work without fabric getting in the way, and anticipate a light touch-up policy from the studio for micro finger work. For subtle accessorizing try stacking thin rings that sit away from the sprig.
Session Day Picks
These first six ideas include ankles, wrists, and fingers that heal differently, so a few basics smooth the session and the first week.
-
Stencil transfer paper kit. Lets you preview the linework on skin and double-check alignment for pieces like the forearm puzzle halves.
-
Topical numbing cream. Applied as instructed before small wrist or ankle sessions eases the initial sting without disrupting linework.
-
Thin protective film roll. Keeps micro wrist or finger tattoos cleaner during the first week of frequent hand washing.
-
Fragrance-free gentle body wash. Mild cleansing for the first few days helps avoid irritation for delicate linework on collarbone and forearms.
-
Aquaphor Healing Ointment. Thin layers for initial moisture retention support micro and fine-line pieces without clogging.
7. Matching Minimalist Moon Phases on Inner Arm
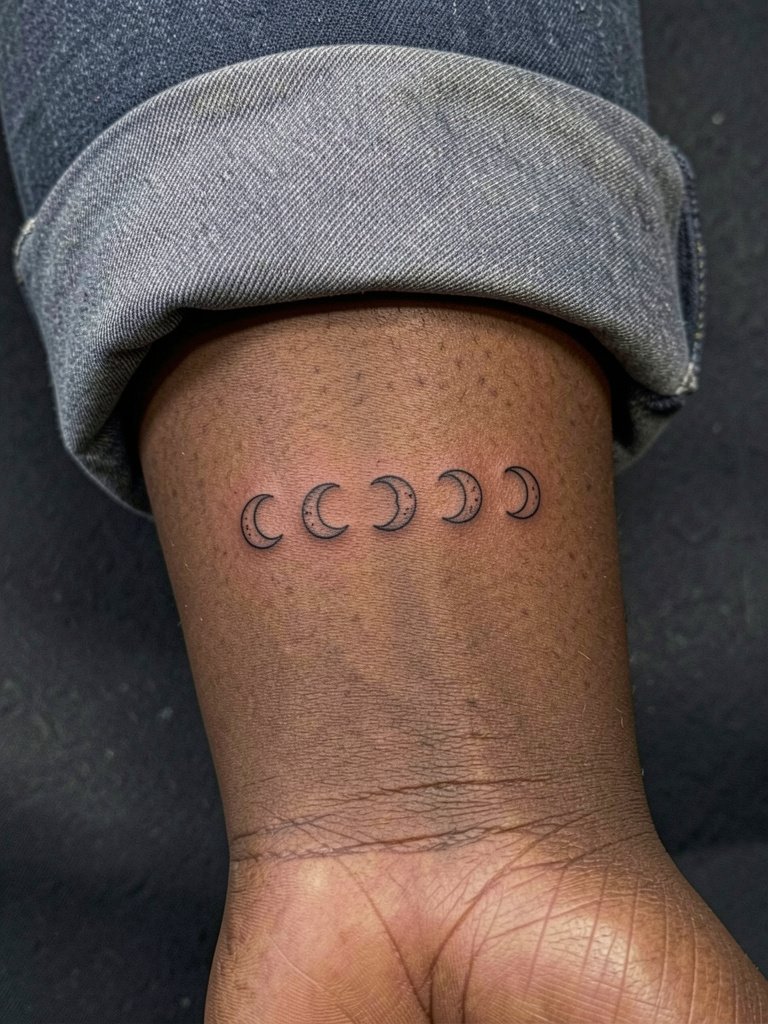
Moon phase lines work well as matching bands that read like a shared rhythm. Place them on the inner forearm for comfortable visibility and similar sun exposure for both friends. Discuss how big each phase should be so small crescents do not merge into a single crescent at the one-year mark. Expect a 30 to 60 minute session depending on spacing. Avoid ultra-skinny strokes in the crescents, add micro dot shading for texture that ages better than hairline shading.
8. Complementary Sun and Wave on Outer Wrist
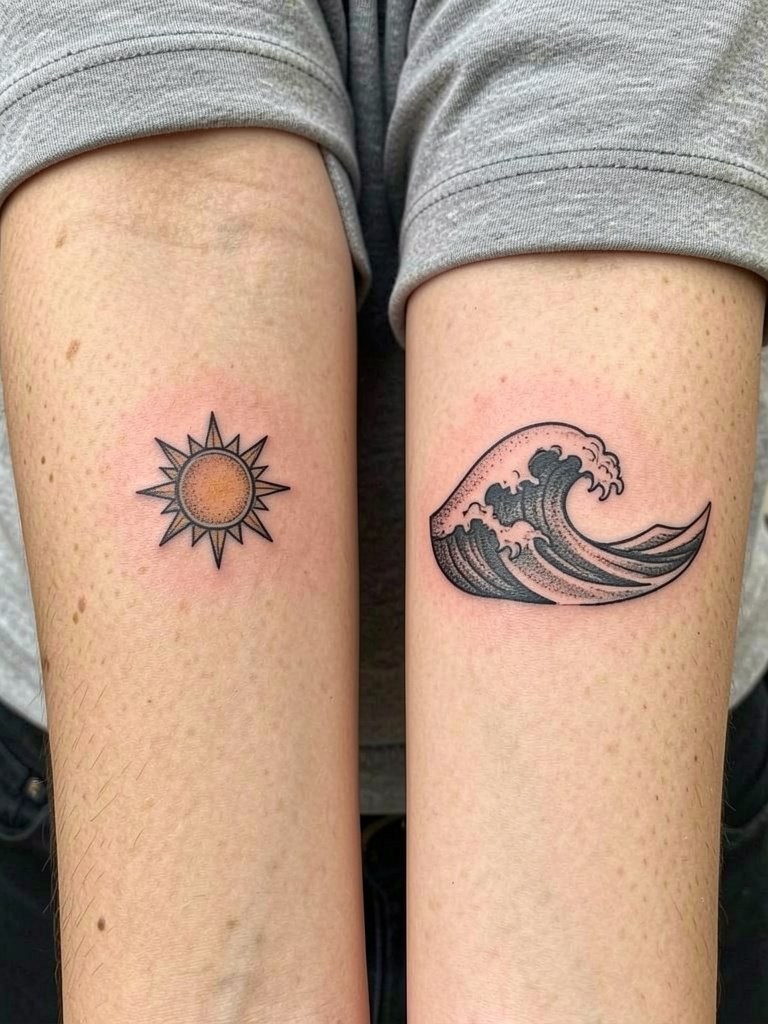
Sun-and-wave complements let each person keep their motif while sharing a theme. The outer wrist tolerates slightly bolder outlines than the inner wrist. One mistake is asking for identical tiny versions, which read like two faded dots after a few years. For the session, a loose tee keeps you comfortable and the artist will outline the sun and wave at a size that preserves contrast. Pair evenings out with open-back midi dresses or rolled sleeves that highlight both wrists.
9. Micro Coordinates on the Side of the Ribcage
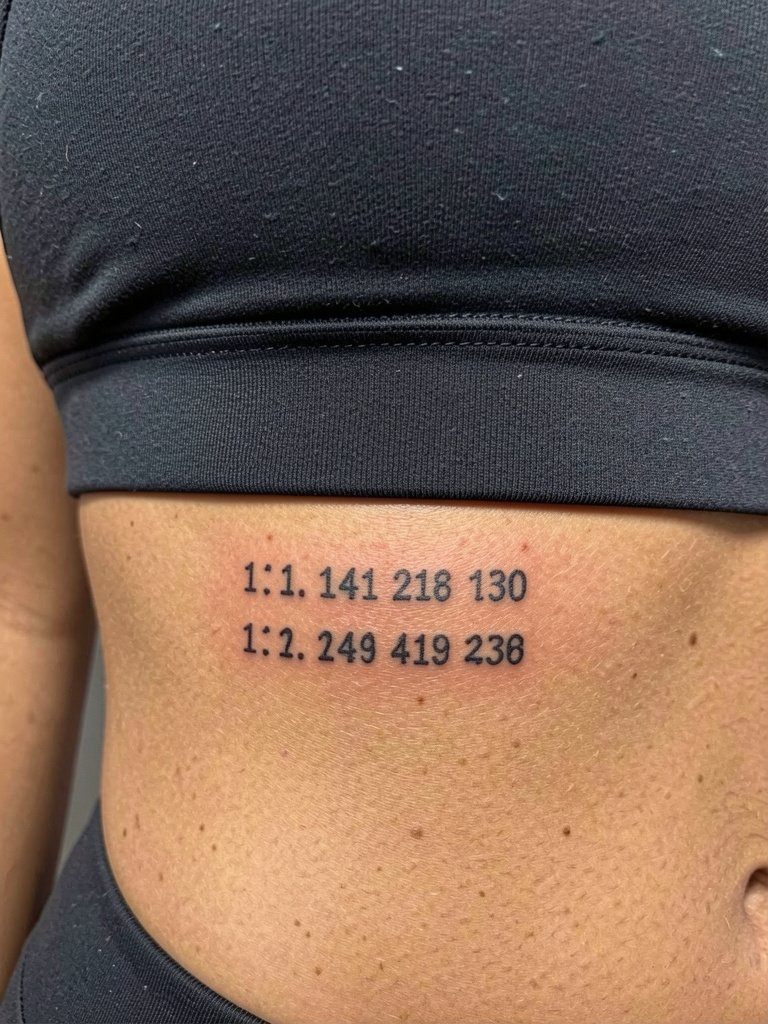
Coordinates feel private and specific without being overtly sentimental. Ribs are higher on the pain chart so plan for a slightly longer session window and breaks. Fine-line coordinates here can blur if placed too close to the lower ribs because of skin stretch. Discuss spacing and ask the artist to preview the stencil on the flank while you breathe normally so the numbers sit comfortably. Expect a touch-up within one to two years for micro numerals.
10. Tiny Matching Crescent and Dot Behind the Ear
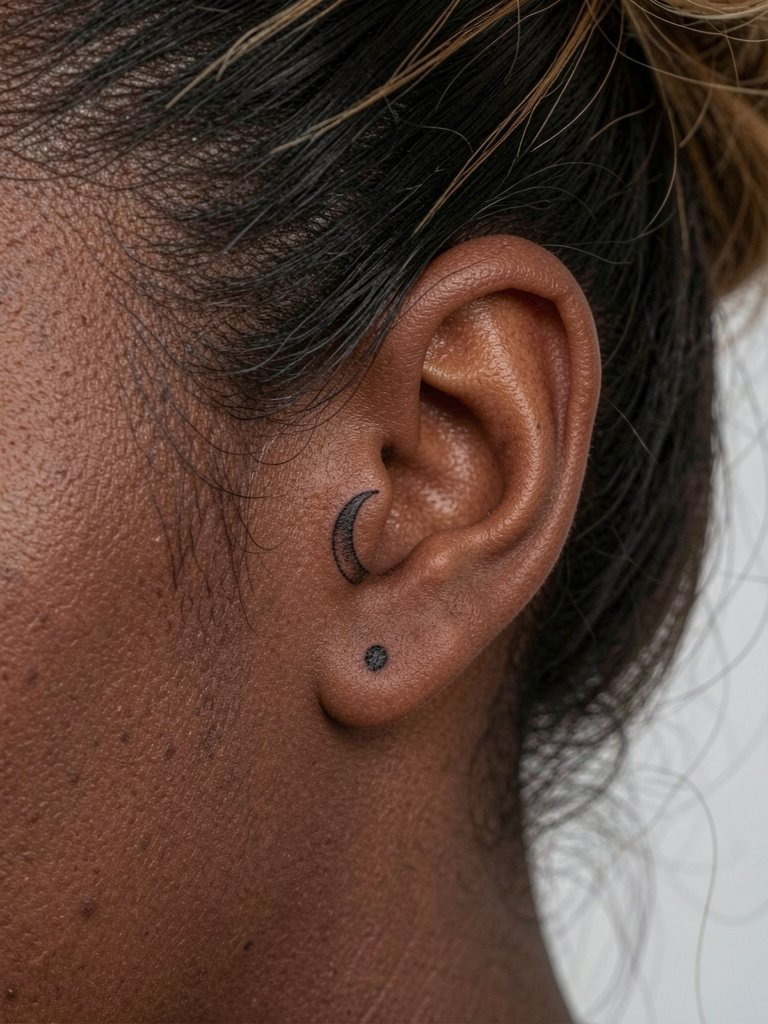
Behind-the-ear placements are private and discreet. They require an artist with steady micro work because curved anatomy can make thin crescents gape if laid too shallow. The most common error is shallow needle depth that fades fast. Sessions are short but expect sensitivity. For showing the piece, a simple hair clip or updo lets it peek out without needing clothing changes. Use a neutral haircut that frames the area.
11. Paired Minimal Arrows on the Outer Forearm
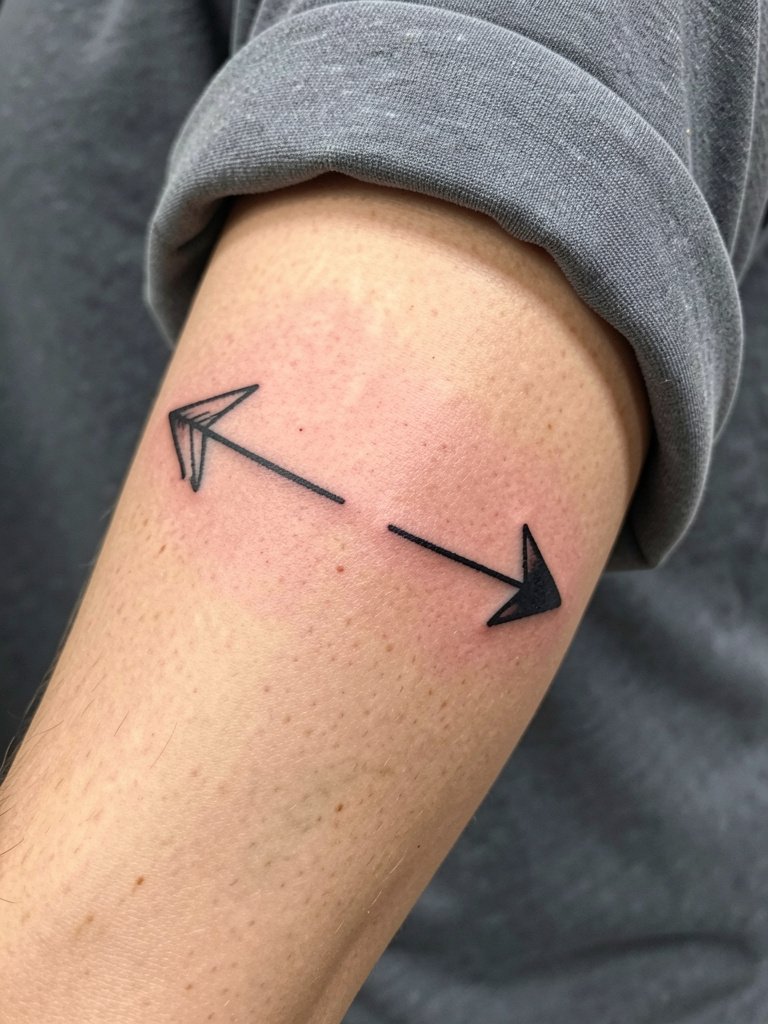
Directional arrows are simple and symbolic, and they age well with modest lineweight and clear negative space. A common mistake is using arrow tips that are too fine, which become rounded after healing. For outer forearm placement expect moderate pain and a 40 to 60 minute session if the design is longer. The outer forearm suits both bold and fine renditions, but plan accordingly so both friends end up with similar visual weight.
12. Tiny Matching Origami Crane on the Collarbone
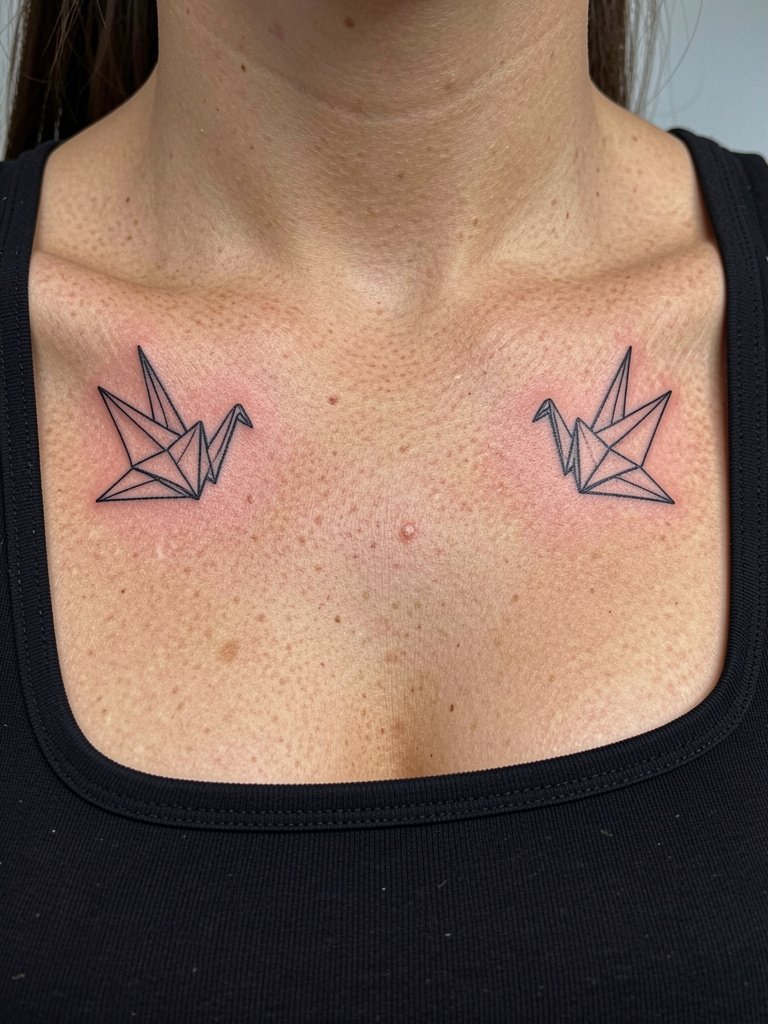
Origami cranes translate well into small symbolic tattoos and keep clear shapes when given crisp folds and modest spacing. The collarbone moves with shoulder motion so ask the artist to show how the crane sits when you move your arm. The main mistake is compressing too many folds into a tiny space. For showing the design, a square neck tank keeps the collarbone visible without revealing more than intended.
13. Matching Tiny Hearts on the Ankles, Offset
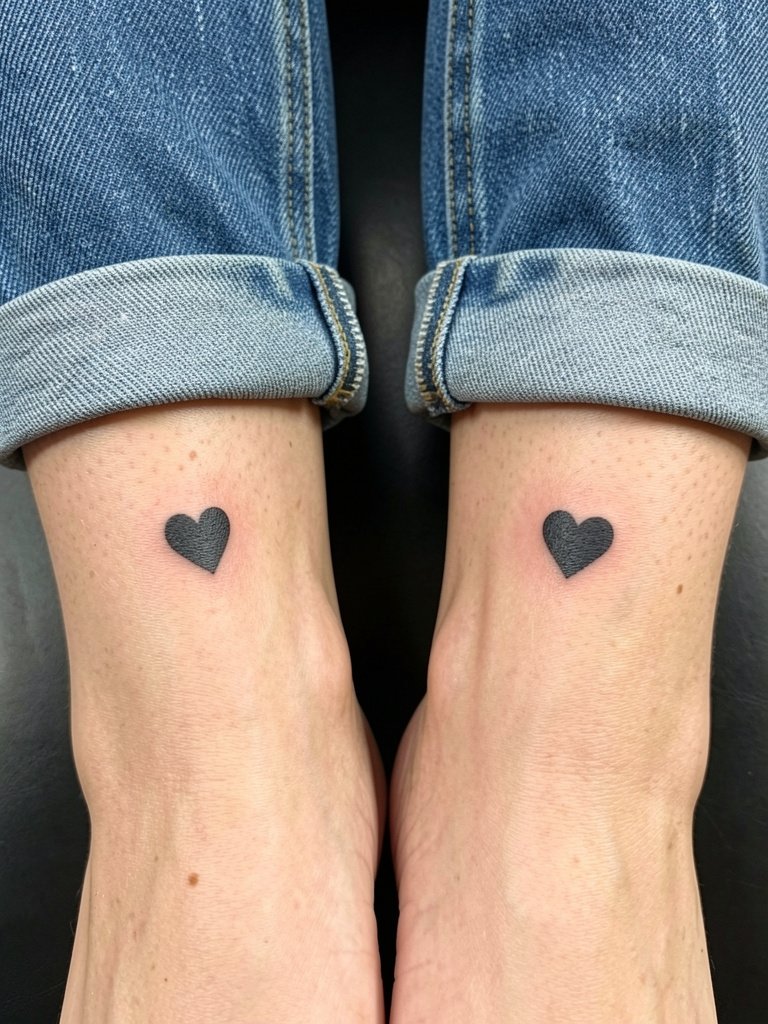
Tiny hearts are appealing and readable if you avoid pushing them to microscopic scale. Offset placement on each ankle keeps the match subtle. Ankles endure friction so plan slightly bolder silhouette fills to prevent patchy fading. A mistake to avoid is asking for pastel shading in this area that will wash out; solid fill reads longer. Sandals and rolled cuffs pair well to show these off.
14. Matching Minimal Constellation Lines on Upper Arm
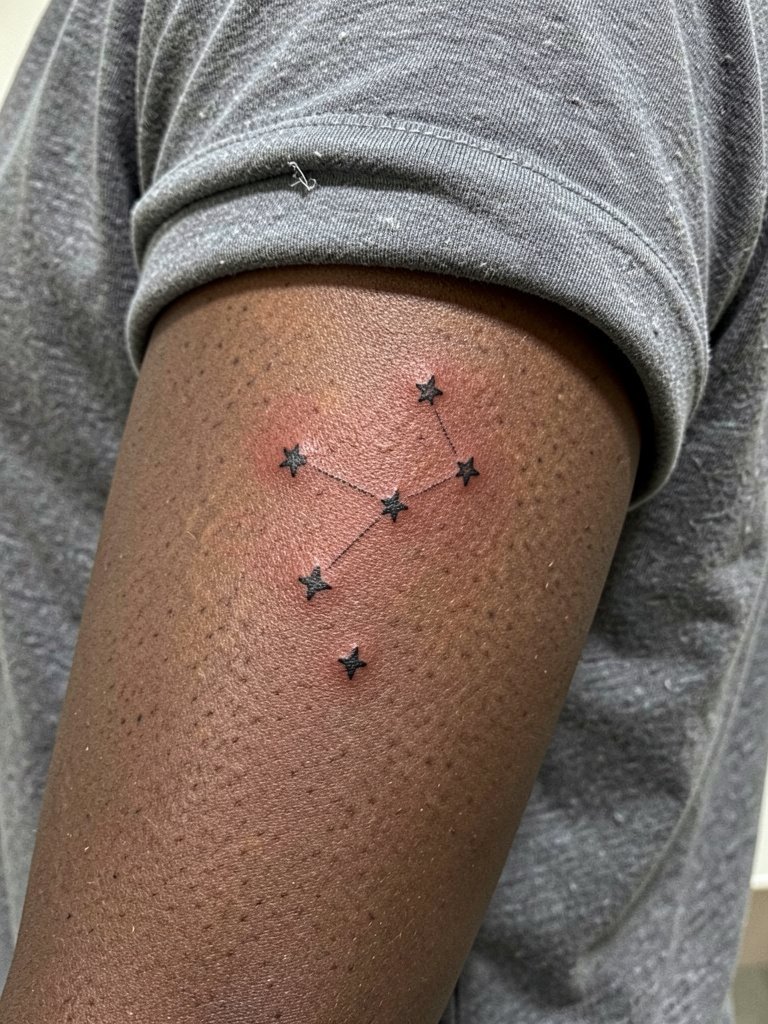
Constellations can be personalized while staying tiny and readable. Pick star spacing wide enough so dots do not merge in two-year healed photos. Outer upper arm tolerates slightly denser composition than the inner wrist, so you can add a small dot work cluster without losing form. Session time 35 to 50 minutes. For evenings out, a rolled sleeve and a minimal bracelet set frame the arm piece nicely.
15. Two-Part Botanical Stem That Completes When Hands Meet
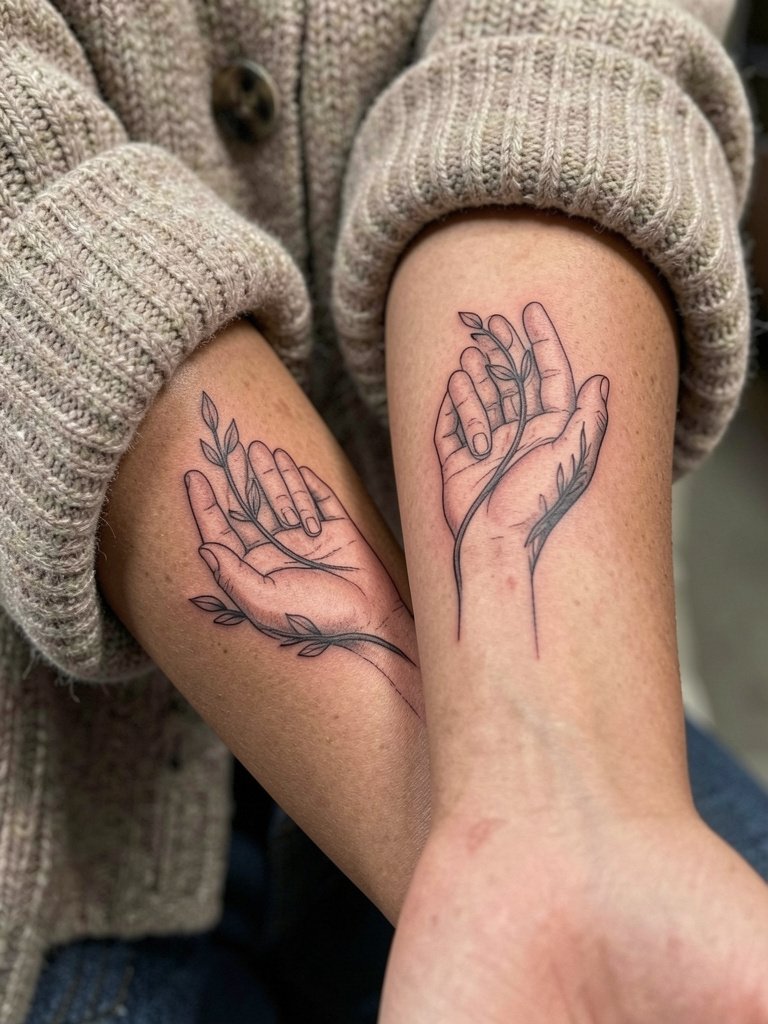
A two-part botanical lets each friend keep a full motif while sharing an interlock moment. The critical detail is matching curvature so the stems visually align when the forearms meet. A common error is inconsistent scale between pieces. The forearm needs moderate spacing and a touch-up after one to two years, particularly where leaves meet joints. Wear a relaxed cardigan when you introduce the design to others.
16. Miniature Paper Airplane on the Index Finger Side
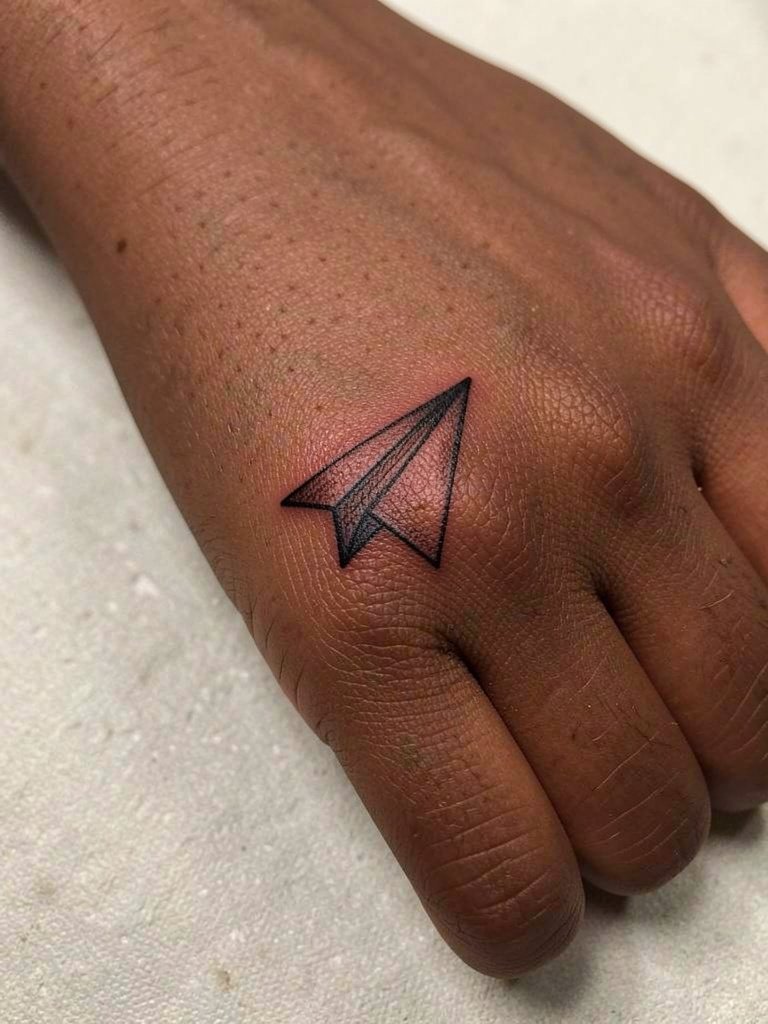
Paper airplane motifs feel playful and low-commitment. Side finger placement avoids fingertip rubbing but still sees frequent contact. Expect a one-hour session and plan for at least one touch-up. The typical mistake is placing the plane on the pad or top of finger where lines erode quickly. For styling, pair with thin stacking rings that sit off the plane and do not rub the ink directly.
17. Matching Tiny Mountains on the Back of the Arm
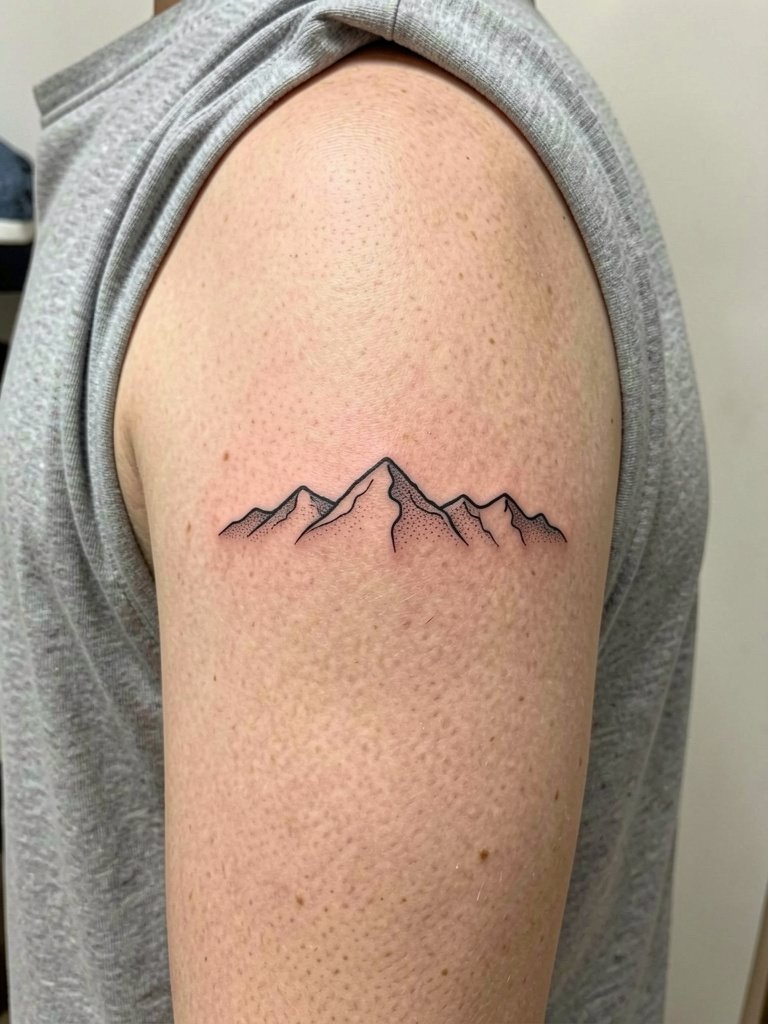
Mountain silhouettes make for simple matching statements that age well when kept bold enough. The back of the arm is less sun exposed so linework retains contrast longer. Mistakes include compressing too many peaks into a tiny band which blurs into an undifferentiated edge. Expect a 30 to 50 minute session and easy wardrobe compatibility with tank tops.
18. Paired Tiny Lock and Key on Inner Wrist and Inner Forearm
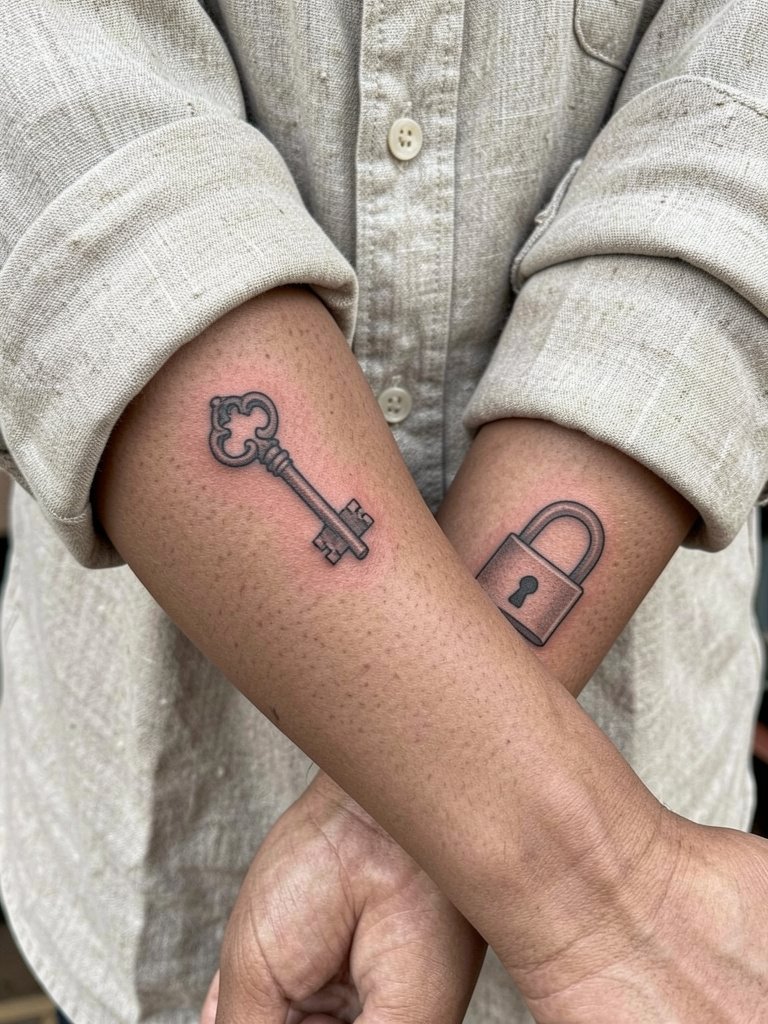
Lock-and-key complements are literal and customizable. One person carrying the key and the other the lock keeps symbols personal. Discuss proportions so neither piece overwhelms the other in size. Common error is making the key too ornate for micro scale. The inner wrist heals faster with less sun, so plan the lock on the wrist and the key on the forearm for even longevity. Pair with a thin cuff bracelet to balance the wrist design.
19. Matching Minimal Anchor on the Ankle Side
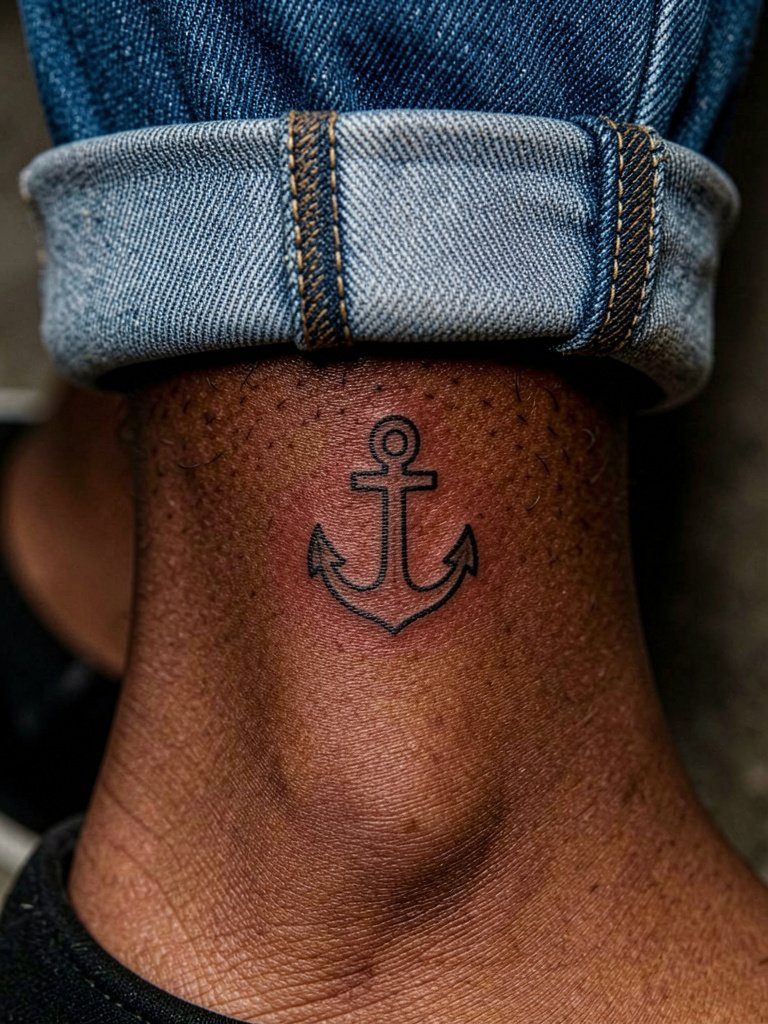
Anchors are compact symbols that take well to ankle placements. Use a solid silhouette rather than fine filigree so the anchor keeps visual weight despite shoe friction. The common mistake is adding tiny rope details that disappear. Session around 25 to 40 minutes and plan for minor touch-up if you wear closed shoes daily. Strappy sandals and rolled cuffs make the anchor sing.
20. Matching Tiny Wave Line Behind the Ear
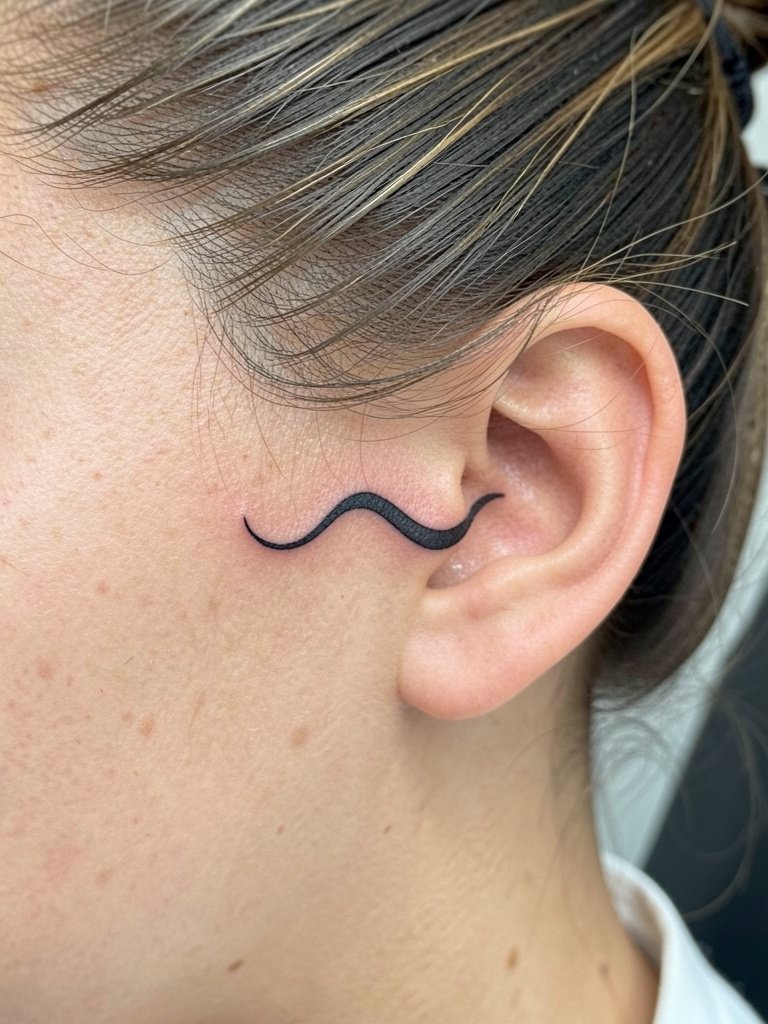
A wave line behind the ear is private, subtle, and works in pairs without feeling matchy. The area heals quickly but needs precise stencil placement because curvature can distort a straight line. Avoid asking for gradient shading here. For reveal moments pick simple updos that expose the area; hair ties and clips do the job.
21. Matching Minimal Crescent Moon on the Thumb Side
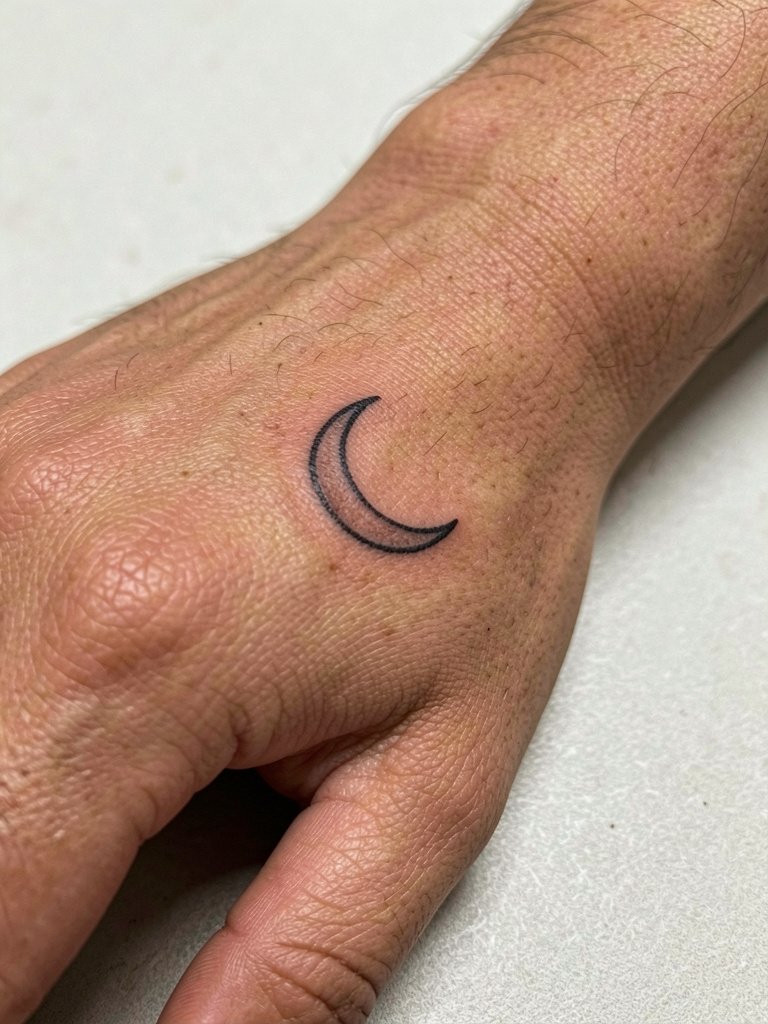
Thumb-side placements are noticeable and unique. The common mistake is putting the crescent too near joints where motion breaks up ink. Pick a slightly offset placement and a modest outline thickness so the crescent remains crisp. Sessions are short but healing needs careful hand use management. Minimal rings that do not sit over the tattoo complement this look.
22. Matching Tiny Coordinate Bar on the Inner Wrist
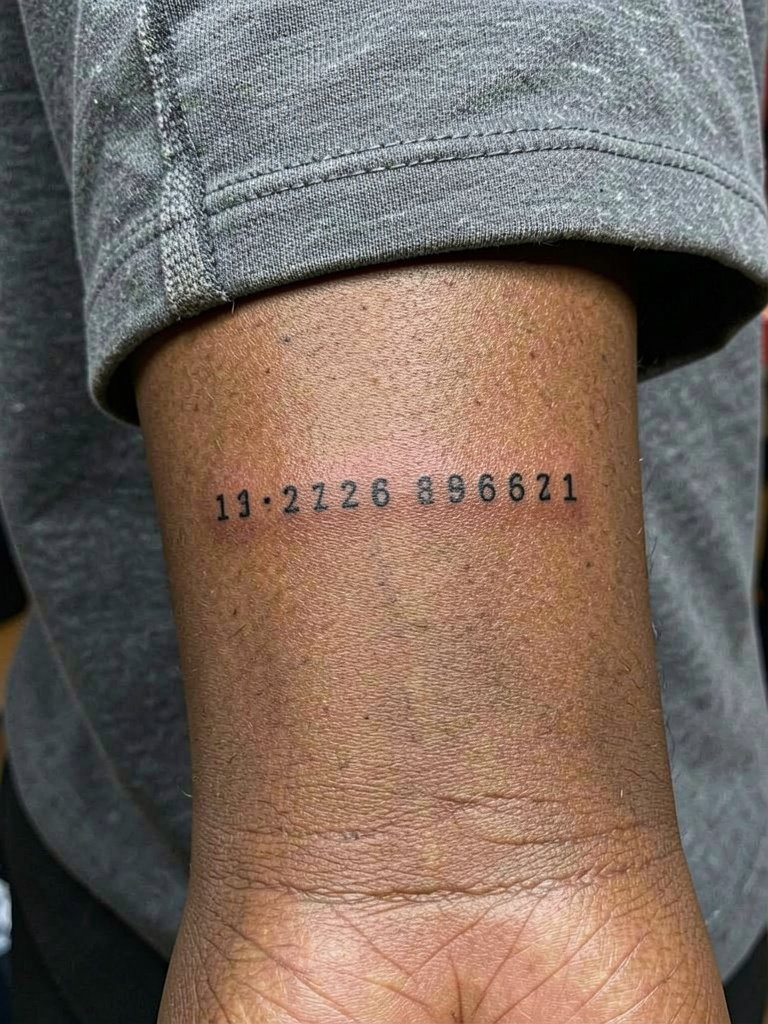
A coordinate bar is discreet and matches without obvious imagery. The inner wrist needs slightly heavier digits than the tiniest sample to avoid smudging by year two. Ask the artist to preview sizing at arm length so the digits remain legible in different lighting. Plan for a touch-up once healed to keep numerals crisp. A slim watch on the opposite wrist pairs well to balance the visual weight.
23. Matching Tiny Crescent and Star on the Collarbone Tip
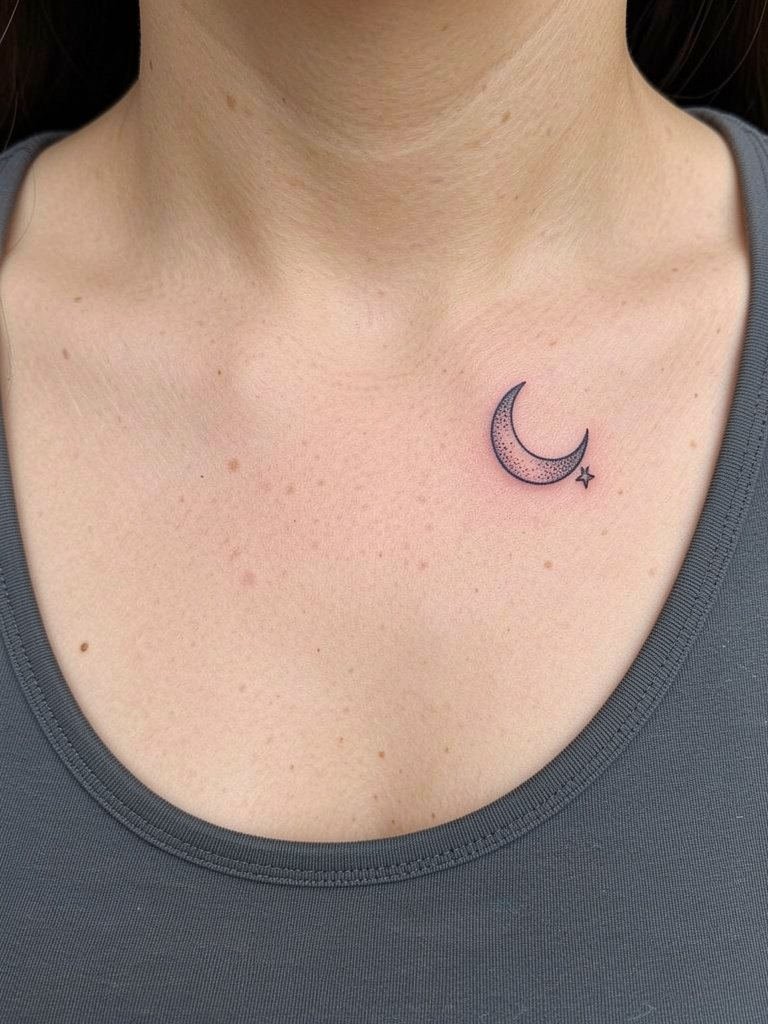
Collarbone tips are flattering for matching micro motifs because clothing often frames the area. The error people make is compressing star and crescent into a too-small space. Keep each element distinct and allow a bit of negative space. Session typically 30 minutes. Layered necklaces that sit above the collarbone work well to show or hide the tattoo depending on the look you want.
24. Matching Minimal Paw Print at the Ankle Inner Side
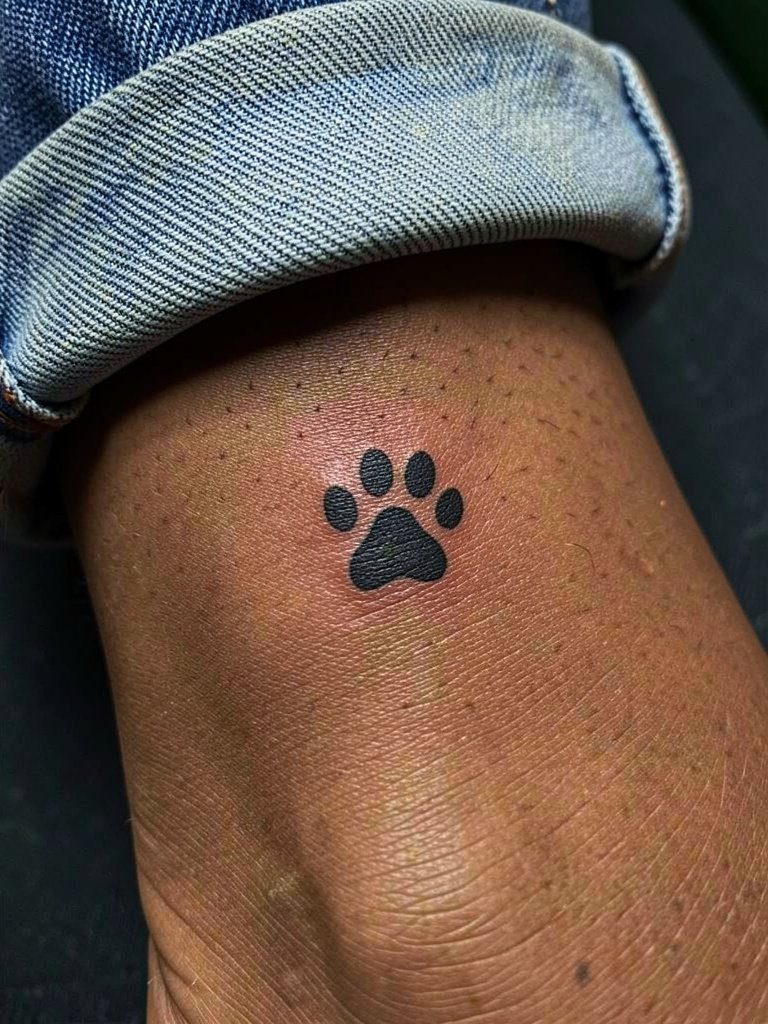
Paw prints feel personal and translate well as tiny solid silhouettes that avoid thin detail pitfalls. Inner ankle placement reduces abrasion from regular shoe sides. Keep toe pads solid rather than linework for durability. Sessions short, plan for a small touch-up in the first year if needed. Pair with sneakers and cropped pants to let the print show.
25. Matching Minimal Compass Navel-Side on Lower Rib
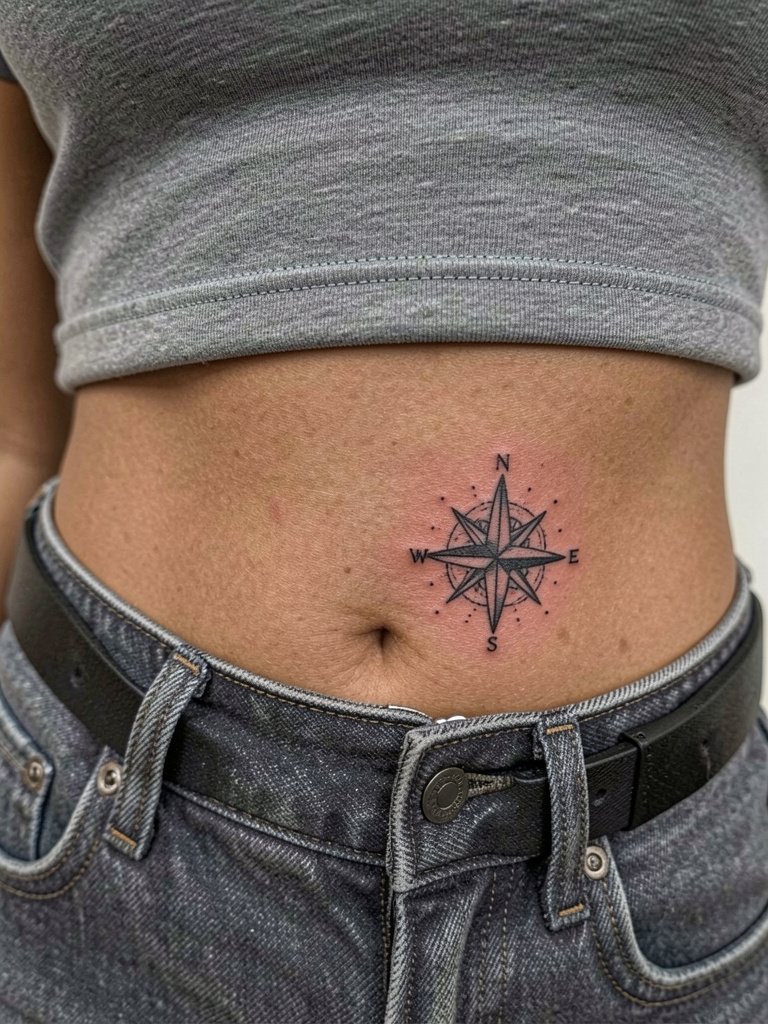
Compass pieces read like shared direction markers. On the lower ribs expect more movement from breathing and clothing, so the artist will recommend spacing and slightly bolder cardinal points to retain shape. The mistake is over-detailing the rose at micro size. Session may be 45 to 75 minutes depending on placement. High-waisted jeans and cropped tops show the compass without overexposing.
26. Matching Minimal Sunflower Seedling on Inner Forearm
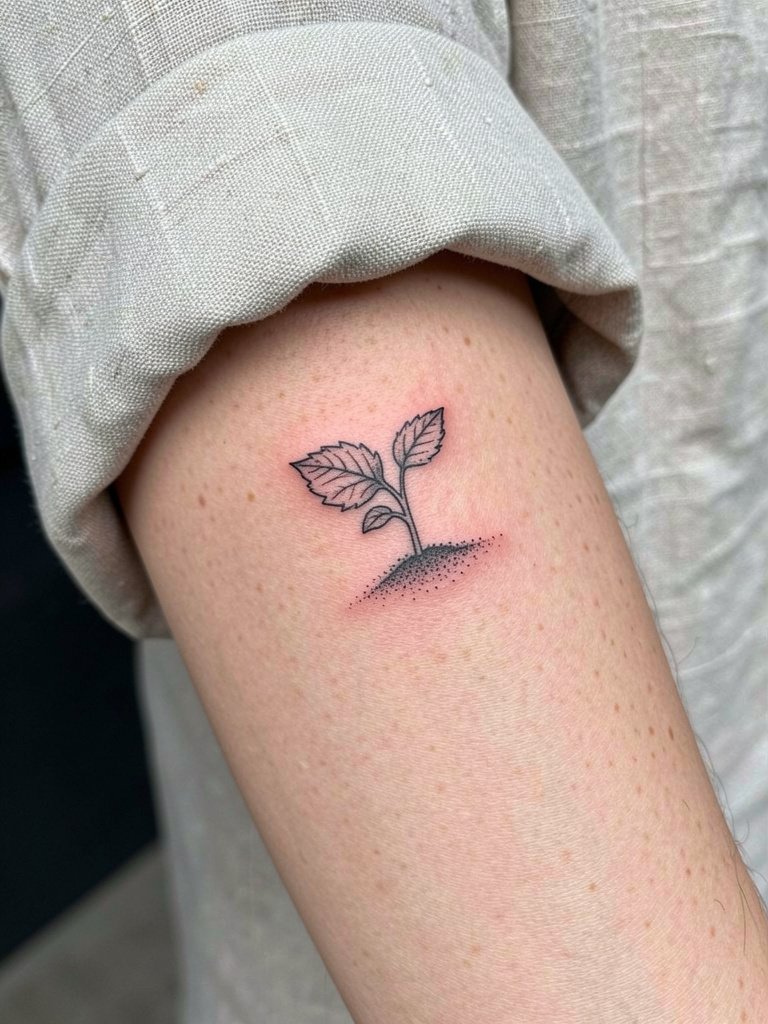
Seedling imagery suggests growth without florals that become fussy at tiny sizes. On the inner forearm this holds well if the stem is not hairline thin. Avoid asking for watercolor fills that fade unevenly on small motifs. Sessions are under an hour and touch-ups are usually minor. Pair with rolled sleeves or a relaxed cardigan to keep the seedling visible in casual looks.
27. Matching Tiny QR-Like Symbol That Reads as a Token
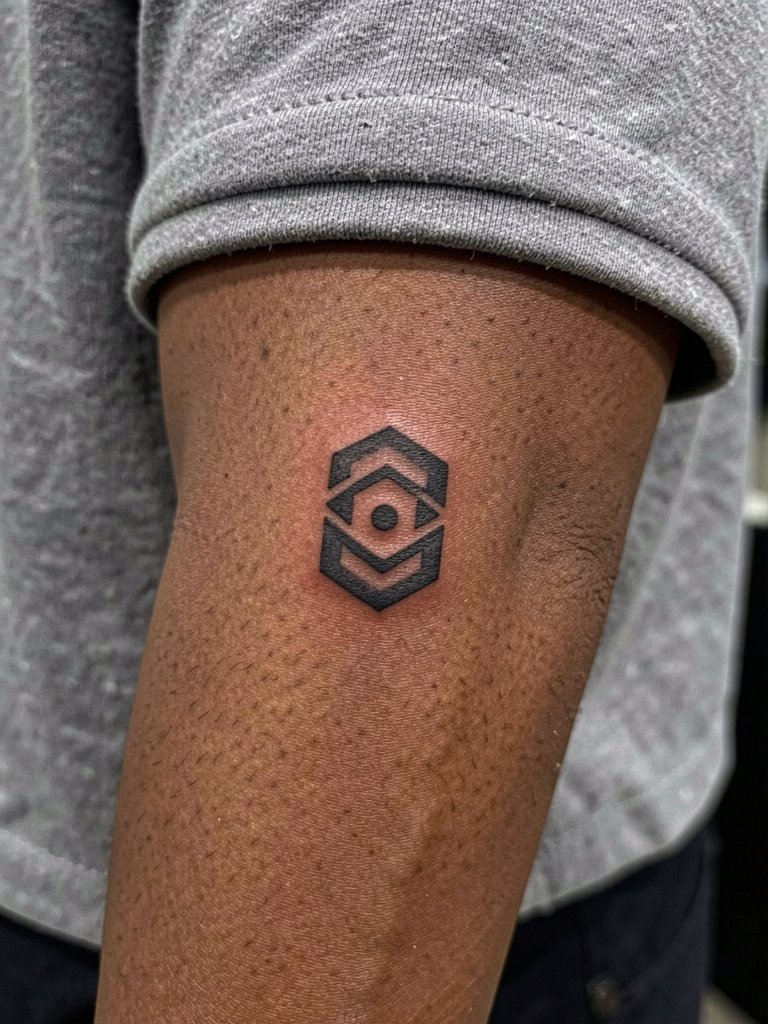
Abstract tokens let friends create a symbol that only they fully know. For geometry keep blocks slightly larger than micro pixels so edges do not merge. The wrist location needs enough negative space around the token. The most frequent mistake is requesting an overly dense grid that blurs. Sessions are short and low to moderate in pain. A slim watch or bracelet on the other wrist keeps balance while showing the token.
Frequently Asked Questions
Q: How much should we expect to pay for small matching tattoos in the US?
A: Small matching tattoos usually fall into broad ranges depending on the shop and city. Expect most micro or single-session wrist, ankle, and collarbone pieces to land somewhere between 50 and 200 per person in many markets. Larger or multi-element matches that need an hour or more can move into higher brackets. Tour around local shop portfolios for healed micro work to confirm the price bands where you live.
Q: What if one of us wants a bolder look and the other prefers fine line?
A: You can keep the shared motif but vary saturation and lineweight so both styles coexist. One person can choose slightly bolder outlines and the other a finer interior detail with the same silhouette. Artists often recommend matching overall scale and spacing so the pair reads cohesive while respecting personal taste. If you need specific phrasing to bring to the consultation, show one bold reference and one fine-line reference and ask the artist to adjust lineweight to match scale.
Q: I'm worried we'll regret a friendship tattoo. Any less-committal options?
A: Complementary halves, coordinates, and abstract tokens give shared meaning without an overt friendship label. Low-visibility placements like the inner ankle, behind the ear, or lateral hip reduce public visibility but keep the connection. Some people also choose a patchwork approach where each person adds small pieces over time so the collection, rather than one large match, marks the relationship.
Q: Where can we find healed examples and artists who post matching work?
A: Search hashtags like #bestfriendtattoo, #matchingtattoos, and #friendshiptattoo on Instagram and TikTok, then filter by your city to find local portfolios with healed photos. Tattoodo and portfolio directories let you search by motif and style terms. Reddit tattoo threads often link to healed sets and candid shots if you look under location or style subthreads. Focus on artists who post healed photos of similar scale before you book.
Q: Do fine-line designs hold up better or worse than bolder lines for matching tattoos?
A: Artists split into two camps on fine-line longevity. One camp says fine line looks elegant and modern and that with correct placement and depth it can age beautifully. The other camp warns that fine single-needle work can blur faster on high-movement or high-wash spots, so slightly bolder lineweight is safer for long-term clarity. Both sides have valid points, and the right choice depends on placement, lifestyle, and the exact line spacing you select.
Q: How often do small matching tattoos need touch-ups?
A: Micro and fine-line pieces commonly need at least one touch-up within the first one to two years, especially on hands, fingers, and ribs. Wrist and forearm pieces often keep shape longer and might only need minor refreshes at year two or later. Expect touch-up timelines to depend on sun exposure, skin type, and how aggressive your daily activities are with that area.
Q: Any wardrobe tips for showing off or hiding matching pieces at work events?
A: Pick placements aligned with your usual professional attire. Collarbone or inner forearms are easy to show by changing a neckline or rolling sleeves. For a low-key reveal tuck pieces under long sleeves or choose accessories that frame rather than hide them. When planning outfits for the healing week, bring loose tops or items listed earlier so the area stays exposed without rubbing.
