
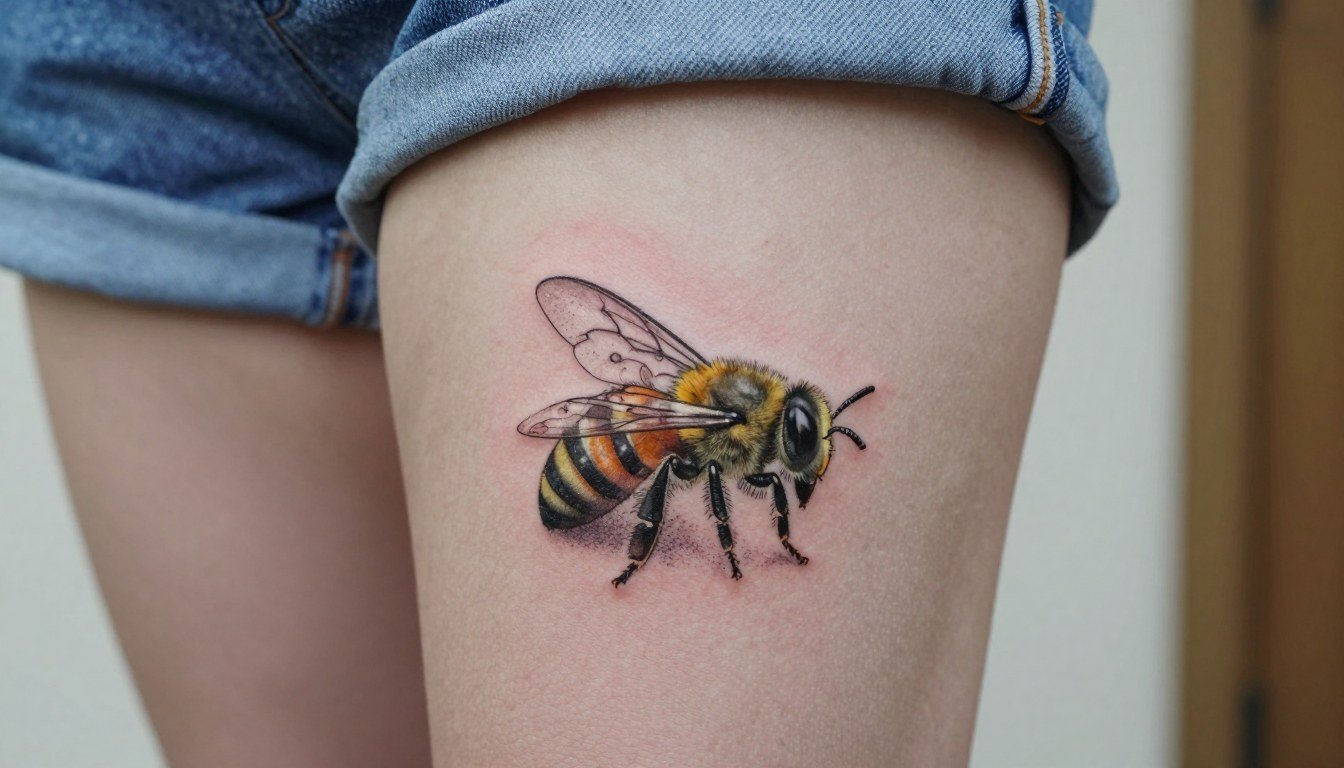
Fine line bee tattoos look delicate on the flash sheet but they behave differently on skin. Tiny wings, filigree thoraxes, and hex grids all compete with movement, sunlight, and daily wear. Pick a design that gives the bee room to breathe, plan slightly heavier linework up front, and think about how you will show it off after healing.
1. Fine Line Micro Bee on Inner Forearm

A micro bee on the inner forearm reads best at three to four inches rather than one. Request slightly heavier single-needle linework so the wings and antennae keep shape after six months. Expect a 45 to 75 minute session and low to medium pain on the forearm. A common mistake is packing filigree inside the thorax, which blurs into a dot by year two. For showing it off, rolled sleeves and narrow cuff bracelets frame the forearm well, and a slim linen button-up shirt keeps the tattoo visible without rubbing. Pair with a thin gold stack ring on the opposite hand for balance.
2. Minimal Honeycomb Band on the Ring Finger
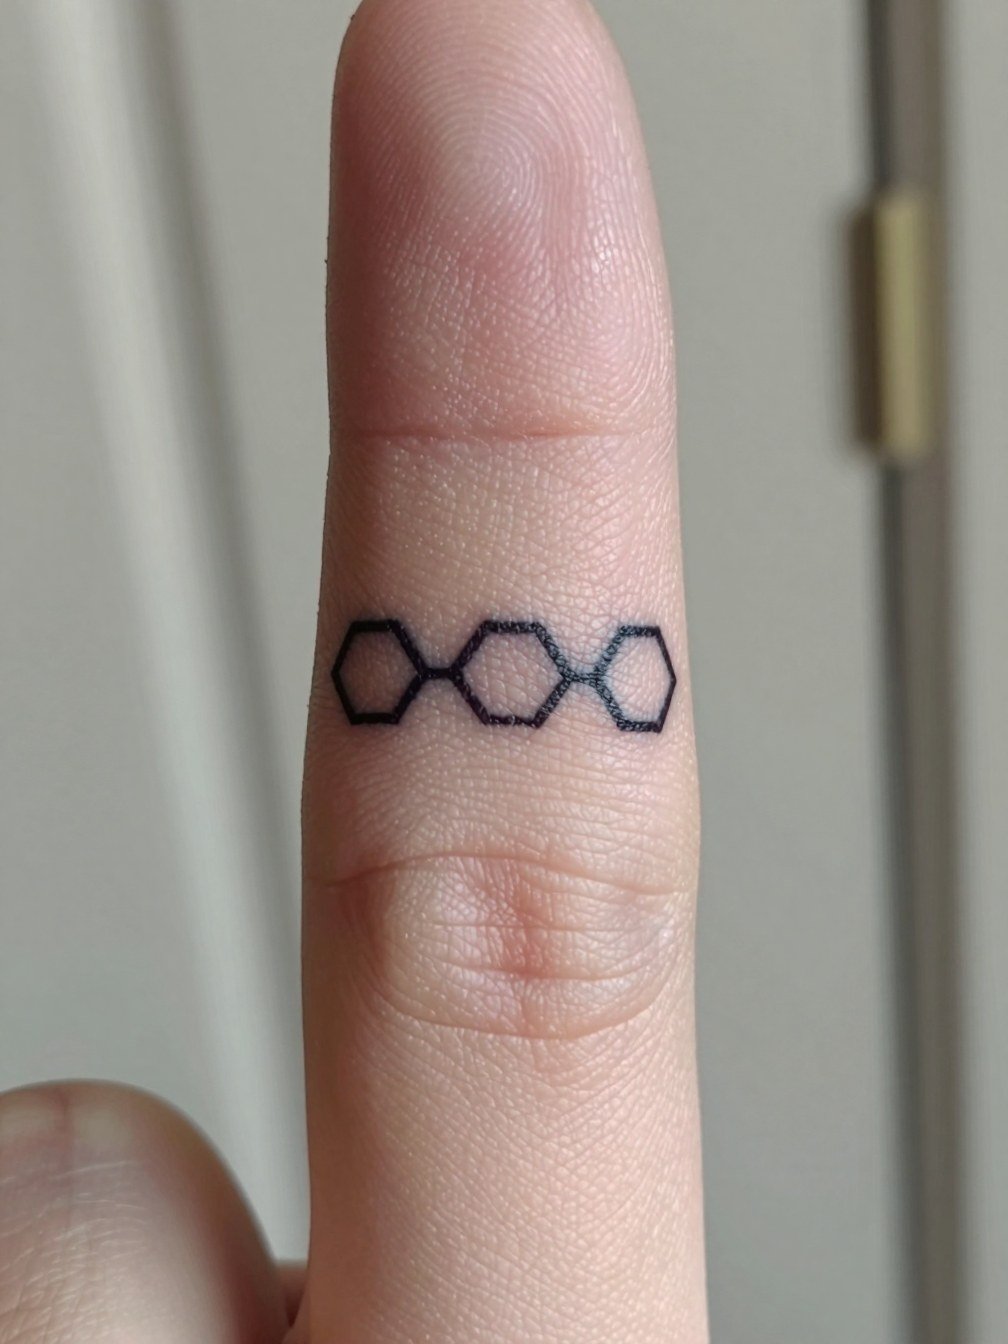
Finger tattoos live in a high-friction zone so keep hexes open and bold rather than detailed. Expect frequent touch-ups in the first two years and a higher chance of partial fading. The session is short and sharp, typically 15 to 30 minutes, and the skin sometimes heals uneven around knuckles. Avoid asking for micro stipple inside each cell because that detail heals into a gray patch. For longevity, ask for slightly thicker contour lines and plan a touch-up after nine to twelve months. Fingers also flex constantly, so linework that reads at three millimeters across will still look intentional after a year.
3. Realistic Micro Bee on the Thigh
Thigh placements are forgiving and let you do more realistic micro work because the skin stretches less with daily motion. A realistic micro bee at two to three inches allows for subtle wing veins and soft color saturation that age well. The session runs from one to two hours depending on color layering, and pain is usually low to medium. A typical error is overloading tiny bees with high-contrast color that flakes and looks spotty at six months. For evenings out, a slit midi skirt and simple ankle strap sandals put the tattoo on display, try a slit midi skirt for easy reveal without rubbing.
4. Queen Bee Over Sternum, Small Blackwork Emphasis
Fine line work on sternum and adjacent ribcage splits artists into two camps. One camp argues the skin stretch and motion across the chest blur single-needle detail within two years. The other camp says that with slightly heavier spacing and confident needle depth, the lines settle and stay readable for longer. For this placement expect a longer session and higher pain, especially near the bone. Keep the motif compact and prefer bold contours with internal stippling over micro filigree. Because this area is intimate, choose an artist known for chest work and be prepared for a touch-up plan.
5. Honeycomb Geometry Accent on Upper Arm
Upper arm geometry reads well from across a room because the silhouette is bold. This placement tolerates slightly tighter line spacing than fingers, but avoid micro filigree inside each hex. Expect a one hour session and low to medium pain. A common mistake is filling every cell with tiny detail, which blurs into a gray mass at two years. For daytime looks, the upper arm pairs with rolled sleeves and mid-sleeve dresses, try a casual sleeveless knit top to show the area. Add a cuff bracelet when you want contrast between skin and jewelry.
6. Neo-Traditional Bee with Floral Wreath on Calf
Calf pieces let you go bold with saturation and color without worrying about constant abrasion. Neo-traditional bees with heavy outlines and solid color panels age into a readable statement. Expect a one to two hour session and medium pain on the lower leg near the bone. The mistake people make is choosing a complex palette too small for the calf. Color heals differently across skin tones, so ask for reference healed shots on similar skin if possible. Calf tattoos need fewer touch-ups than fingers because they see less washing and friction.
Pre-Session Essentials
The small placements above behave differently during the first week, so a few tools make the session and the first days easier.
-
Transfer stencil paper kit. Lets you preview linework on skin and reposition the layout for finger and forearm bees before the needle starts.
-
Topical numbing cream. A benzocaine-free formula applied 30 to 45 minutes before eases wrist and sternum sensitivity for people who prefer less pain.
-
Thin protective film rolls. Keeps finger and ankle tattoos clean during the high-contact first week and reduces scab tugging while you heal.
-
Fragrance-free gentle body wash. Cleanses healing skin without stripping color, useful for calf and thigh pieces that see regular showers.
-
Aquaphor healing ointment. A familiar mainstream option for locking in moisture during the first two to three days without heavy residue.
7. Micro-Realism Bee Behind the Ear
Behind-the-ear bees are intimate and subtle because they peek out only with certain hairstyles. Sessions are short and the skin there is thin so pain can be moderate. The biggest practical issue is visibility for touch-ups, so plan on a follow-up at six to twelve months. Keep the design small and avoid heavy color which can migrate in this area. For showing it off when you want, pair with hair that can be styled up, and a wide-neck top to balance the look. Because the placement is delicate, choose a crisp stencil that shows exact scale before the needle touches skin.
8. Cartoon-Inspired Retro Bee on the Outer Shoulder
Retro cartoon bees give a playful tone and they wear well when bold outlines and flat color are used. Outer shoulder placements see sun exposure, so plan for sun protection to preserve saturation. Sessions vary from 45 minutes to ninety minutes based on color layering, and pain is usually low. A typical error is requesting washed-out color that looks weak after healing. For casual show-off style, sleeveless tops and tank dresses highlight the shoulder. If you want to experiment, bring reference flashes and ask the artist to simplify shadow areas so the bee reads clearly at arm's length.
9. Single-Needle “Queen Line” Collarbone Accent
Collarbone bees are high-visibility and age depending on sun exposure and clothing friction. Single-needle scripts or tiny motifs need breathing room so they do not wash out into a faint smudge. Sessions are usually under an hour and pain ranges from medium to high near the bone. A common mistake is placing text directly on the crest and insisting on hairline strokes. For showing it off, open-neck tops and layered delicate necklaces work well. Try a scoop-neck tee for daytime outfits and a slim delicate chain necklace to frame the piece without covering it.
10. Tiny Flight-Path Constellation on the Ankle
Ankle tattoos face regular friction from socks and shoes so simplify motion lines and keep elements spaced. Sessions run 20 to 45 minutes and pain can spike over the bone. Expect touch-ups sooner than for thigh or calf work because of constant abrasion. Avoid tiny stars packed tightly because they blur with time. For footwear that highlights the ankle, use rolled jeans and low-profile sneakers to keep the area visible. A slip-on canvas or ankle boot helps show the tattoo while minimizing rubbing against the skin.
11. Bold Blackwork Worker Bee for the Upper Thigh
Upper thigh blackwork reads strongly even when scaled large. The heavy fill resists early fading and looks intentional as it ages. Sessions can run from one to three hours depending on size and shading, and pain is often low to medium. A mistake is trying a micro blackwork composition too small for the thigh. Because the thigh sees less daily wear, touch-ups are usually less frequent than on hands or feet. For summer display, high-waisted skirts and mid-thigh hems frame the piece cleanly without rubbing.
Frequently Asked Questions
Q: How long will a fine line bee on my wrist stay readable?
A: Fine line wrist bees often start to soften around year two if the line weight is ultra-fine. Request slightly heavier contour lines and plan a touch-up at nine to twelve months if you want crisp definition.
Q: Are finger and ankle bees worth it if they need frequent touch-ups?
A: They can be worth it if you like seasonal refreshes. Fingers and ankles fade faster because of washing and friction. If you choose those spots, keep the design simplified and budget for a touch-up in the first year.
Q: Where can I find healed examples and portfolios without naming specific artists?
A: Search platform tags and location filters for healed work, for example try hashtags like #beeTattooHealed, #microBeeTattoo, and #smallBlackwork on Instagram and TikTok. Use community threads on Reddit to request photos from different skin tones and search local portfolio listings with the keyword phrases "small bee tattoo healed" plus your city.
Q: How should I dress for a sternum or chest bee session?
A: Wear a fitted sports bra or bandeau so the artist can access the sternum without you disrobing. Bring a loose button-up to wear to and from the studio. The fitted top keeps fabric out of the way and reduces constant readjusting during the session.
Q: Will color bees look different on darker skin tones?
A: Yes, color saturation behaves differently and some hues read stronger on certain tones. Ask to see healed photos on skin tones similar to yours and consider bolder outlines to keep contrast if you prefer long-term readability.
Q: How often should I plan touch-ups for small bee designs?
A: Small placements like fingers and wrists commonly need a touch-up within nine to eighteen months. Thigh, calf, and upper arm pieces are less demanding, often going several years before a refresh is necessary.
