
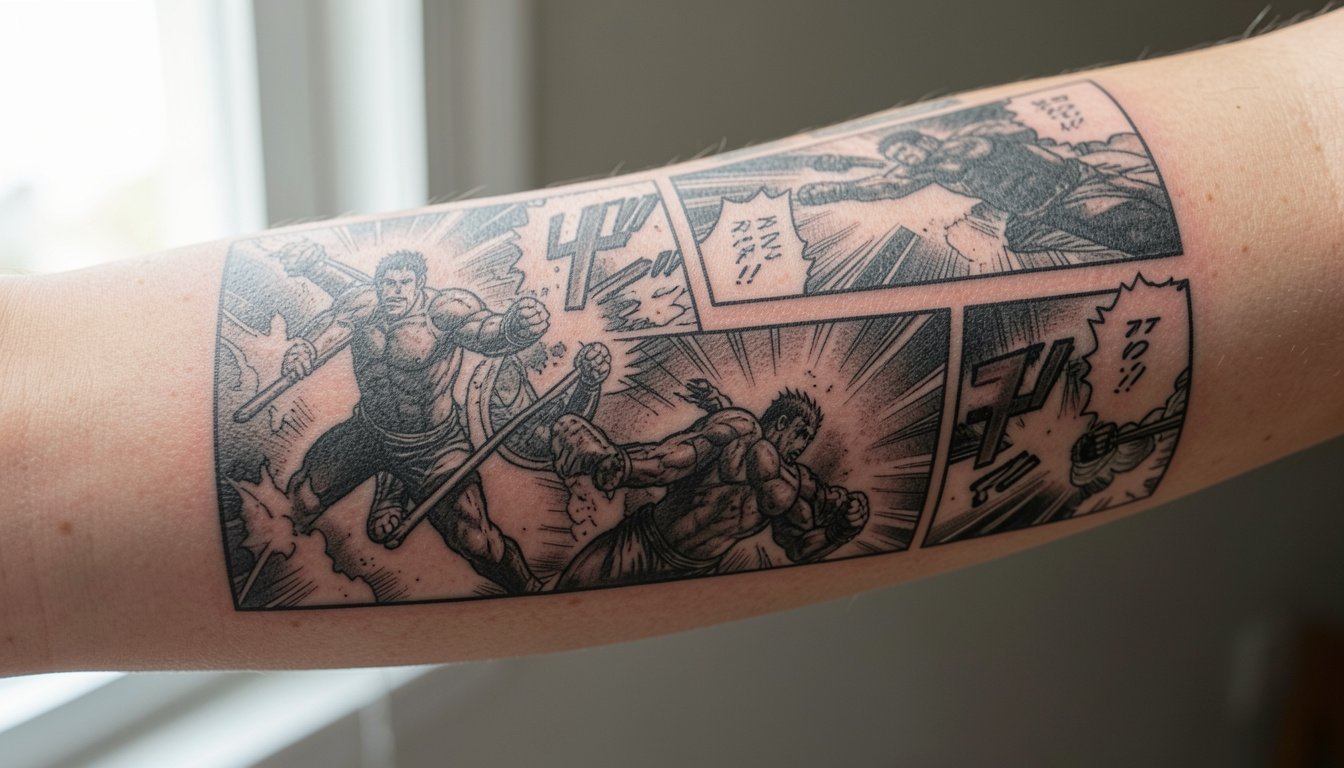
A surprising truth for anime fans getting sleeves is that the flashiest, most faithful color pieces are often the ones that need the most maintenance a few years later. Black-and-gray manga work and bold symbol pieces hold contrast longer and connect multiple series more easily. Pick the visual anchor and plan negative space from the start so the arm reads as one composition rather than a stack of stickers.
1. Naruto Sage-Style Portrait With Seal Accents
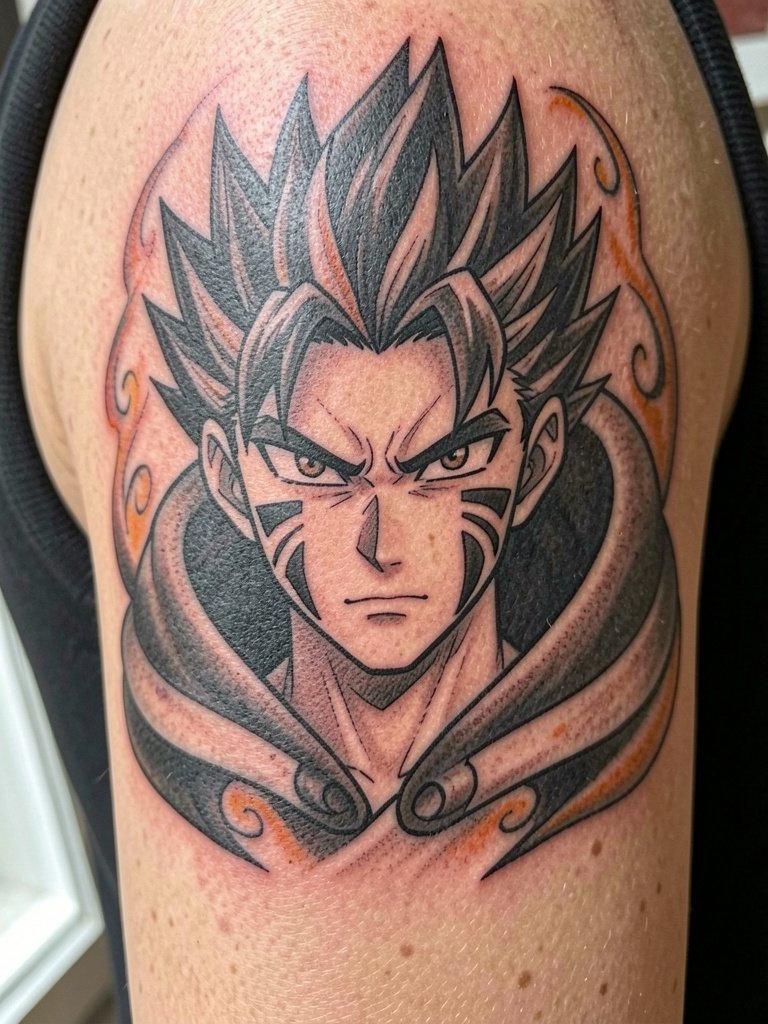
Use this portrait as a sleeve anchor panel. For readability choose bold linework around the eyes and broader hair shapes rather than microscopic hair strands. A common mistake is requesting a tiny face with single-needle detail that blurs by year two. Plan one or two background energy elements so later pieces can tuck into the aura and the arm reads cohesive. Session time for an upper-arm portrait like this is typically two to three hours depending on shading. If you want to show it off in summer, pair it with a sleeveless tank top for clean shoulder visibility during healing and beyond.
2. Haku-Style Serpentine Dragon Flow
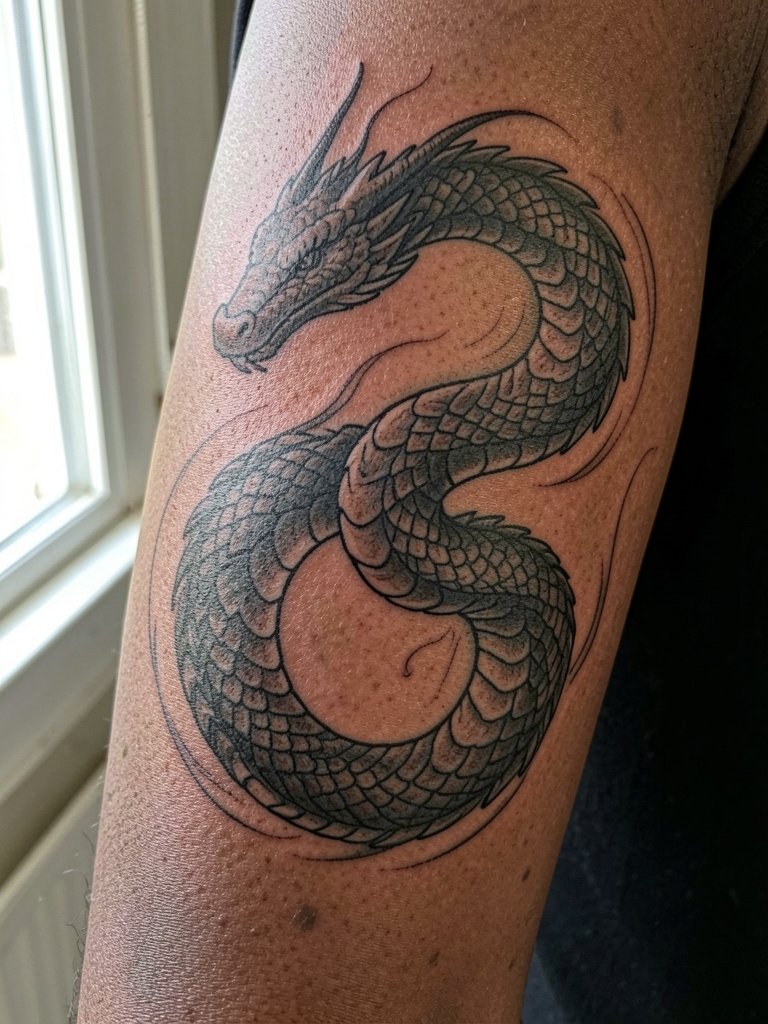
This design lives in motion and pairs with wrap-around placements. The dragon uses large, ribbon-like shapes so negative space can be carved into later panels without losing flow. A mistake is overfilling scales with fine stipple on high-movement zones; those details can soften unevenly. Expect four to six hours across sessions for a forearm-to-bicep wrap. For session wear, bring a plain crew neck tee you can easily roll up so the artist gets full access without tugging at seams. On healed skin the large black shapes keep the serpent readable at a distance.
3. Luffy Gear-Style Energetic Action Portrait
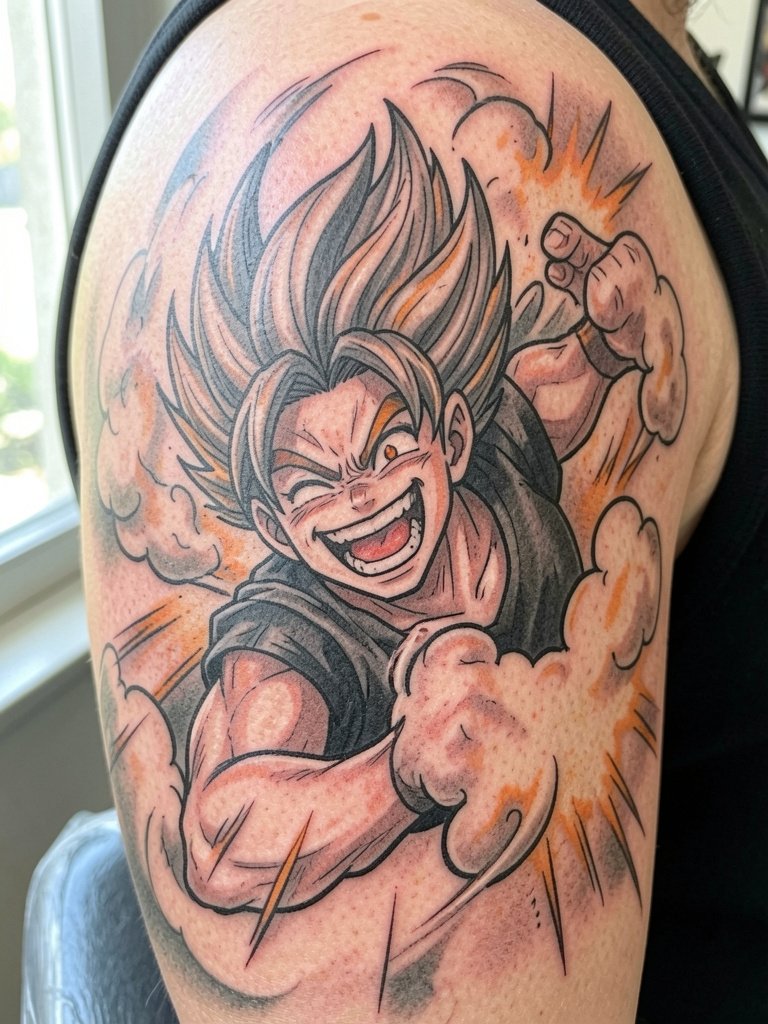
This subject benefits from being larger than a palm or it loses that kinetic read. There is an ongoing debate about color versus black and gray for this kind of energy piece. One camp insists that full color preserves the original energy and personality of the character. The other camp argues black and gray with selective highlights unifies a sleeve and will age with cleaner contrast. If you choose color, ask for saturated fills in protected areas and plan touch-ups at two to three year intervals. Style tip for showing off this shoulder cap piece: an open short-sleeve overshirt frames the shoulder without hiding the action.
4. Straw Hat Jolly Roger Emblem, Minimalist Blackwork
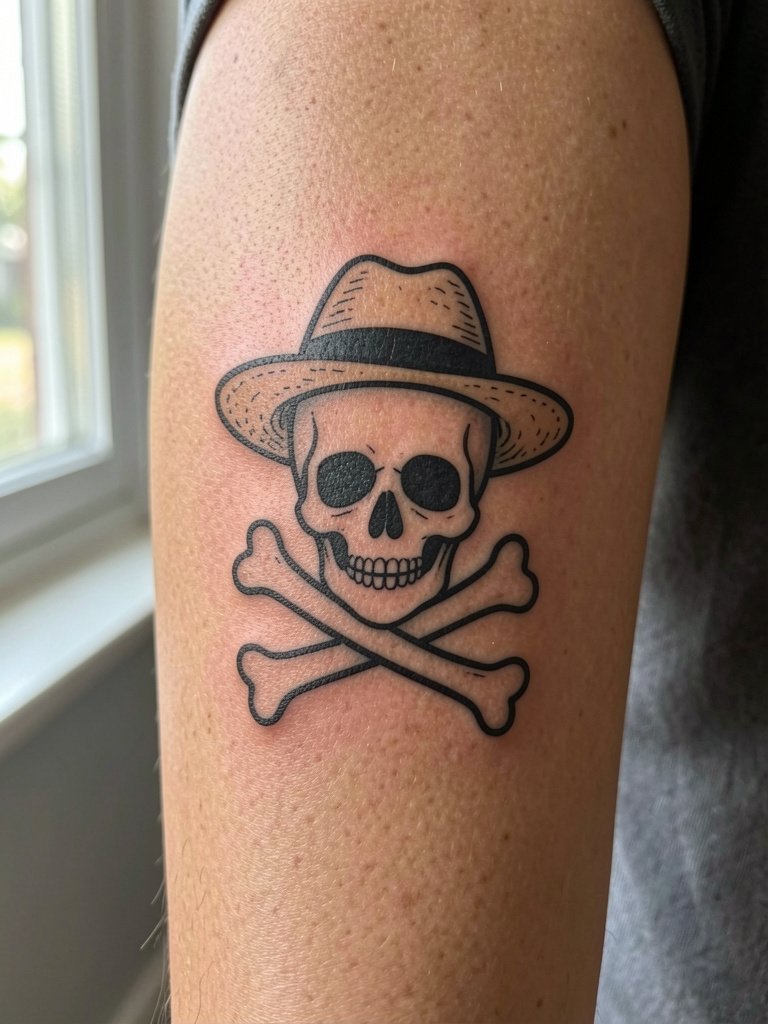
Symbol-first pieces are a smart sleeve strategy for longevity. Symbols are easier to scale, sit well as filler between portraits, and resist the softening that tiny facial features suffer. A typical error is placing the emblem too small on the wrist where blowout risk is higher. On the forearm or calf this design reads clean for years. If you want it to live as part of a larger patchwork sleeve, leave ¾ inch of breathing room for later connectors. For outfits, the emblem pairs with a rolled-up Oxford cuff and a minimalist watch on the opposite wrist; try rolled sleeve oxford shirts when you want the forearm visible.
5. Zoro-Style Three-Sword Diagonal Composition
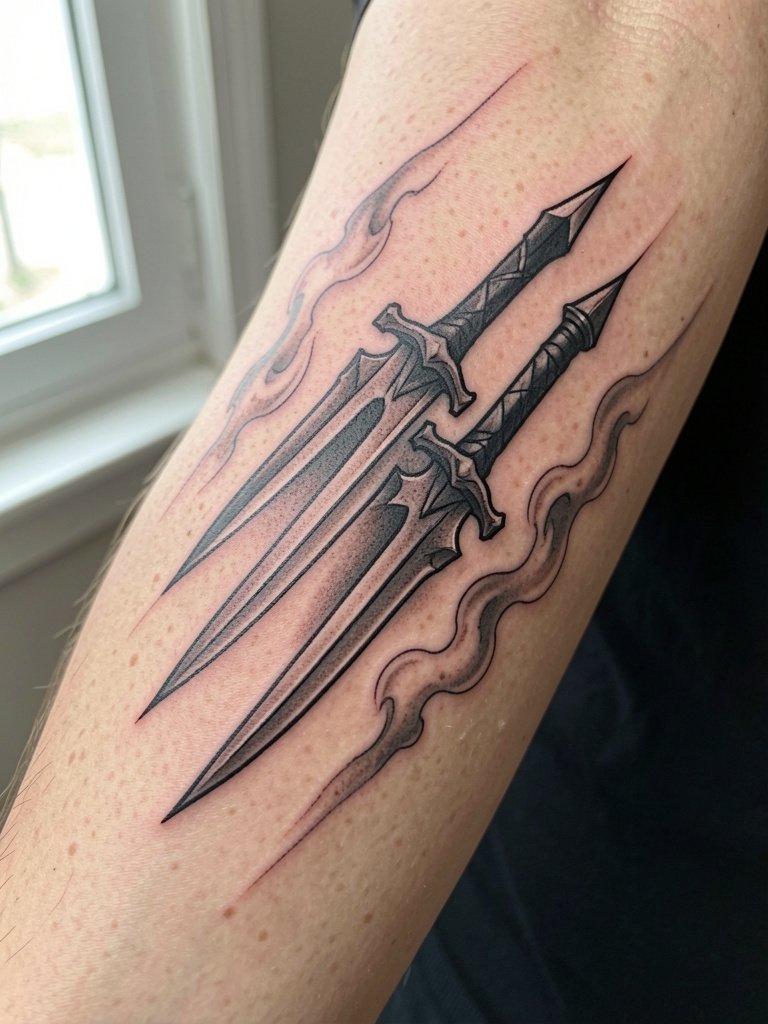
Weapon motifs create directional flow that helps a sleeve avoid feeling static. Recommend slightly heavier linework on blade edges so the silhouette reads from across a room. A common mistake is asking for ultra-fine detail in the hilts that becomes muddy when the arm moves. Match the sword scale to the arm width so the diagonal line crosses the muscle naturally. For the appointment, wear a loose short sleeve tee you can roll up to the shoulder; that saves time and keeps the area clean during breaks.
Before You Book
The upper-arm portraits and forearm panels above heal differently, so a handful of practical items smooth the session and the first week.
-
Stencil transfer paper kit. Helps preview placement on skin before committing, crucial for portraits and panel layouts in ideas 1 through 6.
-
Topical numbing cream. Applied per directions 30 to 45 minutes before reduces shoulder and rib discomfort for longer sitting sessions.
-
Thin protective film roll. Keeps forearm and calf work clean during showers and daily friction.
-
Fragrance-free gentle body wash. Cleanses healing skin without irritation for linework and shaded areas.
-
Healing ointment. Light application in the first days locks in moisture for fine details without clogging channels.
6. Sukuna-Style Facial Mark Motif, High-Contrast Blackwork
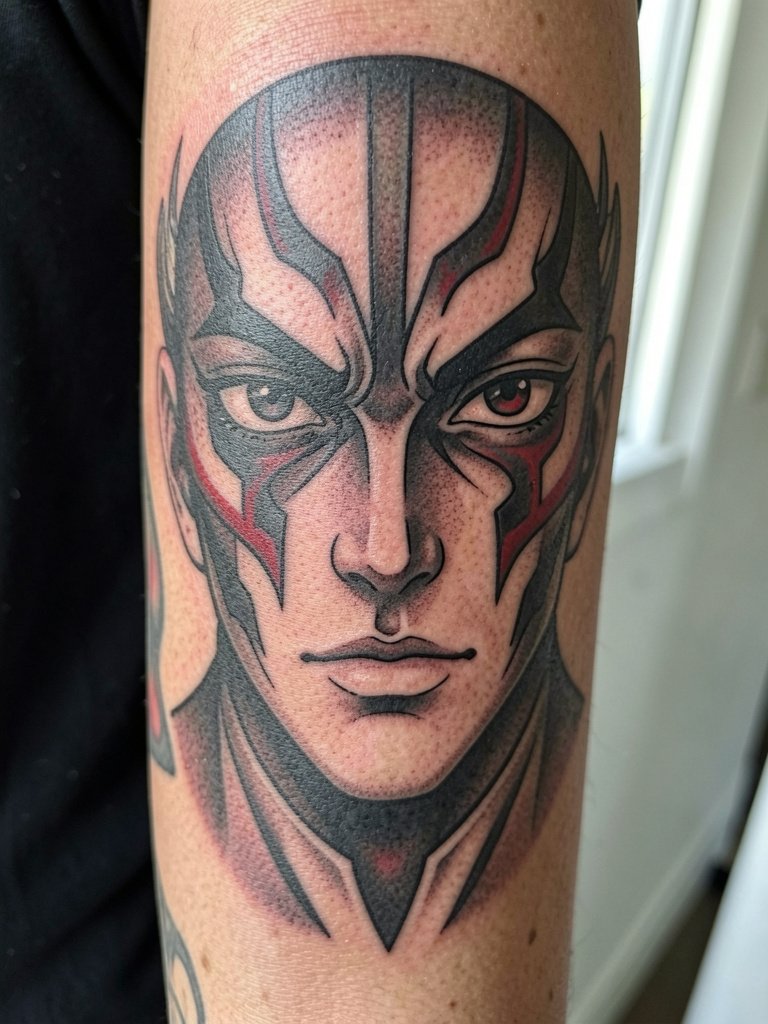
Graphical facial-mark motifs read well even when cropped into a sleeve. Keep the marks thick enough to survive two to five years without merging into the skin tone. A common error is asking for pencil-thin marks that look great on a screen but blur in practice. For placement on the outer forearm, expect one to two sessions with bold filling and clean outlines. Style tip for showing off contrast-heavy motifs: a plain black tee makes the markings pop while keeping the overall look cohesive with other blackwork panels.
7. Dragon Ball-Style Energy Blast Pose
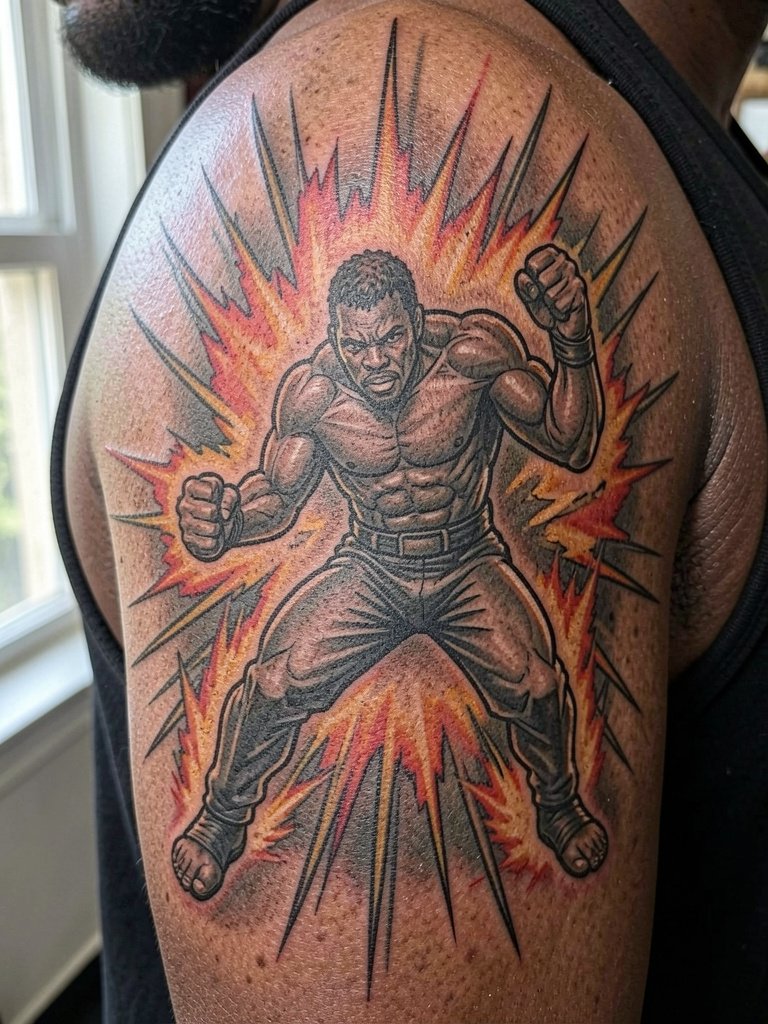
Action poses translate better into sleeve narratives than static headshots. If you want an energy pose, make the limbs and aura larger than life so the motion reads when the arm moves. The choice between saturated color and black-and-gray again divides artists and collectors. One camp says faithful color keeps the character recognizably classic. The other camp points to cohesion and durability as reasons to favor black-and-gray. If you prefer color, ask the artist where to place the brightest fills so they avoid high-friction spots. To show this off on warm days, pair with a fitted crew neck tee that reveals the shoulder transition.
8. Attack-Style Titan Silhouette, Vertical Panel
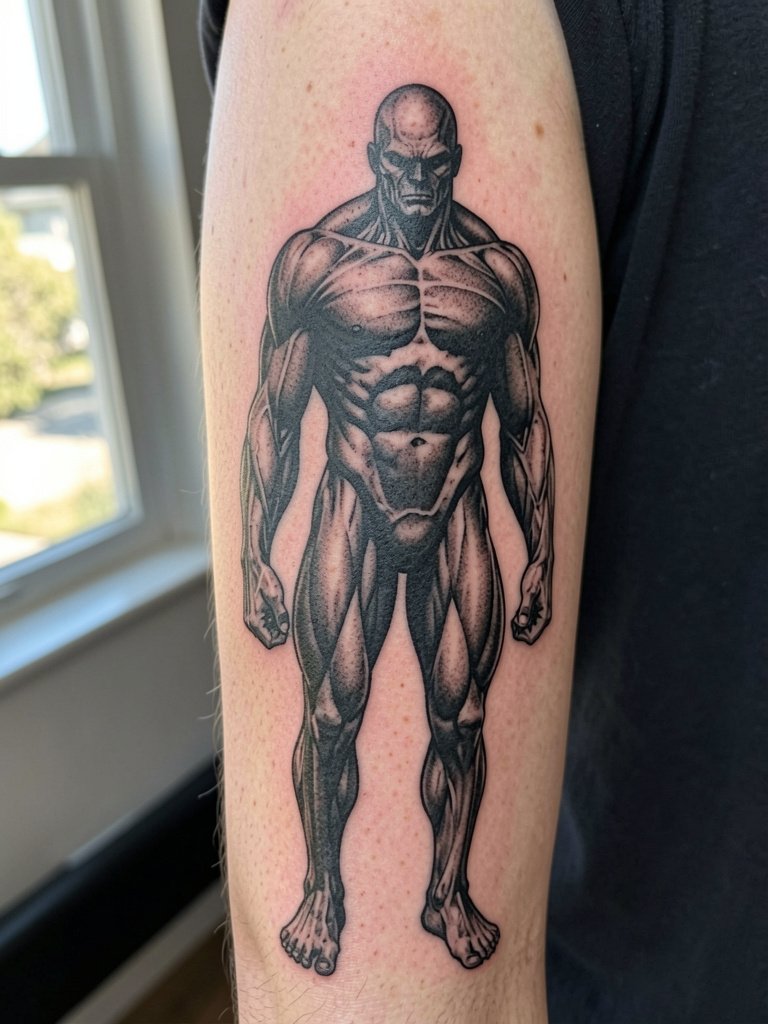
Tall vertical subjects fit sleeve flow naturally and use negative space to separate panels. Place heavy shadows strategically so the silhouette keeps its edge when the arm bends. A mistake is crowding the vertical panel with tiny interior detail that competes with the silhouette. For a clean read, keep the silhouette bold and the internal anatomy simplified. If the piece sits near the elbow, expect more discomfort and plan shorter sittings. Outfit pairing: cuffed shorts or rolled flannels work well when the sleeve extends to the lower arm; try a flannel overshirt for casual reveal.
9. Full Manga Panel Narrative Sleeve
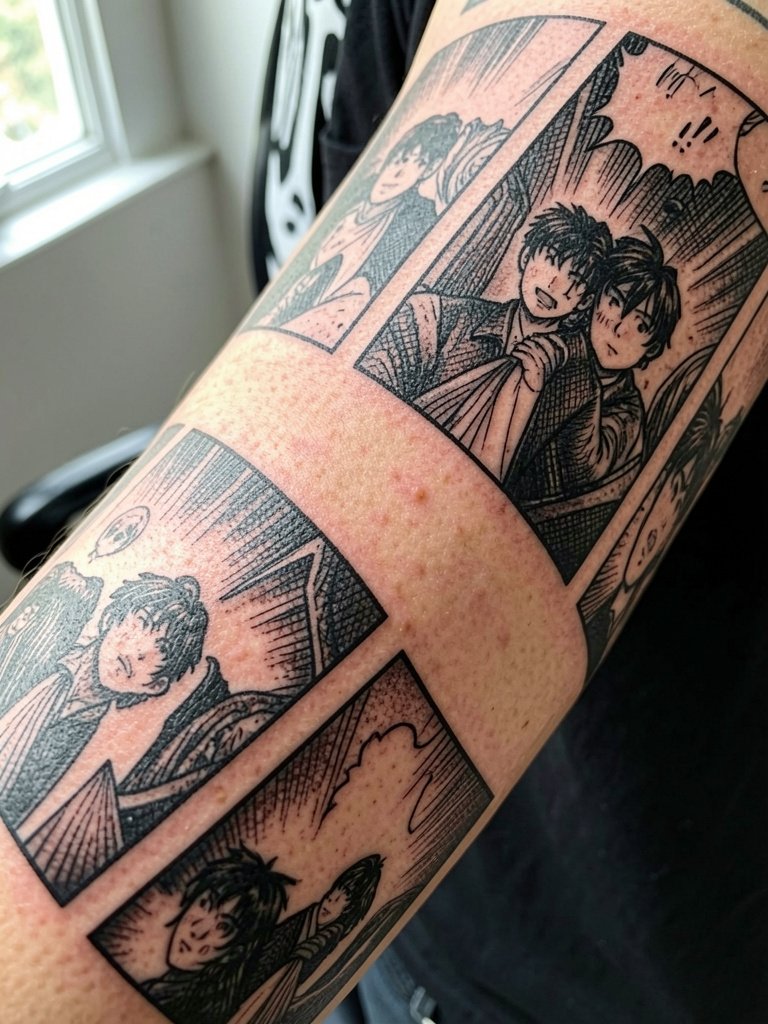
Manga-panel sleeves turn fandom into a readable sequence and prevent the "sticker" look. The challenge is scale and pacing. Panels that are too small become visual noise when you step back. Plan a mix of large anchor panels and smaller vignette gutters so the eye flows. One big risk is placing too many frame borders close to joints; those lines can blur into each other over time. For session planning expect four or more sittings depending on density. Clothing tip for showing narrative panels: neutral tees keep attention on the arm so a plain black tee or an open overshirt will not compete.
10. Black-and-Gray Manga Hatching Panels
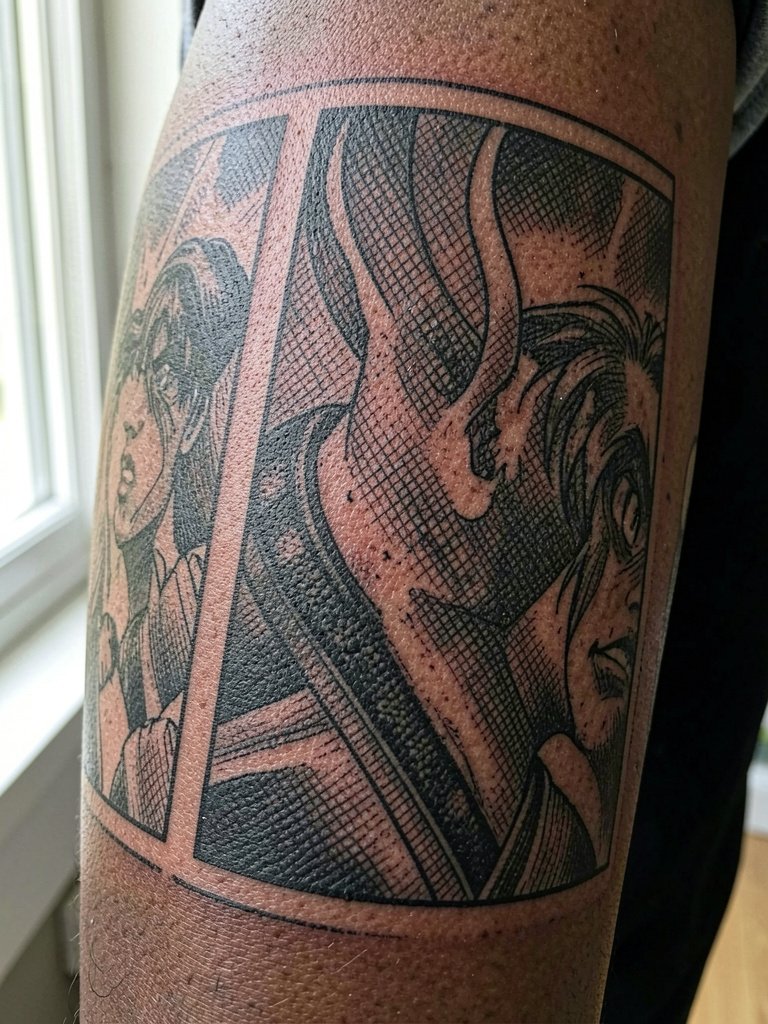
Hatching delivers a comic-book texture that ages better than pastel color fills if executed with room to breathe. The common error is asking for micro-hatching that the skin cannot hold over five years. Ask the artist for sample healed photos of similar hatching at six months and three years. Plan touch-ups for heavy hatching panels at the three-year mark. If you wear long sleeves for work, rolled cuffs help when you want people to notice just the panel edge; a rolled sleeve oxford shirt keeps the aesthetic tidy.
11. Patchwork Mixed-Fandom Vignettes
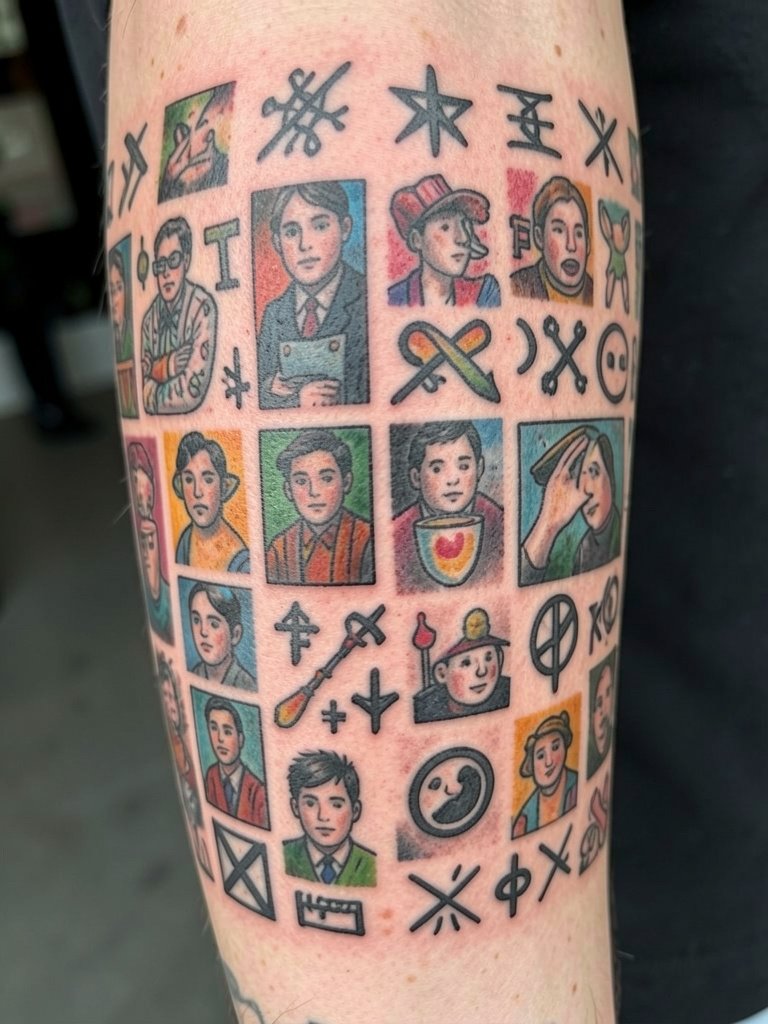
Patchwork sleeves let collectors build over years without committing to a single scene. Structural planning matters more than many clients assume. Anchor pieces at three points on the arm so future inserts slot naturally. A frequent mistake is starting with all small icons; they can leave the arm feeling disjointed. If budget or time is limited, alternate medium panels with smaller symbols and use smoke, waves, or tonal backgrounds to knit everything together. For wardrobe, simple neutral tees and open overshirts prevent visual competition; a plain black tee is a safe choice for show-off moments.
12. Minimal Line Anime Icons for Wrist or Inner Forearm
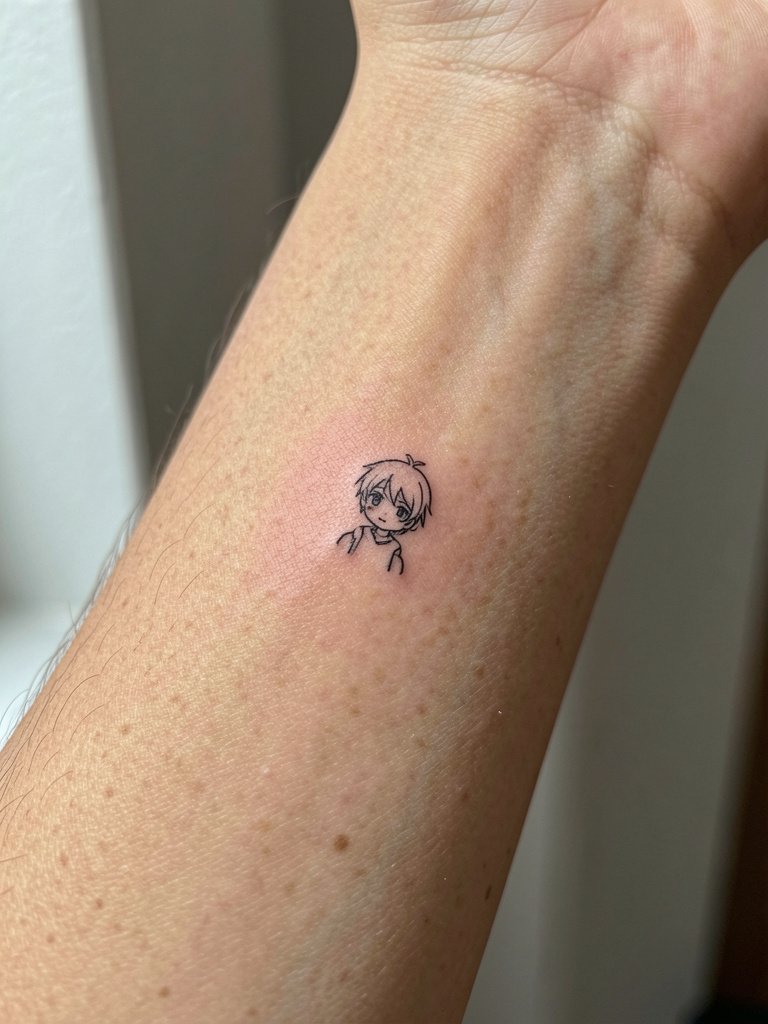
Minimal icons work well as starter pieces but they carry longevity risk on the wrist. Fine line here must be slightly bolder than the initial reference so features do not blur within two years. A common oversight is not asking for healed photos of similar placements on the same skin tone. For session comfort wear short sleeves with no tight cuffs and bring a loose shirt for aftercare. When you want to show this off, a thin bracelet stack will either complement or crowd the motif, so choose a bare wrist or a single slim bracelet like a minimal wrist bracelet.
13. Aura-Framed Portrait With Environmental Effects
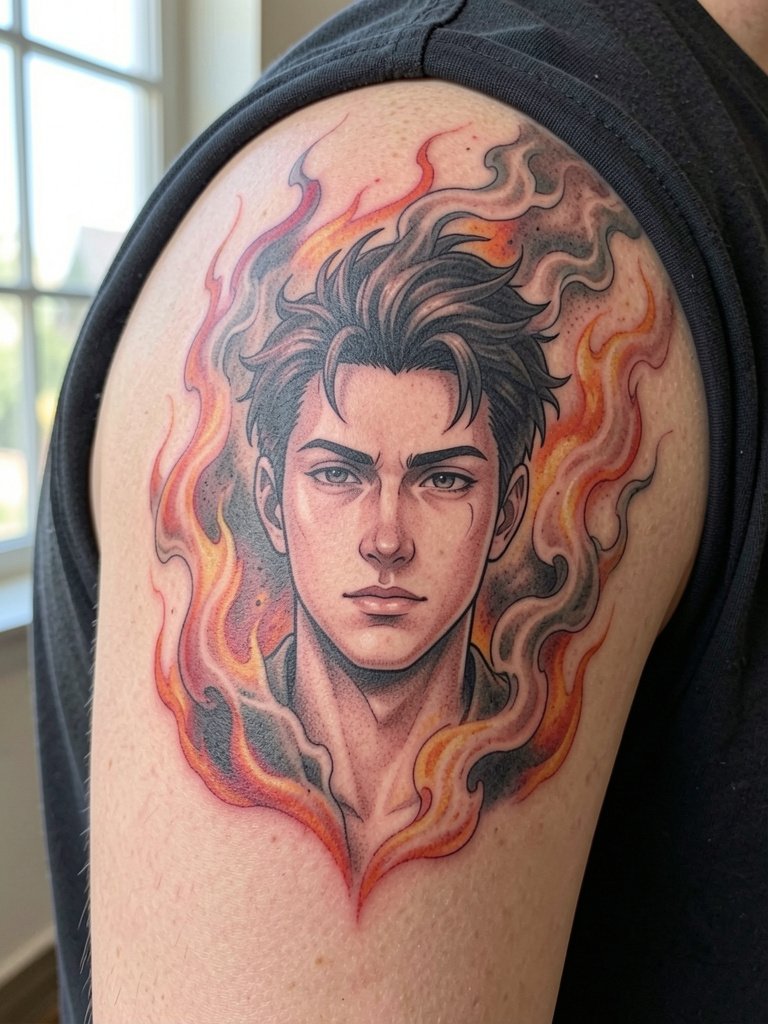
Environmental effects add drama and help portraits read as sleeve-ready panels. The mistake is surrounding a tiny face with a huge aura; scale the portrait to match the effects so the center of attention stays the face. Plan where the aura bleeds into negative space so future pieces can connect without losing the portrait silhouette. Expect two to four hours for a detailed shoulder portrait with effects. For clothing, an open button-down or fitted tee that reveals the shoulder curve frames the aura nicely; try an open button down shirt.
14. Crest and Seal Emblems as Flexible Fillers
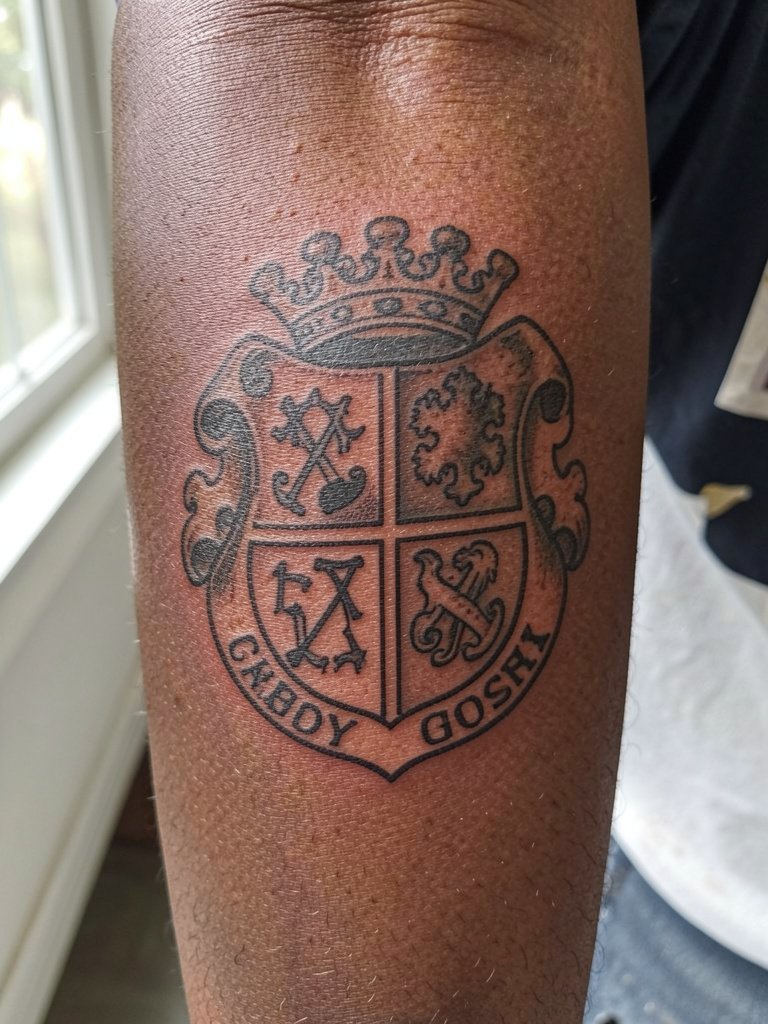
Crests and seals are wardrobe-friendly inserts that age well. They work as neutral connectors between portraits and action panels. A common error is crowding them into small spaces where detail will merge. Scale crests to at least three inches across on textured skin so the panels maintain separation. They are low-maintenance and often need only a single session plus a touch-up after a year. Pair crest pieces with neutral sleeves and workwear overshirts for contrast; a zip hoodie lightweight is a practical show-off option.
15. Mixed Shonen Greatest-Hits Sleeve
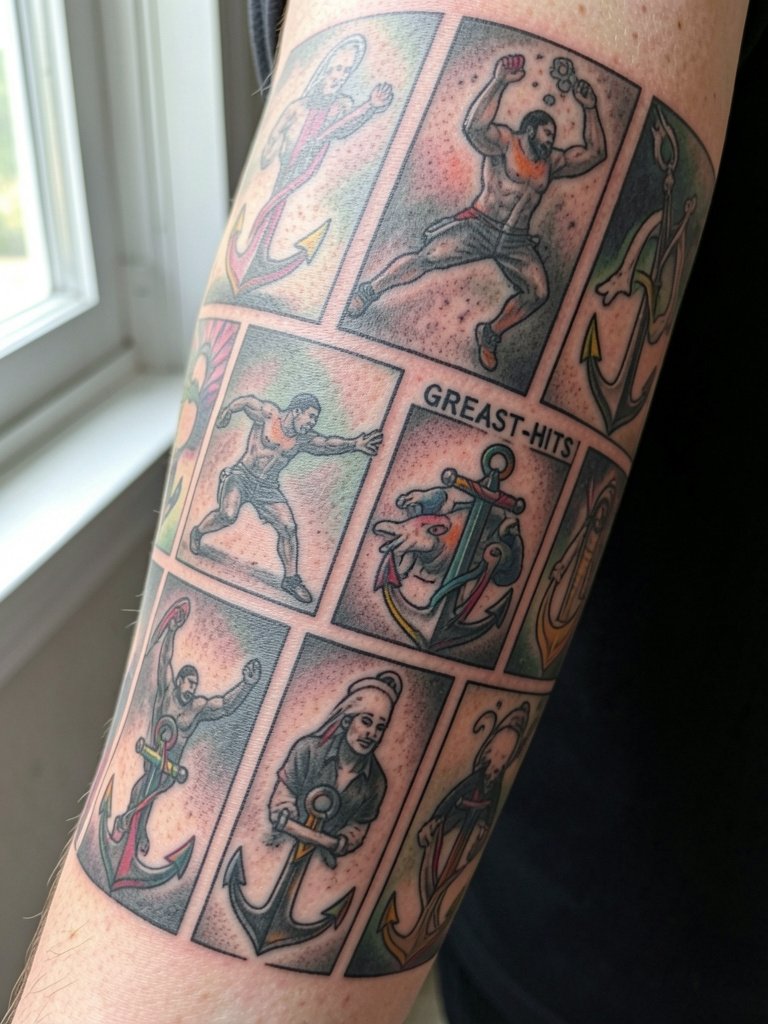
Many collectors prefer a mixed-series sleeve rather than one-fandom purity. That approach needs strict compositional planning so scale, line weight, and contrast match across series. One frequent problem is mismatched saturation when a color-heavy panel sits beside blackwork; the result looks uneven. The fix is to designate black-and-gray anchors that tie the sleeve together and treat color as accent only. For big sleeves expect three to eight sessions or more depending on density. When you want to show off the full arm, neutral tees or a workwear overshirt help the sleeve read without visual clutter; a plain black tee keeps attention on the artwork.
Frequently Asked Questions
Q: How do I find artists who show healed anime sleeve photos and not just fresh ink?
A: Search local portfolios for healed shots specifically and ask studios whether they archive healed photos at six months and one year. Use Reddit threads in r/Animetattoos for honest feedback and healed examples and filter Instagram and TikTok by city name when browsing hashtags.
Q: Should I choose full color or black-and-gray for a sleeve that mixes multiple series?
A: If your sleeve mixes different series, black-and-gray or a blackwork anchor strategy usually unifies disparate styles more effectively. Fans who want exact color accuracy often accept more frequent touch-ups, while others prefer selective color accents and stronger outlines so the whole arm ages consistently.
Q: How many sessions will a full manga-panel sleeve likely take and what should I wear?
A: A full manga-panel sleeve commonly takes four or more sessions depending on detail and size. Wear layered clothing you can remove without touching ink and bring a loose top for the session; a zip hoodie or button-down makes access and temperature control easier during long sittings.
Q: What specific design choices help anime tattoos read clearly on darker skin tones?
A: Higher contrast, bolder outlines, and reduced reliance on pastel fills help designs read on darker skin. Ask the artist to show healed examples on similar tones and prioritize heavy silhouettes and negative space so facial features and effects do not wash out over time.
Q: Where should I look to discover local anime tattoo portfolios without naming artists directly?
A: Use hashtags like #animetattoo, #mangatattoo, #tattoosleeve and add your city name on Instagram and TikTok. Search terms such as "anime sleeve tattoo [your city]" and browse Tattoodo portfolios for keywords like "manga panel sleeve" or "black and gray anime." Reddit threads in r/Animetattoos and r/tattooadvice also point to healed examples and local studio recommendations.
