
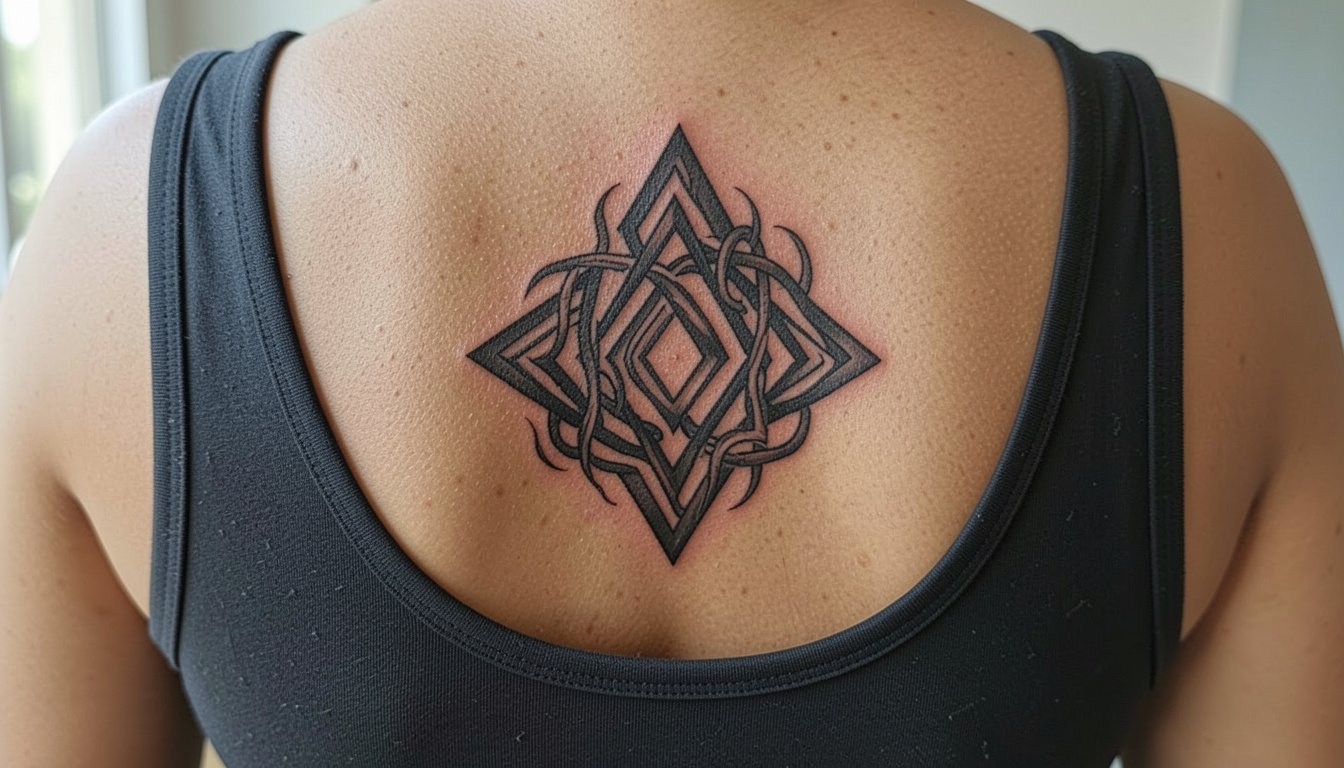
A clean curse-mark piece can read like a badge to other fans and still outlast trends if you pick the right scale and contrast. Tiny single-needle replicas look fragile after a few years on high-motion skin, while slightly bolder blackwork sigils keep their silhouette. Below are tested design directions and placement notes that help the motif age, pair with everyday outfits, and avoid the most common regrets.
1. Fine-Line Inner Forearm Sigil
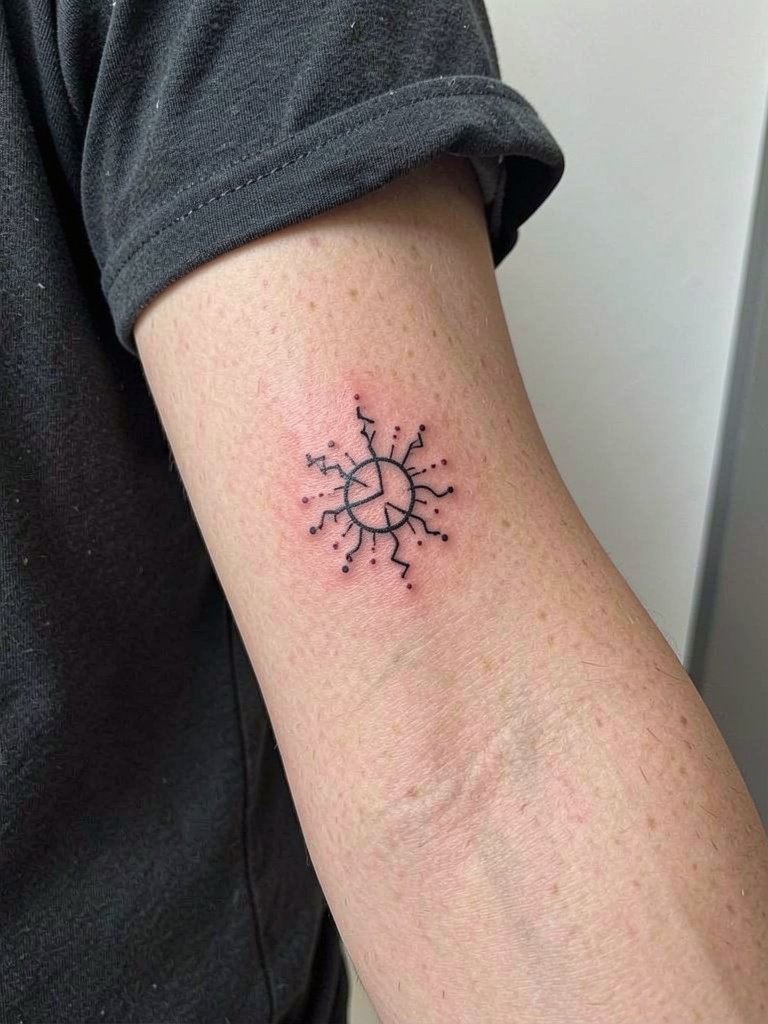
I like this when you want a subtle badge that can peek out from rolled sleeves. Linework should be a hair heavier than your Instagram reference because the inner forearm eats single-needle detail over time. Expect a one to two hour session for a compact piece and a six- to twelve-month touch-up window for clarity. A common mistake is asking for a too-small rune surrounded by tight dots; expand the spacing so stipple shading can breathe. For outfit pairings try rolled linen short sleeves to show the mark without overexposing it.
2. Bold Shoulder Blackwork Mark
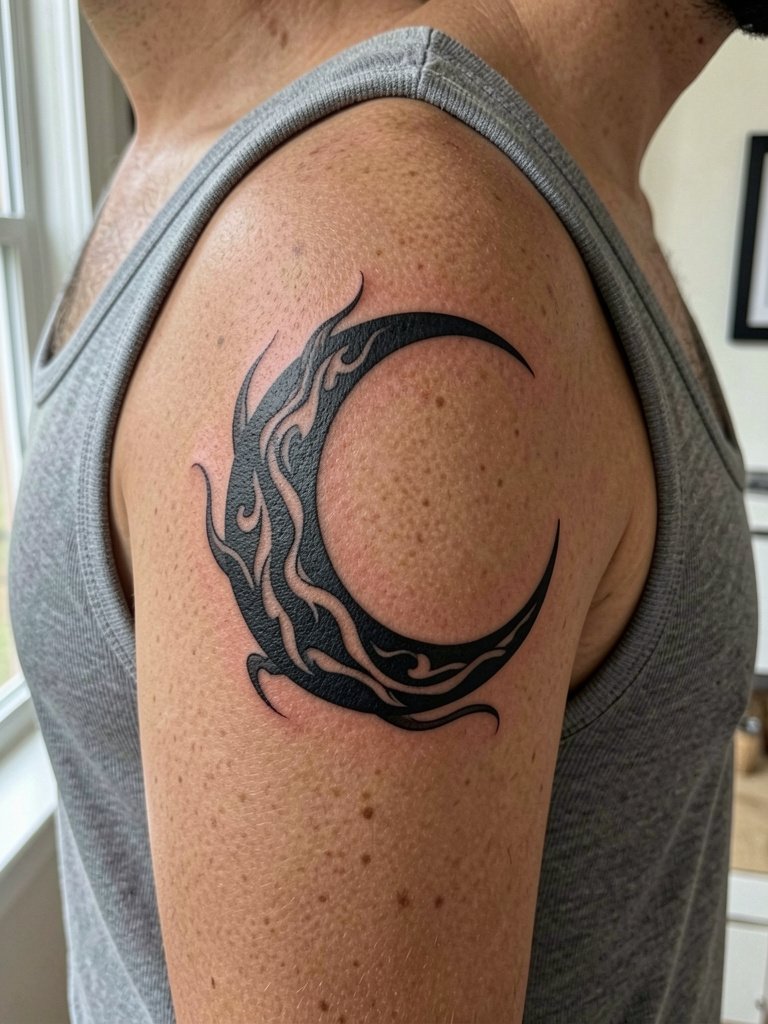
This placement favors saturation and bold outlines because the shoulder moves but rarely rubs against clothing. A two- to three-hour session gets good saturation and crisp edges, and most artists will advise a touch-up at the one-year mark to renew saturation. For showing it off, a loose tank with dropped armholes frames the deltoid without pulling on the skin. Avoid asking for ultra-thin filigree that sits right on movement zones because blowout risk rises where skin stretches.
3. Minimal Wrist Micro Sigil
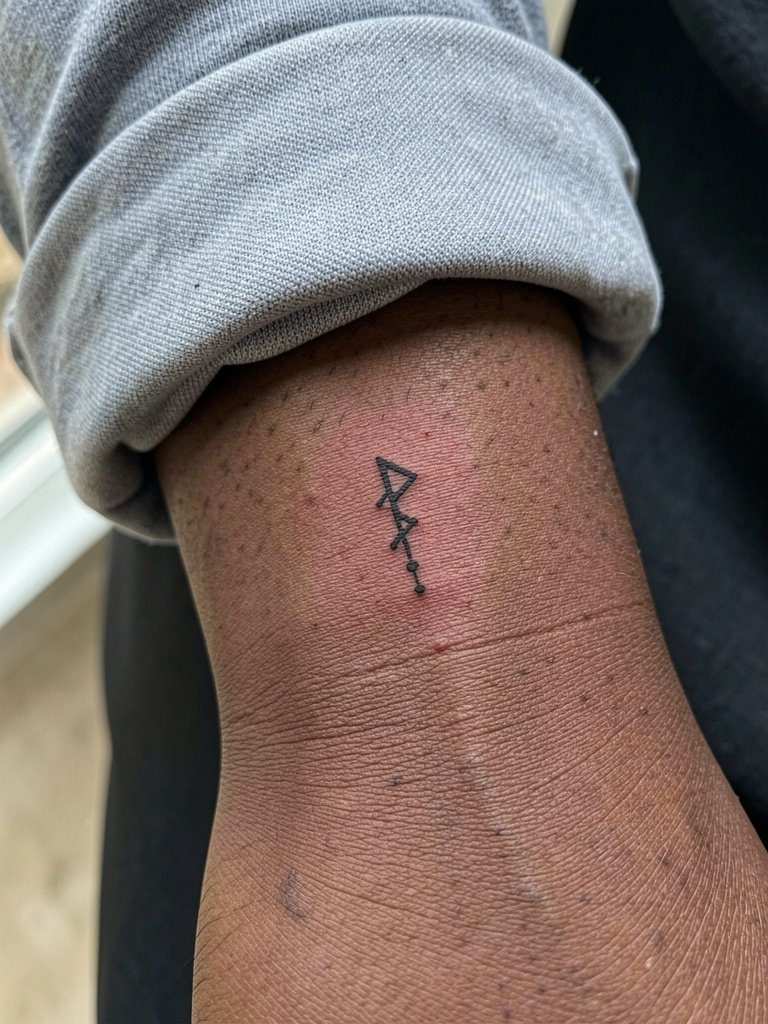
Great for a discrete symbol that peers out when you gesticulate. The wrist is a high-motion area, so single-needle work here softens faster than on less active skin. Session time is short, often under an hour, but plan a touch-up within a year. For wear, slender chain bracelets or a minimal leather cuff frame the mark while protecting it during daily tasks. A common regret is placing too many tiny dots close to the crease; leave room for future settling.
4. Upper Back Curse Panel
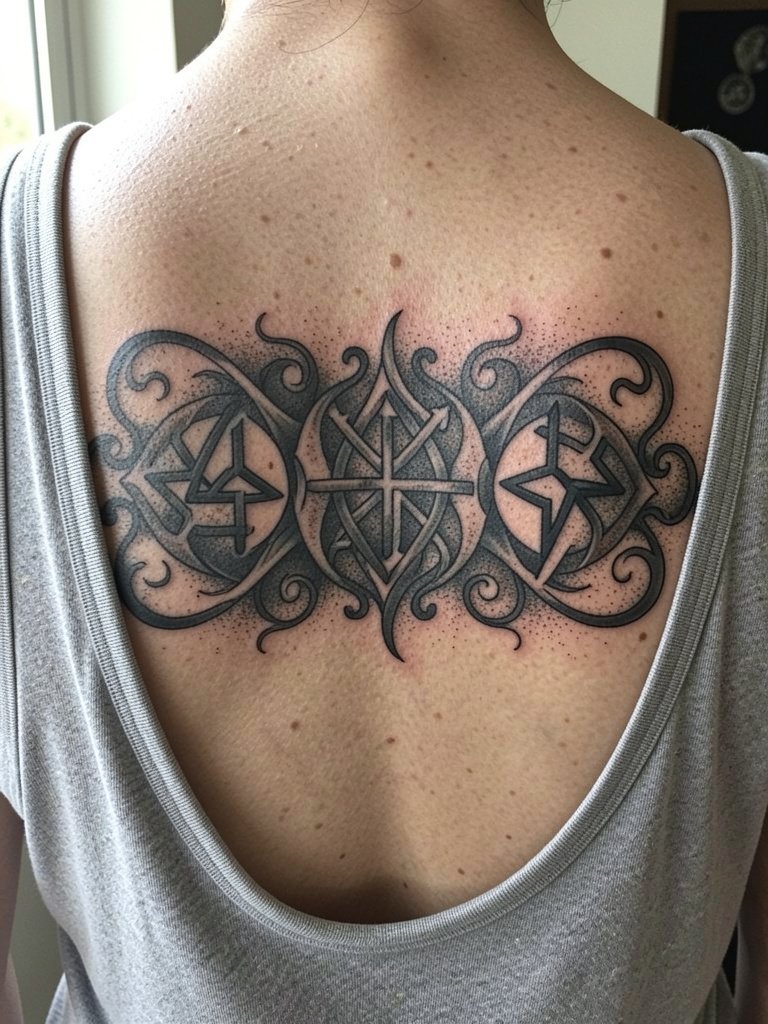
This is a good option if you want a larger canvas that can read from a distance. Multiple sessions are typical because saturation and layered shading benefit from separate passes. Plan for two to four hours per sitting and expect a touch-up around the one-year mark for uniform saturation. For evenings out, an open-back dress or spaghetti-strap top makes the panel a statement without exposing it all the time. Avoid trying to cram micro detail into a wide panel; bold shapes preserve the motif as you age.
5. Ankle Tendril Trace
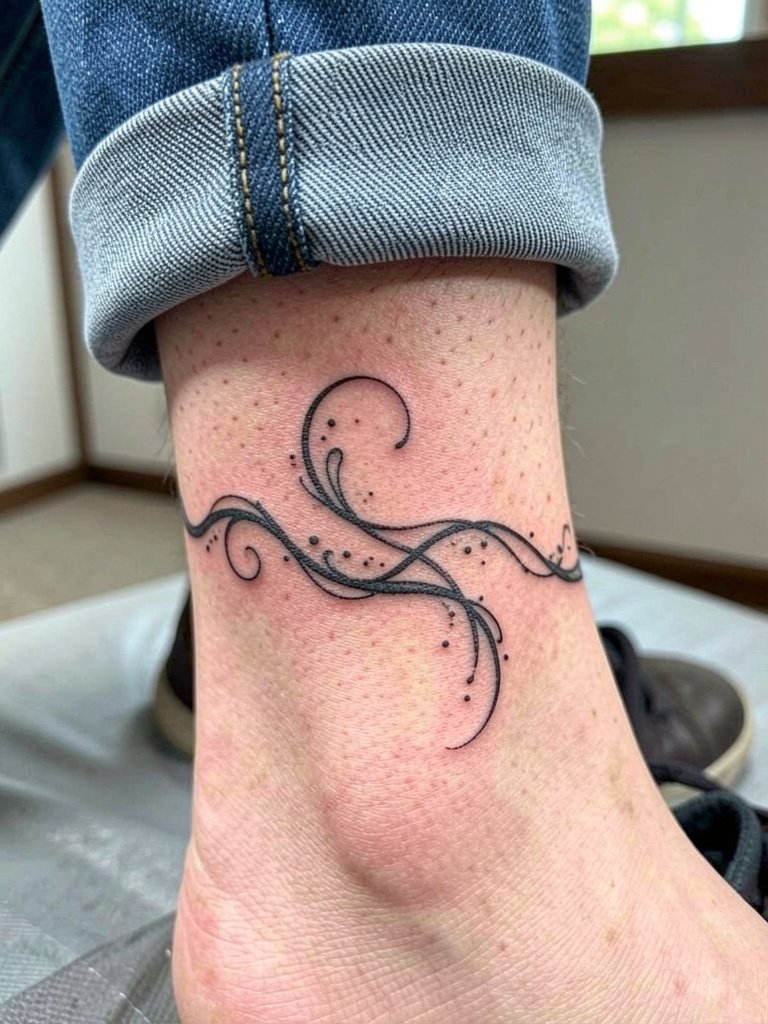
Ankle marks are elegant when scaled to avoid overlapping the ankle crease. Expect moderate pain and a session under an hour for a slender design. The ankle faces friction from shoes and socks, so plan an initial touch-up once the scar tissue settles. For daytime showing, pair with rolled jeans and low-top sneakers so the tendril peeks without constant rubbing. A common mistake is placing too much stipple shading near the bone; keep shading light to prevent muddiness.
6. Collarbone Scripted Mark
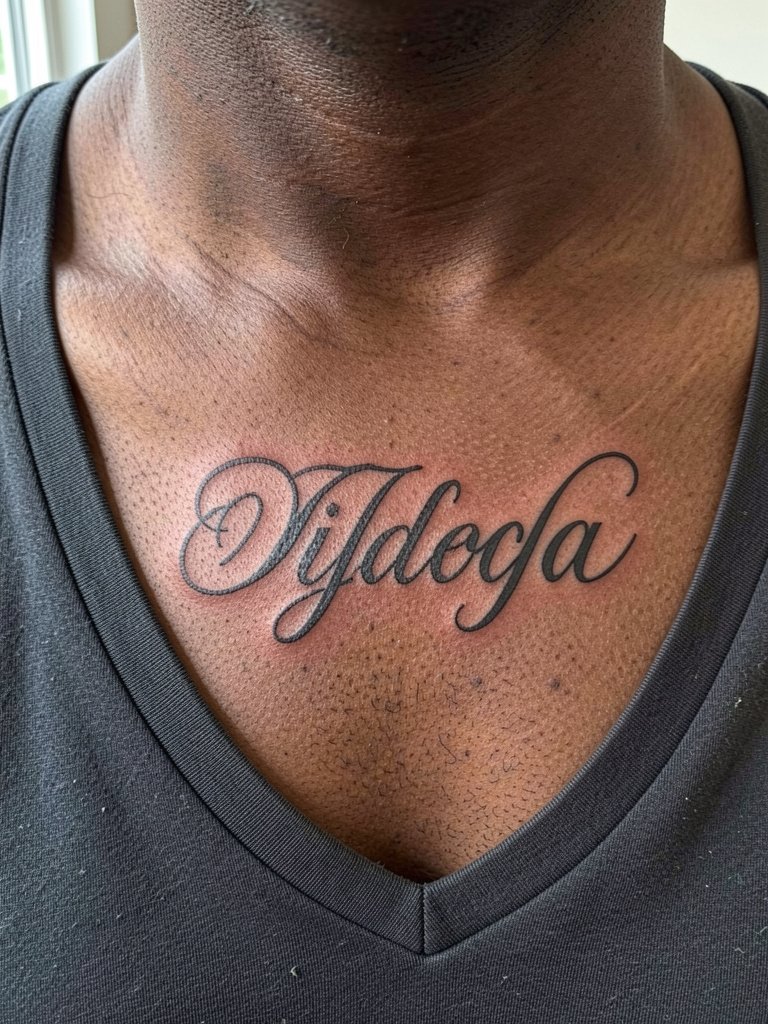
This spot looks refined when the script is given breathing room from the clavicle. Expect a one-hour session for a single-word mark and a touch-up in the first year if line edges soften. For styling, an open-collar blouse frames the clavicle and lets the script read without overexposure. Avoid having the script sit directly in the hollow of the clavicle where motion and shirts rubbing lead to faster blur.
Pre-Session Picks
The shoulder, wrist, and forearm pieces above call for a few small items to smooth the appointment and early healing.
- Stencil transfer paper kit. Allows you to test positioning before the artist inks, especially useful for the forearm and wrist sigils described above.
- Topical numbing cream. A 30 to 45 minute application reduces sharp sensation on the wrist and ankle without changing linework when used properly.
- Thin protective film roll. Keeps ankle and wrist pieces cleaner during the first few days of frequent washing.
- Fragrance-free gentle body wash. Mild cleansing helps avoid irritation on newly healed collarbone and forearm marks.
- Aquaphor healing ointment. Thin application in the first 48 hours aids moisture balance for fine-line work while avoiding clogged channels.
7. Side Rib Creep Mark
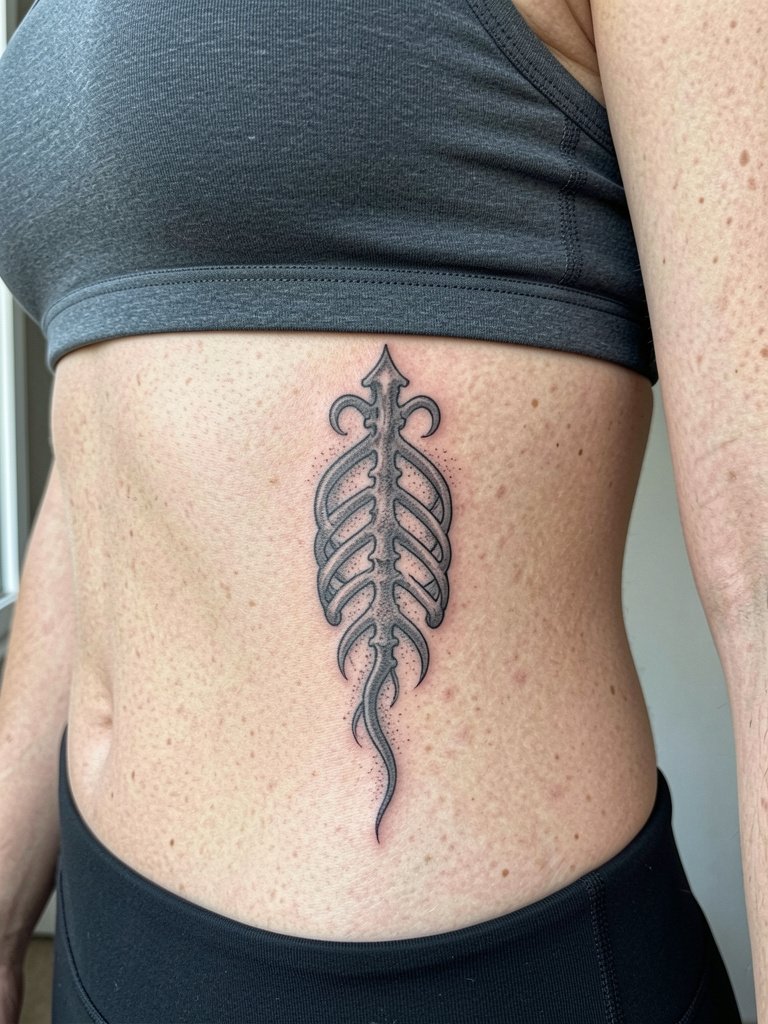
Rib pieces can look dramatic but they test fine-line durability. Artists split into two camps. One camp says fine-line on ribs blurs quickly because the skin stretches and the constant breathing motion disrupts tiny lines. The other camp argues that slightly wider spacing and careful needle depth let fine work settle and remain legible for years. If you prefer a middle path, give the rib sigil clean negative-space breaks and expect a longer session with two shorter passes rather than one marathon sitting. For the appointment wear a fitted cropped top so the artist has clear access without fabric shifting.
8. Calf Vertical Mark
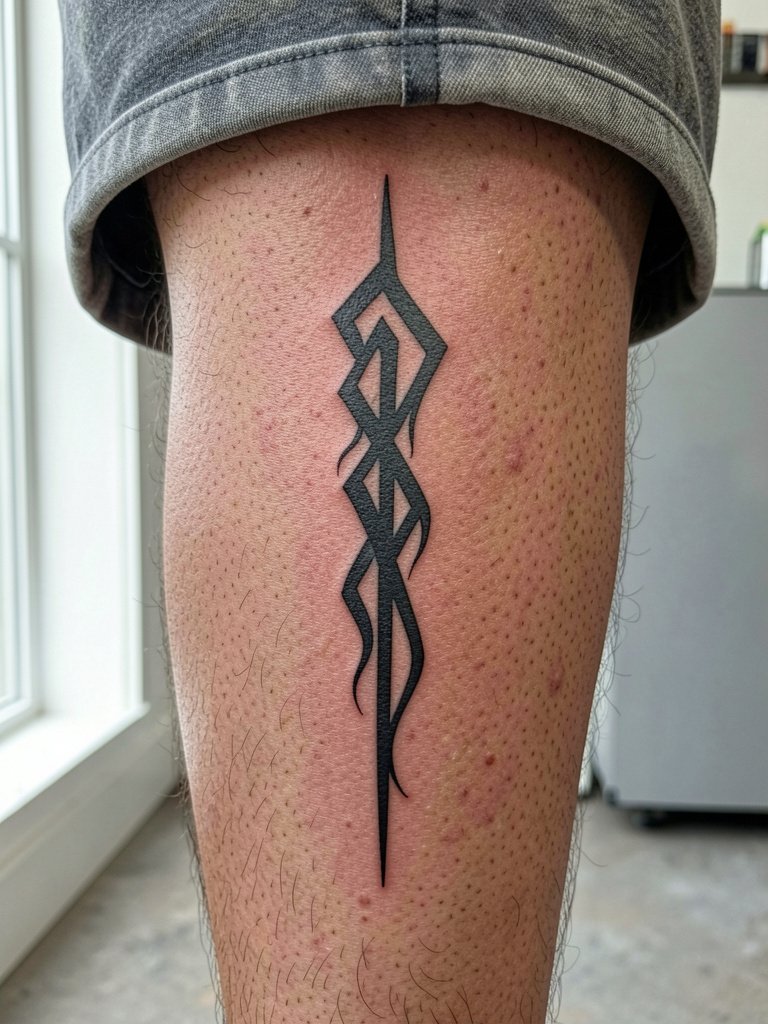
Calf placements take well to more intricate linework because they sit flat and away from constant creasing. Sessions vary from one to two hours depending on length and shading. For wardrobe, knee-length shorts or a linen midi skirt shows the vertical mark without too much sun exposure. Avoid packing too many small dots along the tendon area where motion can soften stipple over time.
9. Nape Sigil Under Hairline
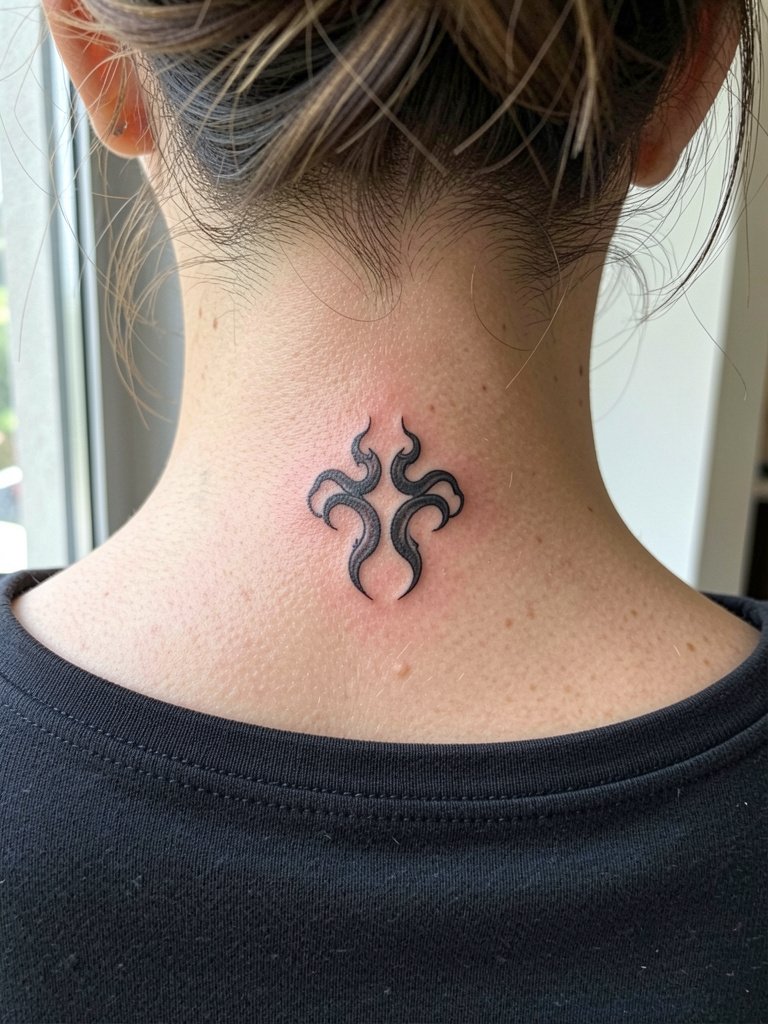
These tiny nape marks tuck beneath hair and look intentional when centered. Pain is moderate and sessions are brief. Ask for slightly bolder linework than your reference so the symbol survives hair rubbing and daily shampooing. If you want to show the mark occasionally, a half-up hairstyle or a scooped-neck top does the job. No hands-on adjustments needed during photos.
10. Outer Thigh Shield Mark
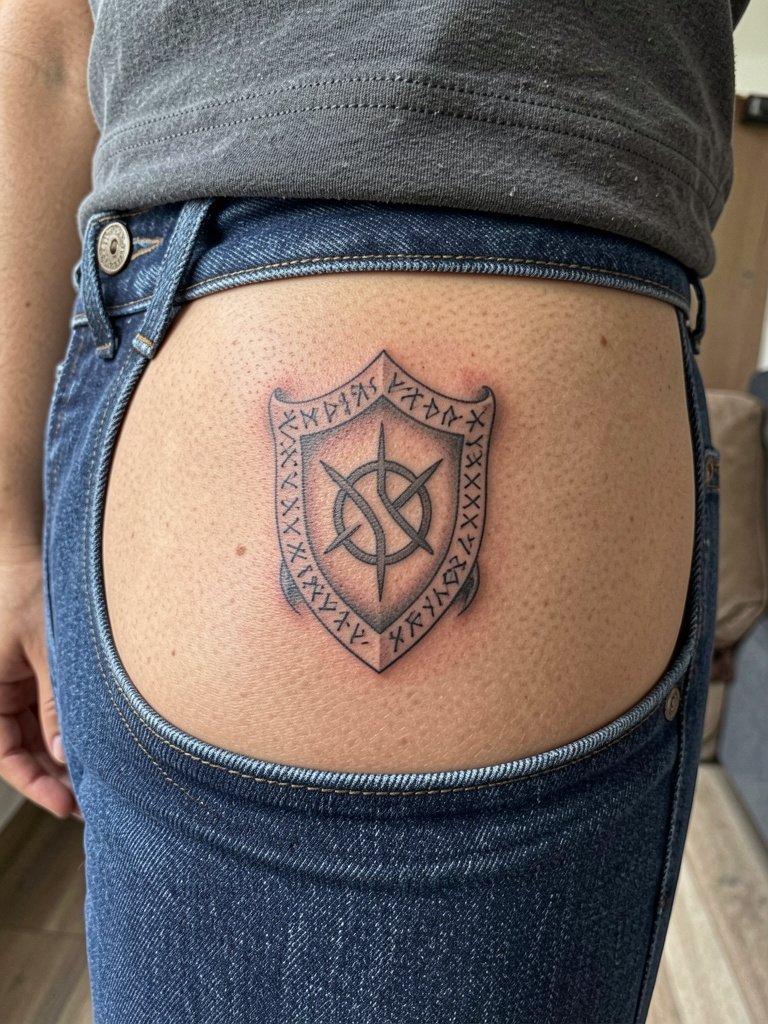
Outer thigh gives you room to expand a shield motif into a small personal panel. The area tolerates heavier shading and more complex linework. Sessions run one to three hours depending on size and shading choices. For show-off outfits, high-waisted shorts make the shield readable without continuous friction. Avoid placing too much micro detail near the groin line where skin texture and movement can obscure fine dots.
11. Dorsal Hand Mini Mark
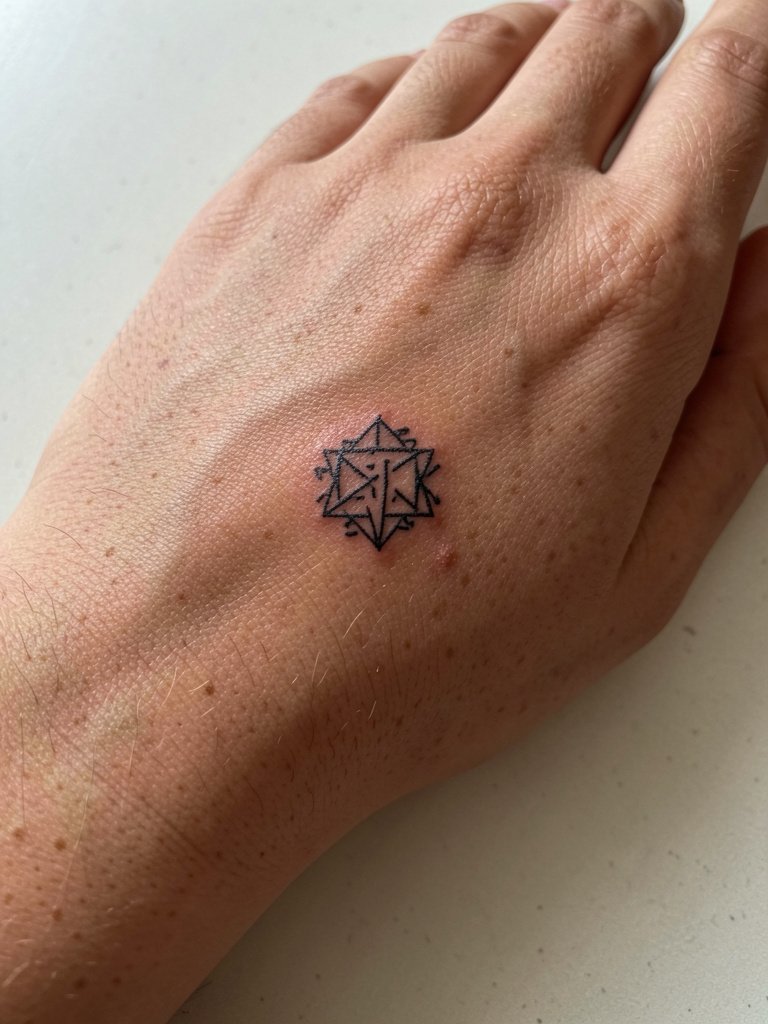
Hand tattoos are visible and demand special consideration. Expect faster fading and more frequent touch-ups because hands meet water and friction constantly. This placement is best for a high-contrast, bold motif rather than delicate single-needle work. The session is short but recovery needs attention. For styling, a minimal ring or a thin band ring set pairs well and directs attention to the mark. Note that some professional workplaces restrict visible hand ink, so check workplace policies beforehand.
12. Sternum Central Mark
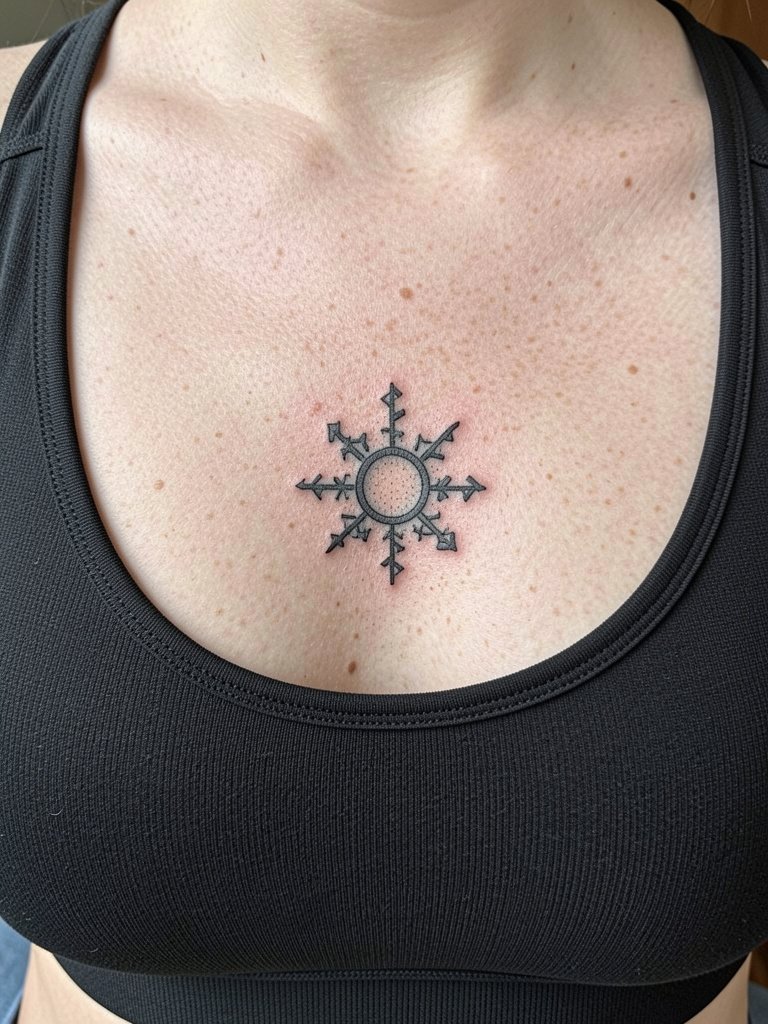
Sternum work reads as intimate and often requires an artist experienced with chest curvature. Pain can be higher and sessions are usually shorter but may require multiple visits depending on shading. For the appointment wear a well-fitting sports bra so the area is accessible without heavy adjustment. Because this is an intimate zone, expect slower healing if fabric rubs the area and plan clothing accordingly. Do not force detailed micro tags too close to the breast crease where motion obscures fine lines.
13. Half-Sleeve Flowing Curse Band
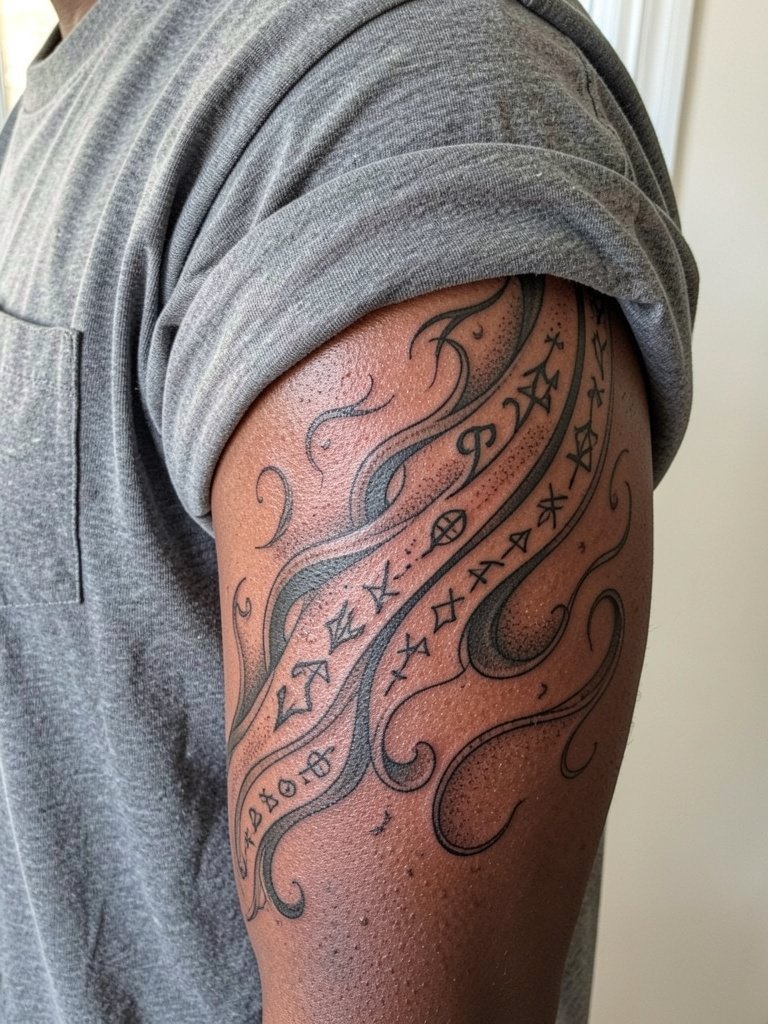
Half-sleeves are where a curse motif can become a narrative band. Sessions are multiple and can total several hours across visits. Expect excellent longevity when you combine heavier outlines on main elements with stipple shading in the backgrounds. There is a debate among fans and artists. One camp insists on near-exact replicas of the original motif for fidelity to the source. The other camp favors abstracted or personalized interpretations to avoid copyright concerns and to create something unique. Name your priority up front and bring reference photos at different scales so the artist can show how the band reads at two sizes.
14. Finger Stack Mini Marks
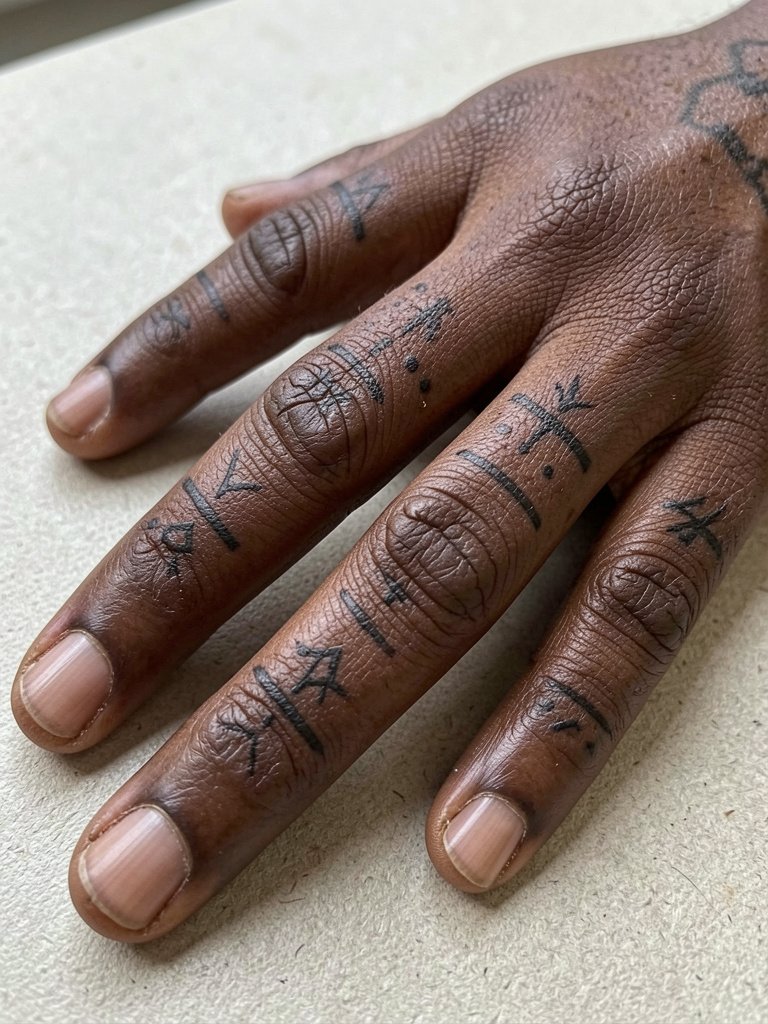
Fingers are notoriously fast-fading because of constant washing and knuckle motion. Keep designs high-contrast and simple. Sessions are brief but expect touch-ups within months, sometimes yearly. For showing off, stack thin rings or a delicate midi ring set that complements the tiny sigils without rubbing them. A frequent mistake is trying to cram too many micro elements onto the finger surface; choose one crisp symbol per finger for longevity.
15. Behind-the-Ear Tiny Mark
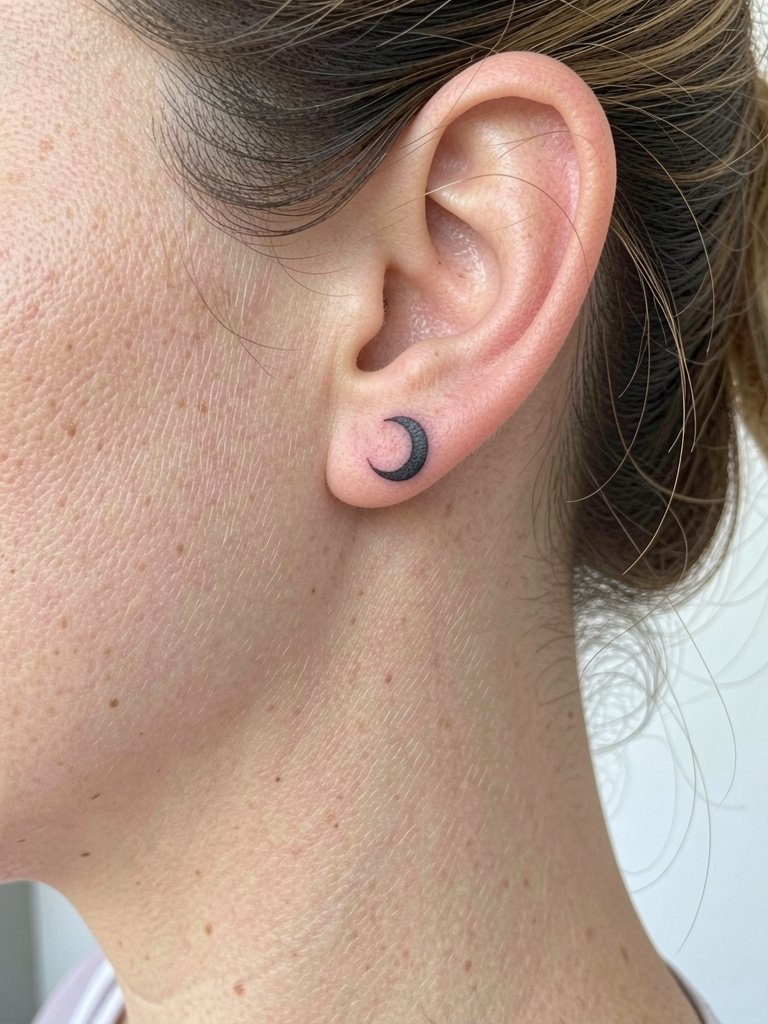
Tiny behind-ear marks are discreet and charming when you want a hidden nod to the fandom. Sessions are short with minor pain. Because the area is small and near the hairline, choose simple, high-contrast lines that tolerate shampoo and styling. If you want it visible sometimes, pull hair into a low bun. Professional considerations matter because not all artists take behind-ear work, so pick a studio with healed photos of similar placements.
Frequently Asked Questions
Q: How do I pick between a faithful replica and an original reinterpretation for a curse mark?
A: Decide if fidelity or personal meaning matters more. If you want exact iconography, expect a bold, high-contrast approach for longevity. If you want a piece that nods to the motif while staying unique, ask for abstracted elements and custom negative-space so the design reads as your own.
Q: Will delicate single-needle curse marks hold up on ribs and wrists?
A: It depends on placement and motion. Wrists usually blur faster than ribs, but the ribs move with breathing which stresses fine lines. A middle path is slightly heavier linework with wider spacing, and planning a touch-up within a year for the best long-term legibility.
Q: Where can I find healed examples and community portfolios without naming artists directly?
A: Search hashtags and keywords on image-forward platforms, filter by location if you need a nearby studio, and look for healed shots rather than fresh work. Try searching tags like #CurseMarkInk, #HealedFandomTattoo, and #DarkSigilTattoo on social platforms and browse portfolio sections with keywords such as "healed fine line" or "blackwork sigil."
Q: What should I wear to my session for an inner forearm or shoulder piece?
A: For an inner forearm pick a short-sleeve or sleeveless top that lets the artist access the underside while you stay comfortable. For shoulder work wear a tank top or a shirt with dropped armholes. A practical option is a loose tank top so the artist can move your arm without fabric pulling.
Q: How often will I need touch-ups for hand, finger, or ankle curse marks?
A: Hands and fingers usually need touch-ups more frequently, often within months to a year, because of daily friction and water exposure. Ankles sit between fingers and larger limbs, so one-year touch-ups are common. Budget for maintenance when choosing these placements.
