

Someone I know spent eight months scrolling tattoos before realizing the real problem was not picking a cool picture. It was knowing which 3D effect would hold up on their skin, how much the placement would hurt, and which questions to ask an artist during a consult. Below are 25 beginner-friendly realistic 3D tattoo ideas, practical notes for bookings, and an essentials shopping list to take a new piece through healing.
1. Realistic 3D Skull Crack on Forearm
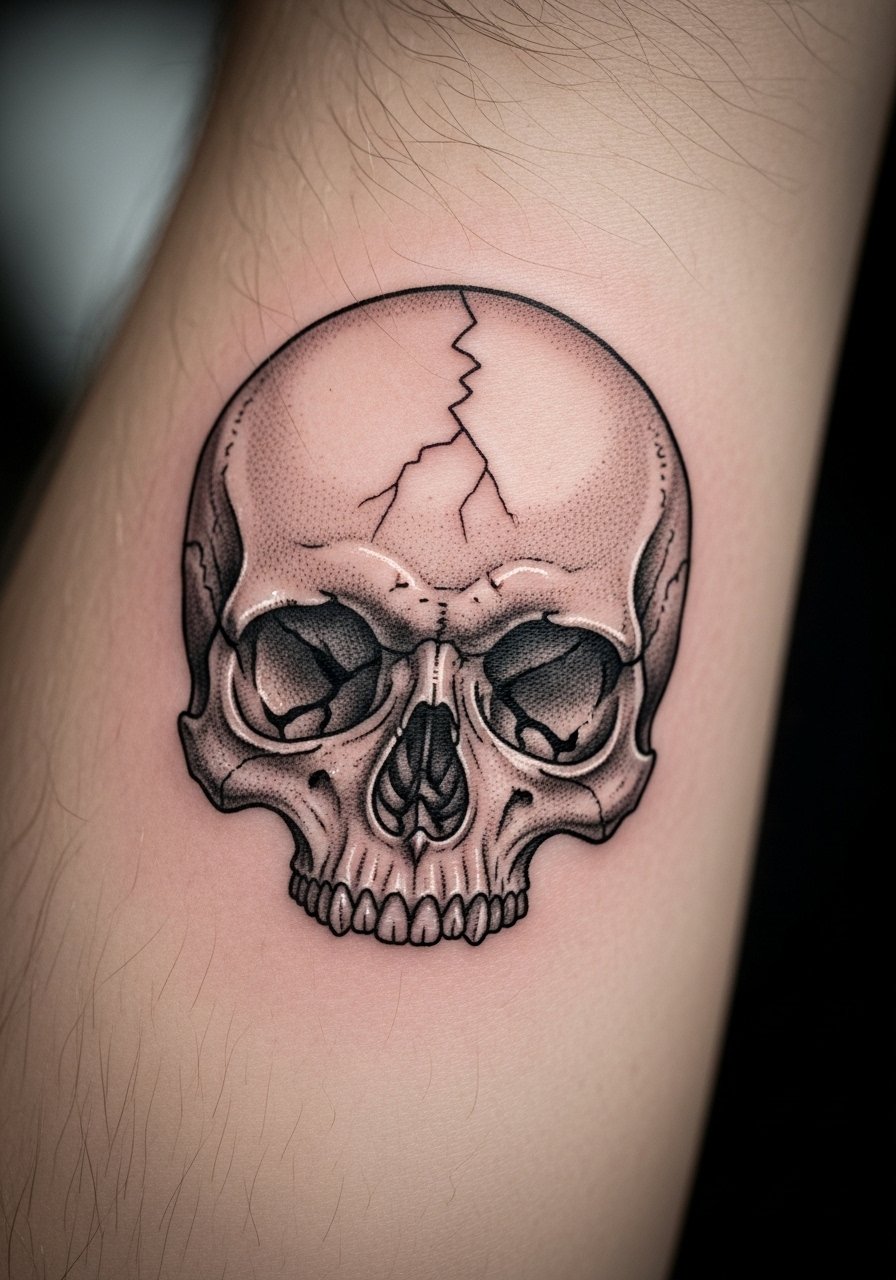
Someone I know first noticed this on a forearm and asked for the same shock factor but smaller. For beginners, I recommend medium scale so the highlights and shadow have room. Tell your artist you want crisp negative-space highlights and shallow stipple shading around the edges to sell depth. Fair warning, forearm linework can suffer mild blowout near the wrist if needles go too deep. Expect one to three sessions around two hours each. At six months the contrast softens a bit, by two years expect a touch-up timeline, and the common mistake is asking for tiny teeth and expecting long-term detail.
2. 3D Flower Emerging from Shoulder
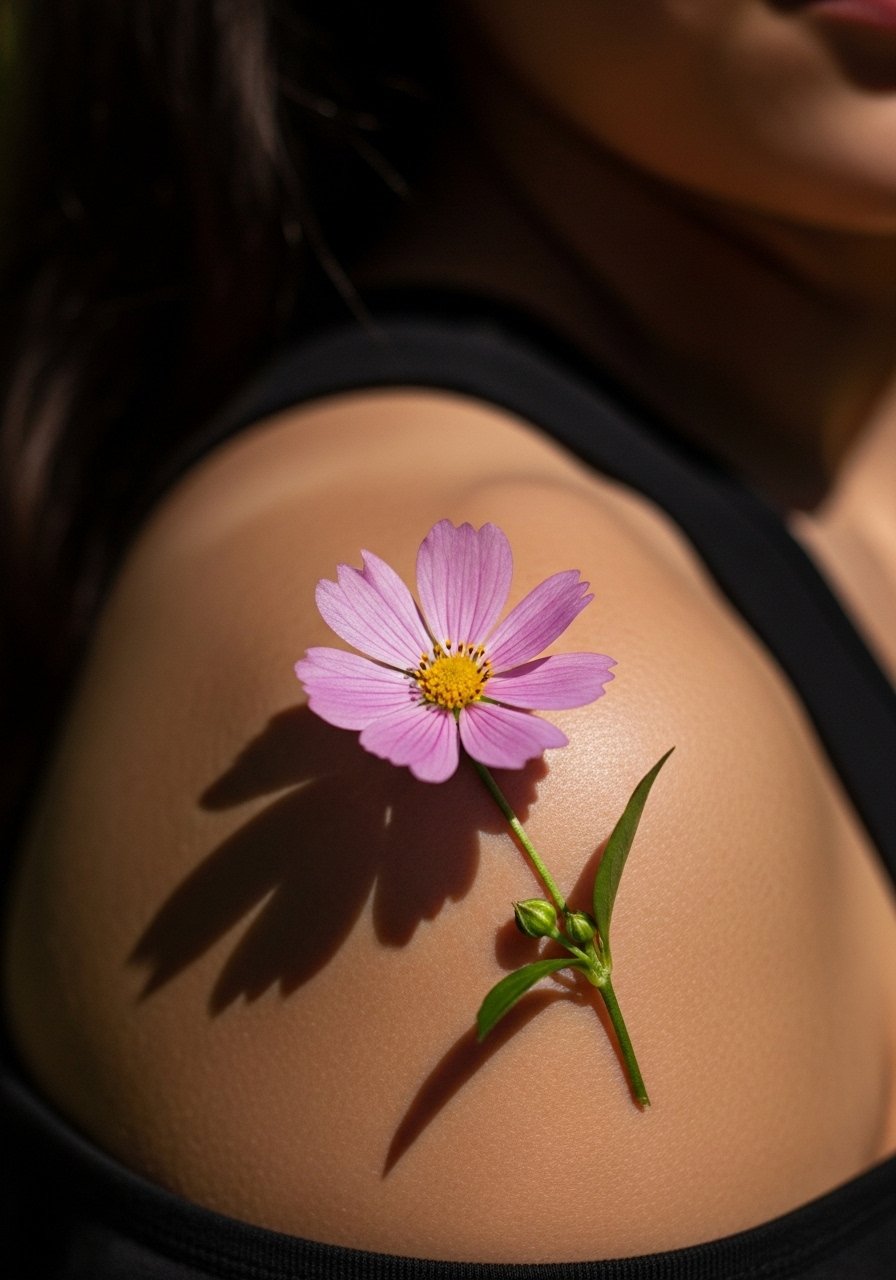
When shoulder placement wins is when you want motion without constant visibility. Ask your artist for heavy shadow under the petals and saturated edgework to create lift off the skin. Most people go too flat with color and lose the illusion after a year. Pain is moderate and usually tolerable for a single long session. The aging pattern shows color losing saturation at year two if sunscreen is skipped. A smart consultation line is: "I want deep under-petal shadow and a soft highlight band, not just bright color."
3. Optical Illusion Geometric Shapes on Calf
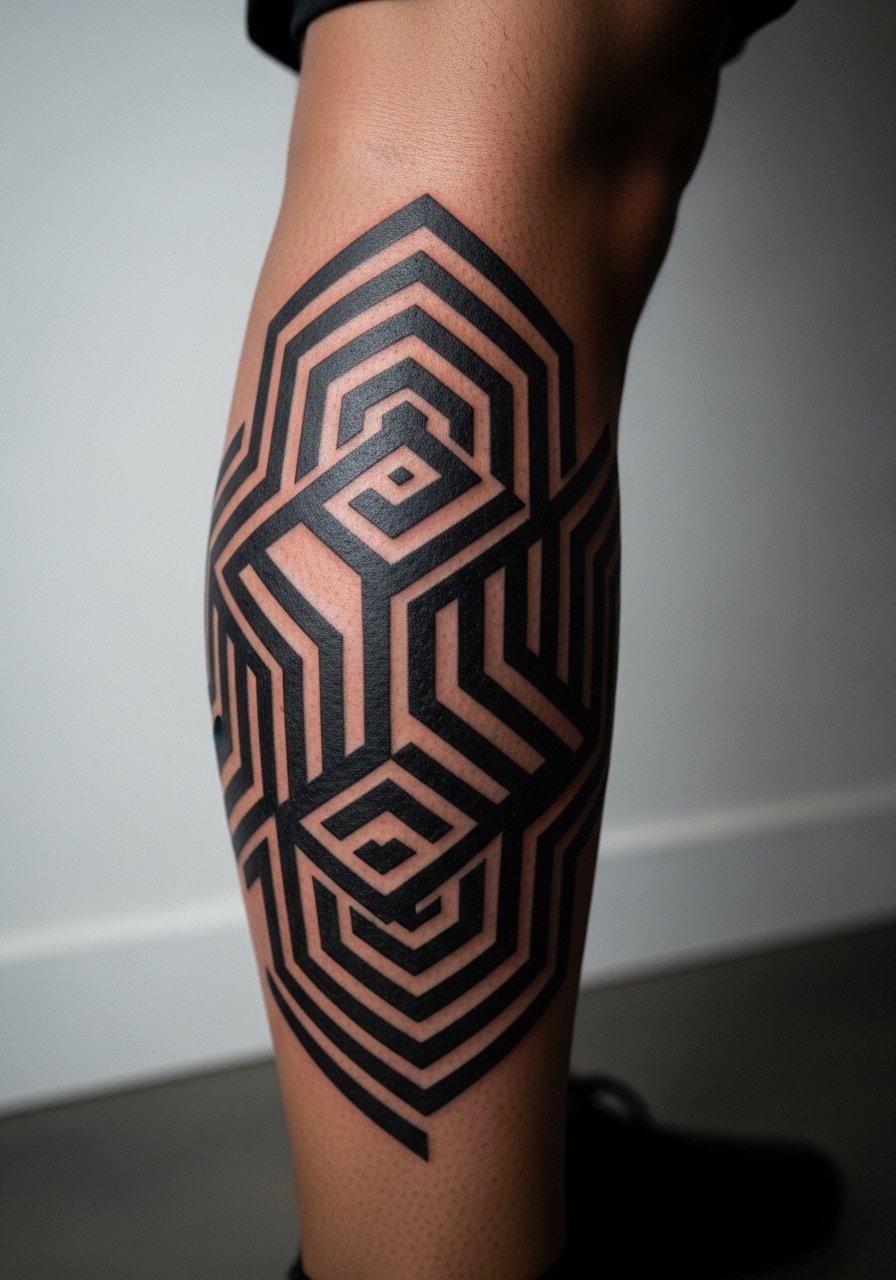
Fair warning: the calf can handle larger pieces but the wrong scale kills the optical trick. The biggest mistake is shrinking geometry too small where parallel lines merge. Ask for clean linework with intentional spacing and stipple shading to suggest cast shadow. Sessions usually split into three hour blocks. Healed at six months the black remains dense if saturation is high, but thin lines may fade into fuzz by year three. This design suits someone who prefers statement pieces and wants an illusion you can read from a distance.
4. Hyper-Realistic Character Portrait on Chest
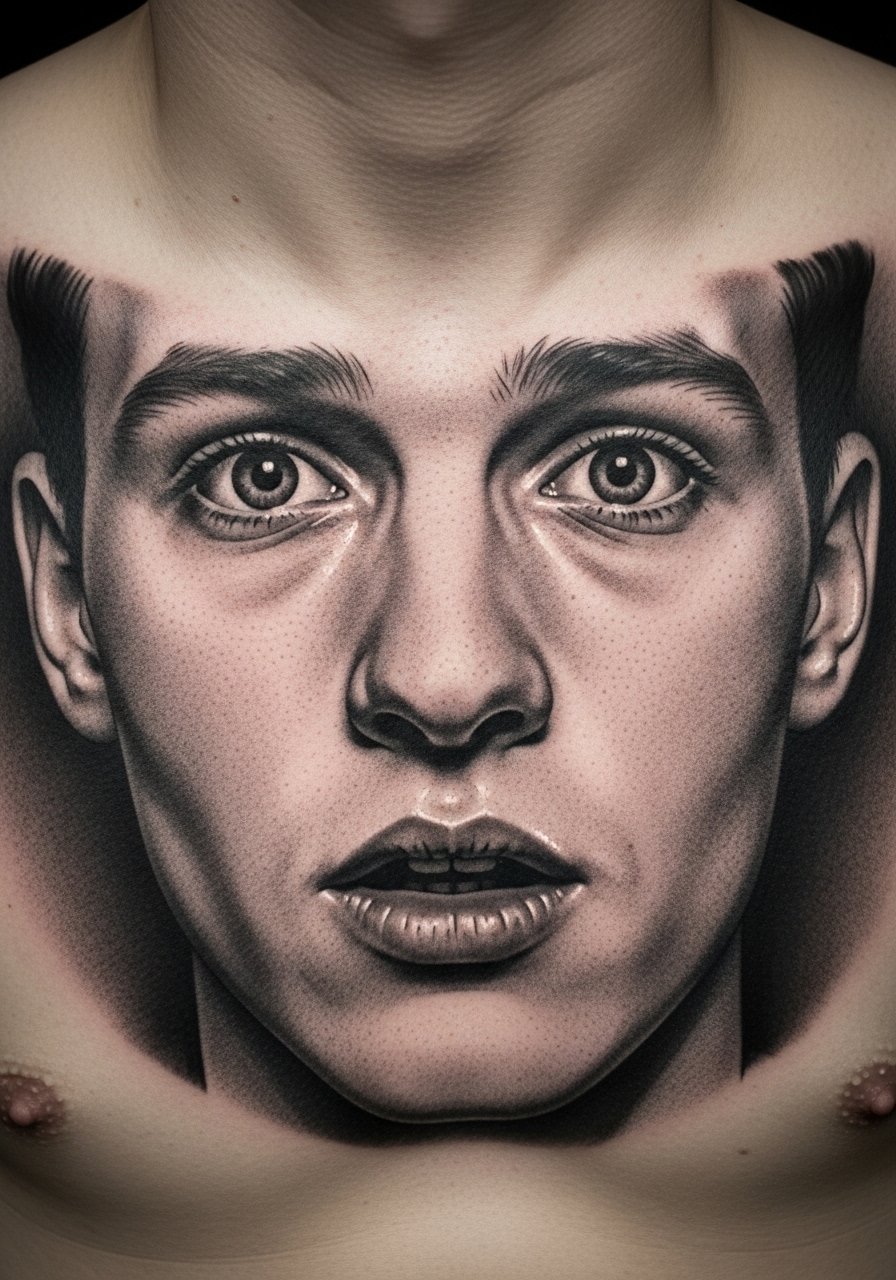
A quick note about chest portraits, they demand time and tolerance for multiple sessions. Pain can be higher near the sternum and collarbone. Tell your artist you want tonal transitions, not heavy outlines, and bring multiple reference photos of the face from the same angle. There are two approaches artists debate: one camp layers many light passes for smoother gradation, the other builds darker blocks then refines. Ask which approach your artist uses. Expect touch-ups at two to four years, and a common error is picking a low-resolution photo as reference.
5. 3D Butterfly Perched on Wrist
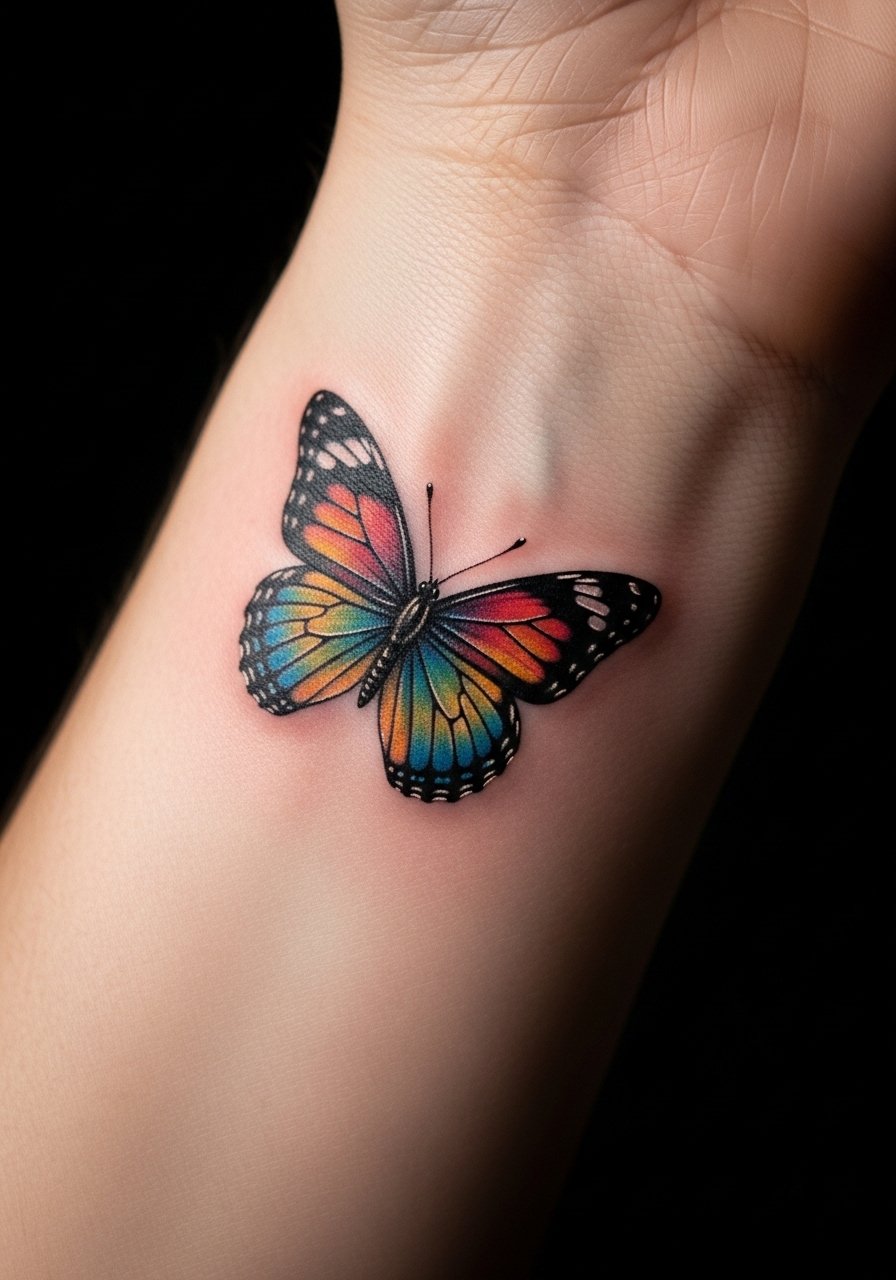
If you want a tiny first 3D piece, the wrist is classic for a delicate butterfly. Pain is moderate since the area is thin. Request ultra-fine linework with crisp white-ink highlights and ask for feathered shading under the wings to create lift. Beware of overdetail in a very small footprint, as antennae and thin veins blur at two years. Hands-on movement gives an interactive feel but also increases friction during healing. Plan for a one to two hour session and a touch-up at year one if edges soften.
6. Cracked Glass Effect on Upper Arm
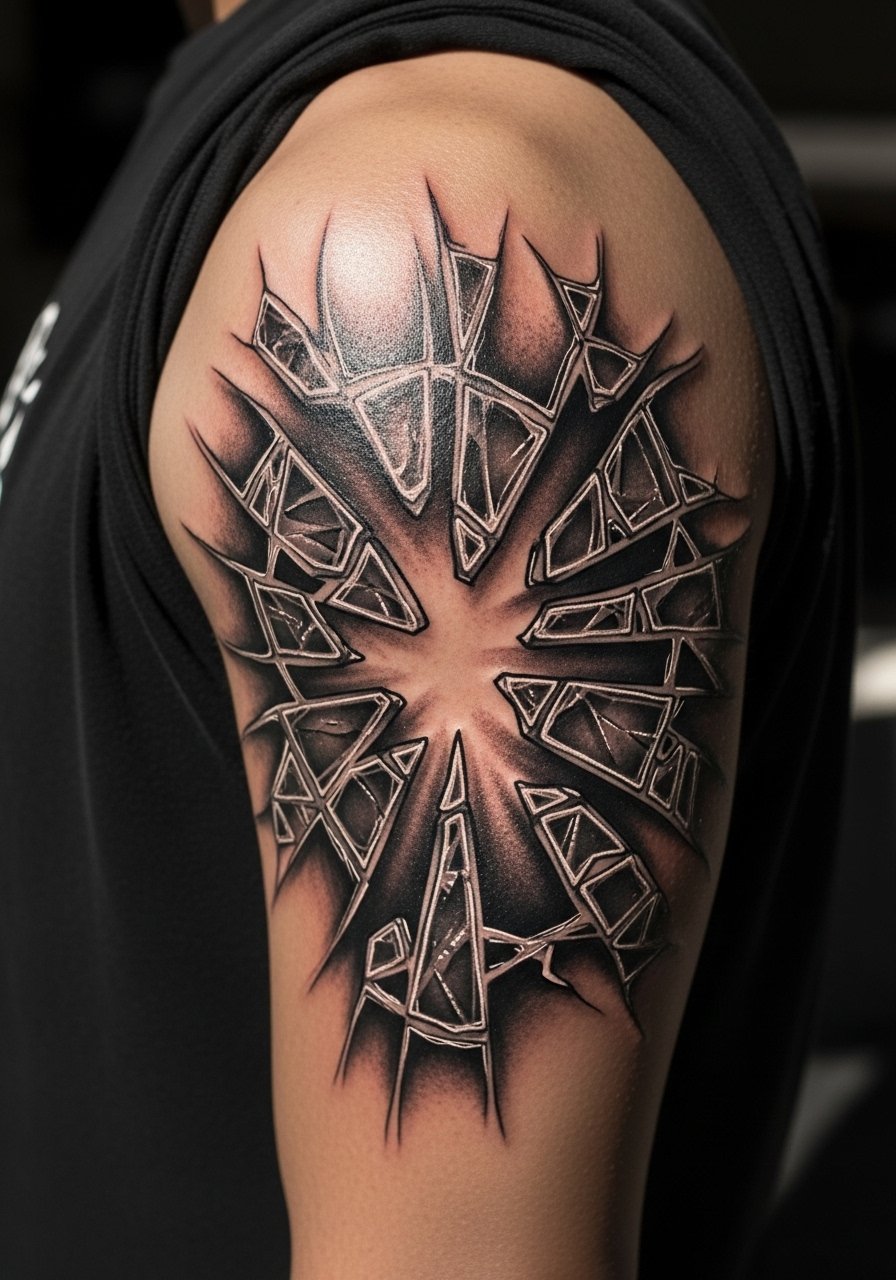
There is a visual thrill in a cracked glass illusion on the upper arm for anyone aiming for edgy but controllable coverage. The trick is deep contrast in the shards and thin white highlights to sell reflection. Upper arm flesh handles saturation well and pain stays low. A common mistake is asking for too many micro-fractures which read as noise when healed. Expect two sessions and watch edges at six months for slight softening. Tell the artist you want larger, readable shards, not a spider web of tiny breaks.
7. 3D Candle Flame on Fingers
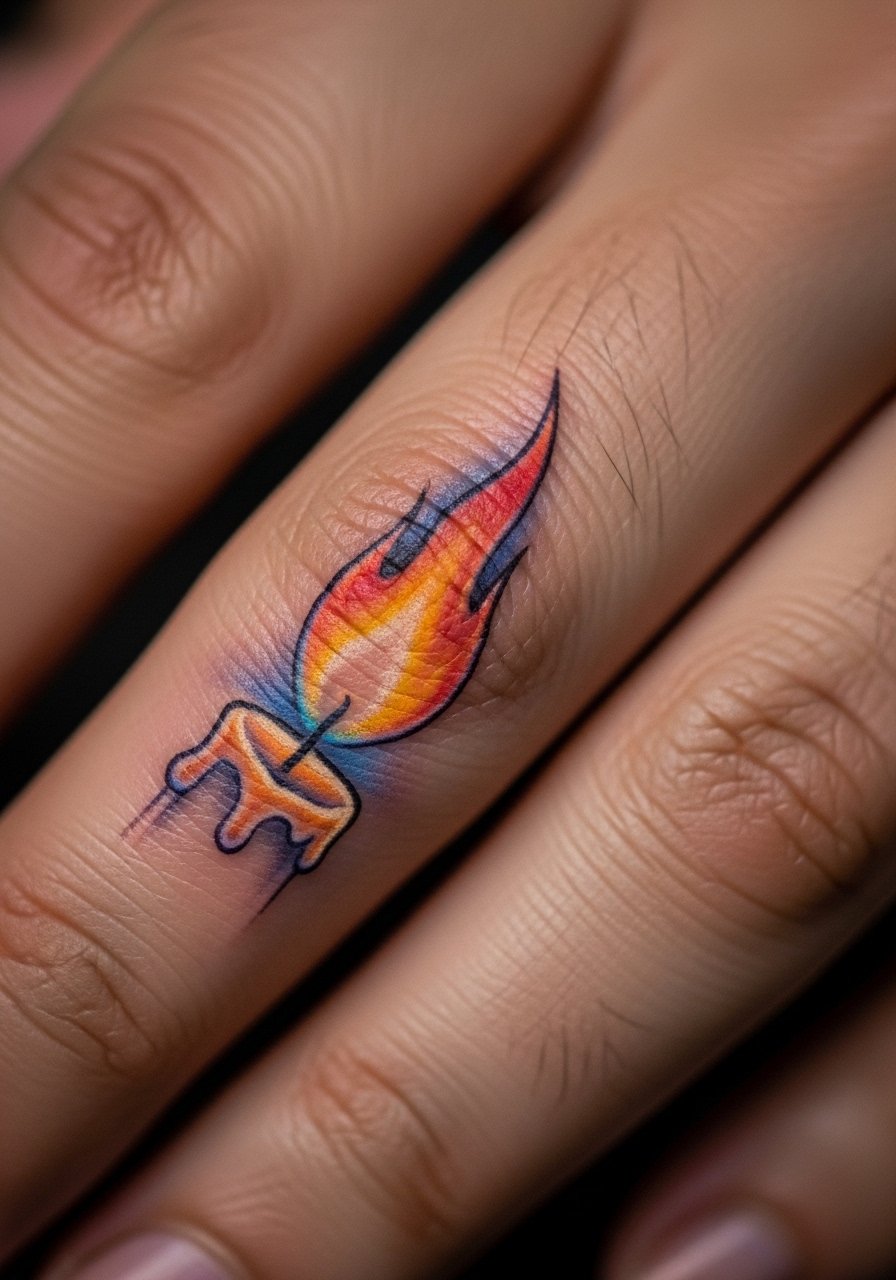
Finger tattoos are highly visible but also high maintenance. If you prefer an interactive, moving piece, a candle flame that stretches across two fingers gives that effect. Pain is sharp since fingers have little padding. Ask for bold contrast and thicker linework near the base to avoid early fading. Fingers commonly need touch-ups within a year. Consider a simple version rather than intricate micro-detail. If you work with your hands daily, be prepared for faster wear.
8. Escher-Style Impossible Shapes on Upper Back
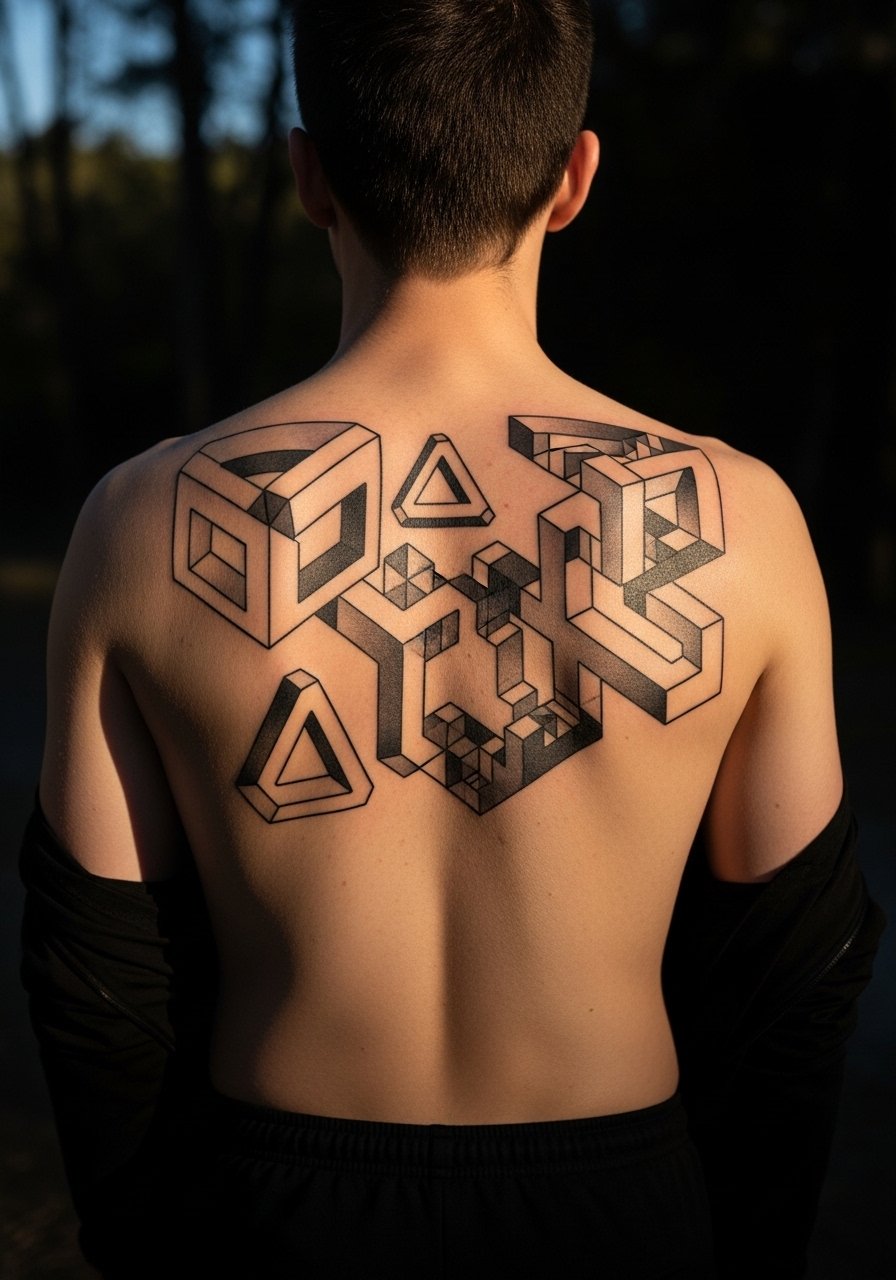
There is intellectual satisfaction in these back pieces and they scale well for conventions. For beginners willing to commit, upper back space lets artists layer shapes into long sessions. The main mistake is asking for overly thin intersections which merge as the skin moves. Expect five or more sessions with heavy linework and precise spacing. Tell your artist you want consistent line weight and deliberate negative-space windows. Healed results at two years hold best when saturation is dense and the skin sees low sun.
9. Realistic Embroidery Stitching on Ribcage
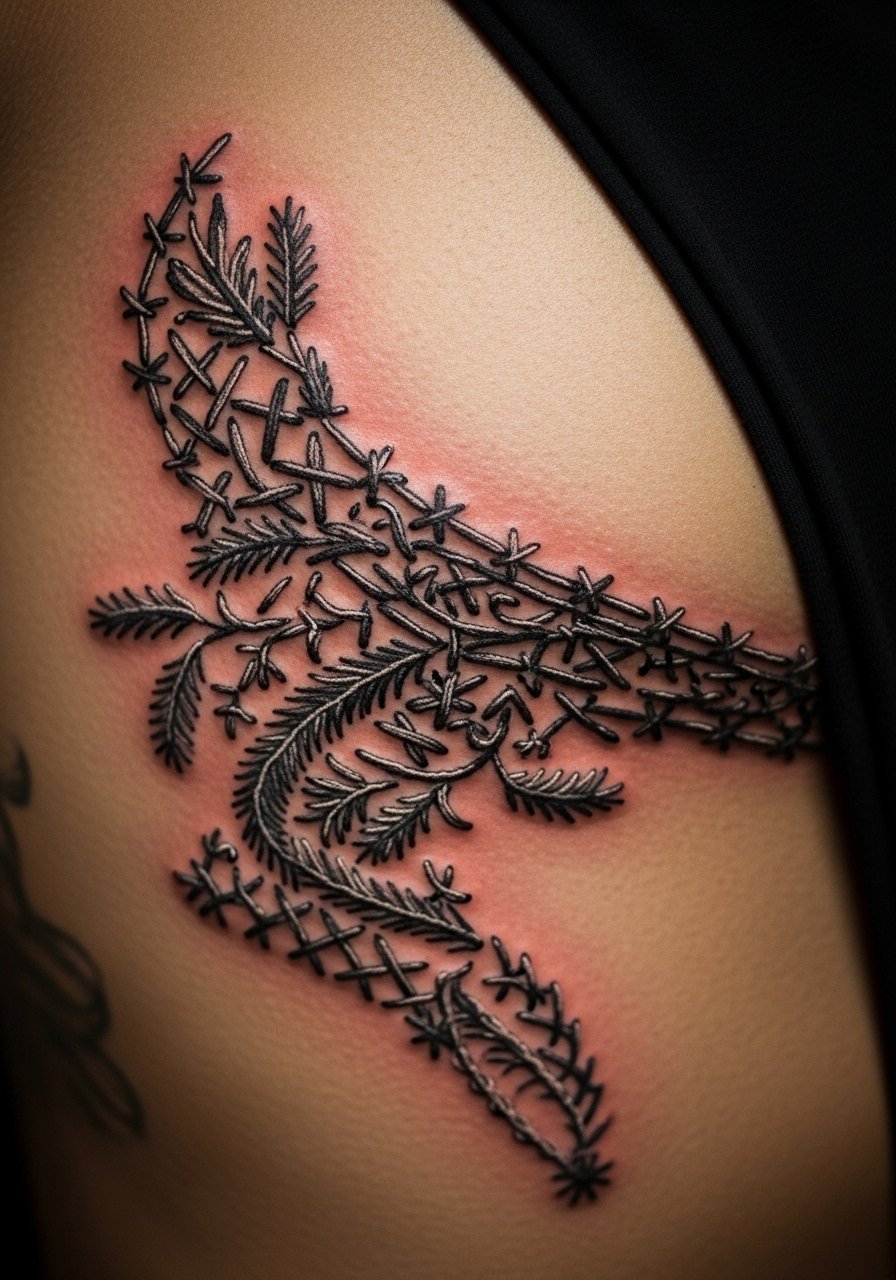
Fine line embroidery on ribs splits artists into two camps. One group says the skin stretch and constant movement blur threads within two years. The other group says with correct needle depth and spaced stitches the pattern settles and stays crisp. Ask your artist which camp they fall into and request slightly bolder stitch marks rather than whisper-fine threads. Pain is high on ribs, so plan for shorter sessions. A common error is asking for dense cross-stitch that needs too much detail in thin skin. Consider a slightly larger scale and expect a touch-up within two to three years.
10. 3D Gear Mechanism in Skull on Neck
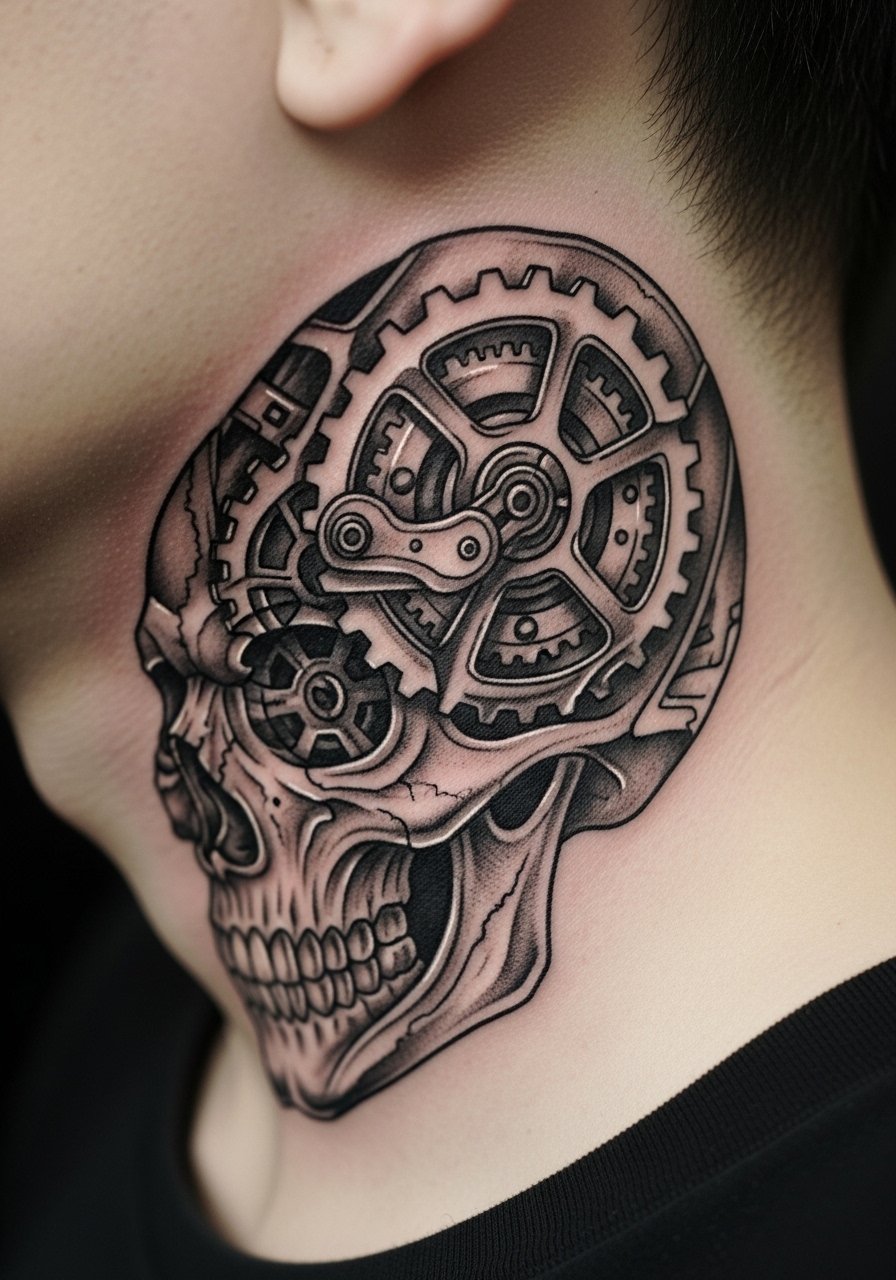
Neck pieces read as bold and require an artist experienced with curved planes. If you want mechanical themes, request deep black saturation within gear cavities and soft stipple shading to suggest depth. Neck placement needs careful planning since the area moves when you turn. Expect two sessions and moderate to high pain. Professional considerations apply for neck tattoos because they impact visible appearance in workplaces. A frequent mistake is underestimating how a design wraps the neck and loses alignment when you move.
11. Superhero Costume Texture on Abdomen
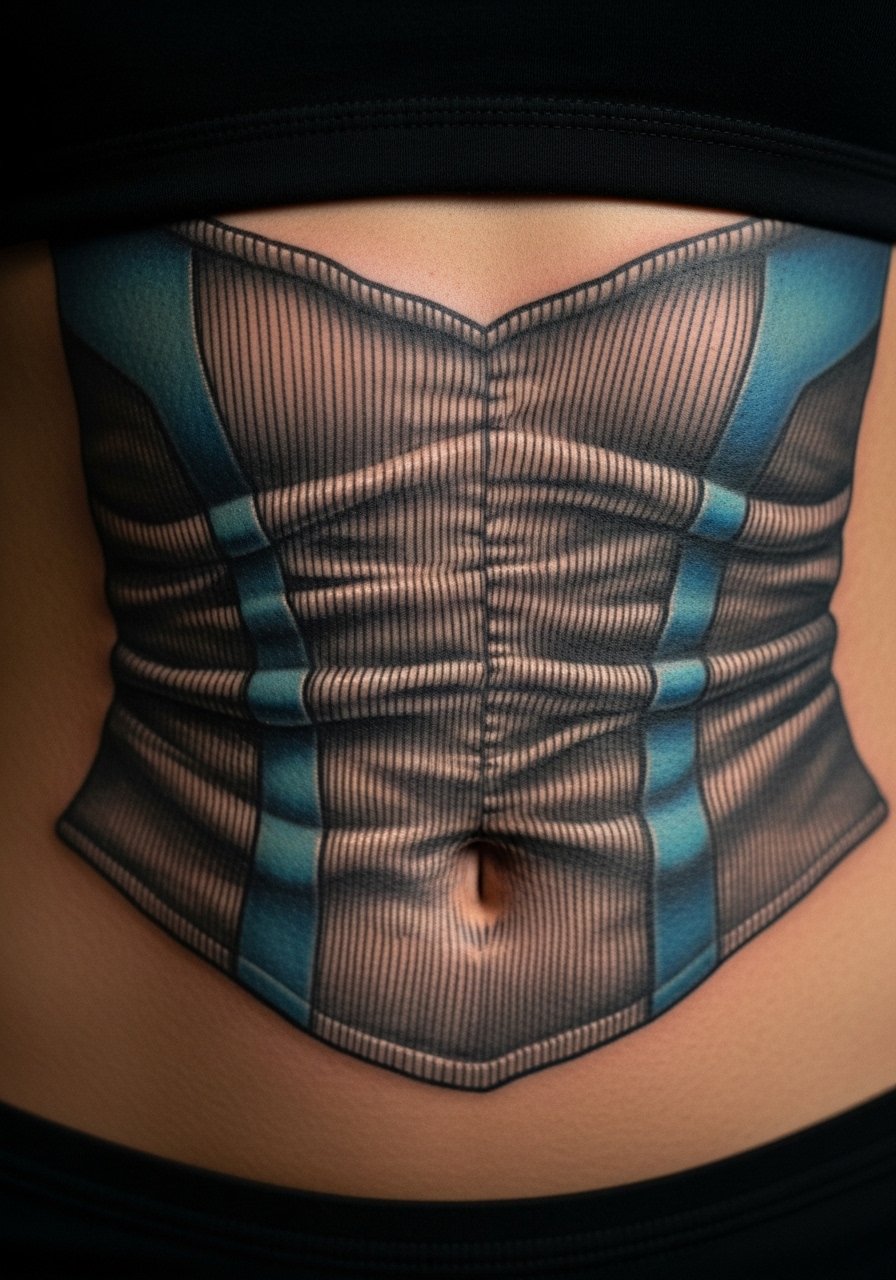
I recommend this for fans who want a large, playful piece that flexes with the body. Tell the artist you want fabric grain, seam highlights, and shadow that reads when you tense your core. Abdomen sessions are longer and can be uncomfortable over the rib margin. The wrong choice is tiny scale seams which blur into a patch at two years. Expect multiple sessions and schedule touch-ups as the skin tone and stretch change. If you plan weight fluctuations, discuss sizing and placement with your artist.
12. 3D Sweets or Candy on Thigh
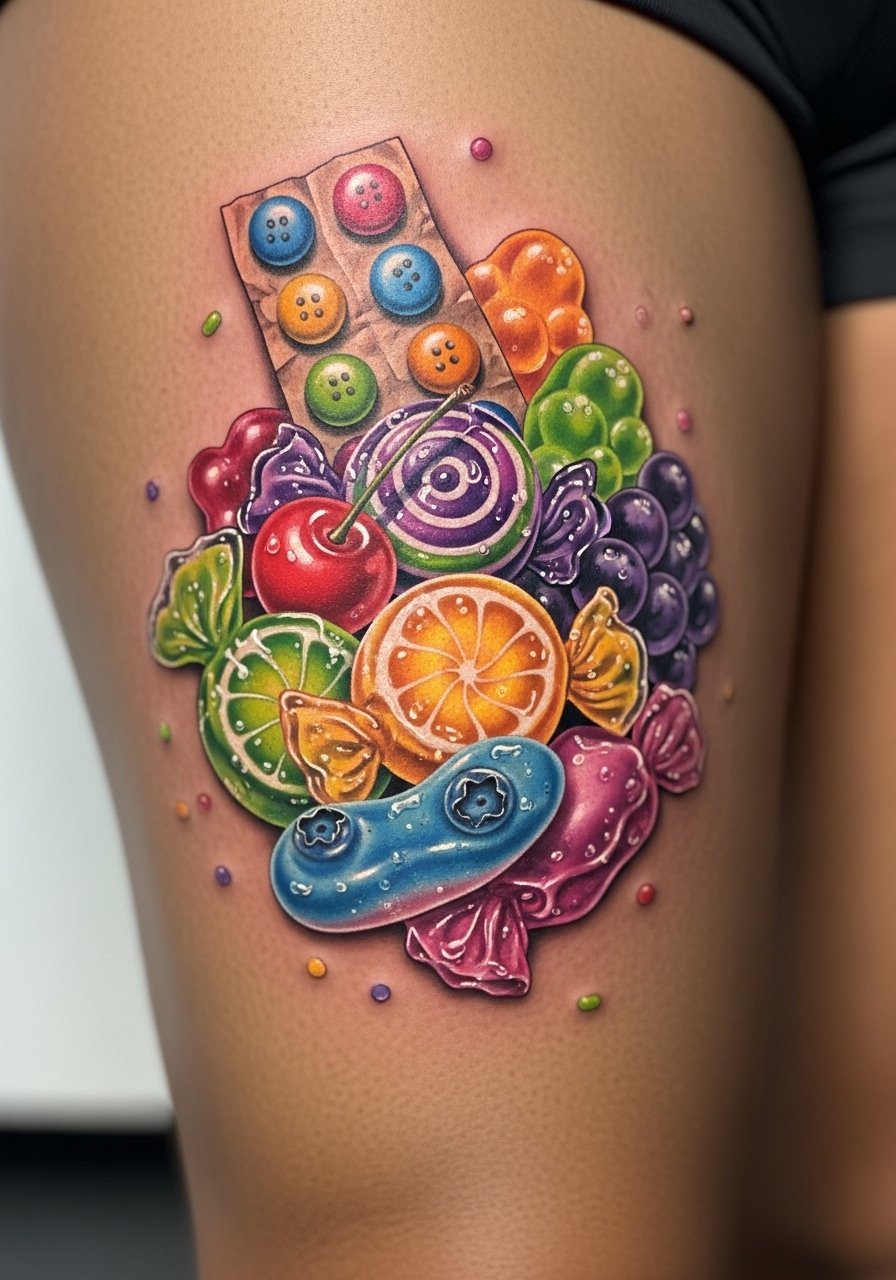
Thighs are forgiving for color and allow playful edible illusions. When you request candy that looks edible, ask for glossy highlights and soft drop shadows that make pieces float. Pain is low to moderate and sessions are comfortable for longer runs. The typical issue is over-detail in tiny candies; keep each candy large enough to display highlight bands. Healed color can stay vibrant for years when properly saturated. Thigh placement also offers private display when you want to conceal a piece.
13. Snake Skin Overlay on Hand
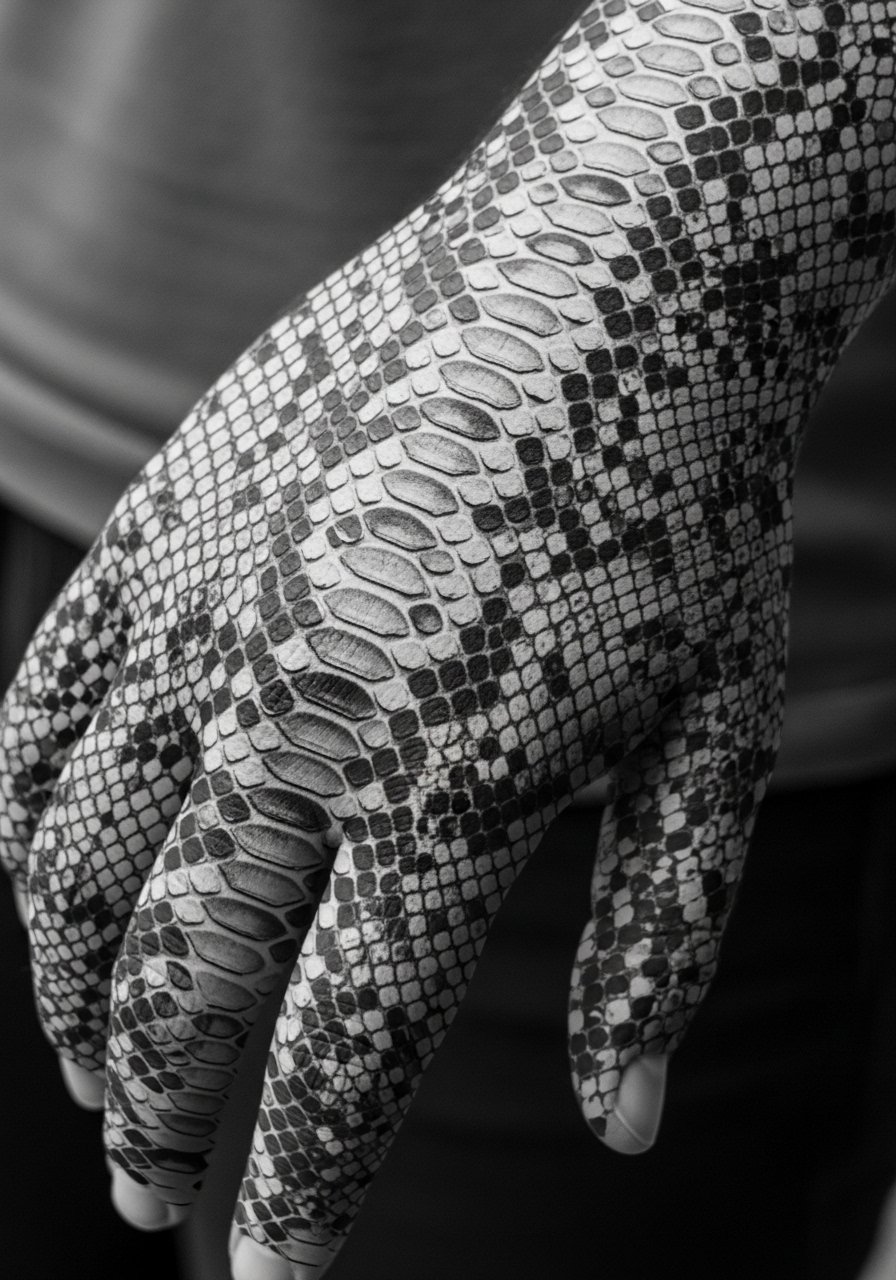
Hand tattoos demand respect because of faster wear. If you want a snake scale overlay, ask for bold scale outlines and careful gradation to avoid a washed look after months. Pain is high and healing is trickier due to constant use. Expect touch-ups within a year and discuss specialized techniques for avoiding blowout on thin hand skin. Professional considerations apply since hand tattoos still affect some job prospects. The common mistake is tiny scales that merge; larger, bolder motifs last better.
14. Zipper Revealing Muscle on Inner Forearm
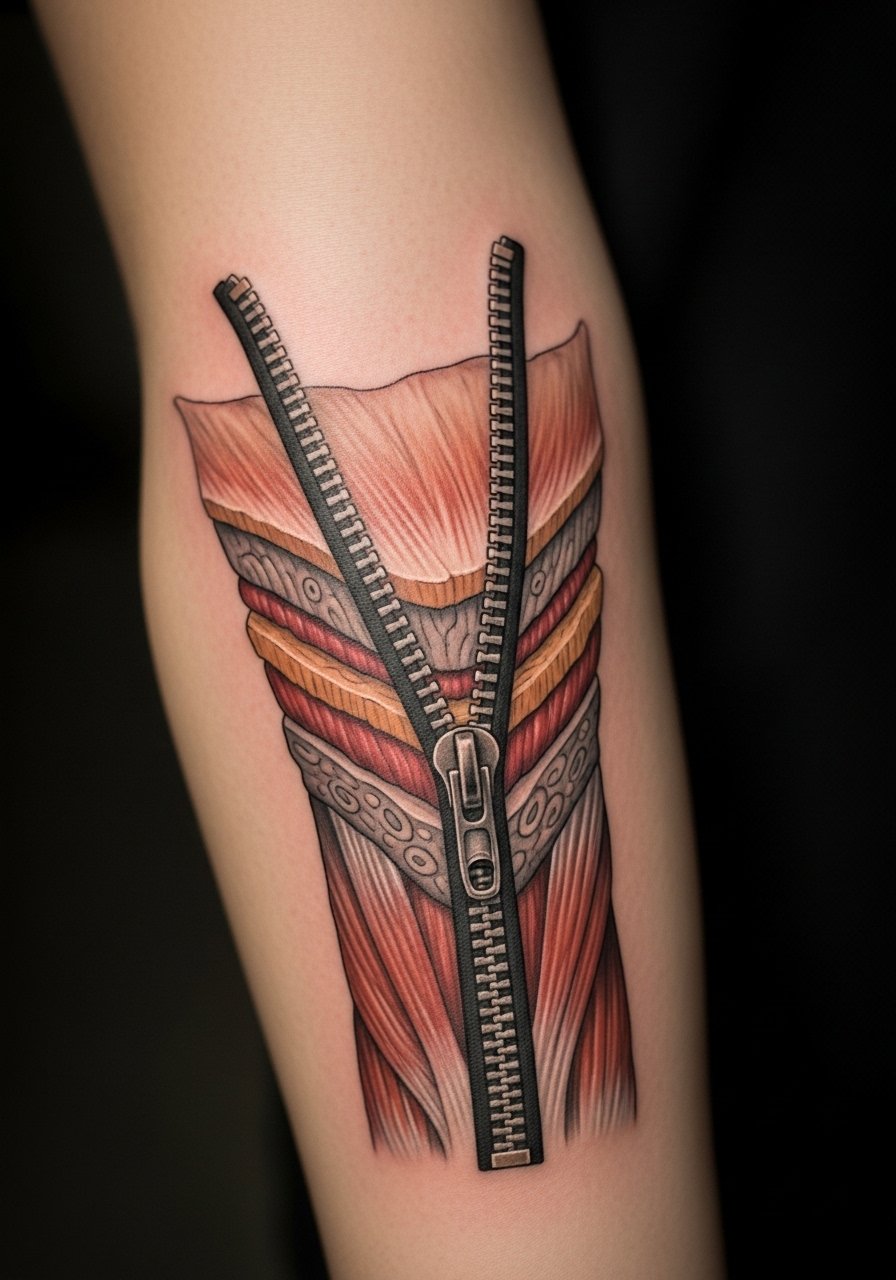
When you want a theatrical reveal but not full gore, a zipper motif on the inner forearm is dramatic without being huge. Tell your artist you want deep cast shadows under the zipper teeth and soft muscle shading to create depth. Forearm placement has moderate pain and handles linework well. A typical mistake is shallow shadowing that looks flat once healed. Expect one to two sessions and a touch-up if edges soften. The piece reads differently on the inner versus outer forearm, so decide how often you will show it.
15. Embedded Gemstone That Protrudes on Clavicle
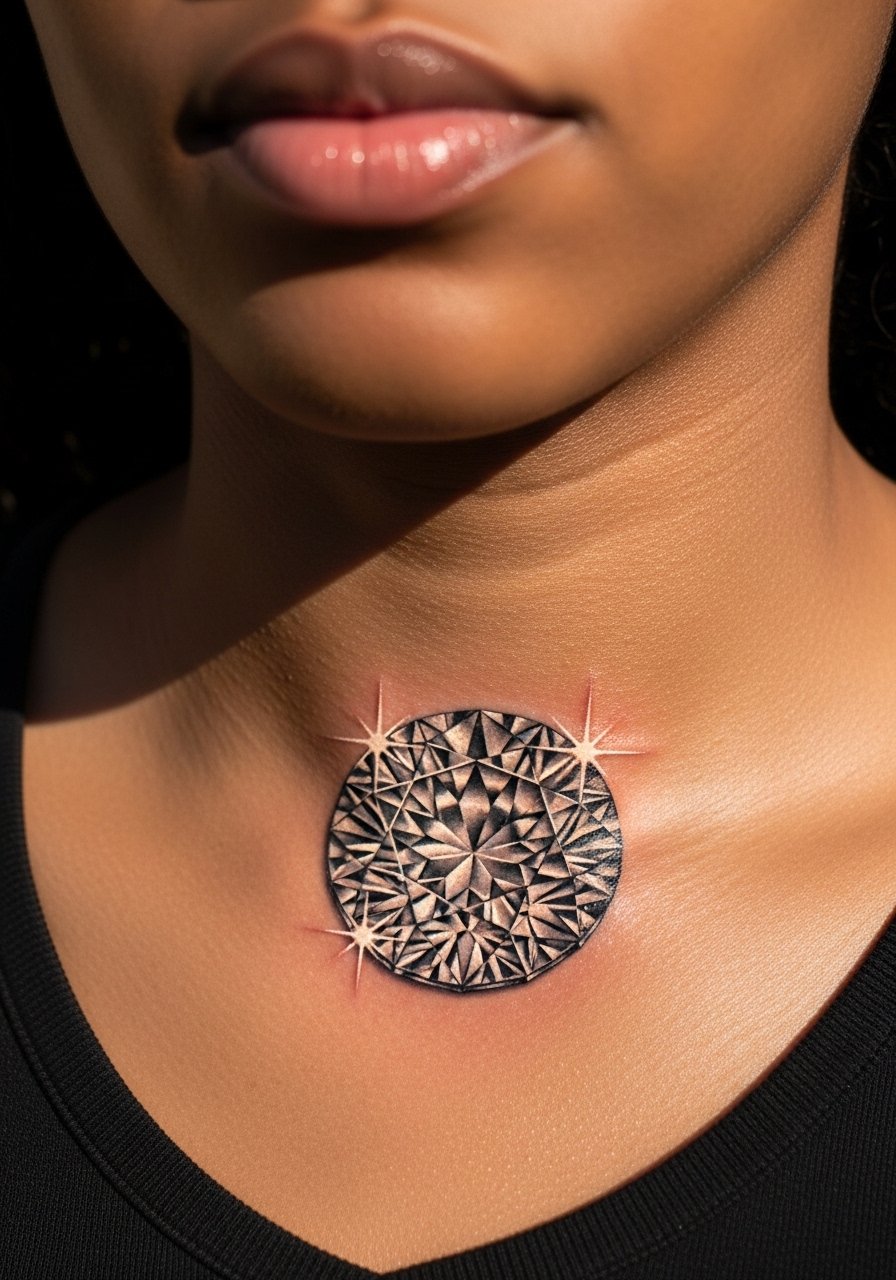
A raised gem illusion works well across the clavicle because the bone gives a natural catch light. Ask for crisp white highlights on facets and deep under-shadowing to sell elevation. Pain can spike over bone, so short sessions make sense. The common mistake is too many tiny facets that become a gray patch with time. Expect color touch-ups at two to three years and mention subtle reflective colors to your artist in consult.
16. Torn Paper Revealing Map on Upper Arm
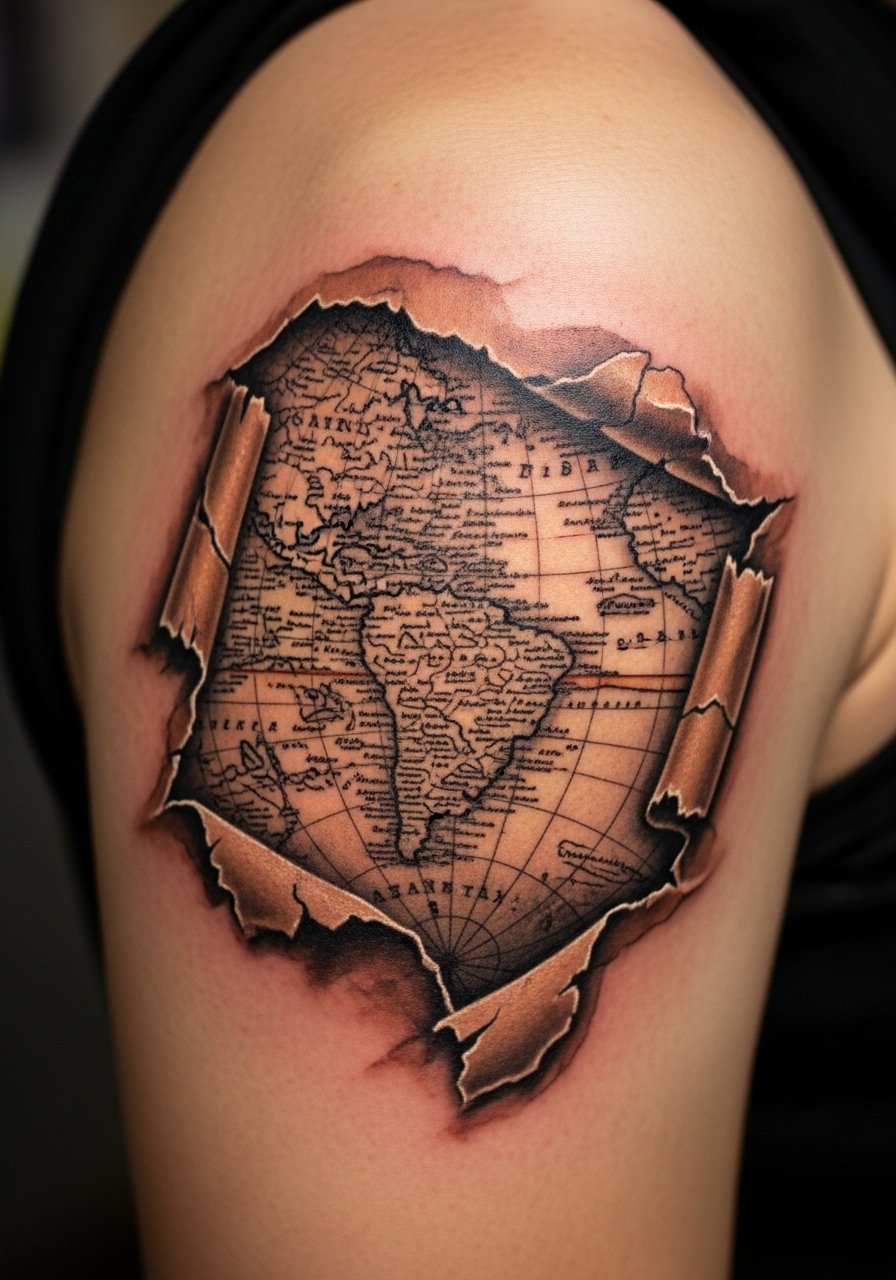
Consultation tip, bring clear map references and decide if you want aged ink tones or crisp black cartography. Upper arm skin handles texture well and pain stays low. People often ask for tiny map labels that blur; choose larger typography and strong linework. Sessions run two to three hours. At six months detail remains readable, and at year two lighter lines may need a touch-up. The torn-edge shadow is what sells the illusion, so specify deep under-edge shading.
17. Stitched Fabric Patch on Calf
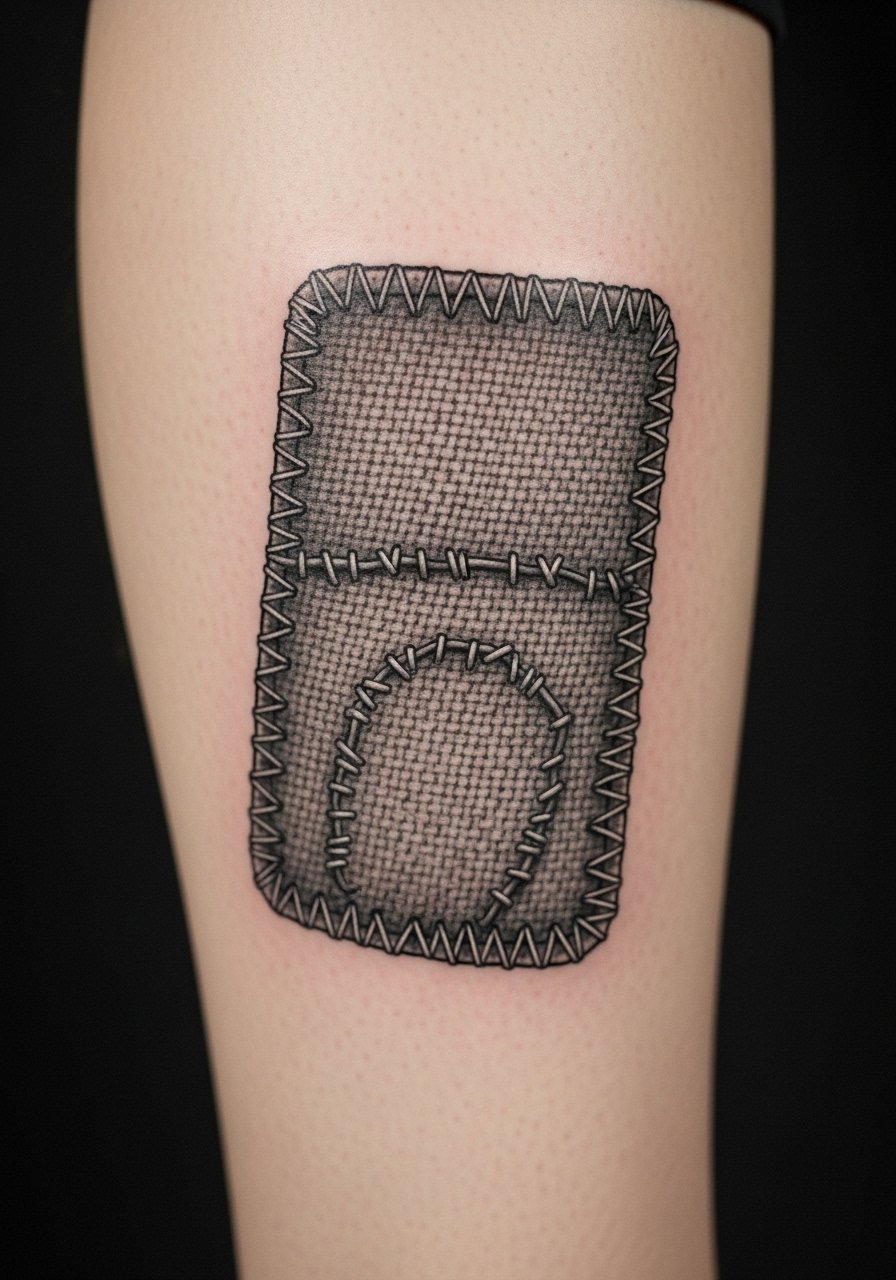
If you sew or craft, this motif reads as personal and tactile. Tell the artist you want alternating thread tension and slight shadow beneath the patch to suggest lift. The calf tolerates saturation well and healing is straightforward. Mistakes happen when stitch lines are too fine; request moderate thread thickness to hold over time. Expect one session for a medium patch and a touch-up window at year two. Placement shifts the look, with lower calf seeing more wear from socks and shoes.
18. Realistic Eye Peeking on Ribcage
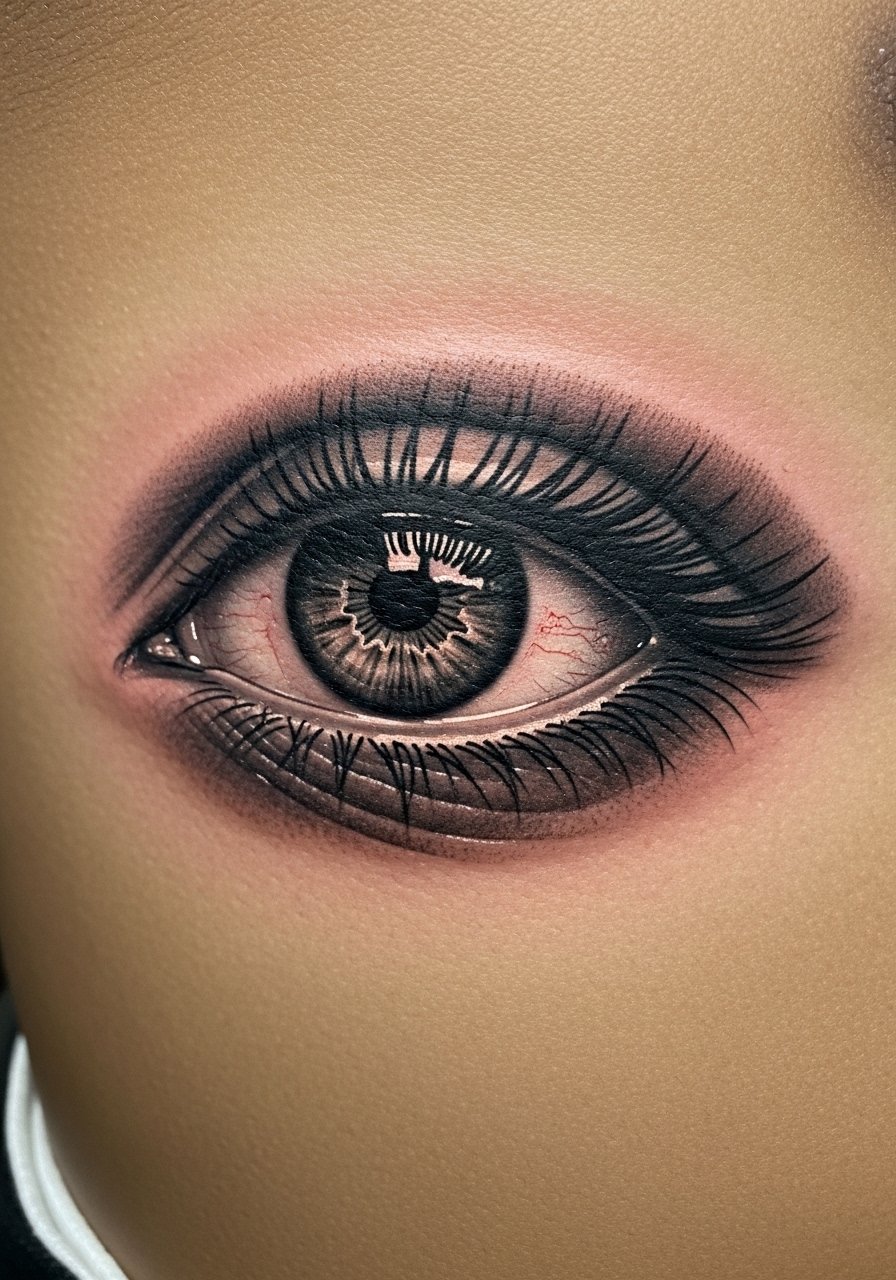
Fair warning, ribcage pain is high and artists split on the longevity of fine detail there. One camp says movement and thin skin blur lashes quickly. The other camp argues careful depth and spacing preserve detail. Ask which side your artist prefers and plan for shorter sessions. For beginners considering surprises, pick slightly larger eyes with bold iris contrast so the focal point survives one to two years. A touch-up at year two is common for fine detail work in this spot.
19. Mechanical Clock on Bicep
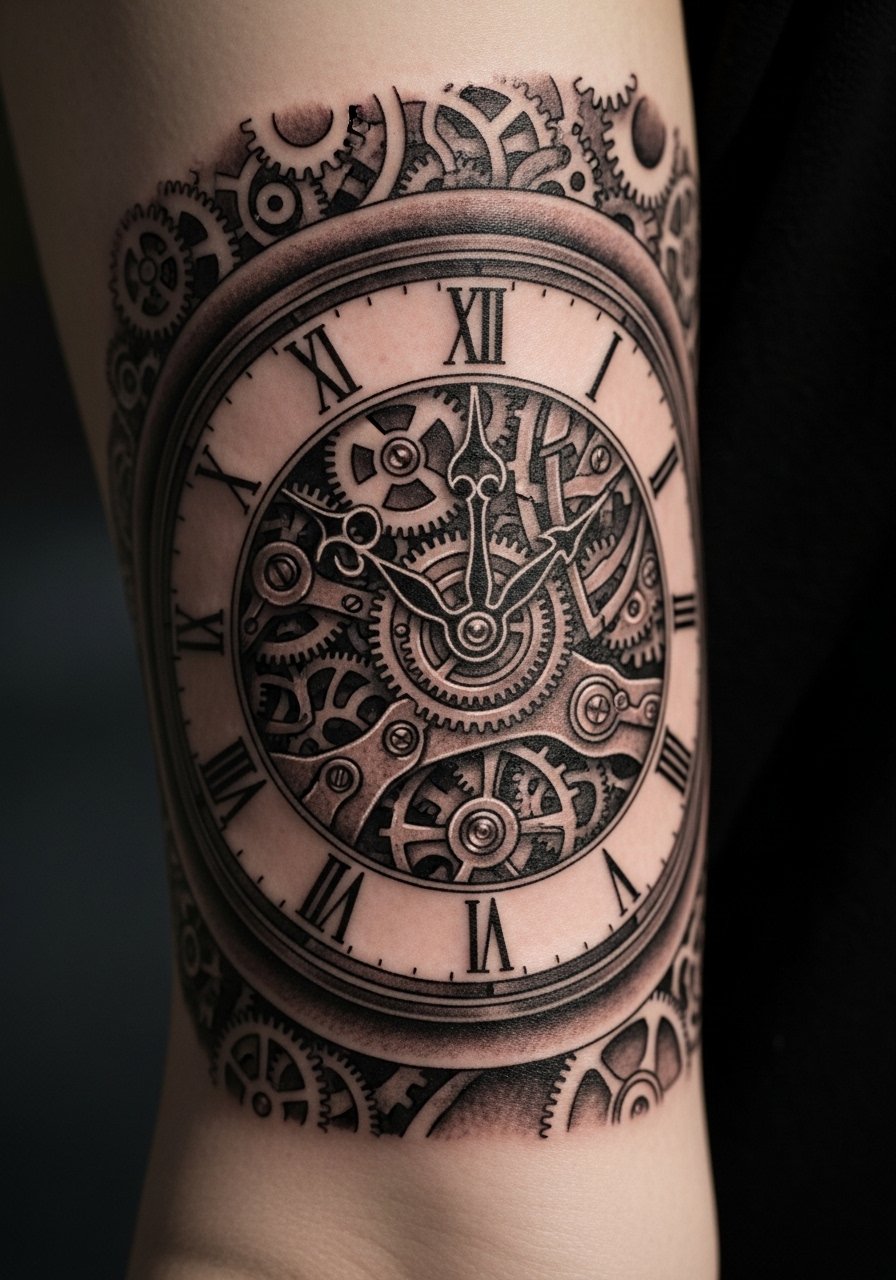
There is satisfaction in a timepiece with layered gears on the bicep because the muscle gives a natural rounded canvas. Ask for deep pockets of black around gear teeth and subtle stipple shading to suggest depth. Biceps are comfortable and heal predictably. A frequent mistake is overcomplicating tiny internal gear teeth which can blur. Expect two sessions and consider touch-ups where tiny teeth meet spokes. If you plan significant muscle changes, discuss placement so the clock does not distort.
20. Ripped Metal with Rivets on Shoulder
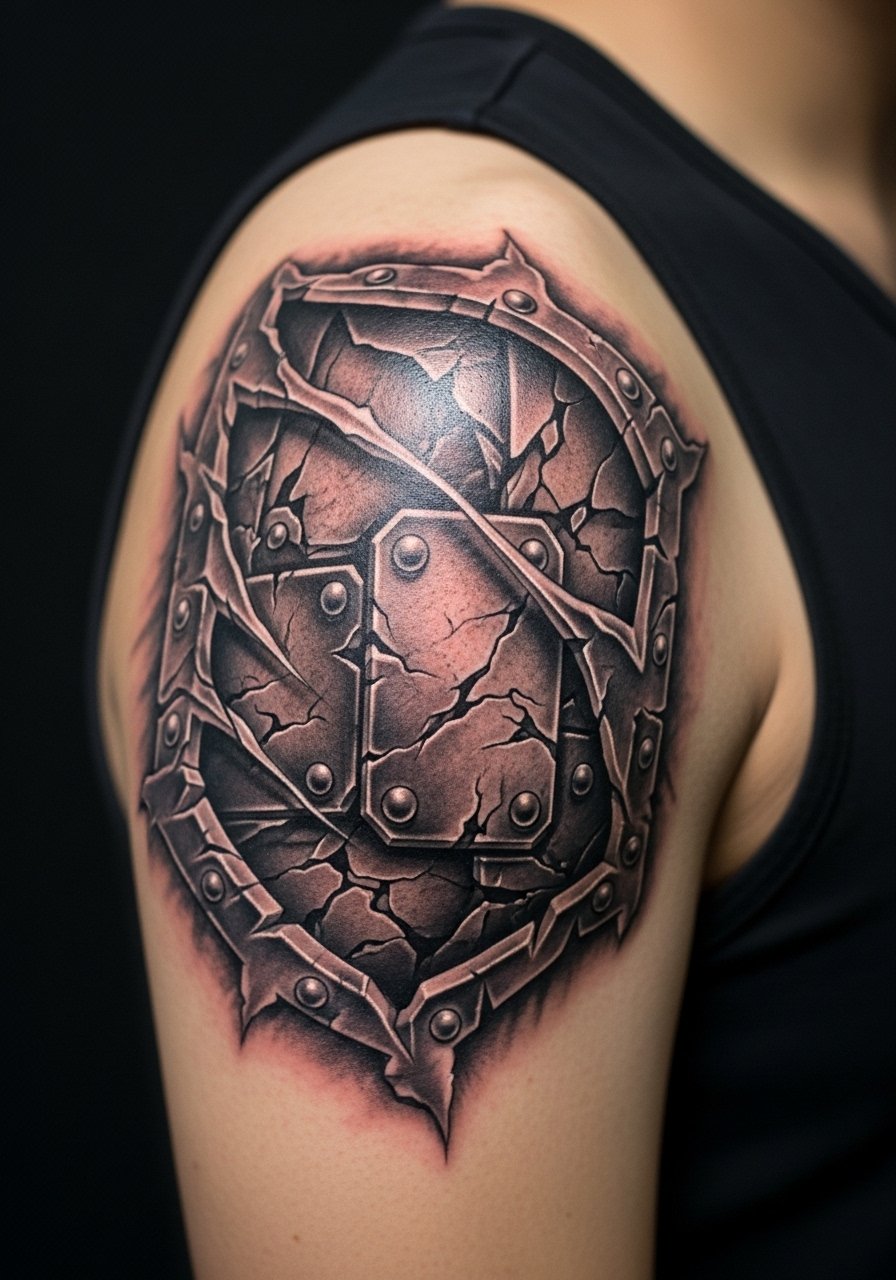
Visual impact lead works here because metallic illusions depend on crisp highlights and reflected light. Tell the artist you want specular highlights and shadowed rivet recesses. Shoulder flesh takes saturation well and pain is moderate. Common mistakes include too smooth a metal finish that ages into a flat gray. Larger panels keep the illusion intact over years. Expect two sessions and ask for heavy contrast so the metallic gleam survives fading.
21. 3D Coin Pocket on Hip
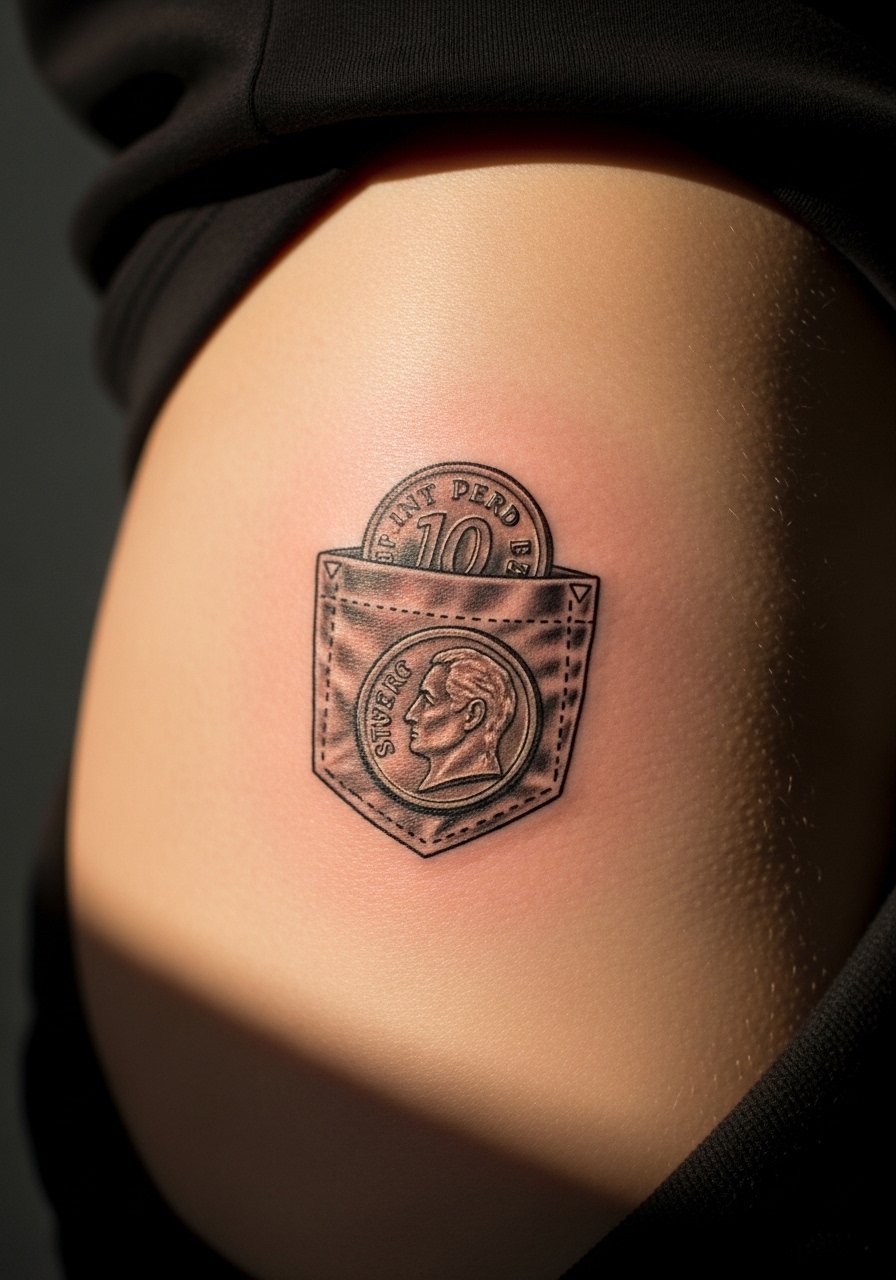
A coin pocket is playful and private, ideal for a first 3D piece. Consultation tip, specify the number and size of coins and where pocket edges sit relative to clothing lines. Hip skin tolerates movement and touch-ups are usually needed at two years if detail is crisp. Pain is moderate depending on proximity to bone. The common mistake is crowding coins too close, which leads to merging of edges. Keep coins slightly larger than actual loose change for longevity.
22. Floating Crystal Shard on Ankle
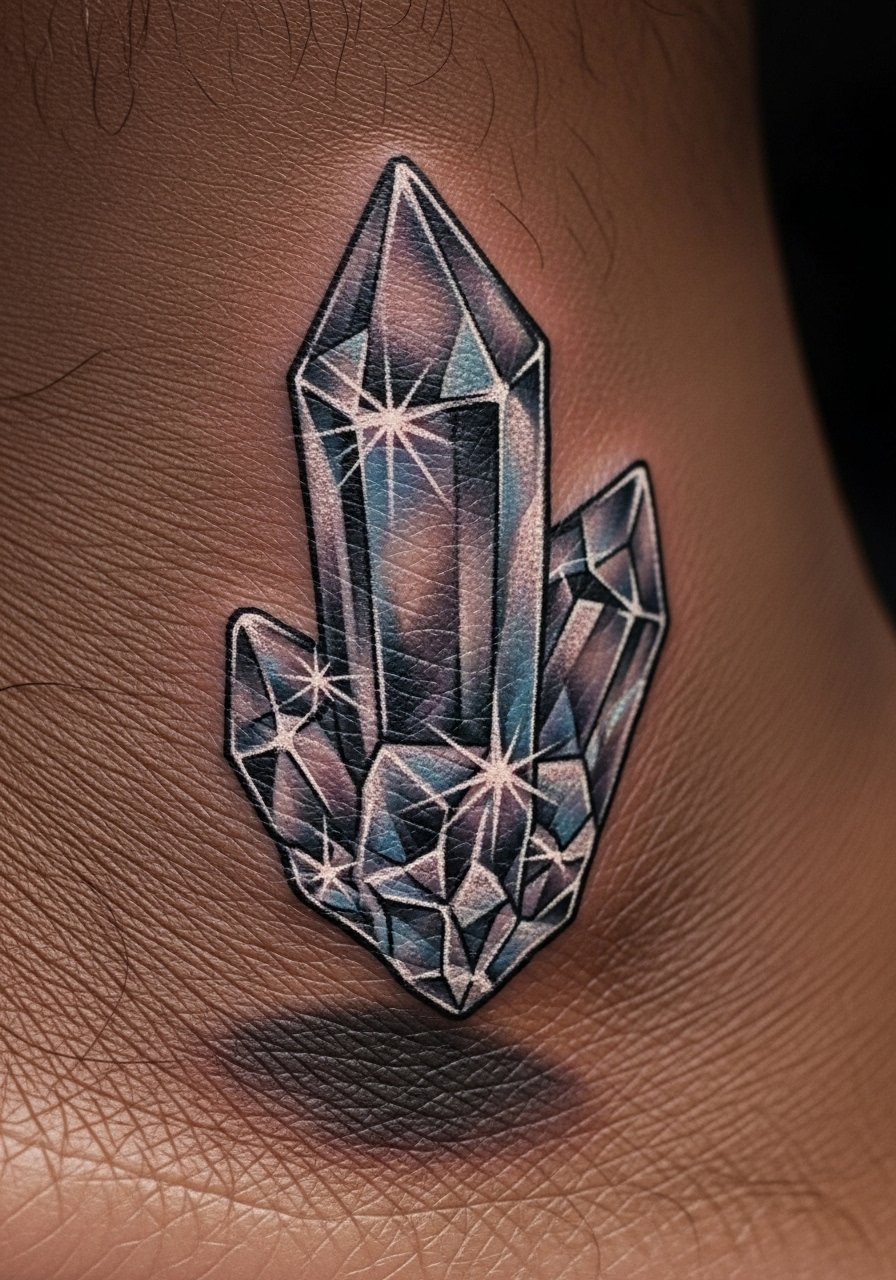
Ankles present a delicate place for a crystal since small facets can blur with time. Ask for bold facet lines and deep under-shadow to give lift. Pain is sharp in the ankle area and healing needs sock-free sleep for a few nights. Expect touch-ups within one to three years depending on exposure. Avoid requesting hundreds of micro-facets; larger planes maintain clarity. The final look reads best when artists emphasize two or three dominant facets.
23. Anatomical Heart with 3D Veins on Chest
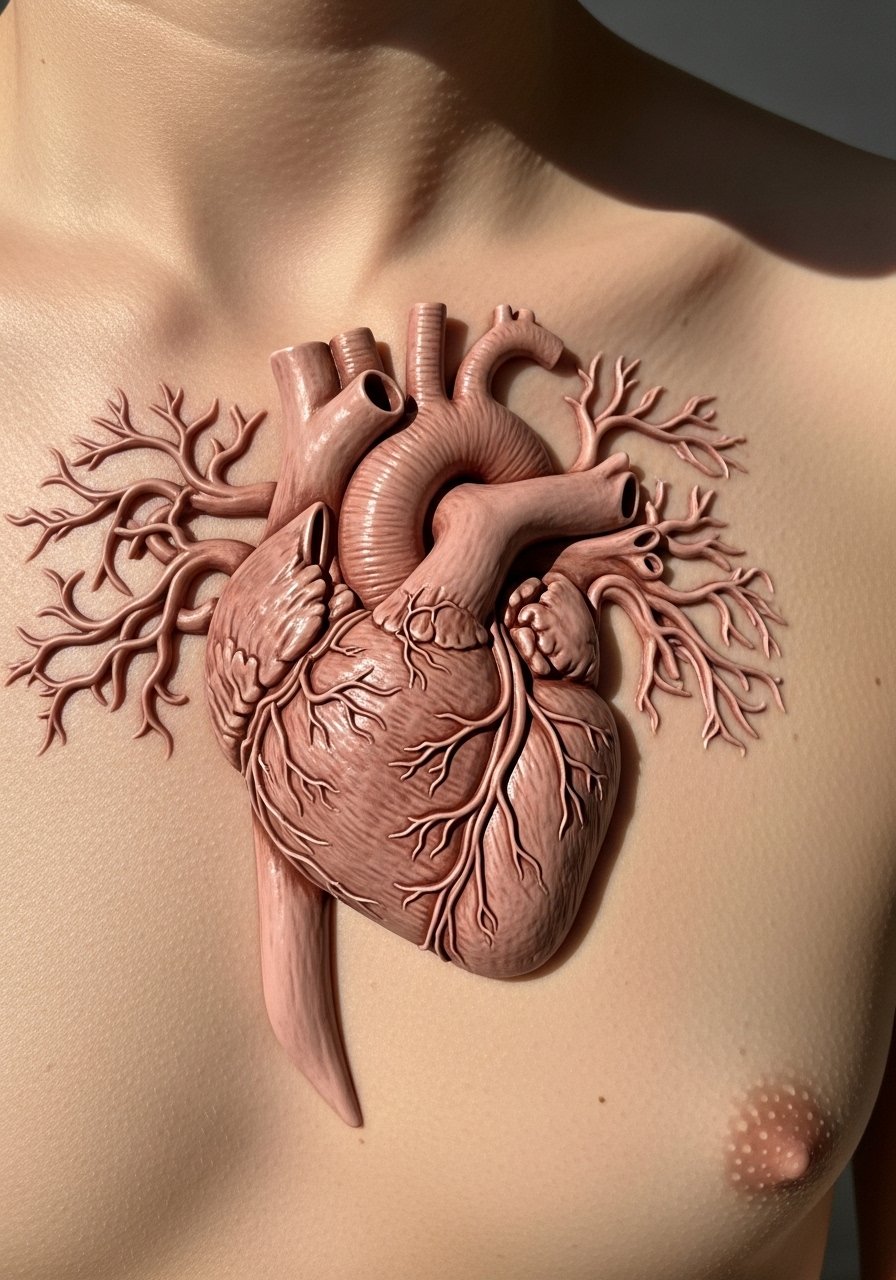
Visual and emotional, an anatomical heart with three-dimensional veins works across the chest where there is space for depth. Tell the artist to focus on vein casting shadows and strong core shading around the chambers. Chest pain varies and will be higher near bone. A common error is tiny capillary lines that fade into a gray wash. Expect multiple sessions and plan for a touch-up to reassert fine veins after normal fading. Consider how clothing will sit over the piece when positioning.
24. Realistic Chain Link That Wraps the Wrist
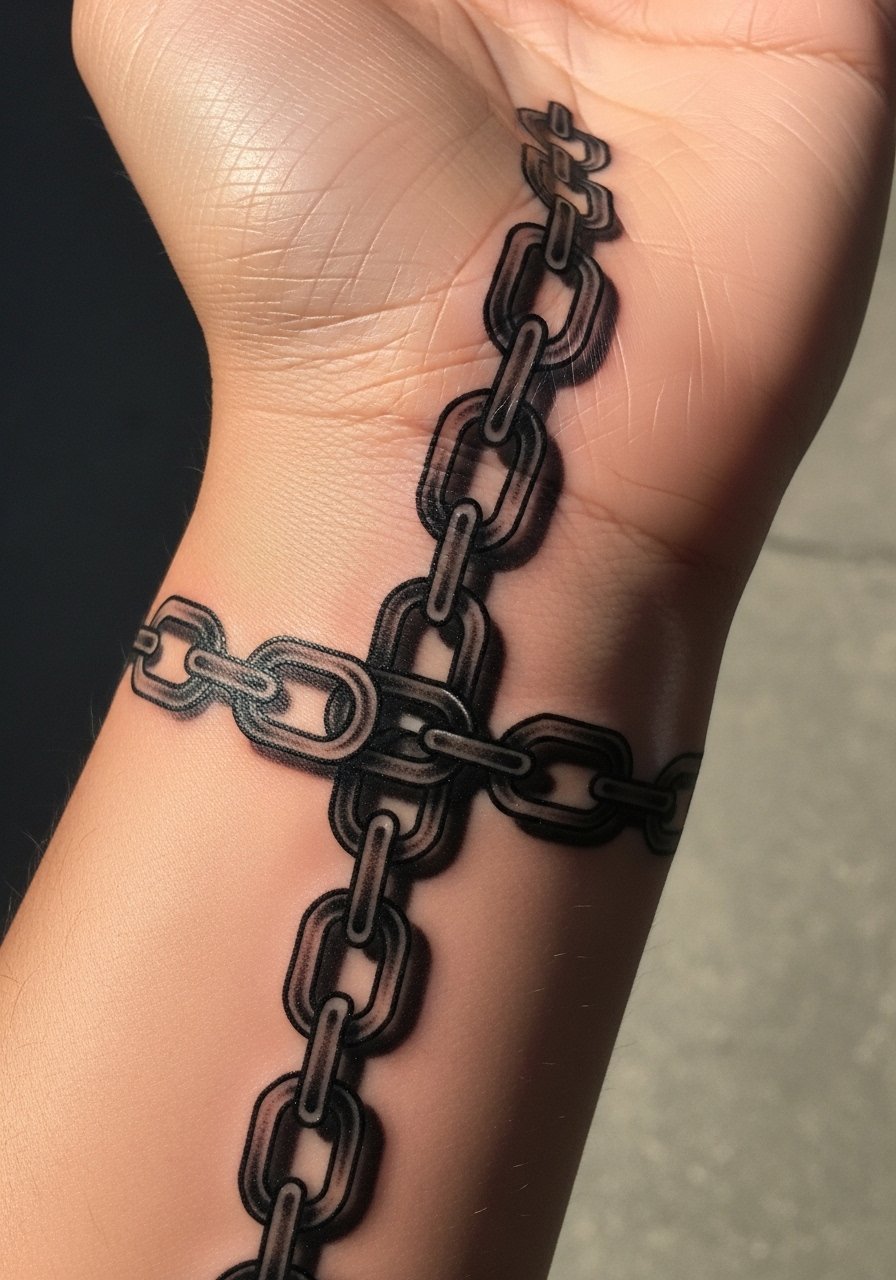
When you want a bracelet that reads realistically, ask for deep shadow between links and subtle highlight on top links to mimic dimensional overlap. Wrist skin sees high movement and the thinner skin can cause slight blowout if ink is pushed too deep. Expect a one to two hour session and plan a touch-up at year one. The mistake is too-fine links that blur into a single band. Discuss gap spacing with your artist so each link reads individually.
25. Pearl Necklace Draped on Collarbone
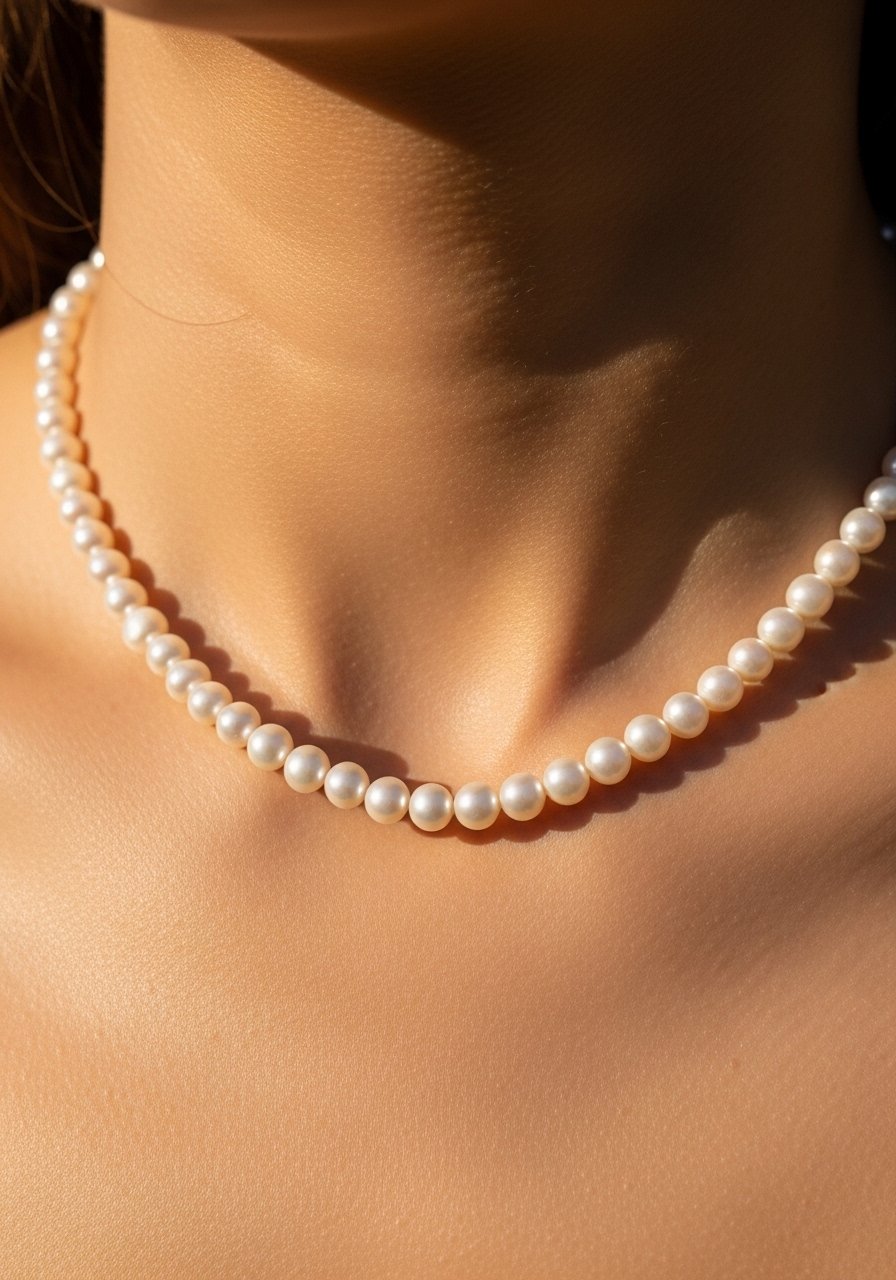
Consultation lead, the collarbone gives a natural ridge for pearl shadowing to play against. Request round highlights and under-pearl shadow to create that lifted look. Pain is moderate near the bone and sessions are short. A common mistake is making pearls too small which reduces the three-dimensional effect after healing. Expect long-term subtle fading and a touch-up if highlights lose their pop. If you want name or date beads, specify exact text to avoid generator gibberish in image prompts.
Tattoo Prep and Aftercare Essentials
When you are booking a first 3D piece, a short prep plan and a compact kit saves stress. Below are essentials for pre-appointment prep, the first 72 hours, and long-term maintenance.
Fragrance-free gentle foaming cleanser for daily cleaning. Use from day two for gentle cleaning without stripping ink. Good foaming action removes ointment residue and surface debris.
Medical-grade second skin bandage, 6-inch roll. Useful for overnight protection in the first 24 to 48 hours when you need a breathable barrier that still allows visibility.
Lightweight fragrance-free balm for moisturizing. Apply sparingly after the initial scabbing phase to maintain saturation and prevent cracking.
Antibacterial saline spray for wound care. Spray for gentle rinses after initial washing to reduce crust adhesion without harsh rubbing.
Low-lint nonstick dressing pads. These help if you need extra padding during the first few nights or to protect clothing from fresh ink.
Aquaphor Healing Ointment, small jar. Use sparingly as a short-term occlusive to prevent excessive drying in the first 48 hours. This is the one mainstream product I include.
SPF 30+ mineral sunscreen for long-term protection. After healing, daily mineral sunscreen is the best defense against UV-driven fading.
Soft cotton pillow protector or sleep wrap. Keeps sheets clean and reduces friction on new pieces during overnight healing.
Every tattoo is different. Always follow your artist's specific aftercare instructions. Consult a dermatologist if you have skin concerns or unusual healing issues.
Frequently Asked Questions
Q: Will the skull crack on my forearm need a touch-up, and when should I plan for it?
A: From what I've seen, medium-scale skull cracks usually need a touch-up around year two, sometimes sooner if you skip sunscreen or get heavy sun exposure. Ask your artist about planned saturation and expectations during the consult so you can budget a single-session touch-up if detail softens.
Q: Is fine-line embroidery on the ribcage a bad idea for a first tattoo?
A: It depends on your pain tolerance and patience for sessions. Ribcage detail can blur faster than on thicker skin, and artists split into two camps on technique. If you really want fine stitching there, ask the artist how they space stitches and whether they recommend slightly bolder lines to improve longevity.
Q: How do geometric calf illusions age compared to portrait work on the chest?
A: Calf blackwork geometric pieces tend to hold crispness longer because bold lines and saturation resist blur. Portraits on the chest require smooth tonal work and can lose fine detail sooner, especially with sun exposure. For both, regular sunscreen and occasional touch-ups help maintain clarity.
Q: My job is conservative. Are hand or neck 3D tattoos advisable?
A: Hand and neck pieces are visible and still affect hiring in some fields. If career flexibility matters, choose placements you can conceal. If you proceed, discuss scale and placement so the piece can be minimized or shifted slightly for discretion.
Q: How painful is a finger candle flame compared with a thigh candy piece?
A: Fingers are among the sharper placement pains because of thin tissue over bone. Thighs are generally much less painful and better for longer color sessions. Expect shorter sessions and faster touch-ups for fingers.
Q: Where should I look to discover artists who do realistic 3D work without naming people?
A: Use style-specific hashtags and local searches, such as realism tags plus your city name, browse tattoo directories filtering for hyper-realism, and spend time at conventions to see guest spots. Also review healed portfolios rather than fresh photos so you can judge how the ink ages.
