
Fine-line pieces on the inner bicep age differently than the same lines on a wrist. I have seen delicate crescent moons and tiny scripts hold for years when scaled correctly, and I have seen them blur when artists followed Pinterest scale without adjustment. This list focuses on designs that read well now and still look deliberate at year three, with practical notes on session wear, aging, and how to style the reveal.
1. Fine-Line Crescent Moon on Inner Bicep
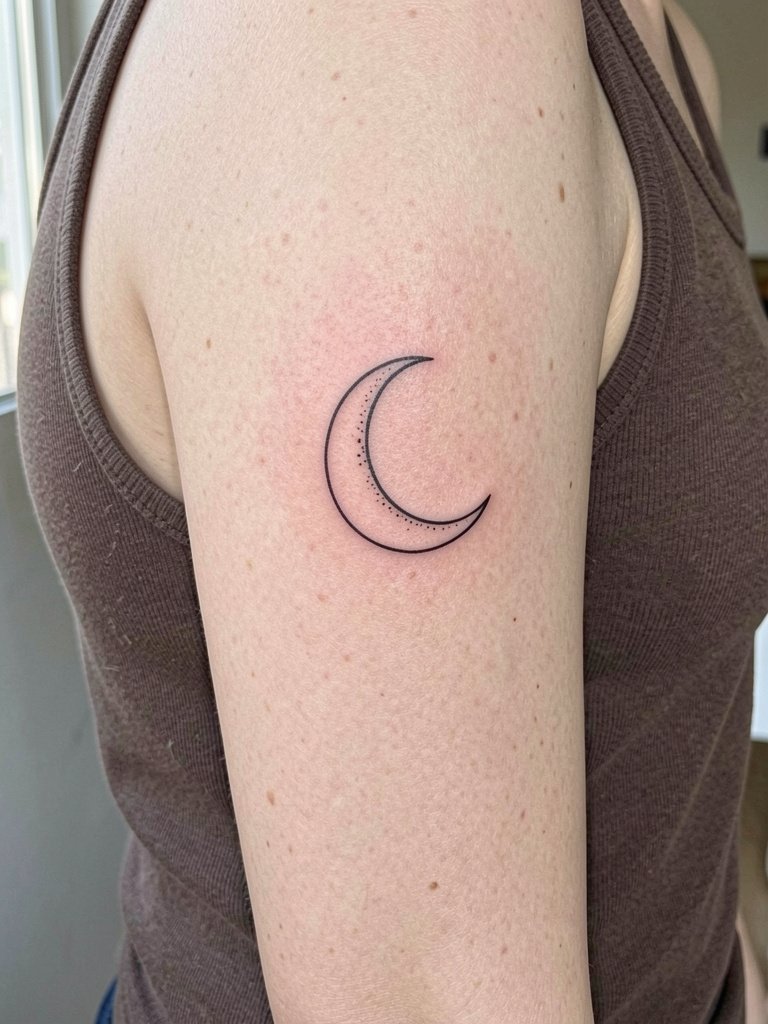
A single-needle crescent reads intimate and refined on the inner bicep. I recommend sizing it at least three inches tall so the thin line has room to breathe and the tiny dots keep their negative space. Fair warning, some artists argue that single-needle detail on the inner bicep blurs sooner than elsewhere, and they prefer slightly thicker line weight. Others argue that with careful needle depth and slightly wider spacing the single-needle crescent holds. For the session, wear a sleeveless tank so the artist can work without lifting fabric, and consider the look with a low-slee cap sleeveless rib tank when you want to show it off.
2. Micro-Realism Bee with Shadow
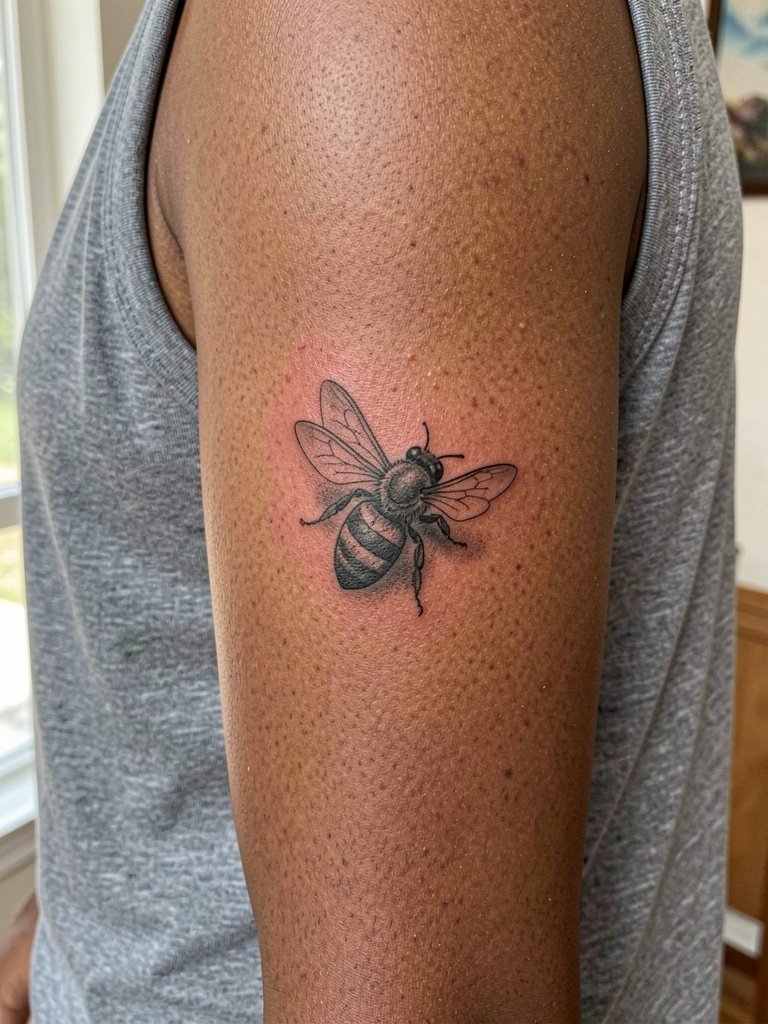
A tiny realistic bee works well when the artist translates full portrait techniques into simplified micro-realism. Ask for crisp contrast under the thorax and a slightly bolder outer contour so wings keep separation after healing. A common mistake is insisting on too much tiny detail inside the thorax, which merges by year two. Expect a single short session under ninety minutes and moderate tenderness when the arm rests against surfaces. For evenings out pair it with a cap-sleeve blouse that leaves the inner arm visible.
3. Single Word Cursive Script, Vertical
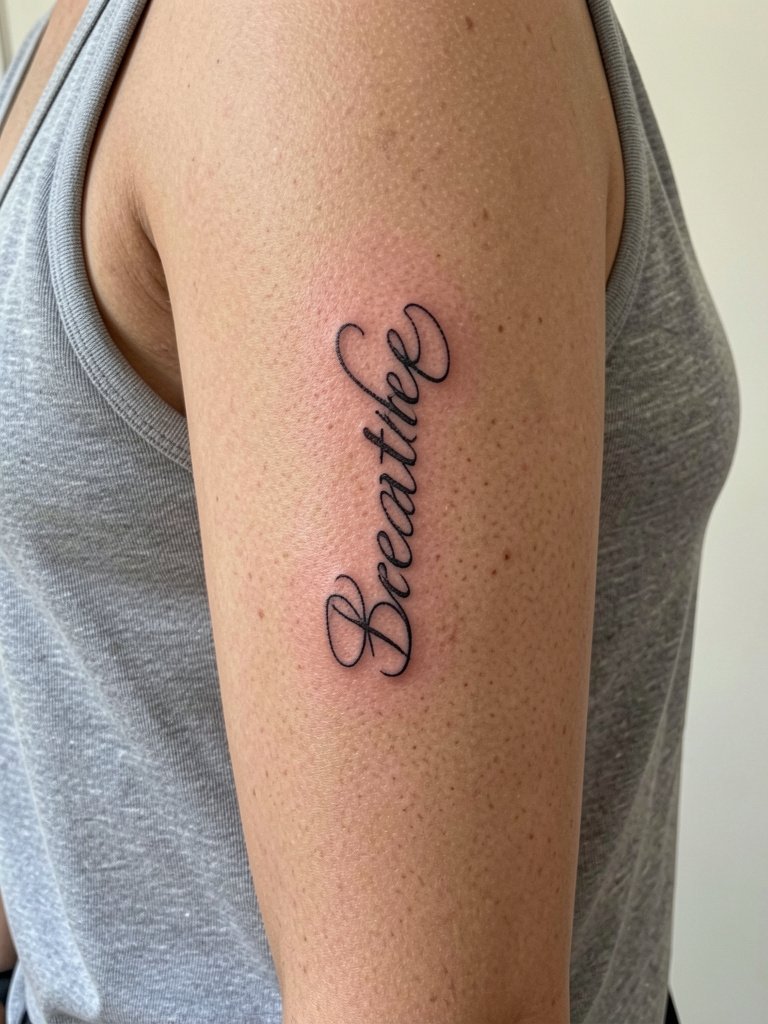
A vertical single-word script uses the natural line of the inner arm to read clean from three feet away. For durability, ask for slightly heavier downstrokes rather than hairline uniform weight. The usual error is insisting on single-needle uniformity when the skin there benefits from subtle modulation. Expect thirty to sixty minutes of work, and mild soreness when pressing the arm to a desk. Pairing idea includes open-back midi dresses for nights out that let the inner bicep peek through while keeping the rest covered.
4. Stipple-Shaded Botanical Sprig
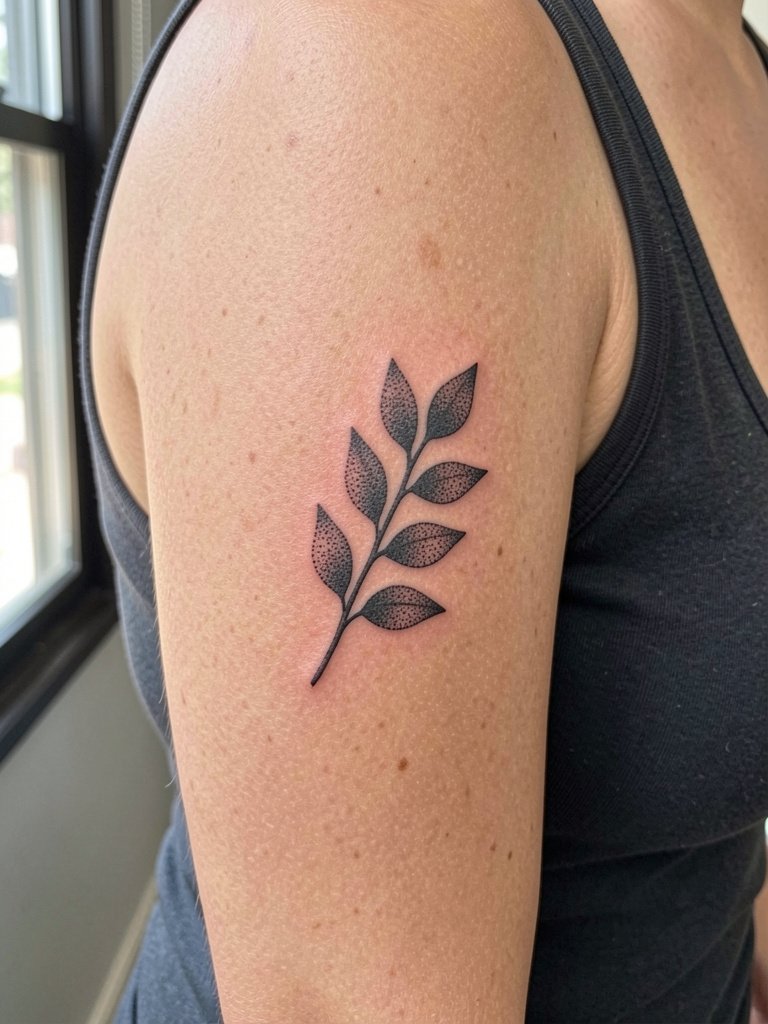
Stipple gives a soft, organic feel that complements the inner bicep curvature. When discussing the piece, bring reference photos that show stipple scale so the artist can translate dot density into longevity. One mistake clients make is insisting on extremely tight stippling that looks delicate at first but gaps into patchy tone by year three. Sessions run about an hour to an hour and a half, and you might need a light touch touch-up at year two. Styling tip, this placement plays nicely with rolled linen shirts and loose drawstring linen pants for a relaxed show-off moment.
5. Neo-Traditional Floral with Accent Color
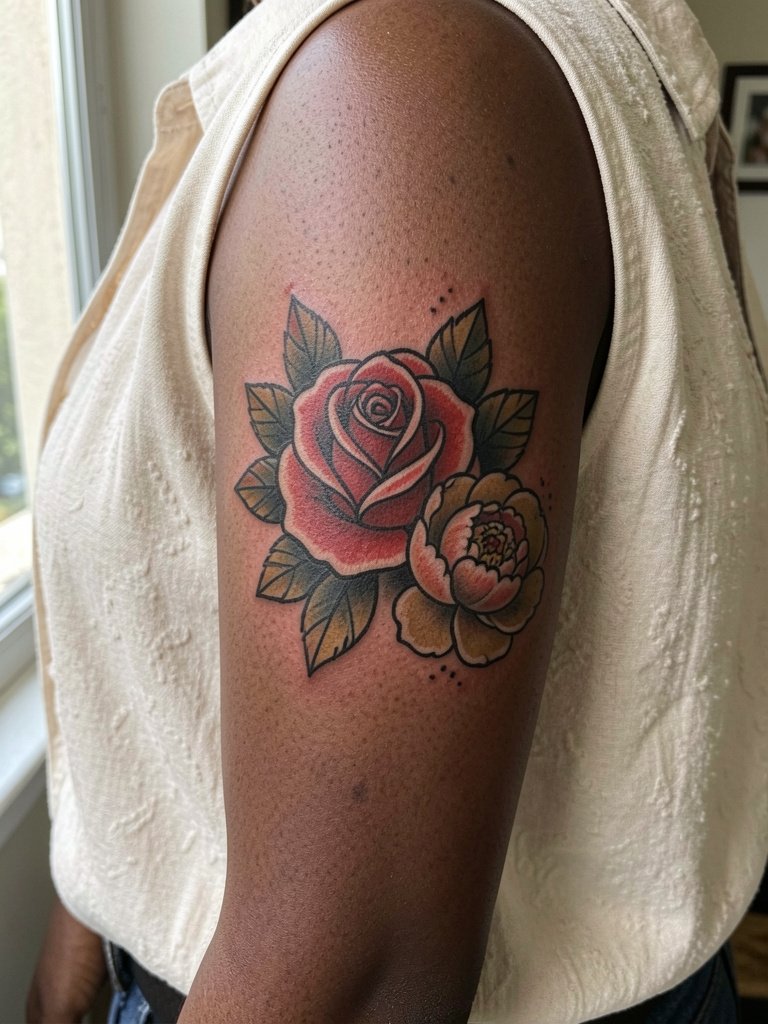
A neo-traditional cluster gives presence without being overpowering on the inner bicep. Ask for moderate saturation instead of saturated blocks that can age into heavy patches on warm skin tones. The common mistake is overloading color, which requires more frequent touch-ups. Expect a longer session near two hours if color fills are involved and moderate tenderness during healing. For showing it off try a rolled-sleeve linen shirt with sleeves pushed to mid-bicep.
6. Minimal Geometric Linework Band
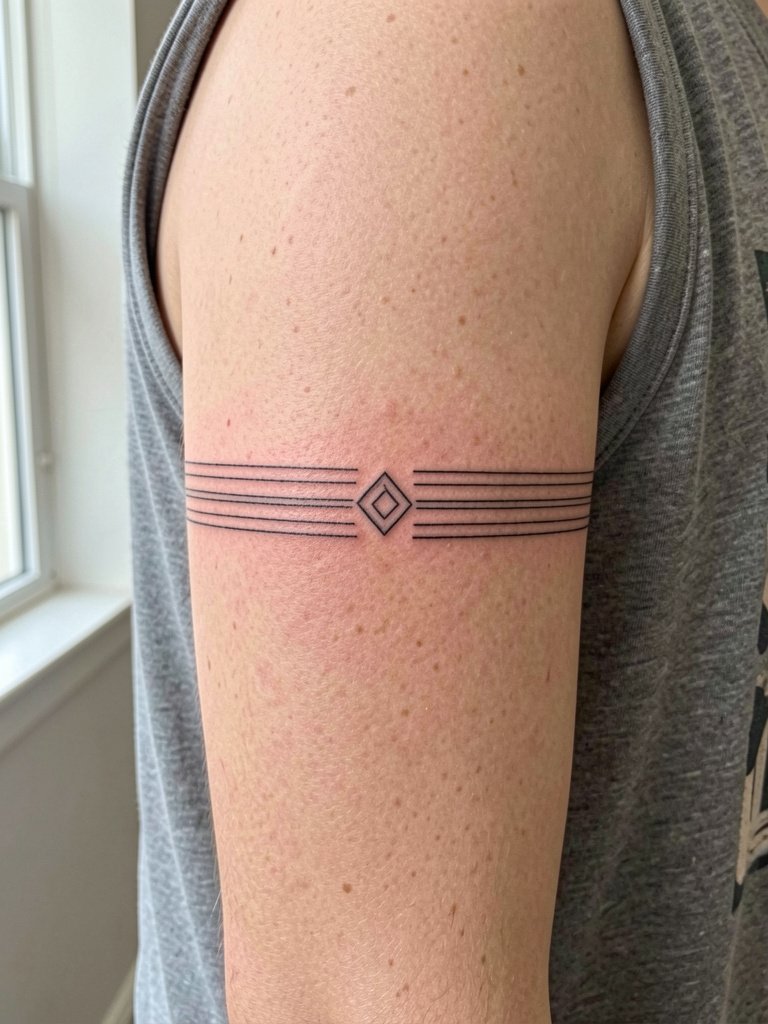
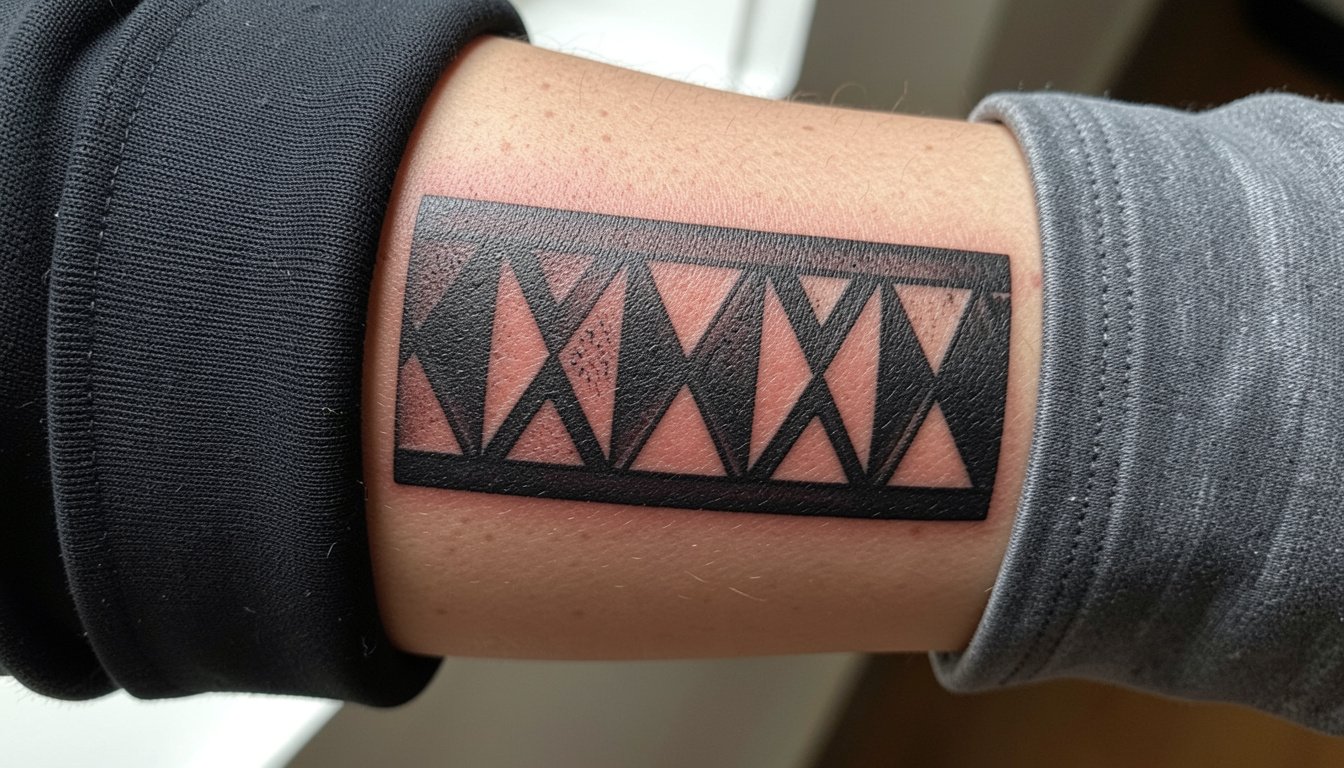
Bands can look crisp for years when spacing is generous. When you book, bring a mock-up at actual scale so you can see how the parallel lines read at three and five inches. A frequent error is requesting lines too close together, which increases blowout risk on the inner arm. This is lower pain than ribs but more sensitive than outer bicep, and sessions usually run under an hour. Pair it with short-slee roll styling and a slim cuff bracelet so the band sits between accessory and skin.
Session Day Picks
The pieces above range from single-needle scripts to color floral clusters, so a few session essentials make a smoother chair day and first week.
-
Stencil transfer paper kit. Lets you preview placement and exact scale on skin, which helps avoid the too-small mistakes common with delicate inner bicep scripts.
-
Topical numbing cream. Apply per label forty to sixty minutes before the appointment to reduce the sting for longer color or stipple sessions.
-
Thin protective film roll. Useful for wrapping small inner arm areas for the first day when clothing friction is most likely.
-
Fragrance-free gentle body wash. Cleans the area during showers without stripping fresh ink or irritating delicate linework.
-
Aquaphor healing ointment. A thin layer for the first few days helps keep fine line work hydrated without sealing off the needle channels.
7. Tiny Portrait Silhouette
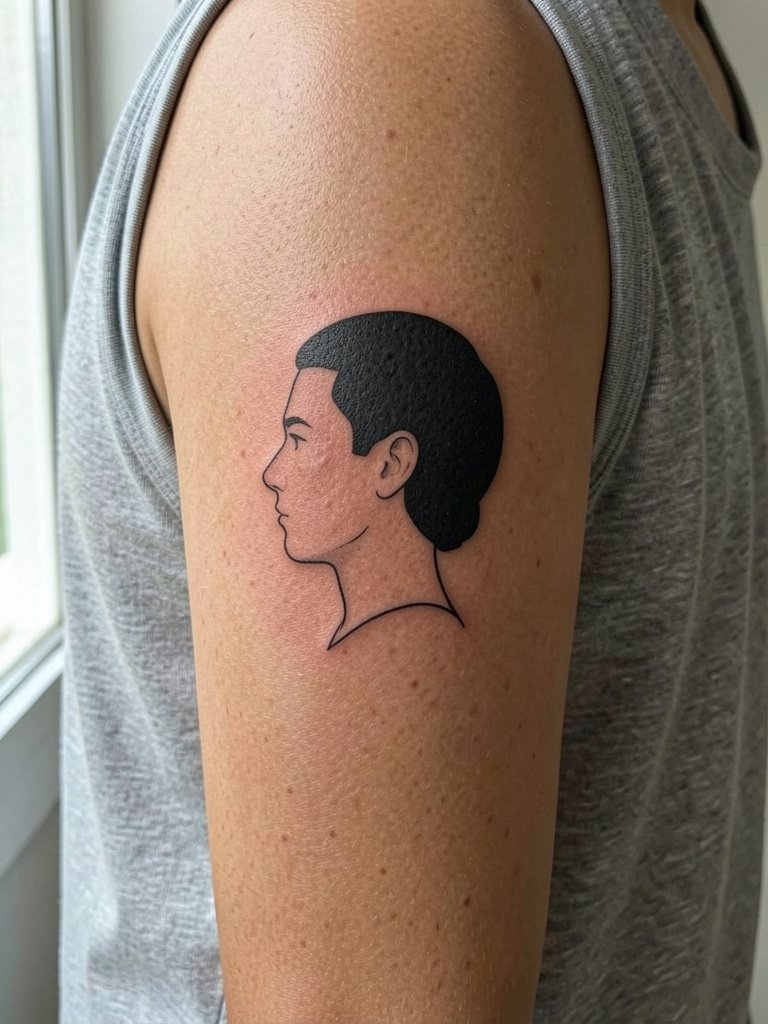
Silhouettes translate portrait ideas into a scale that holds. If you want a likeness, bring a high-contrast photo so the artist can simplify rather than cram detail. The mistake is asking for minute facial features at micro scale, which melt into a blotch when healed. Sessions are short and the pain level is moderate. For outfits that highlight the piece, try a cap-slee blouse with a trimmed sleeve that frames the inner arm.
8. Minimalist Arrow with Negative Space
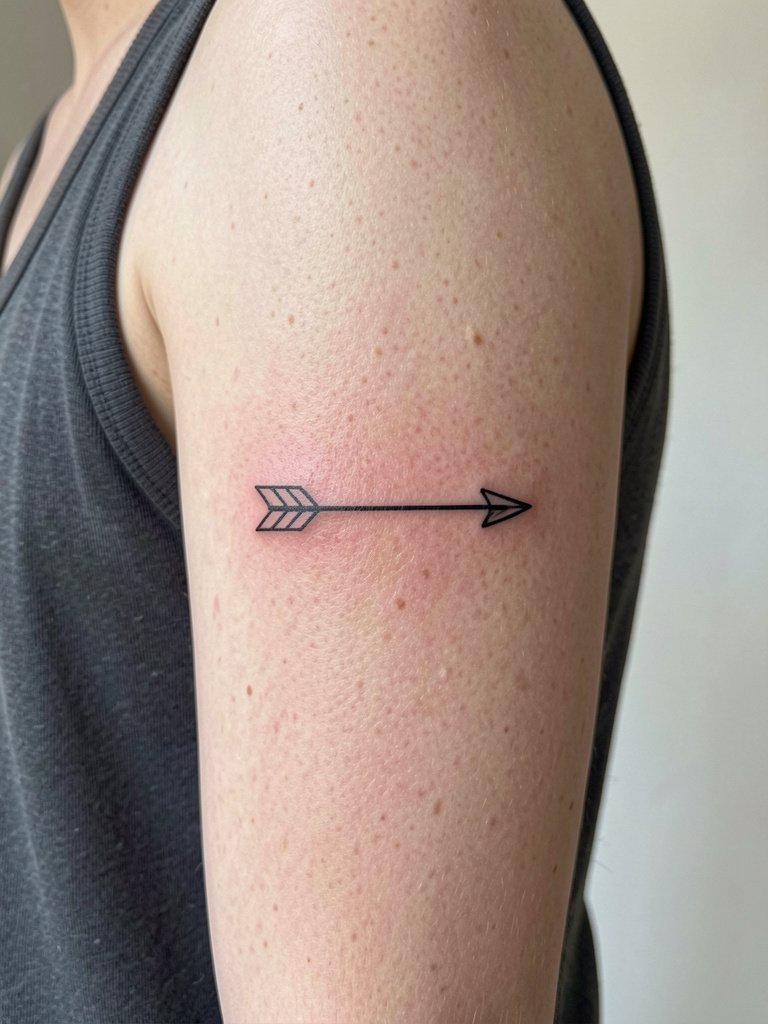
An arrow benefits from a break in the shaft to avoid a solid hairline that can blur. When you consult, specify the negative space size so the artist knows how much breathing room the line needs. People often ask for an ultra-thin uniform line and regret the lack of presence after healing. Session time is short and discomfort light. For casual show-off wear a rolled-sleeve linen shirt that keeps sleeves near mid-bicep.
9. Thin Script Band in Cursive
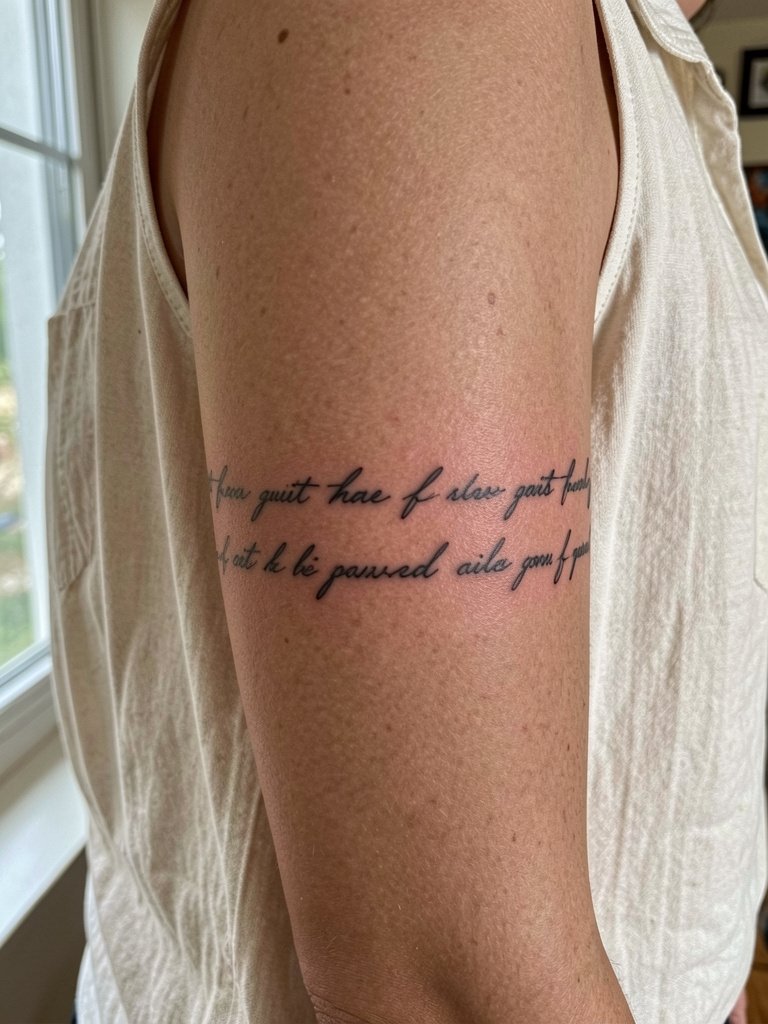
Bands of script can feel intimate when they curve with the arm. Tell the artist exactly how wide you want each letter and request a test transfer that wraps the arm so you can see how the cursive reads in motion. The error is crowding letters to keep the band narrow, which makes it illegible after healing. Sessions take about an hour depending on length. Styling suggestion, a scoop-neck tee keeps attention on the arm without competing silhouettes.
10. Tiny Constellation Cluster
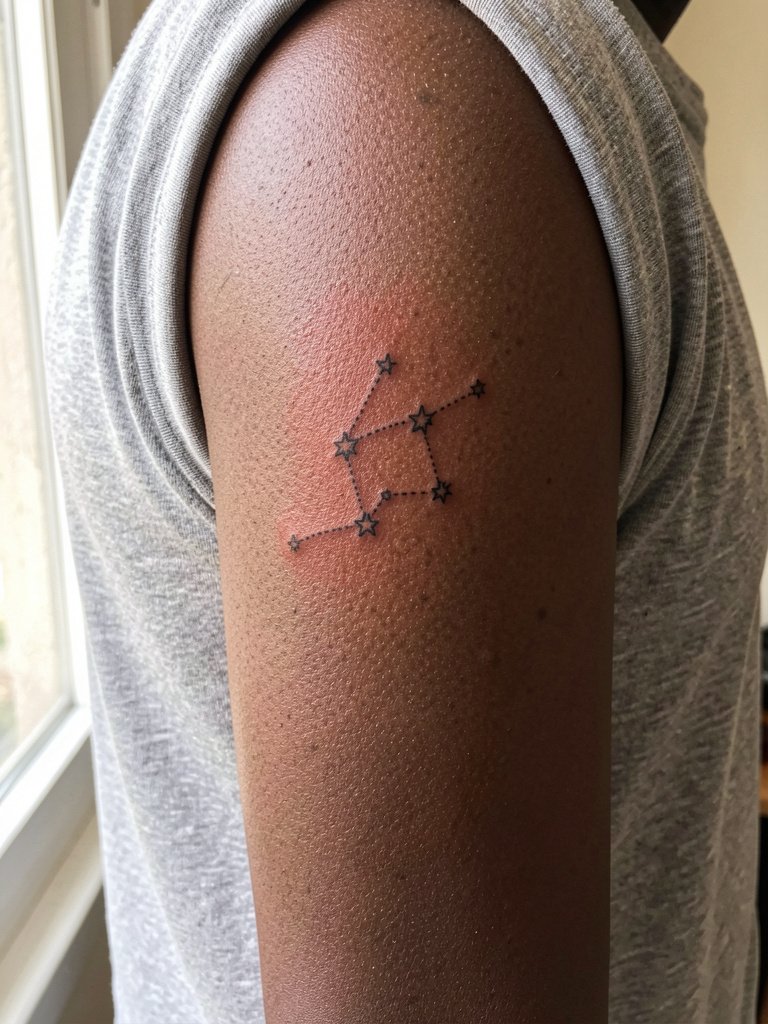
Constellation clusters read well if stars are scaled slightly larger than micro dots. I suggest modest spacing so the dotted connectors stay visible at year five. A frequent mistake is using tiny single-dots for stars that blur into a flecked line. Sessions are brief and healing is straightforward. Wear a loose tank top to the appointment so the artist can access the inner arm without you getting cold.
11. Thin Line Compass Point
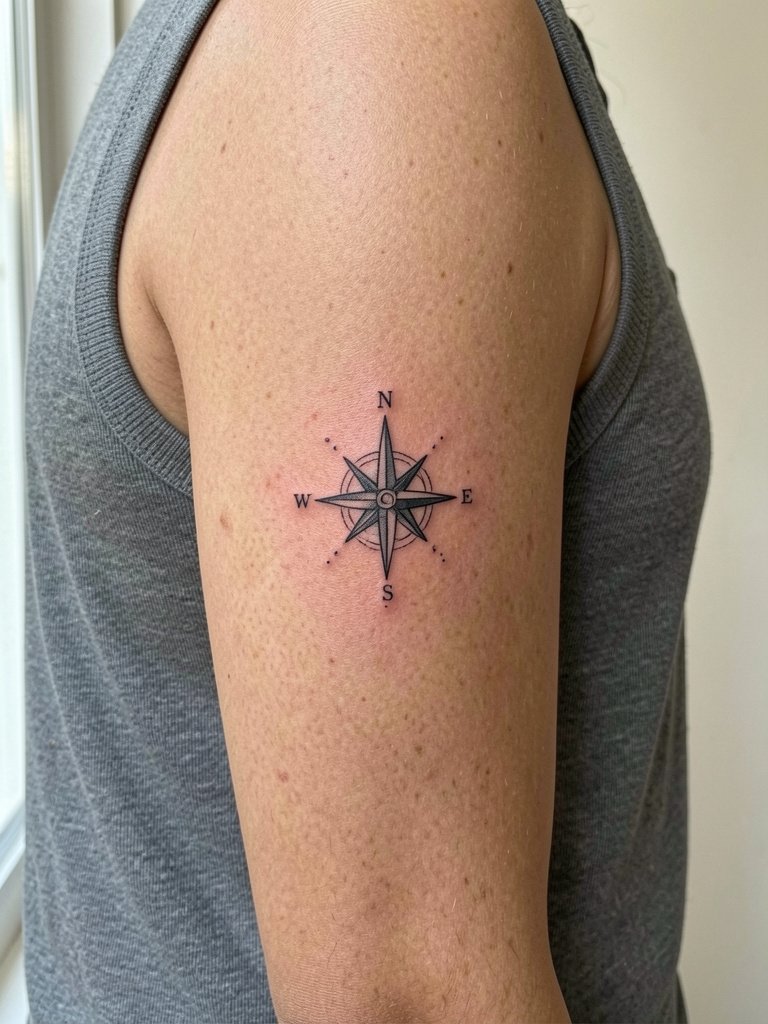
Compass points rely on symmetry to look intentional. Bring a mock-up that shows how the cardinal points align with the arm axis so the artist can center it accurately. The typical error is misalignment when the client expects the compass to face forward regardless of arm posture. Sessions are under ninety minutes and soreness is mild. For a subtle reveal, pair with a slender watch band worn slightly above the piece.
12. Tiny Botanical Heart Lock
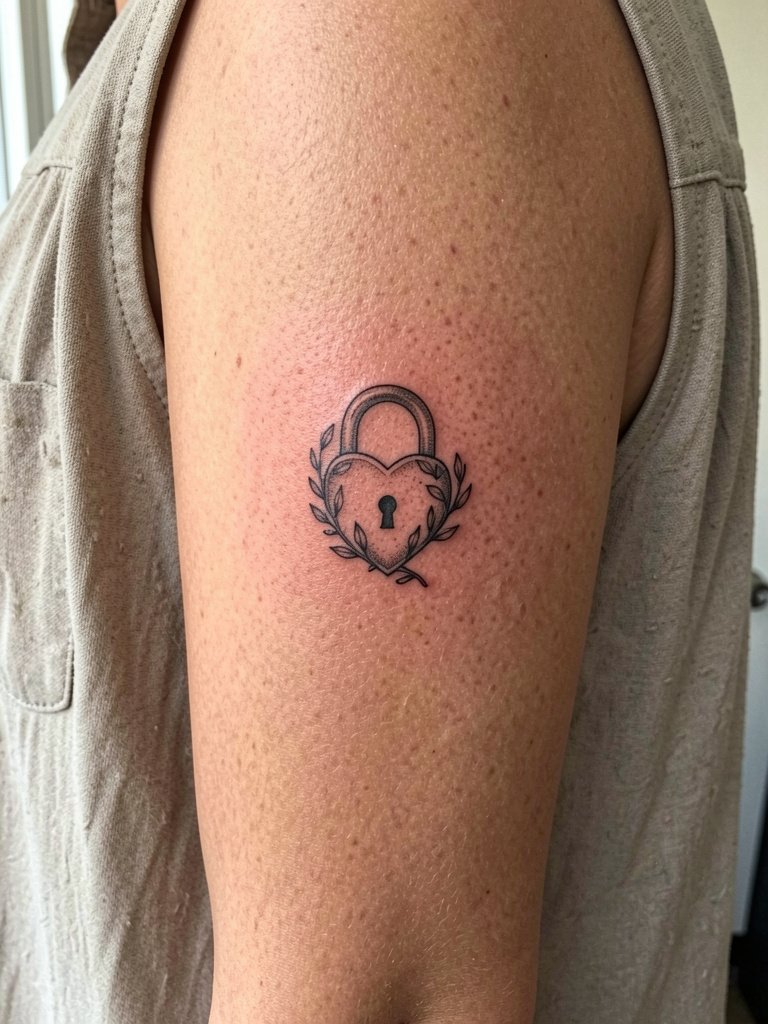
A lock motif balances ornament and durability if the engraving lines are slightly bolder than a single needle. Ask the artist to show a transfer so you can check line spacing inside the heart. The common mistake is cramming too many flourishes into the body of the lock, which muddies with age. Session time is short and discomfort manageable. Style it with a delicate chain necklace that draws the eye diagonally toward the inner arm.
13. Dot-Work Crescent Cluster
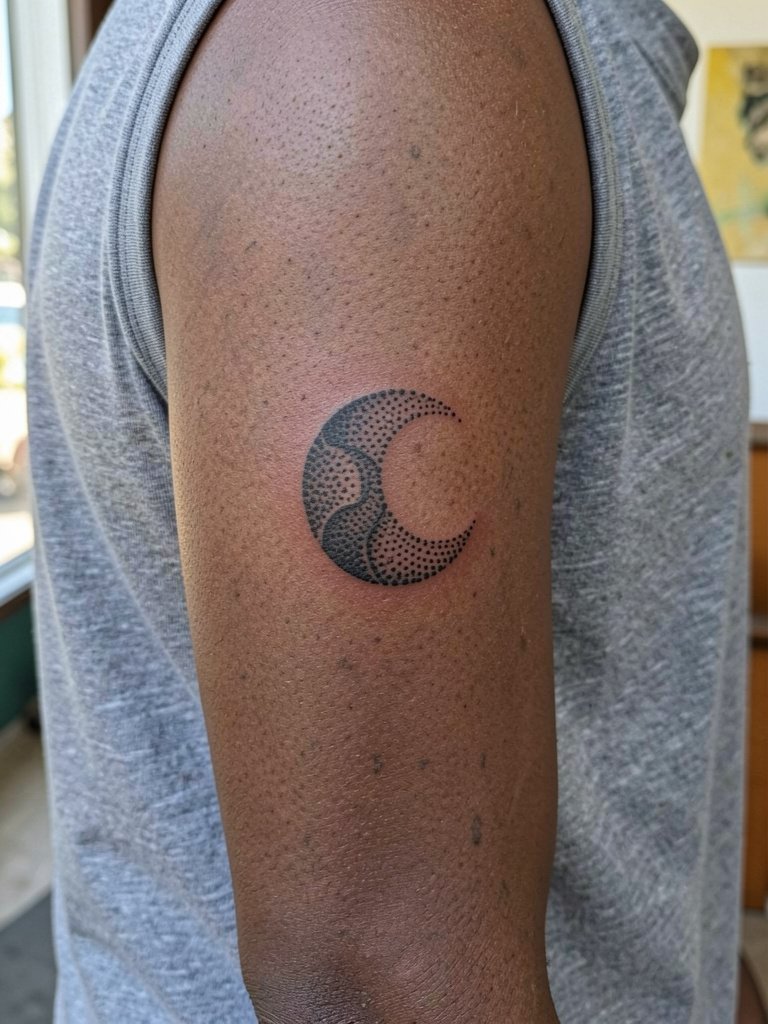
Layered dot crescents make a small composition that reads textured rather than flat. When you plan this, ask how the dot density will age, and request slightly wider spacing in the outer crescents. A mistake is requesting ultra-tight dot fields which merge into patchiness. Sessions are typically one to one and a half hours. For presentation, try a short-slee crop top that leaves the inner arm visible.
14. Small Anchor with Rope Detail
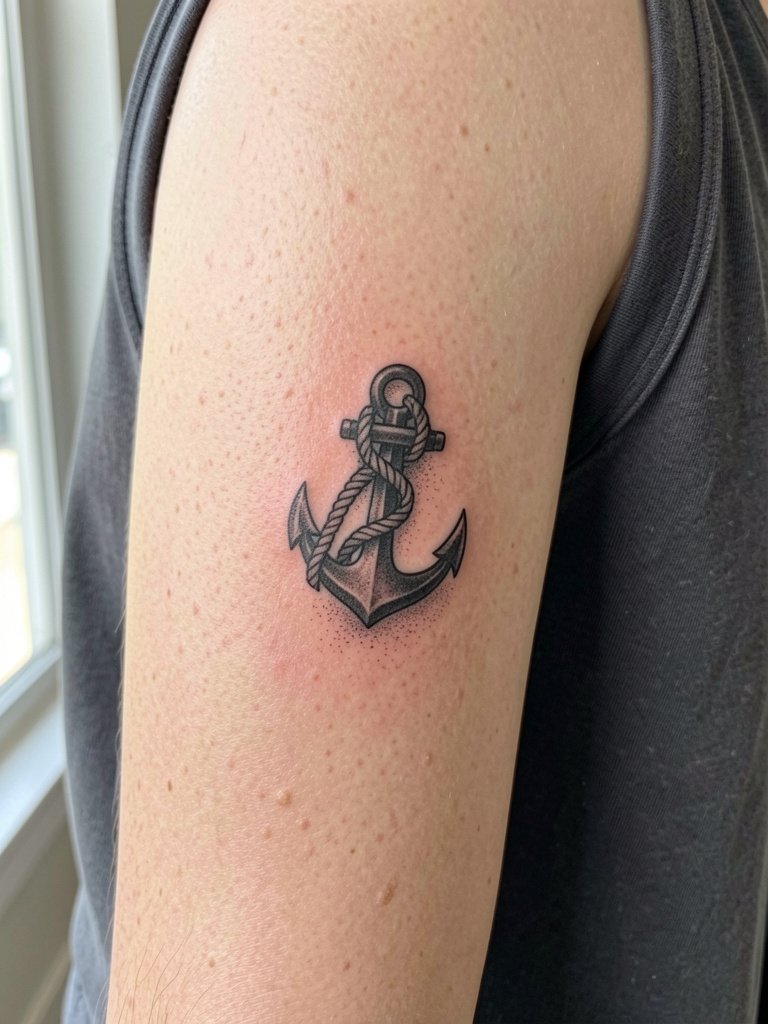
Anchors translate into bold silhouette at small scale if rope texture is rendered with selective linework. Specify that rope turns are suggested rather than densely cross-hatched, so the piece keeps clarity. The usual mistake is over-texturing the rope which fills in over time. Session time is moderate and tenderness is comparable to other inner arm pieces. Pair it with a nautical striped tee for coastal styling.
15. Tiny Crescent Moon with Star Accent
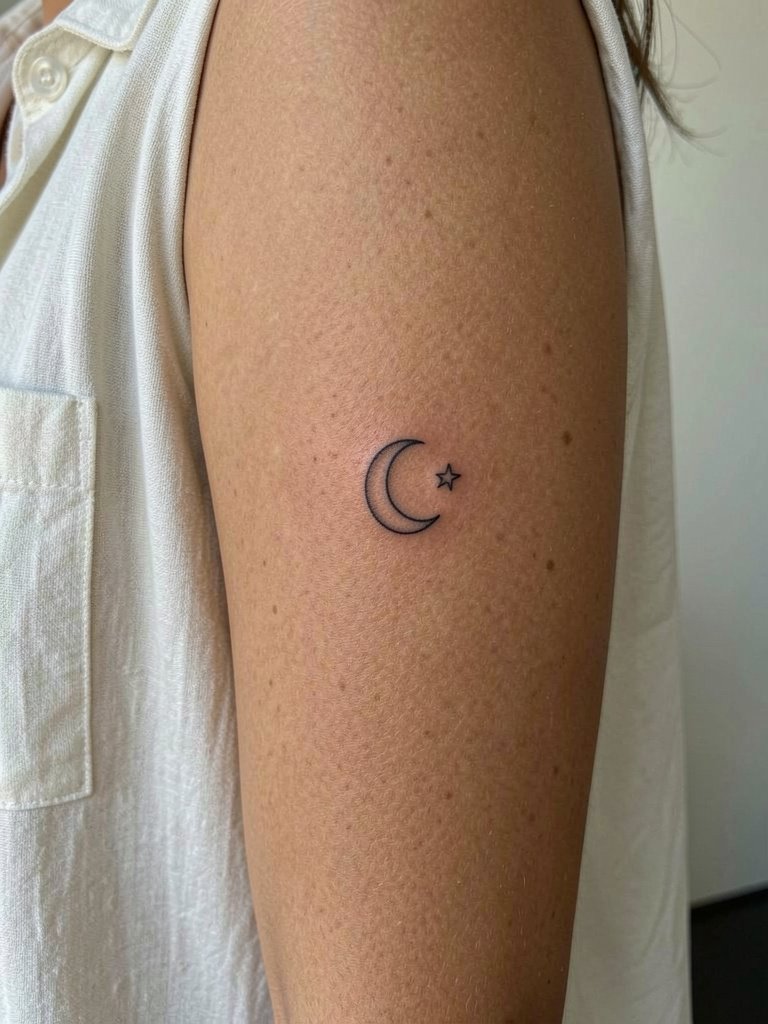
The moon-plus-star combo is classic and low-risk if the crescent gets a slightly heavier outer line. People sometimes choose ultra-fine uniform lines that soften into gray smudges, so request the reinforced outer edge. Sessions are short and discomfort is mild. For evening wear, a halter-back dress shows the inner arm in certain poses without full exposure.
16. Tiny Geometric Flower
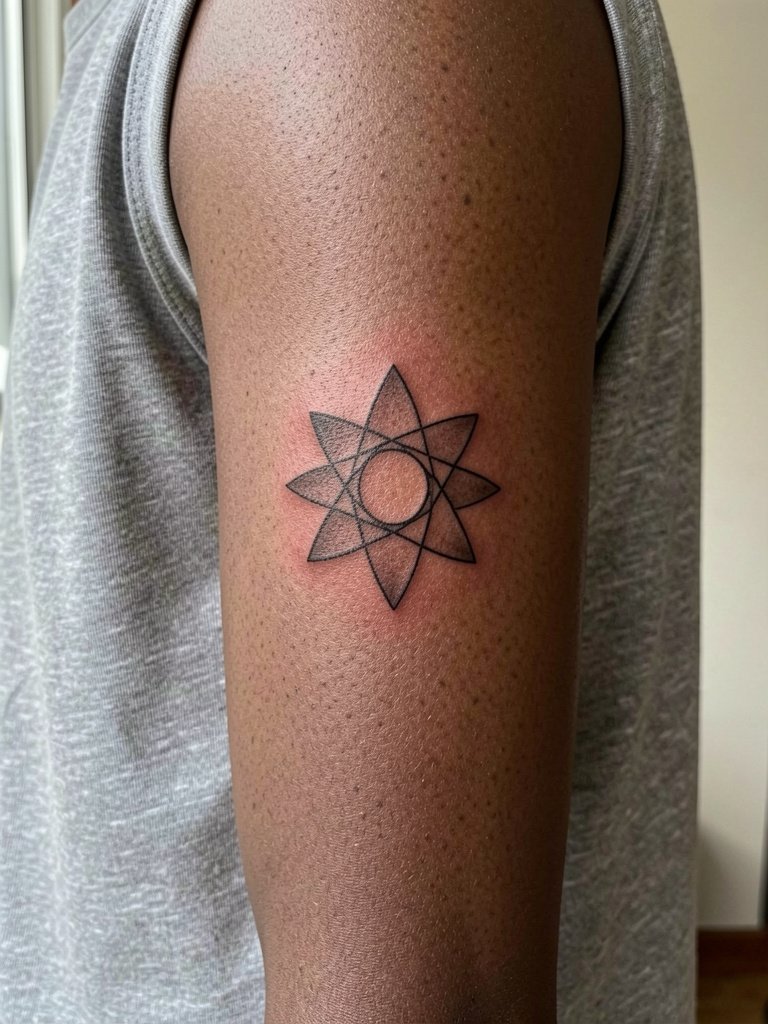
Geometric flowers age well when symmetry is given small tolerances. Request that the artist check the stencil at life-size and test rotation so the petals sit naturally with the arm curve. The error is assuming digital symmetry will match the body contour and skipping the physical transfer test. Sessions tend to be short with mild soreness. Wear a lightweight camisole for easy studio access.
17. Single Needle Tiny Paw Print
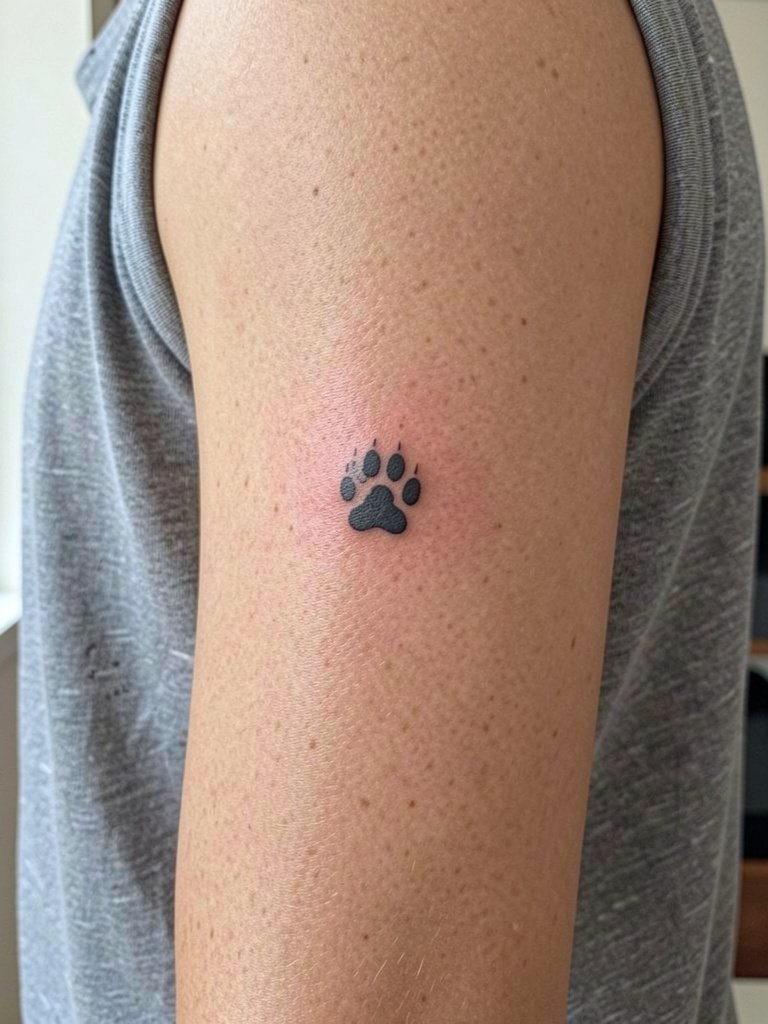
Paw prints are sentimental and simple. Ask the artist to slightly separate the pads so the negative space remains visible after healing. The common mistake is compressing the pads into one dense shape that softens into a blob. Sessions are very brief and pain is low. Pair with casual tees and a thin leather bracelet on the wrist below the piece.
18. Small Scripted Date in Roman Numerals
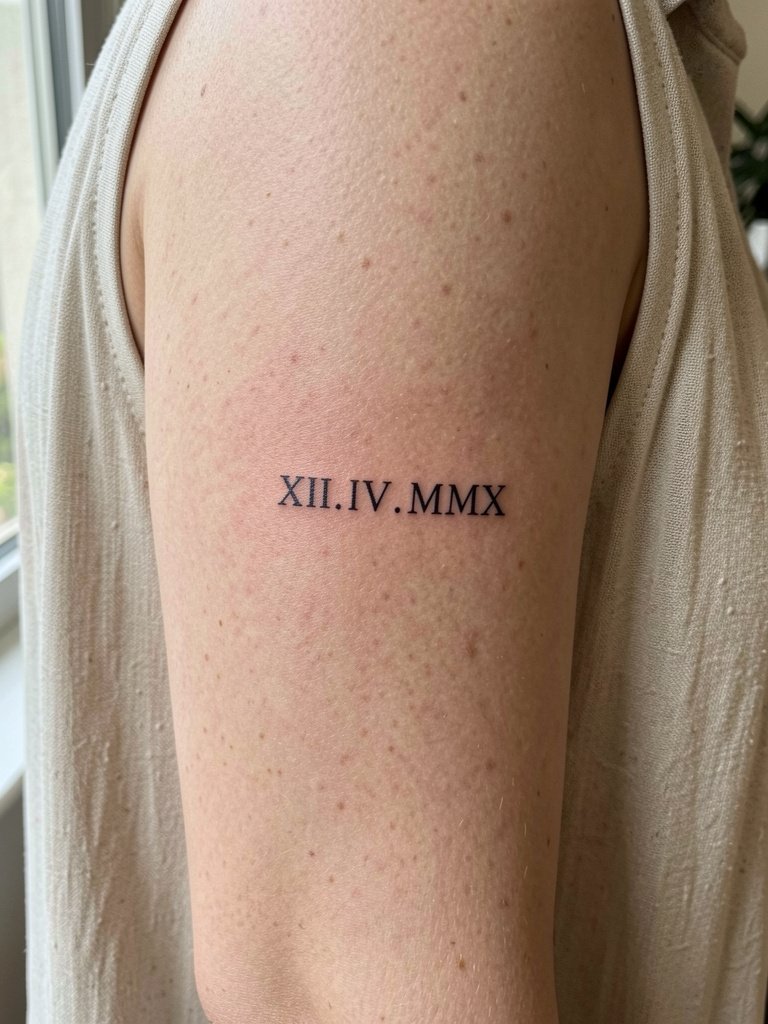
Roman numerals hold up when the strokes are slightly thicker than ultra-fine text. Bring the exact numerals you want written out so the artist can proof the spacing. A mistake is copying a typed font without checking scale for the arm's soft skin. Sessions are quick and post-session soreness mild. For a discreet highlight, pair with a button-up shirt left slightly open so the inner arm shows with movement.
19. Tiny Crescent and Wave Motif
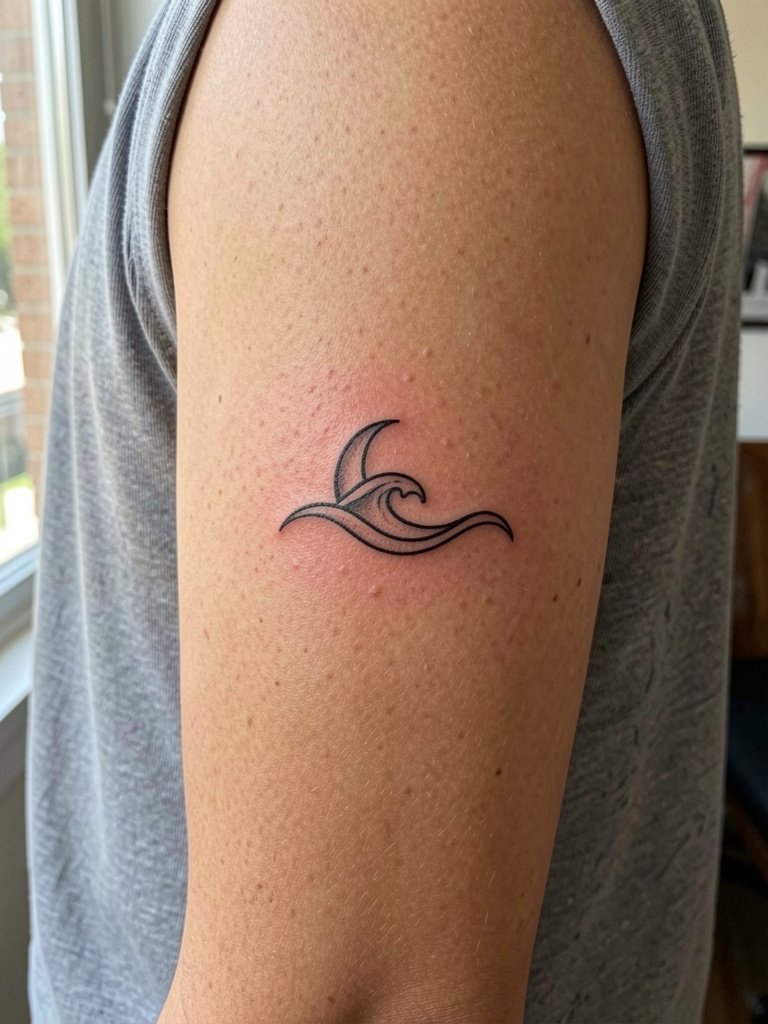
Paired motifs like moon and wave read as a tiny narrative and keep the inner bicep visually interesting. Ask your artist for spacing that allows negative space between symbols to prevent merging. The frequent mistake is crowding symbols to keep the piece small, which sacrifices clarity. This is a short session and the tenderness afterward is low. For beach days try a lightweight cover-up shirt that still exposes the inner arm.
20. Micro-Blackwork Mandala Accent
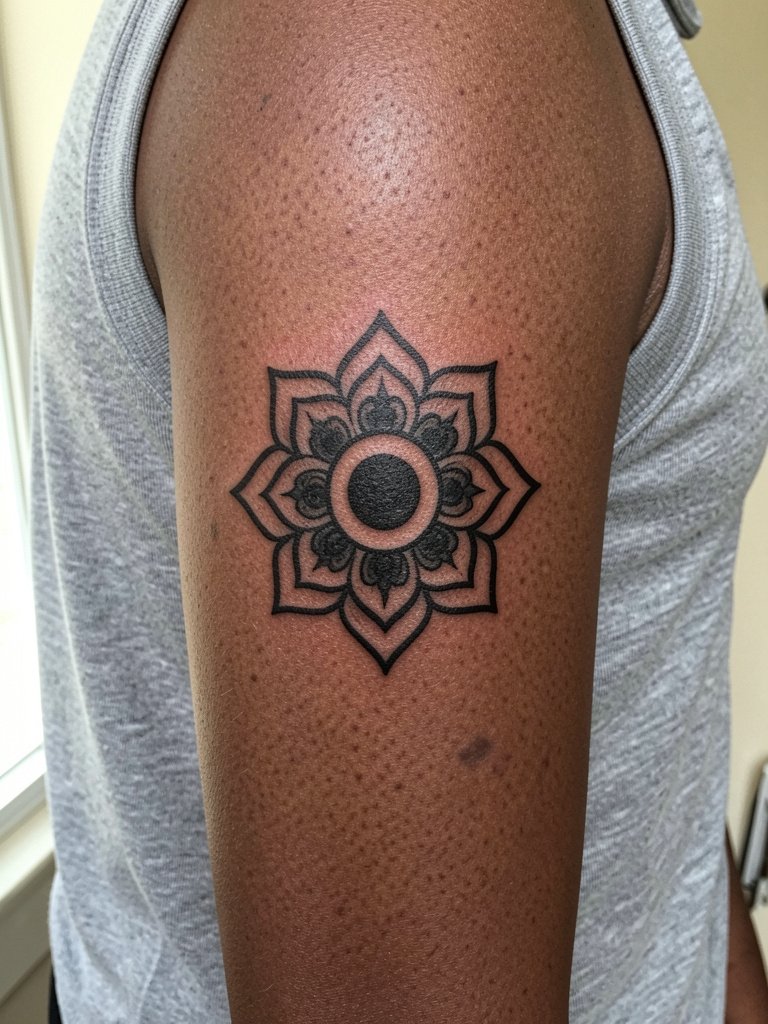
Micro-mandala details need a strong center to avoid looking scrappy as the outer dots soften. Specify a bold center dot and slightly wider petal spacing to the artist. A controversy exists around micro blackwork on soft tissue areas. One camp warns that high-contrast black centers can sink and bloom on inner arm skin within two years. The other camp points to careful depth control and says a skilled blackworker can maintain crisp edges for years. Sessions are often ninety minutes and may need a touch-up at year two. To style, try a sleeveless wrap top that frames the inner arm.
21. Tiny Botanical Crescent Wreath
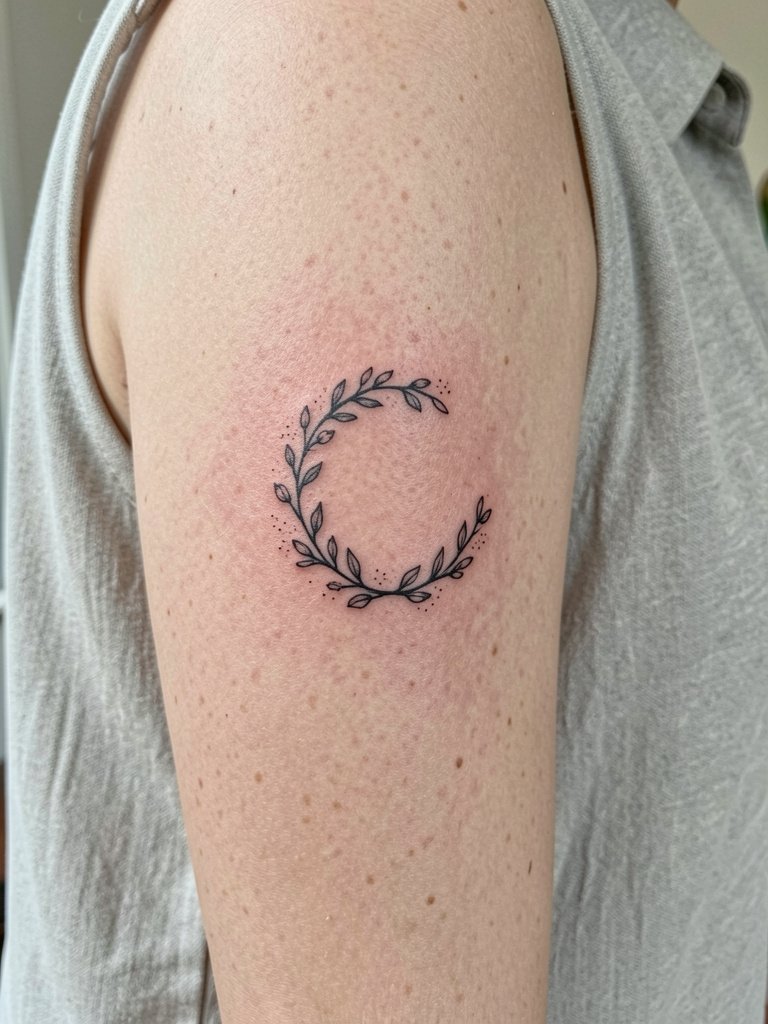
A crescent wreath reads gentle and feminine on the inner arm. Ask for slightly bolder stems and sparser leaves so the composition keeps clarity as the skin shifts. The mistake is over-detailing leaves which merges into a smudged band over time. Sessions are under ninety minutes and pain is mild. Pair it with a flowy short-slee dress for summer looks that let the inner arm show.
22. Tiny Arrowhead Cluster
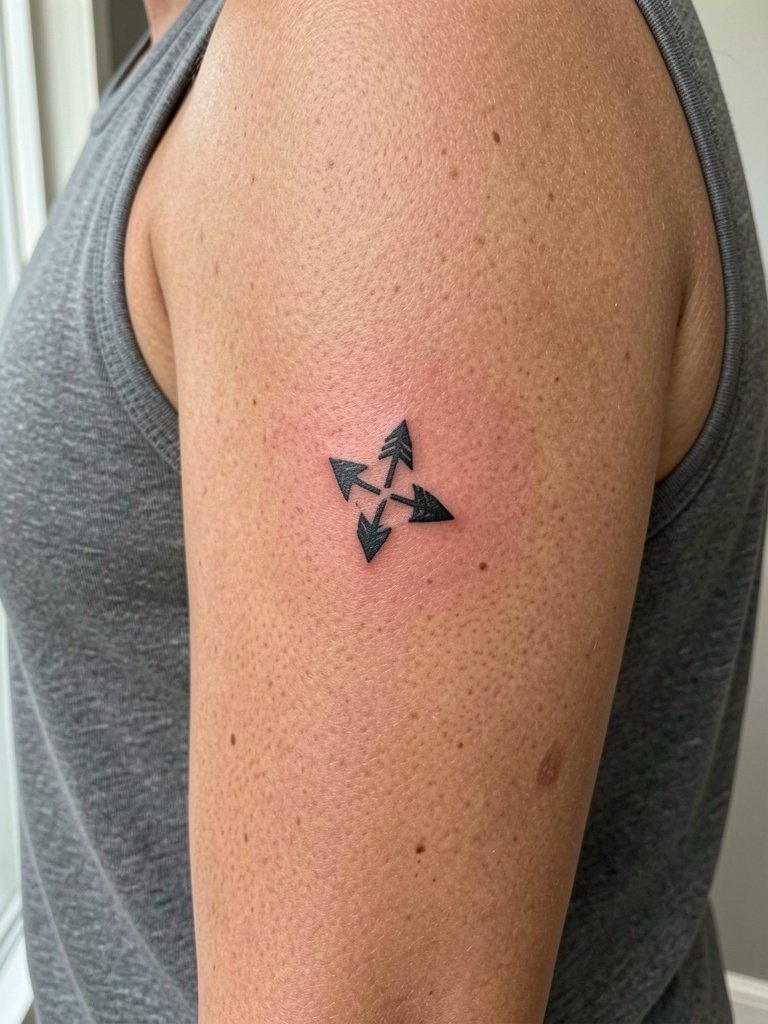
Clustered arrowheads feel graphic and hold because they use shape more than fine interior detail. Be explicit about how far apart each arrowhead sits. A common error is making them almost touch, which invites merging. Sessions are quick and discomfort low. For casual wear pair with a rolled-slee cuff tee that places attention on the inner arm.
23. Micro-Black Crescent with Tiny Leaf
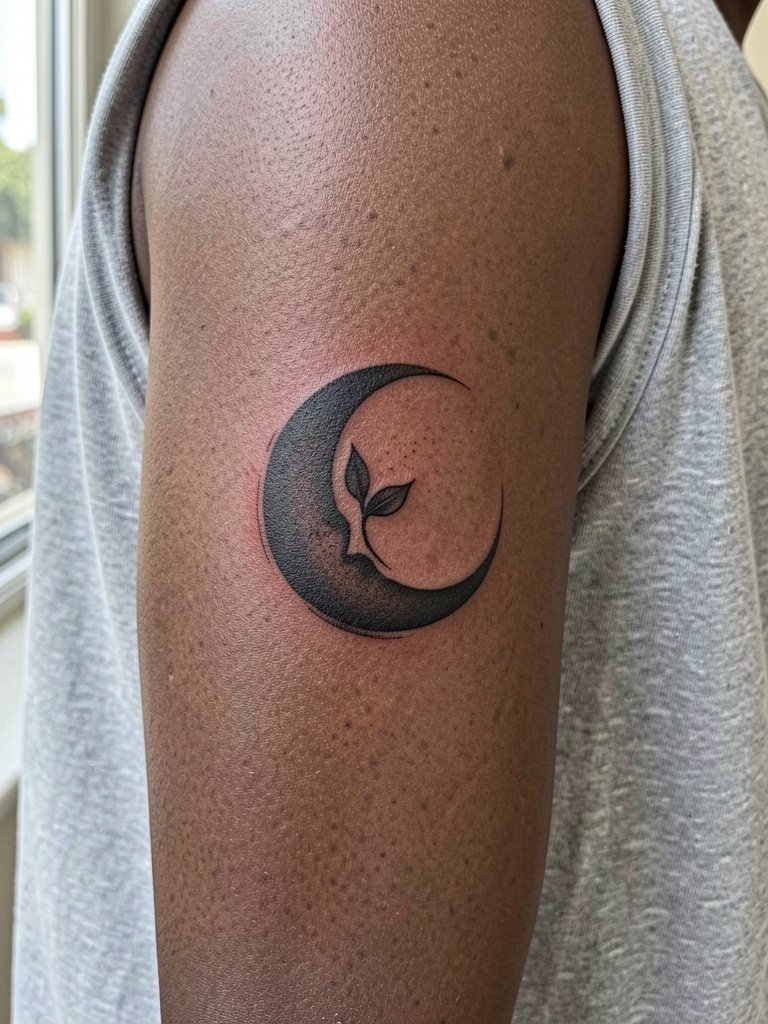
Combining a bold micro crescent and a tiny leaf balances blackweight and delicacy. Request the artist keep the leaf slightly separated from the crescent to protect its silhouette long term. The mistake is placing the leaf too close so lines conjoin as the skin softens. Sessions are short and tenderness is minimal. Style it with a sleeveless denim vest layered over tees for a casual reveal.
24. Tiny Key with Minimal Teeth
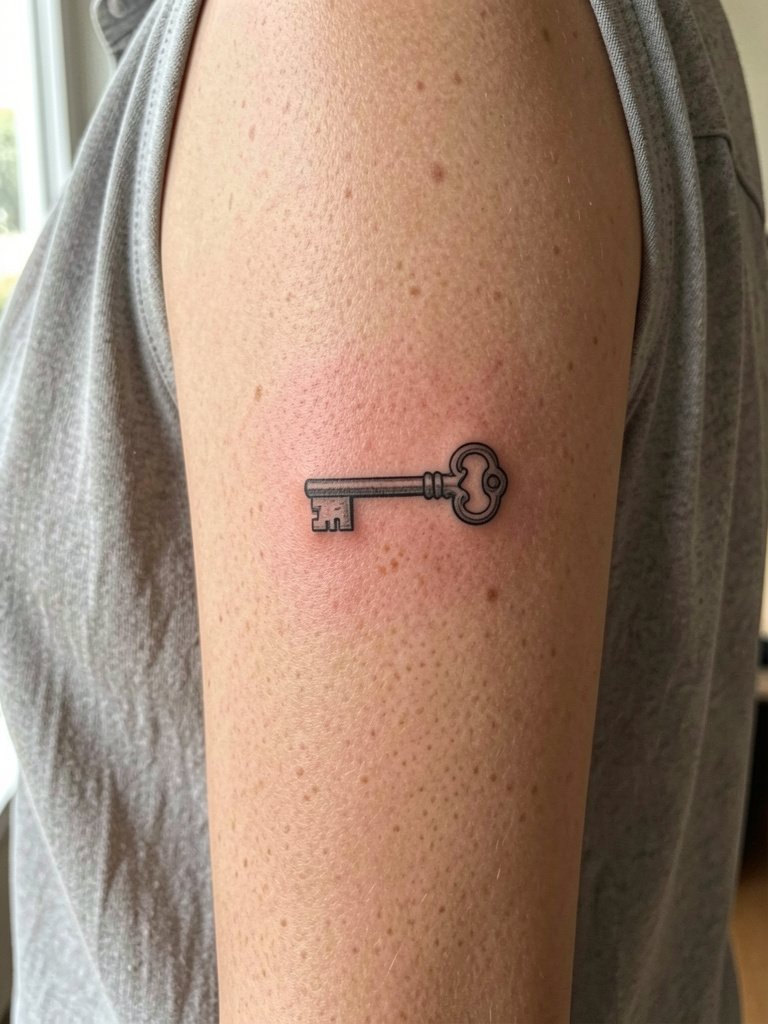
Keys look deliberate when the teeth are implied rather than finely notched. Tell the artist to suggest teeth with short notches rather than full microscopic cuts. The common mistake is over-detailing the shaft which fills in. Sessions are brief and pain is low. For nights out try a v-neck camisole that highlights the inner arm.
25. Tiny Botanical Line Cluster
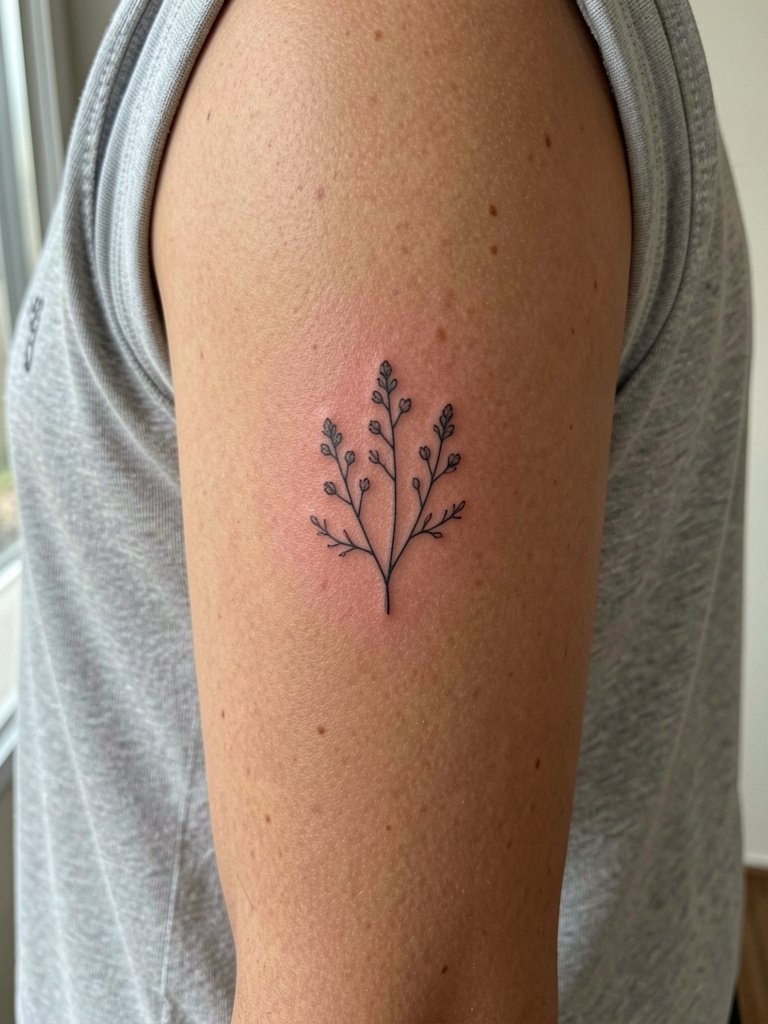
Clusters of stems look organic when the negative space is intentionally part of the design. Ask for a transfer that shows spacing between stems. The frequent error is making stems too close which reads as a blob later. Sessions are short and soreness fades quickly. Pair this with a linen button-down worn open to show the inner arm.
26. Tiny Geometric Sun
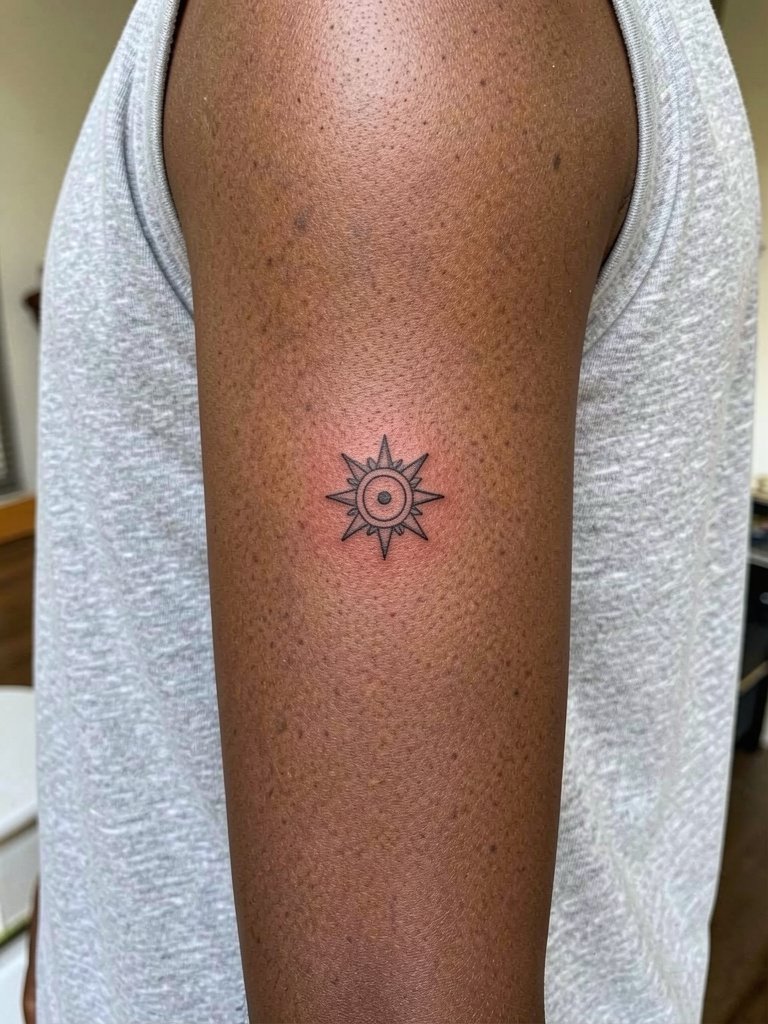
Sun motifs need a bold center to keep definition as outer rays soften. Ask the artist to thicken the central ring and keep rays short and spaced. A common mistake is long needle rays that blur into an indistinct halo. Sessions are quick and healing is uncomplicated. For showcasing, a sleeveless wrap top keeps focus on the inner arm.
27. Tiny Lock and Key Pair
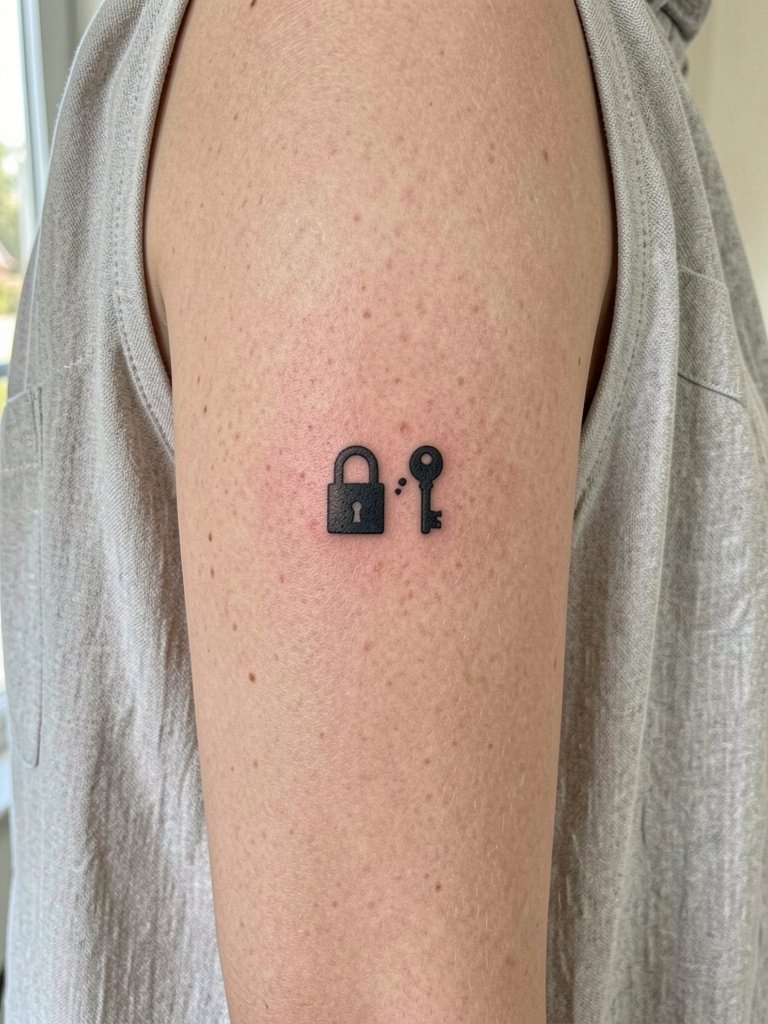
Pairs like lock and key read as a tiny story and remain clear when each element is given breathing room. Tell the artist the exact spacing you want so the pieces do not visually merge over time. The usual mistake is cramming both into a micro area which reduces longevity. Sessions are brief and discomfort low. For accessories pair with a thin charm bracelet that complements the tiny motifs.
Frequently Asked Questions
Q: How painful is an inner bicep tattoo compared with other upper-arm placements?
A: The inner bicep is softer and more sensitive than the outer upper arm, but it is less painful than sternum or ribs. Expect moderate tenderness during and for a few days after the session, especially when the arm rests against surfaces. Short pieces take less than an hour, while color or stipple work can approach two hours.
Q: Will fine-line work on the inner bicep blur faster than on the forearm?
A: The inner bicep can be more prone to line softening because the skin is supple and moves against the torso. One camp warns that single-needle fine lines will blur within two to five years if placed too small. The other camp says that with slightly increased line weight and careful depth control, fine-line work can remain legible for much longer. Ask for a slightly reinforced outer edge rather than ultra-hairline strokes.
Q: How should I dress for my session so the artist has access to the inner bicep?
A: Wear a sleeveless tank top or a loose sleeveless tee so the artist can work without you adjusting fabric. If you prefer more coverage on the way home, bring a lightweight zip or button top you can put on without rubbing the fresh tattoo. For small pieces a sleeveless blouse works fine.
Q: Where can I find healed examples and portfolios without naming specific artists?
A: Search platform hashtags like #InnerBicepTattoo and #MicroBlackworkInk and use location filters on social platforms to see healed photos in different skin tones. Reddit tattoo threads and portfolio aggregators let you filter by placement and technique, which helps you compare how similar pieces age across a range of people.
Q: How soon will I need a touch-up for micro detail on the inner bicep?
A: Touch-up timing depends on scale and contrast. Many tiny single-needle pieces benefit from a check-in at eighteen to twenty-four months. If you want crisp black centers or tighter stipple, plan on a potential touch-up in the second year and discuss expected longevity with the artist during the transfer phase.
