
I spent months saving wave references on my phone before I realized the real choice wasn't just a cool crest — it was picking a style that ages well on my skin. These 27 wave tattoo ideas reflect motion, memory, and the kinds of pieces artists keep recommending to clients in 2026.
This list focuses on minimalist, Japanese traditional, and watercolor vibes — placements that work from wrist to back and sleeves. From what I've seen, fine line waves are trending for subtle meaning, while Japanese swirls still dominate bold sleeves.
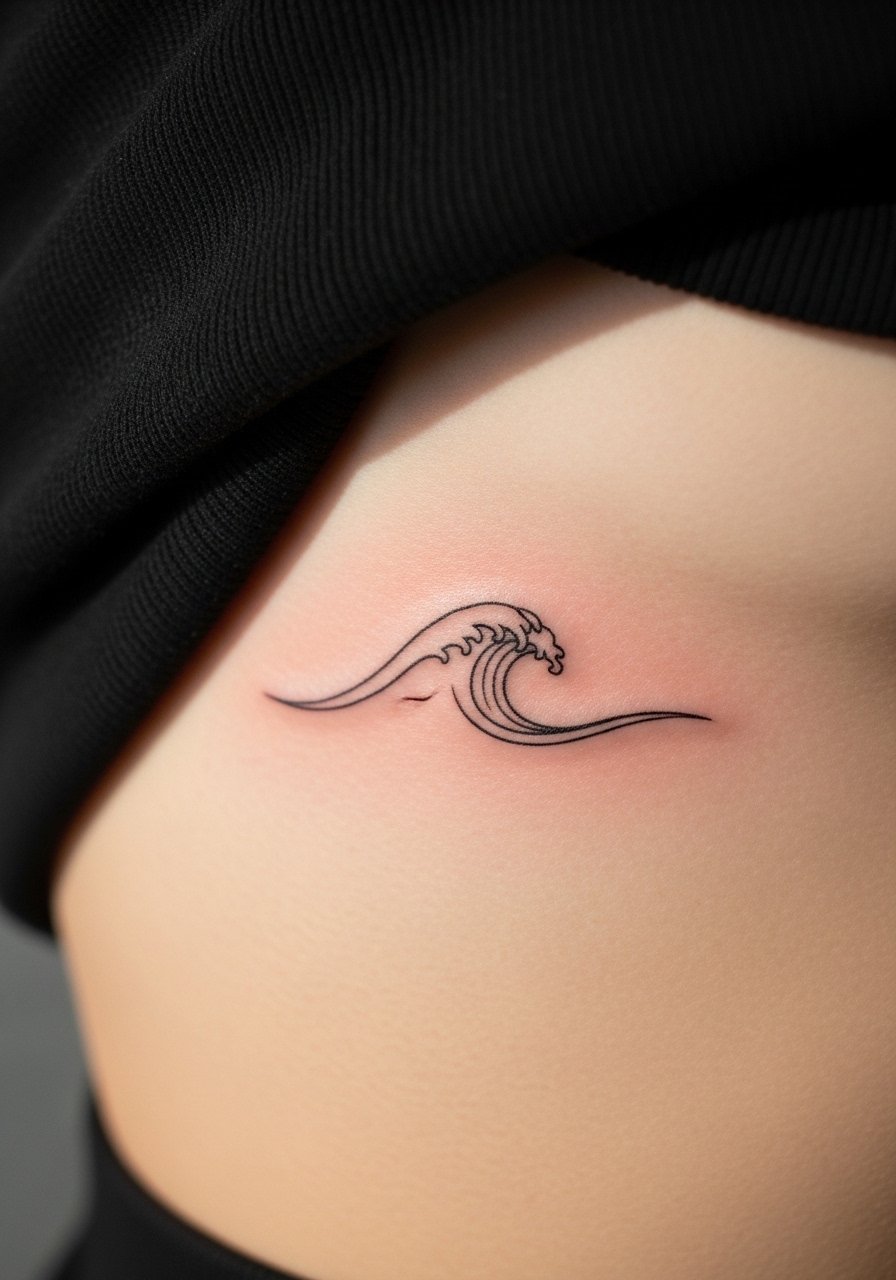
1. Minimalist Single Wave Line on Wrist
Style/Technique: Minimalist / Linework
Pain Level: Low (2-3/10)
Session Time: 30–60 minutes
Best For: First tattoo, discreet visibility
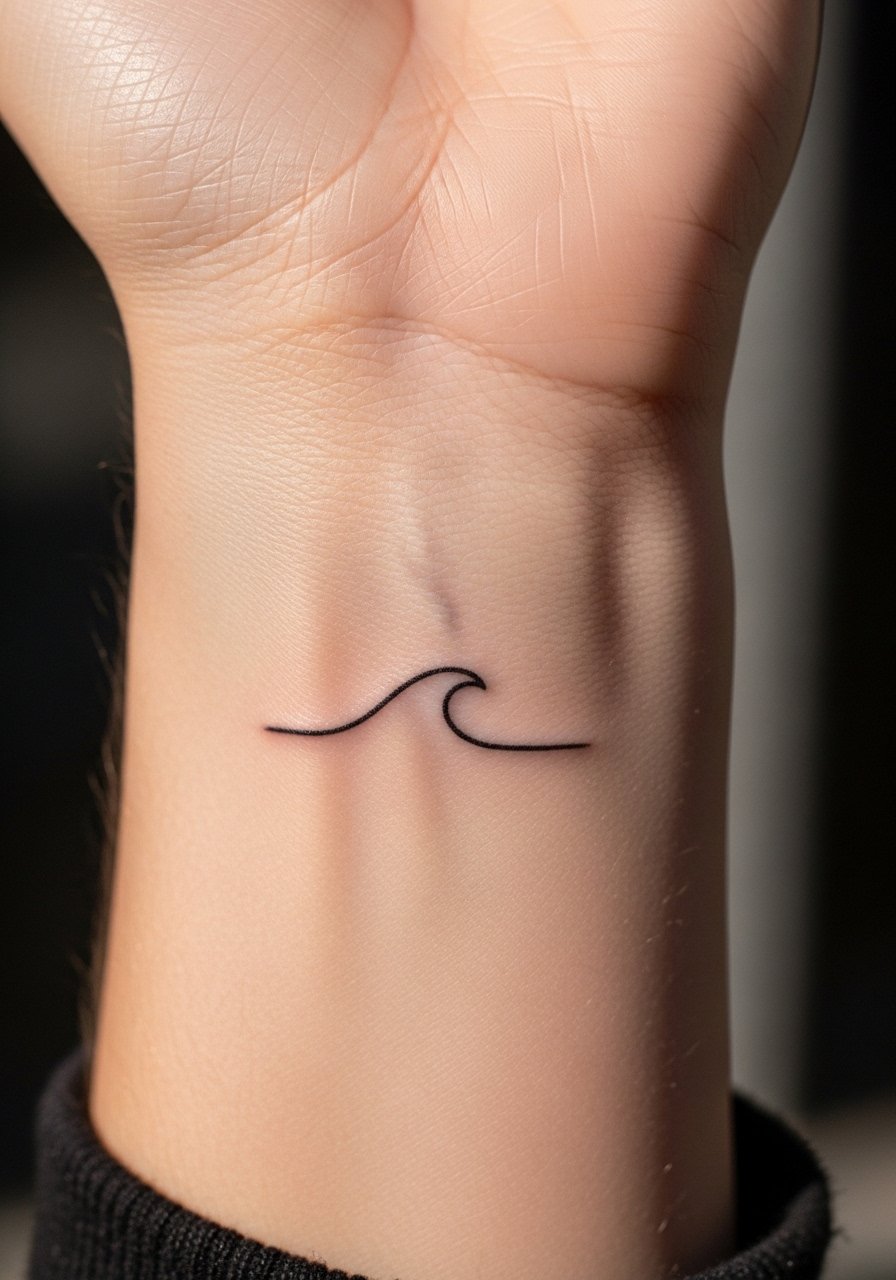
I got a wrist wave like this to mark personal change. It reads clean in daily life and hides under a watch easily. Pain is low; healing is quick if you keep it moisturized. Ask for slightly bolder lineweight if you want longevity — ultra-thin lines can blur over years.
2. Tiny Tide Wave Behind Ear
Style/Technique: Minimalist / Single Needle
Pain Level: Low (2-4/10)
Session Time: 20–40 minutes
Best For: Hidden, subtle symbolism
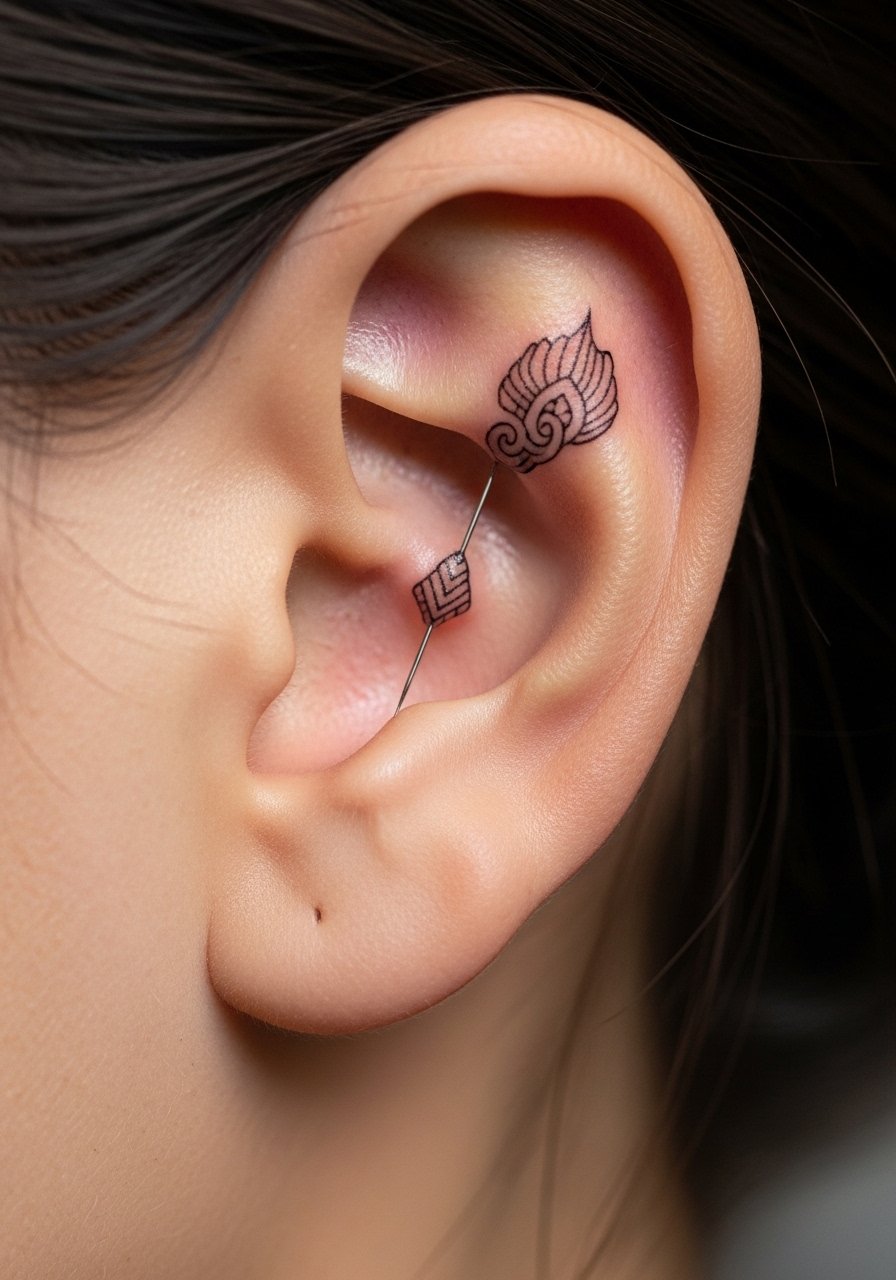
Behind-the-ear waves are discreet and feel personal. I chose this spot when I wanted meaning without visibility. Expect mild soreness; keep it dry initially. Tiny placements need an expert in fine line to avoid blowout — ask to see healed examples.
3. Small Wave and Moon on Inner Wrist
Style/Technique: Fine Line / Illustrative
Pain Level: Low (2-3/10)
Session Time: 30–60 minutes
Best For: Celestial balance, minimalist fans
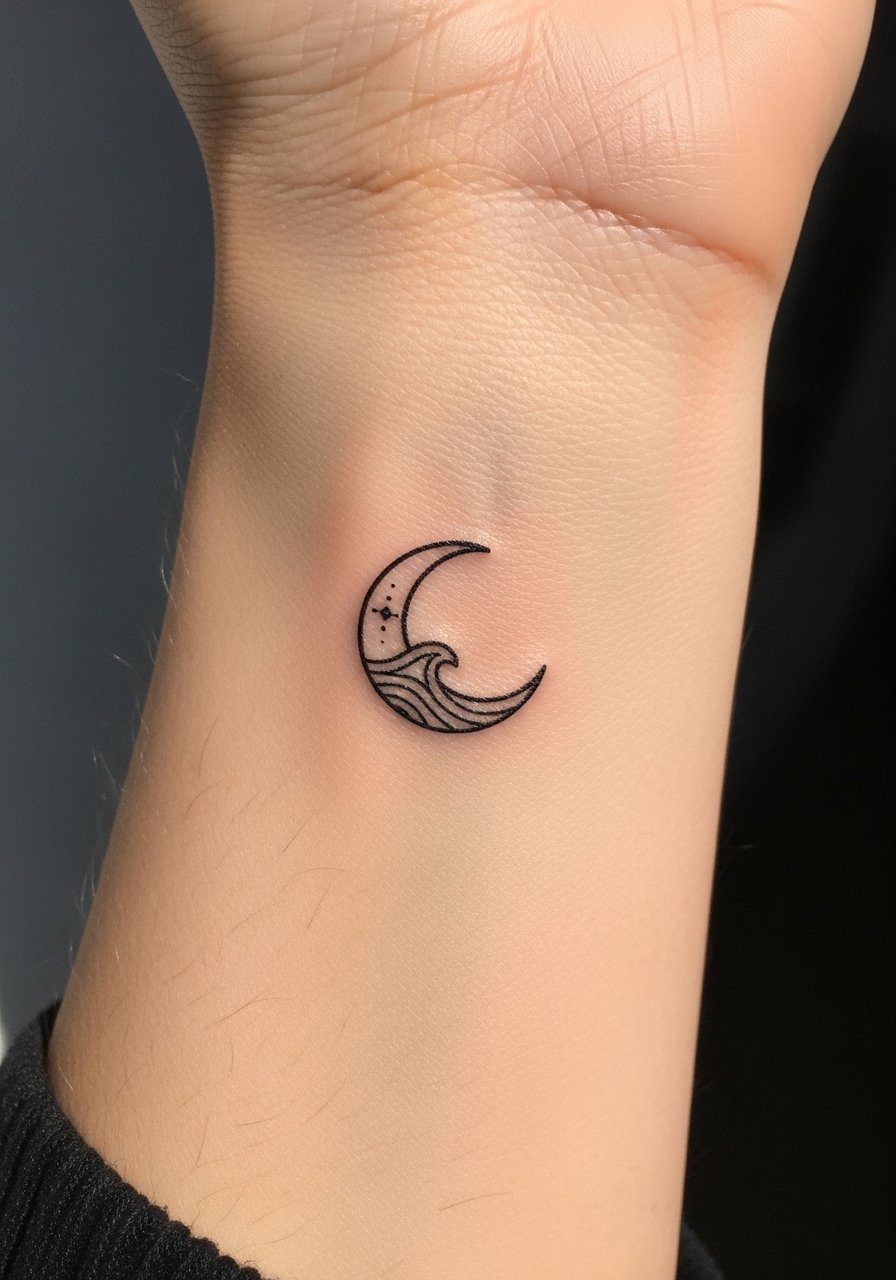
Pairing a crescent moon with a wave gives a calm-versus-motion story. I like this as a daily reminder of balance. Healing is straightforward; avoid heavy wrist flexing while it scabs. For richer contrast, ask your artist to strengthen key anchor lines.
4. Tiny Tide on Finger
Style/Technique: Minimalist / Linework
Pain Level: Medium (4-6/10)
Session Time: 15–30 minutes
Best For: Micro statement, very visible
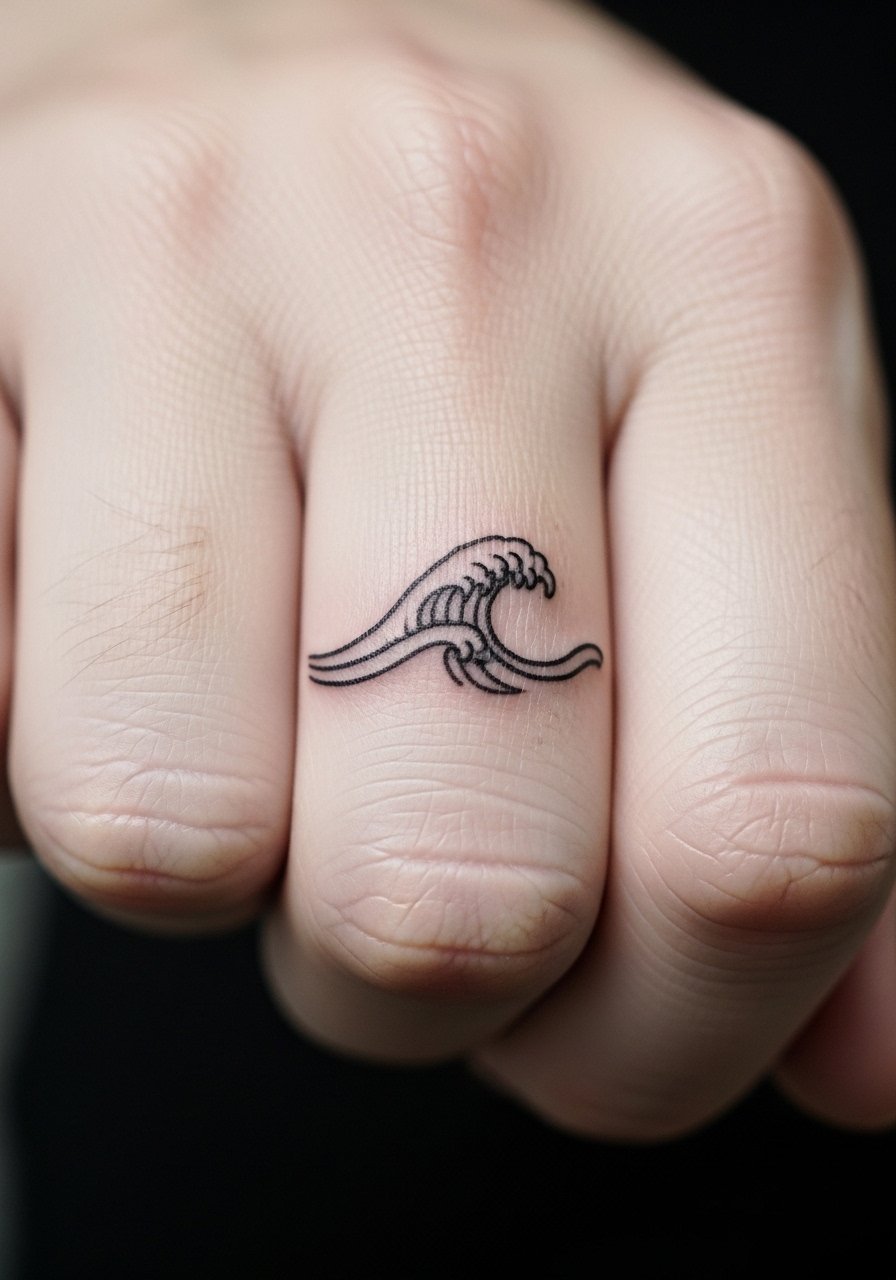
Fingers show character fast — they also fade faster. I got a finger tide to test pain tolerance; it was sharper than expected. If you want longevity, plan for touch-ups and use a tattoo balm once healed.
5. Sine Wave Minimalist on Ankle
Style/Technique: Geometric / Minimalist
Pain Level: Low-Medium (3-5/10)
Session Time: 30–60 minutes
Best For: STEM symbolism, clean aesthetic
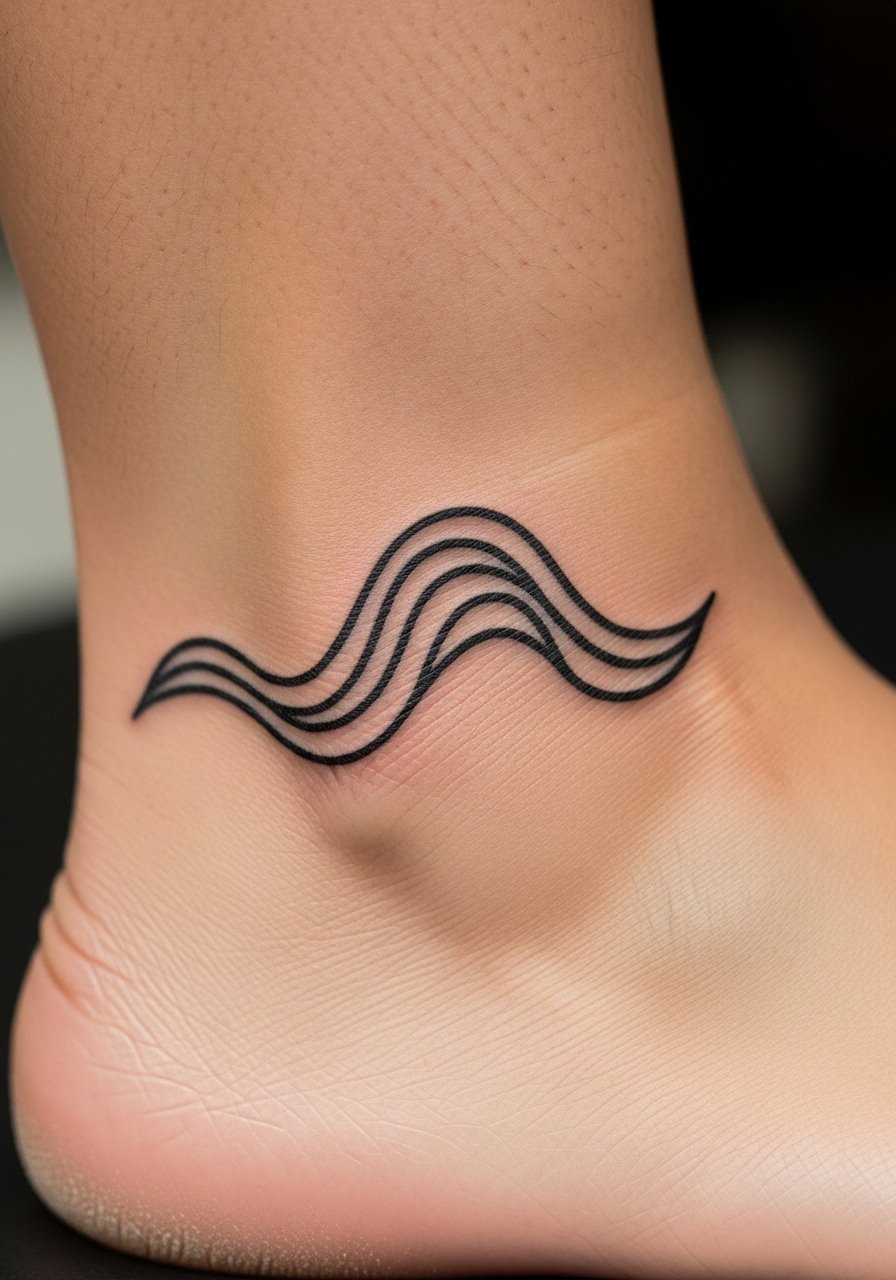
This appeals to people who like rhythm or math symbolism. I picked the ankle because it hides well yet reads clearly in sandals. Ask for a steady hand — geometric waves demand precision to stay crisp when healed.
6. Sound Wave Forearm Stripe
Style/Technique: Geometric / Linework
Pain Level: Low (3/10)
Session Time: 1–2 hours
Best For: Musicians, memorial audio tattoos
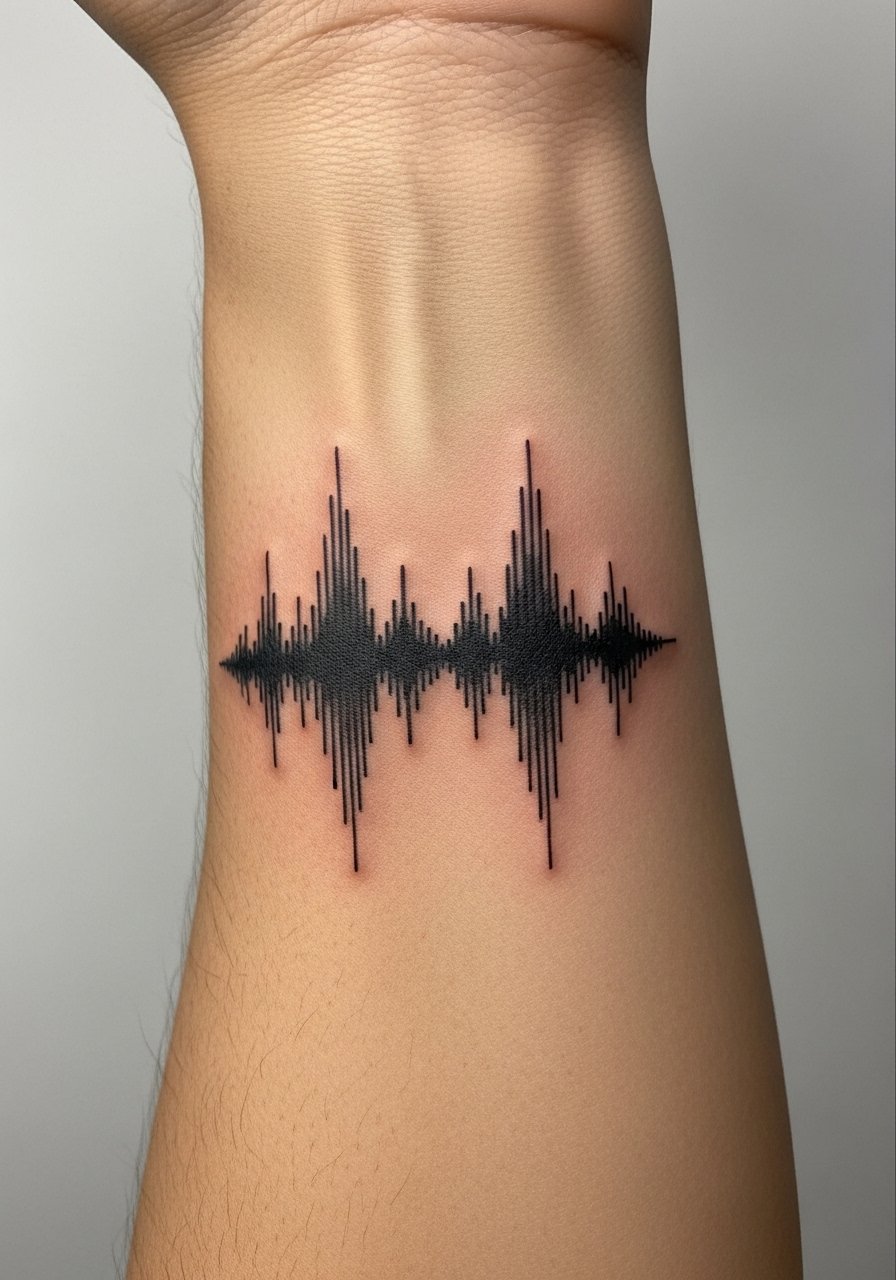
I had a voice clip translated into a waveform and tattooed it down my forearm. It's a conversation starter and very personal. Bring the audio file and ask the artist to simplify peaks so lines hold up. Clean aftercare prevents line loss.
7. Watercolor Wave Splash on Ribcage
Style/Technique: Watercolor / Painterly
Pain Level: High (7-8/10)
Session Time: 1–3 hours
Best For: Artistic pieces, medium visibility
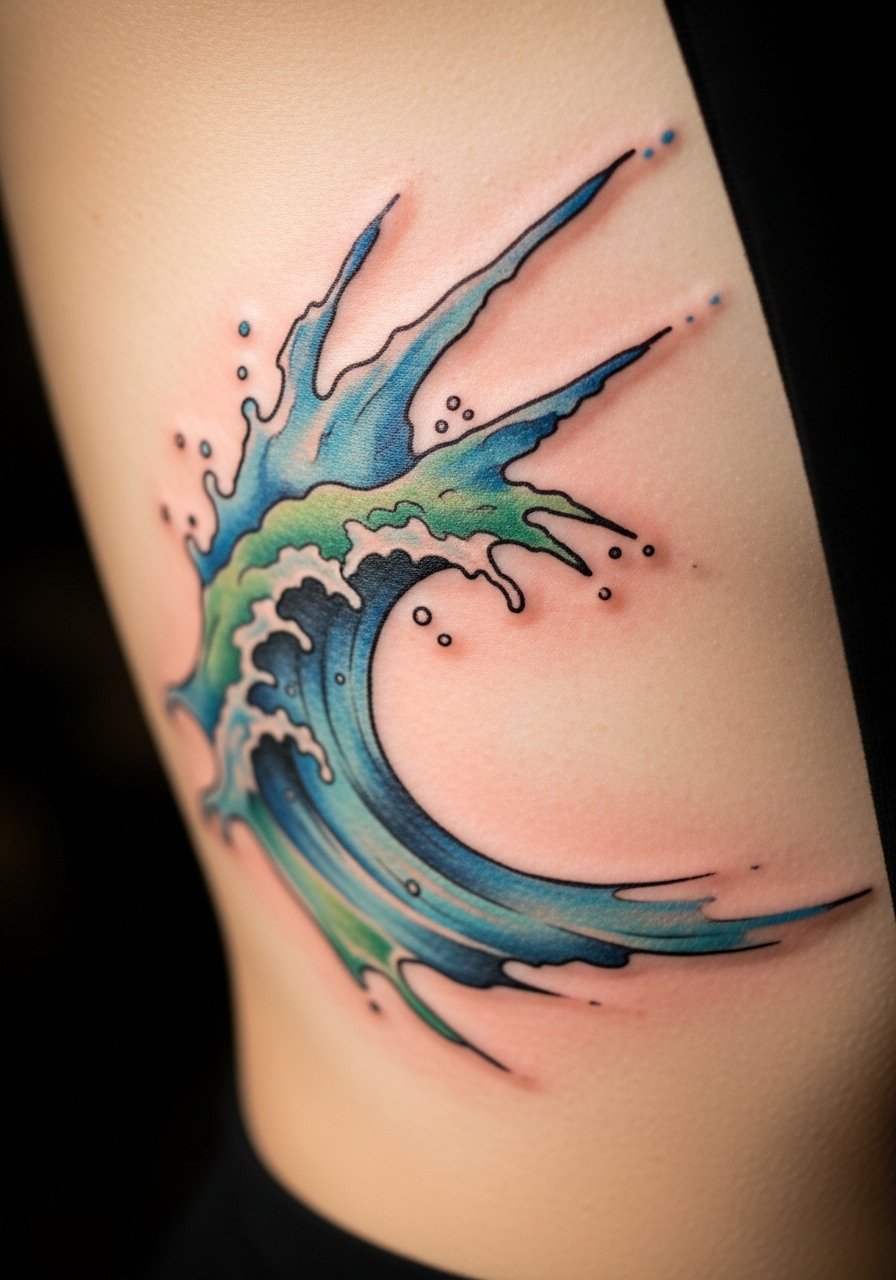
Watercolor waves feel like emotion on skin. I love the organic look, but from experience, colors can mute over time. If longevity matters, ask for black outlines or a hybrid blackwork base to hold the shape as pigments soften.
8. Crashing Wave on Rocks Forearm
Style/Technique: Traditional / Black & Gray
Pain Level: Medium (4-5/10)
Session Time: 1–2 sessions
Best For: Surfers, dramatic storytelling
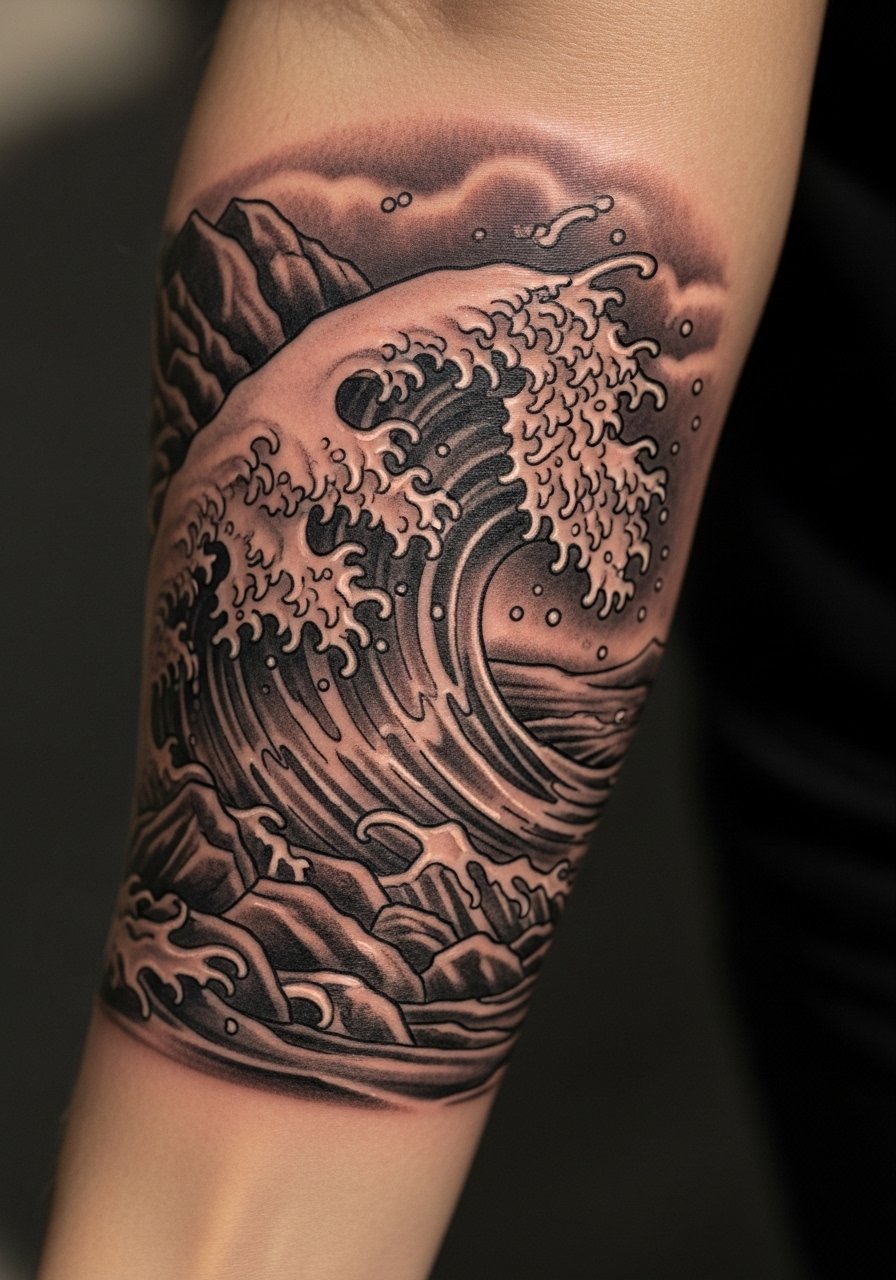
This is a go-to if you want motion and grit. I saw how strong lines and shading keep the scene readable as it ages. Forearm placement handles detail well, and the pain is manageable. Ask for bold anchors to prevent early blur.
9. Ocean Wave with Surfboard on Calf
Style/Technique: American Traditional / Color Accents
Pain Level: Low-Medium (3-4/10)
Session Time: 1–2 hours
Best For: Coastal roots, statement pieces
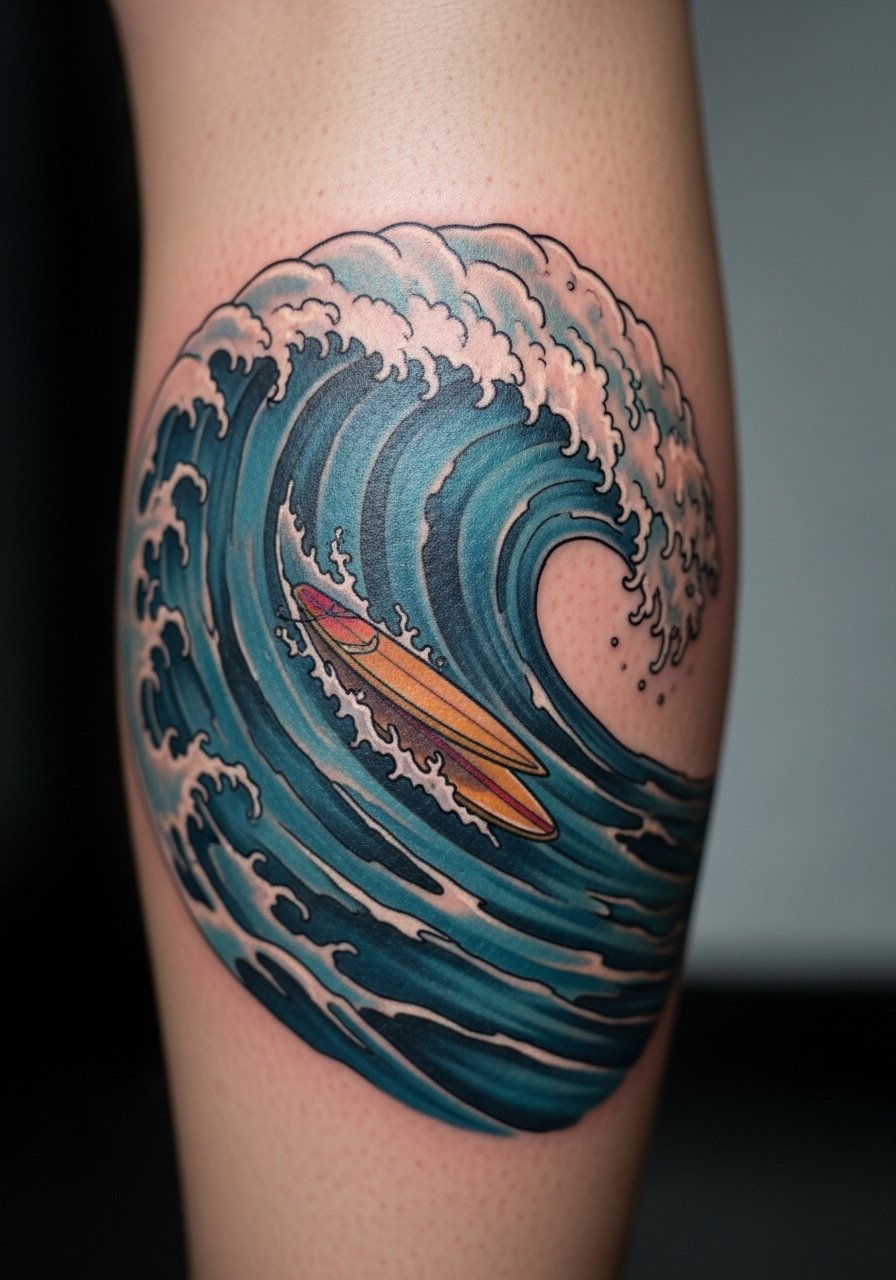
I picked a calf placement once for a surf memory. It feels narrative and stands up well to sun if you protect it. Traditional styles age nicely because of strong outlines—great if you want something that stays recognizably sharp.
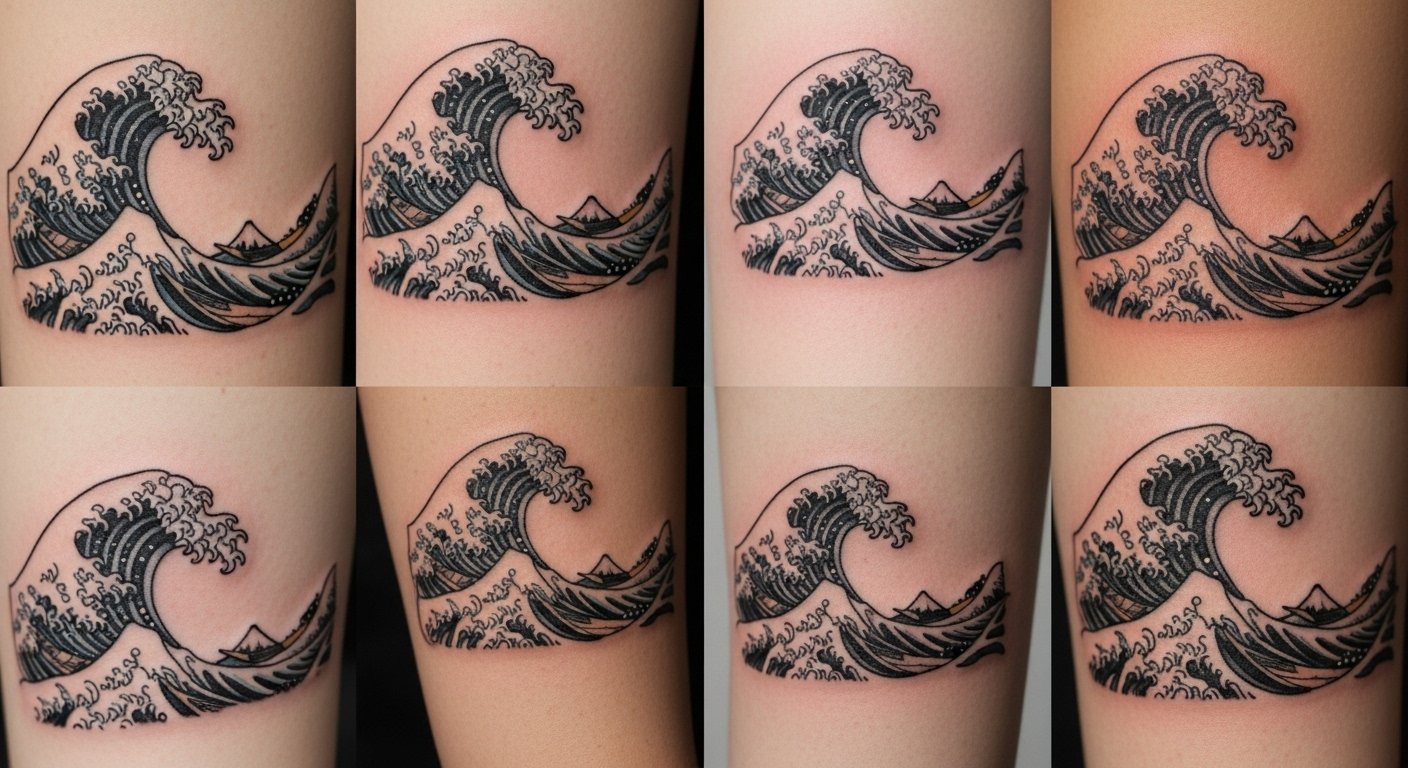
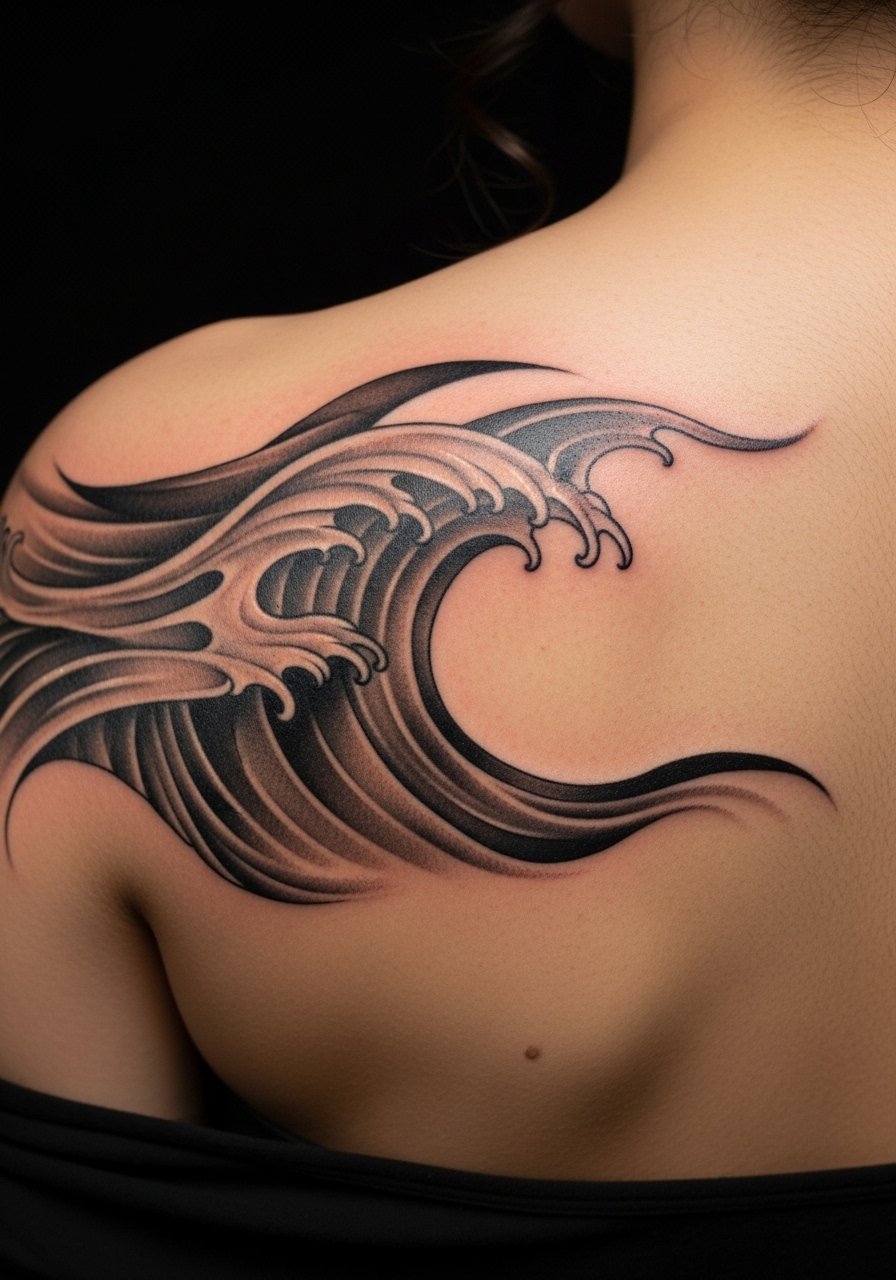
10. Great Wave Kanagawa Inspired on Shoulder
Style/Technique: Japanese Traditional / Irezumi Influence
Pain Level: Medium (5-6/10)
Session Time: Multiple sessions
Best For: Cultural homage, large canvas
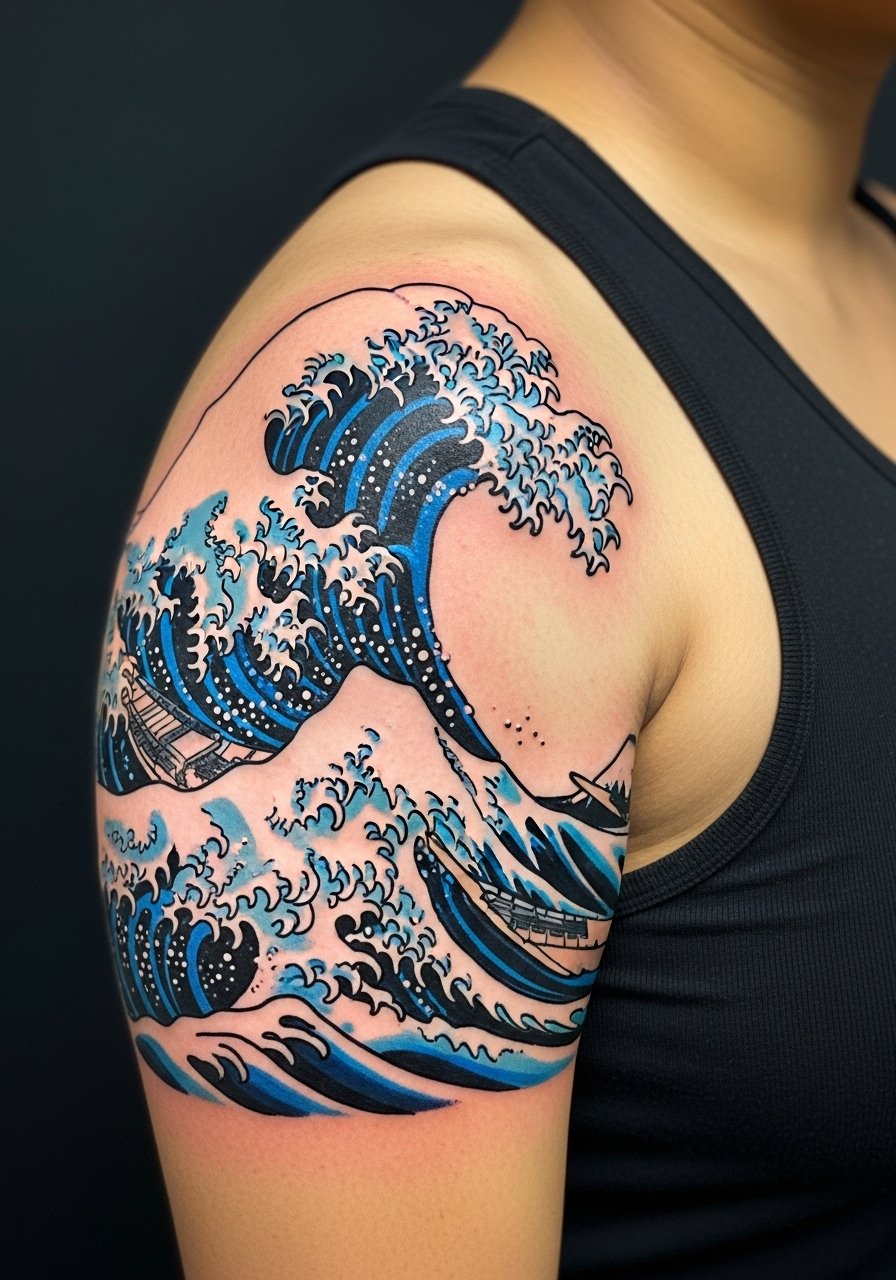
I’ve always been drawn to Hokusai’s motion; a shoulder or back canvas lets the wave breathe. These require an artist experienced in Japanese swirls. Expect sessions and strong blackwork to keep the drama after healing.
11. Japanese Swirling Wave Sleeve Filler
Style/Technique: Irezumi / Filler Work
Pain Level: Medium-High (5-7/10)
Session Time: Multiple long sessions
Best For: Full sleeve cohesion with koi/dragon
Waves as filler tie sleeves together. I’ve seen sleeves where waves elevate the whole story. Tell your artist what motifs you want linked — good flow demands planning and a steady shading approach for longevity.
12. Mountain and Wave Blend on Upper Arm
Style/Technique: Neo-Traditional / Blackwork
Pain Level: Low-Medium (3-4/10)
Session Time: 1–2 sessions
Best For: Nature balance motif
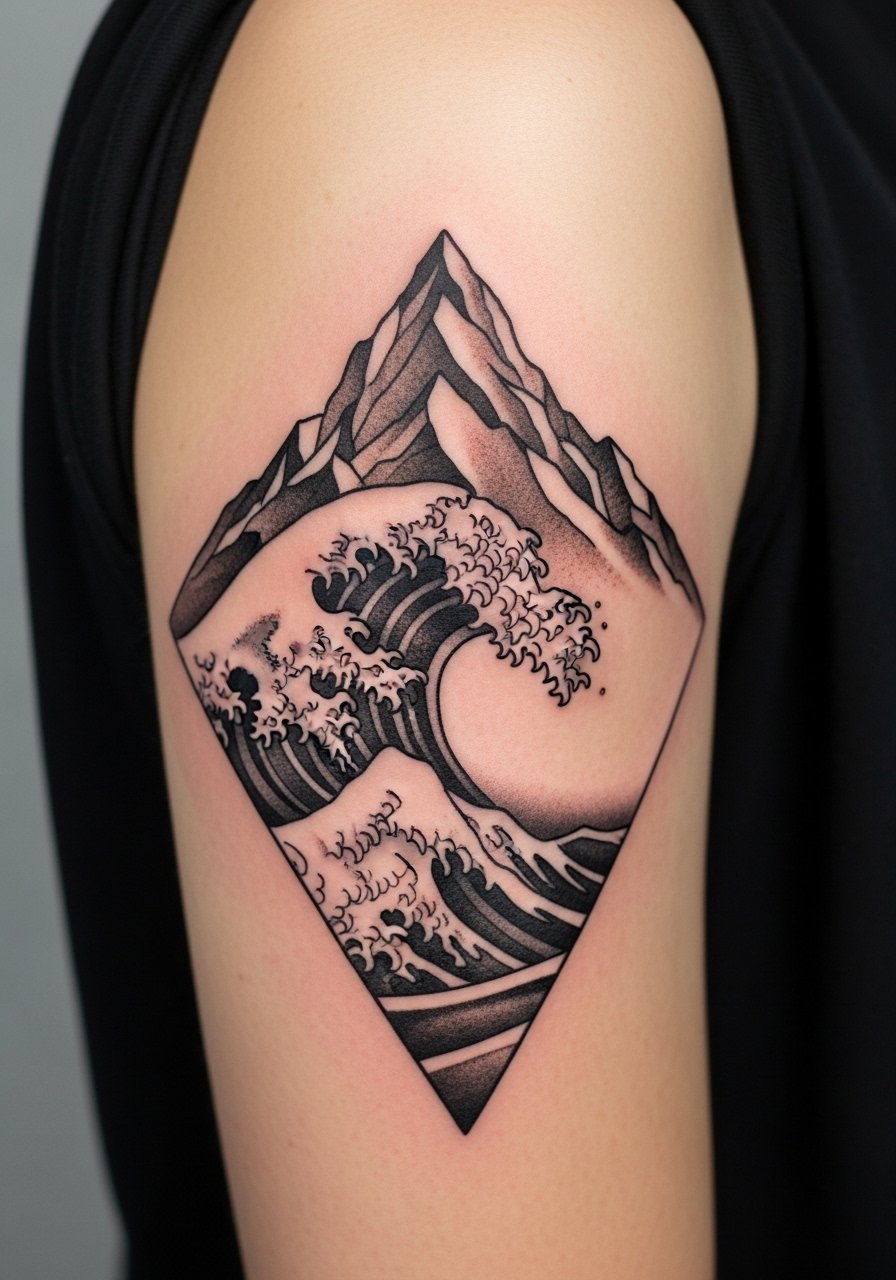
This combo reads as balance — I chose it to mark a life pivot. Upper arm placement is forgiving for detail and less painful than ribs. Ask for clear separation between elements so the mountain doesn’t blur into the wave over time.
13. Abstract Fluid Wave on Shoulder Blade
Style/Technique: Abstract / Surrealist
Pain Level: Low-Medium (3-5/10)
Session Time: 1–2 sessions
Best For: Modern art lovers
I love how abstract waves let an artist interpret motion. This style ages well because shapes are bold rather than reliant on thin details. Bring references from Procreate sketches to the consult to refine the flow.
14. Blackwork Seismic Wave on Thigh
Style/Technique: Blackwork / Dotwork
Pain Level: Medium (4-6/10)
Session Time: 1–3 hours
Best For: Geology or earth-power symbolism

A seismic tattoo reads as earth’s pulse. I recommended this to a geologist friend. Thigh skin tolerates shading and dotwork well. For crispness, insist on bold anchor lines and discuss dot density for long-term clarity.
15. Ocean Band Around Wrist (Continuous Wave)
Style/Technique: Minimalist / Band Tattoo
Pain Level: Low (3-4/10)
Session Time: 30–90 minutes
Best For: Symbolic bands, repeat reminders
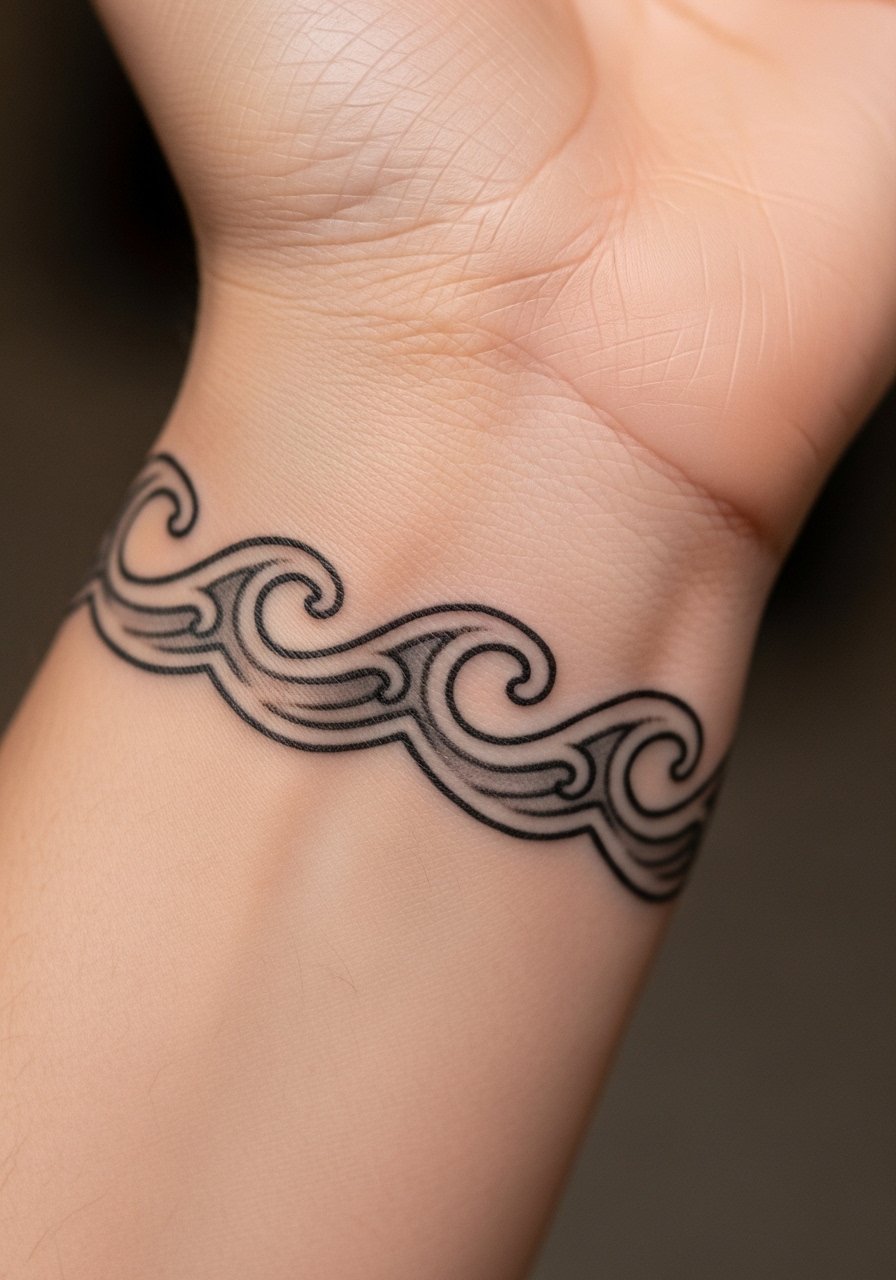
Bands feel symbolic and rhythmic. I chose a subtle continuous wave as a reminder to stay adaptable. Beware wrist movement while healing. A slightly thicker line helps this style hold up better over time.
16. Watercolor Wave on Thigh
Style/Technique: Watercolor / Painterly
Pain Level: Medium (4-6/10)
Session Time: 1–2 hours
Best For: Large color-focused pieces
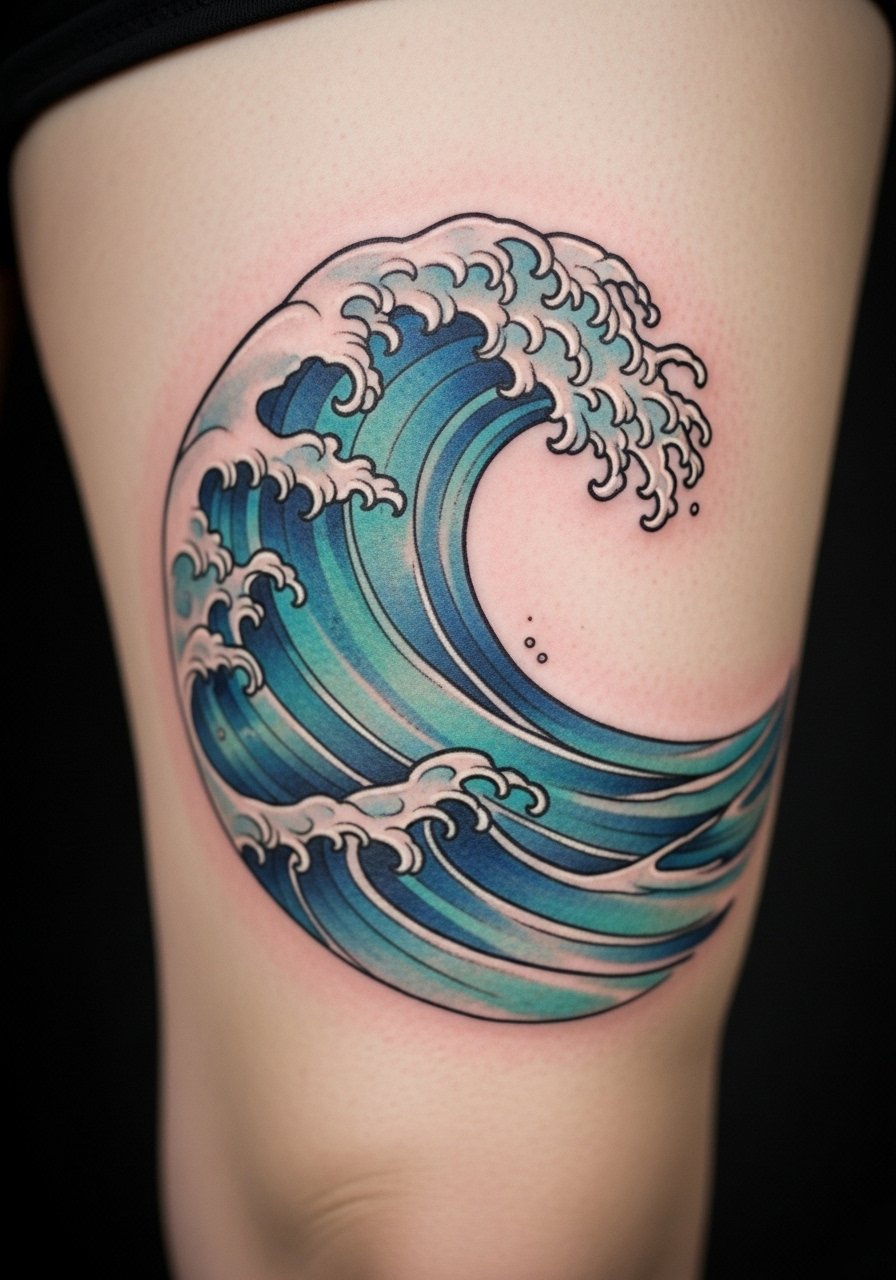
Thighs are great for watercolor because they’re less sun-exposed. I picked this when I wanted a color splash that doesn’t see daily abrasion. Ask your artist about pigment saturation and touch-up plans; colors shift as skin regenerates.
17. Crashing Wave Sternum Piece
Style/Technique: Neo-Traditional / Black & Gray
Pain Level: High (7-9/10)
Session Time: 2–4 hours
Best For: Bold centerpieces, personal statements
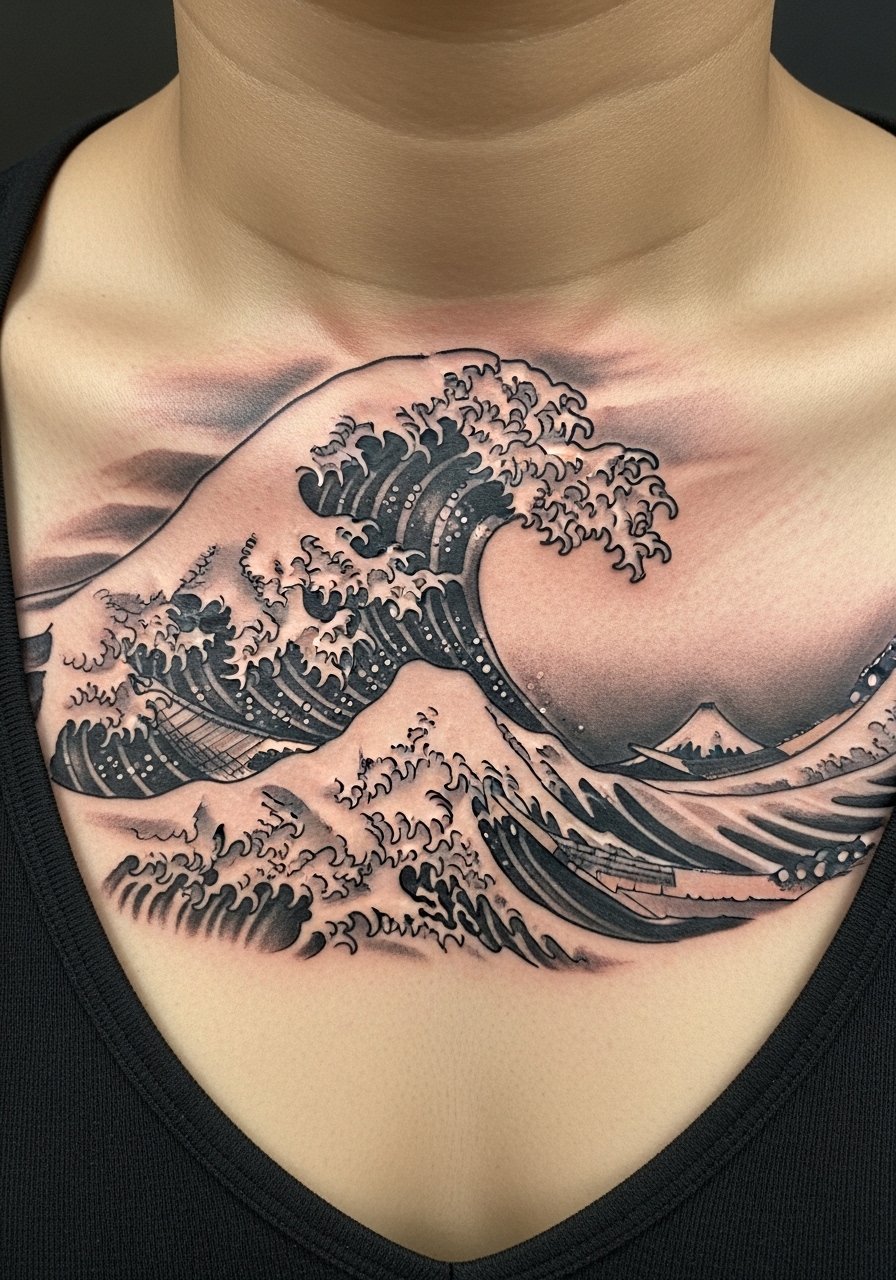
I learned sternum pieces are intense but visually striking. Pain is real here, and healing needs careful clothing choices. Strong blackwork holds up well in this spot compared to delicate lines.
18. Micro-Realism Tide Line on Collarbone
Style/Technique: Micro-Realism / Fine Line
Pain Level: Medium (4-6/10)
Session Time: 1–2 hours
Best For: Subtle portrait-like detail
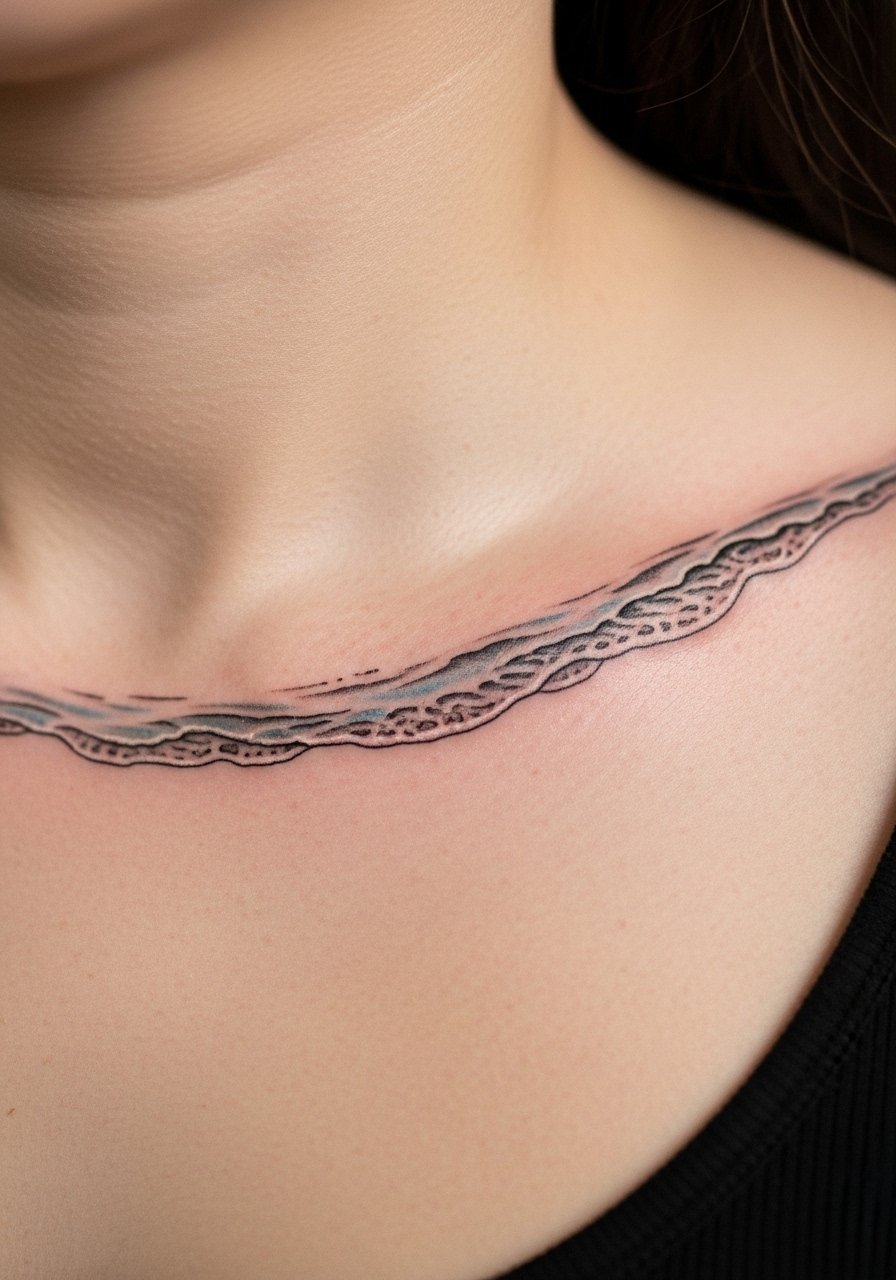
Micro-realism on the collarbone reads intimate. I had one and found it ideal for showing on certain outfits. The area is bony, so expect sharp sensations; keep aftercare strict to protect delicate shading.
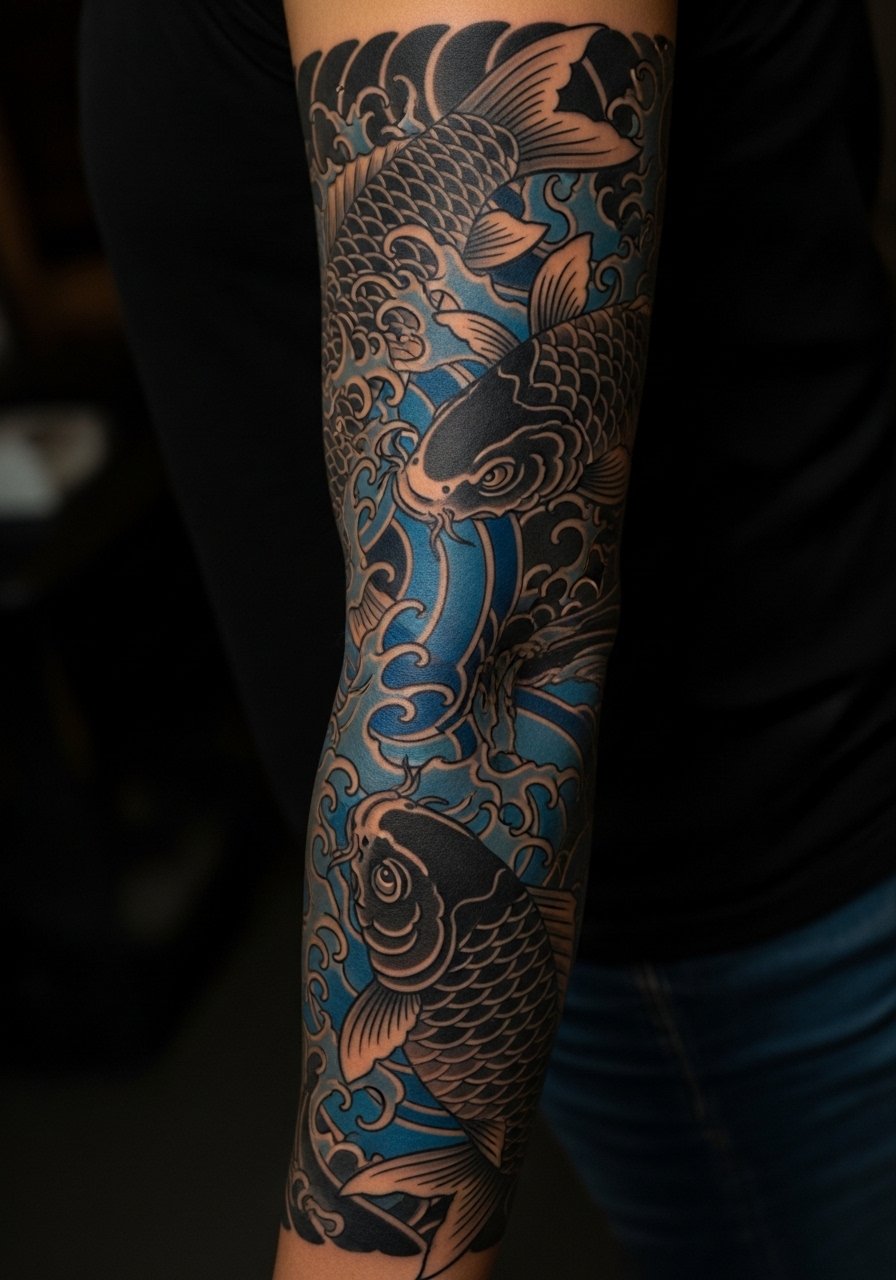
19. Wave and Koi Fusion on Calf
Style/Technique: Japanese / Neo-Traditional Mix
Pain Level: Low-Medium (3-4/10)
Session Time: Multiple sessions
Best For: Storytelling pieces
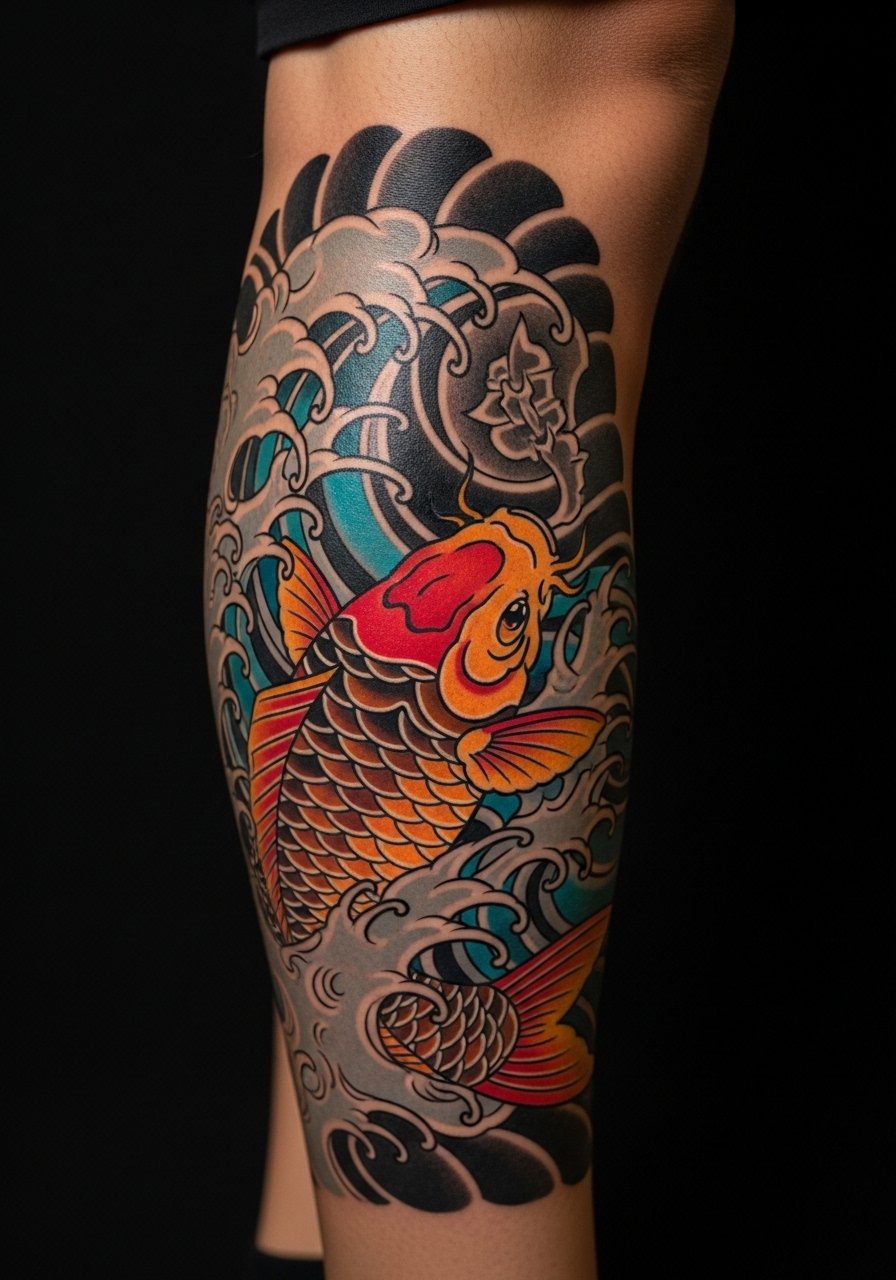
Combining koi and waves creates a narrative of perseverance. I recommended larger, bolder strokes so both elements read clearly as they age. Calf placement is forgiving for touch-ups.
20. Single Curved Wave on Ribcage (Delicate)
Style/Technique: Fine Line / Minimalist
Pain Level: High (7-8/10)
Session Time: 30–60 minutes
Best For: Hidden elegance, close-to-heart symbolism
Rib tattoos sting, but they’re intimate. I got a small curve there and kept it meaningful. For rib placements, a slightly thicker line keeps the shape readable years down the road.
21. Wave Mandala on Back of Neck
Style/Technique: Blackwork / Geometric
Pain Level: Medium (4-5/10)
Session Time: 1–2 hours
Best For: Visible symmetry, spiritual motifs
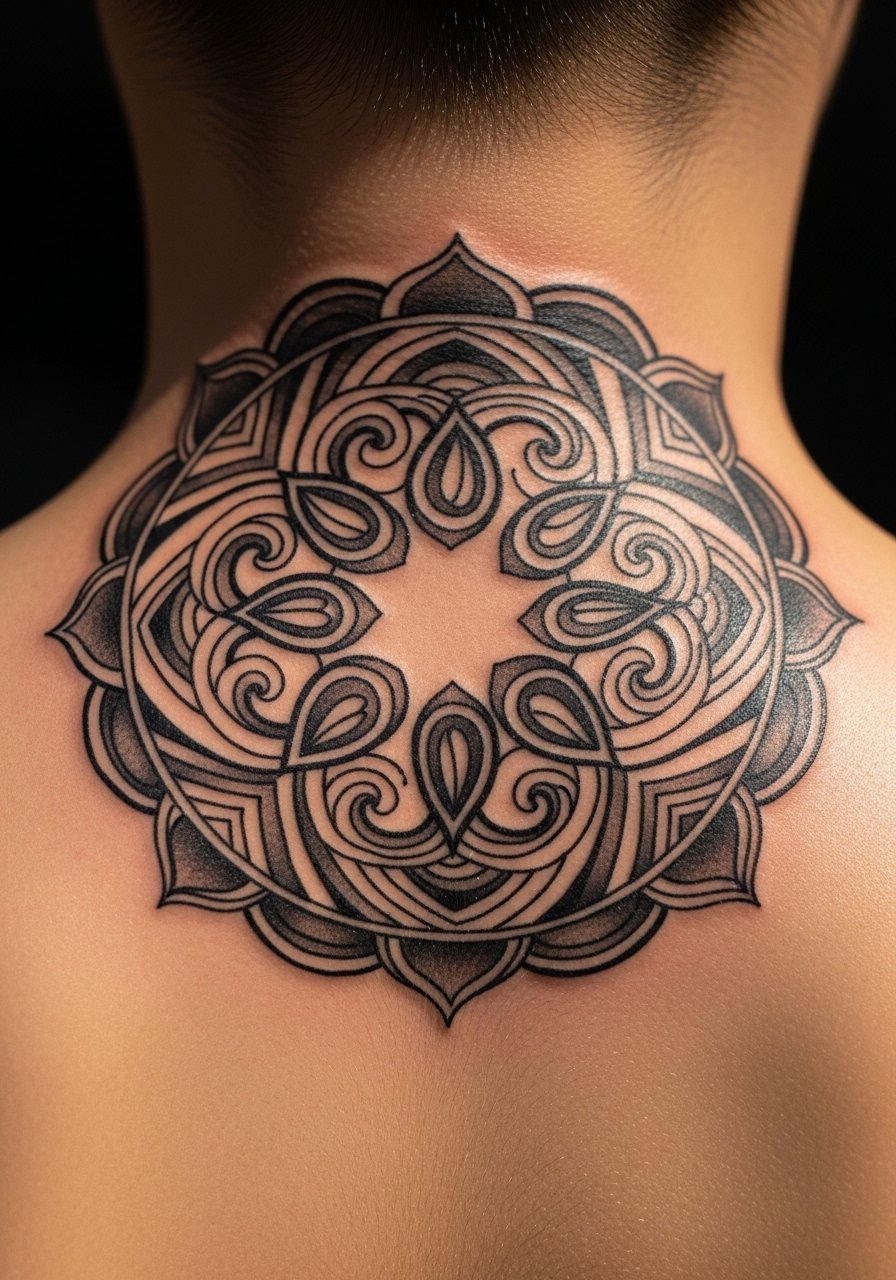
Mixing mandala geometry with wave elements creates a meditative piece. I chose this spot to peek above collars. Keep lines strong and centered; asymmetry shows quickly with movement.
22. Surrealist Wave Collage on Thigh
Style/Technique: Surrealist / Mixed Styles
Pain Level: Medium (4-5/10)
Session Time: Multiple sessions
Best For: Custom art lovers
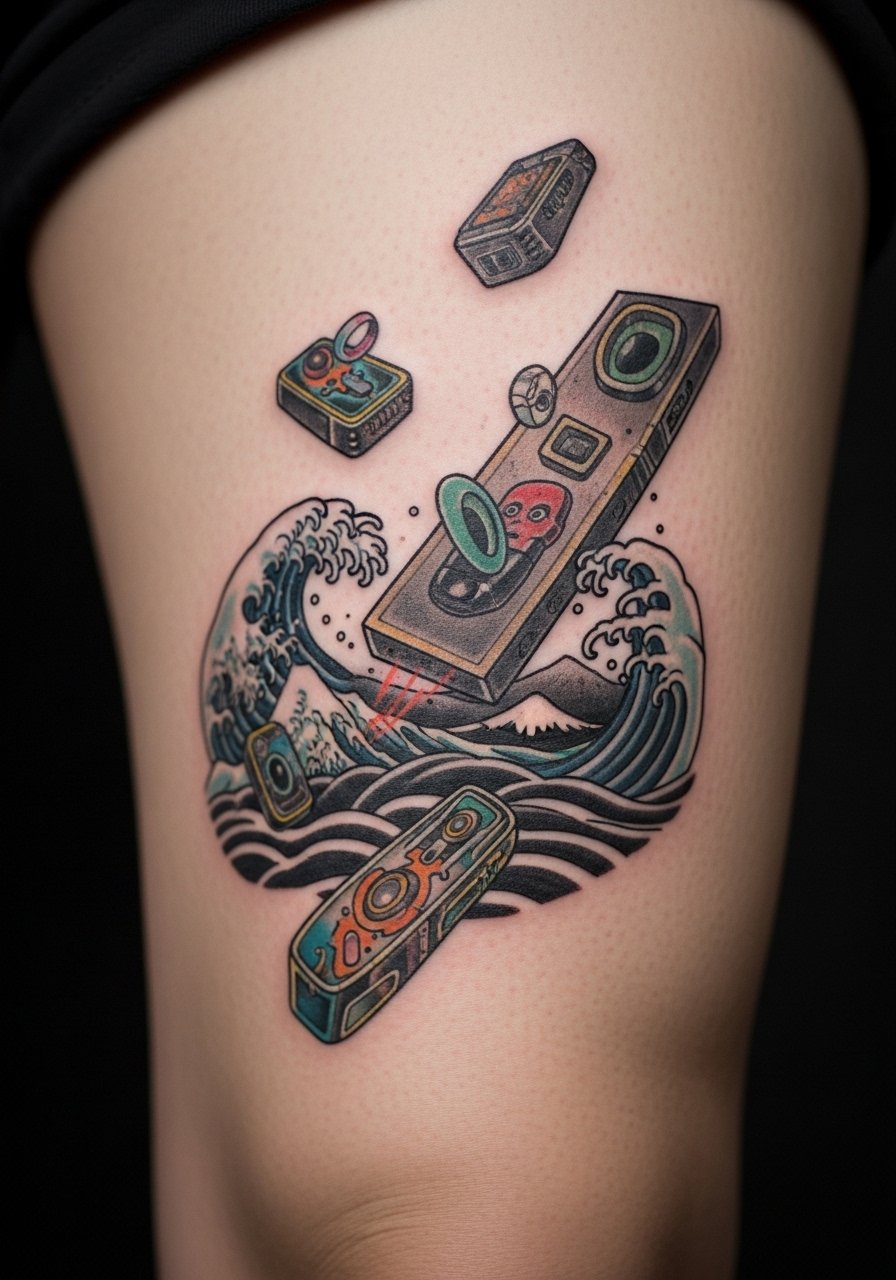
Surrealist waves let an artist interpret storylines. I worked with an artist who used Procreate mocks to refine composition. Thigh canvas gives room for details that heal well when moisturized and sun-protected.
23. Linework Wave Rib Panel (Repeating)
Style/Technique: Minimalist / Repetitive Linework
Pain Level: High (7-8/10)
Session Time: 1–3 hours
Best For: Pattern lovers, subtle rhythm
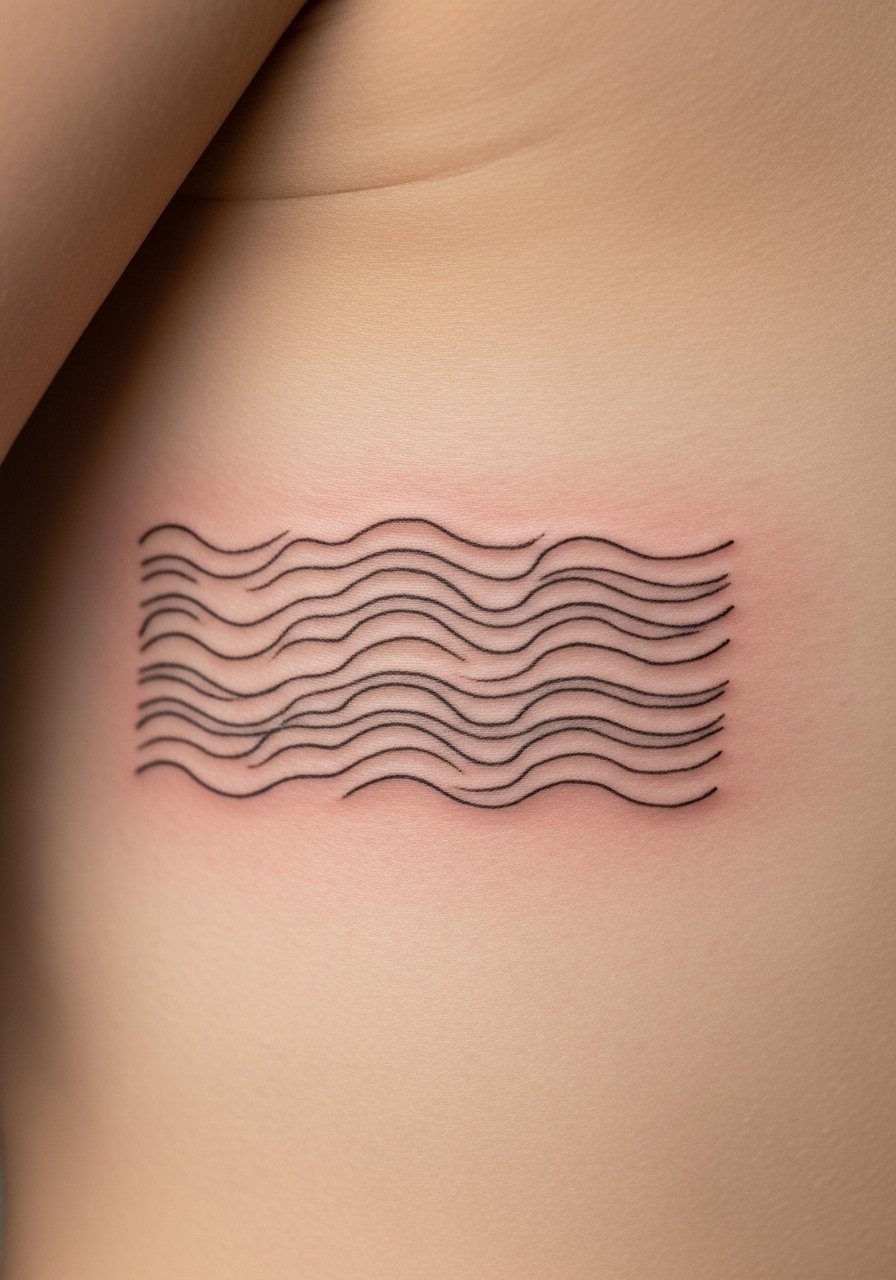
Repeating rib panels look meditative. I’d caution you about pain thresholds here; ribs are sensitive. To prevent early blur, ask for slightly heavier lines and plan for touch-ups if you want them crisp long-term.
24. Nautical Compass and Wave on Upper Chest
Style/Technique: Traditional / Illustrative
Pain Level: Medium (4-6/10)
Session Time: 1–2 hours
Best For: Travel/sailor symbolism

Combining a compass with waves reads like a travel motto. I like how chest placement feels anchored. Keep in mind sun exposure here — sunscreen matters once healed to prevent color drift.
25. Minimal Wave Tattoo as Ear Cuff Line
Style/Technique: Fine Line / Minimalist
Pain Level: Low (2-4/10)
Session Time: 15–30 minutes
Best For: Jewelry-alternative aesthetic
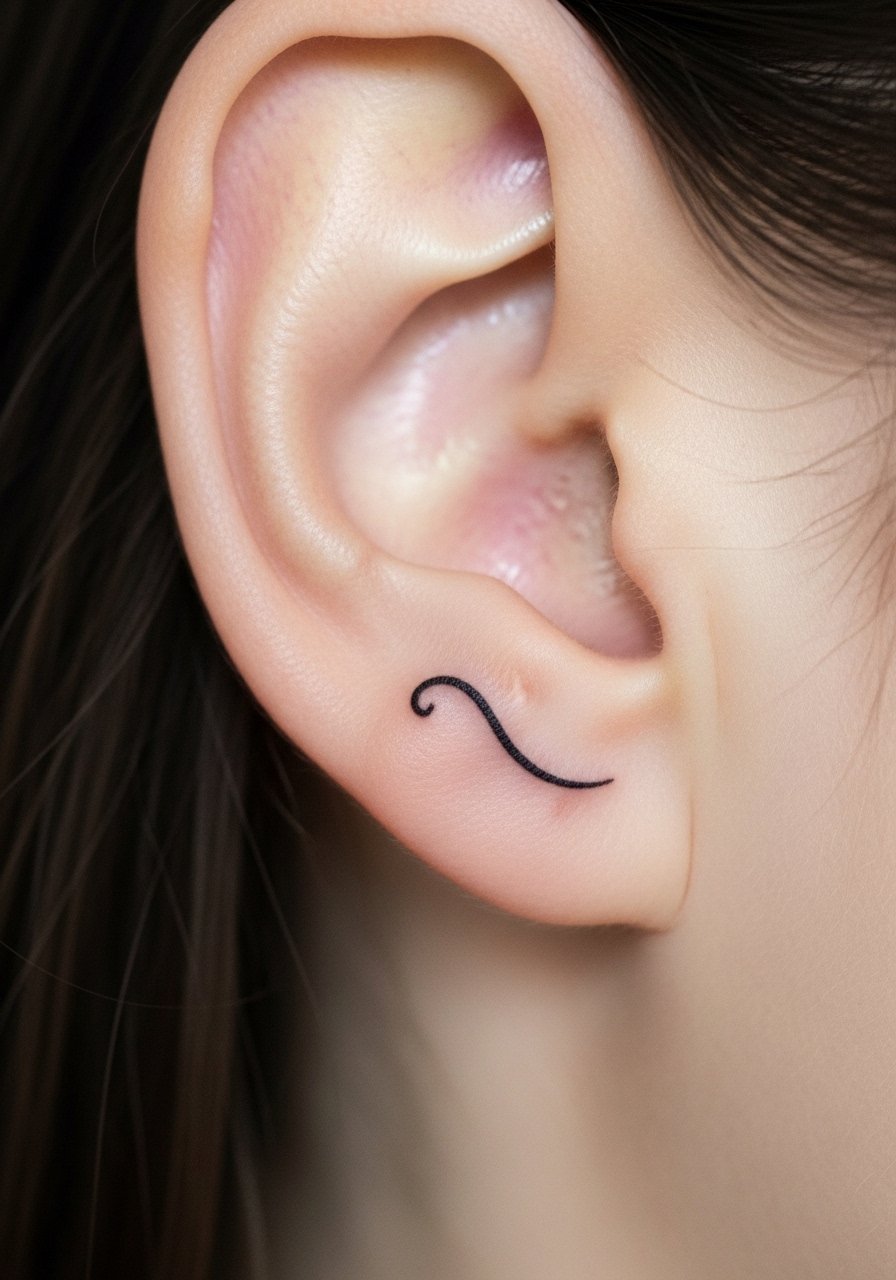
An ear-cuff wave is delicate and stylish. I found it perfect for people who like subtle adornment. The area is finicky — choose an artist experienced with cartilage lines and understand touch-ups may be needed.
26. Seascape Wrist Wrap with Tiny Details
Style/Technique: Illustrative / Micro-Detail
Pain Level: Low-Medium (3-5/10)
Session Time: 1–2 hours
Best For: Story mini-sleeves, visible art
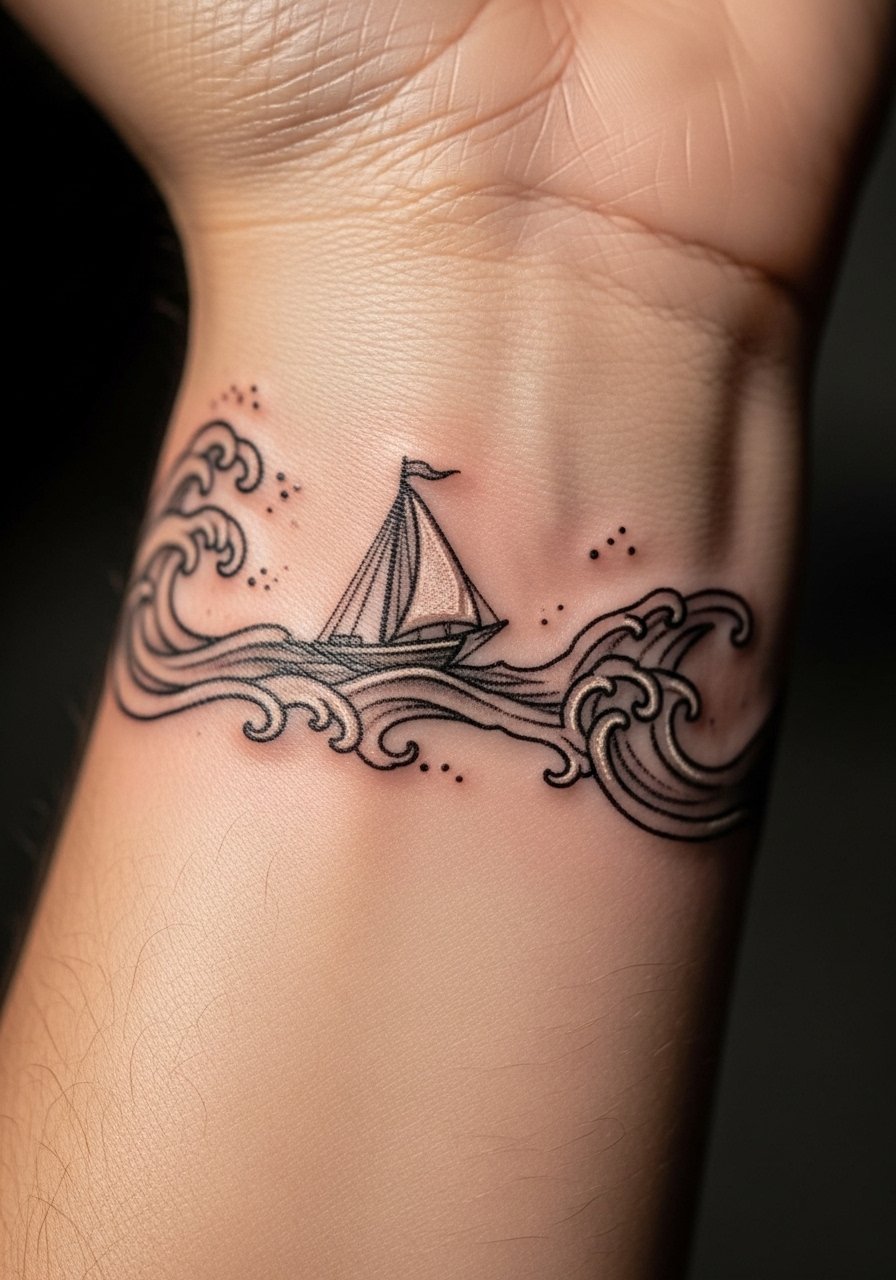
Wrist wraps tell mini stories. I recommend bold anchors combined with small details so the scene remains legible after healing. Moisturize and avoid constant friction to preserve tiny lines.
27. Solar Wave — Wave with Sunburst on Shoulder Cap
Style/Technique: Neo-Traditional / Illustrative
Pain Level: Low-Medium (3-4/10)
Session Time: 1–2 hours
Best For: Symbol of renewal, visible placement
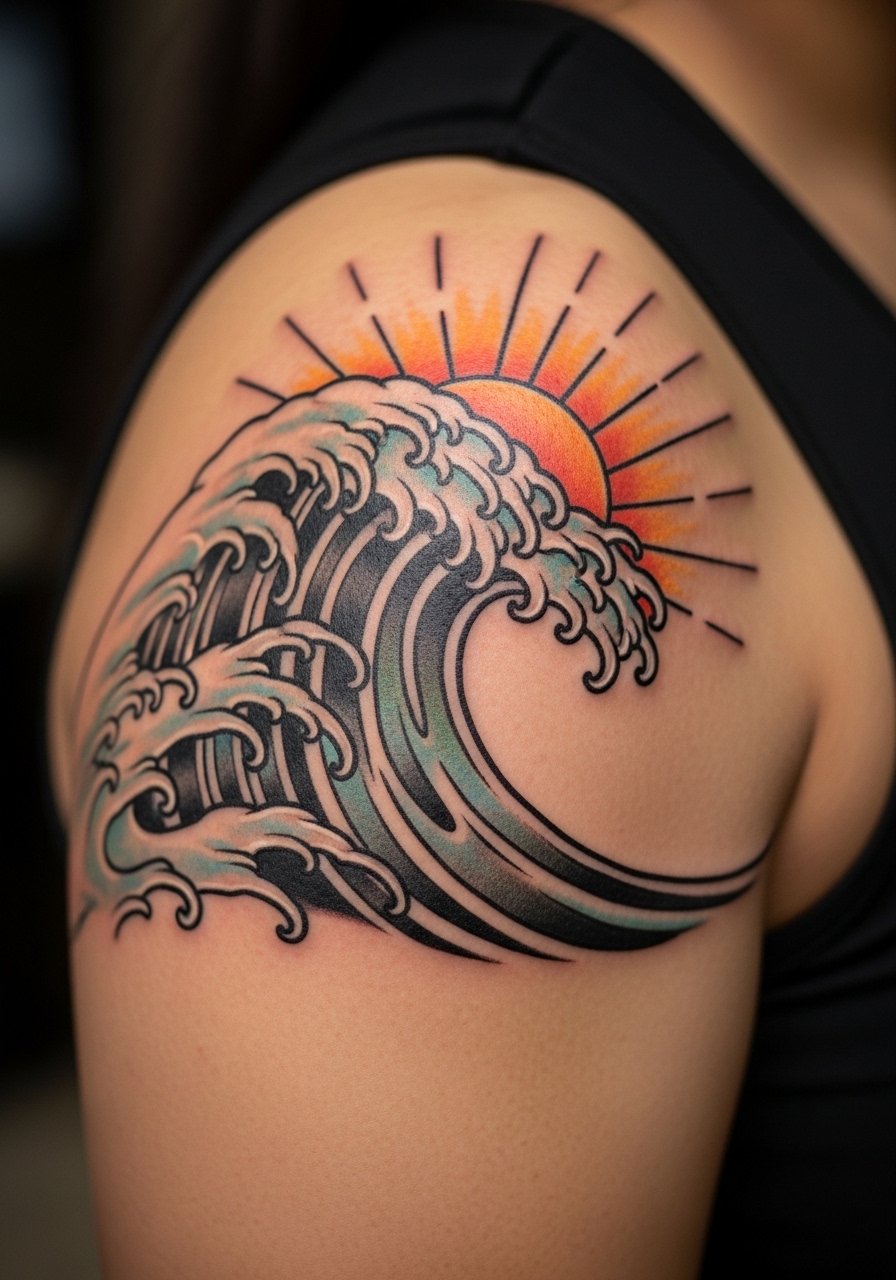
Pairing sun and wave symbolizes cycles for me. Shoulder cap allows this to be visible or covered easily. Ask for saturated pigments and bold outlines so the sunburst keeps contrast as it ages.
Tattoo Prep and Aftercare Essentials
Aftercare Essentials:
- Aquaphor Healing Ointment, 14oz tube — Use first 3–5 days to keep the area protected.
- Saniderm Transparent Adhesive Bandage, 6-inch roll — Second-skin option artists recommend for early healing.
- CeraVe Fragrance-Free Moisturizing Lotion 12 oz — Daily moisturizer once initial scabs fall.
- Dr. Bronner's Unscented Castile Soap, 32 oz — Gentle cleaning during first two weeks.
- Mad Rabbit Tattoo Balm, 2 oz — Keeps healed ink vibrant per many artists' suggestions.
- Hustle Butter Deluxe, 2 oz — Vegan aftercare alternative for ongoing skin health.
Before Your Appointment:
- Hush Anesthetic Numbing Cream 5% Lidocaine — Use only if your artist approves, 30–45 minutes prior.
- Tattoo Stencil Transfer Paper A4 Pack — For testing placement with temporary stencils.
- Medical Alcohol Wipes 70% Isopropyl — Useful for prep and touch-up hygiene.
Long-Term Maintenance:
- SPF 50 Sunscreen Stick for Tattoos — Daily protection to prevent fading.
- Hydrocolloid Bandages (Large) — For protecting small touch-ups or blisters.
- Tattoo Aftercare Kit (Multi-Piece) — Good starter option for first-timers.
Frequently Asked Questions
Q: How bad does a tattoo actually hurt?
A: Pain depends on placement and your tolerance. From my experience, forearm or upper arm placements feel like a 3/10; ribs or sternum push toward 7–8/10. It's more an irritating scraping than sharp pain. For sensitive spots, ask about Hush Anesthetic but only use it if your artist approves.
Q: What if I regret my tattoo choice?
A: I've seen people avoid regret by sitting with ideas for months and choosing placements that are easy to hide (upper thigh, upper arm). If you’re unsure, start with a small wave tattoo in a discrete spot. Laser removal exists, but it's a long process.
Q: How do I keep my wave tattoo from fading?
A: Sunscreen is non-negotiable in my experience. Use an SPF 50 stick every day on visible ink and keep healed skin moisturized with a fragrance-free lotion like CeraVe. Blackwork holds up best; watercolor needs extra protection.
Q: Can I work out after getting a tattoo?
A: Wait at least 48–72 hours before light activity; longer if the tattoo is in a flex area. I avoid heavy sweating for a week and keep the area clean with gentle soap like Dr. Bronner's Unscented Castile Soap.
Q: Should I get a small wave first to test pain?
A: Only if you actually want a small wave. Pain varies by spot more than by size — a tiny rib tattoo can hurt more than a larger outer-arm piece. Pick a placement you can live with.
Q: How long does a tattoo take to heal?
A: Surface healing is usually 2–3 weeks; full skin regeneration can take 2–3 months. The first week is critical: keep it clean, use Aquaphor early, and switch to a gentle lotion after scabbing.
Q: Do tattoos look different on different skin tones?
A: Yes. From what I've seen, black and gray reads well across tones. Bright colors may appear muted on deeper skin; white ink can be nearly invisible. Ask to see healed examples on skin tones similar to yours.
