
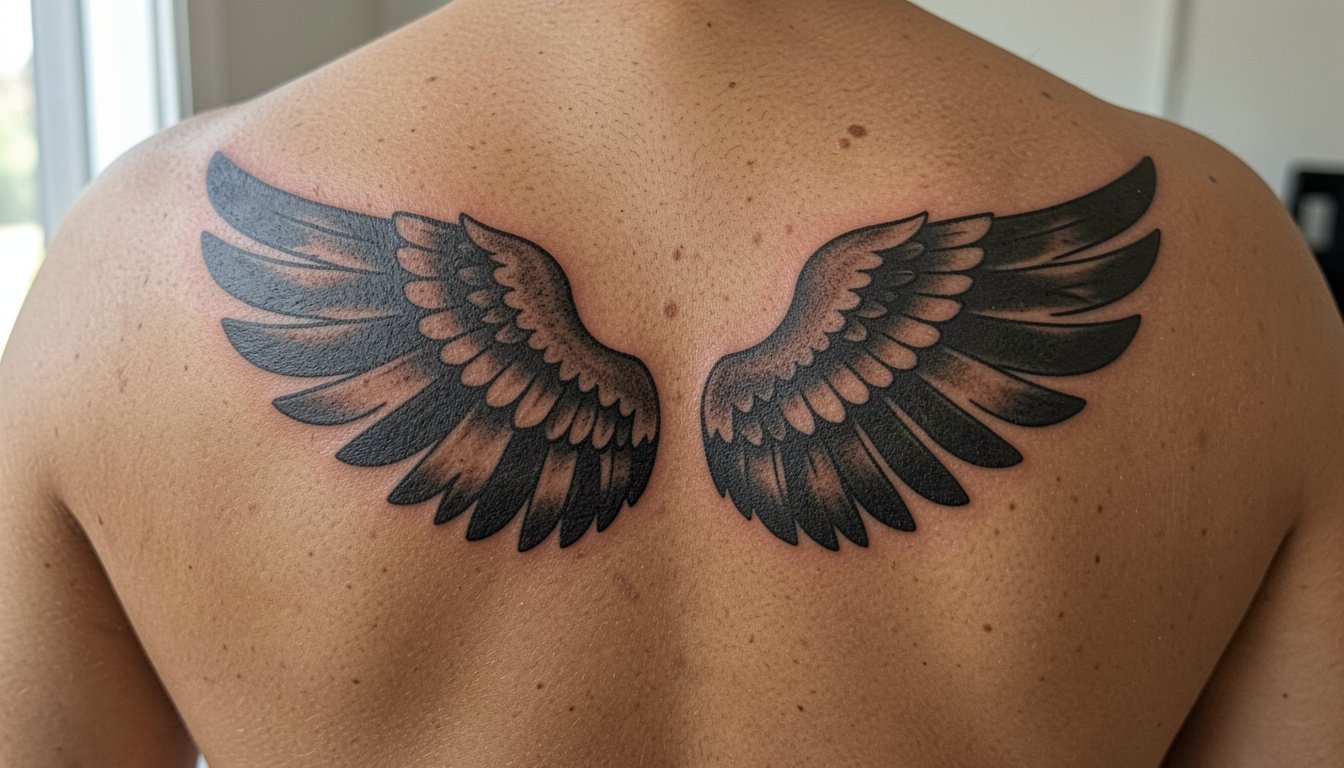
Seraphim imagery carries weight in a tattoo, and the choices that make a piece feel sacred are rarely the loudest ones. Small spacing, deliberate negative space around a halo, and sizing that respects the breath of the body all keep details readable for years. You will also need to balance symbolism with placement pain and cultural sensitivity, so plan size, consult on spacing, and choose a placement that matches how often you want the piece seen.
1. Minimalist Seraphim Halo on Inner Wrist
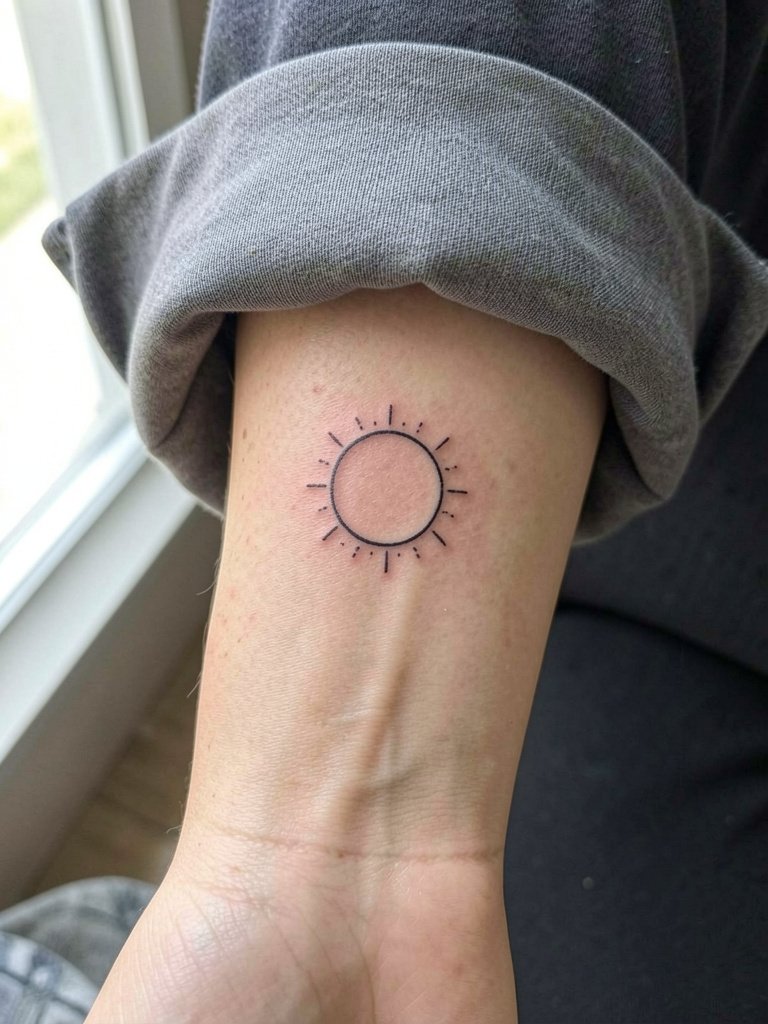
This small inner-wrist halo reads like a quiet sign, and it works best when scaled to three inches or smaller. I recommend bringing a reference showing the exact line weight you want and asking for a slightly thicker single-needle line than the photo if you want the ring to hold at year three. The wrist moves a lot, so expect a mild sting for a 30 to 45 minute session and a likely touch-up after one year. A common mistake is picking filigree too small, which blurs after repeated hand washing. For show-off styling pair it with a simple thin chain bracelet so the wrist reads intentionally framed.
2. Dotwork Seraphim Wings Across Sternum
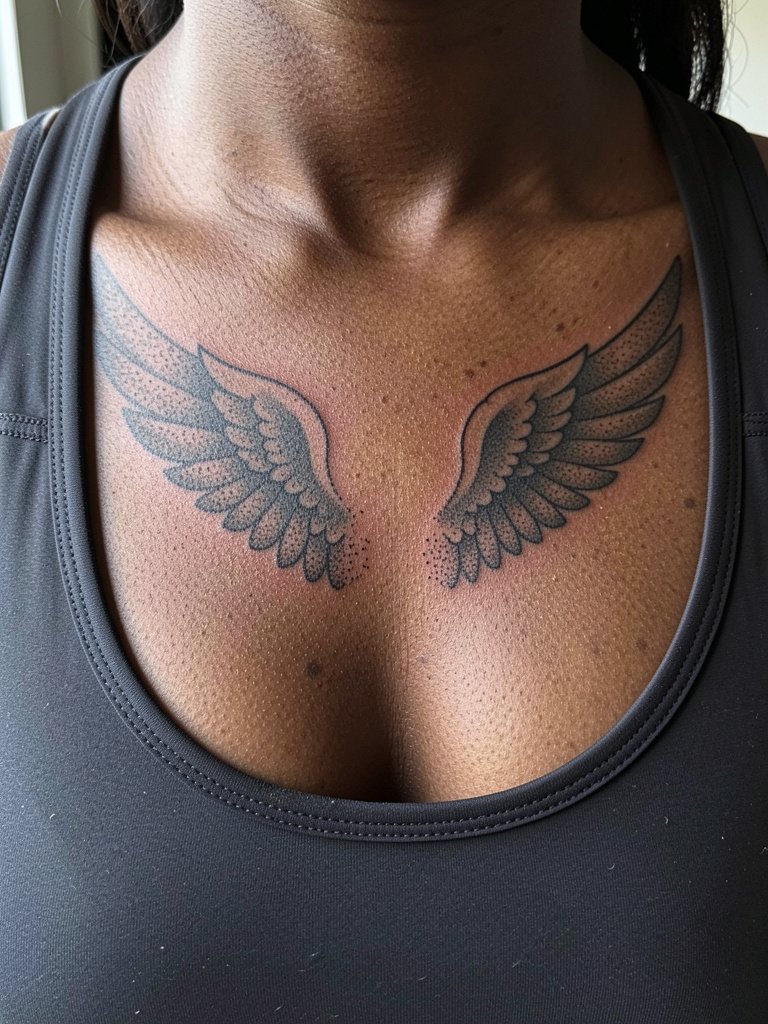
Full sternum wings show well when sized to the chest plate and when stipple shading gives a soft halo effect. Expect the session to be moderately painful and to last one to two hours depending on detail. Tell the artist you want the dots spaced so the negative space between feathers remains visible at two years. Healing on the sternum can scab thicker than on flatter areas, so plan a two-week downtime from tight bras. For evening wear, this placement pairs with open v-neck tops that let the wing tips peek without exposing the whole chest.
3. Micro-Realism Seraphim Face on Inner Forearm
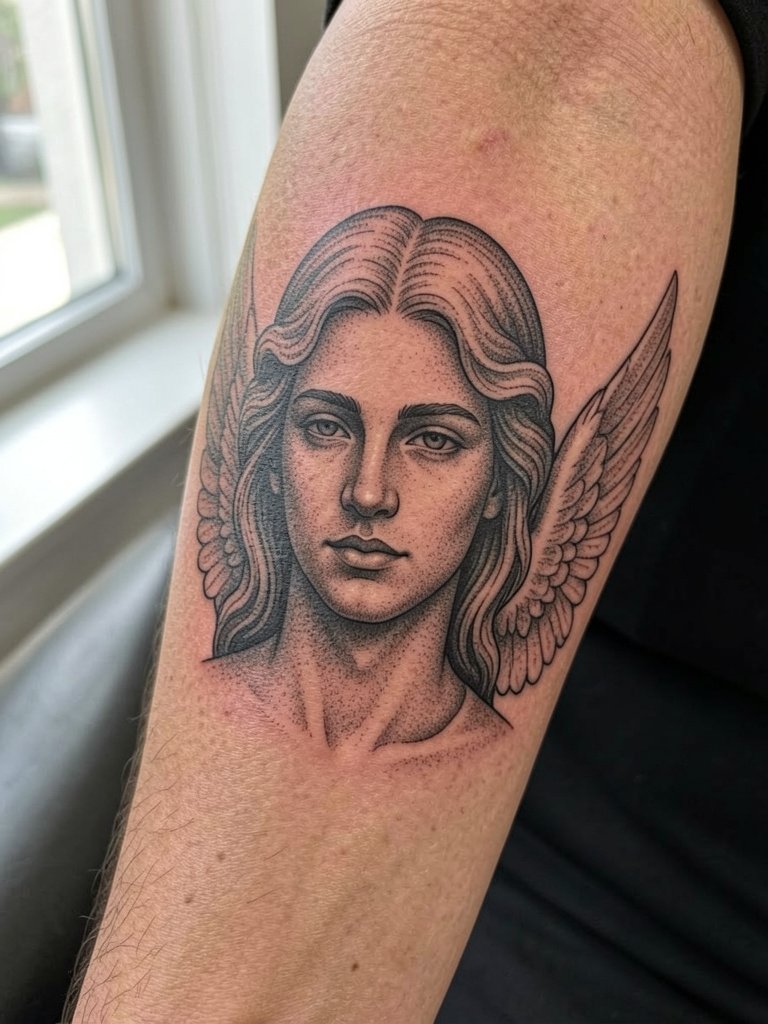
A micro-realism face works when you want sacred imagery that reads intimate up close. Request photos of healed micro-realism pieces at the same scale so you and the artist agree on dot density. The inner forearm is forgiving for single-needle detail but will need a thicker line for the jaw and eyes compared with studio references that are larger. Expect a session of around 90 minutes and a touch-up at the one-year mark for optimal contrast. Avoid asking for extra tiny facial features that will merge with time. For casual daytime outfits consider an oversized linen shirt with rolled sleeves that frames the forearm without hiding detail.
4. Neo-Traditional Seraphim with Flame on Upper Arm
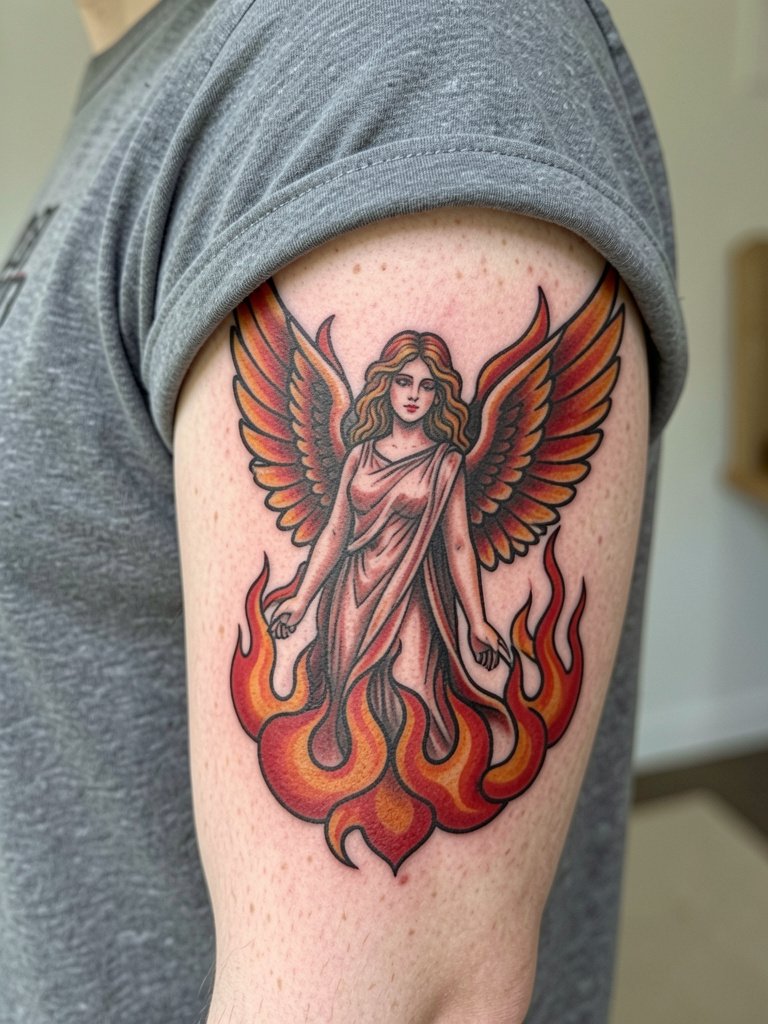
Neo-traditional pieces give seraphim iconography visual presence and they age well because bold outlines protect colored fills from softening. Tell the artist you want saturated color packed to the skin with clear black borders and ask for a mid-session pause so saturation can be checked. Outer upper-arm sessions are moderate in pain and often done in a single two to three hour block. A mistake is asking for muted washes without strong outlines, which leads to muddied color at year five. For warm-weather outfits this placement pairs with rolled short sleeves that show the shoulder when you want it on display.
5. Geometric Seraphim Mandala at Nape
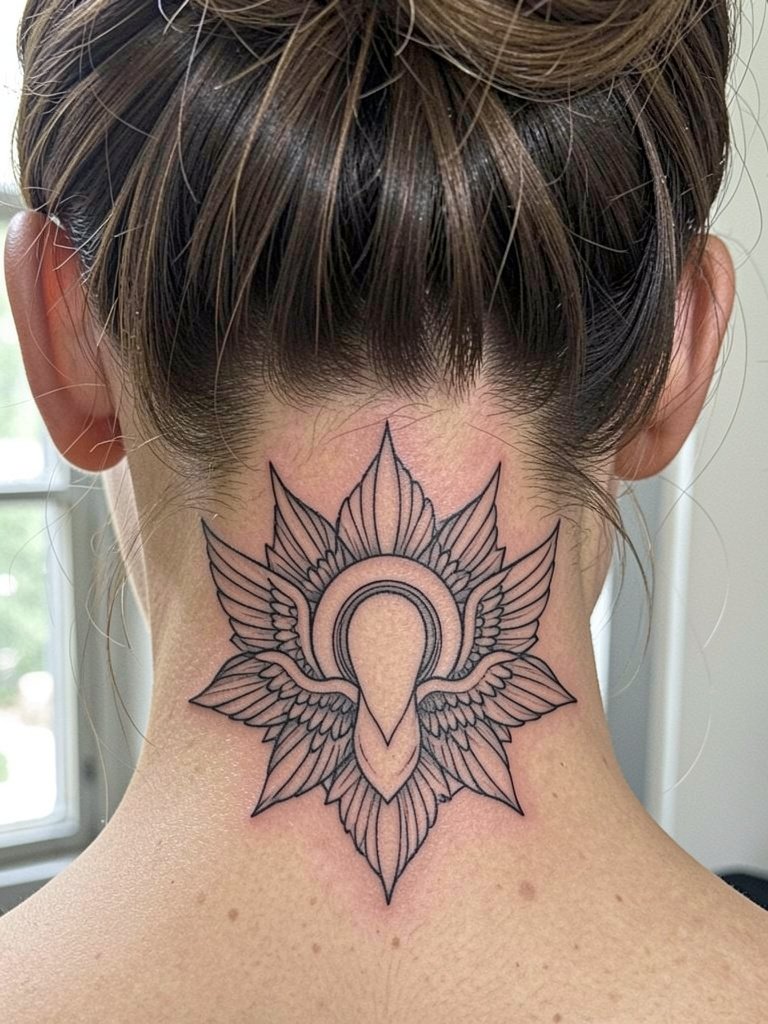
A nape mandala balances visibility with privacy. When you want a crisp radial pattern, the artist must plan spacing so lines do not compress near the center as the skin shifts. Nape sessions are surprisingly tingly because of thin skin, and they usually last 60 to 120 minutes. The common mistake is packing too many tiny concentric rings. If you like to wear your hair up, this placement pairs well with button-up linen shirts that expose the nape for short periods without constant sun exposure.
6. Single-Needle Seraphim Feather Behind Ear
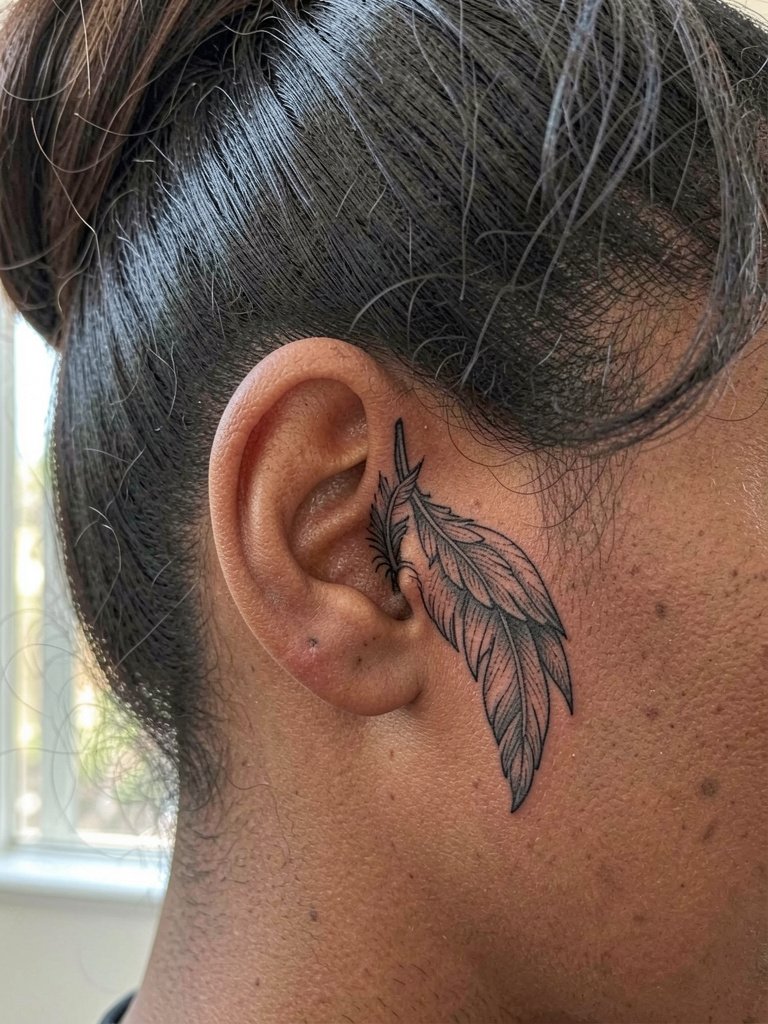
Behind-ear work is intimate and heals fast when the linework is kept sparse. Ask for slightly heavier single-needle strokes around the feather spine so the thin barbs survive daily shampooing. The session is short, often under 30 minutes, but note the area can be tender and you may need to avoid hat wear for a week. A common error is requesting ultra-fine filigree that disappears within a year. For subtle show-off styling choose small hoop or stud earrings that draw the eye to the area.
Session Day Picks
The chest and nape placements above need simple session-day adjustments, so these small items smooth the experience for tattoos one to six.
-
Stencil transfer paper kit. Lets you check line placement on skin before the needle hits, especially helpful for the halo and mandala placements above.
-
Topical numbing cream. Applying 30 to 45 minutes before can reduce the edge on nape and sternum sessions without affecting detail.
-
Thin protective film roll. Useful for keeping sternum and wrist pieces protected during the first few days of movement and sweat.
-
Fragrance-free body wash. Gentle cleansers avoid irritating newly healed dots on forearm and between-feather stipple.
-
Aquaphor healing ointment. Thin application helps lock in moisture on small single-needle areas without clogging.
7. Ornate Seraphim Crest on Chest
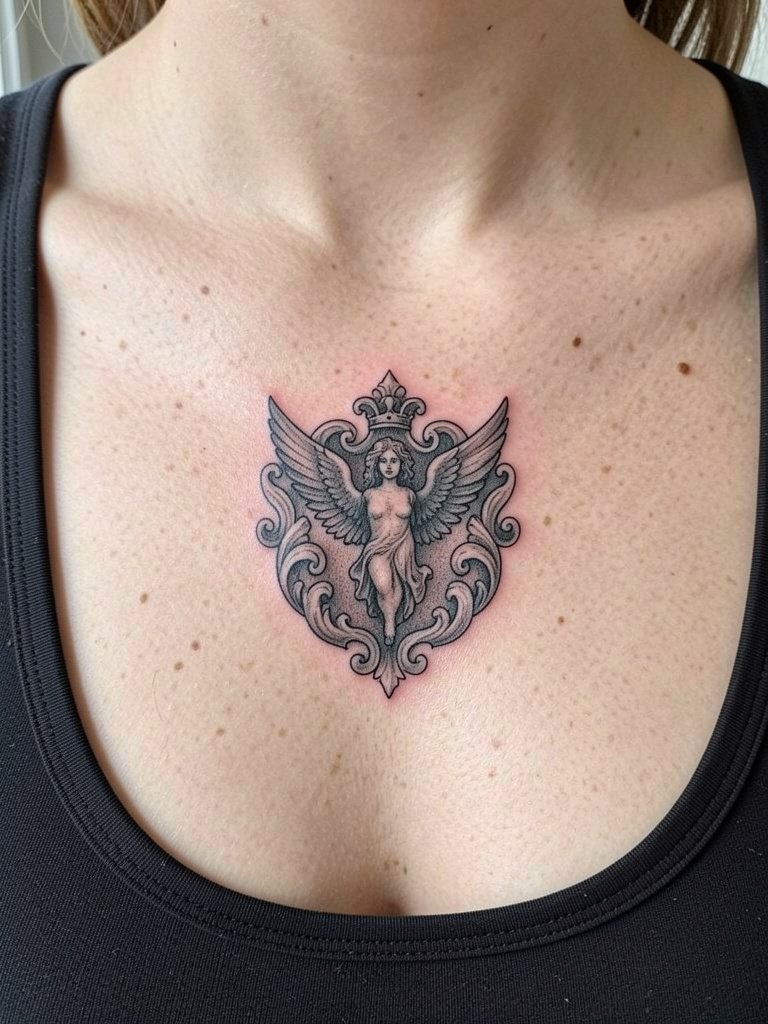
A chest crest reads best when scaled to the sternum width and when the inner panels have deliberate spacing. For this piece tell the artist you want the scroll edges softened slightly to avoid line merging as the skin moves. Sessions can run two to three hours and may need a follow-up for contrast. The mistake is compressing too many small symbols into the quarters, which blurs at three years. For wardrobe the chest crest pairs well with button-front blouses that open just enough to show the crest without exposing the full chest.
8. Single-Wing Thigh Piece with Negative Space
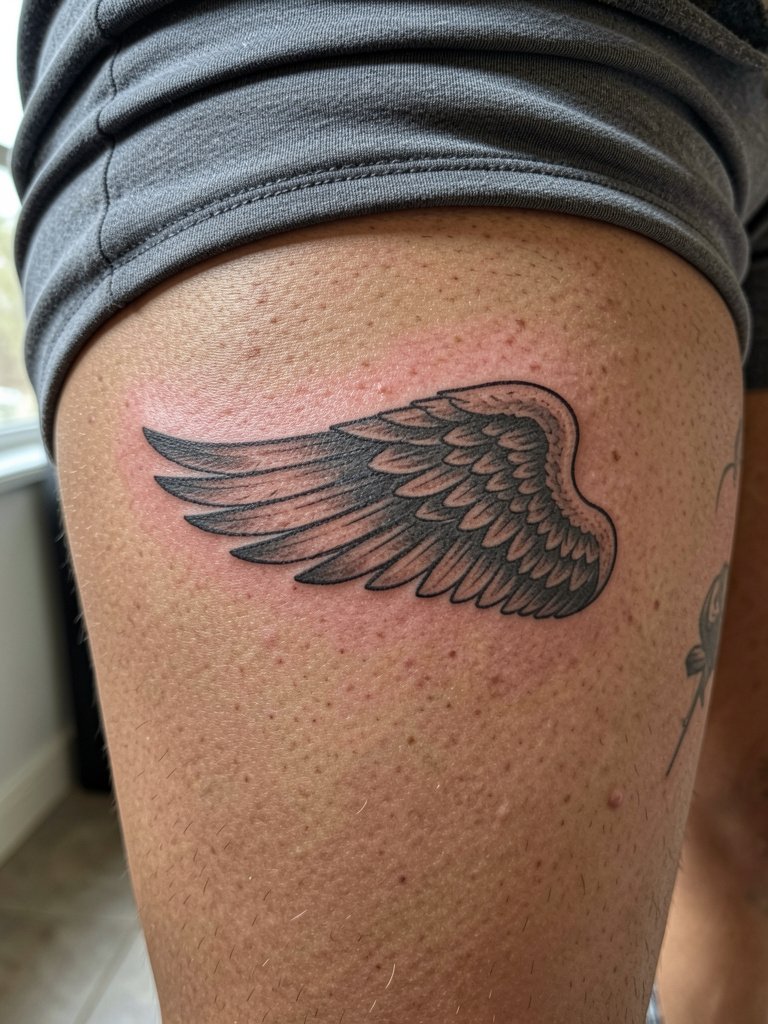
An outer-thigh wing takes advantage of a large canvas and the negative space keeps the feathers legible over time. Recommend that the artist map the feather breaks at life-size to see how the skin stretches when walking. Thigh sessions can be comfortable if you bring snacks and a pillow, and they often last two to three hours. A common error is expecting intricate micro detail in the deepest feather shafts which can soften. For evenings out try a wrap skirt that shows the outer thigh when you want to reveal the work.
9. Blackwork Seraphim Back Panel
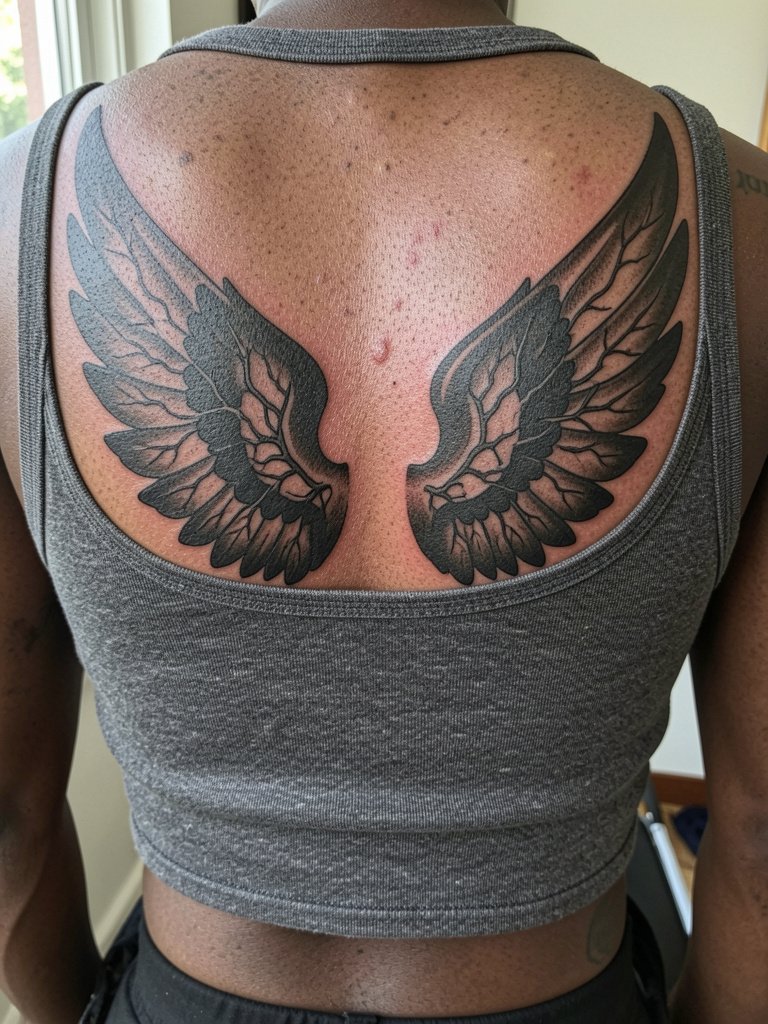
Back panels are dramatic and hold up because large black areas resist blowout better than tiny detail. Discuss how the wings should fall around the spine so the negative veins breathe. Expect multiple sessions for saturation and a longer single appointment if you want one-day coverage. The mistake is trying to cram micro-ornamentation into a heavy black field. For layering with clothing choose open-back dresses or low-back tops that show the panel when you want it visible.
10. Stipple Shaded Seraphim on Ribcage
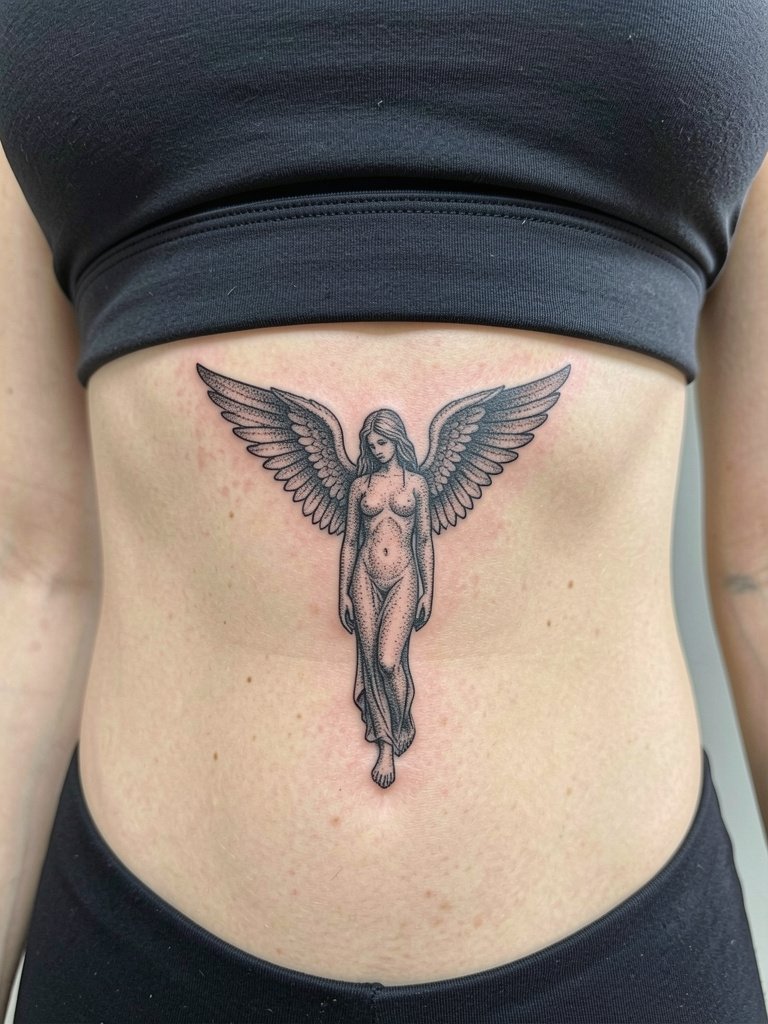
Ribcage pieces have a contentious reputation in the community. One camp warns that fine-line work on the ribs blurs quickly because the skin there stretches and moves with breathing. The other camp insists that with controlled needle depth and slightly wider spacing, fine-line ribs can settle clean and retain detail, and they will show healed photos to support that. If you want stipple shading here, ask for visual examples of three-year healed ribs at similar scale before committing. Expect high pain and a session split into shorter passes for comfort. For session wear bring a loose zip hoodie that you can put on without stretching the area.
11. Linear Seraphim Halo Collarbone Accent
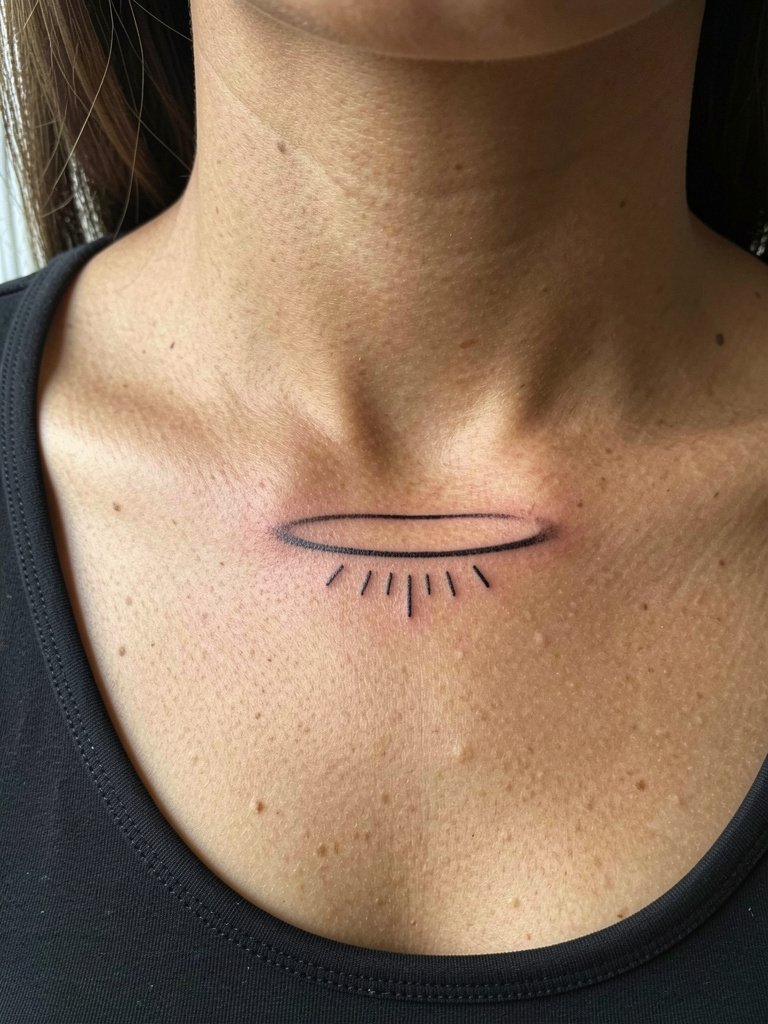
A collarbone halo reads best when the arc follows the bone's contour and rays do not overhang into the hollow. For longevity request slightly bolder outer strokes for the arc while keeping inner rays delicate. Collarbone sessions are quick but the area can be sharp to the touch, so expect a 20 to 40 minute session. A frequent error is centering a halo too close to the clavicle joint making it distort with movement. For polished daytime looks pair with scoop-neck tops that keep the collarbone framed.
12. Watercolor Seraphim Silhouette on Calf
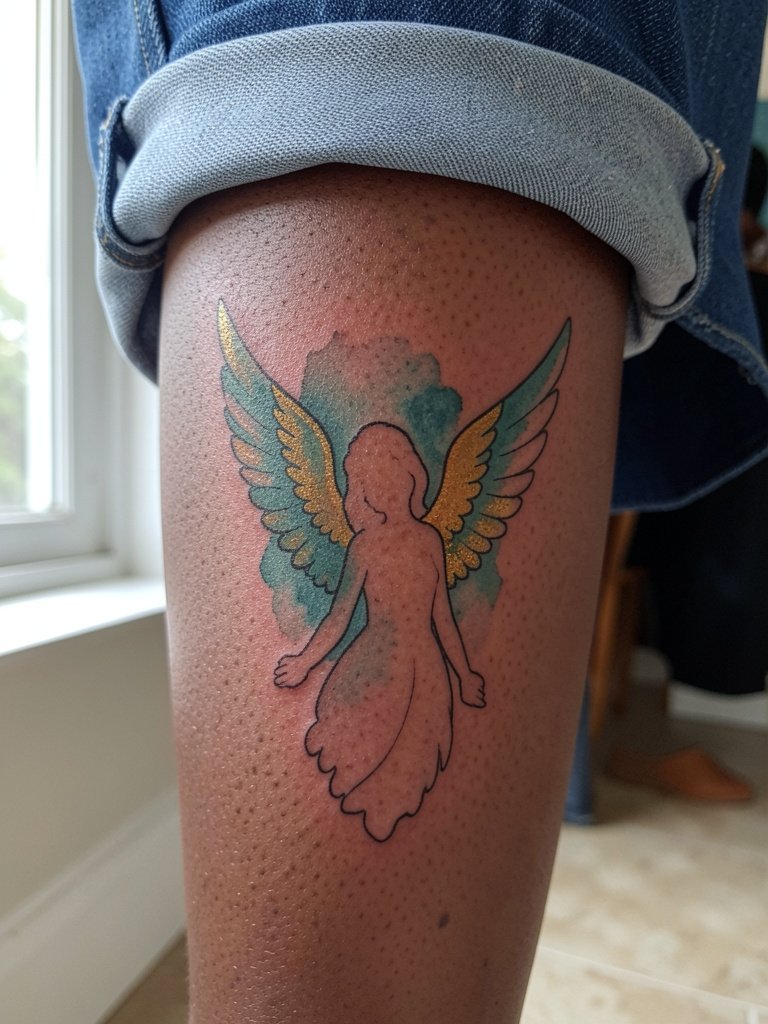
Watercolor washes can add an ethereal quality, but they fade faster than black. Ask the artist to anchor the silhouette in crisp black linework so the composition stays readable as pigment softens. Calf sessions are moderate and often completed in one two-hour slot. A common mistake is relying on soft edges only, which leaves a washed-out patch after sun exposure. For visible outings consider ankle boots or midi skirts that let the calf be shown intentionally.
13. Tiny Seraphim Finger Symbol
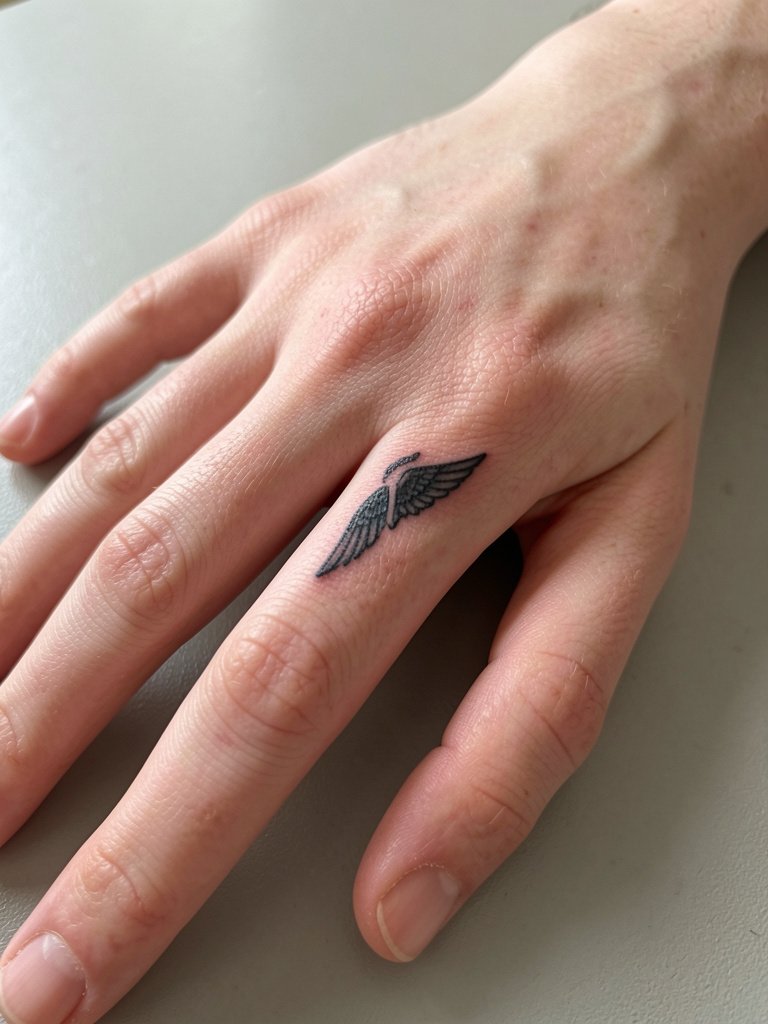
Finger tattoos are exposed to constant washing and friction, so a tiny wing symbol should use bolder, simple strokes instead of filigree. Specify that you want thicker stem lines and ask how the design will be adjusted for seam lines on the finger pad. Sessions are short but you should expect faster fading and more frequent touch-ups, often within 6 to 12 months. The mistake is expecting single-needle fine detail to hold on the finger. For everyday styling add a slim silver stacking ring that frames the symbol without covering it.
14. Armor-Style Seraphim Shoulder Cap
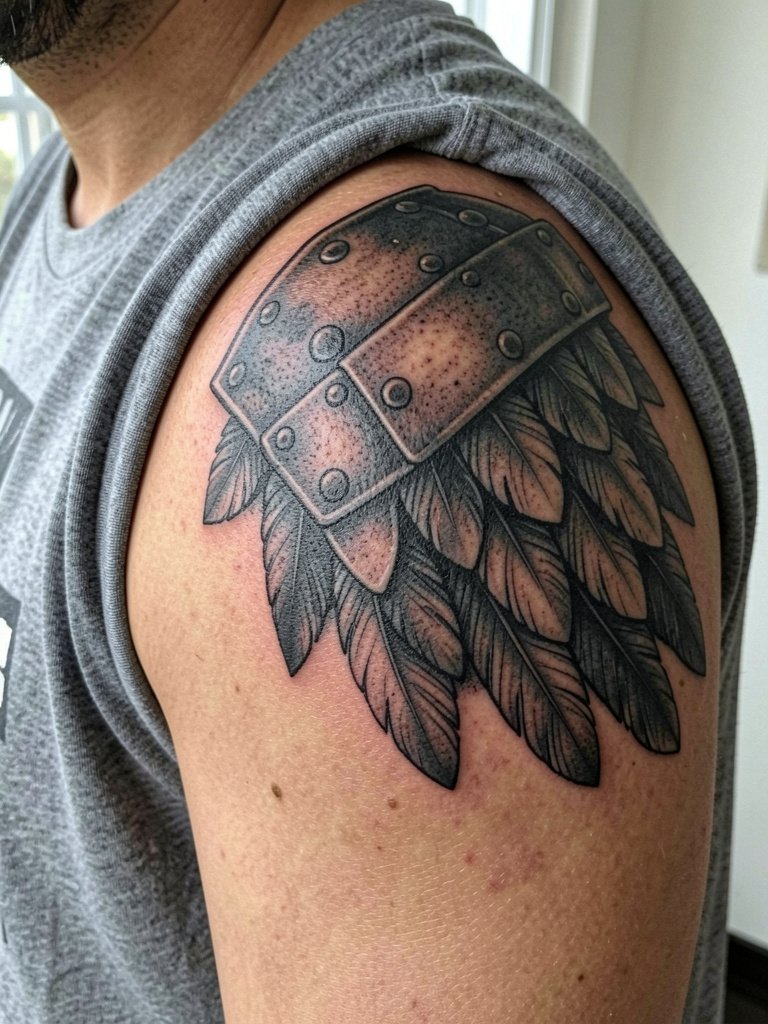
Shoulder caps benefit from a composition that follows muscle curves so the plates look structural. Ask for mockups that overlay the shoulder in motion to check how plates align when you lift the arm. Sessions are mid-level pain with two to three hour blocks common for shading. A typical error is forcing a flat design onto a rounded anatomy which skews lines. For casual show-off wear a tank top with wide armholes that reveals the shoulder cap naturally.
15. Scripted Seraphim Name with Winglet on Inner Bicep
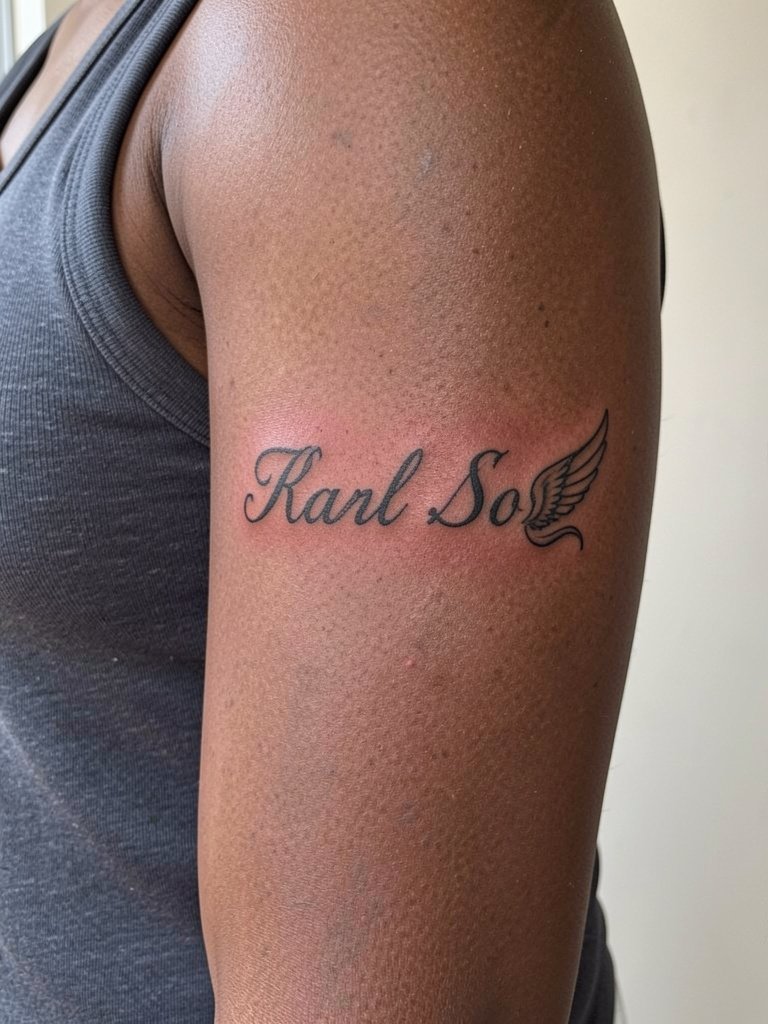
Inner-bicep script works because the area is relatively flat and sheltered. Bring two scaled references at different sizes so you and the artist can see how the script reads at three versus five inches. Request the winglet be slightly thicker than the script tail so it retains shape after healing. Expect mild to moderate pain and session times around 45 to 90 minutes. A frequent mistake is choosing an ultra-thin cursive that loses its flow. For daytime dressing try a short-sleeve button shirt that lets the inner bicep show when you roll the sleeve.
16. Classical Statuary Seraphim on Upper Thigh
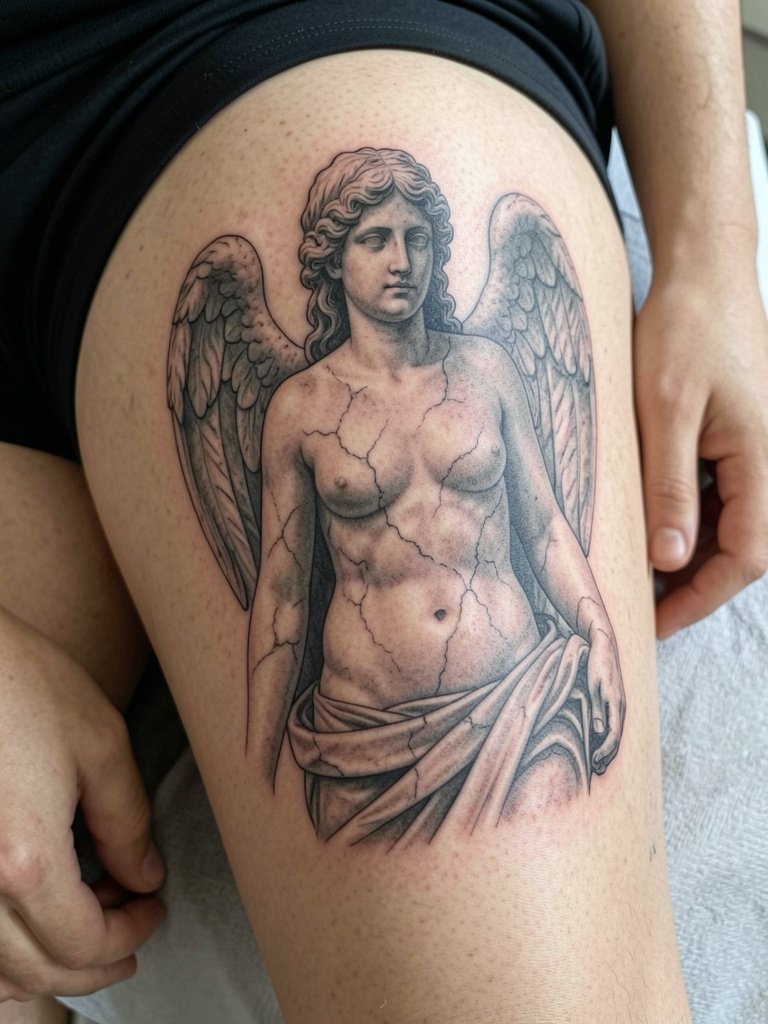
Classical statuary pieces age elegantly when shading imitates stone rather than skin texture. Ask the artist to favor soft gradation over tiny cross-hatching so the statue reads at arm's length. Thigh sessions let you sit comfortably and usually last two to three hours. A mistake is overworking the marble crack details too close to one another which can merge. For seasons with more leg exposure pair this with mid-thigh slip skirts that reveal the piece selectively.
17. Locket Seraphim Portrait on Sternum
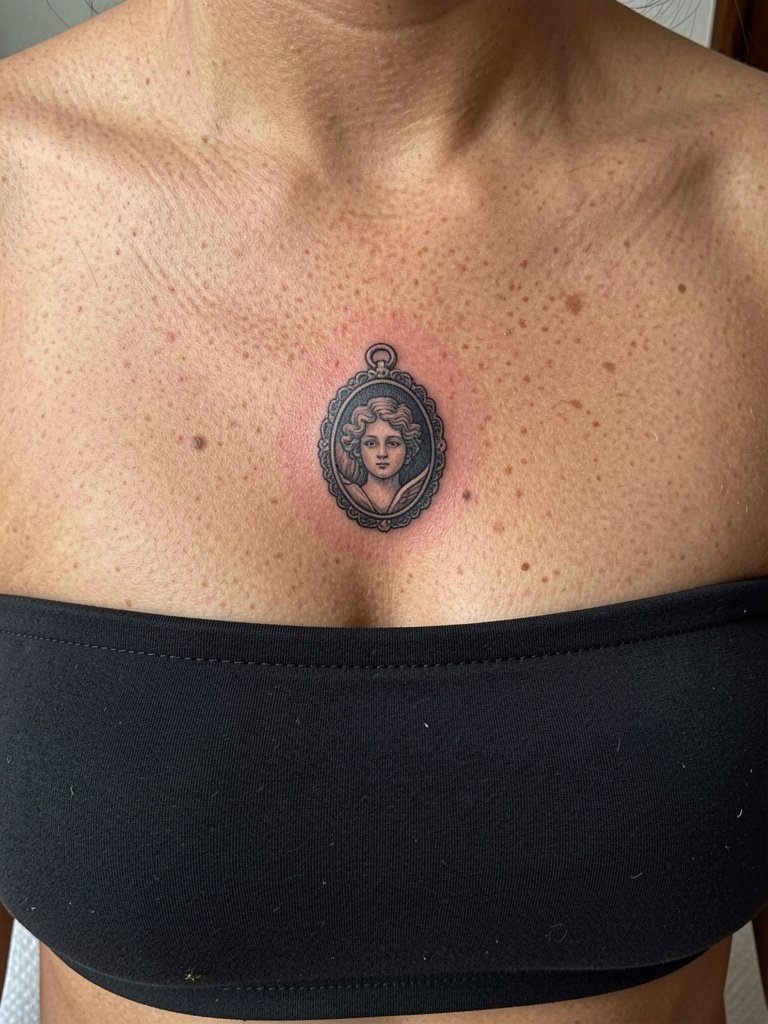
Tiny locket portraits are intimate and need clear edge definition to avoid looking smudged later. Request a bold perimeter and softer internal shading so the frame stays crisp. Sternum placement is tender and may require multiple short bursts rather than one long pass. A common mistake is packing portrait micro-detail that fades into an indistinct spot. For special occasions a fitted strapless dress can showcase the locket without risking friction from straps.
18. Mandorla Seraphim on Lower Back
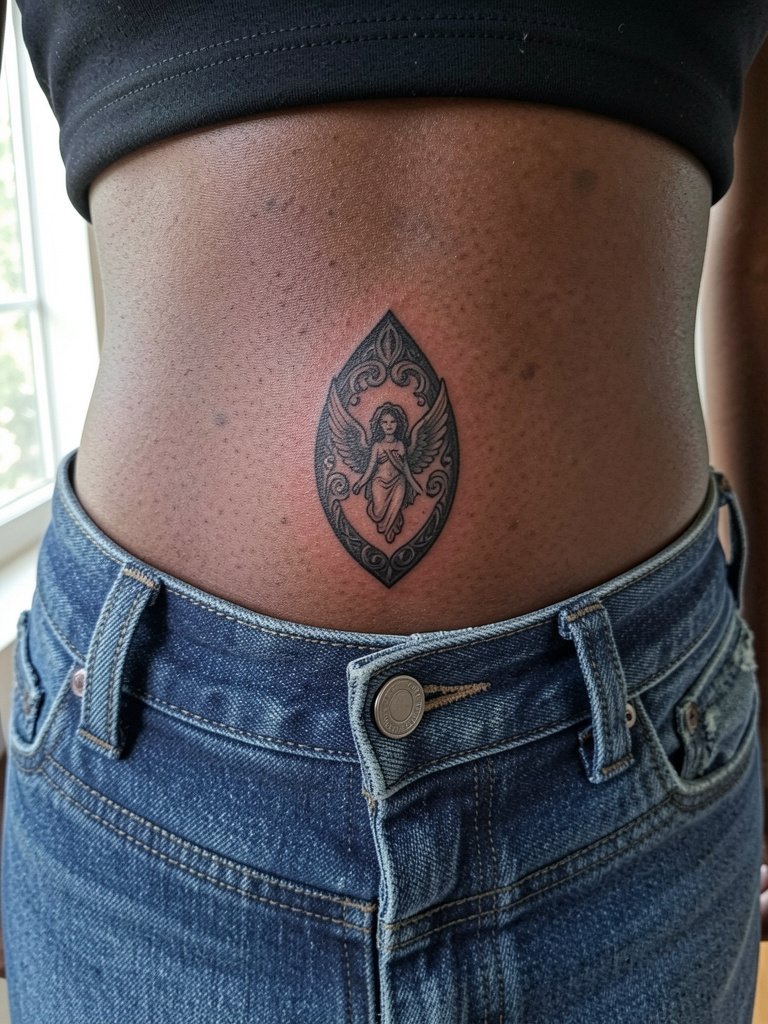
Lower-back mandorlas need to consider clothing pressure and waistbands. Ask for placement mockups while standing and seated to ensure the mandorla centers correctly above the waistband. Lower-back sessions are moderate in pain and usually done in one to two passes. A frequent error is placing the design too low where jeans rub the healing skin. For visibility choose low-rise jeans or a cropped top that reveal the mandorla on occasion.
19. Celtic-Knot Seraphim Wrap on Wrist
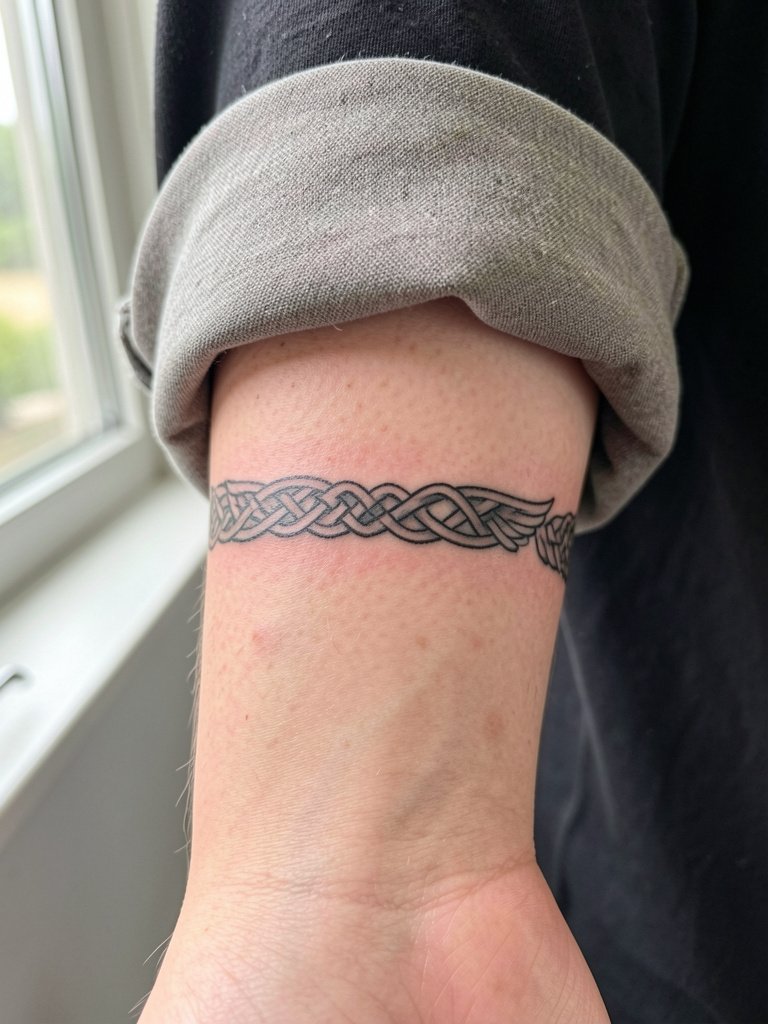
Wrist wraps need even spacing so the knotwork does not collapse over the joint. Ask the artist to show the wrap at the exact circumference to confirm how the knots meet at the closure. Sessions are short but the wrist gets a lot of hand movement that affects healing. A common mistake is overcomplicating the knots which become indistinct quickly. For accessories try a woven leather bracelet that complements the band without covering it.
20. Abstract Wing Band around Forearm
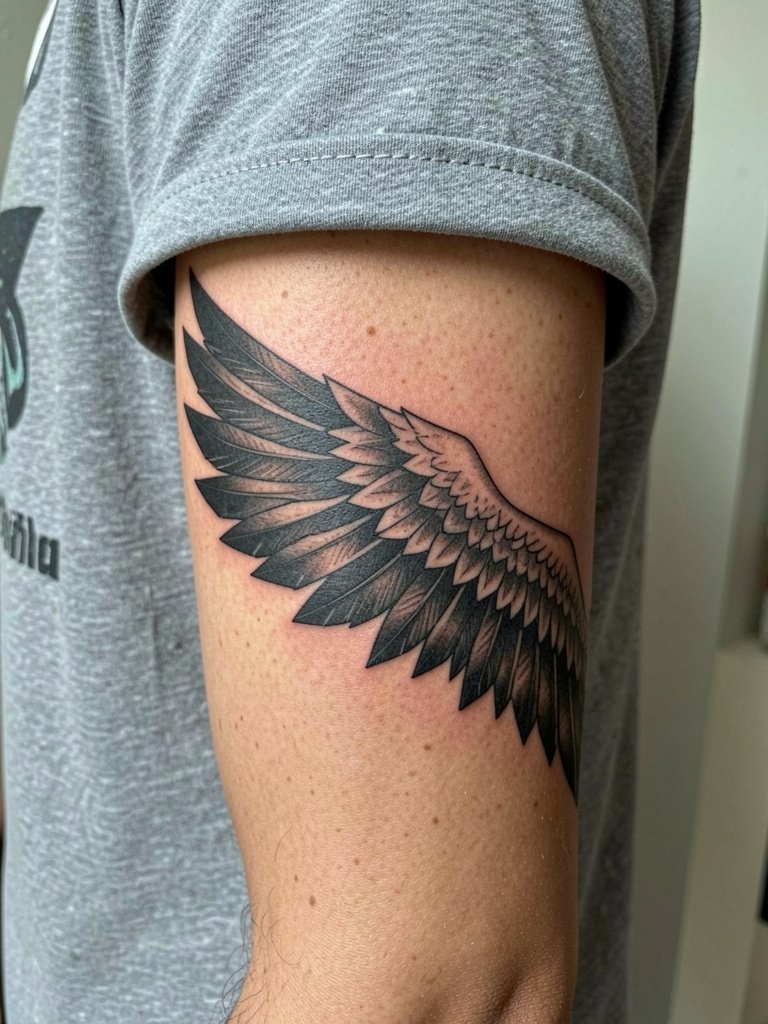
Bands across the forearm rely on rhythm and spacing to read as wings rather than stripes. Request a stenciled wrap test to see how the pattern aligns when the arm is at rest and when flexed. Forearm sessions are relatively comfortable and can be one to two hours long. The mistake is making the gaps too narrow which causes the pattern to blur. For wearing confidence pick a three-quarter sleeve blazer for work days that lets the forearm show in warmer moments.
21. Mirror Seraphim Pair on Shoulder Blades
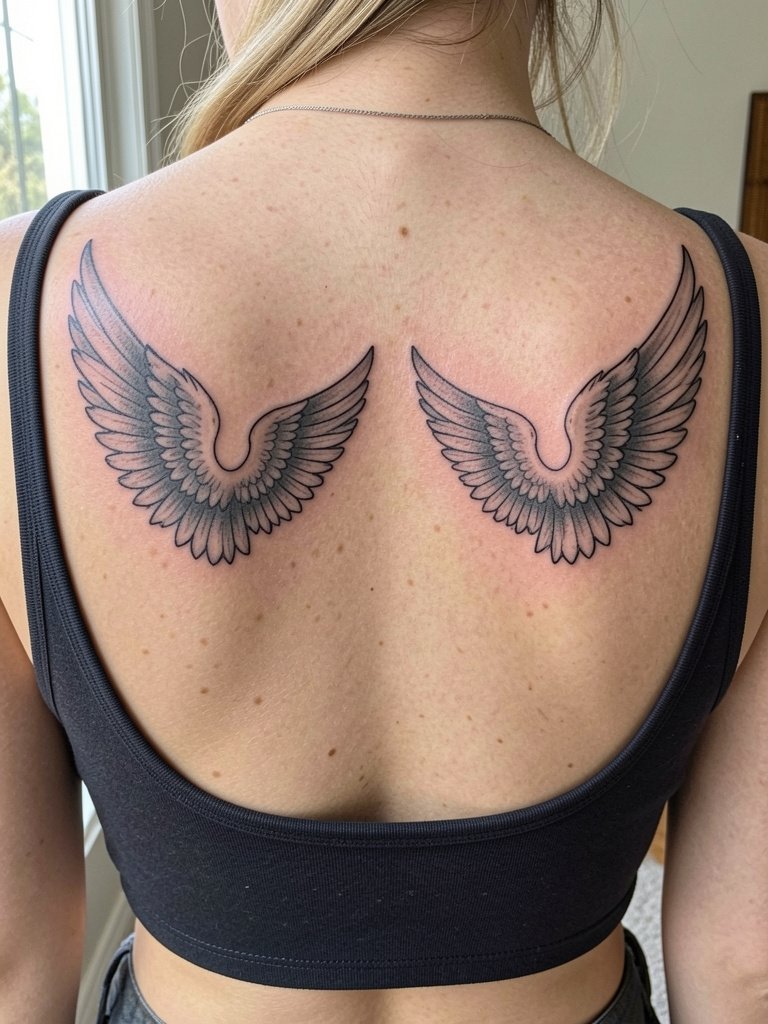
Mirrored shoulder-blade wings are forgiving because symmetry distracts from small inconsistencies. Ask the artist to photocopy the stencil centered on the spine to ensure equal distance from the midline. Sessions often require two matching passes and can be done in a single day if you have the time. The common mistake is slight offset symmetry which the eye notices immediately. For clothing choose low-back tanks that offer glimpses of both wings.
22. Minimal Black Line Seraphim on Ankle
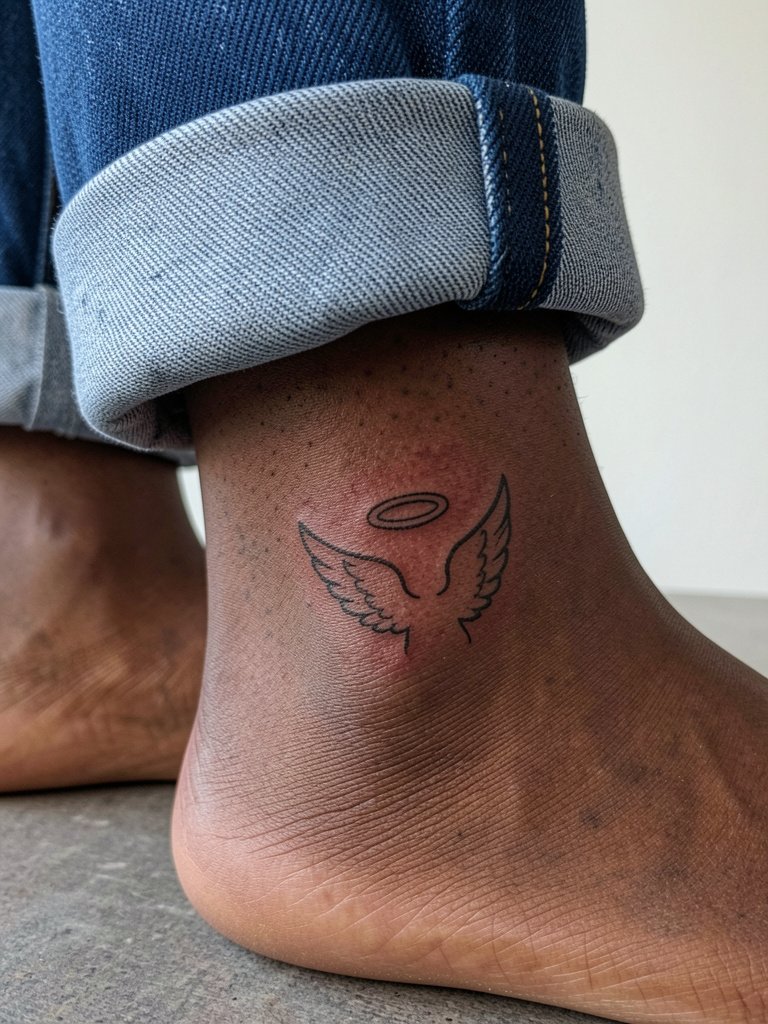
Ankle work encounters friction from socks and shoe collars, so keep lines bold and compact. Ask for a slightly stronger outer contour and a note about how the design will read under daily movement. Sessions are quick but touch-ups are common in the first year. A mistake is picking ultra-fine wings that get scuffed by shoes. For footwear that shows the piece, try low-profile slip-on sneakers that expose the ankle without rubbing the design.
23. Micro Dot Seraphim Orbit on Finger Side
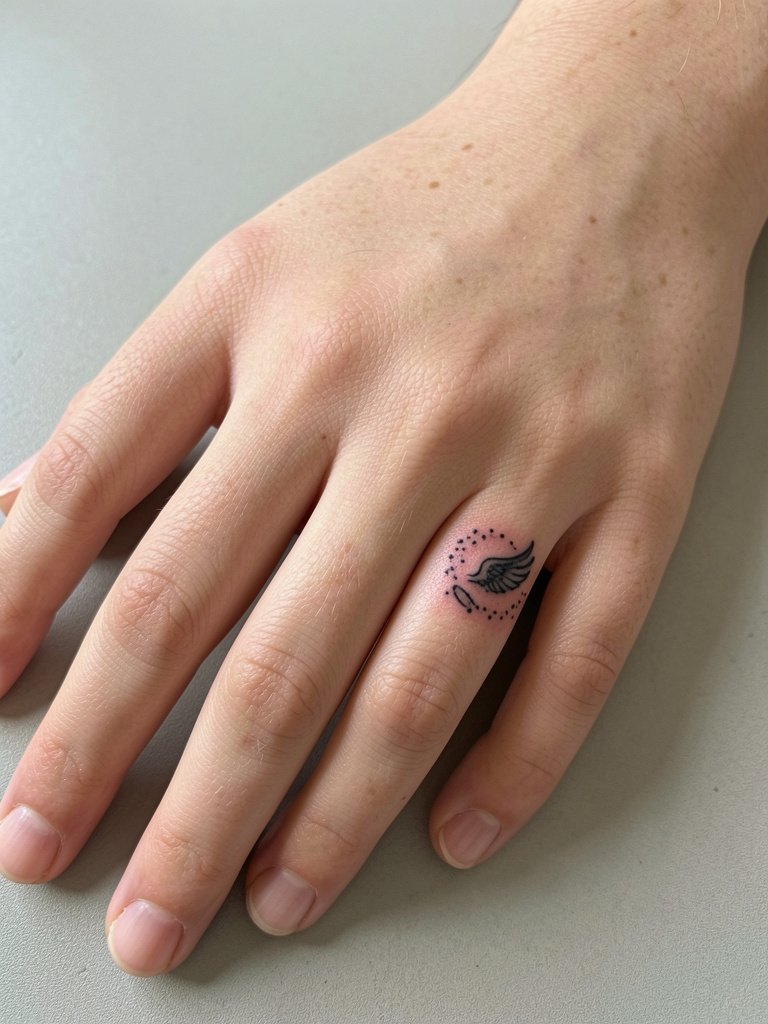
Side-finger dot clusters are delicate and need stronger anchor points to stay visible. Discuss scaling with your artist so dots are slightly larger than the reference, which improves longevity. Sessions take minutes but expect a touch-up within the first year. The frequent mistake is using sparse microdots that disperse with normal hand use. For complementary jewelry choose a thin open ring that frames the design without rubbing.
24. High-Contrast Silhouette over Scapula
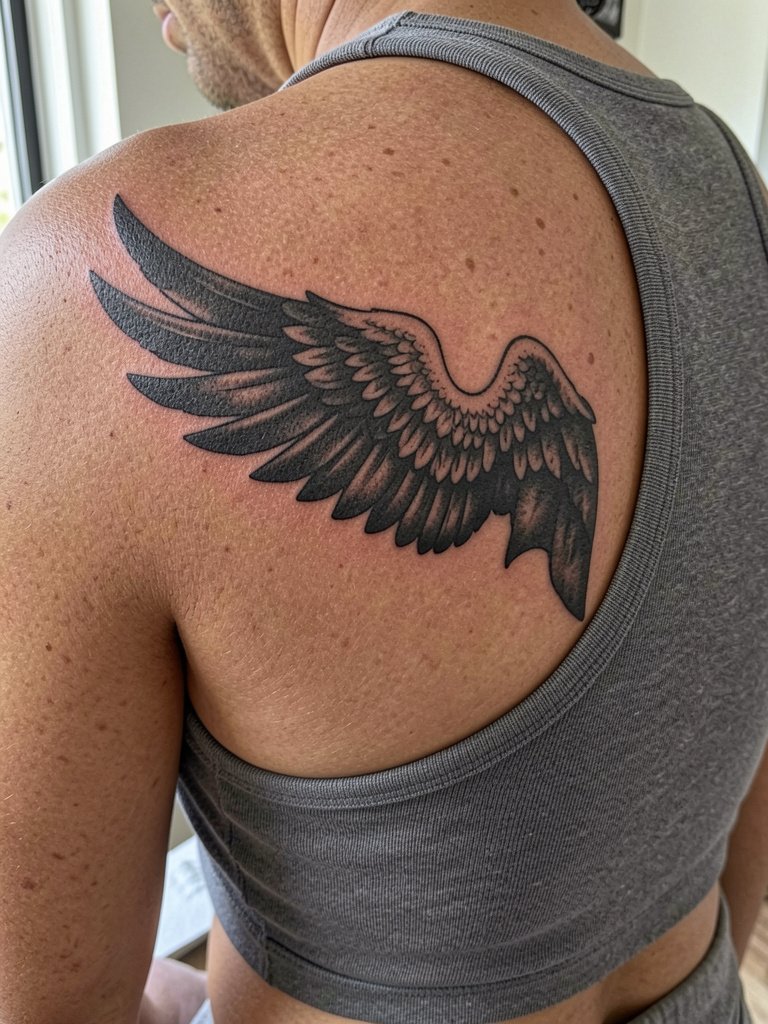
Silhouettes over the scapula read from distance and resist blowout when edges are clean. Ask the artist to block the silhouette with one dense pass then refine edges on a second pass to ensure crispness. Scapula area tattoos can be done in a single two-hour session and have moderate pain. A mistake is filling large areas without checking healed contrast on similar skin tones. For summer outfits the scapula works well with a cropped tank that reveals the silhouette.
25. Halation Seraphim Chest Strip
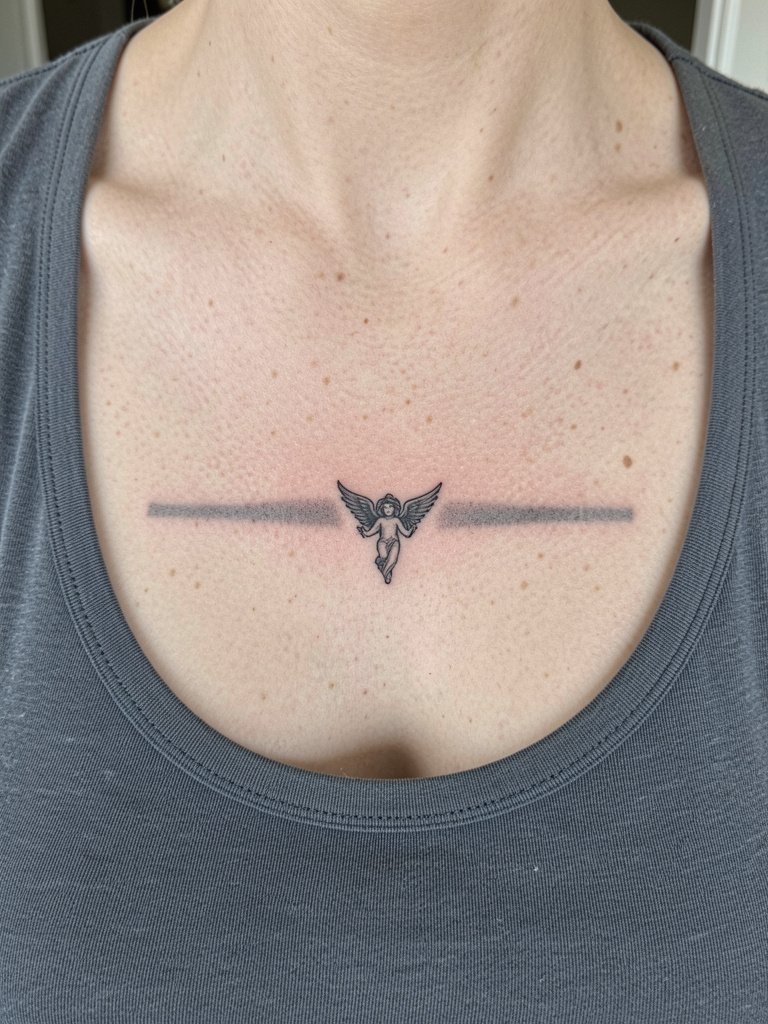
Thin halation strips need spacing so the grey wash does not encroach on the tiny emblem. Ask the artist to test the wash density on similar skin before committing. Chest strip sessions are brief but the area is exposed to sun, so plan sunscreen after healing. A typical mistake is choosing a wash that looks good fresh but fades into a grey haze over time. For styling try a v-neck tee that shows the strip neatly.
26. Stained-Glass Seraphim Thigh Panel
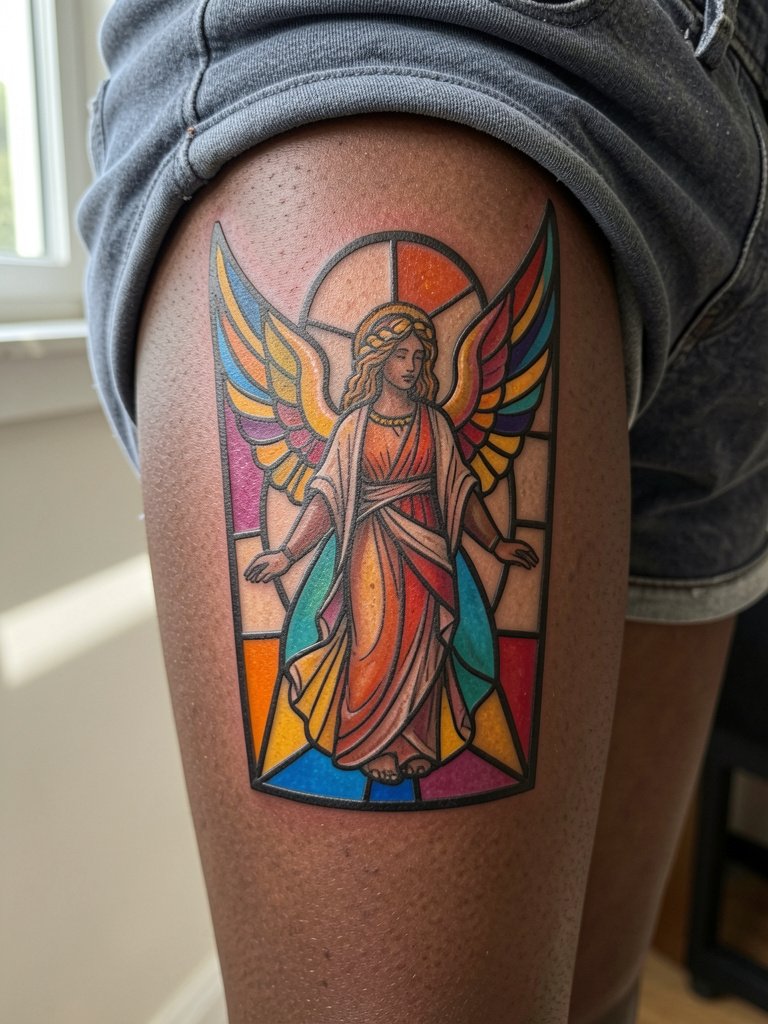
Stained-glass panels look stunning when lead lines are bold and colors are packed. Ask the artist about contrast on your skin tone so colors retain vibrancy. Thigh sessions are comfortable for longer sittings and often completed in extended two to three hour blocks. A mistake is choosing too many tiny panes which can blur. For statement looks consider strappy sandals and a midi skirt that let the thigh panel appear.
27. Fine-Line Seraphim Sleeve Starter on Outer Forearm
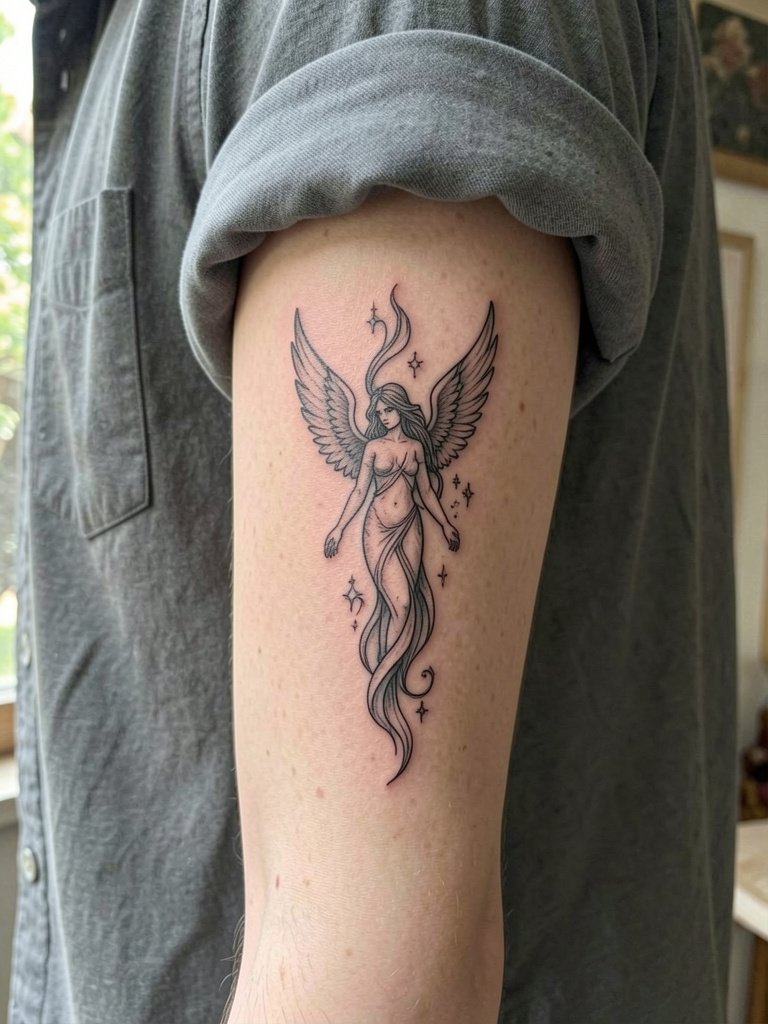
A sleeve starter should establish scale and spacing for future additions. When you meet the artist bring placement photos of a half-sleeve so you both agree on how motifs will breathe as the piece grows. Outer-forearm sessions are moderate in pain and commonly split into one to two hour passes. The common error is starting too close to the wrist with fine detail that limits expansion. For everyday wear layer with a lightweight cardigan that can be pushed back to show the starter piece without sun exposure.
Frequently Asked Questions
Q: How do I avoid religious appropriation or misrepresentation when choosing seraphim imagery?
A: There are two camps on sacred imagery. One group argues that any use of religious iconography by someone outside that faith requires deep research and, often, permission because symbols can carry living ritual meaning. The other group believes that respectful adaptation with clear attribution and education can honor the source while expressing personal devotion. My practical approach is to learn the symbol's origins, use visual elements that acknowledge tradition, and be transparent about your intent during the consult.
Q: Where can I find healed portfolios and community feedback without naming individual artists?
A: Search platform tags and location filters for healed photos and community threads. Try hashtags that combine the subject and style and use city filters on image platforms to find nearby studios. Reddit threads and dedicated portfolio tags on larger tattoo sites often include multiple healed shots across skin tones and ages which helps assess longevity.
Q: How much will fine-line seraphim work need touch-ups over time?
A: Fine-line and single-needle pieces typically need a touch-up between six months and two years, depending on placement and skin type. Areas with heavy movement or friction usually need earlier refreshes. Plan on at least one follow-up within the first year for most delicate work.
Q: Are there placements you should avoid for heavy symbolic seraphim pieces?
A: Avoid places with constant high friction like the top of the foot or directly on joints for dense symbolic detail. If you want a chest or ribpiece for symbolism, opt for slightly larger line weights and spacing so the iconography remains readable. For less visible or intimate options, the thigh or upper back offers a larger canvas with lower daily abrasion.
Q: What should I wear to the studio for sensitive placements like ribs, sternum, or inner thigh?
A: Choose loose, easy-to-change clothing that exposes the area without you adjusting fabric during the session. Options include a fitted sports bra for chest work, loose shorts for thigh sessions, and a zip-up hoodie for quick cover afterward. A plain cotton top in a neutral tone and comfortable pants are usually best to avoid fabric dyes transferring after the session.
Q: How do seraphim designs age across different skin tones?
A: Heavier black outlines and careful contrast planning help seraphim motifs read across all skin tones. Artists often adjust saturation and line weight based on pigment and undertone so the piece keeps definition as it heals. Ask for healed examples from clients with similar skin tones when you want a realistic expectation.
