
I spent months curating mountain tattoo ideas because the real struggle wasn't finding pretty pictures—it was finding designs that actually feel like freedom and age well on skin. I wanted grounded pieces that tell a story, not just something trendy that peels out after a year.
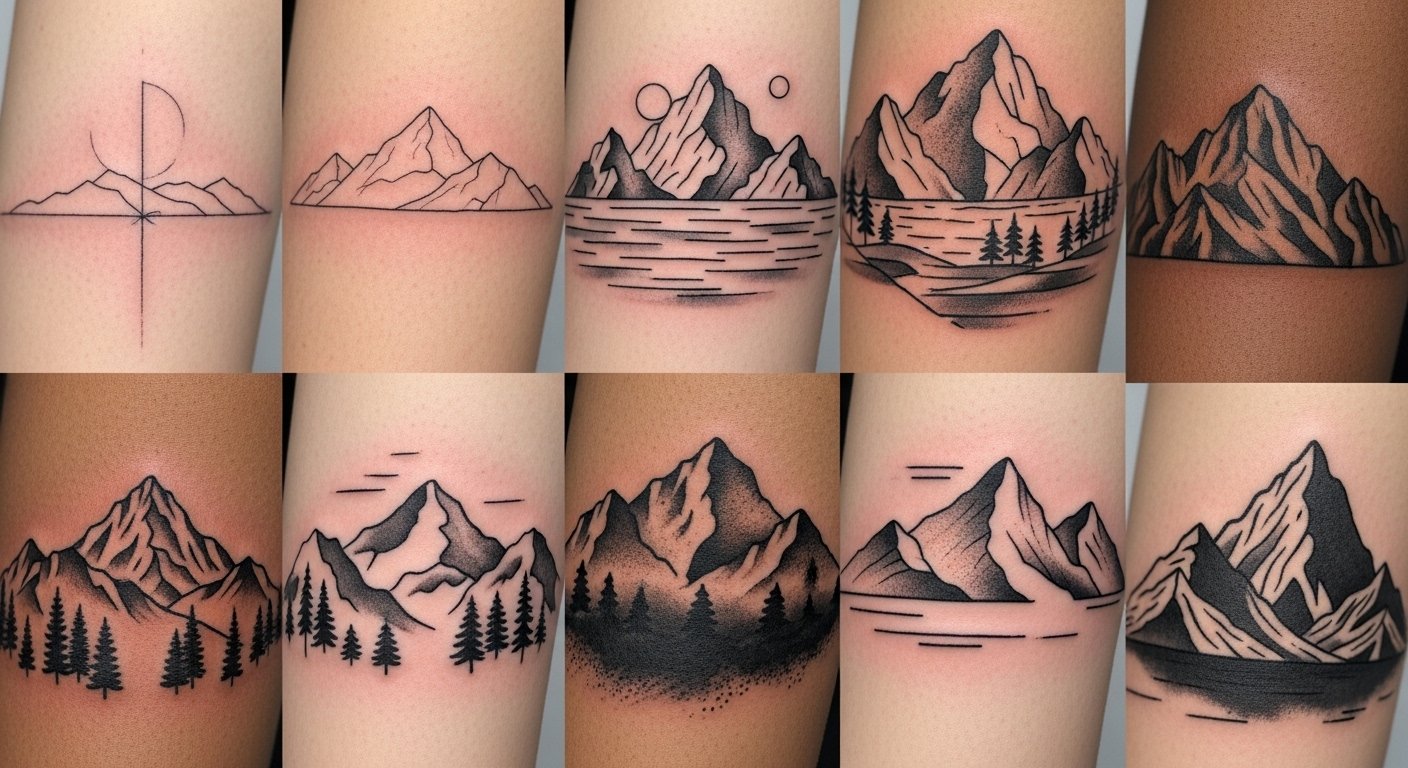
This list focuses on mountain tattoo styles that read as freedom—geometric, realism, watercolor, and neo-traditional vibes. These work on forearms, sleeves, ribs, ankles, backs, and calves. From what I’ve seen in artist feeds this year, mountains paired with trees, moon, or water tell the clearest stories and hold up best healed.
1. Geometric Mountain Band on Inner Forearm
Style/Technique: Geometric / Fine Line
Pain Level: Low-Medium (3/10)
Session Time: 1–2 hours
Best For: First tattoo, visible statement
Geometric mountain bands use sharp angles and negative space to suggest peaks. I like this for the inner forearm because the flat canvas keeps lines straight and shows texture as it heals. Pain is moderate—the inner forearm is tender but tolerable. Healing is straightforward: expect 2–3 weeks for surface flakes and 2–3 months for full settling. Fine line geometry looks crisp fresh but can soften over years if lines are ultra-thin; ask your artist to bolden critical lines slightly. Common mistake: asking for too many tiny triangles—simplicity reads cleaner healed. Mention you want consistent line weight and a reference for healed examples during your consult.
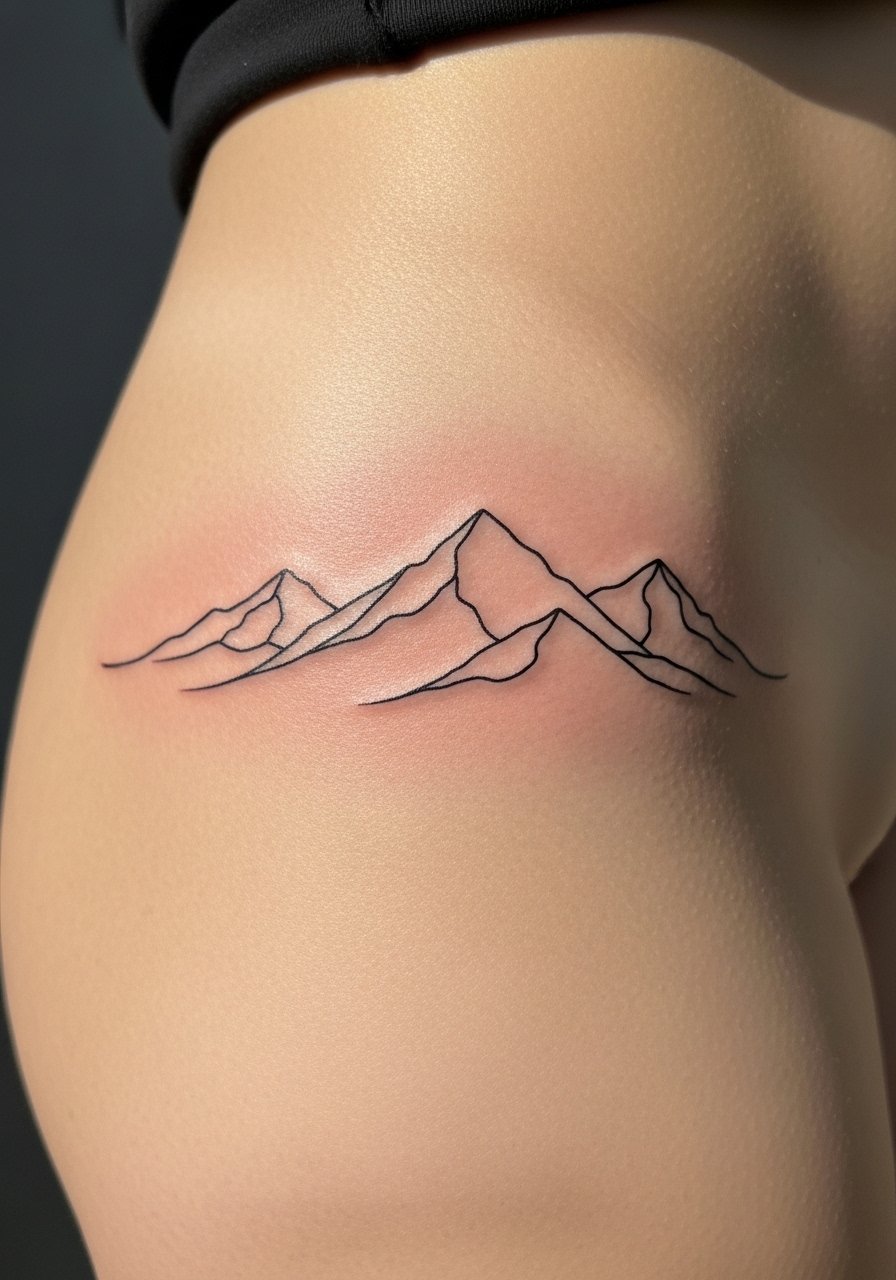
2. Minimalist Mountain Range on Ankle
Style/Technique: Minimalist / Single Line
Pain Level: High (5–6/10)
Session Time: 30–60 minutes
Best For: Subtle piece, easy to hide
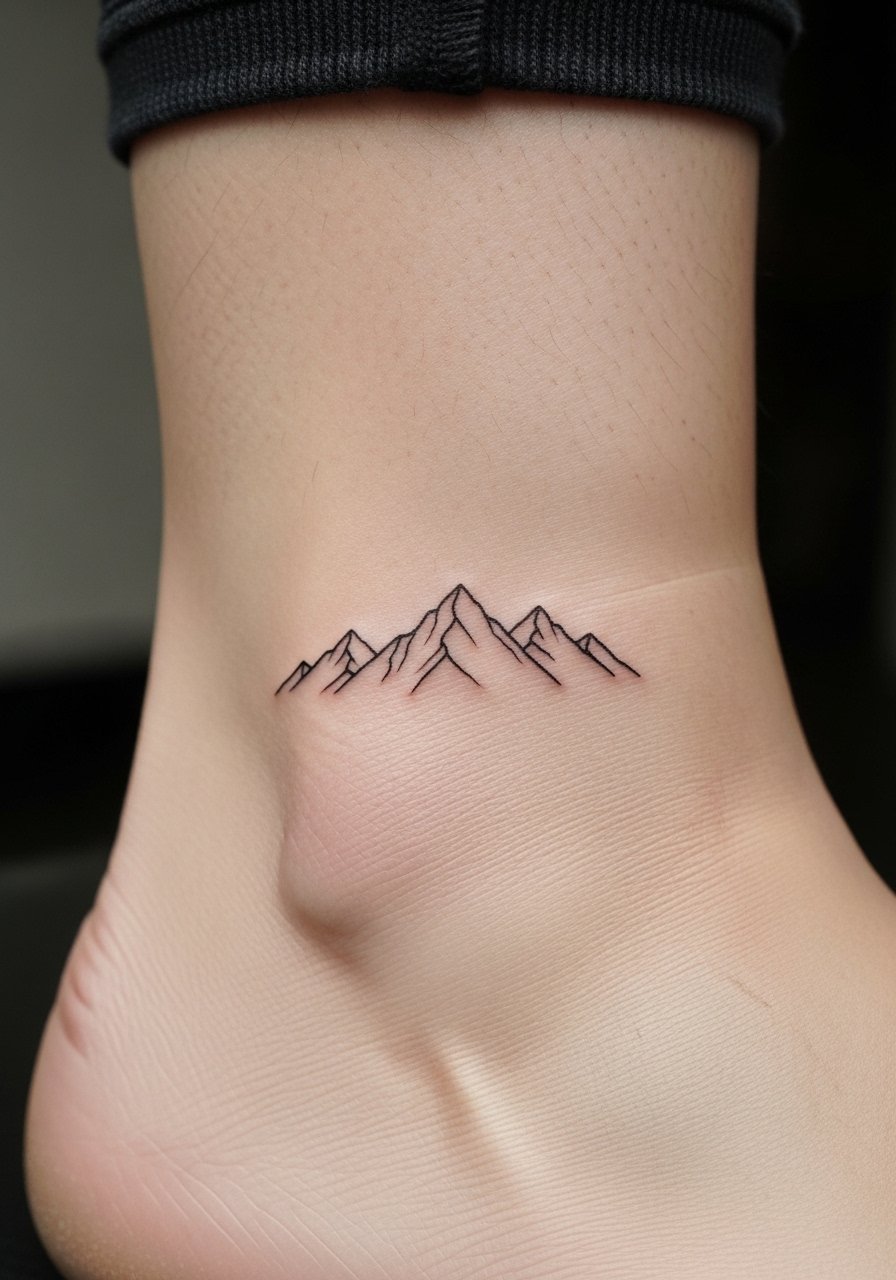
A tiny mountain range above the ankle is clean and meaningful. The ankle bites more than the calf because it’s close to bone, so expect sharper sensation. Healing is a bit slower thanks to movement and socks rubbing—keep it uncovered at home and avoid tight footwear for a week. Minimalist single-line designs can blur faster than bolder work, so slightly thicker lines or a small dot anchor helps longevity. I always tell people to test a single-line script elsewhere first if they worry about how thin lines will age on their skin. Ask your artist about healed photos of ankle thin-line work.
3. Watercolor Mountain with Sunrise on Shoulder Blade
Style/Technique: Watercolor / Painterly
Pain Level: Low-Medium (3/10)
Session Time: 2–4 hours
Best For: Color lovers, soft statement
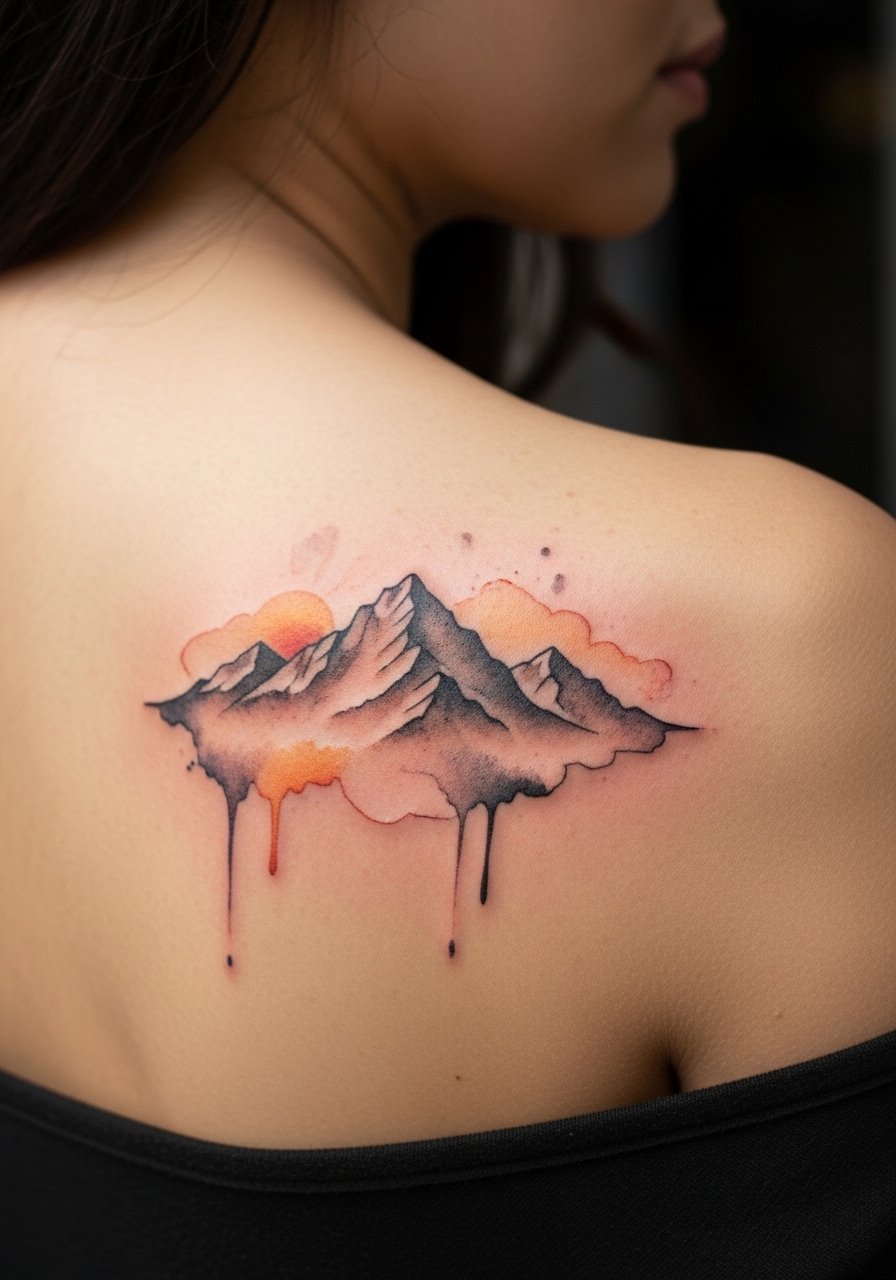
Watercolor gives mountains a dreamy, liberated feeling—perfect when paired with a sunrise or gradient sky. The shoulder blade is great because it’s flat and hides under clothing easily. Pain is manageable; it’s one of the calmer spots. Color fades faster than black, so expect touch-ups in years if you want vivid saturation forever. From what I’ve seen, artists who specialize in color layering produce the most natural healed results. Common mistake: using fluorescent pigments or tiny splatter areas that heal patchy. Ask to see healed color work on your skin tone.
4. Blackwork Mountain Silhouette on Sternum
Style/Technique: Blackwork / Solid Fill
Pain Level: High (7-8/10)
Session Time: 2–4 hours
Best For: Bold center-chest statement
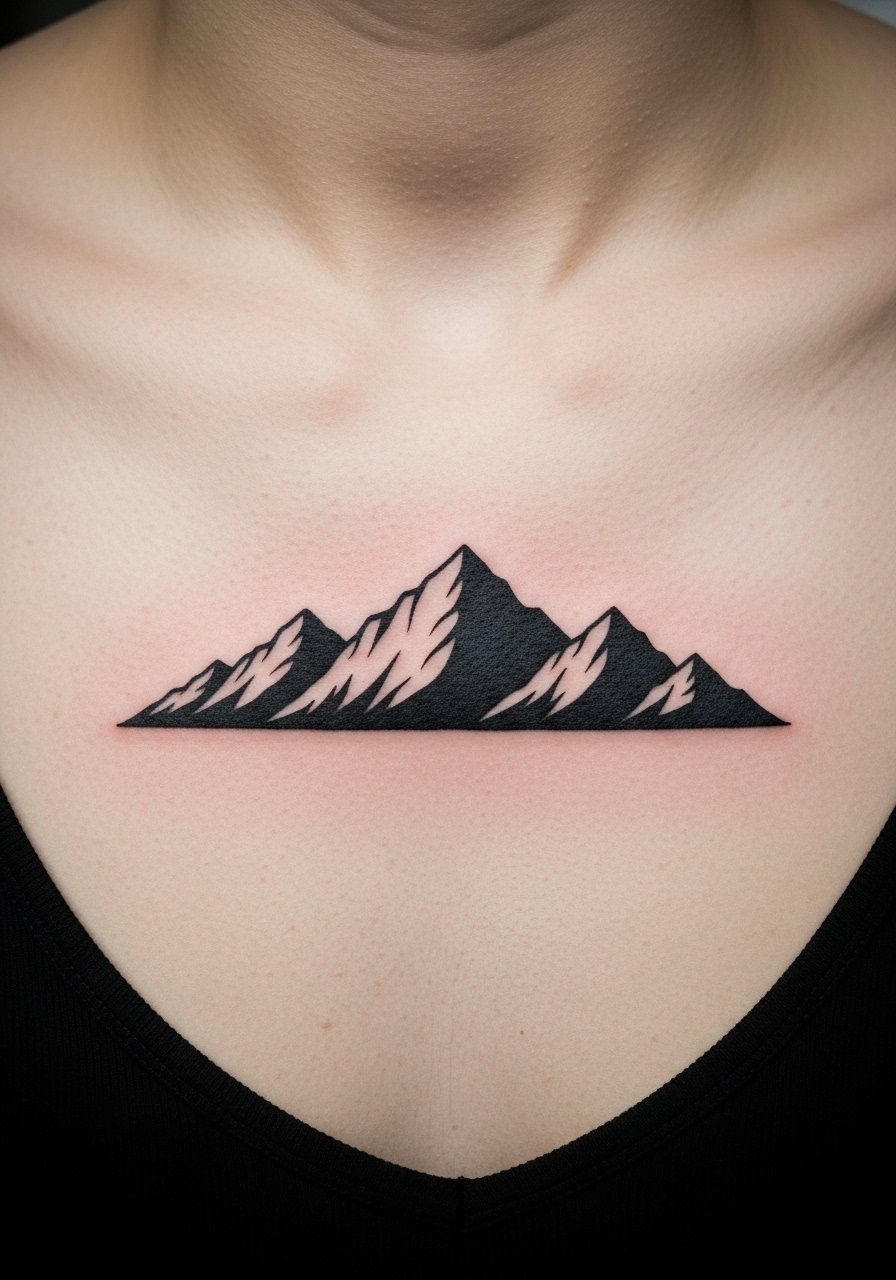
A bold black silhouette across the sternum reads dramatic and grounded. The sternum is painful—thin skin over bone—so expect intense sensation during the session. Healing takes careful attention because clothing rubbing can irritate the area. Blackwork ages well; solid fills retain contrast longer than thin lines. Avoid overly intricate negative-space details in this spot; they can blur into a patch over time. Tell your artist you want clean, saturated black and show references for healed chest blackwork.
5. Micro-Realism Mountain on Inner Wrist
Style/Technique: Micro-Realism / Black & Grey
Pain Level: Medium (4-6/10)
Session Time: 1–2 hours
Best For: Tiny, detailed personal piece
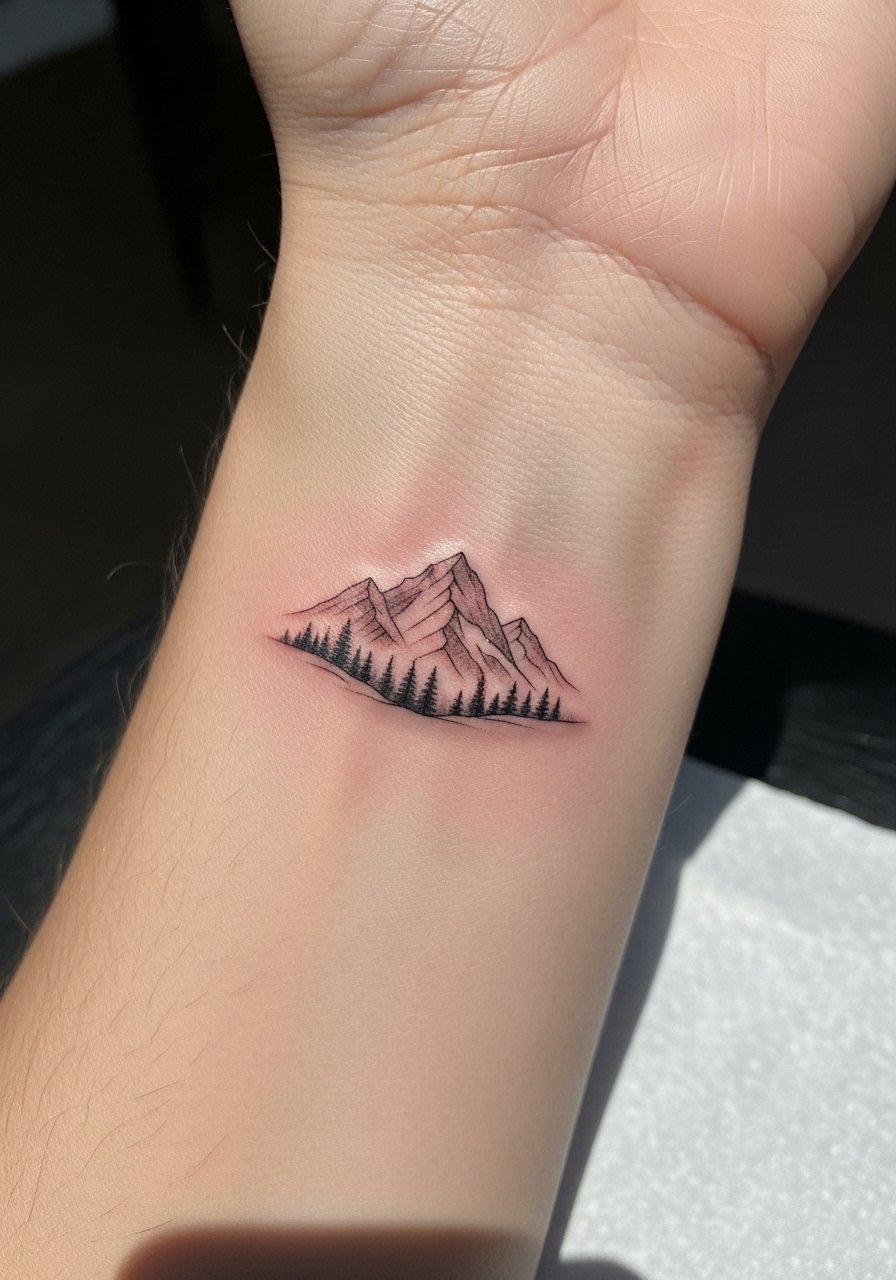
Micro-realism on the wrist packs a lot of detail into a small area. The inner wrist is sensitive but visible—great for a meaningful piece. Healing needs gentle care; avoid watches and bracelets until healed. Tiny shading can lose clarity over time, so artists usually recommend compressing contrast (strong darks and light highlights) rather than tiny mid-tone gradients. A common mistake is asking for excessive fine detail in a very small tattoo—scale it to the wrist. Ask your artist for healed wrist macro photos.
6. Neo-Traditional Mountain With Wolf on Upper Arm
Style/Technique: Neo-Traditional / Color & Line
Pain Level: Low (2-4/10)
Session Time: 3–5 hours
Best For: Narrative piece, sleeve starter
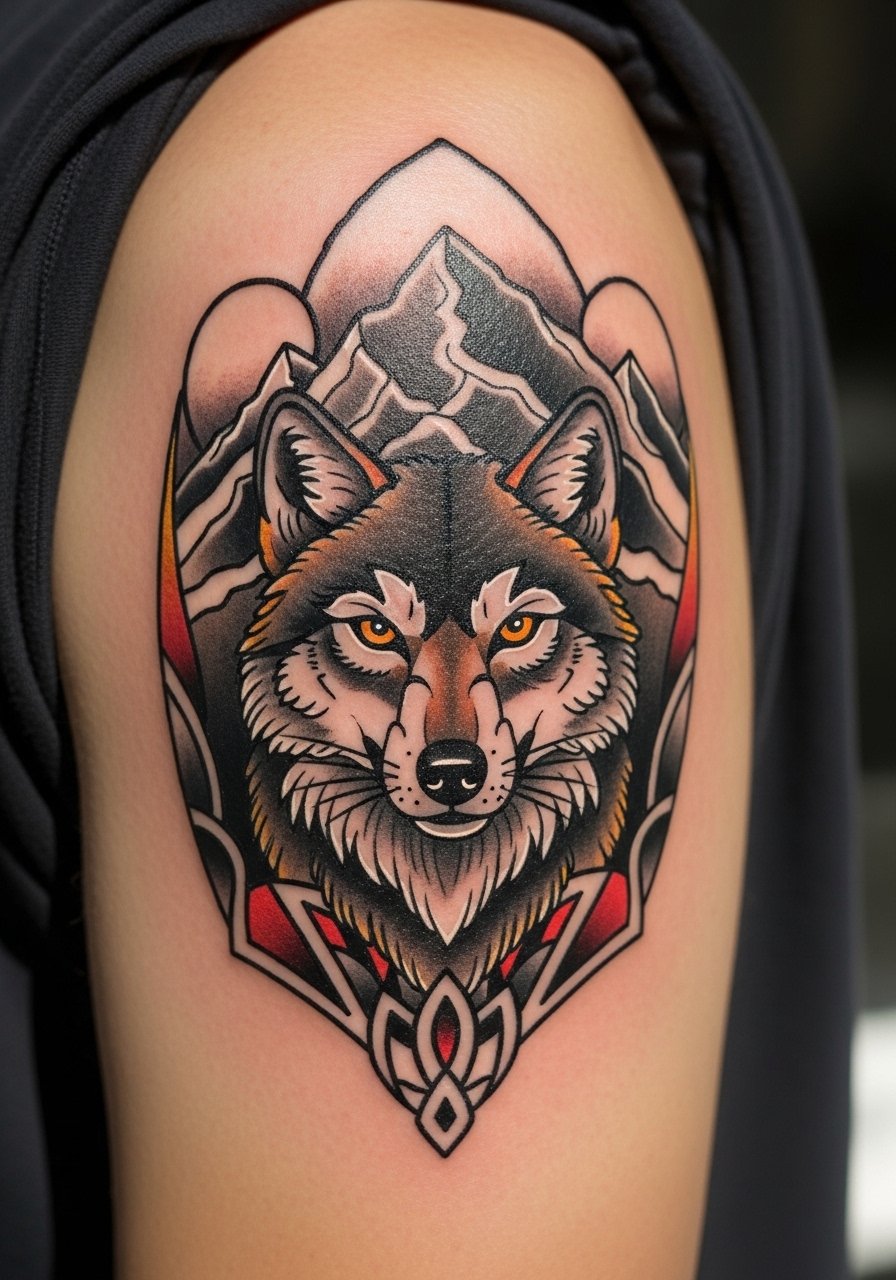
Neo-traditional allows mountains to pair with animals like wolves for storytelling. The upper arm is forgiving pain-wise and great for show-and-hide. Colors and bold lines in this style age predictably well; the heavy outlines keep the image readable as pigments soften. Healing is routine; expect surface scabbing but minimal complication. Avoid tiny text or microscopic details within the fur—they blur. In my experience, artists who work in neo-traditional styles will have portfolios showing 1–3 year healed pieces—ask to see them.
7. Linework Mountain and Constellation Behind Ear
Style/Technique: Fine Line / Micro
Pain Level: High (6-7/10)
Session Time: 30–60 minutes
Best For: Hidden, intimate piece
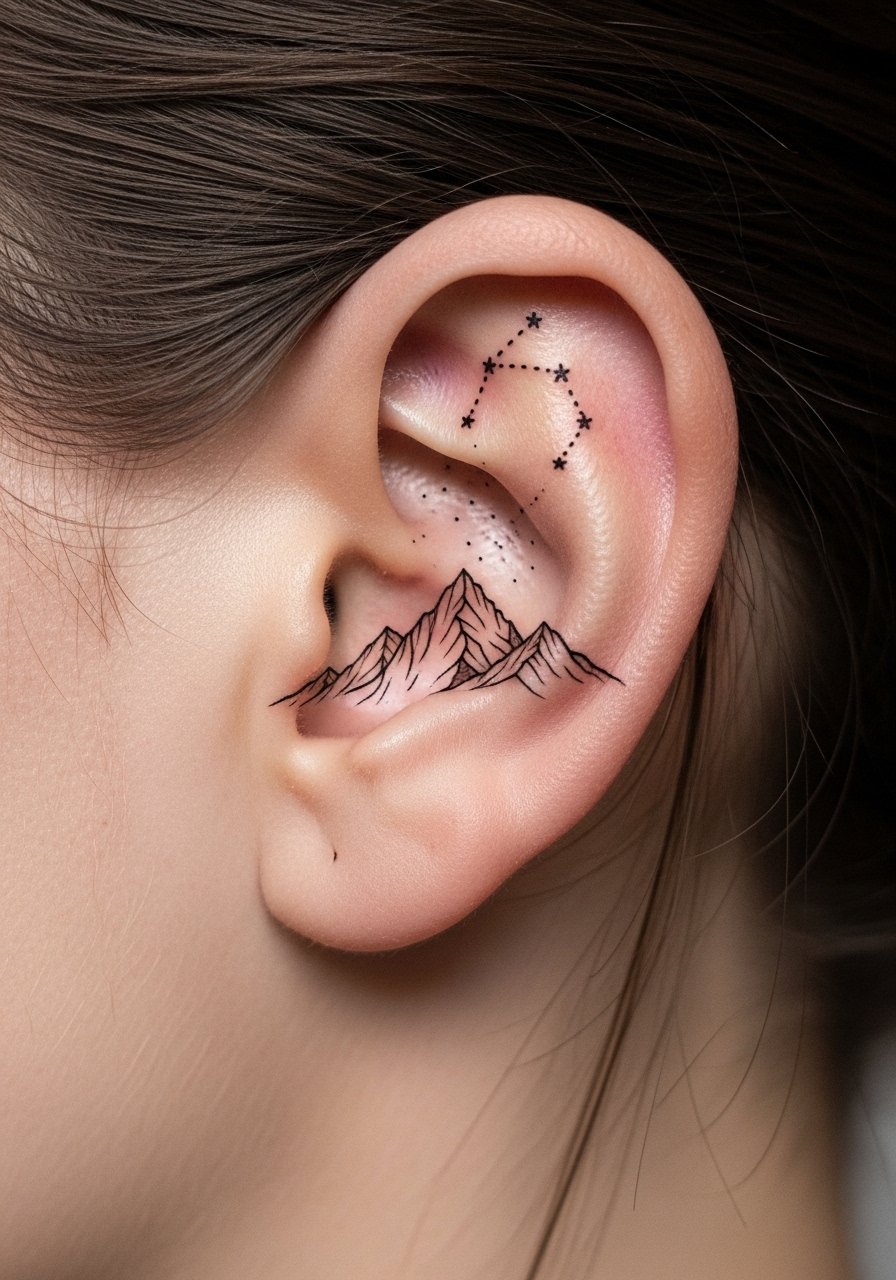
Behind-the-ear tattoos are intimate and cool but sting due to thin skin and proximity to bone. This placement is ideal if you want a subtle daily reminder of freedom. Small fine lines can blur here, so a slightly bolder line weight helps retention. Healing requires being careful with hair products. I advise clients to avoid very delicate dotwork in this spot—hair growth and shampooing can disrupt scabs. Ask for healed behind-ear examples.
8. Mountain and Moon Ribcage Watercolor Blend
Style/Technique: Watercolor / Illustrative
Pain Level: Very High (8-9/10)
Session Time: 3–5 hours (may split)
Best For: Private, emotional piece
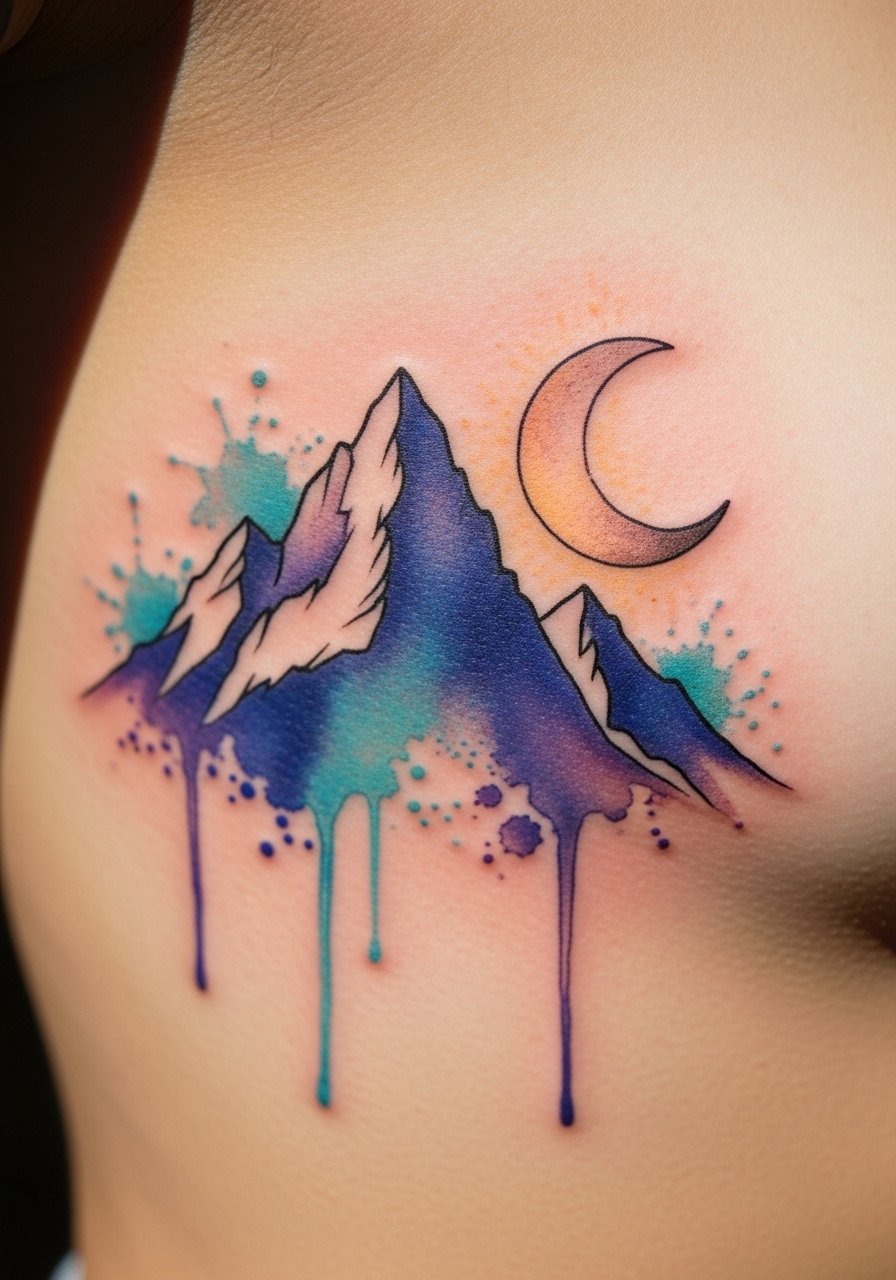
The ribcage is notoriously painful but perfect for a personal mountain and moon piece. Colors can create a soft, meditative vibe. Healing needs extra attention—tight clothing or sleeping positions that press the area will irritate scabs. Watercolor fades faster, especially on areas that stretch; plan for touch-ups down the road. From my experience, splitting the session into two helps manage pain and allows the artist to layer color cleanly. Avoid expecting crisp edges in watercolor—it's meant to be softer.
9. Black-and-Grey Realistic Mountain on Thigh
Style/Technique: Realism / Black & Grey
Pain Level: Low-Medium (3/10)
Session Time: 3–6 hours
Best For: Large realistic scene, coverable
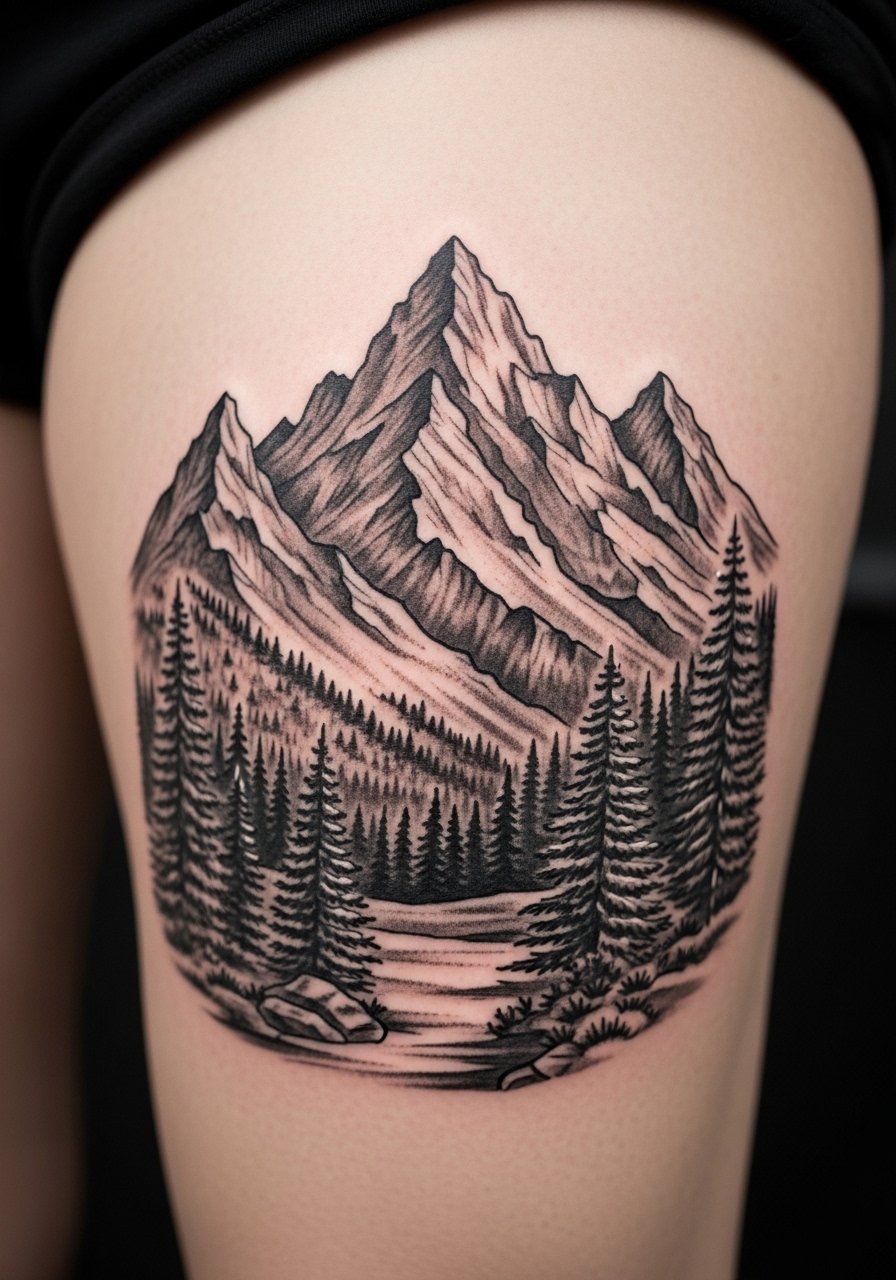
The thigh is a forgiving area for a large, realistic mountain scene. Pain-wise it’s one of the easier spots and allows for longer sessions. Realism holds well when artists use strong contrast—mid-tones can look muddy if over-blended. Expect several hours; larger scenic pieces might require touch-ups after initial healing. Avoid overly delicate tiny branches if you want long-term clarity—scale elements so the main composition reads at arm’s length. Ask your artist about healed thigh realism photos to check texture.
10. Mountain Compass on Chest Pocket
Style/Technique: Neo-Traditional / Small Color
Pain Level: Medium (4-6/10)
Session Time: 1–2 hours
Best For: Symbolic, travel-inspired piece
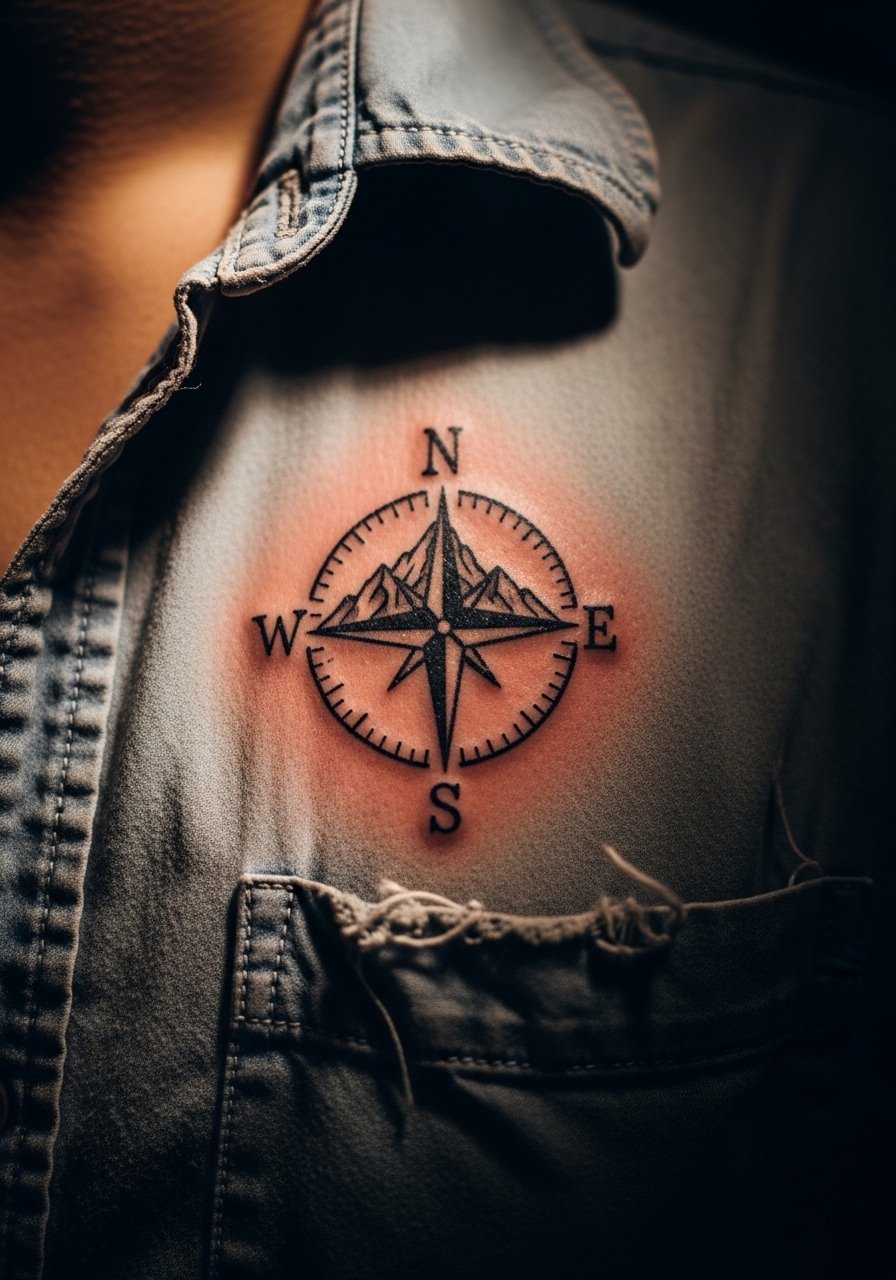
A mountain integrated with a compass is a strong freedom symbol—navigation + peaks. Near the chest pocket it sits well under shirts but is visible when wanted. The chest has variable pain depending on proximity to bone. Small color accents work nicely here and age reasonably if saturation is solid. Common mistake: asking for micro-compass ticks—keep the compass simple so it reads from a distance. Tell your artist you want clear contrast and healed examples on chest placements.
11. Forearm Landscape Sleeve with Mountains and Pines
Style/Technique: Black & Grey / Illustrative Sleeve
Pain Level: Medium (4-6/10)
Session Time: Multiple sessions
Best For: Sleeve project, storytelling
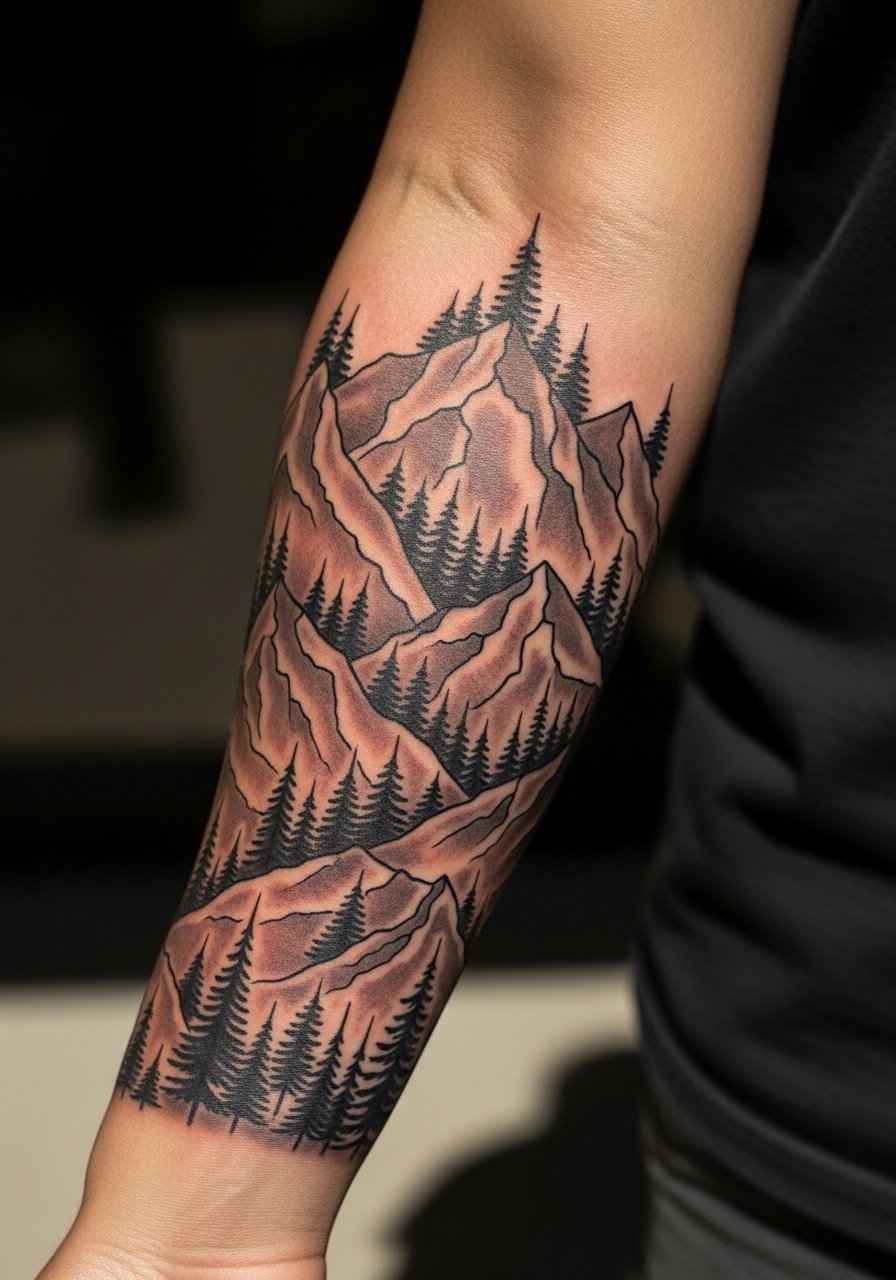
A forearm sleeve lets you build a narrative—mountains flowing into pine forests and rivers. Pain is moderate and sessions are staged. I’ve seen sleeves heal differently depending on artist layering; lighter mid-tones can dull, so ask for clean contrast between darks and lights. Forearm sleeves get more sun, so long-term maintenance (sunscreen) is essential to keep mood intact. Avoid cramped compositions; flow matters so the piece breathes when the arm moves. Ask your artist for healed sleeve progress photos.
12. Tiny Mountain on Finger Knuckle
Style/Technique: Minimalist / Micro
Pain Level: High (7-8/10)
Session Time: 15–30 minutes
Best For: Micro, symbolic, always visible
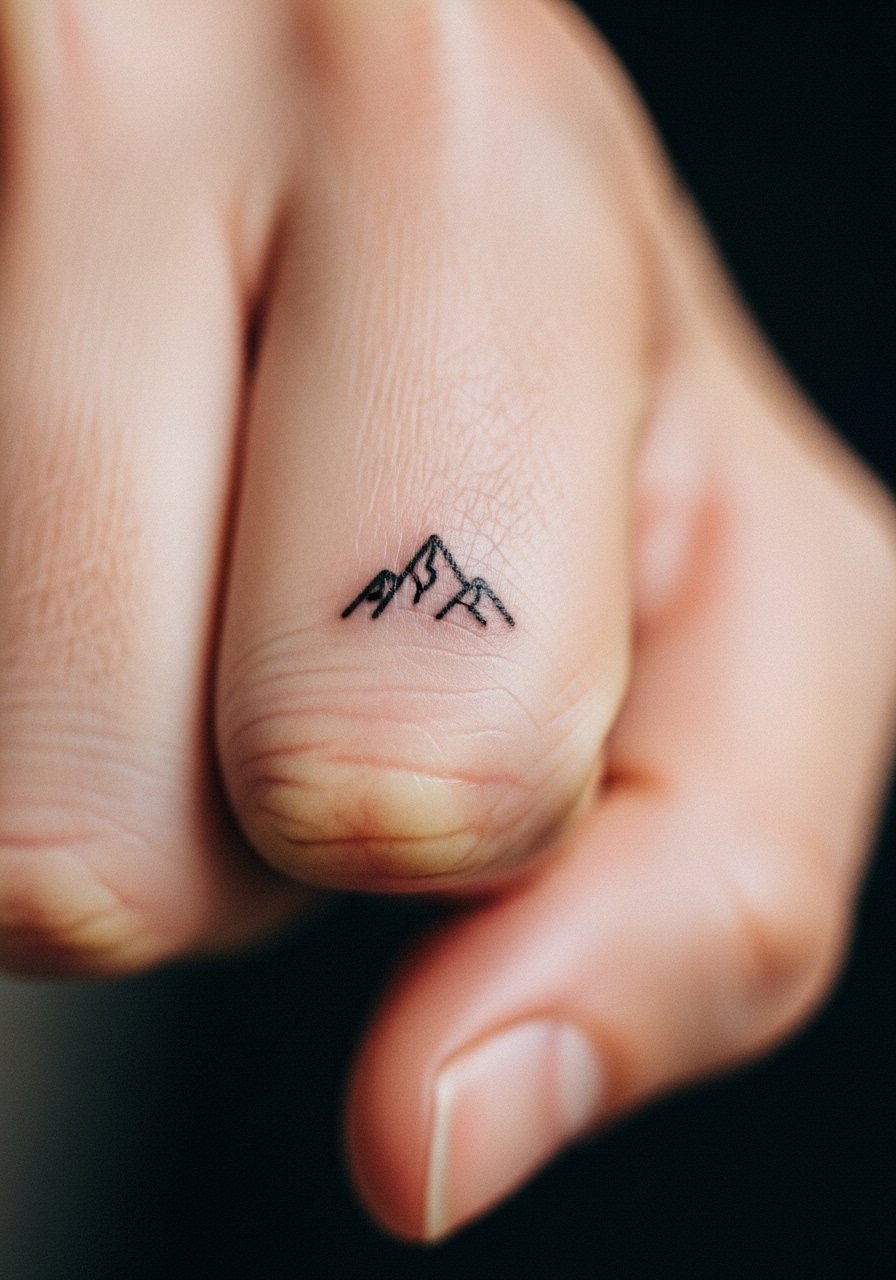
Finger knuckles are bold choices but blur quickly because of constant hand use and thin skin. I’ve watched knuckle tattoos soften fast; expect faster fading and potential touch-ups. Pain is sharp and localized. Tiny mountain icons work as personal tokens but require realistic expectations. If you want longevity, consider placing slightly above the knuckle or using bolder simplified shapes. Ask your artist about their experience maintaining finger ink.
13. Mountain and Wave Calf Piece
Style/Technique: Illustrative / Line & Shade
Pain Level: Low-Medium (2-4/10)
Session Time: 2–4 hours
Best For: Balanced landscape, visible in summer
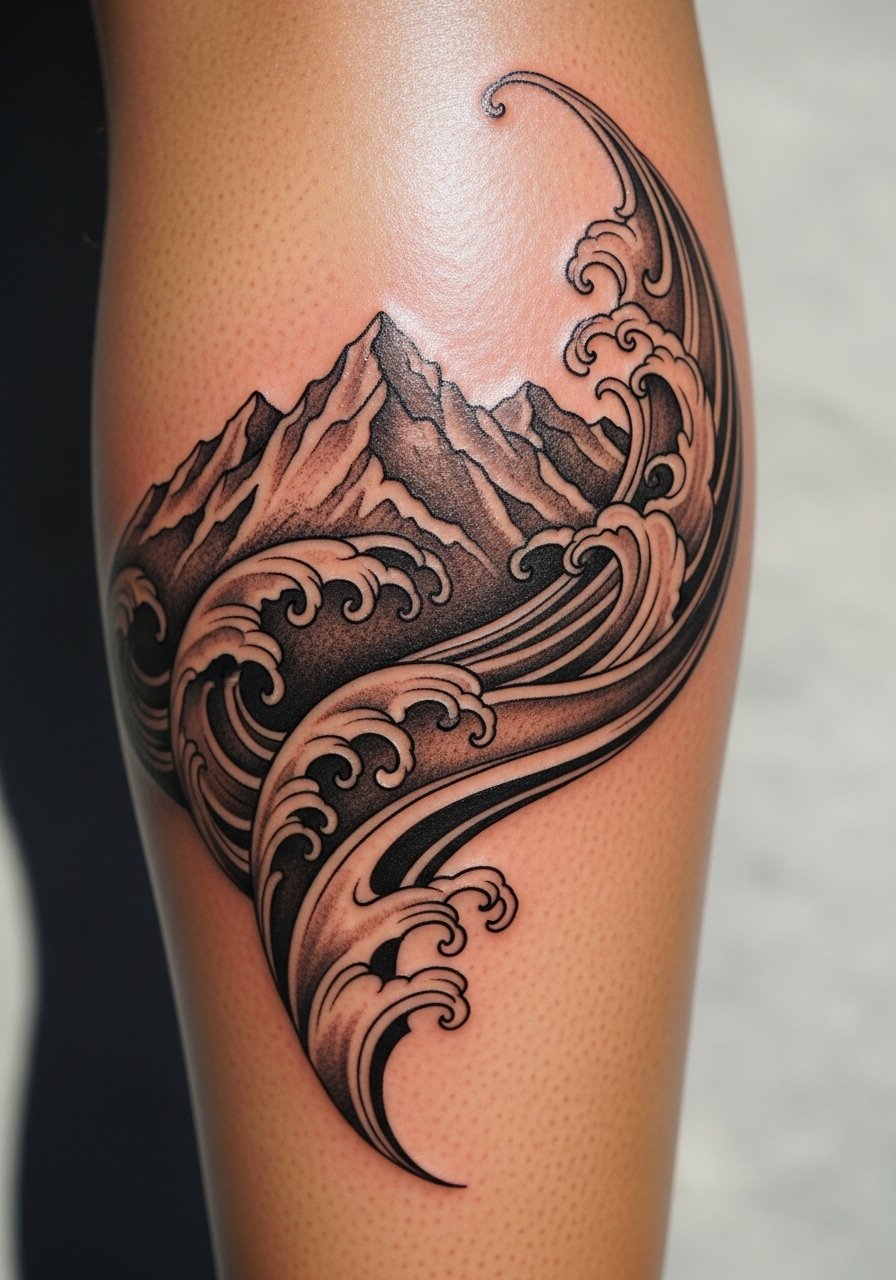
Combining mountain and wave evokes movement and freedom—land and sea. The calf is a low-pain area with great canvas space for mid-sized pieces. Lines and shading age well here because the skin is thicker. Be mindful of clothing rubbing from long pants in the first week. Avoid overfilling small wave textures that might blur; keep main elements bold and let texture live in negative space. Ask to see calf healed reference photos.
14. Single Peak Behind Knee (Popliteal)
Style/Technique: Minimalist / Small Linework
Pain Level: High (7-8/10)
Session Time: 45–90 minutes
Best For: Hidden, playful placement
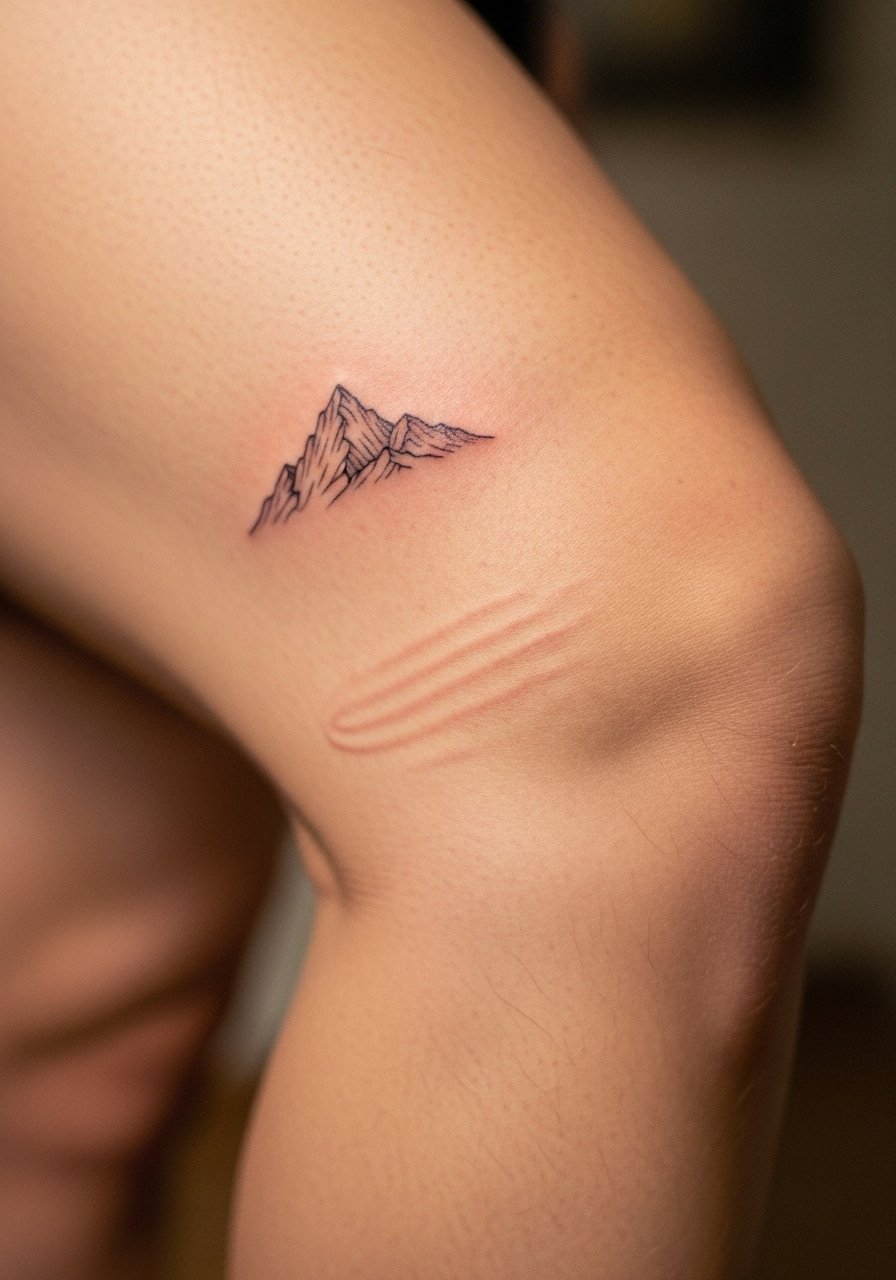
Behind-the-knee tattoos are surprisingly painful due to movement and thin skin. They’re a fun hidden spot that peeks out in summer. Keep designs simple; intricate detail struggles to survive here. Healing needs mobility moderation—avoid bending too much in early days to reduce scab cracking. I suggest a simple silhouette or single-peak mark. Ask your artist how they handle movement areas and healed examples.
15. Mountain Range Sleeve Wrap Around Upper Arm
Style/Technique: Blackwork / Bold Lines
Pain Level: Medium (4/5/10)
Session Time: 3–6 hours (multiple)
Best For: Cohesive arm wrap, bold statement
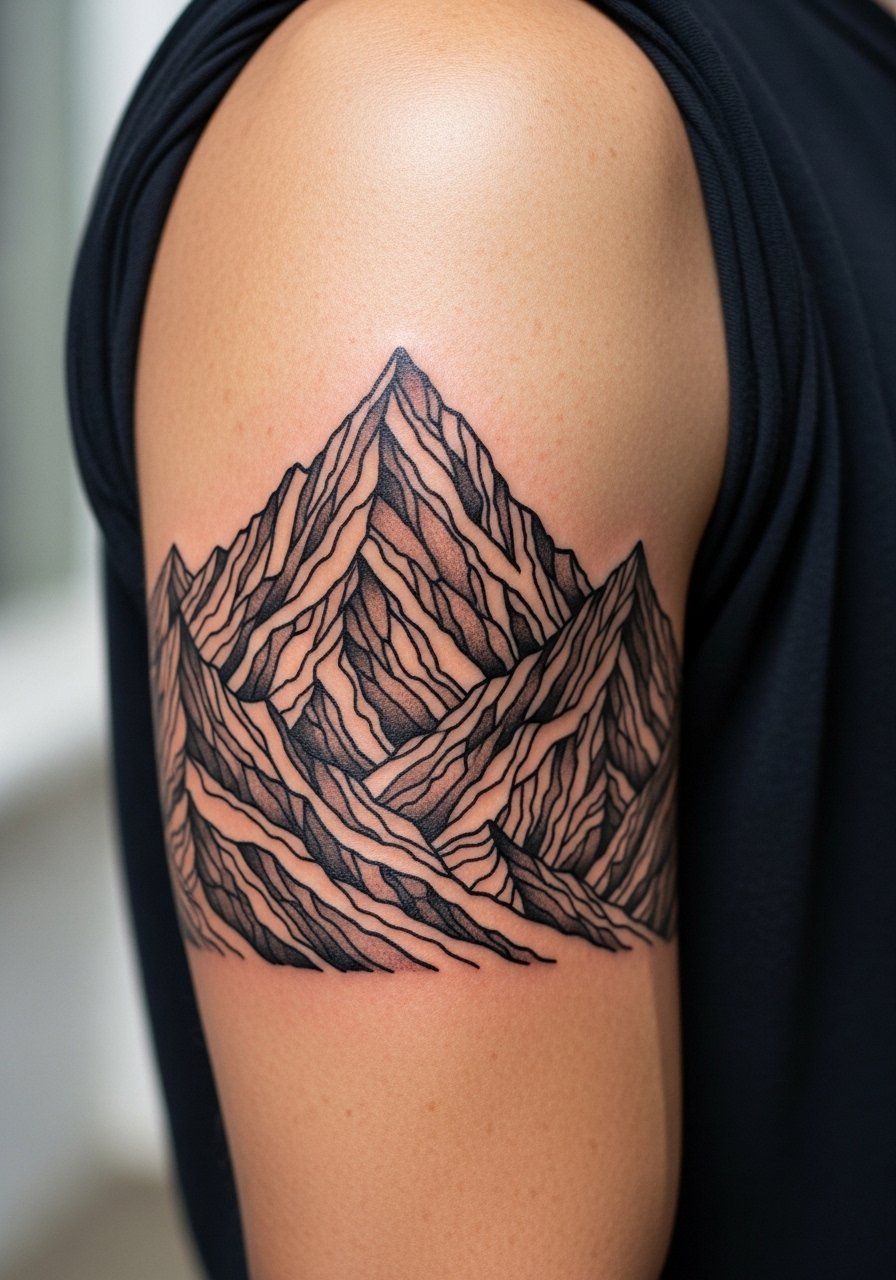
A wraparound mountain range across the upper arm looks continuous and powerful. Bold black lines help the piece retain form as skin shifts. Pain is manageable and sessions can be grouped. Aging is friendly for bold styles. A common error is adding too many tiny textures that read as noise when healed—ask for clear foreground/midground separation. In my experience, wrapping designs need mapping on the arm while upright—ask the artist to check placement standing and seated.
16. Mountain and Tree Ankle Bracelet
Style/Technique: Fine Line / Ornamental
Pain Level: High (5-7/10)
Session Time: 1–2 hours
Best For: Feminine, decorative, travel-inspired
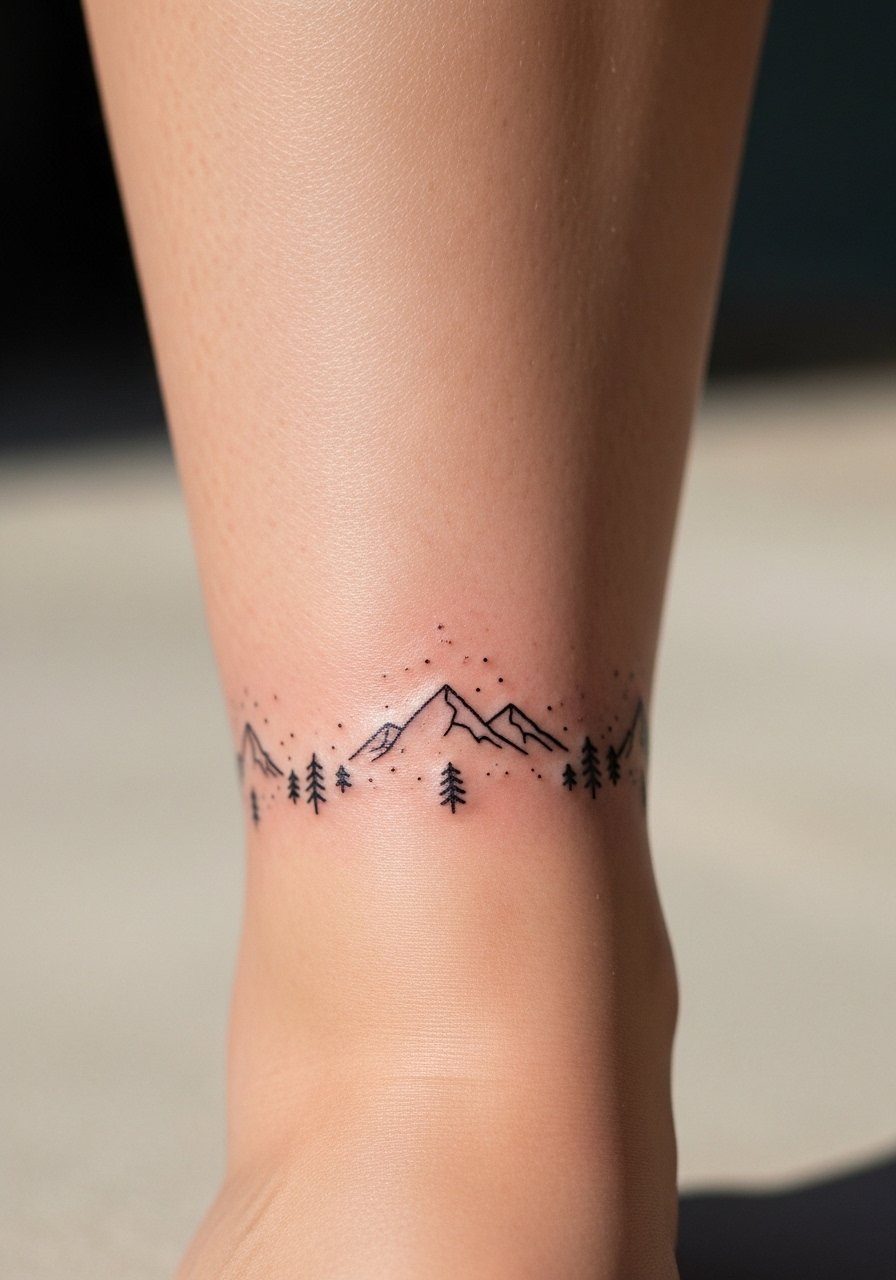
An ankle bracelet of mountains and trees feels like a wearable reminder of adventure. The ankle is sensitive and can scab if irritated by socks—plan footwear to avoid rubbing. Fine lines here look delicate but may need thicker anchors to remain crisp. I often recommend spacing the motifs so each element breathes. Ask for healed shots of ankle ornamental work to set expectations for line retention.
17. Mountain Crest on Shoulder Cap
Style/Technique: Traditional / Bold Color
Pain Level: Low (2-3/10)
Session Time: 1–3 hours
Best For: Classic, visible when sleeveless
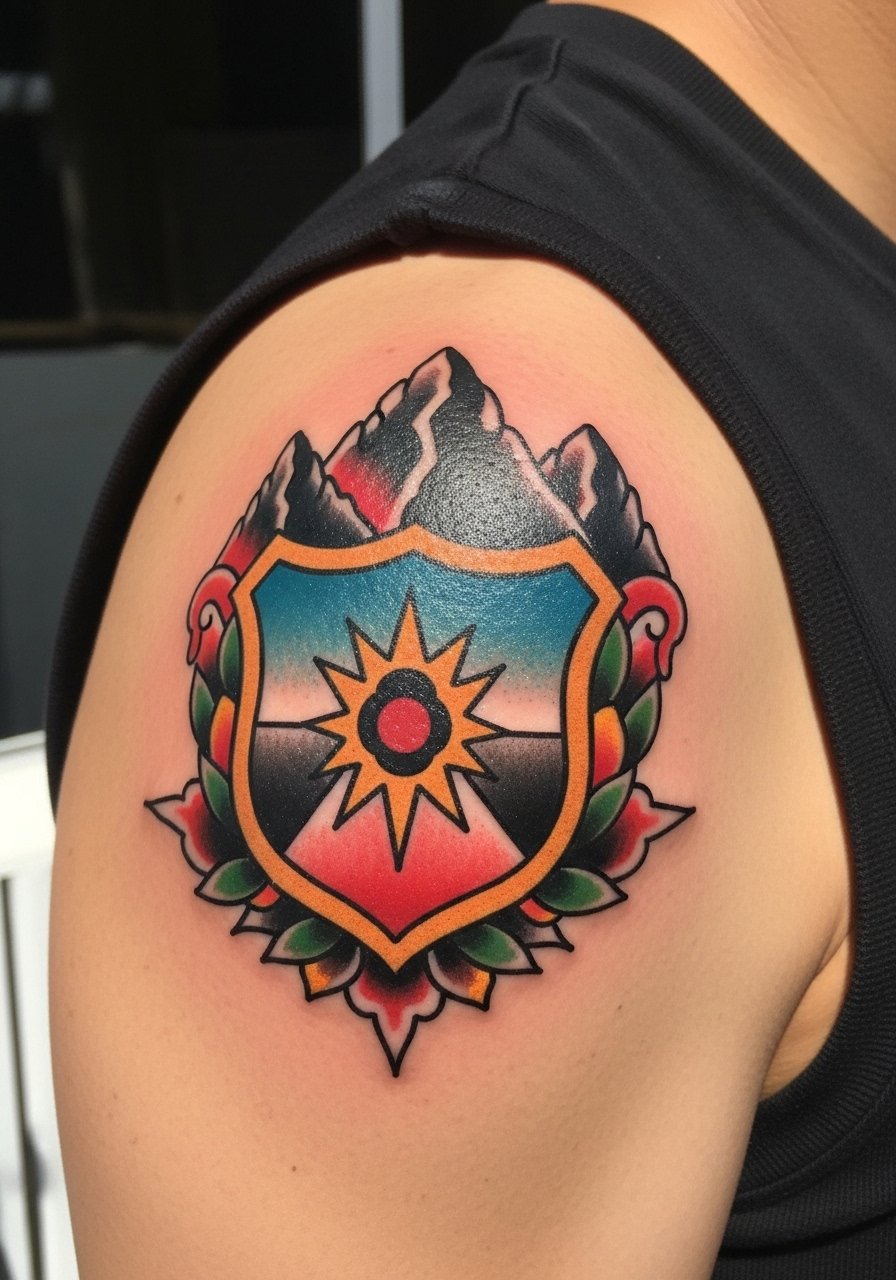
The shoulder cap is great for bold, traditional mountain crests. Pain is minimal and the area accepts color and solid outlines well. Traditional work ages nicely because heavy outlines protect interior color. Avoid overly intricate inner details; traditional shines with simplicity. I’ve seen shoulder crests maintain their silhouette for years with basic sun-care. Ask your artist about color saturation and how it heals on your skin tone.
18. Negative Space Mountain With Sun on Sternum Edge
Style/Technique: Blackwork / Negative Space
Pain Level: High (7-8/10)
Session Time: 1–2 hours
Best For: Subtle contrast, modern look
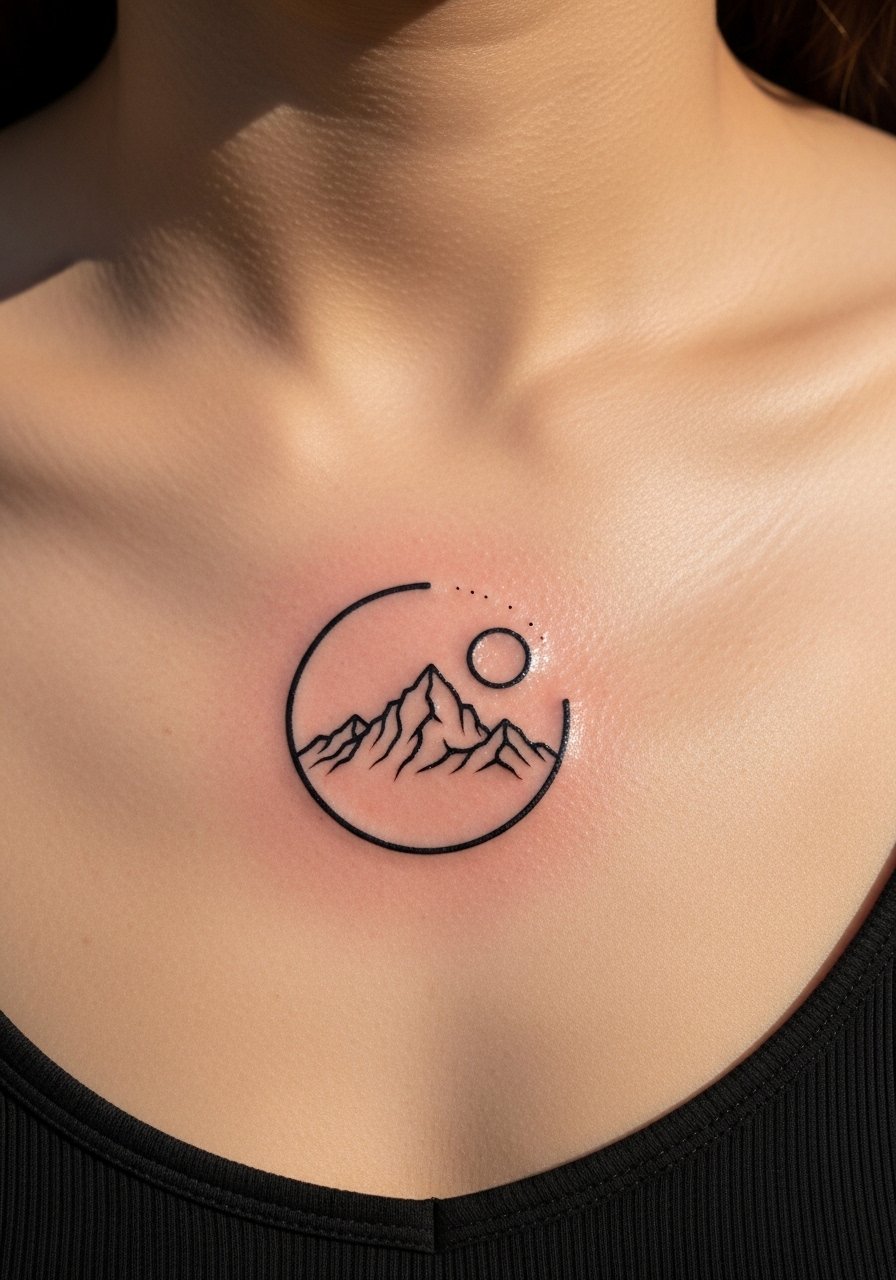
Negative-space mountains invert the usual approach—solid blacks carve out the peak. On the sternum edge, it’s dramatic but painful. This technique ages well because the black stays legible, and the negative sun stays crisp if executed with clean borders. Common mistake: using thin negative details that can bleed; ask for slightly thicker negative shapes. Mention you want healed photos of negative-space chest work.
19. Mountain Range With Script on Rib Side
Style/Technique: Fine Line + Script
Pain Level: Very High (8-9/10)
Session Time: 2–3 hours
Best For: Emotional, personal statement
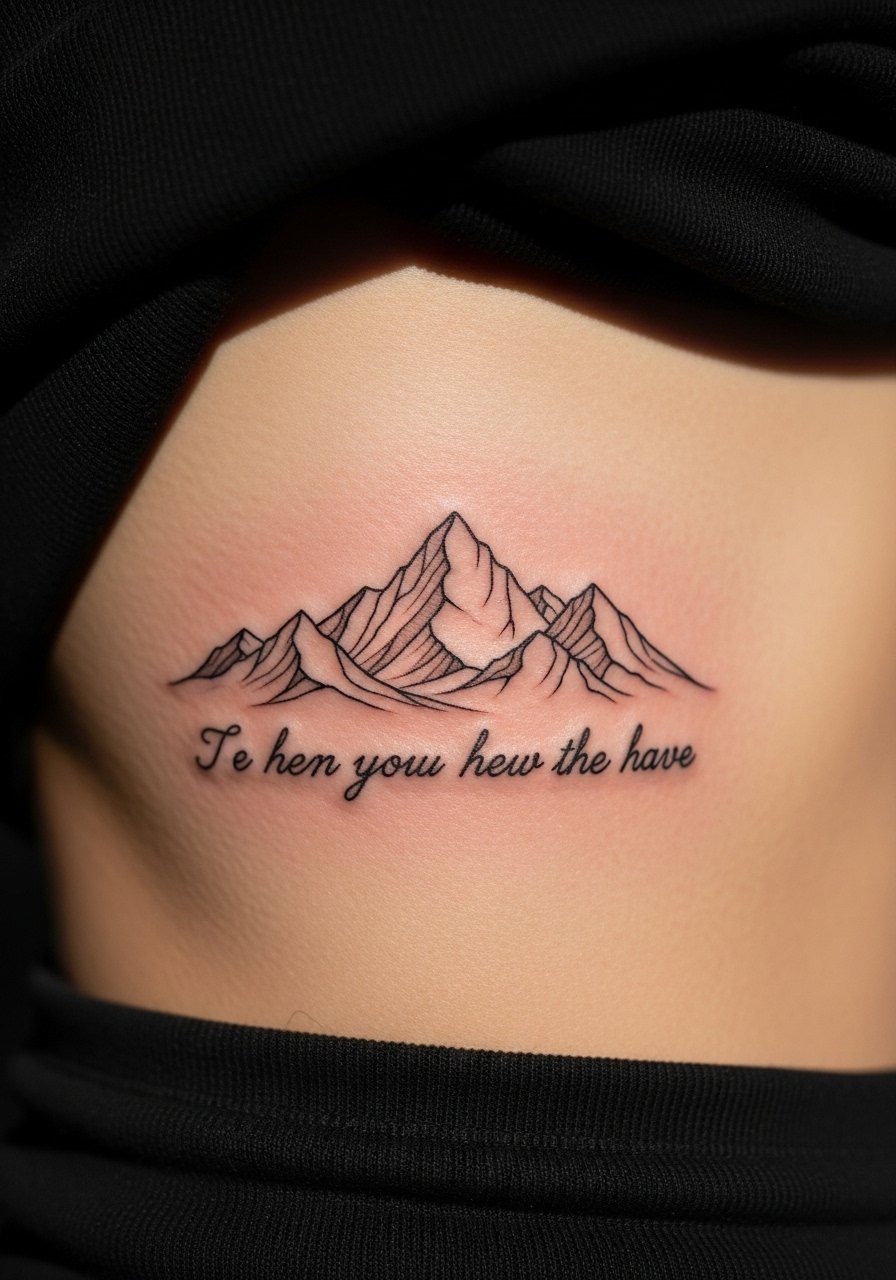
Pairing a mountain range with script along the ribs looks poetic but ribs hurt and scripts can distort with movement. Healing needs steady care—no tight clothing. Fine line script may blur if too small; pick a font with medium weight. From my experience, spacing matters a lot here—leave air between peaks and letters. Ask your artist to stencil the script and Mountain together so you can live with placement before inking.
20. Pocket-Sized Mountain on Upper Thigh
Style/Technique: Minimalist / Small Illustration
Pain Level: Low (2-3/10)
Session Time: 45–90 minutes
Best For: Hidden, feminine, first-timers
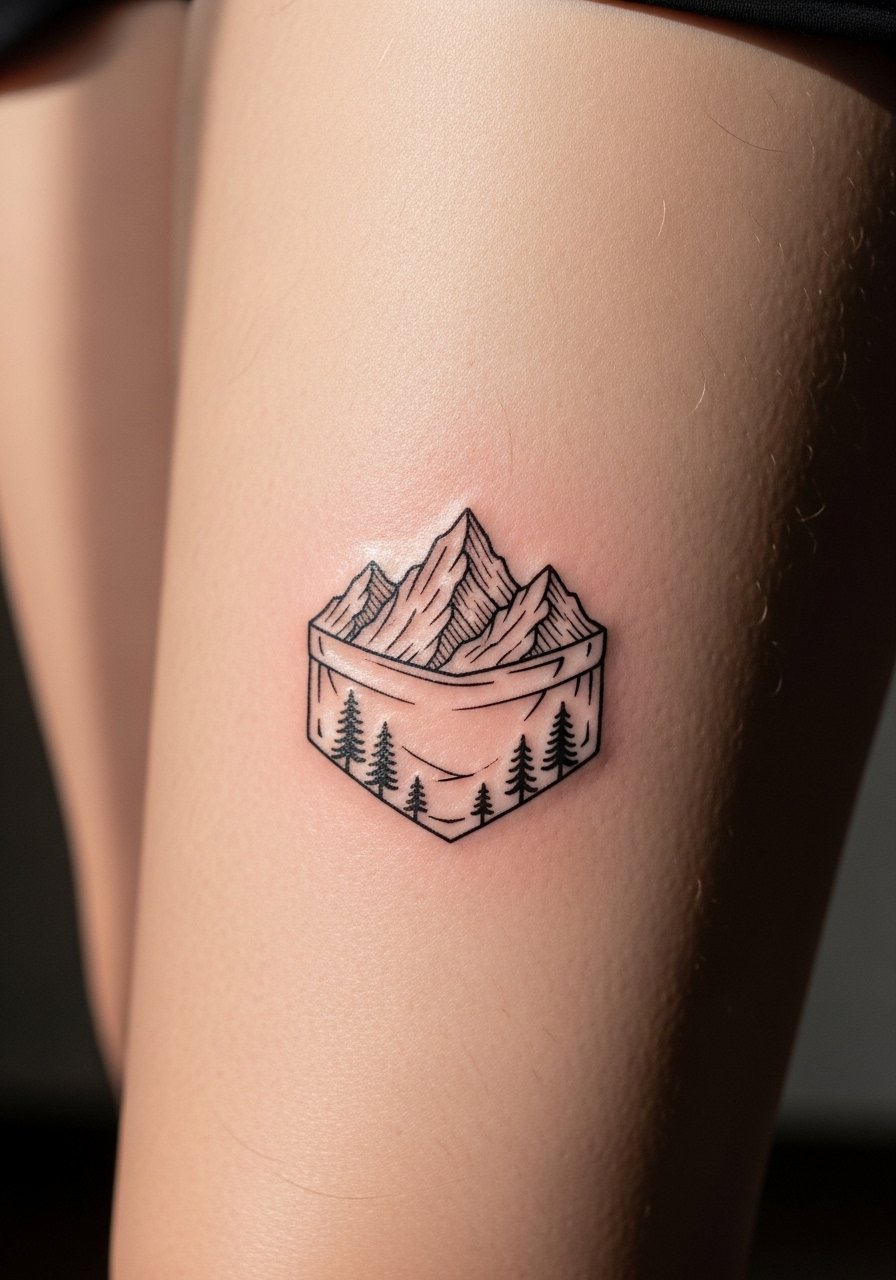
Upper thigh tattoos are comfortable to sit through and hideable for work or family. A pocket-sized mountain is ideal for first-timers who want a meaningful piece without high visibility. Healing is predictable; avoid tight undergarments during initial days. Tiny illustrative work here tends to stay crisp longer than on hands or feet. I always tell people to ask for slightly exaggerated shapes so the form reads as the skin settles.
21. Mountain Mandala on Upper Back
Style/Technique: Blackwork / Geometric-Mandala Mix
Pain Level: Low-Medium (3-5/10)
Session Time: 2–4 hours
Best For: Centerpiece, spiritual vibe
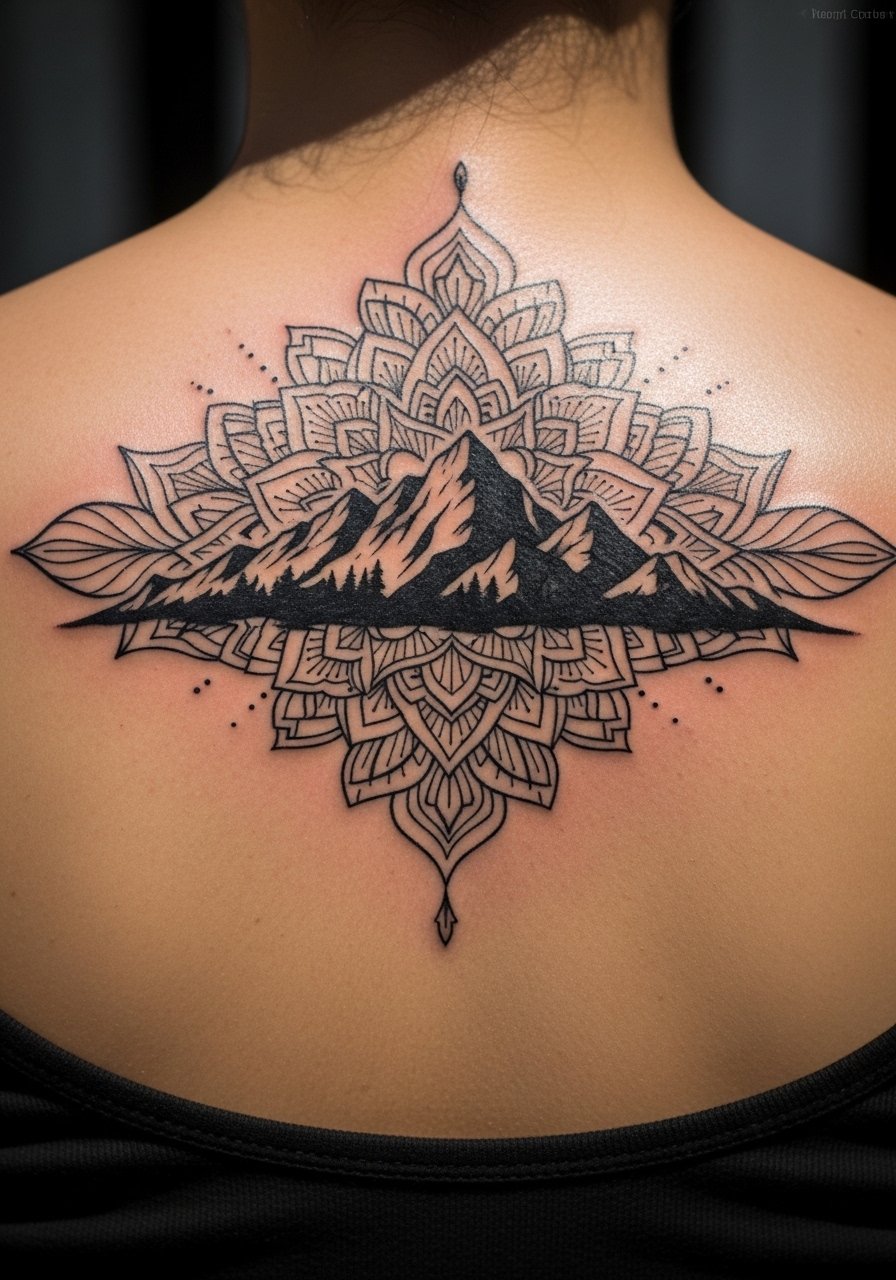
Combining mountains with a mandala on the upper back creates a meditative, grounded focal point. The back tolerates longer sessions and holds detail well. Blackwork mandalas age gracefully thanks to solid lines; keep inner mandala elements balanced to avoid visual clutter. Avoid very thin radial lines that can blur—ask for bold radial anchors. I like seeing healed 1+ year mandalas to understand how fine details soften.
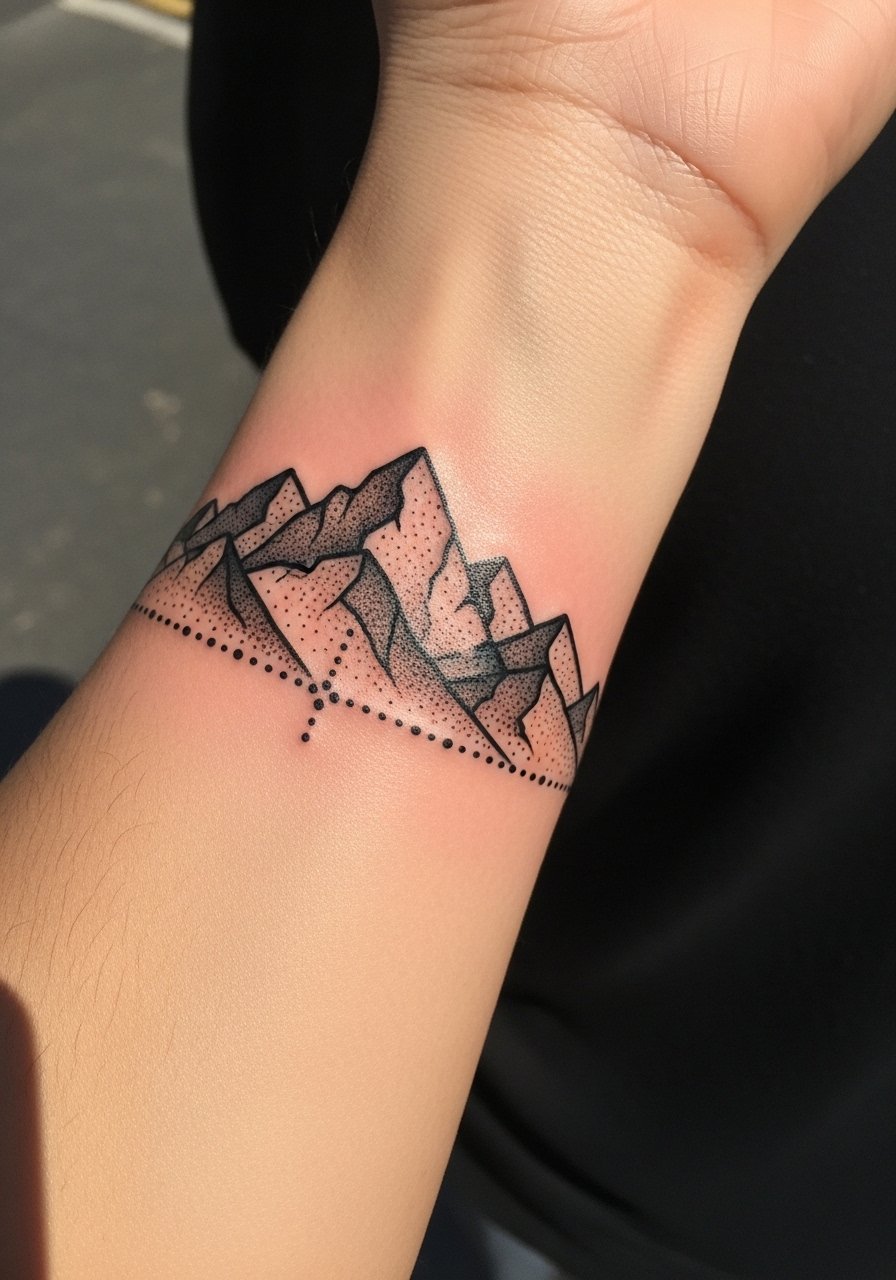
22. Mountain With Conifer Band on Wrist Wrap
Style/Technique: Illustrative / Band Tattoo
Pain Level: Medium (4-6/10)
Session Time: 1–2 hours
Best For: Wrapping detail, subtle landscape
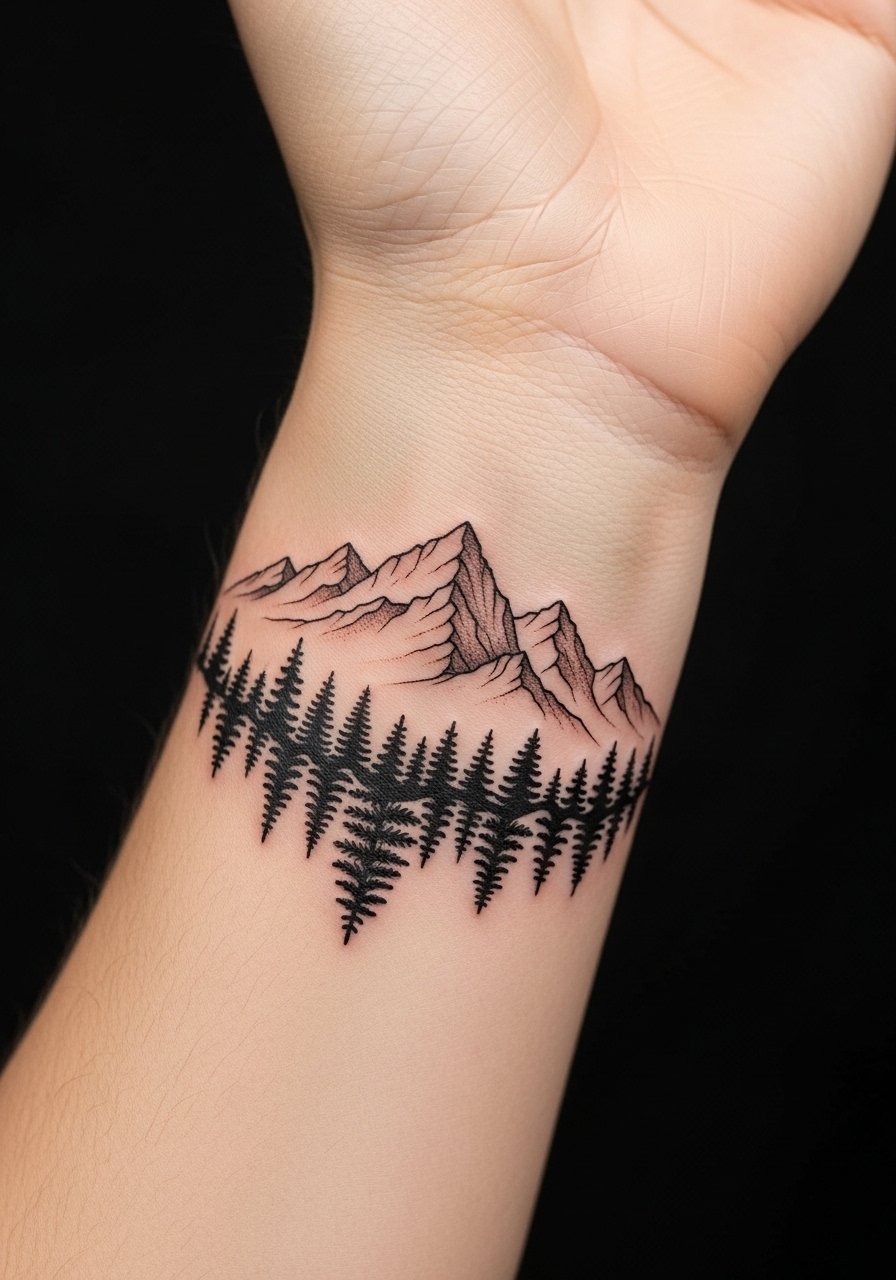
Wrist wraps are decorative and symbolic. They get plenty of sun and friction, so expect faster fading—sunscreen helps. The wrist needs slightly bolder lines for longevity. Keep the band continuous enough to read but simple enough to rework during touch-ups. I always recommend planning the band break at a natural wrist crease for comfort. Ask to see healed wrist bands from your artist.
23. Mountain Constellation Sternum Split
Style/Technique: Fine Line / Dotted Constellation
Pain Level: High (7-8/10)
Session Time: 1–2 hours
Best For: Cosmic symbolism, chest statement
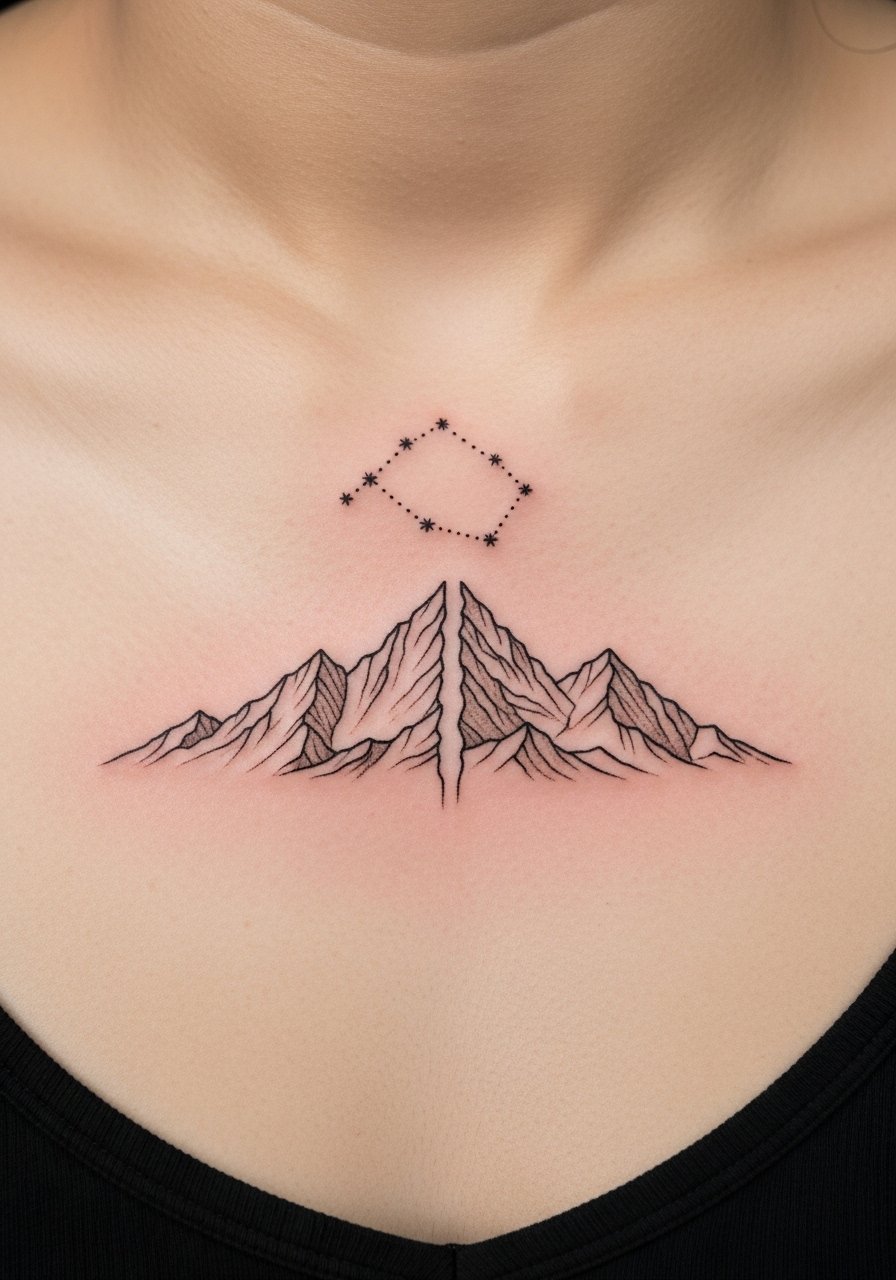
A split sternum mountain with a constellation reads like a celestial map of your journey. It’s painful and needs careful aftercare because movement and clothing can irritate healing. Dotted constellations can fade if dots are too faint; ask for slightly larger dots or small anchors. I’ve seen these look incredible healed when the artist balances dot size and line weight. Bring references that show healed chest constellation work.
24. Abstract Line Mountain Over Hip Bone
Style/Technique: Abstract / Continuous Line
Pain Level: Medium-High (5-7/10)
Session Time: 1–2 hours
Best For: Modern, body-curved placement
Abstract continuous-line mountains that curve over the hip can follow body movement and feel like a private ribbon of freedom. The hip can be tender near the bone, so expect varied sensations. Continuous-line designs should have slight variance in thickness to age gracefully—ultra-thin continuous lines can break up over time. I advise sitting with the sketch while standing so you see how curves lay on the body. Ask your artist for healed hip-line examples.
Tattoo Prep and Aftercare Essentials
Aftercare Essentials:
- Aquaphor Healing Ointment, 14oz Tube — Good for the first 3–5 days to prevent excessive scabbing
- Saniderm Transparent Adhesive Bandage, 6-Inch Roll — Second-skin healing method many artists recommend
- CeraVe Fragrance-Free Moisturizing Lotion, 12oz — Lightweight daily moisturizer for weeks 2–8
- Dr. Bronner's Unscented Castile Soap, 16oz — Gentle cleansing during the first week
Before Your Appointment:
- Tattoo Numbing Cream with 5% Lidocaine — Use only if your artist approves; helps for sensitive areas
- Stencil Transfer Paper, Tattoo Stencil Paper — Handy if you’re testing placement and layout at home
Long-Term Maintenance:
- SPF 50 Sunscreen Stick for Tattoos — Daily sun protection preserves color and contrast
- Mad Rabbit Tattoo Balm 2oz — Keeps healed tattoos supple and vibrant
- Hustle Butter Deluxe 4oz — A popular vegan aftercare option for long-term moisturizing
Optional Comfort Items:
- Tattoo Numbing Spray — For touch-ups or very sensitive areas (ask your artist)
- Hydrocolloid Bandages, Large — For protecting small touch-ups or spots prone to rubbing
Frequently Asked Questions
Q: How bad does a tattoo actually hurt?
A: Pain depends on placement and your tolerance. Ribcage, sternum, and behind-the-ear areas are on the higher end for me—sharp and intense. Forearm, thigh, and shoulder are much gentler. Expect sensations that range from deep scratching to steady vibration. For sensitive spots consider asking your artist about a numbing cream with 5% lidocaine but only use it with their okay.
Q: What if I regret my tattoo?
A: Sit with the idea for months, choose a placement you can hide if uncertain, and pick motifs that mean something long-term. If regret still happens, removal exists but is a process. In my experience, starting with a small mountain in a hidden spot helps you test both pain tolerance and feeling for ink.
Q: How do I keep my tattoo from fading?
A: Sunscreen is the non-negotiable step. From what I’ve seen, daily application of an SPF 50 stick over exposed tattoos is the single best habit to retain contrast and color. Also moisturize regularly with a fragrance-free lotion like CeraVe.
Q: Can I work out after getting a tattoo?
A: Wait at least 48–72 hours before strenuous workouts; longer if the tattoo is in a flex area (elbow, knee). Sweat and friction can irritate scabs and risk ink loss. Keep the area clean and covered as your artist recommends.
Q: Should I get a small tattoo first to test my pain tolerance?
A: Only if you genuinely want a small tattoo. Pain relates to placement more than size. A tiny wrist or ankle piece can hurt more than a larger arm piece. Choose an area known to be less painful (outer arm, thigh) if you need a test run.
Q: How long does a tattoo take to heal?
A: Surface healing often finishes in 2–3 weeks; full dermal healing takes about 2–3 months. The first week is the most critical—clean gently with mild soap, apply ointment or your artist’s recommended product, and avoid picking. If you use Saniderm, follow the specific wear schedule your artist gives.
Q: Do tattoos look different on different skin tones?
A: Yes. Black and grey inks show consistently across skin tones. Bright colors may read differently and sometimes appear muted on deeper tones. I always tell people to ask for healed photos of work on similar skin tones so you can see expected saturation and contrast.
Q: What’s the single most important aftercare product?
A: From what I’ve gathered, a reliable healing ointment like Aquaphor for the first few days, followed by gentle fragrance-free moisturizer, is the core combo that keeps new tattoos safe and skin healthy.
