

A lot of people assume a Japanese sleeve needs tiny detail and delicate linework to feel authentic. The opposite is true. Traditional irezumi reads best when motifs have room, bold outlines, and consistent background flow so the arm moves as a single composition. Pick motifs that wrap with the musculature and plan for multiple sessions so the piece breathes rather than fighting the skin.
1. Full Koi and Waves Sleeve, Flowing Chest-to-Wrist Composition

Koi and water are the classic sleeve melody for a reason. Choose this when you want motion that reads as the arm bends and reaches. For the stencil meeting, bring full-arm reference art and a photo of your arm so the artist can map the koi scale to your forearm width. A common mistake is shrinking the koi to fit a flash piece, which blurs into the waves after two years. Plan for heavier linework around the fins so the scales keep contrast as the piece heals. Session time for a forearm-to-elbow koi block is usually several hours per sitting. For show-off outfits, pair the finished sleeve with a heavyweight short-sleeve tee that lets the color pop without distraction.
2. Dragon Wrap with Wind Bars and Cloud Background
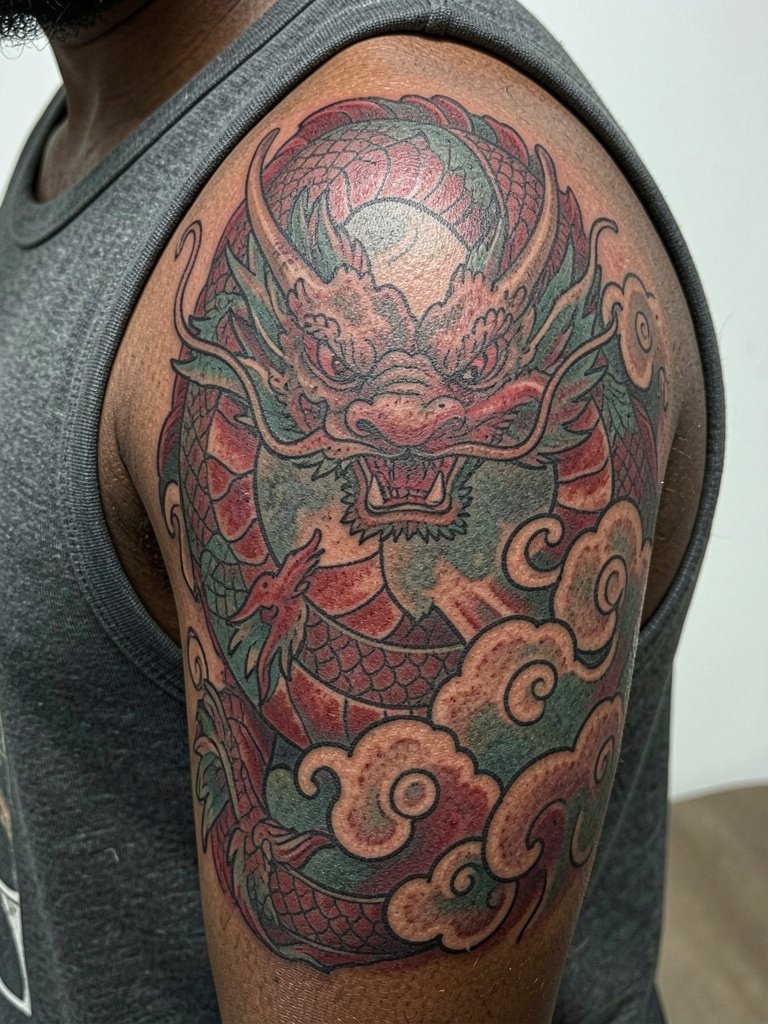
Dragons work at sleeve scale because they wrap and read from multiple angles. Choose a dragon when you want a focal motif that still uses background filler to unify the whole arm. Ask for scale studies in your consultation so the head sits where you want it when the arm is relaxed or flexed. One mistake is over-detailing the body scales in a small forearm placement, which risks muddiness later. Expect a multi-session build, often with the head and chest in early sessions and the tail and filler later. For sessions, wear a drop-shoulder tee to give the artist full shoulder access while staying comfortable.
3. Samurai Narrative Sleeve Anchored at Outer Upper Arm
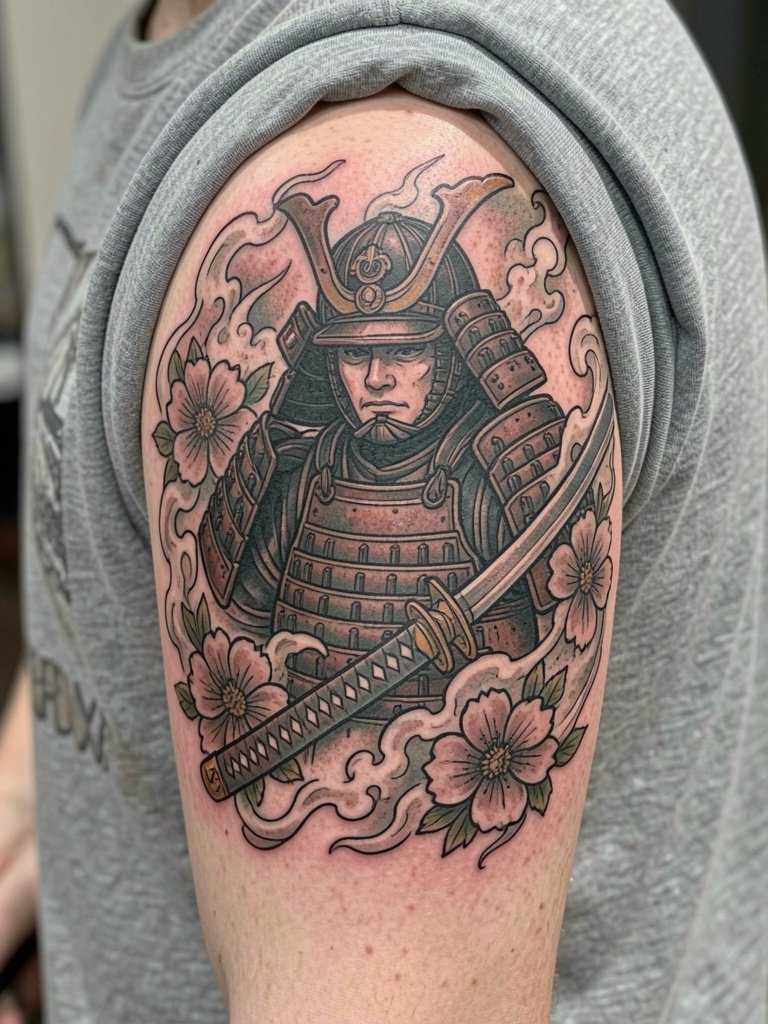
A samurai sleeve gives a strong narrative anchor and suits people who want figurative work rather than animal motifs. When you consult your artist, bring photos showing the exact armor patterns and a note about how much facial realism you want. The common aging issue is overworking tiny armor studs; instead ask for simplified pattern blocks that read from a distance. The outer upper arm tolerates more saturation with lower blowout risk than the inner arm. Session length varies, but expect multiple long sittings to do facial detail and armor texture. To show the piece, a fitted-but-not-tight tee keeps the shoulder framed without shrinking the view.
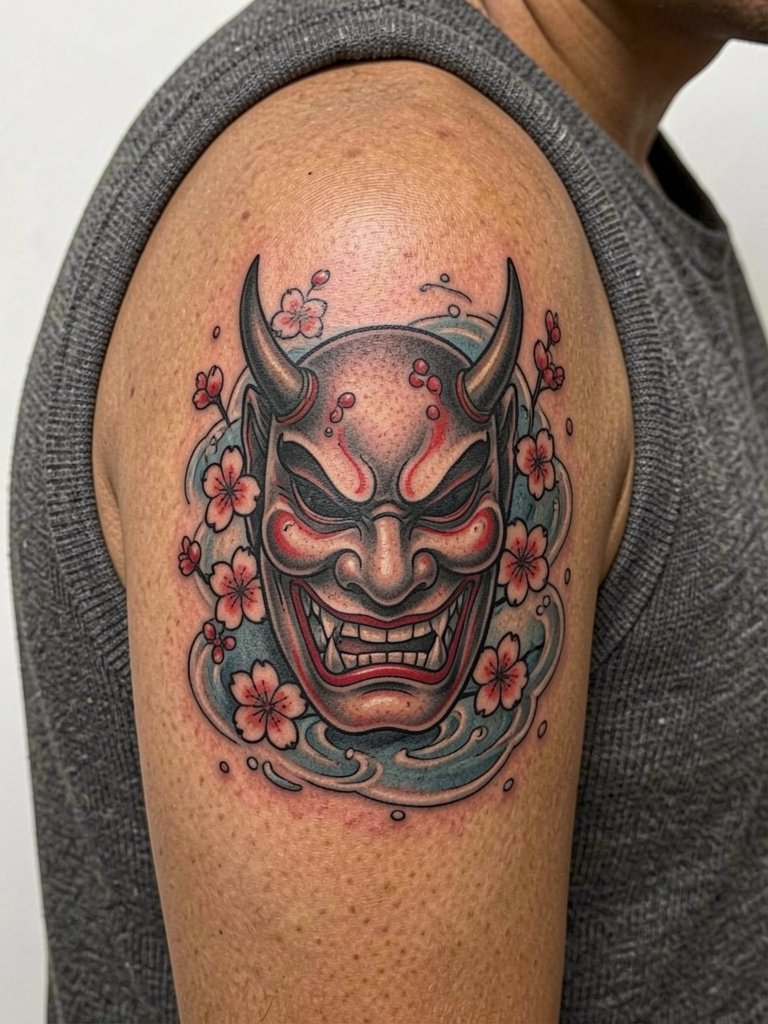
4. Kitsune Mask Surrounded by Cherry Blossoms and Smoke
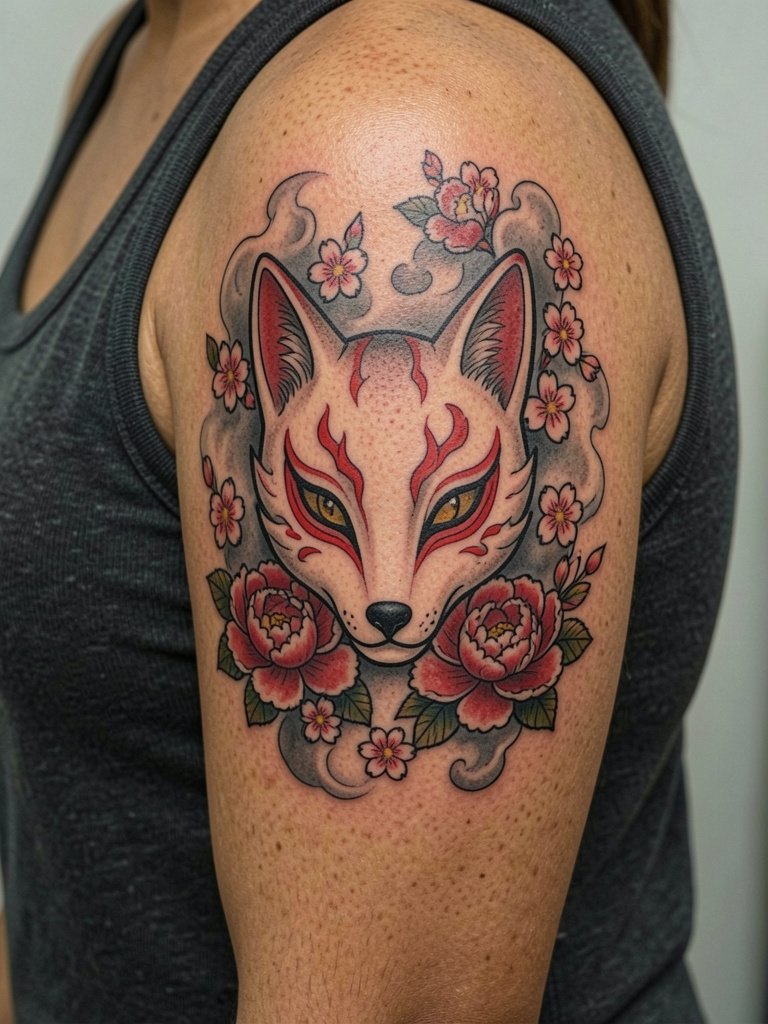
The kitsune mask gives a striking focal point while florals and smoke keep the sleeve cohesive. Opt for a slightly larger mask than you think you need so facial features do not blur into the filler by year three. Tell the artist exactly which petals and smoke density you want near the eyes so the mask never loses personality. A frequent mistake is mixing too many flower types next to the mask, creating composition conflict. Expect mid-range session times and a likely touch-up at year two for saturated reds. When showing off the upper-arm mask, a drop-shoulder tee or sleeveless tank highlights the focal face.
5. Phoenix Rising Through Flame and Cloud Transitions

Phoenix designs are ideal when you want rebirth symbolism with dynamic vertical movement. Ask for feather studies that show how the plumage breaks into cloud filler so the wing still reads while the arm bends. A common error is tiny flames that merge into cloud filler. Larger flame shapes preserve contrast as color fades. Sessions often stage the body and wing pieces on separate days. For session wear, a rolled-sleeve linen shirt keeps the forearm accessible and comfortable.
6. Tiger with Bamboo Stripes and Vertical Rhythm
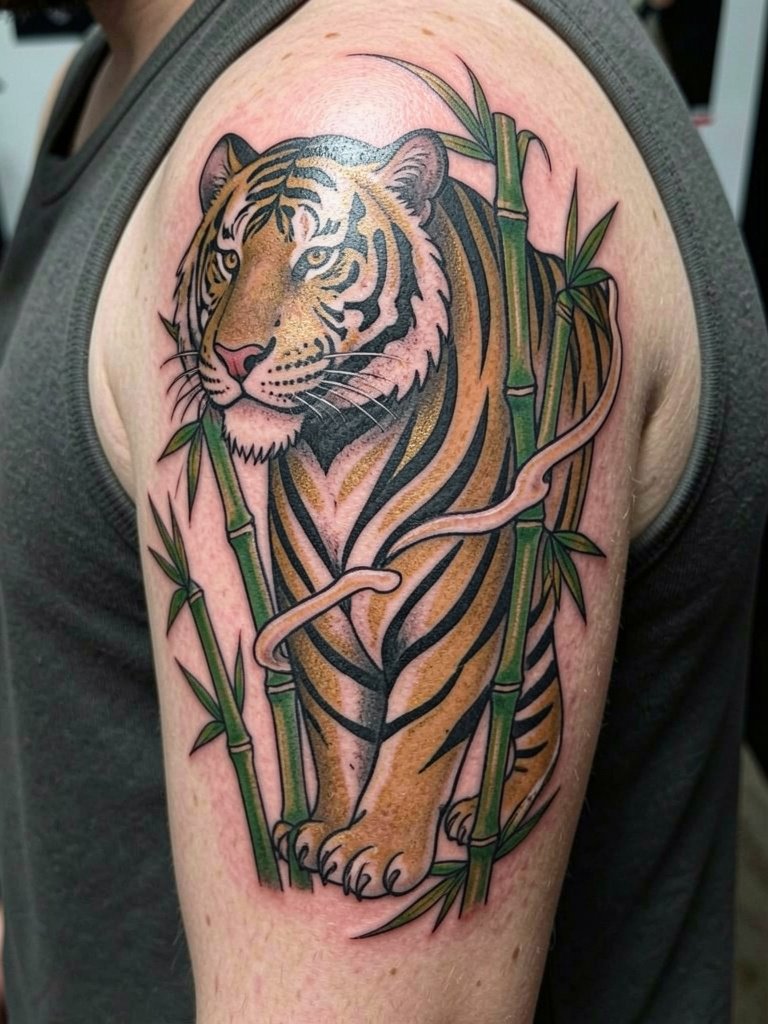
Tigers read strongly at sleeve scale and benefit from vertical bamboo to add rhythm. For the consultation, bring photos of your arm standing still and flexed so the artist can place stripes that curve with muscle. The inner-side striping often blurs if done too fine. Ask for broader stripes where the arm compresses. Session feel is medium to high depending on chest extension. To complement the tiger when you wear it out, try a muscle tee or relaxed fit tee that frames the outer arm.
Pre-Session Essentials
These picks smooth the first week and match the full-arm pieces above that rub against shirts.
-
Dermalize-style second skin film. Useful for large color blocks and sleeves that might otherwise rub under shirts during the first 24 to 72 hours.
-
Fragrance-free gentle wash bar. Cleanses without sting while you shower the new sleeve, which matters when you have multiple sessions in close succession.
-
Tattoo balm from Australian-style brands. A lighter balm option for large color areas that avoids the heavy occlusion some people find uncomfortable on a full arm.
-
Barrier repair lotion with minimal ingredients. A thin layer after the first few days slows peeling on big saturated panels without clogging.
-
Mineral sunscreen for tattoos. Use on healed shoulders and forearms to preserve reds and contrast when the sleeve is exposed long term.
7. Half Sleeve with Hikae Chest Panel for Traditional Flow

A Hikae chest panel changes the whole sleeve by anchoring the arm to the torso. Traditionalists say Hikae is essential because it creates authentic flow from chest into arm. Other people argue a sleeve can still read as Japanese without chest coverage for concealment or budget reasons. Be specific in your consultation about how far the panel will reach onto the pectoral edge so there is no surprise about shirt coverage. The common aging problem is tight chest detail that becomes indistinct; ask for stronger borders and slightly simplified motifs to hold up. For session wear, a button-down or zip hoodie that opens fully saves the artist time.
8. Three-Quarter Sleeve with Strong Border Treatment

Three-quarter sleeves keep forearms available for work or visibility control while preserving traditional structure. For composition, request mockups showing the mikiri border treatment so the arm does not look like a floating collage. A frequent mistake is weak border contrast, which makes the sleeve feel unfinished. Expect 3 to 6 sessions depending on filler. To style a three-quarter sleeve, pair it with camp-collar shirts or linen button-ups that let the cuff sit just above or below the edged finish.
9. Chrysanthemum-Heavy Sleeve as Seasonal Filler
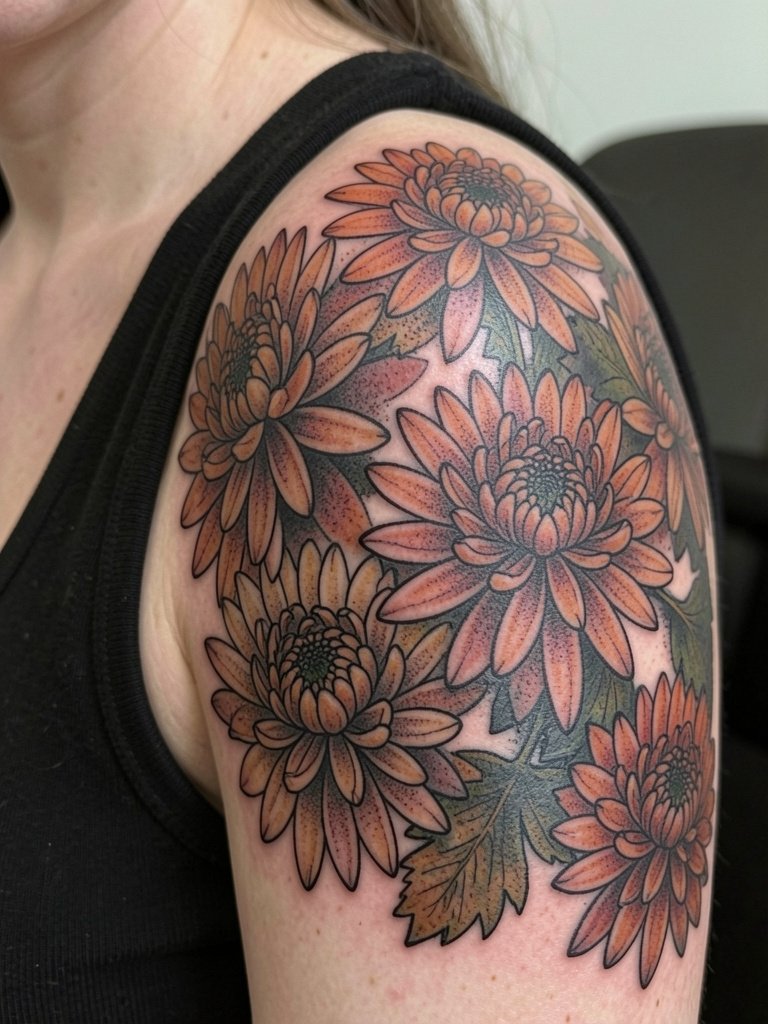
Chrysanthemums give dense, layered texture and carry seasonal meaning that reads well in traditional sleeves. Choose this if you want layered petals to act as connective filler between major motifs. For the consult, show clear photos of petal overlap you like because small petal details can vanish in five years if crowded. The typical mistake is overlayering with other flower species that compete. This placement ages well when negative space is planned between blooms. If the sleeve is shoulder-heavy, a wide-neck top or sleeveless tank frames the florals without covering the composition.
10. Maple Leaves and Seasonal Transition Band

Seasonal leaves are excellent connective filler that avoids overcrowding. Ask for varied leaf scale so some leaves read close up while others act as background. A common aging issue is small veins and tiny serrations that blur. For longevity, pick simpler silhouettes with a few color accents. This band-style transition is a low-blowout option for forearms. For showing this on casual days, rolled sleeves and a minimalist watch keep focus on the flowing leaves. Add a minimalist watch on the opposite wrist to balance the look.
11. Bamboo Forest Sleeve for Vertical Architecture
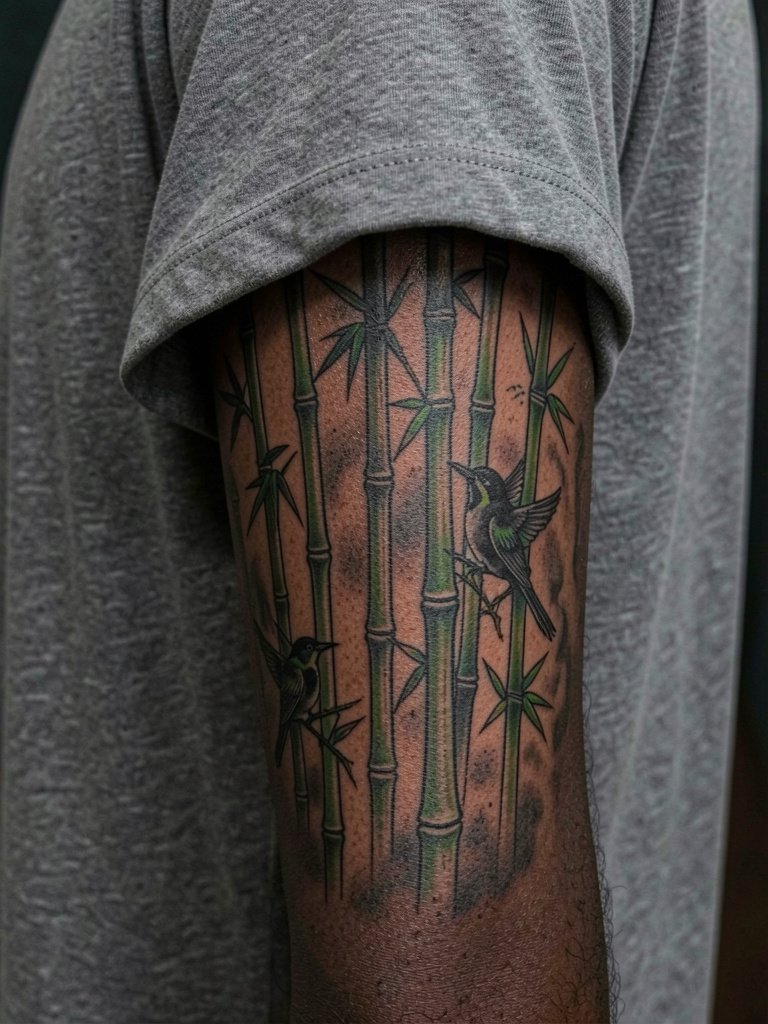
Bamboo works well when you want the arm to appear longer and more architectural. For the appointment, request vertical placement studies so stalk spacing matches the long axis of your arm. A mistake is uneven stalk spacing that makes the pattern read lopsided. Bamboo is lower risk for blowout but needs steady linework to avoid wobble. Sessions are moderate length and often staged to finish stalks first, then birds and mist. For wardrobe pairings, a loose short-sleeve tee complements the vertical rhythm without crowding the look.
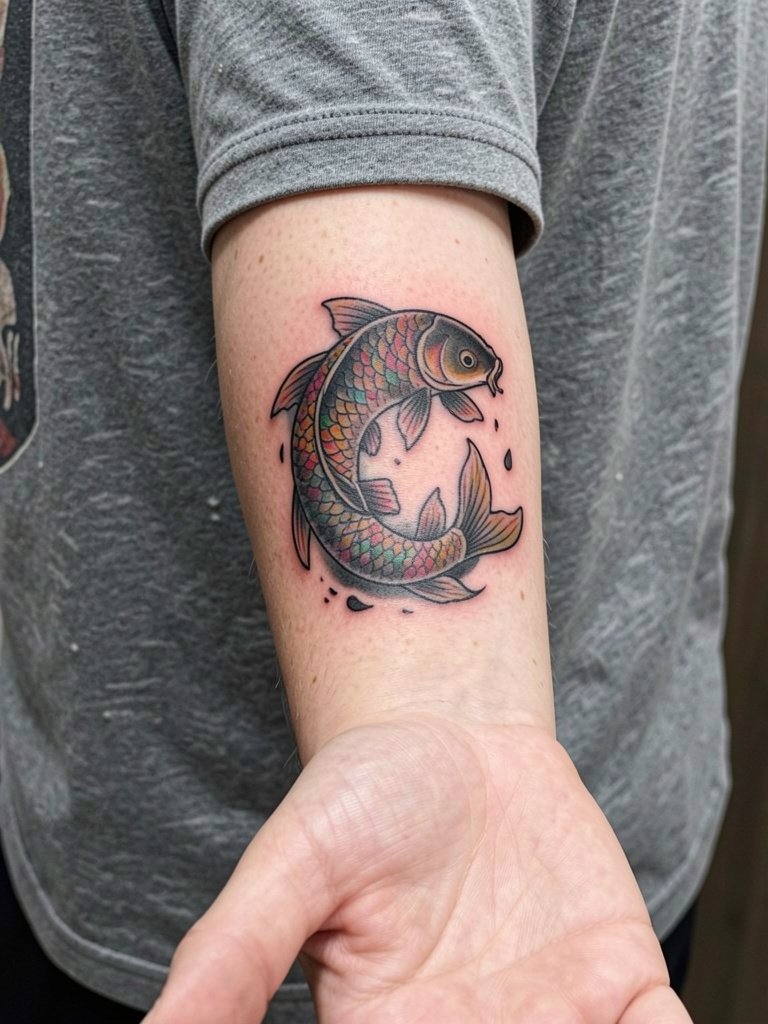
12. Minimalist Koi Forearm That Keeps the Symbolism Light

Minimalist koi is a good compromise for people who want symbolism without a full sleeve commitment. Ask for a proof showing the koi at two sizes so you can see how much linework survives at year two. The inner wrist and forearm can eat single-needle detail so request slightly heavier line weight than your reference if you want longevity. A common error is copying a tiny Pinterest single-needle block that looks brittle after healing. Expect shorter sessions and likely a touch-up within 12 to 24 months for tiny lines. For daily wear, rolled sleeves and a thin bracelet stack on the opposite wrist keep the focus on the simplified koi.
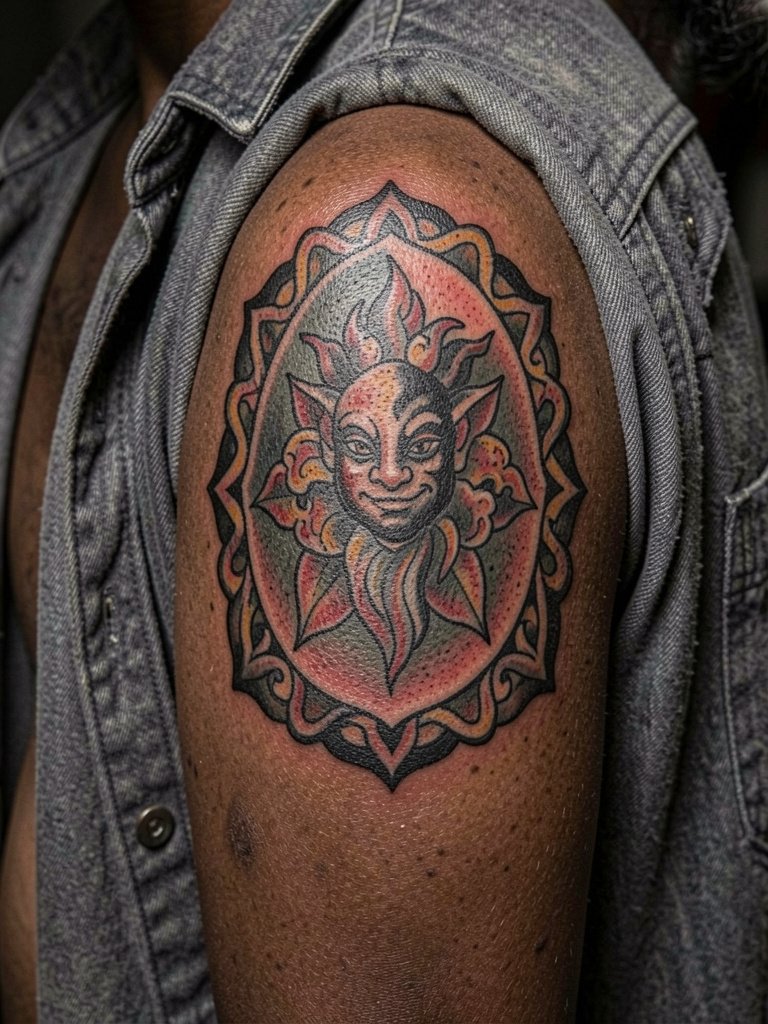
13. Oni or Theatre Mask with Soothing Natural Filler
Masks read as strong focal motifs and benefit from softened natural filler so they do not feel isolated. During the consult, bring mood references for the mask expression and specify how much blossom overlap you want near the mouth. A frequent mistake is packing too much micro filler around facial detail, which makes expressions muddle with time. Plan for bolder outlines in key facial contours to preserve character. To display a mask on warm days, sleeveless tops and open overshirts work best. Consider a tank top for sessions to keep the area accessible.
14. Gaku-bori Framed Sleeve with Mikiri Border for Authentic Structure
Gaku-bori and mikiri borders give unmistakable traditional structure and are favored by collectors who want a framed look. If authenticity matters to you, request compositional sketches showing the frame and negative space mapping before any needle touches skin. Some clients prefer borderless looks, but a true framed sleeve helps the motif age predictably because the border protects visual weight. Common errors include too-thin borders that fade into the background. Sessions are often longer because the border requires crisp, steady linework. For outfits, open-collar shirts and henleys let the frame show without competing necklines.
15. Forearm-Only Sleeve Nuki-Bori Style for Concealment and Flexibility
Forearm-only Japanese work is a practical compromise for visibility control, but it does shift the composition rules. Traditionalists argue a full sleeve needs chest flow to feel authentic. Contemporary clients and some artists say a forearm-focused nuki-bori approach can still read Japanese if the filler is adapted. When you plan a forearm-only piece, ask the artist to show how edge treatments will look when the arm is bent. Mistakes include trying to copy full-sleeve density onto a narrow forearm which leads to muddiness. Forearm sessions are shorter and easier to schedule. For daily wear, rolled sleeves and minimalist wrist accessories help the work read as intended. Try a rolled sleeve shirt for casual show-off days.
16. Samurai Helmet Close-Up as a Shoulder Anchor

A helmet close-up is a compact way to get samurai gravitas without committing to a full narrative sleeve. Ask for reference photos that show the exact ornamental crest you want and how it sits under the clavicle when you reach. A common error is placing too much filigree near joint lines where it loses definition. Session pain is moderate on the shoulder cap but higher near the collarbone. This placement looks great with boat-neck or wide-neck tops. For sessions, a loose tank top or button-down that clears the shoulder saves time.
17. Wave Panel as a Strong Background Element

Strong wave panels act as the glue between motifs and reduce visual fragmentation. Request mockups showing how the wave crest intersects with other motifs so nothing appears to float. A common mistake is adding micro filler on top of strong wave lines which leads to a muddy long-term result. Waves age well when left with crisp negative space. These panels can be done in large single sessions. For everyday outfits, a washed indigo tee or workwear overshirt complements the nautical feel.
18. Peony Cluster as Mid-Arm Anchor for Color Balancing
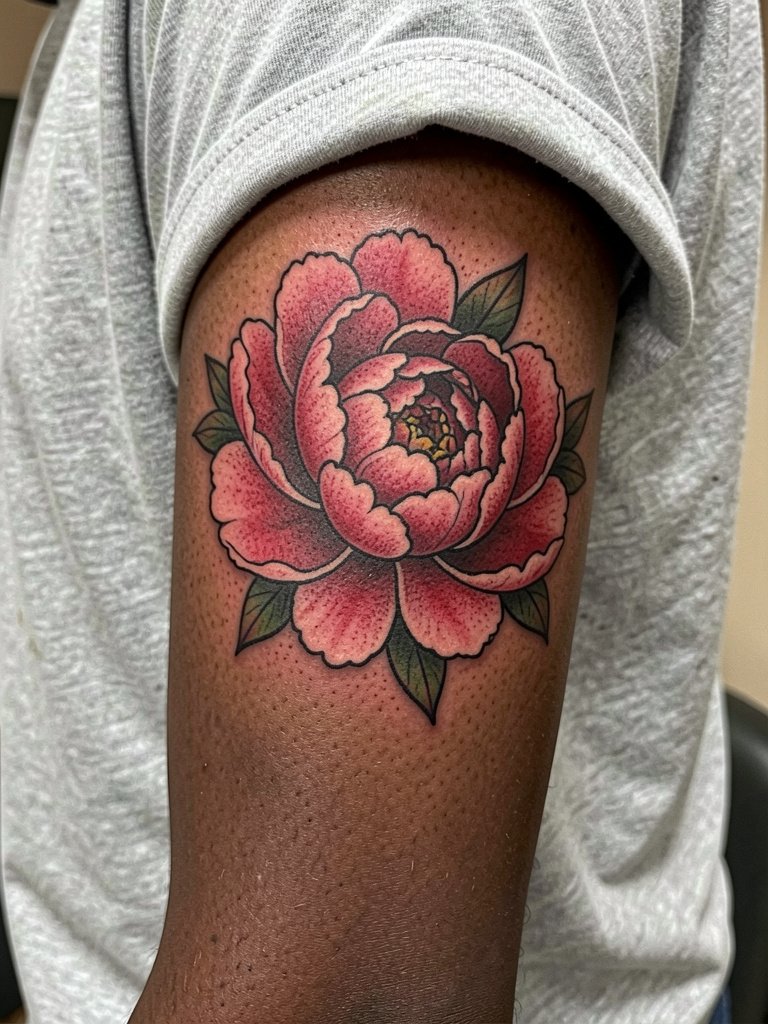
Peonies make great mid-arm anchors because they balance saturated panels and soft filler. For the consult, bring images that show petal layering from different angles so the artist can plan overlap without choking the design. A mistake is adding too many tiny shadow strokes inside each petal which muddles after a couple of years. Expect moderate session lengths and a likely color boost touch-up at year two. To show peony saturation, wear a relaxed fit tee with neutral tones that let the reds read.
19. Dragon Head on Outer Bicep for Dramatic Motion

Placing a dragon head on the outer bicep gives immediate drama and reads well across distance. Request scale mockups showing the head when the arm is both straight and flexed so eyes and jaw remain in proportion. A common error is small whisker linework that blurs; swap those for slightly thicker strokes to maintain definition. Expect a longer single sitting for a detailed head. For display, sleeveless tanks and athletic cuts keep the head unobstructed and visible.
20. Full-Arm Black-and-Gray Sleeve for Longevity and Texture

Black-and-gray sleeves are often chosen for longevity and subtle texture. Some artists and clients prefer color as the traditional default and say black-only feels incomplete. Others prefer black-and-gray for cost control and less maintenance. If you lean black-and-gray, ask for tonal maps showing where saturation will be strongest to avoid flatness. A mistake is failing to plan negative space which can make a full black sleeve look like a single mass. Touch-ups are typically less frequent than with saturated color. For showing a black-and-gray arm, a fitted black tee frames the tones cleanly.
21. Minimal Cloud Filler with Large Negative Space for Cleaner Aging
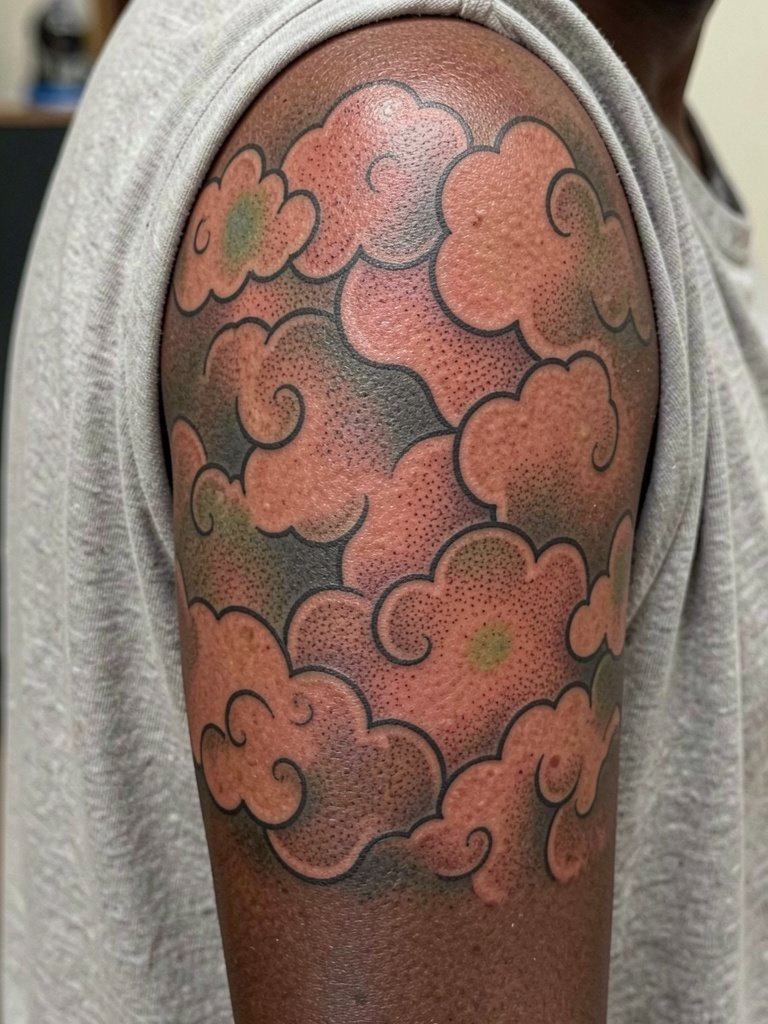
Cleaner negative space is a valid strategy to prevent a sleeve from going muddy as it ages. Ask for a healed photo reference set showing how the artist handles negative space on different skin tones because contrast varies. The common mistake is treating negative space like empty space instead of compositional breathing room. This approach reduces long-term touch-ups but requires careful initial spacing. Session lengths vary depending on how much solid black you avoid. Pair this look with linen or camp-collar shirts that let the negative space read without over-patterned clothing.
22. Koi with Cherry Blossom Accents and Strategic Red Pops

Adding cherry blossom accents to a koi sleeve creates soft visual pauses and seasonal meaning. For the consult, show precise color swatches for the petal red you want because red fades differently than other pigments. Mistakes include overusing red in small areas which accelerates the appearance of patchiness. Plan for a color boost touch-up three years out if you want the reds to remain vivid. For style pairings, neutral solids and rolled sleeves keep the red pops from clashing. A v neck tee or neutral button-down frames the forearm without drawing color attention elsewhere.
23. Bamboo and Tiger Hybrid Sleeve for Contrast Play

Combining a tiger with bamboo delivers contrast between bold animal marks and architectural plant rhythm. During the consultation, ask for placement studies that show where stripes will intersect stalks so the eye reads both elements clearly. A typical mistake is letting the tiger stripes align with bamboo stalk lines which removes the separation between motifs. Expect several sessions to balance animal work and background. For showing off composite sleeves, a loose short-sleeve tee or workwear overshirt provides a clean backdrop that keeps the contrast visible.
Frequently Asked Questions
Q: How do I tell if a design is truly traditional Japanese or just Japanese-inspired?
A: Look at composition first. Traditional irezumi uses framed flow, chest-to-arm connections, and background elements like waves, clouds, and wind bars to unify motifs. If a design is a single motif dropped on the arm with no chest panel or consistent background, it is likely Japanese-inspired rather than fully traditional. Ask for healed portfolio shots of full sleeves from the artist to confirm how their pieces age.
Q: How should I plan sessions and budget for a full traditional sleeve?
A: Expect multiple sessions spaced months apart to allow proper healing between color passes and heavy filler work. Budgeting in tiers helps: half sleeves usually take fewer sessions than full chest-to-wrist sleeves. Prices vary widely by artist and region, but plan for staged sessions and possible touch-ups years later. Bring references at full-arm scale so the artist can give realistic session estimates during the consult.
Q: Where can I find artists who specialize in authentic irezumi without relying on specific names?
A: Search platform hashtags like #irezumi, #japanesetattoo, and #japanesesleevetattoo with location filters on Instagram and TikTok. Look for portfolios showing full-sleeve compositions, chest panels, and healed photos rather than only fresh ink. Reddit communities such as r/tattoos and r/irezumi are useful for healed examples and booking tips. Use directories like Tattoodo and booking apps to filter by style and region.
Q: Will black-and-gray or color last better on a sleeve, and what tradeoffs should I expect?
A: Artists split on this. One camp says color is more authentic because traditional Japanese work uses saturation for symbolism and visual hierarchy. The other camp prefers black-and-gray for longevity, lower maintenance, and subtler contrast. Your choice should consider how much future touch-up you want and how visible the sleeve will be over time. If you pick color, ask the artist where they will prioritize saturation so reds and blues remain balanced.
Q: What should I wear to a multi-hour sleeve session so the artist has access and I stay comfortable?
A: Wear loose clothing that gives the artist immediate access to the placement. For shoulder and chest pieces, open button-downs or tank tops work. For forearms and wrists, short sleeves or rolled sleeves are ideal. Choose fabrics that do not rub the healing area after sessions. Bringing a light zip hoodie or loose shirt you can remove easily helps during longer sittings.
Q: How do sleeves usually age across different placements like inner arm versus outer arm?
A: Inner arm skin tends to be softer and can soften fine detail faster than outer arm skin. Outer arms and shoulders hold saturation and contrast better because they see less constant compression. Negative space and heavier linework help inner-arm pieces last longer. Expect touch-ups sooner for placements with thinner skin or high friction zones.
Q: Can I balance visibility for work while still getting a traditional sleeve that reads correctly?
A: Yes. Three-quarter sleeves or forearm-focused nuki-bori approaches let you balance concealment and traditional language. If you want traditional flow without visible chest work, ask the artist to design strong border treatments and deliberate edge transitions so the sleeve reads cohesive without a Hikae panel.
