
Watercolor jellyfish flood feeds because they move on the body the way the sea moves on a shore. Many people worry about three things at once: will the wash blur with time, why do small pieces still cost more than expected, and how do I find someone who actually knows watercolor blending on skin. Read on for ideas that balance painterly color with the structure that keeps a jellyfish readable after healing.
1. Loose Watercolor Jellyfish on Outer Upper Arm
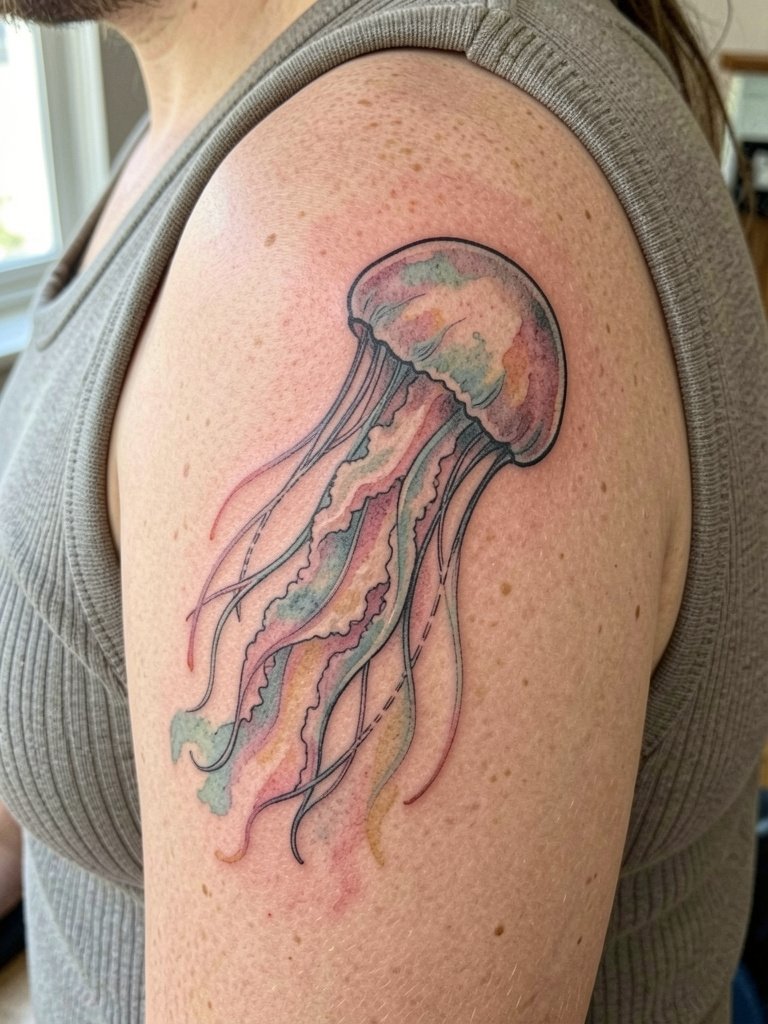
This style leans into soft pigment and trailing tentacles so the movement reads like watercolor on skin. One camp argues that loose washes soften into muddy color within a few years if there is no structural linework underneath. Another camp accepts the faster fade because the initial painterly payoff is the point, and they plan touch-ups as part of the design lifecycle. For a balanced result, ask the artist for a faint black or dark gray contour under the bell, then layered color on top to protect edges. For the session wear bring a ribbed tank top so the shoulder is exposed but easy to cover afterward. Expect moderate pain on the shoulder and plan for one to two sessions for a medium piece.
2. Geometric Jellyfish with Watercolor Wash on Inner Forearm
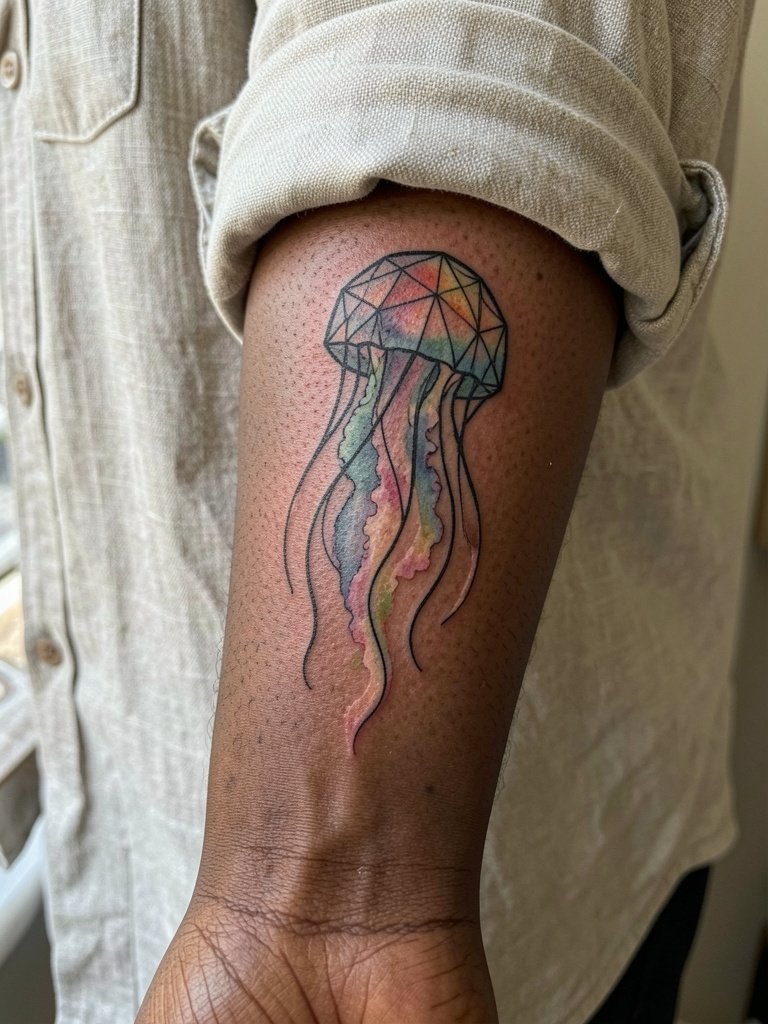
This fusion works when the hard geometry gives the watercolor something to land on and keeps the composition readable. One camp says the geometry improves longevity by holding edges, while the other camp worries the shapes fight the organic flow of tentacles and make the piece feel stiff. If you want the wash but not the rigidity, request the framework in single-needle or thin black lines that stop before the tentacles. Bring photo examples of the exact line weight you want and wear a linen button-down with sleeves you can roll for the session. Inner forearm work is low to moderate pain and usually fits in a single session for small to medium sizes.
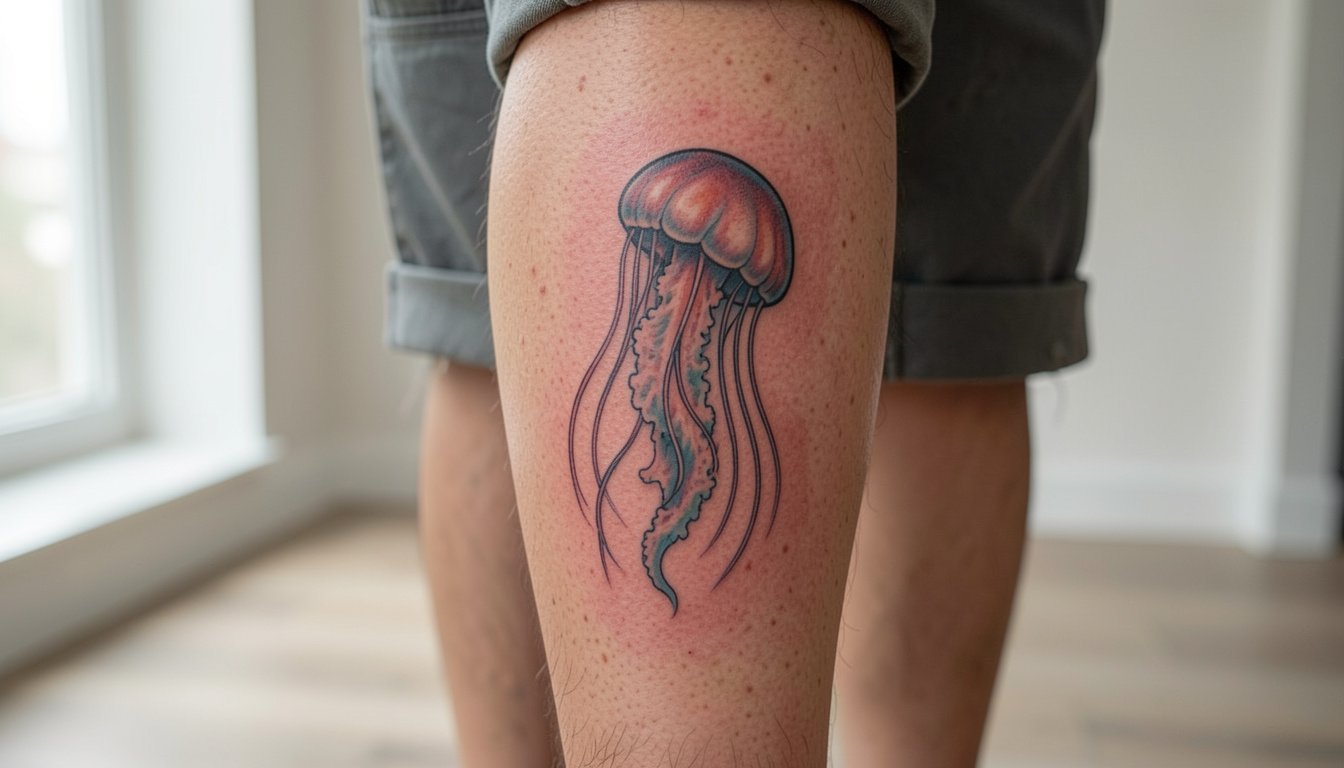
3. Realistic Jellyfish with Fine-Art Shading on the Calf

Realism gives the jellyfish a museum-quality presence and needs surface area to show translucency. The common mistake is trying to compress photographic detail into a wrist-sized piece, which flattens the depth and becomes a smudged patch by year two. A better plan is medium to large scale on the calf with layered stipple and soft gradients. Talk specifically about healed contrast and ask for examples of three-year healed realism on similar skin tones. Calf sessions run moderate pain with good artist visibility and typically two to four sessions for large pieces. Pair the finished piece with cropped trousers and ankle-baring shoes to show detail.
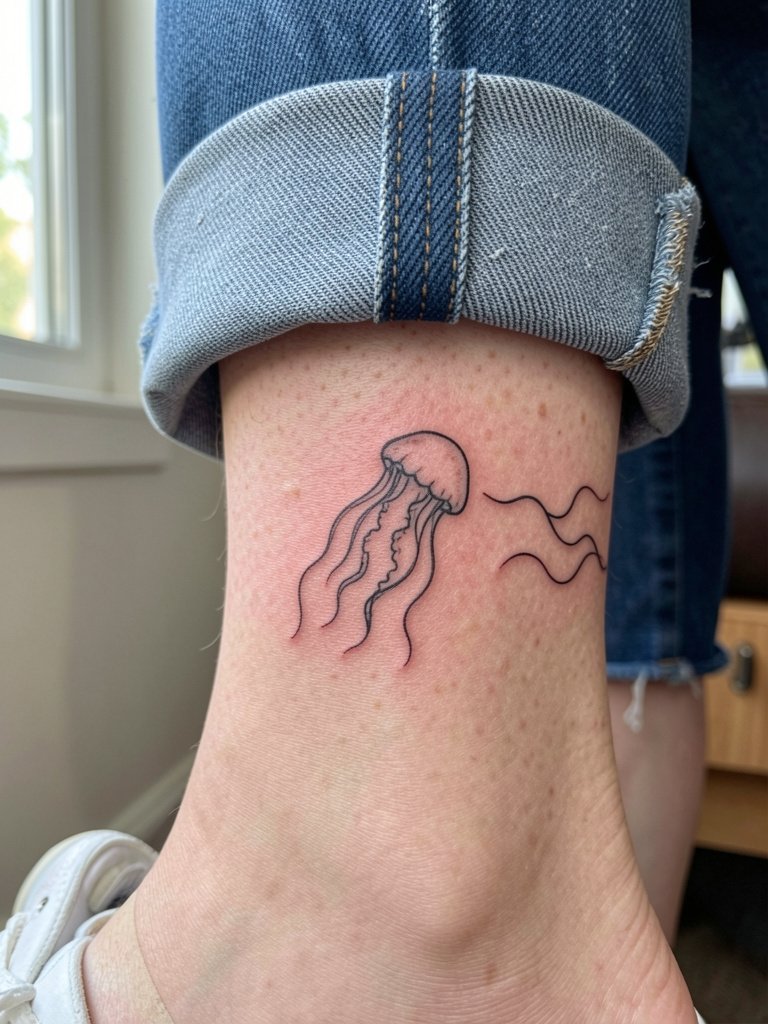
4. Micro-Realism Jellyfish at the Wrist

Micro-realism is attractive because it fits discreetly into daily life, yet the wrist eats detail faster than the calf. The usual failure is ultra-fine shading without a slightly heavier anchor line, which blurs after frequent washing and sun exposure. For lasting results, specify exact scale and ask the artist to show a healed macro shot of a similar micro piece on the wrist. Expect low to moderate pain. For session prep wear a short sleeve tee so the wrist is fully accessible. Touch-ups are common at the one- to two-year mark for micro pieces.
5. Dotwork Jellyfish Silhouette on Inner Forearm
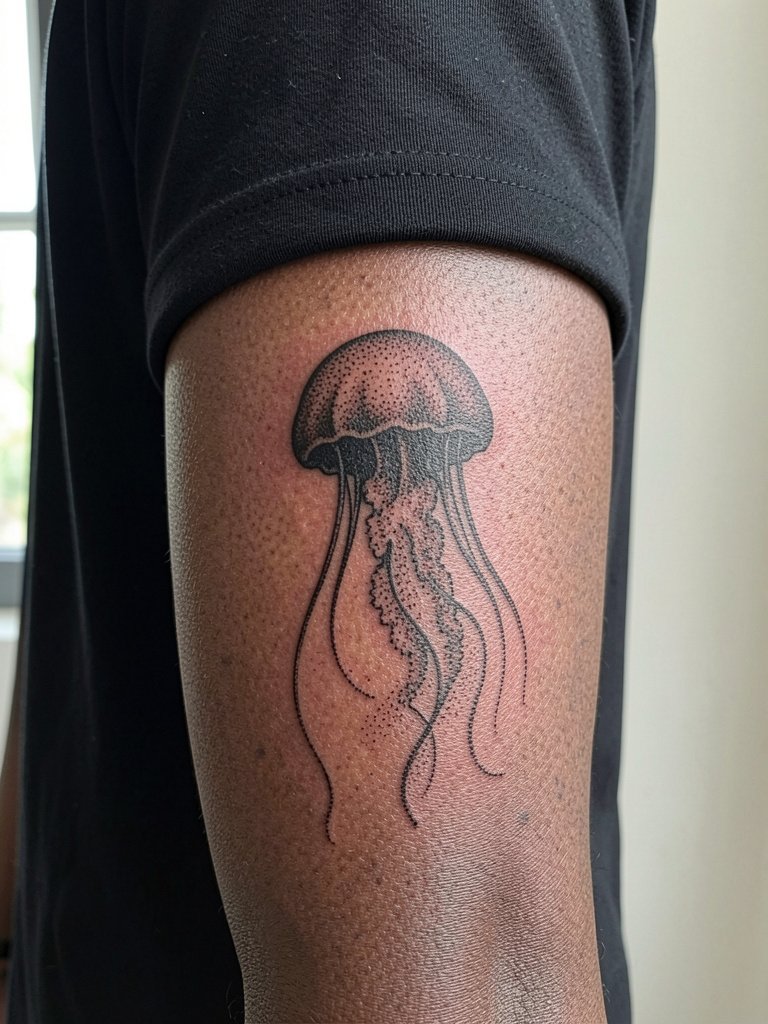
Dotwork reads texturally and keeps the design subtle while still reading from a short distance. A common mistake is placing dotwork too small, which makes the stippling blend into a gray patch after healing. Ask for spacing samples and a stipple density that reads at three inches. Inner forearm dotwork is forgiving for first-timers and usually finishes in one session. For showing it off, keep layers simple and pair it with a black crew neck tee or monochrome layers that let the texture pop. Blowout risk here is low if dots are spaced and needle depth is controlled.
6. Minimalist Line Jellyfish at the Ankle
Minimalist linework suits the ankle because the surrounding footwear and hems frame the tiny silhouette. The mistake is asking for razor-thin single-needle lines without allowing for a slightly heavier hairline that will survive daily abrasion from socks and shoes. Discuss line thickness in millimeters and request healed photos of similar ankle pieces. The ankle is higher on most pain charts than the forearm, so plan accordingly. For session comfort wear pants that can be rolled and bring delicate anklets to style it afterward. Touch-ups within a year are common for fine single-needle work on ankles.
Studio Day Picks
These upper-arm and forearm looks above can be easier to manage on session day when you bring the right gear and basic protection for the first week.
- Stencil transfer paper kit. Lets you preview placement on skin which is helpful for the inner forearm and ankle layouts discussed earlier.
- Topical numbing cream. Useful for sensitive areas like the ankle and ribs when you want a gentler session experience.
- Thin protective film roll. Keeps newly inked forearm and wrist pieces clean during the first days of healing.
- Fragrance free gentle body wash. Mild cleansing without irritants during showers matters for color retention on watercolor washes.
- Aquaphor Healing Ointment. A thin layer in the first two to three days helps keep fine line and watercolor edges from scabbing too thickly.
7. Black and Gray Jellyfish with Stipple on Outer Forearm
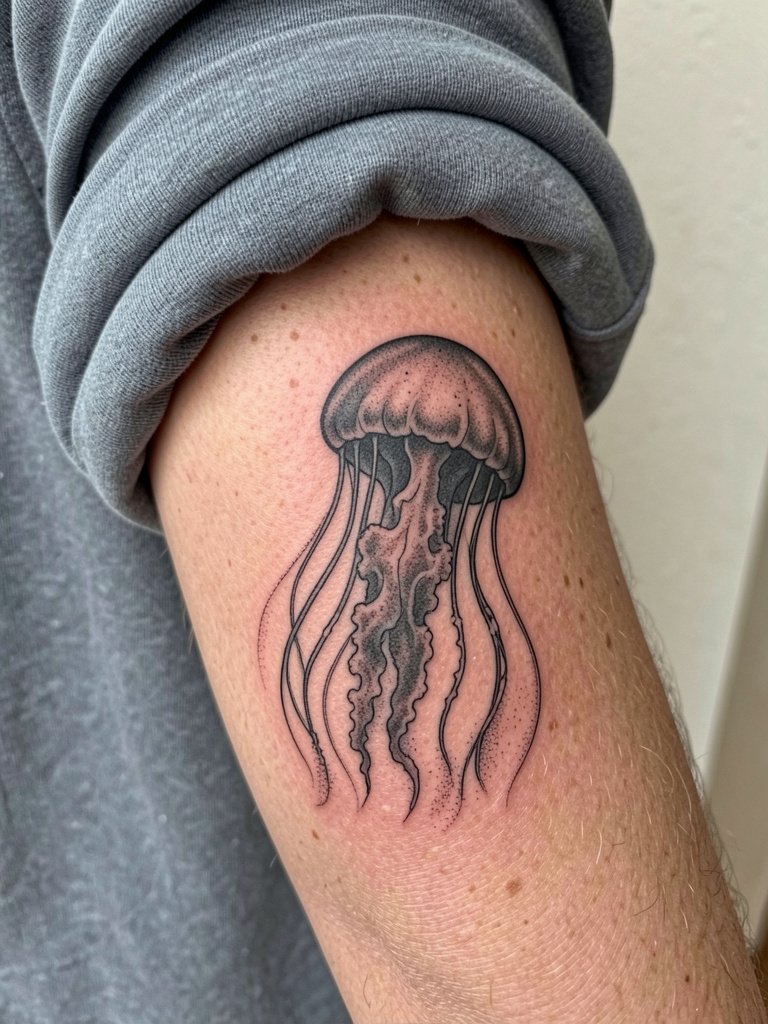
Monochrome stipple holds up well because it does not rely on color saturation that can fade unpredictably. The common error is over-detailing tiny tentacles which later become indistinct. Talk about intended viewing distance and ask the artist to simplify any details that will be unreadable at arm's length. Outer forearm work is moderate pain and usually one to two sessions depending on size. For wardrobe pairings try a denim jacket or vintage tees to echo the contrast-heavy look. Expect touch-ups after a few years if dense shading sits in high-sun zones.
8. Starry Galaxy Palette Jellyfish on Upper Arm
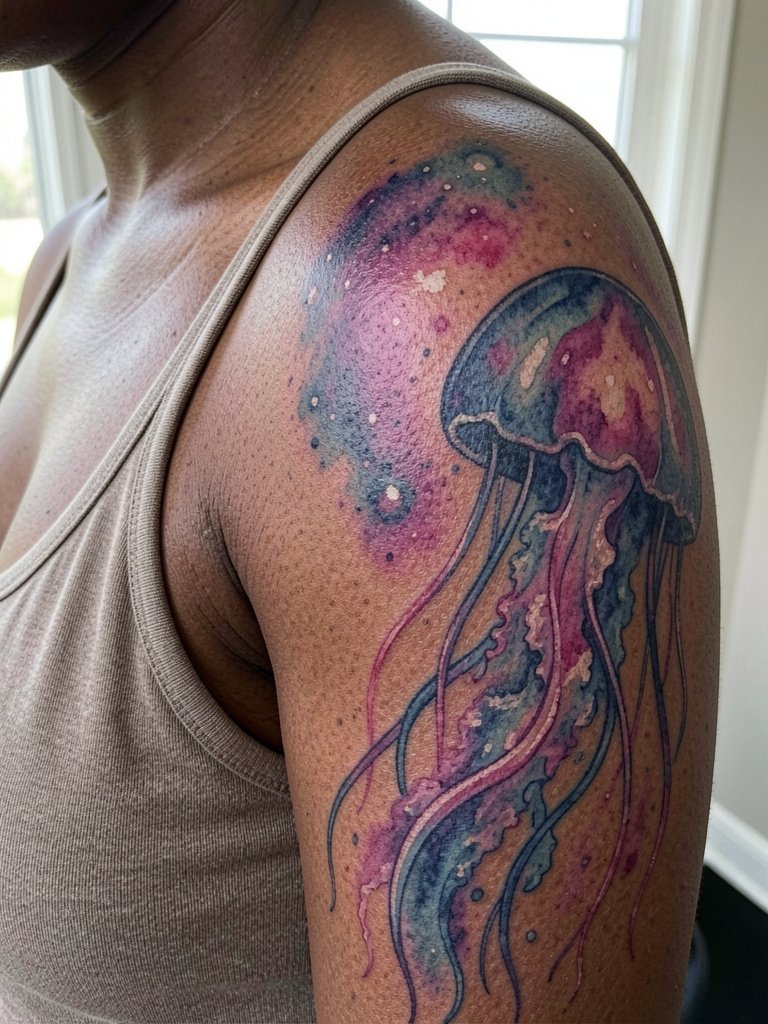
Fantasy palettes turn the jellyfish into a night-sky object, which appeals to people who want color without literal ocean references. The risk is over-saturated micro-gradients that lose subtlety on deeper skin tones if contrast is not planned. Request healed examples on similar skin tones and ask for a higher contrast point in the highlights so the colors keep their shape. Upper arm pieces show well with sleeveless tops, so bring a scoop-neck camisole to the session and for photos afterward. Depending on color layering this may take one to three sessions and will likely need a color touch-up within a few years.
9. Single Jellyfish with Negative Space on the Shoulder

Negative space helps the bell and tentacles remain legible by giving them breathing room. A frequent mistake is filling every area with wash, which compresses the silhouette and reduces the visual impact. During consultation show the exact proportions you want and request the artist mark the negative areas on a stencil so you can see the spacing before needle hits skin. Shoulder placements are lower pain and often finish in a single session. For styling, off-shoulder tops like an off shoulder top frame the piece without covering it.
10. Two-Jellyfish Composition on Outer Thigh
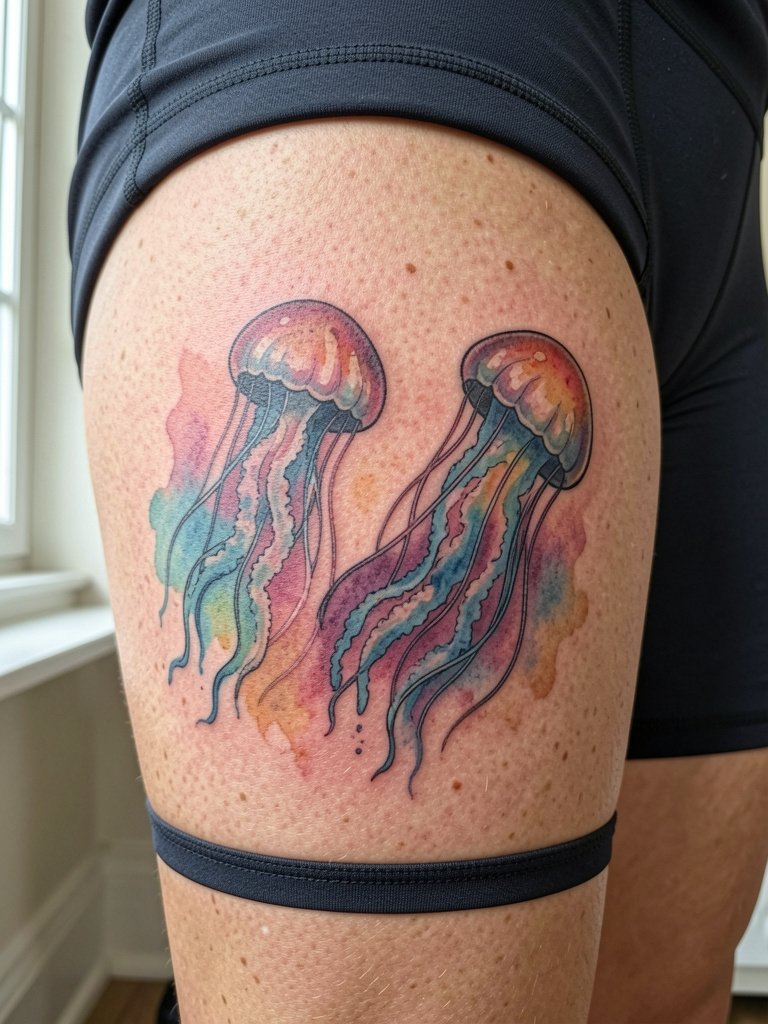
Paired jellyfish create internal movement and let artists play with interaction and negative space without building a large scene. One mistake is crowding the two forms so their tentacles tangle into unreadable noise. Discuss separation distance and a focal jellyfish so the eye has a clear anchor. Thigh pieces tolerate longer sessions because of cushion, but watch for shifting if you sit for a long time. Show-off outfits like bike shorts or split-hem skirts make the placement feel editorial when you want to show it.
11. Curved Contour Line Jellyfish for Inner Forearm

Curved contour lines help the bell feel three-dimensional and keep the jellyfish from flattening on the arm. A common error is using identical curve spacing that reads machine-drawn rather than organic. Ask the artist for variable-width contouring and for a few corrective passes in the stencil phase to see how it sits with your arm curve. The inner forearm is one of the most readable spots and is moderate on pain. No styling link here to keep the balance across sections.
12. Soft-Flow Mushroom Hood Jellyfish on the Ribcage

Ribcage placements look dramatic because the hood can be elongated to follow the body curve, but they also register higher pain and movement during healing. One camp says ribs are too volatile for fine line watercolor and that the skin stretch blurs lines. Another camp counters that a slightly bolder anchor line and staged session breaks produce a graceful long-term result. If choosing ribs, specify session-length breaks and bring a loose sports bra or fitted top that can be adjusted easily. For session wear prefer a loose sports bra or a top you can remove without tugging.
13. Vertical Drop Jellyfish for the Nape
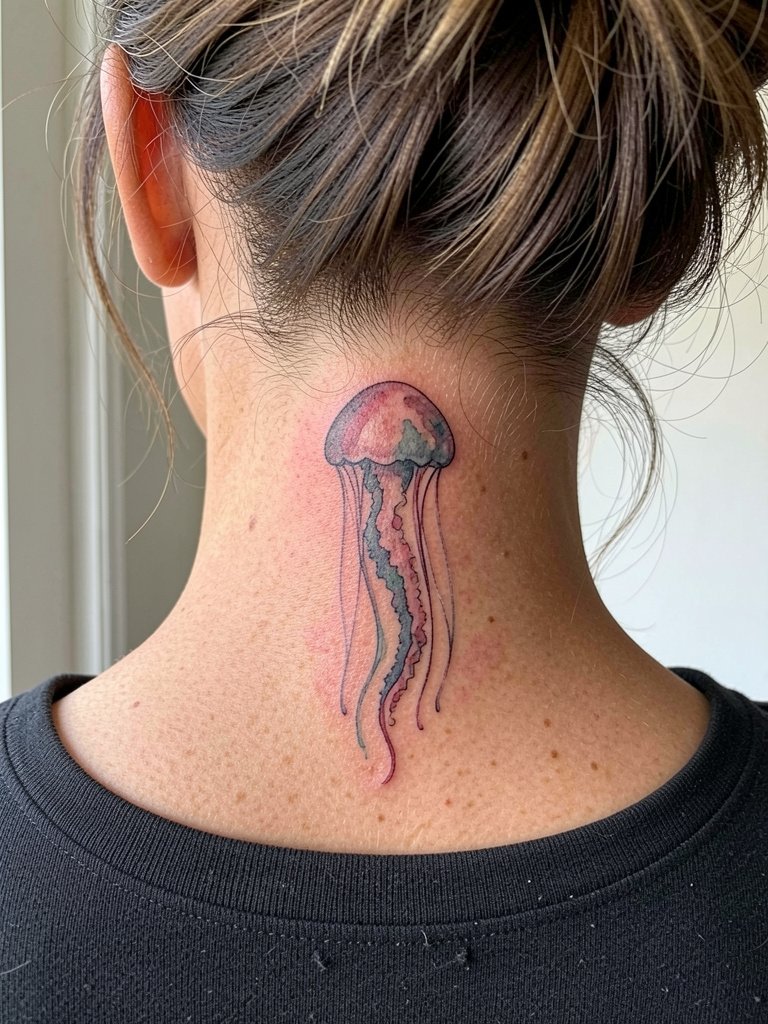
A vertical drop uses the neck's natural axis to make tentacles look like they fall. The nape is a discreet spot that looks intentional when you wear an updo. The biggest mistake is placing the piece too high under the hairline where hairstyling causes friction and premature fading. Ask for a placement mockup while sitting up with hair tied to match your usual style. Nape sessions are brief and low to moderate pain. Accessorize with claw clips or updos to show the tattoo without constant exposure, and bring a claw clip if needed.
14. Fine-Line Jellyfish with Tiny Color Splash on Inner Upper Arm

Combining fine line with a restrained color splash gives you watercolor feeling with more longevity. The typical error is splashing weak color without anchor lines which yields uneven fade. Request the exact hue sample and ask the artist to save stronger contrast points under the color so the splash keeps shape. Inner upper arm work is moderate pain and often one session. Wear a loose tank top to the appointment so the artist can access the area without pressure from a strap.
15. Vertical Composition with Long Tentacles on the Thigh
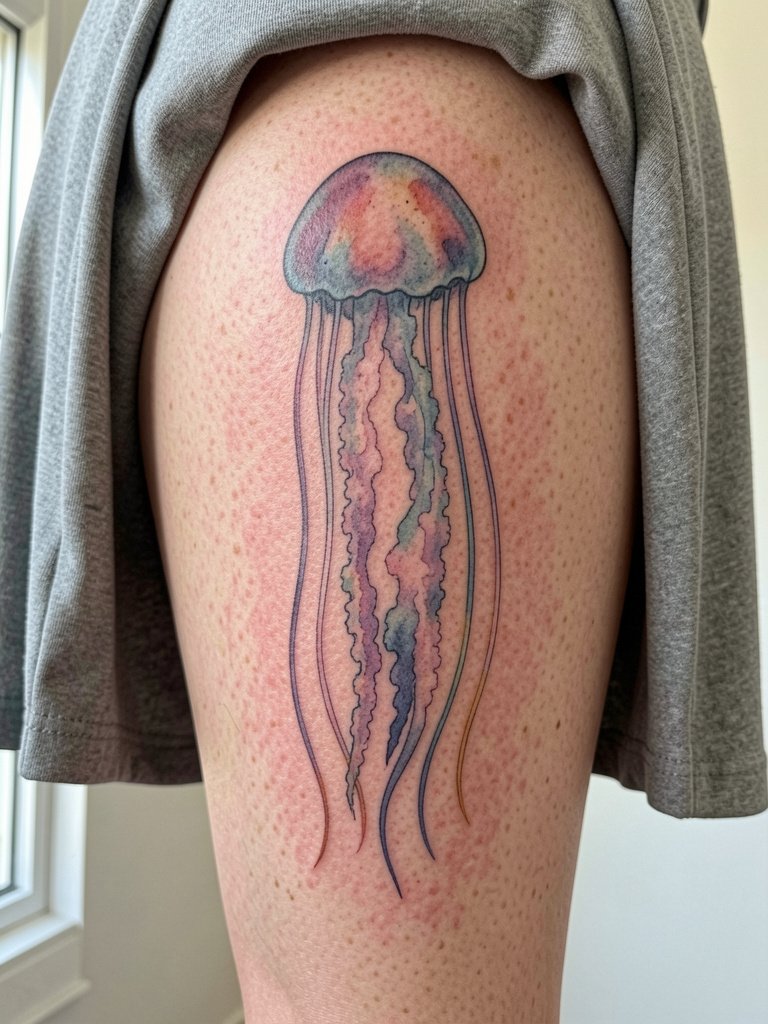
The thigh provides room for tentacles to descend and keep their rhythm without crowding. A frequent mistake is compressing the tentacles so they tangle when you sit. Ask for tentacle spacing studies at your seated and standing posture so the composition reads in both positions. Thigh work is lower on the pain scale and can be done in longer sessions. For showing it off try split hem skirts or bike shorts that frame the design.
Frequently Asked Questions
Q: How much does a watercolor jellyfish tattoo cost and what affects the price range?
A: Expect a range that depends on size and color complexity. Small wrist or ankle pieces commonly fall between $150 and $350 while medium to large custom watercolor or realism pieces can range from $400 to $1,200 or more depending on artist rates and session count. The main cost drivers are color layering, session time, and the artist's portfolio demand.
Q: How do watercolor jellyfish age compared with black and gray versions?
A: Watercolor fades differently because pigments sit in layers that can soften over time, while black and gray relies on contrast that often reads longer on skin. One camp thinks watercolor will blur faster and needs more touch-ups. The other camp argues that careful structure under the color and planned touch-ups keep the look painterly and acceptable longer. If longevity matters, ask for an anchor outline and choose a calmer palette.
Q: Where can I find artists who actually show healed watercolor work and not just fresh photos?
A: Search social platforms with specific tags like #watercolortattoo, #jellyfishtattoo, and #microrealismtattoo and filter by recent posts or location. Tattoodo keyword searches help surface portfolios, and Reddit tattoo threads often point to healed shots. Always request healed photos from the artist for similar placement and skin tone before booking.
Q: Will a small jellyfish be readable on darker skin tones?
A: It depends on contrast and hue choice. On deeper tones you will usually need stronger contrast or slightly larger scale for the same visual read at a distance. Ask to see healed examples on similar skin tones and request color adjustments that keep highlights and darker points distinct.
Q: How long before I should expect a touch-up for watercolor pieces?
A: Many watercolor pieces see a first touch-up between 12 and 24 months, especially if they sit on high-movement or high-sun areas. Fine-line accents might need earlier refreshing. Plan touch-ups into the timeline rather than treating them as a failure.
Q: What should I wear to a shoulder or upper-arm watercolor session?
A: Choose clothing that exposes the placement without being tight or needing to be moved during the session. For shoulders a sleeveless scoop-neck camisole or ribbed tank works well. For thigh work pick shorts or a skirt that can be adjusted without pulling on the inked area.
Q: Are there placements I should avoid for watercolor if I want low-maintenance results?
A: High friction zones like the top of the foot and inner wrist need more maintenance. If you want less care, choose areas with fewer daily rubs and less sun exposure such as the calf or outer thigh.
