
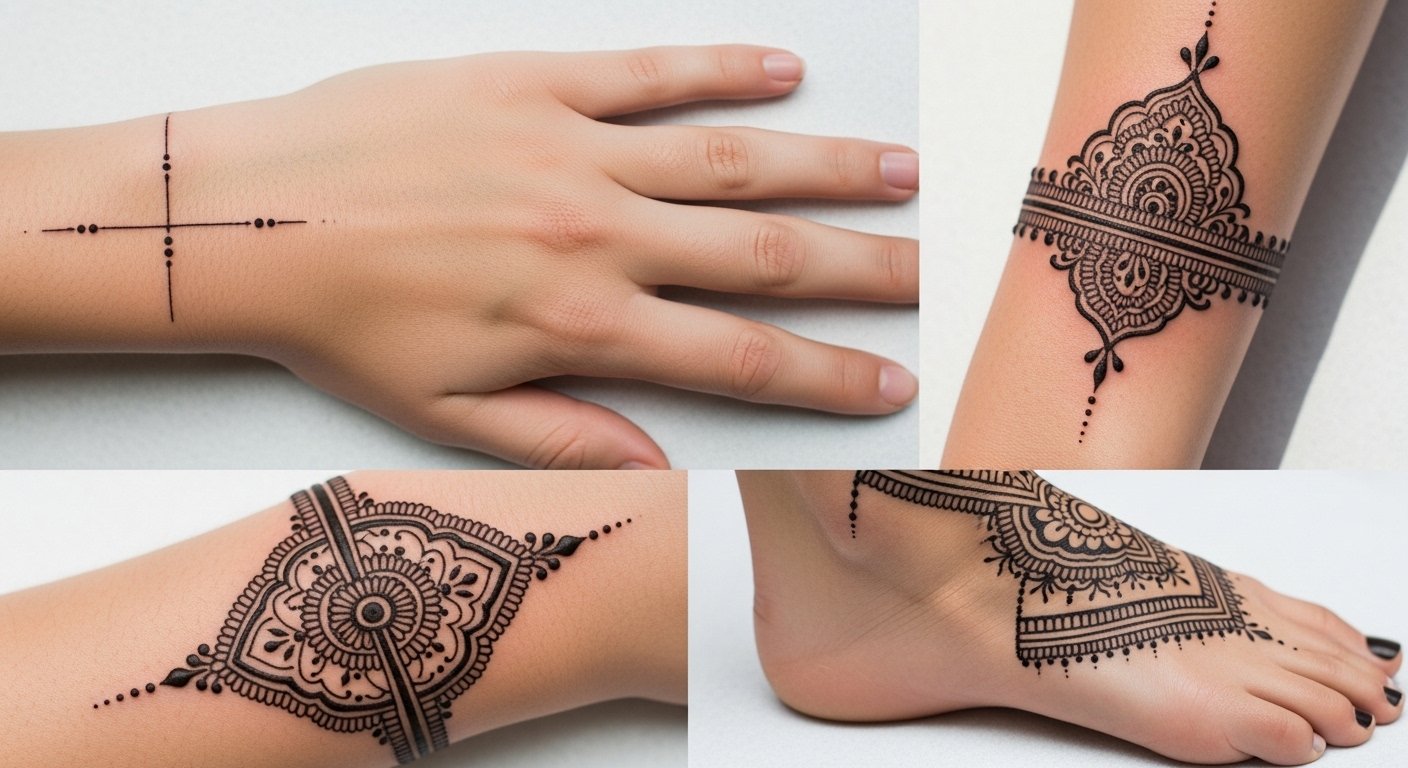
I spent months studying henna motifs before I finally asked my artist to translate that lace-like detail into permanent ink. The trick wasn’t copying henna exactly—it was keeping that filigree feeling while choosing line strengths and placements that age well. These 28 henna-style tattoos I’ve collected (from hands to ribs and ankles) show how to get that intricate look without sacrificing longevity.
This list focuses on henna-style tattoos—delicate dotwork, mandalas, paisleys, and geometric bands—that work well on hands, forearms, ribs, ankles, and feet. From what I’ve seen, artists mixing fine-line and dotwork give the best long-term results for these detailed looks.
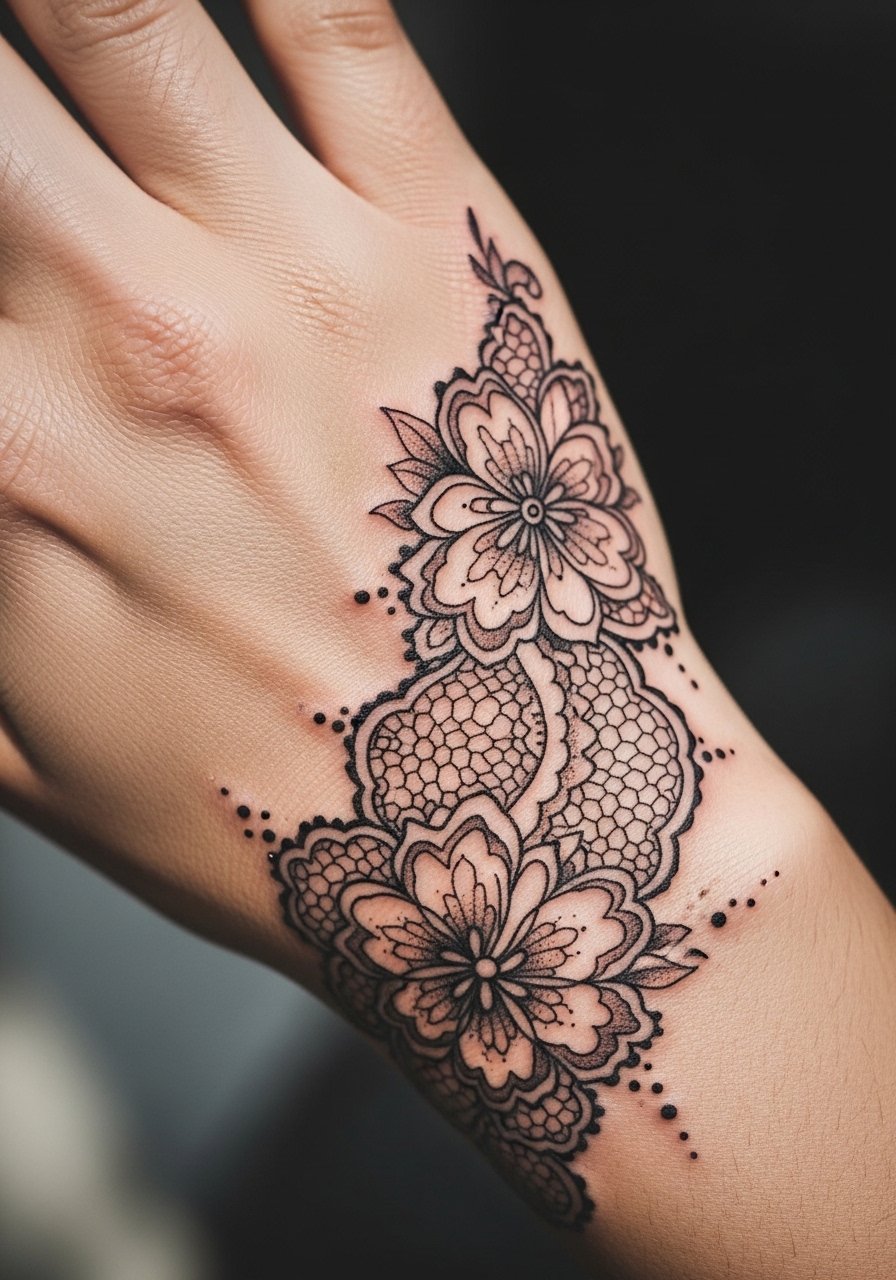
1. Henna Mandala on the Back of the Hand
Style/Technique: Fine line + dotwork
Pain Level: Low-Medium (3-4/10)
Session Time: 1–2 hours
Best For: Visible statement, bridal-inspired ink
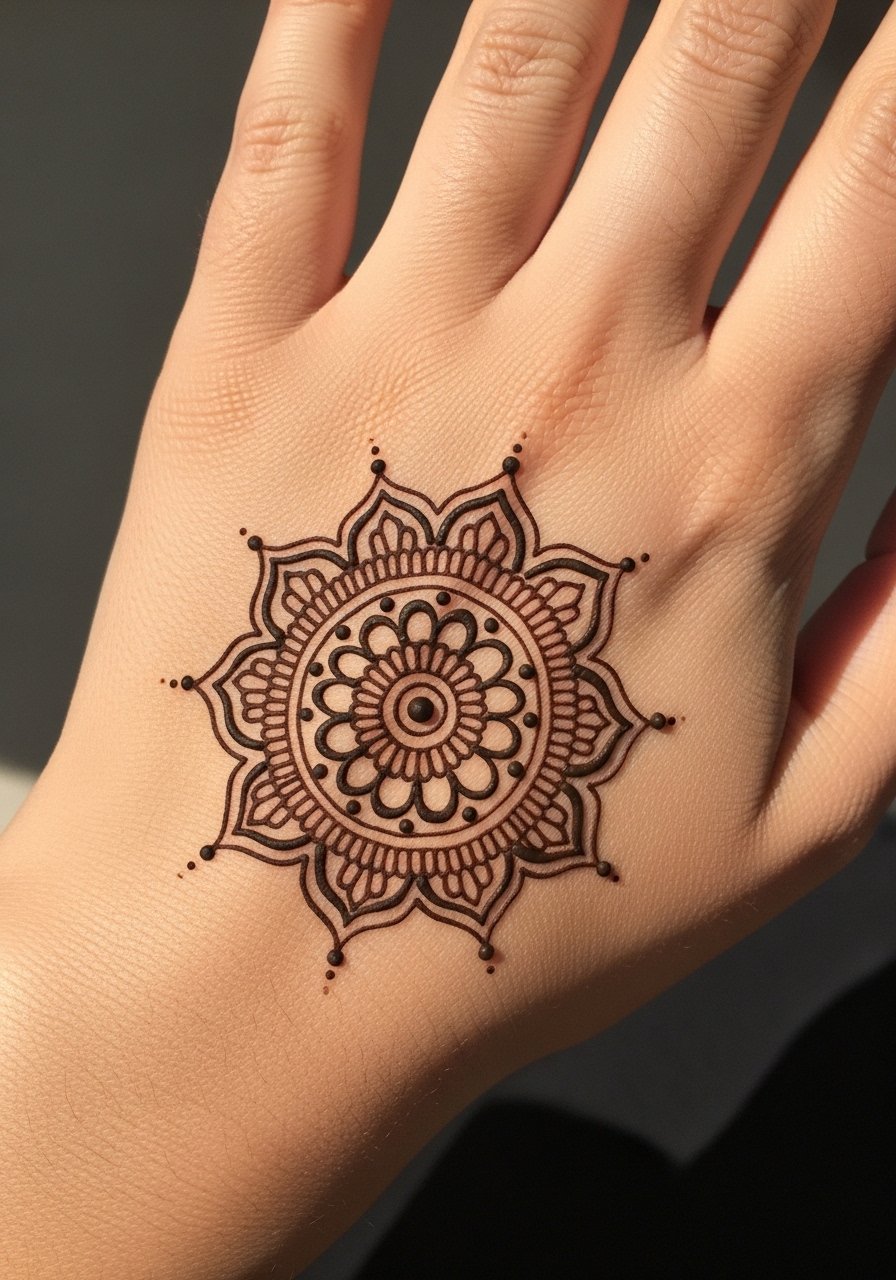
I love how a mandala reads like a henna crown on the hand. Visually, the symmetry draws the eye and reads delicate even when healed. This placement can sting a bit near knuckles, but the shape suits single-session work. Expect surface healing in 2–3 weeks; dots and hairlines can blur if too thin—I've seen artists recommend slightly bolder single lines to keep the pattern readable after a year. Ask for micro-dot shading that isn’t razor-thin.
2. Paisley Wrist Band
Style/Technique: Ornamental linework
Pain Level: Low (2-3/10)
Session Time: 1–2 hours
Best For: Everyday jewelry alternative
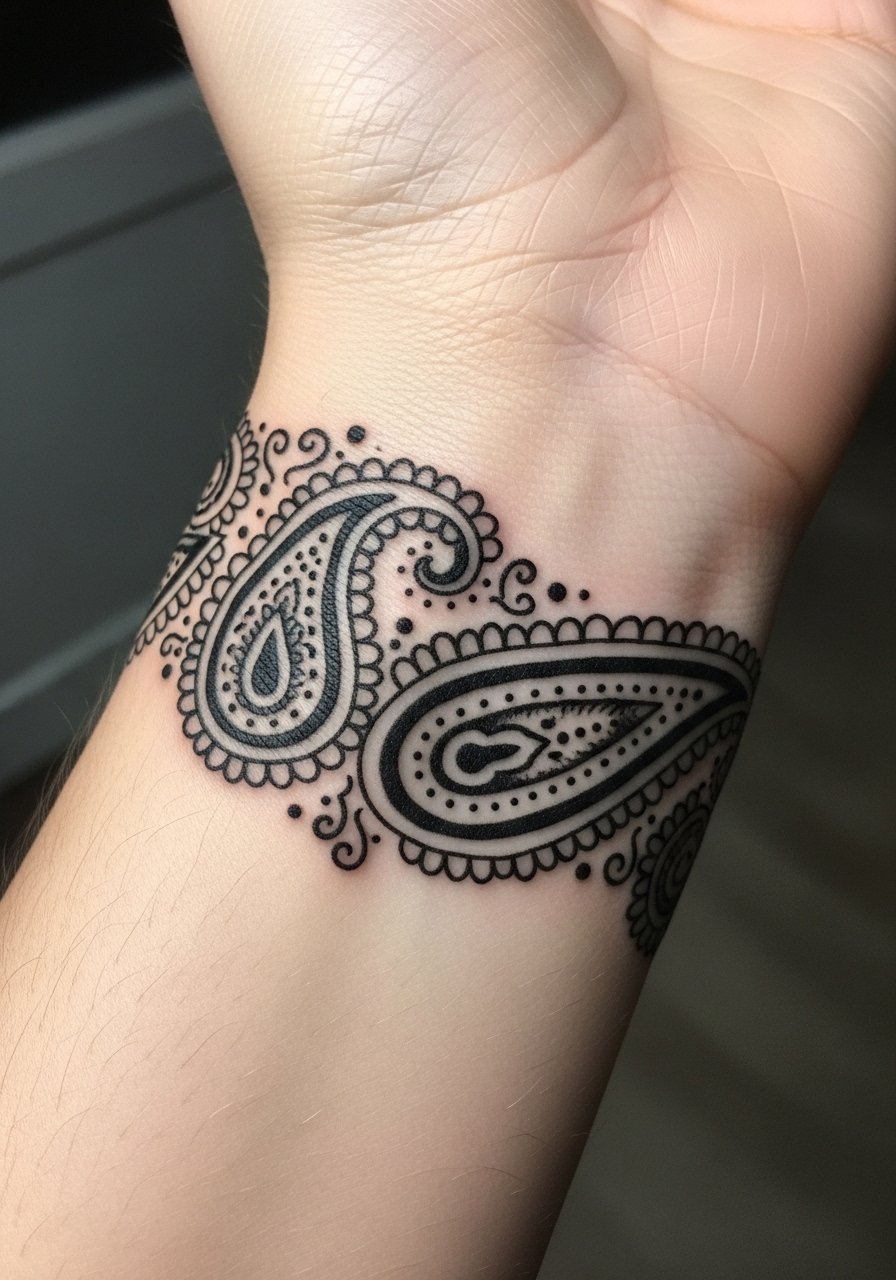
A repeating paisley band instantly reads henna-inspired jewelry. It’s low on the pain scale and easy to hide under bracelets. The wrist is prone to rubbing, so I’ve noticed bands hold best when artists use slightly thicker outlines and tight dot fillers. Healing is straightforward—avoid chokey bracelets while it scabs. Common mistake: over-detailing the band with ultra-fine dots that merge over months. Ask for artists experienced in ornamental repeat patterns.
3. Finger Ring Filigree
Style/Technique: Minimal filigree / Tiny dotwork
Pain Level: Medium (4-5/10)
Session Time: 30–60 minutes per finger
Best For: Subtle henna vibe, daily wear
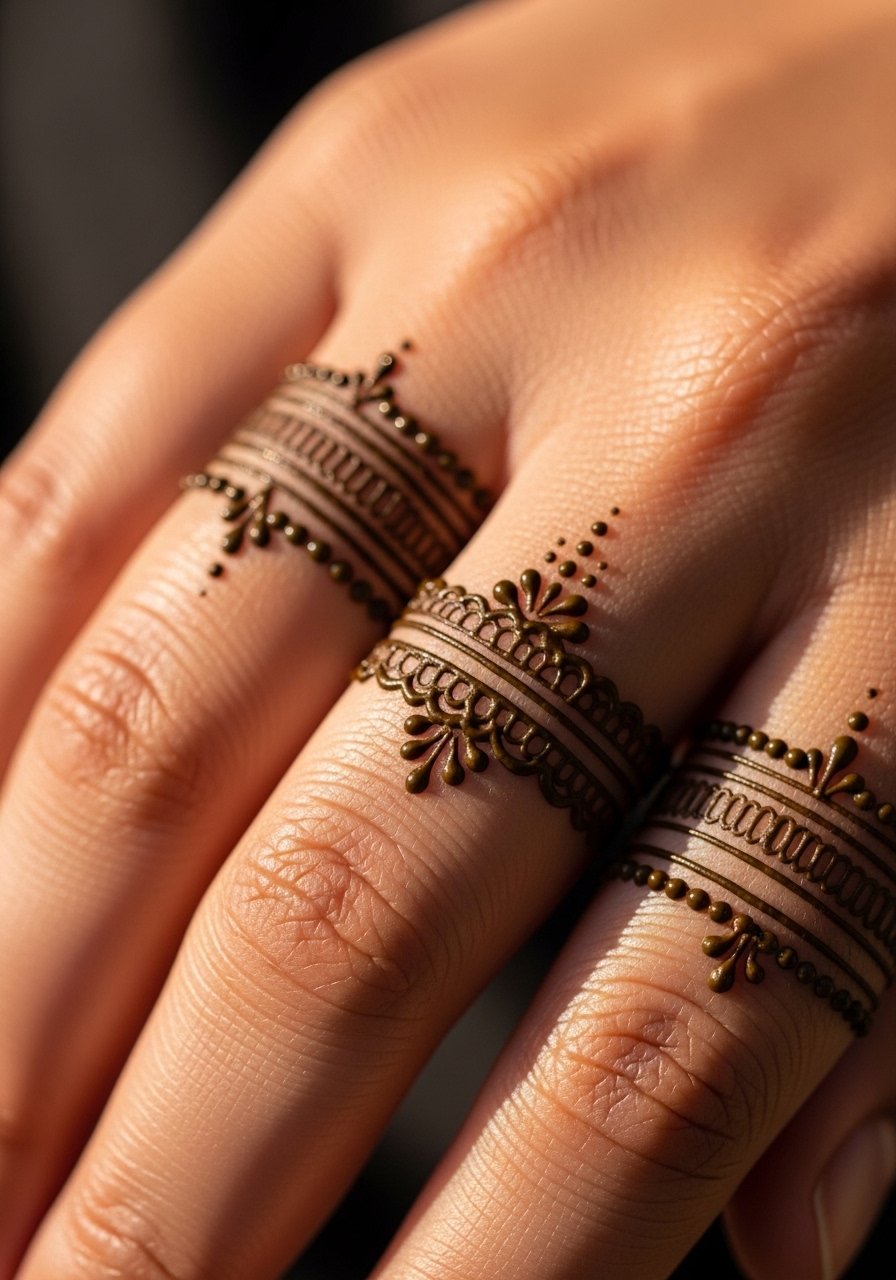
Finger pieces mimic henna ring patterns beautifully but need special planning—skin creases and frequent washing speed fading. I tell people ring filigree is perfect if you accept more touch-ups. Expect faster fading than forearm work. To avoid blotchy healing, artists should use compact line work and avoid hairline spacing on knuckles. Ask for denser lines where the skin flexes.
4. Back-of-Neck Mandala Cluster
Style/Technique: Small mandala cluster / Dot shading
Pain Level: Low (2-3/10)
Session Time: 1–1.5 hours
Best For: Hidden-or-visible option with hair up
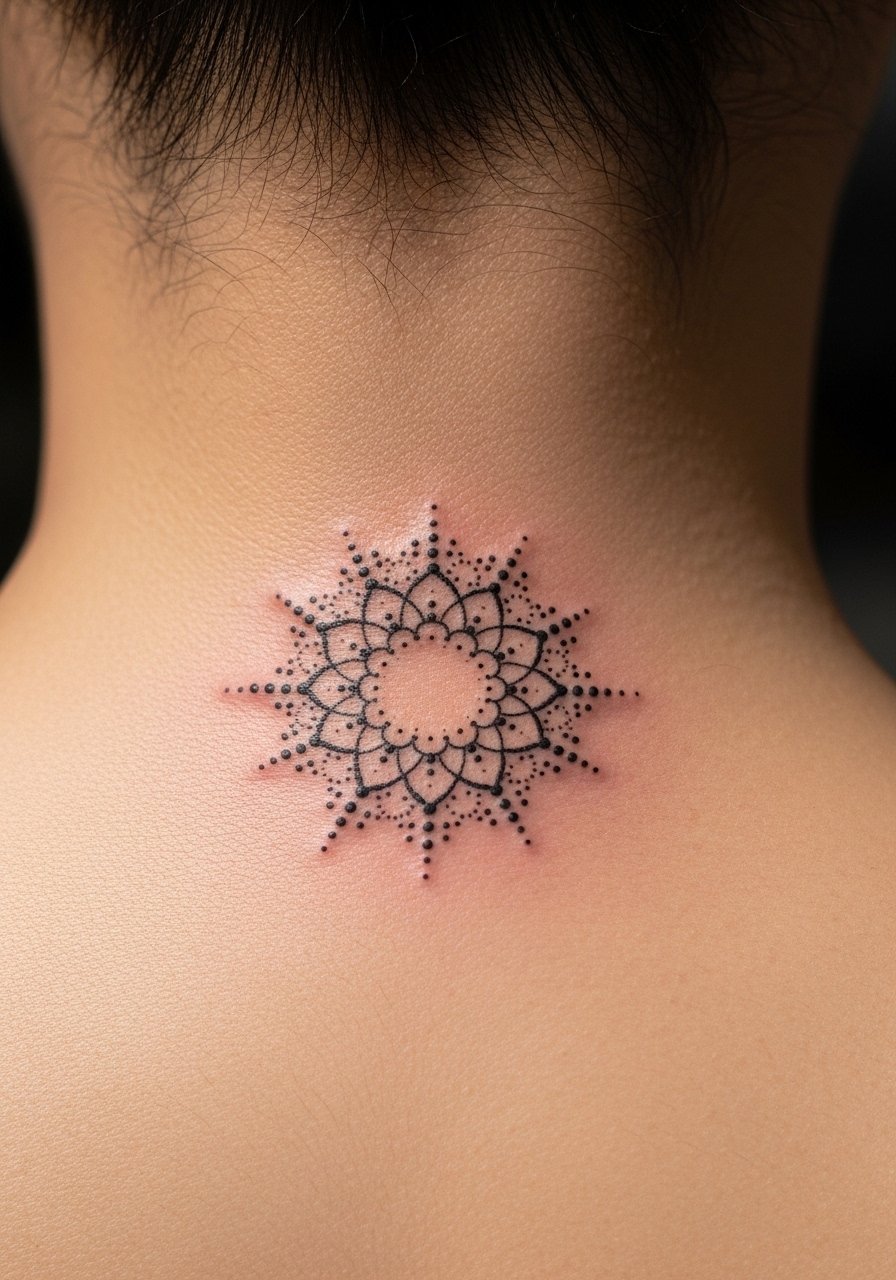
A small cluster at the nape reads like henna peeking out when your hair is up. It’s one of those spots that feels intimate and ages well because it doesn’t get constant sun. Pain is mild, and touch-ups are easy. I’ve noticed artists keep the center slightly bolder to maintain structure as dotwork softens. Avoid excessively thin spokes that can disappear into the skin tone over time.
5. Inner Forearm Henna Lace Panel
Style/Technique: Fine line panel with scalloped edges
Pain Level: Low (2-3/10)
Session Time: 1.5–3 hours
Best For: First-time henna-style statement
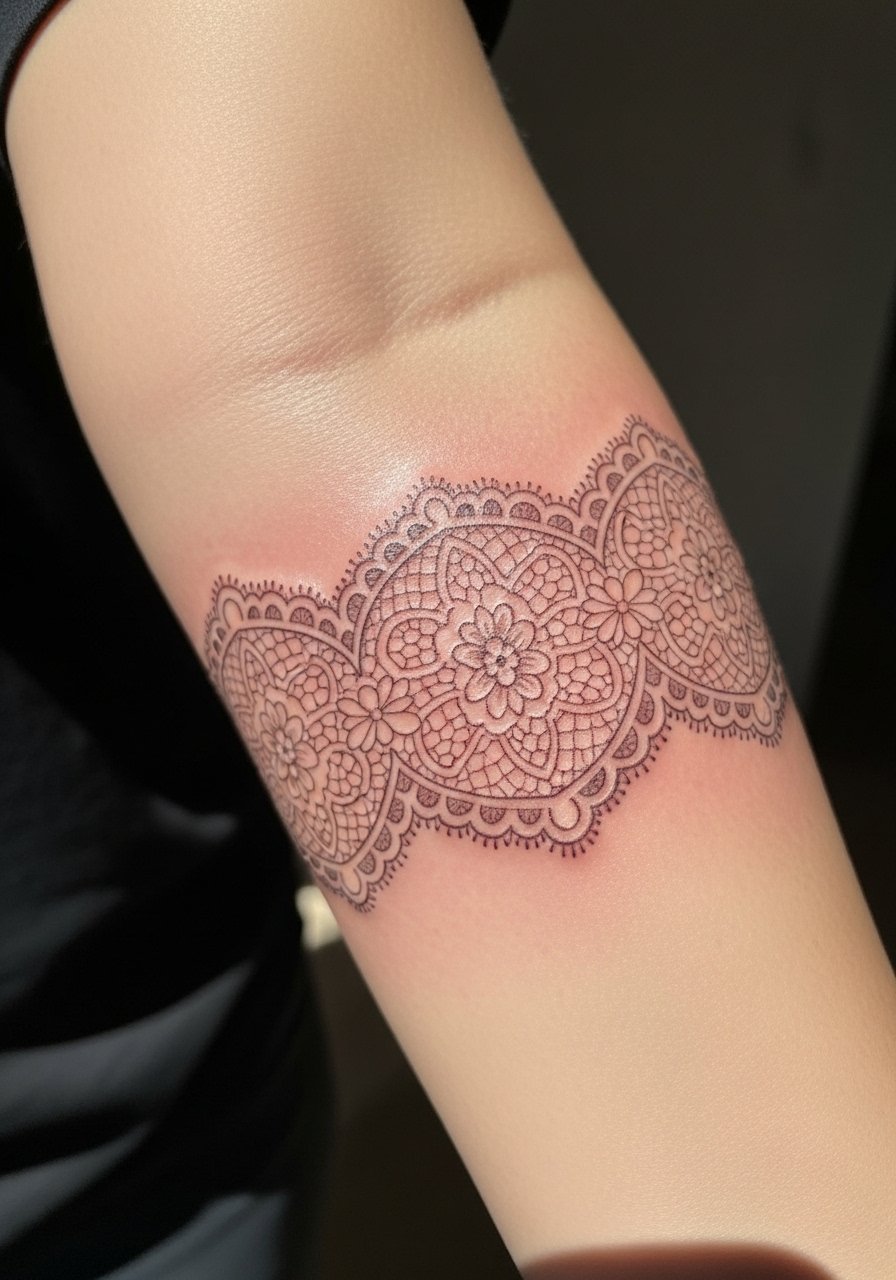
The inner forearm is a go-to for henna-style panels—the canvas shows off delicate symmetry and holds detail well. Pain is manageable and healing is predictable. In my experience, panels with a mix of thin and mid-weight lines read best healed; if everything is hairline-thin it can fuzz. Ask your artist to map the negative space as carefully as the inked lines so the lace breathes.
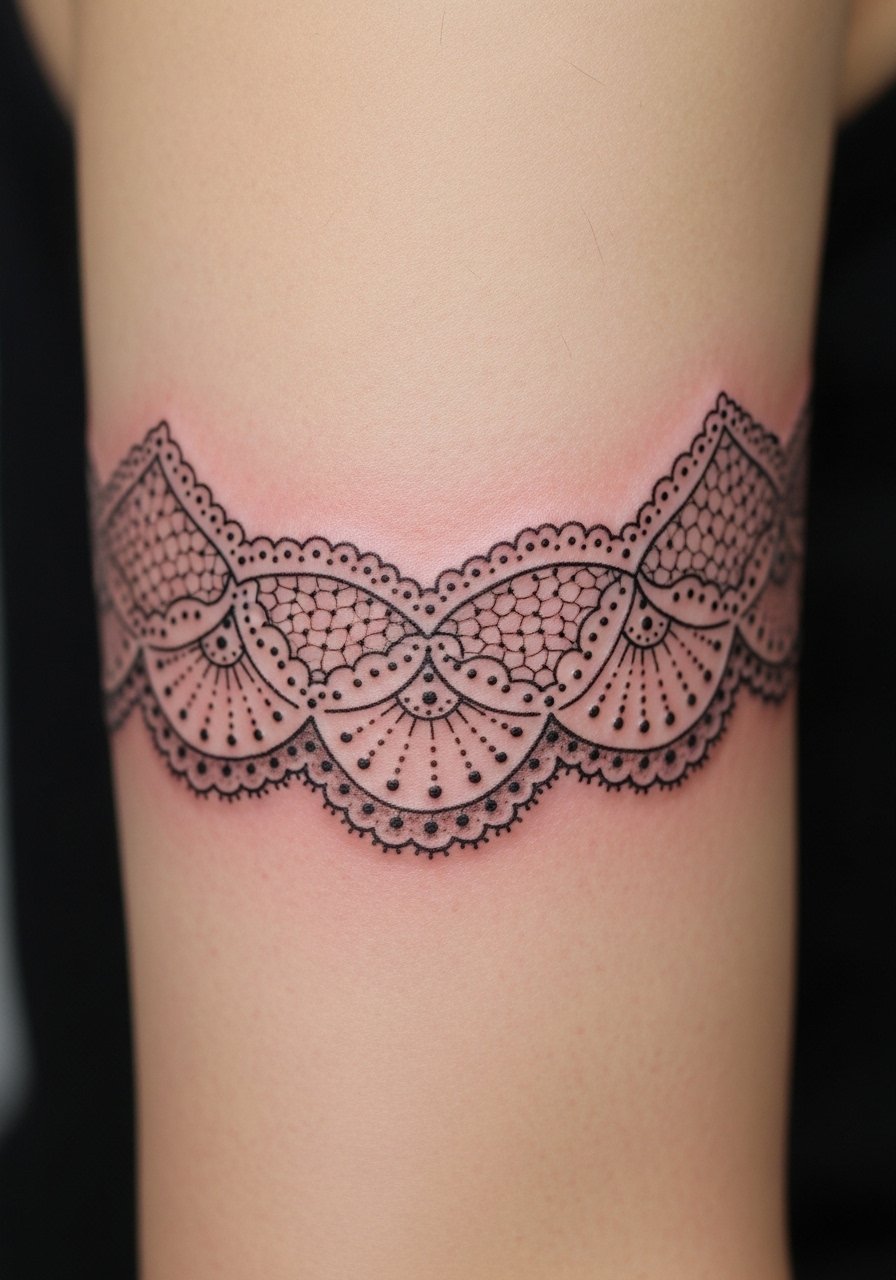
6. Ankle Henna Band with Dots
Style/Technique: Geometric band + dot chain
Pain Level: Low (2/10)
Session Time: 45–90 minutes
Best For: Footwear-friendly accent
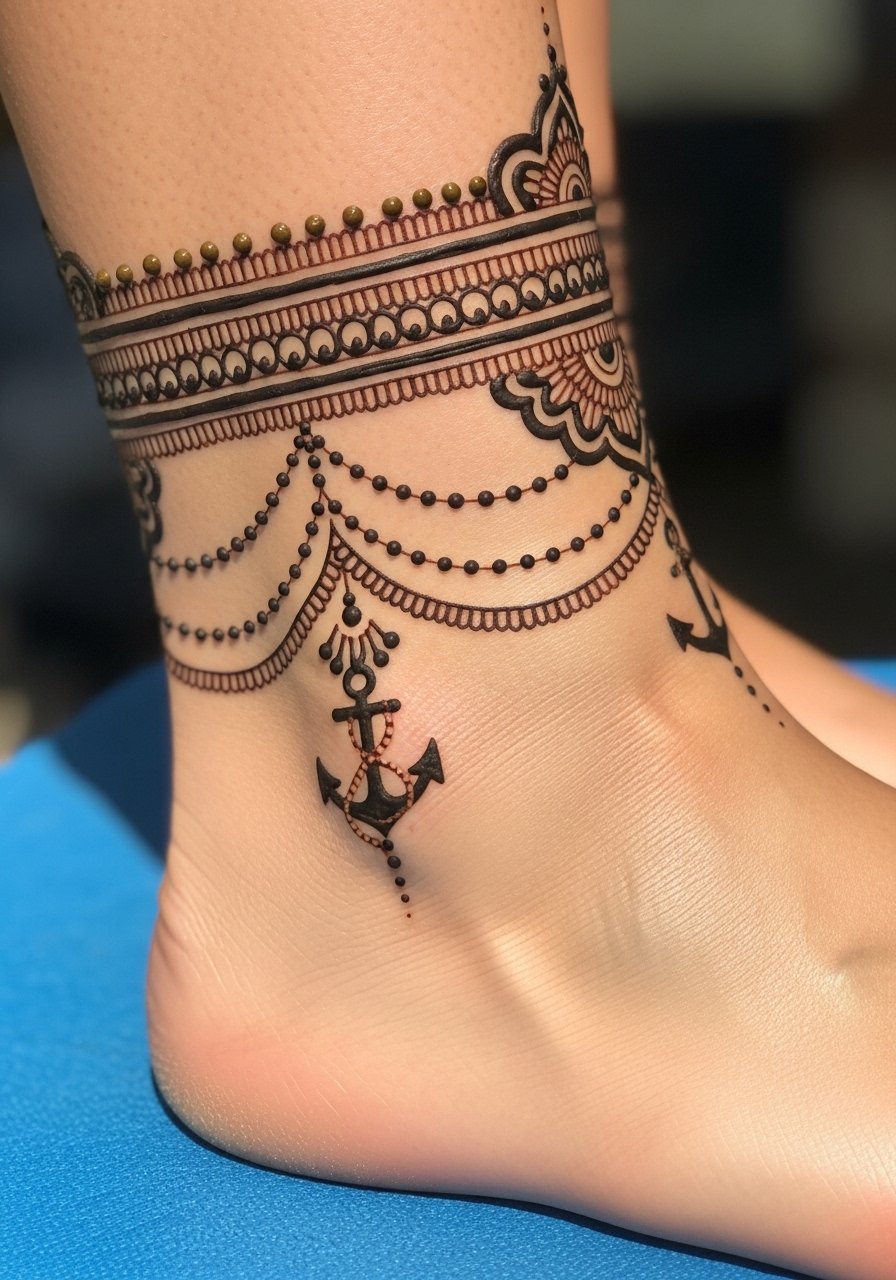
Ankles are perfect for henna bands that echo ankle jewelry. I’ve seen them last nicely if you avoid shoes that rub the area while healing. The skin there is thin but not high-movement, so dot chains and tiny crescents keep their character. Common mistake: placing the band too low where socks rub—ask for higher placement if you want longevity.
7. Thumbprint Henna Motif (Thumb Pad)
Style/Technique: Tiny mandala / Micro-dotting
Pain Level: Medium (4/10)
Session Time: 30–45 minutes
Best For: Unique small focal point
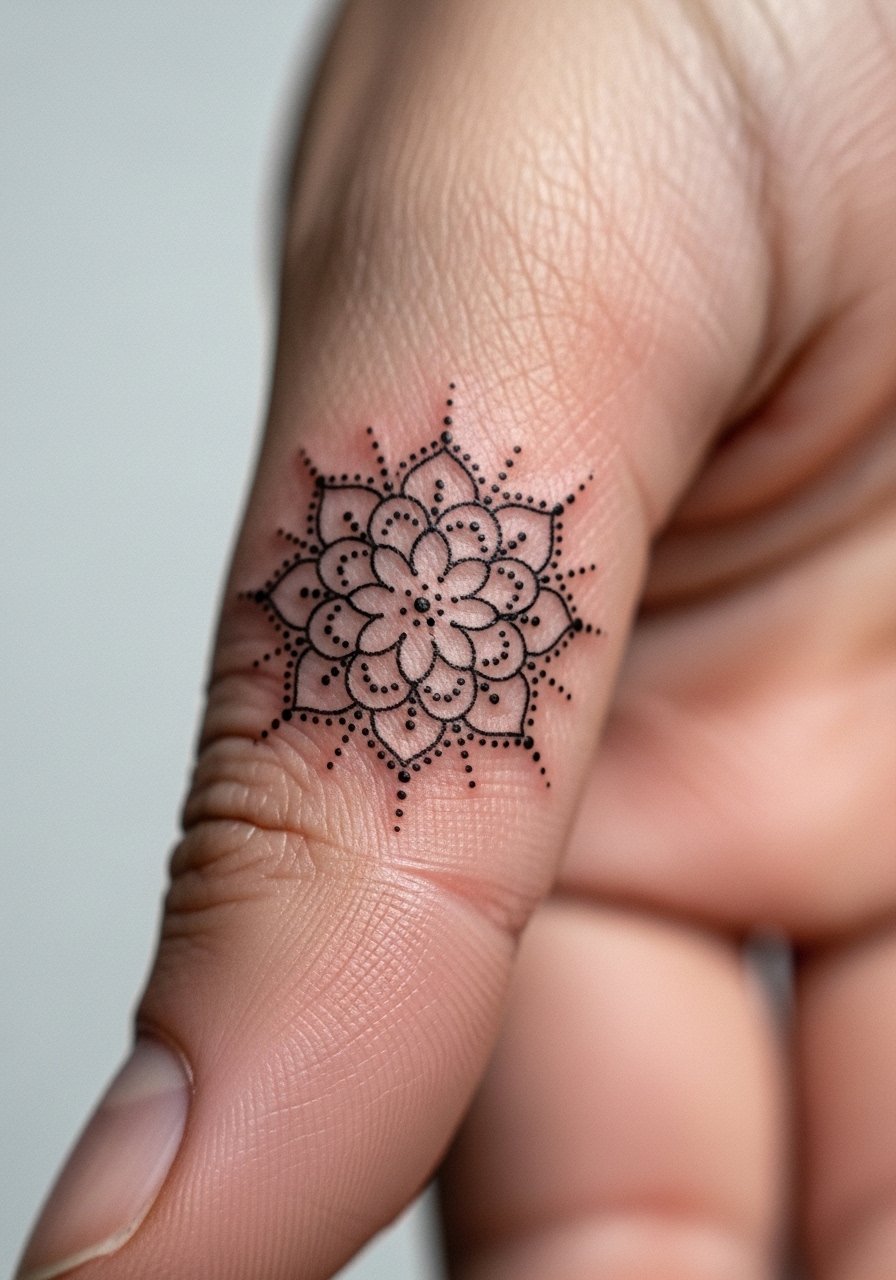
I was surprised how much personality a thumb pad motif adds—henna often uses that spot for small anchors. It’s slightly higher pain due to padding and movement but makes a memorable placement. Expect more fading and potential touch-ups because of frequent use. Ask for denser center ink to preserve contrast as the outer dots soften.
8. Shoulder Blades Mirrored Henna Panels
Style/Technique: Symmetrical ornamental panels
Pain Level: Low (2-3/10)
Session Time: 2–3 hours (both sides)
Best For: Symmetry lovers, back accents
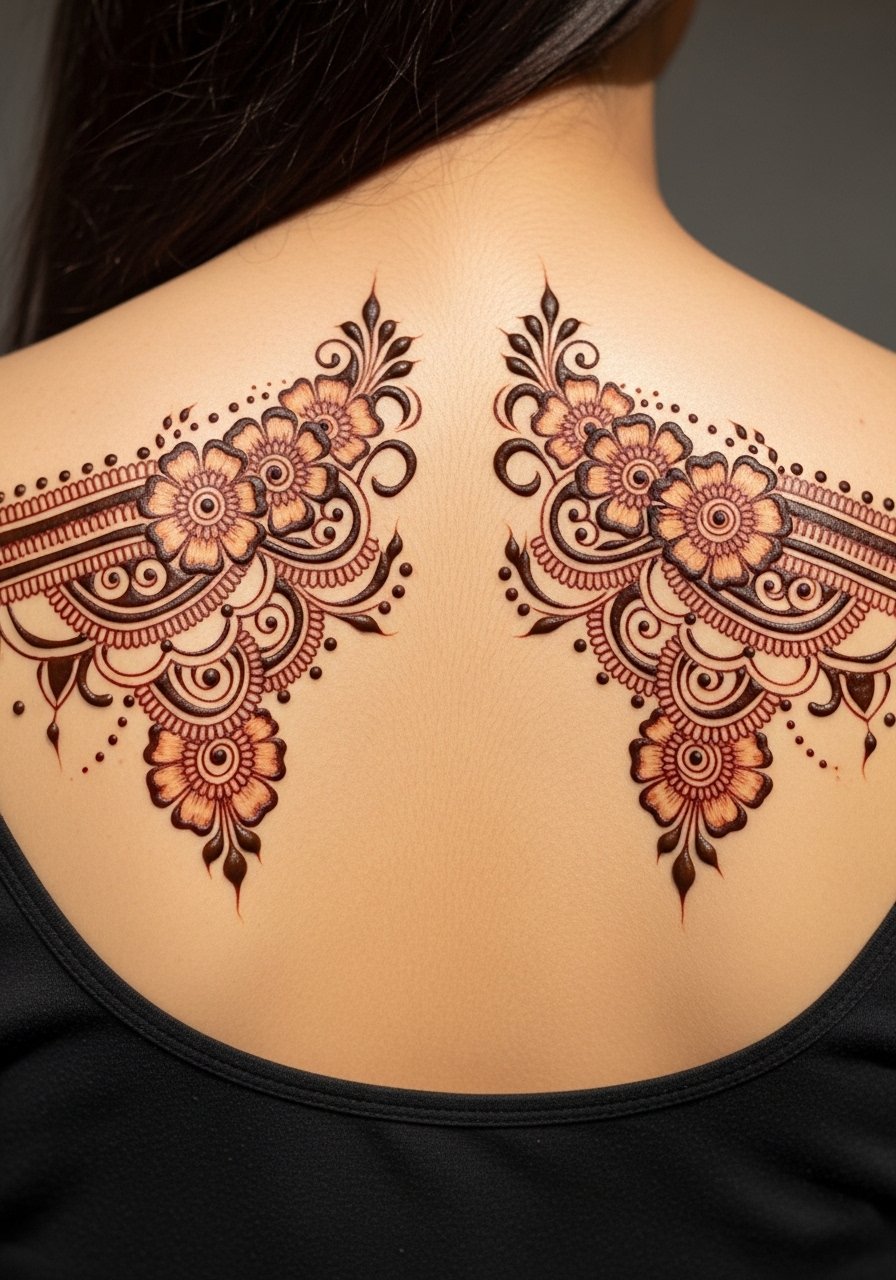
Mirrored panels on the shoulder blades make a dramatic but personal statement when hair is worn up. The skin tolerates detail well here and lines settle nicely. I’ve noticed that artists who design negative-space petals and balanced dotwork produce the best healed results—overly tiny textures can bleed together. Ask for mockups in motion (with shirt on/off) to ensure placement flatters shoulder movement.
9. Sternum Lace Motif
Style/Technique: Ornamental lace / Filigree
Pain Level: Medium-High (5-6/10)
Session Time: 1.5–3 hours
Best For: Centerpiece under low-cut tops
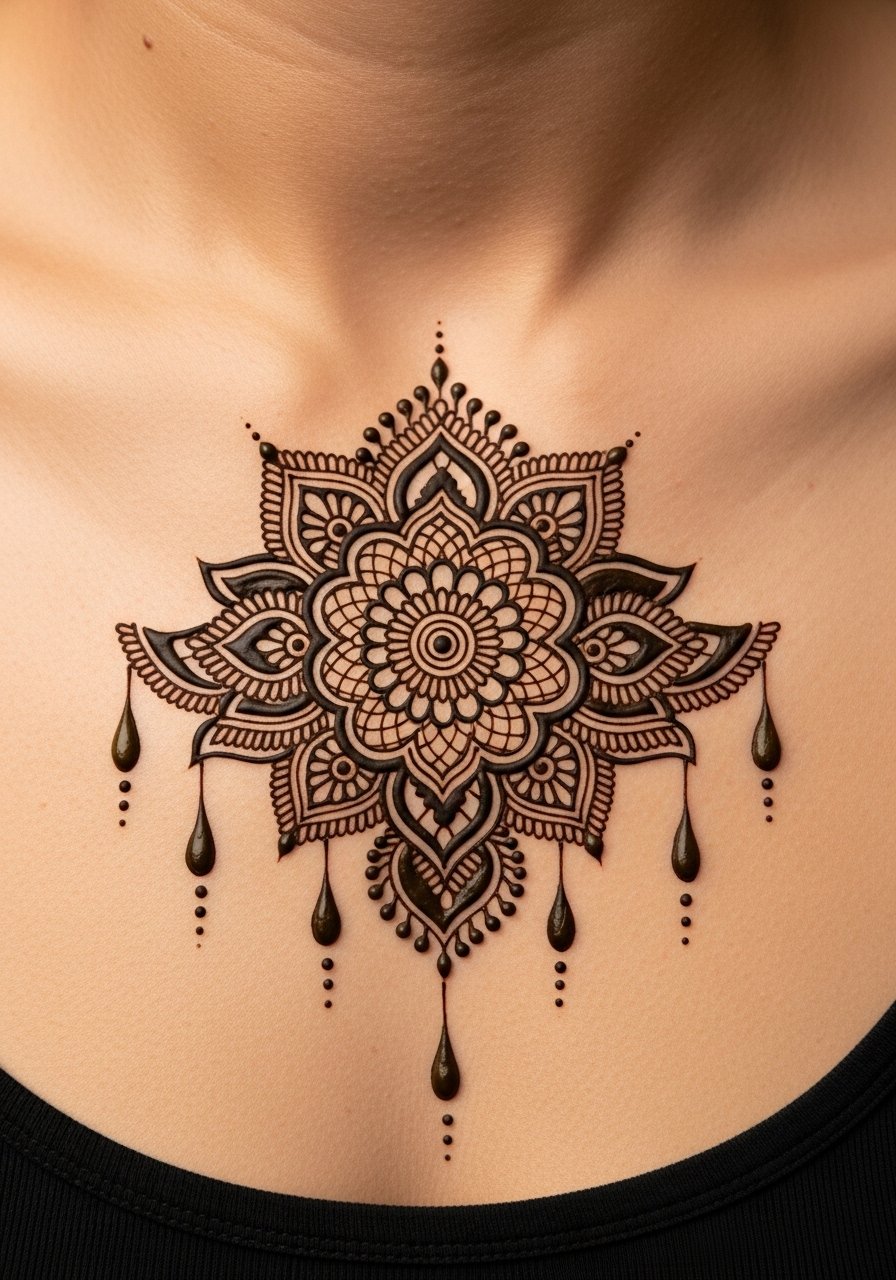
A sternum lace piece captures that bridal-henna feel but as permanent ink. It’s intimate and can be more painful because of the sternum proximity, but visually it’s worth it if you want a centerpiece. Healing requires care—avoid tight bras and friction. I’ve seen lace age well when artists use balanced line weights and avoid excessive micro-stippling that can blur.
10. Ribcage Paisley Cascade
Style/Technique: Flowing paisley + dot cascade
Pain Level: High (6-8/10)
Session Time: 2–4 hours
Best For: Hidden statement, sensual placement
Ribs are a classic painful spot, but paisley cascades hug the body beautifully. I’ve recommended this to friends who want something private and sensual. Expect longer healing as movement and breathing affect scabbing. Artists should avoid ultra-fine filler lines in that area because stretch and healing can soften them into a gray wash.
11. Collarbone Filigree Trail
Style/Technique: Linear filigree with tiny spacers
Pain Level: Medium (4-5/10)
Session Time: 1–2 hours
Best For: Subtle décolletage accent
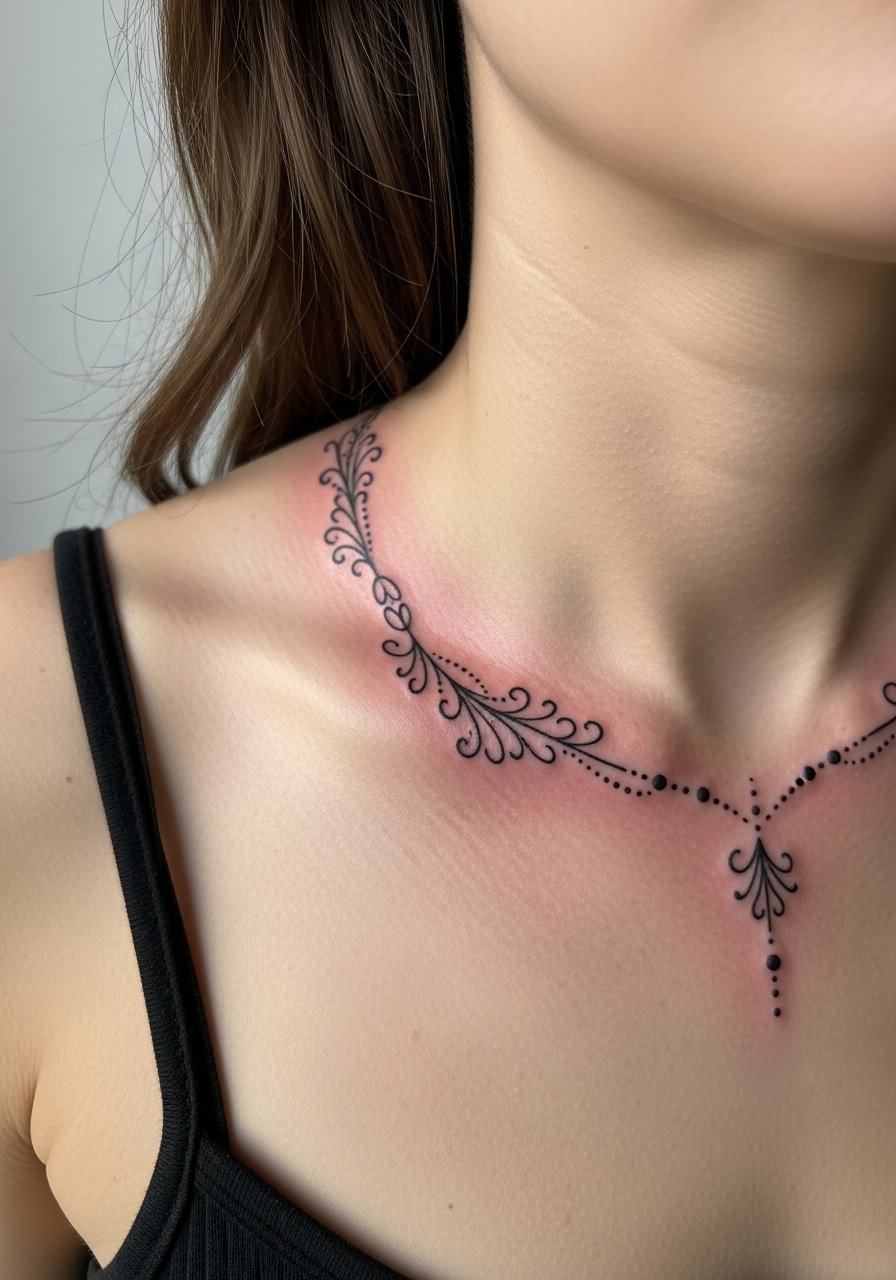
Collarbones frame filigree beautifully and show henna influence without being loud. Pain is manageable, and healed lines tend to keep shape if not overly thin. I tell people to request slightly stronger primary lines and lighter secondary lines for long-term definition. Avoid crossing the collarbone joint with super fine hairlines—they blur faster.
12. Behind-Ear Tiny Henna Motif
Style/Technique: Micro motif / Single-drop dot chain
Pain Level: Low (2/10)
Session Time: 15–30 minutes
Best For: Tiny hidden accents
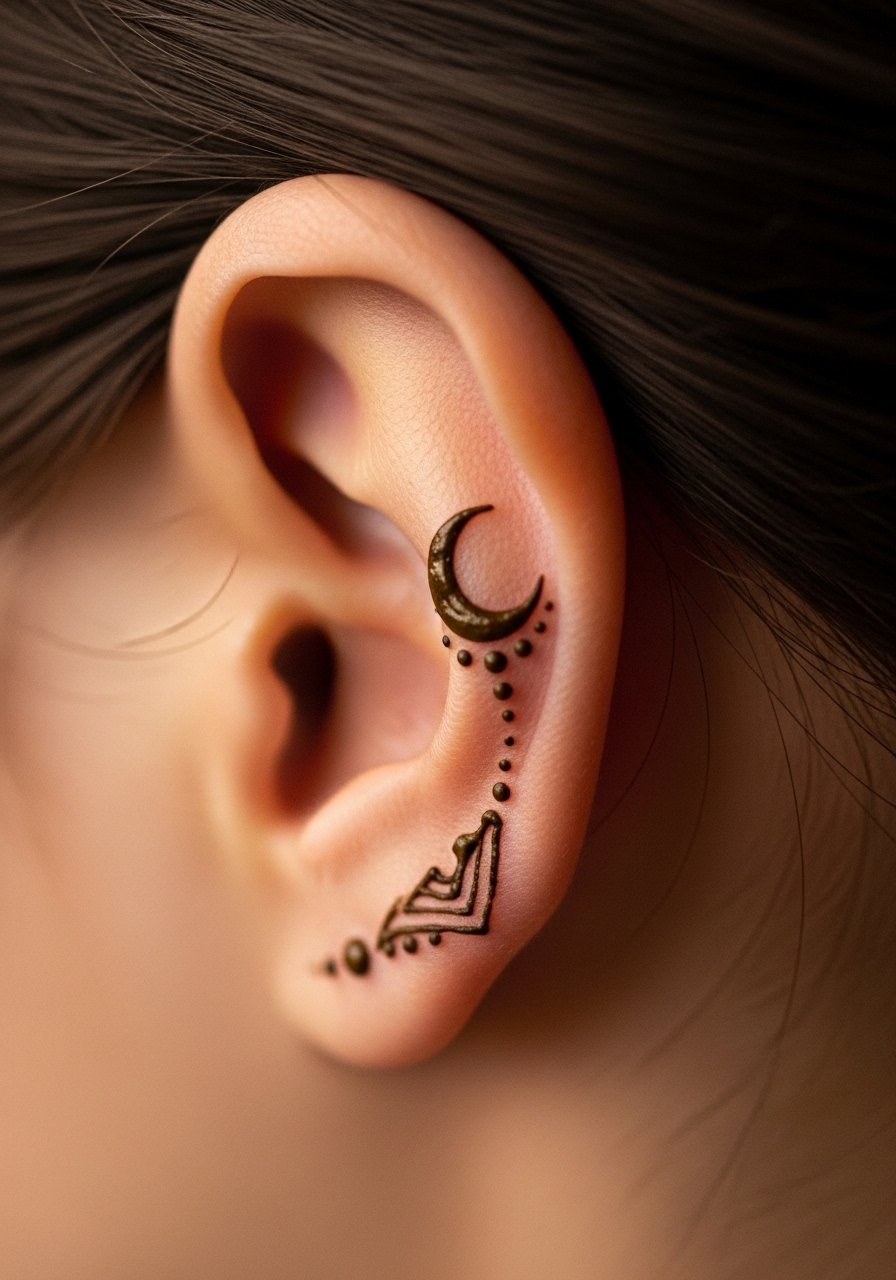
A behind-ear motif is a discreet way to wear henna-style ink. It’s quick and low pain, but watch for placement under hair—friction can reduce longevity. I’ve found simple single-drop designs with a bold dot center last best. Artists should avoid wasted filler that adds healing risk for little payoff.
13. Upper Thigh Lace Patch
Style/Technique: Lacy panel with scalloped edges
Pain Level: Medium (4/5/10)
Session Time: 1–2 hours
Best For: Concealed statement, sensual lines
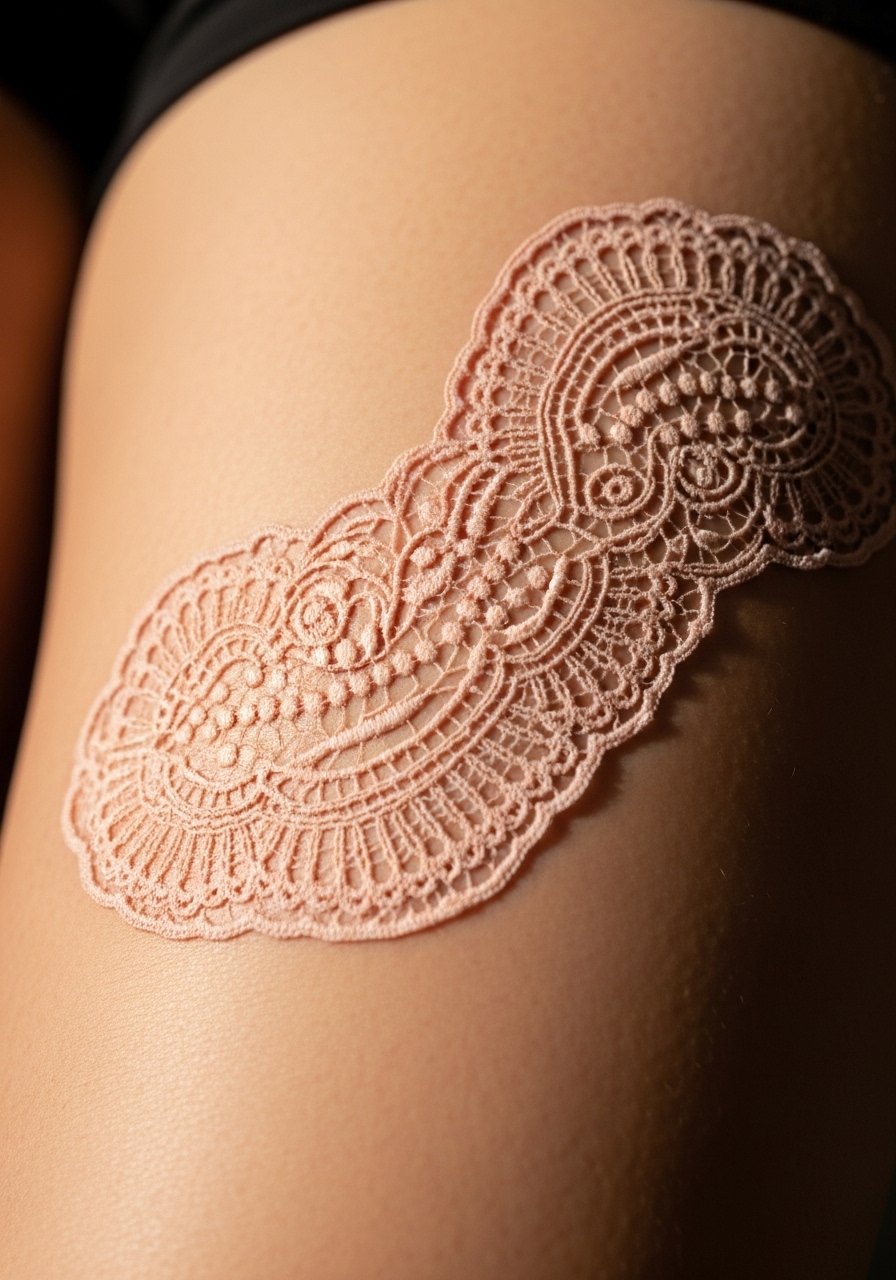
The thigh offers a larger canvas for henna lace—great if you want the look but prefer it hidden. Lines heal well on the thigh thanks to thicker skin, and movement doesn’t blur the design much. I prefer panels with negative space and mid-weight outlines to preserve the lace look. Avoid stacking too many tiny filler dots that can merge over time.
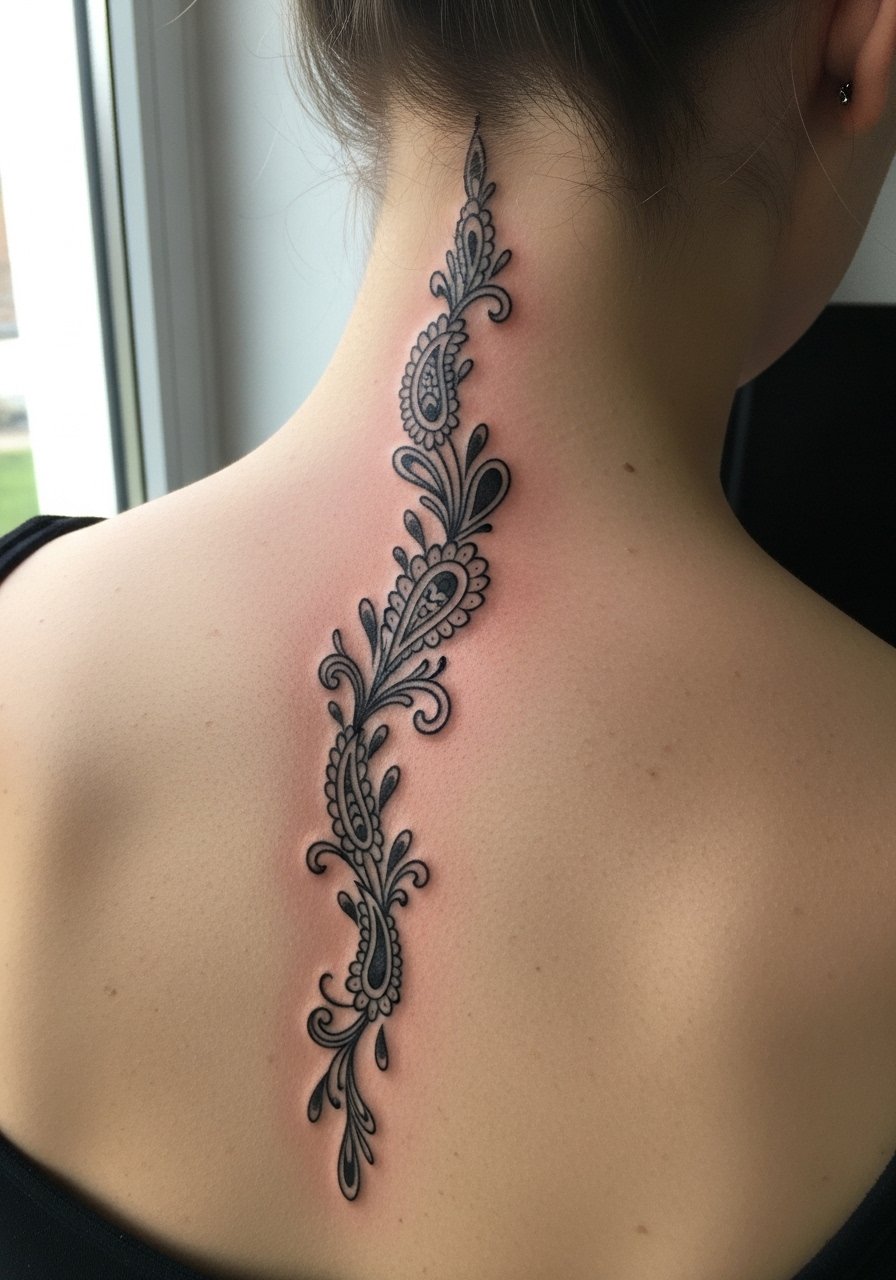
14. Spine Compass Mandala
Style/Technique: Vertical mandalas linked with dotline
Pain Level: Medium-High (5-7/10)
Session Time: 2–3 hours
Best For: Vertical visual flow, center-back art

A spine compass composed of linked mandalas reads like a henna column. The vertical flow flatters the back and holds detail well in healed ink. Pain varies—closer to spine is more intense. I advise spacing the mandalas so each can breathe; overcrowding makes the column look muddy after a year. Ask for slightly stronger central motifs and lighter linking dots.
15. Foot Top Henna Medallion
Style/Technique: Circular medallion with dot bloom
Pain Level: Medium (4/5/10)
Session Time: 1–1.5 hours
Best For: Sandal-ready statement
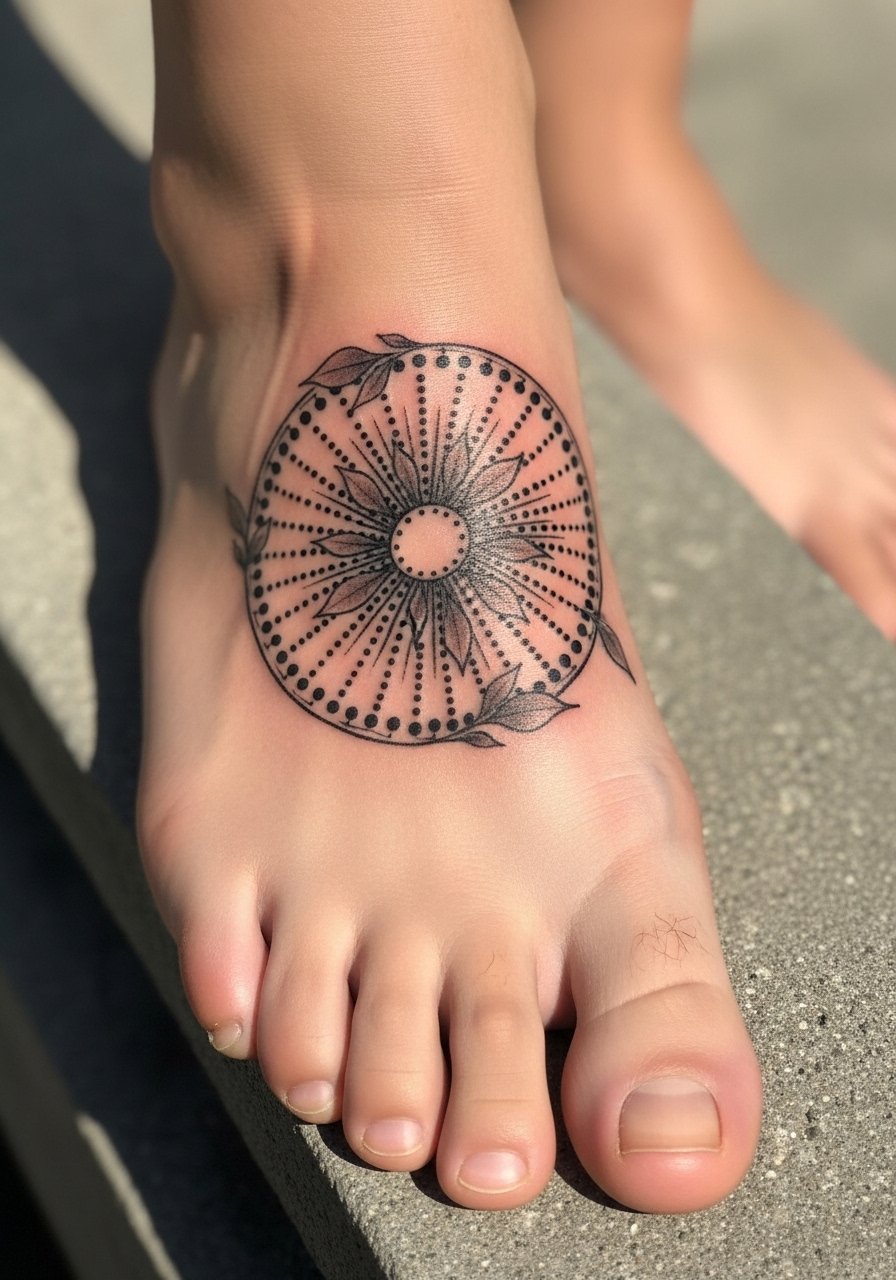
Foot tops are classic henna spots; they translate cleanly to tattoo when planned right. Expect moderate pain and faster fading with footwear—healing needs socks-free time. I’ve noticed medallions last better when the artist uses bold outline anchors with delicate inner work. Avoid placing the heaviest detail where straps or shoes will rub.
16. Inner Wrist Mini Mandala
Style/Technique: Tiny mandala with bead chain
Pain Level: Low (2-3/10)
Session Time: 30–45 minutes
Best For: Small visible charm
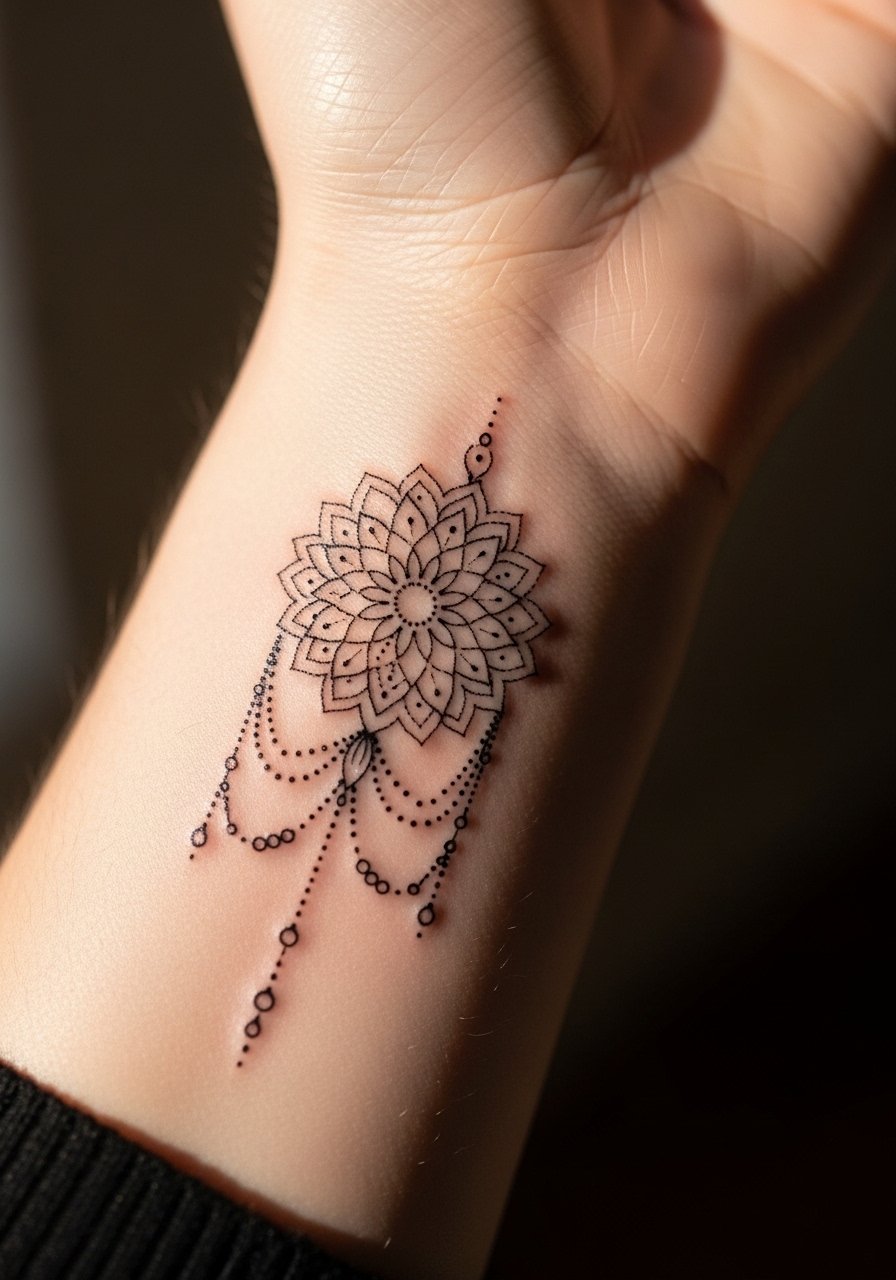
Inner-wrist mandalas are the everyday henna effect—visible and delicate. I tell clients this is a good first permanent henna-style pick because it’s easy to show or hide. The skin is thin, so ask for defined primary lines; too many micro-dots will blur. Protect daily with sunscreen to prevent premature fading.
17. Ear Cuff Linework
Style/Technique: Tiny repeated arches that mimic ear cuff jewelry
Pain Level: Low (2/10)
Session Time: 15–30 minutes
Best For: Jewelry-alternative accent
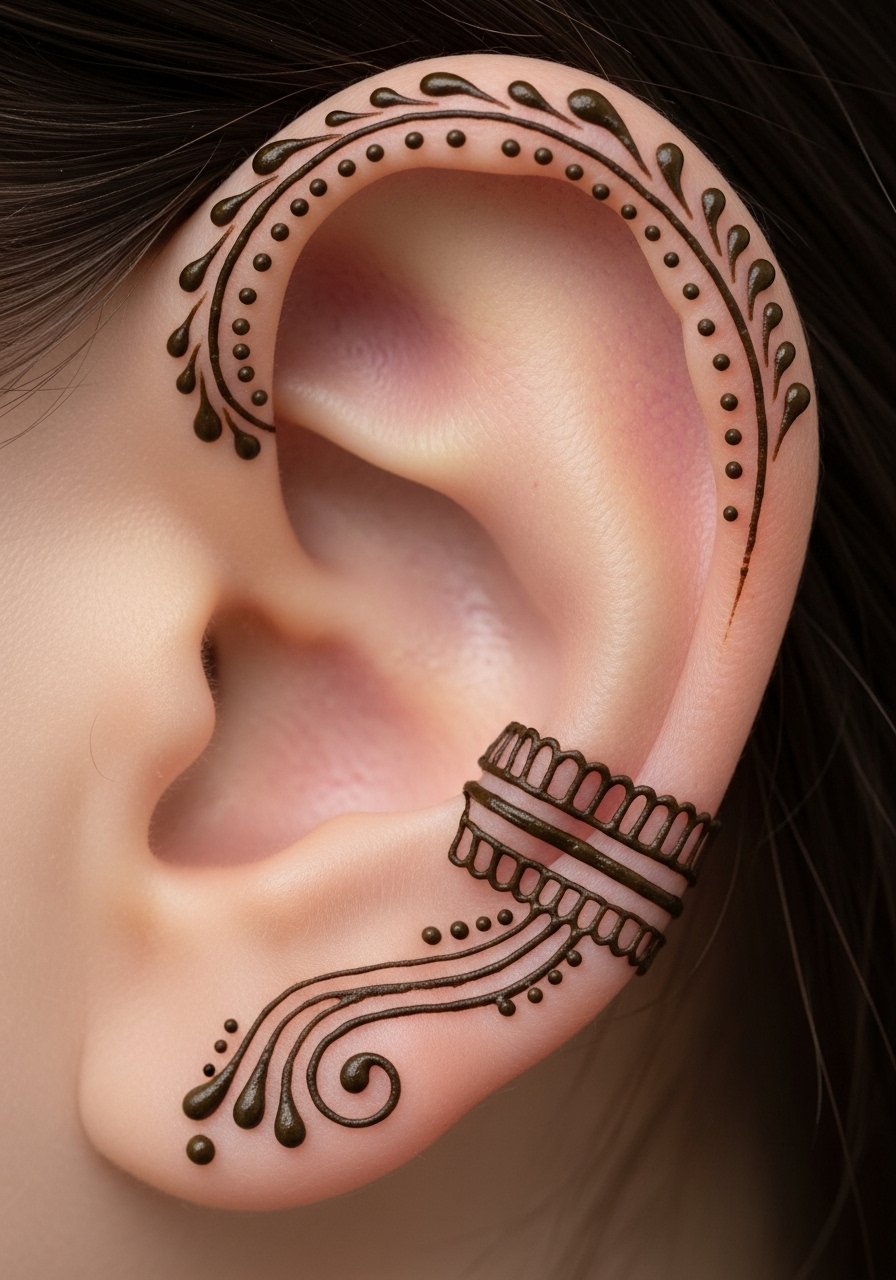
Ear-cuff ink reads like piercings without the commitment. It’s quick, minimally painful, and looks delicate healed. Because it’s often near hair, avoid ultra-fine inner shading that gets lost. I recommend artists use steady mid-weight lines for a crisp healed result.
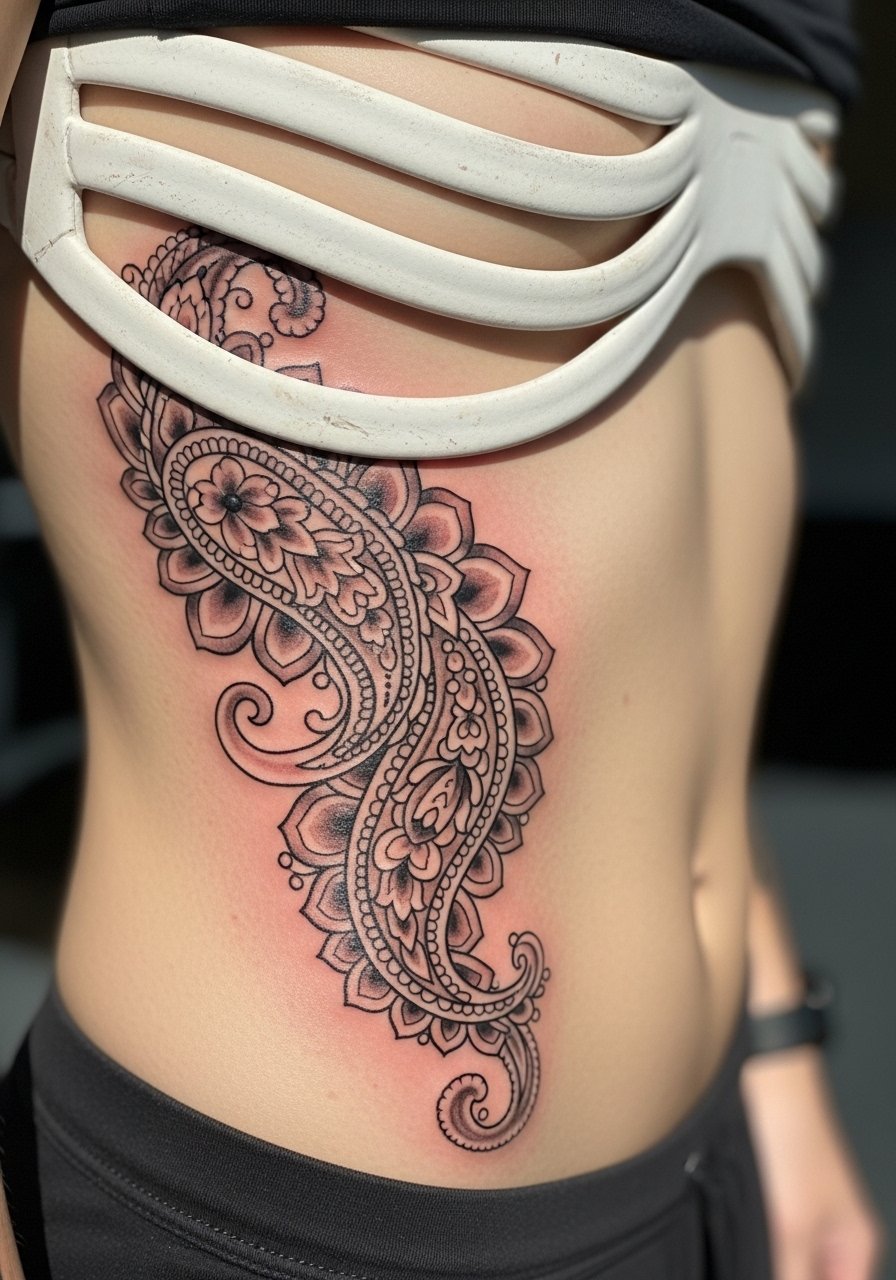
18. Rib-to-Side Vine of Paisleys
Style/Technique: Flowing paisley vine with dots
Pain Level: High (6-8/10)
Session Time: 2–4 hours
Best For: Dramatic sidepieces that peek with clothing
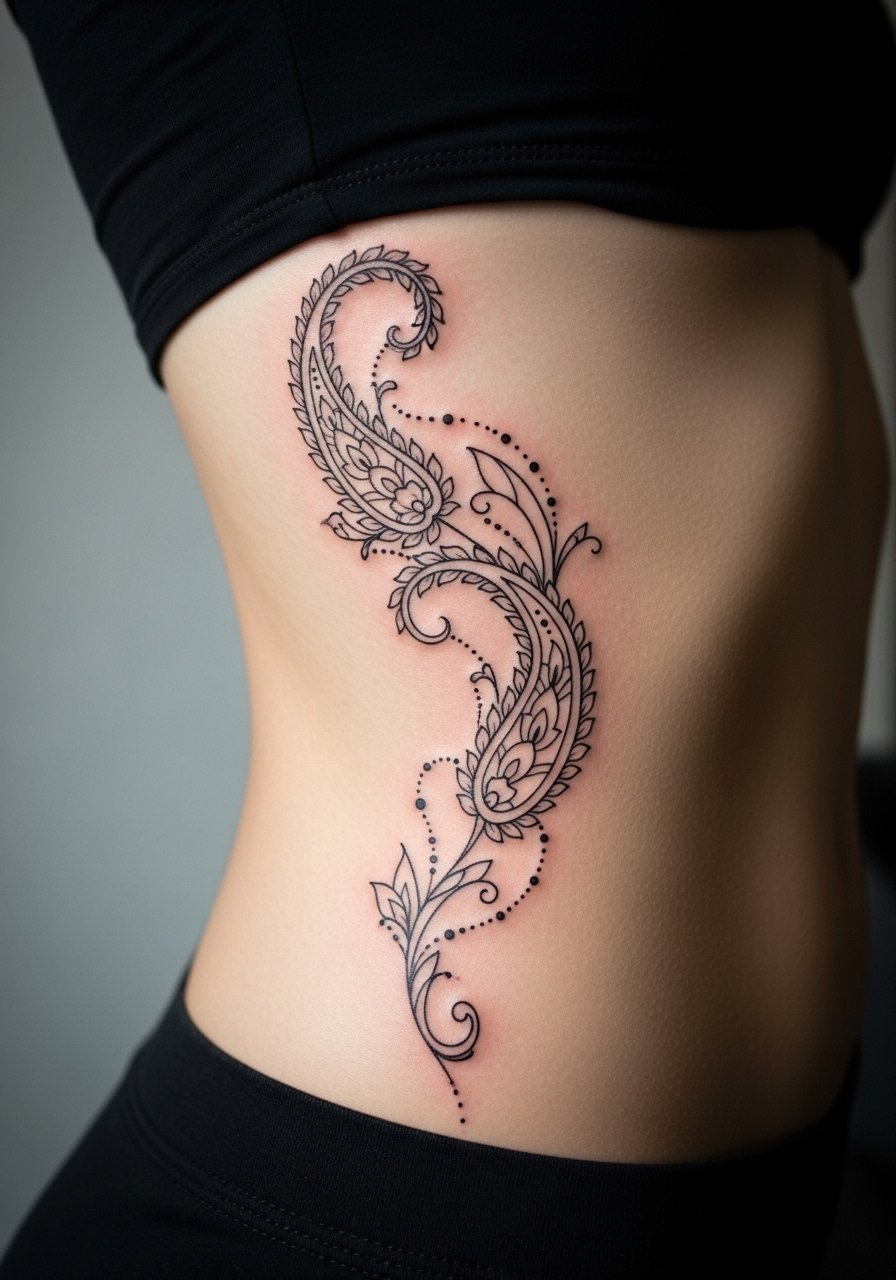
This placement is dramatic but painful; breathing can make sessions challenging. When done right, however, the flowing paisley vine looks organic and very henna-esque. Artists should plan for movement and avoid overly dense fillers near high-flex areas. I’ve learned that spacing and rhythm matter more than filling every void.
19. Center-Finger Tiny Crest
Style/Technique: Vertical dotline with teeny crest
Pain Level: Medium (4/10)
Session Time: 20–40 minutes
Best For: Petite focal point, stackable with rings
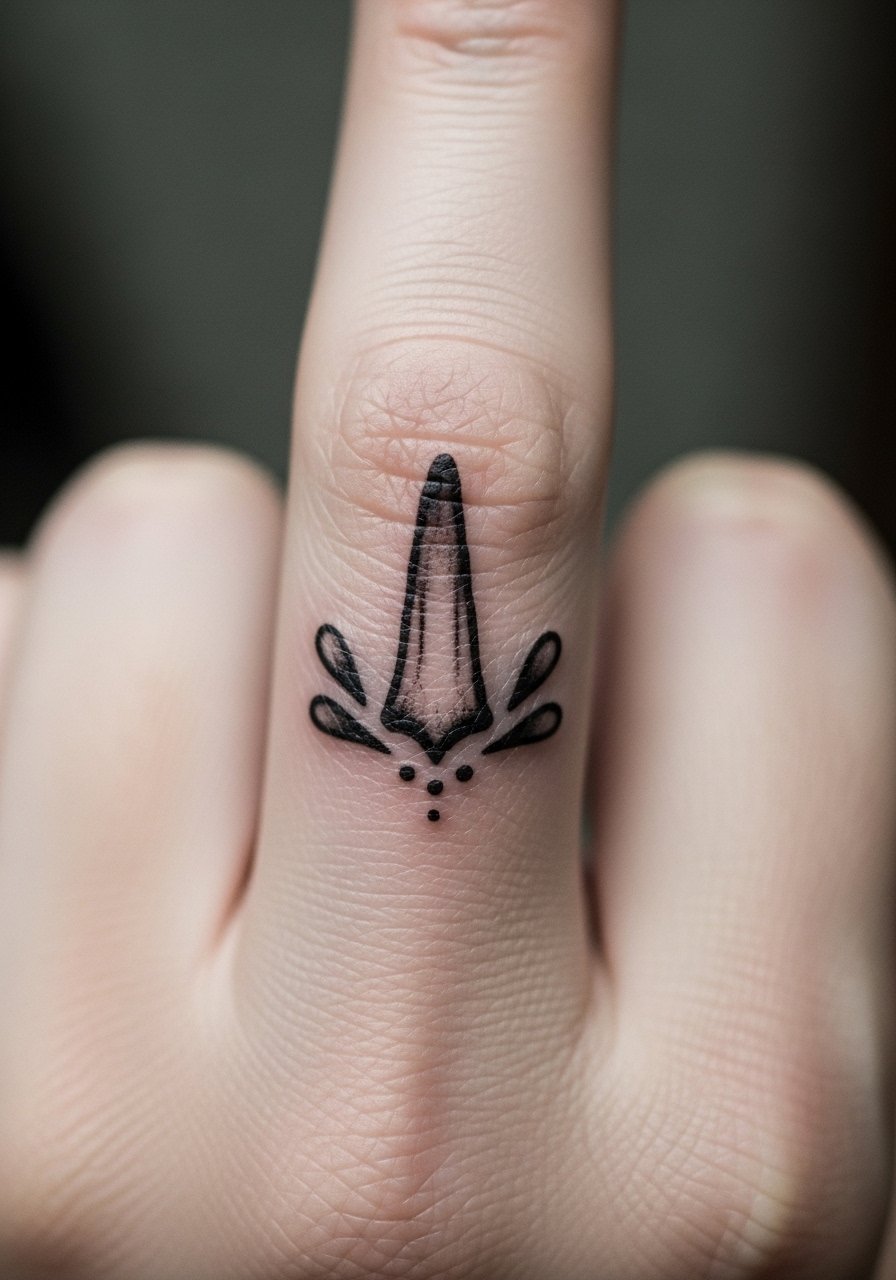
Tiny center-finger crests are subtle but give a strong henna nod. They’re handy for stacking with rings but fade faster than hand panels. I recommend stronger primary lines and minimal delicate fillers for longevity. Artists should discuss touch-up expectations up front.
20. Throat Chakra Tiny Mandala
Style/Technique: Small centered mandala below the throat
Pain Level: Medium (4/5/10)
Session Time: 30–60 minutes
Best For: Spiritual or symbolic placement
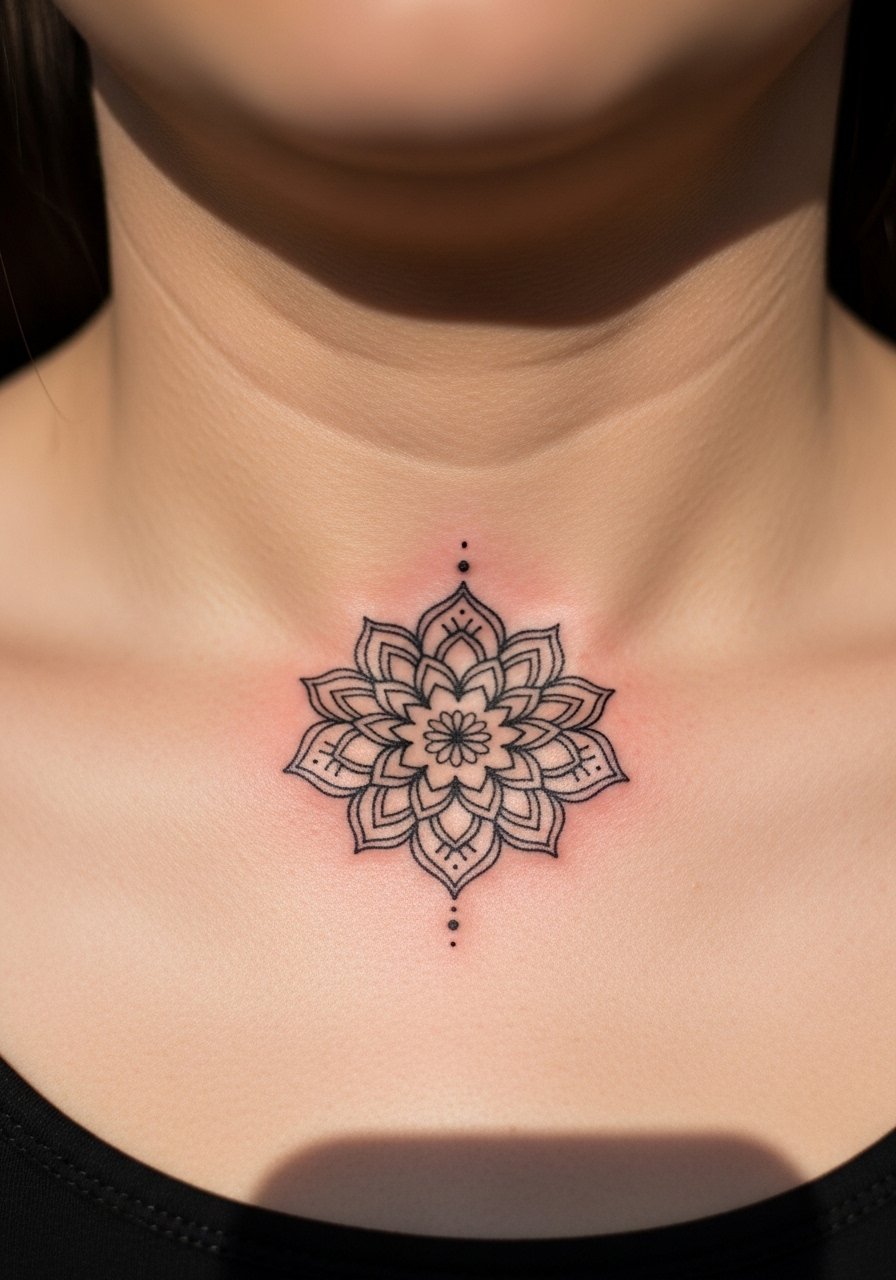
A throat-adjacent mandala feels intentional and reads like a permanent henna talisman. It’s visible but can be hidden with scarves. Healing is straightforward, but the skin’s movement means mid-weight lines work better than hairline finery. I’ve seen the best results with a clear central anchor and light surrounding dotwork.
21. Elbow Pit Mini Lace
Style/Technique: Small scalloped lace that sits above the elbow crease
Pain Level: Medium (4-6/10)
Session Time: 30–60 minutes
Best For: Playful peek when sleeves are rolled
The elbow pit is a tricky area due to creasing—lace works if placed just above the fold. I’ve seen too-fine work smear across the crease; the trick is to use slightly bolder outer lines with intact inner detail. Plan for some movement during healing; avoid heavy stretching immediately after.
22. Palm-Center Tiny Compass
Style/Technique: Bold micro lines with dot surround
Pain Level: High (6-8/10)
Session Time: 45–90 minutes
Best For: Bold palm statement (accepts faster fading)
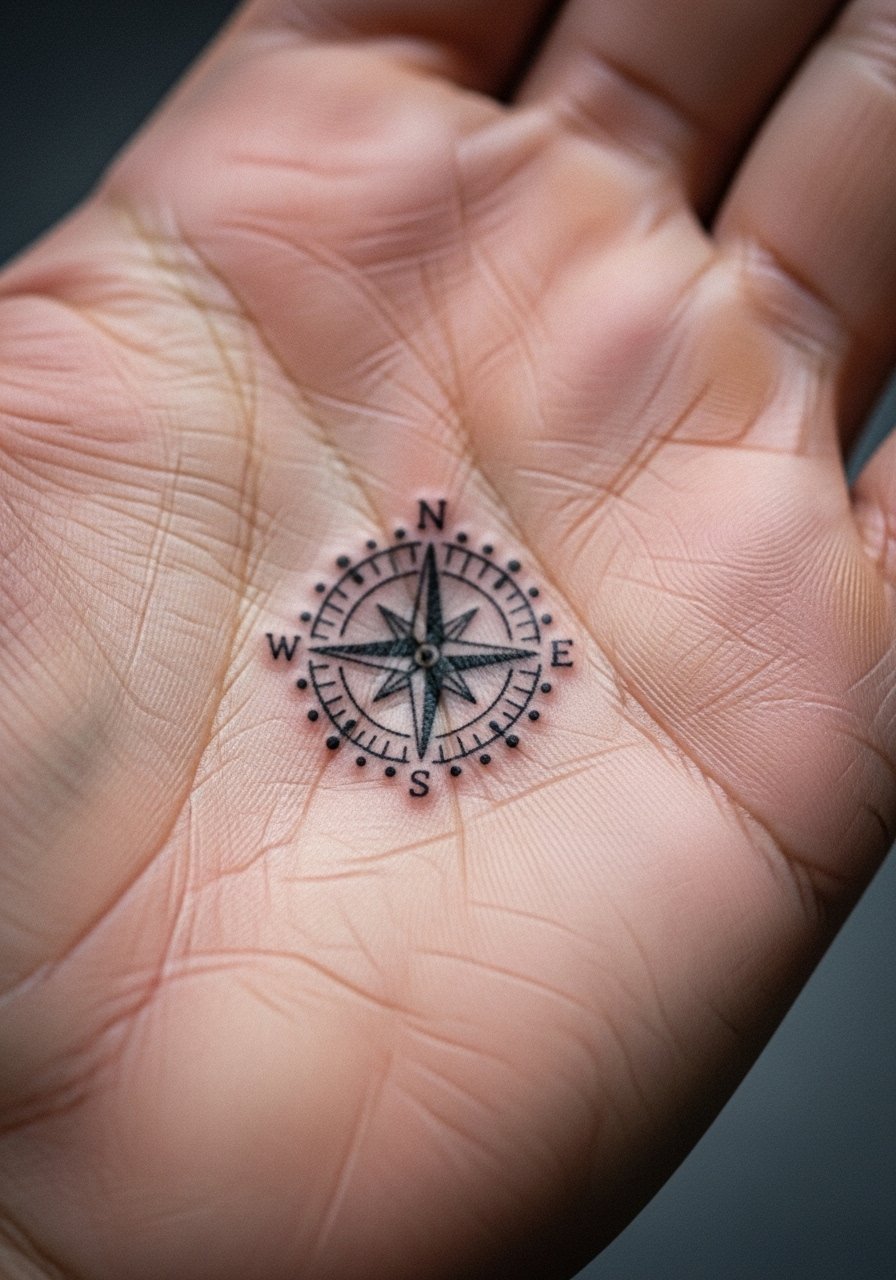
Palms are high-wear surfaces; if you want a palm motif, accept touch-ups and faster fade. I only advise this if you love the immediate look. Artists will use denser, simpler shapes to avoid rapid muddiness. Expect healing challenges—keep it dry and out of heavy work for longer than other areas.
23. Ankle-to-Foot Chain of Motifs
Style/Technique: Linked tiny mandalas and chains
Pain Level: Low-Medium (3-4/10)
Session Time: 1–2 hours
Best For: Continuous henna look around foot
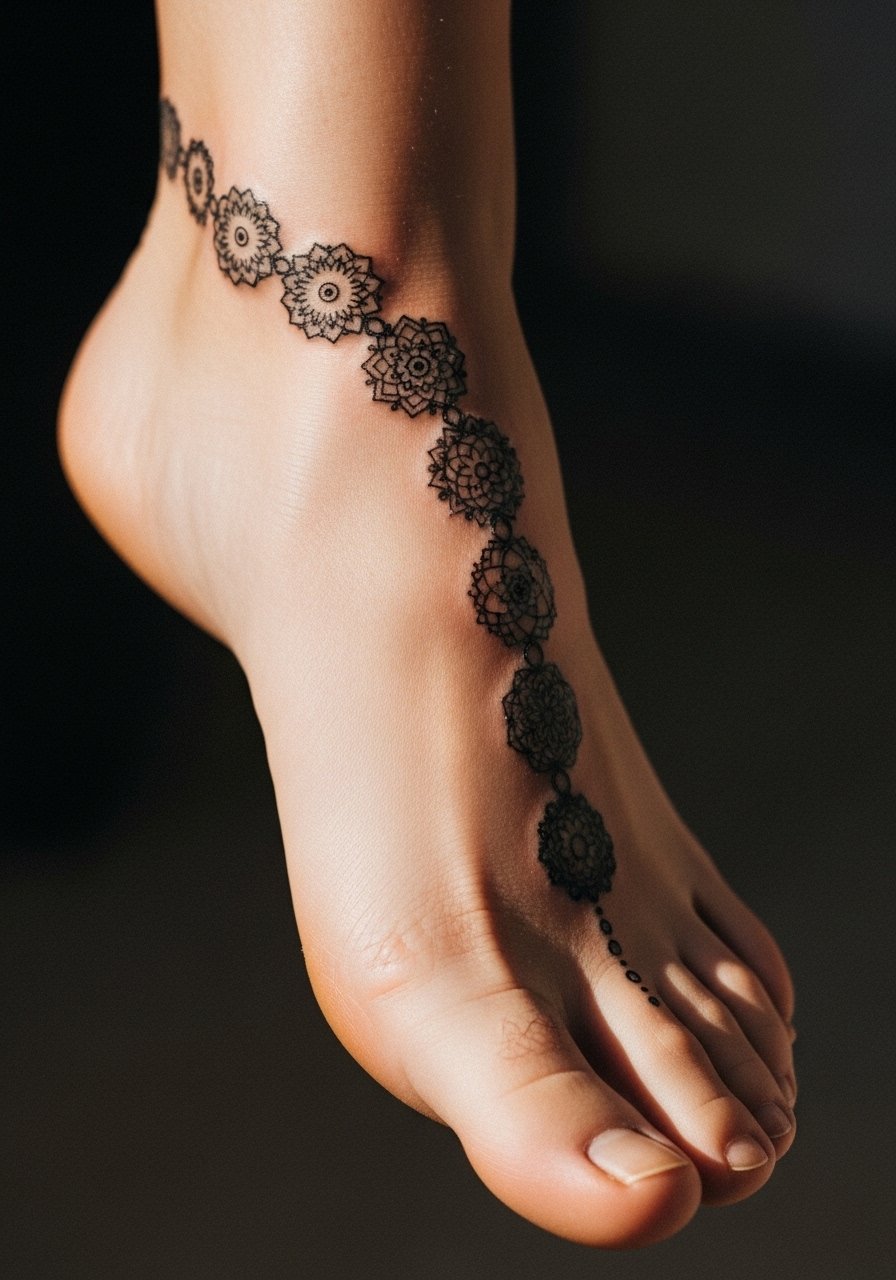
A chain of linked motifs gives that henna wrap effect around the ankle and foot. It’s comfortable to heal if you plan footwear accordingly. I prefer slightly bolder anchors with delicate connecting dots—too many tiny lines in the chain blur. Ask your artist to map placement with shoes you actually wear.
24. Side-Hand Lace (From Thumb Web to Wrist)
Style/Technique: Linear lace with negative space
Pain Level: Medium (4-5/10)
Session Time: 1–1.5 hours
Best For: Edge-detail that reads henna-like without full-hand work
Side-hand lace creates a henna illusion without the commitment of a full hand. It’s visible and ages reasonably well if lines aren’t hairline thin. I’ve seen the best longevity when artists keep a slightly bolder spine line and delicate inner fillers. Avoid packing filler right into the thumb web crease.
25. Nape-to-Upper-Back Single Vine
Style/Technique: Single flowing vine with teardrops
Pain Level: Low-Medium (3-4/10)
Session Time: 1–2 hours
Best For: Subtle vertical accent under hair
A single vine down the upper back echoes traditional henna garlands and looks graceful when hair moves. It’s low enough pain and heals cleanly. I recommend spacing elements generously—overfilling can make the vine look heavy once the skin settles. Ask for mock placement with clothing to ensure it peeks where you want it.
26. Small Knee Cap Henna Halo
Style/Technique: Circular halo with small fillers around the patella
Pain Level: Medium-High (5-7/10)
Session Time: 45–90 minutes
Best For: Athletic or seasonal reveal
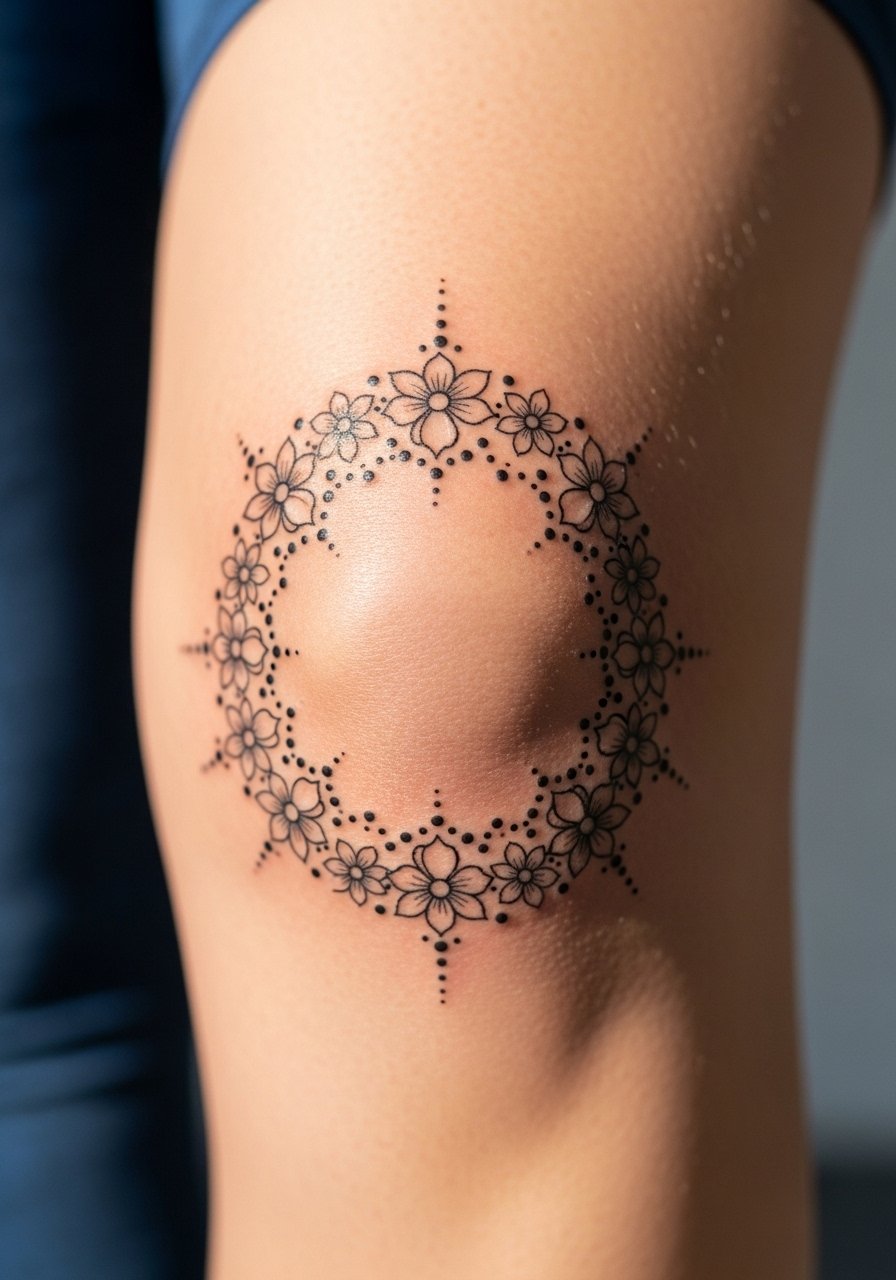
Knee caps are sensitive and move a lot, but a halo reads like henna festival ink. Pain and healing are notable—bend carefully while it sets. I advise slightly thicker primary lines and minimal micro-dots to keep the halo readable through wear. Avoid placing the heaviest detail over the most mobile skin.
27. Lower Back Lace Strip
Style/Technique: Horizontal lace strip with scallops
Pain Level: Low (2-3/10)
Session Time: 1–1.5 hours
Best For: Beltline peek, low-rise reveal
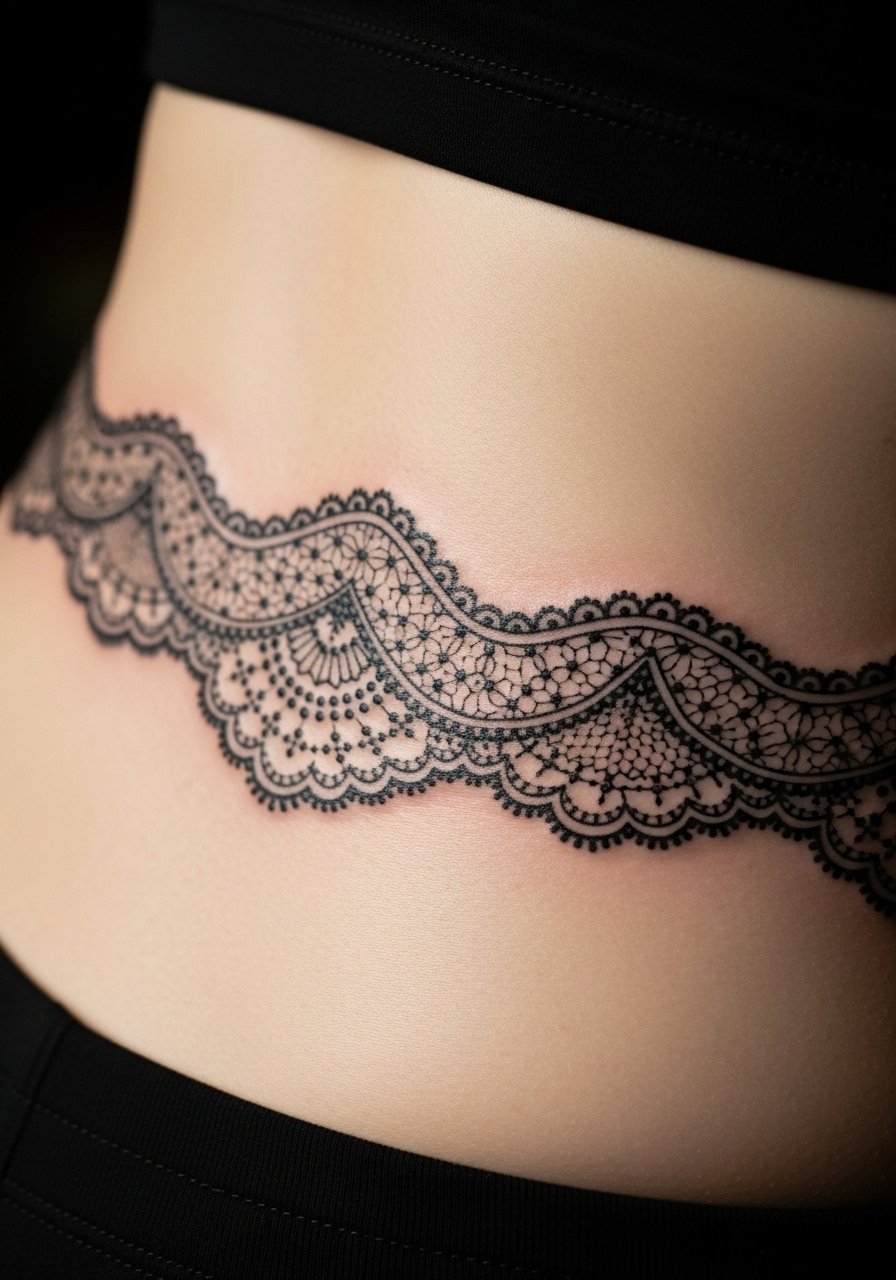
The lower back is back-in-fashion for henna-style lace strips. It’s low on pain and tends to age predictably. I’ve noticed strips holding up best when artists maintain bold scallop anchors with airier internal details. Keep in mind clothing choices during healing to prevent rubbing.
28. Micro Nose Bridge Henna Dotline
Style/Technique: Tiny vertical dotline between brows or on the nose bridge
Pain Level: Low (2/10)
Session Time: 10–20 minutes
Best For: Micro accent, subtle center alignment
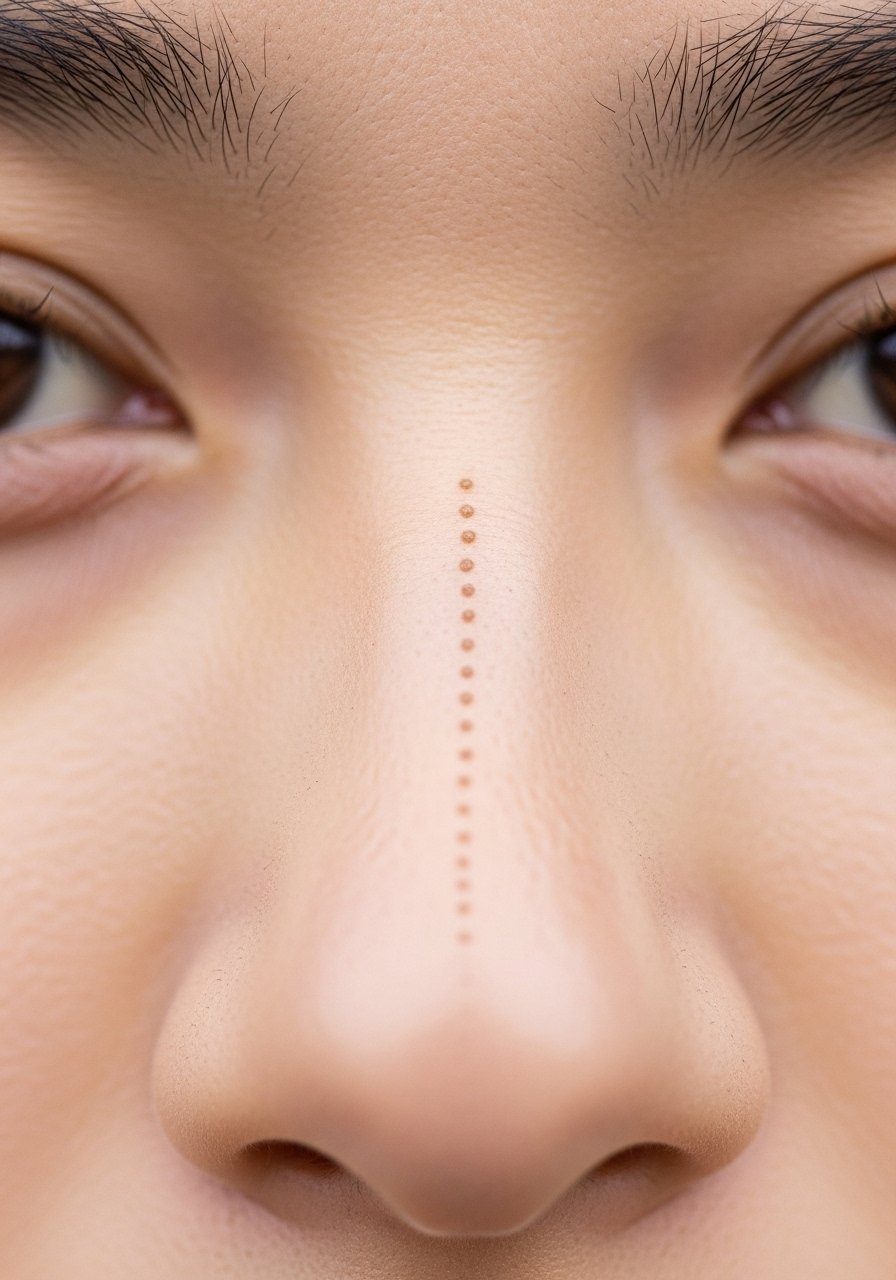
A micro dotline on the nose bridge is a minimalist nod to henna’s central accents. It’s quick and low pain but requires precise placement. I’ve seen it read very elegantly when dots are slightly bolder than hairline size—too delicate and they can vanish. Ask for slow single dots rather than a stroked line.
Tattoo Prep and Aftercare Essentials
Aftercare Essentials:
- Aquaphor Healing Ointment, 14oz tube — for the first 3–5 days
- Saniderm Transparent Adhesive Bandage, 6-inch roll — second-skin healing option
- CeraVe Fragrance-Free Moisturizing Lotion — daily moisturizer after initial healing
- Dr. Bronner's Unscented Castile Soap (Liquid) — gentle wash during first week
- Hustle Butter Deluxe Tattoo Aftercare — vegan aftercare option for healed skin
- Mad Rabbit Tattoo Balm — maintenance balm for healed tattoos
- SPF 50 Sunscreen Stick for Tattoos — daily protection to prevent fading
- Tattoo Numbing Cream with 5% Lidocaine — ask your artist before using
- Tattoo Stencil Transfer Paper — useful if testing custom henna-inspired layouts
- Hydrocolloid Bandages (large) — for spot protection during early healing
- Cotton Swabs (Pack) — gentle cleanup and paste correction during healing
- Fragrance-Free Antibacterial Ointment (small tube) — for occasional follow-up care if recommended
From what I’ve gathered, artists I trust recommend Saniderm or short Aquaphor use initially, then switching to a fragrance-free lotion and strict sunscreen once healed. Avoid products with fragrance or harsh additives that can irritate delicate linework.
Frequently Asked Questions
Q: How badly do henna-style tattoos hurt?
A: Pain depends mostly on placement. Flat, fleshy areas (inner forearm, thigh) are lower—around 2–4/10 in my experience. Thin, bony spots (ribs, knuckles, palms) jump to 6–8/10. If you’re anxious, ask about a numbing cream with lidocaine, but check with your artist first.
Q: Do henna-style tattoos hold their detail?
A: They can—if you plan line weight wisely. From what I’ve seen, artists who balance mid-weight anchors with finer insets produce the best healed detail. Tiny micro-dots and hairline spokes often blur, so ask your artist to slightly thicken the most important lines.
Q: How long does healing normally take for detailed pieces?
A: Surface healing is usually 2–3 weeks; full settling can be 2–3 months. The first week is critical—clean with gentle soap like Dr. Bronner's Unscented Castile Soap and use Aquaphor or Saniderm early on as recommended.
Q: Can I get a henna-style tattoo on my hands and expect it to last?
A: Yes, but hands fade faster due to washing and use. I’ve found that simpler, bolder motifs with less micro-filling maintain their look longer. Plan for occasional touch-ups if you want long-term crispness.
Q: How do I prevent henna-style tattoos from fading?
A: Sunscreen is essential—use an SPF 50 stick (SPF 50 Sunscreen Stick for Tattoos) on exposed ink. Keep skin moisturized with a fragrance-free lotion and avoid abrasive scrubs on the design.
Q: I want a bridal henna feel—what placement should I pick?
A: Back of the hand, inner forearm panels, sternum lace, and ankle bands are bridal-friendly spots. I usually suggest a mix of visible and private placements so the design reads during events but still feels personal.
Q: What’s a common mistake people make with henna-style tattoos?
A: Insisting on hairline-only detail. I’ve seen too many designs lose their identity after a year because the lines were too thin. Let your artist thicken key lines slightly and plan negative space intentionally.
Q: Should I expect touch-ups?
A: For high-movement or high-wash areas (hands, fingers, palms), yes—touch-ups are normal. For forearms, ribs, and back panels, good planning reduces the need. If you want longevity, discuss line weight and aftercare with your artist before booking.
