
I spent months collecting cyberpunk tattoo images and asking artists what actually heals and lasts. The trick wasn’t finding futuristic designs—it was picking styles that still look crisp after a year. These 30 cyberpunk tattoos blend neon vibes, circuitry, and wearable tech aesthetics that age well and read as futuristic on the street.
This list focuses on fine line, blackwork, neo-traditional, and minimal neon styles. I picked placements that suit first-timers and collectors—forearm, chest, neck, and fingers. From what I've seen in 2026 trends, subtle glow accents and geometric circuitry are the looks artists keep recommending.
1. Fine Line Circuit Band on Inner Forearm
Style/Technique: Fine Line / Minimalist
Pain Level: Low-Medium (3/10)
Session Time: 1-2 hours
Best For: First tattoo, visible tech detail
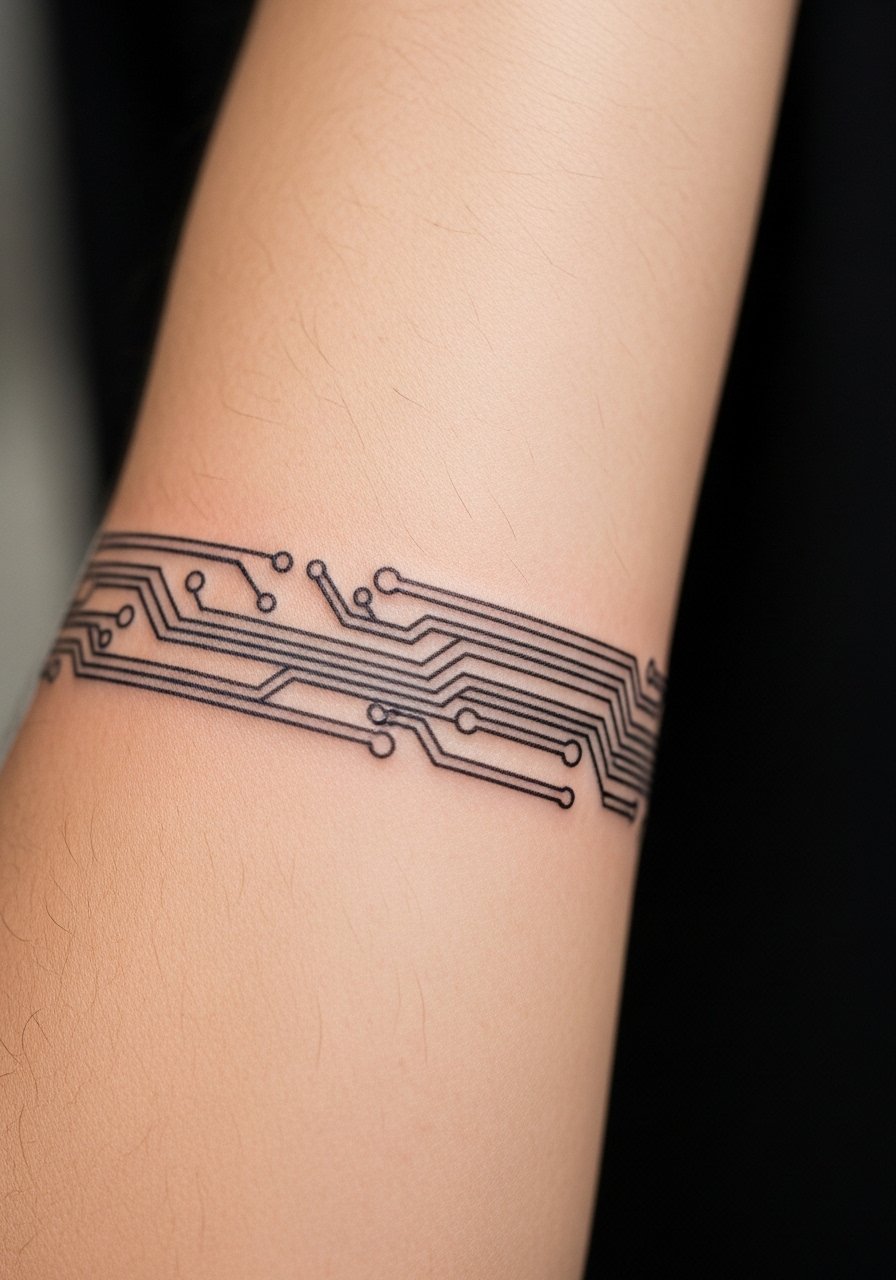
I love this for its clean tech vibe. It reads like a wearable HUD when viewed up close. Placement on the inner forearm is forgiving for detail. Expect mild discomfort and two weeks of surface peeling. Fine line blurs faster—ask for slightly heavier lines if you want longevity. A common mistake is tiny, unreadable nodes; ask the artist for clear spacing and minimalist neon accents.
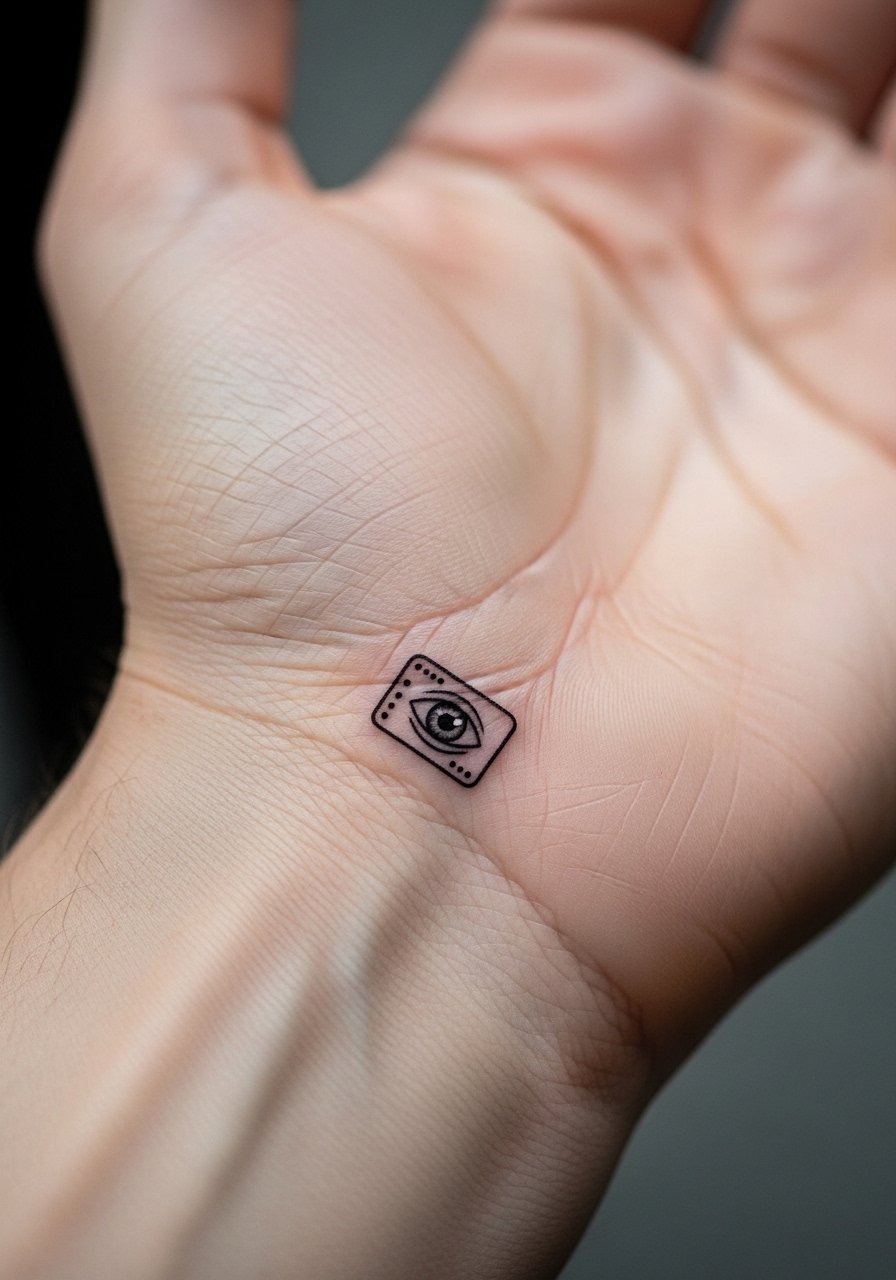
2. Micro-Realism Cybernetic Eye on Temple
Style/Technique: Micro-Realism / Portraiture
Pain Level: High (6-7/10)
Session Time: 2-4 hours
Best For: Statement, visible edge piece
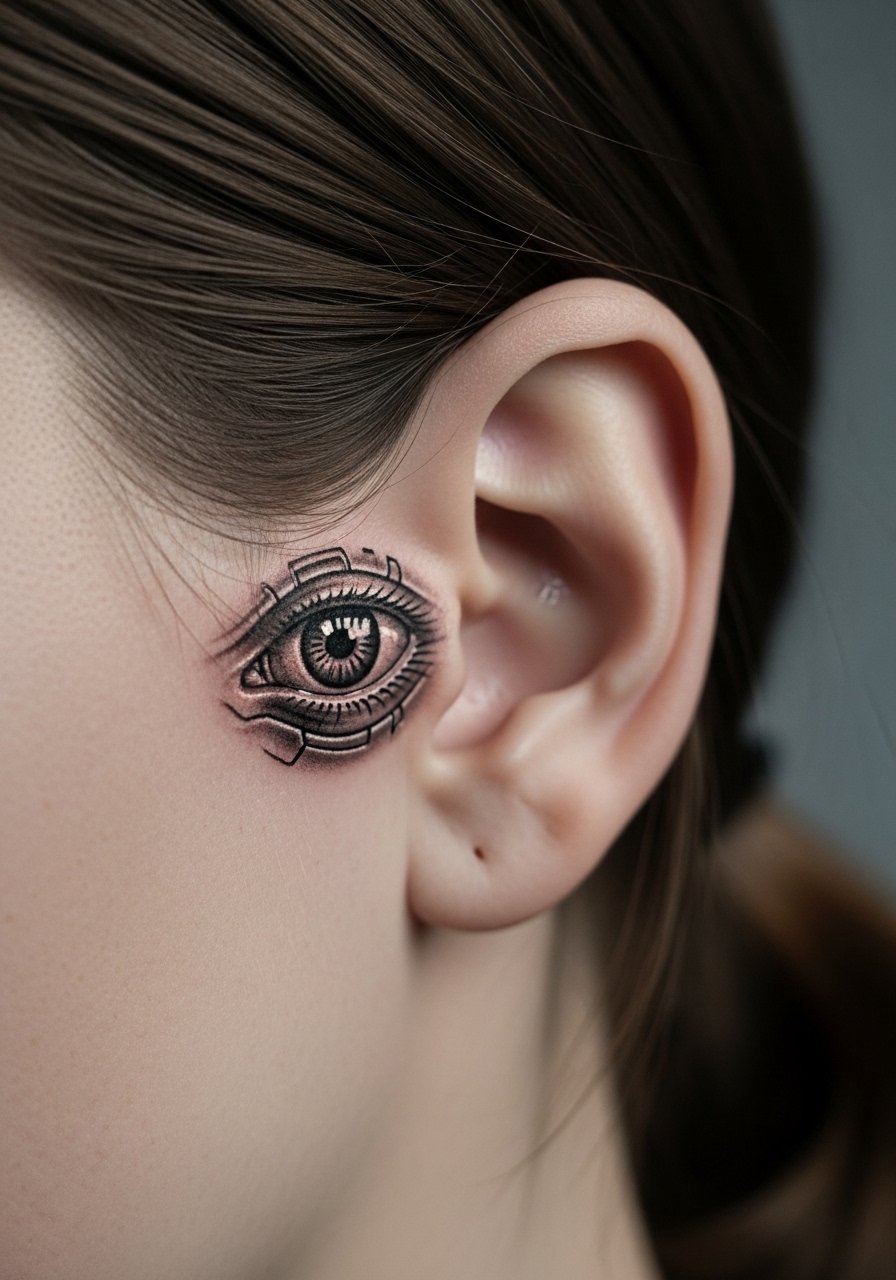
This creates an uncanny, futuristic stare. The temple hurts more than the arm, so expect higher pain and short breaks. Micro-realism needs an experienced artist—tiny detail can blur if done by beginners. Healing takes longer because facial skin is thin; keep it moist and avoid sun. Avoid over-saturating with color—metallic effects often rely on contrast more than pigment.
3. Blackwork Tech Panel on Chest
Style/Technique: Blackwork / Geometric
Pain Level: Medium (5/10)
Session Time: 2-5 hours
Best For: Chest statement, cover or complement
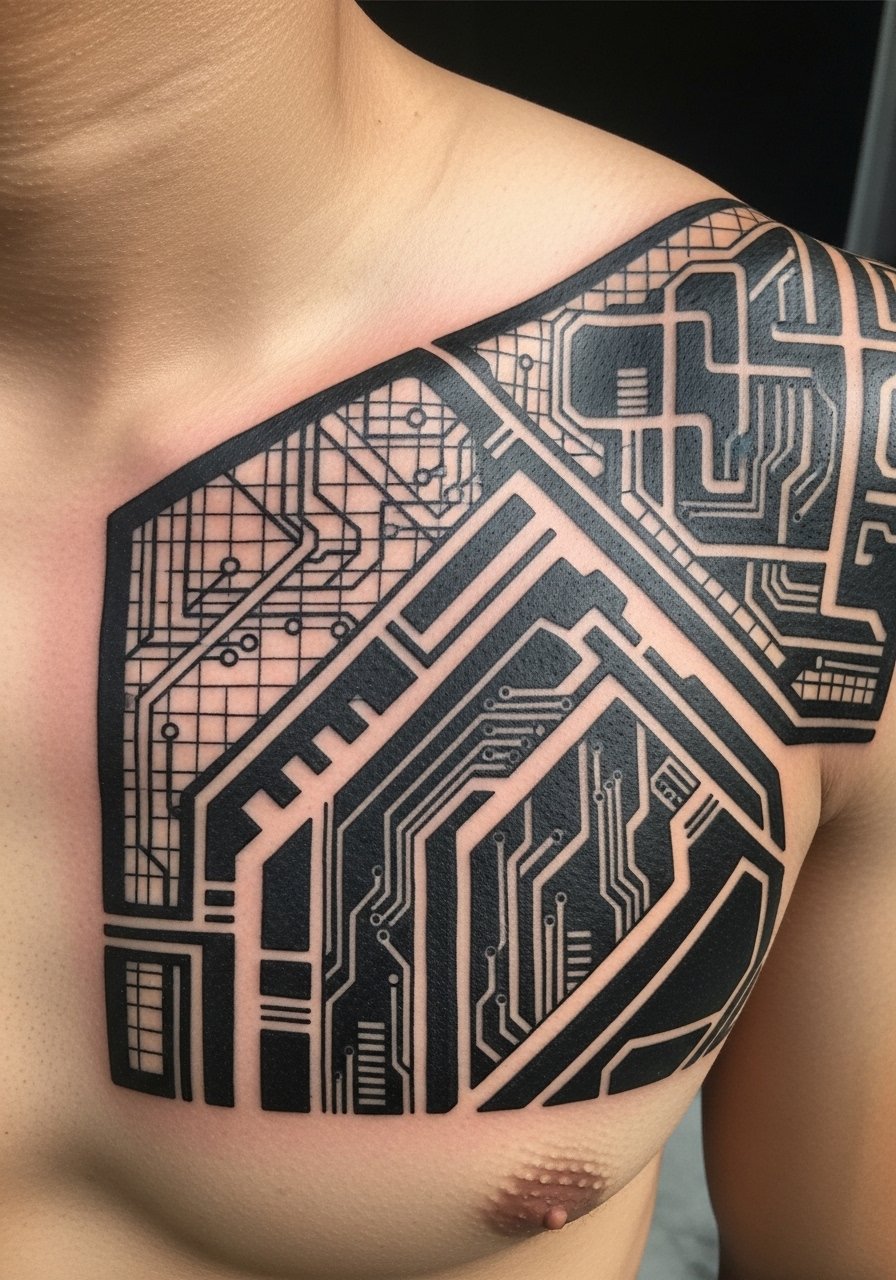
Blackwork reads bold from a distance and holds up very well. Chest offers a flat canvas for symmetry and paneling. Expect steady discomfort near the sternum. Healed black ink stays strong, though edges can soften a bit—sharp geometry helps longevity. A common mistake is over-detailing tiny gaps; prioritize bold shapes and negative space.
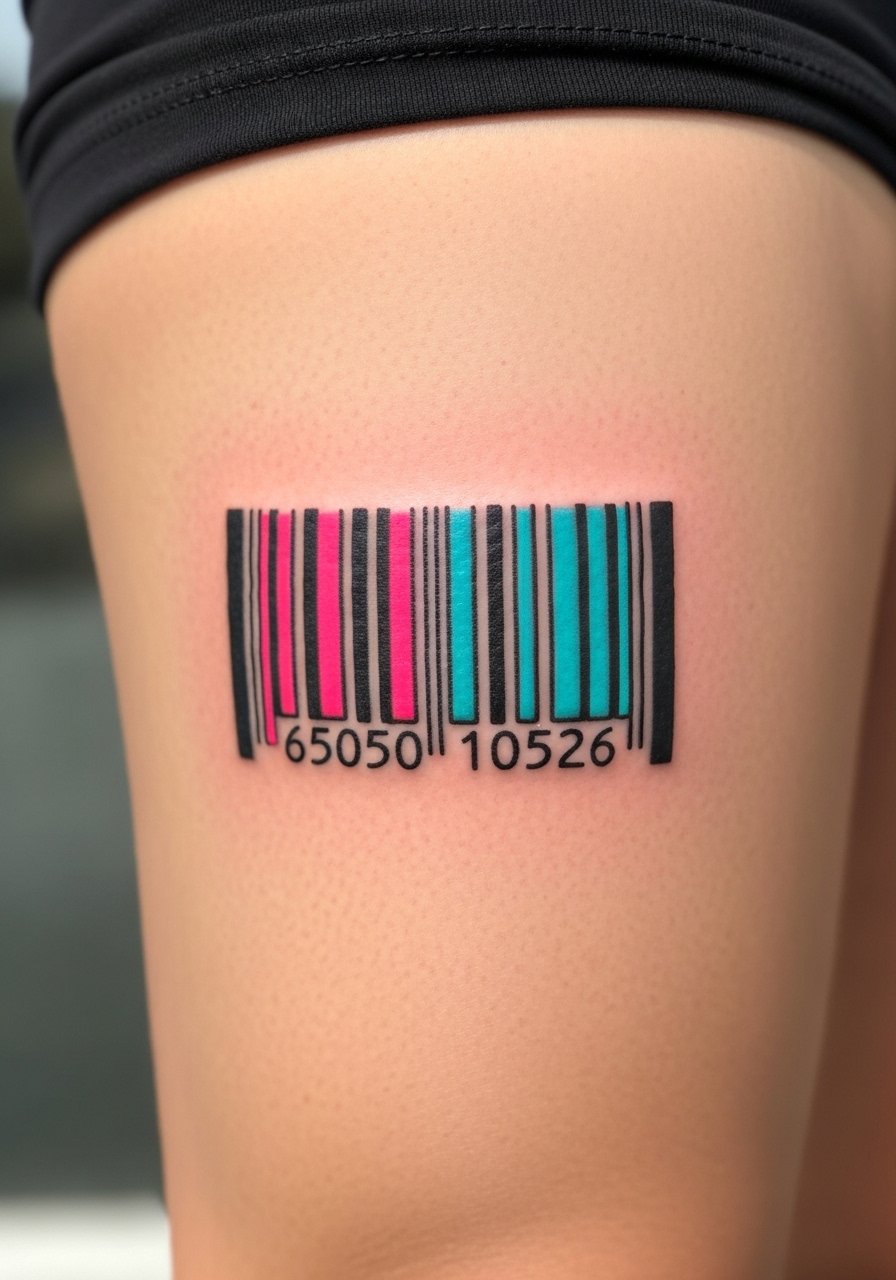
4. Neon Glitch Barcode on Side Rib
Style/Technique: Neo-Traditional / Color Accent
Pain Level: High (7-8/10)
Session Time: 1-3 hours
Best For: Hidden statement, edgy aesthetic
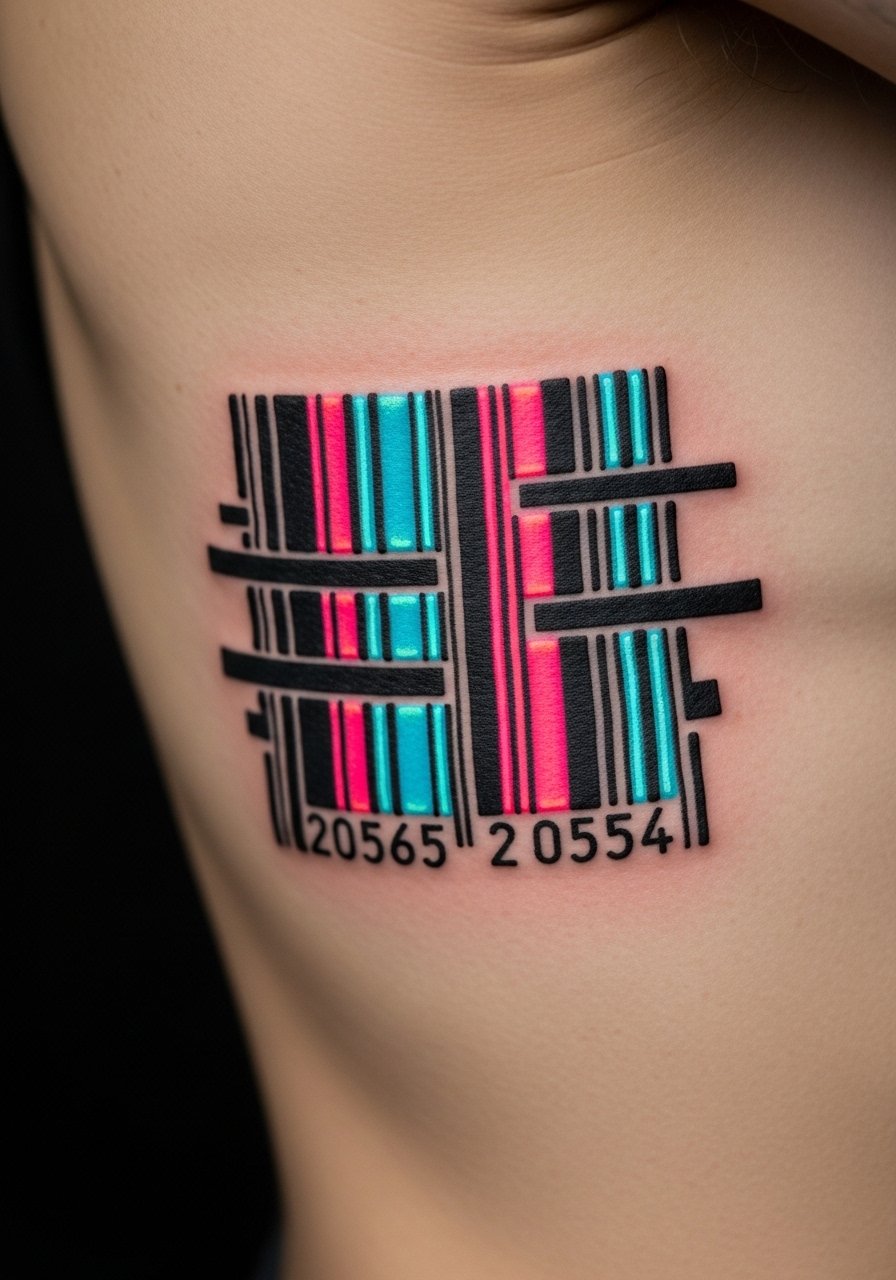
Rib pieces look cool but sting. The neon streaks pop fresh but can fade faster—black outlines keep it readable. Healing is slower because skin stretches when you move. I’ve seen neon lose punch on some skin tones; ask your artist about color saturation and healed photos on similar skin. Don’t cram complex type into the barcode—readability matters.
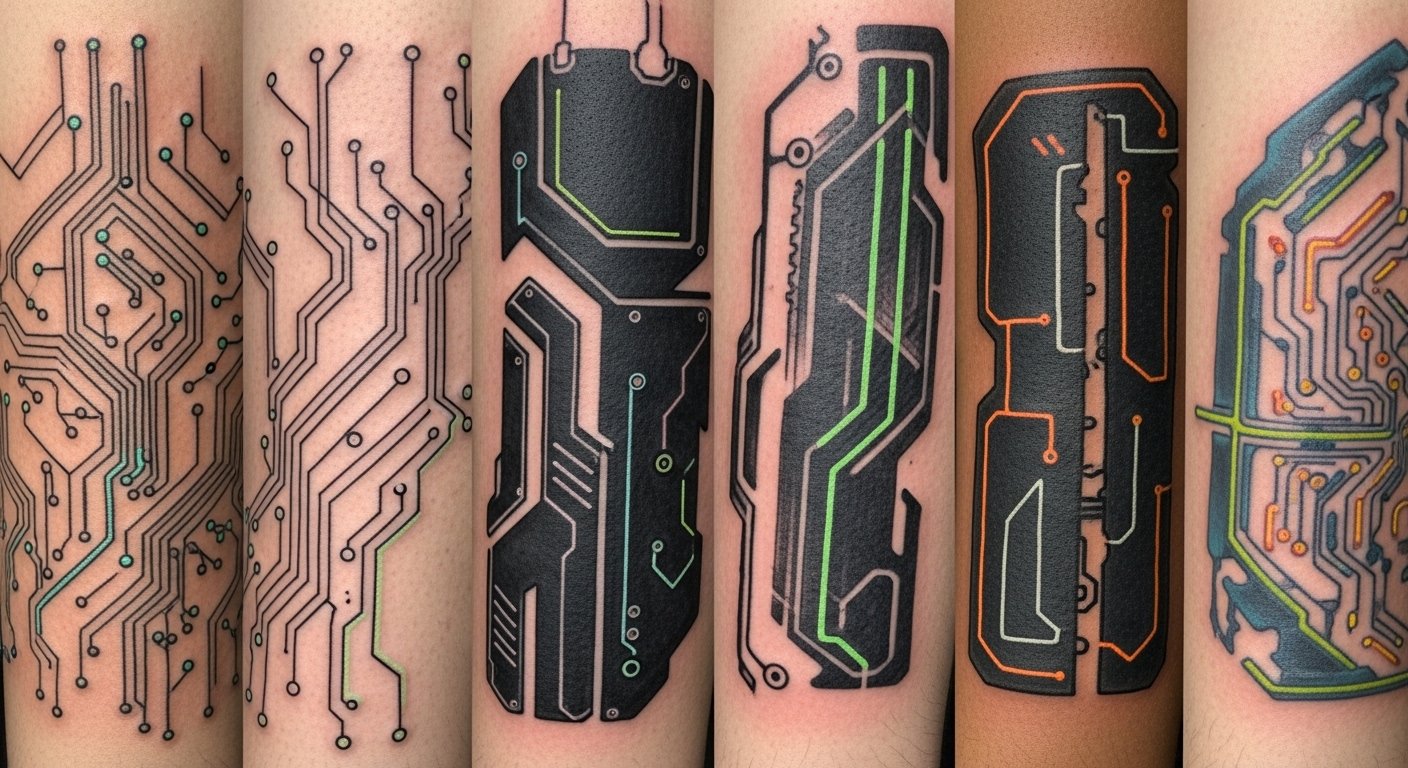
5. Geometric HUD Half Sleeve on Outer Arm
Style/Technique: Geometric / Blackwork
Pain Level: Medium (4/10)
Session Time: Multiple sessions
Best For: Sleeve starters, futuristic armor look
This gives a layered, wearable UI look. Outer arm is a relatively painless place to build a sleeve. Dotwork gradients age nicely if done with the right spacing. Plan sessions so bold anchors are done first—tiny filler dots can blur over time. Avoid overly thin connecting lines; they may disappear after healing.
6. Minimalist Neon Line Wrist Tattoo
Style/Technique: Minimalist / Fine Line
Pain Level: Low (2-3/10)
Session Time: Under 1 hour
Best For: First visible cyberpunk accent
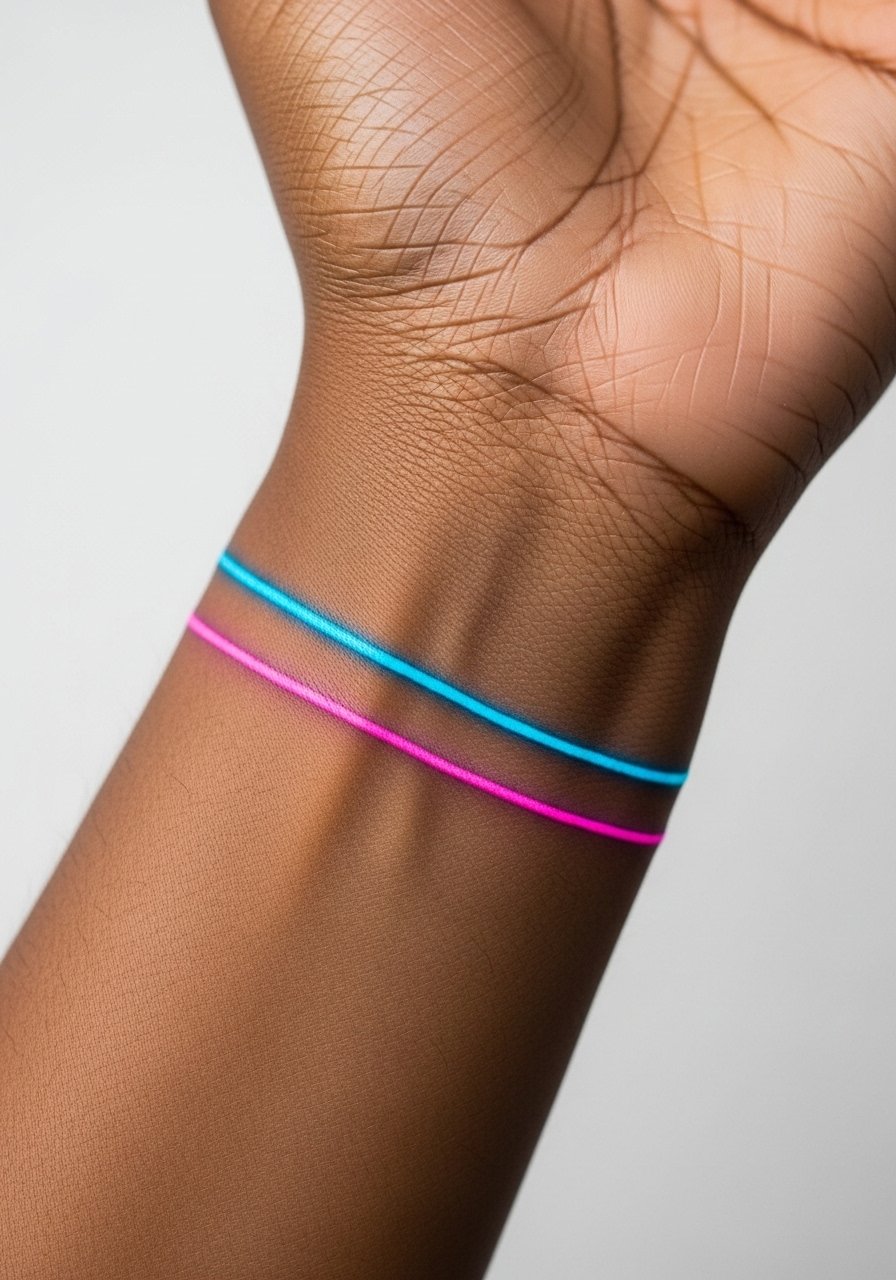
Small neon lines are modern and subtle. Wrist tattoos are on the thinner side of skin, so expect light stinging. Fine line here is delicate—avoid hairline lines that won't hold. I recommend slightly bolder strokes and asking for healed examples. Sunscreen and gentle moisturizing keep this visible.
7. Microchip Outline Behind Ear
Style/Technique: Fine Line / Tiny Detail
Pain Level: Medium (4-5/10)
Session Time: Under 1 hour
Best For: Hidden tech nod, subtle placement
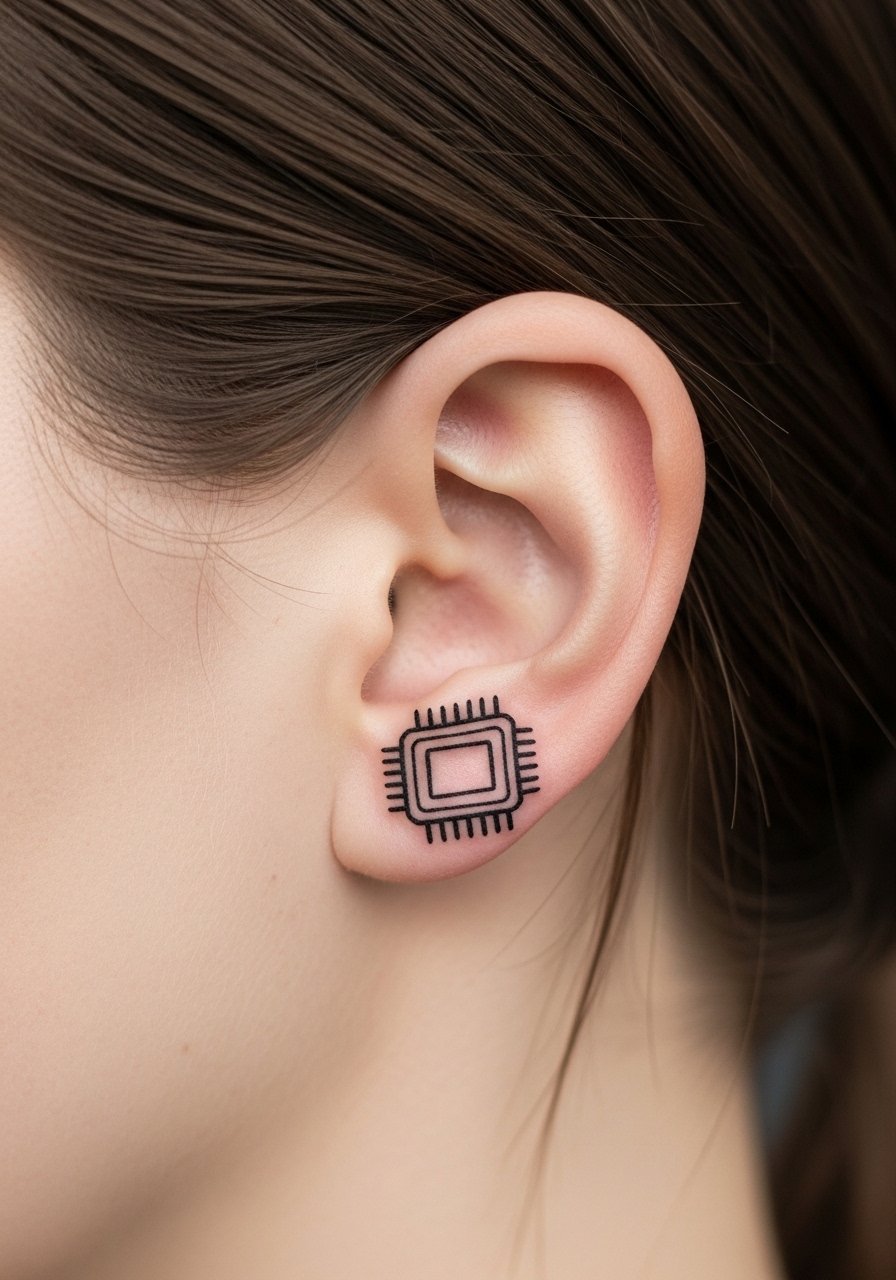
This is a secret tech badge. Behind the ear heals fast but is sensitive. Tiny work can blur, so insist on slightly thicker outlines. Artists often suggest a simple silhouette rather than excessive detail. Avoid complex shading—flat black or single-line work lasts better.
8. Neon Circuit Thigh Panel
Style/Technique: Illustrative / Color Pop
Pain Level: Low-Medium (3/10)
Session Time: 2-4 hours
Best For: Larger color piece, easy to hide
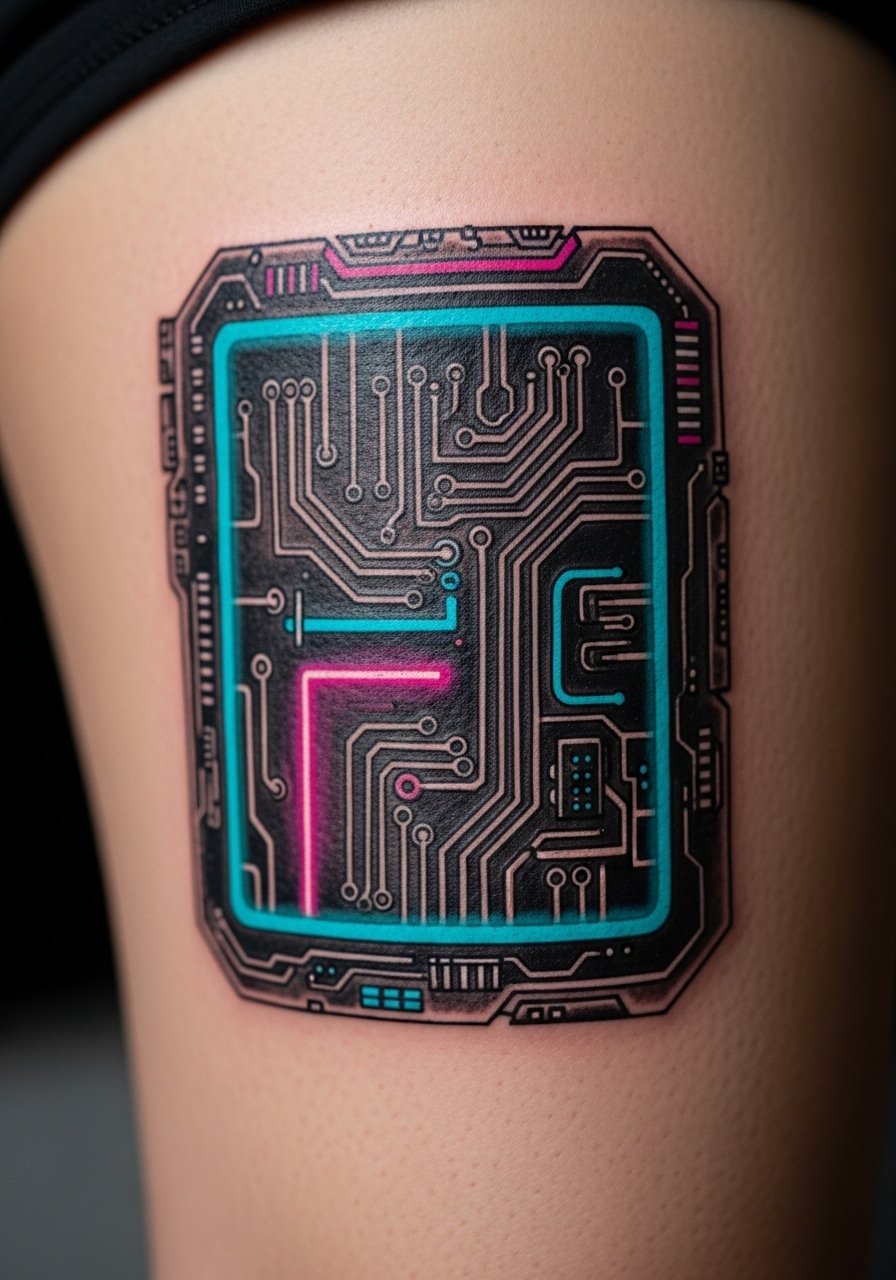
Thighs are forgiving for color and size. Neon accents look great fresh and can be boosted later if needed. Healing is comfortable since rubbing is minimal. I’ve seen neon fade quicker on frequently exposed skin—thigh placement helps preserve saturation. One mistake is tiny color fills that spread; go for bold blocks.
9. Binary Script Collarbone
Style/Technique: Minimalist / Typographic
Pain Level: Medium (4-5/10)
Session Time: 1-2 hours
Best For: Meaningful subtle statement

Binary lines read mysterious and futuristic. Collarbone hurts more than the arm because of bone. Fine numerals can blur if too small—scale them so digits remain legible. Keep lines spaced. Heals in 2-3 weeks visibly; full settling takes a few months. Discuss font weight with your artist.
10. Holographic Watercolor Skyline on Upper Back
Style/Technique: Watercolor / Neo-Traditional
Pain Level: Medium (4-5/10)
Session Time: 2-4 hours
Best For: Artistic full-back detail
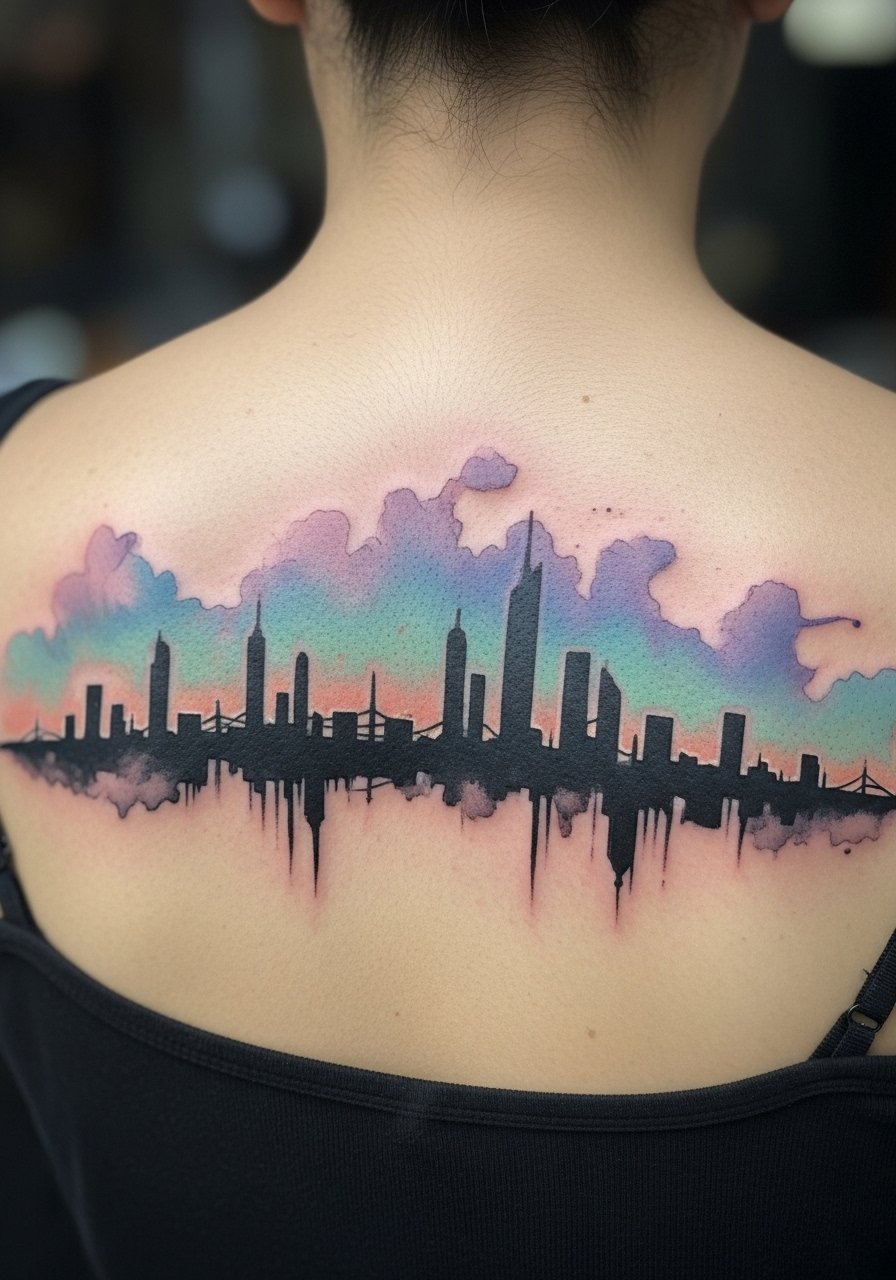
Watercolor creates that holographic city vibe. Upper back is a large, low-pain canvas. Color diffusion from watercolor can blur slightly—ask for strategic black anchors to maintain shape. Healed watercolor often looks softer; if you want crisp edges, combine with linework. Keep sun exposure low during healing.
11. Glitch Portrait on Forearm
Style/Technique: Micro-Realism / Glitch Art
Pain Level: Medium (4/10)
Session Time: 2-4 hours
Best For: Modern portrait, visible art piece
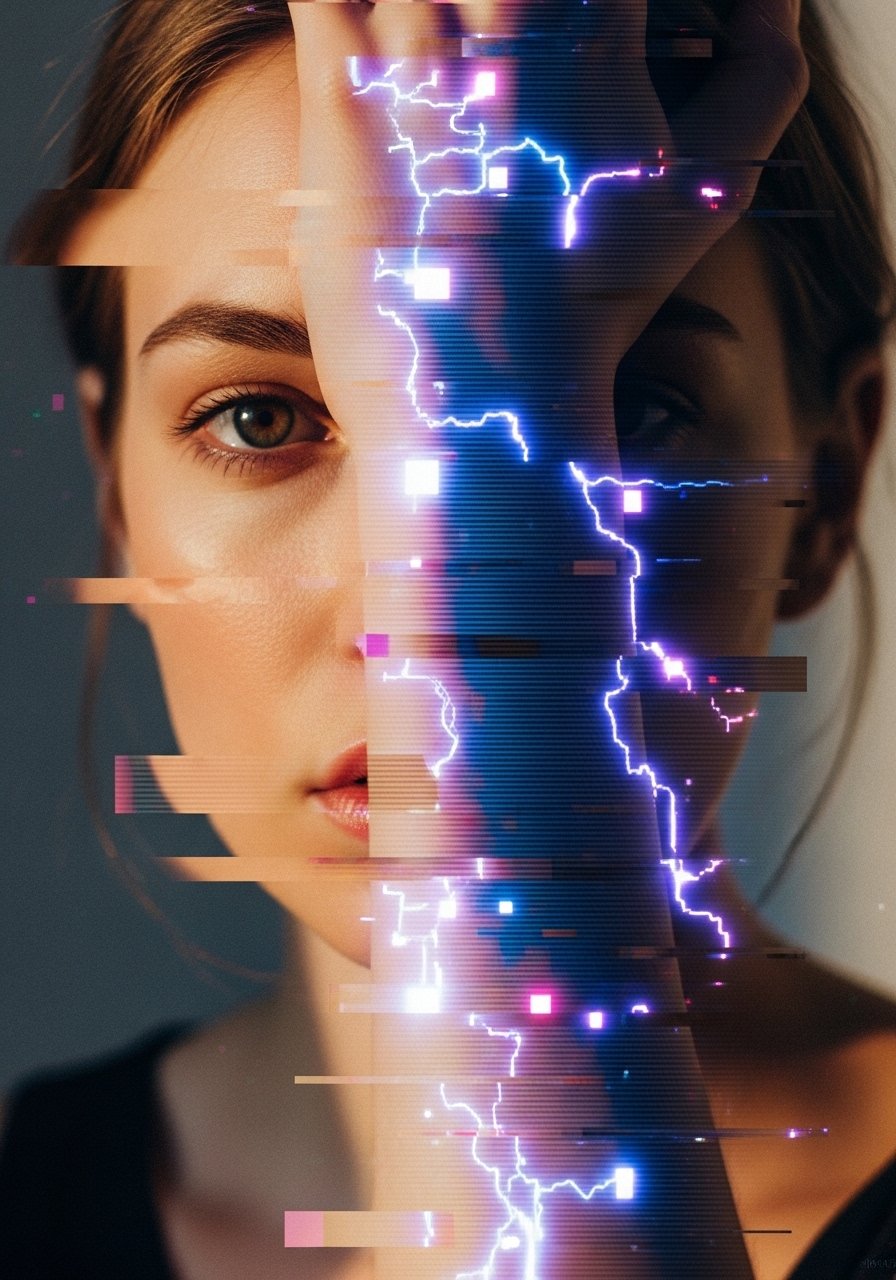
Glitch portraits mix realism and pixel breaks. Forearm placement is great for showing detail. Micro-realism needs strong aftercare—tiny lines can soften. I’ve seen artists blend small color blocks to mimic screen artifacts; avoid tiny dots that can bleed. Ask for healed photos of similar work.
12. Barcode Neck Wrap with Negative Space
Style/Technique: Blackwork / Negative Space
Pain Level: High (7/10)
Session Time: 1-2 hours
Best For: Bold visible statement
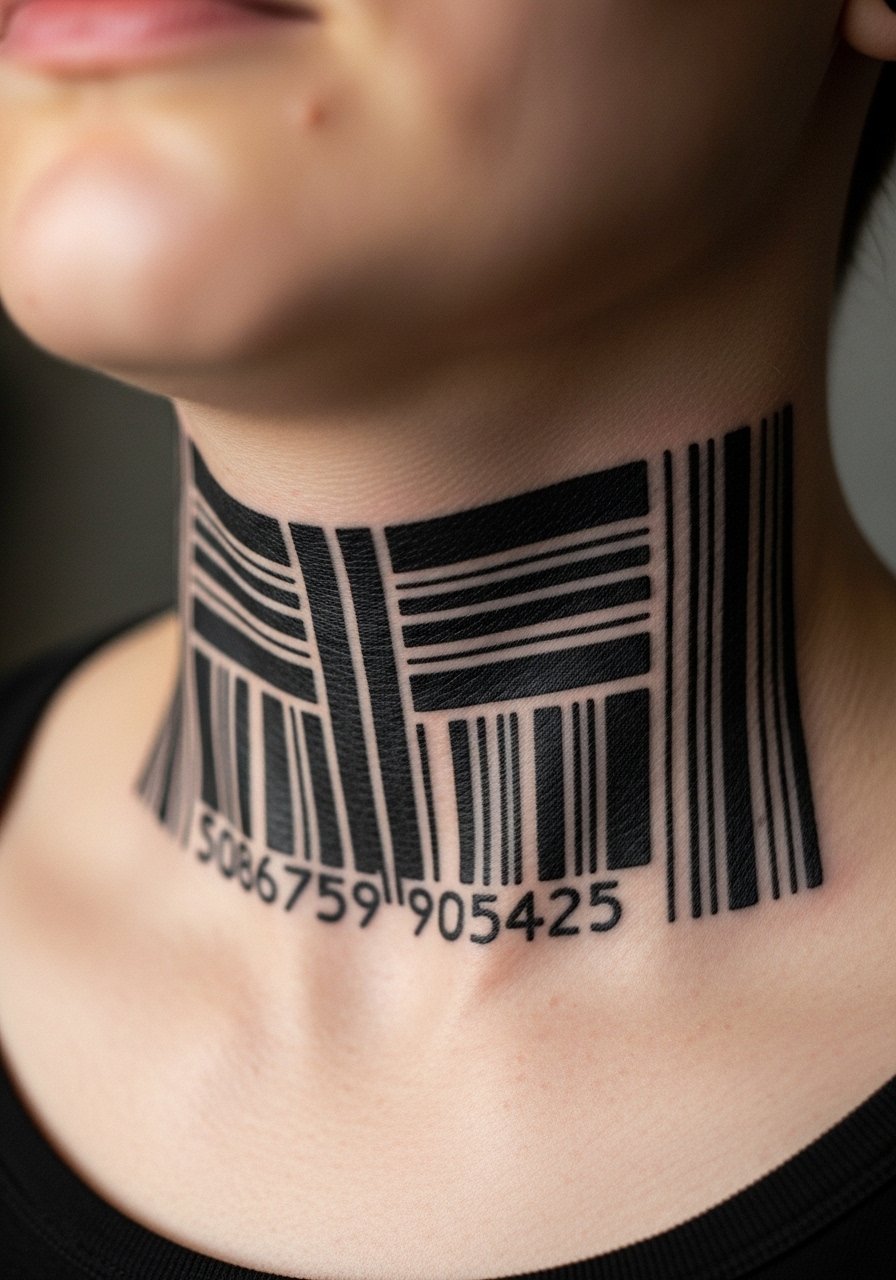
Neck is sensitive and visible. Blackwork here holds well if lines are bold. Pain and aftercare matter—neck moves a lot and can scab more. Avoid tiny inner details; they tend to blur. Consider how visible you want it to be long-term.
13. Augmented Reality QR Code on Hand
Style/Technique: Fine Line / Functional Art
Pain Level: Medium (5/10)
Session Time: 1-2 hours
Best For: Playful interactive ink
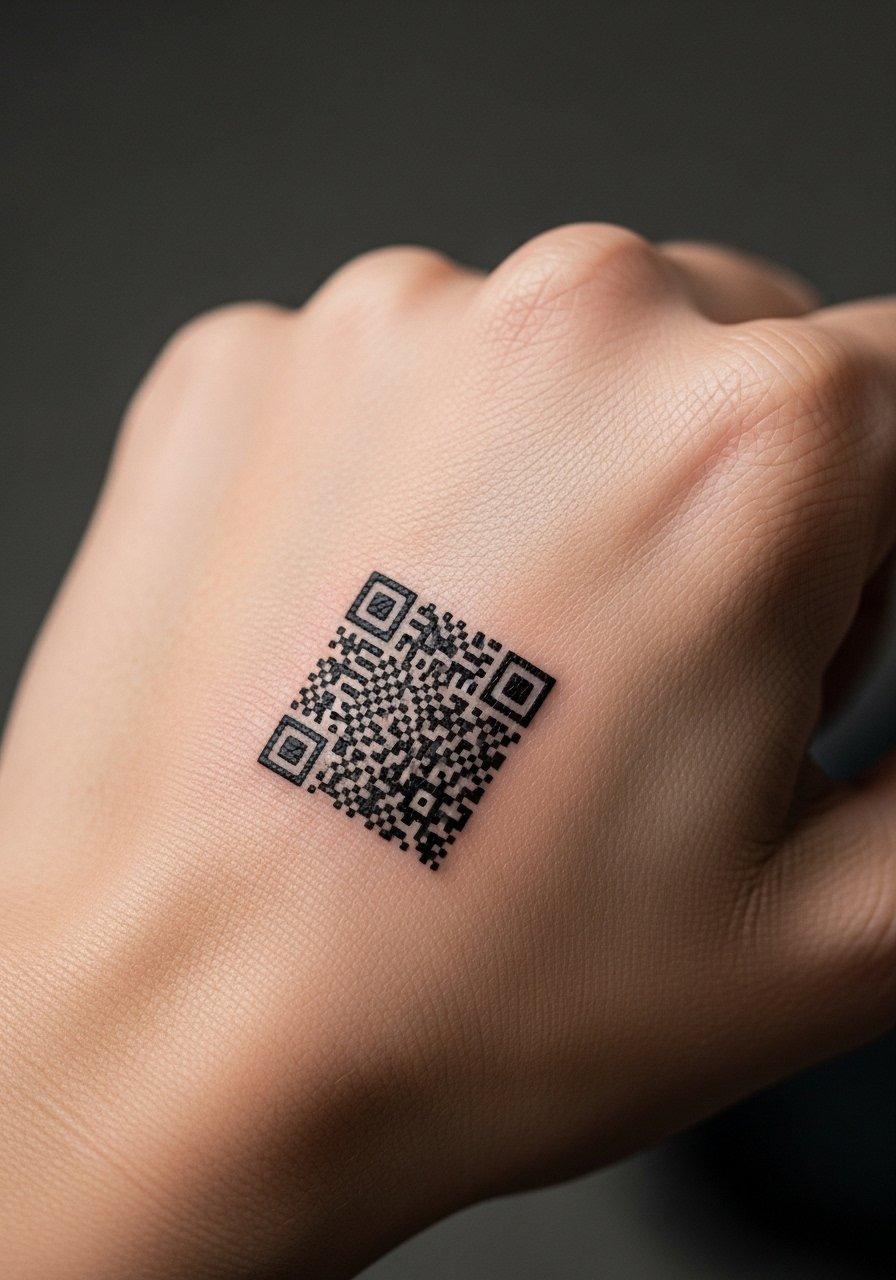
Hands are high-wear. QR codes can scan if executed with thick, precise blocks. Expect quicker fading and touch-ups. I’ve seen great results when artists slightly oversize the modules. Avoid placing on fingertips—too much wear. Moisturize and protect from frequent washing.
14. Pixel Cloud on Calf
Style/Technique: Minimalist / Pixel Art
Pain Level: Low (2-3/10)
Session Time: Under 1 hour
Best For: Subtle playful cyber motif
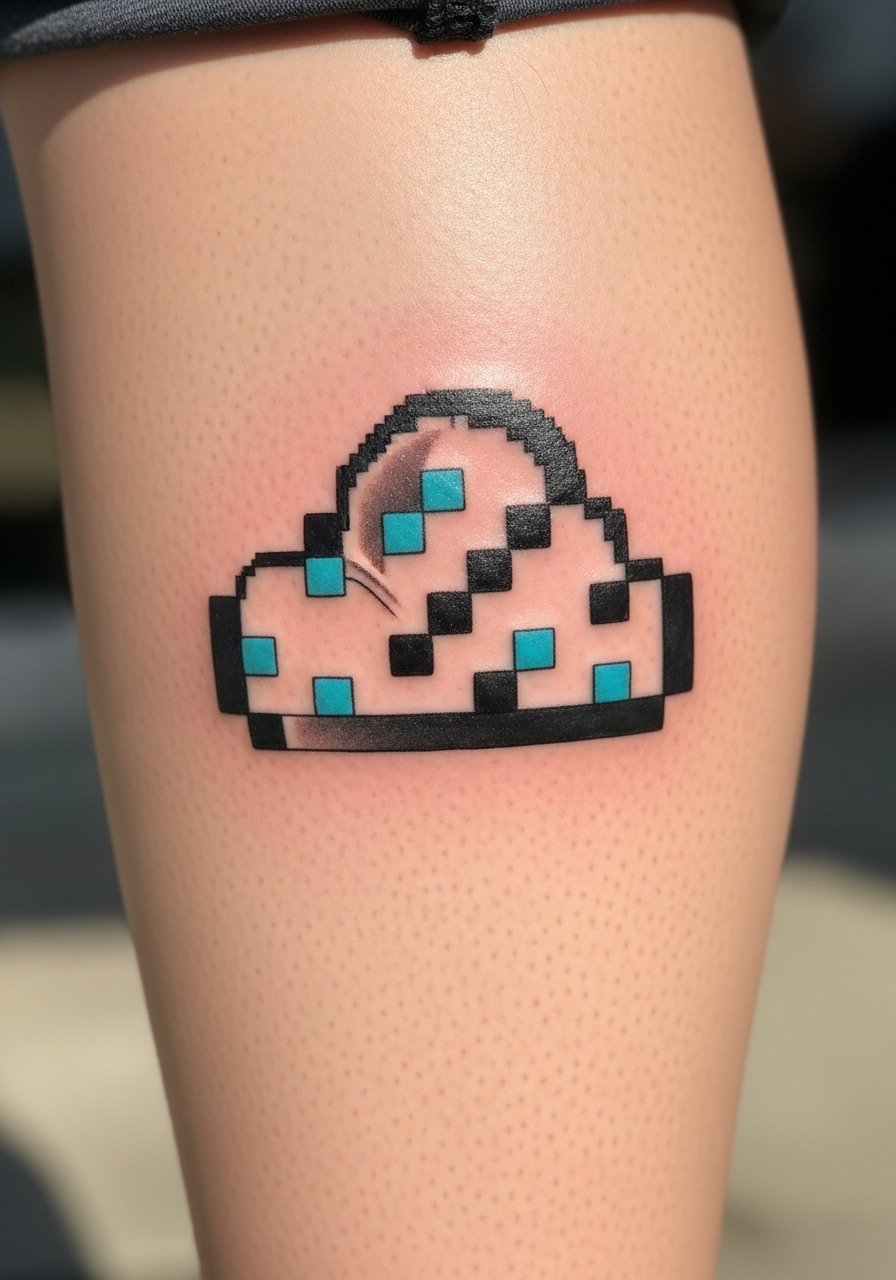
Calf is easy to heal and shows pixel clarity well. Pixel art ages nicely if blocks are kept solid. Pain is low. I recommend bold squares rather than tiny dots. It’s a low-maintenance cyber accent.
15. Biomech Spine Runner
Style/Technique: Biomechanical / Blackwork
Pain Level: High (7-8/10)
Session Time: Multiple sessions
Best For: Dramatic central piece
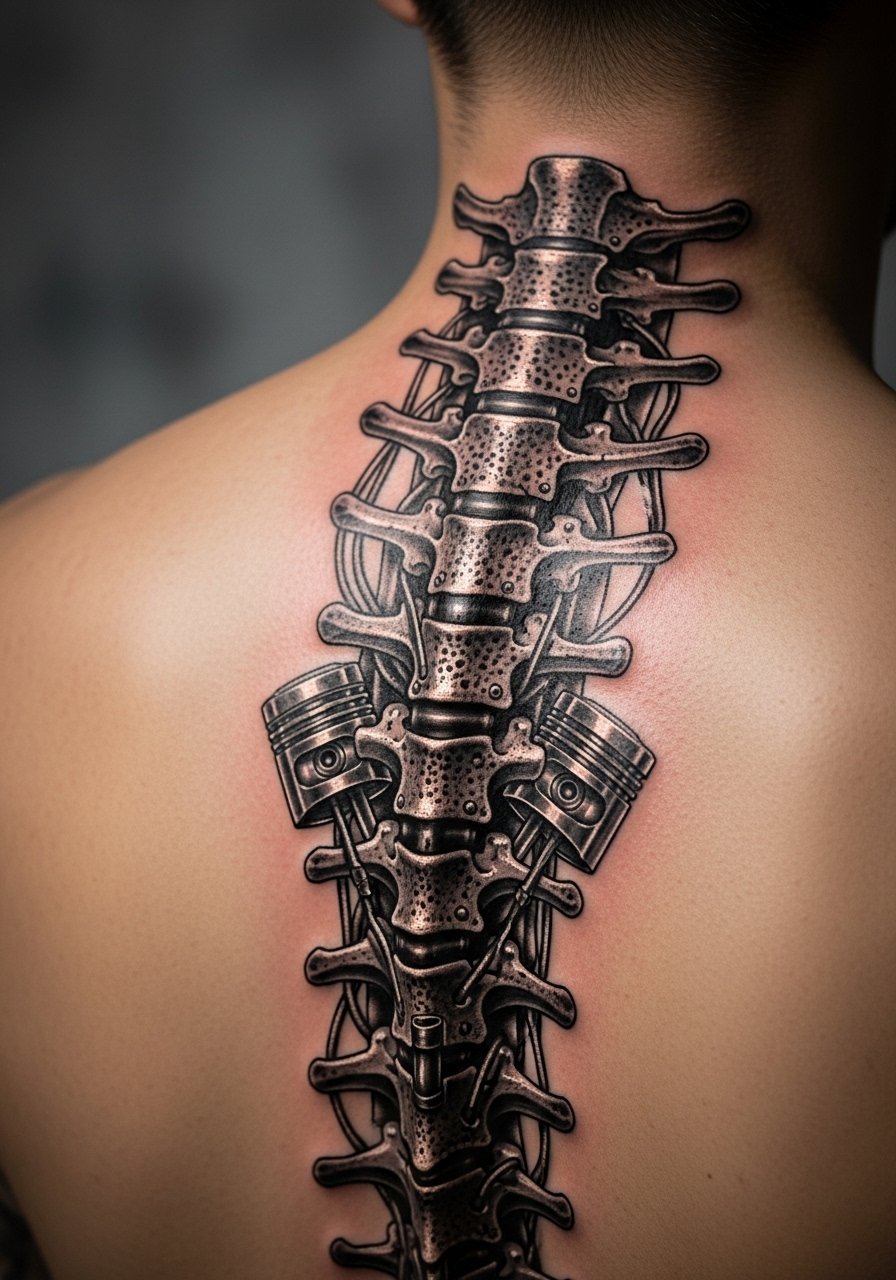
Spine work looks intense and futuristic. It’s painful but dramatic. Healing needs patience and careful sleeping positions. Healed biomech holds up if shading is done with spacing—solid black anchors prevent washout. Avoid over-fine shading in high-motion zones.
16. Nano-Tat Circuit on Finger Side
Style/Technique: Fine Line / Tiny Tech
Pain Level: High (6/10)
Session Time: Under 1 hour
Best For: Micro accents, secret detail
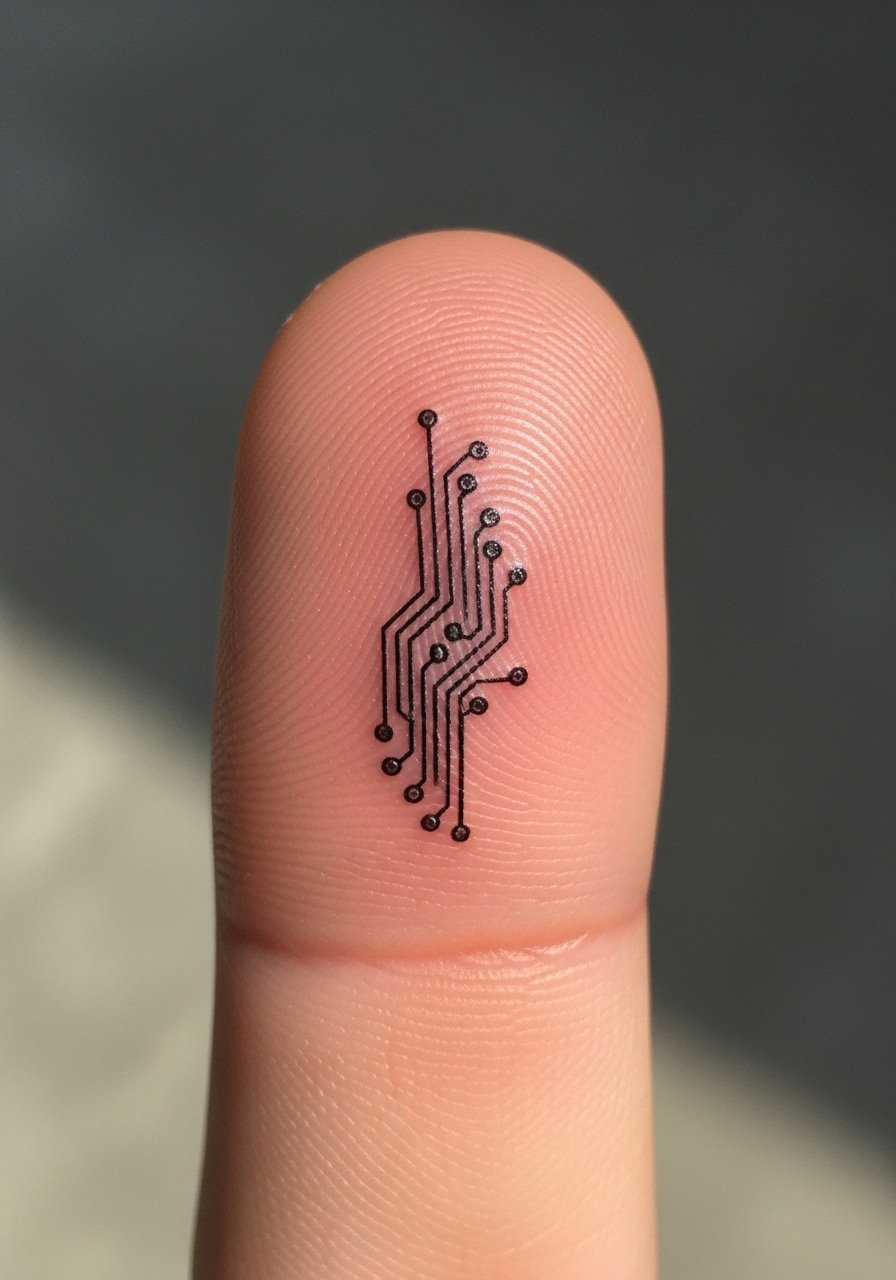
Fingers are high-movement and prone to fading. Tiny circuits can disappear quickly; I advise thicker strokes and expect touch-ups. Pain is sharp but brief. Keep hands out of water long enough during initial healing.
17. VR Grid Shoulder Cap
Style/Technique: Geometric / Linework
Pain Level: Medium (4/10)
Session Time: 1-3 hours
Best For: Shoulder armor aesthetic
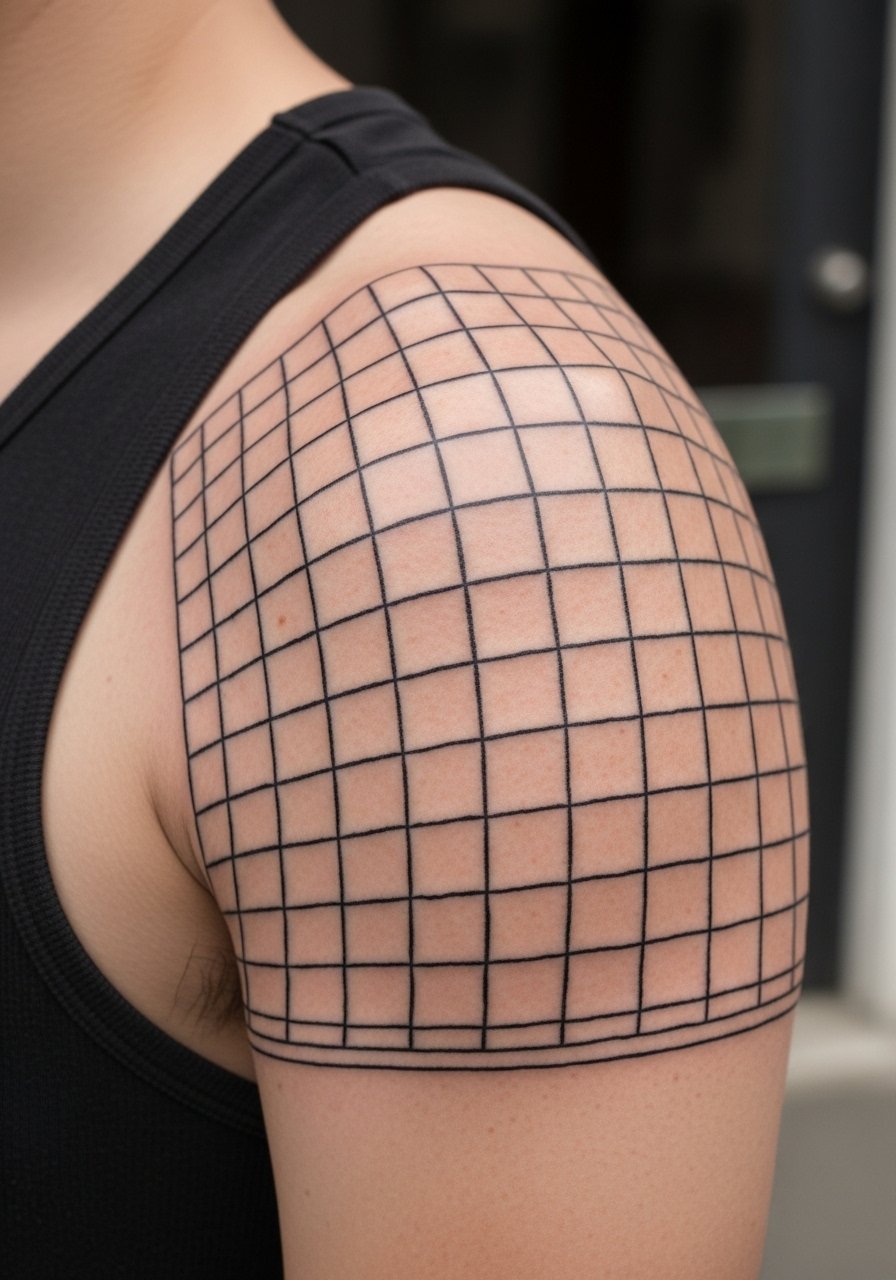
Shoulder allows curved geometry and reads like wearable plating. Grid lines age well if lines are balanced with negative space. Expect mild soreness; rotation of sessions helps. Ask for slightly bolder lines to preserve shape.
18. Haptic Dotwork Rib Accent
Style/Technique: Dotwork / Blackwork
Pain Level: High (7/10)
Session Time: 2-3 hours
Best For: Tactile, textured cyber look
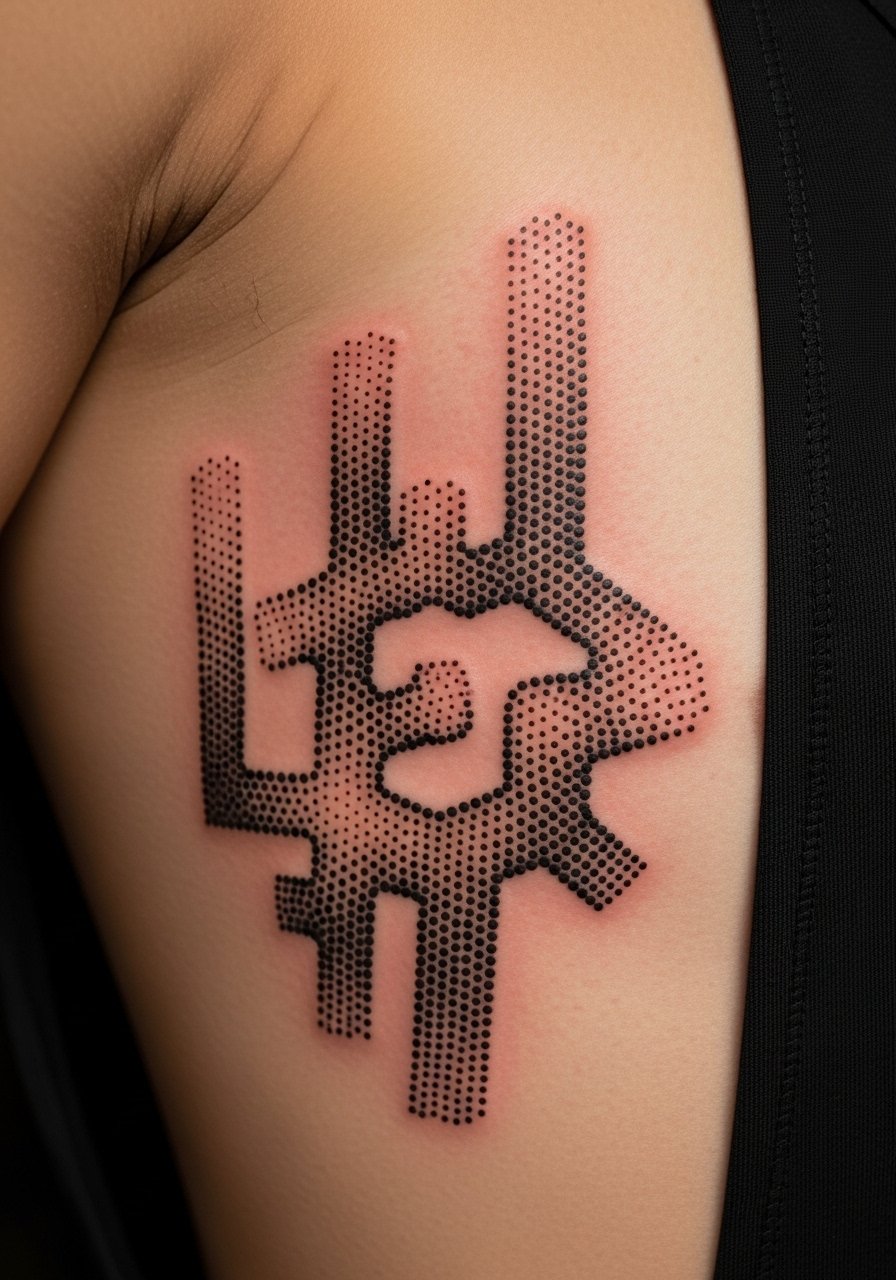
Dotwork creates texture and depth. Ribs are painful but provide dramatic effect. Dot spacing is key—too dense and it can look muddy later. Artists I follow use measured gradients for longevity. Healing needs careful movement management.
19. Neon Spine Micro-Lines
Style/Technique: Fine Line / Color Accent
Pain Level: High (7/10)
Session Time: 1-2 hours
Best For: Vertical neon accent
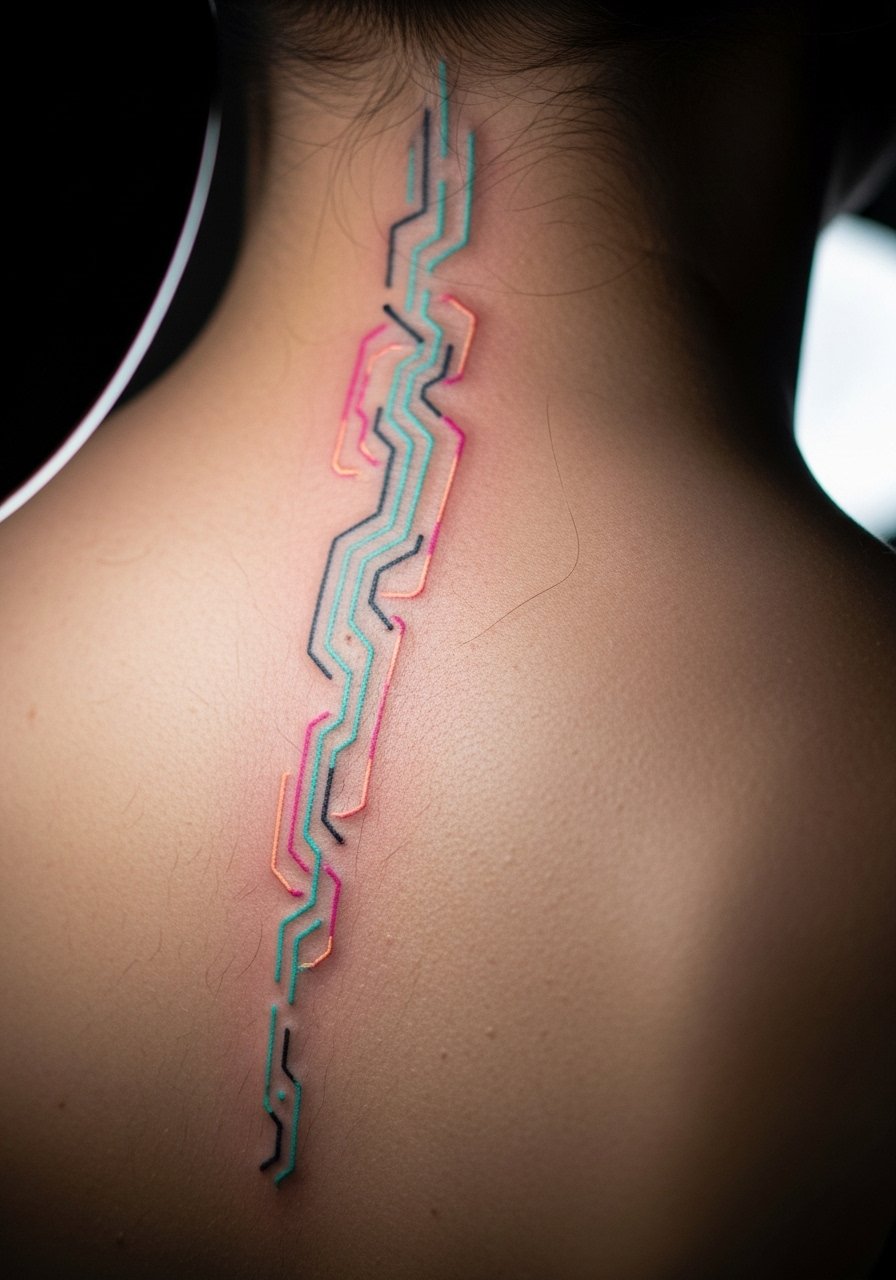
Delicate neon down the spine reads like a power conduit. Spine pain is significant. Neon fades faster—pair with black anchors. Keep movement light during healing. Ask for healed examples on similar skin tone.
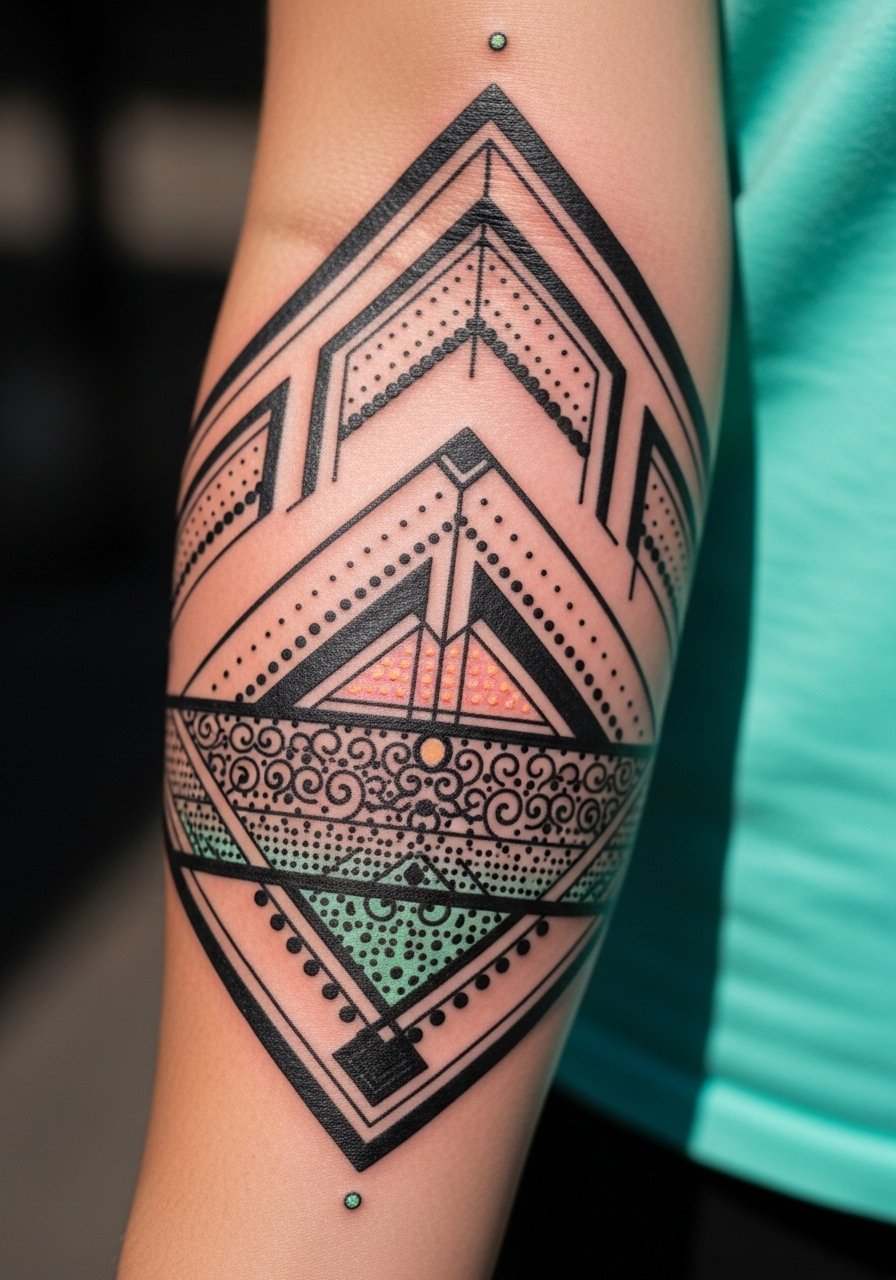
20. Optical Illusion Circuit Ankle
Style/Technique: Geometric / Optical
Pain Level: Medium (4/10)
Session Time: 1-2 hours
Best For: Playful techno look
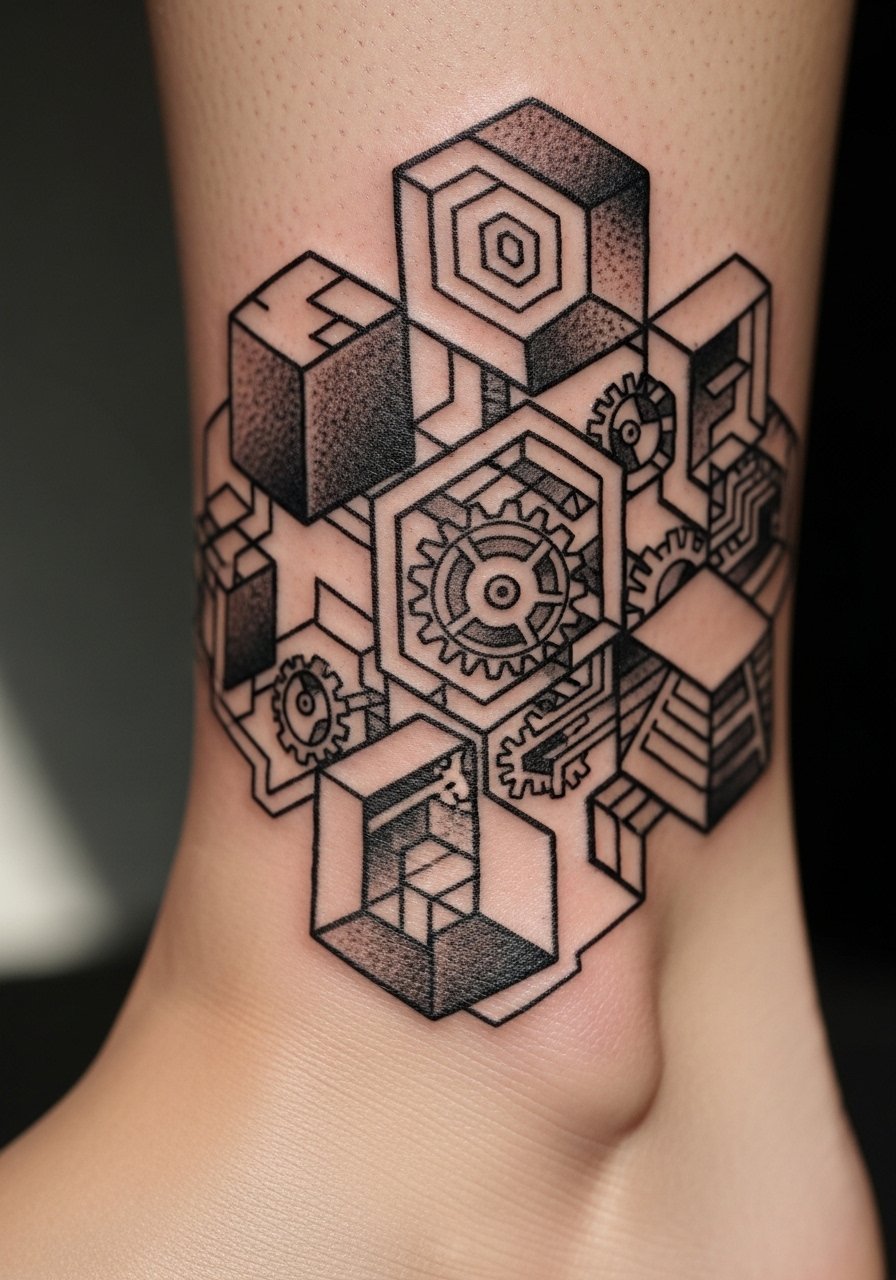
Ankles can handle optical patterns well. Expect some soreness and slower healing due to footwear. Bold shapes prevent blur. Avoid tiny interlocking lines that may soften.
21. Neon Barcode Thigh Strip
Style/Technique: Neo-Traditional / Color Accent
Pain Level: Low (3/10)
Session Time: 1-2 hours
Best For: Bold hidden stripe
Thigh hides and preserves neon. Color stays vibrant when not sun-exposed. Heals comfortably. Keep fills bold and avoid tiny color dots.
22. Data Stream Ribcage Watercolor
Style/Technique: Watercolor / Flowing Lines
Pain Level: High (7/10)
Session Time: 2-4 hours
Best For: Organic cyber flow
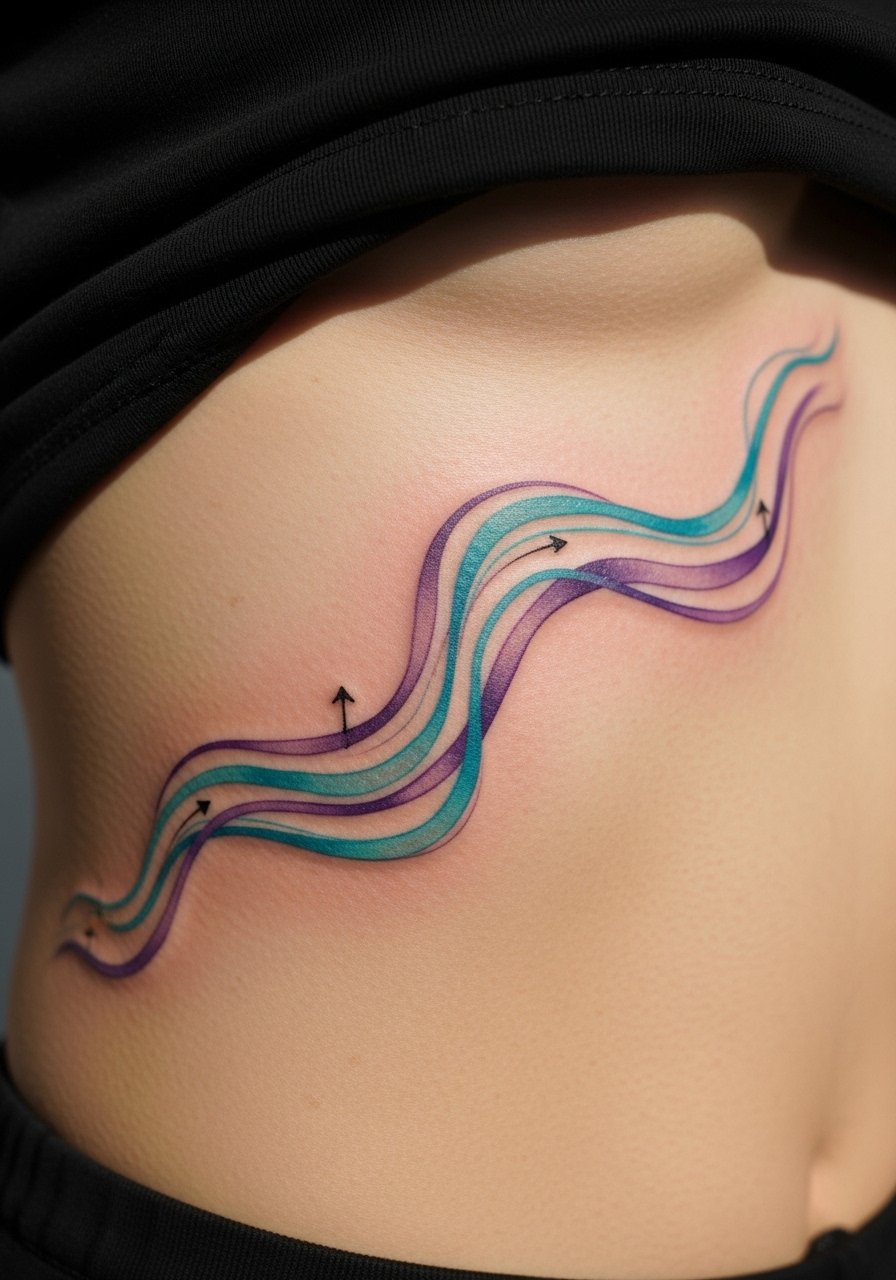
Flowing watercolor mimics streaming data. Ribs hurt and need careful aftercare. Healed watercolor turns softer—combine with linework to maintain shape.
23. Monochrome Hex Sleeve on Forearm
Style/Technique: Blackwork / Geometric Sleeve
Pain Level: Medium (4/10)
Session Time: Multiple sessions
Best For: Cohesive futuristic sleeve
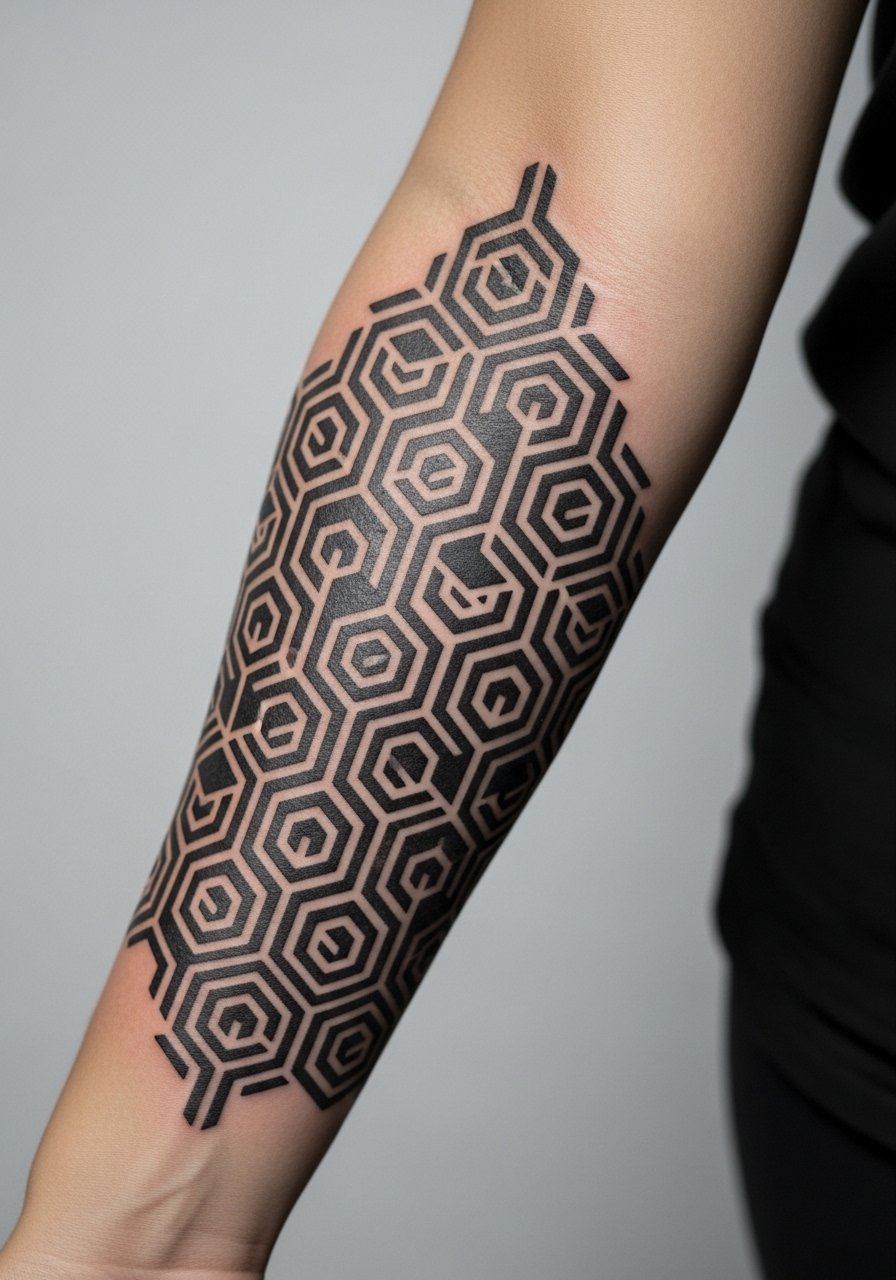
Hex patterns age reliably when bold. Forearm is forgiving. Plan composition to include rest areas of skin. Avoid over-detailing small hexes.
24. Circuit Heart Over Sternum
Style/Technique: Illustrative / Tech-Heart
Pain Level: High (7/10)
Session Time: 1-2 hours
Best For: Symbolic personal piece
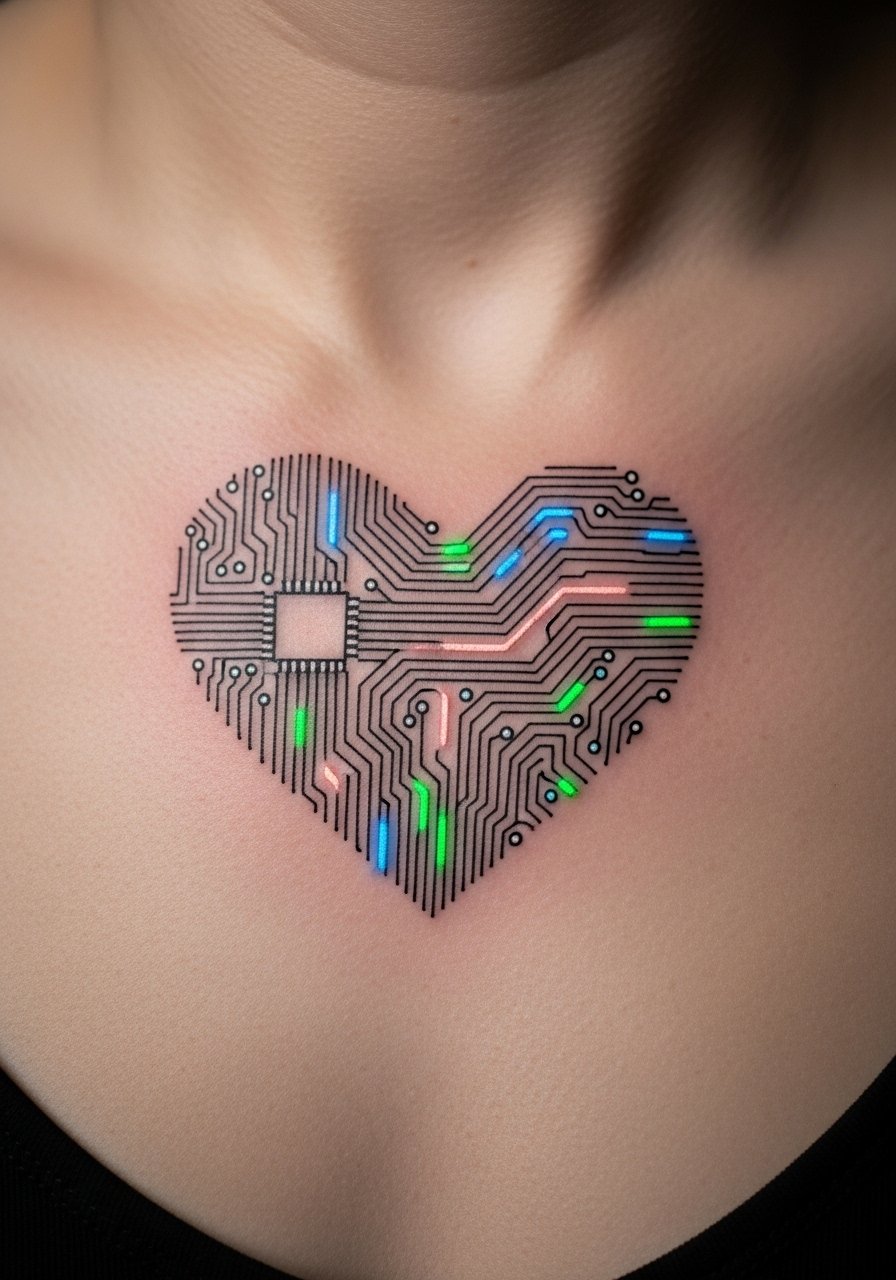
Sternum placement is painful but symbolic. Keep lines readable and avoid tiny inner elements. Heals slower; be gentle with movements.
25. Bioluminescent Jellyfish on Calf
Style/Technique: Neo-Traditional / Color Glow
Pain Level: Low (3/10)
Session Time: 2-3 hours
Best For: Organic cyberpunk motif
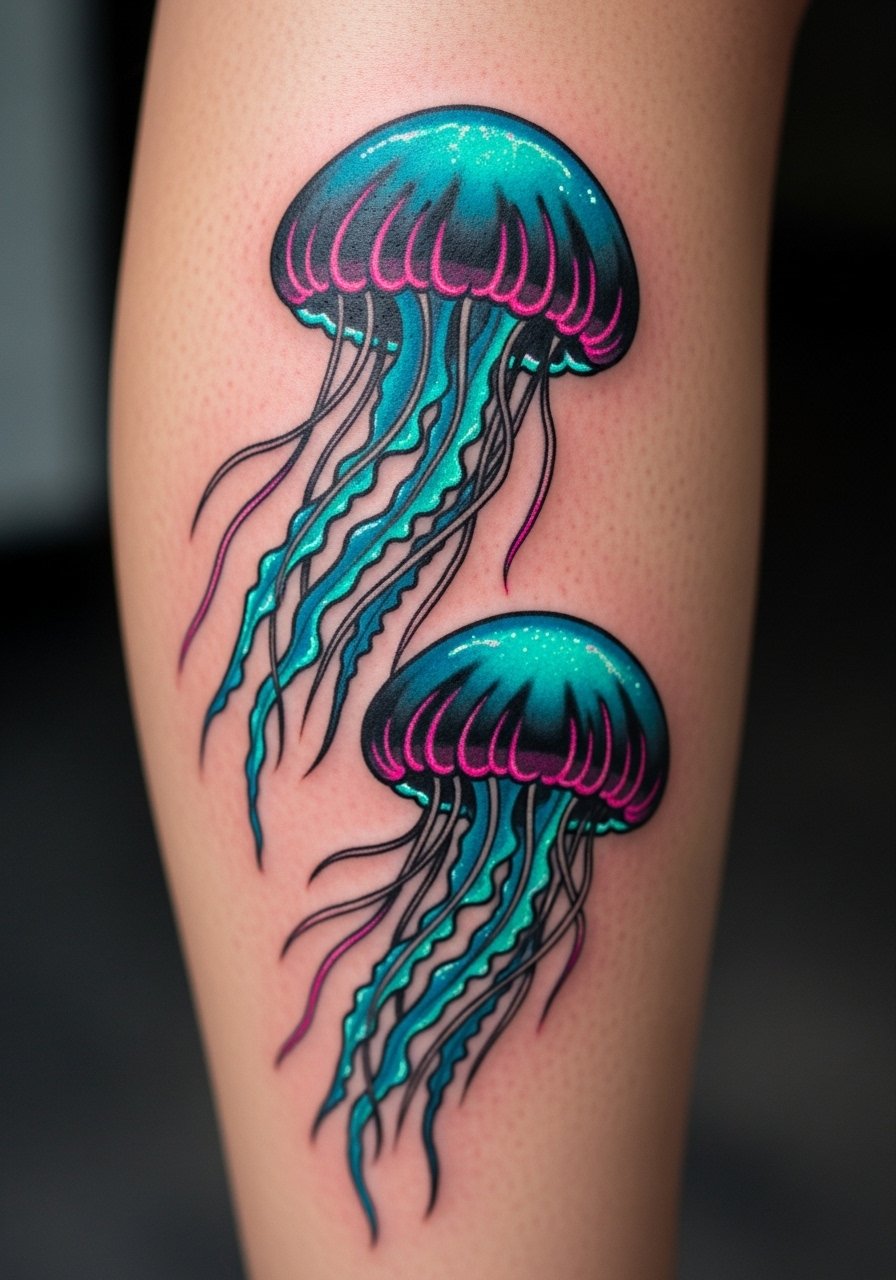
This blends organic and neon tech. Calf heals well and protects color. Colors may mellow—keep saturation and contrast strong. Avoid tiny tentacle filigree.
26. Circuit Mandala Behind Knee
Style/Technique: Geometric / Mandala
Pain Level: High (6-7/10)
Session Time: 1-2 hours
Best For: Hidden geometric statement
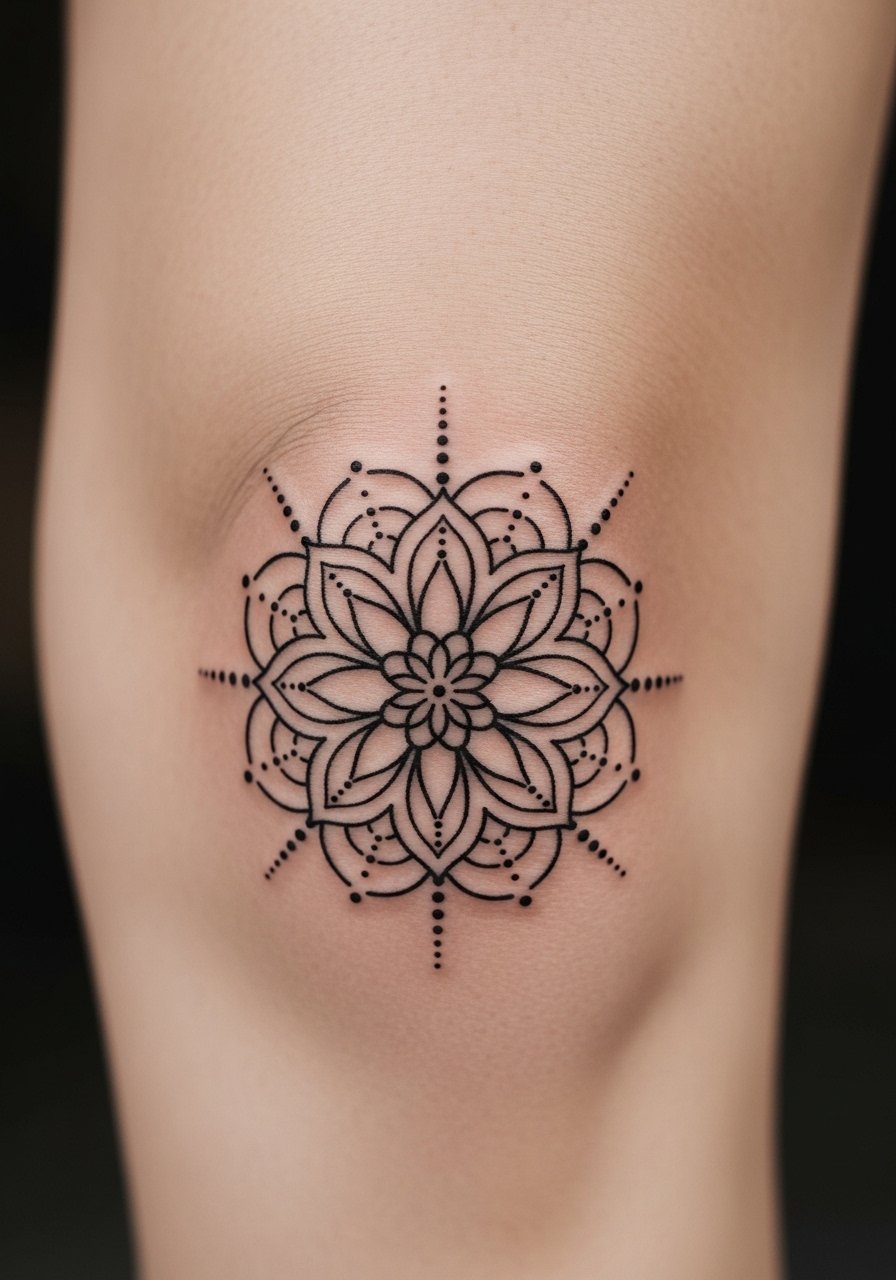
Behind-knee tattoos flex and scab more. Mandalas require spacing to avoid mudding. Artists recommend bolder separations for lasting clarity.
27. LED Pixel Heart on Chest Pocket Area
Style/Technique: Pixel Art / Minimal
Pain Level: Medium (4/10)
Session Time: Under 1 hour
Best For: Cute tech nod near heart
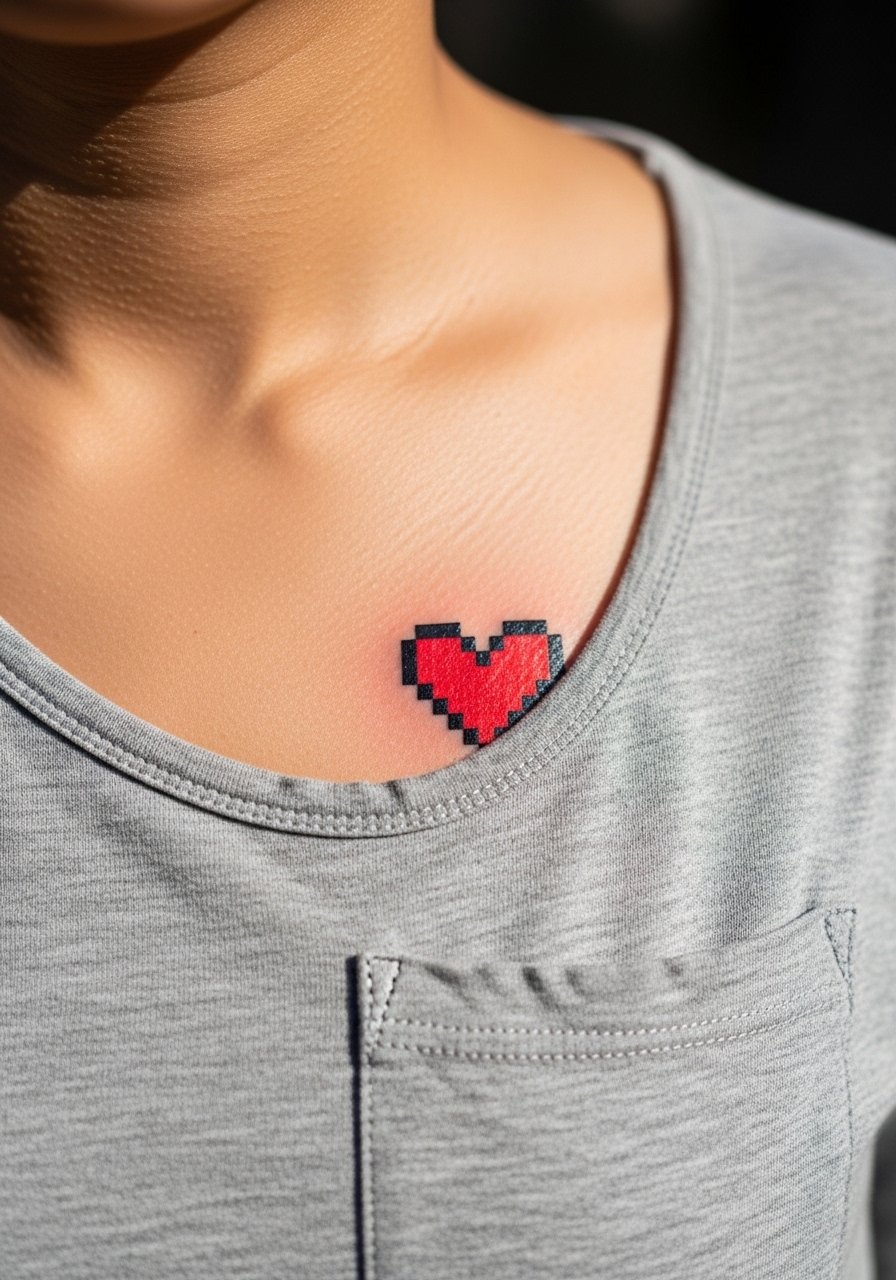
Small pixel hearts age well if pixel blocks are solid. Chest area is good for symbolic pieces. Keep spacing and ensure pixels are slightly oversized for longevity.
28. Cyber Samurai Neo-Traditional Thigh
Style/Technique: Neo-Traditional / Illustrative
Pain Level: Low-Medium (3-4/10)
Session Time: Multiple sessions
Best For: Large illustrative leg piece
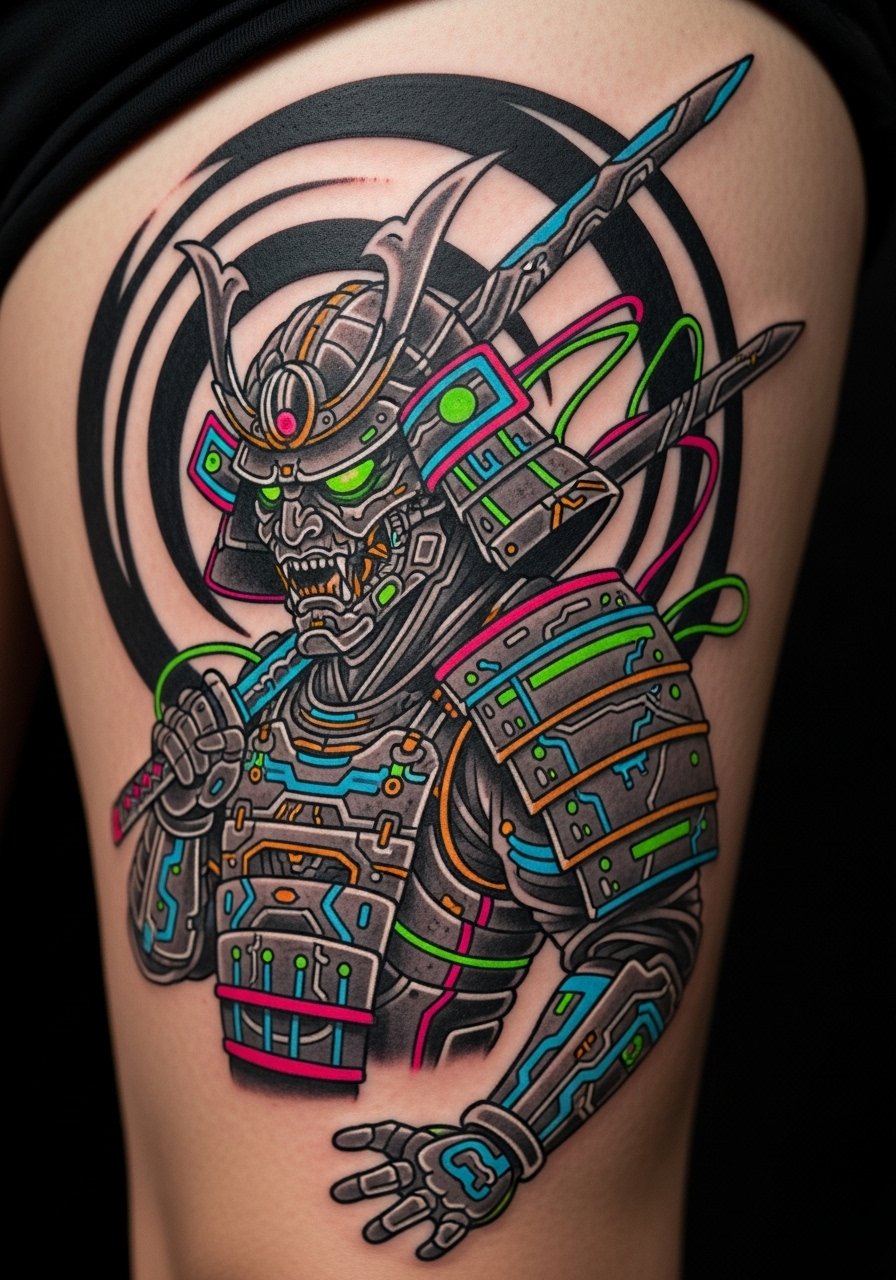
Neo-traditional gives strong outlines with color pop—great for thigh canvases. Heals comfortably and holds shape. Avoid tiny background fill that can muddy.
29. Optical HUD Eye on Palm Edge
Style/Technique: Fine Line / Micro
Pain Level: High (8/10)
Session Time: Under 1 hour
Best For: Extreme statement, rarely recommended
Palm-adjacent work fades the fastest. Only choose this if you want frequent touch-ups. Pain is intense. Use bold simplified shapes for any chance of lasting.
30. Luminous Spine Circuit Column
Style/Technique: Illustrative / Vertical Blackwork
Pain Level: High (7-8/10)
Session Time: Multiple sessions
Best For: Central luminous column effect
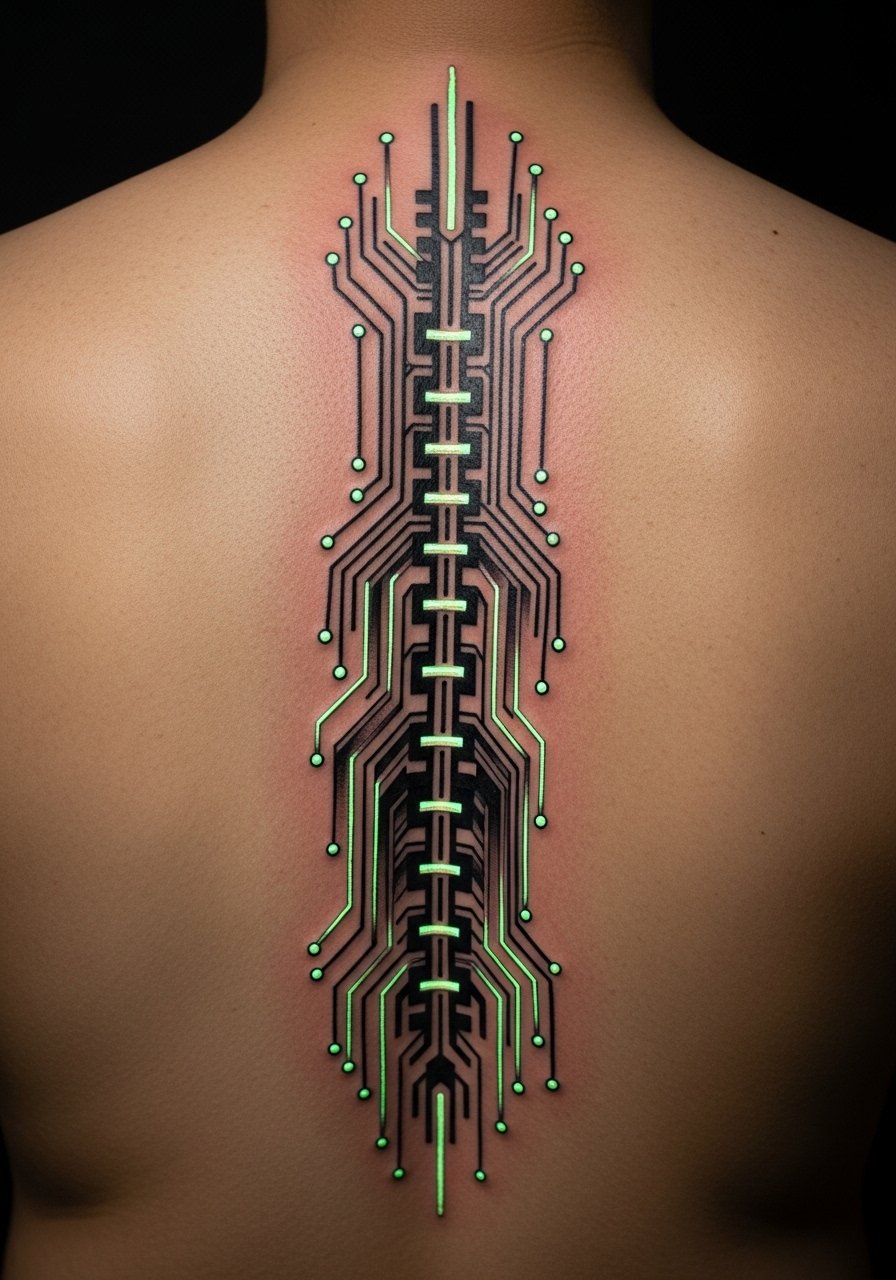
This long central piece reads like a core power conduit. Spine pain is significant; plan sessions with rest. Neon highlights should be used sparingly and anchored with black. Expect longer healing and occasional touch-ups for color.
Tattoo Prep and Aftercare Essentials
Aftercare Essentials:
- Aquaphor Healing Ointment, 14oz tube — Use first 3-5 days as directed
- Saniderm Transparent Adhesive Bandage, 6-inch roll — Second-skin method for first 24-48 hours
- CeraVe Fragrance-Free Moisturizing Lotion, 12oz — Daily moisturizer after initial ointment phase
- Dr. Bronner's Unscented Castile Soap, 32oz — Gentle cleaning during first week
Before Your Appointment:
- Tattoo Numbing Cream with 5% Lidocaine, 30g — Ask artist before use
- Tattoo Stencil Transfer Paper, Pack — For home mock-ups
Long-Term Maintenance:
- SPF 50 Sunscreen Stick for Tattoos — Daily sun protection keeps neon and color alive
- Mad Rabbit Tattoo Balm, 1.7oz — Keeps healed ink vibrant
- Hustle Butter Deluxe, 2oz — Vegan aftercare alternative
Optional Comfort Items:
- Tattoo Numbing Spray — For touch-ups or sensitive zones
- Hydrocolloid Bandages (Large Pack) — For small touch-up protection
Frequently Asked Questions
Q: How bad does a tattoo actually hurt?
A: Pain depends on placement and tolerance. Outer arm and thigh feel mild (2-4/10). Ribs, spine, and neck can be intense (7-8/10). It’s more a burning/scratching than sharp stabbing. For sensitive spots, consider numbing cream with 5% lidocaine after discussing with your artist.
Q: How long until it looks like the healed photos I see?
A: Surface healing is about 2-3 weeks. Colors and fine lines settle over 2-3 months. Neon and watercolor often look duller during healing and brighten later. From my experience, patience and consistent moisturizing make the biggest visual difference.
Q: What if my cyberpunk colors fade fast?
A: I’ve noticed UV exposure and frequent friction kill saturation. Daily SPF 50 sunscreen and avoiding constant rubbing preserves bright pigments. Black anchors behind neon also keep shapes readable as colors age.
Q: Can I work out after getting these placements?
A: Wait 48-72 hours minimum. For high-movement placements (ribs, shoulders, knees), skip heavy exercise a week or longer. Sweat and friction increase infection risk and can pull ink out during early healing.
Q: Should I expect touch-ups for tiny cyberpunk details?
A: Yes. Small fine-line details, finger and palm-area work, and neon accents often need touch-ups. I advise discussing durability with your artist up front and asking for slightly bolder lines to reduce the need for early corrections.
Q: Do tattoos look different on darker skin tones?
A: Yes. Black and bold geometric work shows clearly across skin tones. Bright neons can read differently—some colors may appear muted. I always ask to see healed examples the artist has done on similar skin tones before deciding on color choices.
Q: What are the most common mistakes with cyberpunk tattoos?
A: Tiny unreadable tech details, overuse of thin lines, and expecting neon to stay as vivid without sun protection. From what I’ve seen, planning with negative space and bold anchors prevents early muddiness.
Q: Which aftercare products do artists actually recommend?
A: Most artists I talk to recommend starting with a thin layer of Aquaphor or Saniderm initially, then switching to a fragrance-free lotion like CeraVe and daily SPF 50 for long-term care.
