

I spent months saving cross tattoos I actually liked—and what surprised me was that the best ones weren’t the loudest. They were the designs that fit a person’s life and still looked honest healed. These 29 cross tattoo ideas lean into that same faithfulness: styles that read well fresh, age predictably, and carry meaning without shouting.
This list focuses on modern takes—fine line, neo-traditional, blackwork and realistic 3D—across placements like forearm, chest, wrist and sleeve. I’ve been tracking 2026 trends and the crosses I keep seeing are the ones that last visually and emotionally.
1. Fine Line Celtic Cross on Inner Forearm
Style/Technique: Fine Line / Neo-Traditional
Pain Level: Low-Medium (3/10)
Session Time: 1–3 sessions, shorter sittings
Best For: First cross tattoo, subtle cultural statement
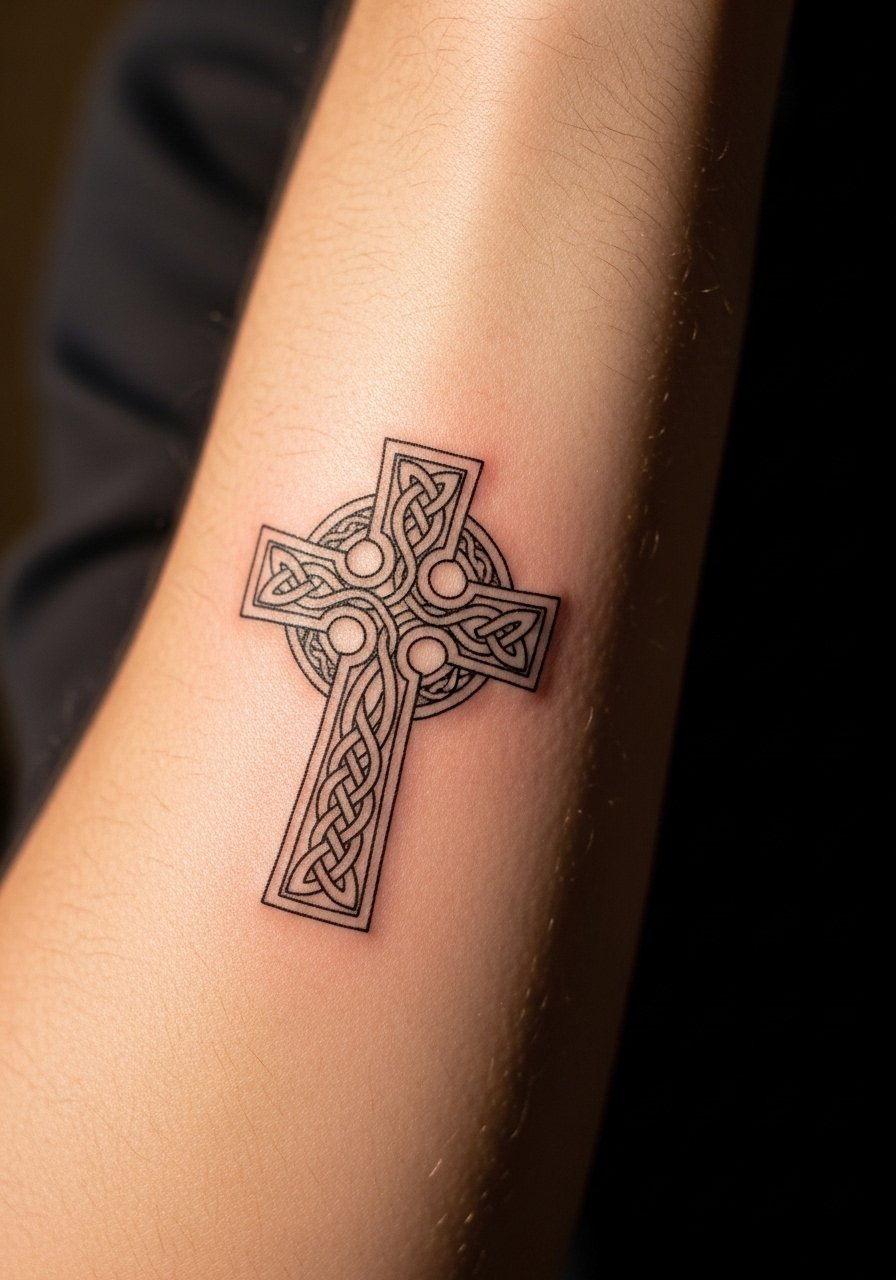
I love Celtic crosses because they carry heritage and still read delicate when done in fine line. On the inner forearm the knotwork looks intimate and readable; that placement keeps pain moderate and the piece easy to cover if needed. Expect surface healing in 2–3 weeks and full settling in a few months—fine knots will soften a bit, so ask your artist to slightly bolden critical intersections. A common mistake is asking for ultra-thin knots; that detail often blurs with time. Bring examples of healed Celtic work and look for artists who do both fine line and neo-traditional detail (Valerie Vargas–style colorists adapt well if you want subtle accents). For aftercare, keep the area moisturized and protected from sun while it settles.
2. Three Crosses Memorial on Upper Back
Style/Technique: Realism / Blackwork
Pain Level: Medium (4/10)
Session Time: 1–3 sessions
Best For: Memorial or redemption symbolism
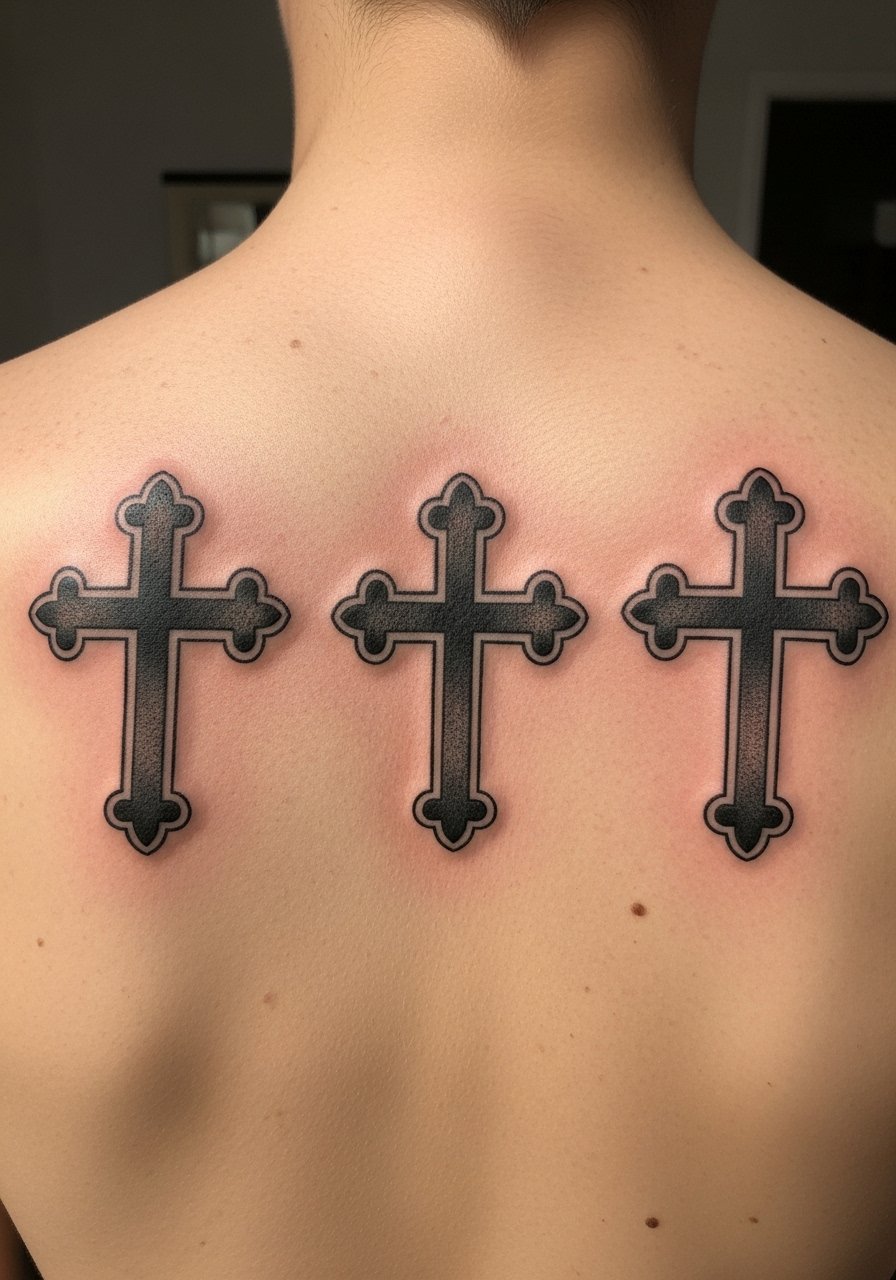
The three-cross motif instantly evokes the crucifixion scene and works beautifully across the upper back where there’s room to balance size and spacing. In my experience, blackwork shading gives gravitas and heals predictably; it’s a go-to when people want a meaningful memorial. Placement on the back keeps the piece private unless you choose to display it. Pain here is moderate—more than the forearm but less than ribs. Artists who shine in realistic blackwork (think Boris Bianchi-style) will do layered shading that reads clean healed. Avoid tiny crosses with dense shading; they tend to fill in. Ask for stencil placement checks so the spacing feels personal.
3. Bold Traditional Chest Cross Centerpiece
Style/Technique: Traditional / Bold Linework
Pain Level: Medium (4/10)
Session Time: Multiple sessions if large
Best For: Strong faith statement near the heart
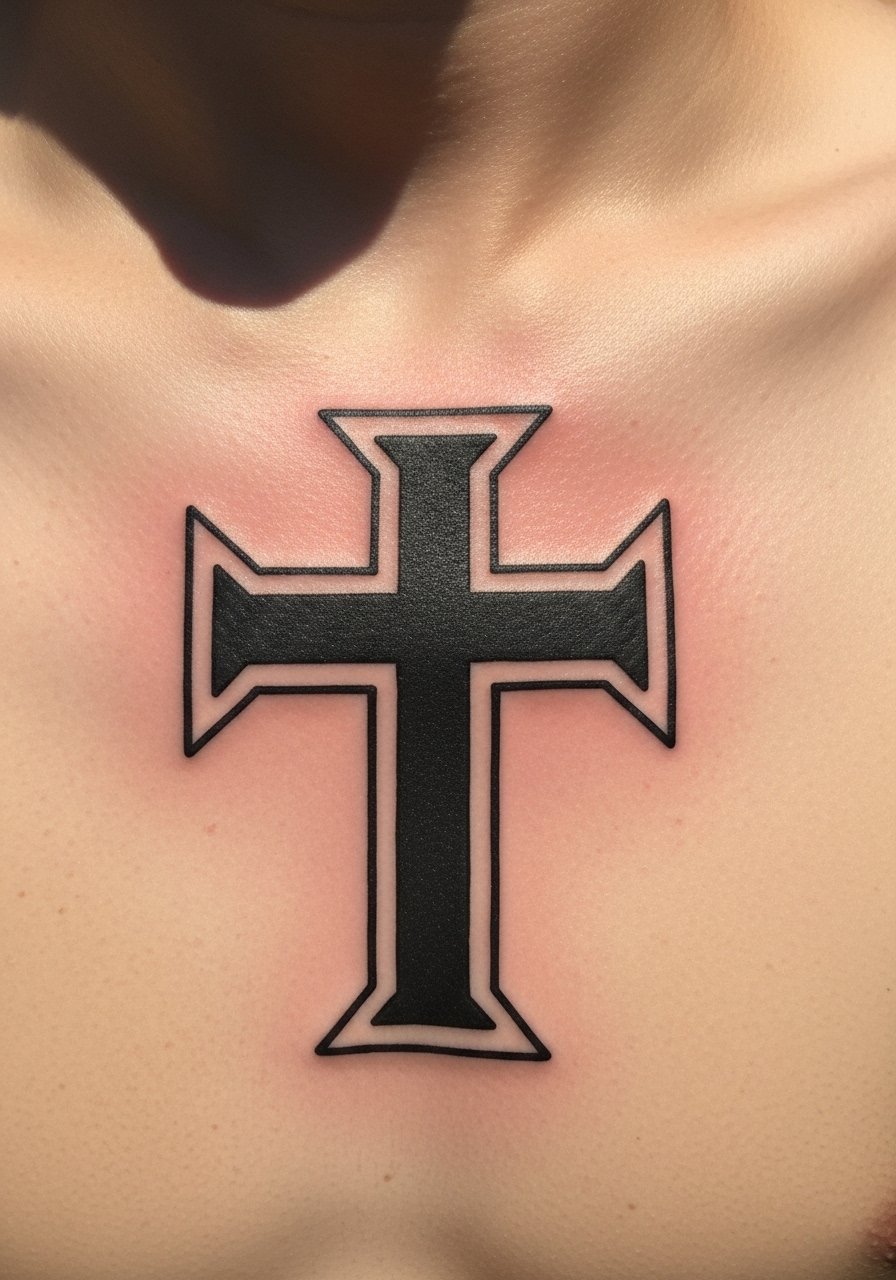
A large chest cross sits literally over the heart and that placement feels intentional in a way few tattoos do. Traditional line weight works here because bold lines age well on the chest’s movement-prone skin. Expect moderate pain but short breaks help—chest work usually heals in a few weeks on the surface, with full settling after months. From what I’ve seen, the best chest crosses use clean black outlines and restrained shading so the symbol remains crisp as it ages. A common mistake is over-detailing inside a central chest cross; those micro-details can blur. If you want color, ask a neo-traditional artist to keep palettes saturated but restrained.
4. Cross With Roses on Outer Forearm
Style/Technique: Neo-Traditional / Illustrative
Pain Level: Low-Medium (3/10)
Session Time: 1–3 sessions
Best For: Romantic and spiritual fusion
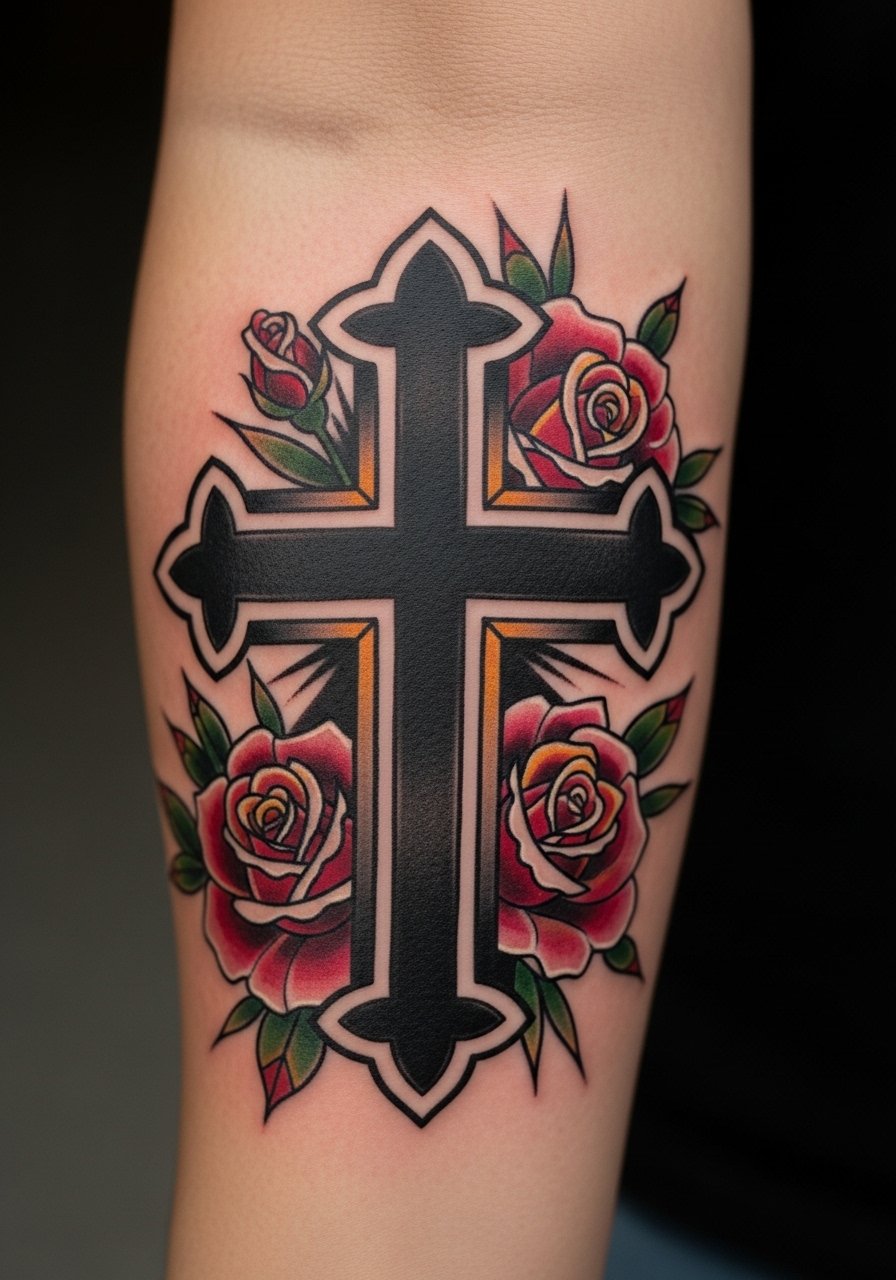
Pairing a cross with roses balances faith and love—roses soften the symbolism while keeping the cross visually central. Outer forearm placement shows the image often without being permanent face-level visible. In my experience, neo-traditional shading holds well when outlines are solid. Pain is manageable and healing predictable. Watch out for overly pale color fills; thin color spots (especially light yellows) can fade faster—ask your artist about saturation. If you’re aiming for a timeless feel, request slightly bolder outlines so the combo reads well as it ages.
5. Masculine Bold Forearm Cross
Style/Technique: Traditional / Blackwork
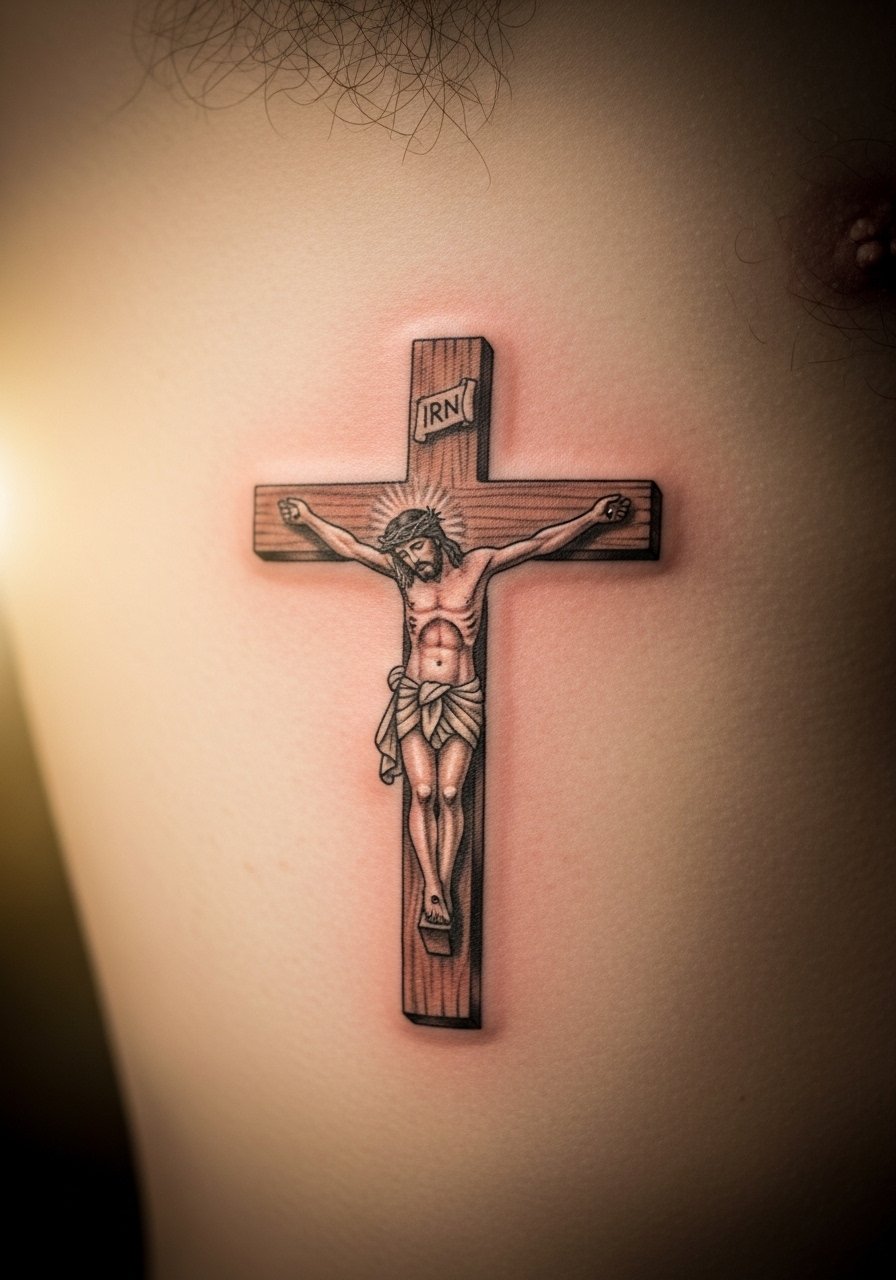
Pain Level: Low (2–3/10)
Session Time: 1 session for medium size
Best For: Visible statement piece, daily reminder
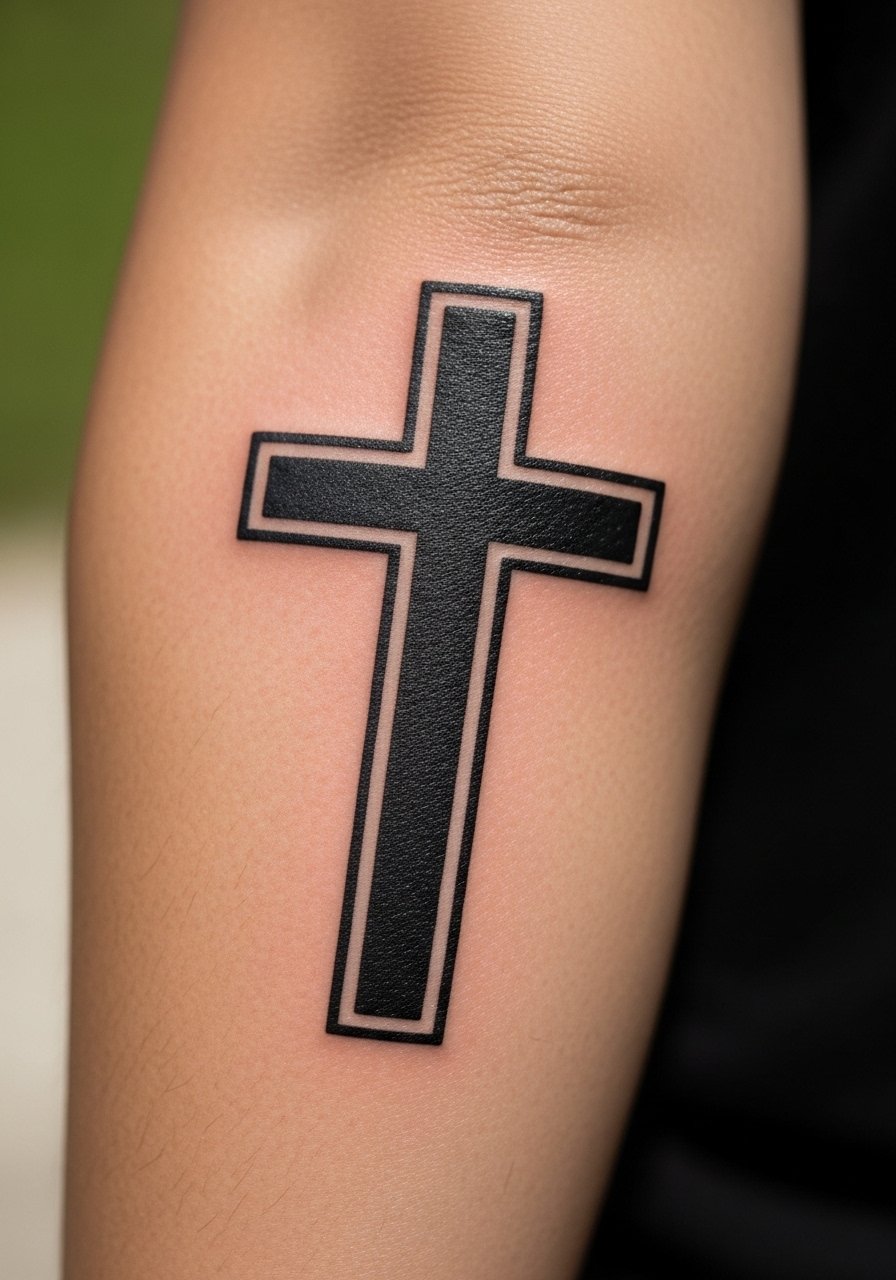
A thick-lined forearm cross reads like a quiet declaration—clean, masculine, and low-maintenance. I’ve seen these age beautifully because the heavy lines resist blowout and fading. Placement is great for visibility and for testing how a visible faith tattoo fits your daily life. Pain is lower on the outer forearm, and healing is straightforward if you avoid heavy friction. Common misstep: making the cross too narrow—wider arms benefit from proportionate scaling so it doesn’t look cramped. If you want a modern edge, ask for small geometric fills or negative-space detailing.
6. Delicate Inner Forearm Cross (Female-Friendly)
Style/Technique: Fine Line / Minimalist
Pain Level: Low (2–3/10)
Session Time: 1 short session
Best For: First cross tattoo, subtle daily symbol
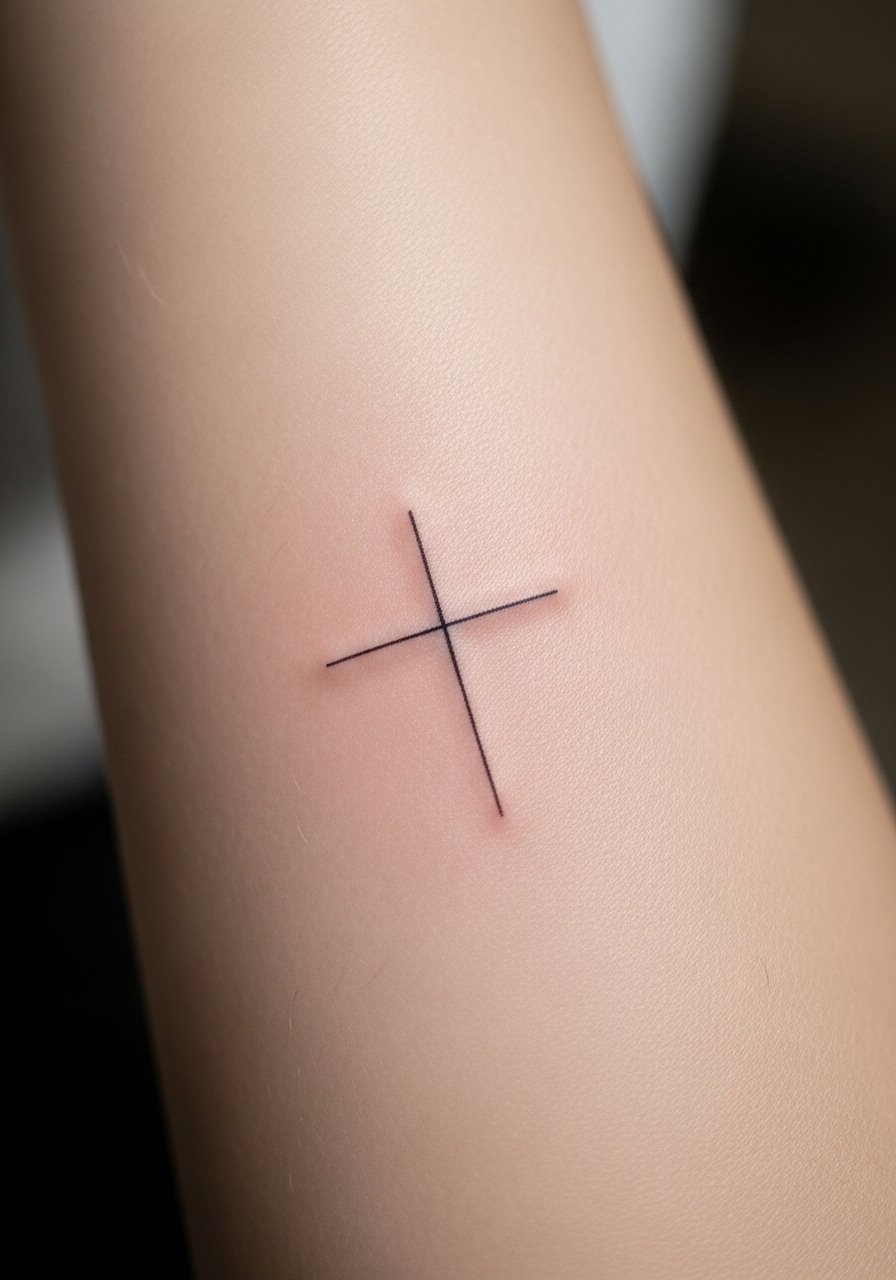
An inner forearm fine line cross is a classic starter tattoo—subtle, personal, and easy to hide with sleeves. From what I’ve observed, single-needle work looks crisp fresh but does blur slightly with time, so ask your artist to reinforce anchor points in the design. Pain is generally low and sessions are quick. The trick is sizing: too small and the central junction fills in; slightly larger and the lines settle better. I typically recommend healed examples from your artist so you can see how their fine line work ages on real skin. For women who want a delicate presence, this placement and style strike the right balance.
7. Watercolor Cross With Wildflowers on Wrist
Style/Technique: Watercolor / Illustrative
Pain Level: Low (2–3/10)
Session Time: 1–2 sessions
Best For: Feminine, soft aesthetic on wrist or ankle
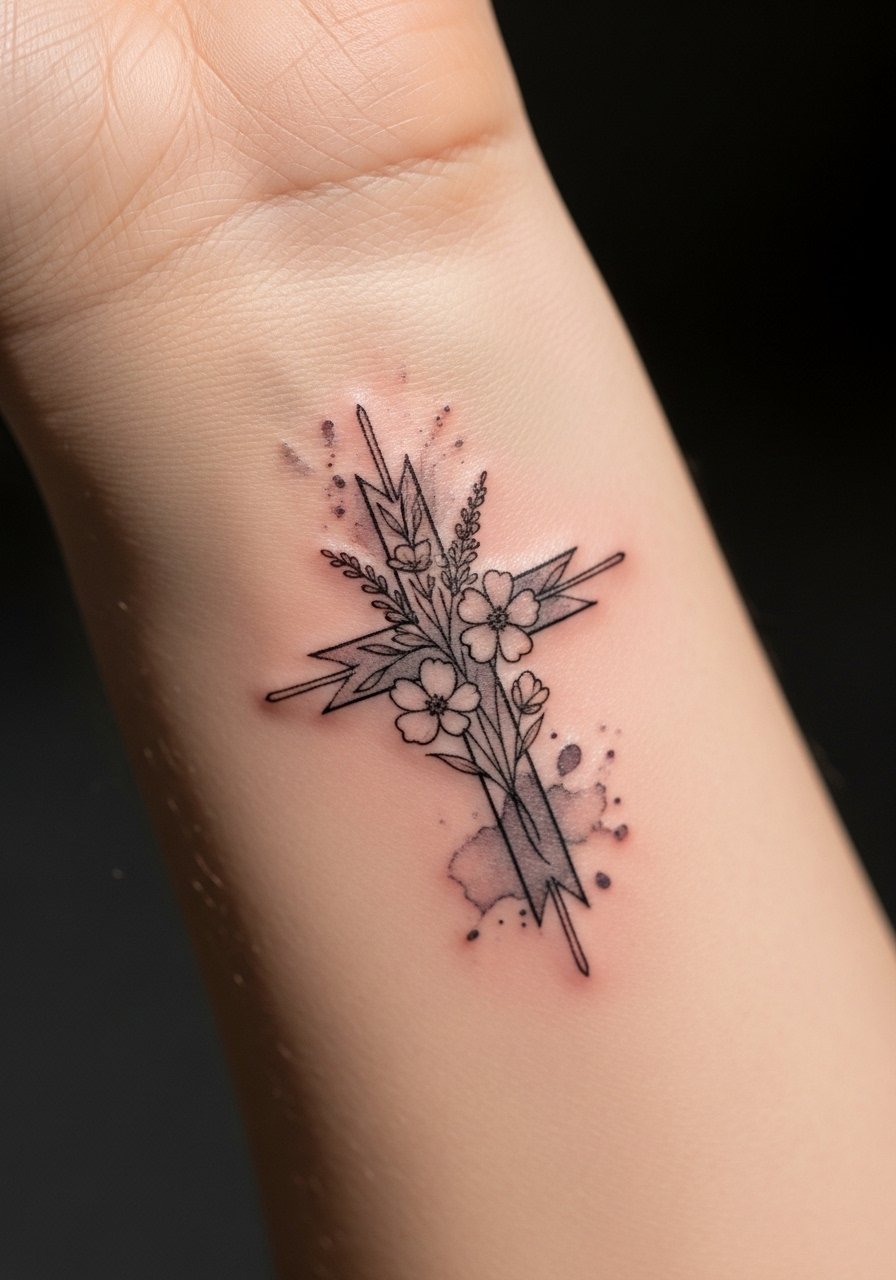
Watercolor crosses inject color and softness into a traditionally stark symbol. On the wrist or ankle, the effect is wearable and romantic, but I always warn people: watercolor fades faster in high-friction areas. From what I’ve seen, keeping a solid black outline under the color helps longevity. Wrist placement makes touch-ups more likely over the years, so go in knowing maintenance could be needed. Pain is mild, healing straightforward. Ask your artist about color saturation and how they plan for healed vibrancy; artists who do illustrative watercolor well will show you healed pieces. Avoid tiny watercolor splashes that will disappear—opt for defined color zones.
8. Lion Face Cross on Bicep
Style/Technique: Realism / Blackwork Fusion
Pain Level: Medium (4/10)
Session Time: Multiple sessions for detail
Best For: Courage-themed statement piece
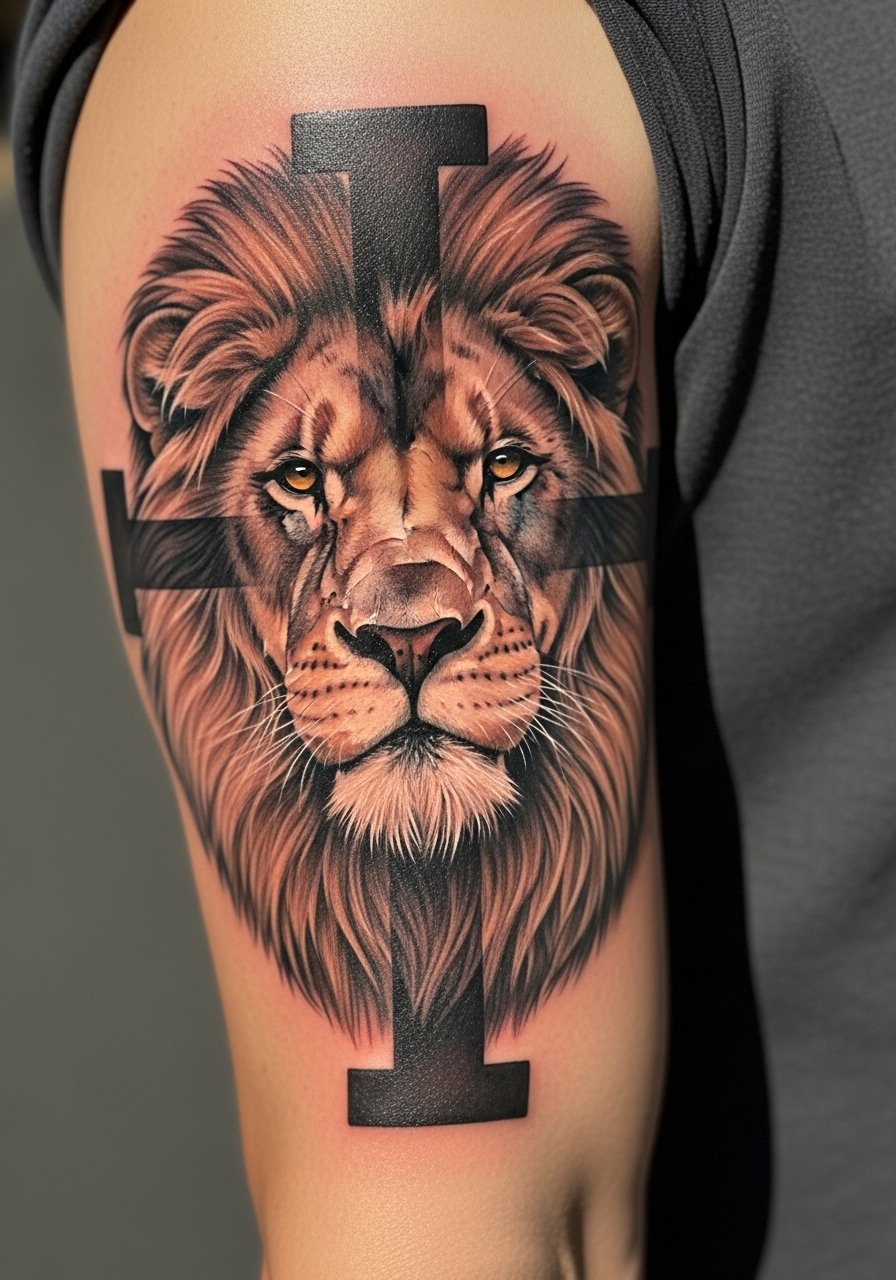
A lion-cross combo reads as courage and faith intertwined. The bicep offers a broad canvas for detailed realism blended with symbolic blackwork. From conversations with artists I follow, this fusion needs an artist who does both realistic animal work and bold graphic symbols (Roxx-style blackwork artists often pull this off). Pain on the bicep is moderate and sessions can span multiple days. Realism takes well to black and gray shading, which also ages predictably. Common mistake: cramming too many small features into the lion’s mane—keep major forms clear so the image still reads from a distance.
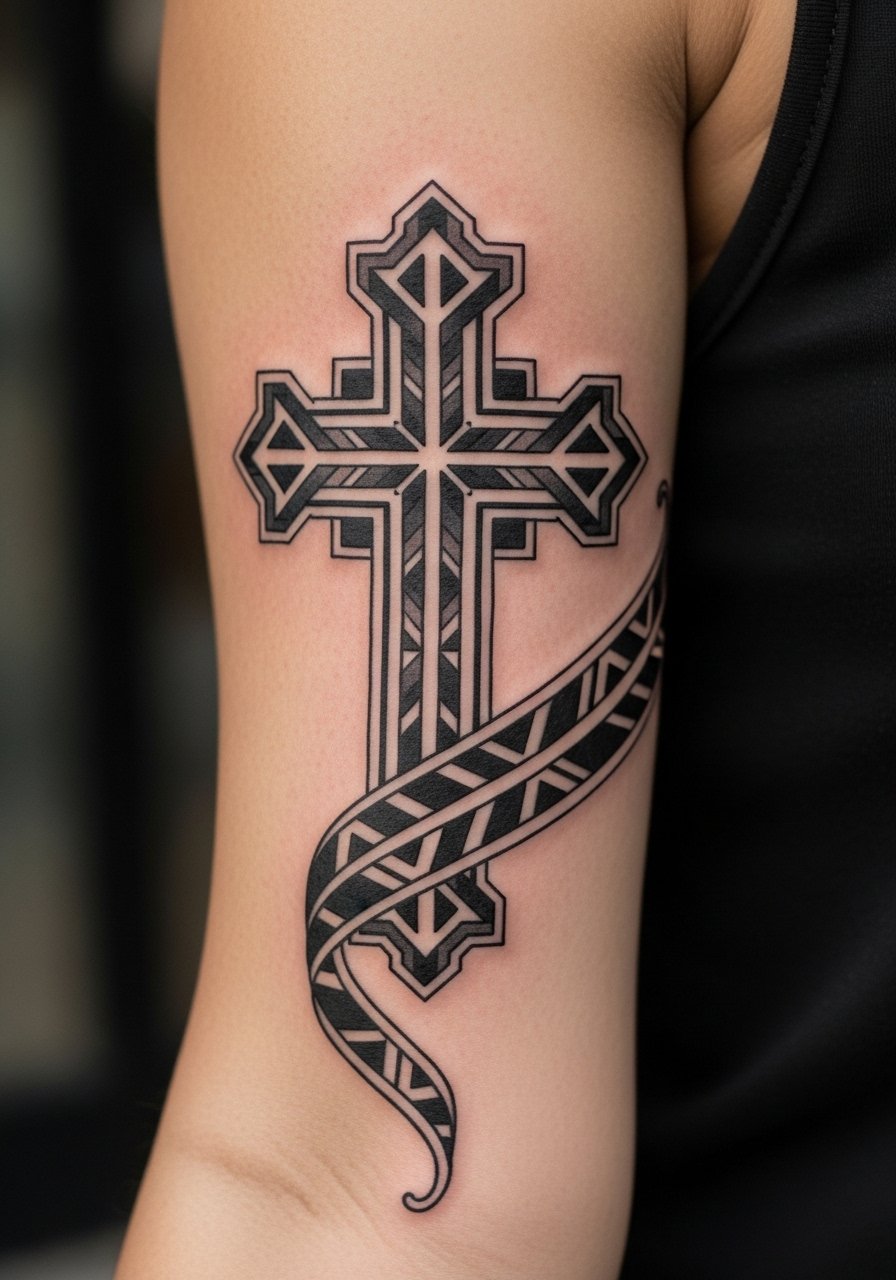
9. Tribal Pattern Cross on Shoulder Blade
Style/Technique: Tribal / Blackwork
Pain Level: Medium (4/10)
Session Time: 1–3 sessions depending on size
Best For: Heritage-forward, bold back piece

Tribal crosses borrow cultural patterns to create a powerful visual. Shoulder blade placement lets you go medium-large without being constantly visible. I’ll caution: tribal elements should be approached respectfully—bring references and be ready to discuss cultural meaning with your artist. On the shoulder blade, blackwork holds well because the skin isn’t as friction-prone. Pain is moderate but tolerable for most. To avoid regret, stay away from generic “tribal clip art” and find an artist who can adapt traditional motifs into a custom, meaningful composition.
10. Top-of-Hand Minimalist Cross
Style/Technique: Minimalist / Geometric
Pain Level: High (7–8/10)
Session Time: Short sessions, one or two
Best For: Bold visible faith statement (be prepared for visibility)
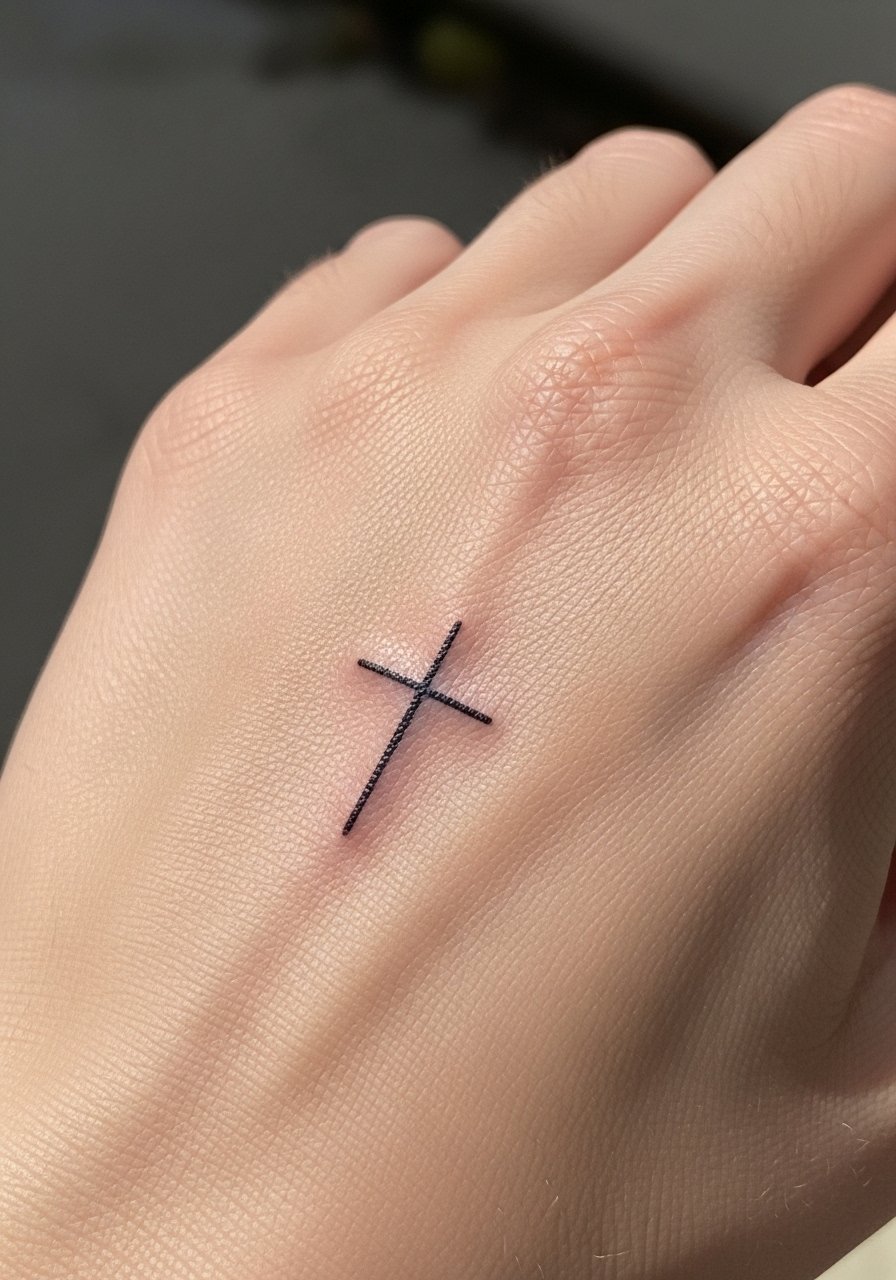
Hand tattoos are visible and raw—if you want your faith front-and-center, a minimal cross fits. Be aware: top-of-hand tattoos hurt more and the skin is more exposed, so healed texture can get patchy with time. I’ve seen minimalist hand pieces look great for a year or two and then need touch-ups; that’s normal. Common mistake: making the lines too thin—opt for slightly heavier single lines to help longevity. Ask your artist about how they handle healing on high-movement areas and whether a small Saniderm patch is recommended during the first few days.
11. Ornamental Coptic Cross on Collarbone
Style/Technique: Ornamental / Blackwork
Pain Level: Medium (4–5/10)
Session Time: 1–2 sessions
Best For: Cultural identity, subtle neck-level visibility
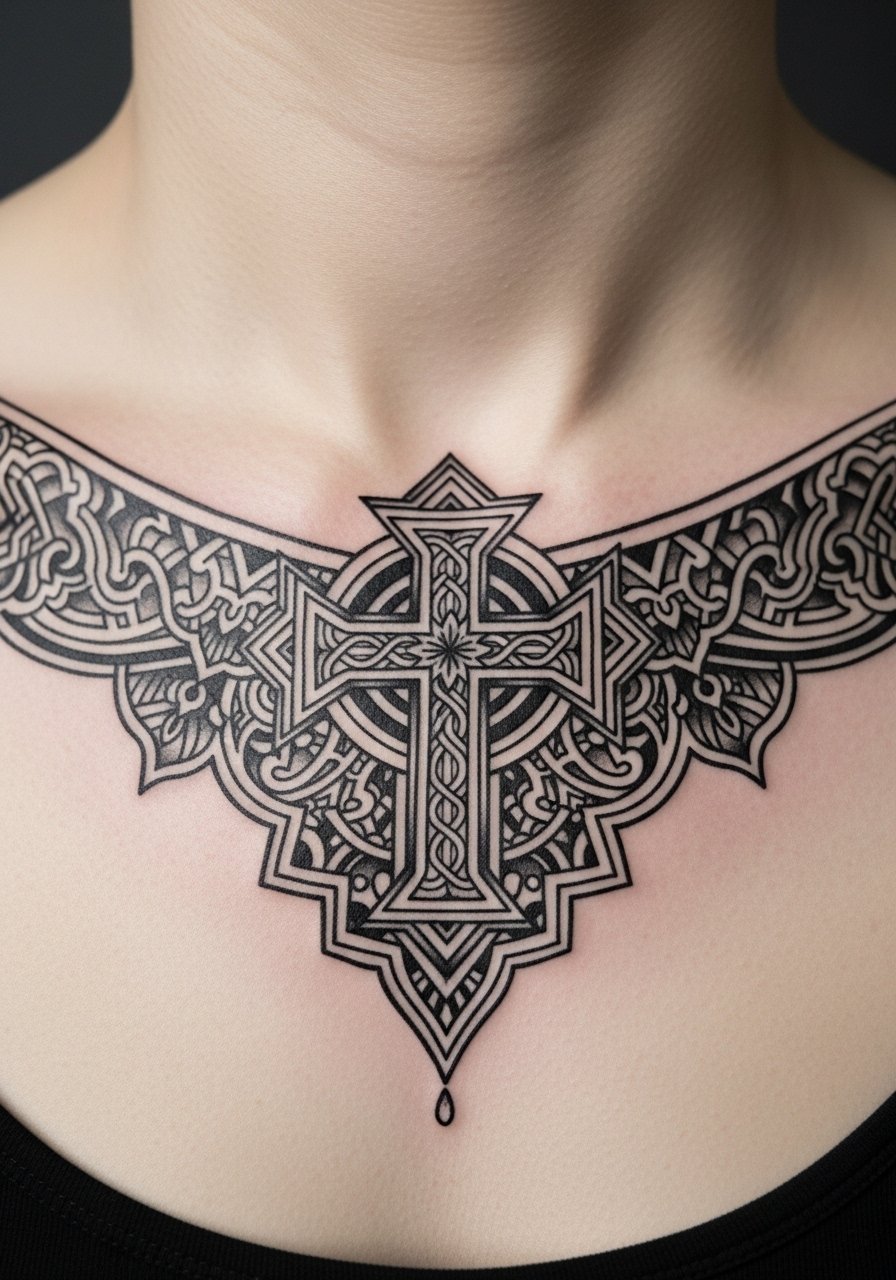
Coptic crosses carry a deep cultural lineage and look ornamental when placed on the collarbone. That spot creates a graceful line with clothing and can be discreet. Collarbone work is medium in pain—you’ll feel some bone—but the visual payoff is strong. In my experience, decorative blackwork holds up well here when the artist scales patterns properly. A common error is over-detailing; fine filigree needs room to breathe. If cultural identity is driving your design, bring family references or historical images so your artist can craft an authentic piece.
12. Chrome Heart Cross on Finger
Style/Technique: Neo-Traditional / Geometric Metallic Effect
Pain Level: High (6–7/10)
Session Time: Short, careful session
Best For: Fashion-forward, small conspicuous placement
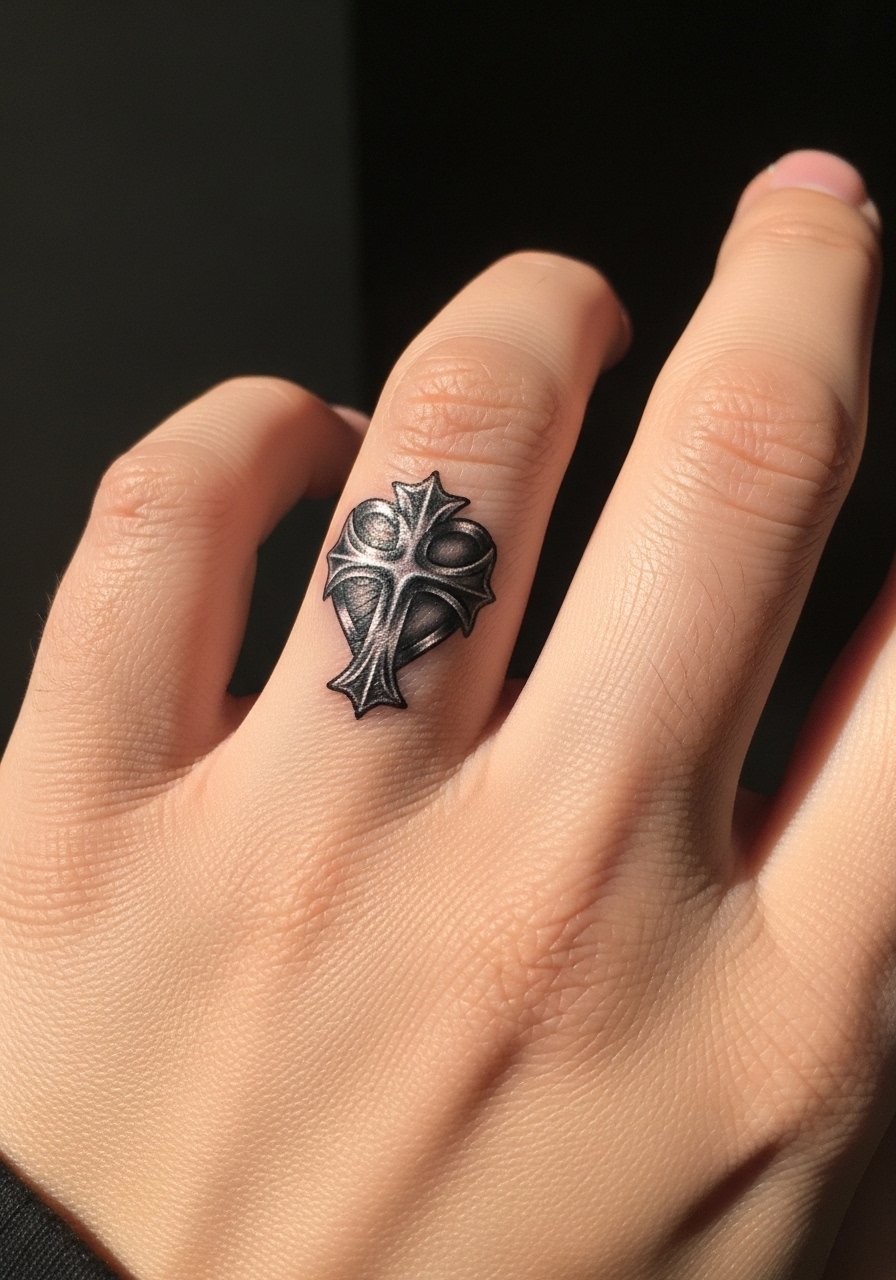
The chrome heart cross is a fashion-forward twist: think metallic shading, small scale, and finger placement. Fingers are painful and heal oddly because of constant use; that’s the trade-off for a stylish, visible mark. From what I’ve seen, geometric shading that mimics chrome looks great fresh but often needs touch-ups—ask your artist about contrast and how it heals on fingers. If you love the look, consider slight negative-space highlights so the chrome effect reads as it settles. Avoid putting too much tiny detail; fingers blur more than other spots.
13. Micro Minimalist Ankle Cross
Style/Technique: Minimalist / Single-Needle
Pain Level: Medium (4/10)
Session Time: One short session
Best For: Hidden, modest symbol for first-timers
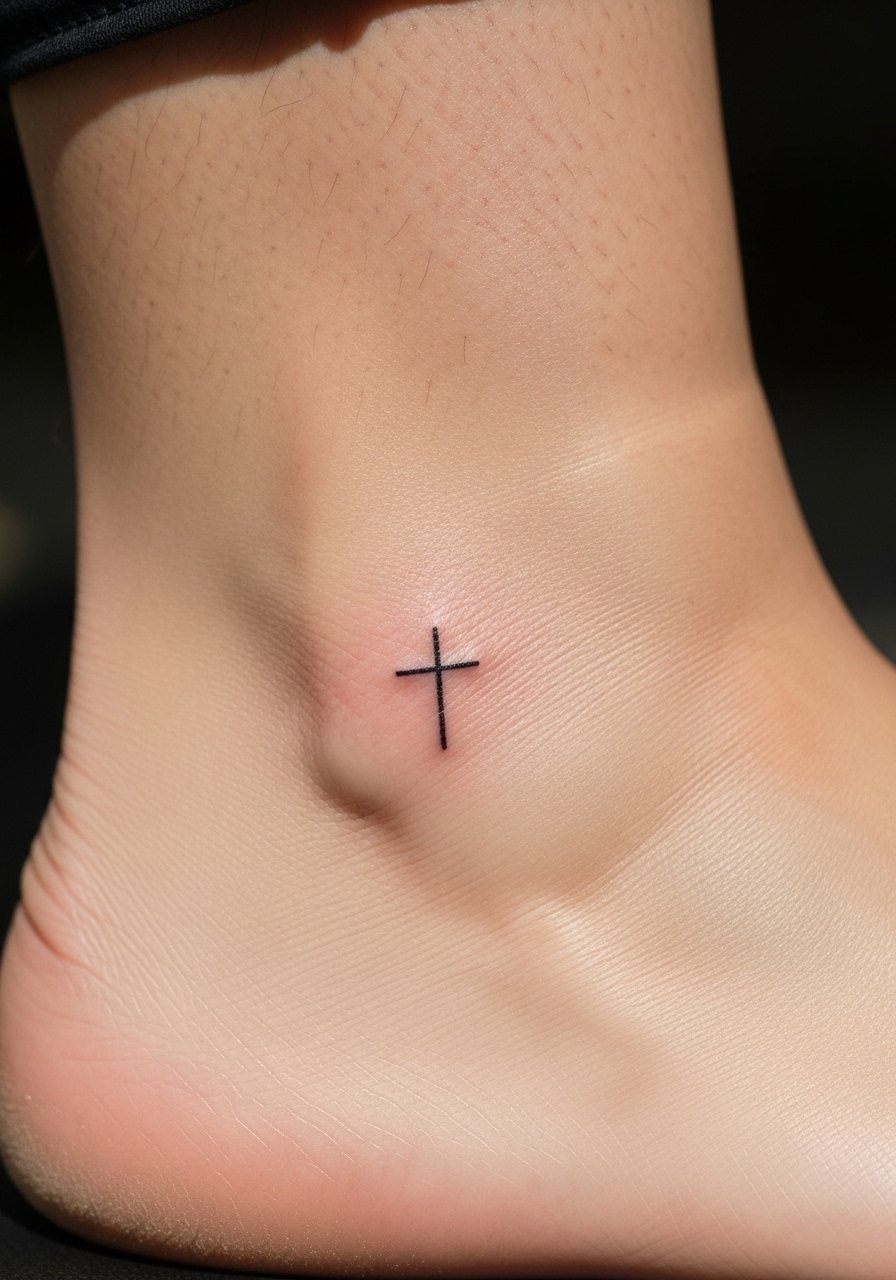
The ankle is a quiet place for a small cross—easy to hide, simple to maintain. Tiny single-needle lines can look refined, but they soften with time; I usually tell people to size up minimally so the junction remains crisp. Pain on the ankle is variable; expect some bone sensation. For aftercare, watch for rubbing from socks or shoes in the first week. This placement is ideal if you want a cross that’s intimate rather than public.
14. Stained-Glass Cross on Upper Arm
Style/Technique: Neo-Traditional / Color Realism
Pain Level: Medium (4/10)
Session Time: Multiple sessions for color depth
Best For: Vibrant, artful church-inspired piece
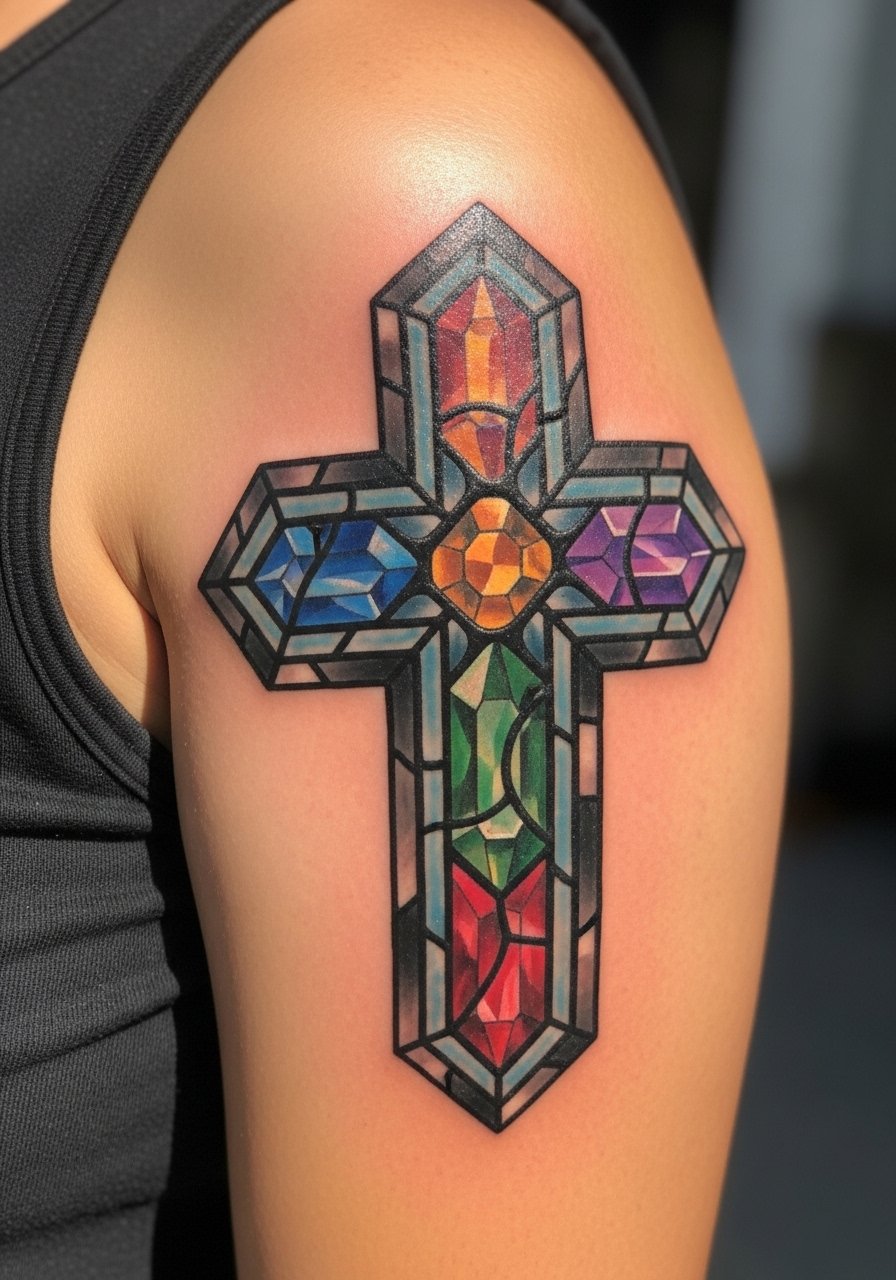
Stained-glass crosses let you wear church-window color palettes with modern tattoo craft. On the upper arm you have space for bold color saturation and it tends to age well if filled properly. I’ve noticed jewel tones like deep blues and reds maintain form if artists layer color correctly. Pain is moderate, and color pieces often require follow-up sessions to top-up saturation. Avoid pale washes that look strong fresh but fade; request healed examples from your artist. If you want an ornate look, find someone who does color realism and neo-traditional ornamentation.
15. Barbed-Wire Cross on Ribcage
Style/Technique: Realistic / Blackwork
Pain Level: High (8/10)
Session Time: 1–2 sessions depending on size
Best For: Edgier symbolism, private placement
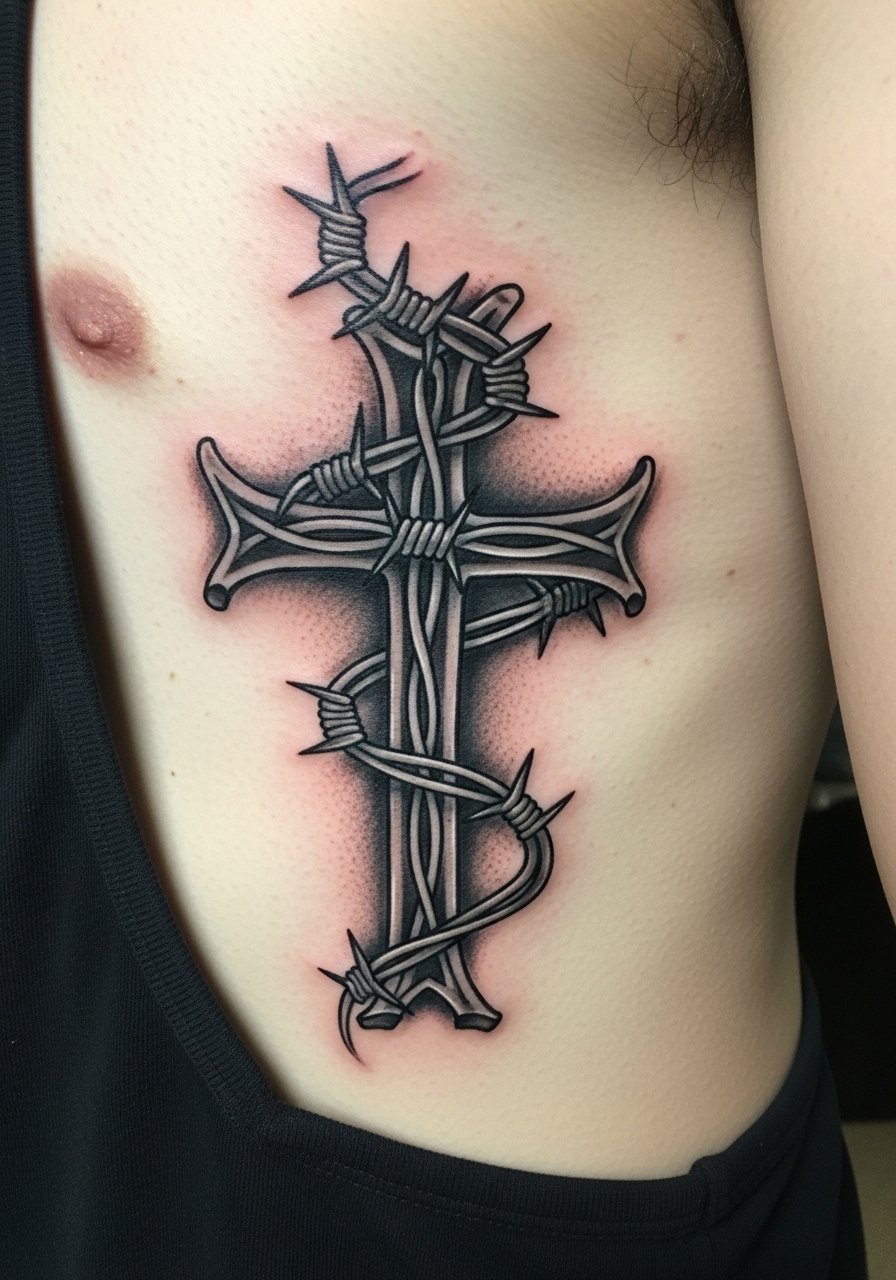
A barbed-wire cross blends grit with faith. The ribcage is a high-pain area but offers privacy and dramatic drape across the torso. From what I’ve seen, blackwork with strong contrast reads clearly on ribs, but expect a tougher healing window due to movement and clothing friction. Many people choose ribs knowing the pain is temporary and the result is personal. Common mistake: overcrowding the design with tiny barbs—keep the silhouette clean. Use breathable clothing while it heals to minimize irritation.
16. Negative-Space Cross on Sternum
Style/Technique: Geometric / Negative Space Blackwork
Pain Level: High (7–8/10)
Session Time: 1–2 sessions
Best For: Modern, sculptural chest statement
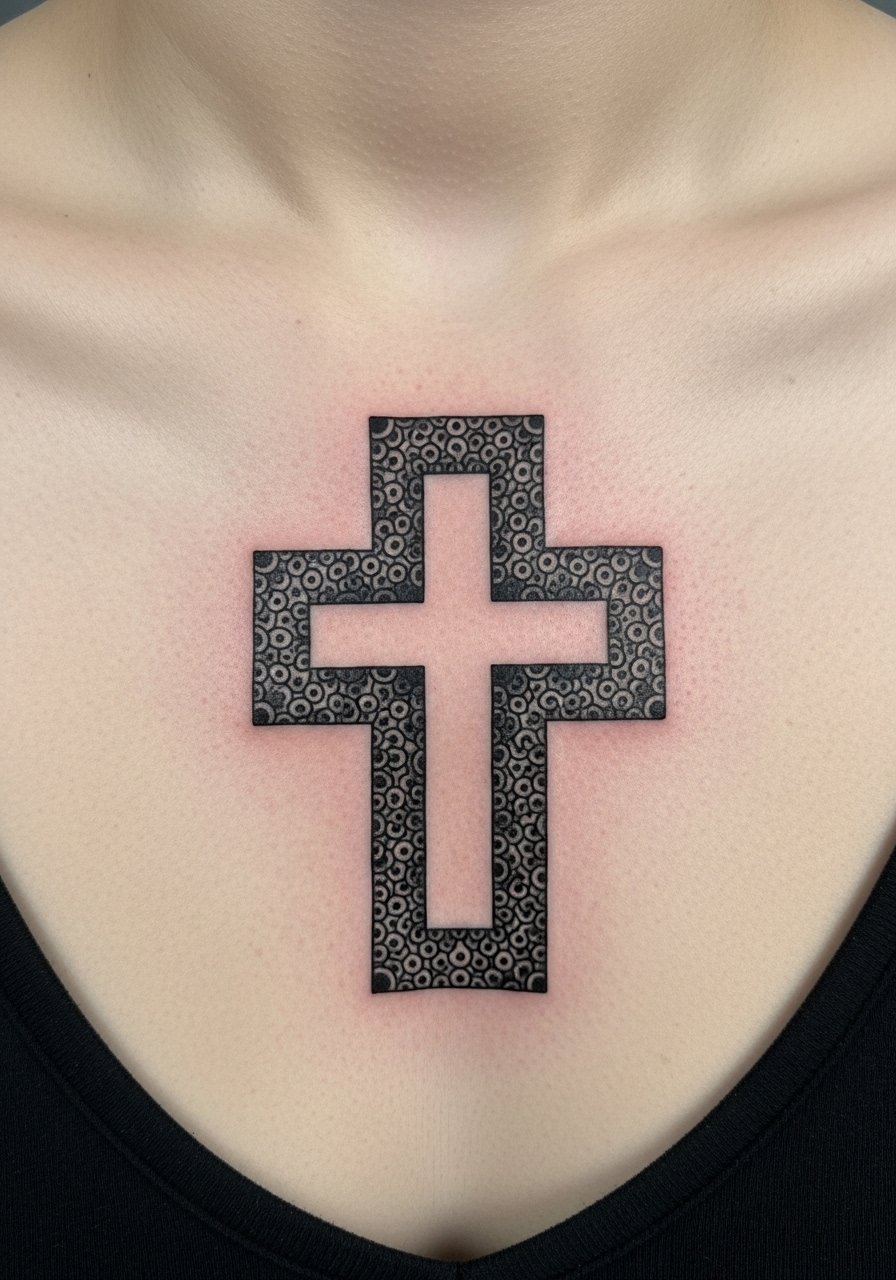
Negative-space crosses use surrounding black or pattern to reveal the symbol—striking on the sternum. Sternum work is painful but the result is sculptural and modern. I’ve noticed negative-space techniques age fairly well because the main contrast is black. The risk is bleeding into the borders if the artist isn’t precise; choose someone experienced in geometric blackwork (Boris Bianchi-style artists are good references). Expect the piece to look strong from a distance long-term.
17. Compass Cross on Outer Shoulder
Style/Technique: Neo-Traditional / Illustrative
Pain Level: Low-Medium (3–4/10)
Session Time: 1 session for medium size
Best For: Guidance symbolism, travel-inspired meaning
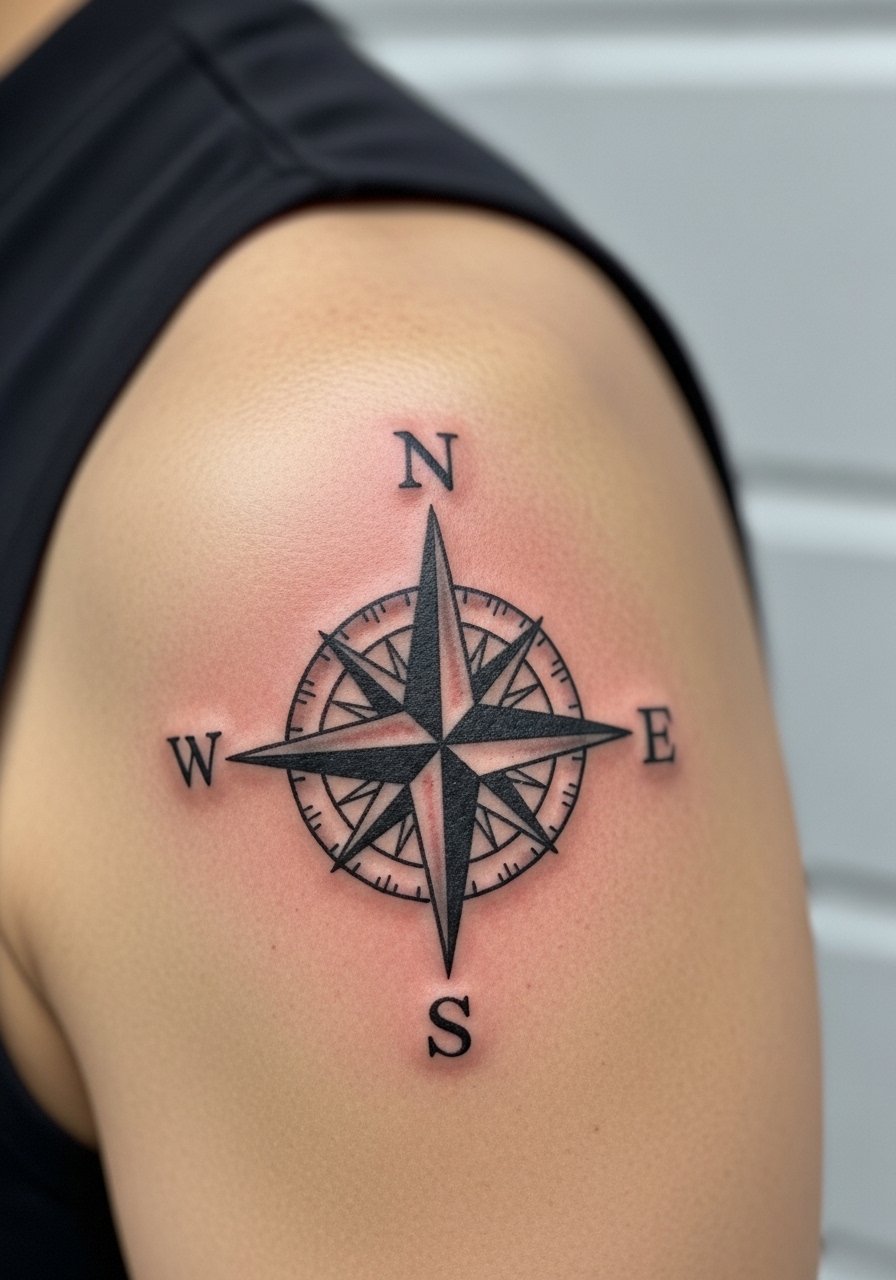
Combining a compass and cross signals direction guided by faith. Outer shoulder placement shows well in sleeveless clothing and stays relatively low-pain. I’ve seen these hybrids succeed when the compass and cross proportions are balanced so neither overwhelms. Healing is straightforward; color needs proper saturation to avoid early fading. Ask your artist about line weight to ensure the compass numbers or ticks remain legible healed.
18. Rosary-Wrapped Cross on Forearm
Style/Technique: Realism / Black & Gray
Pain Level: Low-Medium (3–4/10)
Session Time: 1–3 sessions
Best For: Devotional, tactile symbolism
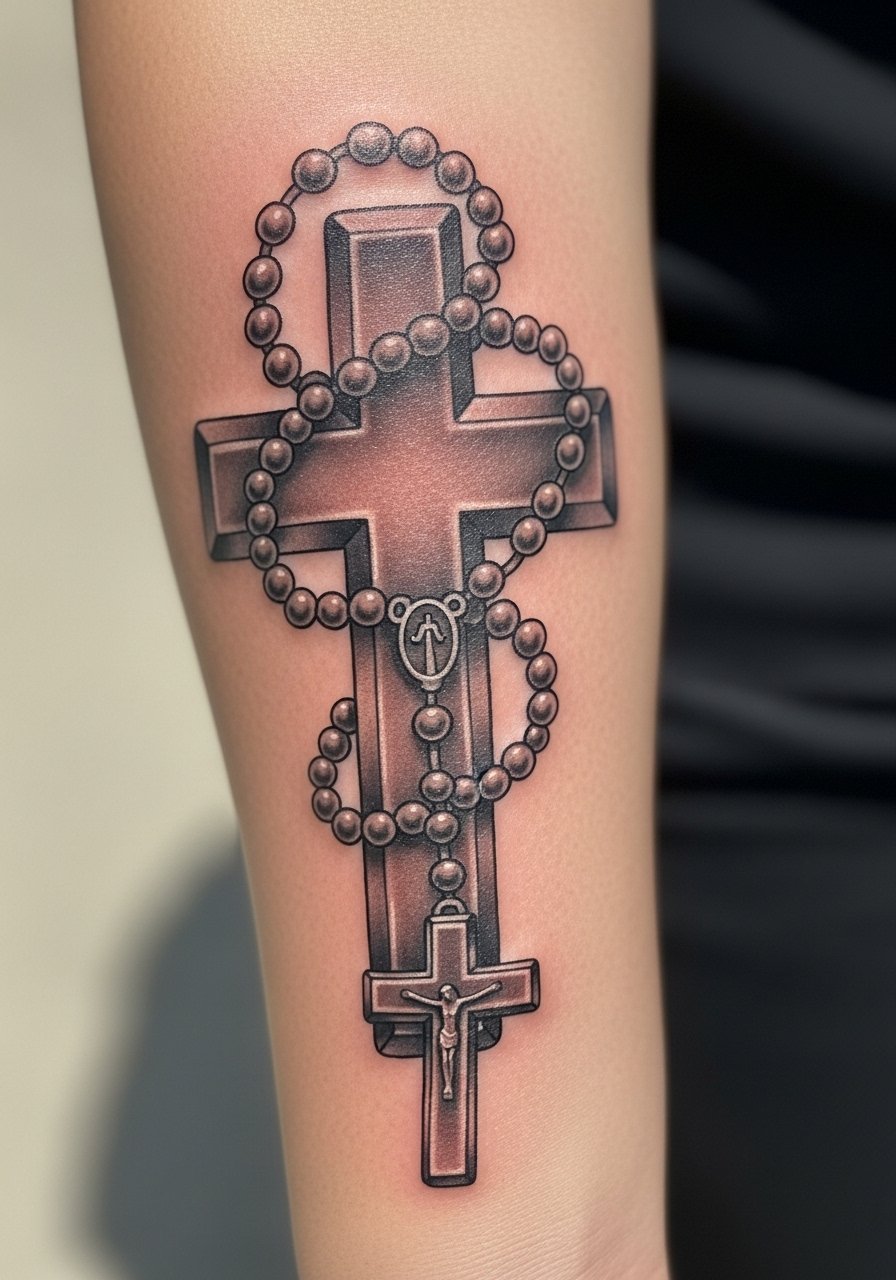
A rosary-wrapped cross is intimate and narrative—perfect for showing devotional practice. The forearm lets the beads curve naturally with arm movement and makes the rosary readable. In my experience, black and gray shading suits rosary knots and beads because it keeps the tactile look without demanding bright color maintenance. Common mistake: making the beads too small—scale ensures they read in photos and healed skin. If you want realism, ask for subtle highlights to suggest sheen on beads.
19. Geometric Blackwork Cross on Upper Arm
Style/Technique: Blackwork / Geometric
Pain Level: Low-Medium (3–4/10)
Session Time: 1–2 sessions
Best For: Bold modern statement that ages well
Geometric blackwork crosses marry crisp lines and heavy fills—great for people who want boldness without color. Upper arm placement is forgiving and the skin holds geometric edges well. I’ve noticed celebrities and style-forward clients favor this for a contemporary look that’s durable. Pain is moderate; heavy black fills can require longer single sittings. Avoid tiny tessellations that might blur; large, intentional geometry fares best over time.
20. Cross With Doves on Upper Back
Style/Technique: Neo-Traditional / Illustrative
Pain Level: Medium (4/10)
Session Time: 1–3 sessions
Best For: Peace and faith symbolism, visible with certain clothing
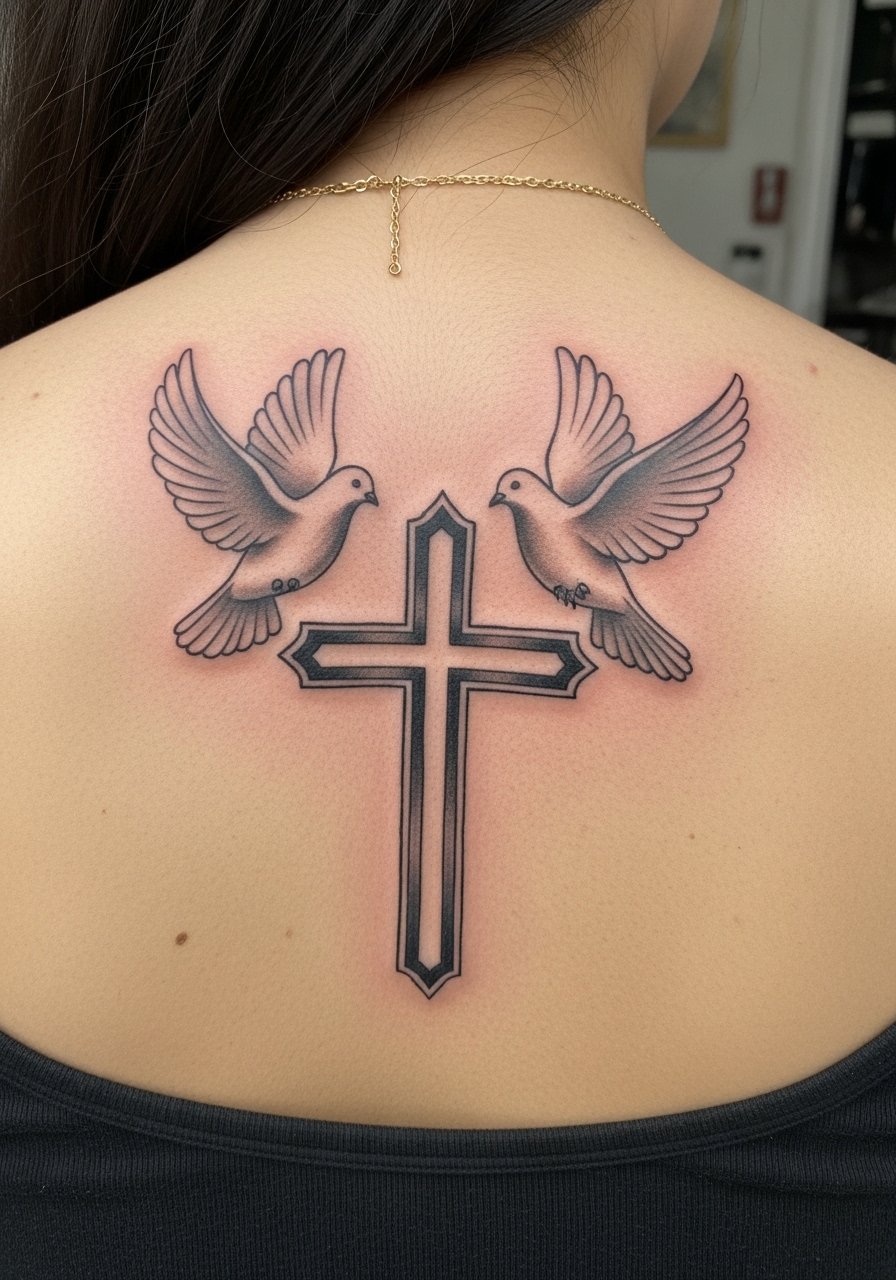
Doves around a cross read as peace and spiritual presence. Upper back provides horizontal space to balance birds in flight and a central cross. I’ve seen these compositions look timeless when the doves are given clean silhouettes against the cross. Pain is moderate on the upper back, and the area is easy to protect while healing. Don’t overcrowd the scene—let negative space let the birds feel like they’re moving around the cross.
21. Stacked Finger Crosses (Tiny Series)
Style/Technique: Minimalist / Micro-Tattoo
Pain Level: High (6–7/10 per finger)
Session Time: Short bursts across multiple fingers
Best For: Incremental collection, discreet everyday reminders
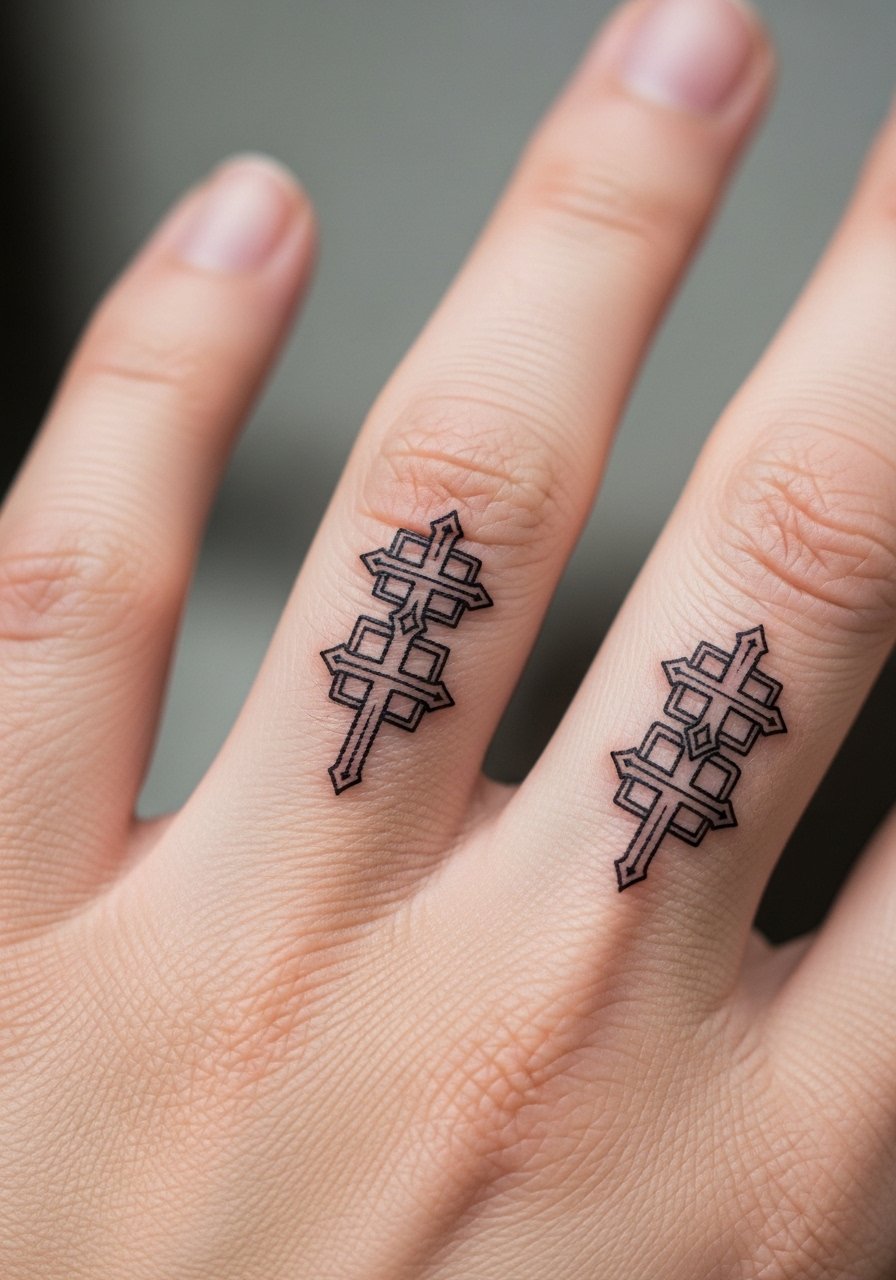
Getting small crosses on multiple fingers lets you build a collection without committing to a large piece. Fingers are tricky: they hurt, heal unevenly, and often need touch-ups. From what I’ve seen, consistency in line weight across fingers matters most—tiny thin crosses can disappear. If you’re trying this route, expect gradual work and accept that fingers often need refreshers. Many people I know planned the set over months to manage pain and healing.
22. Crucifix Realism on Ribcage
Style/Technique: Realism / Black & Gray
Pain Level: High (8/10)
Session Time: Multiple long sessions
Best For: Devotional realism, large private piece
A realistic crucifix on the ribcage is intense in both art and placement. It’s a serious commitment emotionally and physically; ribs hurt, but the result is powerful and private. I’ve talked to artists who warn that realistic human forms on ribs require experienced hands and multiple sessions. The payoff is a piece that reads like a painting on skin—just be prepared for a slower healing curve and likely touch-ups if you want long-term fidelity. Bring references and look for realism portfolios.
23. Mandala Cross Down Spine
Style/Technique: Blackwork / Ornamental
Pain Level: High (7–8/10)
Session Time: Multiple sessions for length
Best For: Spiritual centerline piece with meditative geometry
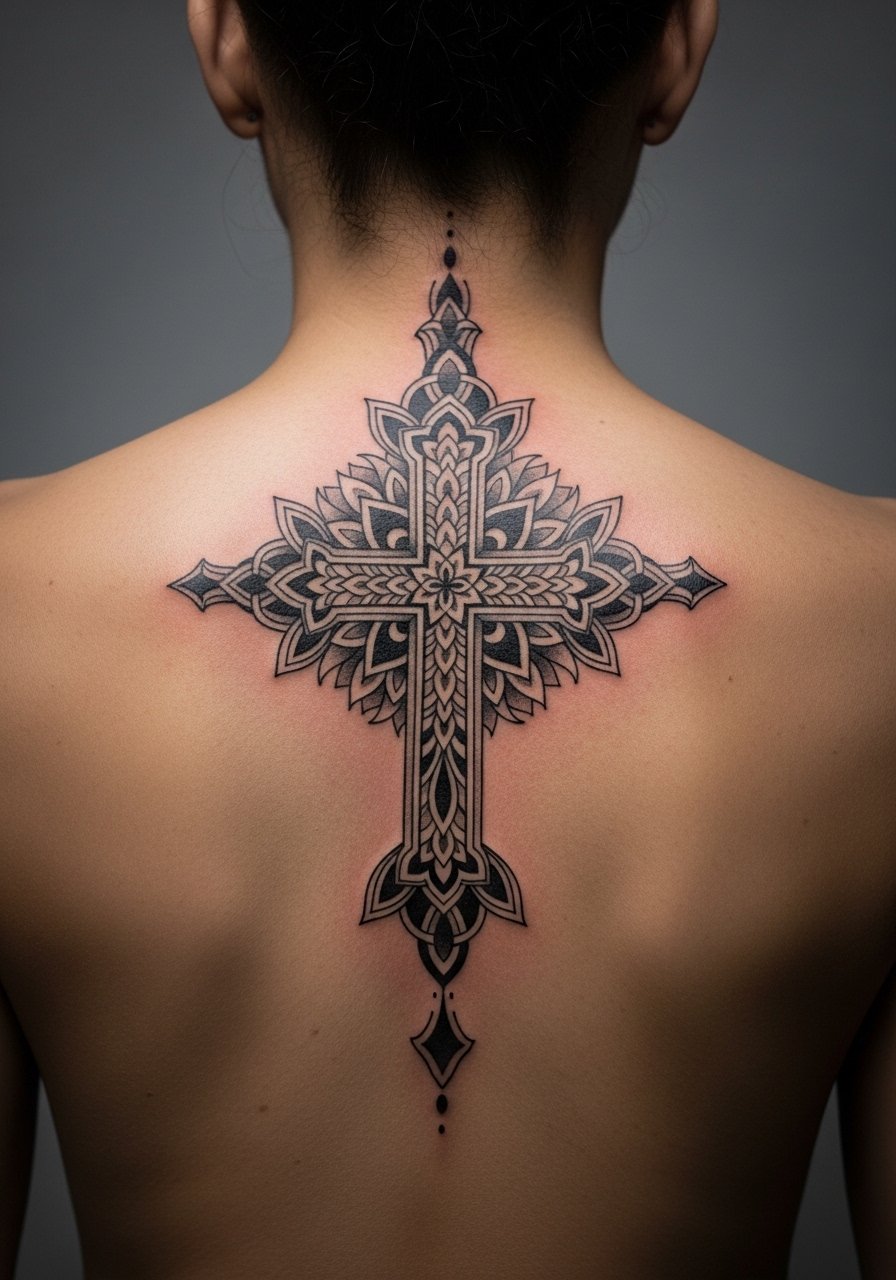
A mandala cross merges symmetry with sacred geometry—spine placement makes it meditative and centered. Spinal tattoos are painful but visually rewarding, and blackwork handles the long vertical canvas well. From conversations in tattoo groups I follow, matching symmetry is key; artists often work in multiple sittings to keep lines crisp. Avoid overly fine mandala details that will blur—focus on larger pattern modules that retain clarity as skin moves.
24. Stacked Memorial Cross With Dates on Side Rib
Style/Technique: Minimalist / Blackwork
Pain Level: High (8/10)
Session Time: 1–2 sessions
Best For: Memorial inscriptions and intimate tributes
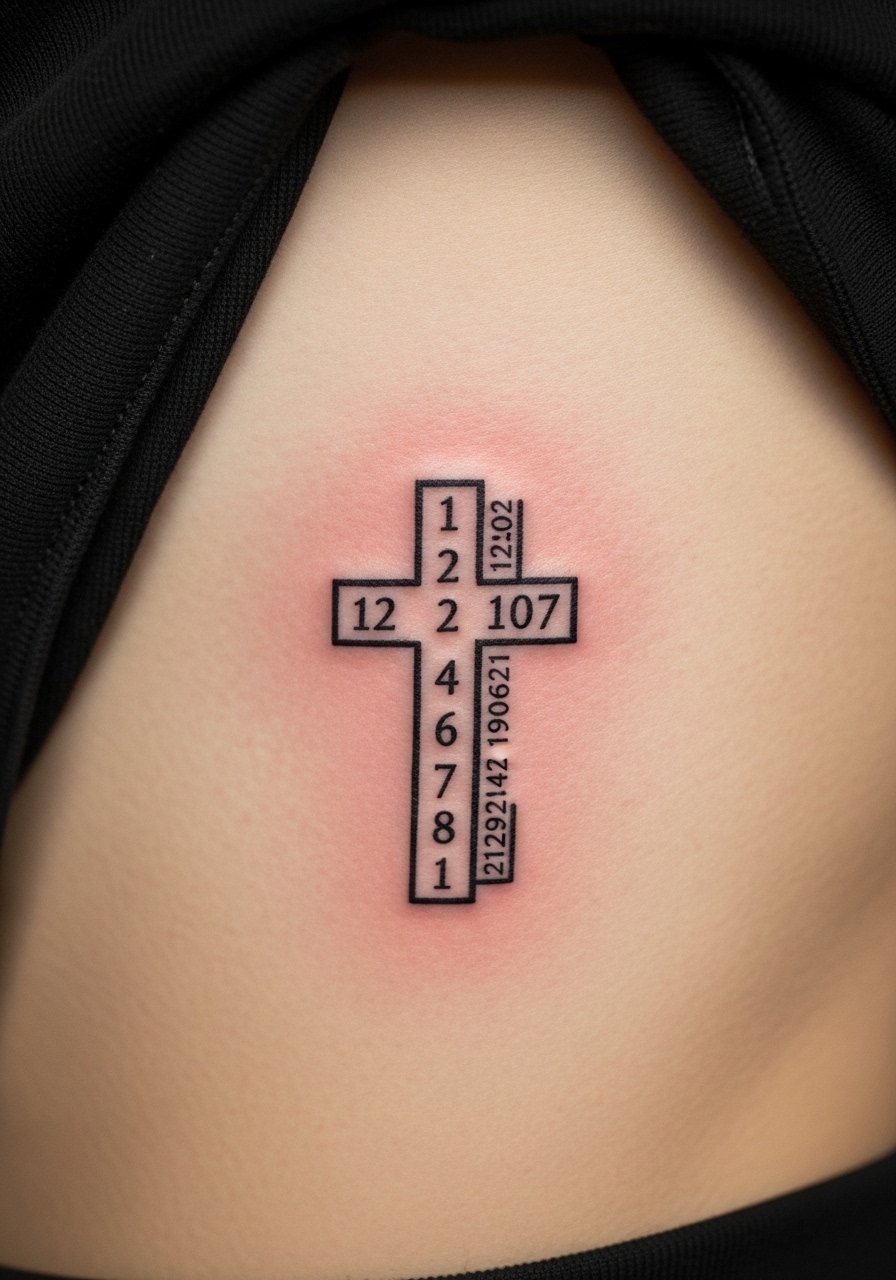
Stacked crosses with dates are a restrained memorial option that’s personal and often hidden. Side rib placement is intimate but painful; people choose it knowing the meaning outweighs the discomfort. I recommend slightly larger numerals than you’d expect so they remain legible as skin ages. Keep the crosses simple and the font clear—ornate scripts can become impossible to read after a few years without touch-ups.
25. Crowned Cross on Inner Bicep
Style/Technique: Neo-Traditional / Black & Gray with Accent Color
Pain Level: Low-Medium (3–4/10)
Session Time: 1–2 sessions
Best For: Symbolic of sovereignty and faith combined
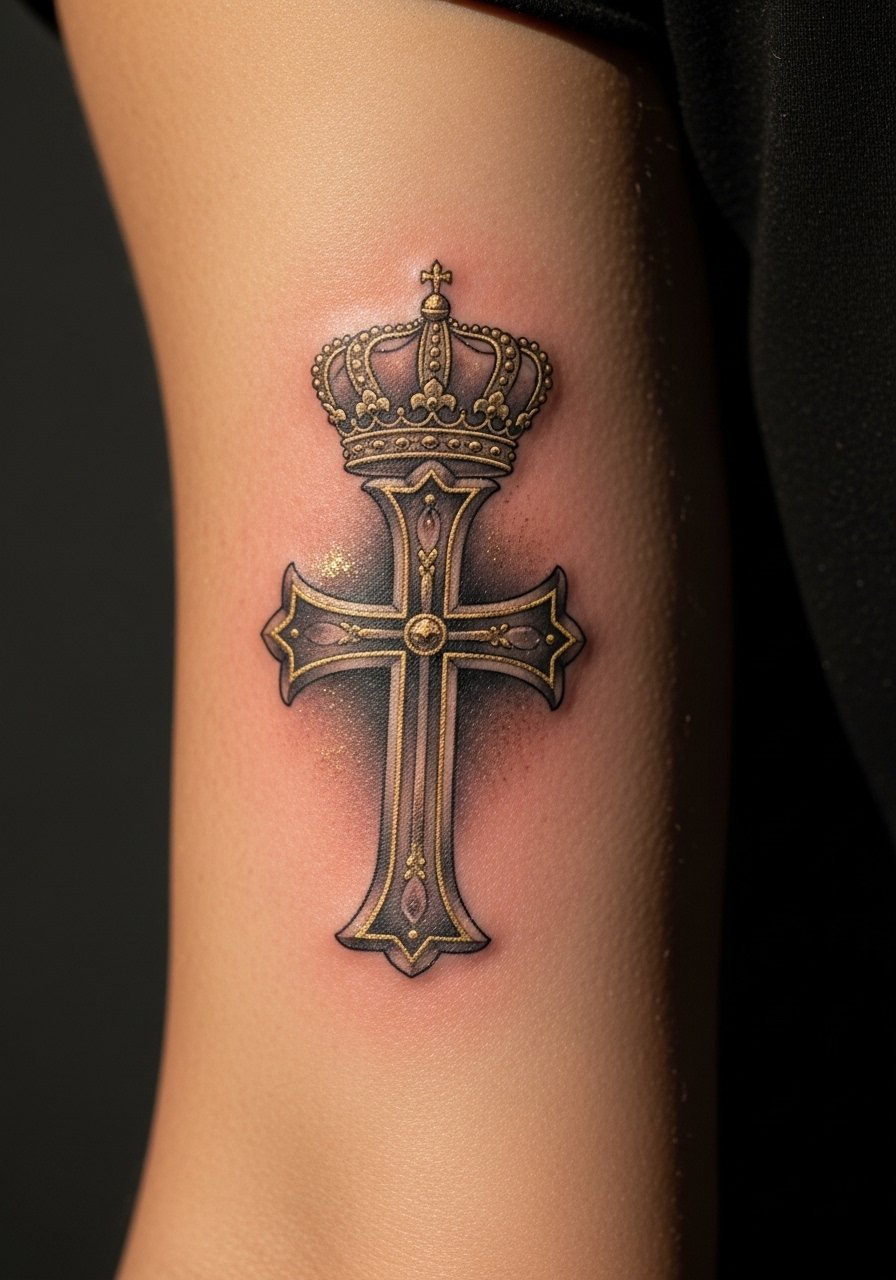
A crowned cross is a classic Christian symbol of kingship and sacrifice. Inner bicep placement keeps it personal but accessible for viewing. In my experience, inner bicep heals well and is low- to medium-pain, with color accents like gold needing careful saturation. Ask your artist about how metallic tones age on your skin tone—some colors need stronger layering to remain visible.
26. Spine-To-Sacrum Vertical Cross
Style/Technique: Blackwork / Linear Realism
Pain Level: High (8–9/10)
Session Time: Multiple long sessions
Best For: Dramatic spiritual path piece
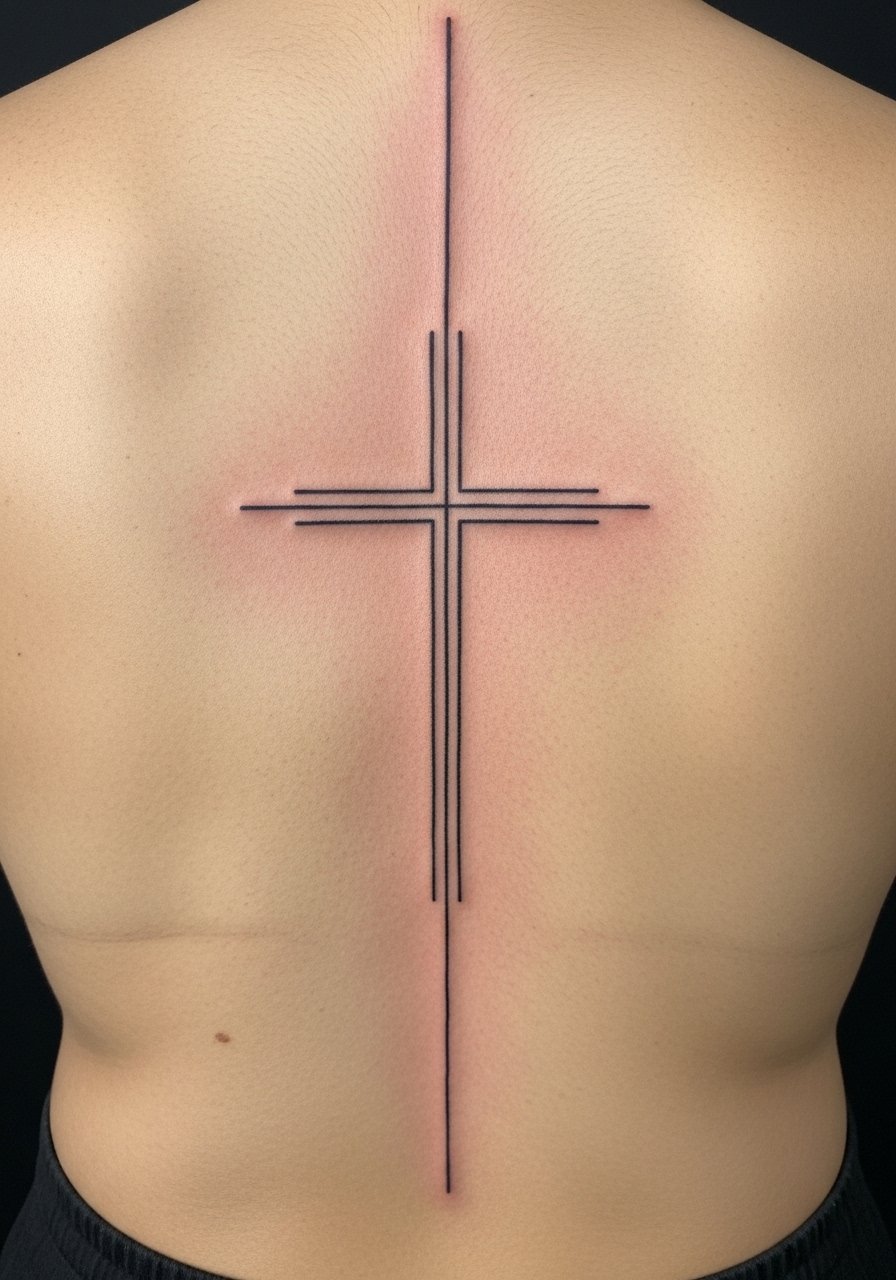
A full spine cross is a commitment both visually and in healing. The linear nature suits bold blackwork and looks powerful when aligned with the body’s center. Pain is significant, and multiple long sessions are common. From what I’ve noticed, people who choose this want a transformative piece; be ready for wardrobe adjustments during healing and realistic expectations about touch-ups on such a taxed area.
27. Small Heartbeat Cross on Rib
Style/Technique: Minimalist / Micro-Realism
Pain Level: High (7–8/10)
Session Time: One short session
Best For: Subtle memorial or life-affirming symbol
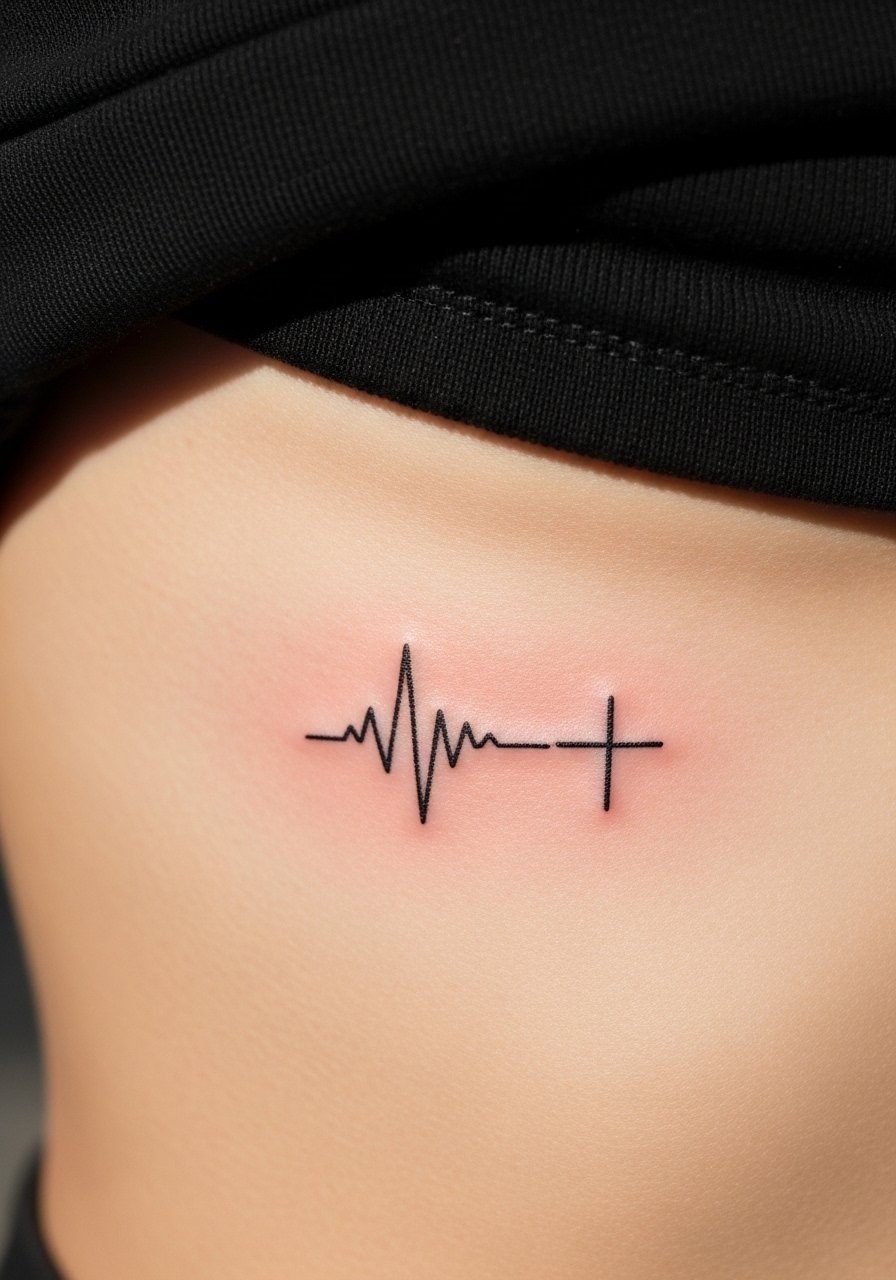
A heartbeat line leading to a cross is a poetic memorial motif that reads well on the ribs or side. It’s tiny but meaningful. Rib placement hurts more, but the intimate scale keeps sessions brief. I’ve seen this design done simply and effectively; avoid overly thin lines that disappear—go slightly bolder at junction points. Artists who do micro-realism can show you healed examples to set expectations.
28. Face Cross (Subtle Temple or Cheek)
Style/Technique: Minimalist / Single-Line
Pain Level: High (8–9/10)
Session Time: One precise session
Best For: Ultimate visible commitment; think carefully
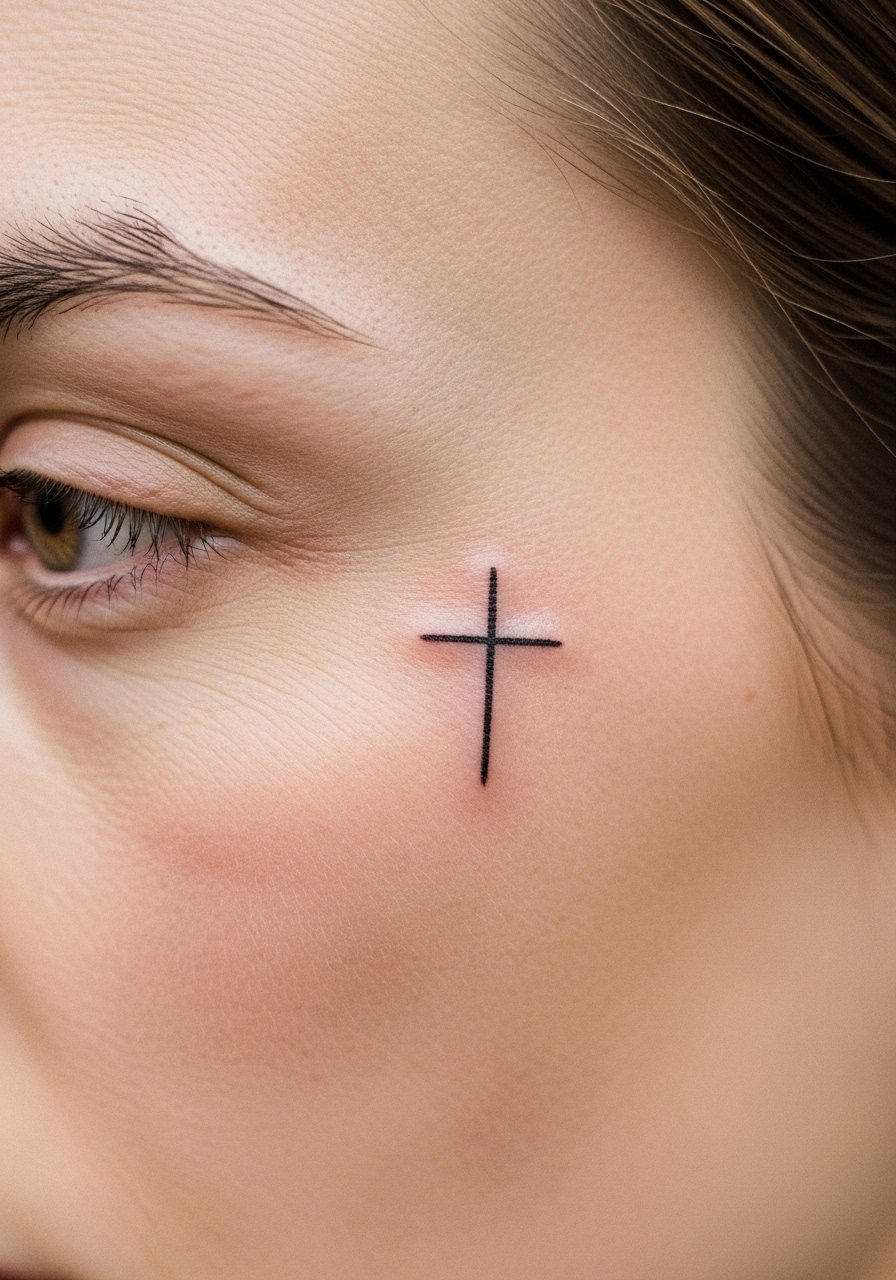
Face crosses are the boldest statement on this list. I include it because some people want a lifelong visible badge of faith; others should know the social and professional implications. Pain and healing are intense and visibility is permanent—I've seen both deeply meaningful outcomes and understandable second thoughts. If you’re considering this, sit with it for a long time and review healed examples on similar skin tones. Many artists will require serious consultation and proof of commitment before inking the face.
29. Patchwork Cross Collection (Multiple Small Pieces)
Style/Technique: Patchwork / Mixed Styles (Fine Line + Blackwork)
Pain Level: Varies by placement (2–8/10)
Session Time: Incremental sessions over months/years
Best For: Building a personal story across the body
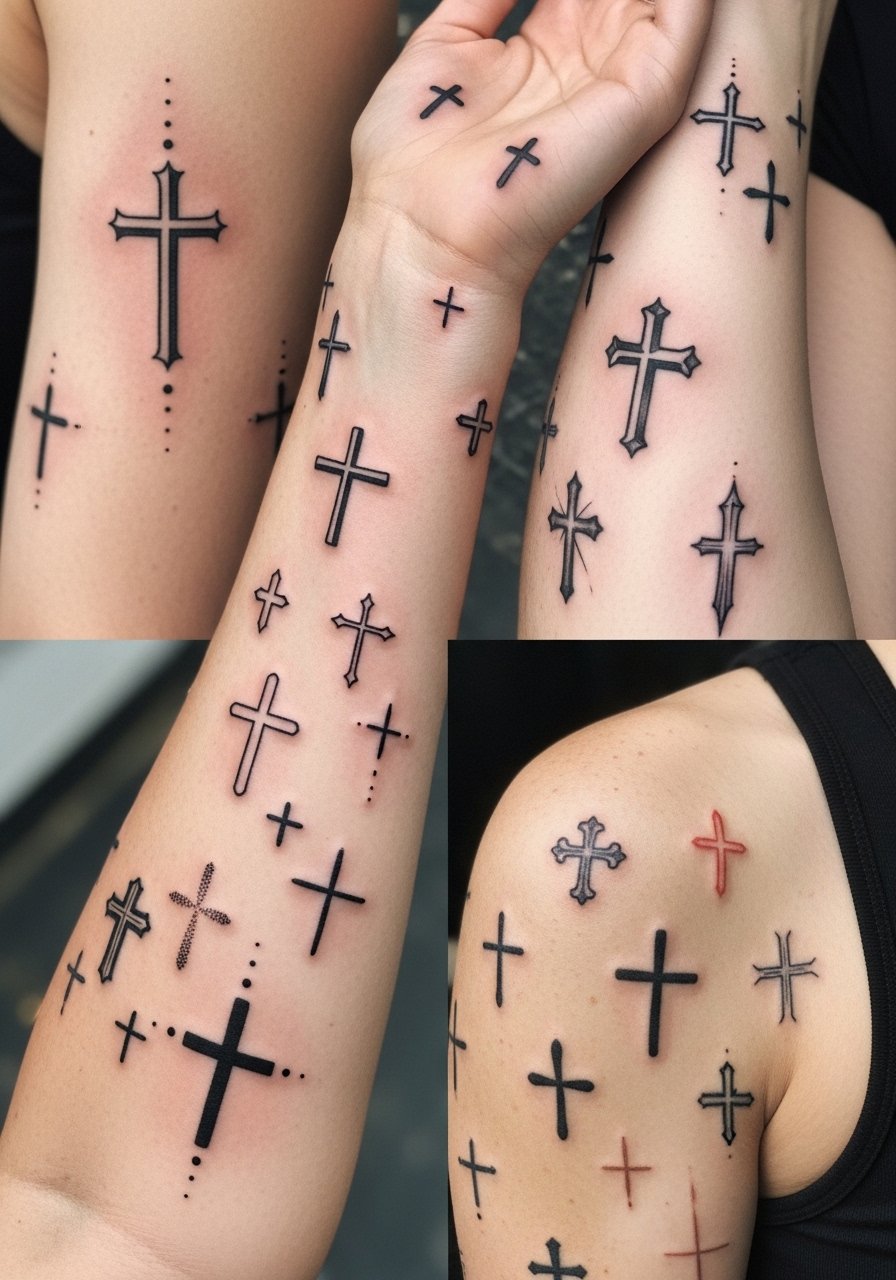
Patchwork collections let you build a faith narrative slowly—tiny crosses in different styles and placements added over time. I love this approach because it removes pressure to “get it all right now.” Pain and healing vary by spot, and you’ll learn what styles hold best on your skin. One common mistake is inconsistent scale; try to keep a visual rhythm so the collection reads like a cohesive set. Artists who do both fine line and blackwork can help plan future placements to balance the overall look.
Tattoo Prep and Aftercare Essentials
Aftercare Essentials:
- Aquaphor Healing Ointment, 14oz tube — Industry staple for first 3–5 days
- Saniderm Transparent Adhesive Bandage, 6-inch roll — Second-skin option many artists recommend
- CeraVe Fragrance-Free Moisturizing Lotion, 12oz — Daily moisturizer post-peel
- Dr. Bronner's Unscented Castile Soap, 32oz — Gentle cleaning during early healing
- Hustle Butter Deluxe, 2oz — Vegan aftercare option for healed skin
- Mad Rabbit Tattoo Balm, 2oz — Long-term moisturizer to keep color vibrant
Before Your Appointment:
- Tattoo Numbing Cream with 5% Lidocaine, 30g — Ask your artist before use
- Tattoo Stencil Transfer Paper, 11×8.5in pack — For home mockups and consultations
Long-Term Maintenance:
- SPF 50 Sunscreen Stick for Tattoos, 1oz — Daily sun protection to prevent fading
- Hydrocolloid Bandages (Large) — Good for small scabs or spot protection
- Aftercare Travel Kit (soap + balm + ointment) — Handy for trips and touch-ups
Optional Comfort & Tools:
- Tattoo Numbing Spray — For touch-ups or very sensitive areas
- Disposable Razors for Prep, Pack — For last-minute area prep if instructed
- Cooling Gel Pack (reusable) — For post-session comfort
Frequently Asked Questions
Q: How bad does a tattoo actually hurt?
A: Pain depends on placement and your tolerance. Forearm and outer shoulder are among the kinder spots; ribs, sternum and hands are significantly sharper. I tell friends to think of it as intense scratching that comes in waves—you can take short breaks. For very sensitive spots, ask about tattoo numbing cream with lidocaine but always check with your artist first.
Q: What if I regret my cross tattoo later?
A: Take time before committing, try temporary tattoos, or start with a small cross in a concealable spot. I’ve seen people add to or integrate a cross into a larger composition when their style evolves. Laser removal exists but it's a long process—so sitting on a big visible idea for months is a smart move.
Q: How do I keep my cross tattoo from fading?
A: Sunscreen is non-negotiable—use an SPF 50+ stick on healed ink daily. From what I’ve gathered, UV is the number-one fading culprit. Also keep skin moisturized with a fragrance-free lotion (CeraVe works well) and avoid abrasive friction in the area while it heals.
Q: When can I exercise after getting inked?
A: Wait at least 48–72 hours and longer for large or high-movement placements (sleeves, ribs). Sweat can irritate a fresh tattoo and increase risk of infection. I usually tell people to skip heavy gym sessions for a week and avoid hot tubs until surface healing is complete.
Q: Should I get a small cross first to test pain?
A: Only if you actually want that small design—don’t use a meaningless piece just to “see how it feels.” Pain varies more by placement than size; a tiny wrist cross can hurt more than a larger outer-arm piece. If you’re nervous, pick a low-pain spot like the outer forearm.
Q: How long does a tattoo take to heal fully?
A: Surface healing is typically 2–3 weeks; full healing can take 2–3 months. The first week is critical—keep the area clean with a gentle soap like Dr. Bronner's Unscented Castile Soap and use a light layer of Aquaphor or recommended balm. Expect peeling and dull-looking color before everything evens out.
Q: Do tattoos look different on different skin tones?
A: Yes. Black and gray typically read clearly across tones; some bright colors will appear more muted on deeper skin. I always recommend asking to see healed examples on your skin tone and discussing color saturation with the artist—artists like Valerie Vargas and others who work across tones can show you comparable healed pieces.
