
Someone I know spent months bookmarking collarbone designs before realizing the real problem was practical: pain, longevity, and whether a script would blur on that curved bone. I visited five shops across Brooklyn and talked with an artist who does fine line work. These 12 collarbone tattoos balance meaning with how they age, what to tell your artist, and the real tradeoffs to accept before booking.
1. Floral vine following the collarbone curve
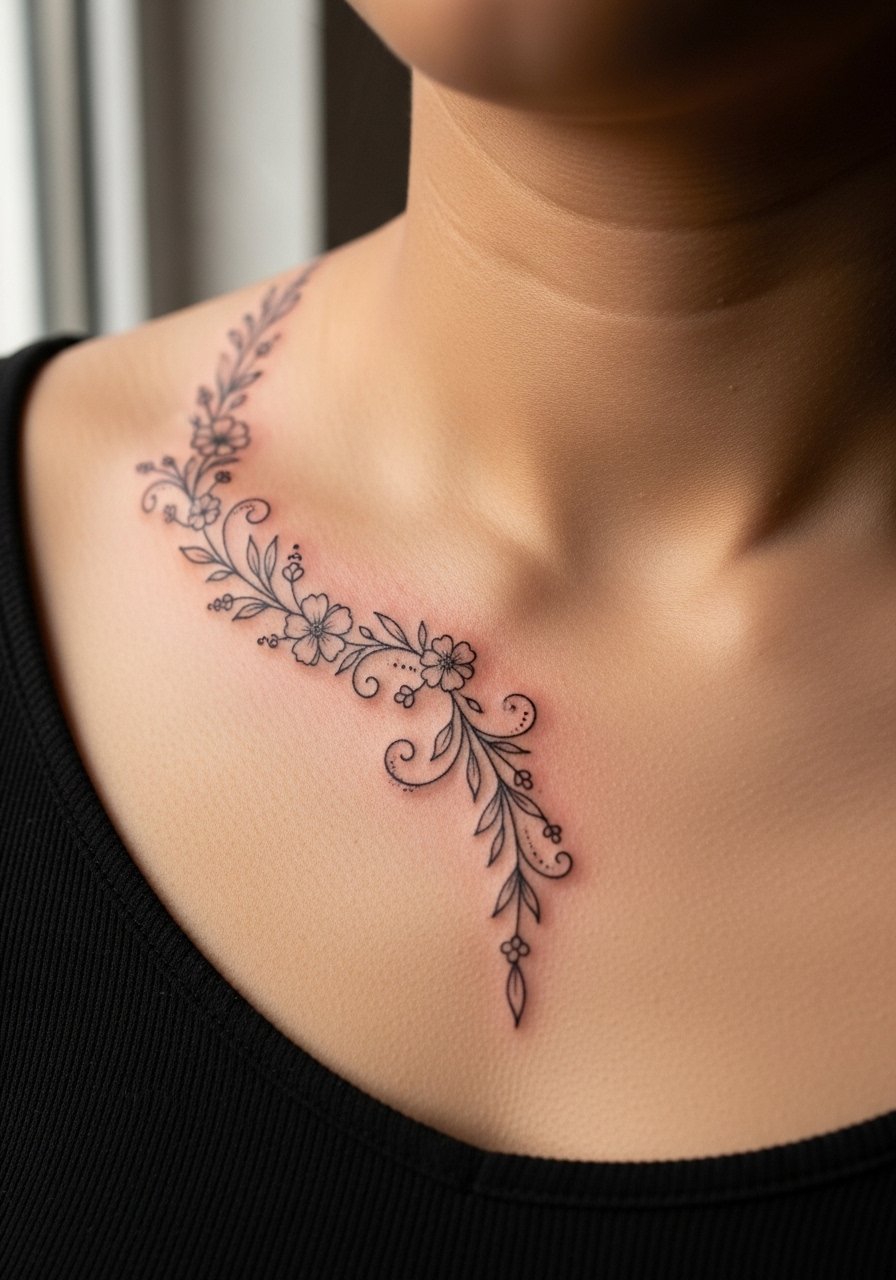
Someone I know picked this when they wanted a piece that moves with clothing. Ask your artist to map the vine so it hugs the bone without crossing the highest ridge. That prevents ink pooling that leads to blurred script or crowded petals at year two. Expect a short session with moderate sting when the needle hits the bone, and schedule a touch-up at six to twelve months for any lost linework. A common mistake is asking for too many tiny petals in a 2-inch span. If you want future expansion toward a sleeve, tell the artist where you plan the next piece so line directions match.
2. Minimalist triangle cluster near the shoulder dip
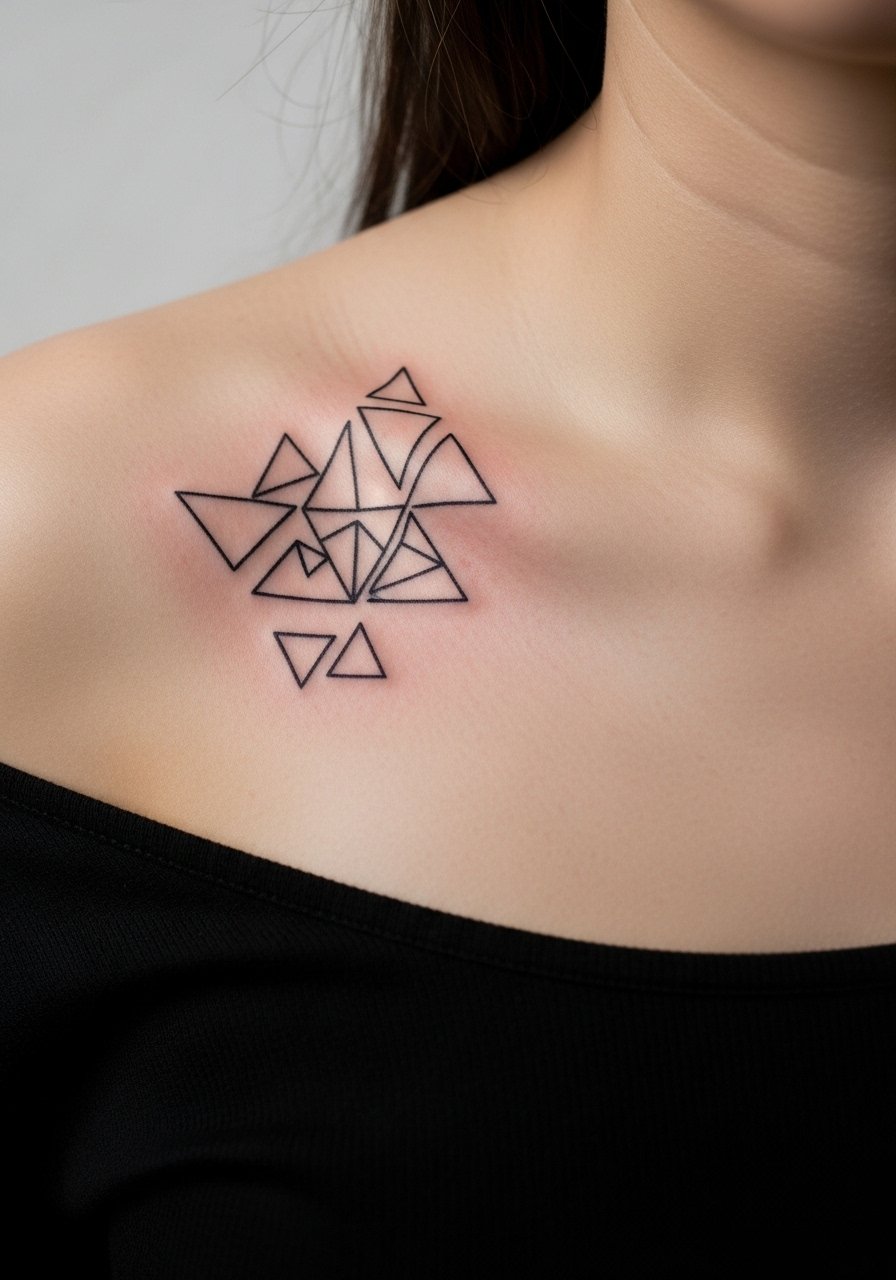
The biggest mistake with geometric clusters is scaling them down until the lines merge after a year. Pick a size that gives each triangle breathing room and insist on slightly heavier linework than a typical eyebrow-thin line. For placement, the shoulder dip reads differently when viewed head-on versus from the side, so test mockups with fitted tops. Pain is lower here than over the peak of the bone, and a single short session usually does it. If you want balance symbolism, ask for a small alignment mark so the cluster arcs with your clavicle rather than sitting flat on the skin.
3. Thin-script quote draping over the clavicle
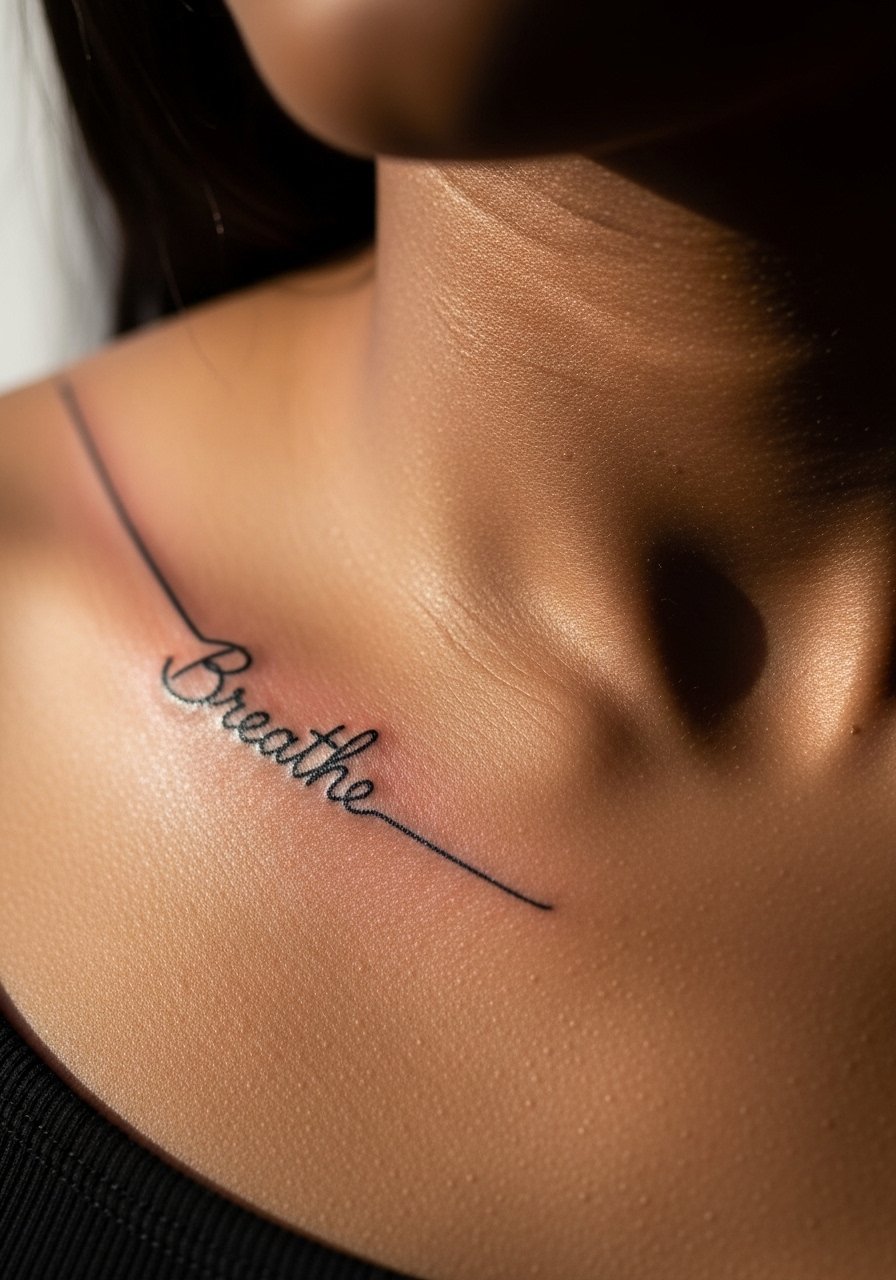
Fine line script on the collarbone splits artists into two camps. One camp says thin cursive blurs quickly near bone curves and advises wider spacing and a sans-serif approach. The other camp argues that expert depth and steady hand preserve thin letters for years. Tell your artist the exact phrase and ask how they handle proximity to the bone. Expect sharper pain when the needle crosses the ridge, and plan a touch-up at the one-year mark if letters soften. Avoid ornate flourishes that compress into blobs as the skin heals.
4. Mandala half-circle tucked in the collarbone hollow
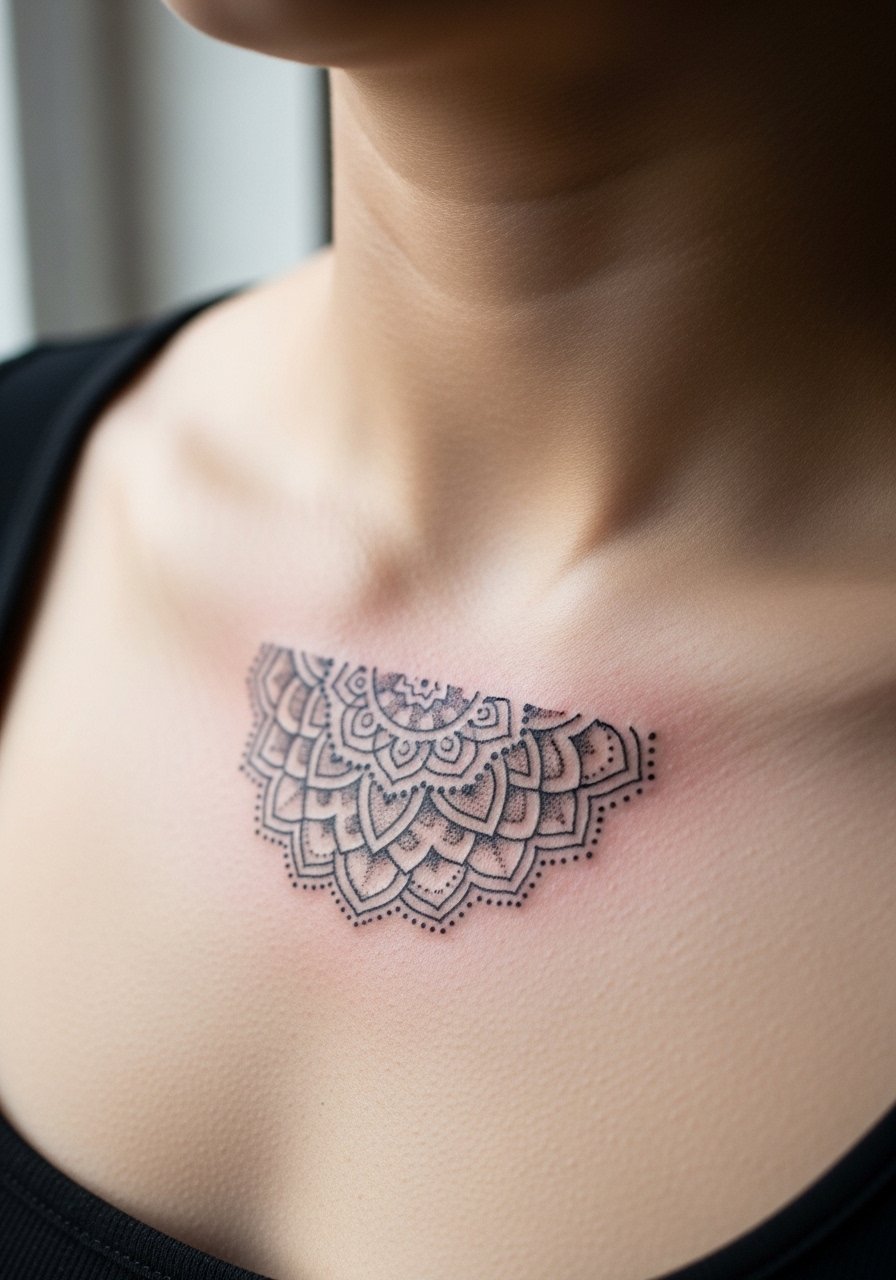
When you sit down for this one, bring clear photos of the hollow on your own body so the mandala centers on the dip and not the peak. A lot of people ask for extremely fine symmetry which can read messy once healed; ask for slightly thicker primary lines with stipple shading inside. Expect moderate pain as the hollow can be tender. At six months the stippling softens but the pattern should remain readable; at two years, expect some softening of the thinnest spokes and plan a small touch-up. This pattern draws from ornamental traditions, so consider subtle personal tweaks rather than direct replicas.
5. Micro-realism bird silhouette winging toward the neck

There is real appeal in a small bird that hides under shirts but peeks out in low necklines. Tell the artist you want the wing angled toward the neck for motion and to keep details concentrated away from the peak of the bone. Micro-realism needs a steady hand so book someone experienced in fine shading. Pain spikes when the needle crosses the bone edge, but most clients get it done in one short session. For longevity, black-only silhouettes hold up best; tiny feather detail sometimes requires a touch-up at year two, especially on skin that tans heavily.
6. Blackwork dotwork wave curving with the bone
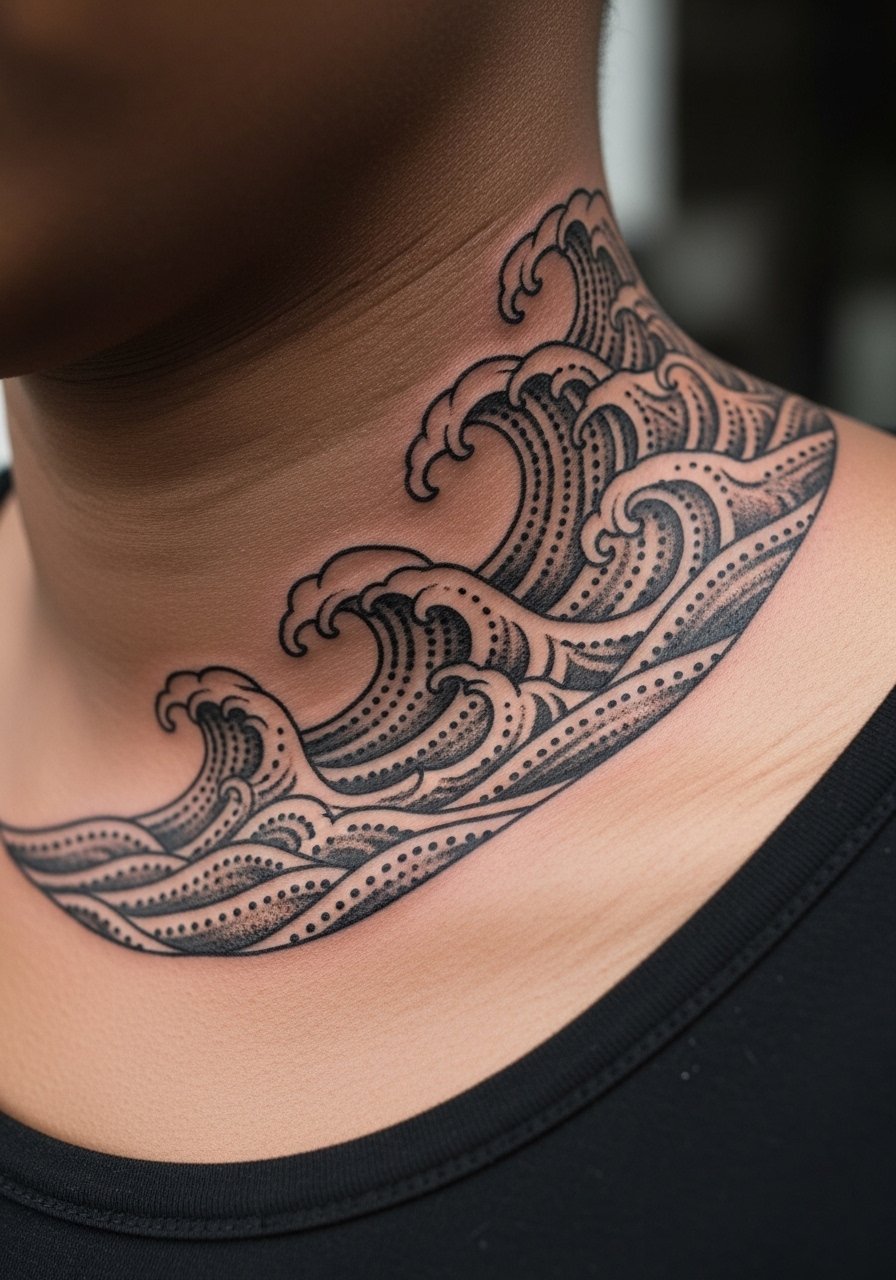
Bold blackwork gives a lot of visual contrast, and that contrast shows well on darker skin tones. Expect longer sessions and a firmer pain level because larger areas need more passes for saturation. A common error is going too dark in one sitting which increases scabbing risk; ask the artist about staged sessions. At six months the saturation will even out, and at two years it should remain strong if UV exposure is limited. If you want an ocean reference without heavy black, discuss dot work spacing to mimic waves with less saturation and lower blowout risk.
7. Watercolor peony fading into the shoulder
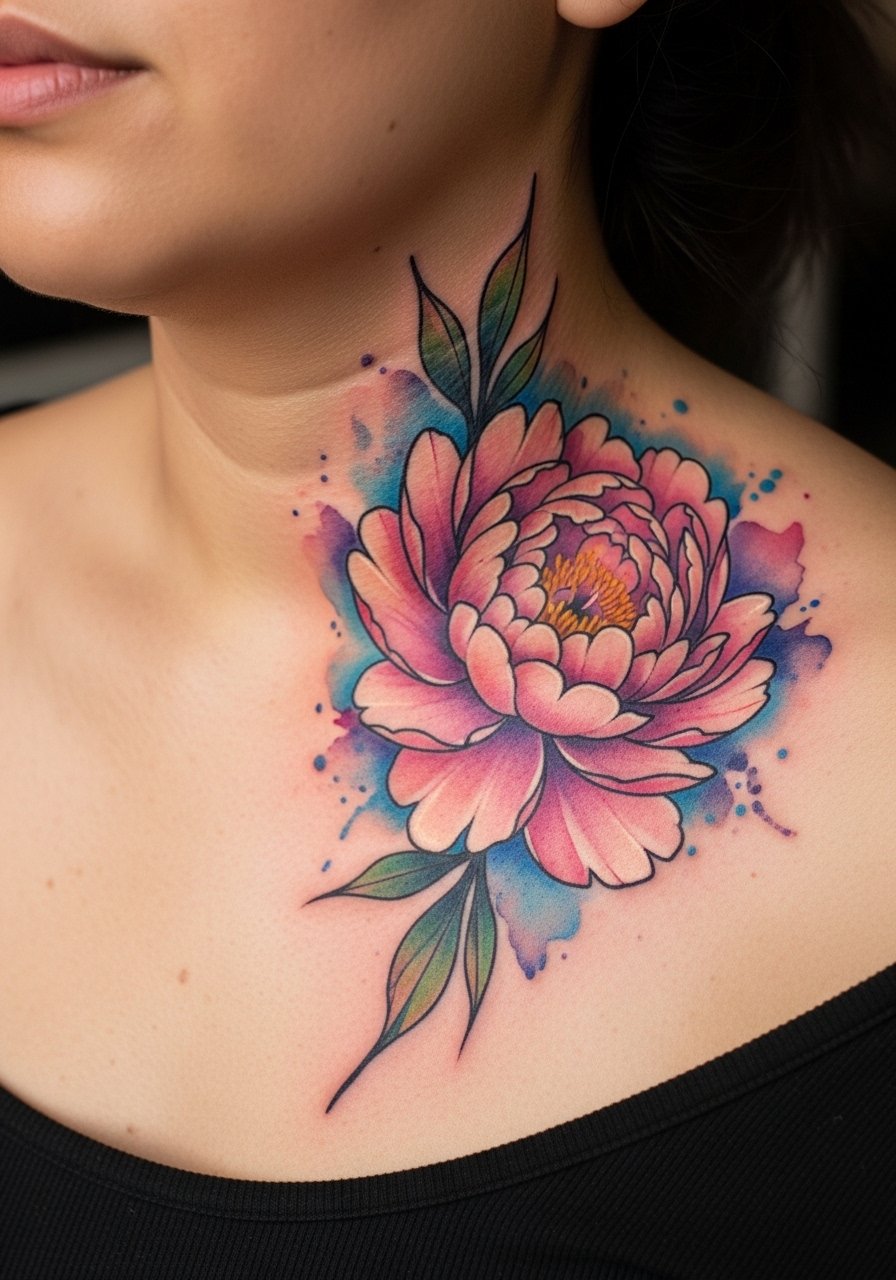
Watercolor brings painterly color but it ages differently on the collarbone. Colors near the ridge and on tanned skin often fade faster than black outlines, so ask for black anchors behind key petals to maintain shape as the color softens. Expect a longer appointment because color layering needs time to settle and heal. At six months colors will bloom and soften, and by year two some hues may wash toward pastel. Many clients schedule a color boost at year three. If you prefer longevity over vibrancy, request a black-and-gray version with strategic color highlights instead.
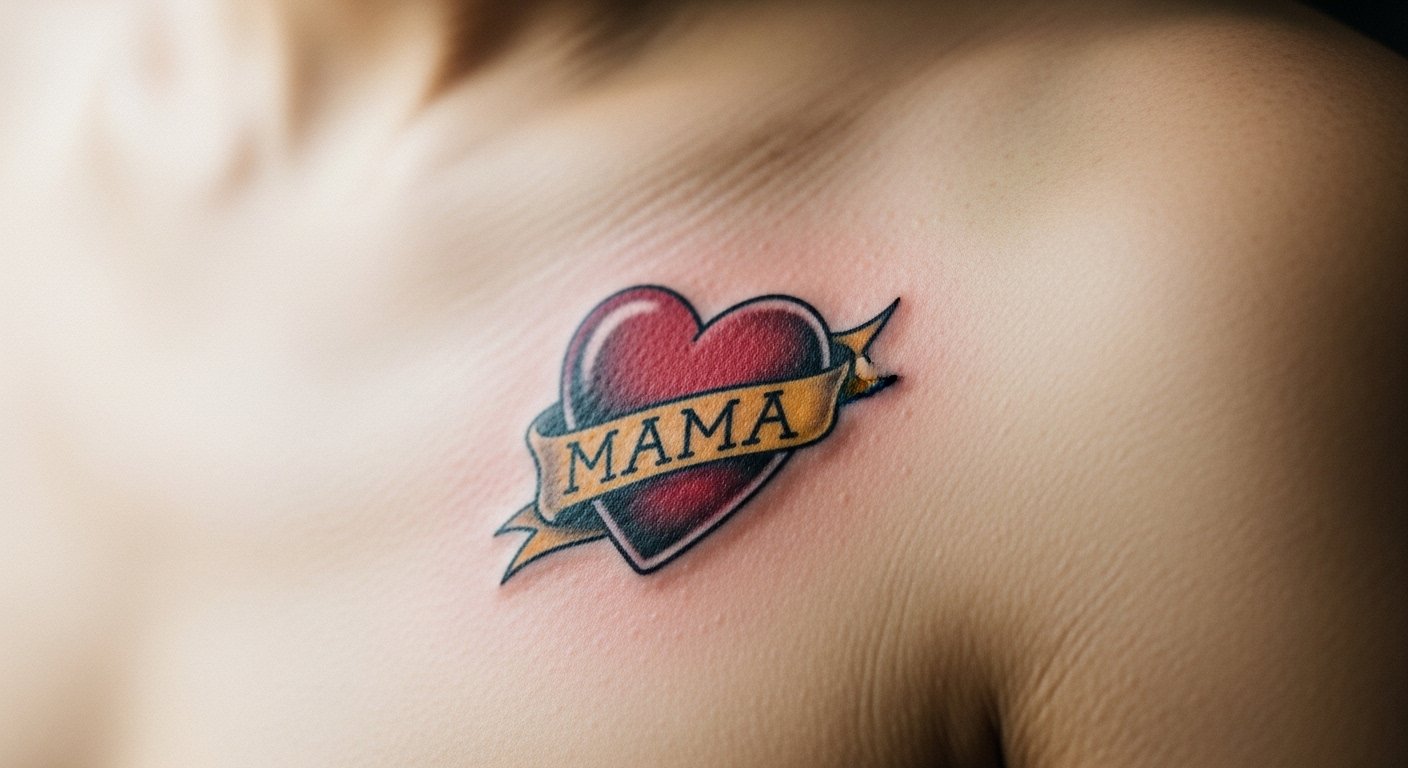
8. Neo-traditional heart with banner on the clavicle peak
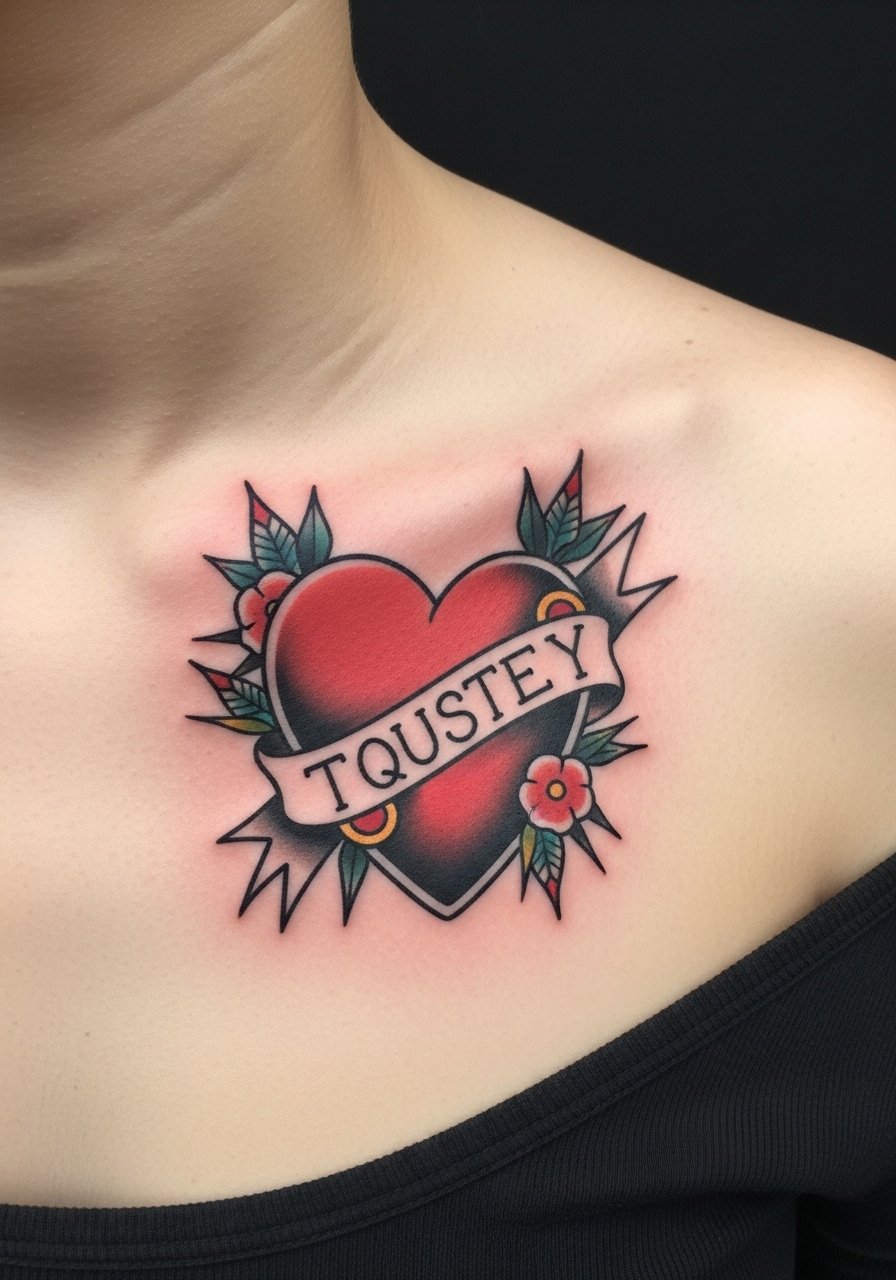
There is something about thicker outlines that helps this style survive years of wear. Tell your artist you want classic neo-traditional linework so the heart reads clearly from a distance. This placement crosses the peak of the bone which increases pain, but the thicker lines shorten session time compared with micro details. At six months the colors will sit and at two years the heavy outline keeps the motif legible with minimal touch-ups. If the banner has lettering, give the exact words beforehand to prevent awkward kerning on a curved surface.
9. Ignorant style abstract lines and scribbles over the bone
Ignorant style appeals because it looks intentionally imperfect, but accidental technical errors make the design read sloppy once healed. In consultation, ask your artist how they recreate the raw hand-drawn look without crossing into uneven depth that causes blowout. Pain is similar to other small pieces, and you can usually finish this in one session. This approach is great if you want a rebellious aesthetic and potential to expand into a larger custom piece. Mention future sleeve plans so line direction can extend naturally into the arm.
10. Fine line butterfly emerging from the shoulder shadow
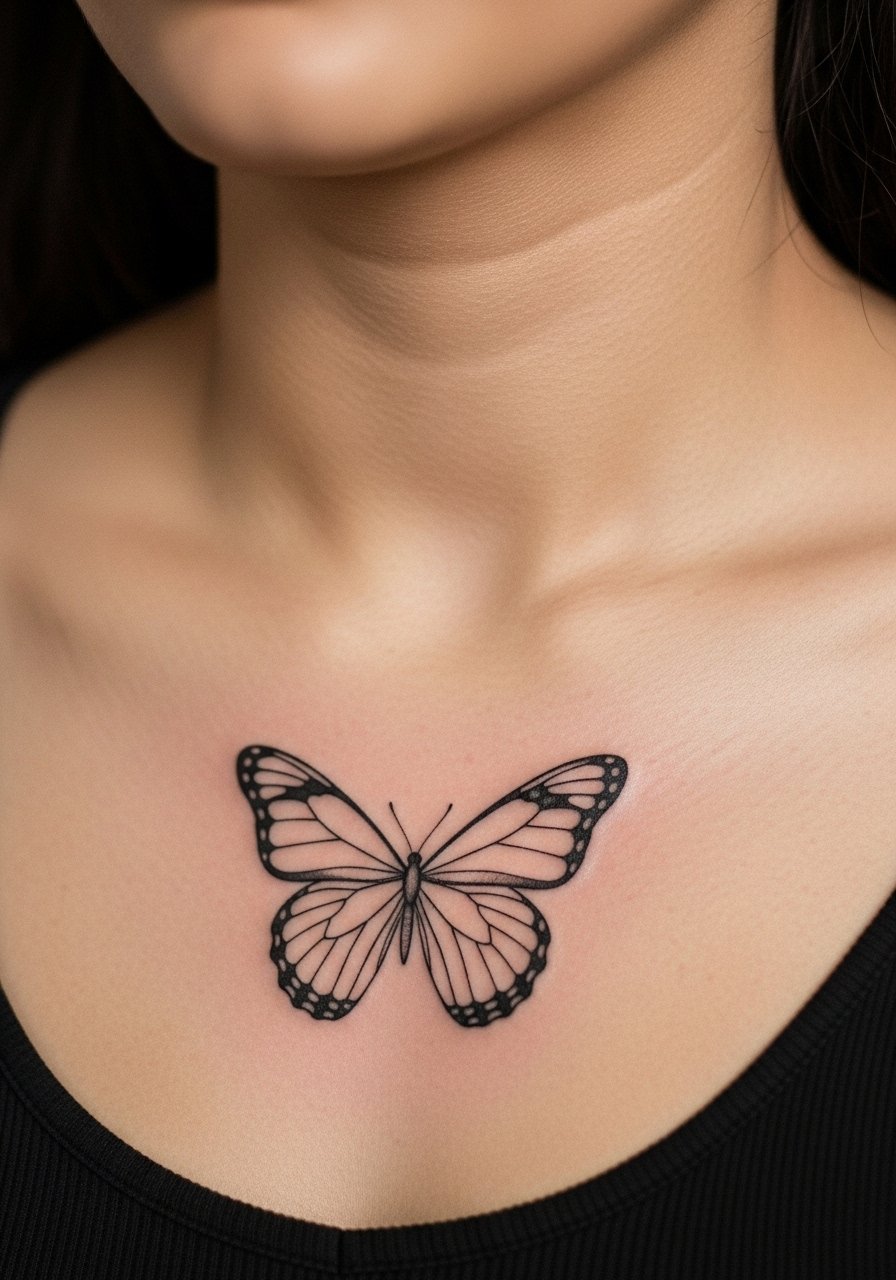
First-timers like butterflies because they can be small and symbolic without a massive time commitment. Ask for slightly more space between wing veins than a strictly botanical reference so the lines survive two to five years without blurring. Pain is milder off the peak of the bone but can spike near the shoulder joint. Expect a single session and a probable touch-up at year one if you want crisp wing detail. If your goal is transformation symbolism but you also want longevity, consider black-only veins with a hint of tone rather than full color fills.
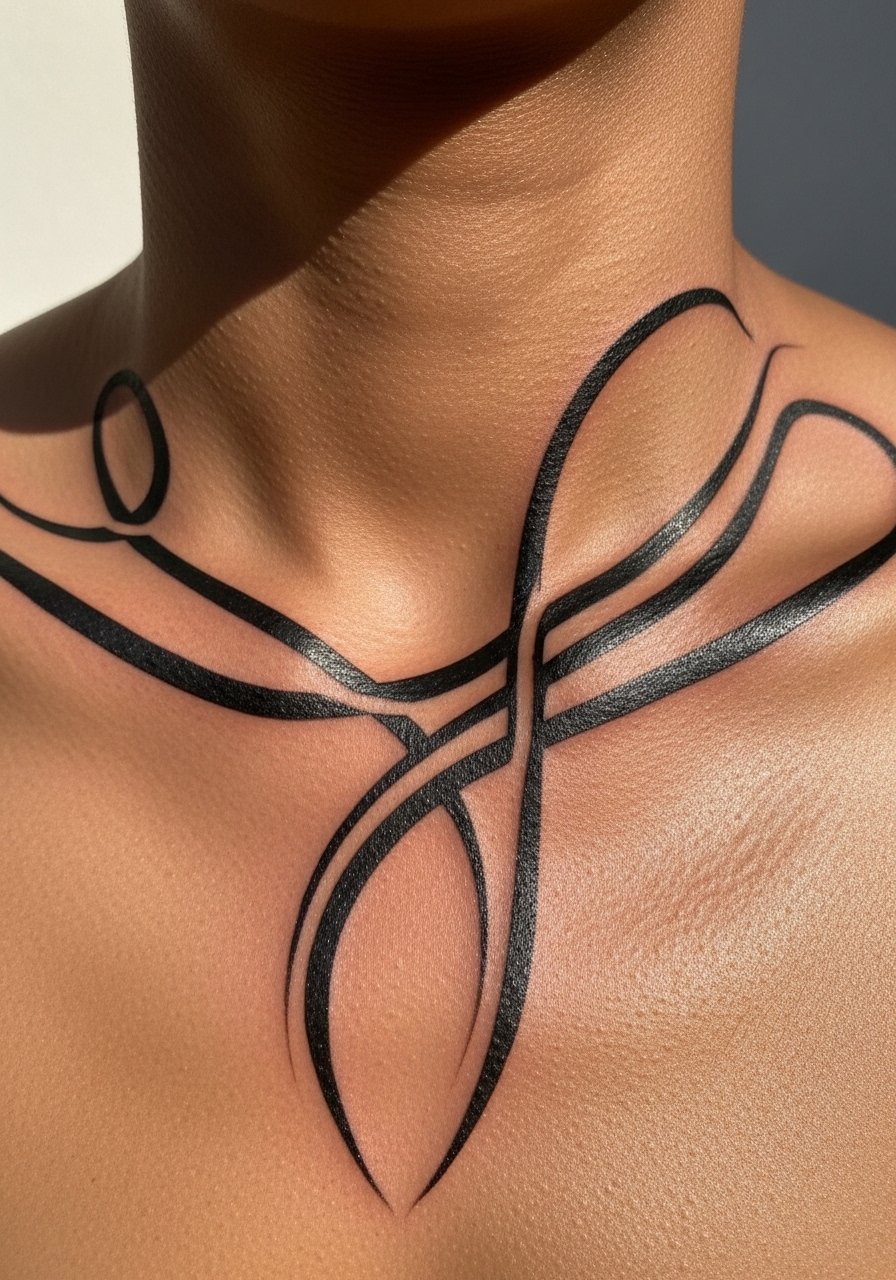
11. Ornamental lace pattern that reads like jewelry
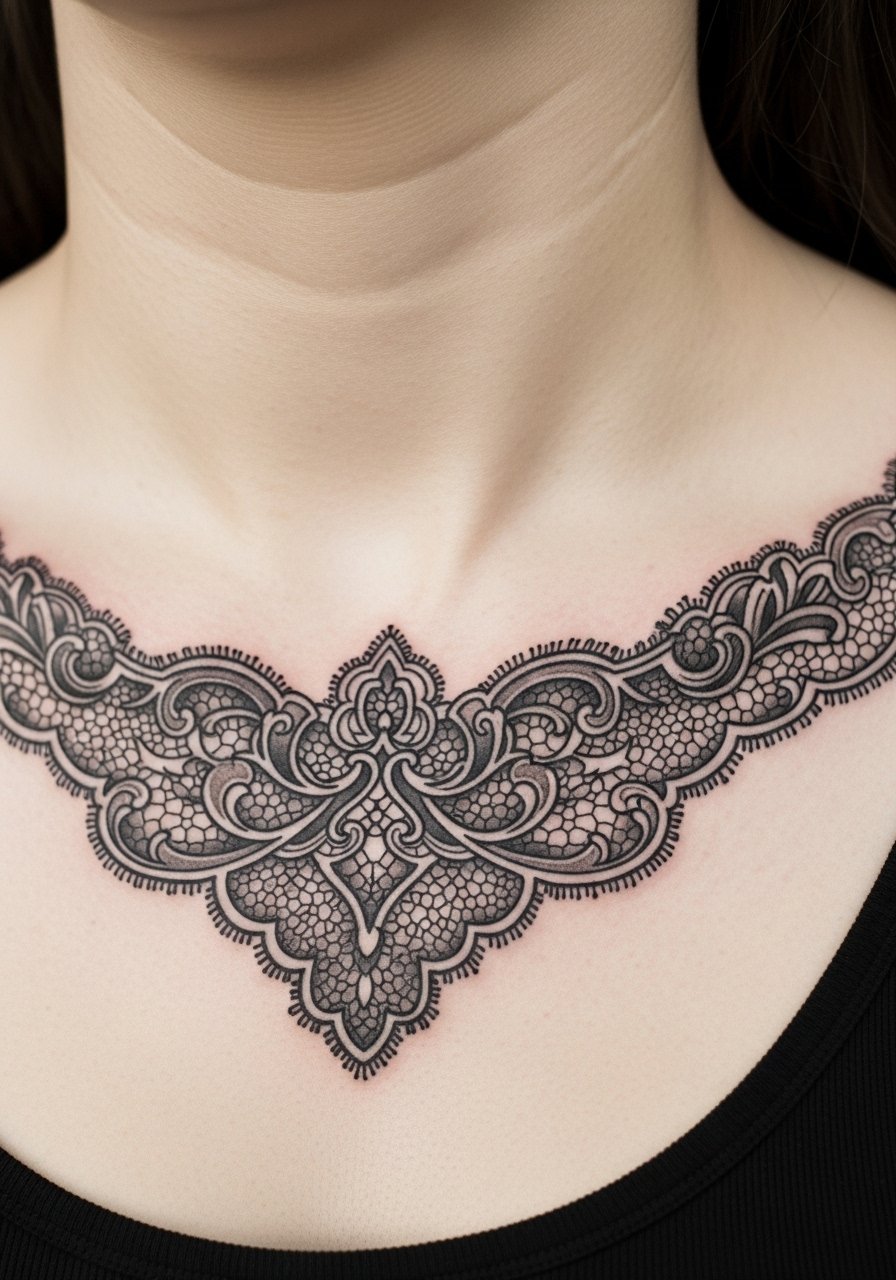
This design mimics a necklace and photographs well at formal events. When briefing your artist, show how you want negative space to act as chain links so the pattern does not feel crowded. Expect moderate pain in the hollow and a short session for a small piece. Many people forget to test concealability with actual necklines which leads to regret at work. This motif borrows ornamental forms from various traditions, so consider a small personal detail that signals respect rather than a straight cultural copy.
12. Minimalist moon phases arching across both collarbones
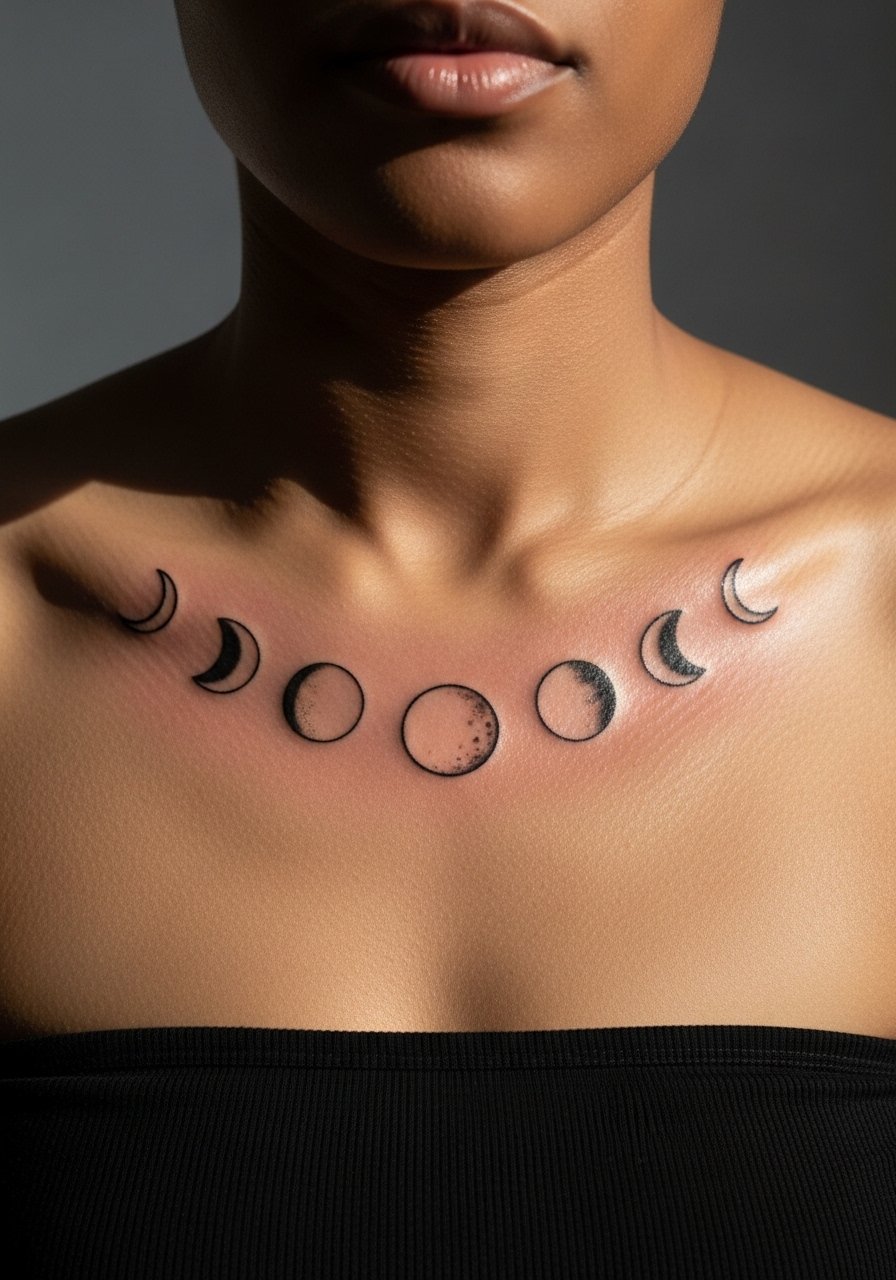
I've noticed moon phases read differently when spaced across both bones rather than stacked on one. Ask your artist to map out the arch so the midline moons align with your sternum. Pain is diffuse because the design crosses peaks and hollows, and many clients opt for two short sessions to avoid long discomfort. Fine line versions age faster on the ridge, so request slightly heavier crescents or plan for touch-ups at year two. If you want a memorial cadence, using small dots between phases can add meaning without increasing line density.
Tattoo Prep and Aftercare Essentials
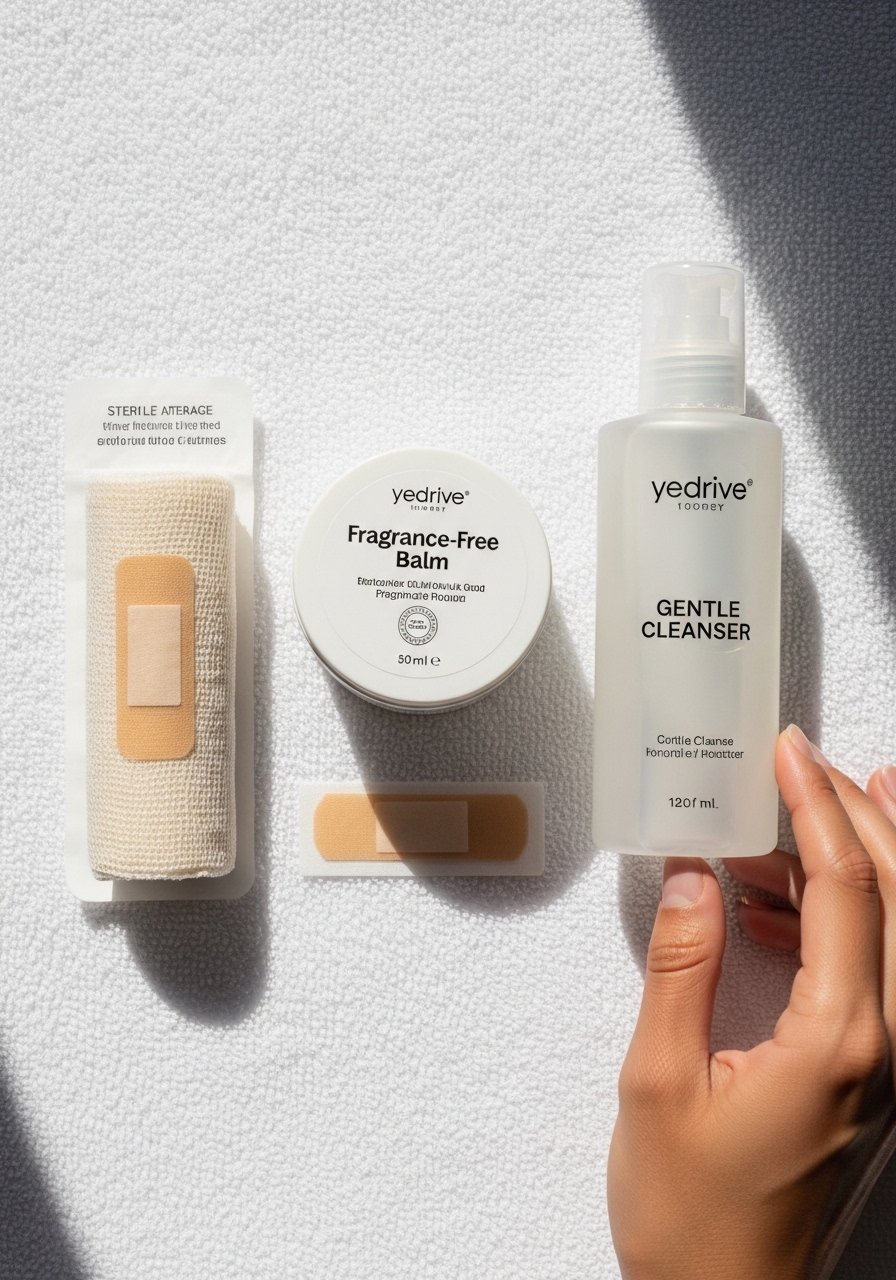
Aftercare matters for collarbone ink because skin curves and clothing rub can change healing dynamics. Below is a practical shopping list built for breathability and low clog risk. Search with the listed keywords on marketplaces or use hashtags and directories to find local sellers. If you use one mainstream product, choose it carefully for short-term use only. Follow your artist's specific healing plan in every case.
Healing and aftercare
Medical-grade second skin bandage, 6-inch roll. Use for the first 24 to 48 hours on areas where clothing rubs the collarbone. It reduces friction and helps scab edges remain even.
Fragrance-free gentle foaming cleanser. Cleans without stripping and lowers infection risk. Use lukewarm water and pat dry.
Lightweight fragrance-free healing balm. Apply thin layers; it keeps ink from drying into thick scabs that pull ink out.
Silicone scar sheets, small size. Optional after full surface healing to reduce raised scarring on heavy blackwork.
Pre-appointment prep
Soft breathable temporary bandage strips. Useful to protect clothing post-session. Apply once the artist gives the go-ahead.
Cooling gel pad for short-term pre and post numbing relief. Use before the appointment to reduce swelling and after to ease soreness. If you plan to use topical numbing, ask your artist about compatibility.
Long-term maintenance
SPF 50 mineral sunscreen for tattoos. UV exposure is the main ink killer, so protect exposed collarbone ink.
Silk or satin travel scarf to reduce friction while sleeping. Keeps sheets from tugging at fresh scars.
Aquaphor Healing Ointment, small tube. Use sparingly for heavy scabbing if your artist recommends a petrolatum option. This is the one mainstream product in this list.
Every tattoo is different. Always follow your artist's specific aftercare instructions. Consult a dermatologist if you have skin concerns or unusual healing issues.
Frequently Asked Questions
Q: How painful is a collarbone tattoo compared with other spots?
A: Collarbone pain varies by placement. Expect sharper sensations when the needle crosses the peak of the bone and milder discomfort in the hollow. Most people handle small fine line or minimalist pieces in a single short session, while heavier blackwork or color needs longer sessions and therefore a higher pain total.
Q: My script blurred on my collarbone before. How do I avoid that with a new quote?
A: Ask for slightly wider letter spacing and a sturdier sans-serif feel rather than thin flourishes. Tell the artist you want minimal contact with the highest ridge and plan a touch-up at six to twelve months. If you have deeply curved anatomy, consider placing script slightly lower into the hollow.
Q: Should I use Saniderm or dry healing for collarbone tattoos?
A: Artists split on this. One group prefers occlusive patches like Saniderm for cleaner initial healing on bony areas because they limit rubbing. The other group favors open air dry healing to avoid trapped moisture and possible bacteria. Talk to your artist about their success rate with each method and follow their protocol for the best result.
Q: Will colors fade faster on tanned skin and how do I help them last?
A: Darker or tanned skin can make some pigments read differently and may need more saturation up front. Black anchors behind color help maintain shape as color softens. Consistent sun protection and periodic touch-ups are the practical solutions for longer vibrancy.
Q: How do I find an artist who knows collarbone placements well?
A: Use style-specific hashtags like #FineLineCollarbone or directories such as Tattoodo. Search "[city] fine line collarbone studio" or check Booksy for confirmed guest spot availability. Look for healed photos that show the same placement you want and ask the artist how they handle blowout risk on curved bone.
