
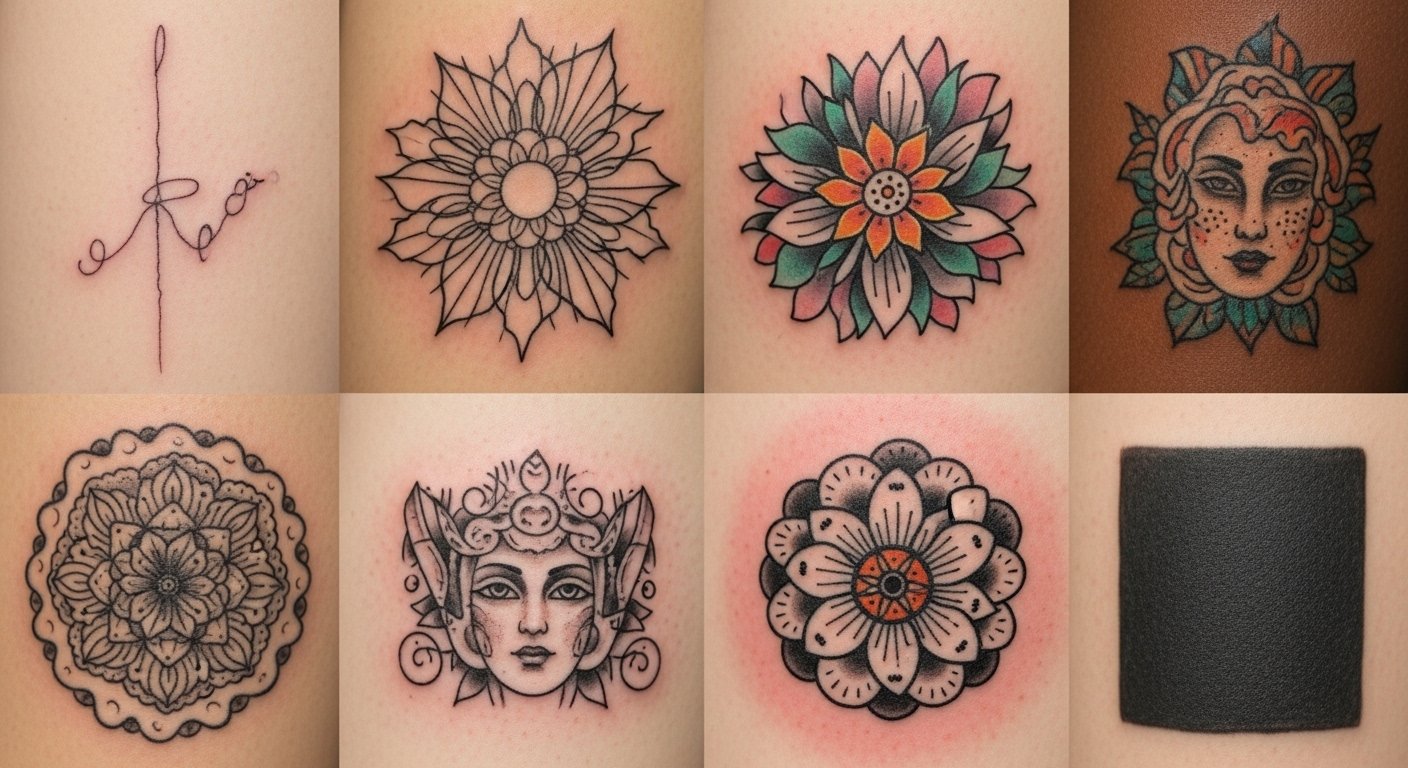
I spent months circling the same floral posts before I realized I was missing the point: it wasn't just the flower, it was the style and placement that gave it personal weight. These 30 birth flower tattoos pair specific flowers with styles and placements I’ve seen age well—plus real advice on pain, healing, and what to ask your artist.
This list focuses on meaningful, wearable designs—fine line, traditional, micro-realism, and neo-traditional. I picked placements that work in daily life and noted what actually heals well. From what I’ve seen in 2026 trends, thoughtful combos and healed examples matter more than fresh flash.
1. Fine Line Carnation on Inner Wrist
Style/Technique: Fine Line / Botanical
Pain Level: Low-Medium (3/10)
Session Time: 1-2 hours
Best For: First tattoo, subtle daily reminder
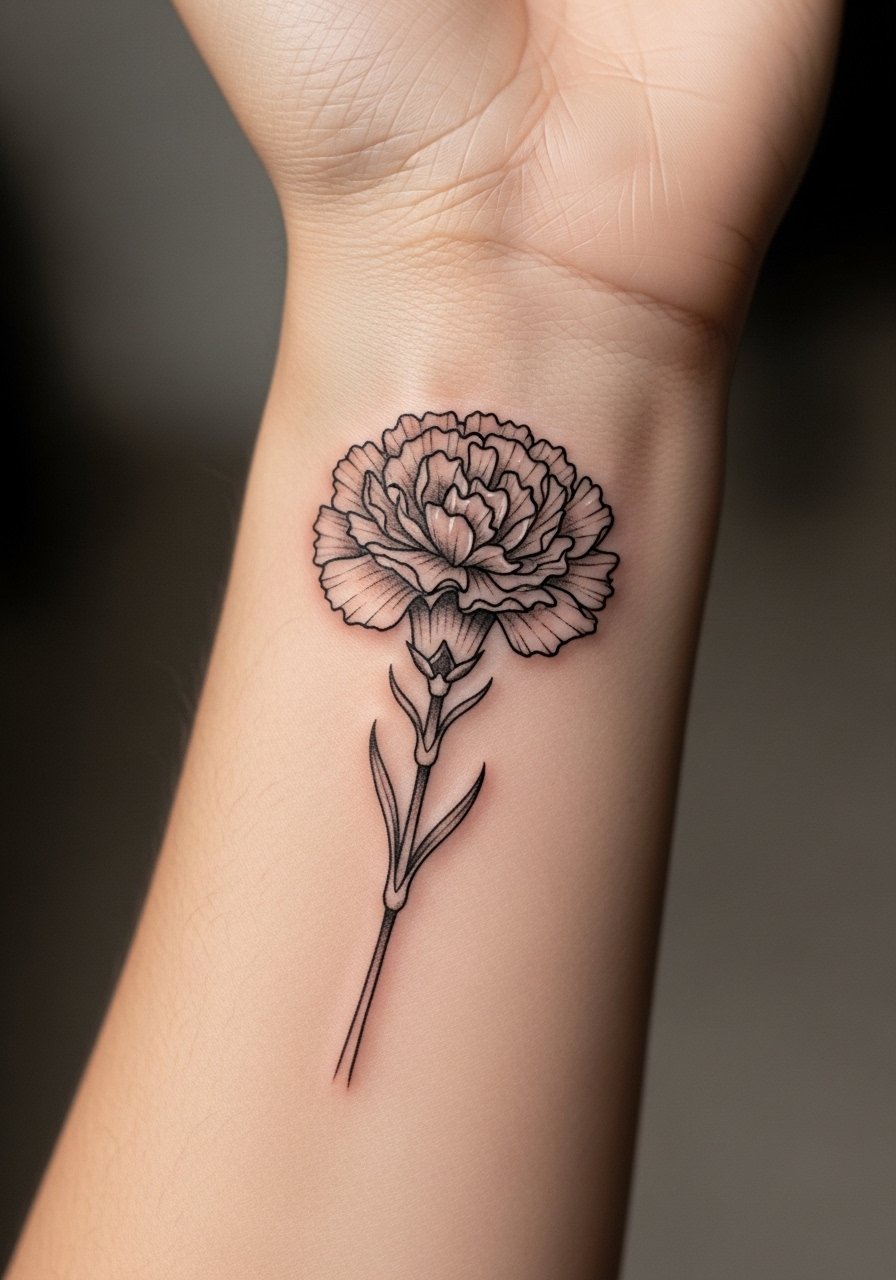
I got my first carnation as a fine line wrist piece and loved how unobtrusive it was. Fine line makes carnations feel intimate and personal. The inner wrist is visible and easy to cover. Expect a light sting that settles quickly; movement can make healing slower. Lines can blur if done too thin—ask for slightly stronger line weight if you want longevity. Heals in 2-3 weeks on the surface; full settling takes a few months. Artists familiar with botanical work will know how to space petals so the design keeps its shape as it ages.
2. Micro-Realism Violet Behind Ear
Style/Technique: Micro-Realism / Tiny Portraiture
Pain Level: Low (2-3/10)
Session Time: 30-60 minutes
Best For: Hidden meaningful spot, delicate detail
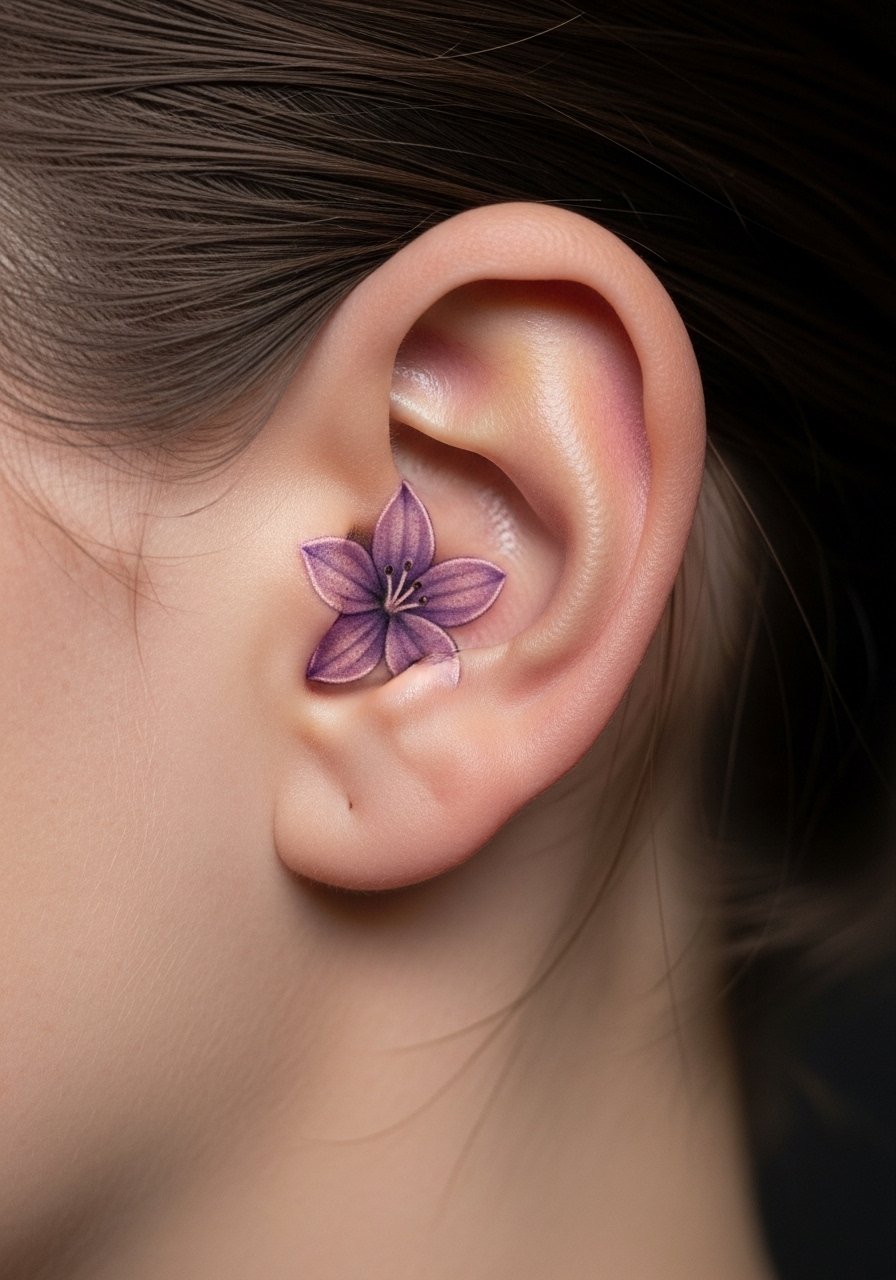
Violets read as personal and quiet. Micro-realism lets you capture the flower’s texture behind the ear, a spot that's easy to hide. Pain is minimal but the area is bony and sensitive at first. Heals quickly but requires careful moisturizing because it's often exposed to hair and sweat. Micro details can blur if the lines are too tight—ask for tiny shaded work rather than needle-fine single lines. This placement is great for people who want a private symbol of identity or memory.
3. Delicate Daffodil on Ribcage
Style/Technique: Fine Line + Watercolor Accent
Pain Level: High (7-8/10)
Session Time: 2-4 hours
Best For: Statement piece, intimate placement
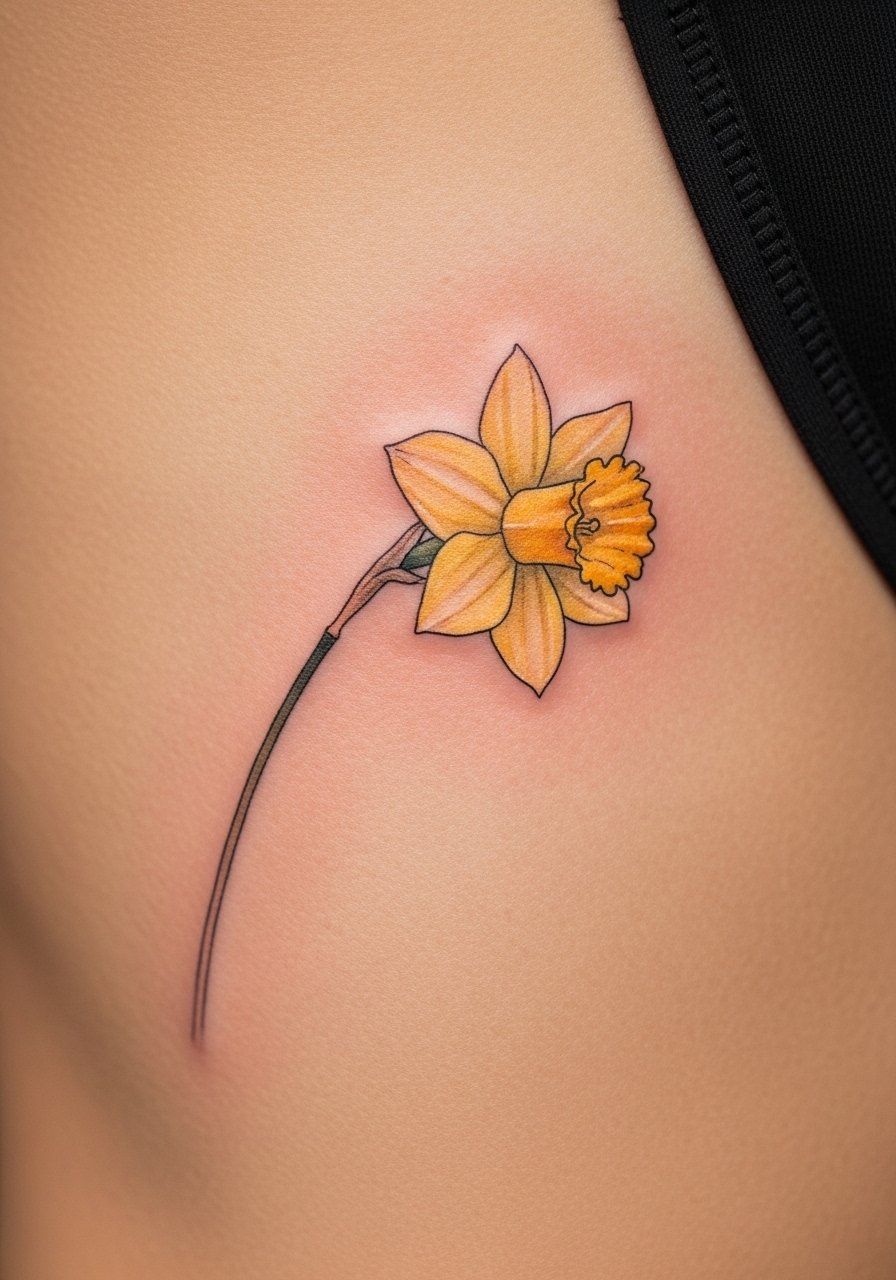
Ribcage pieces look personal and dramatic. Daffodils in a fine line frame with watercolor fills create a soft, nostalgic vibe. Expect higher pain because the rib area is bony and moves with breathing. Healing takes longer—avoid heavy chest movement and tight clothing in the first two weeks. Watercolor can fade faster; ask your artist about slightly deeper saturation at the time of tattooing. A common mistake is overcrowding petals—lean into negative space for longevity and clarity.
4. Minimalist Daisy on Ankle
Style/Technique: Minimalist / Single Line
Pain Level: Medium (4-5/10)
Session Time: 30-60 minutes
Best For: First-timers, easy to hide
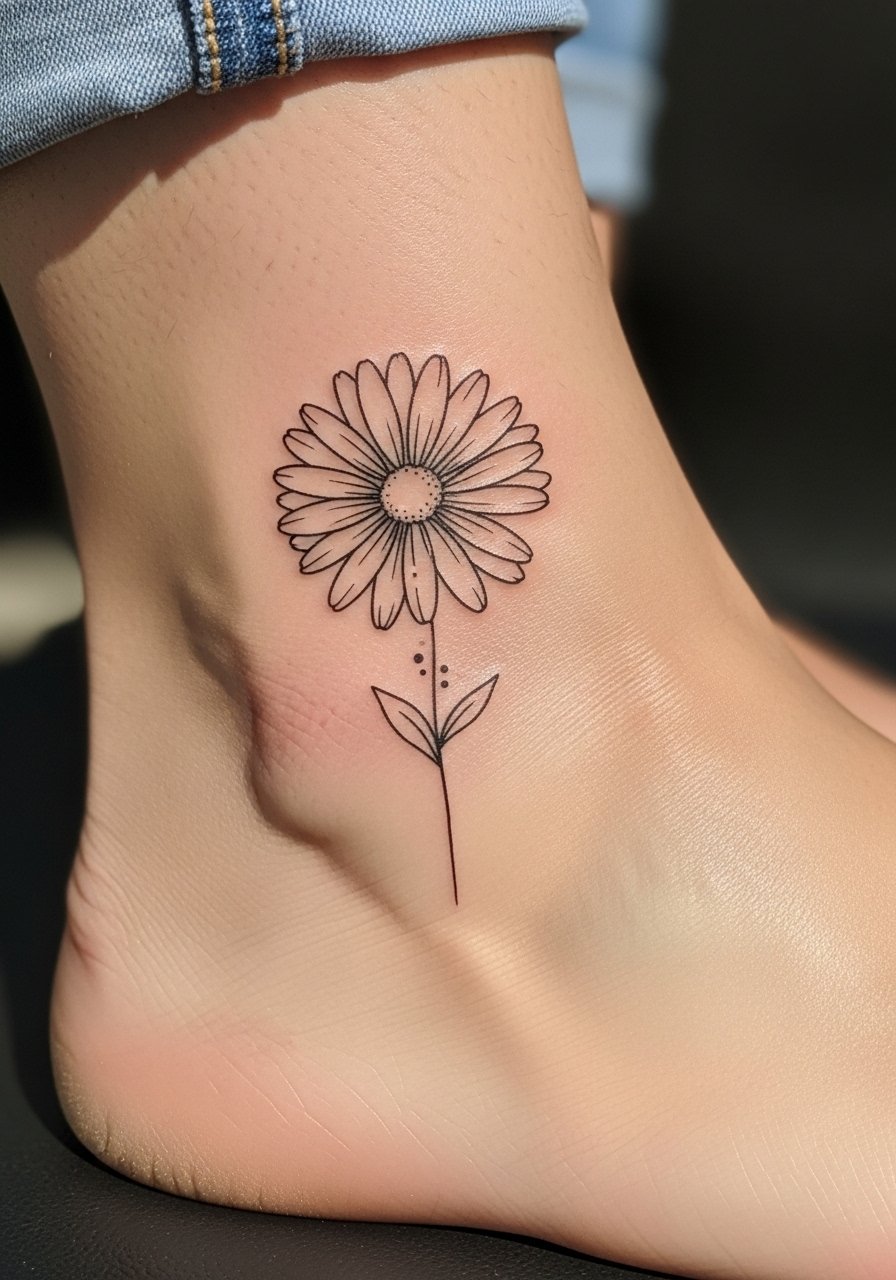
Daisies are classic and translate well to a single-line minimalist look. The ankle shows the design off without dominating your daily look. The ankle is bony and can feel sharp during tattooing; expect moderate discomfort. Small lines can thicken as they heal, so ask for slightly confident line weight. Keep footwear loose while healing; rubbing is the main cause of irritation. Minimalist daisies stay readable if you avoid ultra-thin single lines.
5. Neo-Traditional Lily of the Valley on Thigh
Style/Technique: Neo-Traditional / Bold Color
Pain Level: Low (2-4/10)
Session Time: 2-4 hours
Best For: Statement piece, easy to conceal
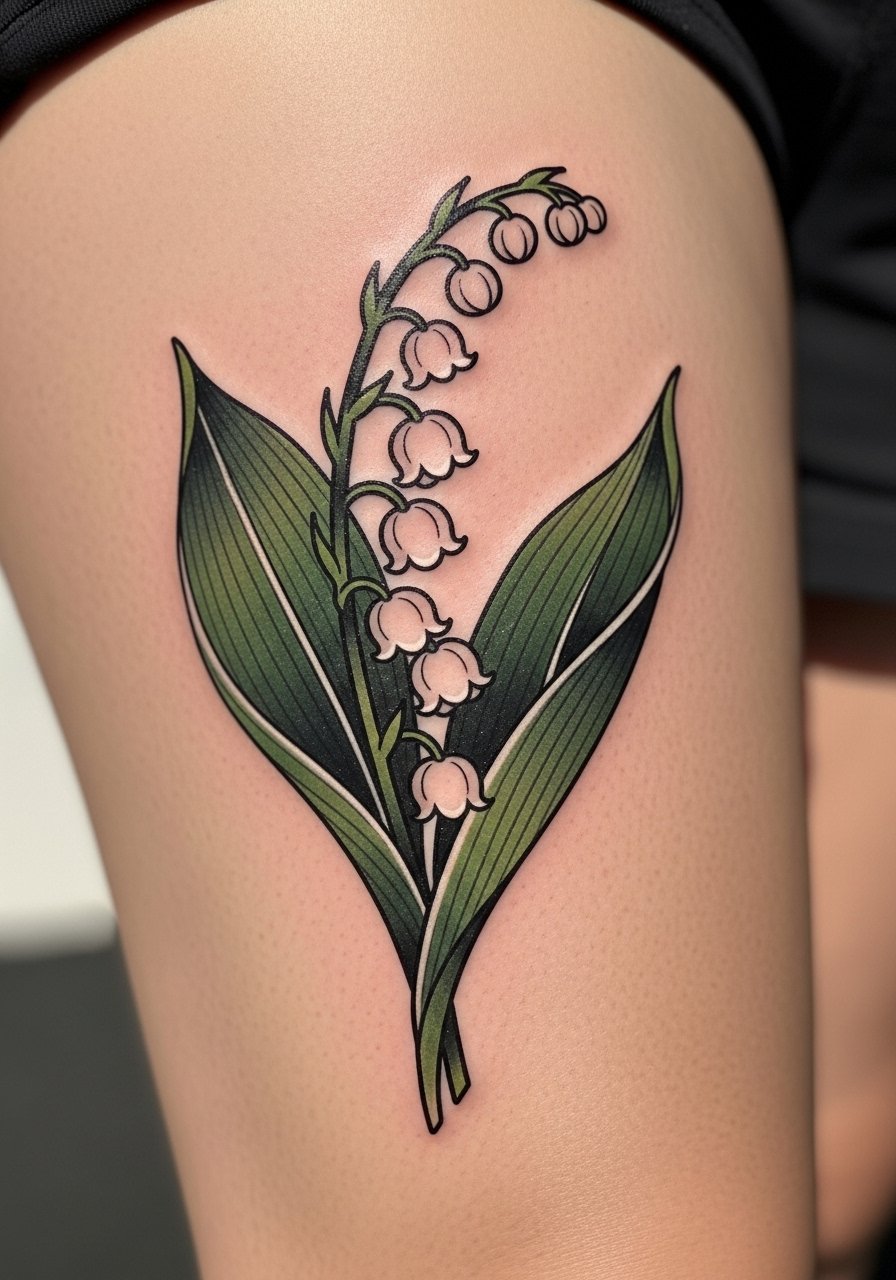
Thighs are forgiving and great for larger neo-traditional pieces. Lily of the valley carries delicate symbolism; neo-traditional enhances that with saturated color and crisp shading. Pain is low thanks to fleshier tissue. Healing is straightforward but keep friction down from jeans. These designs hold color well; however, white highlights can fade—ask your artist about contrast to keep bells readable over time. Avoid overly busy backgrounds; let the bells breathe.
6. Watercolor Rose on Shoulder Cap
Style/Technique: Watercolor / Soft Bloom
Pain Level: Low (2-3/10)
Session Time: 1-3 hours
Best For: Visible, feminine statement
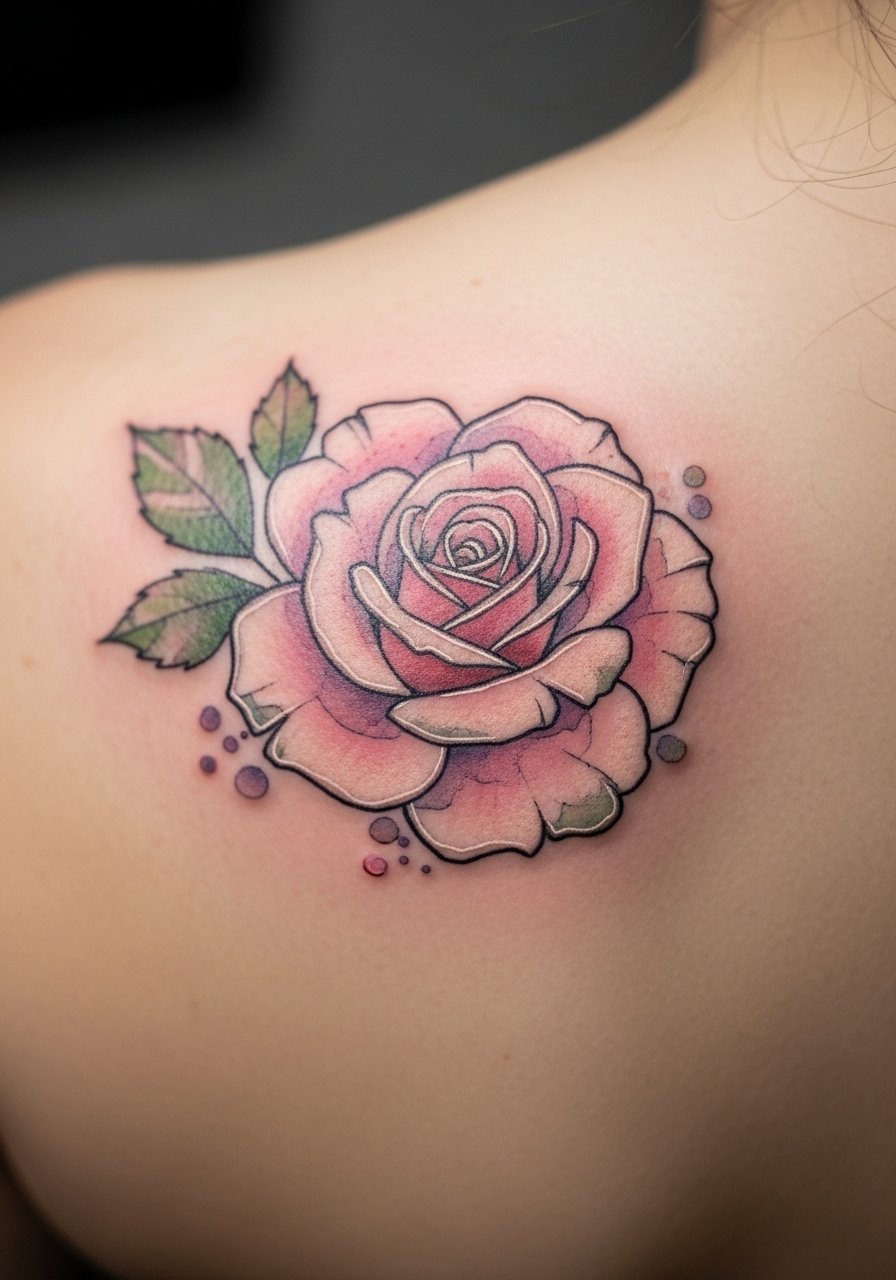
Shoulder caps are classic for roses. Watercolor gives a loose, painterly feel that looks great fresh and softens healed. Pain is mild. The risk is watercolor fade—artists often recommend layering or subtle outlines to hold shape. Heals in 2-3 weeks on the surface. I’ve seen watercolor roses look ethereal healed, but if you want bold longevity, ask for a mix of saturated color and soft wash. Avoid tiny details that rely solely on wash.
7. Bold Sunflower on Outer Forearm
Style/Technique: Traditional / Bold Color
Pain Level: Low (2-3/10)
Session Time: 1-3 hours
Best For: High-visibility statement, durable
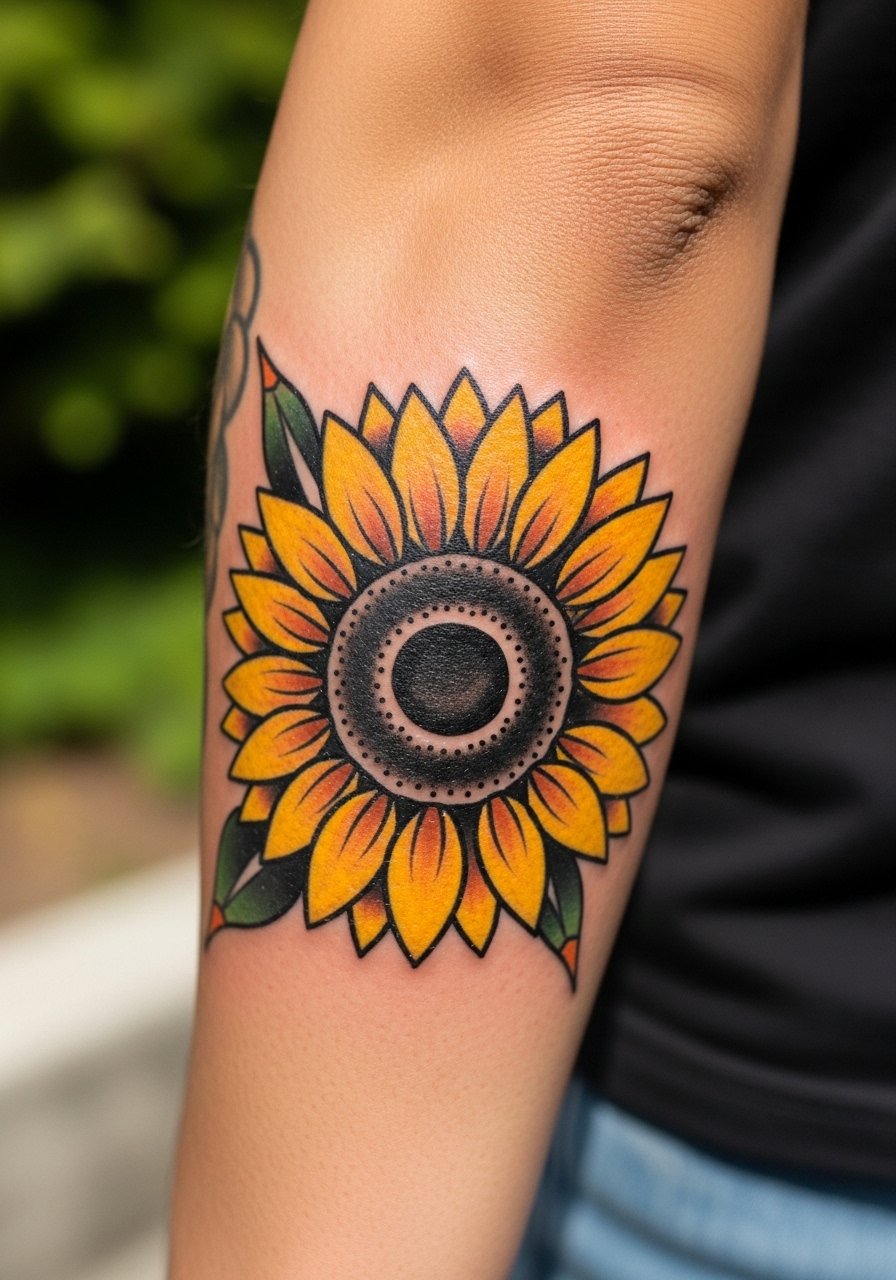
Sunflowers in a traditional style are resilient—thicker lines and solid color hold up. Outer forearm is low-pain and easy to show off. Heals reliably; just avoid heavy sun while fresh. Expect some natural softening of edges over time, but traditional pieces age gracefully. Common mistake: tiny petal details that blur—go for solid shapes. Artists who specialize in American traditional will nail contrast and longevity.
8. Bold Gladiolus on Upper Arm
Style/Technique: Bold/Neo-Traditional
Pain Level: Low (2-3/10)
Session Time: 1-2 hours
Best For: Visible arm piece, vertical flow
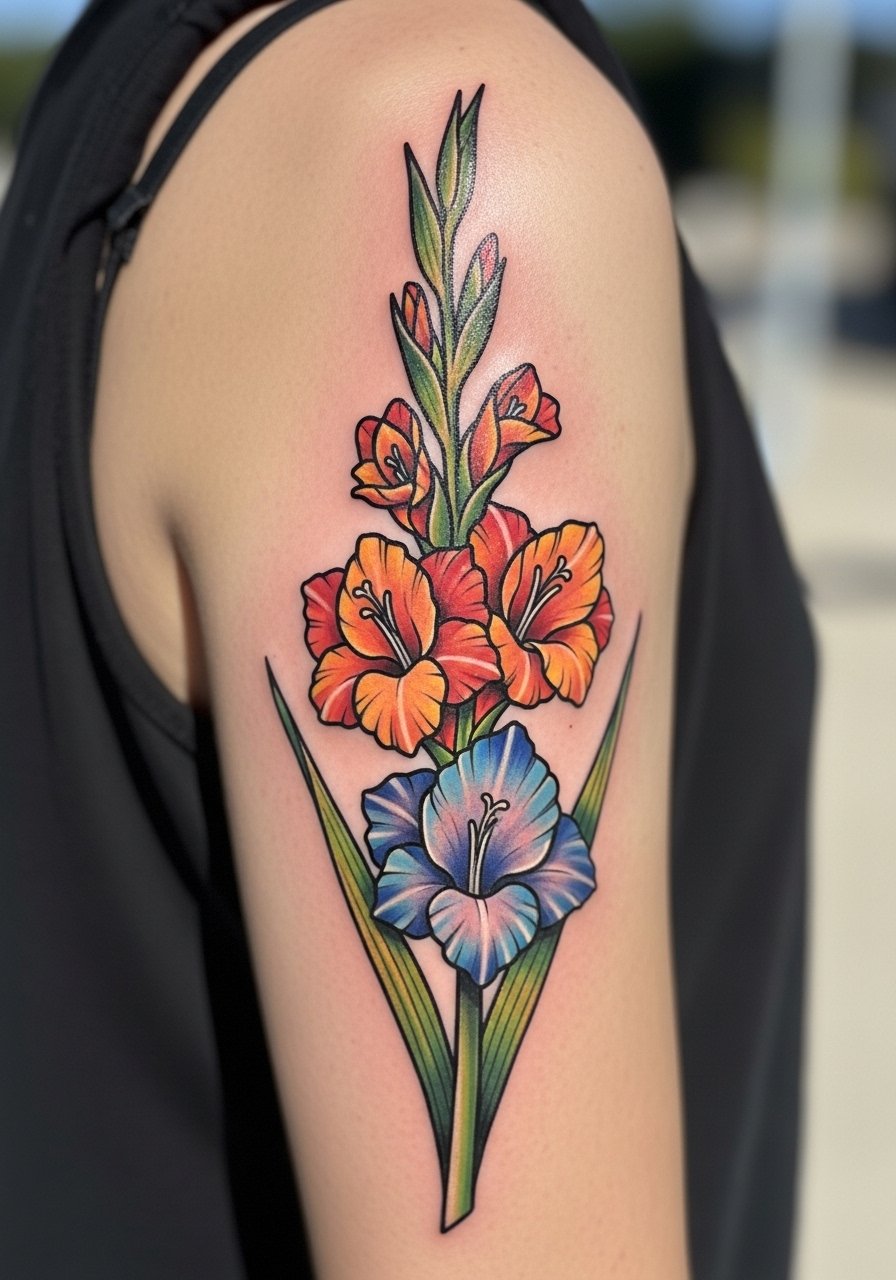
Gladiolus works with the arm’s vertical canvas. Upper arm pain is manageable and sessions are usually short. This flower reads as strong and linear; neo-traditional treatment keeps it readable long-term. Heals well if clothing doesn’t rub it. Artists should space florets so they don’t blend as the ink settles. Ask to see healed examples on similar skin tones.
9. Fine Line Aster on Collarbone
Style/Technique: Fine Line / Minimal Detail
Pain Level: Medium (4-6/10)
Session Time: 1-2 hours
Best For: Delicate, visible neckline piece

Collarbones look elegant with asters in fine line. The area is bony, so expect moderate discomfort; short sessions help. Fine line here can look fragile; ensure lines are slightly bolder than micro hairlines. Healing needs careful clothing choices to avoid scraping. Asters age well when composition includes negative space; avoid tiny clustered dots that can blur into a smudge.
10. Micro-Realism Marigold on Lower Leg
Style/Technique: Micro-Realism / Detailed Color
Pain Level: Medium (4/10)
Session Time: 1-2 hours
Best For: Realistic color work, mid-size piece
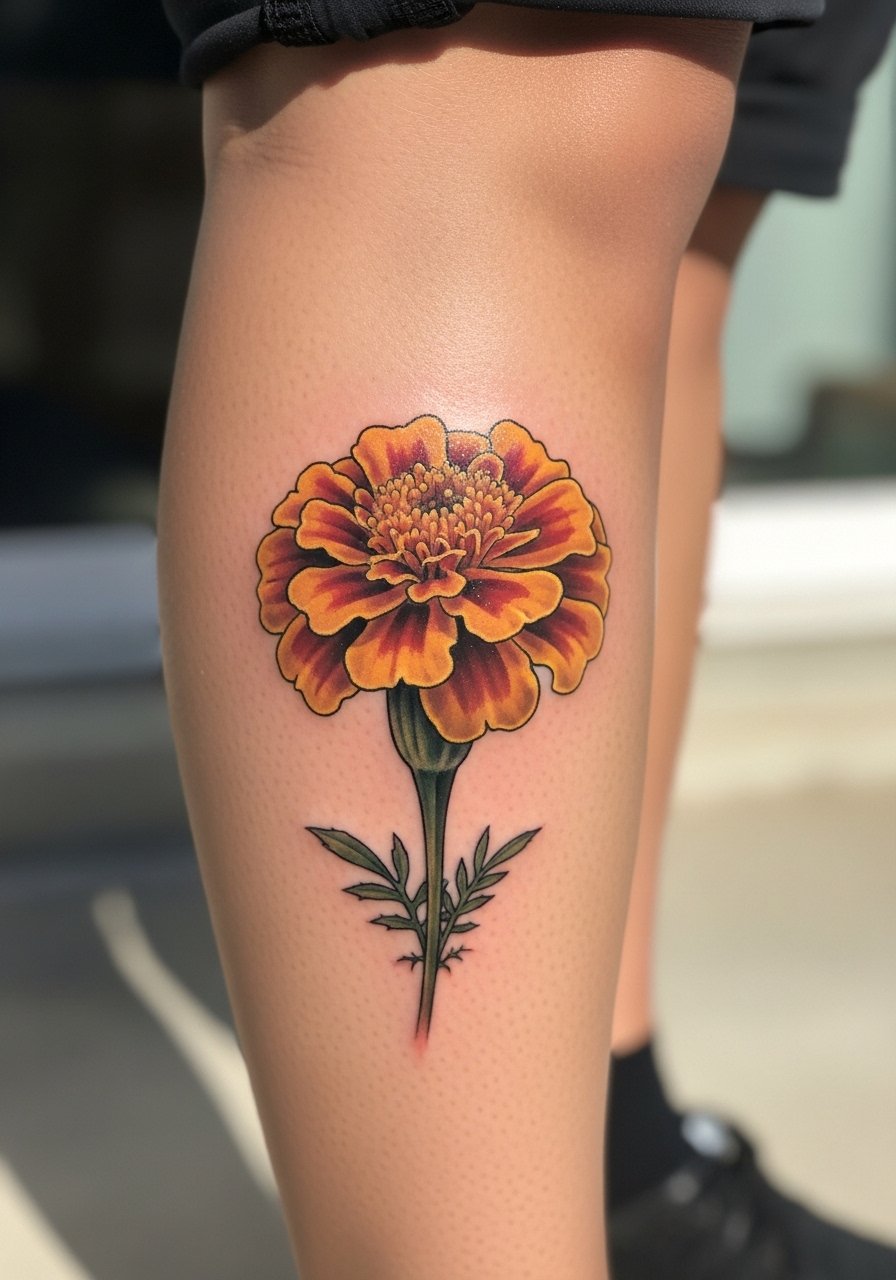
Micro-realism brings marigolds’ layered petals to life. Lower leg placement is forgiving and visible. The area tolerates color well, and micro shading reads beautifully when healed. Beware overly tiny details in thin-skinned areas—legs usually keep detail better. Healing is straightforward; showers and light activity are fine. Ask your artist for healed photos of micro-realism florals to set expectations.
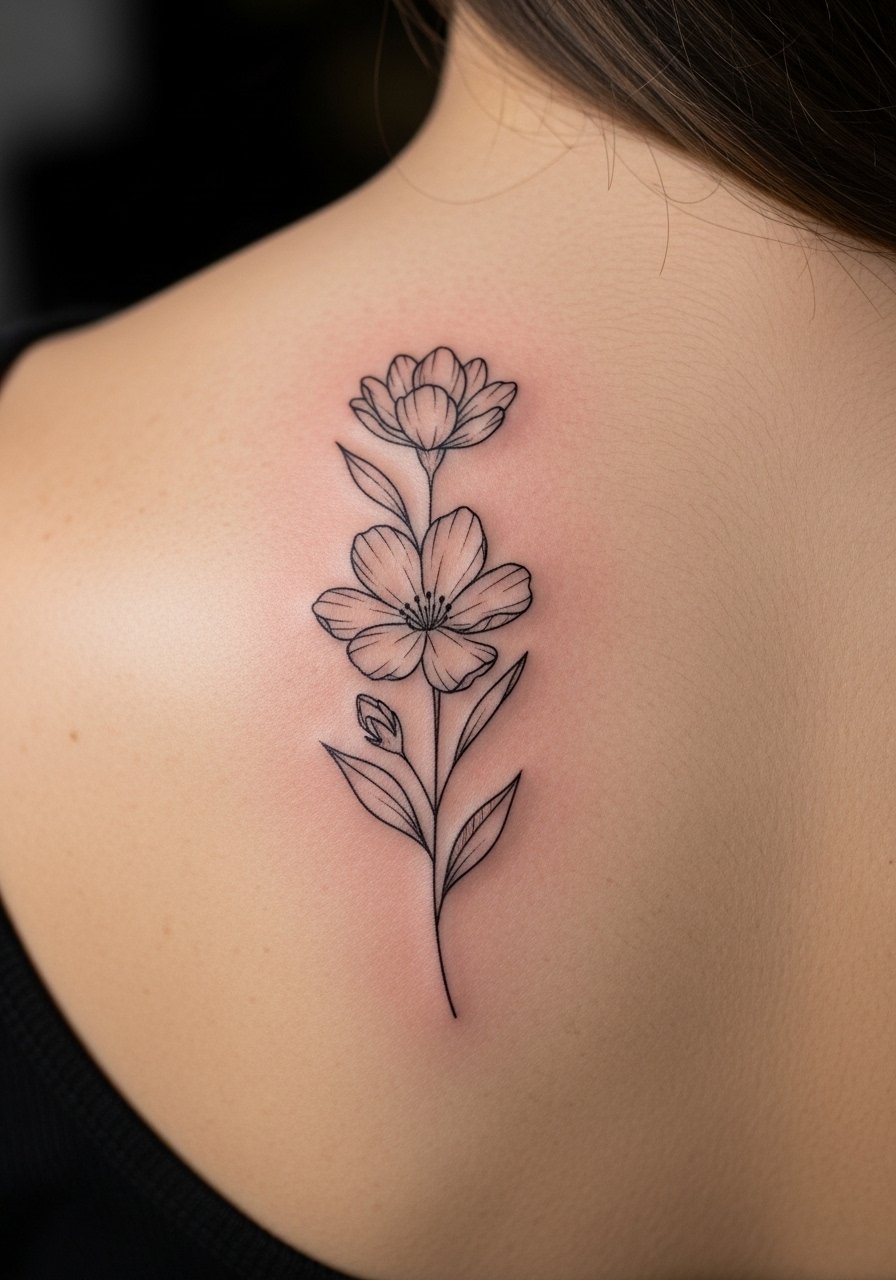
11. Linework Chrysanthemum on Back Shoulder
Style/Technique: Linework / Botanical
Pain Level: Low (2-4/10)
Session Time: 1-3 hours
Best For: Elegant back detail, can expand into larger work
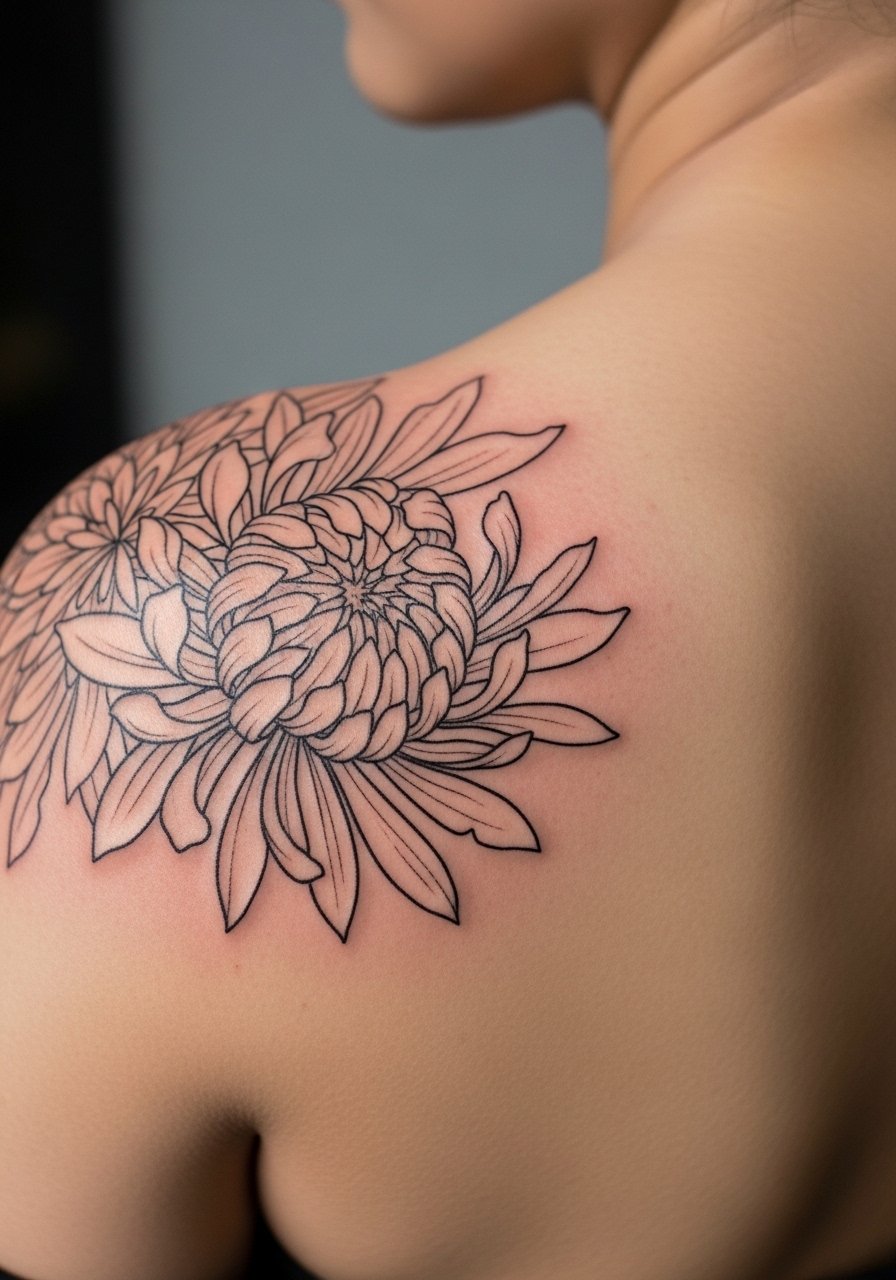
Chrysanthemums in pure linework make a timeless back shoulder tattoo. The shoulder heals well and is easy to conceal. Lines should have variation to avoid a lockstep look as they settle. Pain is low. I’ve seen linework that’s too fine bleed into a fog—ask for confident strokes. This placement scales nicely into a bigger back piece later.
12. Neo-Traditional Cosmos on Hip
Style/Technique: Neo-Traditional / Soft Shading
Pain Level: Medium-High (5-7/10)
Session Time: 1-3 hours
Best For: Flattering hip piece, private and sensual
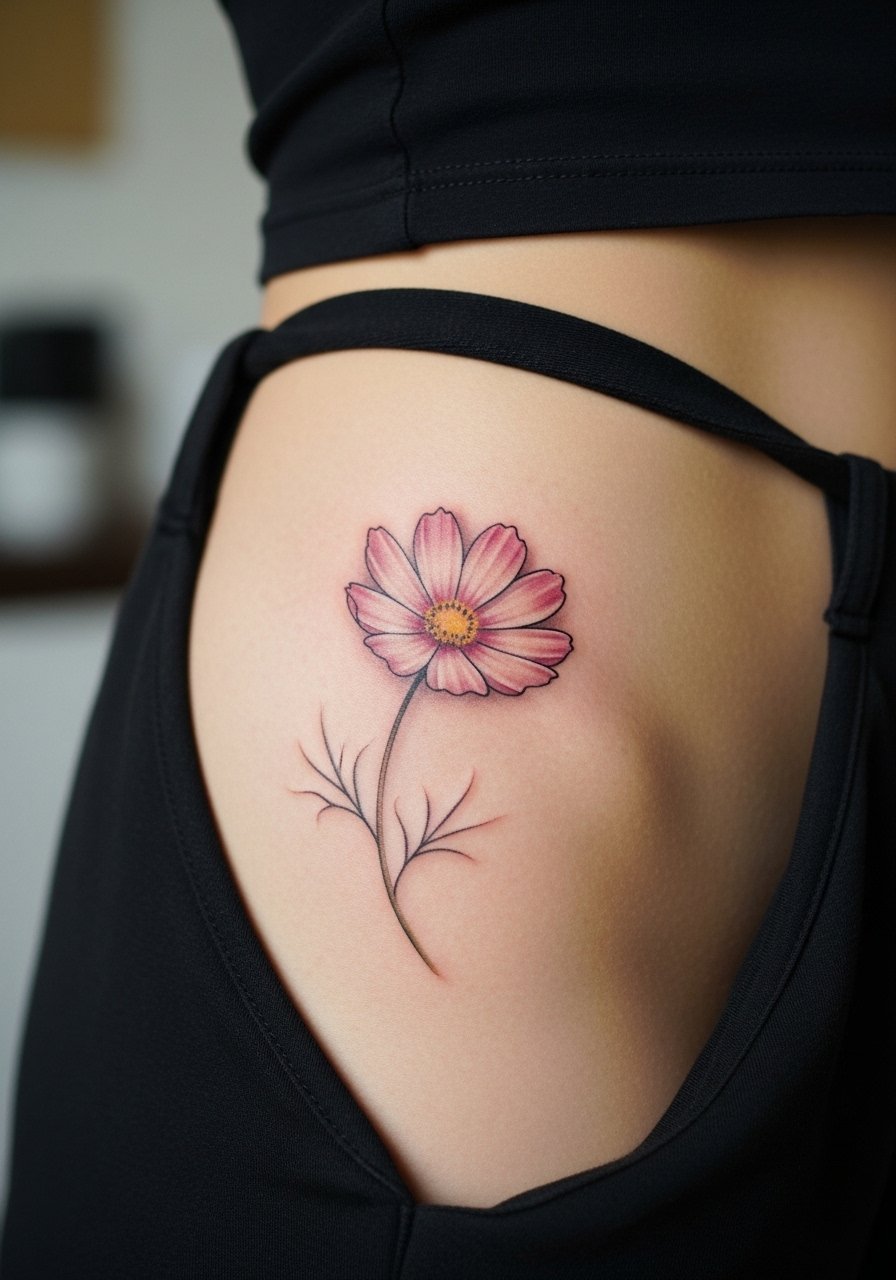
Hip tattoos can be sensitive due to contour and movement. Cosmos in neo-traditional style reads romantic and soft. Expect higher discomfort if the area hugs bone or the pubic bone is near the design. Healing requires loose clothing and attention to sweat. Colors hold up well here; ask for slightly richer saturation if you want long-term vibrancy.
13. Watercolor Peony on Thigh Sleeve
Style/Technique: Watercolor / Peony Cluster
Pain Level: Low-Medium (3-5/10)
Session Time: Multiple sessions
Best For: Large statement, feminine full-thigh work
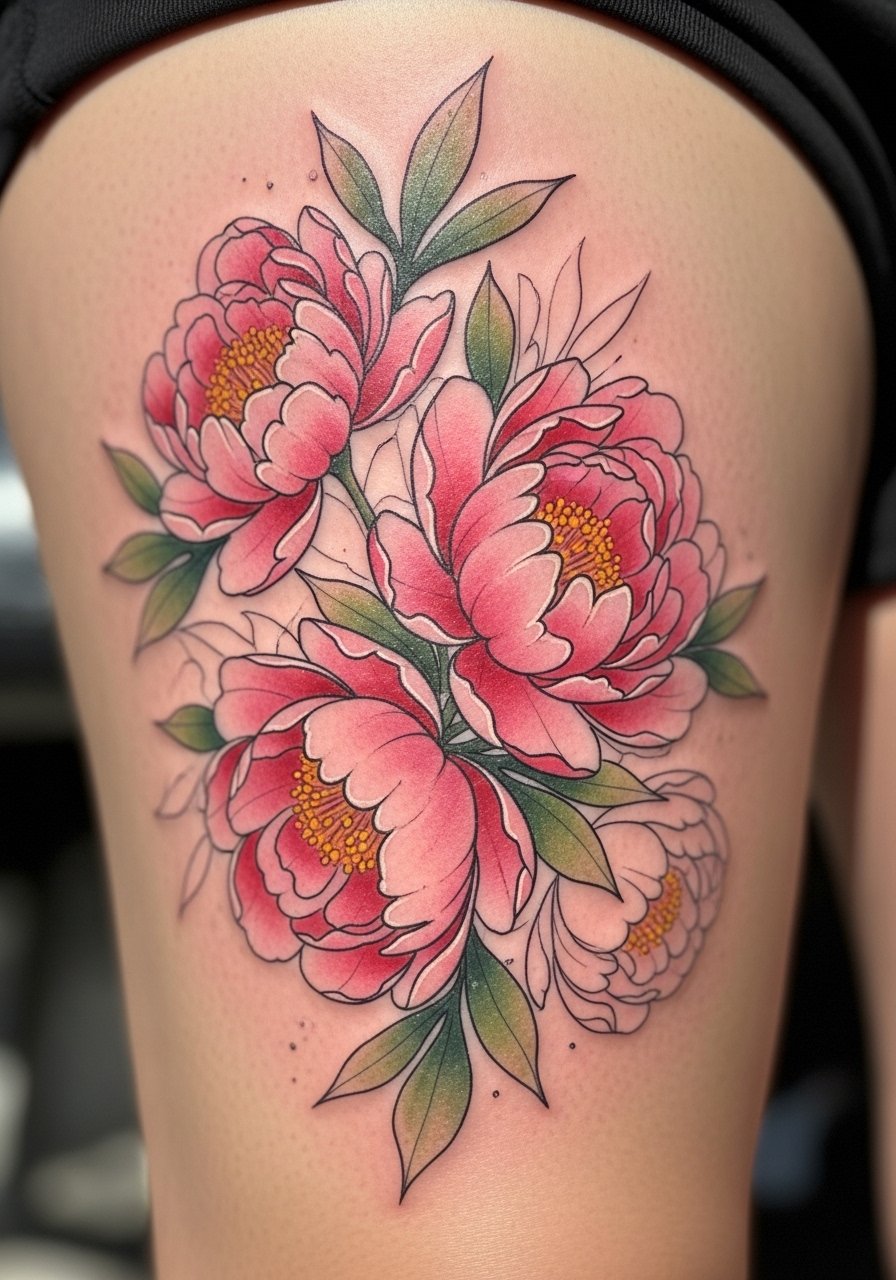
Peonies with watercolor washes become soft, romantic thight sleeves. Thigh flesh makes sessions comfortable; multiple sittings are common. Watercolor fades more than packed color, so artists often mix thin outlines for structure. I’ve seen healed watercolor peonies remain lovely if touched up after a year. Common mistake is overextending wash into areas that rub—plan the layout with clothing in mind.
14. Blackwork Poppy on Sternum
Style/Technique: Blackwork / Graphic
Pain Level: High (7-9/10)
Session Time: 1-3 hours
Best For: Bold center-chest statement
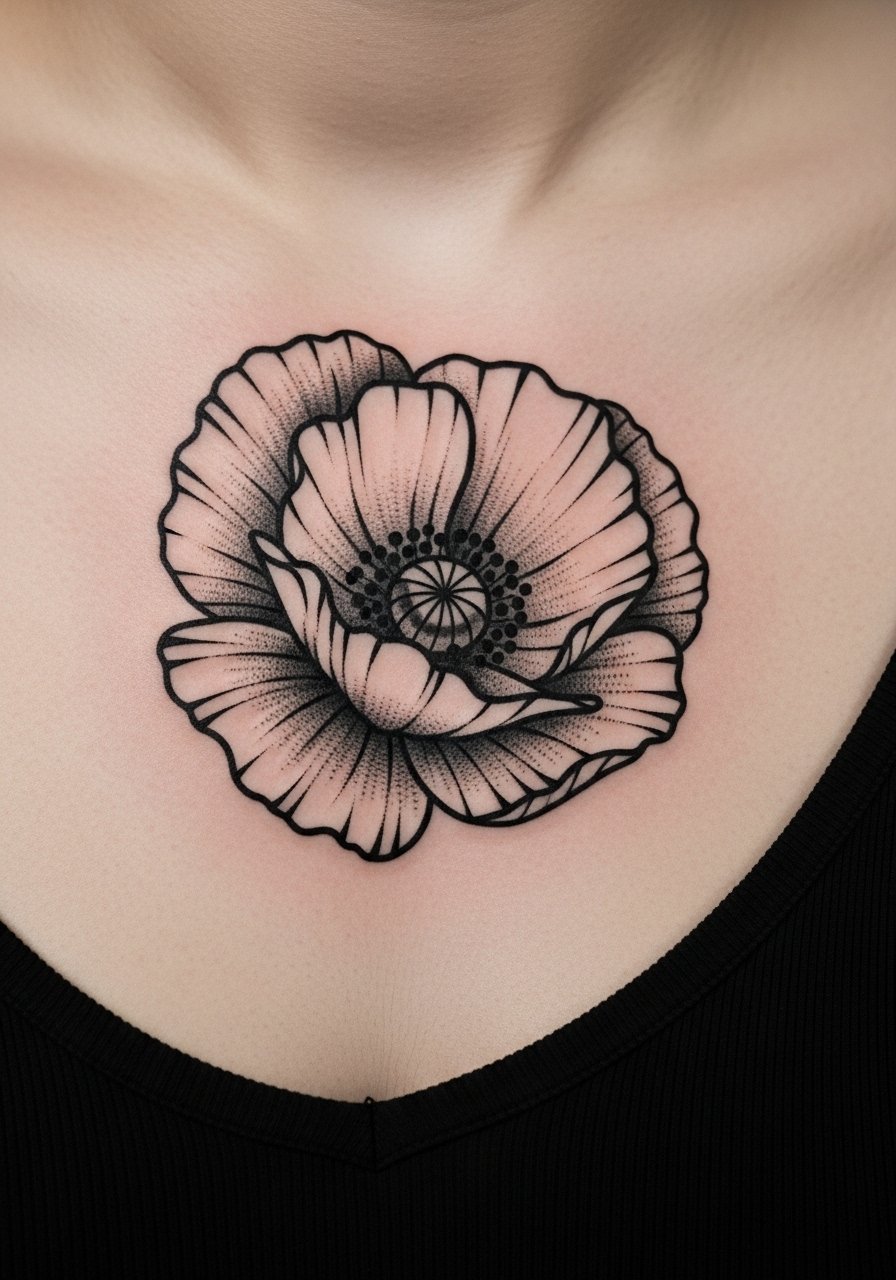
Sternum pieces are powerful but painful. Blackwork poppies read like a sigil and age well because solid black holds. Healing is more intense—avoid heavy chest movement and sleeping on your stomach. Ink saturation is key; patchy fills look worse healed. Ask for layered fills in case touch-up is needed. This is not the spot for your first tattoo unless you’re prepared for pain.
15. Minimalist Forget-Me-Not Finger Band
Style/Technique: Minimalist / Tiny Band
Pain Level: High (6-8/10)
Session Time: 30-60 minutes
Best For: Symbolic ring replacement, subtle reminder
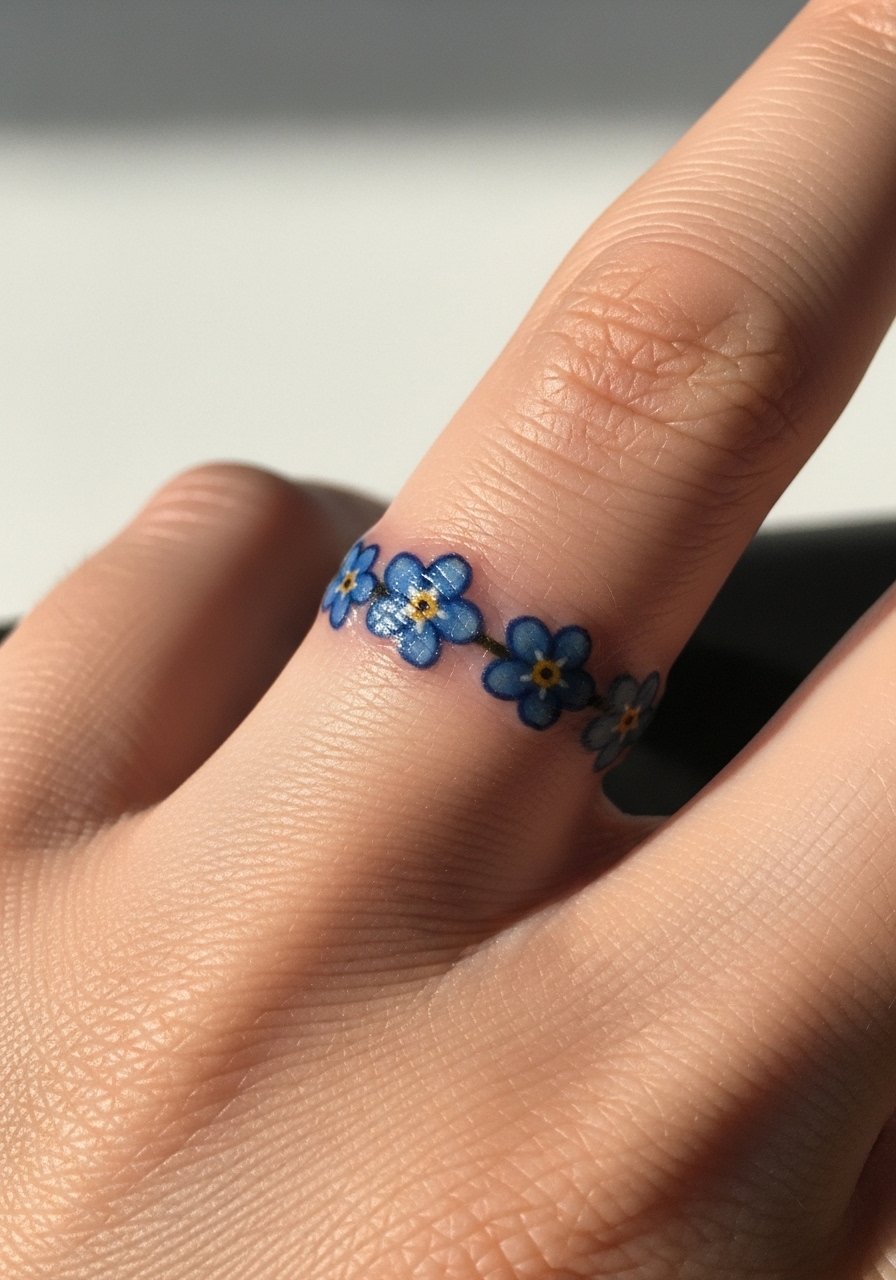
Finger tattoos are popular but notorious for fading and blurring. Forget-me-nots in a minimalist band are meaningful, but expect touch-ups. Pain is high due to thin skin and bone. If you want a lasting finger piece, choose bolder lines and simpler shapes. Keep hands out of harsh detergents while healing—fingers are high-use zones and need extra care.
16. Micro-Realism Orchid on Collarbone
Style/Technique: Micro-Realism / Detailed Bloom
Pain Level: Medium (4-6/10)
Session Time: 1-2 hours
Best For: Elegant visible piece, refined detail
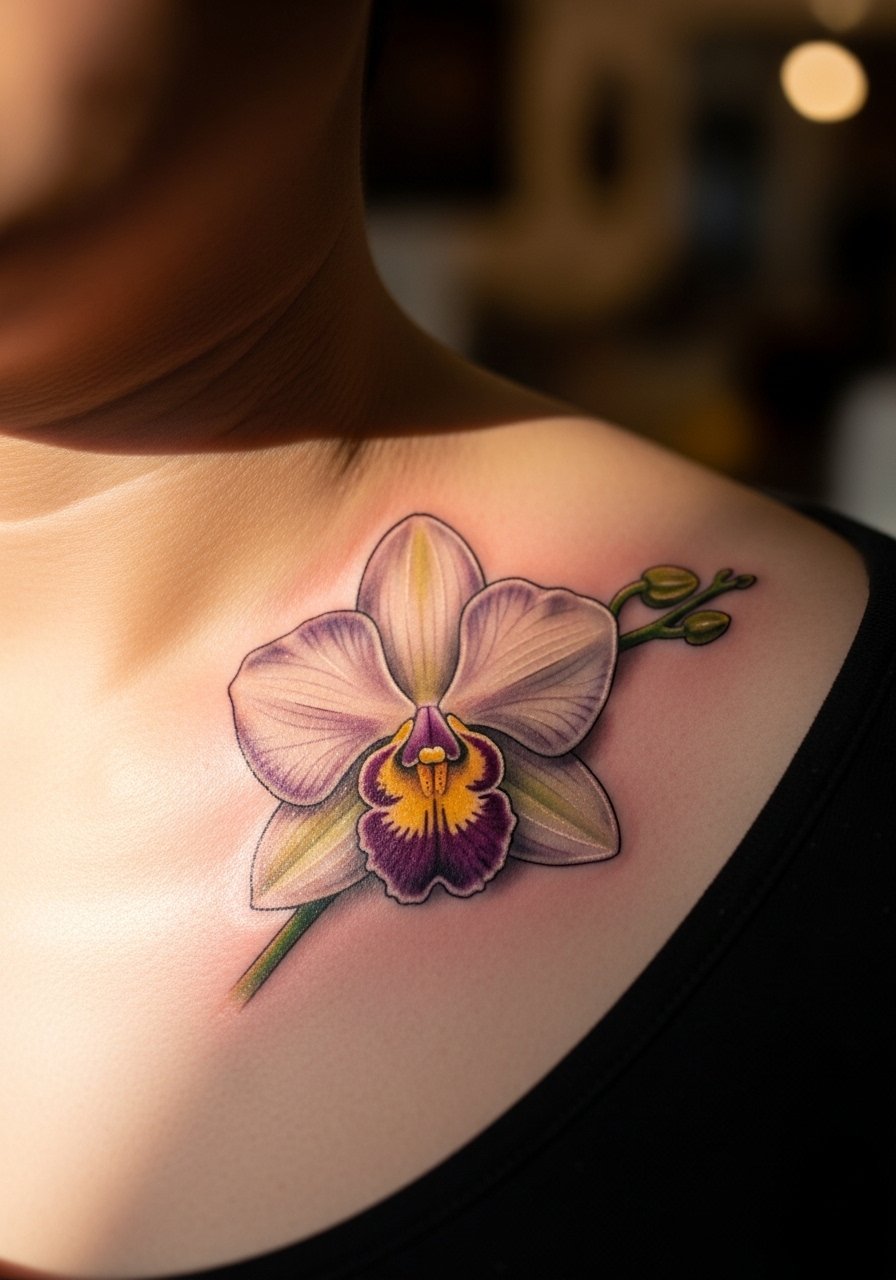
Orchids translate beautifully in micro-realism for a refined look. Collarbone placement gives visibility and elegance. Pain is moderate and healing requires avoiding necklaces and straps. Micro shading holds better when artists use tiny amounts of contrast. I recommend seeing healed examples on similar skin tones—orchid whites and pale colors can read differently once healed.
17. Dotwork Iris on Spine Nape
Style/Technique: Dotwork / Black & Gray
Pain Level: High (7/10)
Session Time: 1-2 hours
Best For: Vertical, symbolic placement
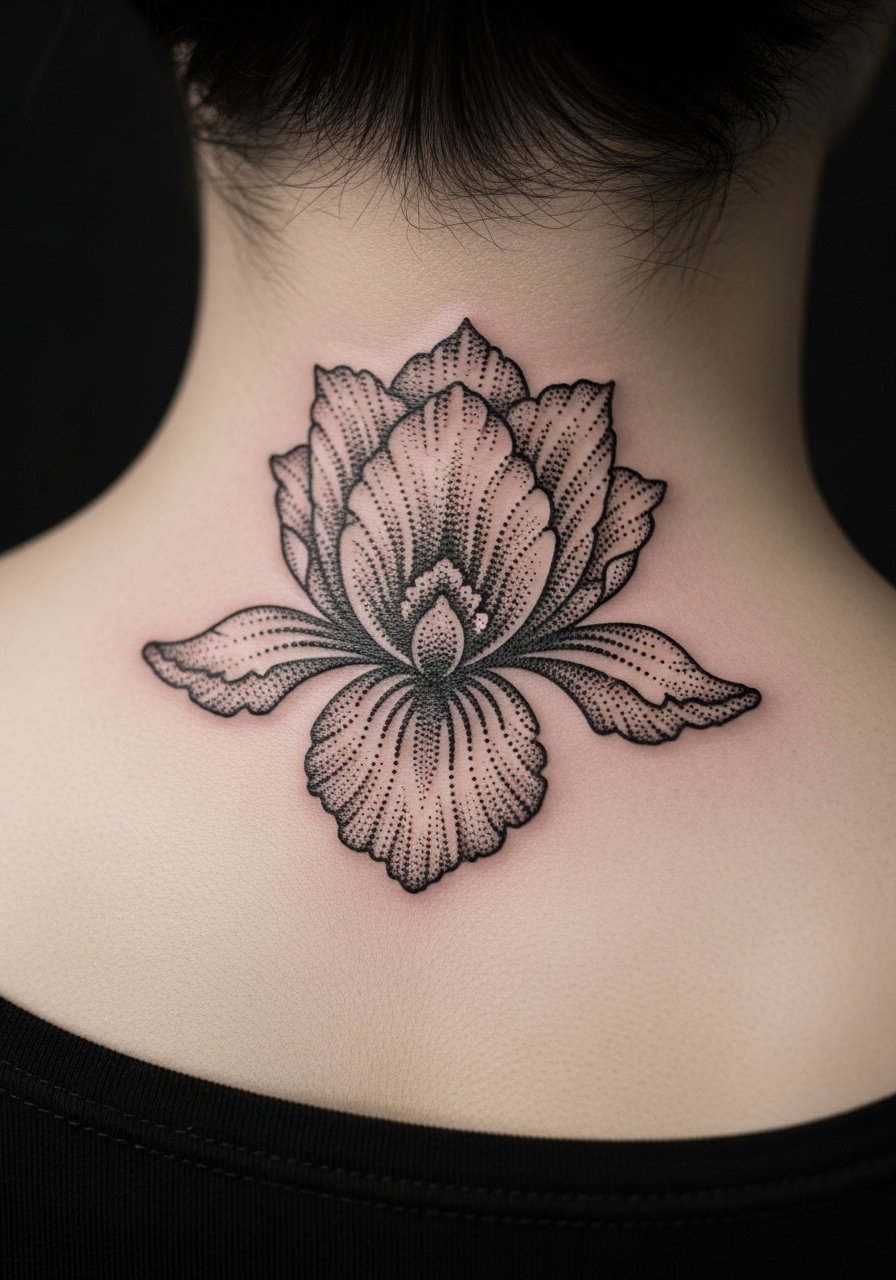
The nape is a striking spot for a dotwork iris. It’s sensitive and movement-heavy; expect higher discomfort. Dotwork ages gracefully if done densely enough. Keep hair away from the area while healing to prevent scabbing issues. Artists skilled in stippling can create delicate gradients that hold up; sloppy dotwork becomes patchy, so pick someone with examples.
18. Botanical Sleeve With Birth Flower Collage (Full Arm)
Style/Technique: Mixed Styles / Botanical Collage
Pain Level: Medium-High (5-8/10)
Session Time: Multiple sessions
Best For: Collector pieces, layered storytelling
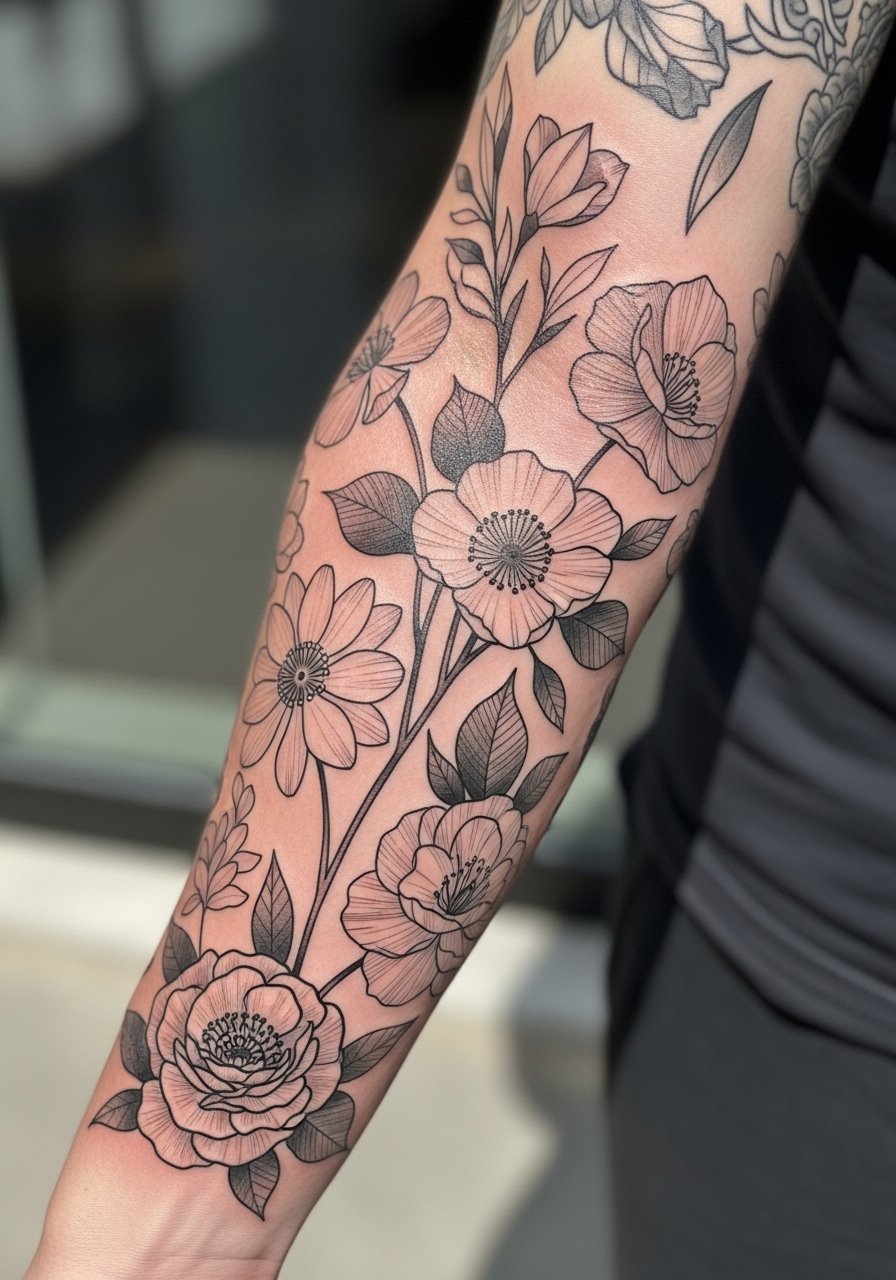
I’ve seen sleeves that thread multiple birth flowers together as a family map. This lets you build narrative across styles—fine line for personal verses, neo-traditional for bold anchors. Expect multiple sessions and evolving pain depending on location. Healing is staged; each session needs full aftercare. Plan negative space so elements don’t merge. This approach is great if you want an intentional, timeless piece.
19. Pressed Flower Tattoo Inside Wrist Capsule
Style/Technique: Micro-Realism / Vintage Pressed Look
Pain Level: Low (3/10)
Session Time: 1-2 hours
Best For: Nostalgic, pocket keepsake
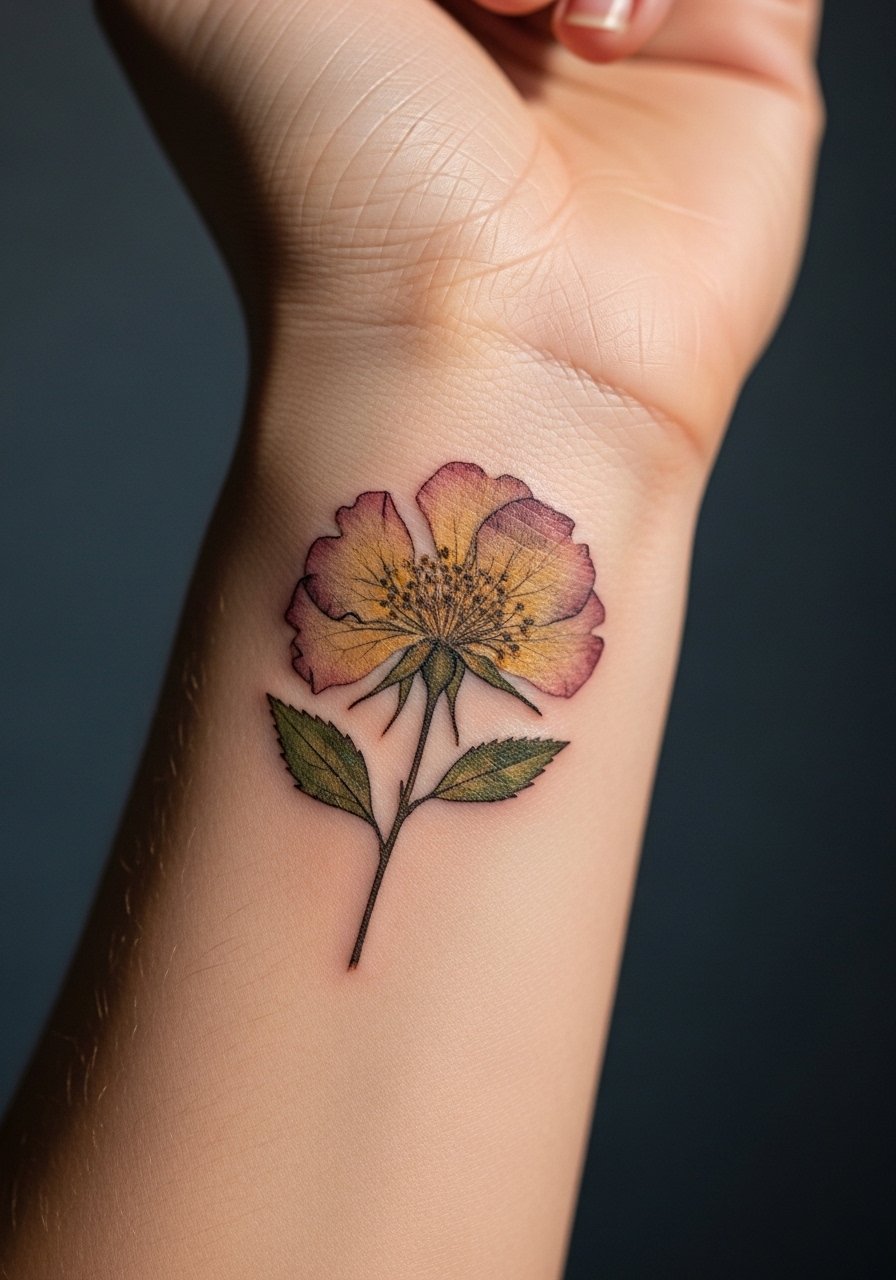
Pressed flower tattoos mimic dried botanicals—perfect for sentimental pieces. The inside wrist is visible and intimate. This style leans on muted color and soft edges to sell the pressed effect. Expect low pain but keep the area protected from friction. Over-saturation ruins the vintage look; ask your artist for thin layering to achieve authenticity.
20. Birth Flower and Constellation Sternum Pairing
Style/Technique: Fine Line + Dotwork Constellation
Pain Level: High (7-8/10)
Session Time: 1-3 hours
Best For: Symbolic, celestial-personal combo
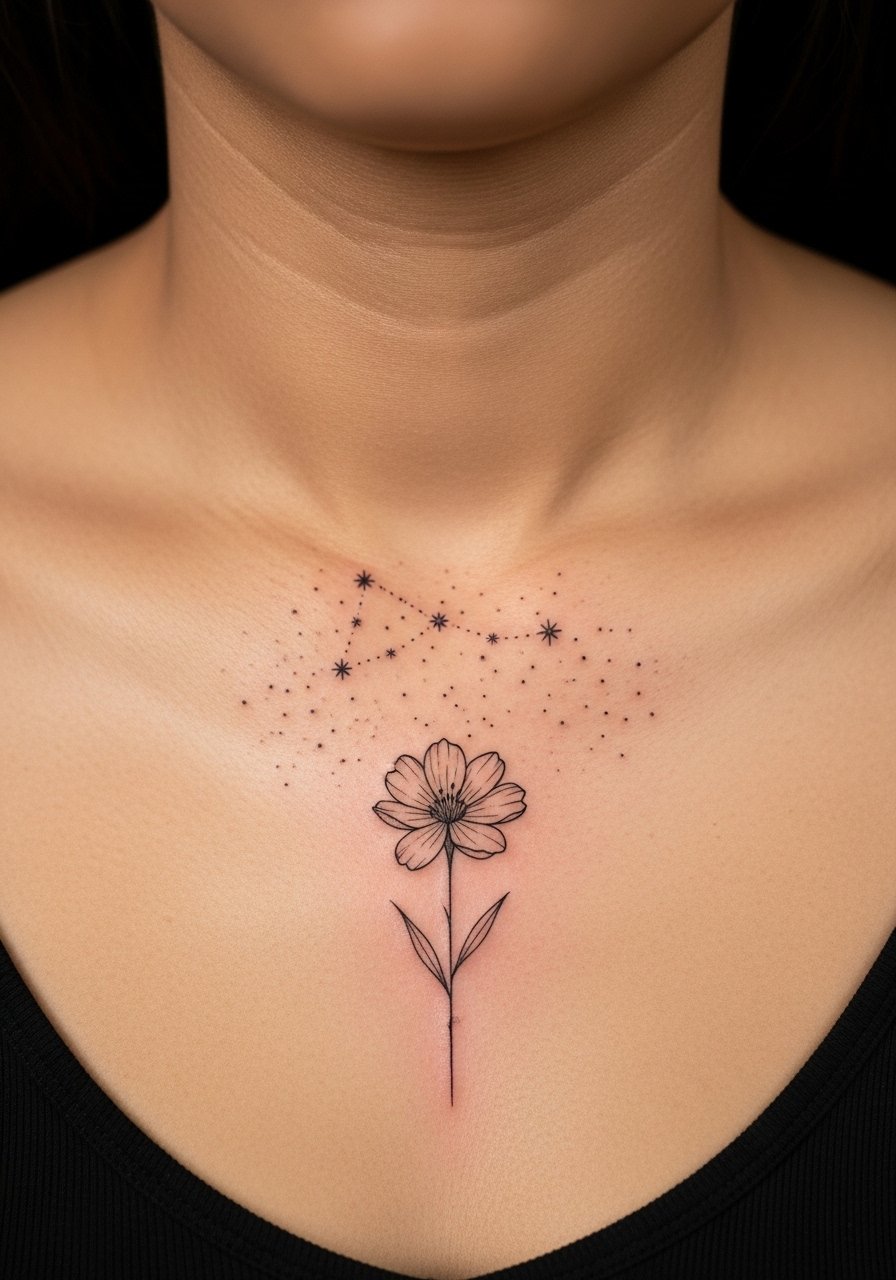
Pairing your birth flower with a constellation adds a personal sky map. Sternum placement amplifies intimacy but increases pain. Fine line florals anchored with dotwork stars age well when the lines are bold enough to survive settling. Keep in mind chest movement affects healing. This combo reads like a small personal emblem—discuss scale carefully.
21. Seed Packet Wrist Stamp (Birth Flower + Name)
Style/Technique: Neo-Vintage / Script + Illustration
Pain Level: Low (3/10)
Session Time: 1-2 hours
Best For: Playful, narrative wrist piece
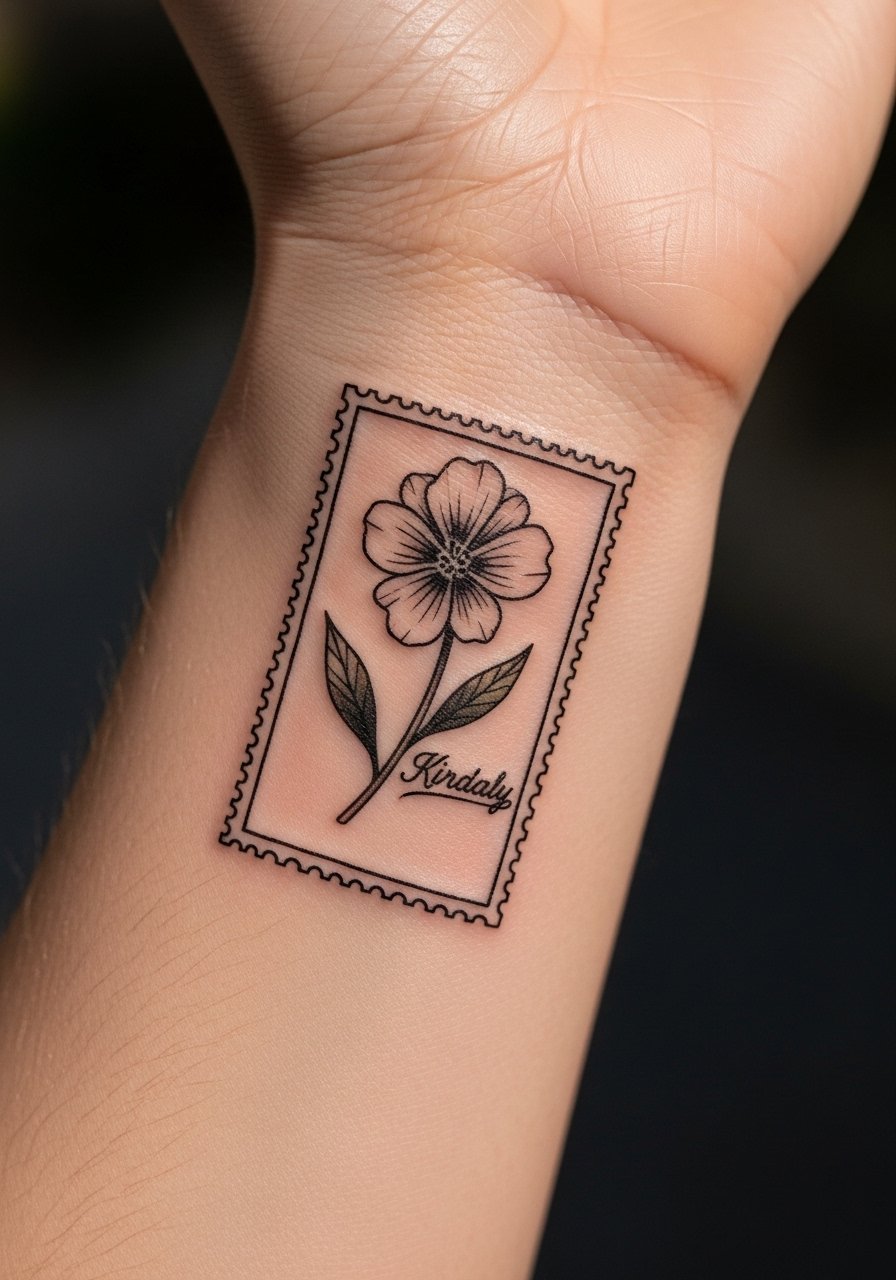
I love the seed packet motif—it's literal and charming without being cheesy. The wrist suits this like a tiny label. Script needs to be bold enough to remain legible; tiny cursive often disappears. Healing is straightforward; protect from wrist flexion and straps. Ask your artist for a mockup scaled to your wrist to ensure readability.
22. Birth Flower Anklet Chain (Multiple Small Blooms)
Style/Technique: Minimalist / Repeating Motif
Pain Level: Medium (4-5/10)
Session Time: 1-2 hours
Best For: Decorative, summery anklet look
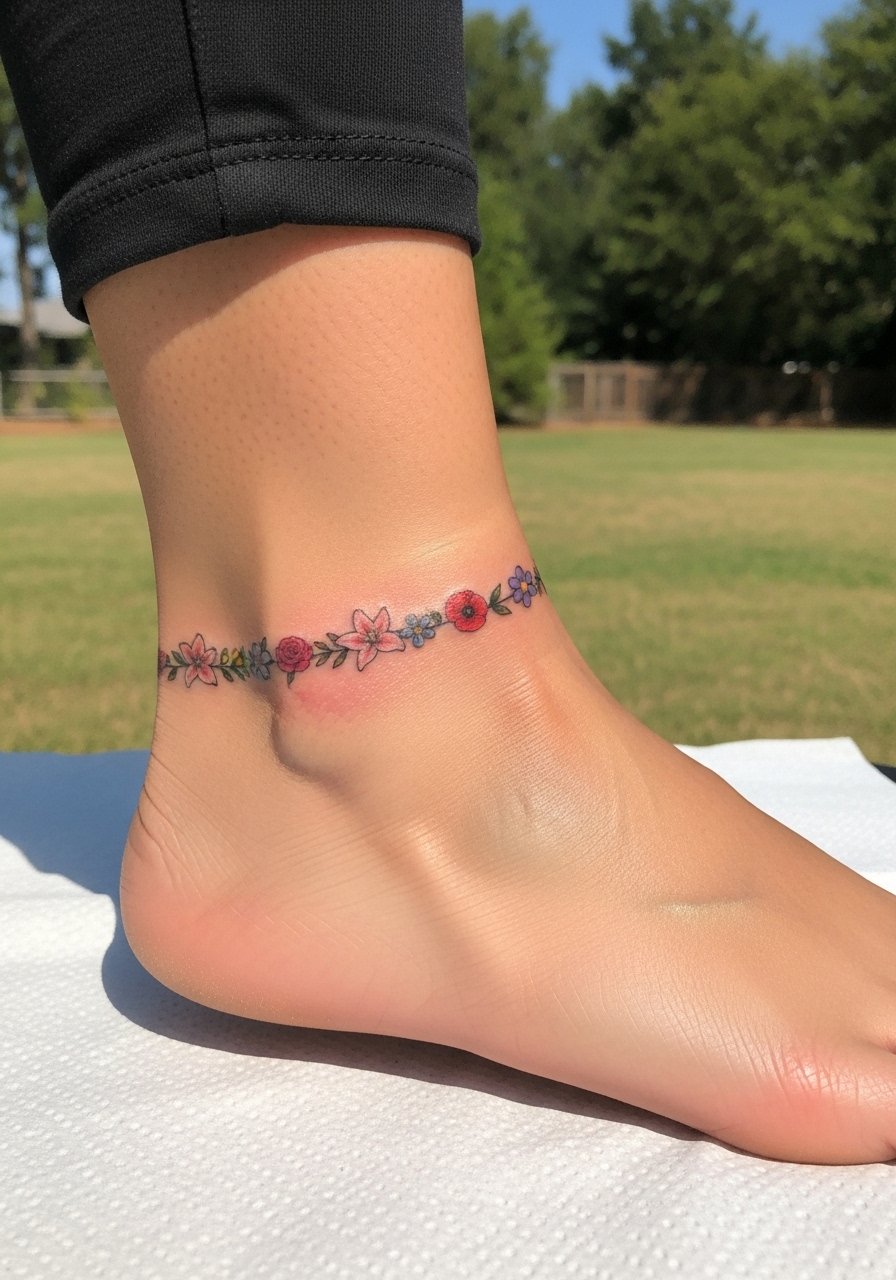
Anklet bands of small flowers act like permanent jewelry. Ankles can be fussy with shoes rubbing—plan footwear while healing. Multiple small motifs require consistent line weight so they age congruently. I’ve seen these look charming healed when spacing is generous. Avoid extremely thin stems that can vanish.
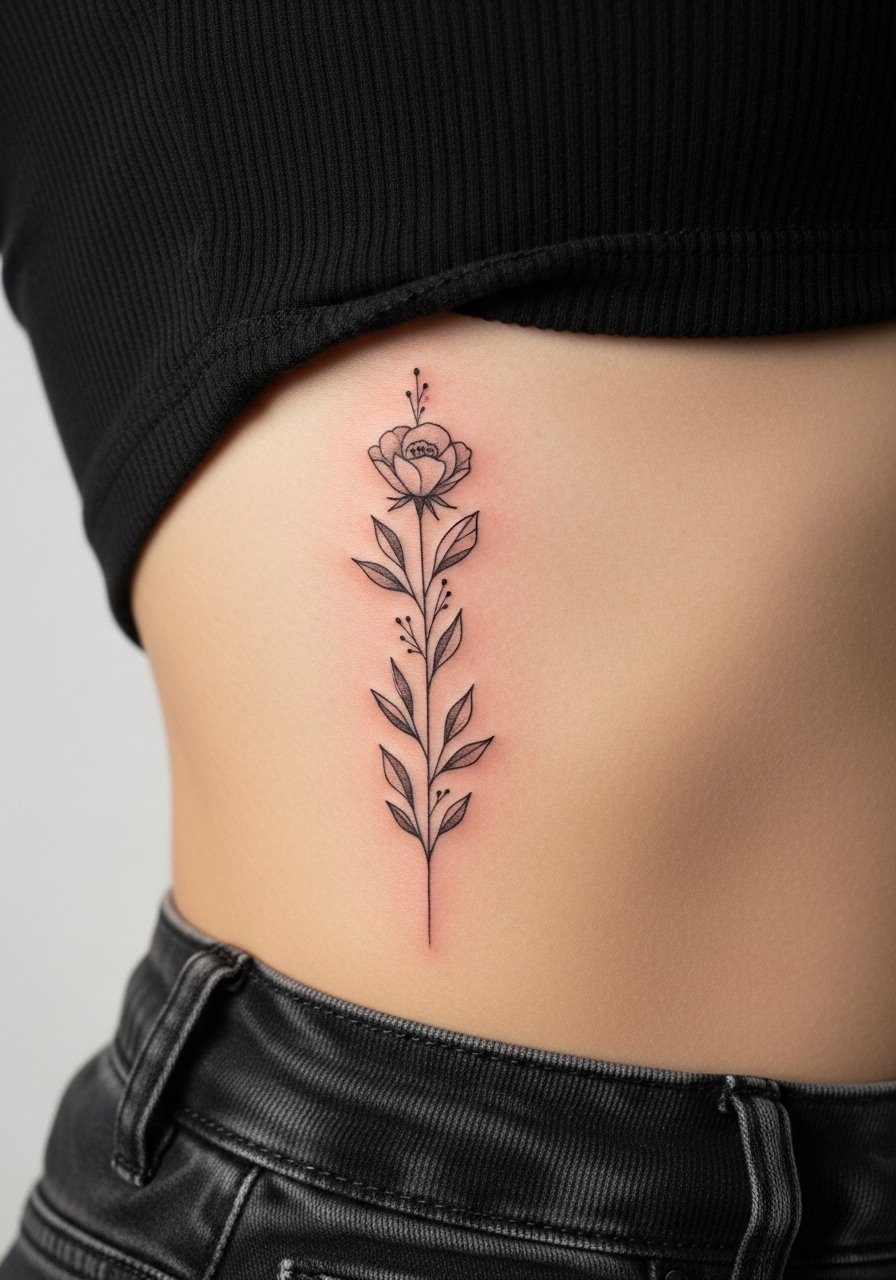
23. Single Stem Magnolia on Sternum Edge
Style/Technique: Fine Line / Elegant Stem
Pain Level: High (7/10)
Session Time: 1-2 hours
Best For: Center-chest accent, romantic
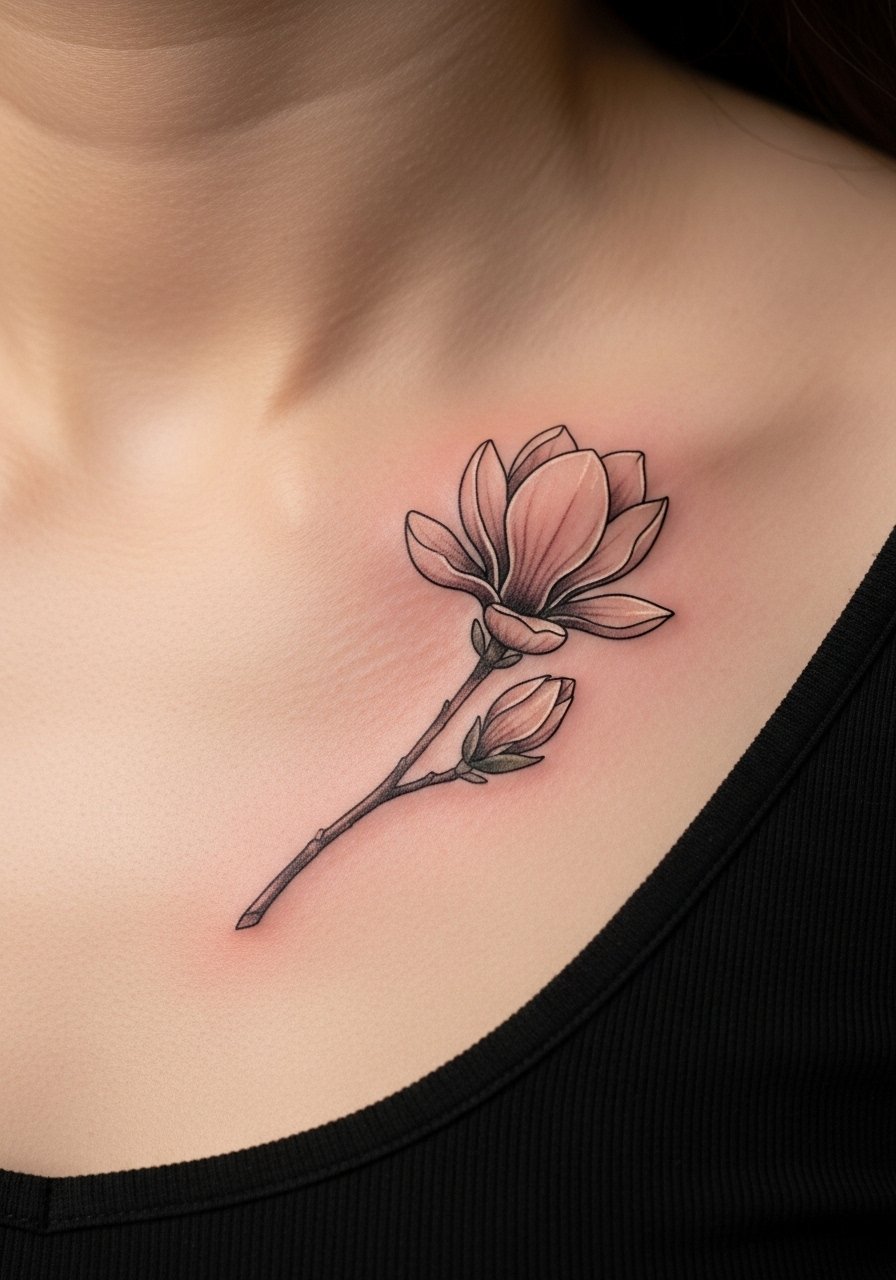
Magnolias are bold yet refined in single-stem placements. Sternum edges are sensitive; expect strong pain. Works well for a vertical, intimate accent. Heals with careful clothing choices. Lines should be confident to account for chest movement; avoid wispy outlines that disappear.
24. Birth Flower Compass on Outer Forearm
Style/Technique: Neo-Traditional / Symbolic Map
Pain Level: Low (2-3/10)
Session Time: 1-3 hours
Best For: Travel or life-guiding symbolism

Combining a compass with your birth flower turns a botanical into a life-direction symbol. Outer forearm placement is low-pain and durable. Make sure the compass lines are bold enough to last. Heals predictably; this is a good spot for visible symbolism that’s not overly flashy.
25. UV-Accent Birth Flower Behind Shoulder Blade
Style/Technique: Fine Line + UV Ink Accents
Pain Level: Medium (4-6/10)
Session Time: 1-2 hours
Best For: Hidden pop under UV light, special meaning
UV accents add a secret layer to your birth flower—visible under blacklight or photos but subtle daily. Shoulder blade is a forgiving spot with moderate pain. UV inks require an artist experienced with them; they can fade differently. I’ve seen UV touches look great for nightlife or photos, but don’t rely on them for daily visibility.
26. Geometric Birth Flower Mandala on Calf
Style/Technique: Geometric + Floral / Dotwork
Pain Level: Medium (4-6/10)
Session Time: 2-4 hours
Best For: Symmetrical, meditative piece
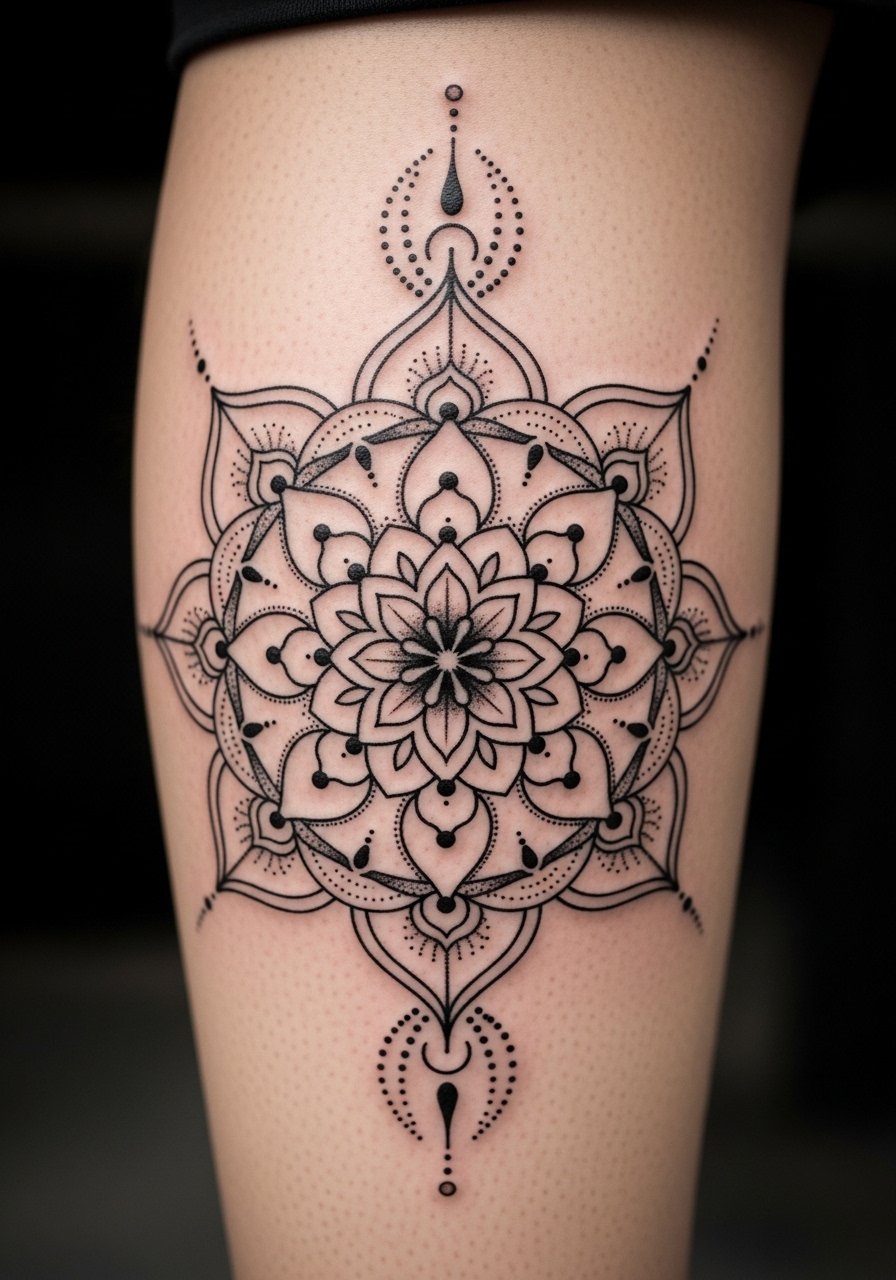
Merging geometry with your birth flower creates a meditative, balanced design. Calves offer a firm surface for symmetry and heal well. Dotwork needs consistent density to avoid patchy healing. Pain is moderate. Artists should plan spacing to maintain mandala clarity as skin ages.
27. Tiny Seedling on Inner Arm (New Life Symbol)
Style/Technique: Minimalist / Tiny Green Growth
Pain Level: Low (2/3)
Session Time: 20-40 minutes
Best For: Symbol of new beginnings, subtle
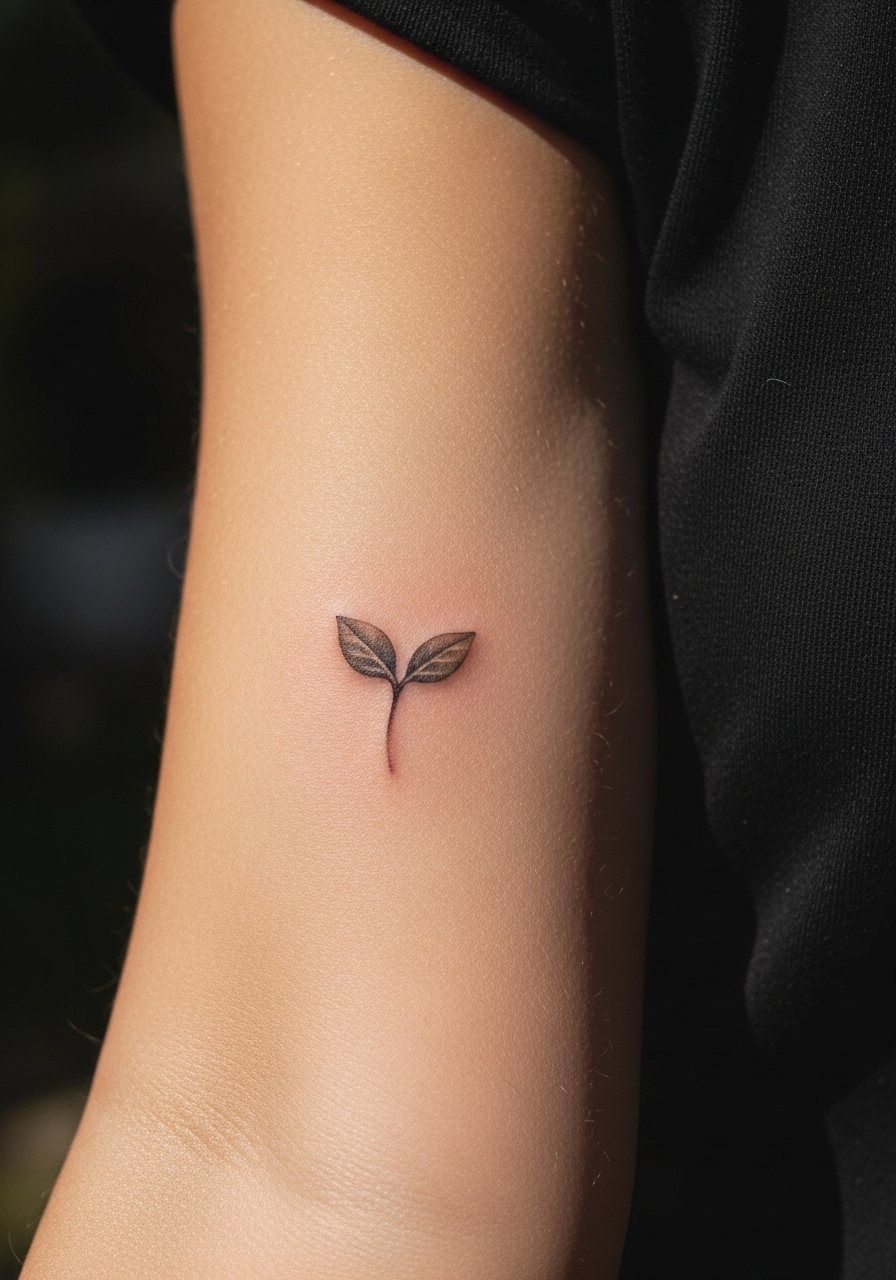
A seedling is an understated way to reference birth flower symbolism—ideal for those wanting a small meaningful mark. Inner arm pain is low and healing is quick. Small designs need confident lines; overly thin marks blur. This is a great starter piece if you want a daily reminder without commitment to a large canvas.
28. Birth Flower Ring on Thumb Side
Style/Technique: Minimalist / Tiny Band Accent
Pain Level: High (6-8/10)
Session Time: 30-60 minutes
Best For: Visible personal symbol, jewelry alternative
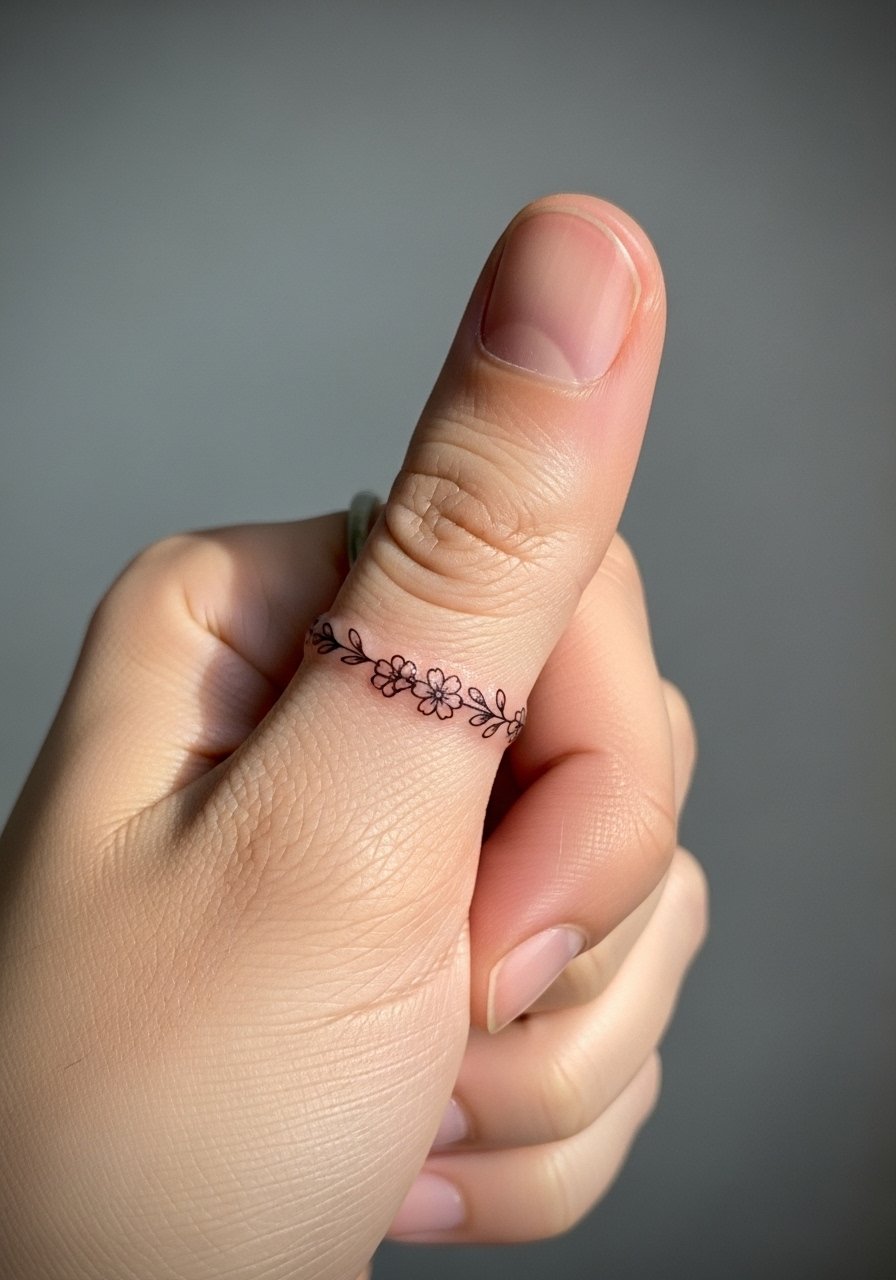
Thumb and hand placements are highly visible and prone to fade. If you want a ring of flowers, accept that touch-ups are likely. Pain is high due to thin skin. Choose bold, simple shapes and thicker lines. Keep hand use gentle while healing to protect ink.
29. Birth Flower Bookmark Tattoo on Side Rib
Style/Technique: Fine Line / Vertical Bookmark Motif
Pain Level: High (7-8/10)
Session Time: 1-2 hours
Best For: Literary symbolism, personal reminder
The side rib is great for vertical pieces that feel private. Bookmark tattoos can mirror your love of stories and symbolize chapters in life. Pain is high; take breaks. Healing demands loose clothing to avoid friction. Fine line bookmarks age well if lines are slightly bolder than micro hairlines.
30. Heirloom Locket With Birth Flower on Chest
Style/Technique: Neo-Victorian / Micro-Realism + Script
Pain Level: High (7/10)
Session Time: 1-3 hours
Best For: Sentimental portrait-style piece
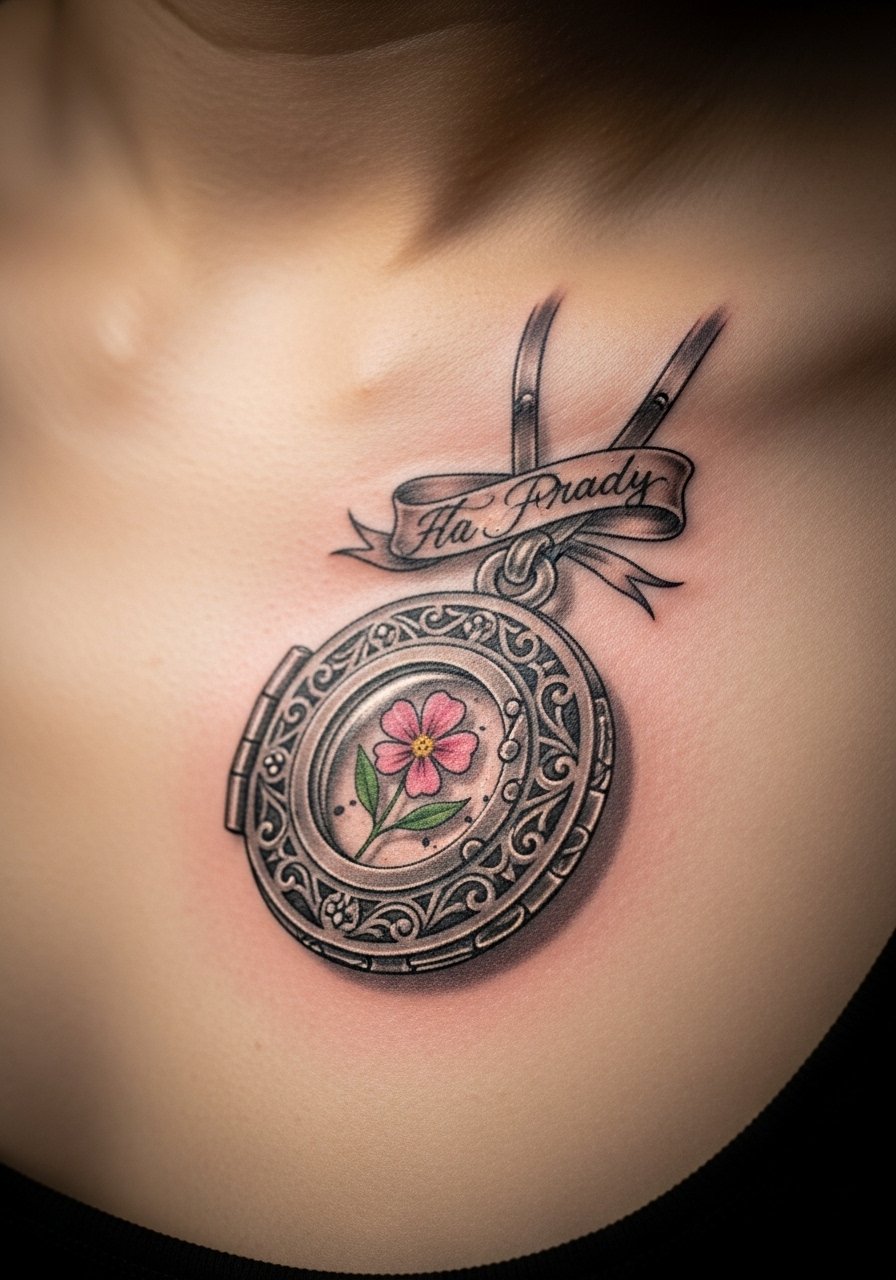
Lockets containing a birth flower feel like wearable memory. Chest pieces are intimate and can be painful, but the result is deeply personal. Script and micro-realism need careful scaling—tiny text often fades. Discuss contrast and spacing with your artist so the locket reads clearly once healed. Protect the area during healing and expect gradual settling.
Tattoo Prep and Aftercare Essentials
Aftercare Essentials:
- Aquaphor Healing Ointment, 14oz tube — Industry-recommended first 3-5 days
- Saniderm Transparent Adhesive Bandage, 6-inch roll — Second-skin healing method
- CeraVe Fragrance-Free Moisturizing Lotion, 12oz — Daily moisturizer for days 4-14
- Dr. Bronner's Unscented Castile Soap, 32oz — Gentle tattoo cleaning
- Hustle Butter Deluxe, 4oz — Vegan aftercare alternative artists often mention
- Mad Rabbit Tattoo Balm, 2oz — Long-term maintenance and color boost
- SPF 50+ Sunscreen Stick — Daily protection to prevent fading
- Numbing Cream 5% Lidocaine — Use only after checking with your artist
- Sanitary Hydrocolloid Bandages, Pack — For spot protection and scab management
- Micellar Water Makeup Remover, Unscented — Gentle cleansing around tattoos near makeup
- Tattoo Aftercare Kit (Multi-Pack) — Good starter kits for first-time healing
- Antibacterial Hand Soap, Gentle — Keep hands clean when touching a fresh tattoo
Before Your Appointment:
- Numbing cream with 5% lidocaine — Apply only if your artist approves
- Tattoo stencil transfer paper — For mockups if you sketch at home
Long-Term Maintenance:
- SPF 50+ Sunscreen Stick — Daily use to slow fading
- Mad Rabbit Tattoo Balm — For healed skin care
- Hustle Butter Deluxe — Keeps healed tattoos supple
Frequently Asked Questions
Q: How bad does a tattoo actually hurt?
A: Pain depends on placement and your tolerance. Outer arm and thigh are low (2-3/10). Ribs, sternum, and fingers run high (7-9/10). It’s usually more of a sharp rubbing or burning sensation than unbearable pain. I recommend short sessions and breaks for sensitive spots. Numbing creams with 5% lidocaine help but don’t remove all feeling—ask your artist first: Numbing cream 5% lidocaine.
Q: What if I regret my birth flower choice later?
A: Choose something with layered meaning—maybe pair the flower with a date, name, or constellation so it feels specific to you. Sit on an idea for several months and mock it up in different sizes and placements. Tattoo removal exists but is a long process; I’ve seen people opt for cover-ups or expansions that make the original feel intentional.
Q: How do I keep a floral tattoo from fading?
A: Sunscreen is the non-negotiable step—apply SPF 50+ daily once healed: SPF 50+ sunscreen stick. Keep skin moisturized with fragrance-free lotion like CeraVe. From what I’ve observed, black and bold color hold longest; pale watercolors and tiny script need more maintenance.
Q: Can I work out after getting a tattoo?
A: Wait at least 48-72 hours for low-friction workouts, longer for sweat-heavy sessions. Fresh tattoos can trap bacteria if you sweat heavily in tight clothing. For contact sports or heavy gym sessions, give it a week or more and use protective covering if needed.
Q: Should I get a small tattoo first to test pain and healing?
A: Only if it’s something you actually want. Size doesn’t always predict pain—a small ankle or rib tattoo can hurt more than a larger forearm piece. If nervous, pick a less sensitive spot like the outer upper arm or thigh for your first piece.
Q: How long until my tattoo looks normal again?
A: Surface healing usually takes 2-3 weeks. Colors and full skin recovery continue for 2-3 months. Expect peeling days 3-10; don’t pick scabs. Use gentle cleaning (unscented soap) and a recommended ointment like Aquaphor in the first days: Aquaphor Healing Ointment, 14oz.
Q: Do tattoos look different on different skin tones?
A: Yes. Black and gray read strongly across tones. Bright pastels can appear muted on deeper skin; white ink may be nearly invisible. I always ask to see healed work on similar skin tones. Artists who regularly tattoo a range of skin tones will guide color saturation and contrast.
Q: Which aftercare products do artists actually recommend vs. hype?
A: From conversations and my own experience, Saniderm and Aquaphor are commonly recommended for early healing. CeraVe or other fragrance-free lotions are artist-approved for later stages. Hustle Butter and Mad Rabbit get mixed but positive feedback for long-term maintenance. Always follow your artist’s specific aftercare instructions for best results.
