
I spent months narrowing down arrow tattoo ideas because the trick isn't just finding something that looks good fresh—it's picking a style that still reads like you after healing. These 24 clean arrow tattoos each carry clear meaning and real-life durability, and I broke down where they work, how they feel, and the one mistake to dodge before you book.
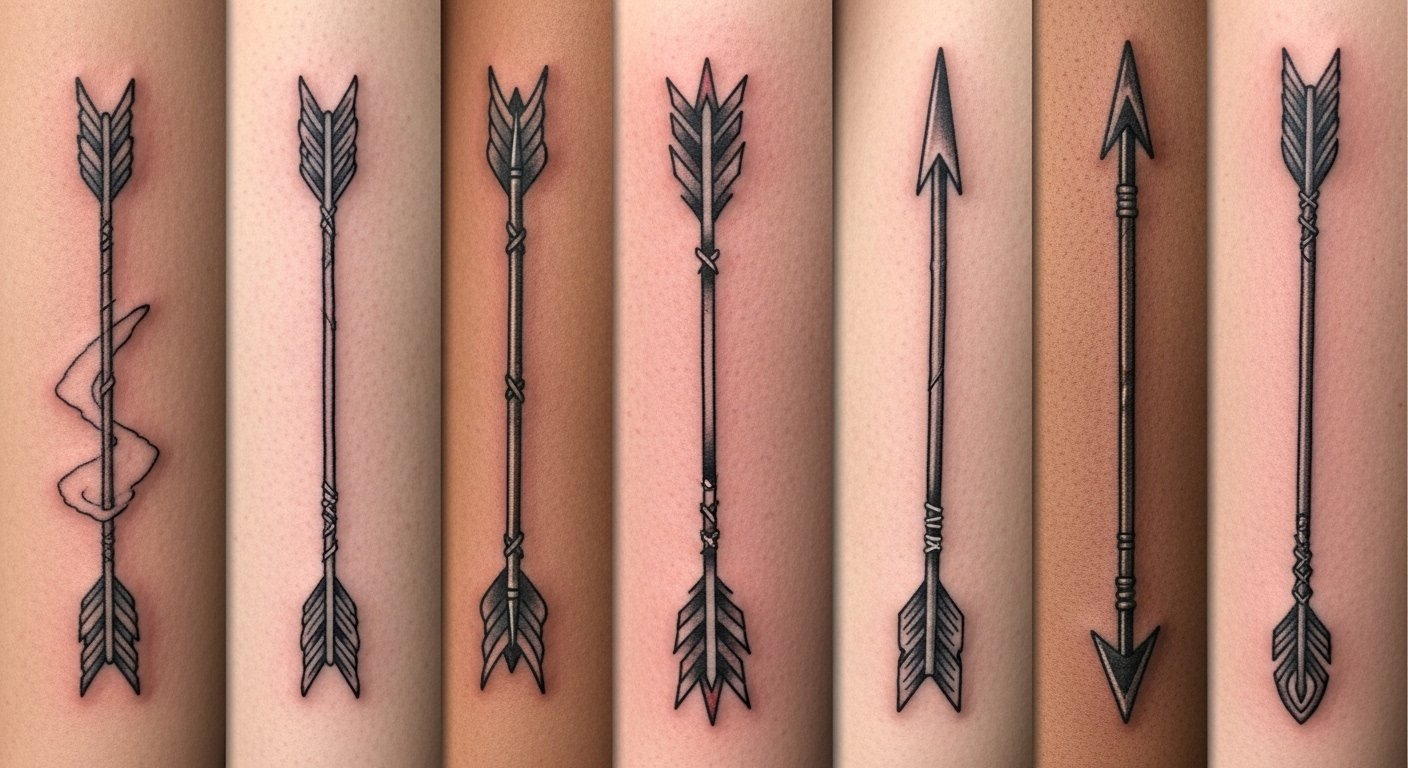
This list focuses on minimalist, traditional, and geometric vibes that work on forearms, wrists, ribs, and shoulders. I’ve been following 2026 trends and keep seeing micro-arrows, three-arrow unity pieces, and snake-wrapped blackwork—styles that age differently, so I call out what holds up healed.
1. Minimalist Single Arrow on Inner Wrist
Style/Technique: Minimalist / Fine Line
Pain Level: Low (2-3/10)
Session Time: 30-60 minutes
Best For: First arrow tattoo, subtle statement
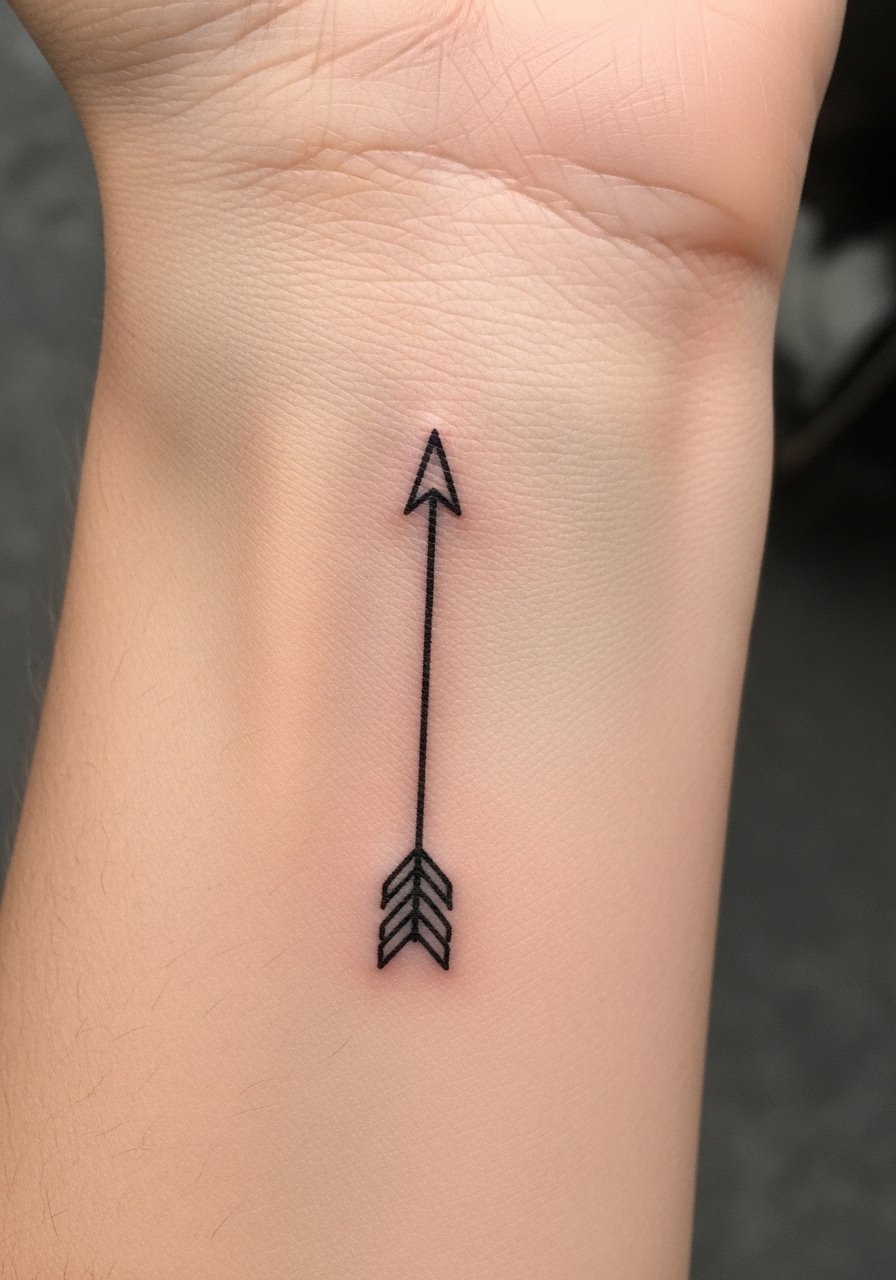
I picked this one as my first arrow tattoo—simple and direct. A small arrow on the inner wrist reads as determination or forward motion without shouting. Pain is mild here, but nerves and bone proximity can tickle. Healing is quick; surface heals in a couple weeks but expect delicate lines to soften a bit over months. Ask for slightly thicker single lines if you want longevity—fine-line arrows can blur faster. Mention "small arrow tattoo" or "first arrow tattoo" during consult so the artist knows to balance delicacy with longevity. Common mistake: asking for lines too hairline-thin. If you like tiny pieces, consider inner forearm instead for extra breathing room.
2. Crossed Arrows on Bicep
Style/Technique: Traditional / Bold Linework
Pain Level: Low-Medium (3-4/10)
Session Time: 1-2 hours
Best For: Friendship or unity pieces
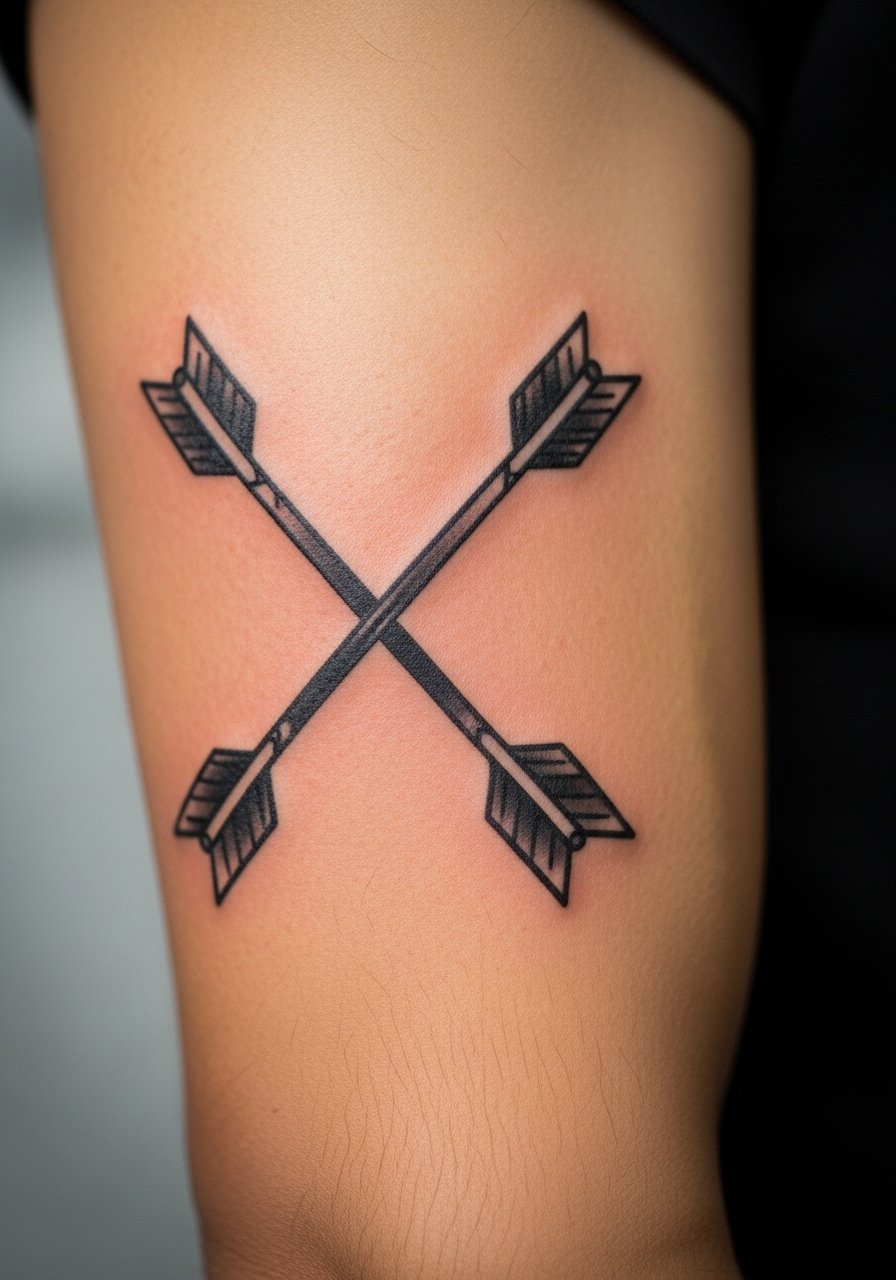
Crossed arrows are a clear symbol of friendship and alliance. I’ve recommended this style to people commemorating a friendship pact; it reads strong and timeless. The bicep gives the space for solid linework, meaning it ages well—traditional bold lines hold up better than ultra-fine detail. Expect low to moderate pain on the outer bicep and a single session for a medium-sized design. Healing needs regular moisturizing and sun protection to keep the black saturated. Don’t overcrowd the crossing point with tiny details—bold negative space at the intersection helps the symbol stay readable years later. Ask your artist about slightly rounded arrowheads for classic appeal.
3. Three Arrows on Forearm
Style/Technique: Neo-Traditional / Bold Lines
Pain Level: Low-Medium (3-4/10)
Session Time: 1-2 hours
Best For: Family, protection, unity
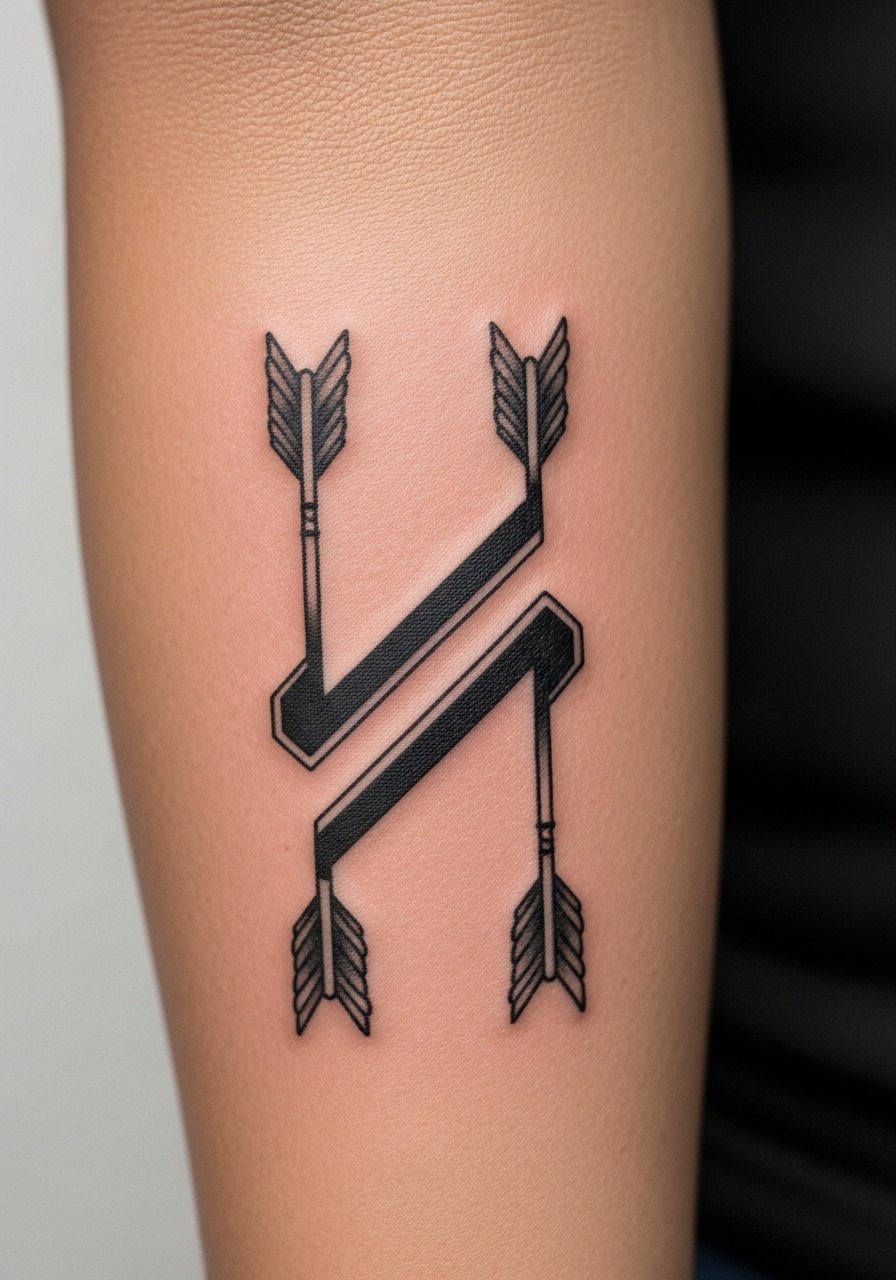
Three arrows together carry a "strength in unity" vibe—family, friends, or protection metaphors. On the forearm they follow the natural flow of the arm and look intentional whether you display or cover. I’ve seen these done in neo-traditional and blackwork styles; bold lines make them resilient to fading. Pain is manageable on the forearm, and aftercare is straightforward—clean gently, moisturize, and keep sun off during early months. A common mistake is crowding them with tiny filler work; the power of this concept is in its clarity. If you want personalization, subtly vary arrowhead styles to represent different people without losing the unity feel.
4. Bow and Arrow on Upper Arm
Style/Technique: Illustrative / Neo-Traditional
Pain Level: Medium (4-5/10)
Session Time: 2-3 hours
Best For: Goal-oriented, narrative pieces
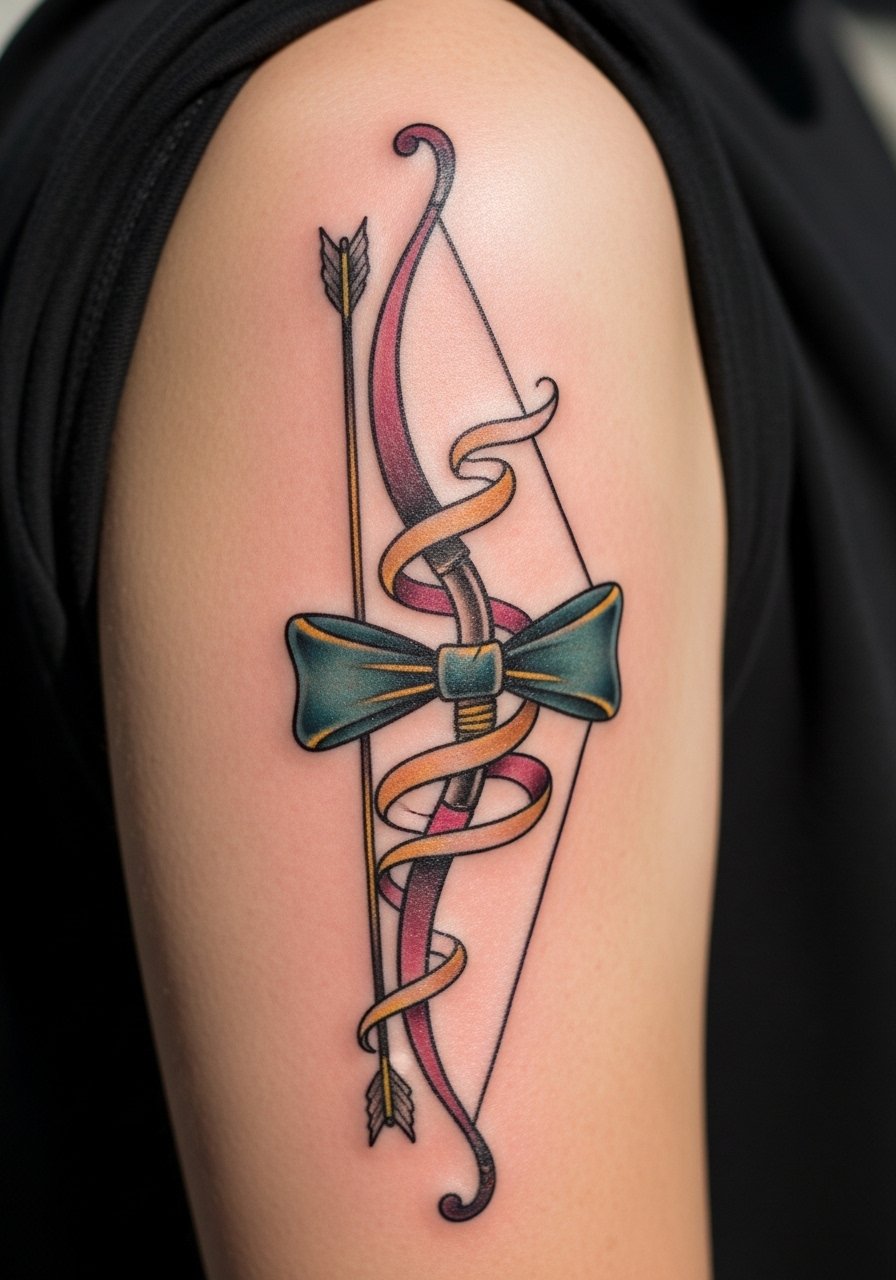
A bow and arrow tells a fuller story than a lone arrow—focus, aim, and intent. I see this as a great choice for people marking a goal or milestone. Upper arm placement gives room for composition and color accents if you want them. Expect moderate pain and a couple hours in the chair for line and shading. Aftercare matters: color tends to seem flatter during healing but brightens later. Artists I follow blend illustrative detail with bold outlines to keep pieces readable after years. Common mistake: cramming a bow into too small an area—pick an upper arm or shoulder blade so the curve reads naturally with your movement.
5. Geometric Arrow on Shoulder Blade
Style/Technique: Geometric / Blackwork
Pain Level: Medium (4/10)
Session Time: 1-2 hours
Best For: Modern aesthetic, symmetry lovers
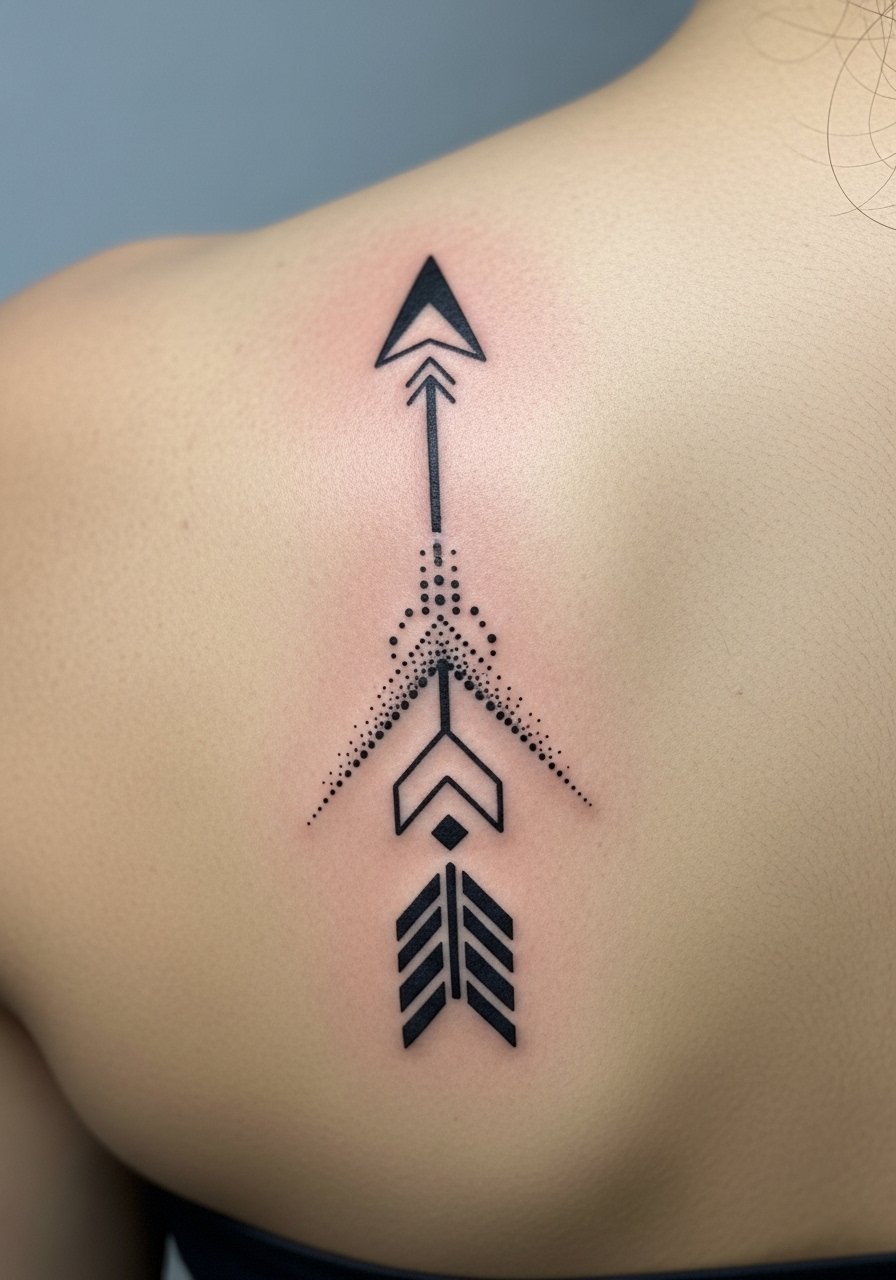
Geometric arrows add symmetry and a modern visual language to the classic arrow tattoo meaning direction and progress. Shoulder blade placement complements larger geometric motifs and lets the design breathe. Pain is moderate because of skin tension and some bone proximity near the shoulder blades. Geometric work reads clean when the artist is precise—look for portfolio examples of straight-line consistency and dotwork. Healing preserves the crispness if you avoid sun and heavy friction from straps. A common mistake: choosing a geometric pattern without considering body curvature—ask the artist to adapt the grid to your contours so the lines stay harmonious when you move.
6. Broken Arrow on Ribcage
Style/Technique: Fine Line / Minimalist
Pain Level: High (7-8/10)
Session Time: 1 session, up to 2 hours
Best For: Healing, peace, reconciliation
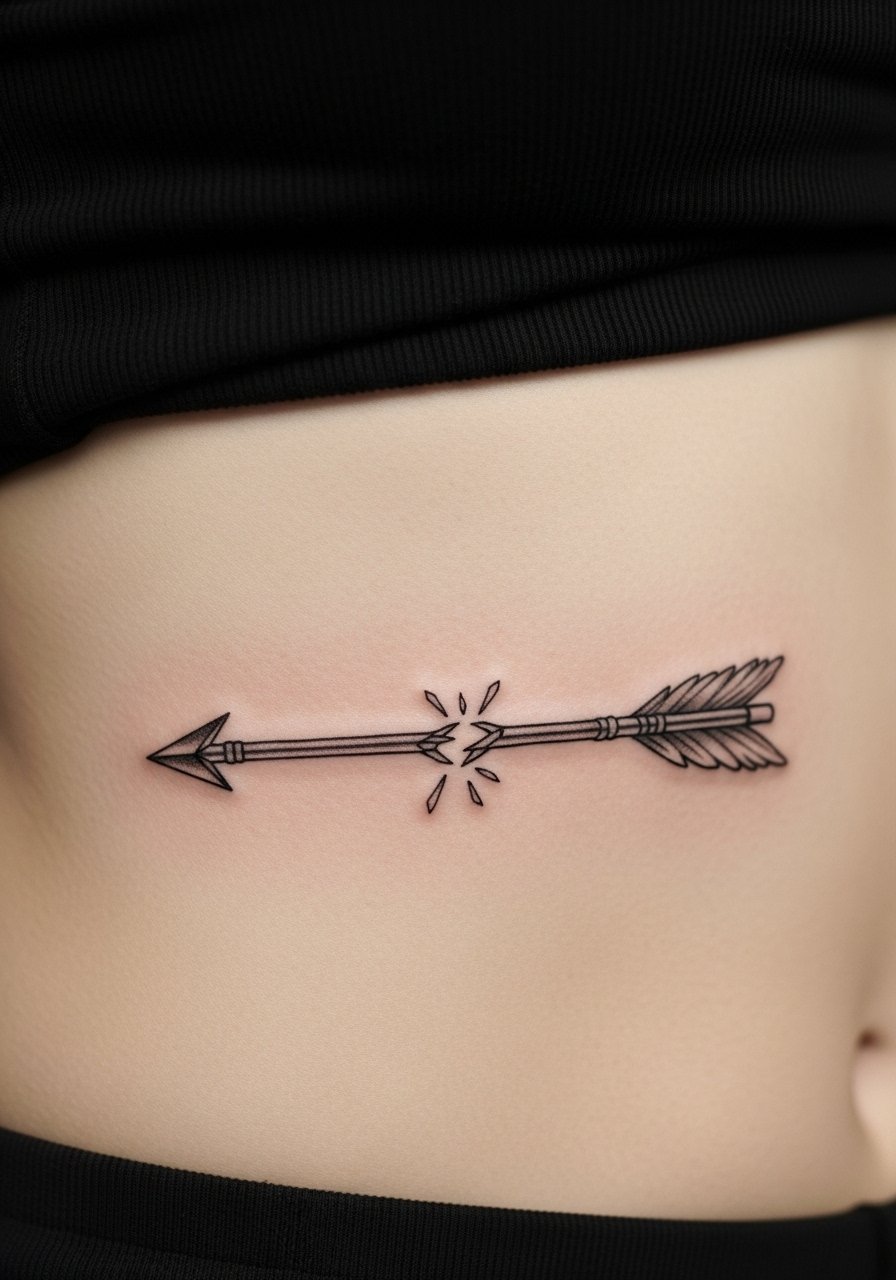
A broken arrow symbolizes peace or moving past conflict. I find ribcage placement adds intimacy and meaning—it's there for you more than everyone else. Beware: ribs are one of the more painful spots, so plan your pain tolerance accordingly. Healing takes care because movement and breathing can irritate the area; sleeping position matters in the first week. Fine lines look delicate here, but they can blur—ask the artist to bolden the break point slightly for durability. One mistake I see is picking too many micro-details for the rib area; simplicity keeps the symbol clean and readable as it ages.
7. Cupid’s Arrow on Collarbone
Style/Technique: Traditional / Watercolor Accent
Pain Level: Medium (4-5/10)
Session Time: 1-2 hours
Best For: Love markers, romantic milestones
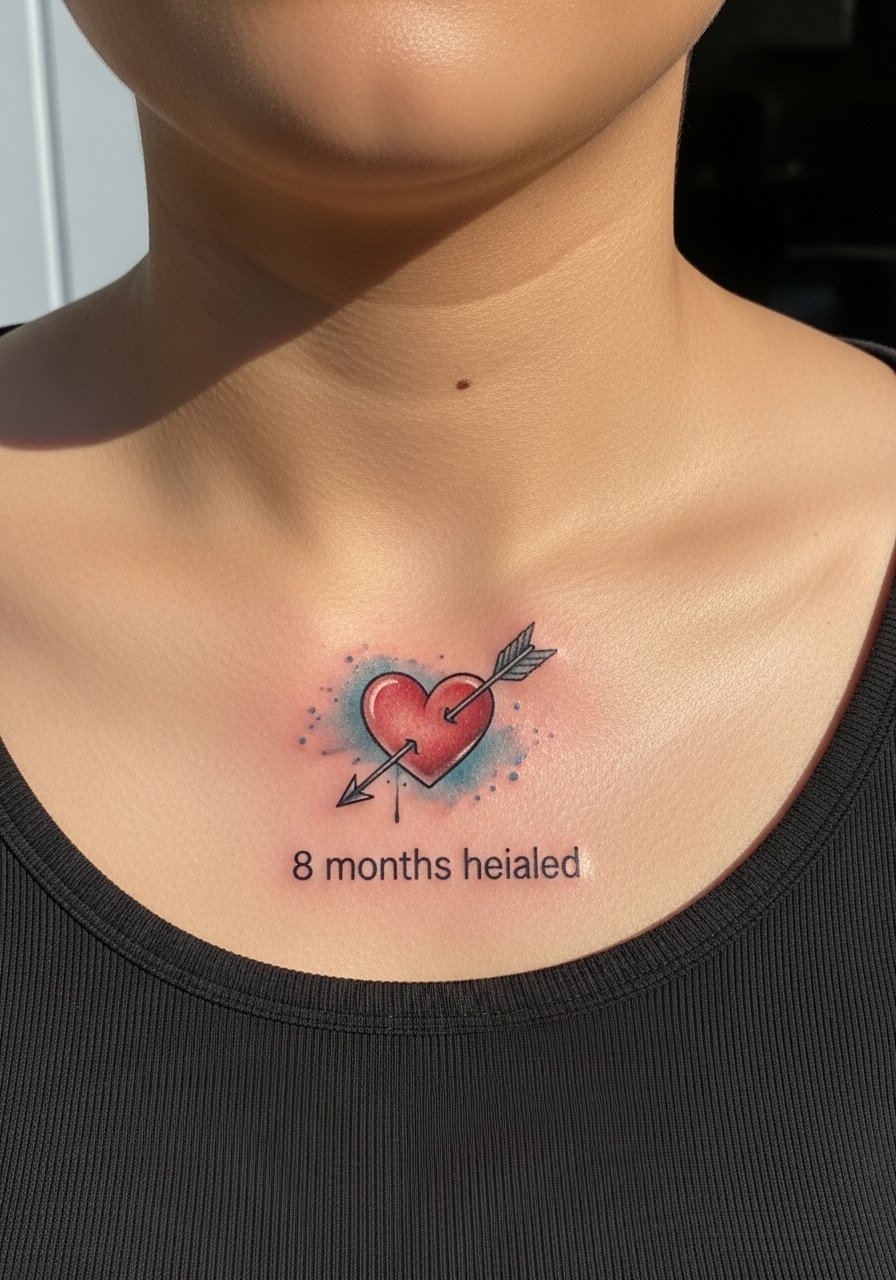
Cupid’s arrow reads as love struck or a romantic milestone. On the collarbone it looks flirty and visible with low-cut tops. Pain is moderate because the bone lies close to the surface. Watercolor accents look soft when fresh but I’ve noticed they can fade unevenly; if you care about longevity, ask the artist for a hybrid approach—solid black outlines with color fills. Aftercare requires extra sunscreen later since collarbone gets sun exposure often. A common mistake: choosing very pale watercolor without anchor lines; colors can wash out on deeper tones unless the artist uses good saturation.
8. Arrow and Compass on Forearm
Style/Technique: Nautical Minimalist / Linework
Pain Level: Low-Medium (3-4/10)
Session Time: 1-2 hours
Best For: Travelers, life-direction symbolism
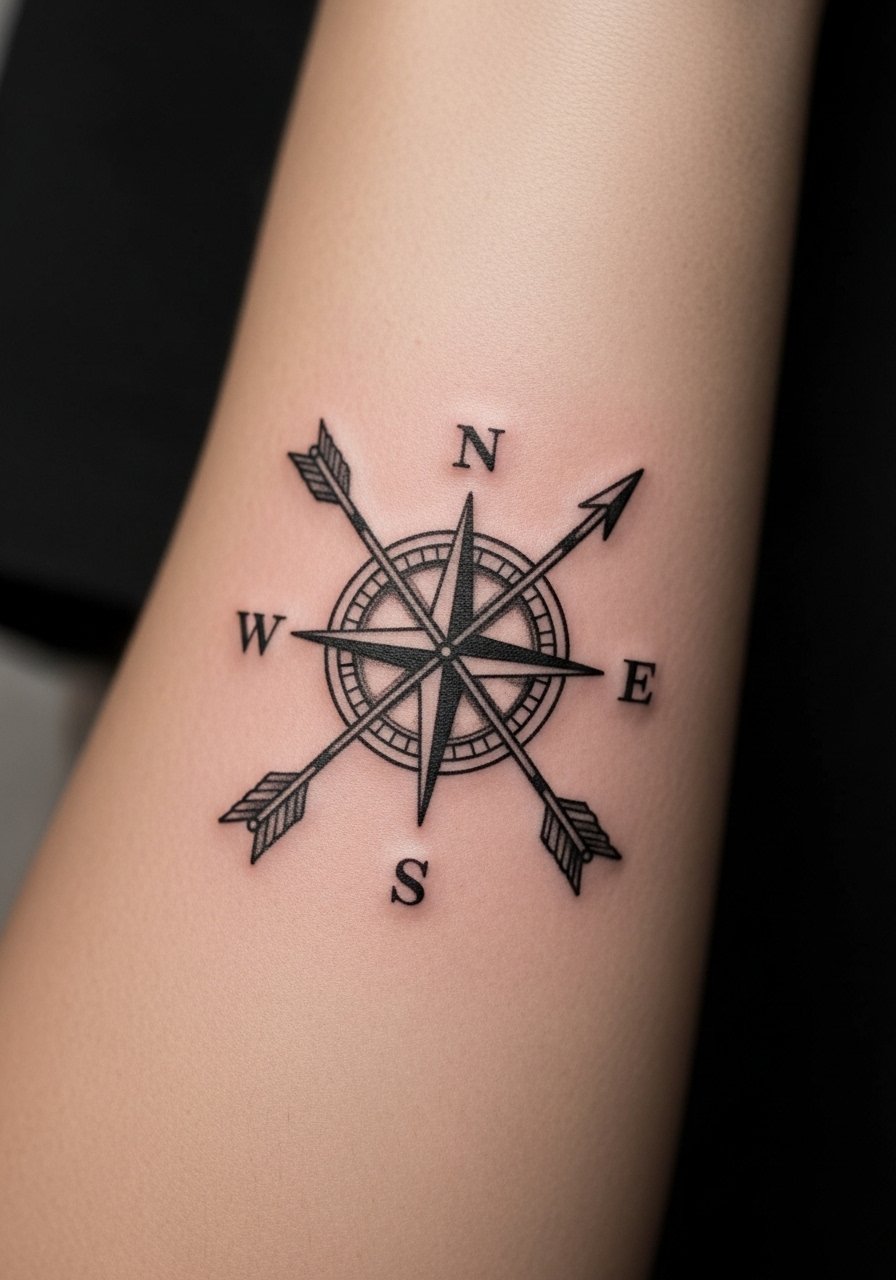
This combo says "direction in life" literally and visually. I recommend forearm placement because you can show it easily or cover it when needed. Pain is manageable, and the shape plays well with forearm anatomy. Artists tend to favor clean, minimalist compass markings paired with a strong arrow shaft so the piece remains readable healed. Don't overload the compass with tiny details—simple cardinal points and a clear arrowhead maintain clarity. If you travel a lot, consider subtle markers or coordinates incorporated into the design for personalization.
9. Heart and Arrow on Inner Wrist
Style/Technique: Neo-Traditional / Fine Color
Pain Level: Low (2-3/10)
Session Time: 45-90 minutes
Best For: Love symbols, intimate placement
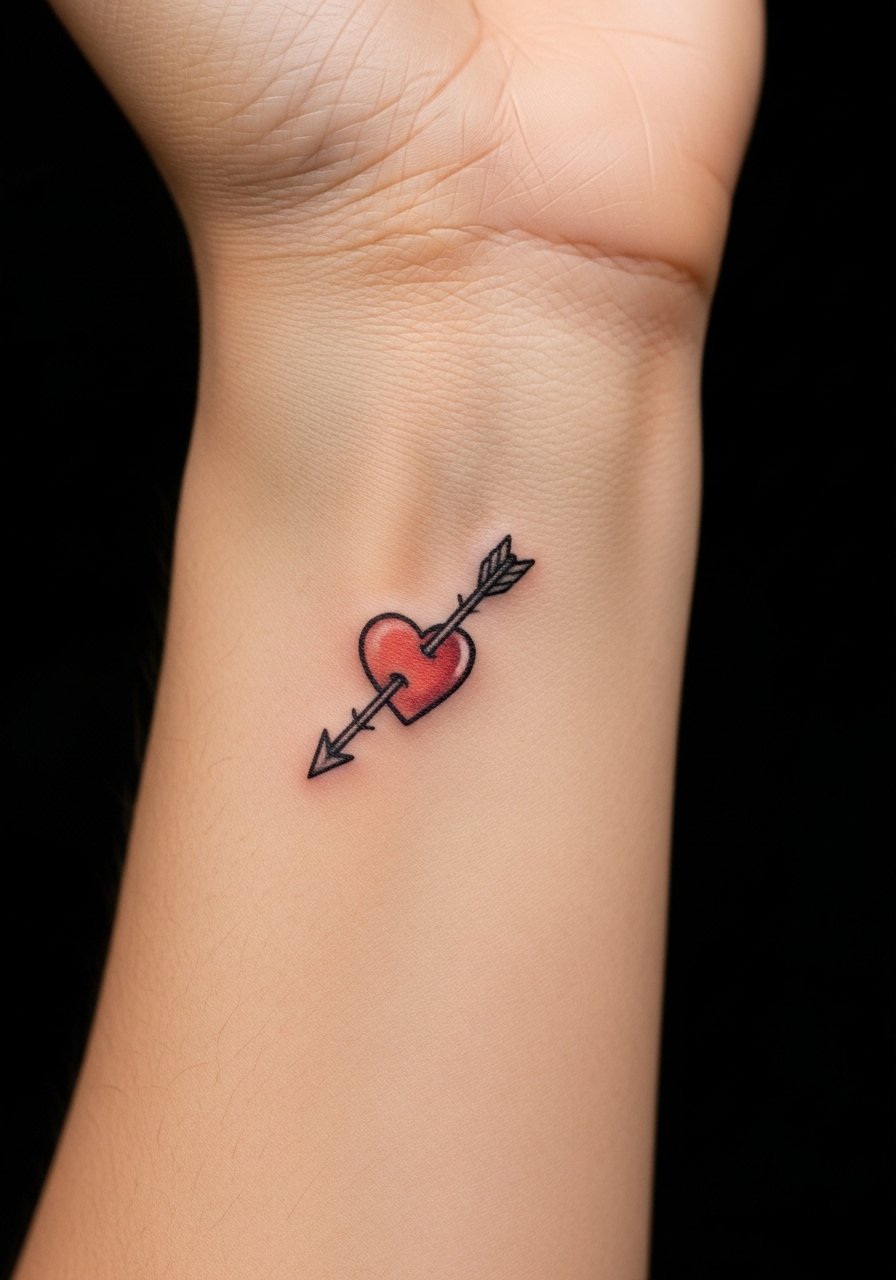
A heart pierced by an arrow is classic symbolism for love and desire. Inner wrist placement keeps it personal and discreet. Pain is low, healing is quick, but thin details can soften—request slightly bolder heart outline for longevity. I advise discussing color saturation with artists if you have deeper skin tone because red can read differently; many artists I follow adjust pigments accordingly. A common mistake is tiny script or initials around the heart that blur; keep this design clean and the meaning remains clear.
10. Infinity Arrow on Ankle
Style/Technique: Minimalist / Linework
Pain Level: Low-Medium (3/10)
Session Time: 30-60 minutes
Best For: Symbolic, petite placements

An infinity arrow blends endless possibility with direction—great for people marking ongoing growth. The ankle is a low-visibility, low-commitment spot, though it can sting more depending on your ankle bone. Expect simple aftercare and watch shoe rubbing during early healing. Like most minimal pieces, thicker single lines keep the symbol legible over time; super hairline work can fuzz. If you want an ankle piece you can hide for work, this is a neat option—just keep in mind friction from socks and shoes during healing.
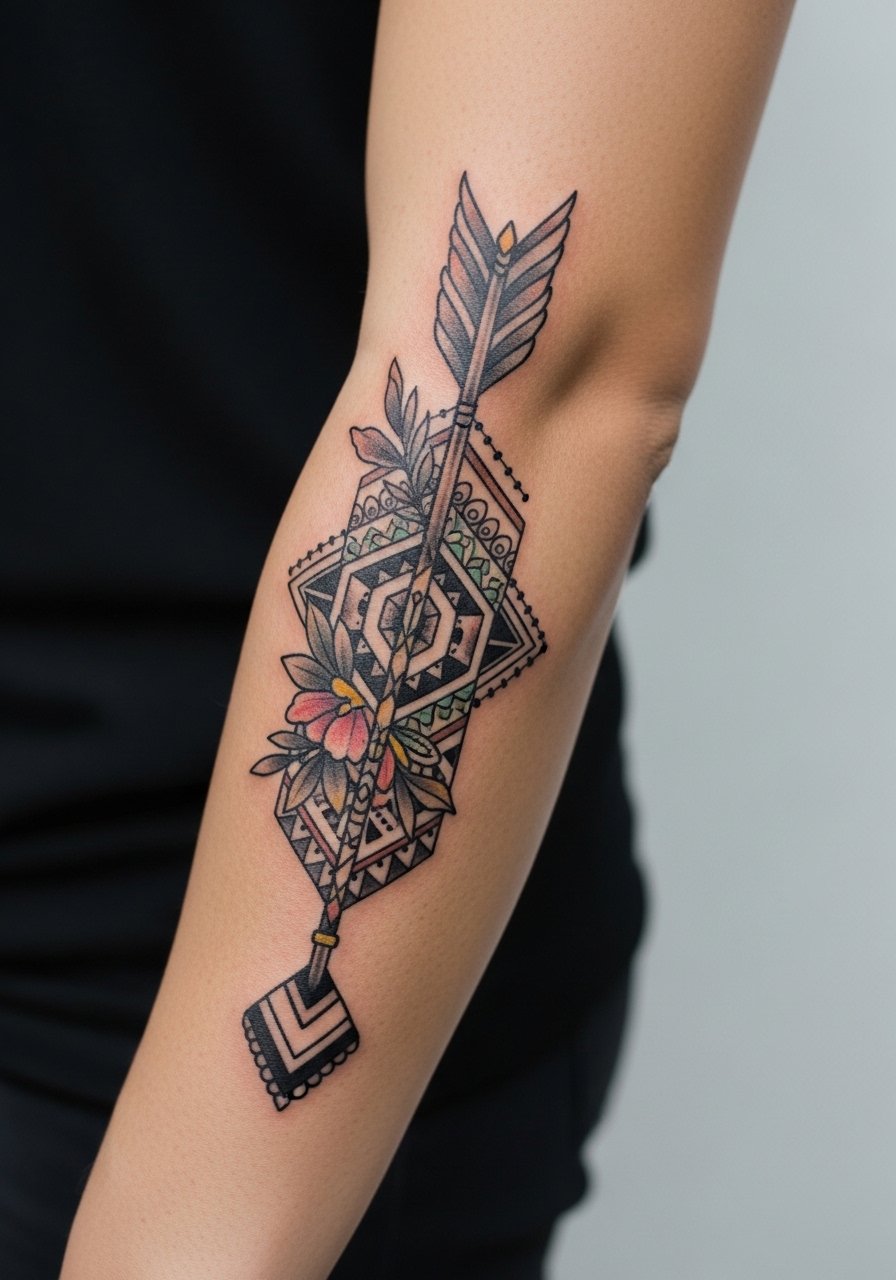
11. Arrow with Flowers on Inner Forearm
Style/Technique: Fine Line / Floral Illustrative
Pain Level: Low-Medium (3-4/10)
Session Time: 1-2 sessions
Best For: Balancing strength with femininity
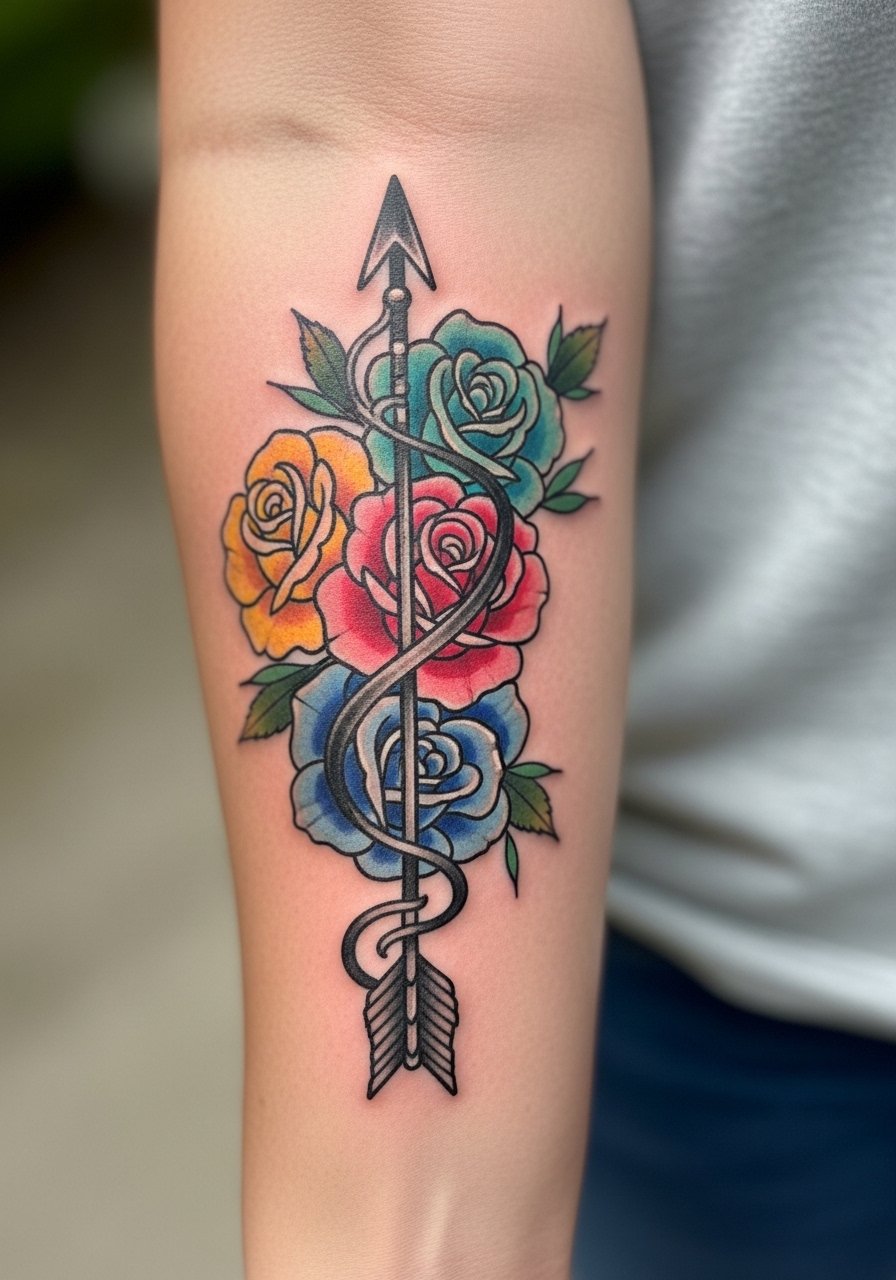
Combining arrows with flowers softens the symbolism—strength meets tenderness. Inner forearm gives artists a flat canvas for floral detail and a clear arrow shaft. I like this for people who want symbolism plus ornamentation. Healing is straightforward but color fades faster than black; I’ve seen roses keep shape if shadowing is used under petals. Artists with floral portfolios can advise on which colors hold on your skin tone. The most common mistake is tiny petals rendered too fine—bolder petal shapes are more forgiving over time.
12. Arrow Wrapped in Snake on Thigh
Style/Technique: Blackwork / Realistic
Pain Level: Medium (4-5/10)
Session Time: 2-3 hours
Best For: Transformation, ambition narratives
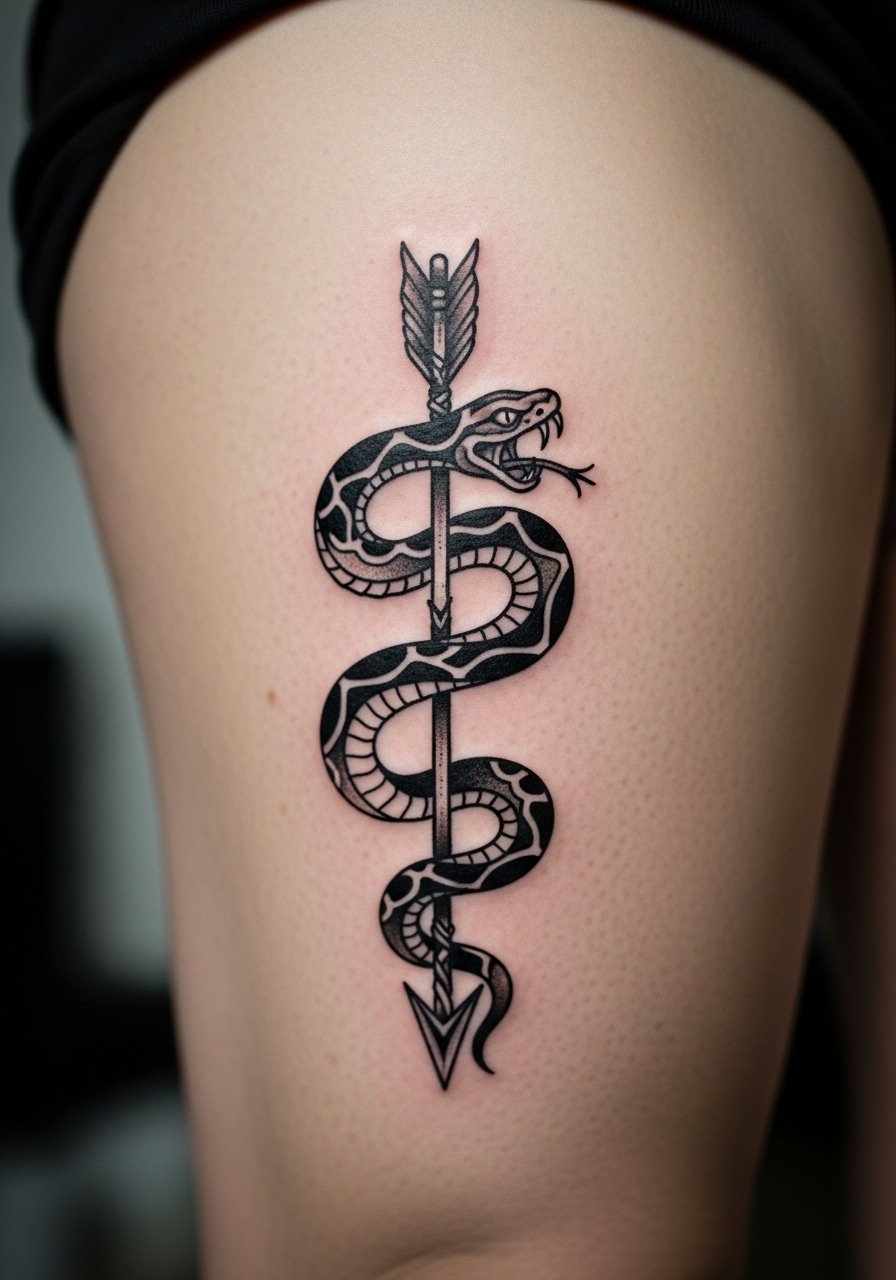
A snake-wrapped arrow signals transformation and ambition—the snake adds motion and mythology. Thigh placement offers privacy and room for a larger composition. Pain is moderate and tolerable for most. Blackwork style ages well here; solid blacks retain depth and the coil reads clearly healed. Expect a longer session for the shading and texture. Don’t overcomplicate the scales in tiny areas—scale patterns need space to avoid muddiness later. Artists who do realistic blackwork or neo-traditional pieces will handle this best.
13. Lotus Arrow on Shoulder Blade
Style/Technique: Watercolor / Illustrative
Pain Level: Medium (4/10)
Session Time: 1-2 sessions
Best For: Spiritual growth, purity symbolism
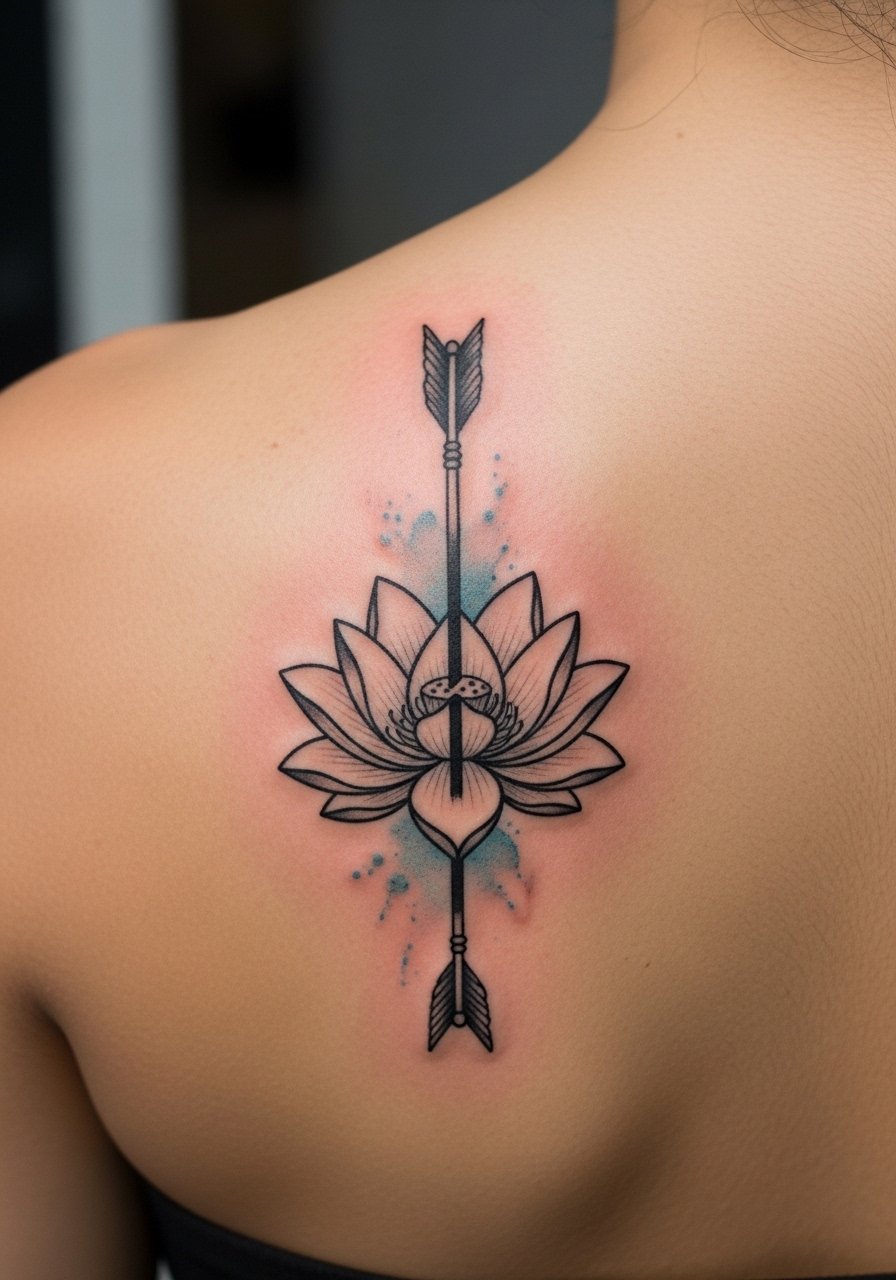
A lotus merged with an arrow brings spiritual direction into the mix—purity and forward motion. Shoulder blade placement fits the picturesque, contemplative vibe. Watercolor looks beautiful but can fade unevenly; if longevity matters, ask the artist to pair color washes with solid black anchors. Pain is moderate; healing is manageable with short clothing choices to avoid rubbing. A common mistake is choosing very pale watercolor; brighter washes with anchoring lines last better across different skin tones.
14. Downward Arrow on Collarbone
Style/Technique: Minimalist / Fine Line
Pain Level: Medium (4/10)
Session Time: 30-60 minutes
Best For: Peace, grounding intention
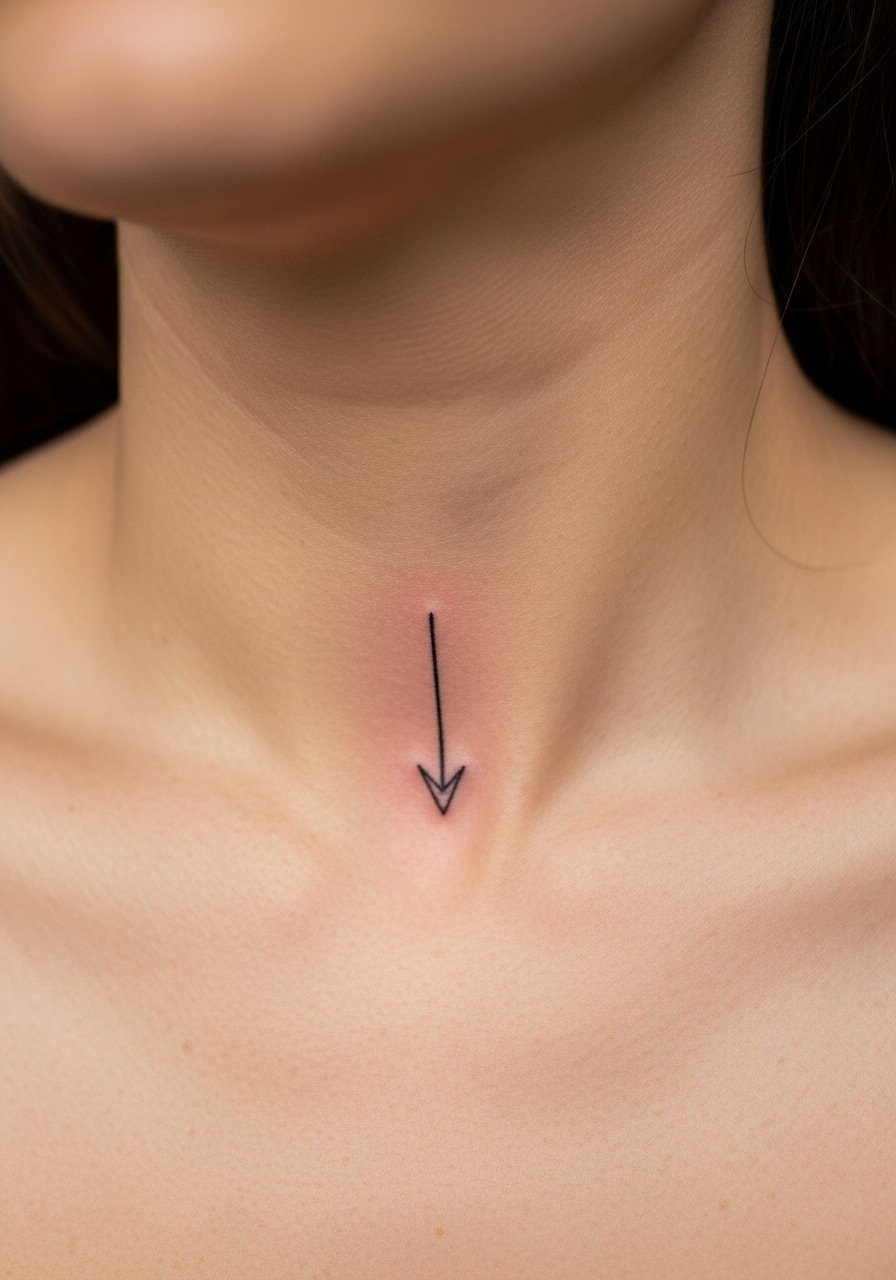
A downward arrow can mean grounding, rest, or mental calm—it's subtle and personal. Collarbone placement gives a calm, centered look but sits over bone so expect medium pain. Healing is quick if you avoid necklaces and tight straps. I’ve noticed downward arrows are chosen by folks seeking a mental-health symbol that reads private. Common error: placing it too close to the neck; give it some shoulder room so clothing won’t rub during the first weeks.
15. Diamond-Piercing Arrow on Sternum
Style/Technique: Neo-Traditional / Bold Line
Pain Level: High (7-8/10)
Session Time: 1-2 hours
Best For: Resilience, invincibility symbolism

This is a bolder choice symbolizing resilience—like an arrow through a gem. Sternum placement is intimate and can be intense pain-wise, so it’s for committed clients. Healing requires care since clothing can irritate the area; expect tenderness for a few days. The bold neo-traditional approach keeps the diamond readable even as lines soften. A common mistake is adding tiny details around the diamond that blur—simple shapes preserve the symbolism over time.
16. Moon Phases with Arrow on Upper Arm
Style/Technique: Illustrative / Minimal Dotwork
Pain Level: Low-Medium (3-4/10)
Session Time: 1-2 hours
Best For: Cycles, spiritual timing

Adding moon phases to an arrow ties direction to cycles and timing. Upper arm placement allows the sequence to read across the curve of your muscle. Dotwork pairs well with thin arrows, but dotwork can blur if too dense—ask for spaced dots. Pain is modest on the upper arm, and healing is straightforward. I like this for people who want an arrow tattoo meaning tied to growth cycles. Avoid packing too many phases into a small space; spacing keeps each lunar icon legible as it heals.
17. Constellation Arrow on Forearm
Style/Technique: Minimalist / Micro-Dotwork
Pain Level: Low (3/10)
Session Time: 45-90 minutes
Best For: Celestial symbolism, subtle personalization
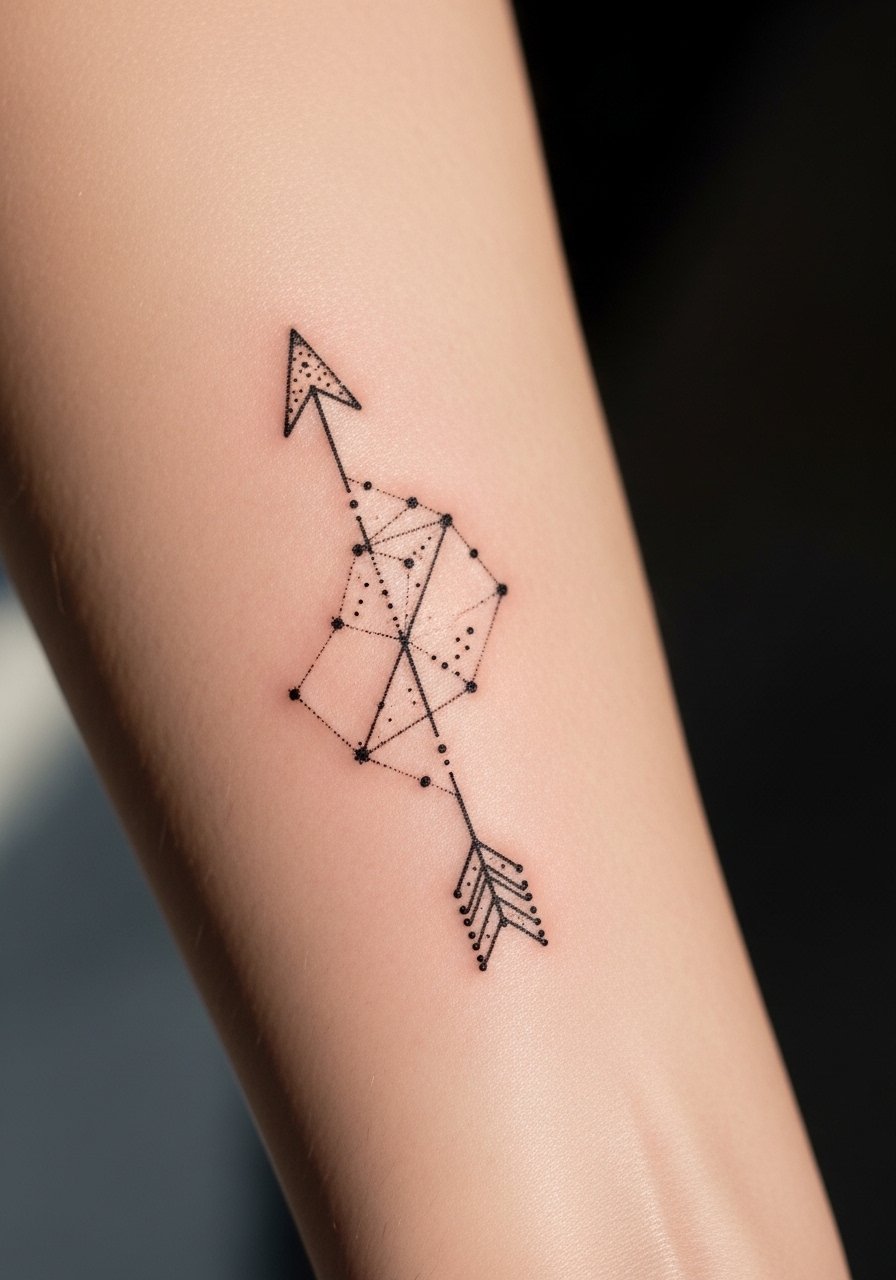
A constellation-style arrow appeals if you want a celestial twist—constellation points become arrow structure. Forearm placement showcases the delicate line work well. Micro-dotwork can be forgiving if the artist spaces dots correctly; too-close points risk merging over time. I recommend asking to slightly thicken connector lines for durability. This reads as both decorative and meaningful, and it’s a smart way to personalize with star patterns or astrological nods.
18. Feathered Arrow Behind Ear
Style/Technique: Minimalist / Micro Line
Pain Level: Medium (4-5/10)
Session Time: 30-45 minutes
Best For: Tiny accent, subtle symbolism
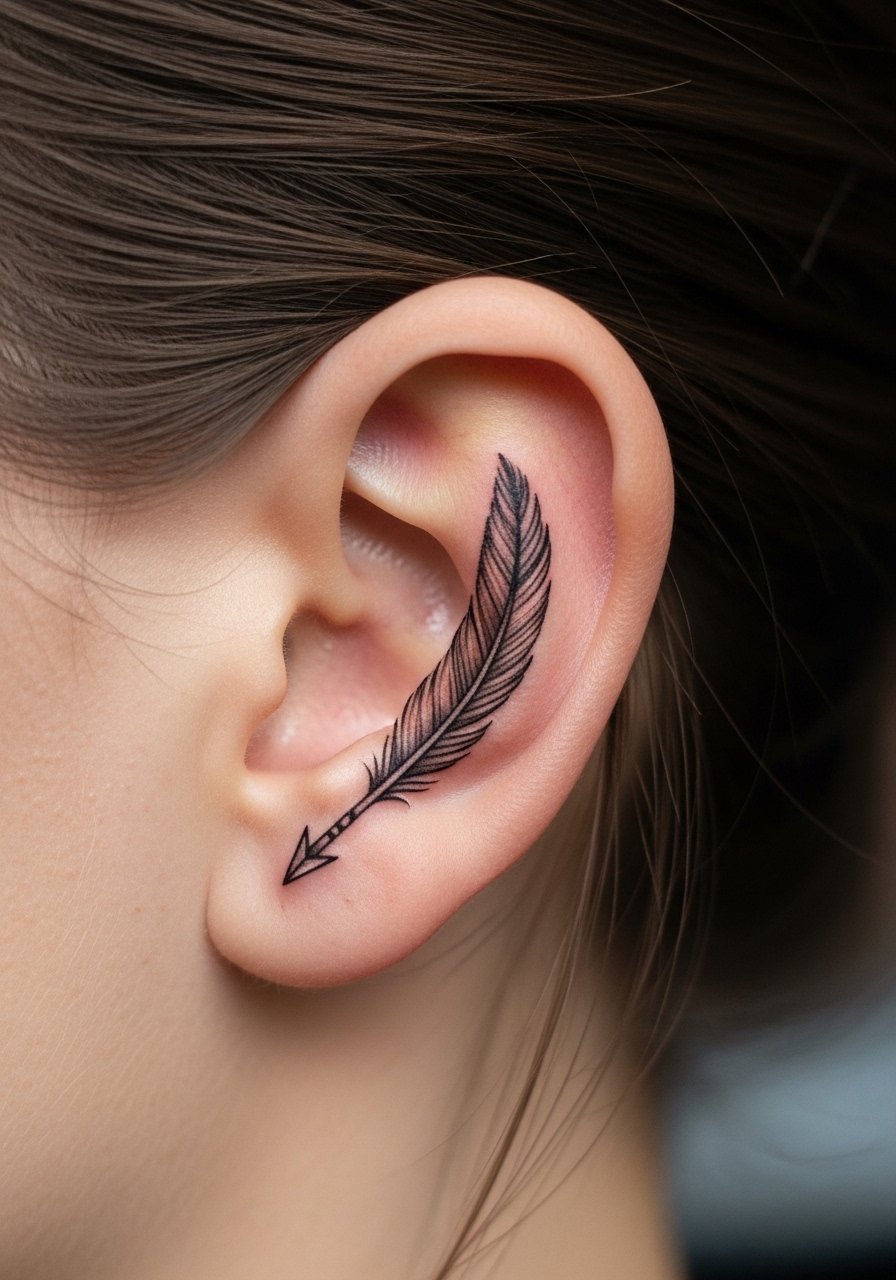
Behind-ear arrows are tiny and intimate—a little nod to direction or freedom. The area is sensitive, so expect a bit more sting than an arm piece. Healing is quick but be careful with hair and shampoo for the first week. Tiny feather detail looks great fresh, but micro lines can blur; ask for slightly bolder feather quills to preserve texture. This placement is great if you want a small arrow tattoo that's easy to hide under hair or show off in the right moments.
19. Arrow with Quote on Ribcage
Style/Technique: Script + Fine Line
Pain Level: High (7/10)
Session Time: 1-2 hours
Best For: Personal mantras, hidden symbolism
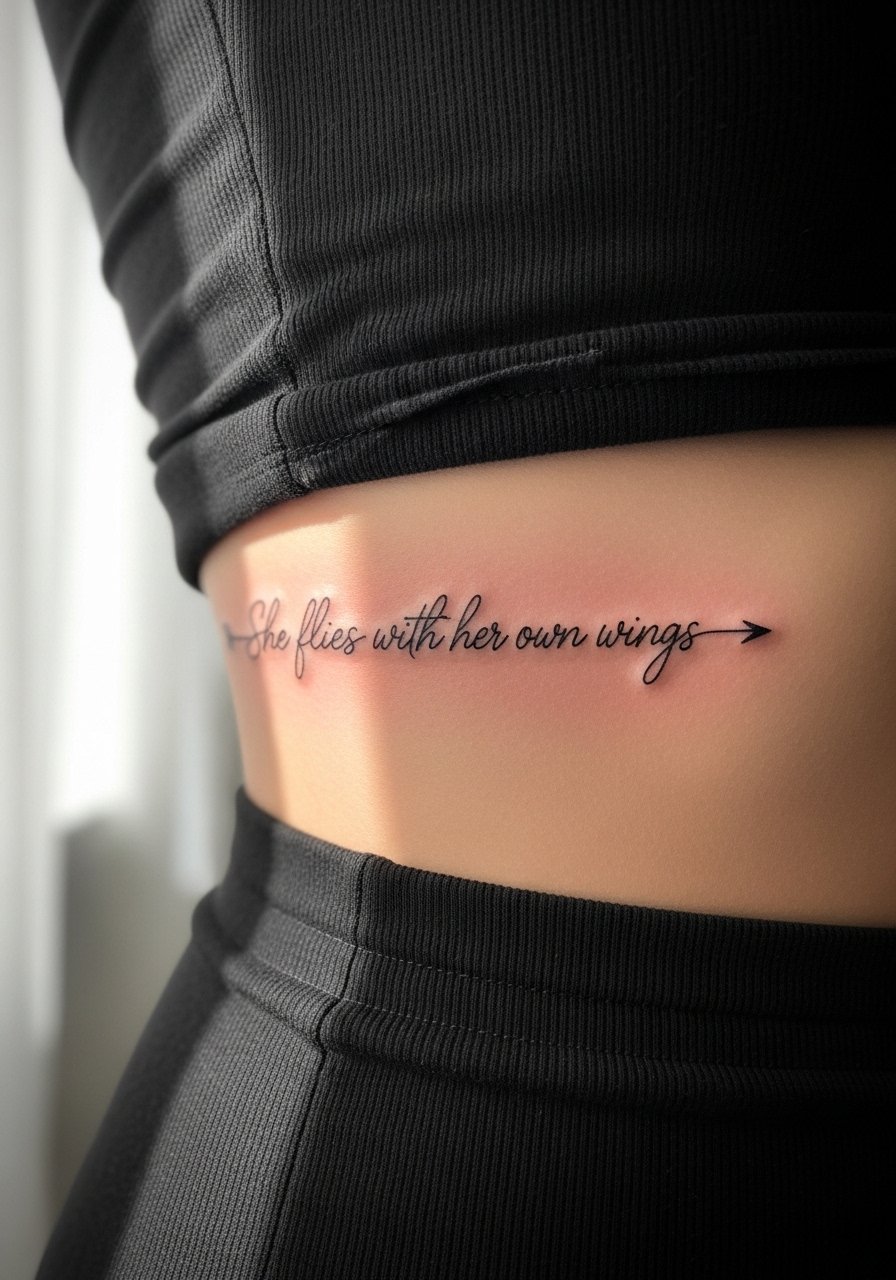
Pairing an arrow with a short quote creates narrative meaning. Ribcage placement keeps it private and intentional, but it's a painful spot. Script and arrow together need spacing—tiny script may blur over time, so choose a bolder script or slightly larger font. Plan for healing that respects breathing movement; avoid activities that stretch the area for a week. I suggest temporary transfers to live with the placement before committing—it's an easy way to avoid placement regret.
20. Double-Ended Arrow on Back of Neck
Style/Technique: Minimalist / Fine Line
Pain Level: Medium (4-5/10)
Session Time: 30-60 minutes
Best For: Ambivalence, duality symbolism
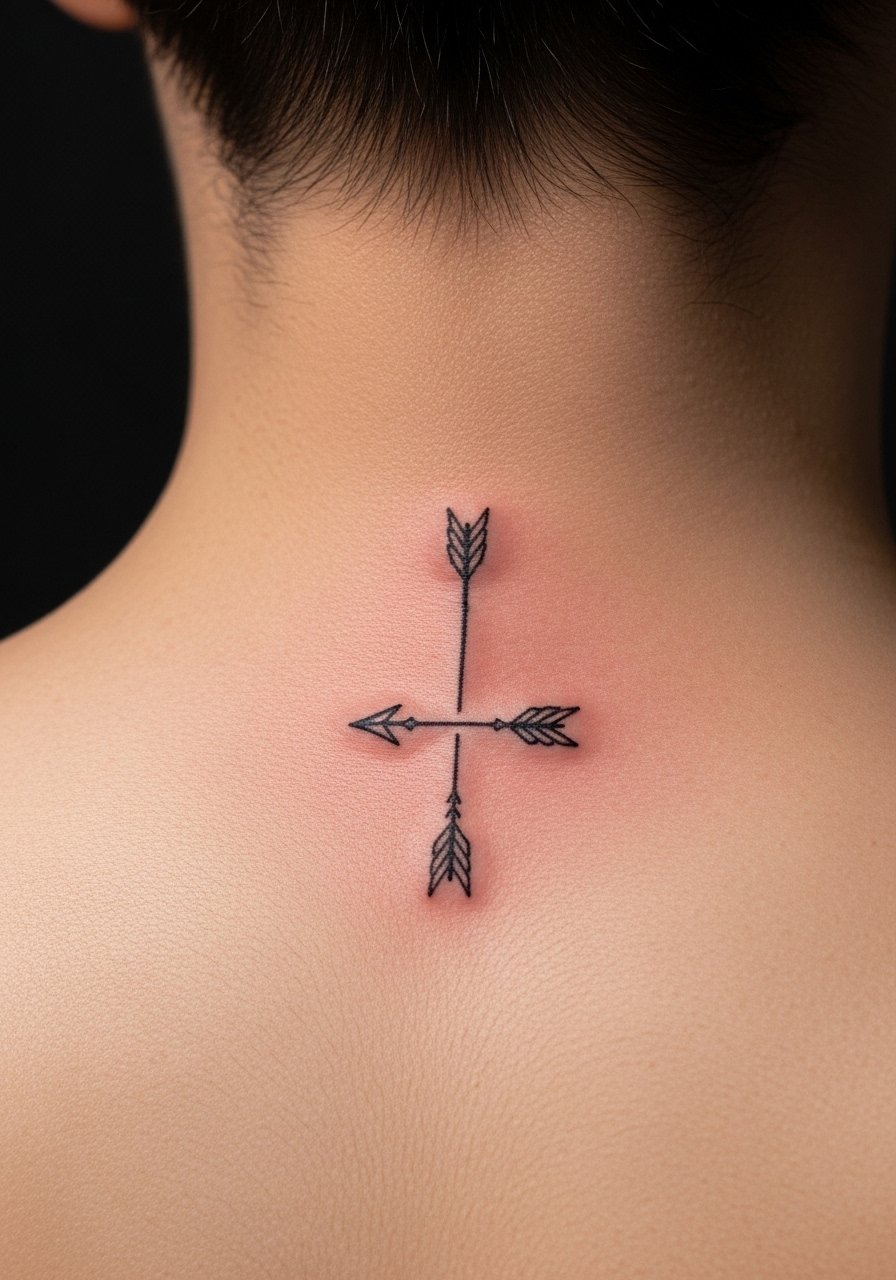
A double-ended arrow can represent dual paths or balance. Back of neck placement is visible with short hair or updos and feels modern. Pain is moderate due to thin skin and nerve endings. Healing is straightforward but avoid tight collars in early days. Fine-line double arrows work, but I’ve seen them fade quicker; ask for a touch more line weight to keep the center crisp as it ages. This is a low-commitment visible spot that reads intentional and minimal.
21. Stacked Arrows on Calf
Style/Technique: Blackwork / Vertical Composition
Pain Level: Low-Medium (3-4/10)
Session Time: 1-2 hours
Best For: Vertical flow, leg display
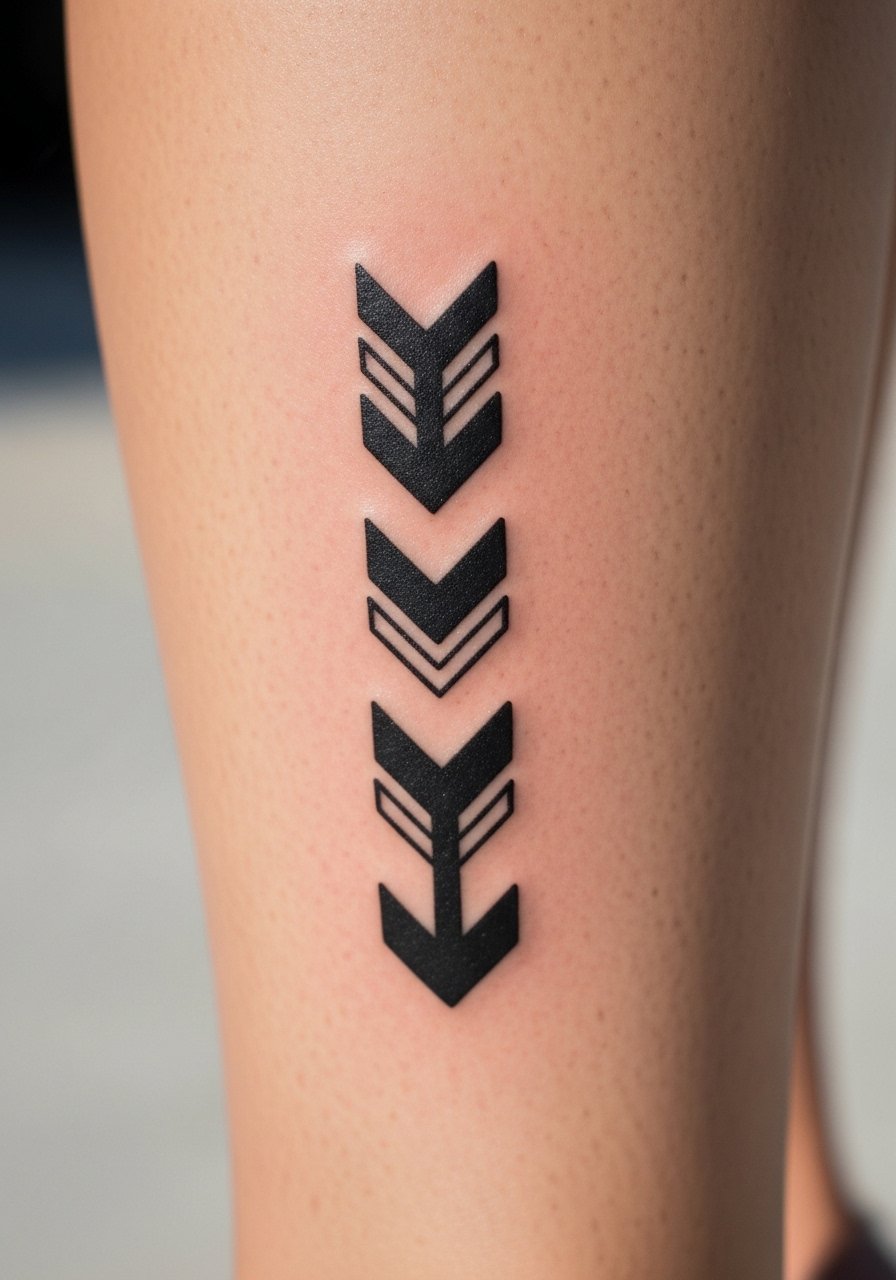
Stacked arrows make for a striking vertical composition on the calf. I like this for people who want a visible statement that follows natural muscle lines. Calf pain is usually mild, and healing is easy if you avoid tight pants initially. Bold blackwork helps these stay readable over time. Avoid adding tiny filler that crowds the vertical flow; simple spacing and consistent arrowheads are key. This placement also allows for larger designs if you decide to expand into a sleeve later.
22. Arrow Knot on Shoulder
Style/Technique: Geometric / Symbolic Knotwork
Pain Level: Medium (4/10)
Session Time: 1-2 hours
Best For: Interconnectedness, resilience
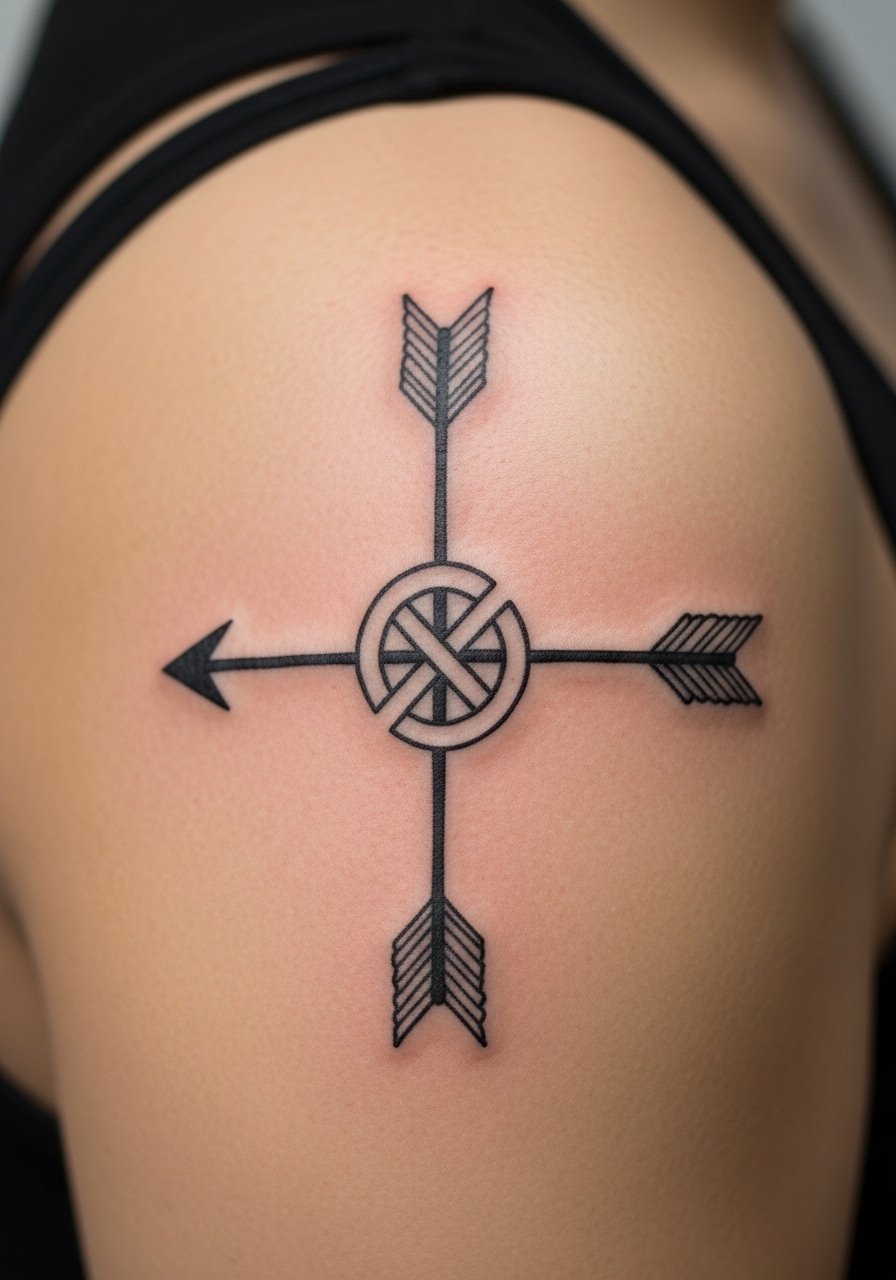
An arrow tied into a knot symbolizes interconnected paths or resilience—an interesting twist on unity themes. Shoulder placement gives a natural curve and visibility. Expect moderate pain and steady aftercare. Geometric knotwork requires an artist comfortable with line intersections so the knot stays readable healed. A common mistake is making the knot too dense; clear negative space keeps the symbol crisp as lines age. This design works well if you want something unique that still reads as an "arrow tattoo meaning" piece.
23. Arrow Sleeve Accent on Inner Arm
Style/Technique: Illustrative / Mixed Styles
Pain Level: Medium-High (5-6/10)
Session Time: Multiple sessions
Best For: Statement sleeves, layered storytelling
If you’re planning a sleeve, arrows make great directional accents weaving through larger elements. Inner arm work can be sensitive, so expect multiple sessions and some soreness. The payoff is a cohesive narrative across the arm; arrows guide the eye through the sleeve. I’ve seen artists mix floral, geometric, and blackwork arrows to create movement. Plan the composition so arrows have breathing room; overcrowding makes the sleeve feel busy once healed. A session-by-session plan helps manage pain and healing cycles.
24. Micro Arrow on Finger
Style/Technique: Minimalist / Micro Line
Pain Level: Medium-High (5-6/10)
Session Time: 15-30 minutes
Best For: Tiny visible reminders, discreet symbols
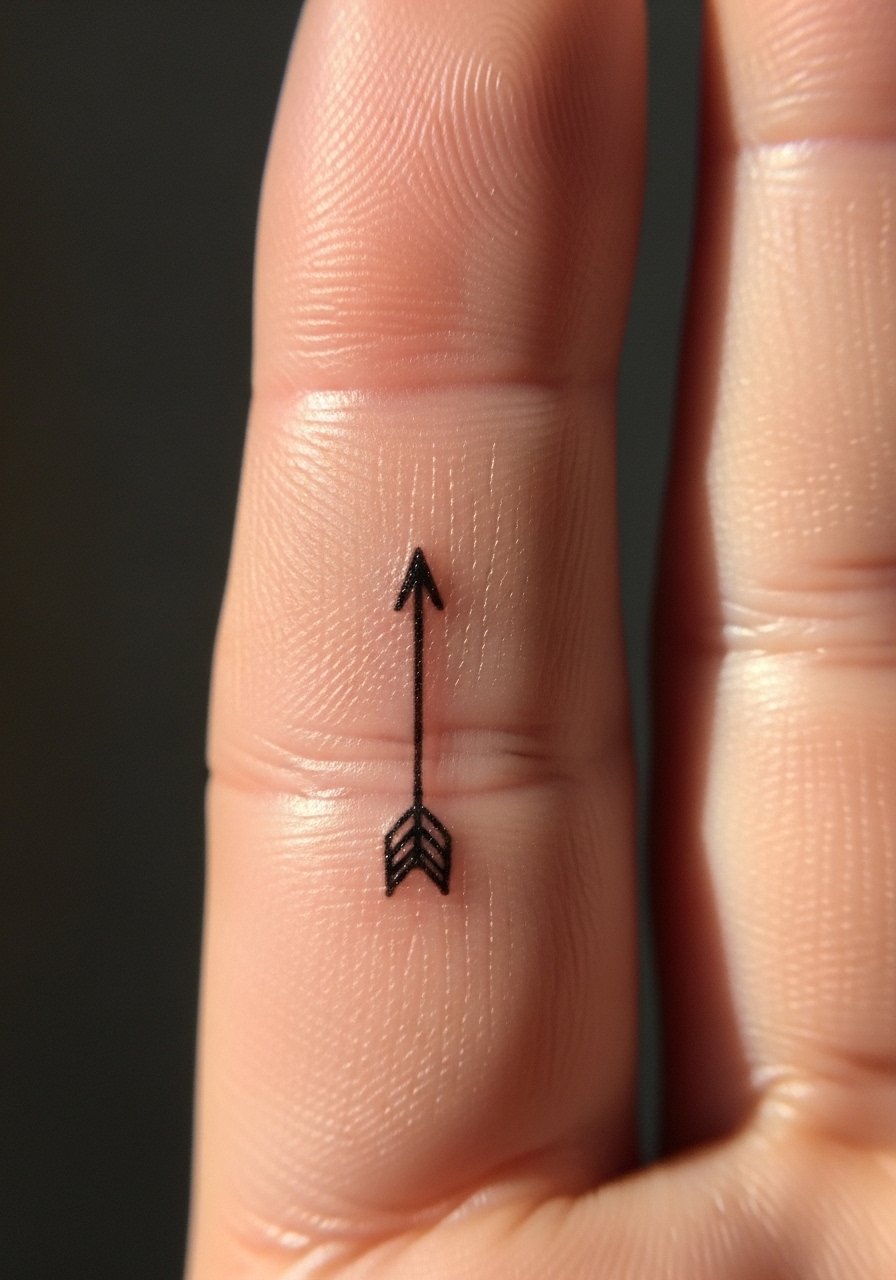
Finger tattoos are trendy but tricky—lines blur and fade faster due to constant use and washing. I’ve advised people to consider micro arrows on fingers only if they accept touch-ups down the line. Pain can be sharper because of thin skin and bone. For longevity, ask your artist to bolden the shaft slightly and avoid tiny interior details. Aftercare and long-term maintenance are more involved; expect color shifts and potential need for periodic refreshes. If you want something tiny and visible, this is a good test of commitment.
Tattoo Prep and Aftercare Essentials
Aftercare Essentials:
- Aquaphor Healing Ointment, 14oz tube — Recommended for the first 3-5 days to protect fresh ink
- Saniderm Transparent Adhesive Bandage, 6-inch roll — Second-skin option many artists suggest for the first 24-72 hours
- CeraVe Fragrance-Free Moisturizing Lotion, 12oz — Daily moisturizer for days 4-14
- Dr. Bronner's Unscented Castile Soap, 16oz — Gentle cleaning during early healing
- Mad Rabbit Tattoo Balm, 2.0oz — For healed-tattoo maintenance and vibrancy
Before Your Appointment:
- Numbing Cream with 5% Lidocaine, 30g — Use only after checking with your artist
- Tattoo Stencil Transfer Paper, Pack — Useful if you’re refining custom work at home
Long-Term Maintenance:
- SPF 50 Sunscreen Stick for Tattoos — Daily sun protection prevents fading
- Hustle Butter Deluxe, 4oz — Vegan aftercare alternative for healed tattoos
- Hydrocolloid Bandages, Multipack — Good for spot protection on scabs or touch-ups
Optional Comfort Items:
- Tattoo Numbing Spray — For very sensitive areas or touch-ups
- Tattoo Aftercare Travel Kit — Handy for keeping essentials together during healing
From what I’ve seen, artists frequently recommend Aquaphor or a thin Saniderm layer initially, then a gentle lotion like CeraVe. Sunscreen and occasional balm keep healed arrow tattoos vibrant. Avoid heavy fragrances and aggressive exfoliation during recovery.
Frequently Asked Questions
Q: How bad does a tattoo actually hurt?
A: Pain depends on placement and your tolerance. Forearm and upper arm are typically low (around 2-4/10). Ribcage, sternum, and ankle can be high (6-8/10). It’s more of a sharp scratching or burning sensation than a single intense shock. For sensitive spots, ask about a numbing cream with 5% lidocaine—it helps some people but don’t expect total numbness.
Q: What if I regret my tattoo later?
A: I recommend sitting with designs for months and testing placement with temporary tattoos. If you still change your mind later, laser removal exists but it’s a long process. Picking personal symbolism rather than trendy phrases reduces regret. Hidden placements like the thigh or upper arm are good if you want flexibility.
Q: How do I keep my arrow tattoo from fading?
A: Sunscreen is essential. From what I’ve noticed, UV exposure is the number-one fading cause. Use an SPF 50 sunscreen stick on visible tattoos and moisturize regularly with fragrance-free lotion like CeraVe.
Q: Can I work out after getting a tattoo?
A: Wait at least 48-72 hours, longer for high-movement areas. Sweating can irritate a fresh tattoo and increase infection risk. If it’s in a flex area like an elbow or shoulder, give it a full week before heavy training.
Q: Should I get a small tattoo first to test my pain tolerance?
A: Only if you genuinely want a small piece. Pain varies by placement, not just size—a tiny rib tattoo can hurt more than a larger forearm piece. If you’re anxious, choose an outer arm or thigh spot for the first one.
Q: How long does a tattoo take to heal?
A: Surface healing is usually 2-3 weeks; full settling can take 2-3 months. The first week is critical—clean gently with mild soap, apply a thin layer of Aquaphor or Saniderm per your artist’s advice, and avoid picking scabs. Colors look muted while healing and brighten as the skin regenerates.
Q: Do tattoos look different on different skin tones?
A: Yes. Black and gray work shows clearly across tones. Bright colors may appear differently on deeper skin tones—artists often adjust saturation. White ink is subtle and can be nearly invisible on darker skin, so discuss healed examples from the artist’s portfolio.
