
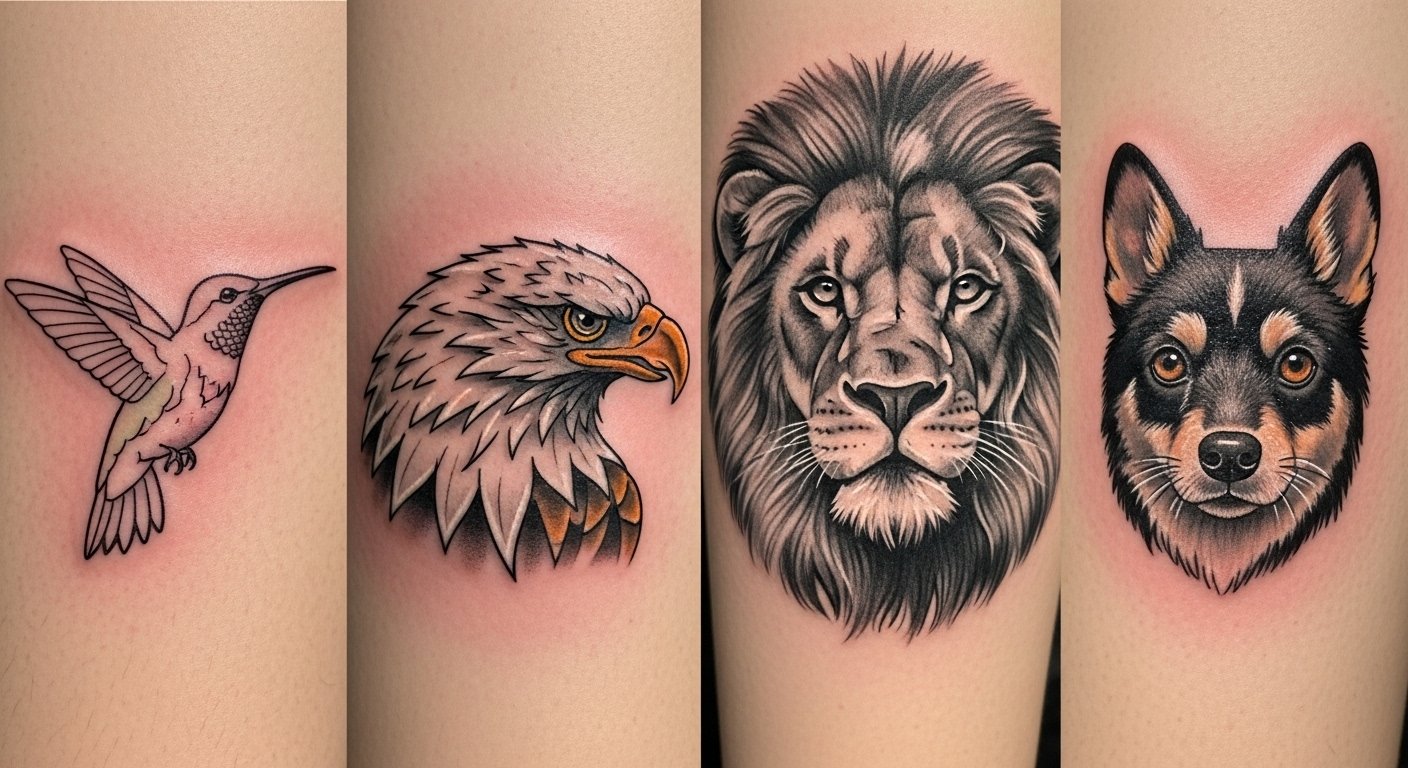
I spent months saving screenshots before I realized the real choice wasn’t the animal itself but the style and placement that tell your story long-term. These 25 spirit-driven animal tattoos pair clear symbolism with styles that heal and age well. I picked designs I’ve seen on real people and in artist portfolios so you can pick something that looks great both fresh and healed.
This list focuses on realistic animal tattoo ideas plus fine line, neo-traditional, and micro-realism options. These placements work well on forearms, ribs, chest, ankles, and sleeves. From what I’ve seen, black & grey realism and micro-realism keep detail longer, while bold neo-traditional pieces photograph consistently.
1. Black & Grey Lion Portrait on Chest
Style/Technique: Black & Grey Realism
Pain Level: Medium-High (6-7/10)
Session Time: Multiple sessions for full detail
Best For: Statement piece, symbolic leadership
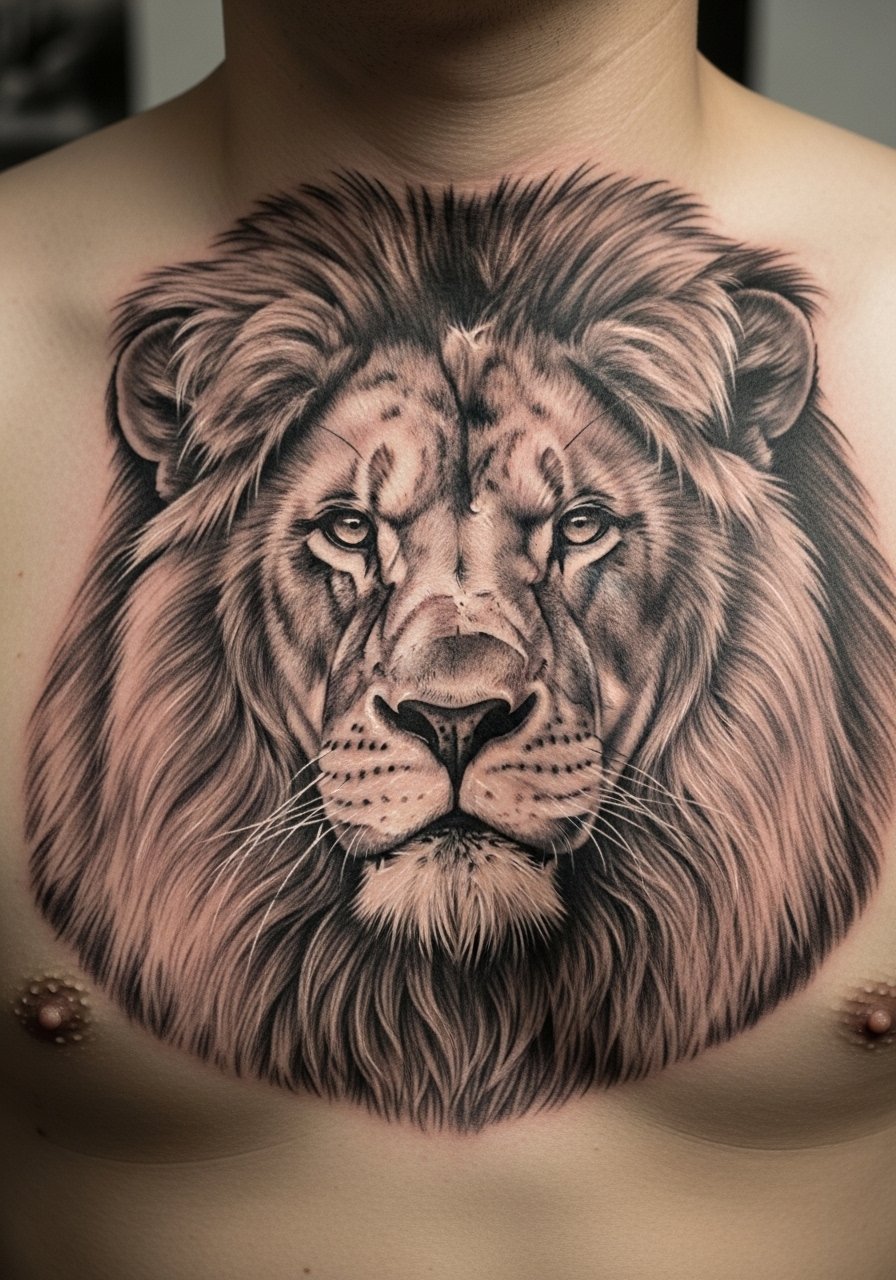
I picked lions when I wanted a symbol of courage that reads clearly as it ages. Black & grey realism holds texture well; healed photos show softer contrast but excellent depth. Chest placement gives the artist room for facial detail, but expect stronger pain near the sternum. Healing takes a few weeks for the surface and a couple months for full settling—keep it moisturized and out of sun. A common mistake is choosing too-small sizing; realistic detail needs room. Ask for artist portfolio shots of healed portraits and whether they recommend a single large session or staged shading.
2. Wolf Pack Sleeve Across Back Shoulder
Style/Technique: Color Realism / Narrative Sleeve
Pain Level: High (7/10 across ribs/shoulder)
Session Time: Multi-session narrative build
Best For: Family or loyalty symbolism, large canvas
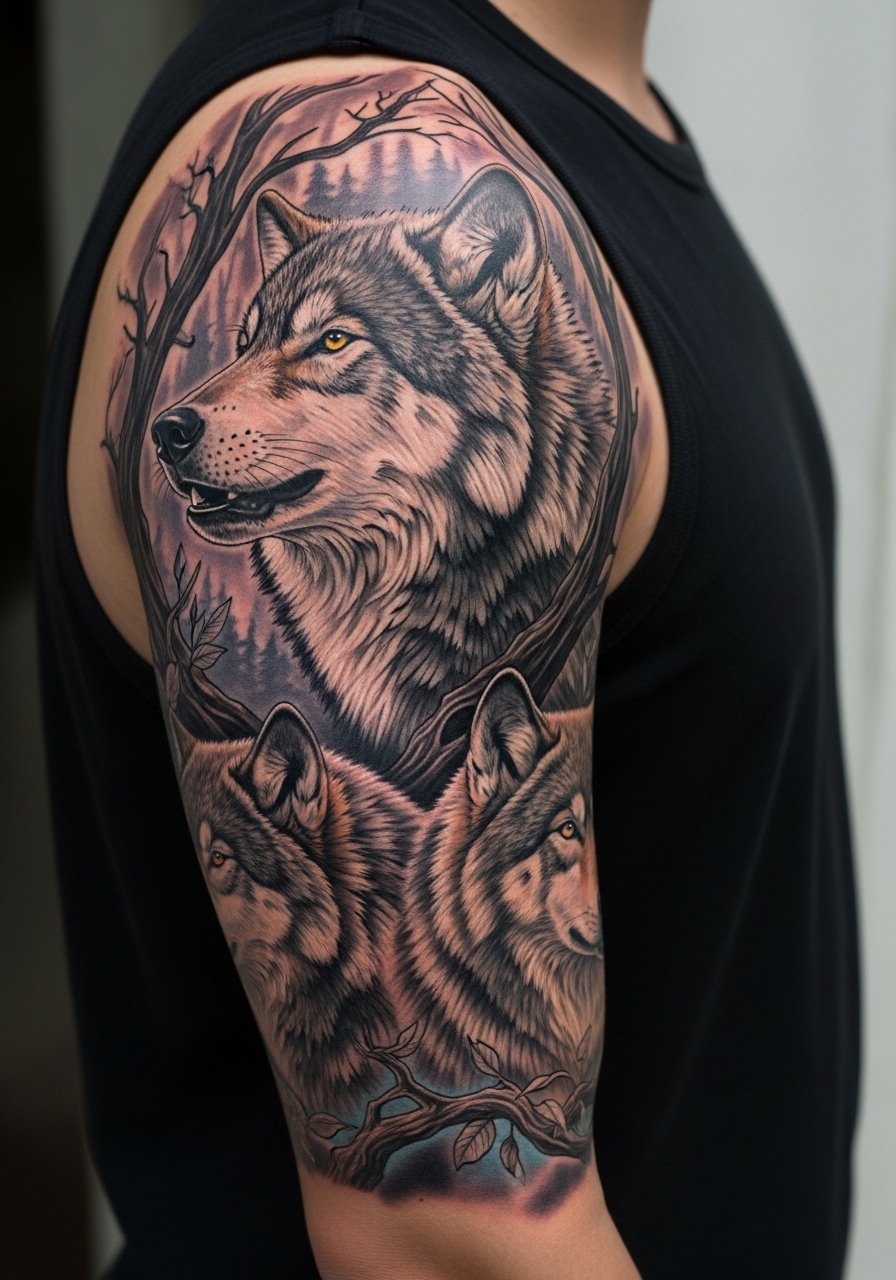
Wolves read like family and instinct to me. A pack composition lets you tell a story—alpha figure, cubs, moon accents. Color realism can look vivid fresh and slightly muted healed; I suggest asking for ash-grey gradients for longevity. Back and shoulder placement needs long sessions and a staged plan so shading settles uniformly. Pain varies with ribs vs. fleshy shoulder. Artists I follow blend realism with subtle geometric overlays for modern symbolism—ask if they do “cybersigilism” elements if you want a contemporary twist. Avoid overcrowding tiny facial details; leave breathing room.
3. Watercolor Butterfly on Ribcage
Style/Technique: Watercolor / Minimalist Color
Pain Level: High (ribcage sensitivity)
Session Time: 1-2 sessions depending on color
Best For: Transformation symbolism, feminine placements
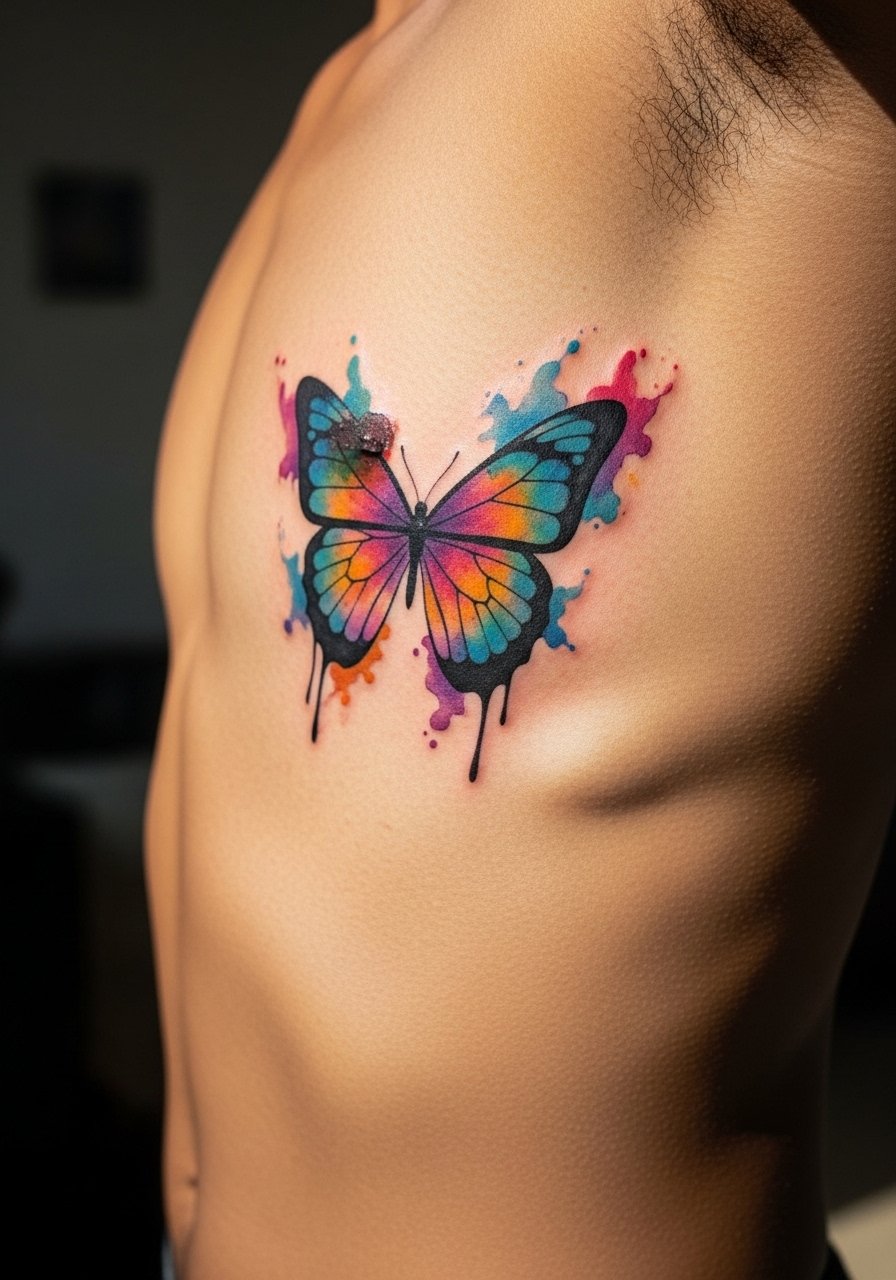
Butterflies are classic for transformation and renewal. Watercolor suits wing gradients and motion, but I’ve noticed watercolor fades faster than black & grey—so saturation and artist touch-ups matter. Rib placement looks intimate and moves with the body, but it’s a painful spot. For aftercare, avoid friction from clothing while it peels. A common error is trusting thin color washes with no black anchor line; I recommend subtle lining so the shape reads over time. Ask your artist about healed examples on your skin tone.
4. Tiger Stripes Thigh Sleeve
Style/Technique: Realism / Abstract Bold Lines
Pain Level: Medium (thigh is more forgiving)
Session Time: Multi-session for full wrap
Best For: Power motifs, large visual impact
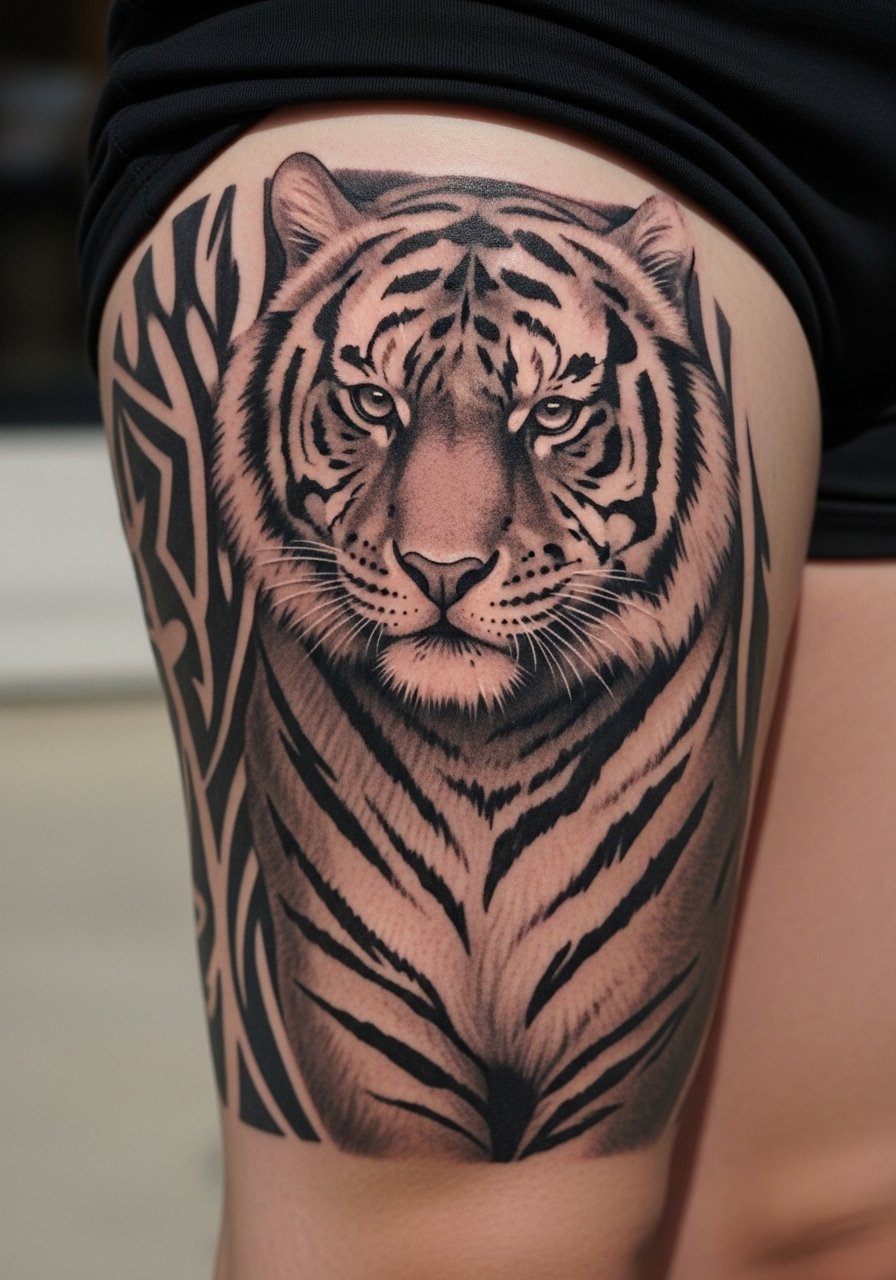
I went for tiger stripes when I wanted danger and protection without a full tiger face. The thigh gives enough space for flowing stripes and abstract negative space. Thigh tattoos are lower on pain charts, but deep shading sessions still need recovery. Healed results show texture in the darker stripes and softened edges in large gradients. Avoid overly thin stripes that blur; keep lines bold where you want longevity. Ask artists about how stripes move with anatomy for a flattering fit.
5. Eagle Spread on Shoulder Blade (Neo-Traditional)
Style/Technique: Neo-Traditional / Bold Lines
Pain Level: Medium (3-5/10)
Session Time: 2-3 hours typically
Best For: Leadership, freedom symbolism, long-lasting photography
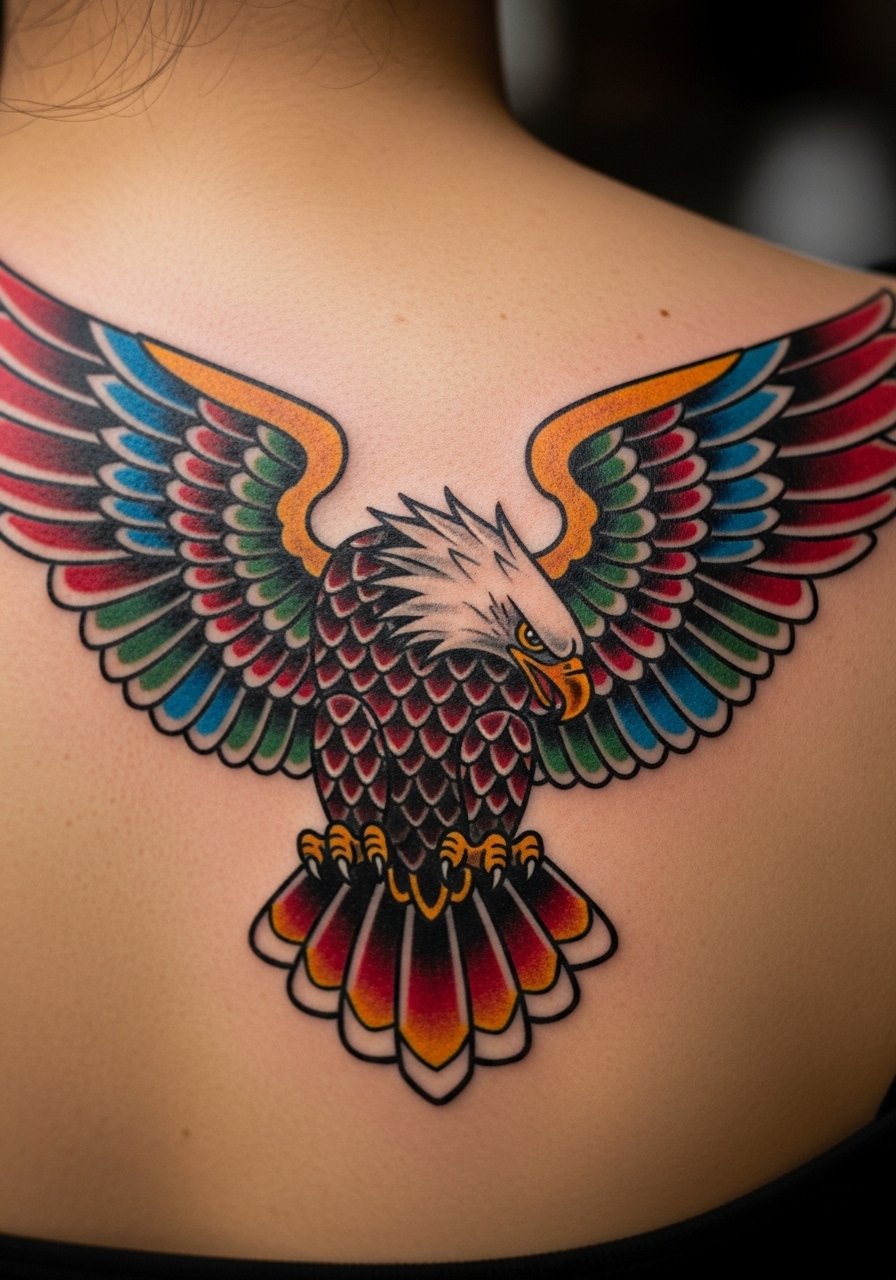
Eagles read as vision and strength. Neo-traditional is forgiving—bold outlines and saturated fills photograph consistently as they age. Shoulder blade placement is ideal for display or concealment. Pain tends to be moderate away from bone. For long-term vibrancy, a solid outline is your friend; thin watercolor fills alone will fade faster. I always ask artists for healed shots of similar neo-traditional pieces. A mistake I see is too-small detail inside the wings—keep elements crisp and simple.
6. Geometric Owl on Collarbone (Fine Line)
Style/Technique: Fine Line / Geometric
Pain Level: Low-Medium (collarbone can sting)
Session Time: 1-2 hours
Best For: Intuition symbolism, photo-friendly placement
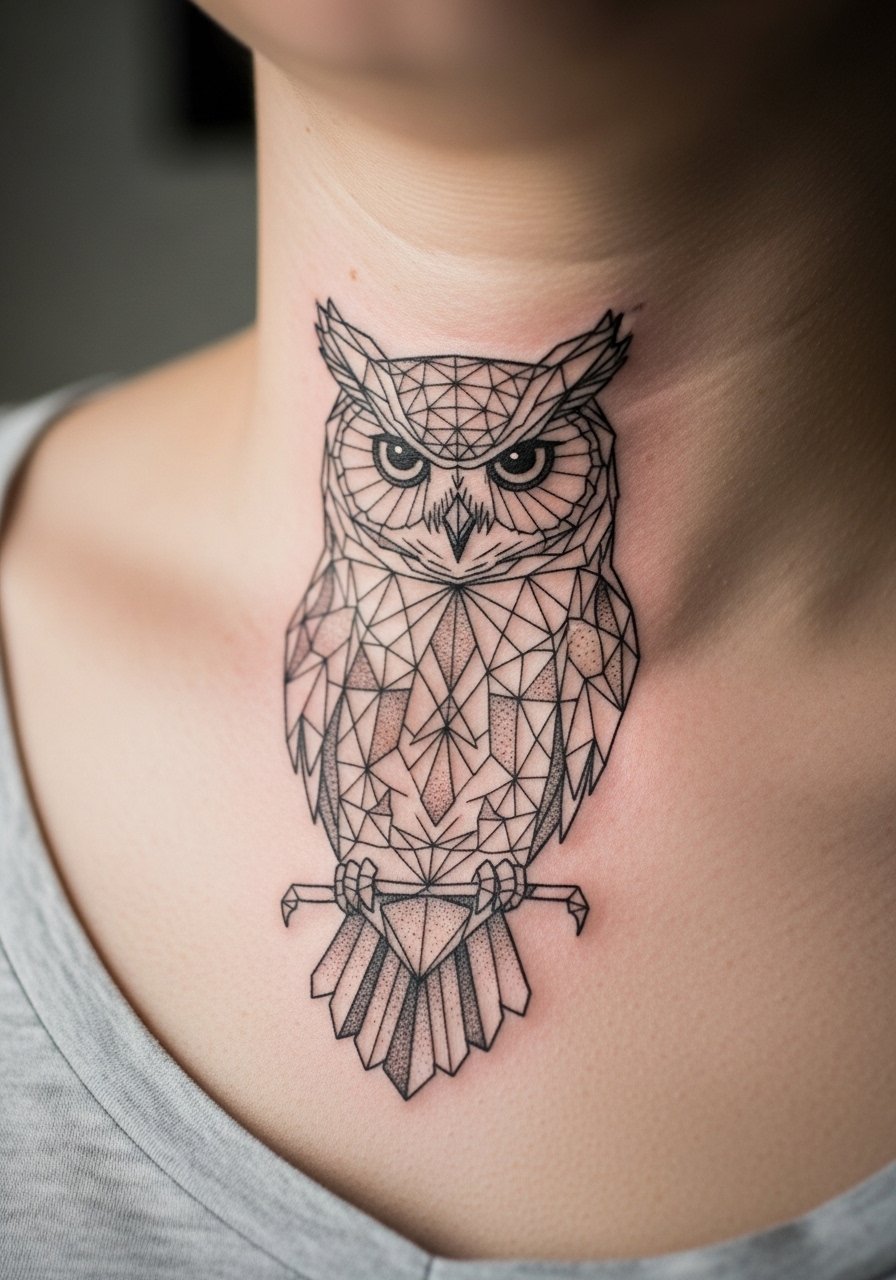
Owls speak to wisdom and intuition. Fine line geometric owls look modern and photograph well on collarbones. Collarbone has thin skin so lines can sting and need precise aftercare to avoid blowout. Fine line work requires an experienced hand—I've seen lines blur if an inexperienced artist uses too much needle pressure. Keep the piece slightly larger than you think to preserve detail. Ask artists about micro-realism vs. geometric combos if you want eyes to pop healed.
7. Micro-Realism Pet Portrait on Wrist
Style/Technique: Micro-Realism / Black Ink
Pain Level: Medium (wrist sensitivity)
Session Time: 1-2 hours
Best For: Pet homages, tiny emotional tributes
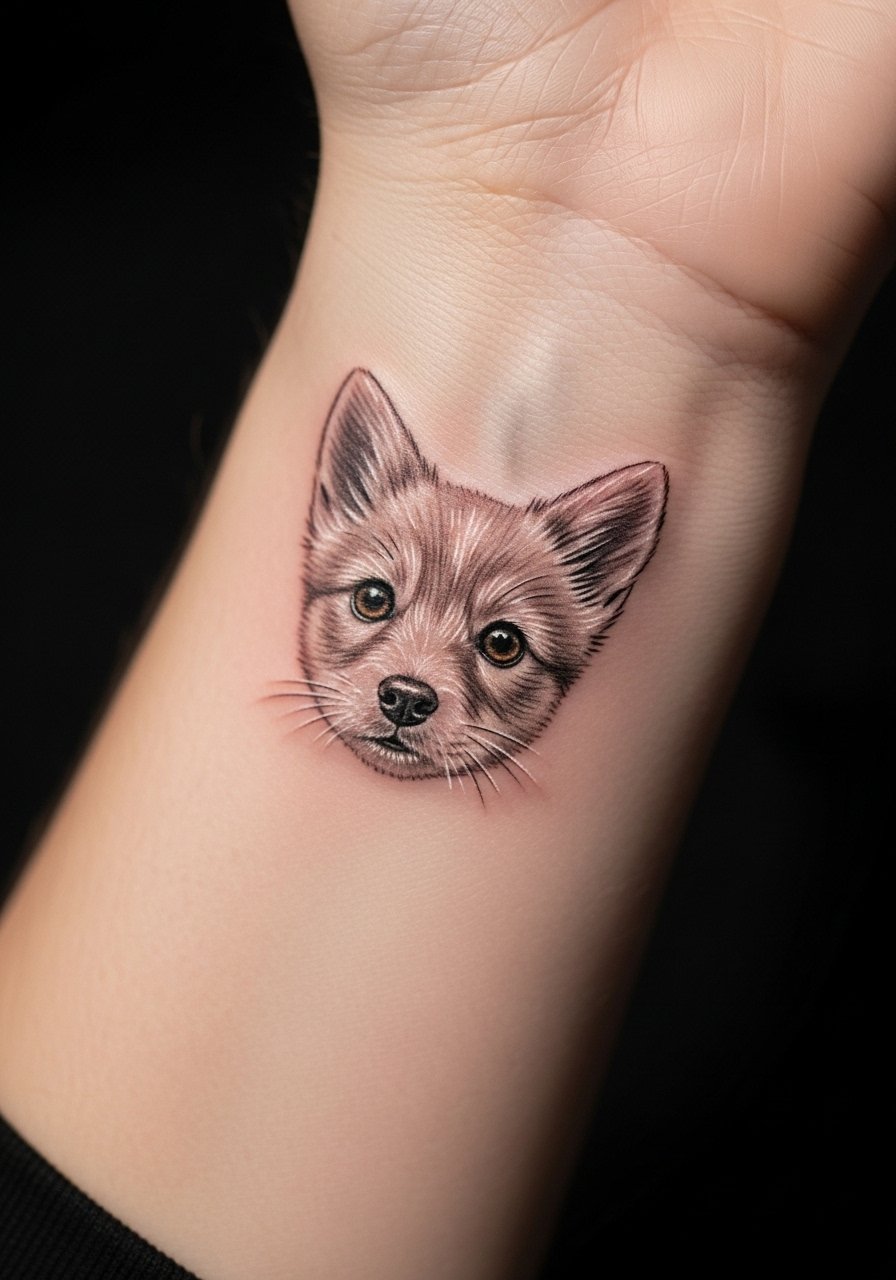
I’ve gotten tiny pet portraits and they pack emotion. Micro-realism needs a steady-handed artist; ask for healed examples at wrist scale. Wrists are visible and susceptible to sun and rubbing, so long-term care matters—SPF and moisturization keep lines crisp. Pain is noticeable but short-lived. A frequent error is asking for extreme tiny detail—faces need room. Discuss whether to add faint background shading to keep the portrait readable as it softens.
8. Snake Rebirth Coil Around Forearm
Style/Technique: Realism with Neo-Traditional Accents
Pain Level: Medium (forearm is moderate)
Session Time: 2-4 hours depending on wrap
Best For: Transformation, protection, visible statement
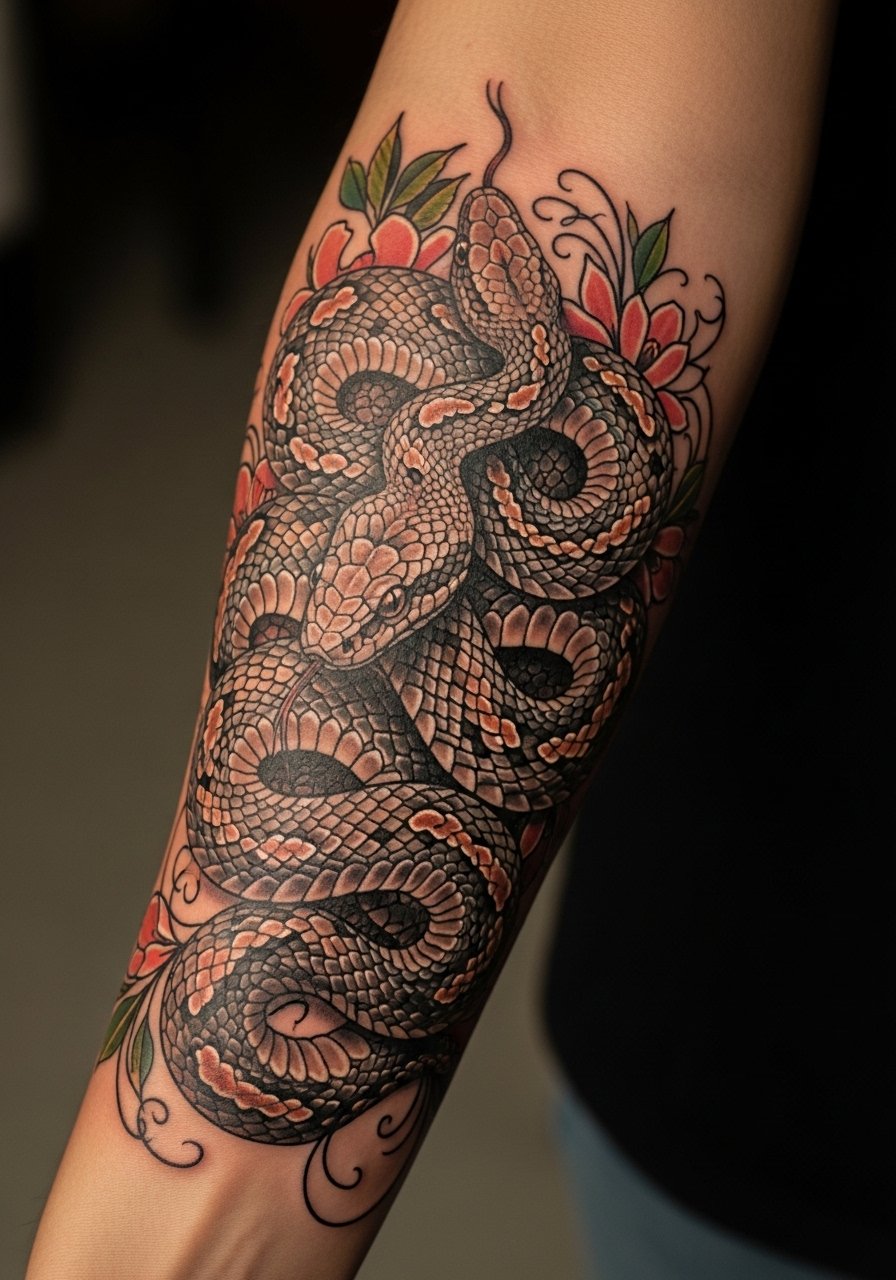
Snakes are great for healing and duality themes. A coil around the forearm moves with musculature and reads well in motion. Forearms handle shading nicely and pain is manageable. Mixing realism scales with neo-traditional florals balances crisp lines and soft color. I recommend discussing how much color you want—the darker scales and solid outlines age better. A common mistake is over-detailing scales on narrow bands; keep patterns simplified where the band narrows.
9. Chibi Mythical Dragon on Ankle
Style/Technique: Chibi Illustrative / Color
Pain Level: Low-Medium (ankle stings)
Session Time: 1 session, quick touch-ups
Best For: First animal tattoo, playful symbolism
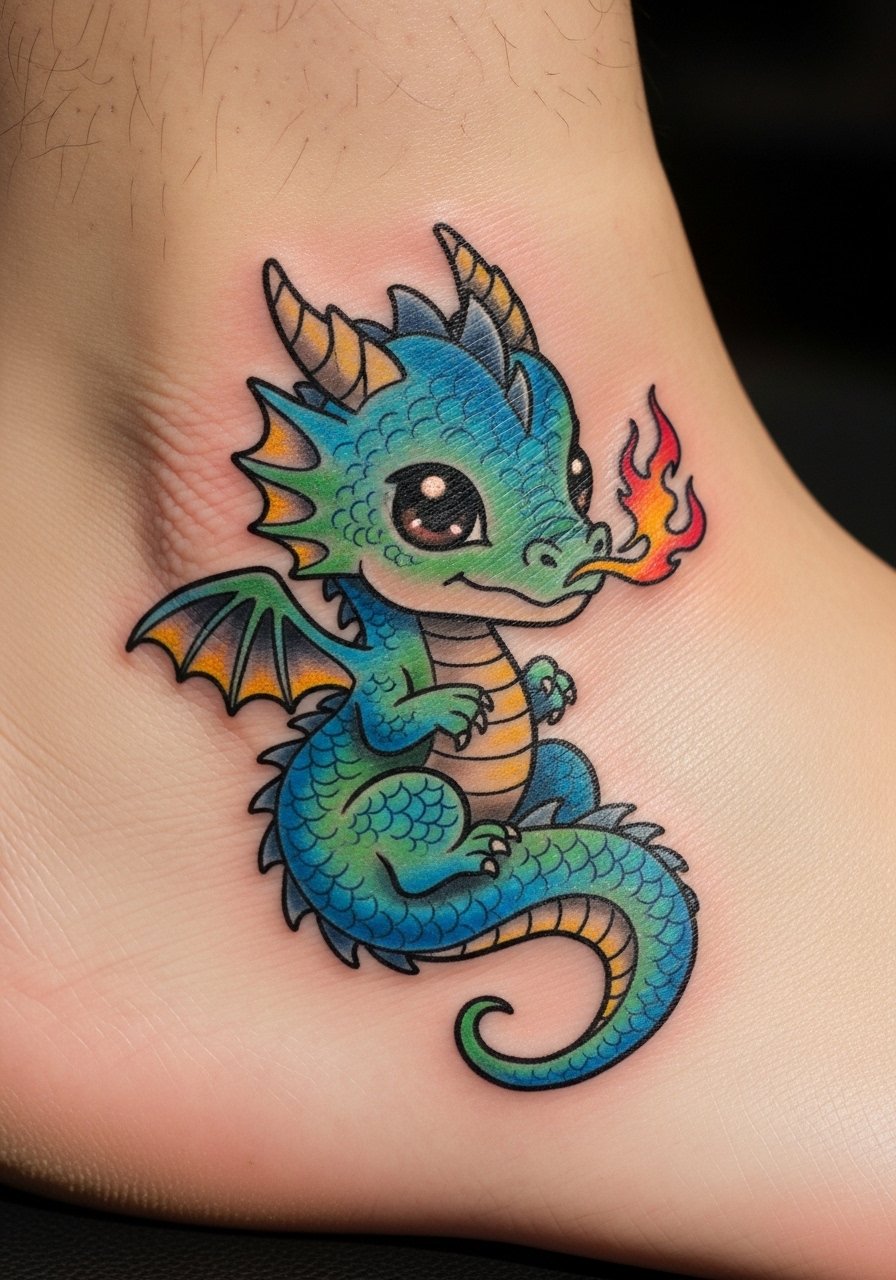
Chibi dragons are a fun first animal tattoo. They’re small, colorful, and low-commitment while still being meaningful. Ankles can be boney and sting, but sessions are short. I like chibi for testing pain tolerance without regret. Colors can soften, so go for slightly saturated palettes and strong outlines. Artists who specialize in illustration will translate cute proportions best. Avoid overly complex backgrounds on a tiny ankle piece.
10. Hummingbird Fine Line Near Collarbone
Style/Technique: Fine Line / Minimalist
Pain Level: Low (collarbone edge varies)
Session Time: 30-90 minutes
Best For: Joy and resilience accents, subtle visibility
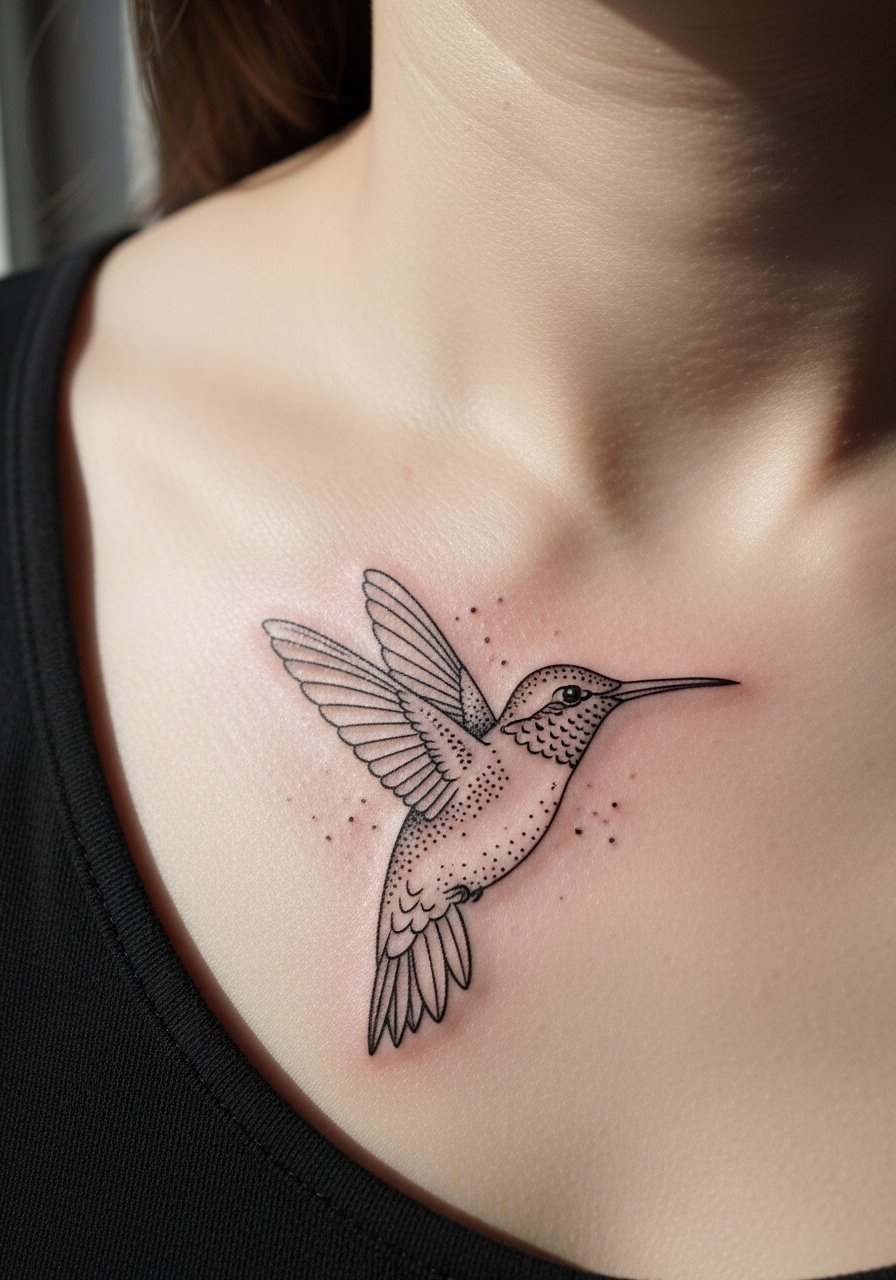
Hummingbirds symbolize resilience and lightness. Fine line versions sit nicely under collarbones or behind ears and read as delicate healed pieces. Expect some stinging near bone. These tattoos are social-media-friendly because they photograph well. The risk is lines becoming too thin—ask for slightly bolder lineweights if you want longevity. Keep composition simple and avoid tiny color fills that age unevenly.
11. Neo-Traditional Eagle Rose on Bicep
Style/Technique: Neo-Traditional / Bold Color
Pain Level: Low (bicep is forgiving)
Session Time: 2-4 hours
Best For: Timeless storytelling, visible arm display
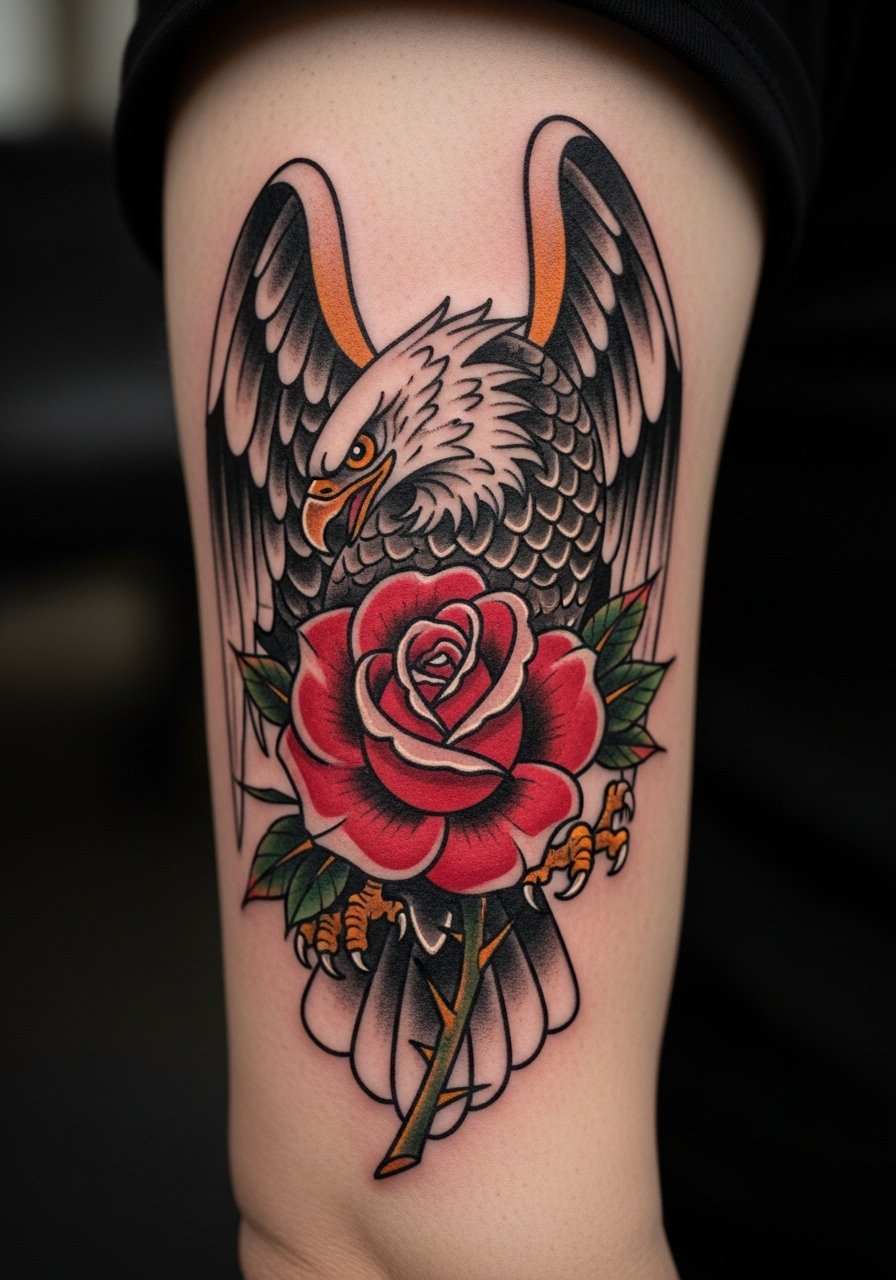
Combining an eagle and rose gives both strength and softness. Neo-traditional color palettes keep the image legible as it heals and ages. Biceps are one of my favorite spots for movement and low pain. Focus on bold outlines and clean color blocks—small interior detail can muddle over time. I usually ask artists for healed examples at least a year old to judge color retention. Don’t skimp on linework integrity; it’s what keeps this style vivid.
12. Cybersigilism Wolf Hybrid Full Sleeve
Style/Technique: Blackwork Hybrid / Geometric Overlays
Pain Level: High (sleeves involve varied zones)
Session Time: Multiple long sessions
Best For: Modern instinct symbolism, dramatic cover-ups
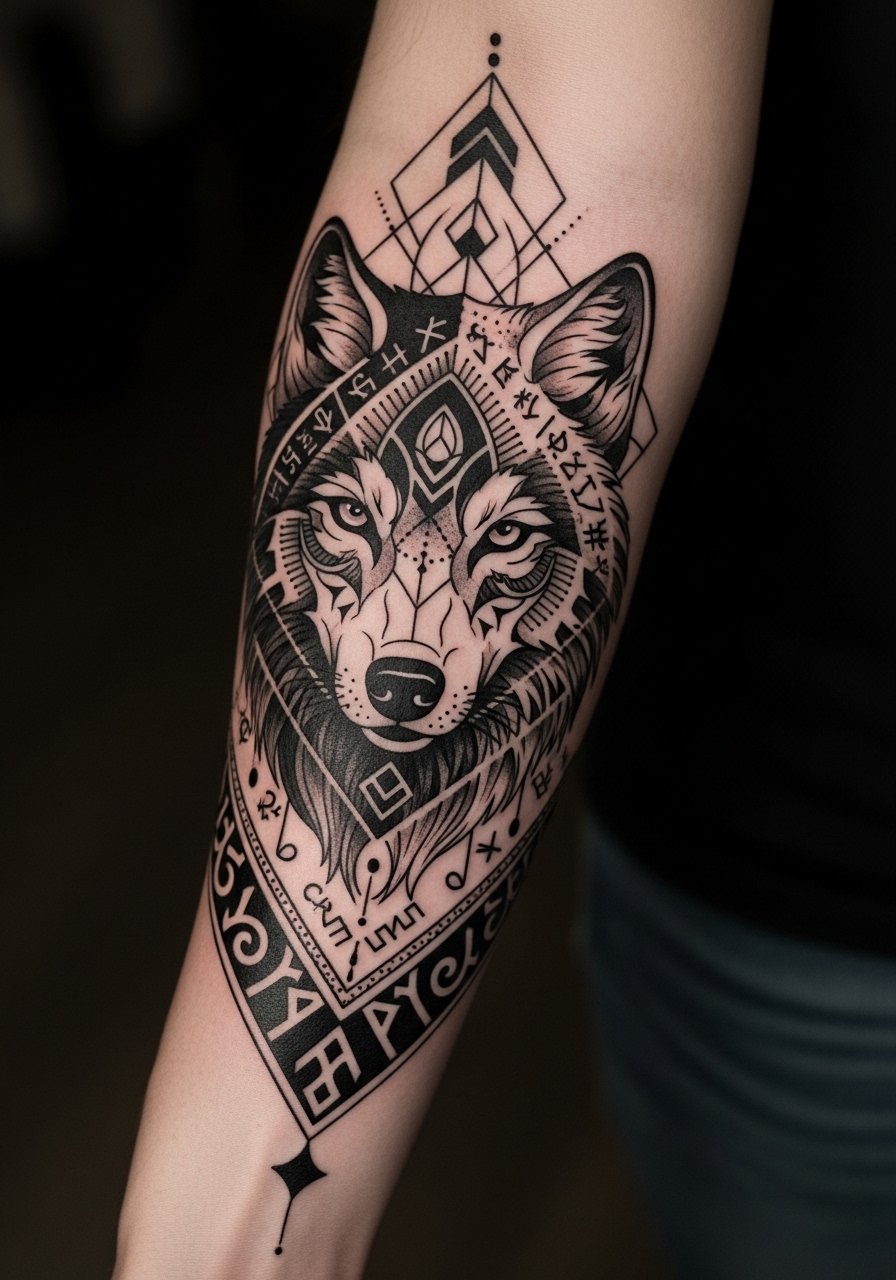
For something modern, I’ve seen wolves with geometric sigils that feel futuristic. Blackwork holds extremely well and the geometric elements age predictably. Sleeves demand planning—pain varies from forearm (easier) to inner bicep and elbow (more intense). This approach needs an artist comfortable with large-scale blackwork and crisp negative space. A mistake is overcomplicating sigils; keep symbols meaningful and spaced for readability.
13. Mythical Serpent Floral Wrap on Wrist
Style/Technique: Fine Line / Illustrative Color
Pain Level: Medium (wrist sensitive)
Session Time: 1-2 hours
Best For: Rebirth themes in a subtle spot
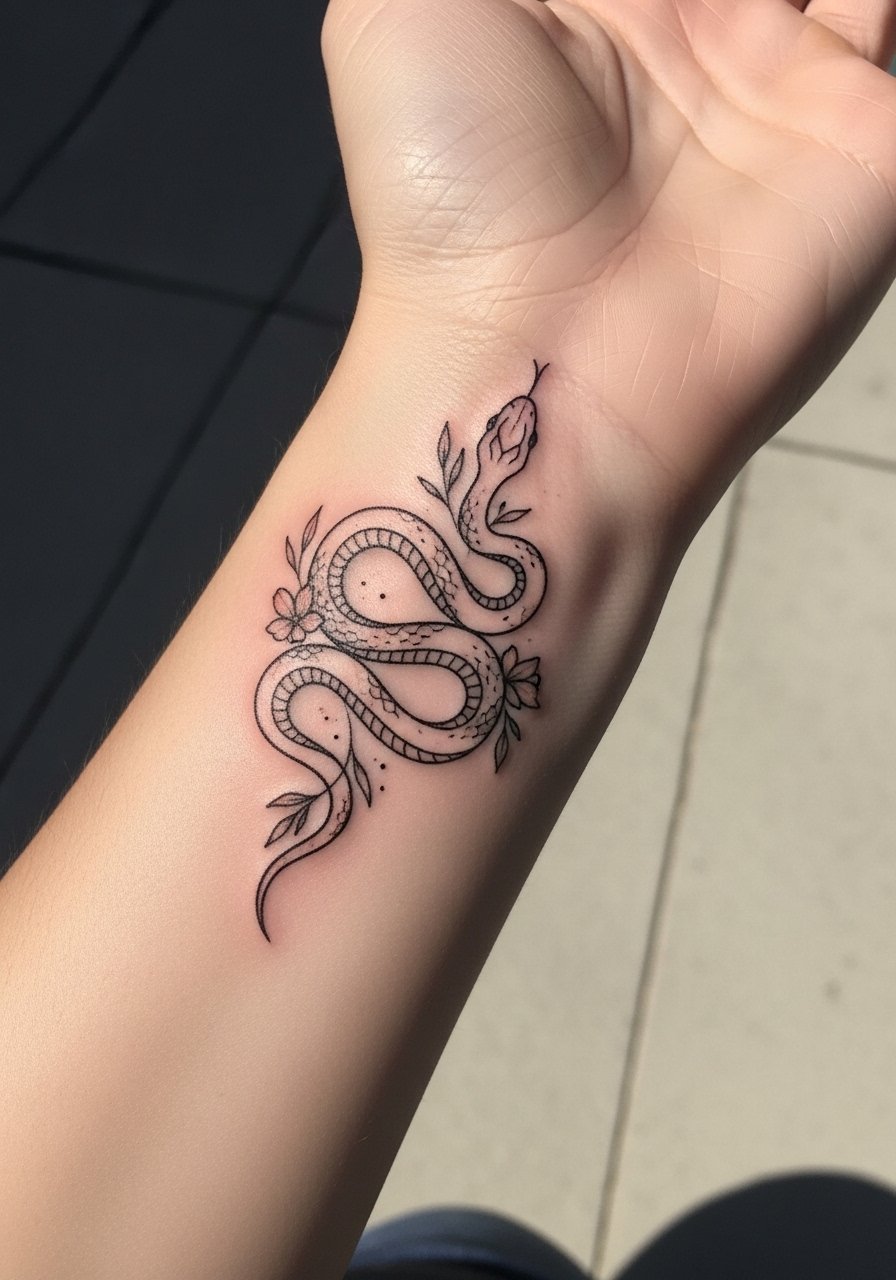
A wrist wrap reads intimate and readable. Fine-line serpent motifs with floral accents are elegant and symbolic of rebirth. Because wrists face friction and sun, pick colors and line weights that artists show healed on wrists. Pain is focused but brief. A common error is making the coil too tight with tiny scales—simple shapes read better as it softens. I recommend Saniderm in the first days if your artist approves to protect the wrap.
14. Stag With Floral Crown on Sternum
Style/Technique: Neo-Realism / Fine Line Florals
Pain Level: High (sternum is intense)
Session Time: 2+ sessions
Best For: Grounding, gentleness + strength symbolism
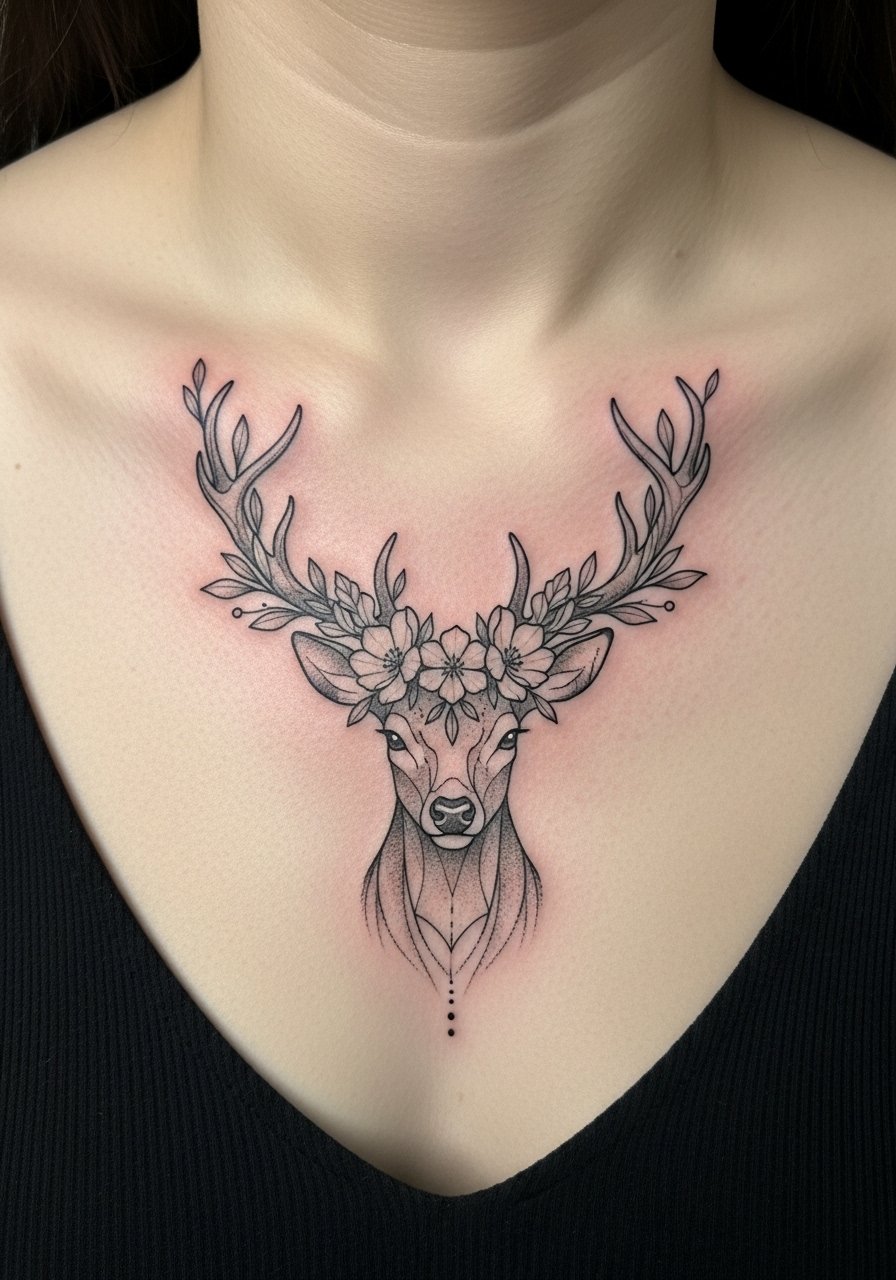
Stags feel stoic and gentle. Sternum placement centers the piece and creates dramatic photos but is one of the more painful spots. The healed look is striking when shading is layered and florals are spaced. Artists need to balance bold antler lines with delicate flower stems to prevent muddiness. If you can tolerate pain, the result is worth it. Remember to avoid tight clothing while it peels to protect fine line florals.
15. Koi Fish Flowing Along Rib
Style/Technique: Traditional / Flowing Color
Pain Level: High (rib area)
Session Time: Multi-session depending on size
Best For: Luck, perseverance, large flowing designs
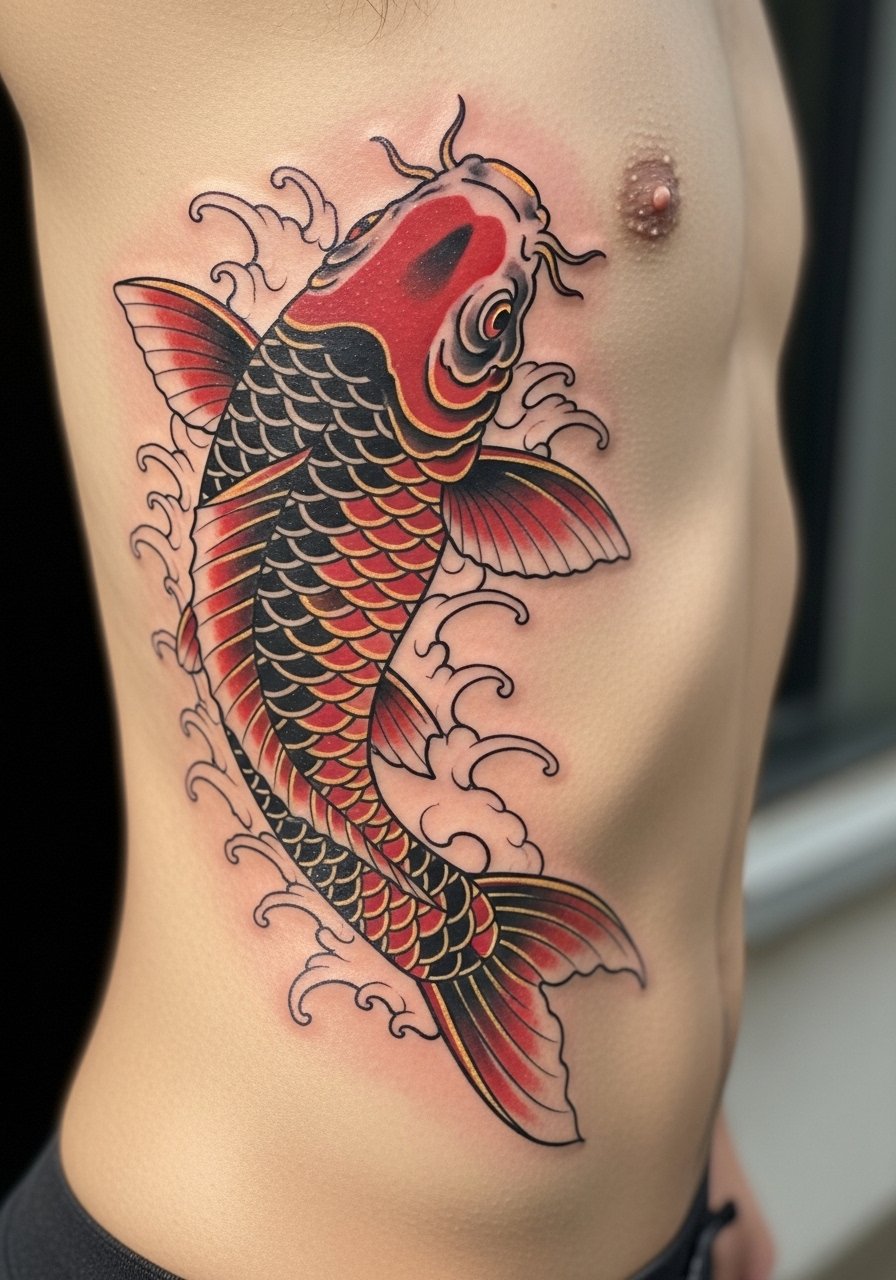
Koi read as perseverance and flow. Ribcage motion complements their curves. Ribs are painful but the way the design moves with breath is worth it. Healed color will soften; ask for balanced fills and a bold outline for longevity. Avoid tiny dot shading in tight rib curves; it can blur. I always check artists’ healed rib pieces before booking.
16. Fox Minimalist Line Art Behind Ear
Style/Technique: Minimalist Line / Single Needle
Pain Level: Low (small spot but sensitive)
Session Time: 30-60 minutes
Best For: Cunning symbolism, tiny hidden tattoos
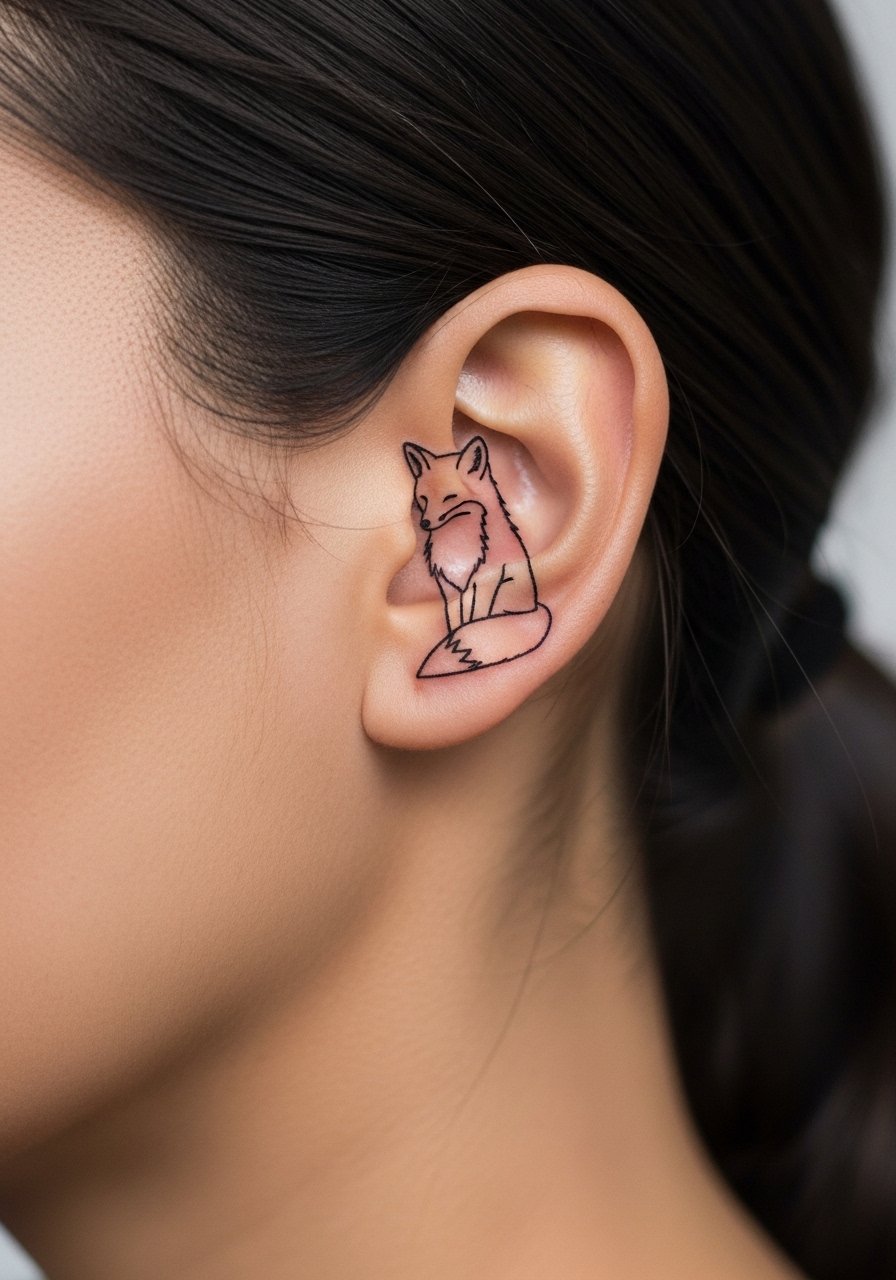
A behind-ear fox is discreet and clever. Minimalist single-needle work can be crisp but needs a steady artist. The area is sensitive though small. Expect quick healing but be gentle with shampoos. Lines that are too thin can blur; I suggest a slightly stronger line than purely hairline for longevity. Ask for healed behind-ear examples.
17. Elephant Trio on Upper Thigh
Style/Technique: Fine Line / Minimalist Grouping
Pain Level: Low-Medium (thigh is forgiving)
Session Time: 1-2 hours
Best For: Family, memory, gentle strength
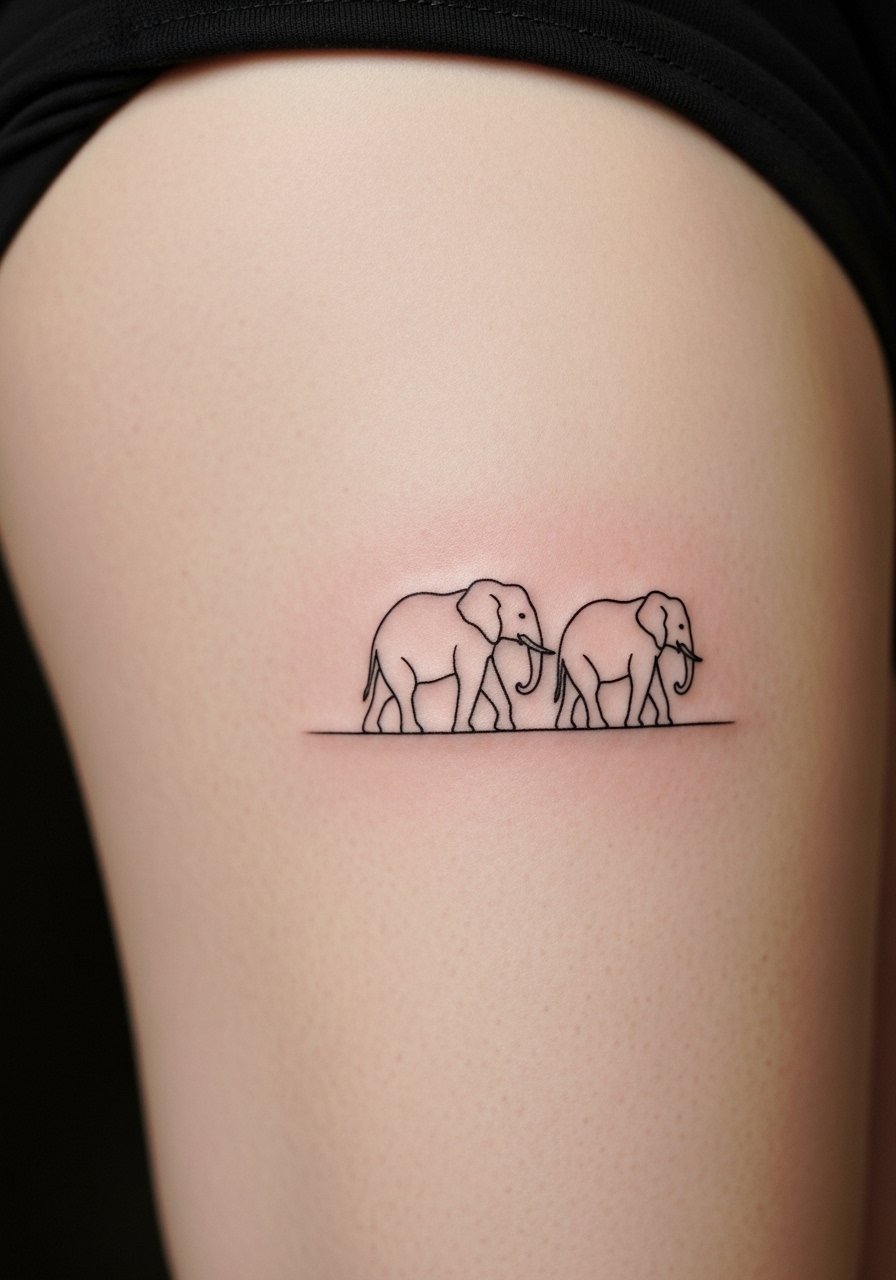
Elephants carry memory and family. A trio across the thigh lets you play with scale and spacing. Thighs heal well and are less painful. Fine line works if the artist pads line weight slightly for aging. A common mistake is cramming too many small features; keep silhouettes clean. Discuss placement so it flatters your movement and clothing choices.
18. Raven In Flight Over Forearm (Blackwork)
Style/Technique: Blackwork / Silhouette
Pain Level: Medium (forearm tolerable)
Session Time: 1-3 hours
Best For: Mystery, transformation, bold contrast
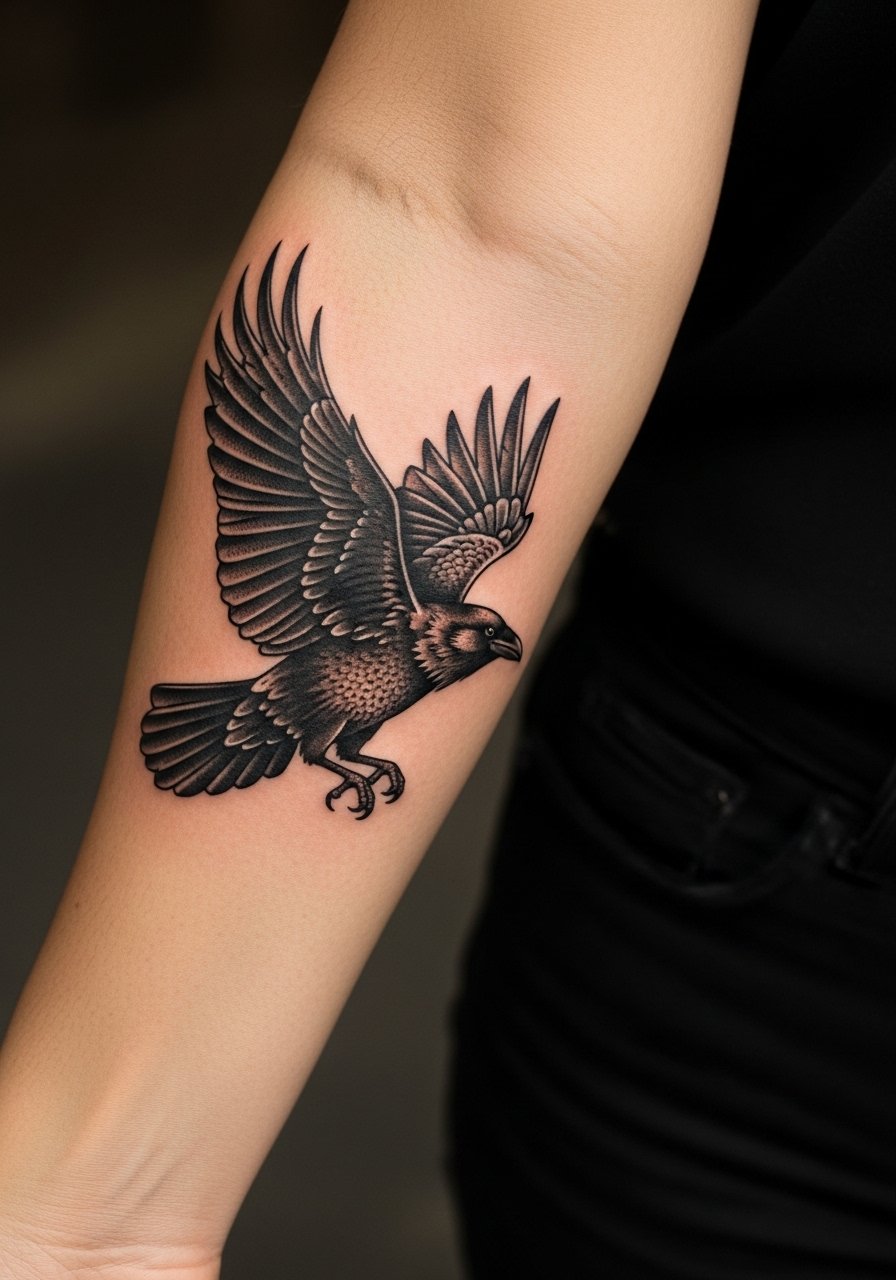
Ravens feel mysterious and transformative. Solid black silhouettes age very well and photograph consistently. Forearms are ideal for wing motion. Solid fills are forgiving as lines soften—less worry about tiny detail blurring. Ask how they layer blacks to avoid patchiness. Avoid tiny feather detail inside a silhouette; the shape is the message.
19. Deer With Constellation Antlers on Rib
Style/Technique: Fine Line / Dotwork Constellation
Pain Level: High (rib sensitivity)
Session Time: 1-2 hours for medium piece
Best For: Gentle wisdom, celestial ties
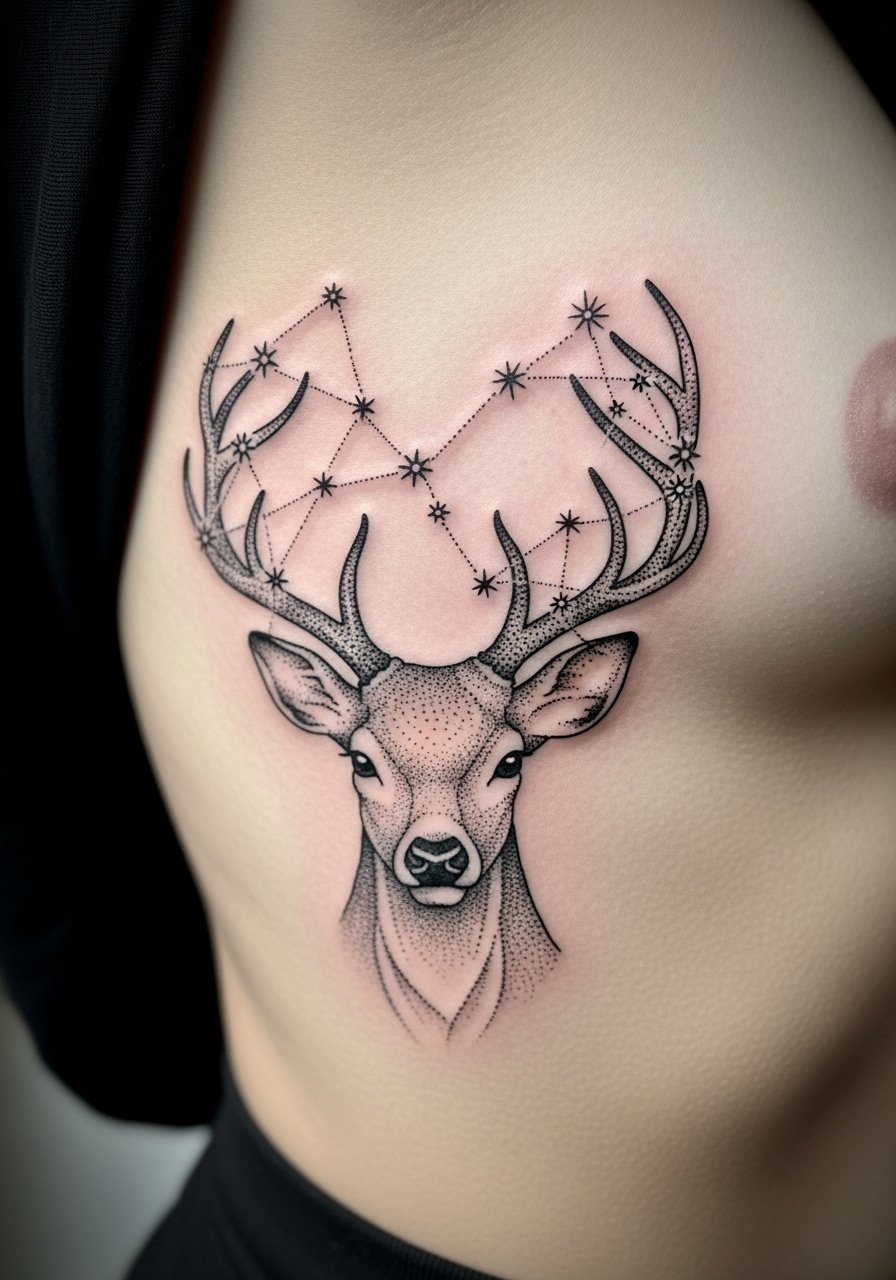
Deer feel gentle and alert. Adding constellation dotwork above the antlers gives personal meaning. Rib placement is sensitive—plan for breaks. Dotwork heals nicely but can take longer to settle; keep moisturized to avoid uneven peeling. I’ve seen beautiful results when artists space dots for clarity rather than clustering too tightly.
20. Seahorse Micro-Realism on Ankle
Style/Technique: Micro-Realism / Fine Detail
Pain Level: Low-Medium (ankle sensitive)
Session Time: 45-90 minutes
Best For: Calm, guardian of the sea themes, tiny placements
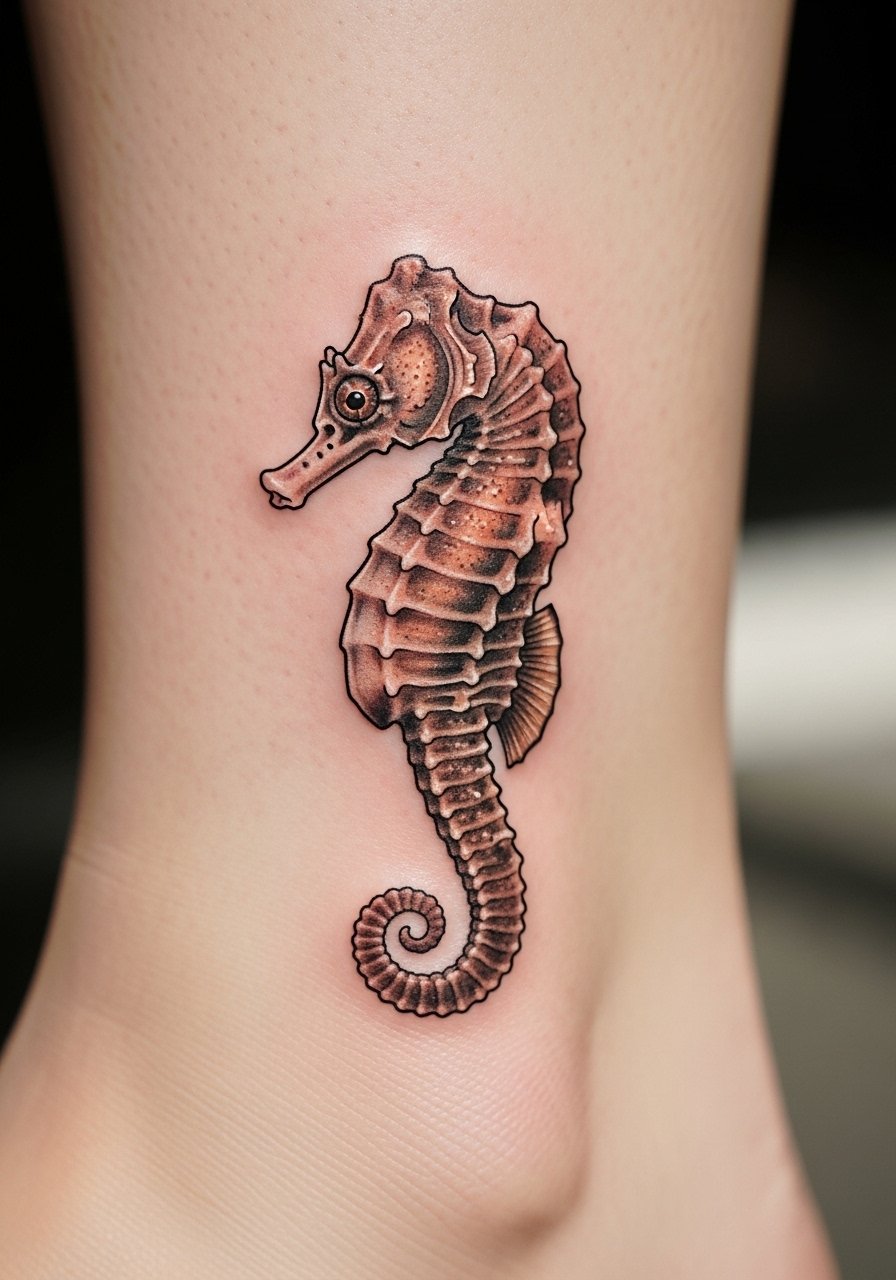
Seahorses feel protective and rare. Micro-realism on an ankle is a sweet personal piece. Because ankles face sun and friction, ask to see healed ankle micro work. Pain is short. The biggest issue is choosing an artist who regularly executes tiny lifelike detail; otherwise the piece can blur. A small touch-up later is normal.
21. Bear Paw Stamp on Upper Back
Style/Technique: Blackwork / Stamp-Style
Pain Level: Low (upper back is forgiving)
Session Time: 1-2 hours
Best For: Protection, grounding, subtle statement
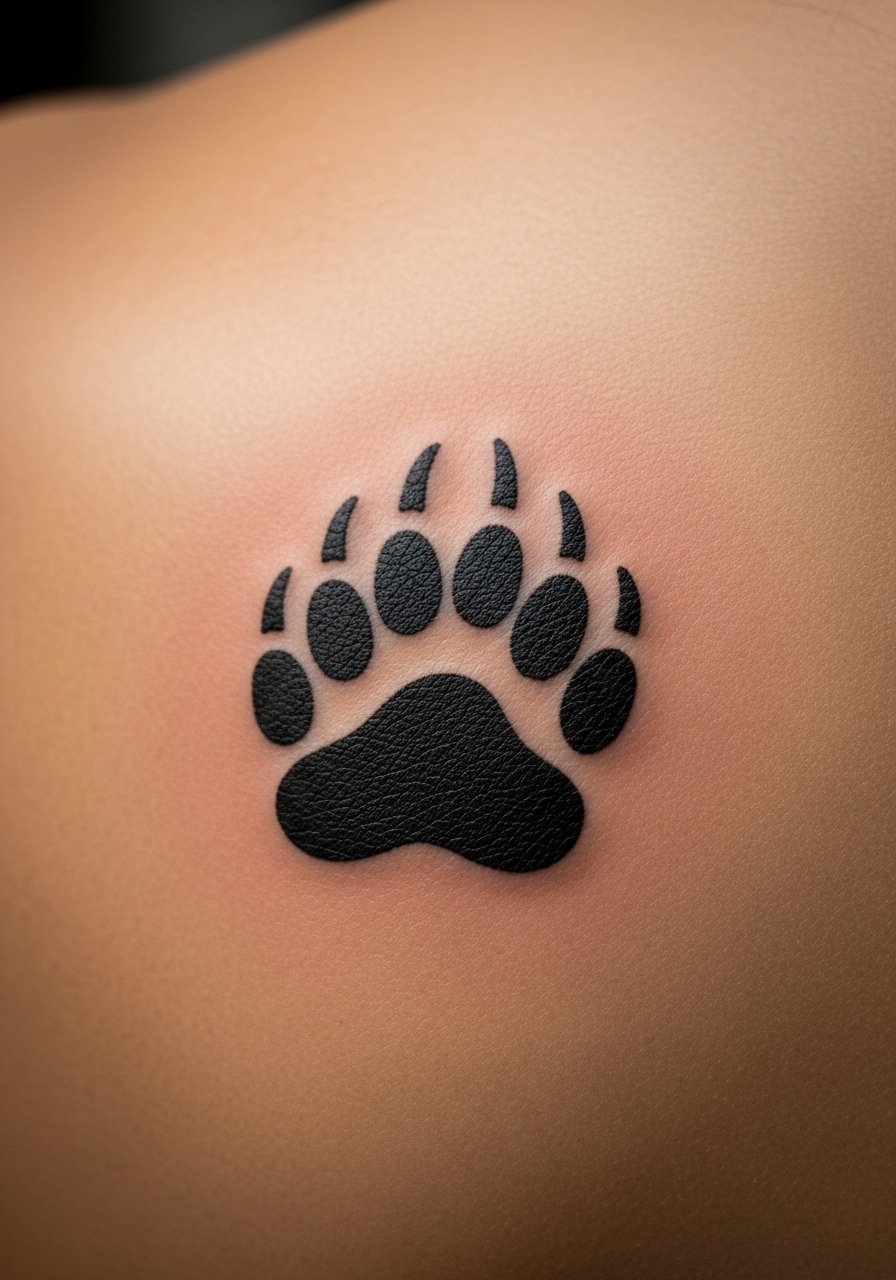
Bear paws read as grounding and protective. A stamp-style blackwork mark holds up over years. Upper back placement gives the shape room and is easy to cover. Solid shapes age predictably better than tiny texture dots. Ask artists for healed samples of blackwork on upper backs to check patch consistency.
22. Whale Tail on Side Rib (Minimalist)
Style/Technique: Minimalist / Linework Curve
Pain Level: High (side rib)
Session Time: 1 session, quick lines
Best For: Calm, depth, ocean ties
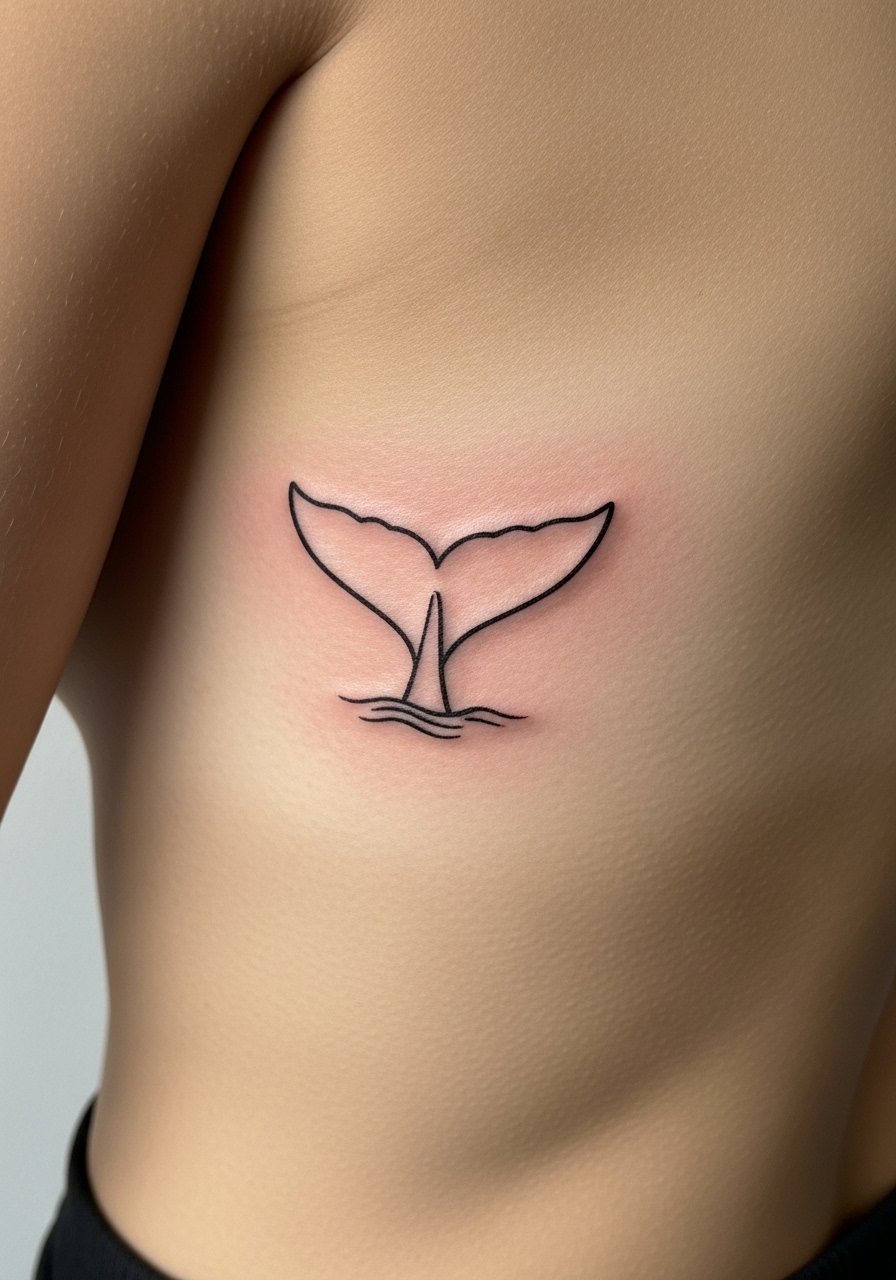
A whale tail is serene and symbolic. Minimalist lines on the side rib look elegant and move with breath. Ribs hurt, but lines are quick. The trick is to keep lines simple—too many tiny breaks make the tail look noisy as it settles. I recommend slightly bolder single strokes for durability.
23. Honeybee on Finger (Tiny Realism)
Style/Technique: Micro-Realism / Small Realism
Pain Level: High (finger pain + fading)
Session Time: 30-60 minutes
Best For: Community, industrious symbolism, tiny visible spots
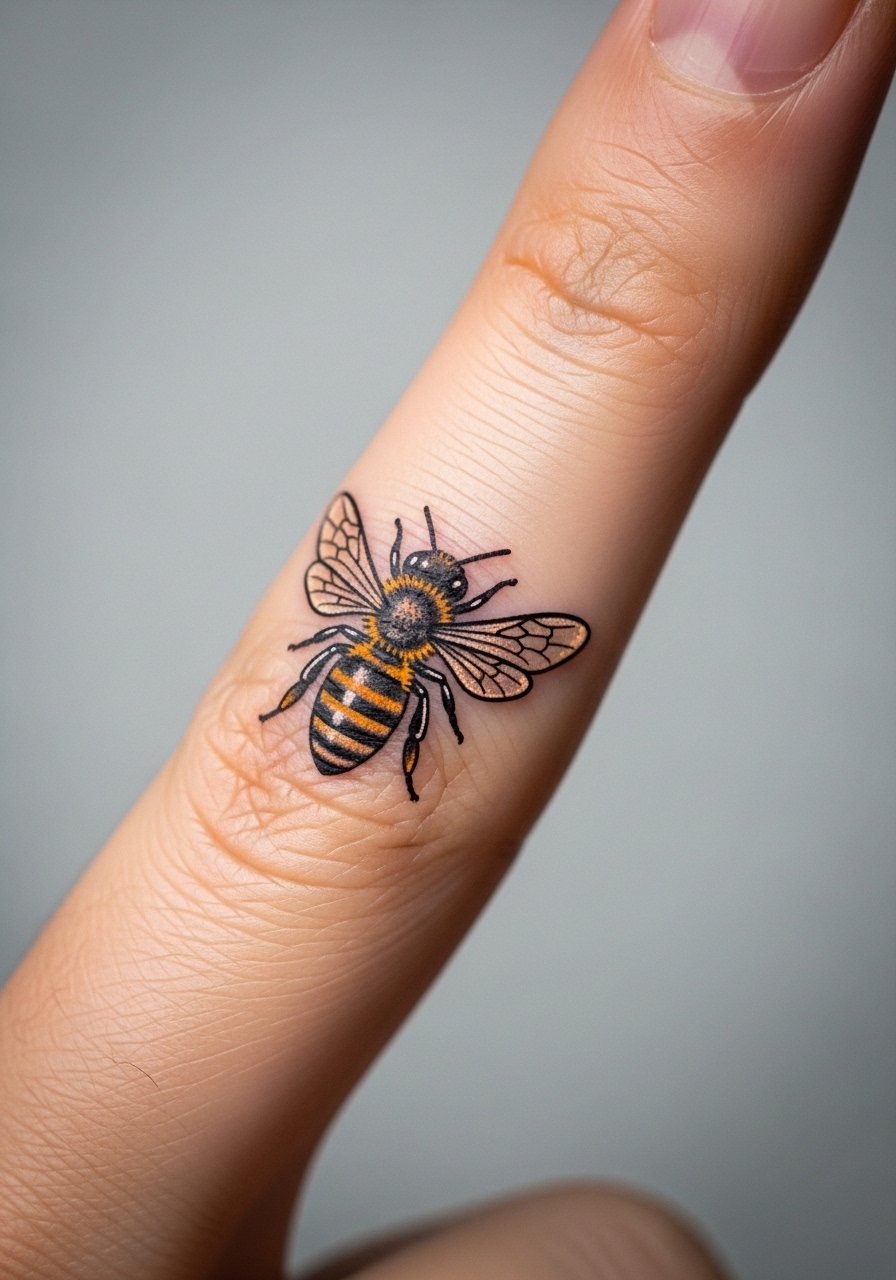
Finger tattoos are charming but notorious for faster fading. Bees symbolize community and work ethic. If you want a finger piece, expect touch-ups; choose bold enough marks. I’ve seen artists recommend slightly larger bees to avoid ultimate blur. Keep fingers out of harsh detergents while healing. Saniderm usage on fingers is common if artist approves.
24. Hounddog Silhouette on Calf (Realism)
Style/Technique: Silhouette Realism / Black & Grey
Pain Level: Low-Medium (calf tolerable)
Session Time: 1-2 hours
Best For: Pet tributes, strong silhouette on a moving canvas
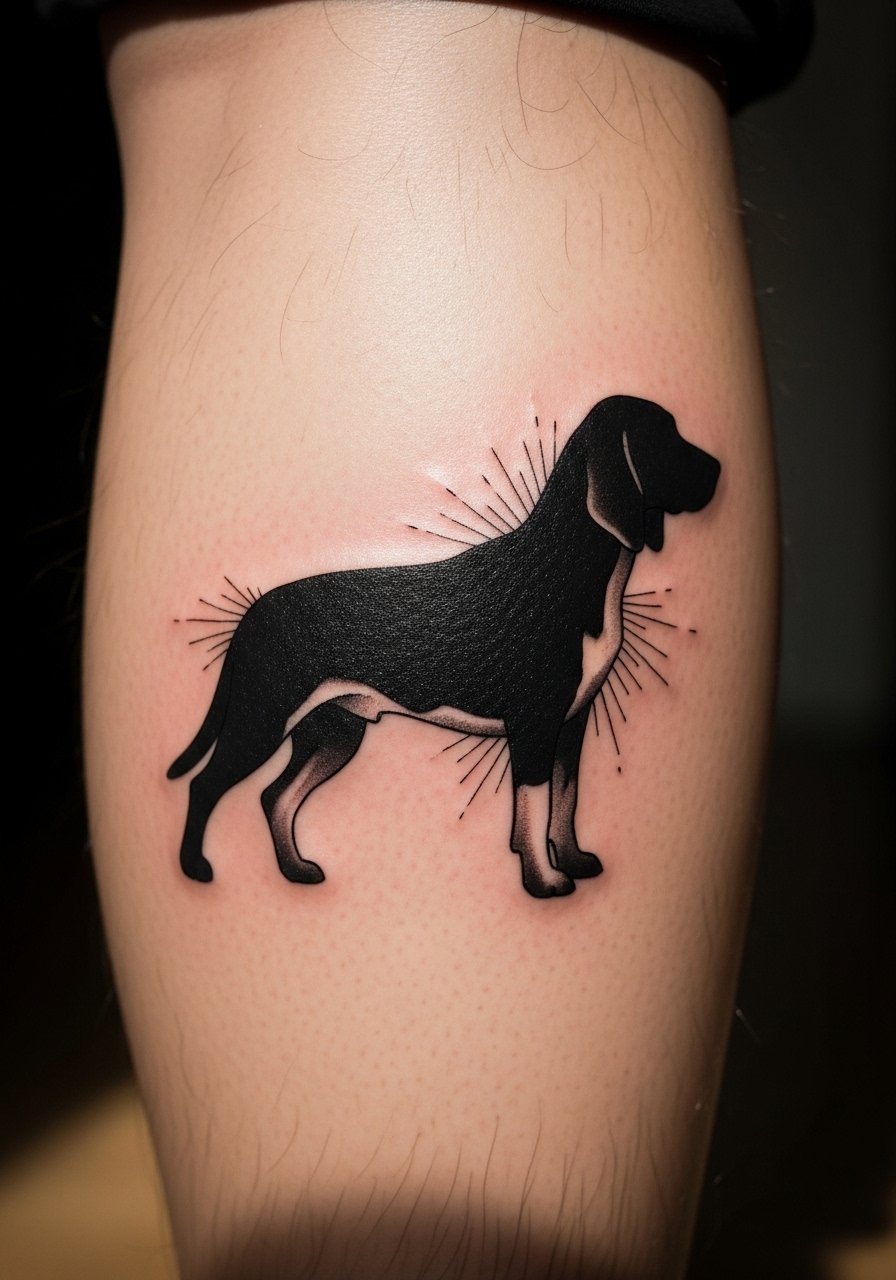
Calf placement gives a moving canvas for pet silhouettes. Black & grey silhouettes age cleanly and are forgiving. I’ve chosen calf spots for tributes because they’re visible and respond well to walking and muscle tone. Avoid tiny internal details unless you plan for regular touch-ups.
25. Fox Spirit with Floral Backpiece (Illustrative)
Style/Technique: Illustrative / Fine Line + Color
Pain Level: Medium-High (back large area)
Session Time: Multi-session backpiece plan
Best For: Personal mythos, large symbolic storytelling
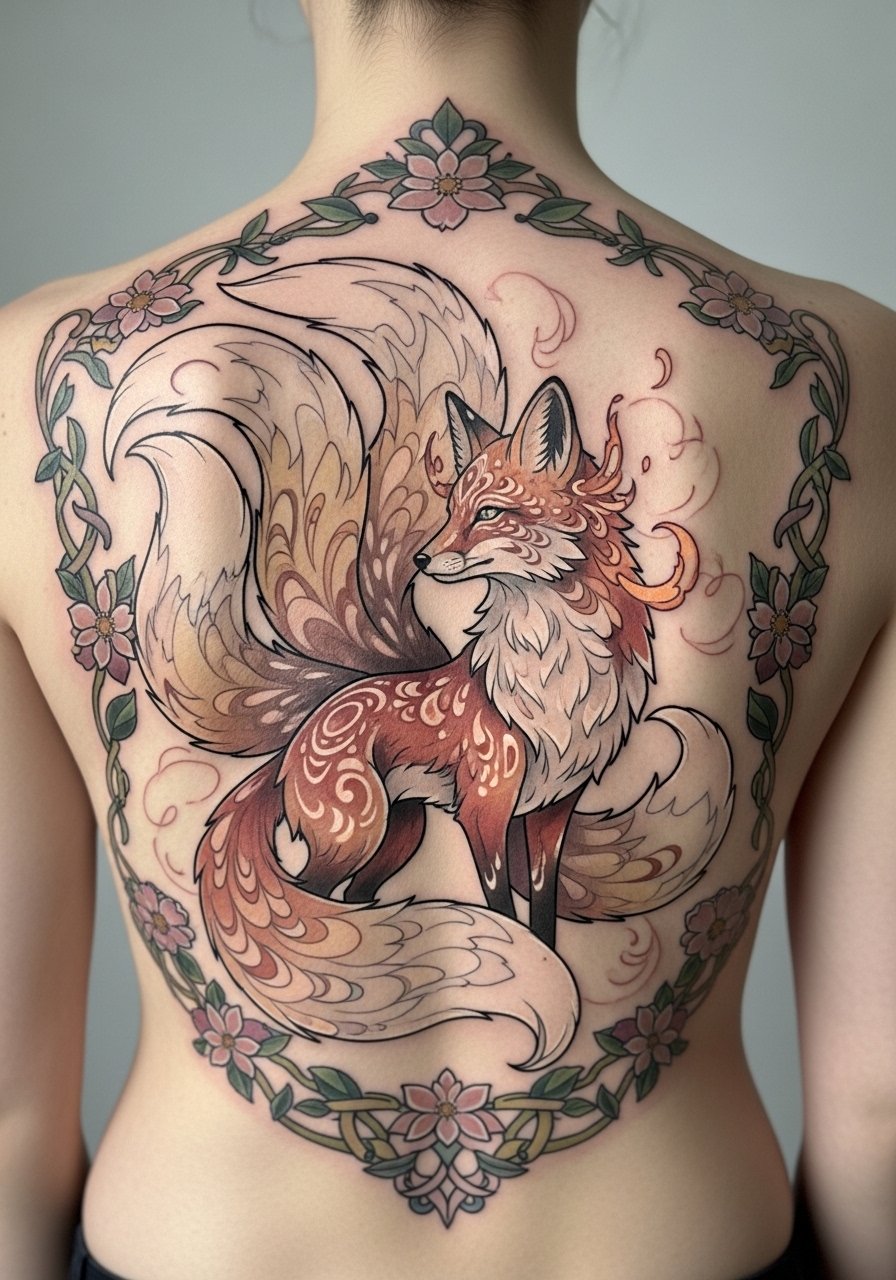
A backpiece lets you craft a personal myth—the fox spirit with florals can tell a whole arc. Illustrative styles with fine line details and color balance photograph well and heal into a cohesive piece if spaced across sessions. Backpieces are a commitment but give an artist room to breathe. Ask for staged session plans and healed progress photos. Avoid overloading with tiny leaves in dense areas; negative space helps clarity.
Tattoo Prep and Aftercare Essentials
Aftercare Essentials:
- Aquaphor Healing Ointment, 14oz tube — Recommended first 3–5 days for heavy protection
- Saniderm Transparent Adhesive Bandage, 6-inch roll — Second-skin wrap for the first 24–72 hours (ask your artist)
- CeraVe Fragrance-Free Moisturizing Lotion, 12oz — Daily moisturizer after initial healing
- Dr. Bronner's Unscented Castile Soap, 8oz — Gentle cleaning during first week
Before Your Appointment:
- Tattoo Numbing Cream with 5% Lidocaine — Use only if your artist approves, apply 30–45 minutes before
- Tattoo Stencil Transfer Paper — If you want to test placement at home
Long-Term Maintenance:
- SPF 50 Sunscreen Stick for Tattoos — Daily protection to prevent fading
- Mad Rabbit Tattoo Balm, 1.7oz — Ongoing color maintenance and moisturizer
- Hustle Butter Deluxe, 4oz — Vegan aftercare alternative artists sometimes recommend
Optional Comfort Items:
- Tattoo Numbing Spray — For sensitive areas or touch-ups (ask artist)
- Hydrocolloid Bandages, Large — For spot coverage during healing if needed
Every artist I’ve talked to has a slightly different routine, but Aquaphor and Saniderm come up most often for early care. I keep SPF and a gentle fragrance-free lotion on hand long-term.
Frequently Asked Questions
Q: How bad does a tattoo actually hurt?
A: Pain depends on placement and personal tolerance. Forearm and thigh tend to be lower; ribs, sternum, and ankles sting more. From what I've gathered, most people describe it as intense scratching or burning rather than sharp unbearable pain. For sensitive spots, ask your artist about a numbing cream with lidocaine—it helps take the edge off but rarely eliminates sensation.
Q: What if I regret my design later?
A: I always tell friends to sit on big ideas for months. If you're unsure, start with smaller placements that are easy to hide (upper thigh, back). Tattoos can be revised or removed, but both involve additional sessions. Choosing a symbol with personal meaning rather than a fad reduces regret.
Q: How do I keep my tattoo from fading?
A: Sunscreen is non-negotiable. From my experience, UV exposure is the biggest ink killer. Use an SPF 50 sunscreen stick on healed tattoos daily and moisturize with a fragrance-free lotion to keep skin healthy.
Q: Can I work out after getting a tattoo?
A: Wait at least 48–72 hours before strenuous workouts, longer if the tattoo is in a flex area (shoulder, knee, elbow). Sweat can irritate fresh ink and introduce bacteria. Focus on light movement and hydration while the surface is sealing.
Q: Should I get a small tattoo first to test pain?
A: Only if you truly want a small tattoo. Pain varies more by placement than size—tiny finger tattoos can hurt more than a larger outer-arm piece. If nervous, pick a less painful area like the outer arm or thigh and ask for a quick session.
Q: How long does a tattoo take to heal?
A: Surface healing is usually 2–3 weeks. Full settling can be 2–3 months depending on depth and location. The first week is critical—clean gently with a soap like Dr. Bronner's Unscented Castile Soap and use a recommended ointment such as Aquaphor. Expect peeling; don’t pick.
Q: Do tattoos look different on different skin tones?
A: Yes. Black & grey tattoos tend to read well across tones. Bright colors can appear differently depending on depth and pigment. I always ask artists to show healed work on a range of skin tones so I can set realistic expectations.
Q: Which aftercare items should I pack for the first week?
A: I pack a small tube of Aquaphor, unscented soap, and a couple of sterile bandages. If your artist uses a second-skin method, have Saniderm ready if they recommend it. Follow your artist’s timing exactly—every piece and skin type is a little different.
