
The tiniest hummingbird stencils look delicate in a grid, but they often lose the defining beak and wing gaps after healing. If you want a hummingbird that still reads at year three, plan for clarity from the start: a little more spacing, a simplified feather logic, and a composition that uses negative space to keep the bird readable. That approach shapes every idea below.
1. Fine-line hovering hummingbird with flower accent
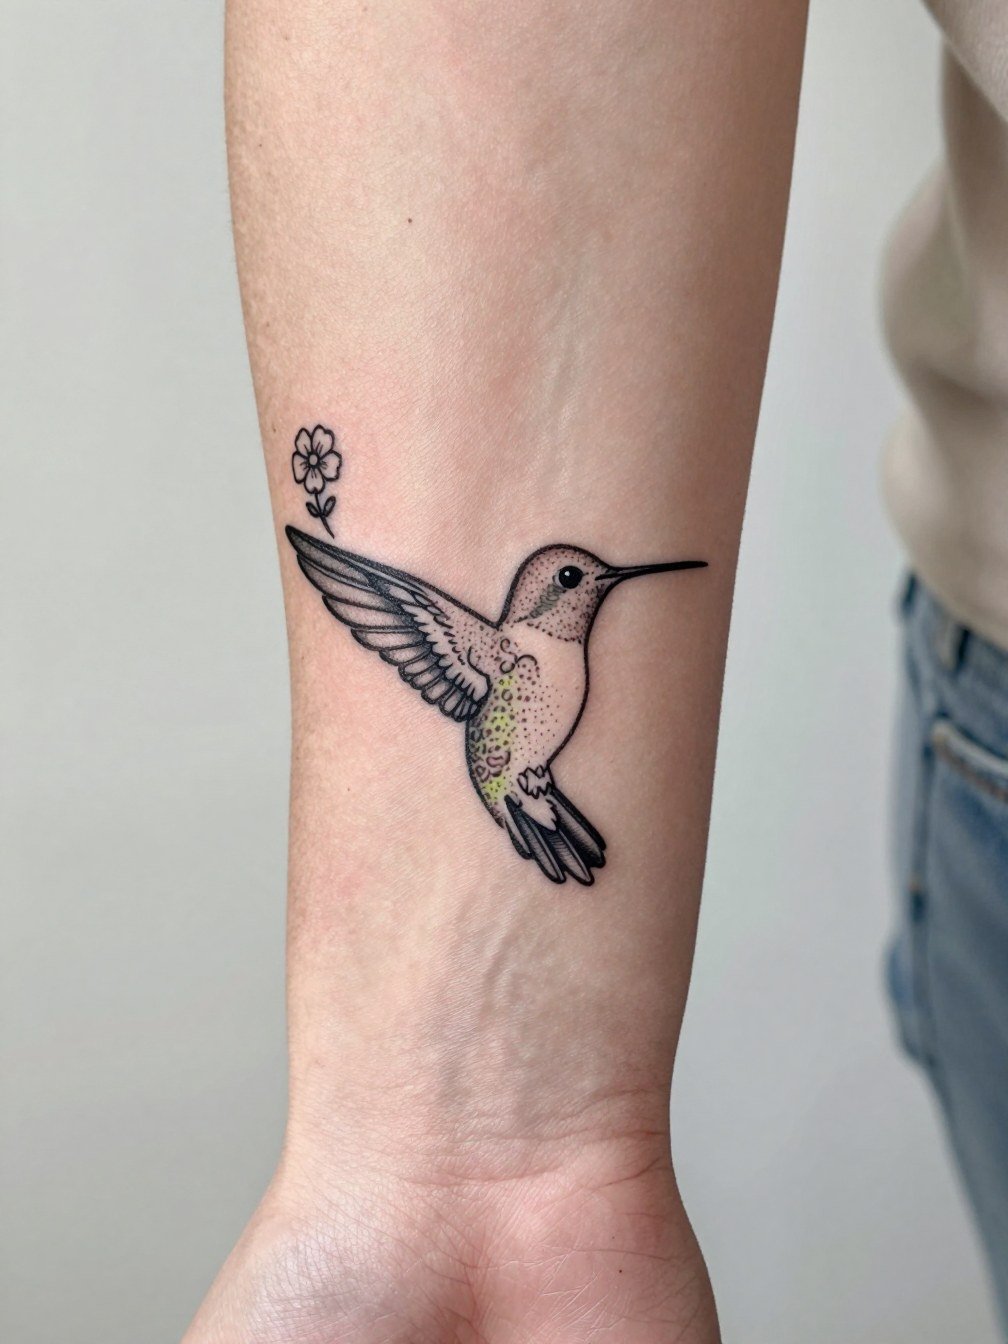
A fine-line hovering bird reads best when the stencil prioritizes contour over feather micro-detail. Recommend slight spacing between primary feathers and a defined beak so the silhouette survives spreading. For the appointment wear a rolled cuff linen shirt so you can push the sleeve above the elbow without tugging at the design. Expect light discomfort on the inner forearm and a single shorter session for a moderate-size piece. Common mistake is asking for photographic feathers at micro scale, which often merge into indistinct shading after a year. Bring a reference showing the exact line weight and ask for slightly bolder contour lines than the smallest Pinterest pin.
2. Minimal hummingbird outline on the wrist

Tiny outlines win on the wrist for discretion, but artists and clients split on scale. One camp says the tiny hummingbird is the point, elegant and discreet even as lines soften with time. The other camp warns that ultra-small feather detail blurs and recommends slightly larger spacing so the beak and wing tips keep reading after healing. If you want a minimal read, request a single-line silhouette with a defined beak, and consider pairing it with a thin chain bracelet that sits below the ink so the tattoo remains unobstructed. The wrist sees constant washing and friction, so plan for a touch-up at the one- to two-year mark if you keep the size under two inches.
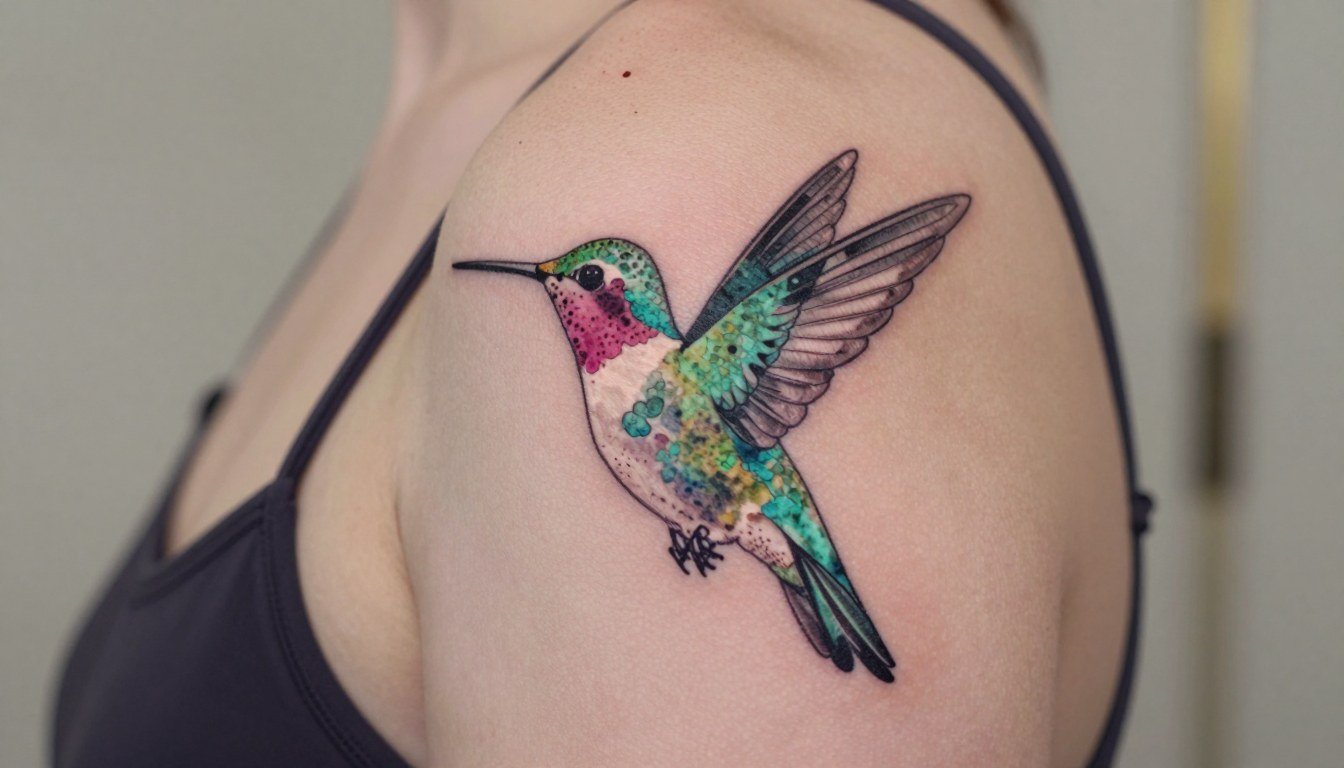
3. Watercolor hummingbird with soft color halo on the shoulder
Color lovers argue for iridescent palettes that echo real hummingbirds, and that has merit when the design is large enough. One side prefers color for vibrancy and lifelike energy. The other side points out that black-and-gray ages more predictably for small placements and keeps contrast over time. For a shoulder piece the watercolor halo gives motion without packing in tiny feather detail that will fade. Wear an off-shoulder top for the session so the artist can access the area easily. Expect one to two sessions depending on color layers, and plan on a follow-up for any color refresh after year two if you want saturation to last.
4. Black-and-gray hummingbird with feather detail
Black-and-gray brings legibility to medium forearm pieces because contrast beats tiny color blends for aging. For outer forearm placement ask for slightly broader feather strokes in the stencil so individual feathers separate rather than merge. Pair the finished work with a cuffed tee shirt and simple rings to frame the forearm in photos. Pain is mild to moderate and sessions usually finish in one sitting for medium pieces. A frequent error is requesting ultra-dense feather shading at a small scale, which looks great fresh but softens into muddiness. Budget a touch-up at year two for any high-contrast spots.
5. Hummingbird in flight with trailing linework at the ankle
Motion lines help a small ankle piece avoid looking static. Keep the trailing strokes bold enough that a slight spread does not erase the sense of flight. The ankle gets friction from socks and shoes, so avoid tiny internal feather detail that relies on crisp micro-strokes. For showing it off in warm months try low-top sneakers and cropped pants that stop above the ankle. Session time is short and pain can spike near the bone, so schedule in breaks if the artist suggests them. A common mistake is designing too tightly for the canvas; expand the negative space slightly to help the lines breathe as the skin settles.
6. Hummingbird and flower duo on the collarbone
Collarbone compositions benefit from a floral anchor that prevents the bird from looking like a floating cutout. Ask for negative space between the bird and flower so the chest movement does not mash the two elements together over time. For the session wear a scoop-neck tank so the artist can work without fabric rubbing the area. The sternoclavicular area can be tingly but not severe on the pain chart. A typical mistake is packing too much detail into the floral side, which competes with the bird and ages unevenly. Plan for a small touch-up if you notice early fading along the clavicle after sun exposure.
Session Day Picks
The inner forearm and collarbone pieces above need different prep, so bring clothing that exposes the exact placement without tugging at the fresh stencil.
-
Printable stencil transfer software search results. Useful for converting a reference into a clean line-only transfer that artists can trace or adapt for the hummingbird contours discussed above.
-
Tattoo stencil transfer paper kit. Lets you preview how a simplified feather pattern or single-needle outline will sit on the skin before committing to ink.
-
Glitter tattoo stencil kit packs. For testing simplified silhouette shapes on the skin surface when you want to evaluate scale and negative space without permanent ink.
-
Temporary stencil marker pens. Handy for adjusting position and scale on the day of the session so the final stencil aligns with muscle and bone landmarks.
-
Aquaphor healing ointment. A mainstream option some people use for short-term moisture control in the first few days while fine-line work seals, applied in a thin layer per the artist's guidance.
7. Fine-line hummingbird with negative space wings at the nape
Negative space wings let tiny nape tattoos stay airy while preserving definition. On the nape the skin shifts with movement, so plan for slightly wider interior gaps that read even if the single-needle lines soften. Wear a claw clip hair accessory so you can pin hair up for the session and then style it for photos without rubbing the fresh work. Pain is moderate because the area has thin skin under the hairline, and sessions are brief. A common mistake is insisting on the smallest possible size; scaling up a fraction makes a big difference to long-term readability.
8. Geometric hummingbird silhouette on the inner forearm
Geometric silhouettes age well because they rely on clear solids rather than micro-shading. The stencil should have uninterrupted fills and crisp anchor lines so the shape remains bold even if small amounts of spread occur. Discuss how the design wraps with the forearm muscles and whether a slight enlargement will improve the silhouette in photos and at rest. Expect a short session and low risk of blowout if line edges are kept clean. People often err by requesting ultra-thin connecting lines inside geometric shapes; thicker bridges keep the composition intact over time.
9. Tribal-inspired hummingbird line art on the upper arm
Bold, black shapes are forgiving and photograph well from a distance. For the upper arm ask for thicker linework and solid fills so the design keeps reading as the skin ages. This placement pairs nicely with sleeveless tanks to show the piece during summer. Upper arm sessions are relatively tolerable and usually finish in a single appointment for medium compositions. A frequent mistake is converting a delicate bird sketch into tribal shapes without considering spacing, which can create dense blobs where negative spaces collapse. Ask for a scaled mockup on the skin to judge rhythm before the first pass.
10. Two-hummingbird composition for relationship or memorial pieces
Compositions with two birds need breathing room between figures so their forms do not merge after healing. When the idea is symbolic, treat spacing like a relationship diagram: enough distance to maintain each silhouette. Outer forearm placement shows well with rolled sleeves and neutral tees for a low-key reveal. Sessions can be longer because there are two focal points, and touch-ups are common if either bird required ultra-fine shading. A common error is symmetrically mirroring every feather; asymmetry in wing position often makes the scene feel more natural and helps readability at a distance.
11. Small printable stencil version for first-timers
Printable stencils are a low-commitment way to trial scale and position, but conversion to skin requires cleanup. Use printable software or a transfer test to remove unnecessary feather detail so the final tattoo is stencil-friendly. For showing off smaller options try an ankle bracelet or low-top sneakers that keep the piece visible. Expect brief sessions and a realistic touch-up window of one to two years for micro work. The mistake is copying a printable photo exactly without simplifying the interior strokes; ask for a reduced feather count so each mark has room to settle.
Frequently Asked Questions
Q: How do I know whether to pick color or black-and-gray for a hummingbird stencil?
A: If longevity and contrast are top priorities pick black-and-gray for small to medium placements because it keeps the beak and wing edges defined. If the color is integral to the concept or you want iridescent effects choose color, but plan for slightly larger scale and a possible color refresh after two to three years.
Q: Where can I find healed portfolio examples and stencil tests without following specific artists?
A: Search Instagram and TikTok using style-plus-placement terms like "fine line hummingbird forearm" or "watercolor hummingbird shoulder" and filter by location. Tattoo directories and booking platforms let you narrow by keywords such as "healed photos" or "bird portfolio." Reddit tattoo communities are useful for honest feedback on readability and placement, and they often link to healed shots that show how a stencil settled.
Q: Will a tiny hummingbird on my wrist need a touch-up, and when?
A: Tiny wrist tattoos commonly need touch-ups within one to two years because frequent washing and friction soften single-needle lines. Expect a short follow-up session rather than assuming a single pass will hold indefinitely.
Q: What should I wear to a shoulder or collarbone appointment?
A: Wear a top that gives clear access without being pulled or held in place, such as an off-shoulder top for collarbone work and a loose tank for shoulder sessions. The clothing should be worn in its normal position to avoid fabric rubbing the fresh stencil.
Q: How does placement affect blowout risk for fine-line hummingbirds?
A: Areas with thin, mobile skin like the nape and inner wrist have higher risk of line softening and minor blowout, so plan for slightly heavier contour lines and more spacing. The upper arm and outer forearm are lower-risk zones where finer internal detail can be considered if the artist adjusts spacing.
Q: Can I test a stencil at home before booking a session?
A: Yes. Temporary stencil tests or printable transfers let you evaluate scale, negative space, and how the bird sits with your movement. Use a temporary transfer or a glitter-stencil trial to see whether the chosen size reads clearly on the exact placement before committing to permanent ink.
