
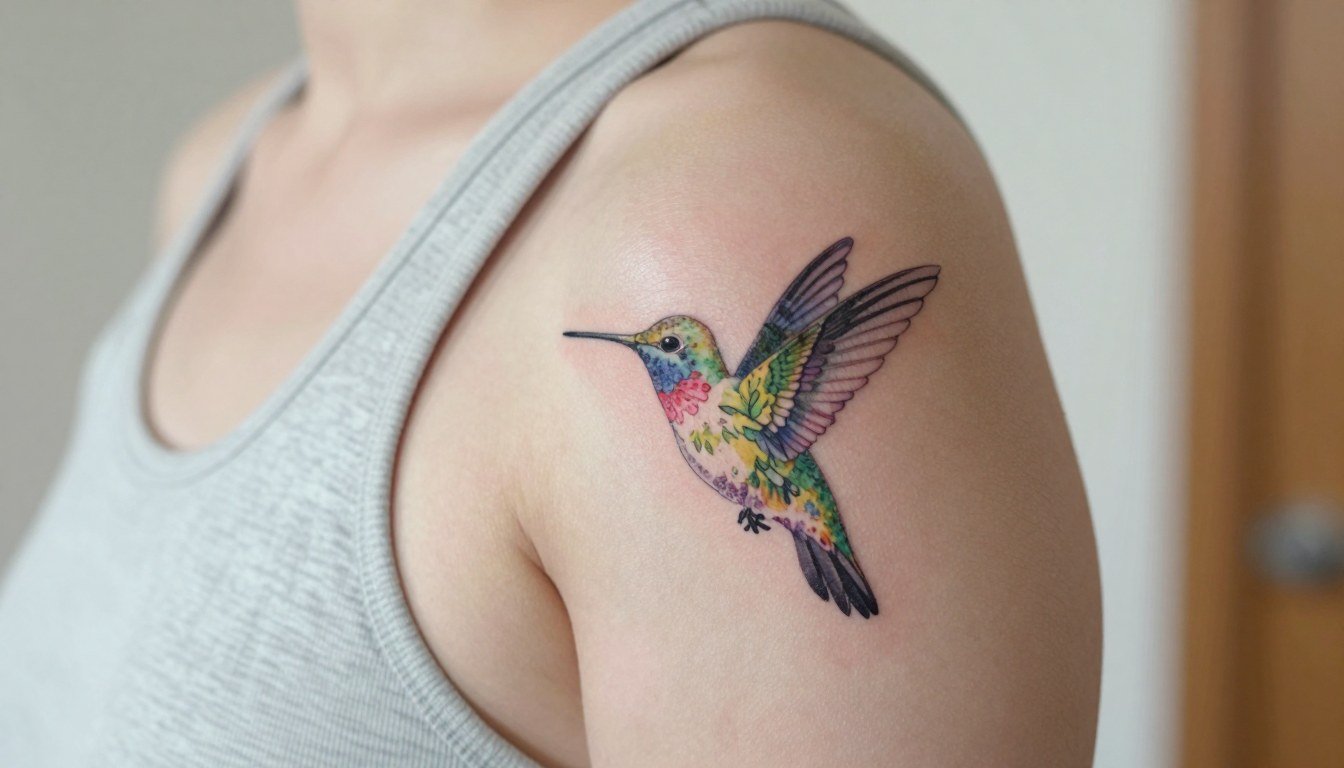
The hummingbird pairings that still read crisp after several years are not always the wispy single-needle pieces people save on Pinterest. I have noticed that slightly bolder linework, careful spacing between petals, and one confident accent color often keeps a floral hummingbird readable for longer. Expect small work to start around 150 to 450 and full compositions to climb into the low thousands depending on sessions and saturation.
1. Fine line hummingbird with snapdragons on inner forearm

This is the classic inner forearm pick when you want airiness without clutter. I recommend slightly wider spacing between petals so the tiny snapdragon trumpet doesn't blur into the wing feathers over time. For the session plan to reserve a single, focused hour plus a short touch-up later if you want color accents. The inner forearm is among the easier placements pain wise. A common mistake is asking for micro-petals that the skin will merge after two years. For showing it off, pair it with a linen button down shirt with the cuff rolled so the palm-up surface remains visible during casual wear.
2. Watercolor hummingbird among wildflowers on shoulder blade

Choose controlled watercolor that keeps some crisp linework around the bird to avoid a muddy healed look. I suggest asking for anchor lines around the beak and wing leading edge so motion reads in photos. Shoulder blade sessions are usually one to two sittings and the area tolerates larger color fields well. A mistake I see is zero structure watercolor with no contrast, which fades into a bruise look after a year. For wardrobe pairing try a racerback tank so you can reveal the painting-like composition without the bra strap competing with the design.
3. Neo-traditional hummingbird and rose on outer upper arm
Neo-traditional brings the advantage of saturation and bold outlines that tend to age well. I advise specifying medium lineweight around the bird so the wing detail reads even as saturation softens. Outer upper arm sessions feel moderate and can often be done in one longer appointment. People who request ultra-fine details on a neo piece usually regret the lack of presence after a year. For an everyday look, the piece reads well with a cropped denim jacket that frames the upper arm when sleeves are pushed up.
4. Black and gray hummingbird with poppies across the ribcage
Ribcage pieces carry both visual payoff and a higher pain cost. Plan for one to three sessions depending on scale and shading. When you want elegant depth without color, ask for soft stipple shading and slightly wider petal shapes so the poppies keep their form as the skin shifts. One common mistake is cramming micro-detail into the rib contour, which blurs with movement. Expect the area to feel tender for several days and use a non-stick dressing during sleep to protect the fresh work. If you prefer a reveal look, plan wardrobe that can cover or reveal easily on demand.
5. Half-sleeve hummingbird with flowing stems
A half-sleeve is the place to let stems breathe and wings overlap without crowding. I tell clients to pick one or two flower species and let the artist repeat them instead of introducing too many varieties. Discuss session staging so the artist can map negative space across two to five sittings. A typical error is starting too small then trying to expand with mismatched elements. For casual styling the flow reads best with an oversized tank top that exposes the full arm when you want to show the story.
6. Delicate hummingbird and single bloom on the wrist
Wrist pieces are great for first tattoos but they need presence. I advise a slightly heavier lineweight than the reference when the client wants longevity. The session is quick, often 30 to 60 minutes, and touch-ups are common after six to 12 months for single-needle work. A frequent mistake is expecting micro-detail to survive constant hand washing and friction. For a polished look, wear a minimalist watch on the opposite wrist to balance the visual weight.
Session Day Picks
These first six ideas include placements that heal and move differently, so a few targeted items smooth the session and early recovery.
-
Second-skin style bandages. Great for larger shoulder blade or half-sleeve pieces that might ooze a bit of color on day one and need gentle protection against friction.
-
Specialty tattoo balm. A thinner balm option avoids the greasy sheen that can hide fine-line detail while keeping the fresh ink moisturized.
-
Fragrance-free lightweight lotion. Daily moisturizing after the initial healing window helps prevent flaking and preserves color saturation without clogging.
-
Non-stick dressings and pads. Useful for ribcage or side-torso placements that rub against clothing while you sleep.
-
Aquaphor healing ointment. A thin layer in the first 48 hours can protect fine-line work without suffocating the skin and makes early touch-ups less likely.
7. Hummingbird with handwritten note and small flowers on forearm
When the piece includes handwriting use the exact line weight and size you want. Bring a scan or photo of the actual handwriting so the artist can trace scale and tilt accurately. Forearm placement shows detail well but ask the artist to thicken the script slightly from the reference so it stays legible over time. People often request tiny script that fades into a line after a couple of years. Expect a one- to two-session plan and a possible touch-up at the six- to twelve-month point. For session ease, wear a loose short sleeve so the cuff can be moved without pressure.
8. Abstract watercolor hummingbird with a darker flower center on the calf
Abstract watercolor pieces are mood-driven and reward clear composition choices. I recommend a strong darker center flower so the eye has an anchor and the hummingbird silhouette does not float away as color fades. Calf sessions are comfortable and often finish in one sitting. A common error is too much pale wash without enough contrast, which can look like a bruise when healed. If you want to show it off in summer pair it with cropped shorts or a skirt that keeps the calf visible.
9. Hummingbird silhouette with symbolic flowers on shoulder blade
Silhouettes are ideal when you want symbolic meaning without clutter. Discuss exact flower choices and what they signify so the artist can balance negative space and silhouette edges. Shoulder blade placement gives room to size the silhouette for longevity. The main mistake is undersizing the silhouette, which loses shape with even small shifts in skin tone or texture. For casual wear, an off-shoulder top highlights the negative space framing.
10. Single-colored bloom with a black-and-gray hummingbird on the forearm
Selective color creates a focal point and improves longevity by reducing total color exposure. Tell the artist which flower is the color anchor and what exact hue you want so they can plan saturation safely. Forearm placement keeps the composition visible and easy to touch up. A mistake is asking for a neon that loses vibrancy quickly on exposed skin. Expect a one-session application and a potential touch-up at the one-year mark to refresh the accent color.
11. Traditional hummingbird with rose on calf or outer arm
Traditional lines help hummingbird detail stay readable for years. Specify saturated flats and clearly defined petals so the rose and bird do not compete. Outer calf tends to hold color well and is a little less sun-exposed than shins. The common error is overcomplicating a trad piece with tiny gradients that contradict the style. For session comfort wear a sleeveless top for upper-arm work or comfortable pants with an elastic waistband for calf sessions so the artist can access the leg without pressure.
12. Stipple-shaded black-and-gray hummingbird with columbine on inner bicep
Inner bicep skin is delicate and benefits from stipple shading rather than heavy saturation. I recommend asking for slightly stronger linework than your reference so the columbine petals keep definition as the arm moves. The pain is moderate to high for some clients. A frequent mistake is requesting extremely fine single-needle wings with no breathing room. For showing it off choose a thin chain bracelet on the opposite wrist so the inner arm remains the visual focus when sleeves are pushed up.
13. Hummingbird and peony wrap behind the ear and upper neck
Behind-the-ear tattoos require an artist comfortable with small-area placement and clean healed examples. Ask to see healed photos in that exact zone because the mastoid skin behaves differently than flat areas. Sessions are short but the area is sensitive and scabbing must be prevented. Many people underestimate how often hair rubs the tattoo and cause itch. For professional settings consider the visibility tradeoff and plan hair styles accordingly.
14. Hummingbird circling a rose in a chest collarbone placement
Collarbone pieces read beautifully but they sit on skin that flexes with breathing. I advise slightly bolder petal outlines and mid-tone shading to keep the rose readable long term. Pain varies but many clients report moderate discomfort near the bone. A common mistake is tiny petal details that disappear with movement. For wardrobe, an open-neck tank exposes the area without forcing a full reveal and keeps the composition obvious in photos.
15. Small silhouette cluster on the ankle with tiny wildflowers
Ankle placements face friction from shoes and socks so silhouette fills perform better than micro-line detail. I recommend solid black silhouettes and larger flower spacing. Sessions are short and the area tolerates single-pass work. The common mistake is asking for single-needle florals at the ankle and wondering why the edges blur. For comfort wear shoes that expose the ankle after the session or bring sandals to avoid rubbing the fresh skin.
16. Flowing half-sleeve with mixed styles and botanical framing
For sleeves, give the artist room to plan negative space and stem flow so the hummingbirds can sit in different directions without crowding. Discuss the palette upfront so saturation and outline strength are consistent across sessions. A frequent error is adding disparate reference photos that conflict in scale and lineweight. Suspense for the arm is best shown with a relaxed tee you can lift at the sleeve without tight seams.
17. Black-and-gray realistic hummingbird with peonies on the shoulder
Realistic shading demands contrast so the feathers keep a three-dimensional quality. Ask the artist how they translate reference photos into stipple and whip shading so you understand how highlights will be preserved. Shoulder sessions are moderate and usually one sitting for small-to-medium work. The mistake I see is too much mid-tone without highlights, which flattens the bird over time. Plan for a documented healed photo so you can compare progress before deciding on a touch-up.
18. Geometric silhouette hummingbird with a single accent bloom on the forearm
Geometric silhouettes read well small and are resilient against blowout when the black shapes are given safe spacing. Tell the artist the exact scale so the angles remain crisp as the skin moves. Forearm placement helps the geometry stay legible. The common misstep is trying to include too many tiny geometric facets, which create a visual muddle when healed. For a modern look pair it with a rolled cuff shirt to keep the clean shapes visible during everyday wear.
19. Half-back hummingbird scene with garden roses
Large back pieces allow scenes that breathe and avoid crowding petals and wings. I recommend a staged plan so you can evaluate healed transitions between sittings. One mistake is rushing color saturation across a large expanse, which can appear patchy unless the artist blends consistently. The back tolerates complex shading well and gives a great canvas for story-like compositions. For shows and photos, racerback tops work well and do not distort the piece.
20. Minimal hummingbird and single poppy near the clavicle
Clavicle placements are visible and subtle. Slightly stronger linework than micro-reference keeps the poppy center and the bird beak distinct. The area can be sensitive against clothing, so plan garments that avoid constant abrasion. A mistake is placing tiny filigree too close to the bone where natural movement will soften detail. For a refined look pick tops with a wide neckline so the clavicle area shows cleanly.
21. Layered composition: black-and-gray hummingbird with a single colored lily on the forearm wrap
Wrap pieces need clear planning for how the bird and flower interact across curves. Ask the artist to sketch the design on your arm to check overlap and negative space at three inches and at five inches so you know how scale translates. Expect one to three sessions and a touch-up timeline depending on how much color is used. A common error is letting petals cross awkward joints where the skin folds. For day-of comfort wear a loose tee that can be rolled without pressing the fresh ink.
Frequently Asked Questions
Q: How big does a hummingbird tattoo with flowers need to be to avoid blurring?
A: Size depends on detail count. If you include more than two flower species or tight feather detail, plan for a medium or larger piece so each element has breathing room. I usually tell clients that petals and feather barbs need slightly more than the reference image to hold clarity at years two to five.
Q: Which placements hurt the most for hummingbird and floral work and how should I prepare?
A: Ribcage and sternum are generally the most painful for many clients because there is less soft tissue over bone. Forearm and outer upper arm are typically the easiest. For ribs bring a fitted sports bra or loose button-down that the artist can move without tugging and consider topical numbing if you are very sensitive.
Q: How should I find artists who show healed floral work and not just fresh photos?
A: Search Instagram and TikTok hashtags like #hummingbirdtattoo and #flowertattoo with location filters. Look for portfolio posts tagged as healed and browse Reddit threads in r/tattoos and r/TattooDesigns for photos people post months later. Use directory searches with style plus subject phrases such as "fine line hummingbird" or "watercolor floral tattoo" to find portfolios that match the exact aesthetic you want.
Q: Does fine line or bold outline hold up better for hummingbird and flower tattoos?
A: Artists split into two camps. One camp says fine line suits the fragile look of a hummingbird and blossoms and can look elegant if the spacing is increased. The other camp says bold outlines hold better long term because tiny petals and feather details can merge as skin ages. Both positions are valid depending on scale, placement, and how the artist translates lineweight into healed examples.
Q: Will watercolor tattoos look cartoonish and how do I avoid that?
A: There are two clear opinions here. Some people praise watercolor for motion and soft color bleed that suits a hovering bird. Others prefer structured color with outlines to keep the design legible long term. If you like watercolor, ask the artist to keep anchor lines or subtle contrast points so the piece retains form and does not heal into a patch of color.
Q: How often do fine-line hummingbird pieces need touch-ups?
A: Fine-line hummingbird tattoos commonly need a touch-up within 12 to 24 months depending on placement and sun exposure. Inner forearm pieces often last longer with minimal touch-ups. Factor in at least one possible touch-up when you plan appointments so longevity is part of the timeline.
Q: What should I wear to a shoulder-blade or upper-arm session and how can I show the healed work later?
A: For shoulder blade sessions wear a racerback tank or wide-neck top that exposes the area without constant fabric pressure. After it's healed a racerback or off-shoulder knit highlights the work. If you want one specific item to make the tattoo visible, try a racerback tank so the composition sits neatly between straps.
