

Custom shops get a steady stream of first-timer questions every Saturday. Most beginners want something meaningful and tiny, then end up asking for detail so fine the skin will eat it within two years. I tell people the real decision is less about the picture and more about line weight, placement, and wardrobe for the first month. Read on for design picks that balance how they look now and how they age.
1. Fine Line Arrow on Inner Forearm

An inner-forearm arrow is a classic first choice because it reads well small but can scale later. For a first piece, increase the line weight slightly from your Pinterest reference so the shaft keeps definition at year three. Expect a low pain level and a single short session under an hour. Avoid ultra-fine feathered fletching because the forearm skin can blur tiny barbs into a gray line. For the session, wear a loose short-sleeve tee so the artist can roll the sleeve without stretching skin.
2. Minimalist Compass on Upper Arm
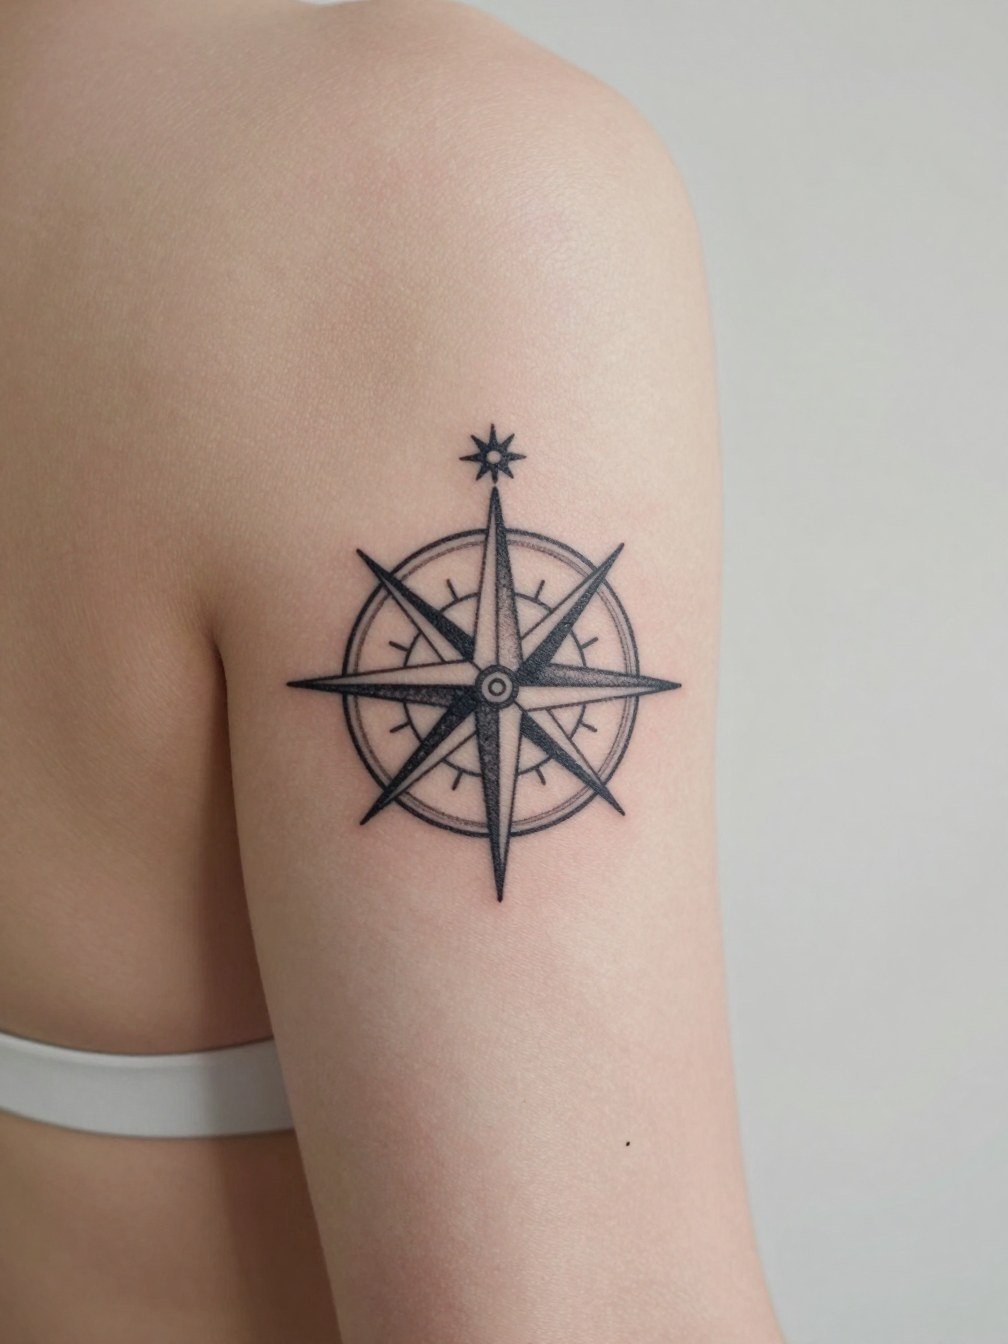
A compact compass sits well on the upper arm and gives you concealment with a sleeve if needed. Ask for slightly bolder cardinal points so the center detail stays readable after a few years. Most sessions take 45 to 90 minutes depending on diameter. Expect minimal blowout risk on the fleshy deltoid if the lines are kept clean and slightly spaced. Pair this look with a rolled-sleeve chambray shirt to show the compass casually.
3. Single-Needle Script on the Collarbone
Collarbone script can look elegant but suffers if the single-needle is too fragile. I recommend a slightly thicker single-needle stroke and open spacing between letters so each character avoids merging. The sternum and chest area move with breathing so expect a modest sting and a session that can finish in one hour. If you want to show it off, an open-neck shirt works well. Try a wide scoop-neck tee that exposes the collarbone for casual wear.
4. Small Geometric Mountain on Calf
Calf pieces age predictably and tolerate fine geometry better than wrists. The muscle there holds saturation nicely, so you can keep lines relatively tight without excessive blur later. Sessions run 30 to 90 minutes depending on filling. One common mistake is placing the design too low where the ankle movement distorts it. For weekend show-off, cuff chinos and slip-on sneakers highlight the calf. Pair the look with rolled-cuff chinos.
5. Micro-Realism Wolf Head on Bicep
A micro-realism animal head can be a great first tattoo if kept to a palm-sized scale. For long-term clarity, choose a version where the darkest blacks form shape anchors and the fine shading reads as texture rather than detail. Biceps are forgiving for touch-ups and feel like a 3 to 5 out of 10 on the pain scale. Dress in a sleeveless top to sit comfortably during the session and to show the piece afterward.
6. Traditional Rose on the Wrist
Wrist roses read well and age sturdily when done in traditional style because bold outlines hold. The wrist sees a lot of friction and sun exposure, so expect color fade faster than on the torso. If you want it visible with short sleeves, consider higher saturation and slightly larger leaves to avoid smudging appearance. Session time is short. For daily wear, a minimal leather bracelet frames wrist pieces nicely.
Pre-Session Essentials
The forearm, wrist, and bicep picks above heal differently from larger back or chest pieces, so a few small items smooth the session and the first week.
-
Stencil transfer paper kit. Lets you and the artist preview how linework sits on curved forearms and wrists before any needle breaks skin.
-
Topical numbing cream. Applied 45 minutes ahead takes the edge off wrist sensitivity without changing how the ink accepts.
-
Thin protective film roll. Useful for small wrist and finger pieces where soaps and towels rub during the first days.
-
Fragrance-free body wash. Gentle cleansing helps avoid scrubbing that undermines fine line work.
-
Aquaphor healing ointment. A thin layer in the initial 48 hours keeps surface moisture balanced for crisp line healing.
7. Tiny Anchor Behind the Ear
Behind-the-ear pieces are intimate and require an artist comfortable with small-area needle control. The skin there is thin so expect a sharper sting and a tiny session time. One professional consideration is that artists who specialize in small hidden placements may use different needle spacing to avoid blowout. Because the spot is subtle, it pairs naturally with shorter hair or tied-back styles. For travel and shows, use a low-profile hair tie to keep the area visible when you want it seen.
8. Anchor Chain Link on the Forearm
A chain-link band can be scaled to wrist or mid-forearm. The common mistake is asking for tiny interlocking links that the skin cannot hold. Ask for link spacing that reads at three inches across the forearm. Expect a light buzz during the session and a likely touch-up at year two if you want crisp edges. Wear a rolled-sleeve button shirt to reveal the band at the cuff.
9. Simple Anchor on the Side of the Ribcage
Rib pieces feel intense in the chair and are a common place for people to test tolerance. Fine single-needle anchors here can blur unless given a touch more spacing. Expect a higher pain level and shorter sessions or breaks. There is debate among artists about single-needle work on ribs. One camp says the skin stretches and blurs fine lines within two years, often pointing to early-fade examples. The other camp says with slightly wider spacing and correct depth, the ribs settle fine and they show three-year healed shots to support that claim.
10. Minimalist Wave on the Wrist Band
Wrist band waves are low commitment but suffer from heavy hand use and soaps. Opt for slightly thicker single-line work and leave micro gaps between repeating crests. Sessions are short. If you plan to show the band with short sleeves, a thin woven bracelet complements the negative-space rhythm.
11. Miniature Compass Rose on the Ankle
Ankle tattoos endure friction from socks and shoes. Keep the compass compact but avoid tiny internal rays that fade into gray. Healing requires attention because the area moves and bends. Session time is brief. For show-off fits, cuffed jeans or low sneakers display ankle pieces best.
12. Stipple-Shaded Crescent Moon on the Inner Bicep
Inner-bicep stipple moon pieces photograph nicely and stay protected under shirts. The major risk is asking for too many tiny dots too close together. For longevity, request slightly larger dot spacing to preserve gradient. Pain tends toward moderate because of the soft tissue. During the session, wear a loose tank so the artist has unobstructed access and you stay cool.
13. Bold Blackwork Arrowhead on the Chest
Blackwork on the chest ages predictably because solid saturation resists softening. Choose crisp edges rather than micro detail for longevity. Expect a one-to-two hour session depending on size. The chest pairs well with open shirts for showing off. For evening wear, a deep V casual shirt displays chest pieces without feeling formal.
14. Tiny Botanical Sprig on the Side of the Neck
Neck placements require an artist experienced with visibility and social context. The skin there moves and is exposed to sun, so keep spacing open and avoid ultra-small veins of detail. Expect a sharper sensation in the chair. If you plan to reveal the spot selectively, pairing it with a low-collar tee gives quick coverage control.
15. Geometric Dot Work Mandala on the Shoulder Blade
Shoulder-blade mandalas breathe because the canvas has muscle and flat space. For a first piece, avoid overly dense inner dots that flatten into a gray mass. Expect a two-hour session for a palm-sized design. Touch-ups at year three are common for dot work if you want crisp separation. Wear a racerback tank to keep the artist's access easy and to show the healed piece.
16. Small Anchor Tattoo on the Side of the Hand
Hands and fingers are high-traffic zones and have a higher chance of early fading and blurring. If you want a hand anchor, make the shapes bolder and accept touch-ups down the road. Sessions are short but may sting more. Professional considerations include finding an artist experienced with hand saturation and who can discuss realistic expectations.
17. Tiny Coordinate Script on the Ribcage
Coordinates are personal and concise, perfect for a first piece if placed where you can conceal it. On the ribs, keep the type slightly larger than your phone reference so the dots and commas do not clump. Expect higher pain and short sessions with breaks. If you want to show it later, a cropped top will reveal it. Consider a fitted cropped tee for staged reveals.
18. Tiny Anchor on the Inner Thigh
Inner-thigh tattoos are private and heal under clothes, so they are less exposed to sun. The skin is forgiving but moist, so follow aftercare closely. Sessions are moderately painful and longer if you pick a more complex motif. For session comfort, wear loose shorts and bring a towel to sit on.
19. Single-Needle Portrait Accent on the Upper Arm
Portrait fragments demand careful reference and an artist confident at small scales. The main mistake is asking for micro portrait detail that blends into gray. Keep contrast strong with dark anchors and softer shading. Expect one to two hours. For wearing, short sleeves or tank tops let the arm piece show.
20. Tiny Anchor on the Calf Posterior
Posterior calf placements avoid constant sun and are low-maintenance. Anchors here tolerate small scale better than ankles because the skin is thicker. Sessions are comfortable and often quick. For visibility, try cuffed pants or shorts.
21. Nautical Star on the Upper Chest
A nautical star is a bold small symbol that photographs well. Keep the negative-space points balanced so the star does not flatten into a blob. Expect minimal pain and a short session. For show-off styling, an open shirt collar works best. Consider pairing with a button-front casual shirt to reveal or conceal easily.
22. Thin Bar on the Ribcage Under the Breast
Sternum and under-bust bars can look striking but need clear spacing and saturation to remain crisp. The area is sensitive and requires an artist used to chest work. Sessions are higher on the pain scale. For session wear, bring a fitted sports bra so the artist has steady access and you stay supported.
23. Tiny Globe Silhouette on the Wrist
A tiny globe is symbolic and low commitment. Keep meridian lines sparse to avoid muddling. The wrist needs a bit more line weight to stay clear. Sessions are brief. Wear a simple wrist cuff to frame the globe when you want it visible.
Frequently Asked Questions
Q: What are the easiest first-timers to live with long term?
A: Solid blackwork icons and slightly bolder traditional pieces tend to age more predictably than ultra-fine single-needle scripts. I encourage slightly thicker line weight and more negative space for longevity. Placement on fleshy areas like the bicep or calf usually needs fewer touch-ups than hands or wrists.
Q: How much will the pain vary across these placements?
A: Expect low to moderate pain for outer arm, bicep, and calf work. Wrists and ribs score higher on most personal pain scales. The sternum and inner thigh can be sensitive but brief if you pick a small design. Plan breaks for rib or sternum sessions and consider topical numbing if recommended.
Q: Where can I find artist portfolios and healed examples without naming people directly?
A: Search platform filters and local studio feeds for tags combining your style and location. Try hashtags like #MinimalForearmTattoo and #MicroRealismHealed with your city name. Browse portfolio sections on major tattoo directories and read Reddit threads that collect healed photos across skin tones. Use saved healed images at your consultation so the artist can show scale and line weight options.
Q: Should I be worried about cultural sensitivity for certain designs?
A: Yes. For motifs with clear cultural origins, state that you want a respectful interpretation and ask the artist about their experience with that tradition. Look for artists who can explain provenance and show thoughtful, non-appropriative work in that style.
Q: What should I wear to the appointment for different placements?
A: Wear clothing that gives the artist clear access without you disrobing. For forearm and bicep pieces, a loose short-sleeve tee is ideal. For chest and sternum work, a fitted sports bra or wide-neck top keeps fabric out of the way. If you want comfort and access, a loose short-sleeve tee covers most needs.
Q: How often do first tattoos need touch-ups?
A: Small wrist and hand pieces commonly need a touch-up within one to three years. Larger saturated blackwork may go longer without maintenance. Expect a realistic touch-up plan from your artist during the consultation, with examples of healed shot timelines.
Q: Is there any reason to avoid certain placements entirely on a first tattoo?
A: Avoid hands and fingers if you want a low-maintenance first piece. Those areas require commitment and periodic refreshes. If visibility and low upkeep matter, pick placements like the outer bicep, calf, or shoulder blade instead.
