
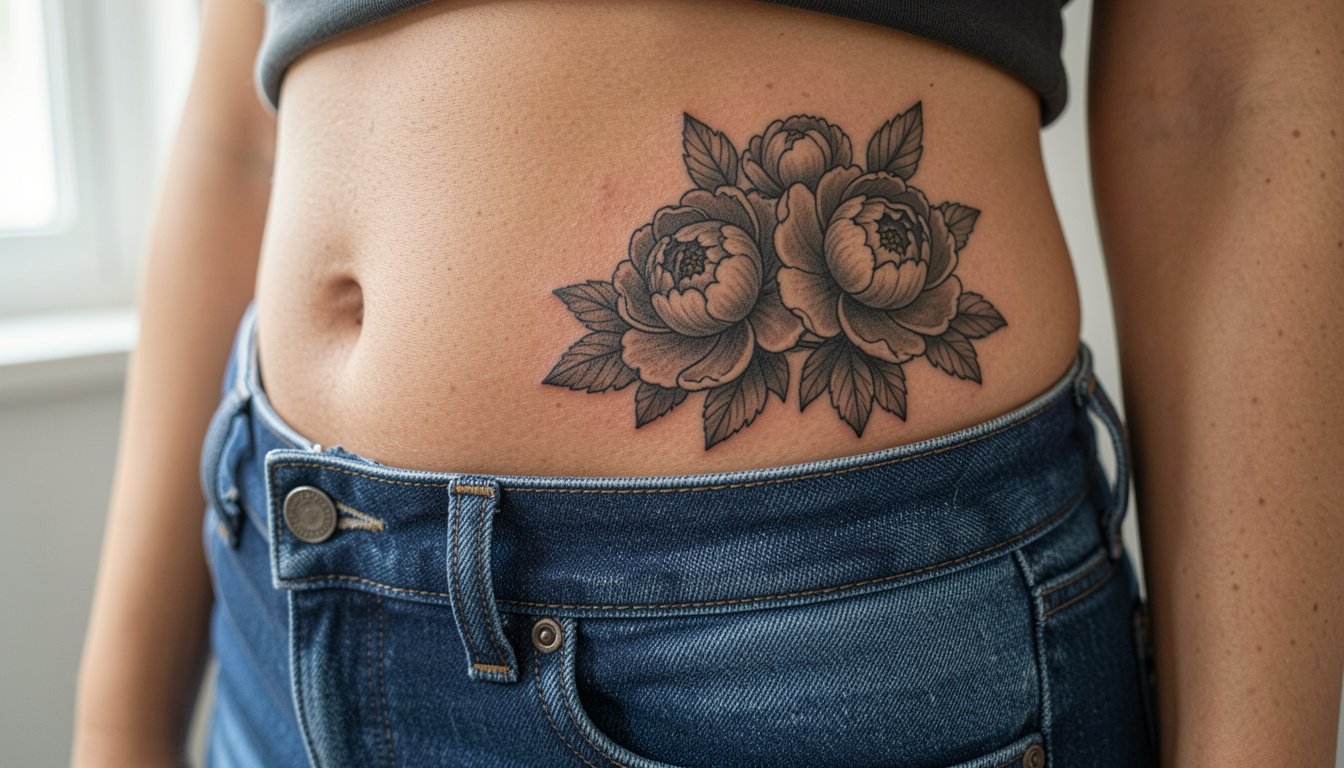
The stencil peeled at the hip bone and the artist smoothed it down while I held my breath. The client chose a sweeping floral vine that would sit just above swimsuit lines, so the placement had to land where clothing and movement would not blur the fine stems. That five-minute adjustment saved the piece from migrating into a blur over a few years, and the sections below show designs and the exact tradeoffs to consider before you sit.
1. Watercolor Vine Along the Upper Hip
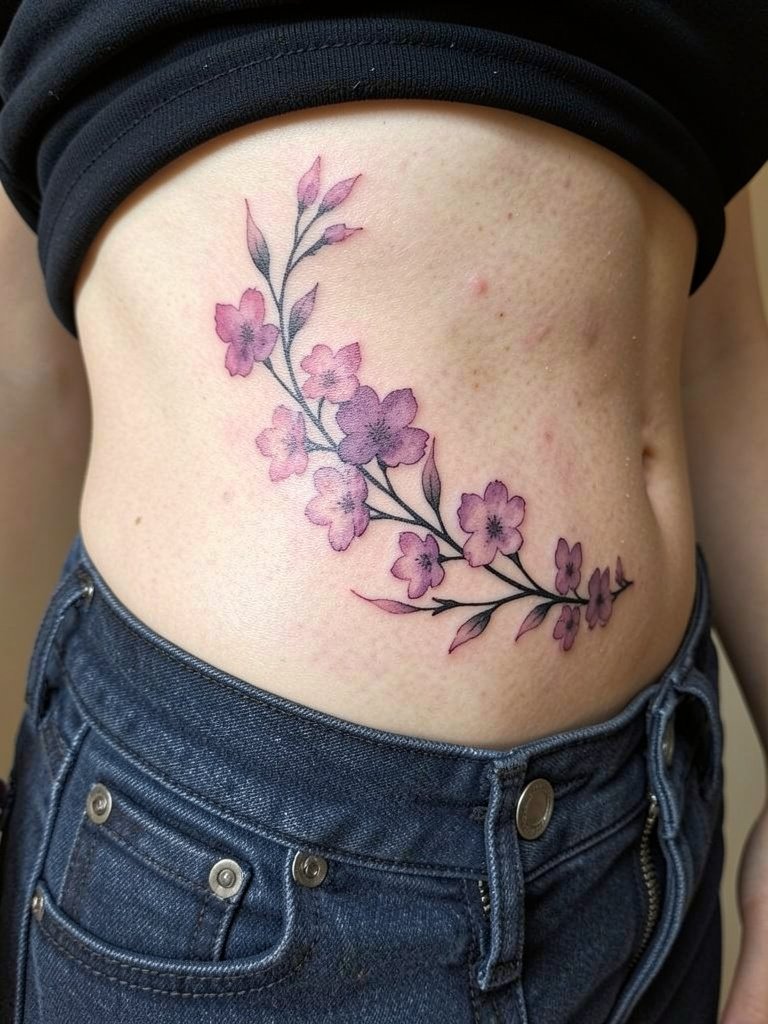
A watercolor vine reads delicate and organic on the upper hip because the skin there moves with clothing. I recommend slightly bolder stems than a pure single-needle reference so the vines keep their silhouette after a few years. Talk with your artist about spacing between petals and stem thickness so the color washes do not merge into a single smudge. In session this placement is a four out of ten for pain, and a typical sitting runs 60 to 90 minutes for a mid-sized piece. A common mistake is asking for ultra-fine watercolor without enough contrast, which looks ethereal at first and then loses definition by year three. For showing it off, an open-back camisole pairs well, try open back midi dresses that reveal the waistline.
2. Single Peony Bloom Over the Hip Bone
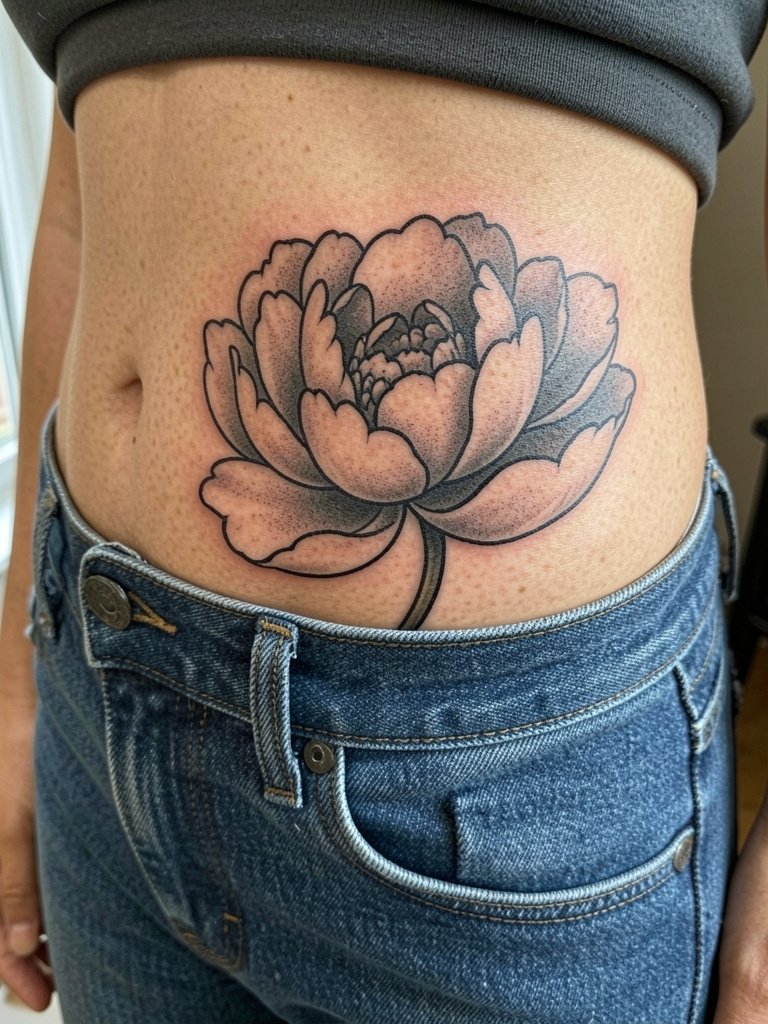
A single peony here reads like intentional jewelry when placed directly over the hip bone. Choose heavier outlines if you want the bloom to age into a defined silhouette rather than a soft blotch. During consultation bring two reference photos at different scales so the artist can show how the bloom looks at three inches versus five. Expect a three to four out of ten pain rating and a one to two hour session. The usual aging issue is low saturation washes; the fix is deeper initial saturation and a touch-up at year two for color refresh. For evenings, this spot pops under low-rise skirts that sit below the design and let the bloom peek out.
3. Minimalist Black Stem Cluster Along the Hip Curve
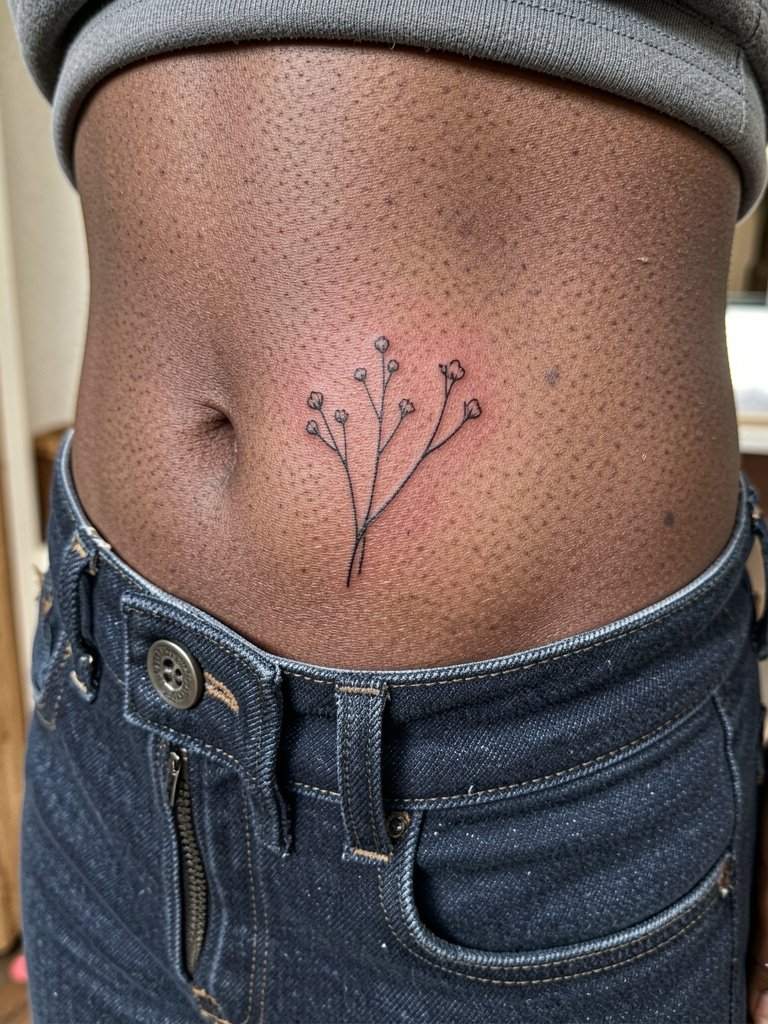
Minimalist stems look elegant here but tiny single-needle lines can blur on textured hip skin if placed too close to the waistband. I suggest slightly increasing line weight compared with a wrist single-needle reference so the stems hold cleanly for at least three to five years. If you want this level of fineness, discuss line spacing and expected touch-up timing during the consult. Pain is moderate and sessions are short, often under 45 minutes. A frequent mistake is placing the design where fabric rubs constantly, so plan placement at least an inch from tight seams. For daytime styling try high-waisted linen shorts that frame the curve without friction.
4. Bold Neo-Traditional Bouquet on the Side Hip
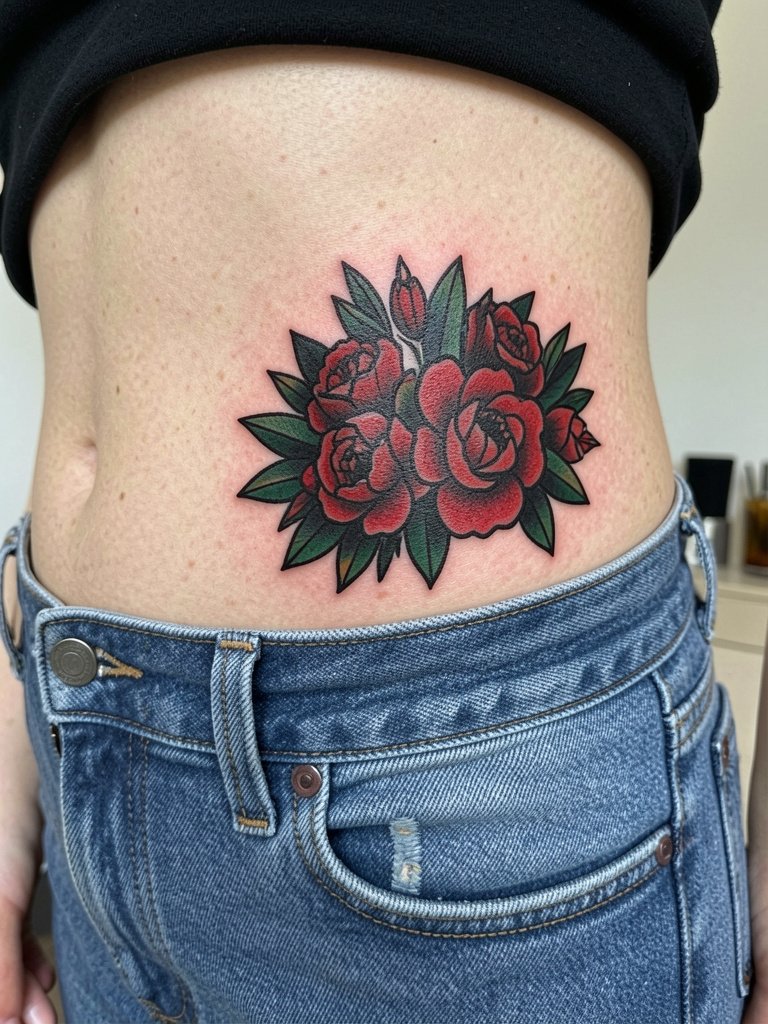
Neo-traditional saturates the hip nicely because bold shapes resist the softening that comes with movement. I recommend a larger composition than a wrist reference so the petals and leaves have room to read. Discuss edge spacing with your artist so outlines do not sit directly under seams. Sessions for a bouquet can run two to three hours and most people plan a touch-up at year two for saturation maintenance. One camp of artists prefers fine-line florals here and says they read as delicate jewelry. The other camp prefers saturated bold outlines and argues those pieces age into readable shapes. Some clients will still prefer the fine look, but be clear on the trade-off when you pick line weight. Pair this style with wrap skirts that show the hip without constant rubbing.
5. Crescent Floral Chain Along the Hip Hollow
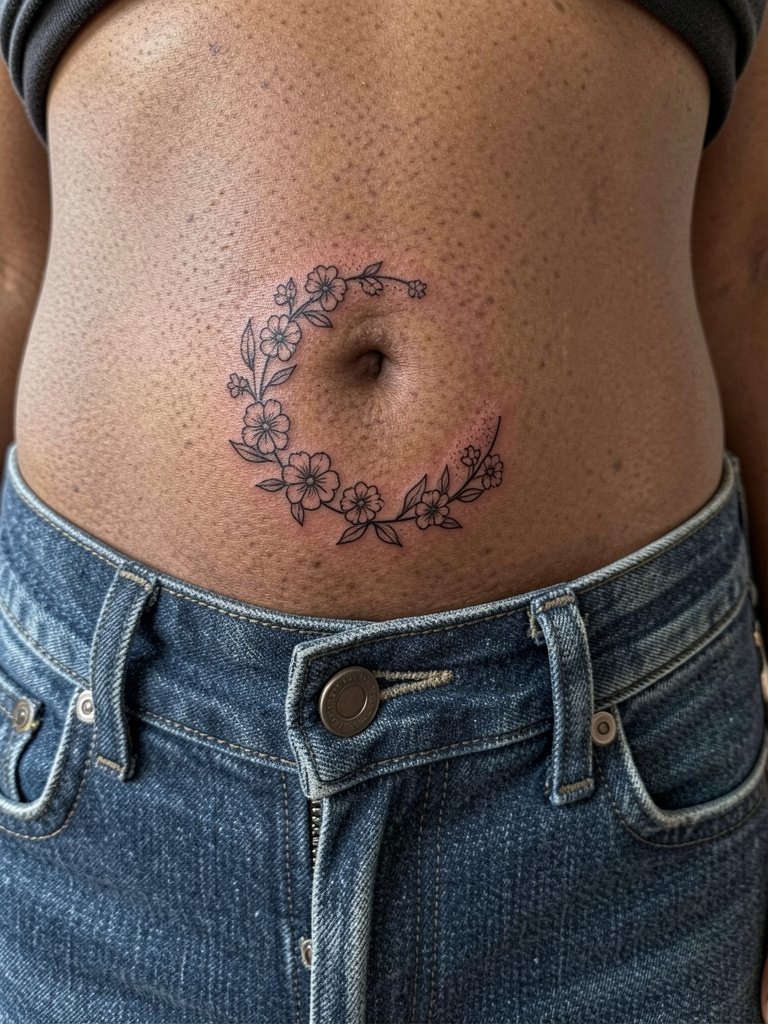
A crescent chain follows body curvature and looks tailored to the wearer when mapped directly to the hip hollow. I often advise mapping it on while standing so gravity and postures are accounted for. The piece is sensitive to motion, so plan slightly wider petal spacing to avoid early merging. Expect a three out of ten pain level and a session under 90 minutes. People sometimes request the chain very close to the bikini line, which invites friction. Place it a touch higher, and consider scheduling a two-year touch-up for the tiny buds. For swim season, complement the curve with low-rise bikini bottoms that sit below the design.
Session Day Picks
Small hip pieces and larger bouquets above the waist need different prep, but the six ideas above share common session risks like waistband friction and color settling.
-
Reusable stencil transfer kit. Lets you preview exact placement and scale against the hip curve before the first needle, which is crucial for asymmetric vine and crescent layouts.
-
Hypoallergenic barrier film roll. Keeps the area protected on days when jeans or belts would otherwise irritate fresh ink during the first 72 hours.
-
Unscented cleansing foam. Gentle cleansing without stripping saturation helps preserve delicate washes on watercolor pieces in the initial healing window.
-
Sterile nonwoven gauze pads. Useful for blotting excess ointment and reducing friction from clothing while the skin scabs and peels.
-
Aquaphor Healing Ointment. Widely used as an initial protective layer to lock moisture in during the first days for fine line and saturated work without clogging.
6. Script and Small Bloom Along the Hip Crease
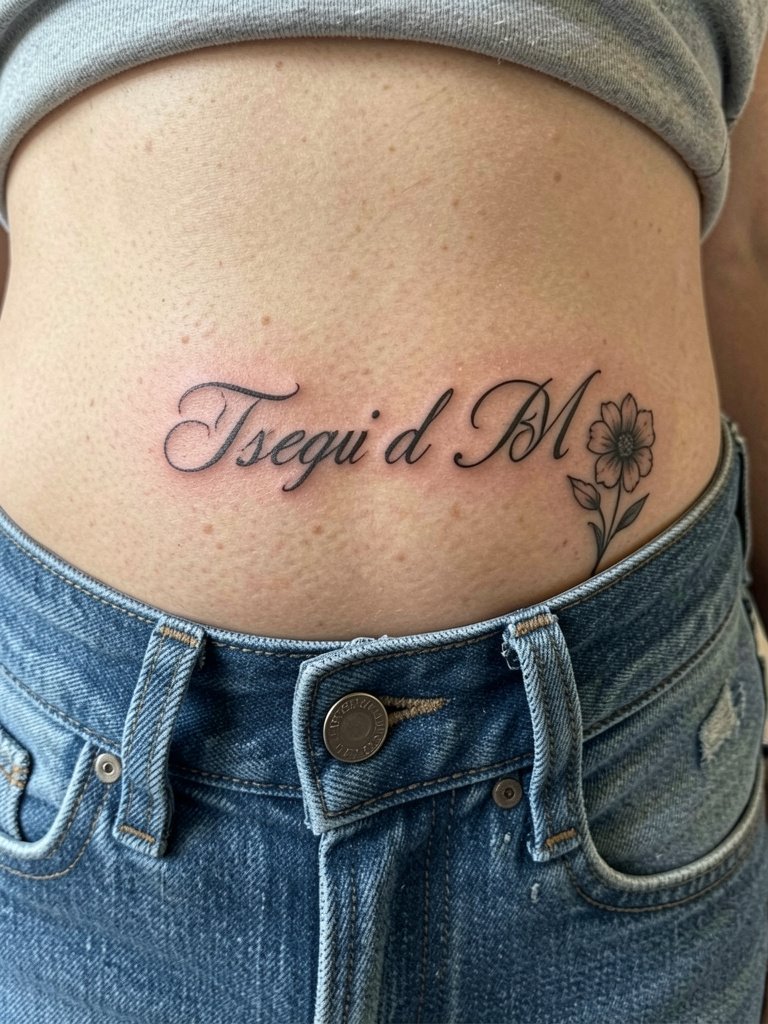
Combining script with a small bloom at the hip crease gives movement to text while keeping the decorative element readable. If you want a script word, specify the exact spelling and font weight during the consult so the artist can recommend a slightly heavier stroke than a chest script. The hip crease eats detail over time, so plan for a touch-up at the two-year mark. Session time is typically under an hour and pain sits around a four. A common error is using a thin handwritten reference meant for the wrist; hip skin texture needs a hair more weight to remain legible. For outfits, an open-back crop or tie-front tops frames the script without covering the area.
7. Blackwork Floral Panel Wrapping the Side Hip
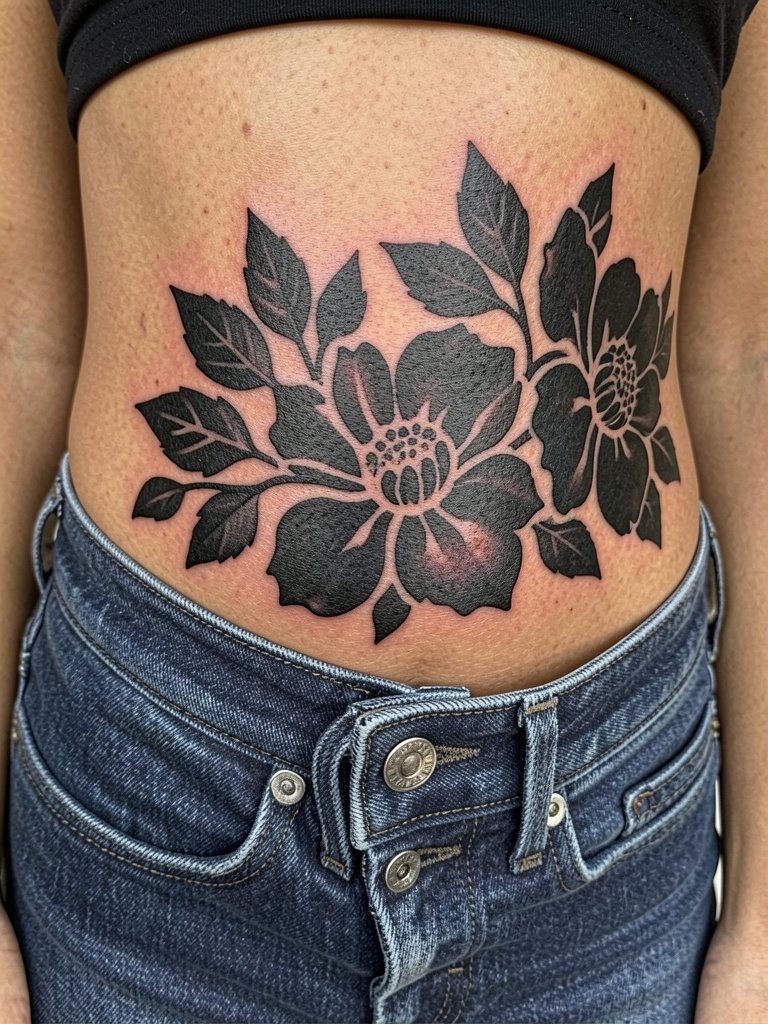
Blackwork is forgiving on the hip because solid fills resist softening and retain presence over many years. Request clear negative space in the composition so the piece breathes and reads from a distance. For sessions expect two to three hours depending on size and a moderate pain rating. The main mistake is packing too much tiny detail into a black panel, which can turn into a blob. Ask your artist to plan negative space pathways and mark them on the stencil so you can see the silhouette before the first needle. For a night out, the panel pairs with open-back knit tops that let the shape show.
8. Dot Work Floral Crescent Near the Hip Flank
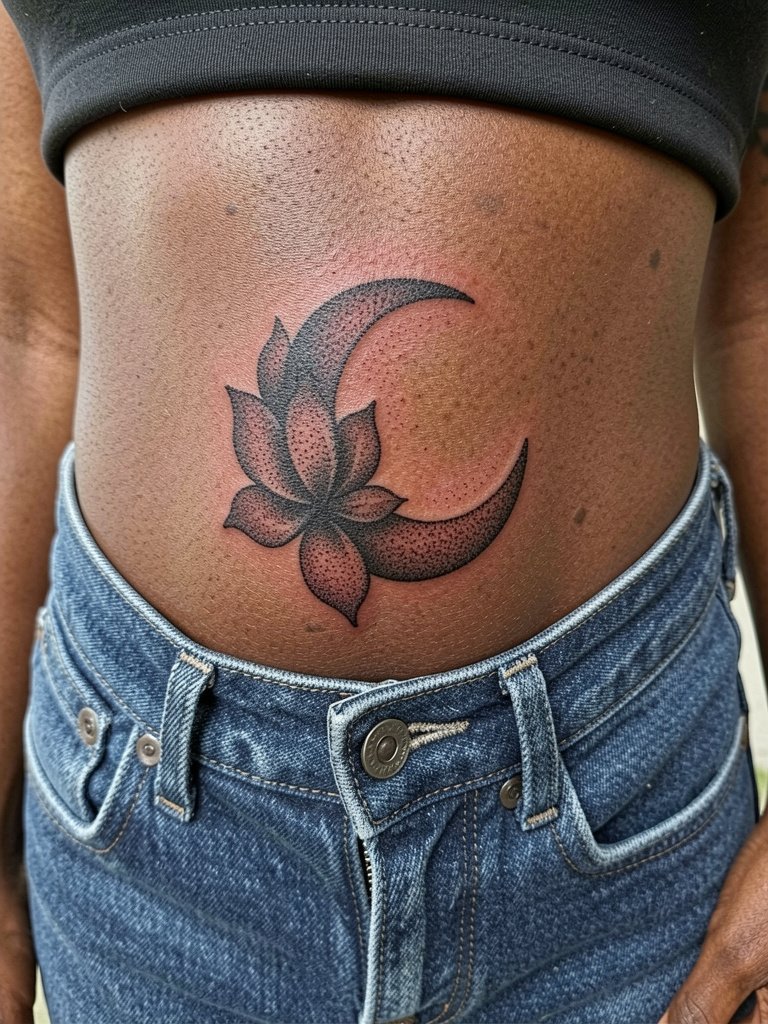
Dot work creates a soft sculpted look without solid fills, but the hip's natural texture can blur tiny dots if placed too small. I advise larger dot spacing and testing a smaller sample patch in the consult so you can see how stippling settles on your skin. Sessions can be longer because stipple shading takes time, often two hours or more. Touch-up cycles will likely be at year two to maintain midtone depth. A common mistake is requesting micro dot density like a facial tattoo; hip skin needs a different approach. For casual wear try high-rise swim coverups that show the flank without tight seams.
9. Cascading Wildflowers Toward the Upper Thigh
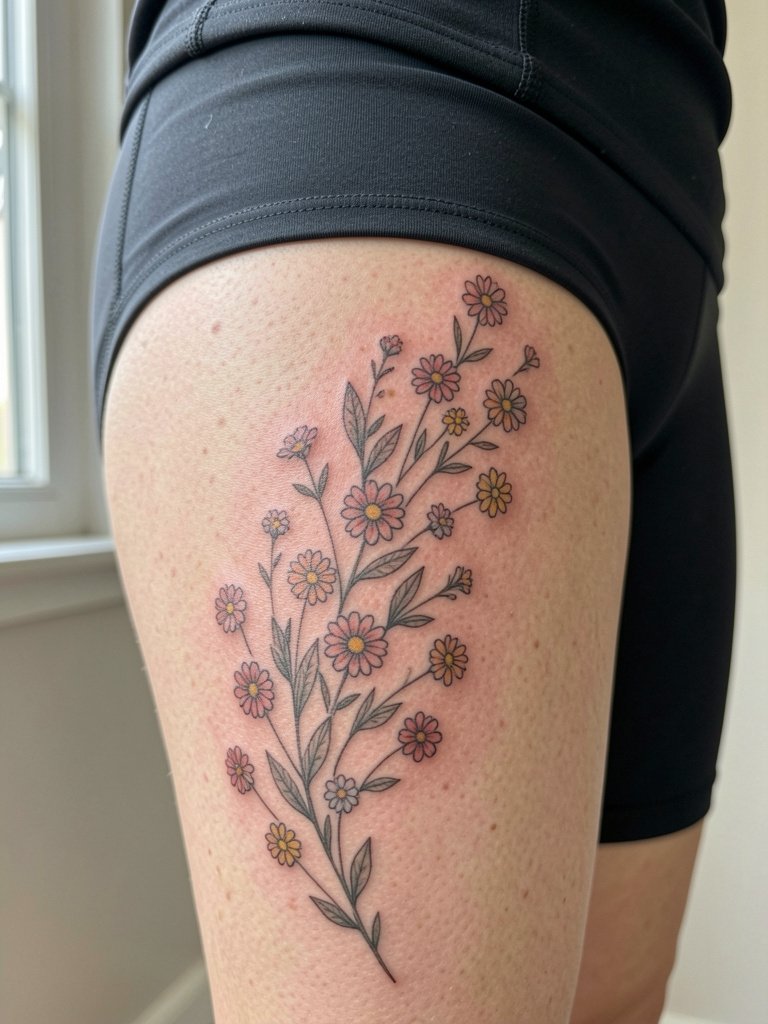
A cascade toward the upper thigh changes how the piece moves with you, and I recommend mapping the fall of flowers while sitting so gravity and leg movement are accounted for. The inner upper thigh has more friction and sensitivity, so plan a slightly larger scale than a hip-only design. Session time varies from one to two hours and pain is often a five out of ten. The typical error is underestimating touch-ups because the thigh and hip move a lot. For session comfort wear loose drawstring linen pants so the artist can roll the leg without pressure, try loose linen drawstring pants.
10. Geometric Floral Band Across the Hip Line
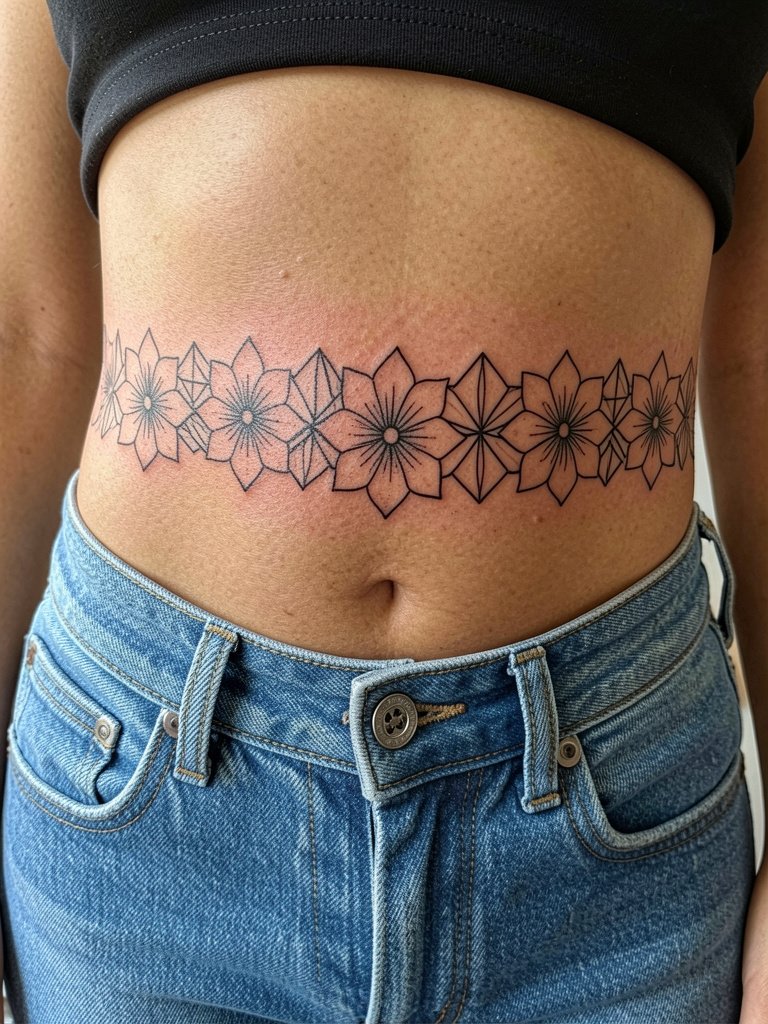
A geometric band gives structure to floral elements and holds up well because repeated patterning disguises minor softening. Exact symmetry matters, so ask for a traced placement photo to check alignment with the hip bone. Expect a two-hour session for a clean band and plan a touch-up at year two for crispness. The common mistake is compressing the pattern too narrowly where skin creases occur, which breaks the rhythm over time. For outfits, a cropped blazer or wrap tops makes the band visible in layered looks.
11. Small Anemone Beside a Natural Waist Hollow
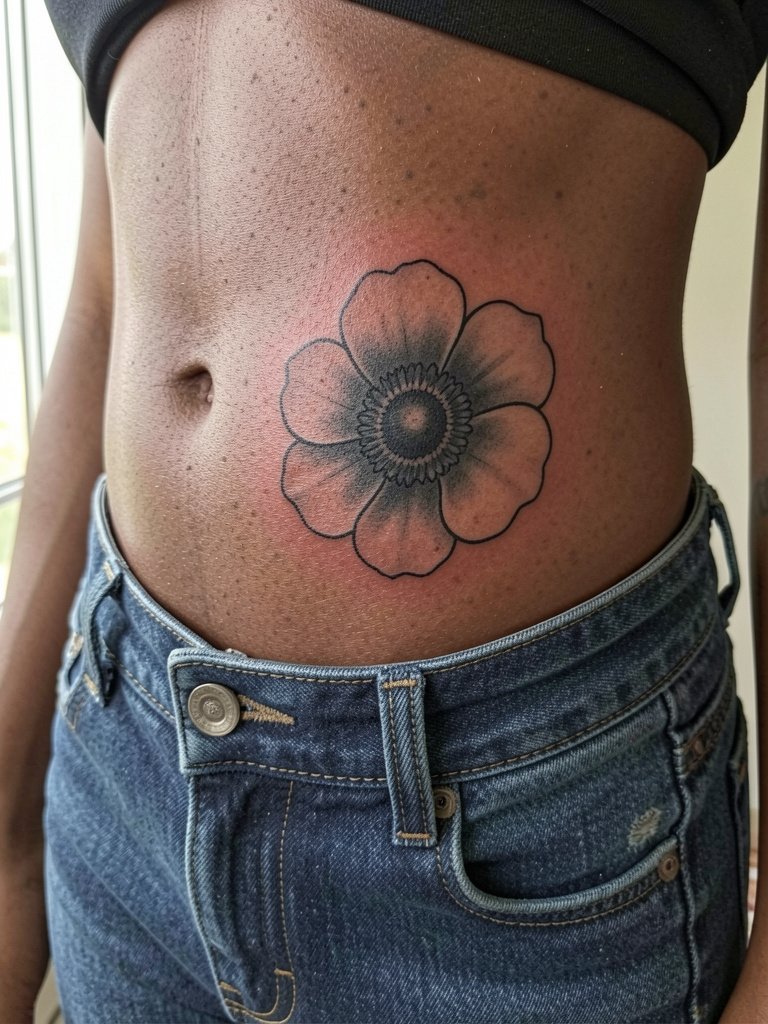
An anemone with a strong center reads like a punctum on the hip when placed beside the waist hollow. For longevity pick slightly larger petal separations and specify stipple shading rather than broad soft washes. Sessions are short and pain moderate, usually under an hour. A typical mistake is choosing too tight a reference for detail meant for the forearm. Bring photos showing the desired scale relative to torso features. For summer looks pair it with cropped knit tanks.
12. Botanical Linework That Tucks Under Swimwear
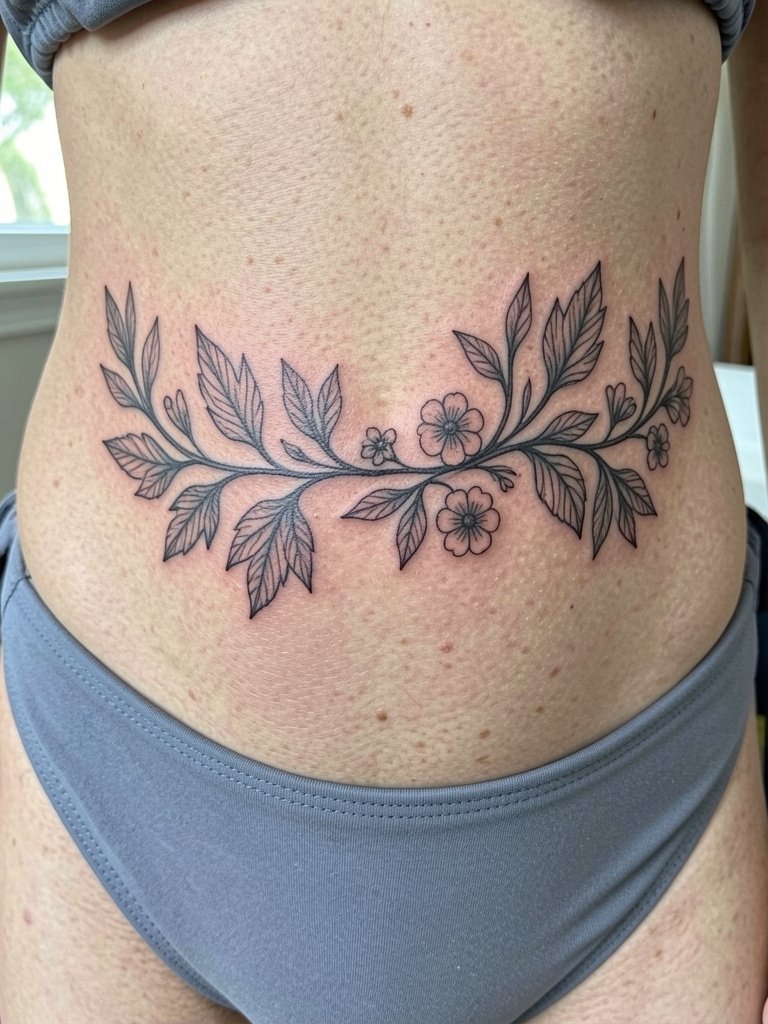
Designs that intentionally sit close to swimwear must account for repeated sun exposure and friction. If you plan the botanical line near the bikini line, ask for UV-safe pigment placement and discuss yearly touch-up expectations. Sessions are typically under 90 minutes and sensitivity is moderate. Many clients underestimate how often sun and chlorine will fade delicate washes, which is a planning oversight more than a technical failure. For shows off the placement, pair with low-rise bikini bottoms that reveal the tucked edges without rubbing.
13. Stretched Petal Composition Over the Hip Flank
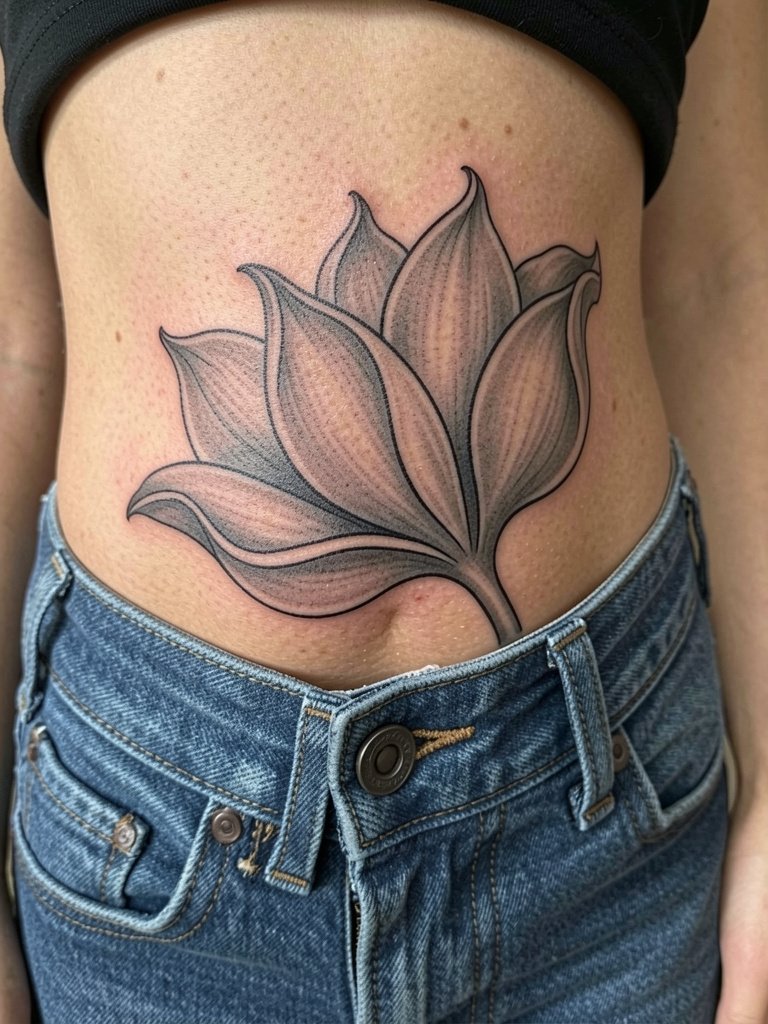
When you want petals that sweep with the body, the stencil must be curved and tested in motion. I have clients stand and walk during stencil checks so the artist adjusts flow lines before inking. Sessions can be longer for large petals, often two hours, and the pain is a moderate three to five depending on depth. The frequent mistake is treating a flat reference as if the skin were flat, which produces petals that distort when you move. For evening wear pick bias-cut slip skirts that mirror the drape of the design.
14. Tiny Floral Anchor Near the Hip Dimple
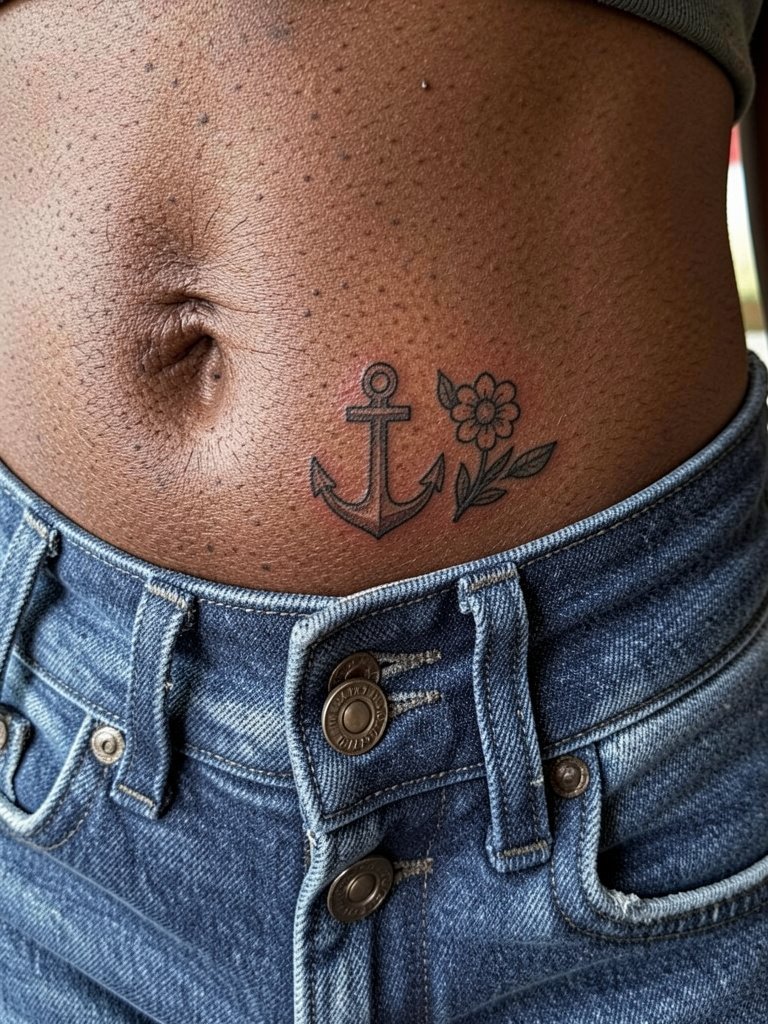
Micro anchors are striking but the hip dimple area can blur very small details because of skin folding. I recommend slightly enlarging the motif from a finger-size reference so the petals keep separation after healing. Sessions are short and pain mild, usually under 40 minutes. A common oversight is expecting fingertip-level detail; hip skin needs scale. For casual days pair with low-rise denim shorts that show the dimple area without tight seams.
15. Asymmetric Floral Motif That Crosses the Hip Line
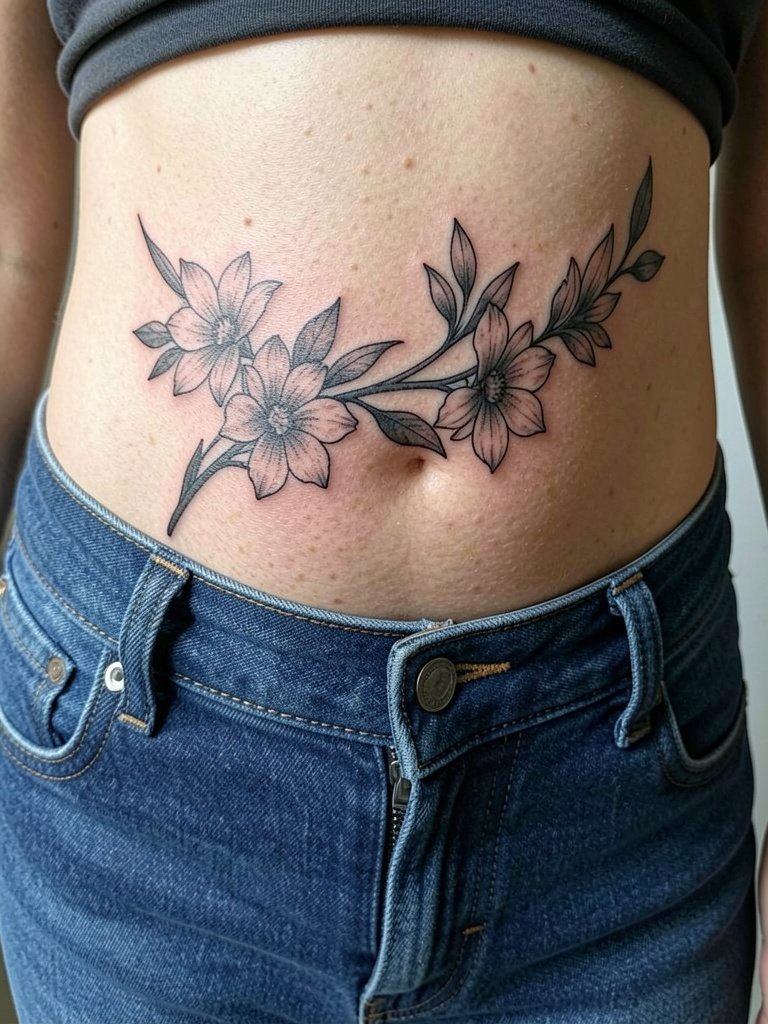
Asymmetric motifs that cross the hip line create motion and look custom because they follow body planes. Before booking, request a photographed mockup so you see the crossing point relative to clothing edges. Expect session time of one to two hours with moderate discomfort at the crossing zone. The principal mistake is poor symmetry control that makes the crossing read lopsided; ask the artist to mirror a small section on your opposite hip as a reference point. For wardrobe, an open-back or cropped top combined with low-rise skirts showcases the layered effect.
Frequently Asked Questions
Q: How painful is a hip tattoo compared with other placements?
A: Hip tattoos vary by exact location. The lateral hip over bone is usually a three to five out of ten, the flank and upper thigh tend to be a three, and areas close to the crease or underwear line can edge toward a five. Pain also depends on session length and your personal threshold.
Q: What should I wear to a hip tattoo appointment?
A: Wear low-rise bottoms you can easily slide down a little without unfastening them, such as loose drawstring linen pants or fitted bike shorts. That keeps the area exposed while avoiding fabric pressure on the fresh ink.
Q: How often will I need touch-ups for hip florals?
A: Plan for at least one touch-up around year two for most fine-line and watercolor work. Bold blackwork often holds longer but may still benefit from a color or edge refresh at two to five years depending on sun exposure and friction from clothing.
Q: Are there arguments among artists about fine-line versus bold work on the hip?
A: Yes, artists clearly split on this. One group says fine-line florals on the hip blur quickly because the skin texture and movement cause lines to spread. Another group says with slightly heavier line weight and careful spacing, fine-line pieces can settle and remain legible for several years. You should weigh both views when choosing scale and line weight.
Q: Where can I find healed examples and portfolios without naming specific artists?
A: Search platform filters and hashtags for healed examples, for instance try TikTok location filters and hashtags like #FloralHipTattoo and #HealedTattooShots. Browse community threads that collect healed pieces and use portfolio sites to filter by keywords such as "hip floral healed." Reddit threads dedicated to healed tattoos are also useful for comparing similar designs on different skin tones.
