
The green you pick matters more than the shape, and a tiny shamrock is not always the safest route to a long-lasting lucky mark. Bright holiday color can read great for a year, but heavier linework and a single green accent often win for clarity after five years. Read the options below to save 15 fresh takes on St. Patrick’s Day inspired marks that age better and pair with everyday style.
1. Small Shamrock Flash on the Wrist
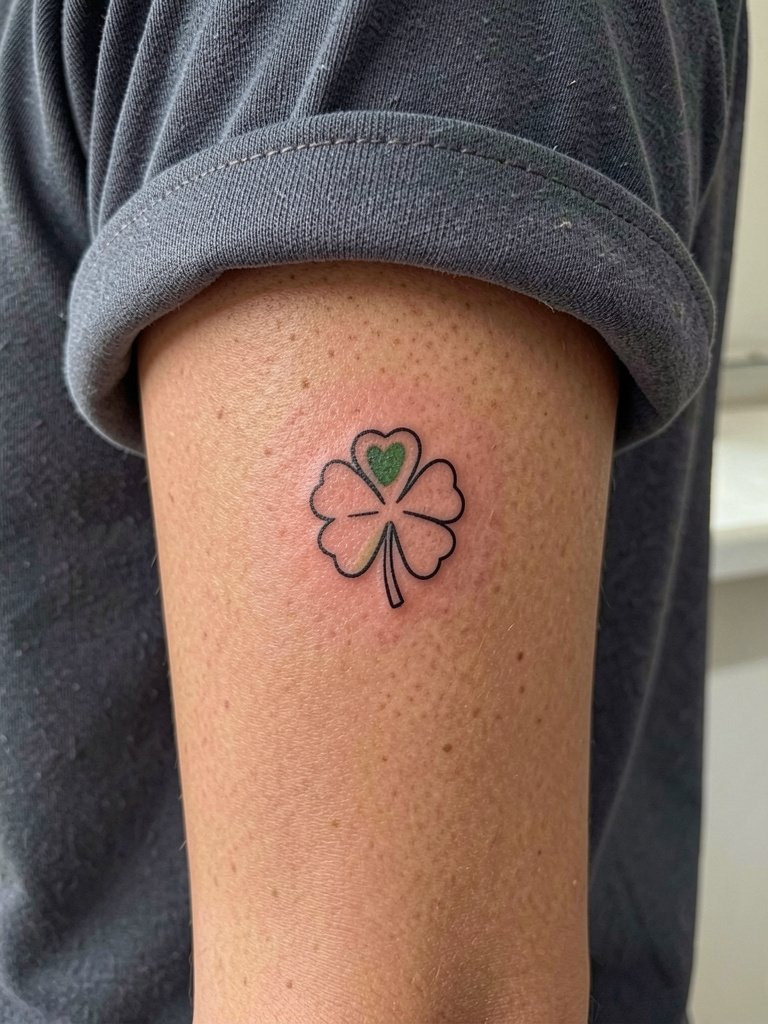
A wrist shamrock reads instantly and fits most wardrobes. For longevity choose a slightly bolder outline than your reference so the four corners have room to hold instead of merging. In the consultation bring two scale references, one at one inch and one at two inches, so the artist can show how the leaf lobes translate. A common mistake is asking for ultra-fine detail inside each leaf, which tends to blur by year two. Expect a 30 to 45 minute session and mild soreness when the wrist tendon is worked. For showing it off try a thin bracelet stack and a snug watch on the opposite wrist, like a thin bracelet stack that keeps the eye on your ink.
2. Lucky Clover Linework on the Inner Forearm
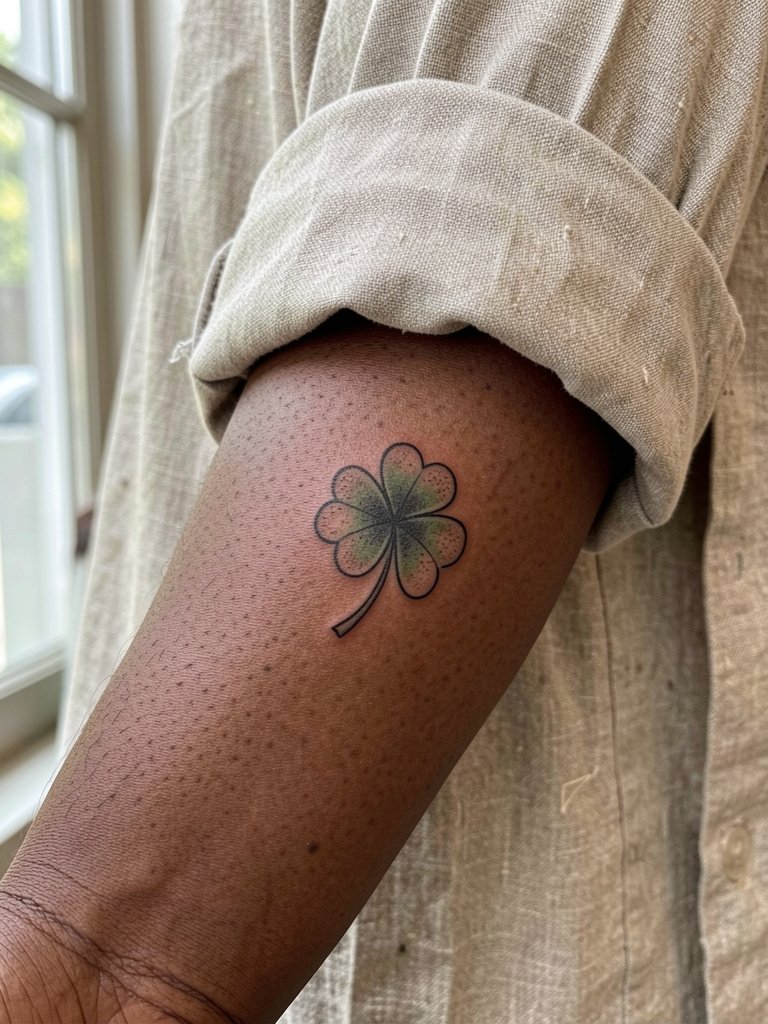
The inner forearm gives a clover room to breathe and lets single-needle detail show without constant sun wear. Request slightly stronger line weight than a social post reference so the veins of the leaves do not close in after healing. One version of this debate is color versus black and gray. One camp says green is the obvious choice because it reads as St. Patrick’s Day and feels lively. The other camp favors black-and-gray for predictability and contrast on darker skin tones. Ask for healed portfolio shots from six to twelve months so you can judge how that specific green holds up on similar skin.
3. Rainbow with Pot of Gold Micro Ankle Tattoo
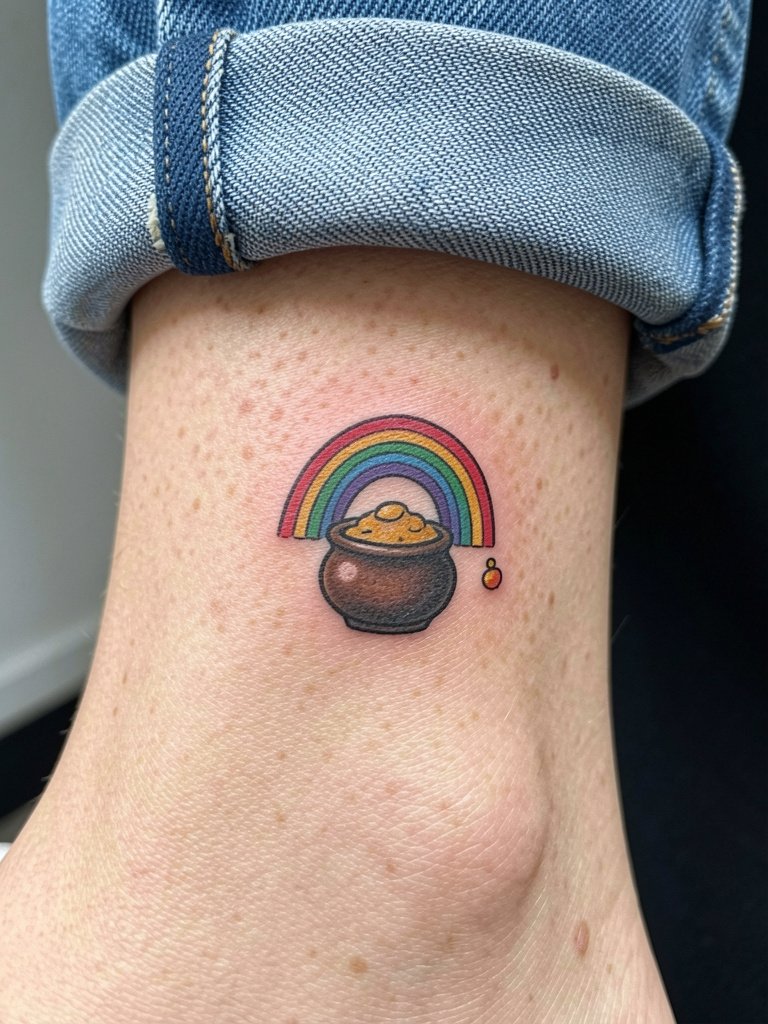
Micro color pieces like a rainbow and pot read cute on the ankle but can fade unevenly. If you want full color, increase the micro elements to at least one inch across so pigment has surface area. The ankle gets friction from shoes and socks, so a common error is asking for ultra-saturated tiny dots that disappear. Session time is typically 30 to 60 minutes and the ankle feels tender near the bone. For outfits, cropped straight-leg jeans and a subtle ankle chain frame the work without hiding it.
4. Leprechaun Hat Neo-Traditional Upper Arm
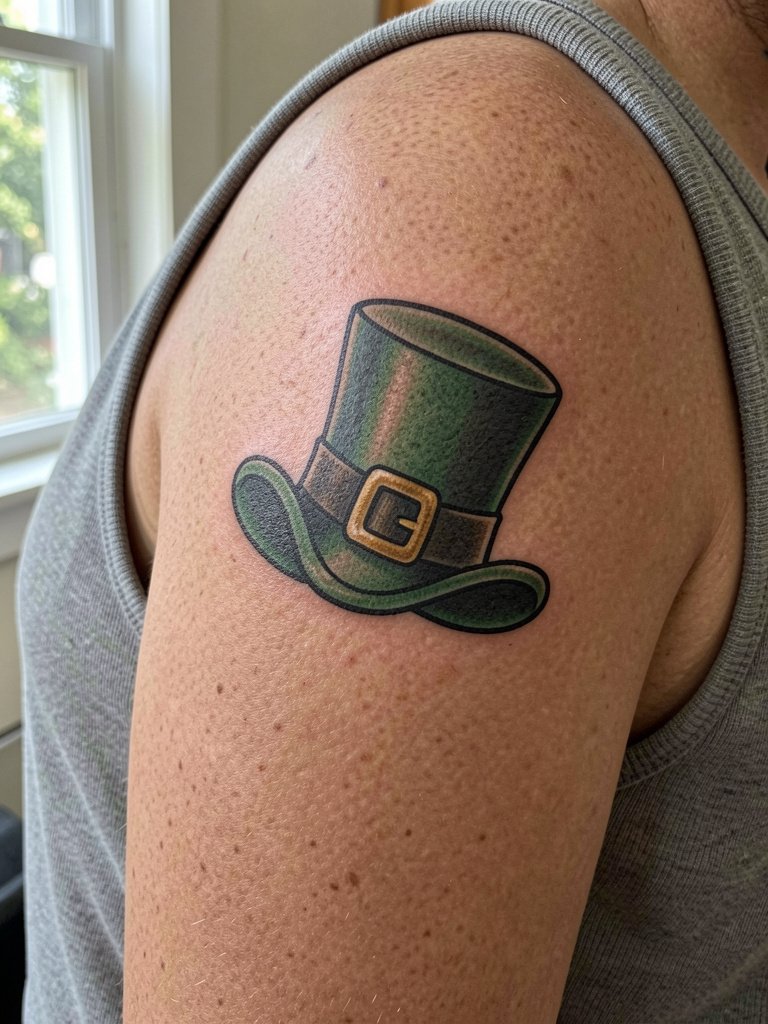
A top hat works well as a mid-arm flash piece that ages clearly. Neo-traditional weight and saturated fills survive better than super-fine illustrative details on this placement. Plan for a one-hour session and expect firm pressure on the outer arm while shading fills in. The choice between holiday novelty and a refined nod is personal. If you want less obvious seasonal flair, ask for a smaller hat motif with ornamental filigree that reads more like vintage iconography. Pair this with a sleeveless top for warm months, for example a relaxed tank top that keeps the silhouette visible.
5. Celtic Knot Lucky Symbol on the Clavicle
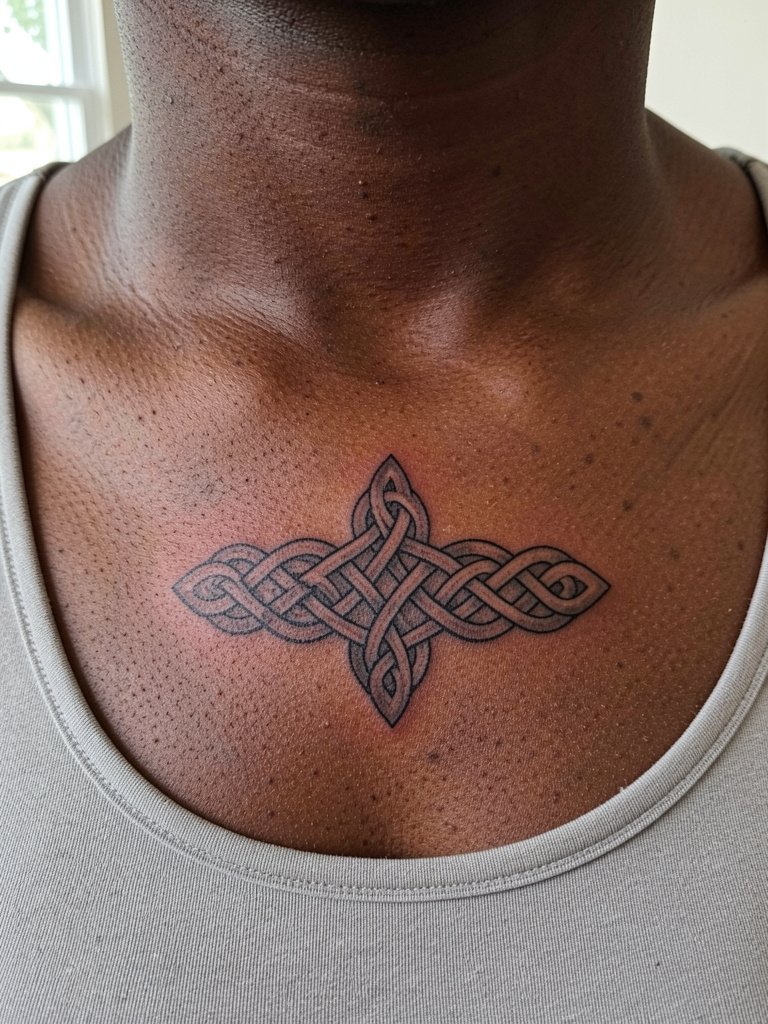
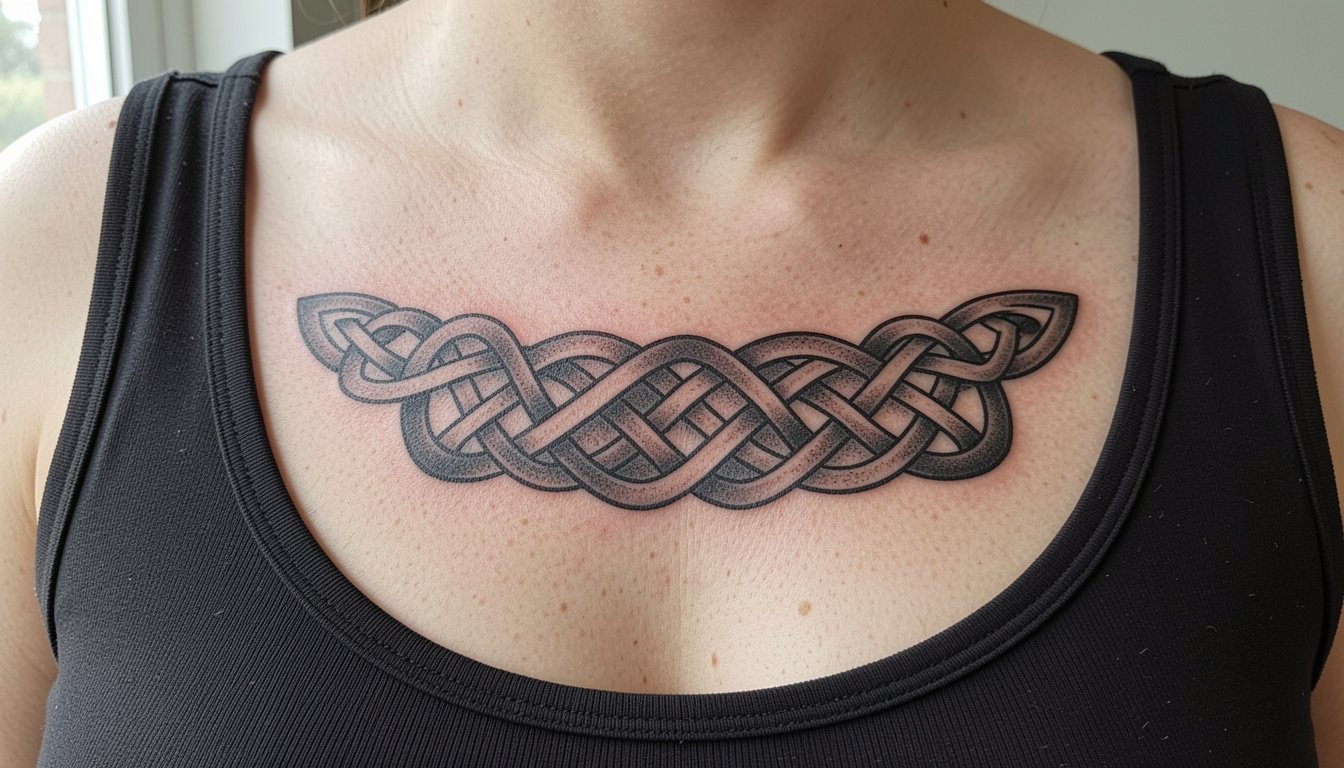
Celtic knots make the theme feel less seasonal and more like a lasting emblem. They need spacing rather than micro filigree so the interlaced lines do not blur together after a few years. One common mistake is compressing several passes of knot detail into a coin-sized piece. Ask the artist to draft the knot at actual size on tracing paper so you can see how the interlock holds at scale. Pain on the clavicle is moderate. Wear a scoop-neck top to the session and bring a delicate chain necklace like a delicate chain necklace for comparison in framing.
6. Four-Leaf Clover Micro Wrist Mark
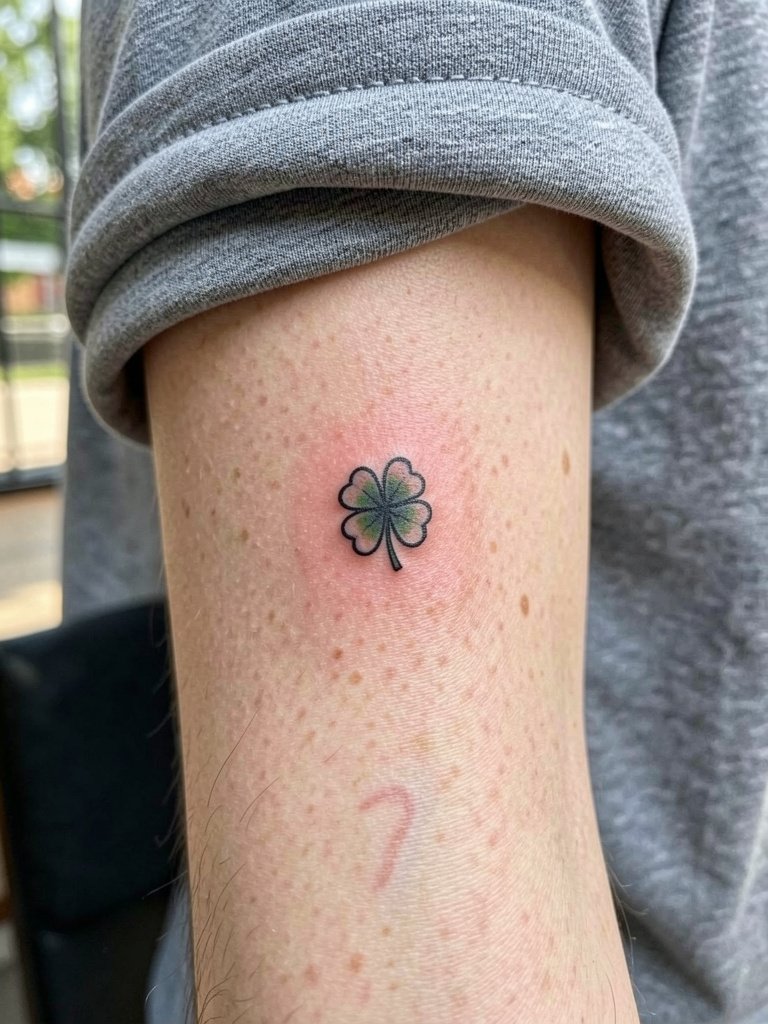
Four-leaf clovers are classic but micro sizes often disappear into wrist motion and washing. The controversy here is scale. One camp insists micro lucky marks are perfect for first-timers because they are discreet and low cost. The other camp warns that tiny linework compresses and softens into a blur within a few years. If you favor longevity, opt for a slightly larger scale, around one to one and a half inches, and ask for a modest outline rather than interior hairlines.
Session Day Essentials
These picks make small lucky tattoos and ankle pieces easier to get through and keep clean during the first week.
- Transparent stencil transfer paper kit. Helpful to preview line placement on the wrist and inner forearm designs from the first six ideas.
- Topical numbing cream. Works for people who need a gentler rib or clavicle session without affecting ink saturation during short appointments.
- Thin protective film roll for small areas. Keeps ankle and wrist pieces from rubbing on socks and watches in the first 48 hours.
- Healed-photo comparison card set. Use these to compare six- to twelve-month results when deciding on color accents for ideas above.
- Aquaphor Healing Ointment. A mainstream go-to for the initial moisture barrier that helps fine line work recover without caking.
7. Irish Trinity Knot at the Nape
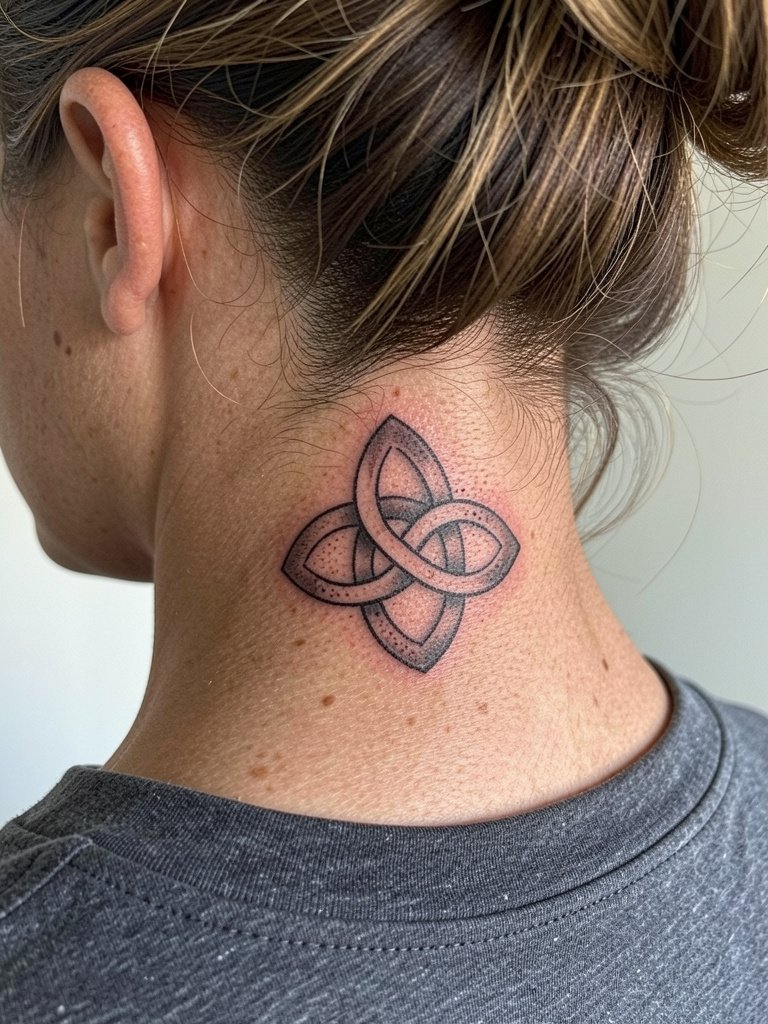
The nape hides a small knot until you put your hair up, which makes it ideal for a subtle symbol. Ask the artist to test line spacing on a scrap stencil so the knot loops remain distinct after hair oils interact with healing. Nape skin can be trickier to keep dry, so sleep on a clean pillowcase and avoid tight collars for two weeks. If you want a polished reveal, wear hair up in buns or high ponytails to show the design. A common mistake is over-detailing a piece meant to be seen at arm's length.
8. Lucky Horseshoe on the Calf
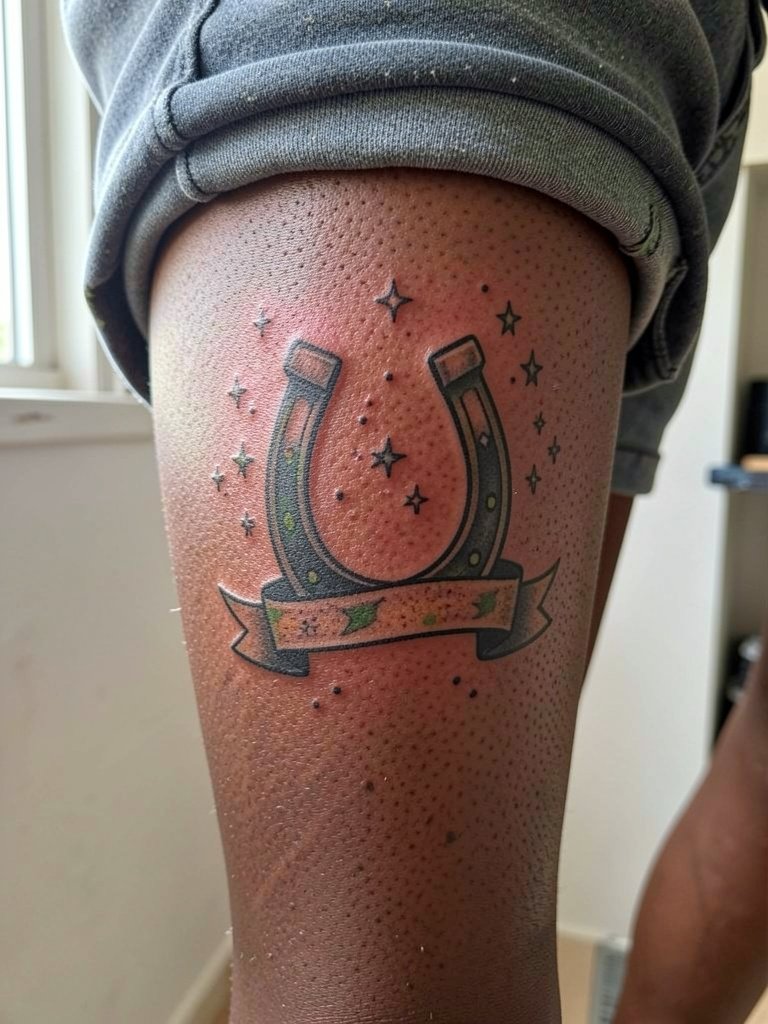
A calf horseshoe gives room for decorative touches and reads well during summer. The surface tolerates heavier shading so it is a low risk for blowout compared with wrist or finger placements. Plan for a 45 minute to 90 minute session depending on banner and stars. The most frequent mistake is cramming text into a tiny banner that becomes unreadable. Show-off pairing includes mid-calf socks and no-show sneakers for a casual reveal.
9. Script “Luck” on the Inner Forearm
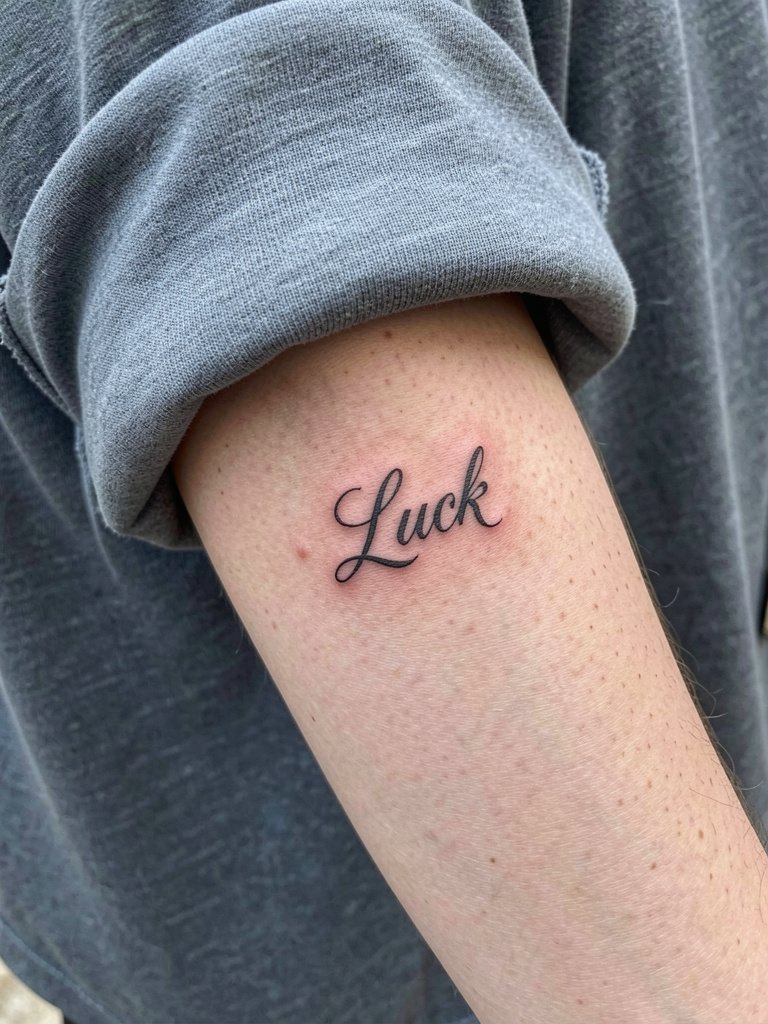
Short scripts work on the inner forearm because the area heals evenly and is easy to monitor. Bring two font references at different sizes so the artist can scale legibility at one inch and two inches. A common trap is asking for extremely thin cursive that looks great in a photo but loses its contrast in everyday wear. Session feel is mild to moderate depending on proximity to muscle. Pair this with cuffed sleeves and simple rings, for example a simple ring set to keep attention on the forearm.
10. Green Ink Accent Shamrock on the Collarbone
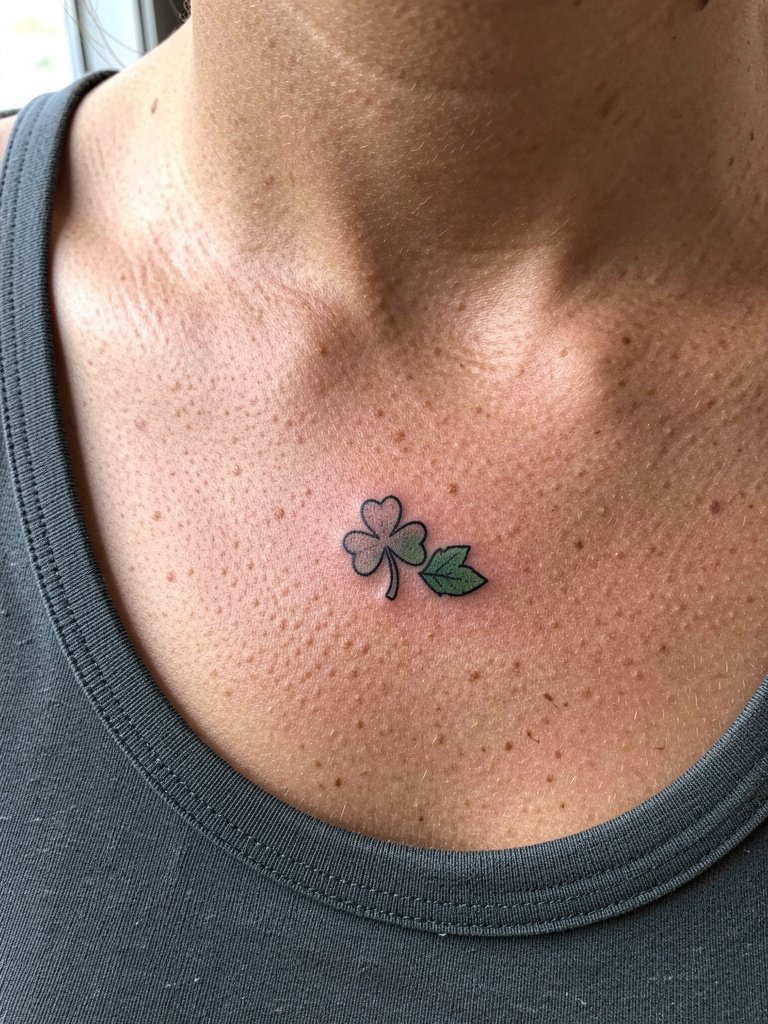
A collarbone shamrock framed by a necklace looks intentional rather than novelty. For color decisions remember that green pigments can soften on medium to dark skin if not paired with a strong black outline. One practical approach is to keep the fill minimal and rely on outline contrast. The collarbone is a sensitive spot so expect a sharper sting during the session. Pair the finished piece with scoop-neck tops to balance the negative space above the knot area.
11. Patchwork Irish-Themed Collection on the Outer Forearm
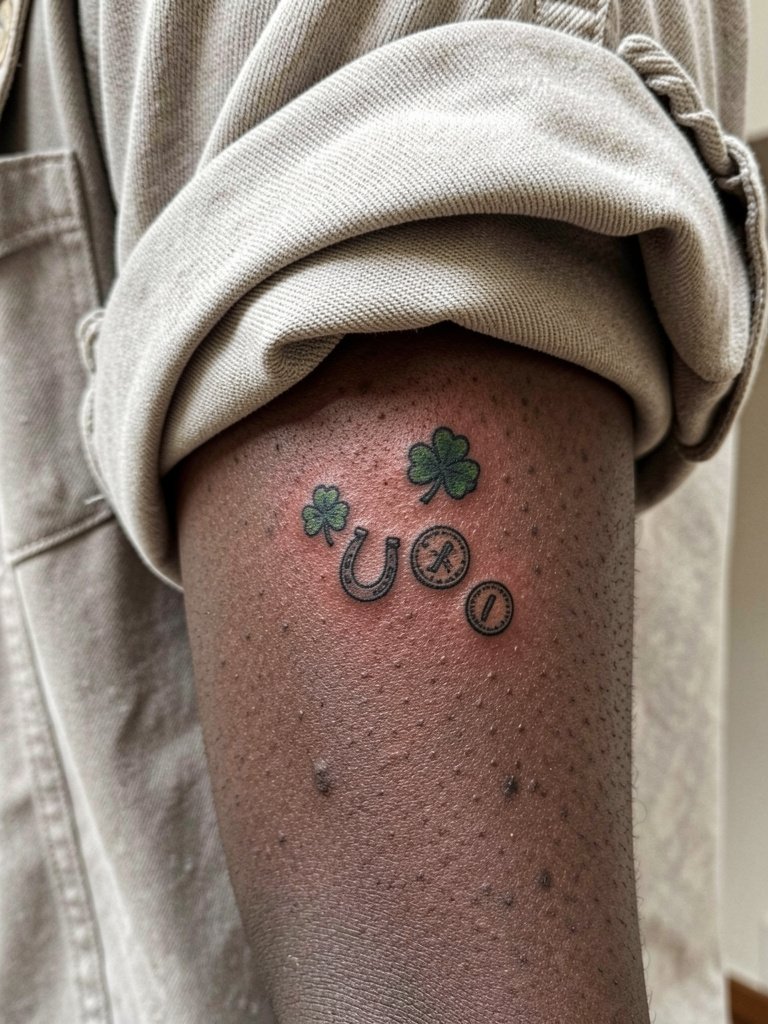
Patchwork lets you build a lucky story over time without committing to one large image. Plan each flash at a similar scale and line weight so the group reads cohesive when healed. A frequent rookie error is mixing ultra-fine micro pieces with bold traditional ones, which ages unevenly. Schedule short walk-in sessions for each motif and keep a sleeve roll handy to show how the cluster reads together. For styling, boxy tees with cuffed sleeves work well to display the collection.
12. Pot of Gold Mini on the Ankle
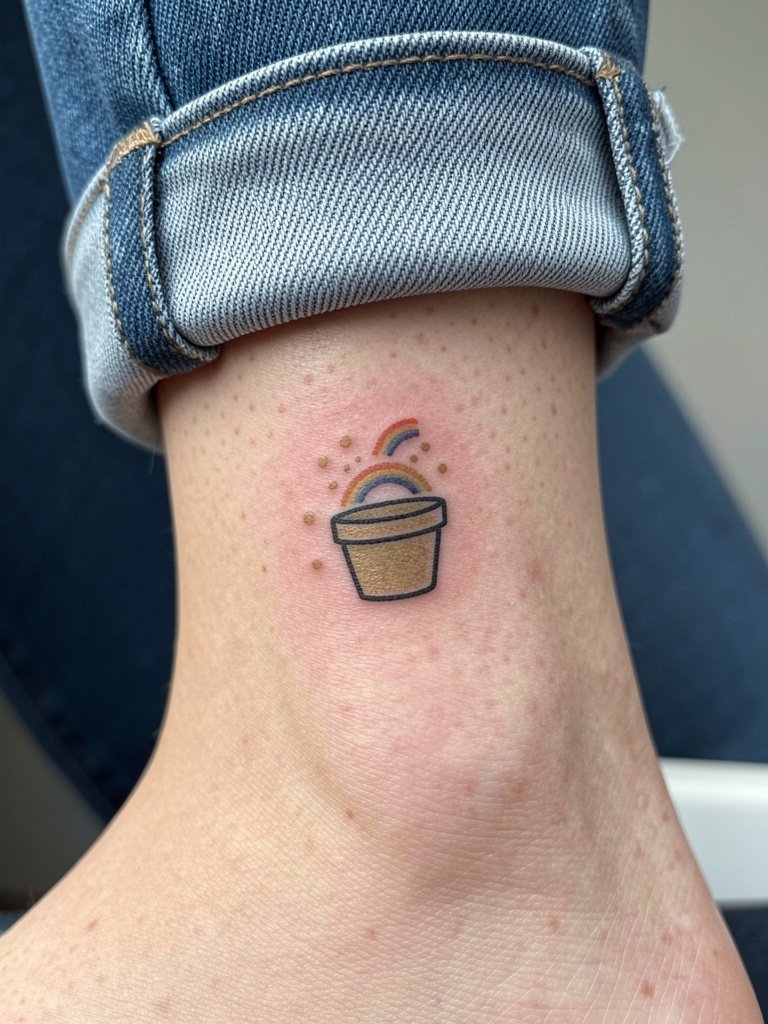
An ankle pot of gold is playful and easy to hide for work. Ask the artist about pigment density at the time of booking because tiny gold dots can migrate if packed too tightly. A common mistake is expecting a bright metallic look from flat ink. Treat color on the ankle as an accent, not a full-color mural. The area takes frosting from movement, so avoid tight socks for two weeks. Pair with cropped straight jeans or low profile sneakers to reveal the work.
13. Clover and Coin Combo on the Upper Thigh
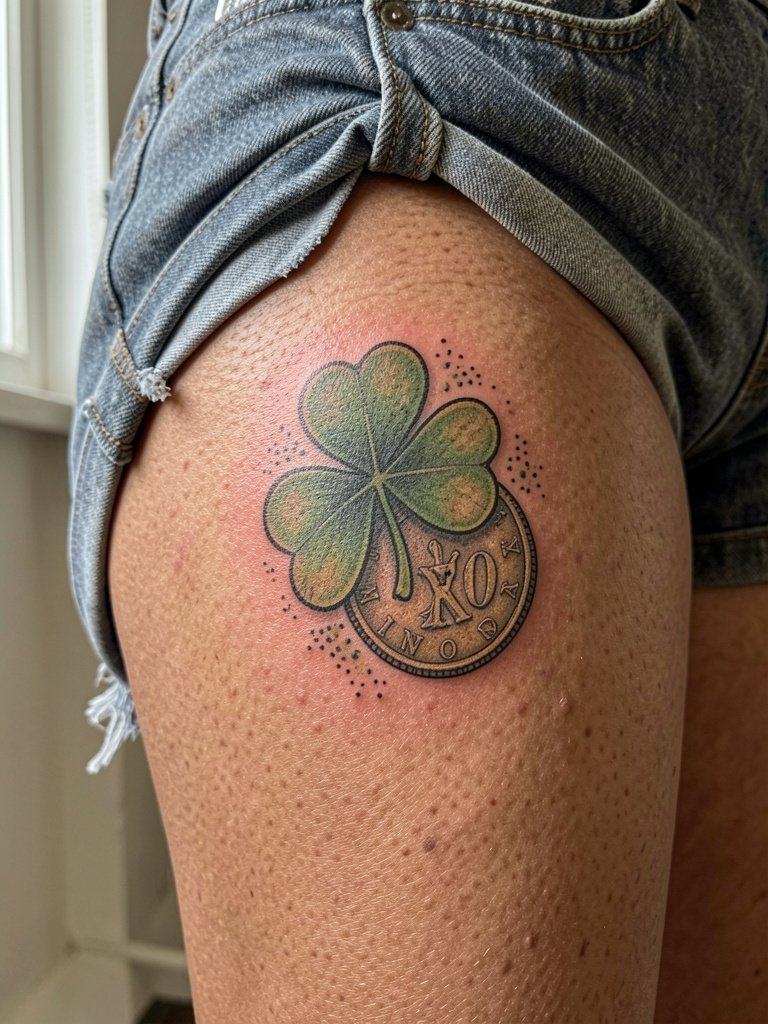
Thigh pieces allow for more detail and comfortable sessions because the muscle group is forgiving. If you want the clover and coin to read as one composition, have the artist draw overlapping negative-space buffers so the elements do not merge after a year. Session time may run longer, so plan for a break halfway through longer appointments. For seasonal reveals, high-waisted shorts and boxy cropped tees style this placement without showing everything at once.
14. Micro Shamrock Behind the Ear
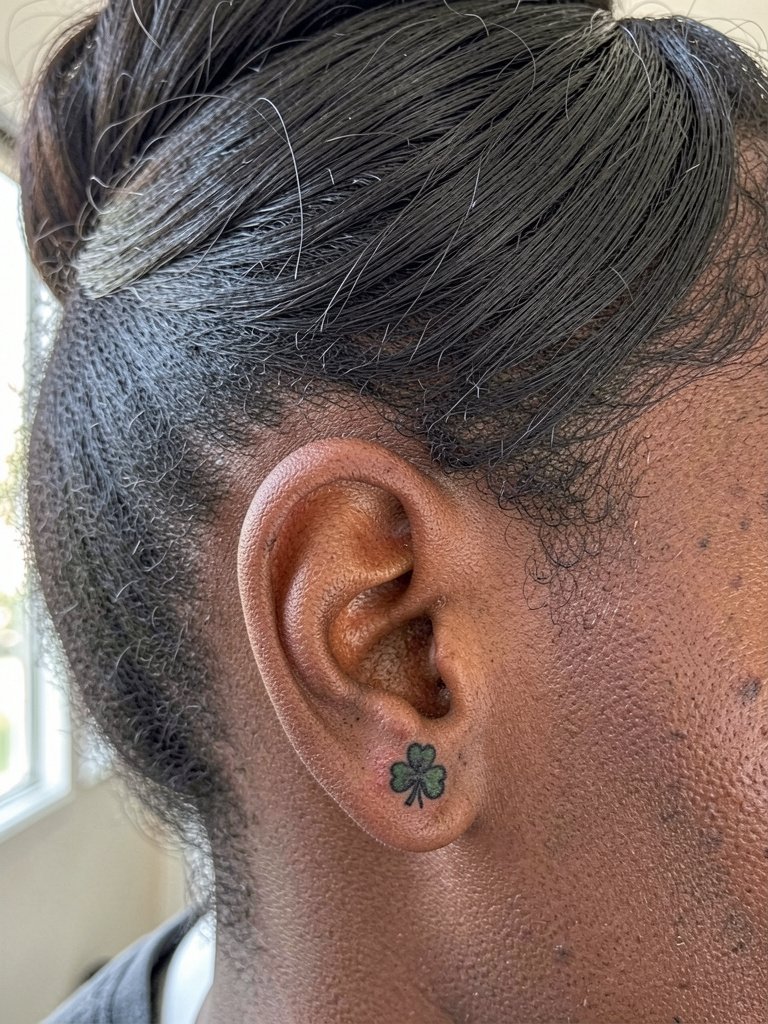
Behind-the-ear marks suit people who want a secret lucky detail. The skin here is thin so lines must be simple. A real mistake is overcomplicating the shape with interior veins or tiny dots that do not survive the movement of hair and skin. The session is short but can sting because of thin tissue. If you plan to style hair often, consider how daily hair products might affect healing and skip heavy sprays for a week.
15. Irish-Inspired Ornamental Forearm Band
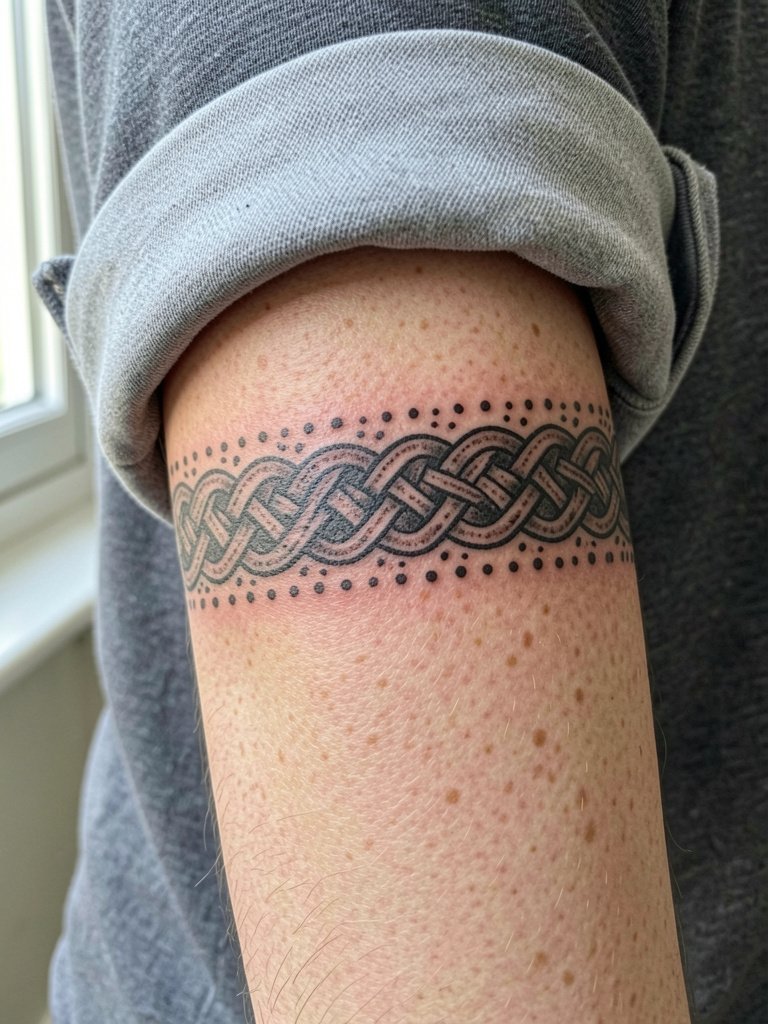
A forearm band reads like jewelry and is collector-friendly. The key is rhythm and repeat spacing so the pattern breathes after healing. One common oversight is trying to shrink a large band into a small wrist cuff that ends up crowded. Forearm bands usually need one to two sessions depending on width. For outfits, rolled long sleeves and open overshirts let the repeat pattern peek through in a styled way.
Frequently Asked Questions
Q: How do I choose green versus black for a tiny shamrock?
A: Think about contrast and future fading. Black outlines anchor tiny motifs and tend to retain crisp edges longer. Green accents make the theme clear at first but can soften depending on your skin tone and sun exposure. Ask for healed photos from six to twelve months to see how a specific green pigment behaves on similar skin.
Q: Where can I find local artists who post healed St. Patrick’s Day style work?
A: Search short-form video and image platforms for hashtags like #stpatricksdaytattoo, #shamrocktattoo, #celticknottattoo, and #luckytattoo while using location filters. Bookmark portfolios that include healed shots, not just fresh photos. Tattoo directories and studio booking tools let you filter by style keywords such as fine line, blackwork, and traditional flash.
Q: Will a small wrist or ankle tattoo hurt a lot and how long is each session?
A: Pain varies by placement and personal tolerance. Wrist and ankle hit bone and tendons so they feel sharper for short bursts. Expect 30 to 60 minutes for most micro pieces and up to 90 minutes for more detailed small work. Bring comfortable clothing that gives the artist access, for example a loose drawstring linen pant if you have thigh or calf booked.
Q: How should I plan touch-ups for tiny colored accents?
A: Color accents often need a touch-up between six months and two years, especially on high-friction areas. Discuss a realistic touch-up window during booking so the artist can schedule a quick follow-up if saturation lightens faster than expected.
Q: Can I make a holiday-themed tattoo feel less gimmicky?
A: Choose lasting symbols and treat them like ornamentation rather than cartoon scenes. Celtic knotwork, simplified horseshoes, and single-leaf color accents wear better than full character pieces. Request mockups that show how the design reads in neutral palettes and ask the artist to remove novelty flourishes if you want a more timeless silhouette.
Q: What should I wear to my appointment for a wrist, ankle, or collarbone piece?
A: Wear clothing that gives clear access without needing to be pulled or adjusted. For a wrist pick a short sleeve or rolled sleeve tee. For an ankle sit in cropped jeans or shorts that are fully zipped and buttoned in normal worn state. For collarbone choose a wide neckline. Bring simple accessories to compare framing once the piece is healed.
