

Bold blackwork often outlasts the delicate single-needle pieces people pin on mood boards. On the chest, heavier linework and clear negative space form a readable shape that still looks deliberate after years of wear. If you want a chest piece that reads across a shirt and holds up through changes in body and lifestyle, the practical choices below show how scale, placement, and wardrobe work together for the long run.
1. Symmetrical Chest Armor Across the Pecs
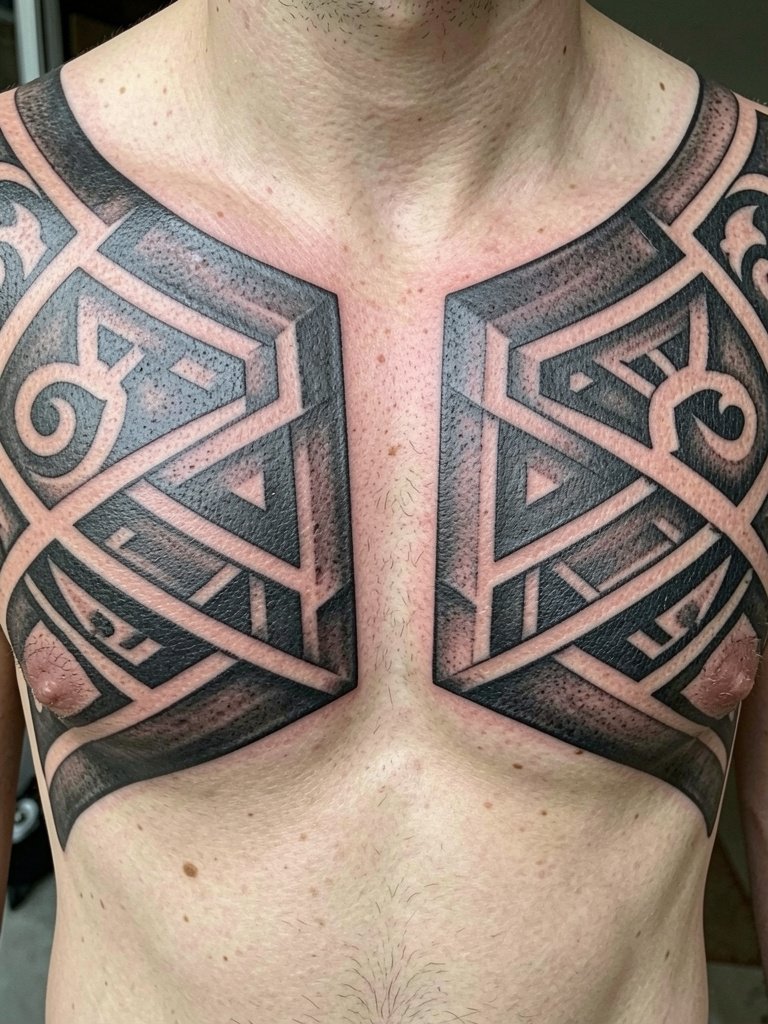
A chest armor layout uses the sternum as an axis so the whole torso reads as a single composition. One camp says chest tattoos should mirror across the sternum to respect natural geometry and give balanced photos. The other camp prefers off-center pieces that feel organic and personal and argue not every chest needs a perfect mirror. For clients who prefer the armor look, I recommend heavier linework and filled black panels to prevent early softening. Pain usually rates moderate to high on the chest, with sessions of two to four hours per pass. Bring full-body reference shots so the artist can map seams to your collarbone and pec line. Common mistake is shrinking the pattern too small, which causes loss of negative space as the piece settles. For the session wear a button-down or a jacket that opens fully so the artist has clear access and your clothing does not rub the fresh work.
2. Near-Heart Cross, Small and Focused
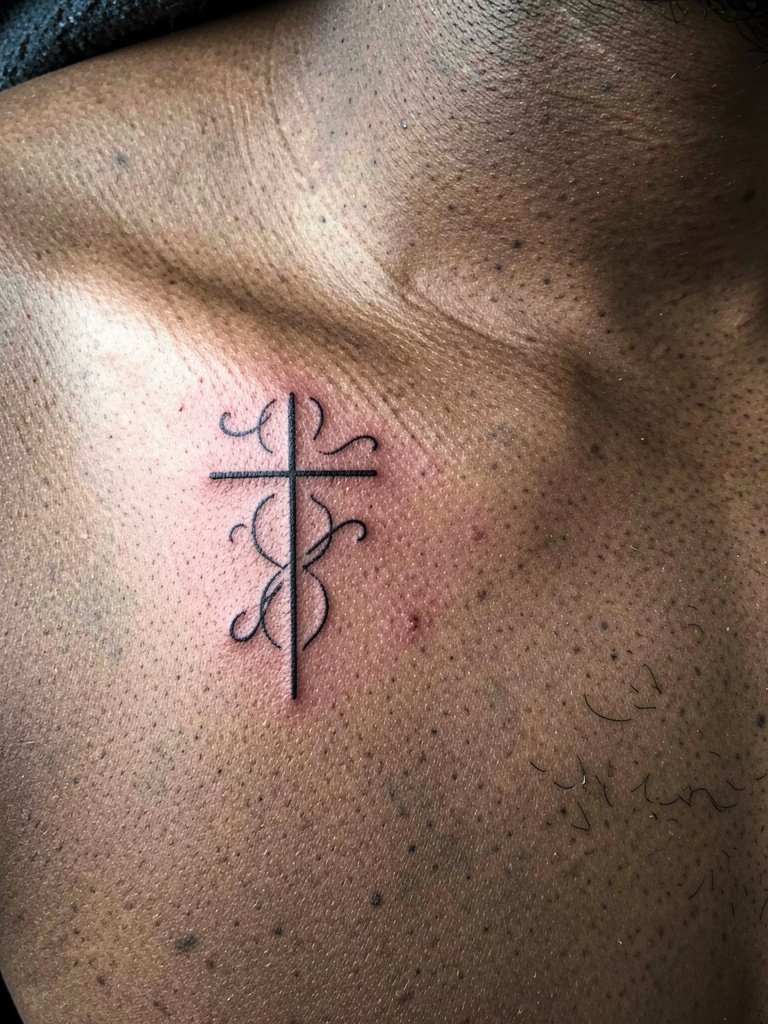
A small cross near the heart reads immediately and fits a modest scale without overwhelming the chest. The piece favors thin to medium linework and a single session of one to two hours. Expect moderate tenderness because the area is close to bone and the clavicle. Specify final scale in centimeters during the consult so the weight reads correctly at shirt level. A common aging problem is choosing ultra-fine single-needle lines that blur into a smudge by year three. Instead choose slightly bolder linework with tight spacing and expect a possible touch-up around year two. For showing it off, pair with an open collar shirt in neutral tones, which frames the collarbone and keeps the small mark visible without overexposure.
3. Tribal Pec Wrap That Follows Muscle Flow
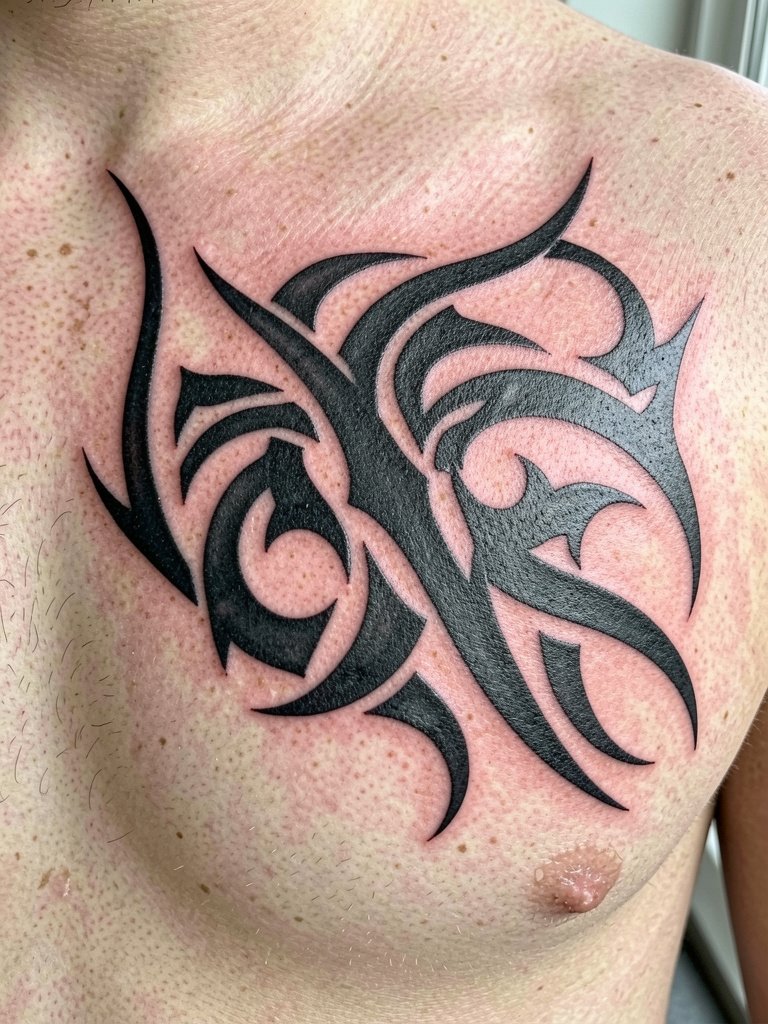
Tribal wraps work when the black forms read with muscle curves rather than against them. I suggest a consultation where you and the artist mark the pec tendon and shoulder slope so the wrap hugs natural movement. Sessions depend on coverage, typically one to three sessions, and expect strong vibration and surface soreness. A mistake I see is copying generic flash that ignores shoulder anatomy, which causes the piece to look pasted on after movement. For longevity, insist on bold saturation and crisp tapering at the ends to reduce blowout risk. When you want to show the wrap, a fitted plain tee keeps the silhouette visible without competing patterns.
4. Full Mirrored Wings Across the Chest
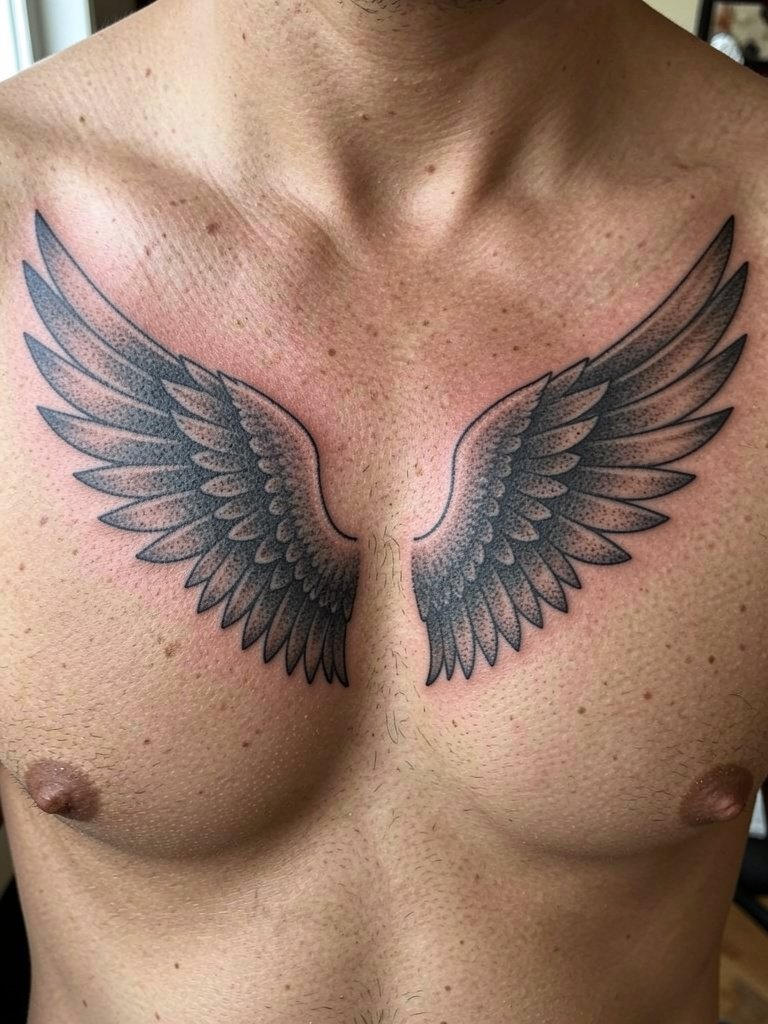
Mirrored wings use the chest axis to create visual balance for portraits and shirtless photos. One advantage is they read well from a distance because feathers create texture without needing tiny details. In a consult, bring photos showing the exact wingspan you want so the artist can scale feather grouping to your pec width. These pieces usually need multiple sessions totaling three to five hours per session depending on shading. A frequent mistake is over-detailing tiny feathers near the sternum, which softens first. Expect a touch-up in two to four years if you want crisp feather tips maintained. If you plan to pair the wings with sleeved work later, mention connection points during layout so transitions are seamless.
5. Lion Portrait on One Pec
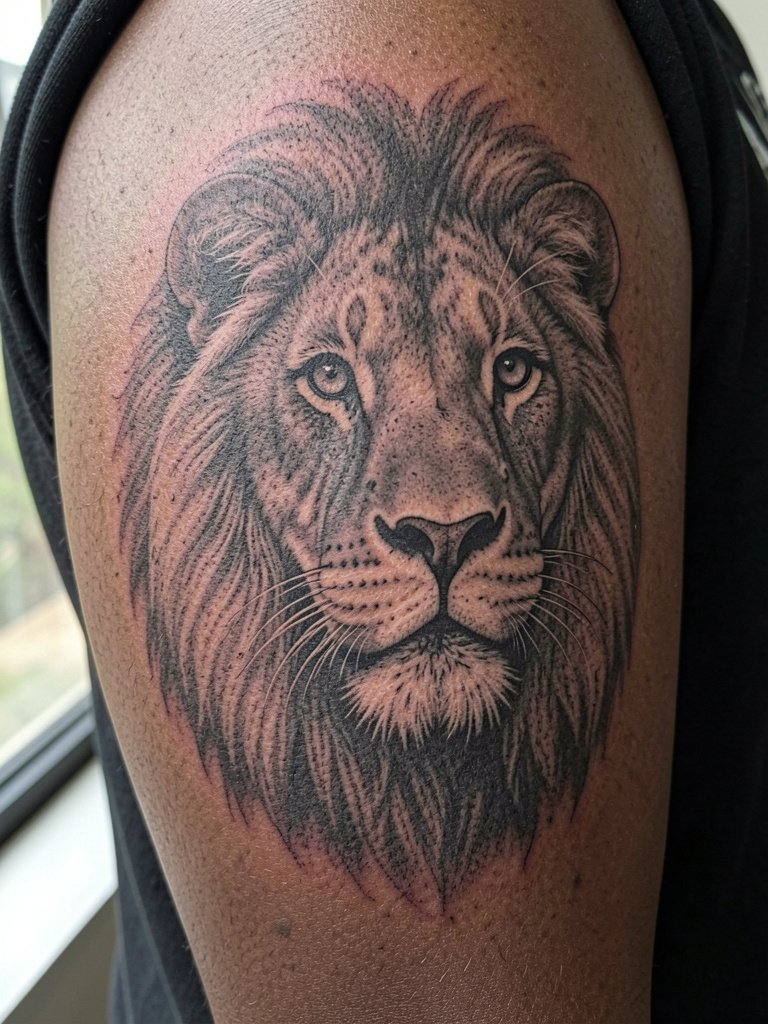
A lion signals traditional masculine imagery without being generic when executed as a high-saturation portrait. I recommend at least two reference photos so the artist can map the eye placement relative to the clavicle and sternum. Portraits take two to four sessions with long passes, and the area will throb during work because of the front torso sensitivity. Common errors include using low-contrast flash photos that lose depth when healed. Ask for strong mid-tone separation and knotty mane texture so it keeps its focal point after a few years. To frame the portrait in everyday wear, try a relaxed crew neck tee or thin chain necklace that draws the eye to the chest.
6. Lion with Roses, Clocks, or Smoke
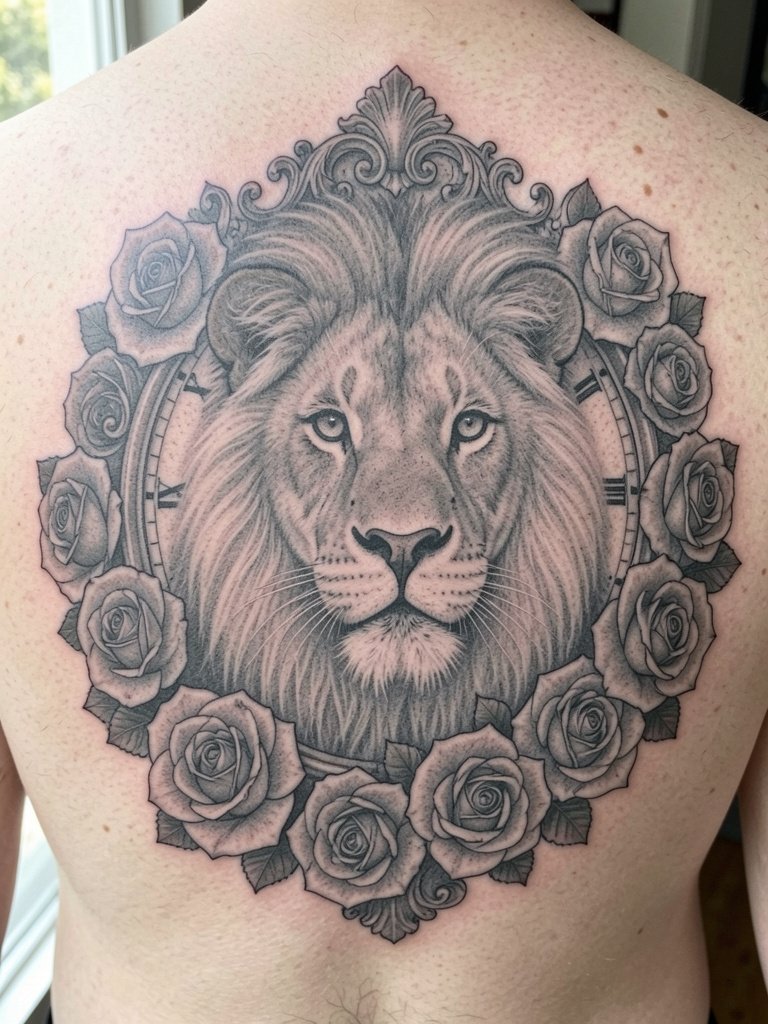
Adding floral or clock elements around an animal portrait builds narrative and fills negative space in a controlled way. One practical tip is to pick one filler element and keep it stylistically consistent with the portrait, for example stipple-shaded roses to match a stippled mane. Sessions will be longer because the ornamental pieces require extra layering, so schedule multiple passes and plan for touch-ups. A mistake is cramming too many motifs close to the face, which makes the portrait lose impact. For the appointment wear a fully front-opening shirt so the chest remains unobstructed and the artist can step back and view composition at scale.
Session Day Picks
The first six ideas range from small near-heart marks to wide chest armor, and these five items help the session and the first week of healing.
-
Stencil transfer paper kit. Handy for artists and clients to test placement on the chest before needle hits skin, especially when you need the armor or wing spans to align with the collarbone.
-
Low-odor topical numbing gel. A lighter numbing formula applied 30 to 45 minutes before a long chest pass reduces surface pain without compromising linework.
-
Thin protective film roll for tattoos. Useful for covering small near-heart pieces and for keeping friction off larger chest fills during the first 24 hours.
-
Fragrance-free gentle body wash. A mild cleanser that rinses without stripping fresh ink, handy for chest showers where runoff is an issue.
-
Aquaphor healing ointment. A widely used barrier ointment for the initial days after a chest session to lock in moisture and protect the stencil lines.
7. Geometric Sternum Medallion
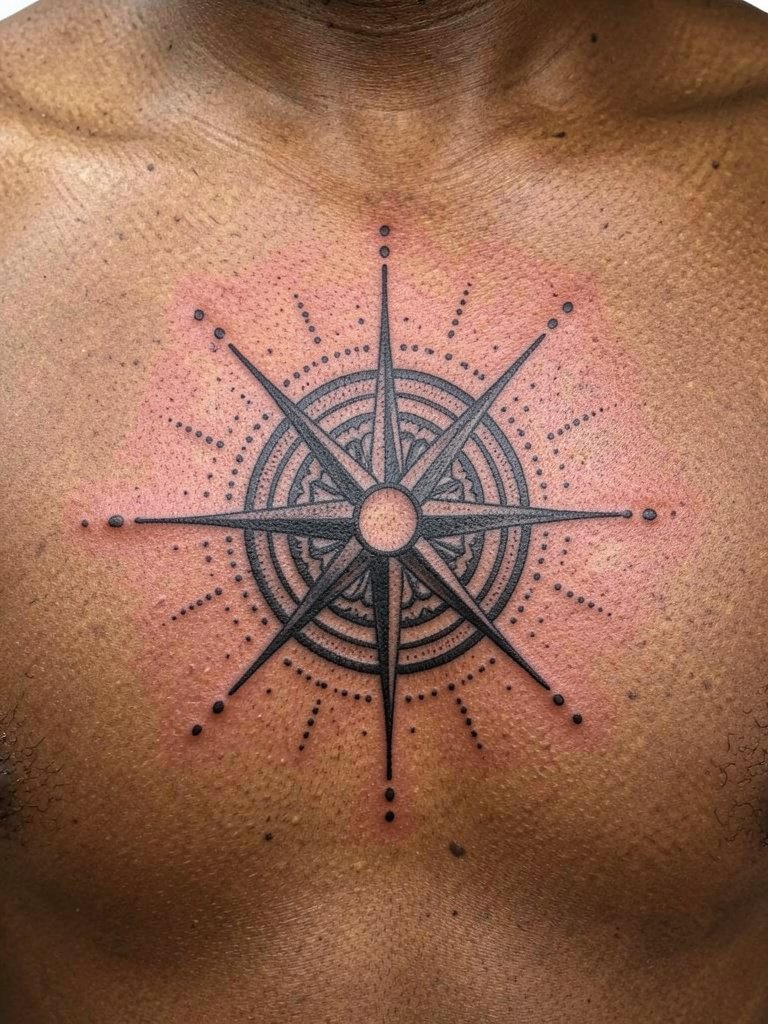
Geometric medallions use the sternum as a center point so spacing and symmetry are critical. One group of artists warns that single-needle geometry on the sternum blurs faster because of skin movement in that zone. Another group argues that slightly wider spacing with crisp stippling retains clarity, and they point to healed portfolios showing three-year examples. For a sternum medallion, mark the exact vertical center with the artist and insist on negative-space buffers between concentric lines. Sessions run one to three hours depending on intricacy and the sternum reads as high-pain for most people. Wear a loose front-opening top on the day and consider deep-V or scoop-neck show-off pieces like a deep v neck shirt afterward.
8. Mechanical Armor and Biomech Panels
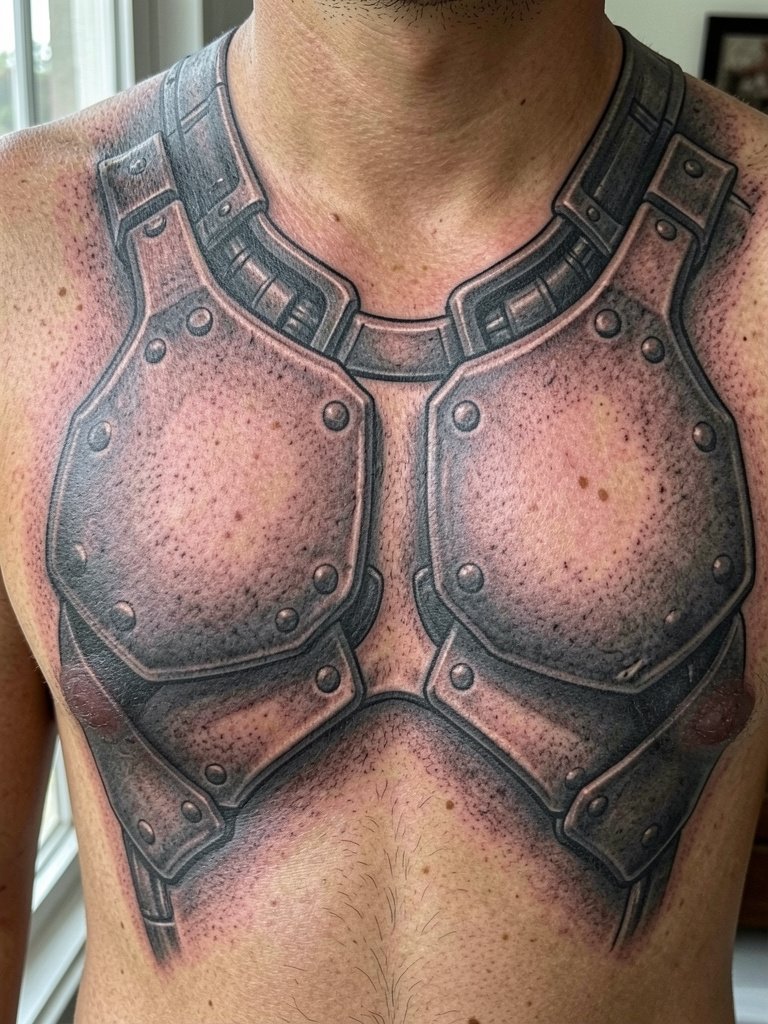
Mechanical armor pieces create an illusion of wearable plating and are best when the artist designs each plate to follow the pec fold. I recommend a session plan that tests plate placement with temporary stencils and body movement checks. These compositions need heavy saturation and layered shading, which increases session length and the chance of swelling. People often request tiny mechanical details that look great in a flash photo but fade into indistinct grey when healed. Request bold separations between metal plates and soft background shading instead. If you plan a photoshoot, fitted tank tops and monochrome layering make the mechanical edges pop.
9. Abstract Mirrored Symbols
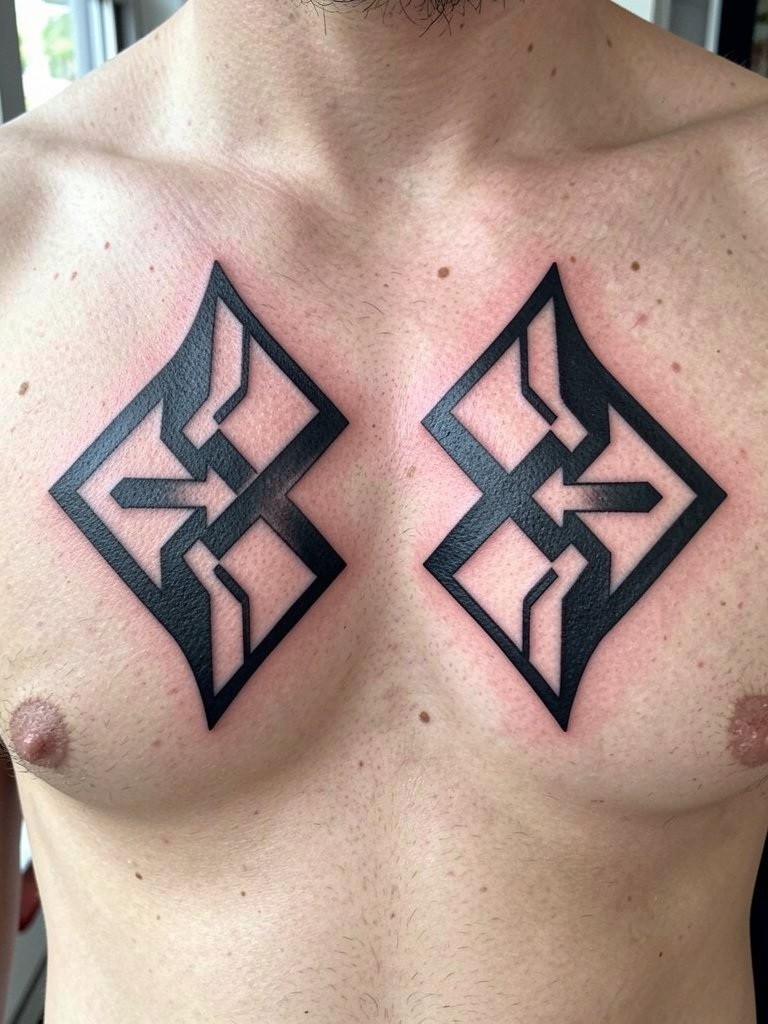
Abstract mirrored symbols give chest coverage without literal imagery, which helps if you want a bold chest identity without a clear motif. For this style, the key is crisp linework and consistent saturation so the blocks stay distinct as the skin ages. In the consultation, bring examples of the exact negative spaces you want preserved so the artist can scale the motif to your pec dimensions. A common error is making the symbols too thin, which leads to merging lines. These hold up best with blackwork and occasional dot work for texture. When showing them off, a fitted plain tee or tank highlights the mirror composition.
10. Minimal Upper Chest Symbol Near the Collarbone
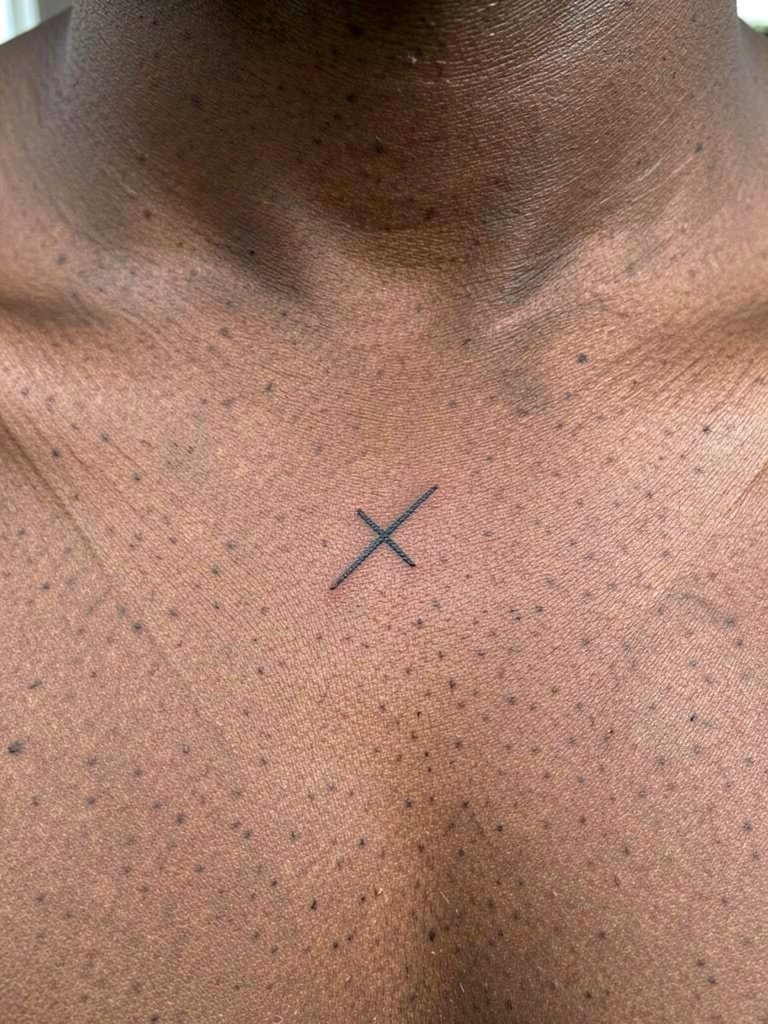
Small collarbone marks are low-commitment and show well with open collars. Camp A argues start small near the clavicle to stay flexible if taste changes. Camp B counters that the chest often reads better when a piece is built around the torso rather than a sticker. If you pick a small symbol, choose slightly thicker single-needle weight and leave ample spacing so it does not read cramped as your body changes. Pain is lower near the clavicle than on the sternum but expect sharp sensations near bone. For session wear, a button-down or zip layer that opens fully prevents fabric drag. To emphasize the placement in daily outfits, try an open collar shirt that frames the collarbone.
11. Script Line Across the Sternum
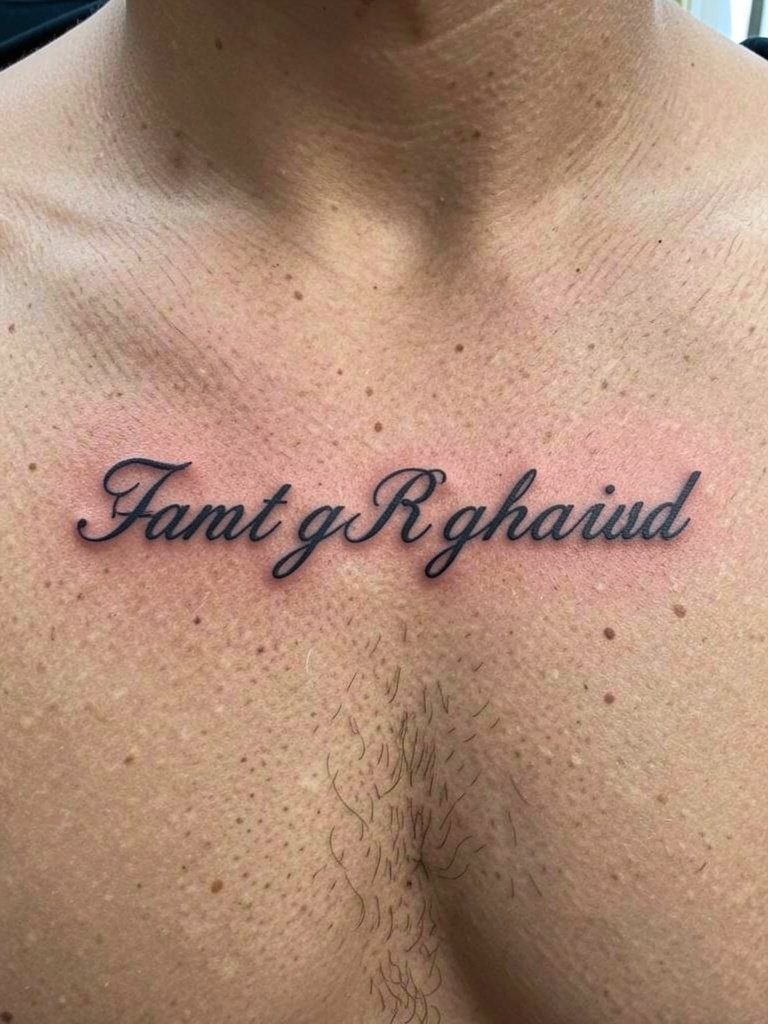
A chest script reads intimate because it sits over the sternum. Choose letter size and spacing that survive stretching and aging. A mistake I see is asking for tiny script that becomes illegible once the skin softens. For a sternum line, aim for medium-weight strokes and test the exact wording in stencil at full size. Expect moderate pain and plan for a single longer session or two shorter passes. If the phrase includes dates or coordinates, spell them out exactly in the reference so the font spacing is right. Pair the finished script with deep V or scoop-neck shirts when you want it visible.
12. Mythological Symmetrical Layout
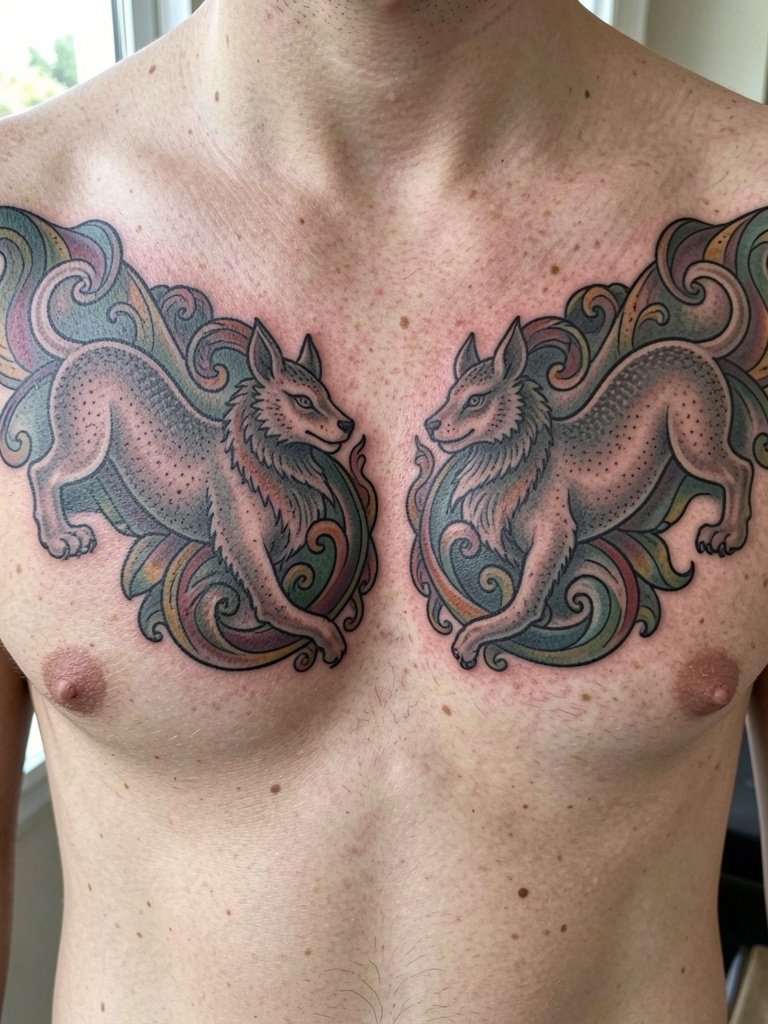
Mythological layouts let you scale a narrative across the chest while keeping balance. For heritage-informed symbols, state the cultural origin and preferences so the artist tailors motifs respectfully. These projects often need two to five sessions and precise staging to avoid overcrowding around the clavicle. A real mistake is layering too many competing icon elements, which makes the story hard to read once healed. Ask for muted color accents only if you want longevity because color usually requires more touch-ups than black and grey. For a casual reveal, wear a button-down overshirt that opens without friction on fresh ink.
13. Sparrow or Winged Animal Set
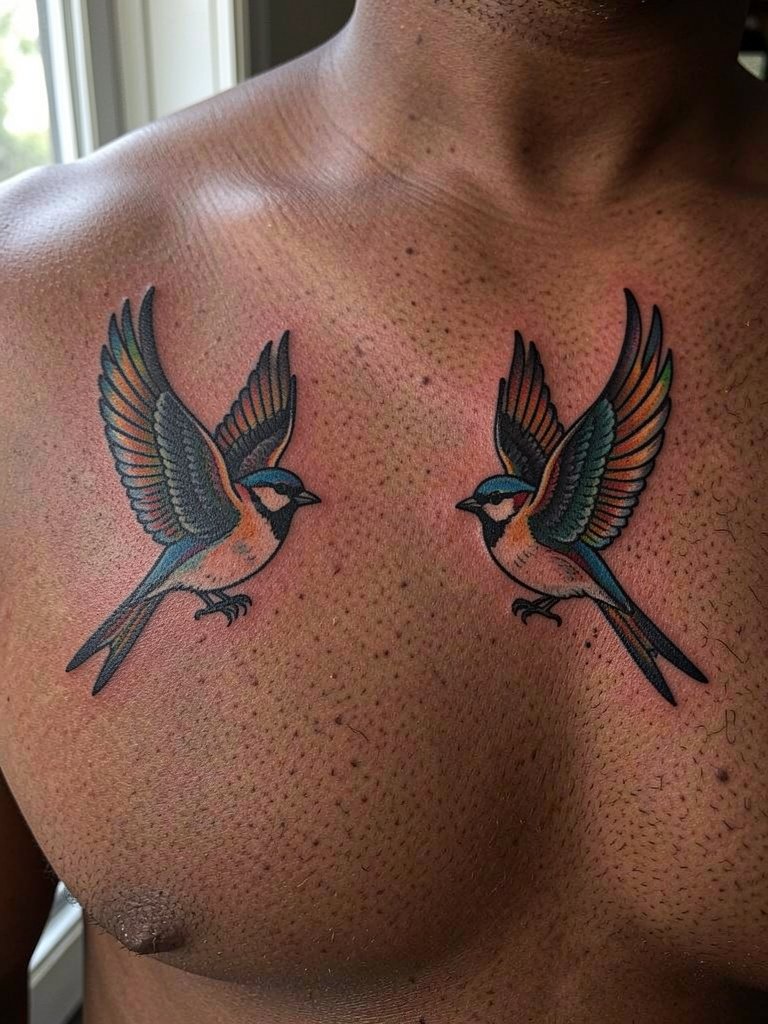
Winged animals work well because feather shapes conform to chest curvature. For smaller winged pieces, keep the body mass a bit bolder than flash to avoid softening in two to three years. Common error is relying on watercolor fills that spread on torso skin, so choose solid fills and clear wing outlines if you want longevity. Session time is normally one to two hours and pain is moderate. If the chest work will pair with arm sleeves later, tell the artist where the wings should taper so future borders feel intentional. For styling, a ribbed tank top shows feather work without distraction.
14. Custom Life-Story Chest Panel
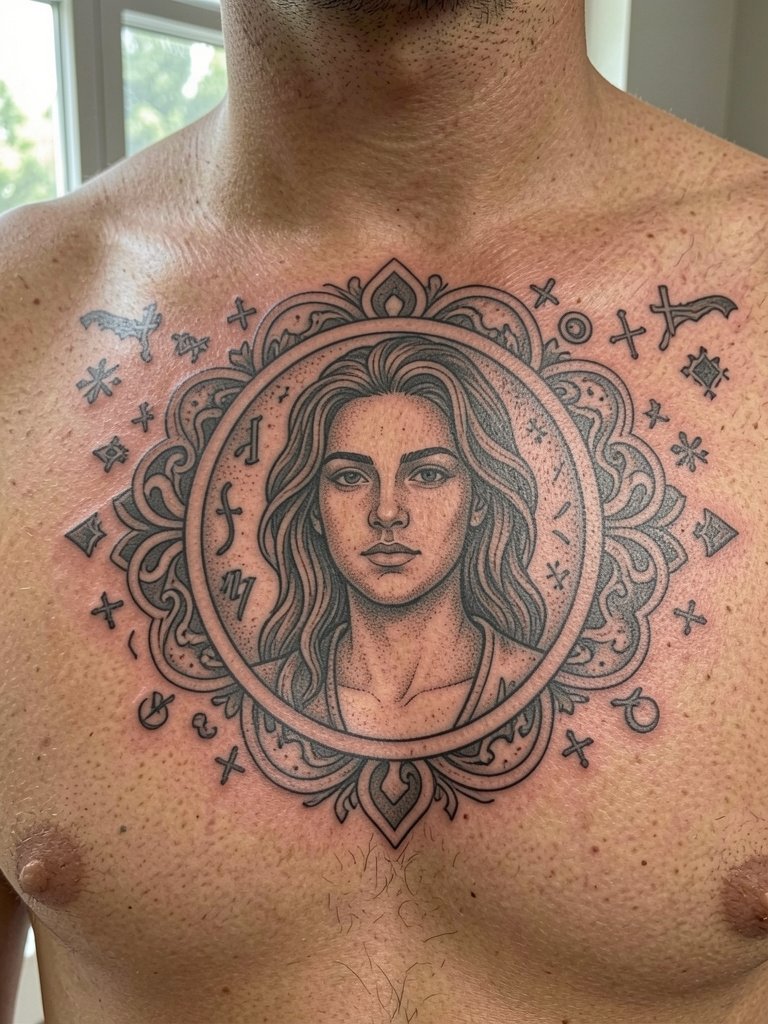
A life-story panel treats the chest as a canvas for a single narrative composition. In consultations, bring a short list of the exact symbols and the relative scale you want for each so the artist can compose without generic filler. These are multi-session projects that demand consistency in linework and shading from session to session. A mistake is trying to merge too many unrelated symbols, which makes the panel read cluttered. Expect touch-ups across the first two years as edges settle. When planning outfits, consider layered chains or open shirts that reveal parts of the panel without forcing a full reveal.
15. Sternum Geometric + Chest Extension
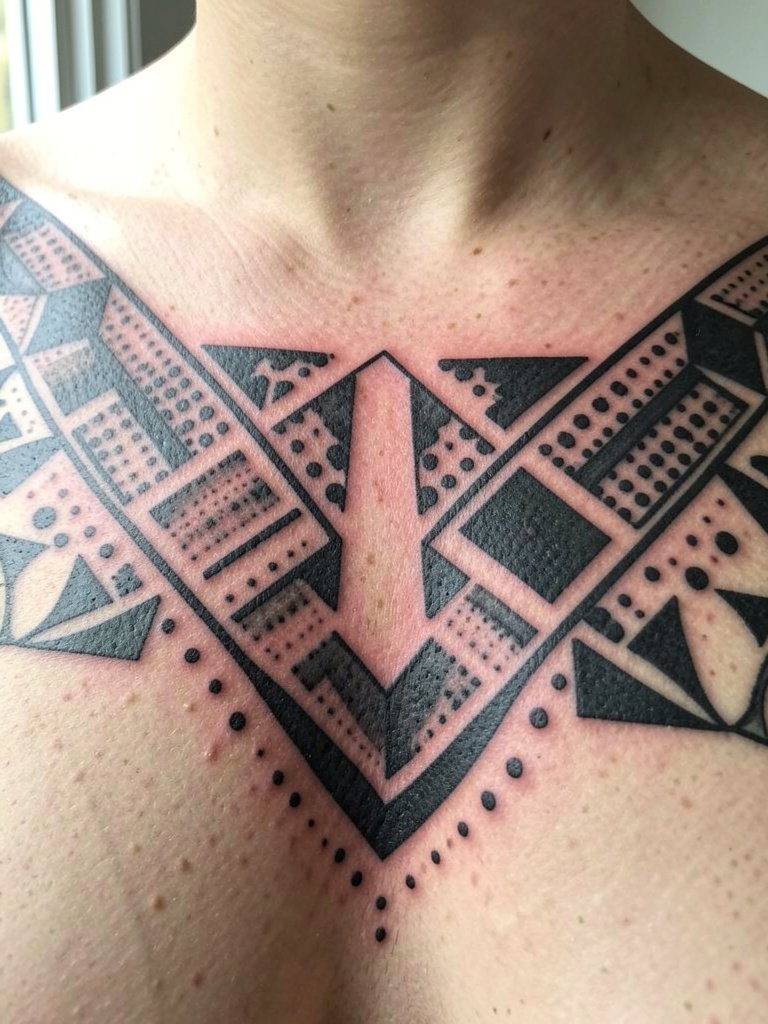
Combining a sternum geometric anchor with chest-side extensions gives you a piece that can grow into a full chest or torso composition. I advise mapping future expansion in the first session so line directions and negative space align later. Sternum cores need medium spacing and the extensions should sit on planes that avoid crease lines to reduce distortion. Pain levels vary across the sternum and adjacent pecs, so break sessions into tolerable blocks and plan for swelling. A common misstep is not saving room for future connectors, which forces awkward seams later. For session clothing, wear a loose button-down you can open, and for showing off try a fitted plain tee that keeps the geometry visible without distraction.
Frequently Asked Questions
Q: How do chest pieces age differently depending on style or placement?
A: In my experience, bold blackwork and designs with clear negative space hold their shape longer on the chest than ultra-fine single-needle pieces. Sternum and clavicle spots can blur faster if lines are too tight, so ask for slightly heavier weight and good spacing when you want longevity.
Q: Should I start with a small upper chest mark or go full chest from the first session?
A: Both approaches have defenders. Starting small gives you room to change direction later and is lower commitment. Going full chest from the first session yields a cohesive composition that reads better at scale, but it needs a long-term plan and likely several sessions to complete.
Q: What should I wear to a chest tattoo session to keep the area accessible and comfortable?
A: Wear clothing that opens or removes without rubbing the fresh ink, like a front-opening shirt or a fitted jacket you can take off. For upper chest and collarbone work, an open collar shirt works well because it exposes the area without pulling fabric across the tattoo.
Q: How do I find artists who show healed chest work and suit my local area?
A: Search hashtags like #chesttattoo and #chestpiece on Instagram and TikTok and filter by location, browse portfolio sites for healed shots rather than just fresh work, and visit Reddit threads for client perspectives. Use style-plus-placement searches such as "symmetrical chest tattoo" or "lion chest piece" with your city name to narrow local studio options.
Q: How often do chest tattoos need touch-ups compared with arm work?
A: Chest tattoos often see touch-ups sooner because the skin there moves with breathing and chest expansion, and because clothing can rub the area. Expect a likely touch-up within two to four years for detailed or colored pieces, and sooner for very fine-line work.
Q: Are there special cultural or professional considerations for tribal or mythological chest designs?
A: Yes. For heritage-based motifs, state the cultural origin during consultation and request respectful adaptation rather than copying sacred elements without context. If your workplace has visibility rules, plan placement so you can cover the ink easily during business hours.
