

Small, intentional facial ink can read bold without overwhelming your features. Tiny marks placed on the temple, near the hairline, or just above the beard line offer high visibility with low commitment, provided the line weight and spacing suit facial skin. Expect slightly heavier linework than wrist pieces so the design stays readable as skin texture changes. The first idea below starts with a temple symbol that works with short hair or a fade.
1. Single-Needle Temple Symbol
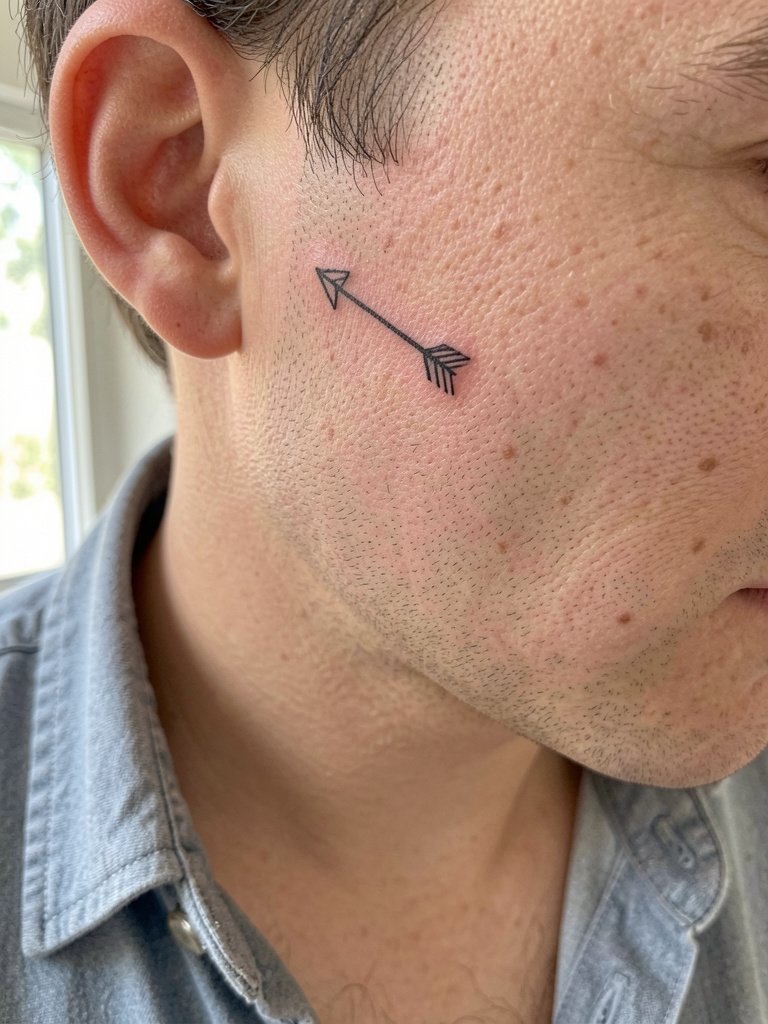
A single-needle temple symbol reads modern and stays subtle if sized to one inch or less. Recommend heavier single-needle linework than you might pick for the wrist, because facial skin softens and light lines can fade into blur. During consultation bring two scale references so the artist can show how the mark reads at one inch and at two inches. Expect a short session and mild tenderness near the bone. Confirm the artist has healed face photos, and check studio policy on facial placements because not every shop accepts them. For showing it off, pair with an open-front shirt that frames the temple without drawing attention away.
2. Small Blackwork Cross by the Hairline
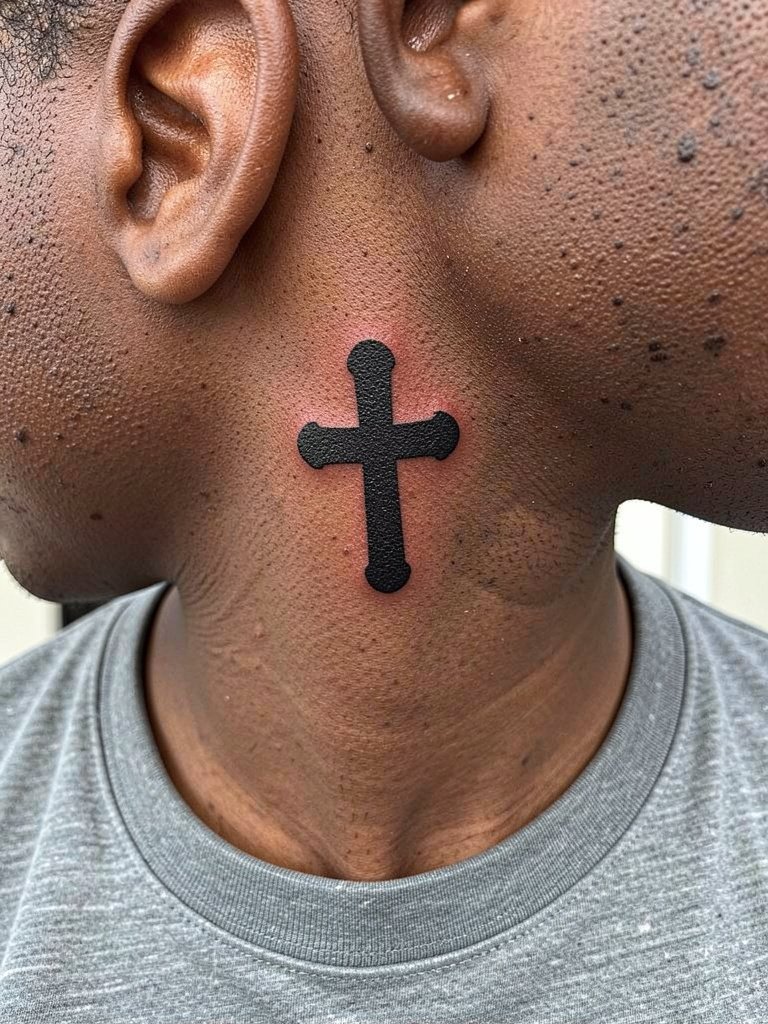
A small blackwork cross reads clear from a distance and holds up better than whisper-thin crosses on facial skin. Specify bold linework and full saturation in the stencil review so the artist avoids whisper-thin strokes that can blow out or fade. An aging-aware version uses slightly thicker limbs and crisp negative space around the cross. One common mistake is picking a cross with tiny internal detail that the temple will not keep. Expect a quick session and a touch-up window at one year for saturation. Because this sits by the hairline, a clean fade or cropped haircut helps keep the symbol visible without compromising a professional appearance.
3. Micro Constellation Cluster on Upper Cheek
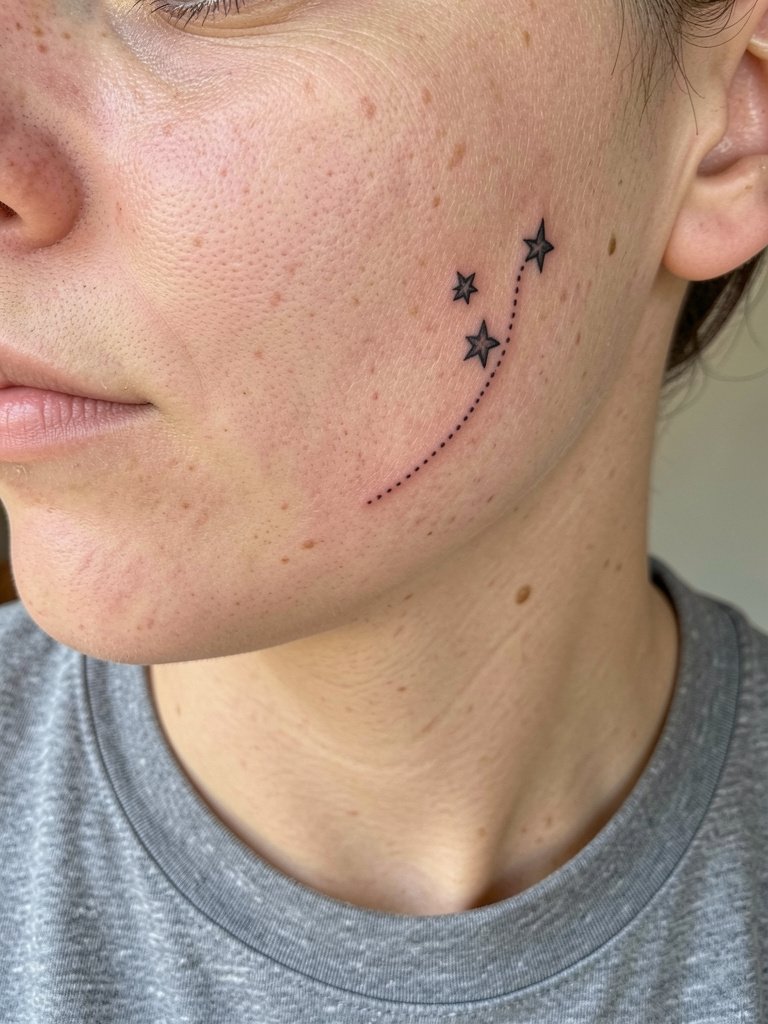
Dot work constellations can be very wearable if the dots are sized to survive facial movement. Ask for dots that read as distinct points rather than a grainy wash. A common aging issue is placing dots too close together or too small, which causes merging into a smudge by year two. Plan the composition so the clearest dot sits nearest the cheekbone high point. During the session you may feel a sharp tickle with short needle passes. Keep glasses off during healing to avoid rubbing. To frame the cluster in photos, a neutral-tone tee keeps attention on the face.
4. Roman Numeral Sideburn Script
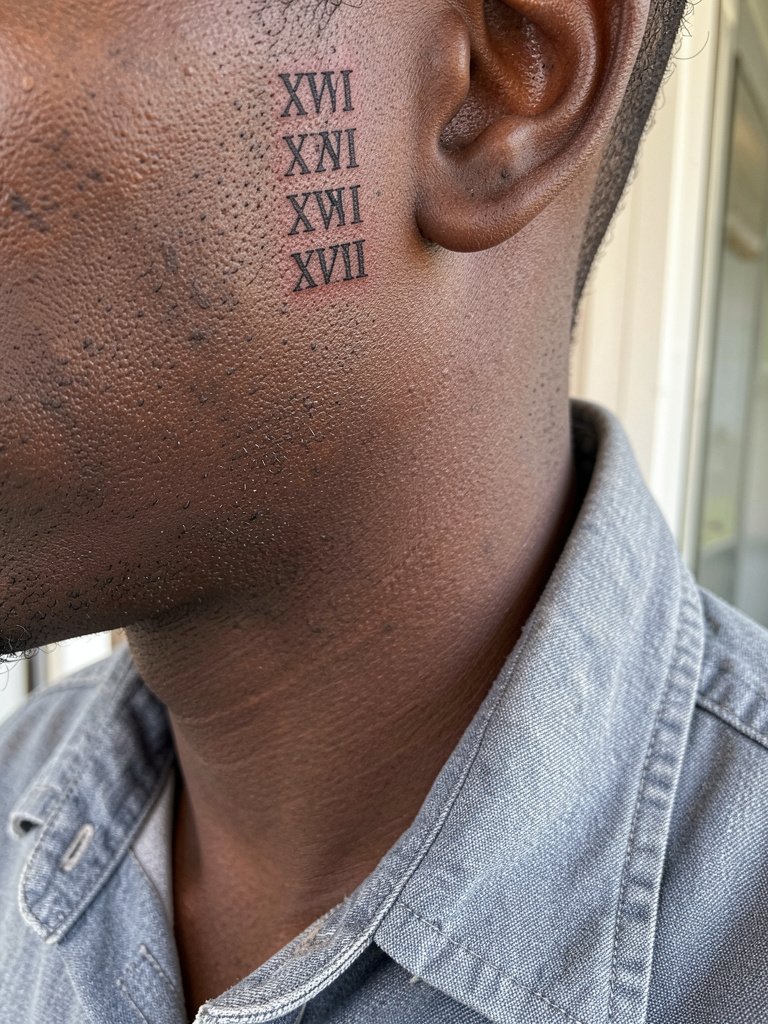
Roman numerals are discreet and age predictably when letterforms are spaced. Request a slightly wider kerning than your initial reference so the numerals remain legible as skin shifts. A typical mistake is tiny serif detail that blurs into the surrounding texture. Expect a 30 to 45 minute session with sharp linework sensations near the ear. This placement works especially well with tapered sideburns or a short beard, because grooming can reveal or soften the mark. For the appointment wear a collared overshirt that gives the artist clear access to the sideburn line.
5. Tiny Dagger on Outer Cheekbone
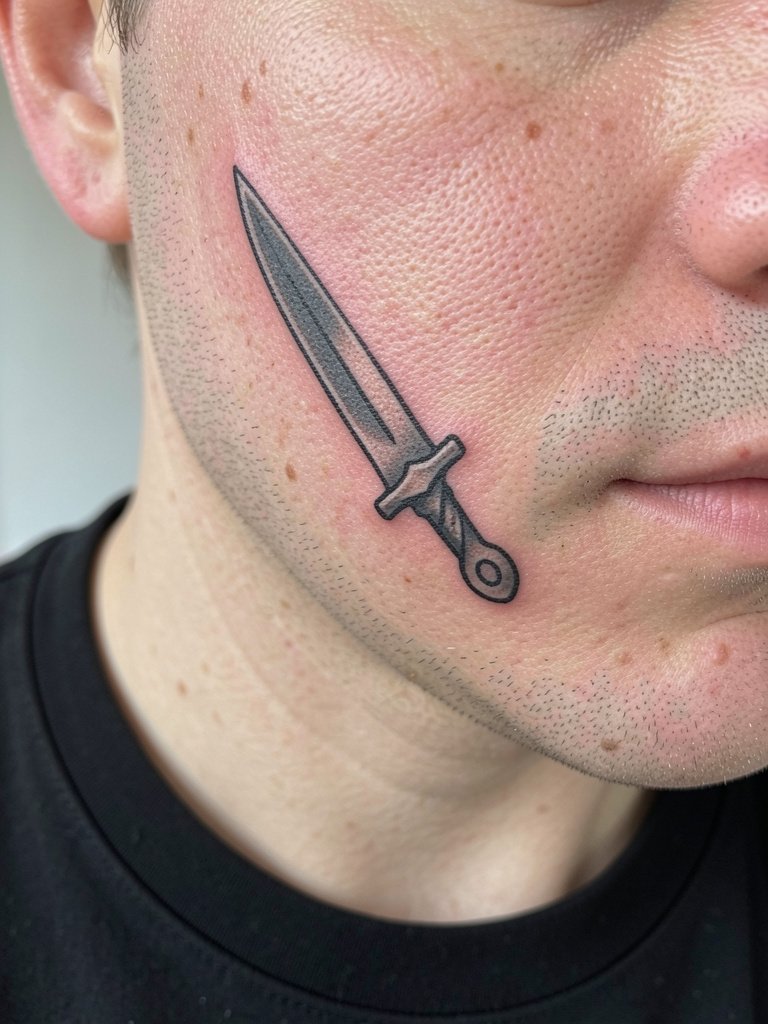
A tiny dagger brings a masculine edge without overwhelming the face if placed along the cheekbone angle. Use bold outline and flat fills to avoid details that the cheek contour will soften. Discuss blade tilt and negative space with the artist so it reads as an intentional motif rather than a random scratch. The outer cheek tolerates a moderate touch of gray shading but is vulnerable to blowout if the artist presses too deep. For sessions avoid tight jackets that might rub the fresh area. This design pairs with solid monochrome tops and a leather jacket for a deliberate look.
6. Minimal Crown Above the Brow Arch
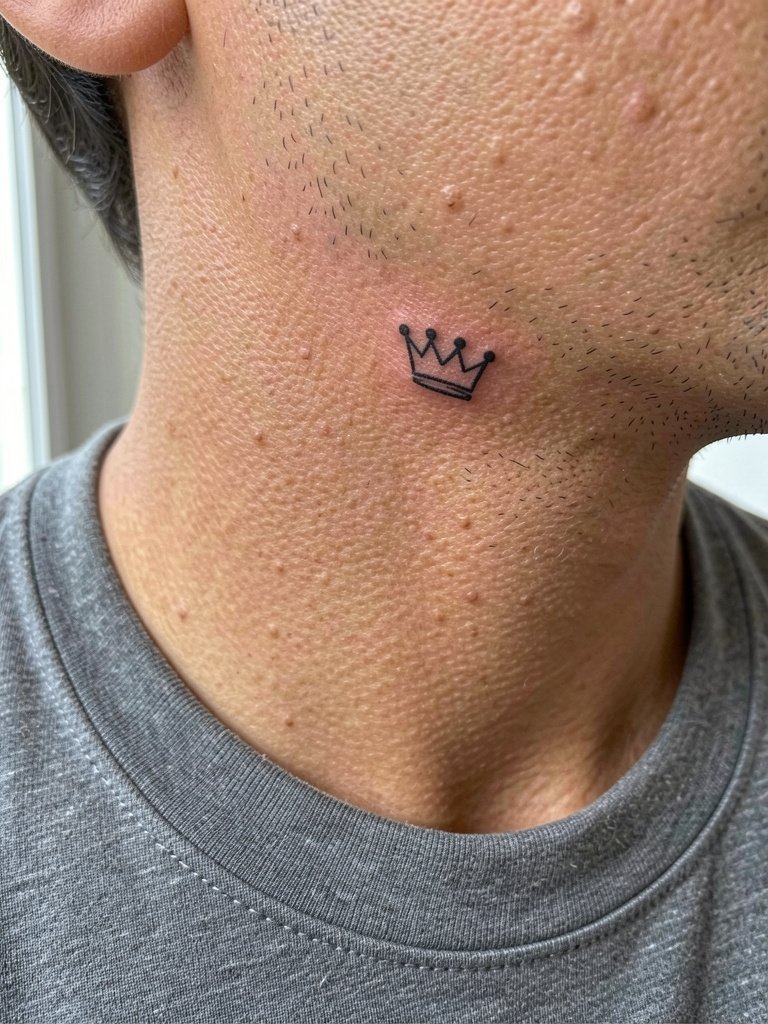
A small crown reads confident when the linework is balanced with the brow curve. Ask the artist to place the design so it complements natural brow movement and avoids eyebrow hairs. The biggest mistake is centering the crown too close to flex points which creates early softness. Expect a brief session and mild swelling that settles within a week. This placement shows best with clean grooming and a fitted crewneck that does not hide the brow area. Try a fitted crew neck tee to let the crown be visible in photos.
Session Day Picks
The temple, cheek, and sideburn placements above heal differently from hand or wrist work, so these items help with session comfort and the first 48 hours.
- Stencil transfer paper kit. Lets you preview exact line placement on the cheek and temple before a single pass, which is crucial when spacing above the brow or along the hairline.
- Topical numbing cream. Applied 30 to 45 minutes before calms the sensitive cheek and jawline without altering linework visibility.
- Thin protective film roll. Keeps tiny temple marks clean while sleeping and during the first showers.
- Fragrance-free gentle cleanser. Good for daily washing without stripping ink from delicate facial linework.
- Saniderm transparent film. A commonly used second-skin option that protects face tattoos from bacteria and friction in the first week according to many studio routines.
7. Micro-Realism Animal Head on Cheek
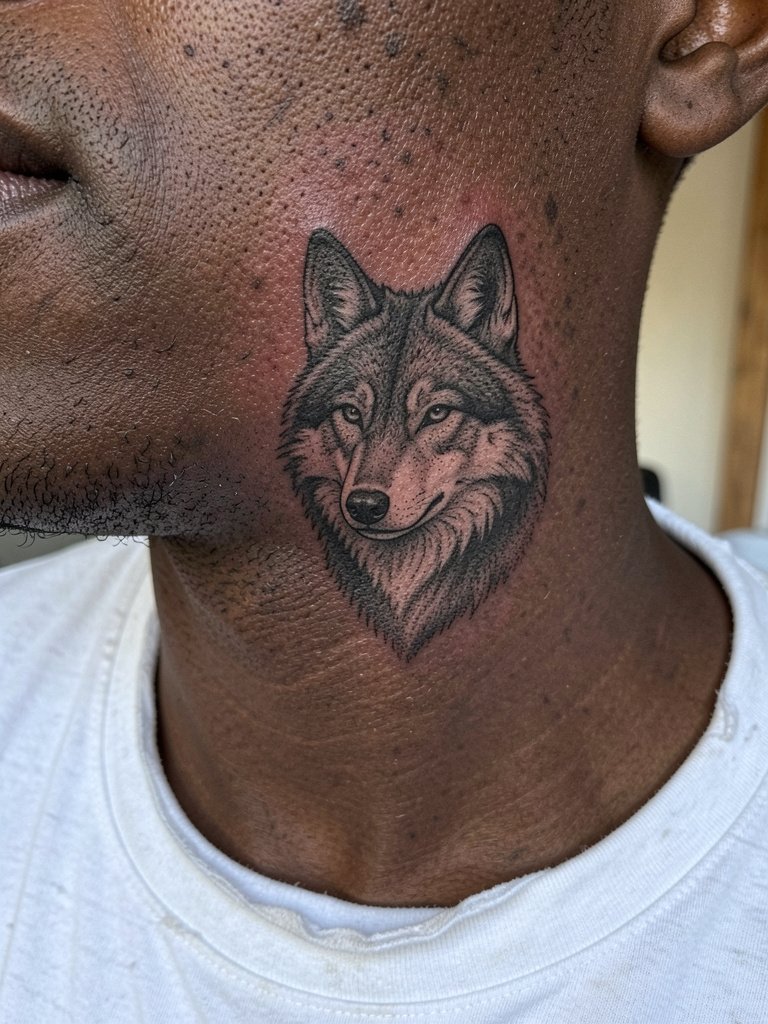
Micro-realism demands careful contrast on facial skin to avoid muddiness. Request high-contrast stipple shading and clear separation between darks and lights so details remain readable after a year. A common mistake is cramming too much tiny texture into a one-inch area. Plan touch-up expectations ahead because micro-realism often needs a follow-up to restore crispness after healing. Sessions feel like repeated short passes rather than continuous shading. Pair this piece with muted outfits so the tattoo remains the focal point.
8. One-Word Jawline Script
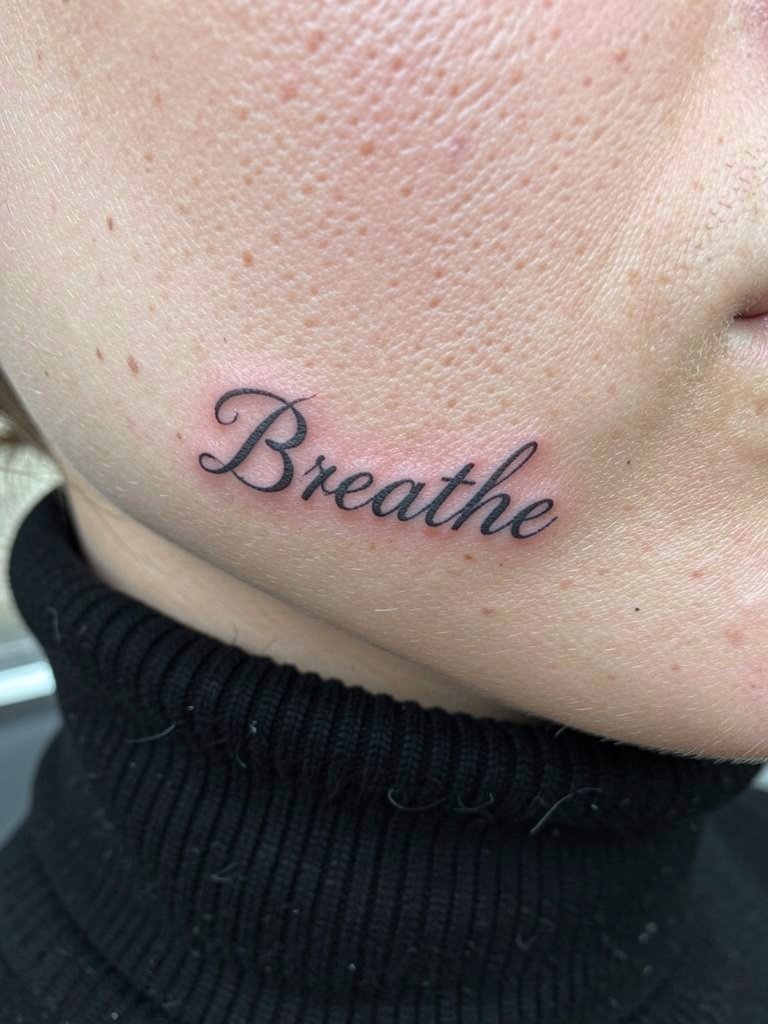
Single-word script along the jawline reads intimate when the script is slightly bolder than you would choose for the wrist. Specify the exact word and font size so spacing follows the jaw curve. The most frequent error is overly fine cursive that vanishes into stubble or beard growth. Expect more sensitivity near the jaw because of thinner soft tissue. For session comfort wear a top with an open collar that does not tug under the jaw. A crew neck undershirt layered under a loose shirt helps when reclining for the session.
9. Geometric Brow Mark
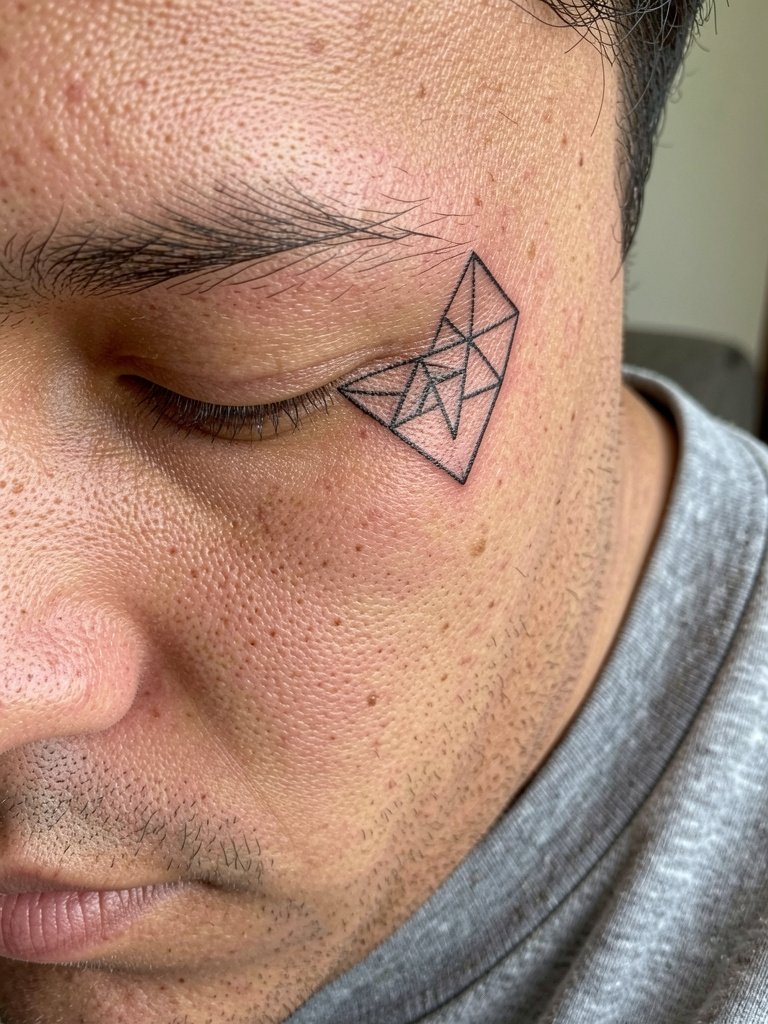
Geometric marks need perfectly straight linework and measured negative space. Tell the artist you want crisp intersections and slight spacing so the shapes do not bleed into one another over time. A failure mode is asking for micro-precision lines that the brow area cannot keep under facial movement. Expect a quick linear session with pinprick sensations. This reads best with sharp haircut lines and lightweight glasses frames or no frames at all.
10. Small Ignorant-Style Slash on Temple
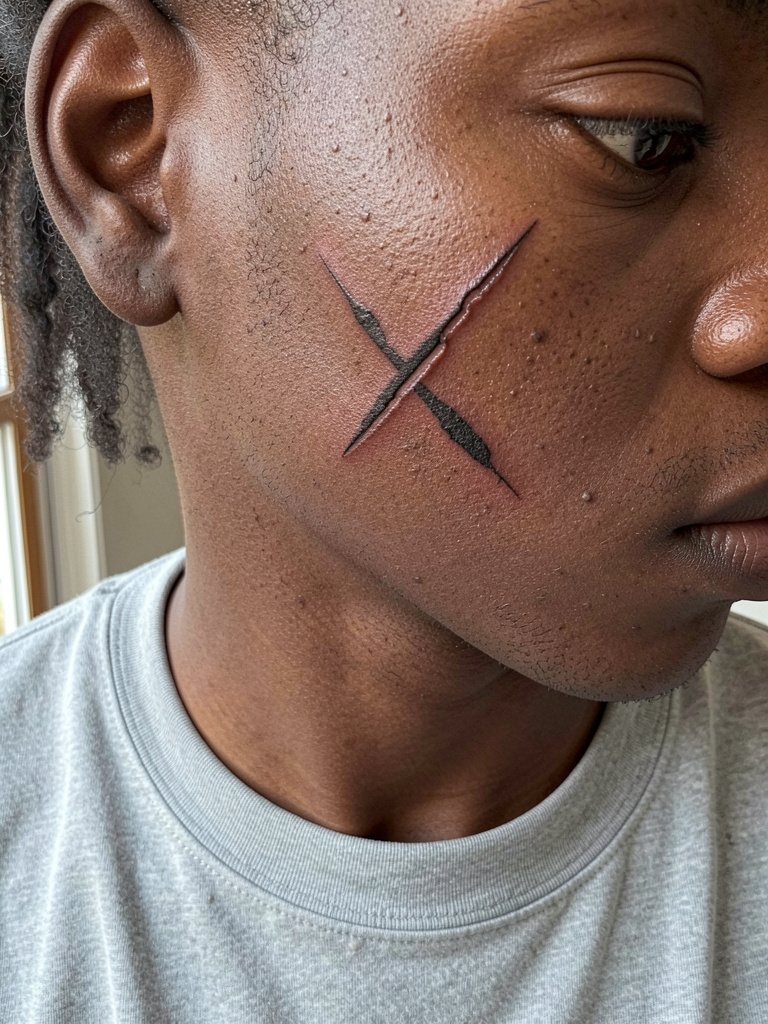
Ignorant-style slashes are designed to look raw. If you want that aesthetic without appearing accidental, specify deliberate stroke weight and a small gap of untouched skin near the edge. The common error is asking for a too-wispy slash that loses personality once swelling and healing settle. On the temple you feel a brief sharp buzz during the pass. This pairs naturally with relaxed streetwear and an oversized tee.
11. Tiny Ornamental Dotwork Under-Eye Accent
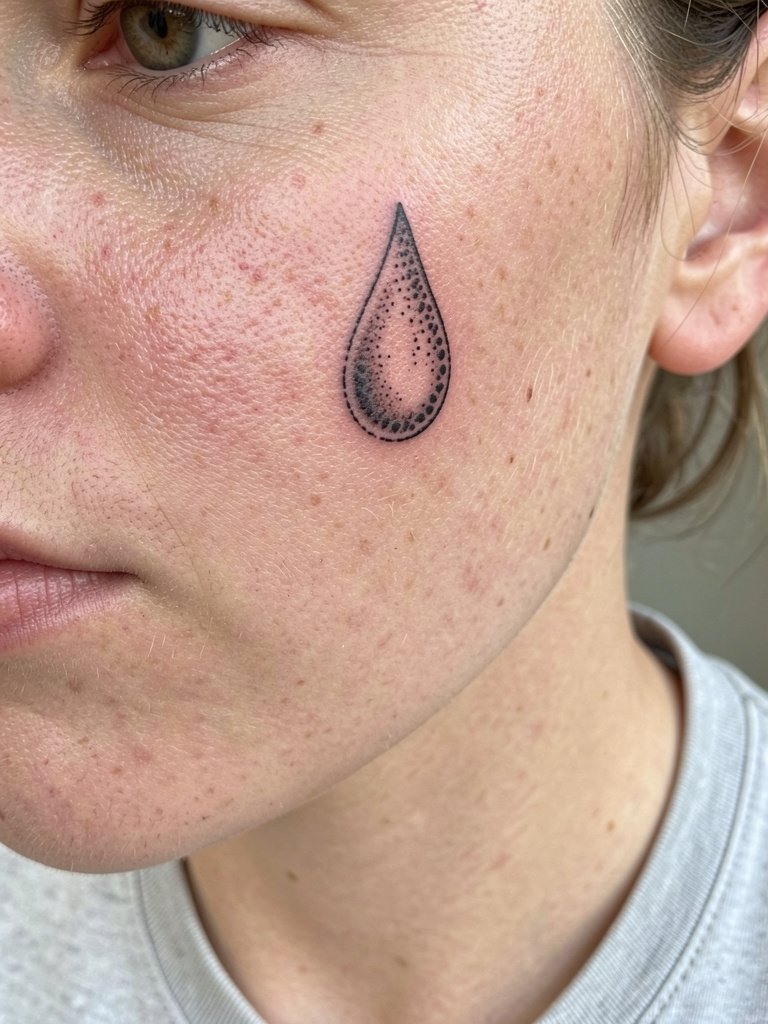
Under-eye accents are very interpretive so placement determines perception. One camp favors ultra-delicate dot work that reads decorative. Another camp warns that under-eye marks can be misread culturally or carry stigma. The first group says tiny ornamental dots look refined. The second group cautions that any mark in that zone is high-visibility and can attract comments. Decide how visible you want the mark and choose spacing so the design reads intentional. The under-eye area is sensitive and the session will feel sharp. Avoid glasses for the first week to prevent rubbing.
12. Fine Line Botanical Sprig by the Ear
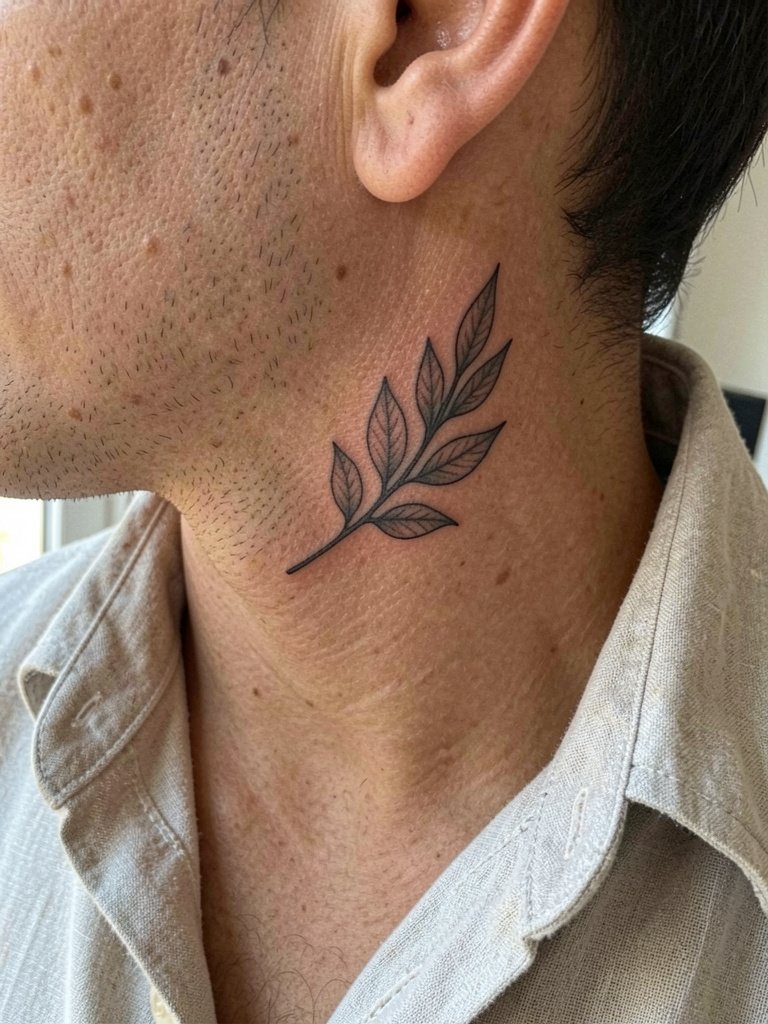
Botanical sprigs on the lateral face can soften angles while remaining masculine with the right line weight. Ask for slightly heavier stem linework and narrow stipple shading for leaf texture to keep contrast over time. A mistake is putting fragile veins into each leaf which turn into smudges on facial skin. The ear-adjacent area handles small script or tiny icons well. For the session wear a loose top and ensure hair is pinned back so the artist has clear access.
13. Mini Lightning Bolt Near Cheekbone
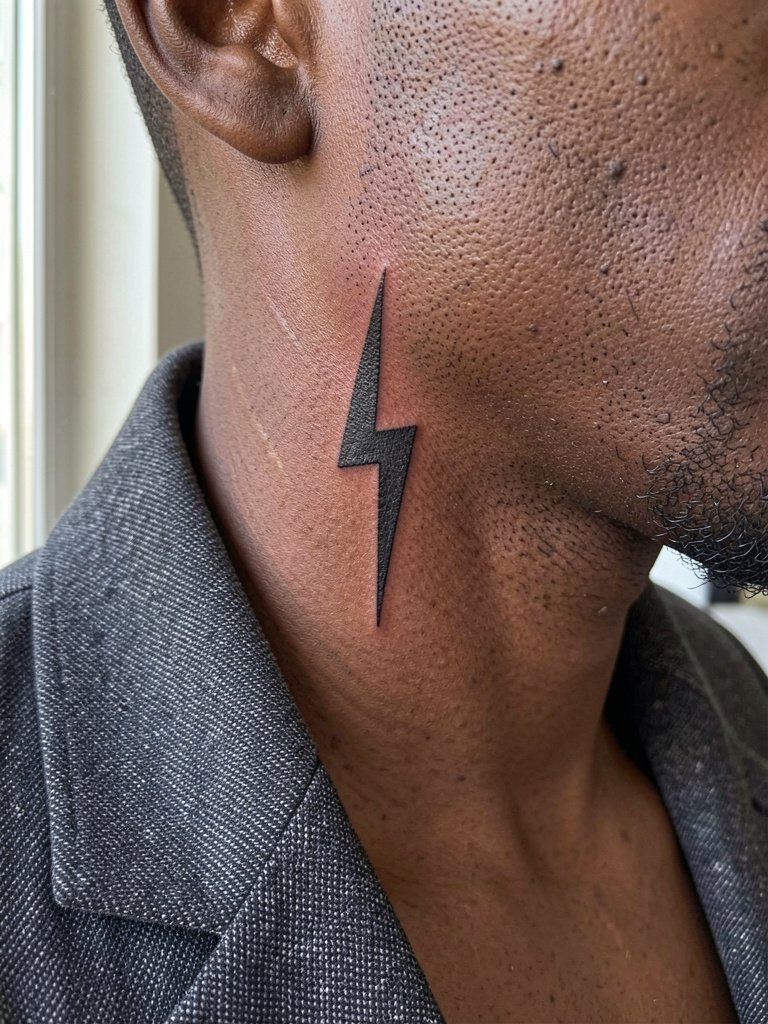
A lightning bolt is graphic and reads strong when linework is bold and the bolt has a bit of negative space. Tell the artist you want a clear silhouette and no micro detail inside the bolt. One common mistake is over-stylizing the bolt with tiny internal highlights that blur. Expect a brief session and a small touch-up at six months for edge crispness. This placement pairs well with monochrome outerwear and fitted jackets that let the face be the focal point.
14. Memorial Initial Behind the Ear
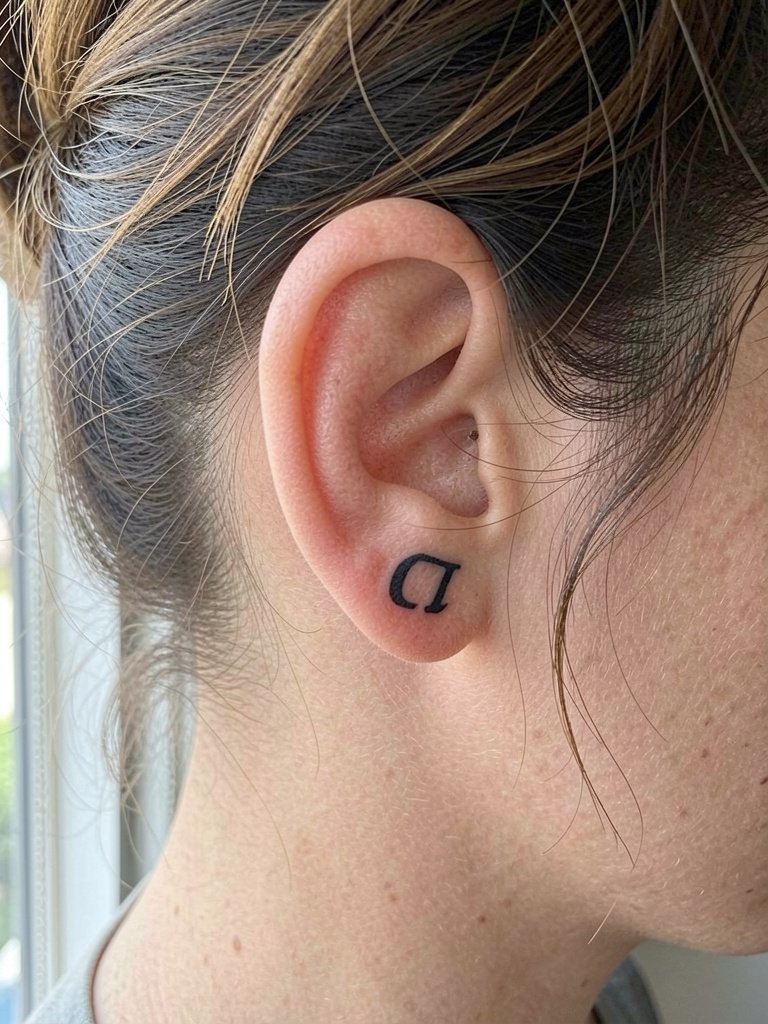
Behind-the-ear initials stay discreet and age well when the letterforms are slightly bold. Request a font that holds weight at small scale and avoid thin serifs that detach. Artists may advise a small touch-up window because the mastoid skin absorbs fine detail. Sessions are quick with local tenderness. This placement looks particularly sharp when hair is short or worn up, and it pairs with open-collar shirts that do not hide the neck.
15. Dot Cluster Near the Brow Tail
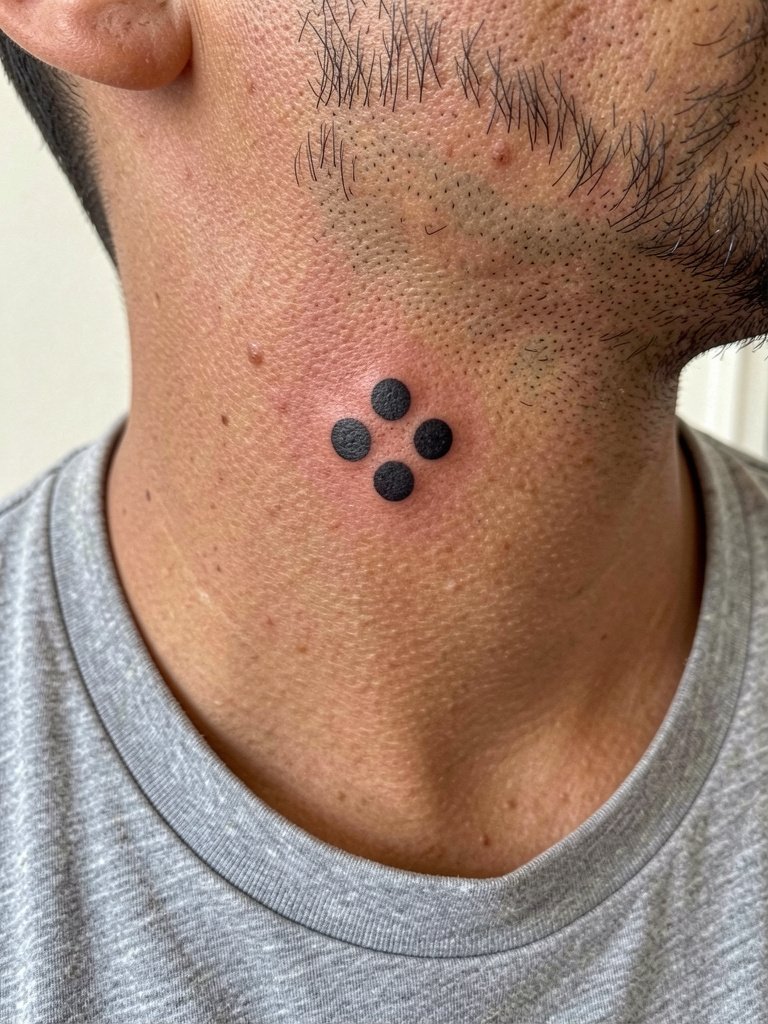
Dot clusters are deceptively simple and require planning so dots do not coalesce. Ask for dot diameter and minimal spacing so the artist maps the healed separation. Mistakes include placing dots too tiny and too close, which leads to soft blobs. The brow area is less mobile than the cheek, so this spot often holds better. For photos choose lightweight frames or no glasses so the dots remain visible. A subtle lightweight glasses frame can complement the placement after healing.
16. Micro Script Near the Jaw and Beard Line
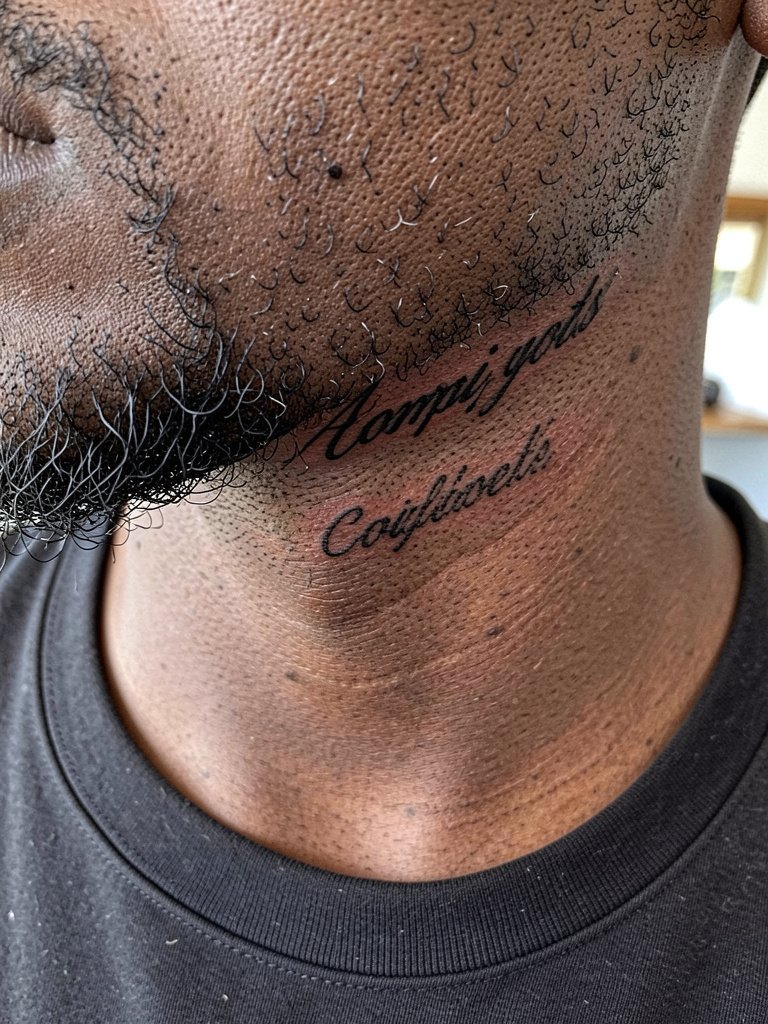
Script near the beard line benefits from slightly bolder line weight so shaving and stubble do not erase the word. Tell the artist the exact placement relative to your beard so the tattoo sits above the stubble rather than within it. A typical error is choosing a delicate single-needle script that disappears under a few days of growth. Plan a touch-up after you have regrown your usual facial hair to confirm placement. For session wear something with a wide neckline so the artist can access the lower cheek comfortably.
17. Tiny Geometric Mark Along Brow Ridge
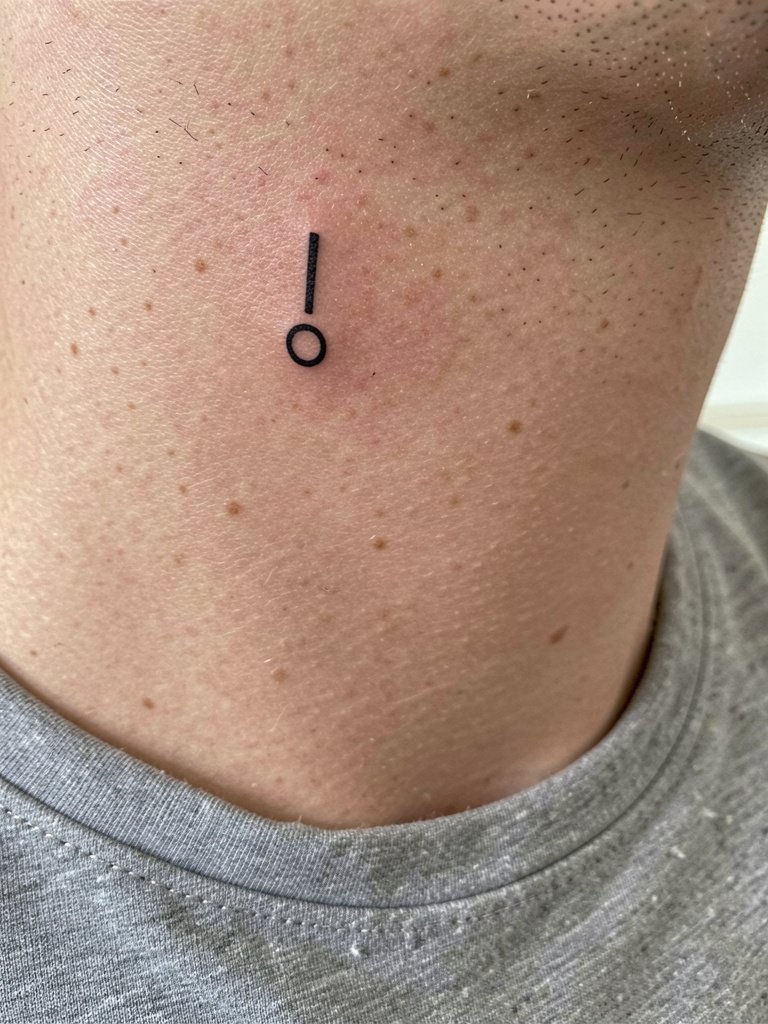
Geometric marks on the brow ridge are subtle and modern. Ask for clear negative space and measured line weight so the circle and bar remain distinct. A mistake is asking for ultra-thin elements that blur when skin moves. Sessions are quick and the sensation is a steady buzz rather than deep pressure. Pair this with sharp haircut lines and consider no eyewear during healing so the mark remains undisturbed.
18. Minimalist Arc and Dot Above Temple
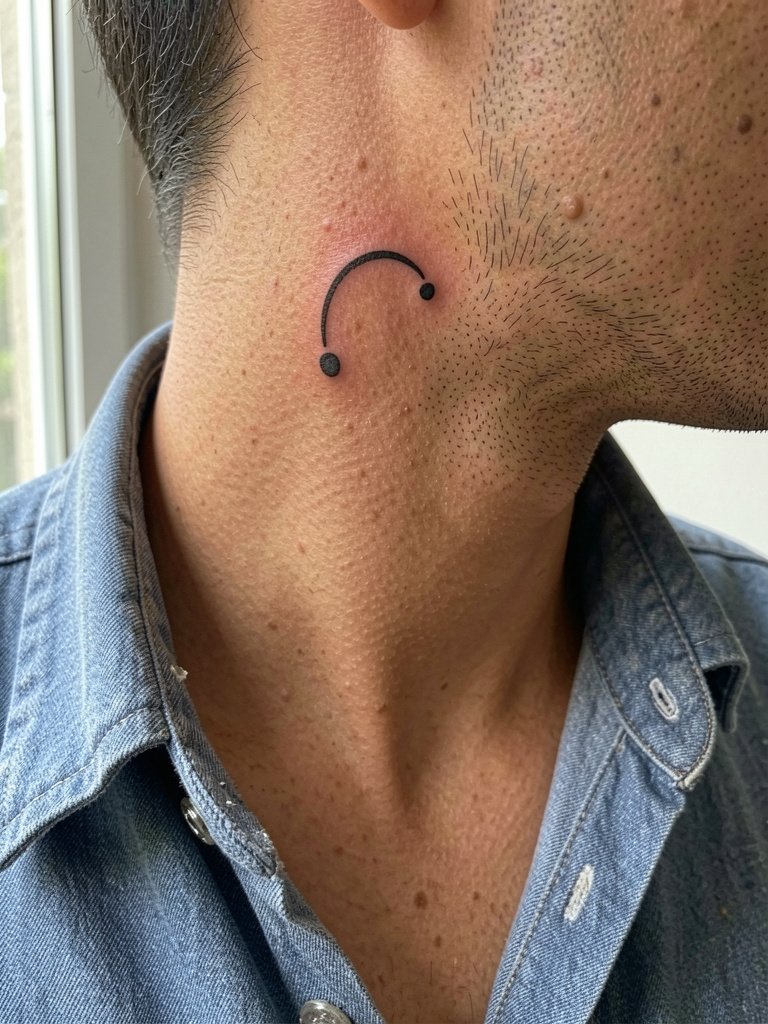
Arcs with a finishing dot make for a compositional accent that complements the hairline. Request the arc to follow your personal hairline curvature so it integrates with grooming. The error people make is choosing an arc that sits across a highly mobile spot which softens. Expect a short session and minimal swelling. This reads well with neutral layers and an olive overshirt.
19. Tiny Memorial Symbol Near the Ear Line
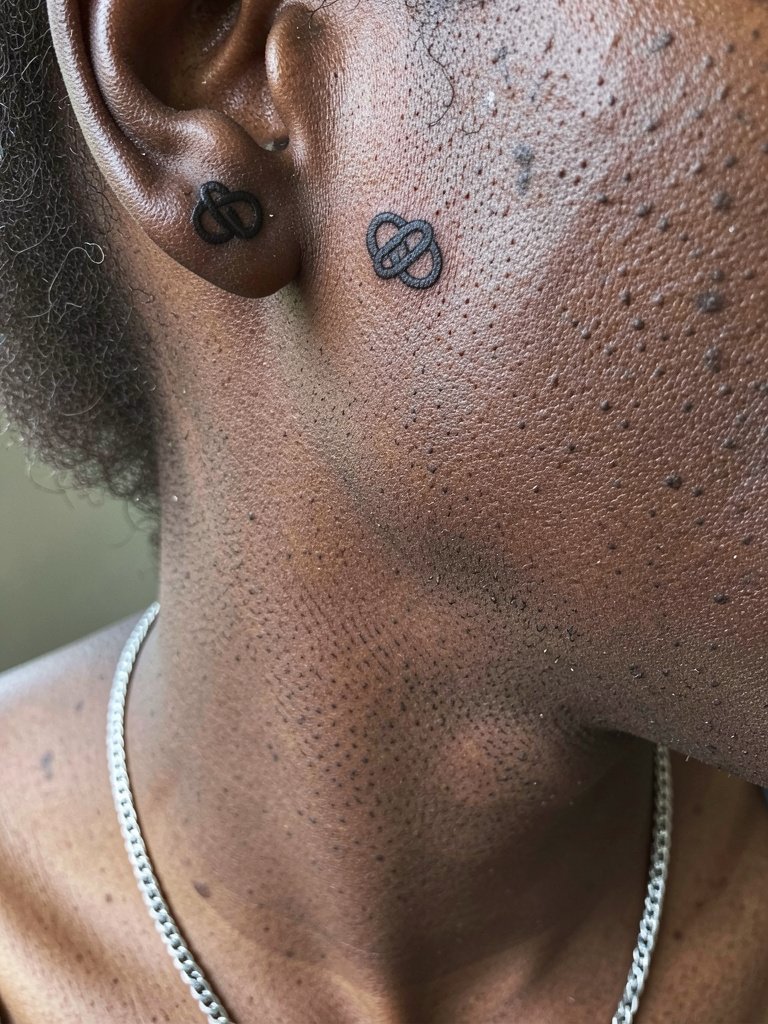
Memorial symbols near the ear stay private yet visible. Specify a simplified knot or mark without fine filigree so it reads clearly after healing. A common mistake is asking for too much internal detail that turns to blur. Sessions are short and mostly superficial. For showing off, short hair or an undercut keeps the symbol framed and visible, and a lightweight chain will not compete visually.
20. Tiny Lightning Bolt Under the Jaw Shadow
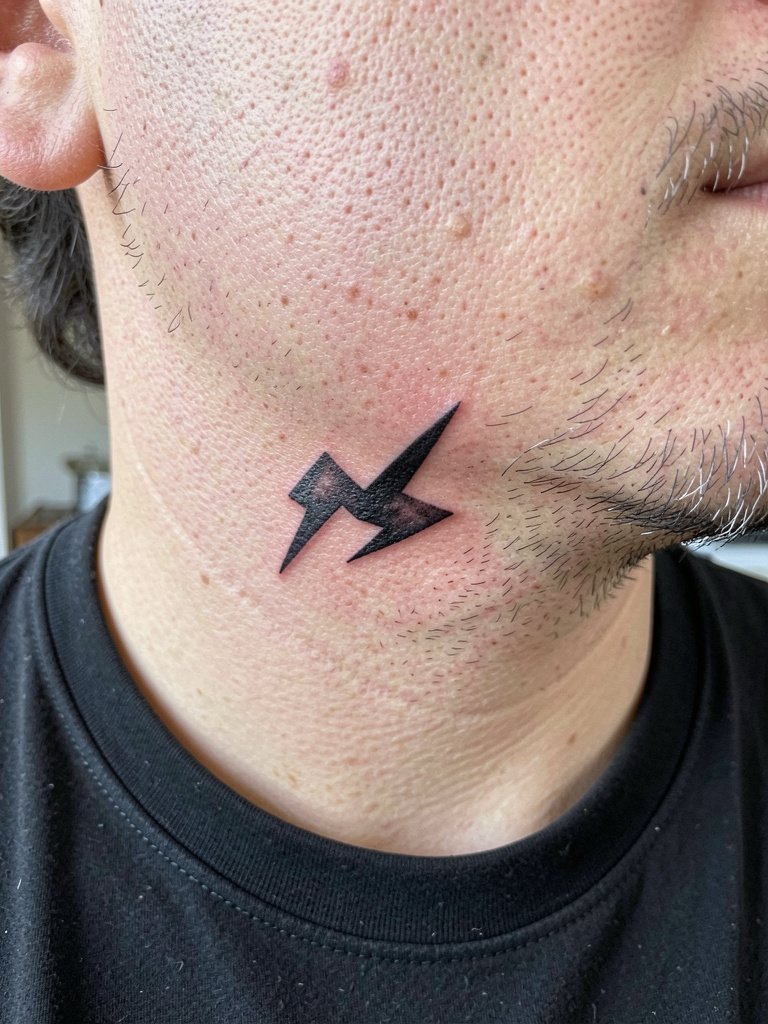
Placing a graphic mark near the beard boundary requires discussing how stubble will sit over the design. Request a small buffer zone between the bolt and your typical beard line so visibility is consistent year-round. The main mistake is embedding the design inside heavy stubble where it becomes obscured. Expect a brief session with surface sensitivity. Monochrome shirts and clean grooming let the bolt read as an intentional accent.
21. Small Dot and Line Combo Near the Ear
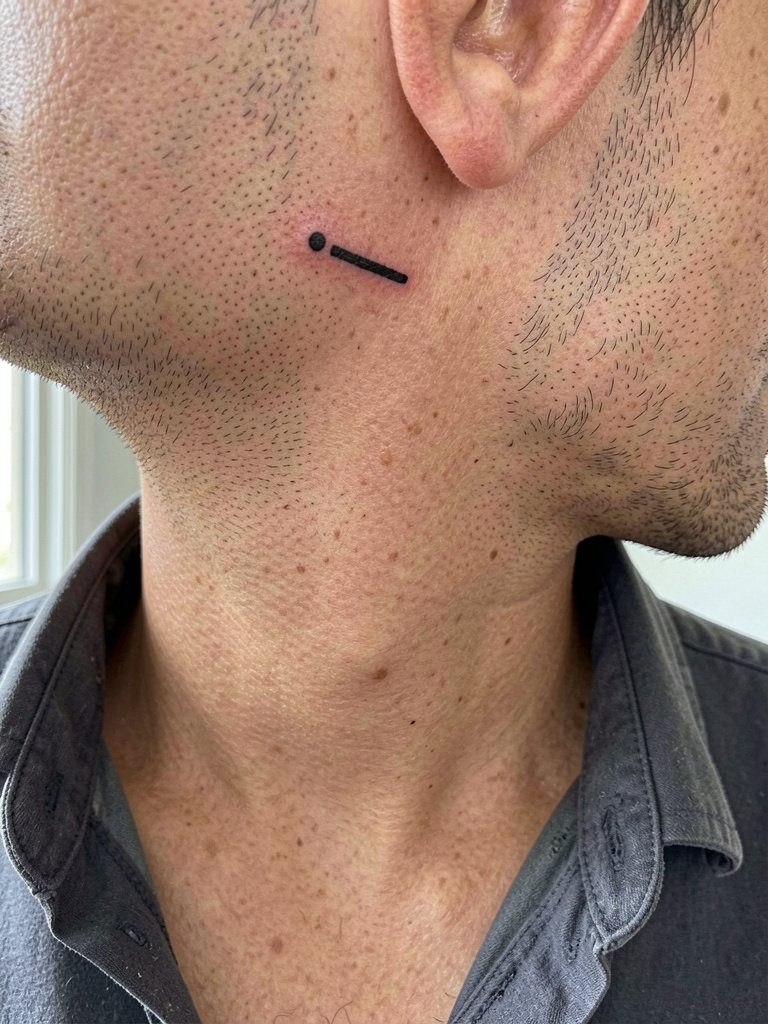
Small combos work because they create a signature motif without needing space. Ask for the line to be slightly heavier than the dots so the duo stays legible. A frequent error is equalizing dot and line size which blurs into an indistinct mark. Sessions are short and mildly tender near the ear. This piece looks great with short hair and an open-collar shirt.
22. Subtle Slash Near the Sideburn
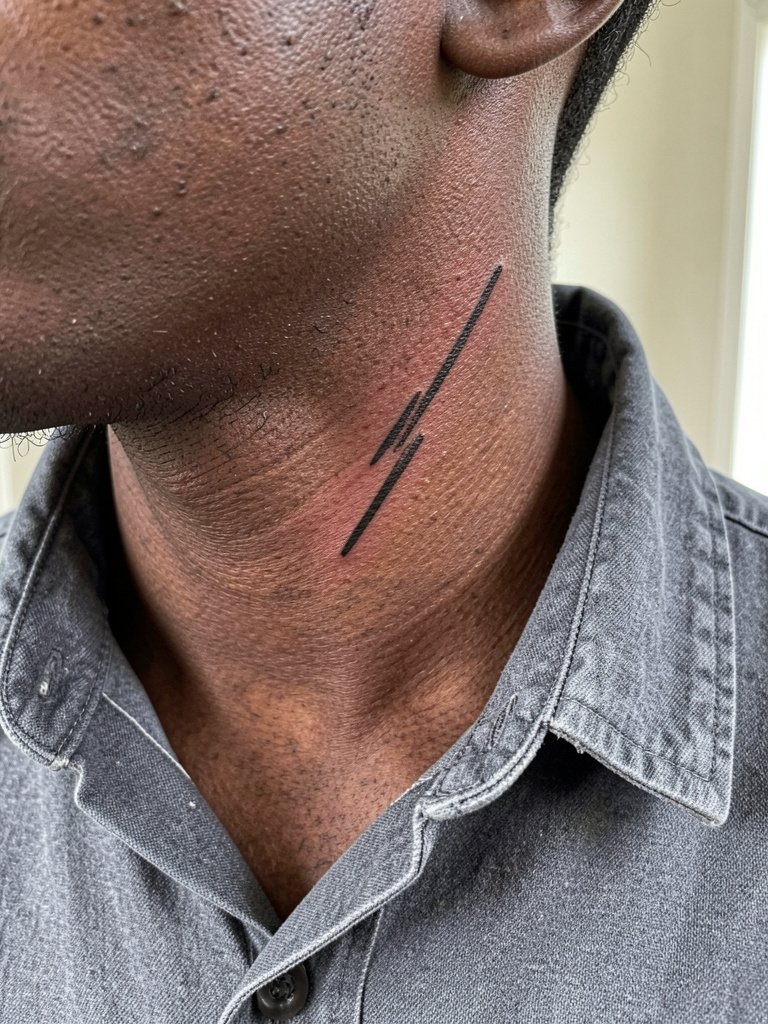
Sideburn slashes pair naturally with short sideburns and tapered fades. Specify exact placement relative to your sideburn so the mark is revealed or concealed by grooming choices. The biggest mistake is placing it where a future beard will cover it. Expect a quick sharp pass and minimal downtime. For the session wear a top without hood strings that could catch the area.
23. Tiny Seal or Sigil on the Mastoid
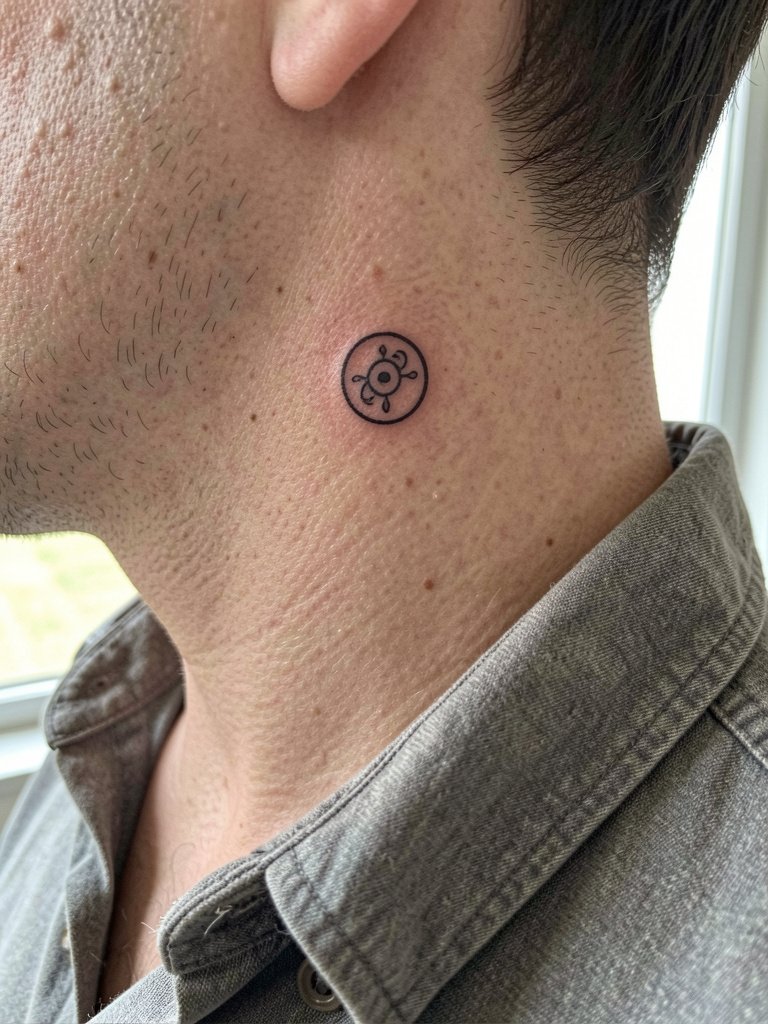
Mastoid sigils are great for private yet visible meaning when hair is short or worn up. Request a slightly bolder outline so the tiny interior stays distinct. A common issue is tiny internal strokes that the nape skin will not hold. The session feels brief and is often done while you are seated and slightly leaning forward. For after-session ease wear a button-down shirt so you can avoid sliding fabric over the fresh area.
Frequently Asked Questions
Q: How much does a small face tattoo actually cost at a shop minimum?
A: Tiny facial marks usually fall under studio minimums which often start around the entry-level fee. Expect the shop minimum to cover needle setup, sterile disposables, and the artist's time even when the art itself is small. Plan for a budget that respects the artist and studio policy rather than the idea's size.
Q: Should I pick fine line or bolder blackwork for a tiny face tattoo?
A: Artists divide into two camps on this. One camp prefers ultra-fine line for a delicate, modern look and prioritizes minimalism. The other camp favors bold blackwork because it retains readability as facial skin changes over years. Both positions are valid, so decide if you prioritize initial elegance or long-term legibility and choose line weight accordingly.
Q: Where can I find healed examples and artists who post face work without naming people?
A: Search hashtags like #smallfacetattoo and #microtattoo on platforms with location filters, then view gallery posts that include healing-time captions. Reddit communities focused on healed photos are also useful for candid before-and-after shots. Use those discovery routes to filter portfolios that show real healed results across skin tones and placements.
Q: How do I plan a face tattoo if I worry about jobs or first impressions?
A: Some people treat small face tattoos as acceptable first tattoos if they are tucked by the hairline or temple. Others believe face tattoos should be earned after other visible work because visibility raises regret risk and social consequences. Name both stances when you weigh this decision and choose placement that feels reversible through grooming if you are uncertain.
Q: What should I wear to a face tattoo appointment?
A: Wear a loose, open-collar shirt or a button-down that you can lower easily so the artist has room around the hairline, temple, or jaw. For temple or ear placements avoid tight hats or heavy glasses during the appointment. A simple crew neck tee works well for most facial sites.
