

Bold blackwork reads longest on the scalp, not the wispy single-needle motifs most beginners pin. If you want a head piece that keeps contrast after years of sun and hair growth, pick heavier line weight and ample negative space. That choice changes session time and pain management, and it changes how you plan hair routines. Below are designs that suit shaved reveals, subtle hides, or a mix of both, plus how each one ages and how to style it in real life.
1. Head Sleeve Blackwork Patterning
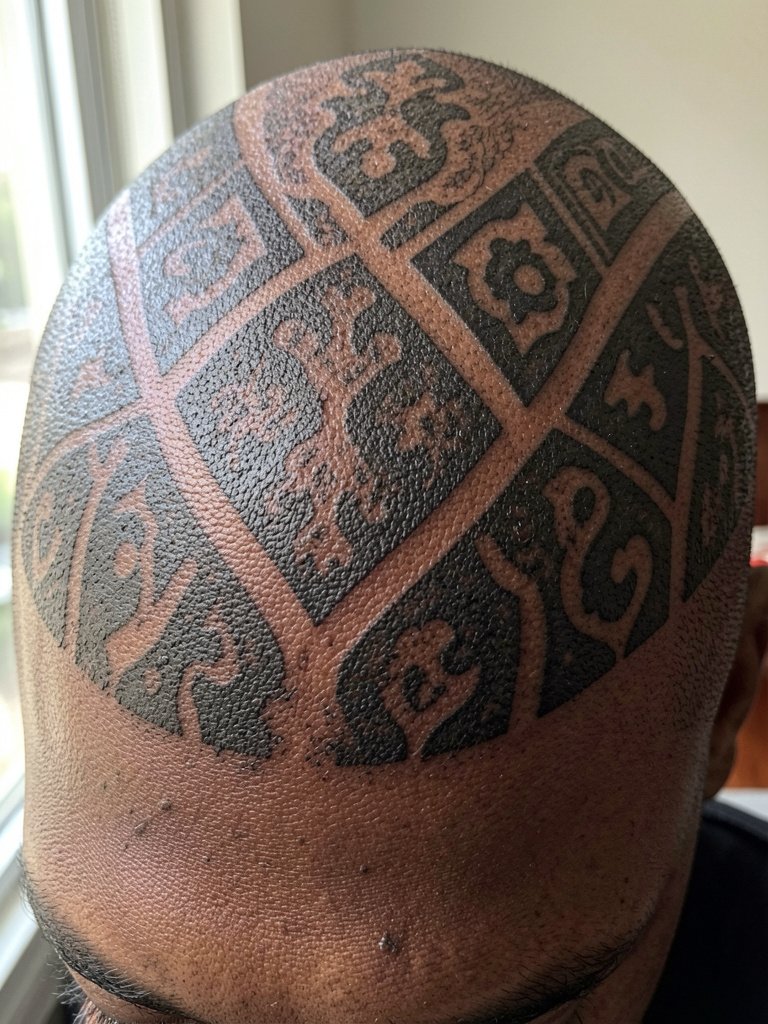
This is the classic statement head piece. It works best for men ready to keep hair short or commit to regular buzzes, because the negative space and solid fills read best without hair covering them. Fine line advocates say thin ornamental work looks cleaner with hair grown out. Bold blackwork supporters argue thick saturation holds contrast through sun exposure and time. If you plan for longevity, ask for larger shapes, not micro filler, and plan multiple sessions for even saturation. Session time is long and the scalp is high on the pain chart, so schedule short visits and bring a loose zip hoodie for the chair. For showing off, pair with a black crew neck shirt for a minimal, intentional look.
2. Small Symbol on the Temple
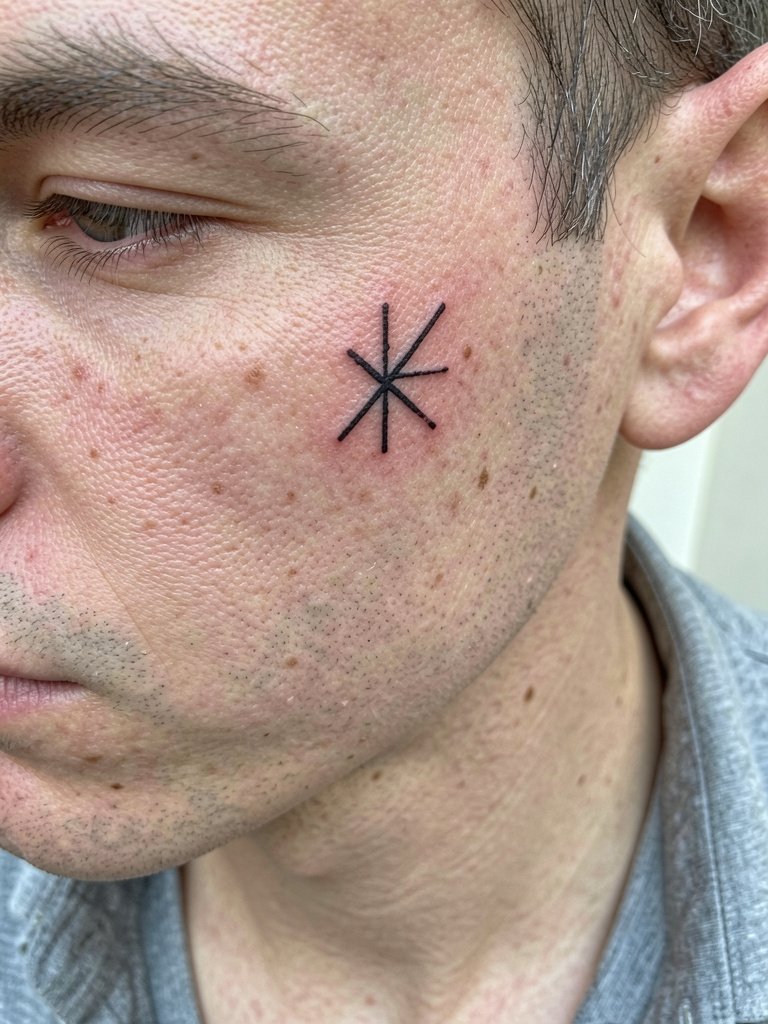
A tiny temple icon gives the shaved look without committing to crown coverage. It is low session time and low cost compared with a scalp sleeve. Because the temple skin moves with facial expression, the common mistake is asking for ultra-thin single-needle letters too close together. Instead pick slightly heavier linework and clear negative space. Expect the tattoo to soften at six months and to need a touch-up around year two if you want crisp edges. For the appointment wear a loose top with an open neck so the artist can access the area without fabric rubbing during healing.
3. Skull Motif on the Side Head
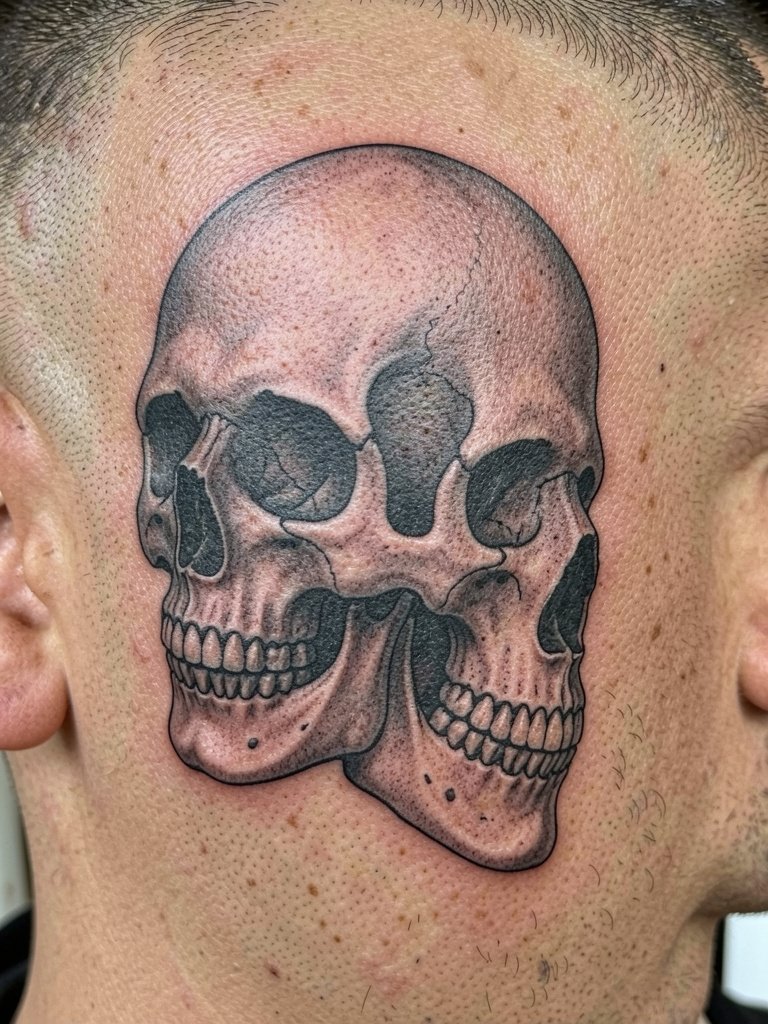
A skull plays with the head’s anatomy and reads as a masculine, anchor piece. The common aging issue is over-detailing in tiny teeth or cracks that blur. Ask for simplified planes and heavier contrast in areas you want to read at a distance. Session pain is moderate to high on the lateral head where bone is close. For after the chair and to emphasize the motif, pair the look with a minimalist bomber jacket that keeps the neckline clean and frames the art without clutter.
4. Mandala on Mastoid Area
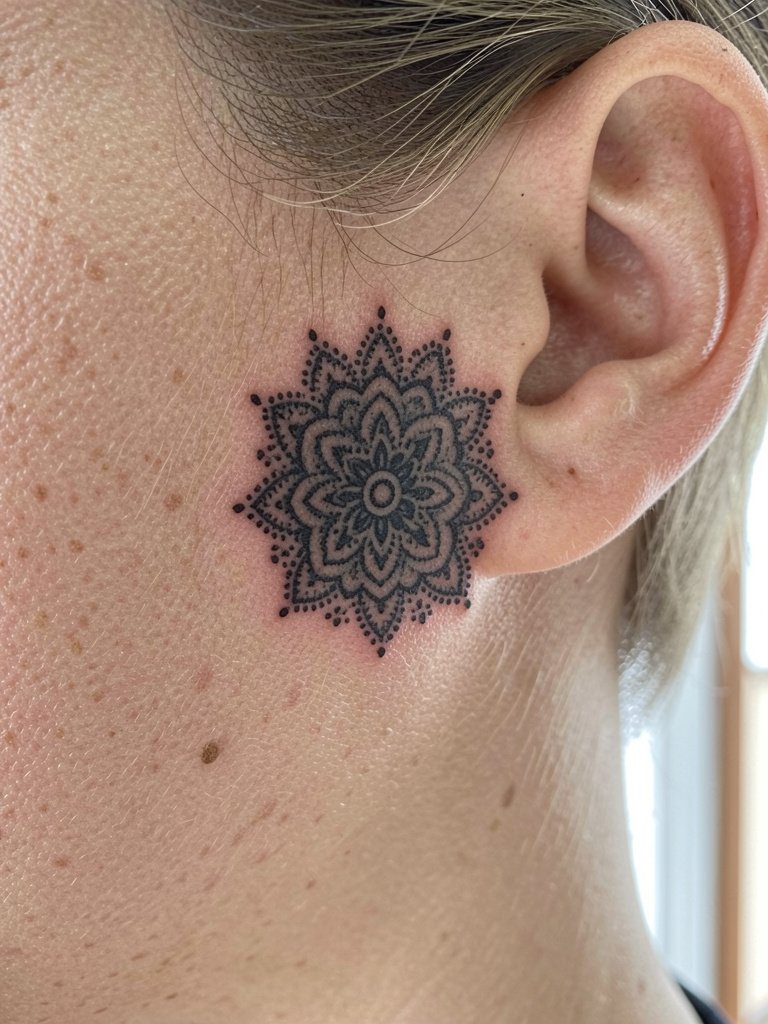
This placement rewards geometry that follows a curve. Mandala dotwork can look intentional with minimal visibility when hair grows back. A common mistake is asking for too many tiny dots packed into a small circle. Ask for slightly larger spacing and bolder outer lines so the pattern keeps clarity at one and two years. Session time is short and pain is moderate. For showing it off, a short fade or clipped back hair pairs well, and a short fade hair product helps maintain the reveal.
5. Full Crown Blackout
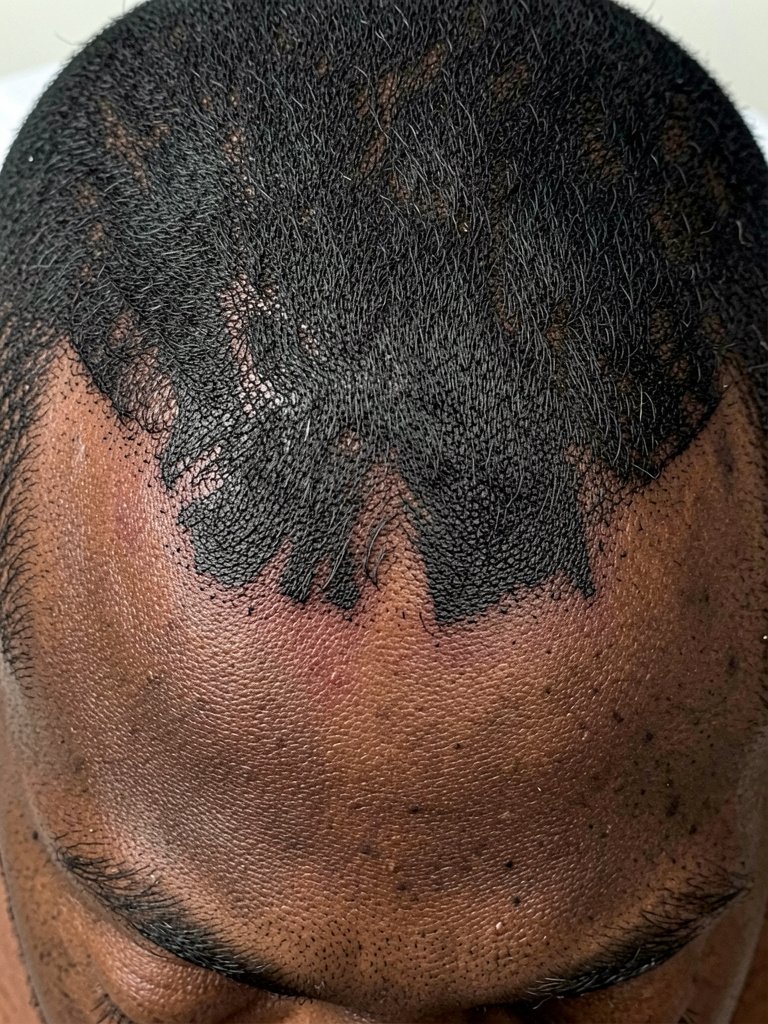
Blackout crown work is dramatic and polarizing. Supporters say the payoff is worth the upkeep because the shaved reveal is graphic and consistent. Skeptics argue that the need to keep hair short, live with heavier sun maintenance, and tolerate intensive sessions makes the placement impractical for many. If you choose blackout, plan staged sessions for saturation and expect touch-ups for even pigment. Wear an oversized zip hoodie to the session so the garment slides on without rubbing the fresh ink. For off-duty looks, a fitted jacket with a clean neckline complements the unified color field.
6. Linework Crown Band
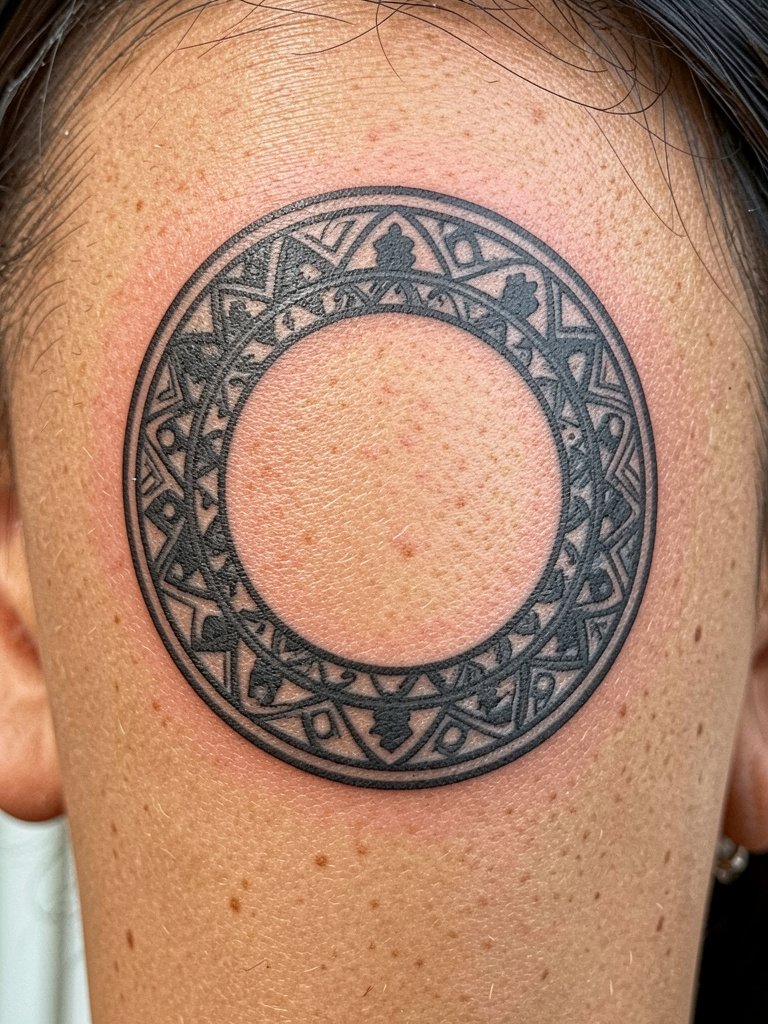
A crown band offers a less aggressive alternative to blackout. There is an active debate about fine line versus bolder linework on the scalp. One camp says thinner lines suit the decorative look and read well when hair is grown out. The other camp recommends slightly thicker line weight because scalp skin and sun exposure can soften fine lines over time. For clients who want longevity, ask for medium line weight and clear spacing between repeats. Session time is moderate and pain is focused around the hairline. This placement pairs with clean crewneck tees for a tidy reveal, try a fitted crew neck tee when you want a pulled-together vibe.
7. Micro-Realism Portrait on Scalp
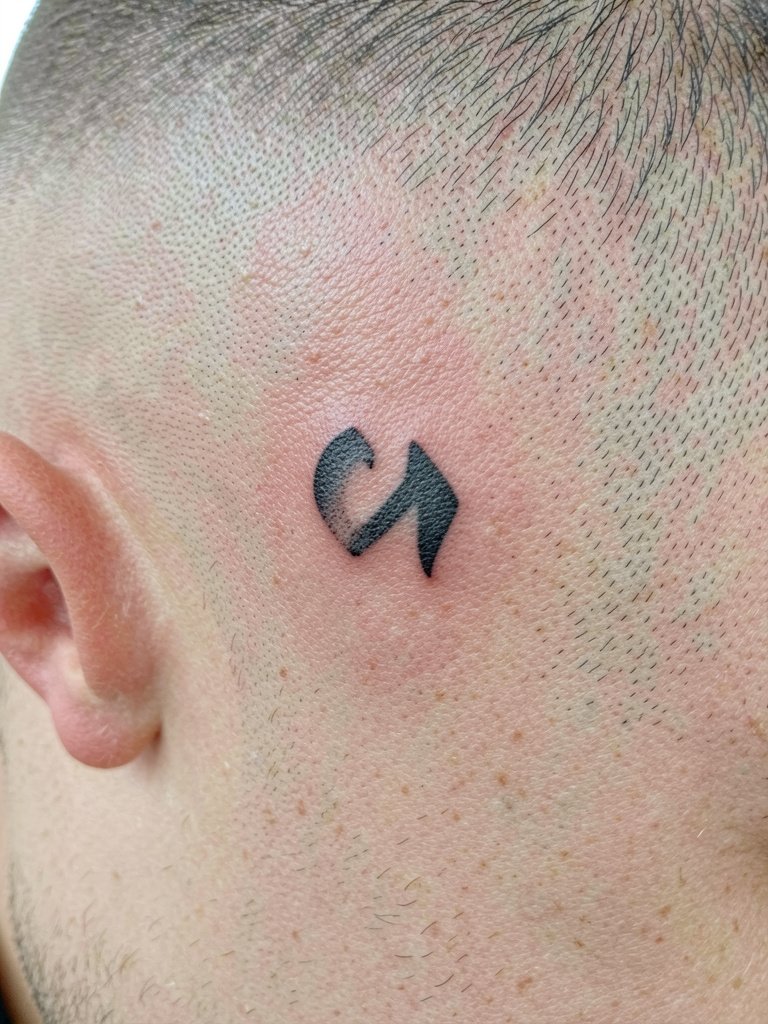
Micro-realism rewards a highly skilled hand and careful placement. The risk is that tiny features compress as the scalp ages and the design loses contrast. Bring two scale references so the artist can show how the portrait reads at three inches versus five. Touch-ups are common around year two for faces and small details. Pain is notable on the crown where bone lies close. For session comfort wear a loose, open-front top that lets the artist access the scalp without rubbing the area during dressing.
8. 3D Illusion Topography
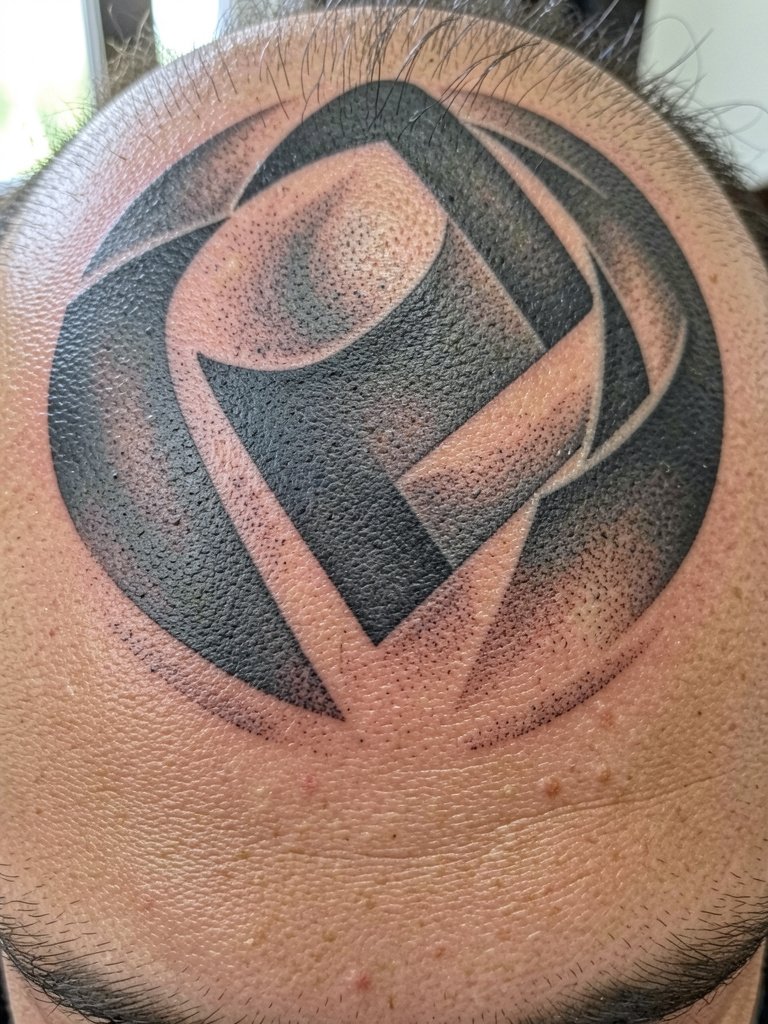
The head’s curve can accentuate depth effects with realism shading. A common mistake is packing too much tiny detail into a small area. Better results come from bold form, crisp shadow edges, and clear highlights so the 3D read survives healing. These pieces take multiple sessions and need a realistic touch-up plan. The scalp feels vibration strongly, so shorter sessions yield better comfort. For styling, a minimalist bomber or dark crew neck keeps the focus on the illusion when the head is shaved.
9. Religious Iconography on Temple or Scalp
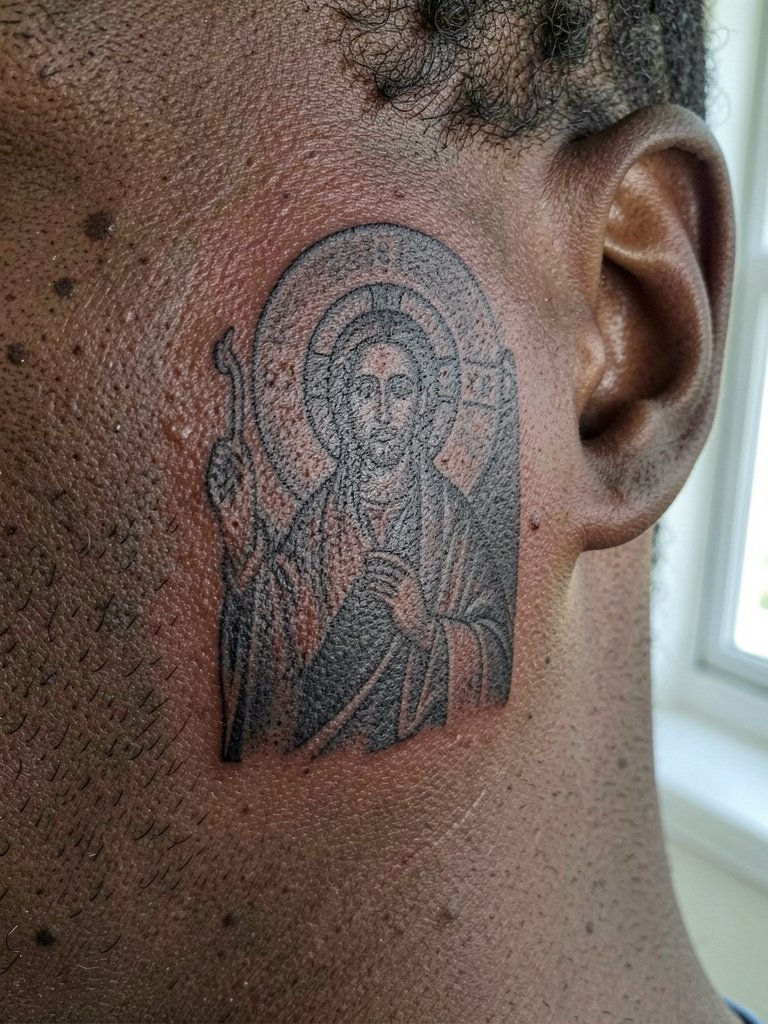
Religious images on the head amplify symbolism because the placement is highly visible. Respect origins by asking about cultural context and appropriate iconography. The main mistake is compressing complex icon detail into a small temple piece. Choose simplified compositions and strong outlines so the imagery remains legible at six months and two years. Pain and session time vary with size. For showing the piece without shouting, pair it with subtle silver chain accessories and an open neck shirt that keeps the face area uncluttered.
10. Animal Head Piece on Side Head
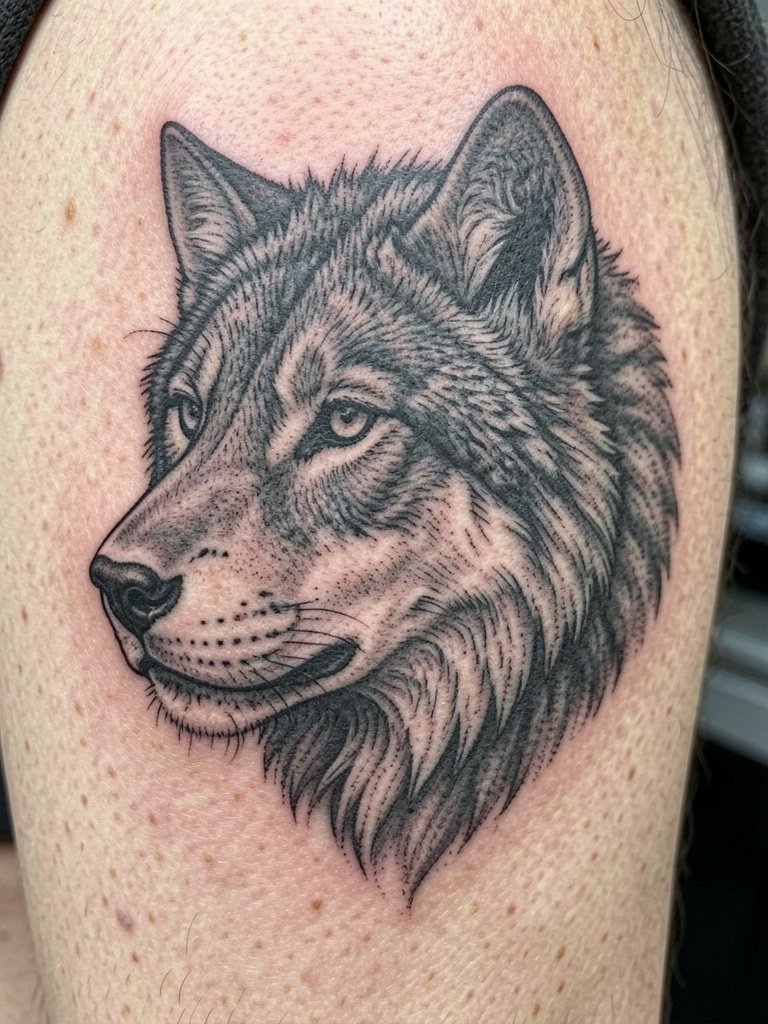
Animal heads work with the head’s natural silhouette and give a strong graphic identity. Artists often caution against tiny whisker lines and feathered detail that blur. Request a composition that uses bold planes for fur texture and leaves breathing room around the ear. These pieces usually require several sessions and are medium on the pain scale. For an everyday look, combine with fitted jackets and plain tees that keep attention on the portrait, try a minimalist bomber jacket to frame the face.
11. Nape Lettering
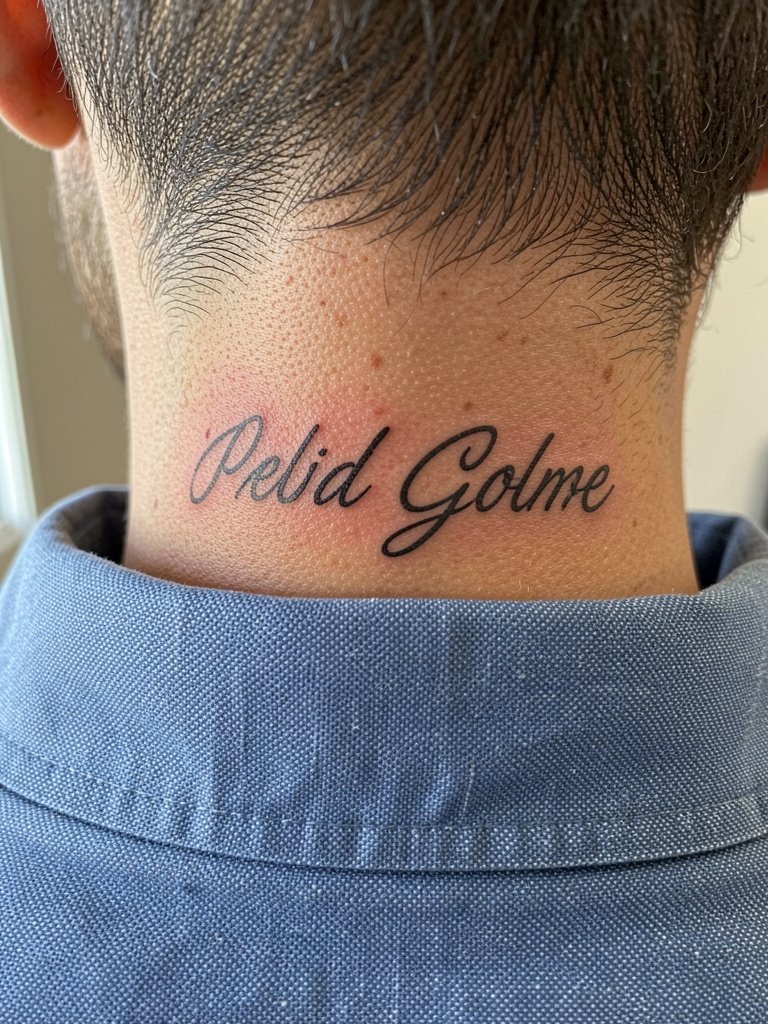
Nape script is personal and relatively discreet. The most common mistake is overly thin script that smears with time. For durability pick moderate letter spacing and slightly heavier strokes. Healing is straightforward but the area sees friction from collars. Wear a button-down or loose crewneck to and from the session so fabric does not rub the fresh ink. Expect a touch-up if you want the fine terminals crisp at year two. Short hair or undercut styles display the script cleanly.
12. Arrow or Feather Near the Ear
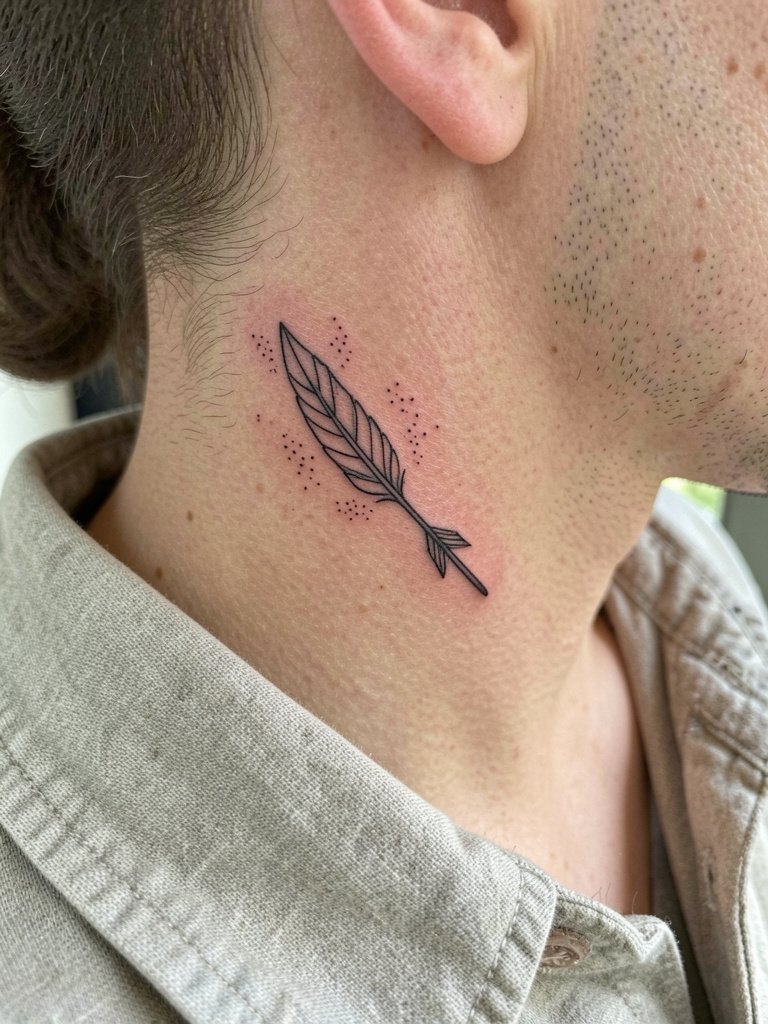
This slim placement suits first-timers. It is low-commitment and easy to hide with hair. Common errors include asking for extremely thin shafts that lose presence. Choose a simple silhouette with a small dotwork anchor so it keeps definition at one and two years. The session is short and pain is moderate. For session comfort wear a loose top with a removable collar and consider a loose collar shirt so dressing does not irritate the mastoid.
13. Full Head Patchwork
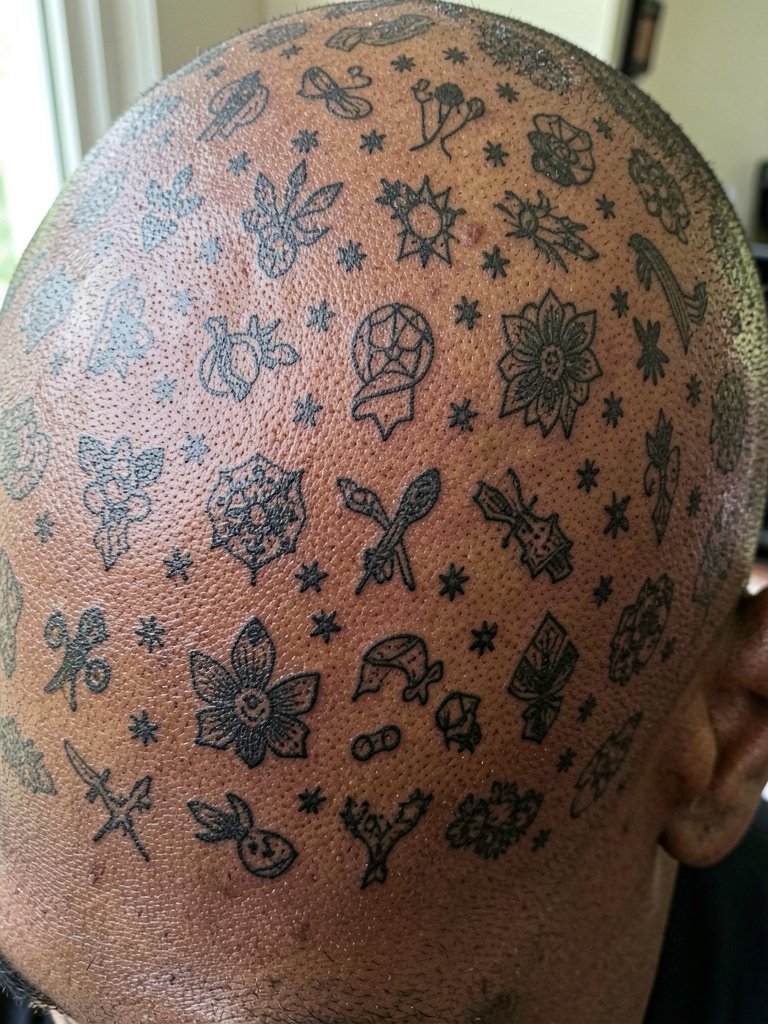
Patchwork allows collectors to build a custom head slowly. The main mistake is inconsistent scale and spacing between individual motifs. Plan a cadence for motifs and a unifying element like bold outlines or a repeating dotwork filler so the whole head reads coherent at distance. Sessions are modular and pain fluctuates by placement. For styling, mix short fades with plain tees so each new piece can be revealed selectively, and bring a hat for after the appointment that does not rub the area.
14. UV or Blacklight Accent
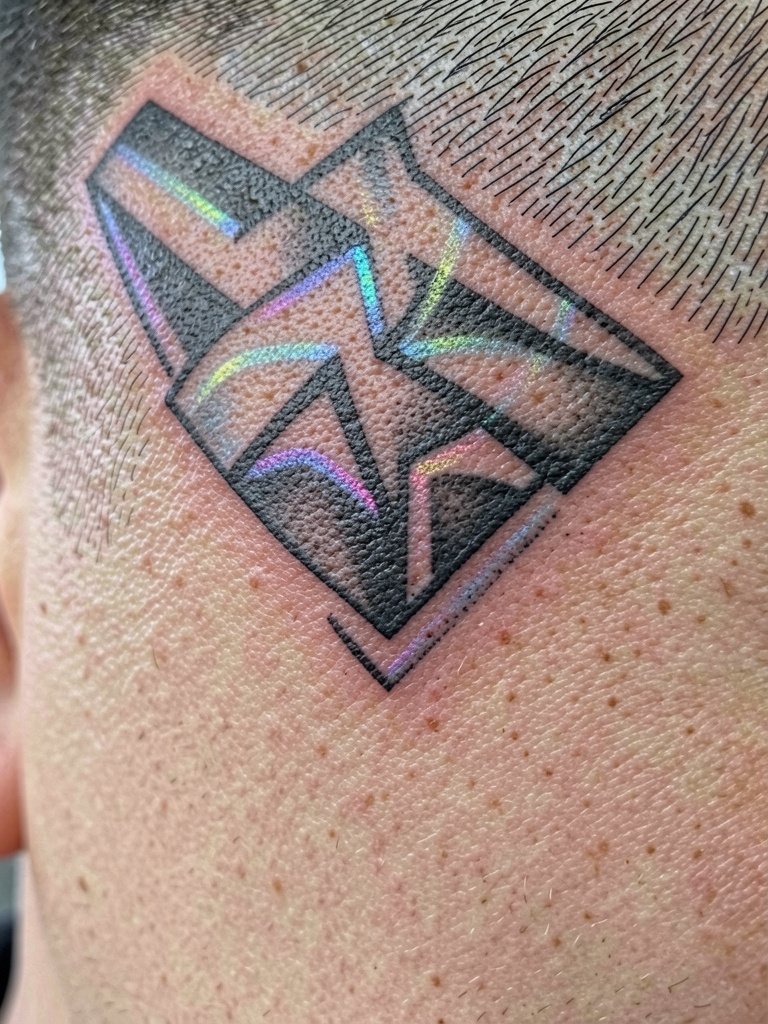
UV work is a novelty and requires specialist inks and artist experience. The risk is that UV only reads under blacklight and can be invisible otherwise. If you want hidden accents, use them sparingly and ask about long-term fading and pigment migration. These sessions are similar in pain to regular ink but require careful placement and aftercare. For daytime wear, a clean crewneck or monochrome outfit lets the blackwork read while UV remains subtle.
15. Stick-and-Poke Accent Behind Ear
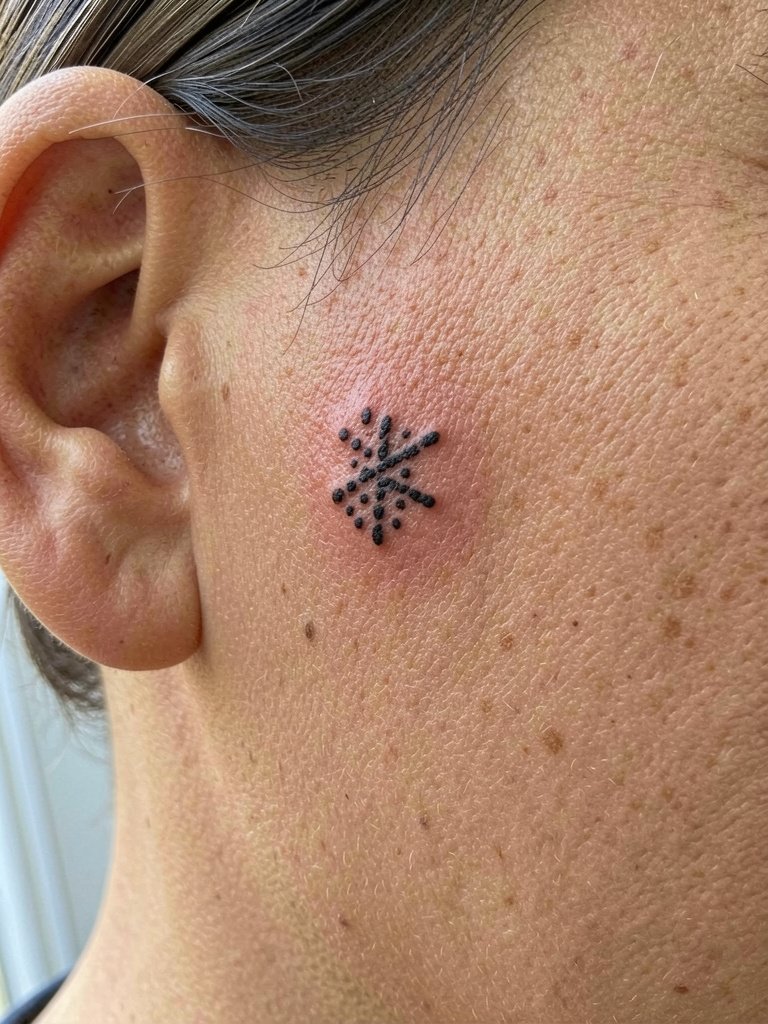
Hand-poked work has a raw aesthetic but can age unpredictably depending on needle depth and spacing. The common mistake is thinking hand-poked equals low maintenance. Discuss exact dot density and spacing so the pattern does not bleed together. Healing is similar in timeline but may take touch-ups for lost dots. Wear a top with an open collar during the session to avoid neck friction. A short fade or tucked collar shows the tiny symbol cleanly when you want it visible.
16. Crown Geometric Panel
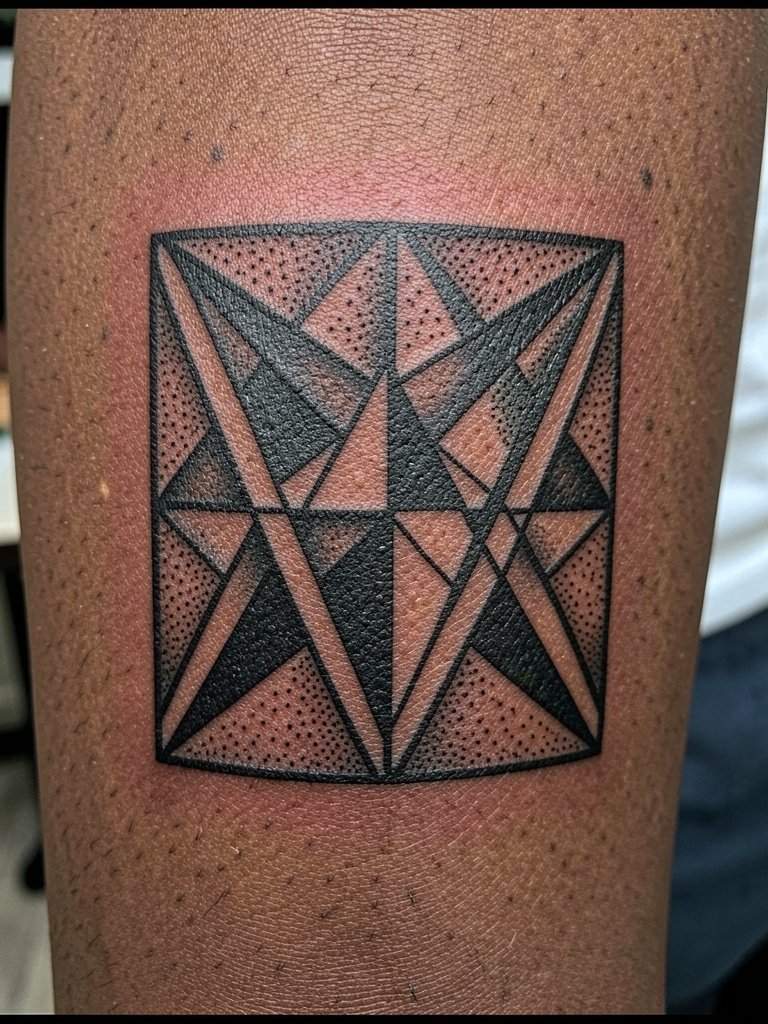
Geometric crown panels read strongly if you give shapes room to breathe. A mistake is overcomplicating with too many intersecting thin lines. Opt for fewer lines with consistent spacing and strong outer borders. Expect medium session times and moderate pain on the crown. For showing off the composition, a fitted jacket or crewneck keeps attention on the symmetry. If you like the look for longer hair days, choose a banded motif that still shows through short growth.
17. Temple Micro-Realism Symbol
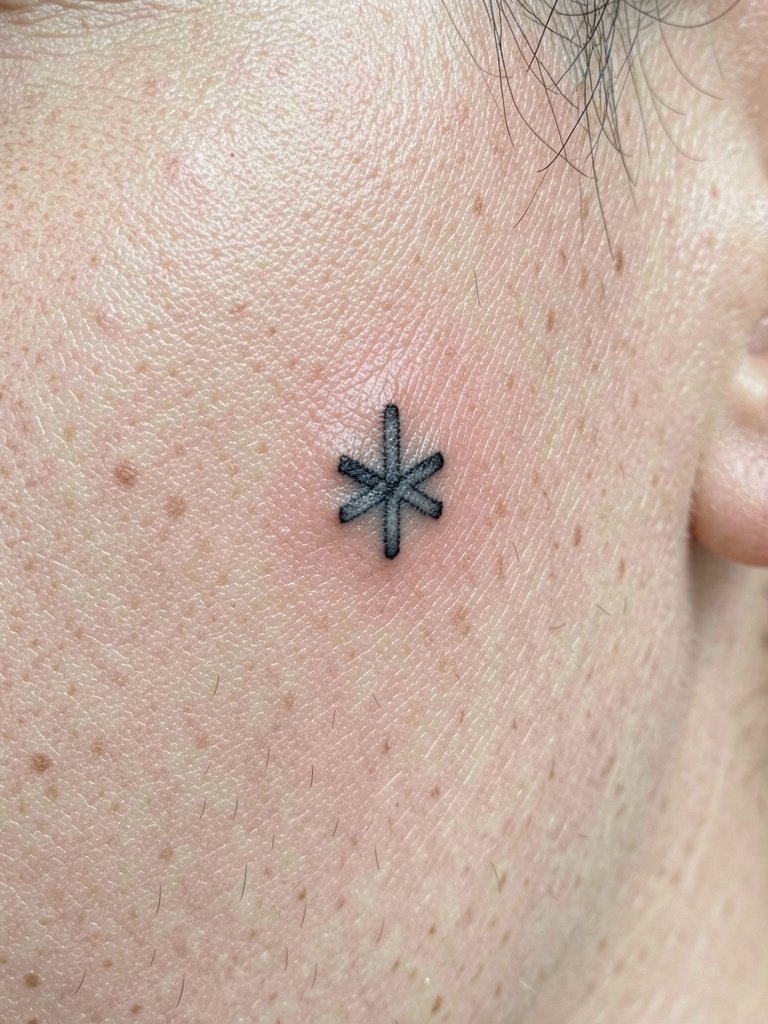
Small micro-realism needs a clear plan for scale so features do not compress. Bring a photo at actual printed size for the artist to evaluate readability. A common error is assuming a photo that looks fine on a phone will translate the same at one inch on skin. Sessions are short and pain is manageable. For daily wear keep collars open and wear clean face-adjacent styling such as a fitted crew neck tee to frame the face without clutter.
18. Temple Negative-Space Line Work
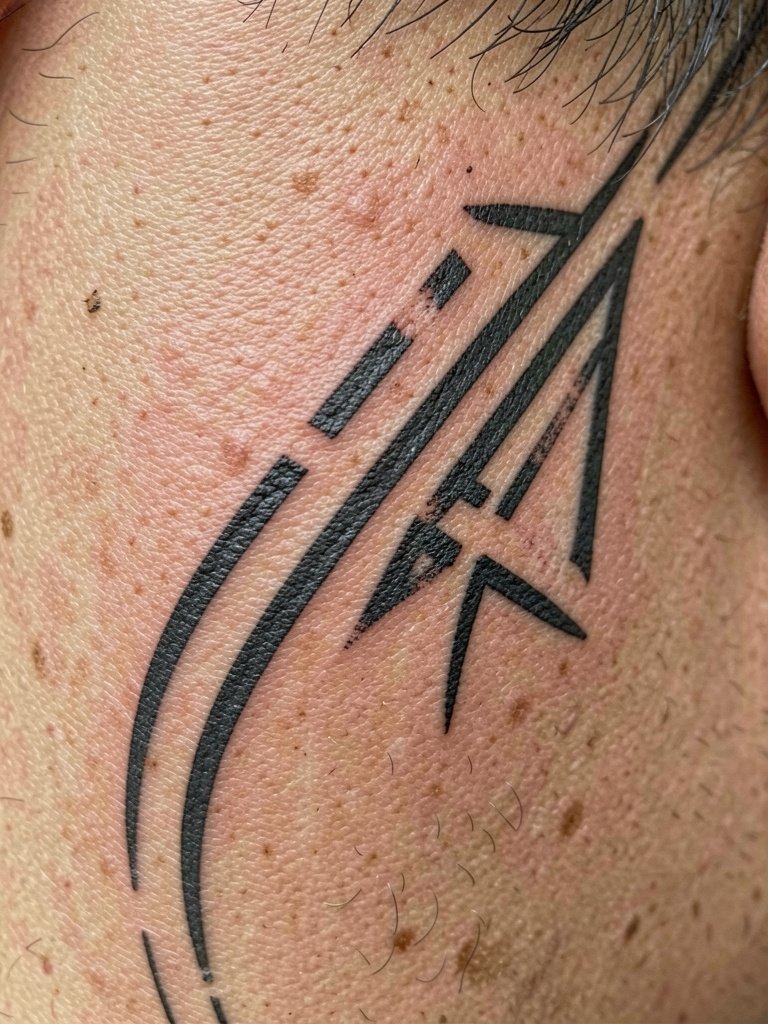
Negative-space lines read elegantly if spacing is deliberate. The main mistake is underestimating how sun and natural skin contrast affect the apparent line weight. Ask for sketches showing the negative space at several distances. Expect a short session and moderate pain. To display the effect, clean collars and simple face jewelry work best. For the chair, a loose top keeps fabric away from the temple during dressing.
19. Side-Neck Ornamental Script
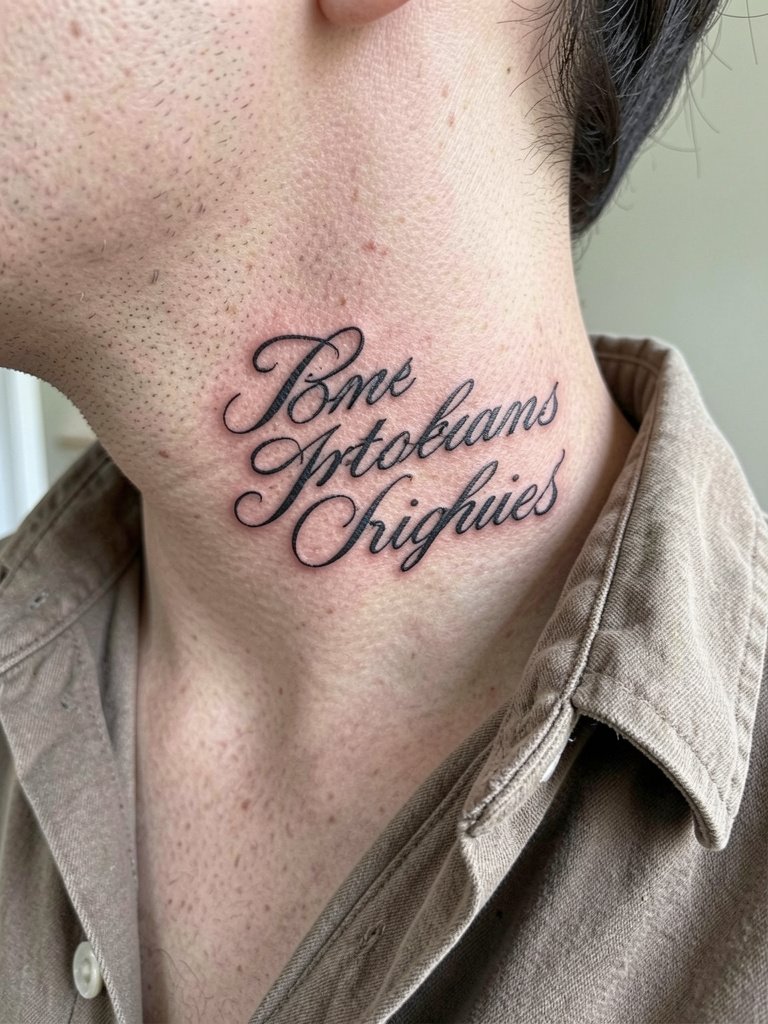
Neck script is instantly noticeable and demands clean lettering with generous spacing. A common error is choosing tiny ornamental flourishes that merge. For longevity pick slightly heavier terminals and ask for test stencils at full size. Pain is moderate and sessions can be quick. Style with open collars or layered chains to complement the placement, try a layered chain necklace to balance the area.
20. Lateral Skull Cap Realism
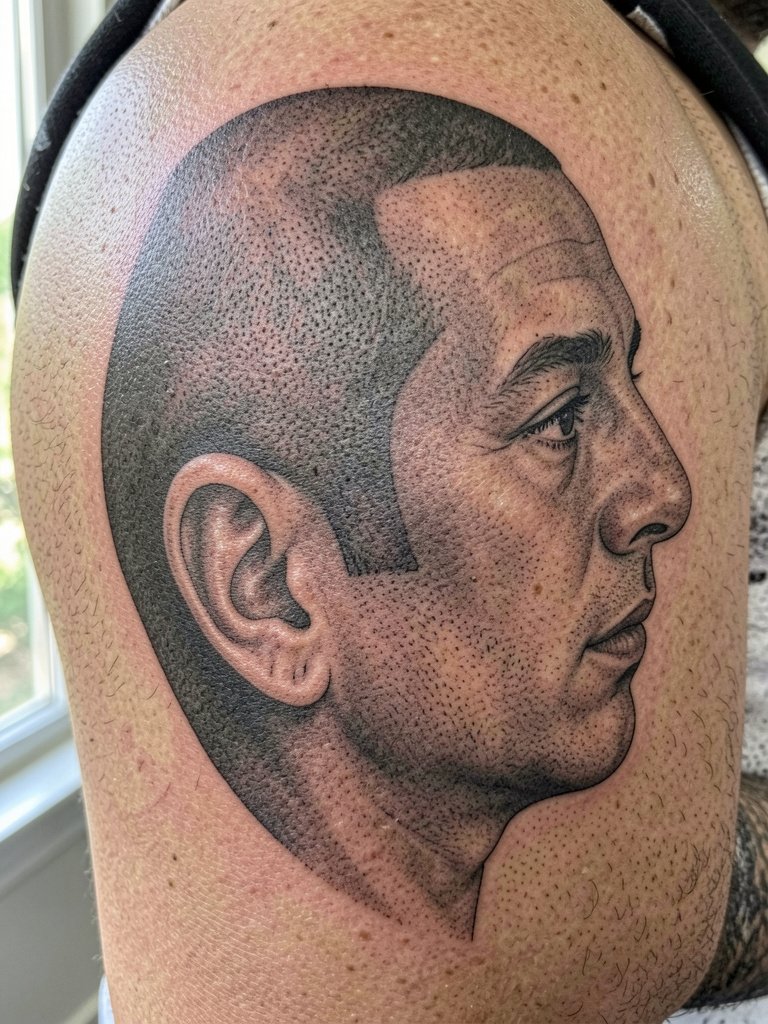
Large realism on the skull cap needs deliberate scale so shading does not become muddled. The biggest mistake is compressing tonal ranges into a narrow band. Ask for photos of healed full-scale work on similar skin tones so you can judge contrast. These sessions are long and may require breaks. For wardrobe, a clean crew neck or monochrome jacket keeps the focus on the portrait.
21. Ear-Adjacent Geometric Accent
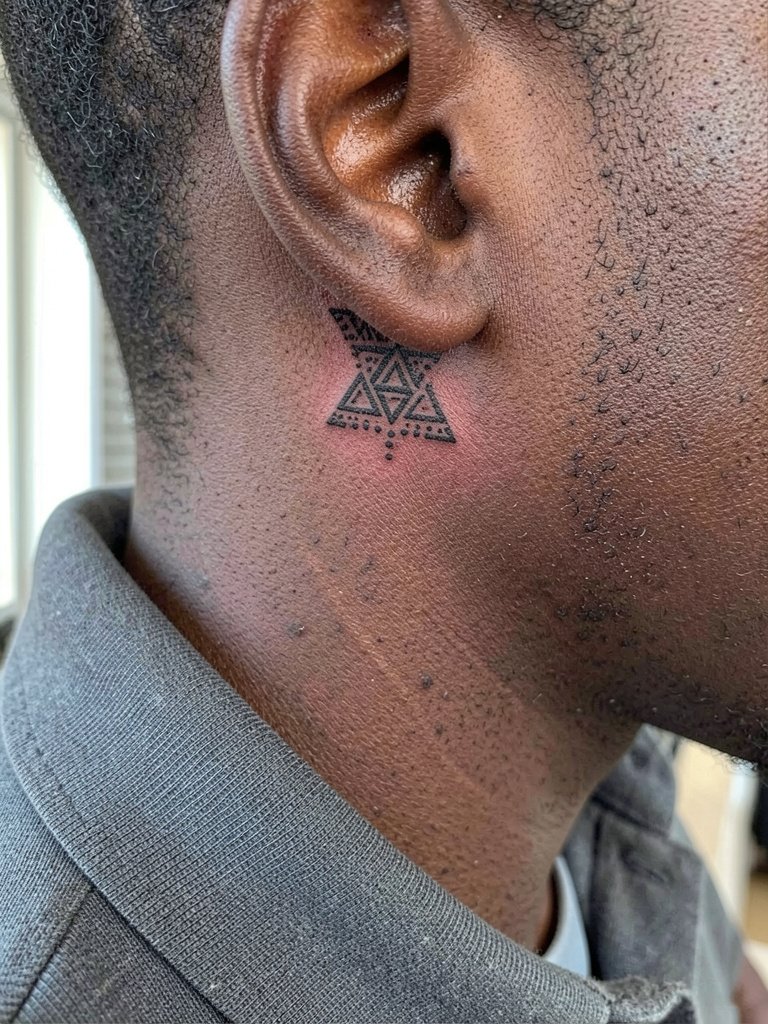
This small placement reads well with short fades and tucked collars. A common error is over-detailing. Choose a clear silhouette and spaced dotwork to preserve definition. The session is short and pain is moderate. To show it, wear shirts with short collars or undercuts. Accessories like small hoop earrings pair subtly without competing with the geometry. Consider a small hoop earring set if you want balanced accents.
22. Minimalist Crescent on Scalp Edge
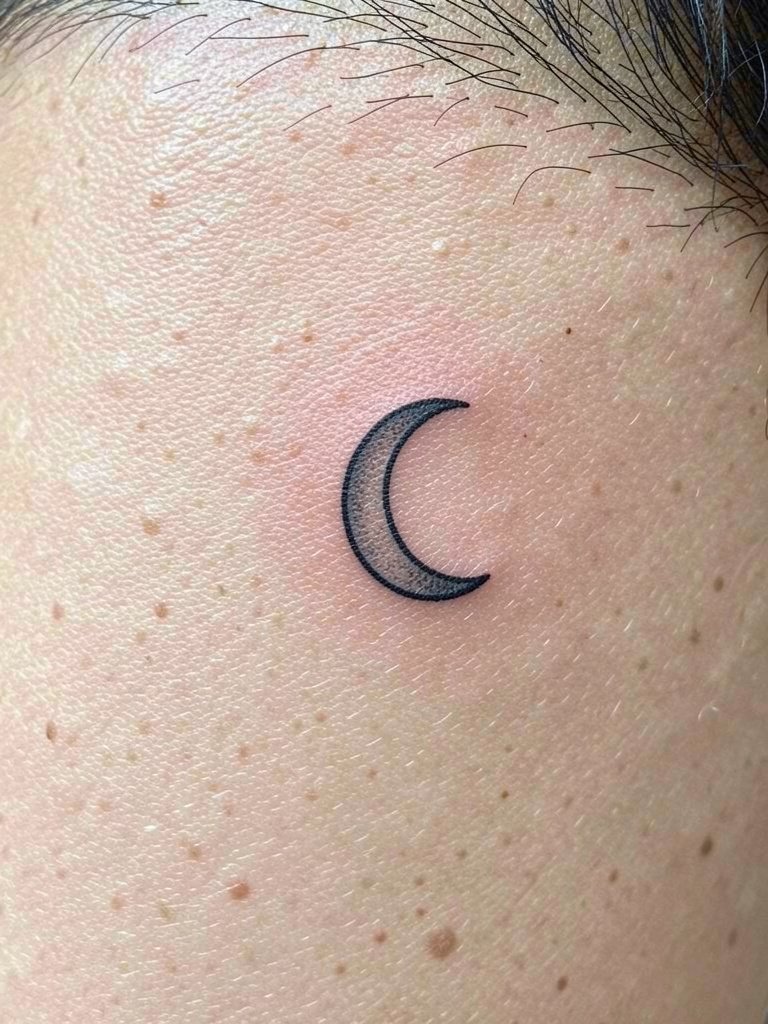
Small crescents at the hairline are subtle reveals when shaved. The aging issue is that very thin crescents can lose definition, so plan for moderate thickness. Bring a single clear reference and ask for a stencil preview at natural size. Session time is brief and pain is lower than crown work. For everyday style, short fades and simple tees keep the crescent visible without distracting from grooming.
23. Scripted Nape Quote in Blackwork
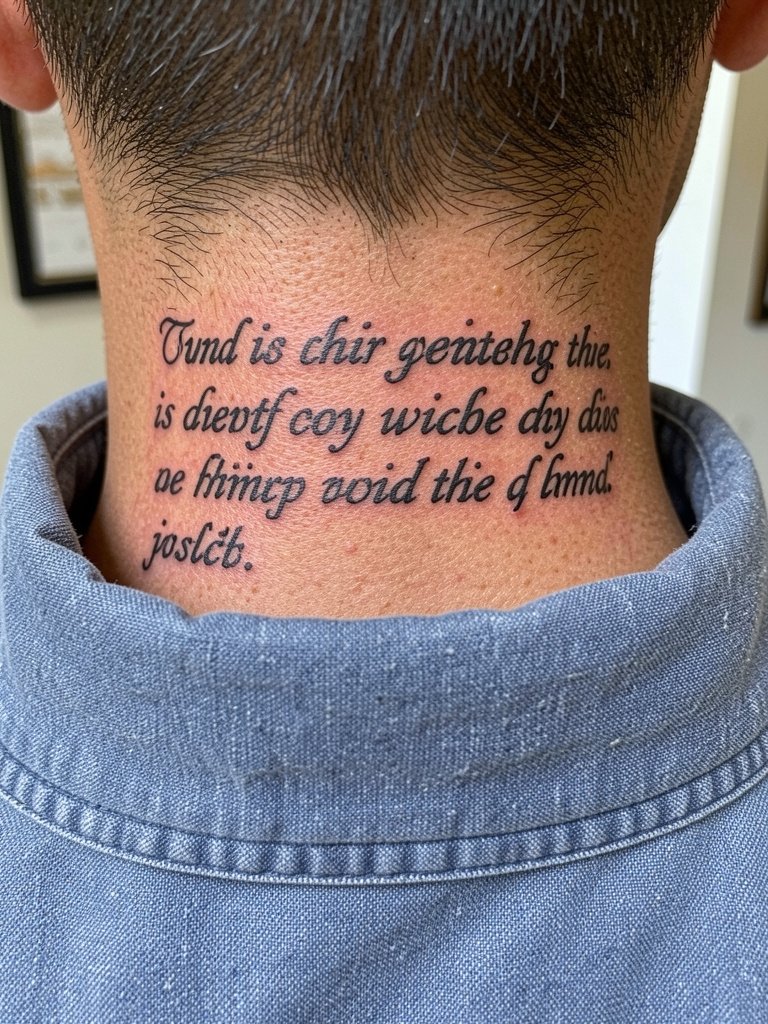
Nape wording should favor legibility over flourishes. The mistake is ornate script in a place that sees collar friction. Ask for bolder terminals and slightly increased kerning. Healing is straightforward but collars matter for the first week. For display pair with short haircuts and open collars, and consider a lightweight open collar shirt for a clean reveal.
24. Abstract Negative Space Scalp Panel
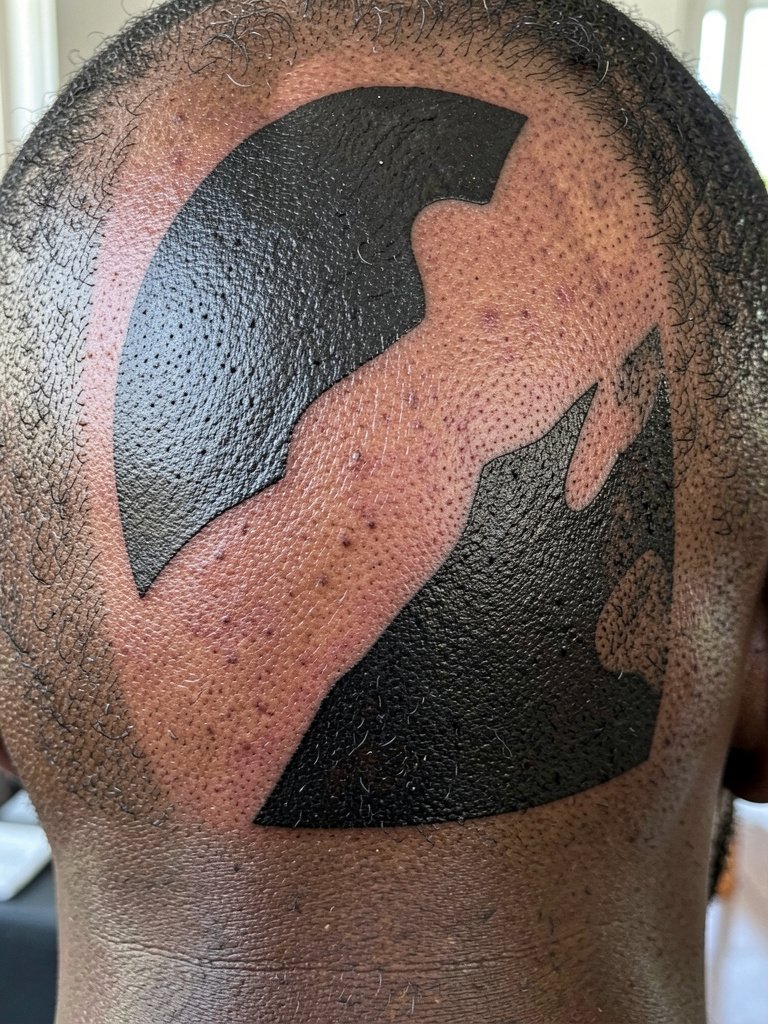
Abstract panels can be sculptural and age predictably when shapes are bold. Common mistakes include too many tiny pockets of negative space that close up. Pick larger shapes and consistent edges so the pattern survives touch-ups. Sessions are multiple and pain varies by crown area. For style pairing, monochrome outfits keep attention on the composition. Short haircuts with structured tops complement the abstraction.
25. Side-Head Botanical Silhouette
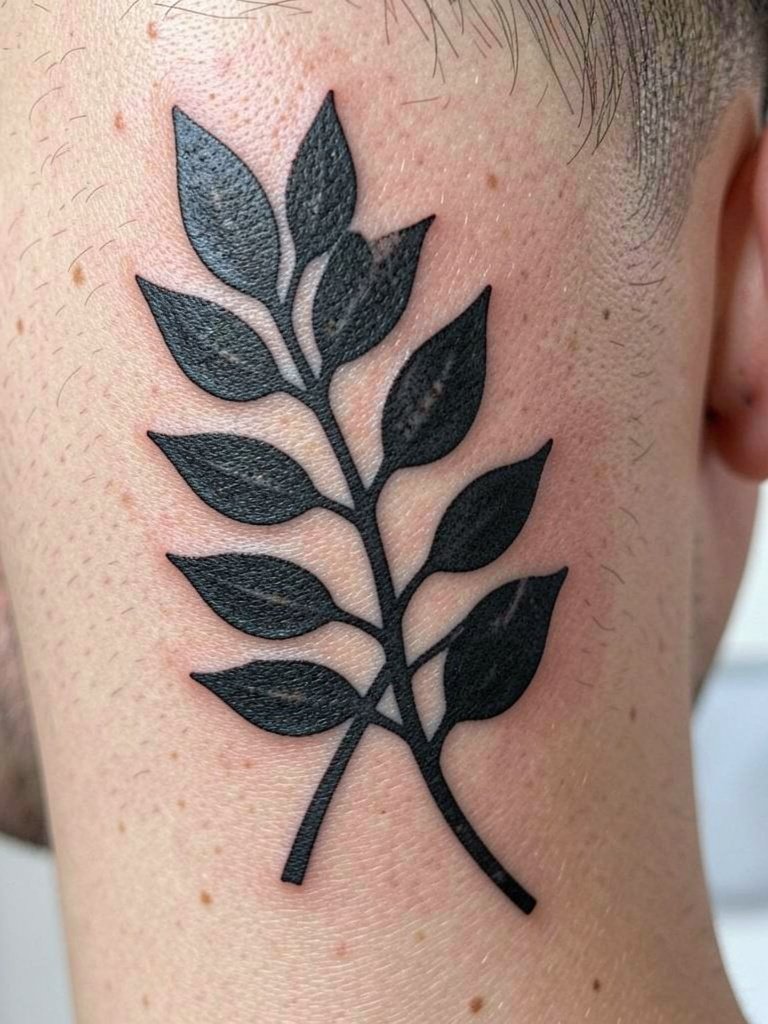
Botanical silhouettes on the side of the head can be elegant and masculine when simplified into solid shapes. The mistake is adding delicate filigree that fails on textured scalp skin. Choose bold silhouettes and test the stencil at full size. Healing is moderate with a possible touch-up after a year. For the session wear an easy-neck top and for showing off a fitted jacket frames the silhouette without competing.
26. Small Coordinate Tattoo on Temple
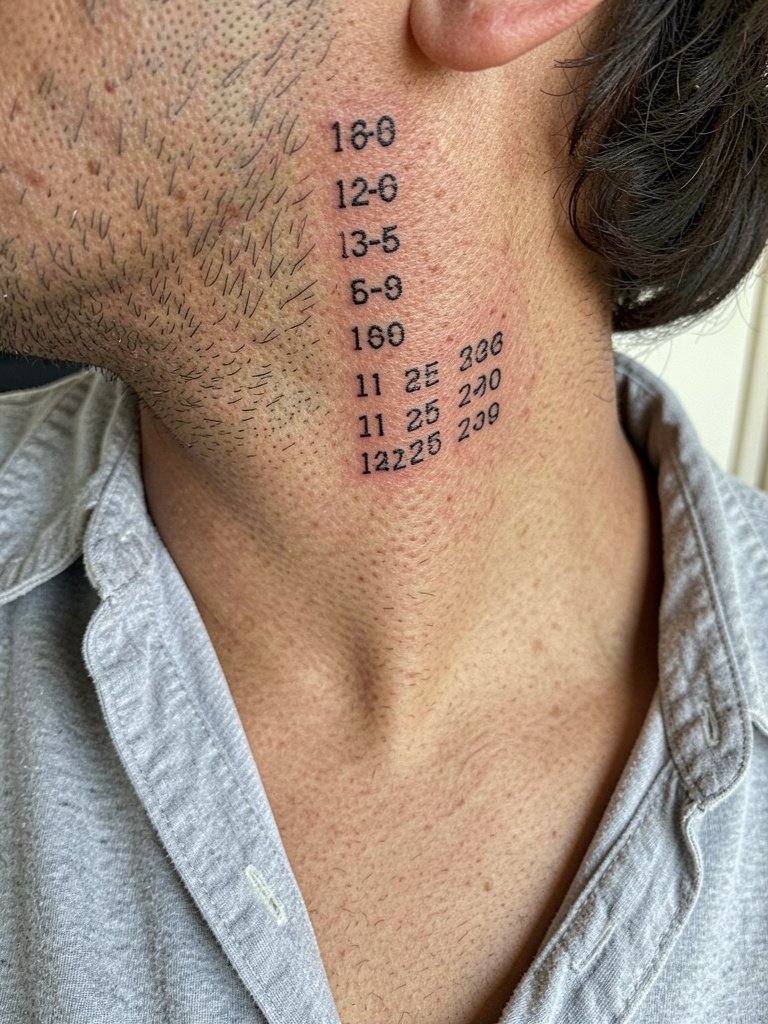
Coordinates work as compact, personal marks. Precise text is critical. Pick a clear monospace or small serif and confirm exact characters to avoid gibberish. A common issue is picking a font too thin. Choose slightly heavier strokes for longevity. Sessions are short and pain is moderate. For daily wear a clean open-neck tee or simple chain keeps the temple area visible and balanced.
27. Patchwork Scalp with Accent Color
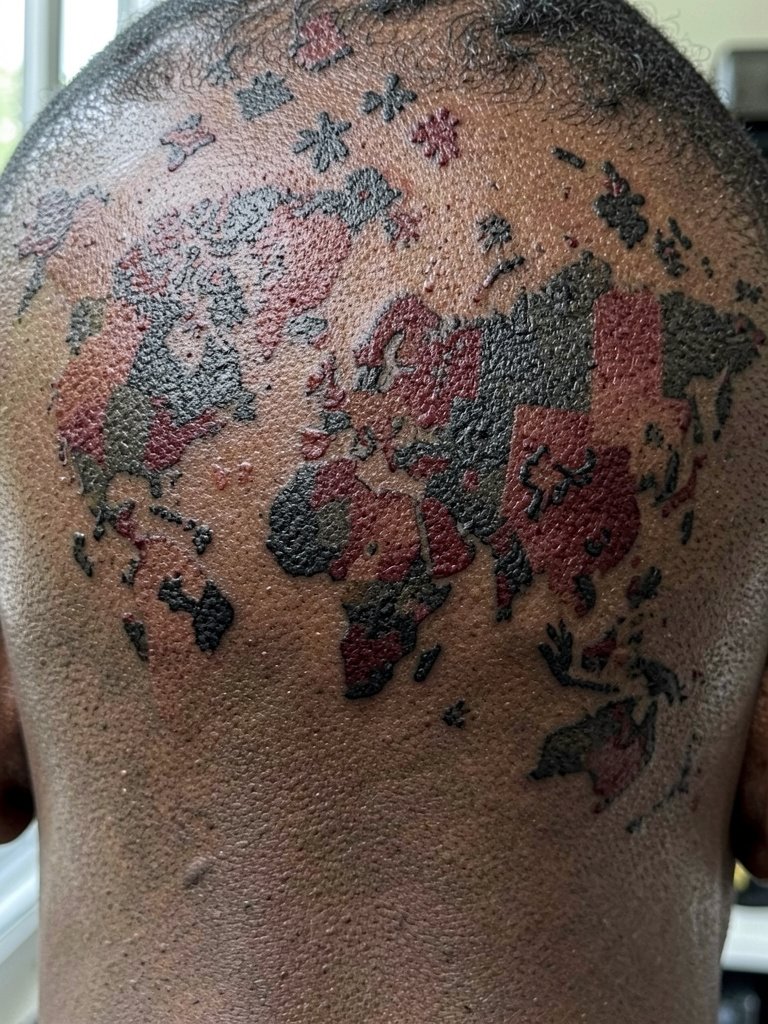
Selective color can modernize a blackwork scalp without overwhelming the head. The controversy here is black and gray versus color. One viewpoint says black and gray is the most durable and readable on the scalp. The opposing view argues that selective color accents prevent a piece from looking flat and add personal pop. If you want color, limit it to small accents and talk through pigment choice and sun protection plans. Patchwork sessions are ongoing and the scalp tolerates staggered appointments. For clothing, monochrome outfits help color points pop without clashing.
For The Healing Window
The first six ideas above span heavy blackwork to small mastoid pieces, so these essentials smooth the first week and protect contrast as the skin settles.
- Saniderm second-skin bandages. A thin protective film that reduces friction and keeps fresh scalp work clean during the first three to five days.
- Specialty fragrance-free tattoo balm. Use a tiny amount after the initial film period to keep dense blackwork from drying into scabs that pull pigment.
- Unscented moisturizer for sensitive skin. A lighter lotion helps when the thick ointments feel too heavy and the area starts flaking.
- Broad-spectrum sunscreen for healed scalp tattoos. Critical for exposed scalp tattoos to slow color fade once fully healed.
- Thin protective film roll. Useful for custom wraps if you need to cover a spot temporarily without affecting healing.
Frequently Asked Questions
Q: How much does a head tattoo cost?
A: Costs vary widely by size and artist skill. Expect small mastoid symbols to fall in a lower range and full crown blackout to be a higher custom quote. Think in ranges rather than exact numbers and budget extra for multi-session saturation and potential touch-ups.
Q: Will a head tattoo still look okay if I grow my hair out?
A: It depends on design and placement. Heavy black shapes and crown bands tend to keep presence under short growth. Tiny filigree and single-needle scripts often disappear under longer hair. Plan the piece around your intended hair routine and choose a motif that reads at the hair length you expect to wear most.
Q: How painful is a head tattoo compared with other placements?
A: The scalp registers high on most pain guides because of thin soft tissue and proximity to bone. Temple and mastoid placements are moderate but still sharper than the forearm. Shorter sessions with breaks reduce discomfort and lower the chance of needing to stop mid-piece.
Q: What should I bring to the consultation to avoid artist guesswork, and where do I find specialists?
A: Bring two reference photos at the actual size you want, a note about your hair plans, and clear placement language like "mastoid area" or "scalp crown." To find specialists search style hashtags filtered by location on social platforms, browse Tattoodo portfolios for healed photos, and read community threads that show long-term healed shots.
Q: How do head tattoos age on different skin tones?
A: High-contrast blackwork reads best across tones, though healed contrast varies. On darker tones, bold fills and clear negative space provide the most legible results. On lighter tones, fine shading can show more subtlety but needs slightly heavier line weight to avoid blurring at four to five years.
Q: What should I wear to a head tattoo appointment?
A: Pick clothing that gives the artist access without rubbing the area when you dress. A loose zip hoodie or open-front top works well for crown and temple work. For nape pieces a button-down shirt that can be pulled forward is practical. Avoid tight collars for the first week.
