
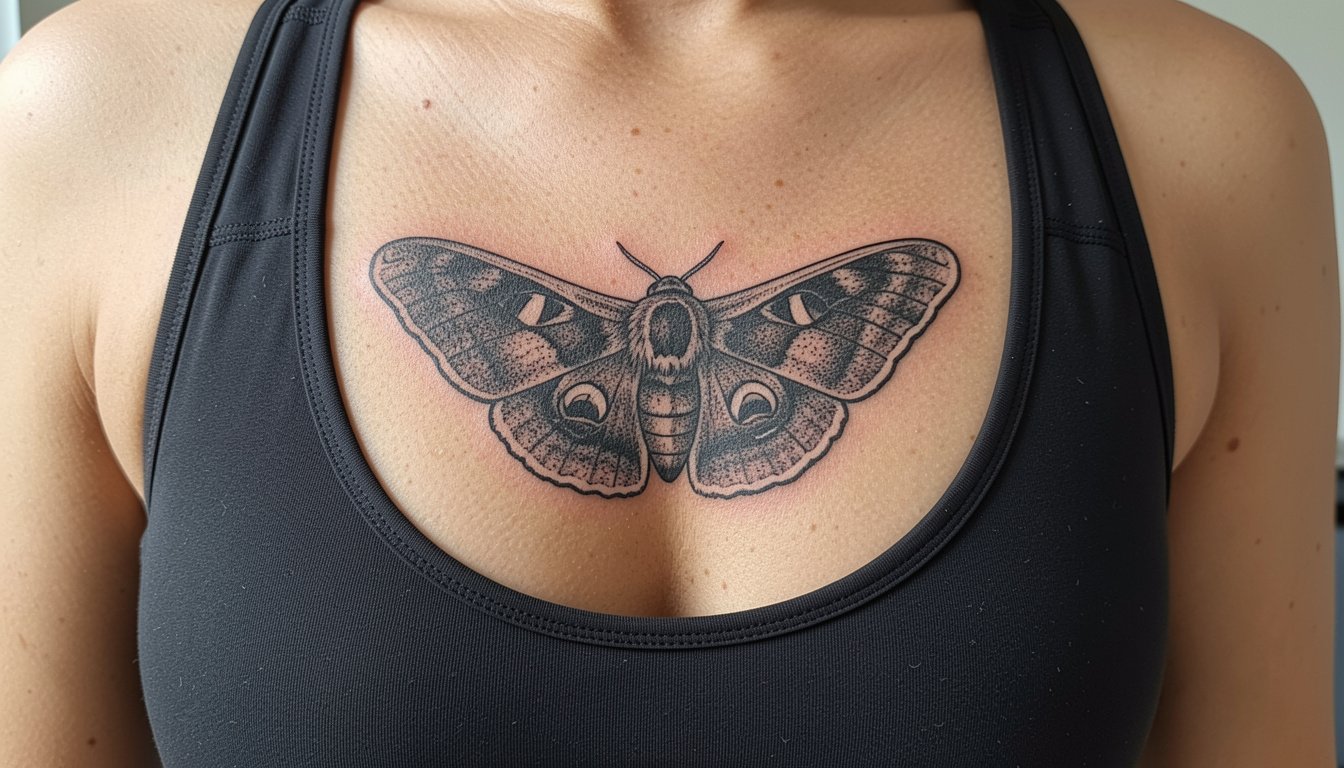
Bold blackwork death moths often read cleaner and last longer than the tiny single-needle pieces everyone pins on the mood board. If you want a moth that still reads as a moth in three years, think about lineweight, healed contrast, and placement before color choices. This list gives 23 concrete ways to wear the motif, with placement notes, session realities, and wardrobe tips so the design looks intentional now and over time.
1. Mini Fine-Line Death Moth on the Inner Wrist
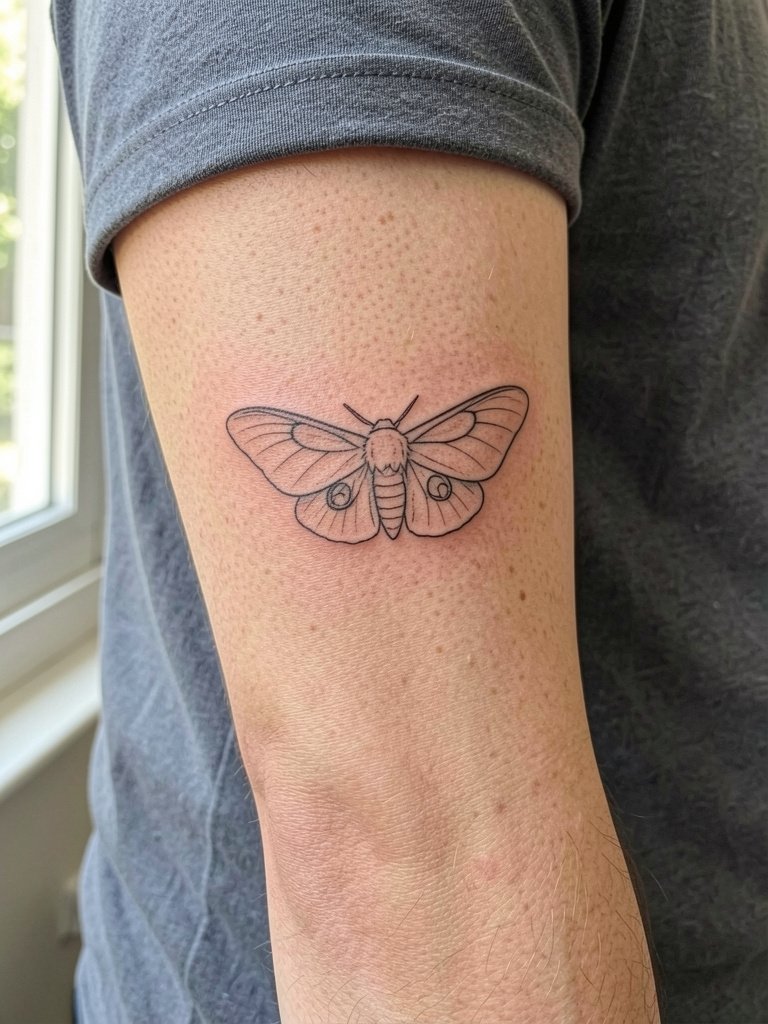
A tiny wrist moth reads best when sized to three centimeters or more so the wing veins do not merge as the tattoo heals. Low-movement zones near the wrist still rub from bracelets and sleeves, so expect slightly faster softening. For the session, request slightly heavier linework than your reference so the single-needle feel remains visible after a year. A common mistake is asking for ultra-tiny filigree without allowing spacing, which leads to blurring and the moth losing its skull-like face. For the appointment wear, skip bracelets and put on a short sleeve tee so the artist has full access to the palm-up surface.
2. Traditional Death Head Moth on the Upper Arm
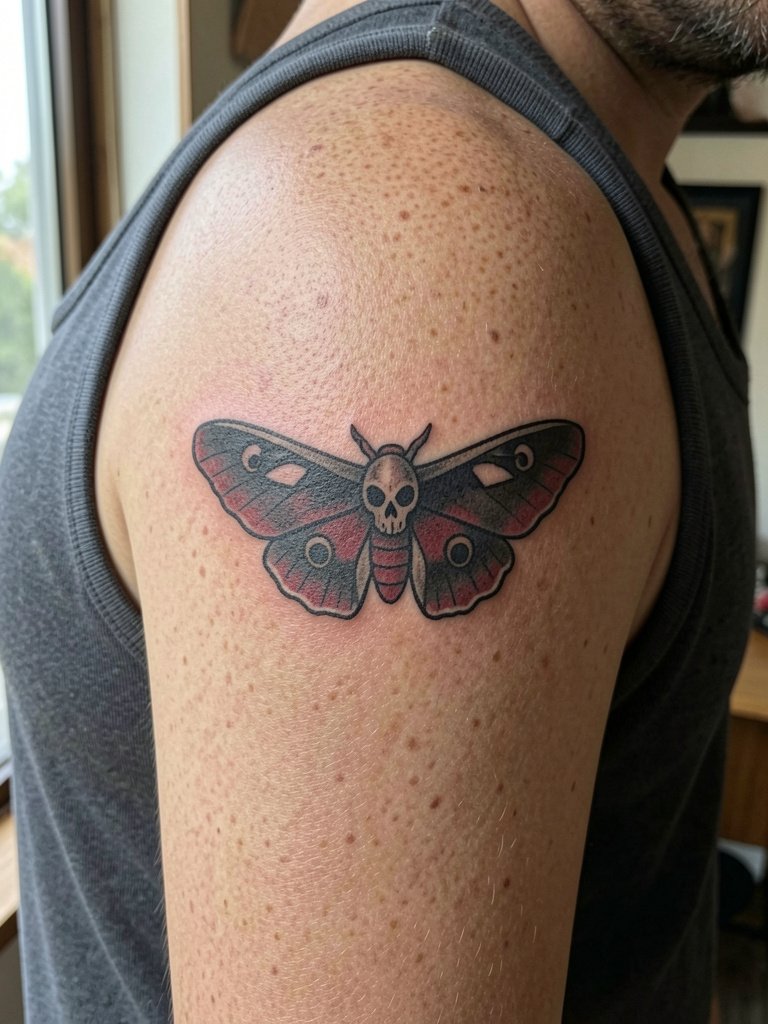
This is the easiest way to get a bold moth that holds up visually and reads from across a room. Traditional linework and solid saturation protect the skull-like markings from softening, so this is a go-to for someone who wants visibility without frequent touch-ups. In a consultation bring healed examples with similar skin tone and ask the artist to prioritize clean outlines and even saturation over tiny decorative veins. People often pick too-small flash for the bicep and then ask for touch-ups; sizing the moth to the upper arm keeps the wing pattern distinct. For showing it off, pair with a sleeveless ribbed tank that frames the shoulder.
3. Bold Neck or Throat Death Moth
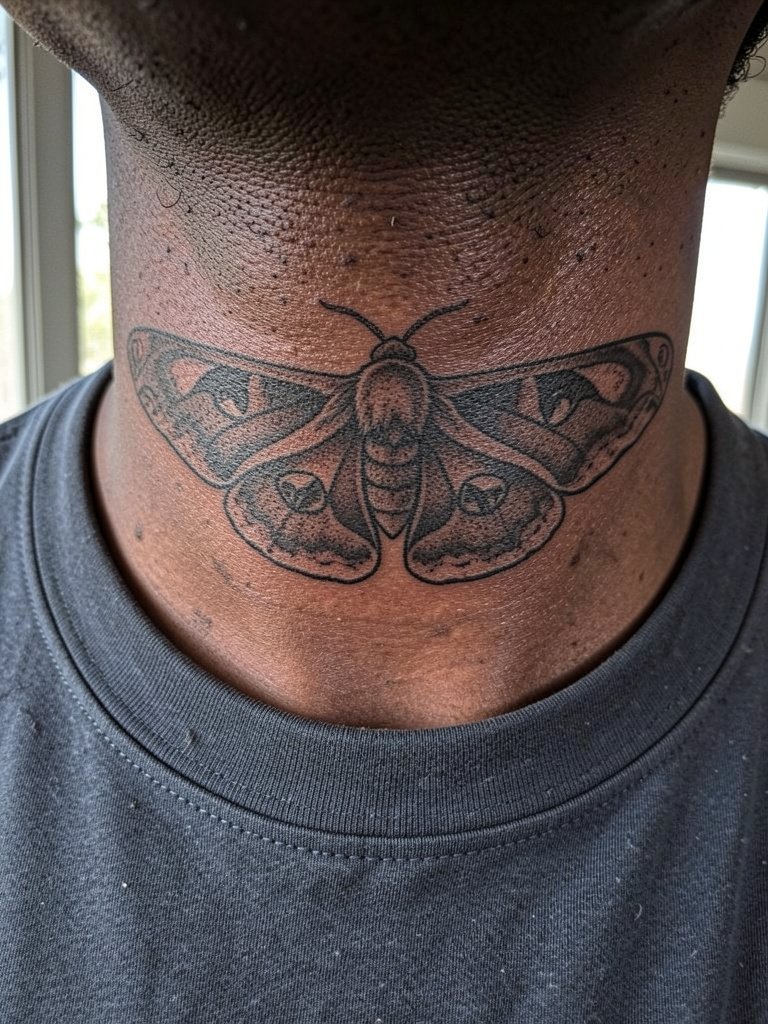
Neck placement is dramatic and shows the symmetry of a death moth well, but it also stirs debate. One camp says neck and throat pieces are powerful and suit the motif because visibility is part of the design intent. The other camp warns they are more painful and more visible, and visibility can lead to regret if style or work needs change. Expect a sharper pain profile and plan sessions shorter with breaks. For the session wear hair up and a wide-neck shirt so the artist has clear access without adjusting fabric. Budget for touch-ups sooner than an upper arm piece because the neck skin moves and stretches more.
4. Ornamental Death Moth with Floral Frame on the Thigh
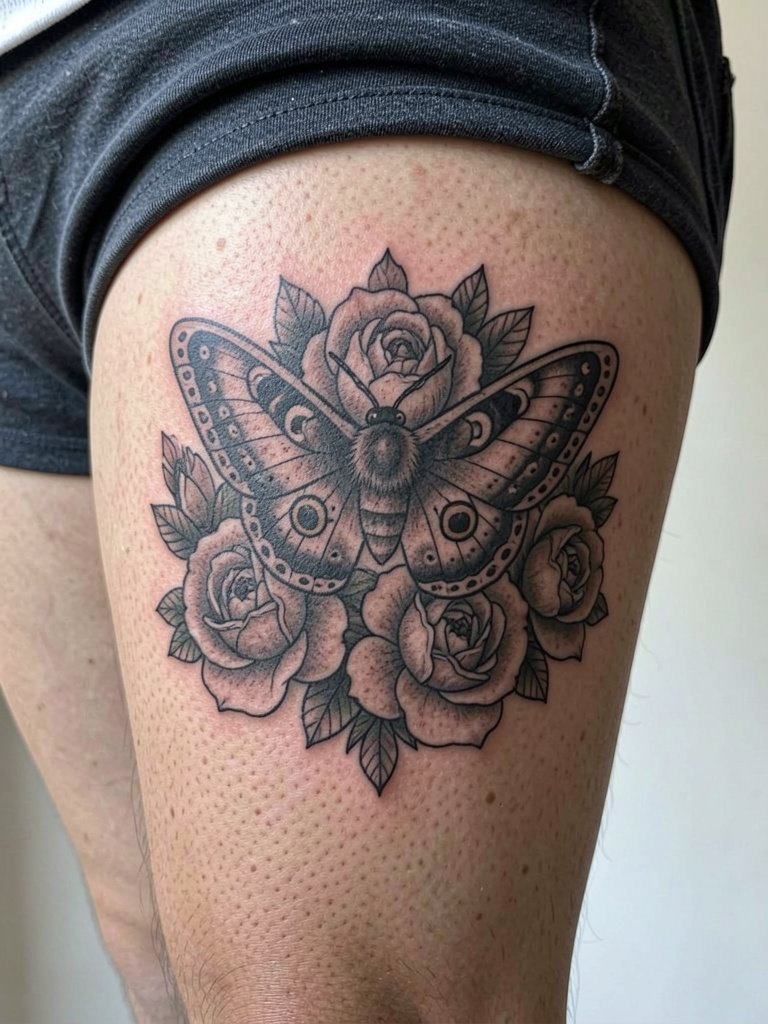
Floral framing softens the goth lean of a death moth while keeping the insect central. This placement gives room for mid-size wings and ornamental details that age into a decorative piece rather than a smudge. Tell the artist to space the petals and keep the moth's skull-marking bold so the focal point does not disappear. A mistake I see often is over-detailing the flowers at the same scale as the moth which competes visually; scale the blooms slightly larger and use muted color accents. For wearing and session comfort, shorts that can be rolled up work best. Try pairing the healed piece with a midi skirt that stops above mid-thigh.
5. Fine Line Death Moth at the Collarbone
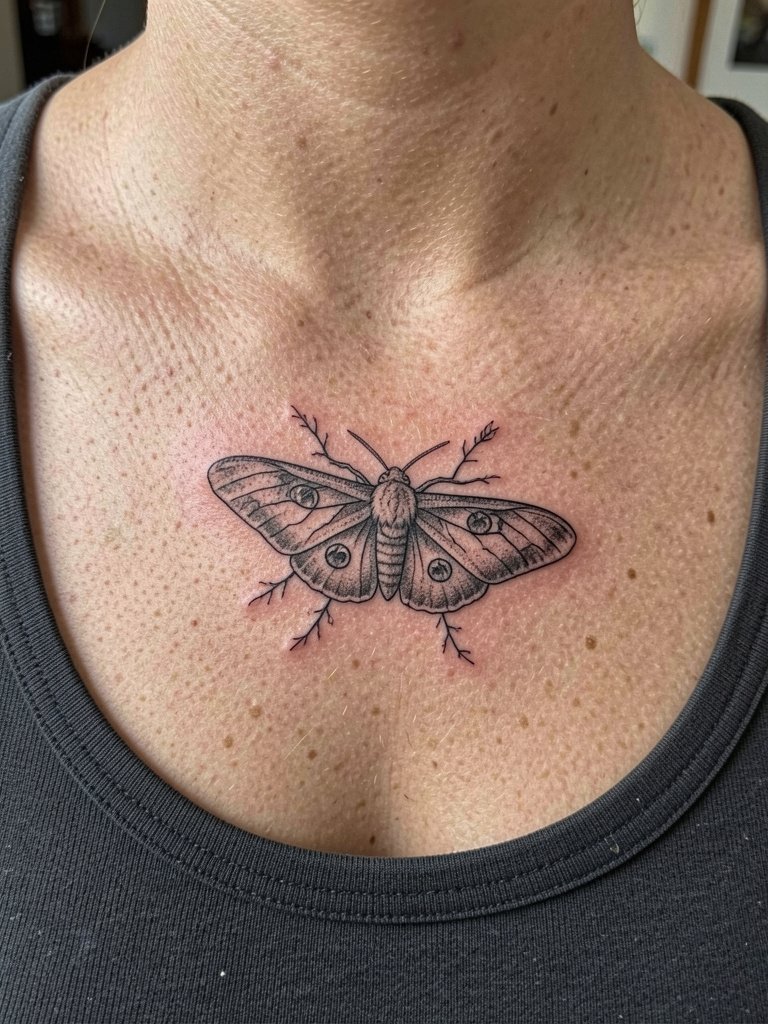
Fine line works beautifully on collarbone skin when the design is scaled generously and line weight is calibrated. Artists split into two camps on fine line longevity. One group argues single-needle detail blurs faster on thin, frequently sun-exposed chest skin. The other group says correct depth and a slightly heavier single-needle suite will settle and hold if spaced well. Bring healed examples at varying ages and ask for slightly reinforced contour lines that keep the delicate aesthetic but survive two to five years before a likely touch-up. For showing the piece, layered thin chains highlight the symmetry without obscuring the wings.
6. Black-and-Grey Skull-Faced Moth Across the Sternum
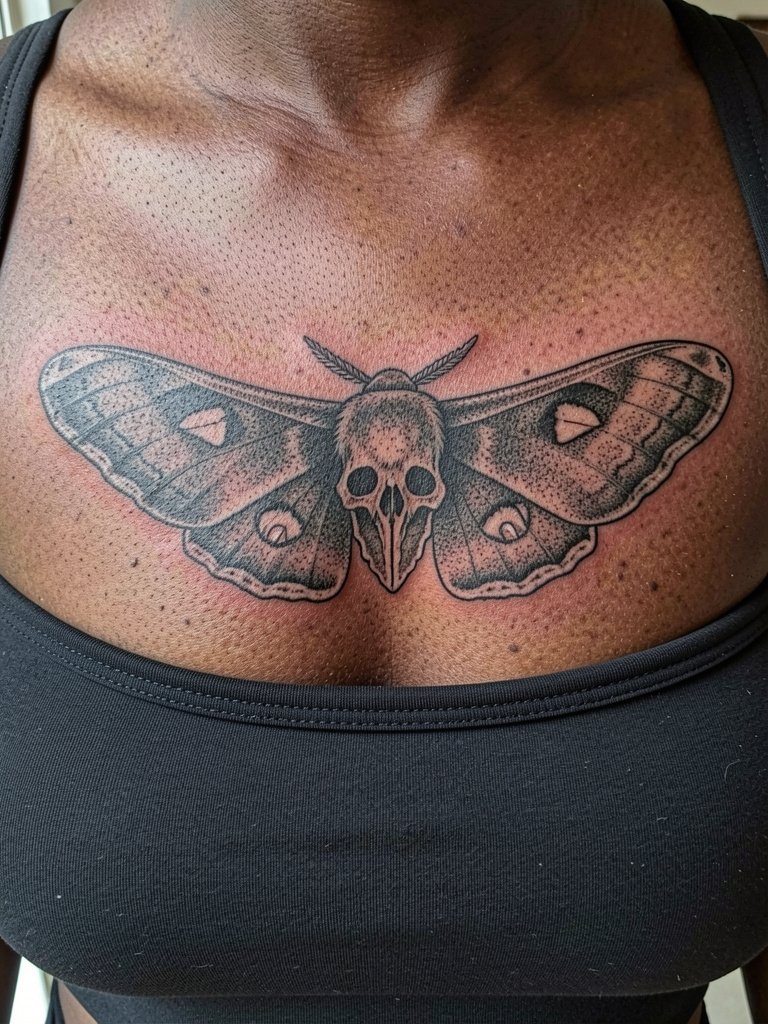
Sternum designs are a payoff for symmetry lovers because the body line enhances the moth shape. Expect a medium pain rating and plan for a one to two session block depending on size. For longevity, high-contrast black-and-grey fills keep the skull motif readable as the piece ages. A common error is compressing too many tiny stipple details near the center which can merge after healing. During consultation, ask the artist to mock up the negative space so the skull reads at a glance. For the session, wear a button-front shirt or sports bra so you can expose the sternum without tugging fabric.
Session Day Picks
The first six designs include small placements with different access needs, so these items smooth the artist handoff and the first week of healing.
-
Stencil transfer paper kit. Lets you preview and reposition stencil lines at chairside, which is useful for precise collarbone and wrist placements from ideas above.
-
Topical numbing cream. Applied per instructions and used sparingly it reduces discomfort on more sensitive zones like the throat and ribs without affecting the artist's depth perception.
-
Thin protective film roll. Wraps awkward areas such as fingers and ankles to cut down on rubbing during the first days.
-
Fragrance-free gentle body wash. A soap that cleanses without stripping healing skin, helpful for pieces that sit near clothing edges like hips and sternum.
-
Aquaphor healing ointment. Thin application during the initial days locks in moisture for linework and filled black patches while avoiding clogged needle channels.
7. Micro Death Moth Behind the Ear
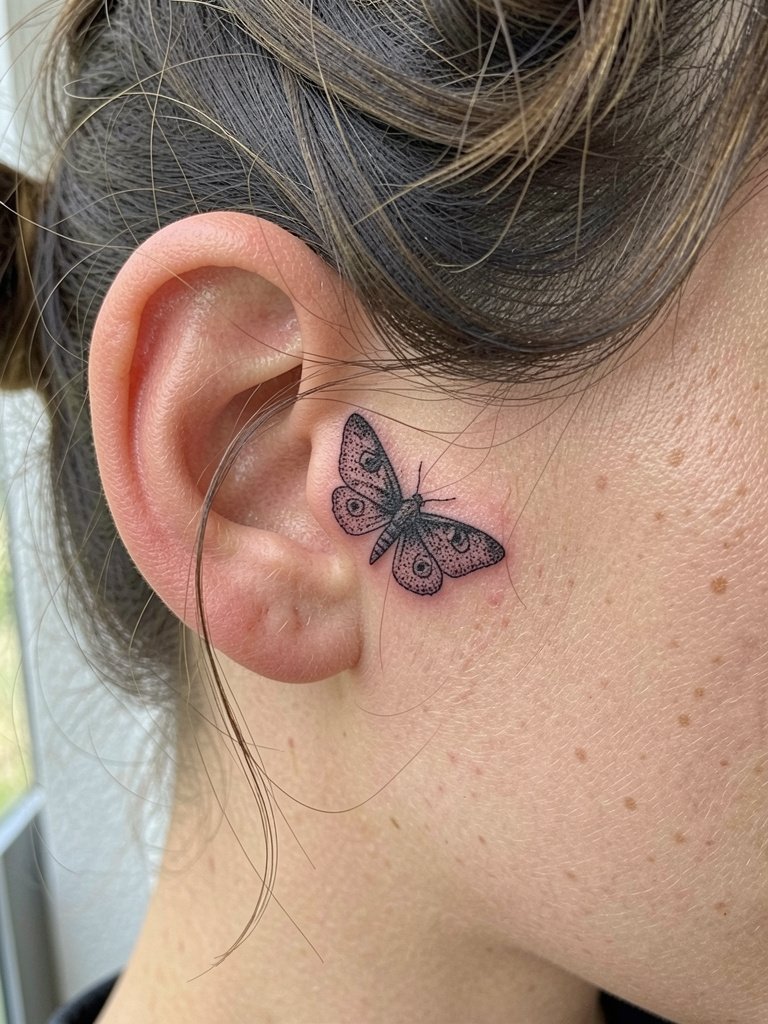
Behind-the-ear moths read as subtle accents and are great for collectors who want compartmental micro work. The skin is thin so single-needle work may need slightly bolder anchor lines to avoid early fade. Session time is short, but tell the artist to avoid dense shading in that spot to prevent blowout. A frequent mistake is cramming extra detail into the micro scale which disappears in months. For the session, have hair clipped up and wear an easy-neck top so the artist can reach the mastoid area. Expect a touch-up within two years for single-needle pieces.
8. Bold Flash Death Moth on the Forearm
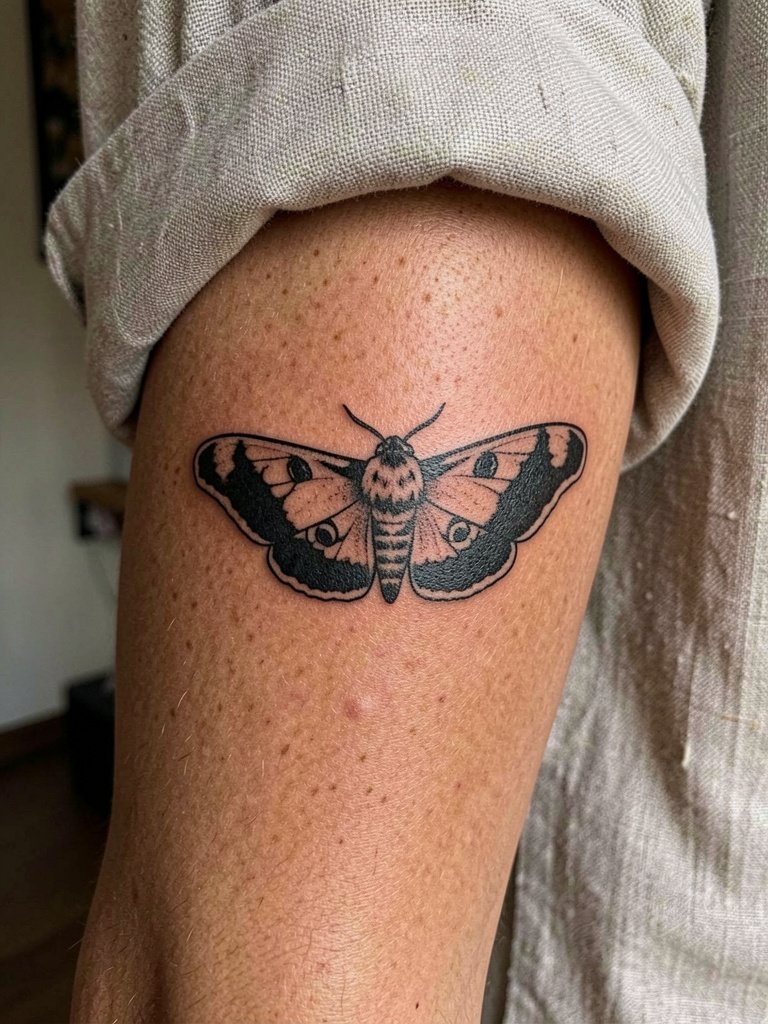
Flash-style moths speed up decision time and translate cleanly from sheets to skin because their shapes are simplified. I recommend a forearm flash when you want bold silhouette that ages into clear form. In the chair request the flash be scaled so the wing tips finish before the wrist and elbow creases to reduce distortion. One mistake is choosing a flash at a scale that lets the wings cross heavy movement zones, which can soften the pattern. For showing it off, a rolled linen shirt gives a casual frame without covering the art.
9. Calf Statement Moth with Ghost Motifs
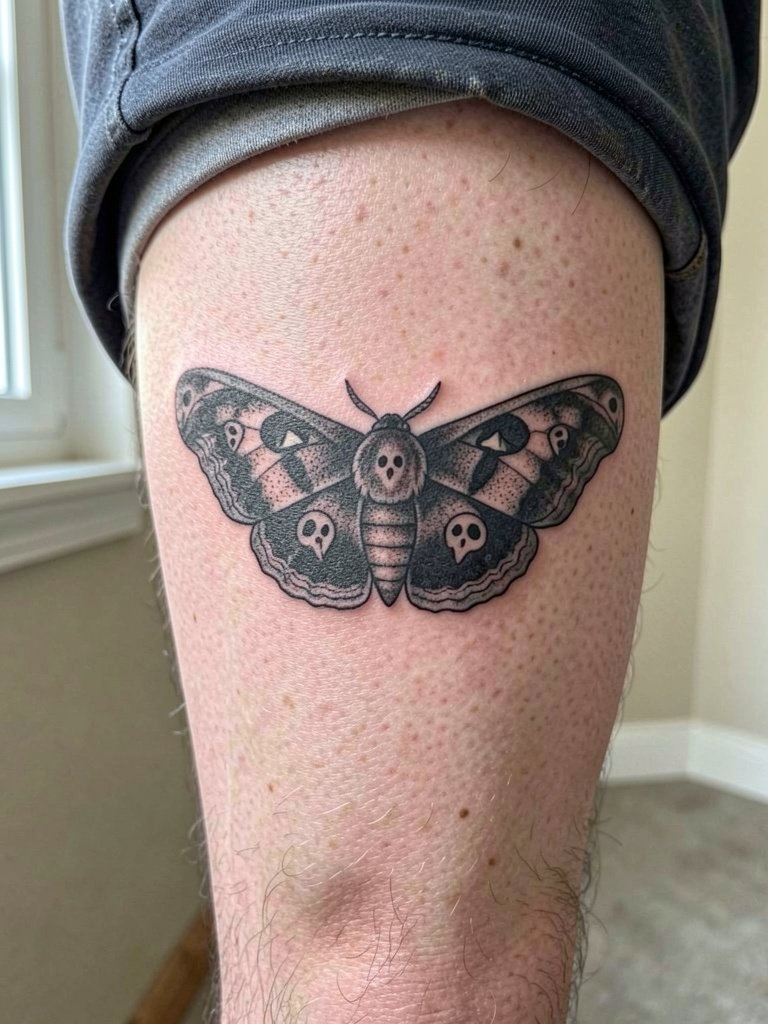
The calf gives space to add narrative elements like ghost silhouettes without crowding the moth. For longevity keep the darkest saturation in the central body and use lighter stipple shading on the ghosts so the main shape remains dominant. A common error is overworking the lower leg with too many tiny elements that compete with the wing spread. For session wear, pick shorts or joggers you can roll up easily. When styling the healed piece, midi skirts or cropped trousers that stop above mid-calf frame the design nicely so it reads as a deliberate statement.
10. Side Torso Wing-Spread Death Moth
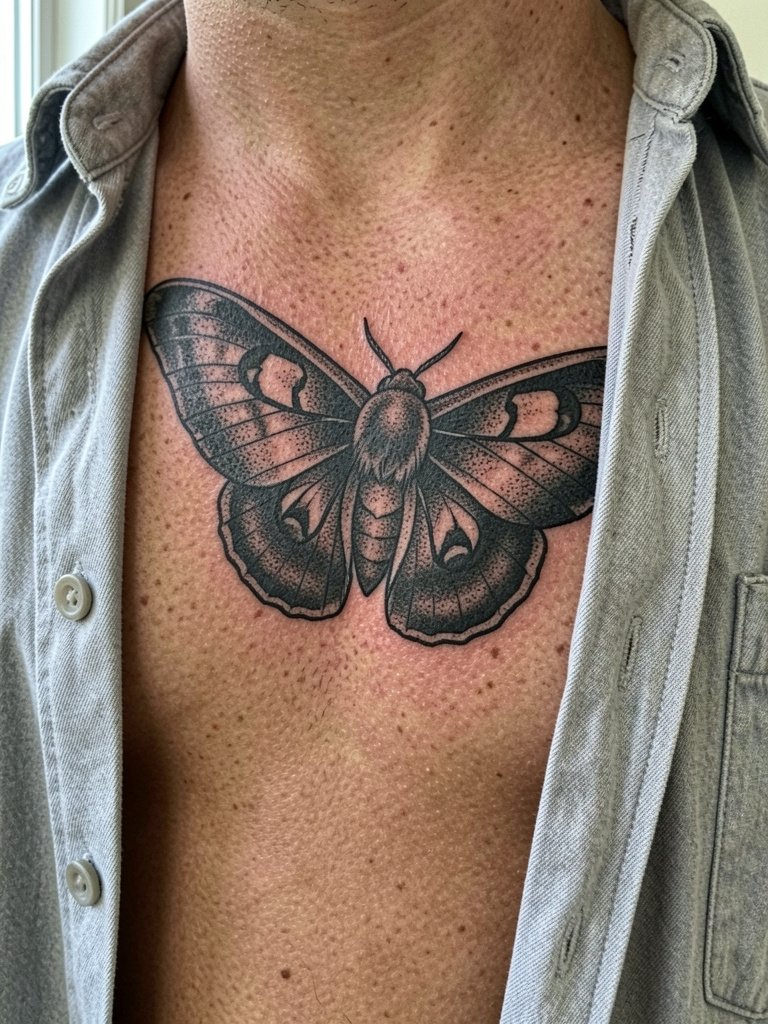
Ribcage placements let the wing spread look dynamic because the body curve adds motion. Fair warning, ribs are higher on the pain scale and the skin stretches more, so spacing has to be generous. The biggest mistake is packing too much micro detail into the wing edge which then blurs with body movement. During consultation specify you want wider wing bar spacing and consistent needle depth to avoid early softening. For session wear, loose button-downs and a soft bra are easiest to remove and replace during breaks. Expect two to three sessions for a large side-torso piece.
11. Death Moth Integrated with a Human Skull on the Thigh
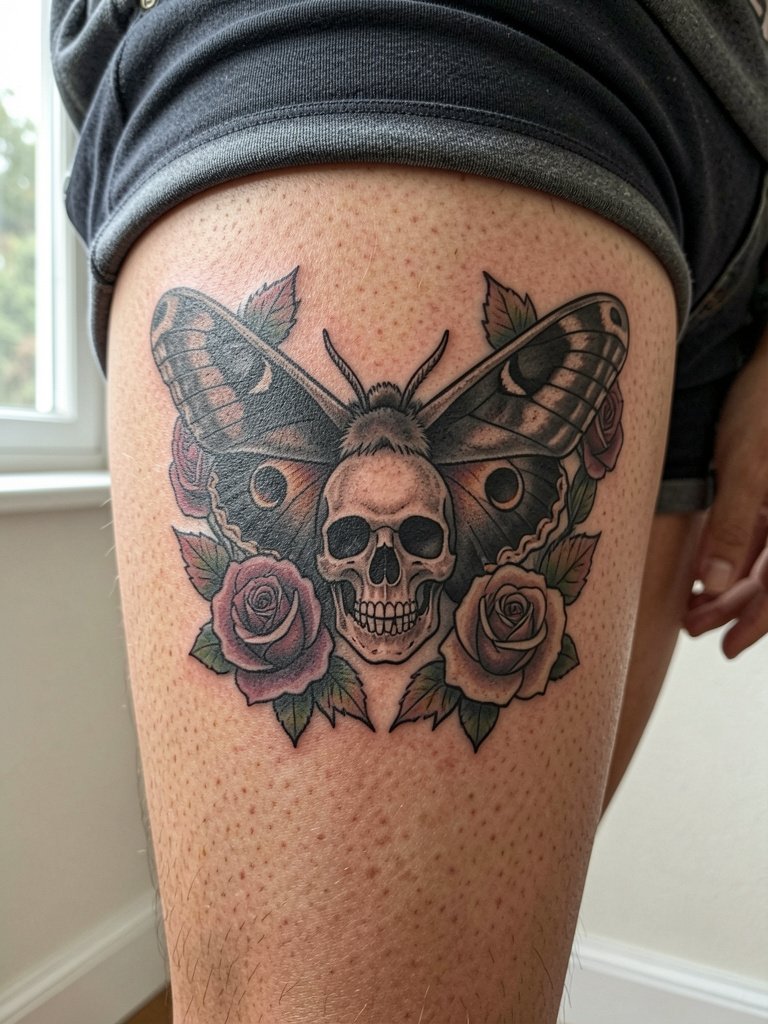
Skull integration doubles down on death symbolism and makes the motif obvious in thumbnails, which some collectors want. The color debate appears here too. One camp prefers black-and-grey because it preserves contrast and reads clearly even as saturation softens. The other camp says muted color accents make the composition feel custom and help separate the wings from the skull in a crowded leg layout. If you choose color, keep it muted and use it as accent only. For session planning tell the artist which elements must remain high-contrast so the skull does not get lost in the wings.
12. Sternum Ornamental Moth with Symmetry Lines
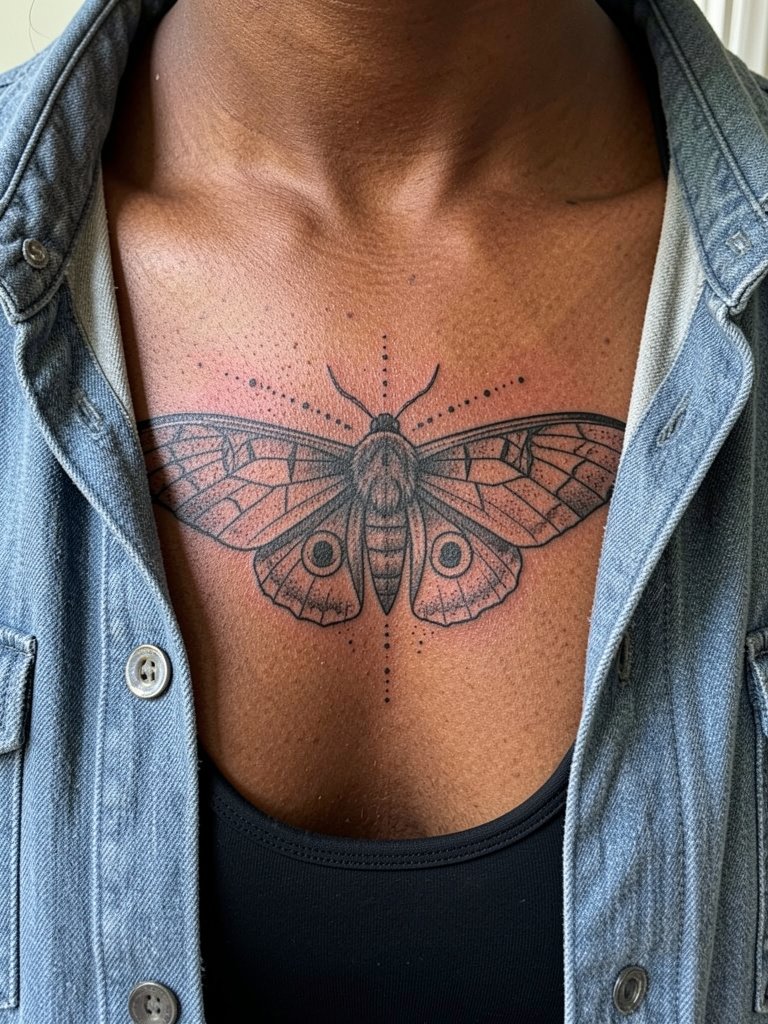
Sternum symmetry amplifies the moth aesthetic and suits jewelry-forward wardrobes. Tell the artist to draw the central spine and spacing lines on the skin and step back to check symmetry before tattooing. A common mistake is overcomplicating the negative space which can flatten the three-dimensional effect once healed. For session comfort wear a button-front that you can remove without tugging. For evening looks, layered necklaces frame the piece elegantly so it reads ornamental rather than purely gothic.
13. Micro-Realism Moth on the Ankle
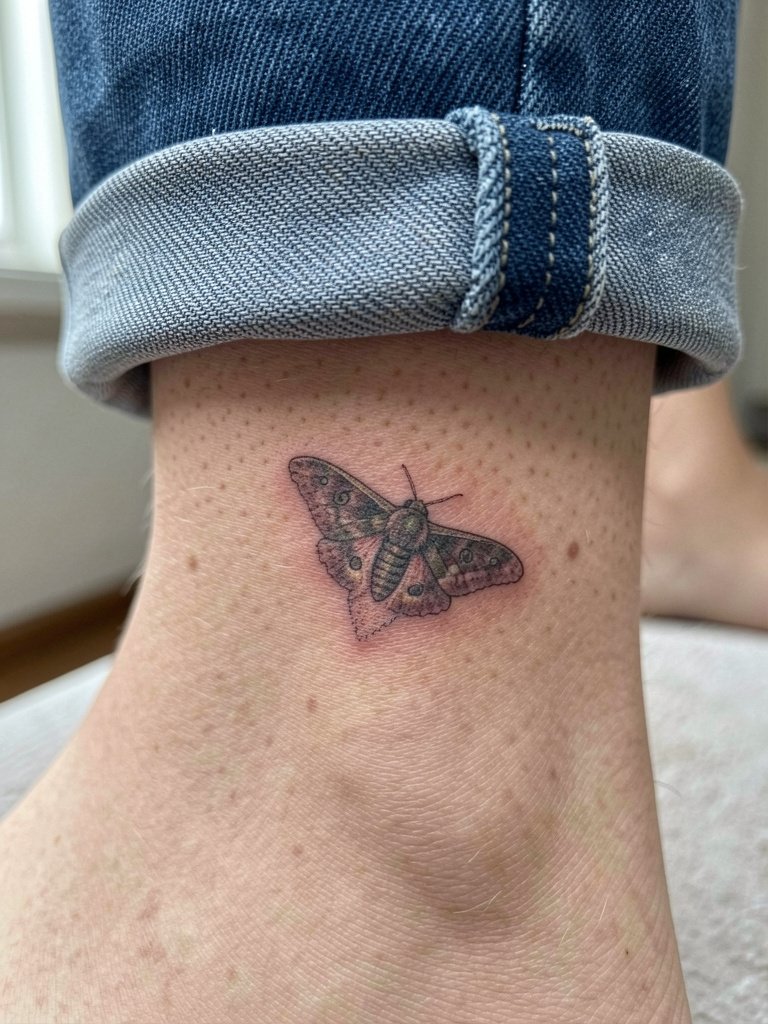
Ankle micro pieces face friction from socks and shoes, so silhouette clarity matters more than tiny shaded detail. Ask the artist to keep the core pattern bold enough that the micro shading reads as texture rather than a blur after six months. A regular error is choosing dense gradients at micro scale which wash out. For the session wear easy-roll pants or shorts and no socks on the tattooed foot. In daylight styling, cropped jeans and low-profile sneakers draw attention to an ankle moth without covering it.
14. Neo-Traditional Moth with Dagger Accent on the Outer Forearm
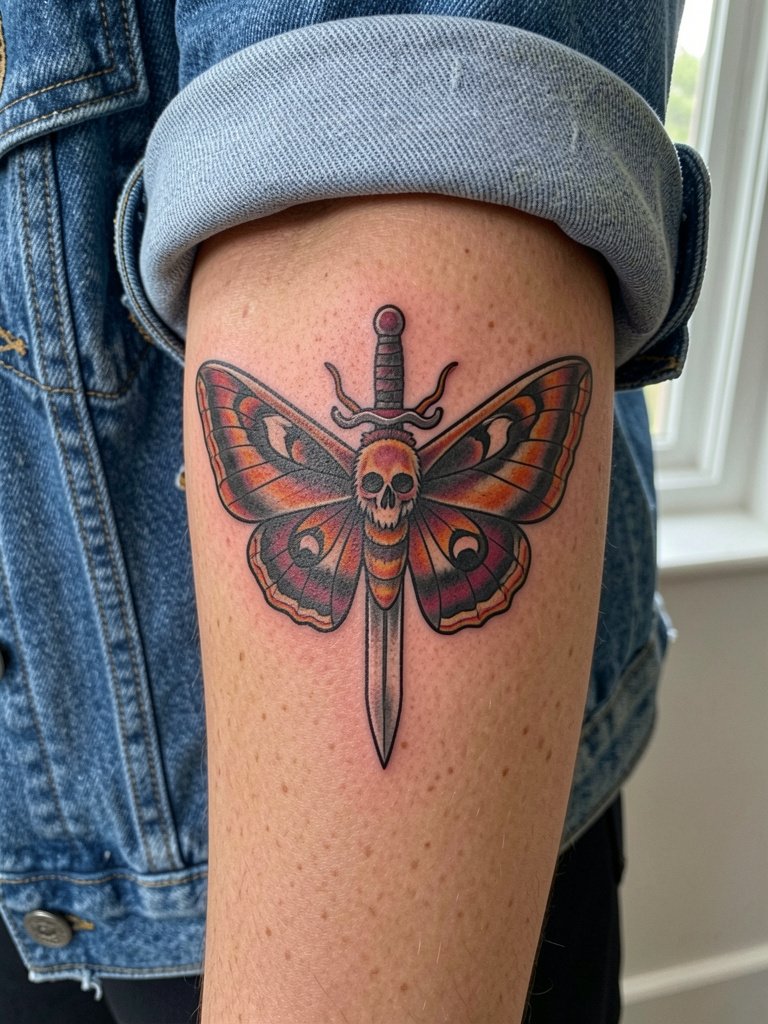
Combining a dagger with a moth reads occult and deliberate when the composition balances negative space and silhouette. For this forearm placement ask the artist to map the dagger line to the arm axis so it follows the limb rather than fighting it. A common mistake is placing the dagger perpendicular to the forearm which makes the piece look awkward as you move. For session wear bring a cropped denim jacket you can remove easily. Touch-ups for color accents may be needed sooner than solid black.
15. Inner Forearm Vertical Moth with Dot Work
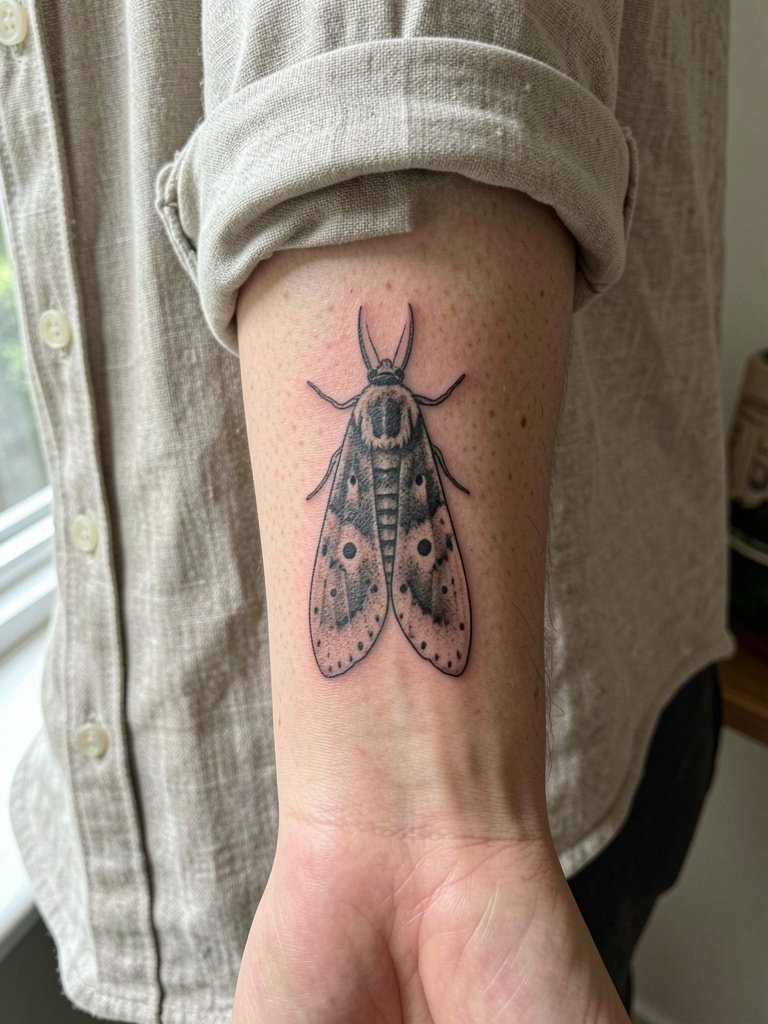
Inner forearm vertical pieces read well because the palm-up surface stays relatively flat and ages predictably. For dot work shading ask the artist to space dots so stipple stays distinct after a few years. The mistake I see is too-dense dot matrices placed at small scales which coalesce into gray patches. For the session wear a loose button-down or roll sleeves so the artist has clear access. This placement is a good compromise if you want a show-off piece that remains subtle under long sleeves.
16. Ribcage Gothic Moth with High-Contrast Wings
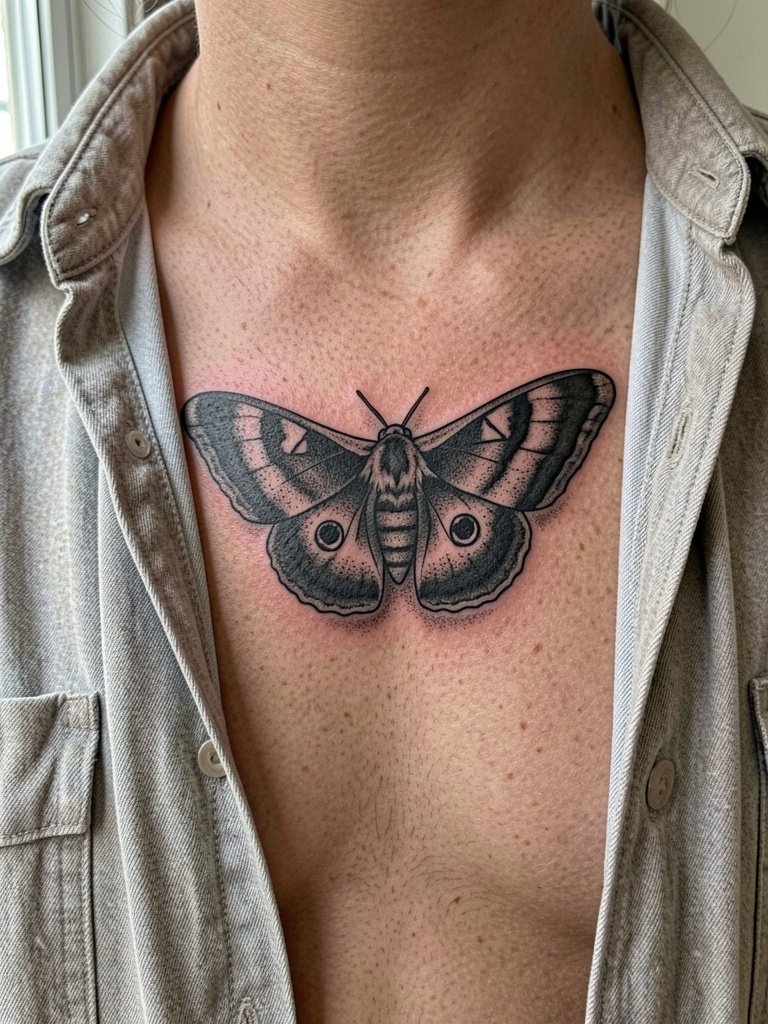
Ribcage is dramatic but high on the pain scale and high on movement for breathing, so plan sessions accordingly. The controversy over fine line on ribs applies here. One camp says fine single-needle lines will blur quickly due to skin stretch. The other camp maintains that with slightly wider spacing and controlled needle depth, fine work can settle well. If you want the moth to last crisp, favor bolder contours and gradated stipple rather than ultra-fine cross-hatching. Wear a loose tee or oversized button-down for the session so you can expose the side torso without tugging.
17. Inner Upper Arm Ornamental Moth
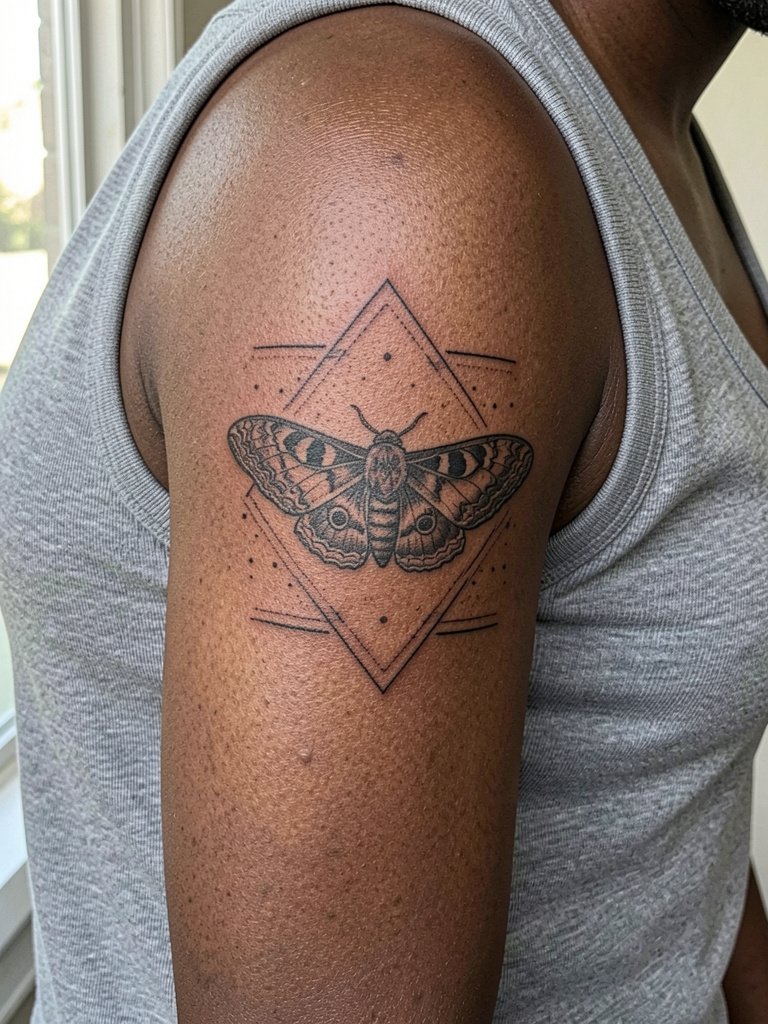
The inner upper arm is a slightly protected spot that lets ornamental details breathe without constant sun exposure. Because the skin can be soft, avoid overly fine cross-hatching near the edges to limit blowout risk. A common mistake is starting with tiny filigree which spreads outward; ask for modest spacing and a clear outer contour. For the session wear a wide-neck tank that exposes the inner arm without pulling fabric. This placement suits someone who wants a decorative, discreet moth that peeks out when desired.
18. Back-of-Shoulder Spread Moth
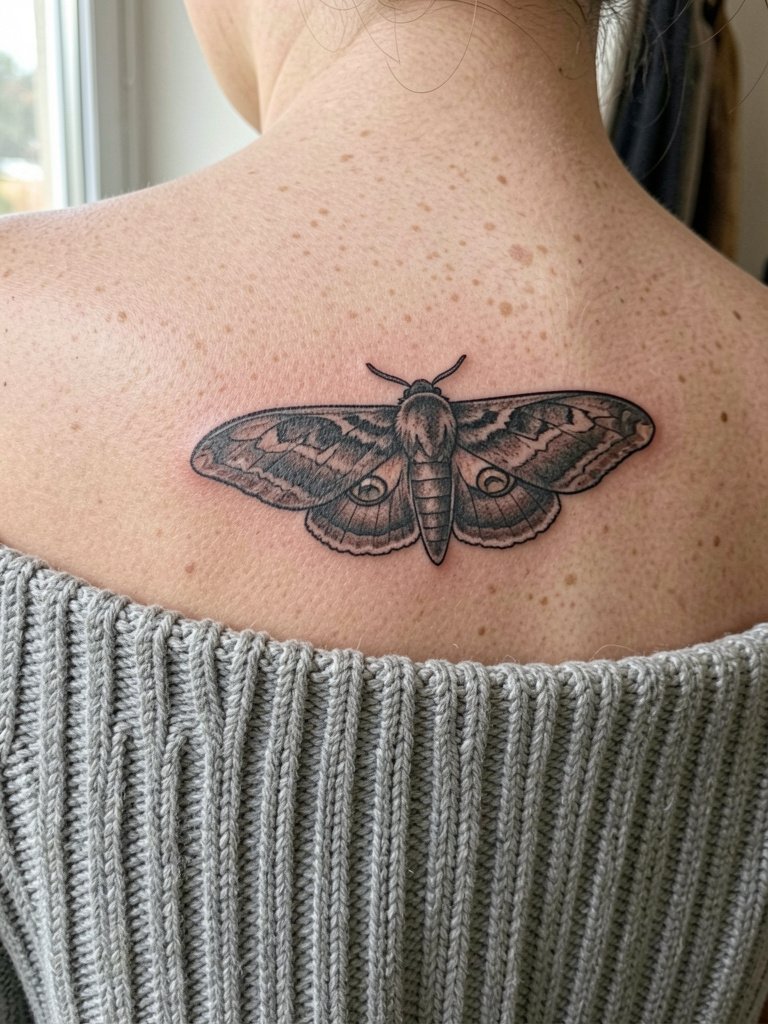
The back of the shoulder is forgiving for medium wings and looks great with off-shoulder styles. Ask the artist to align the center with the shoulder blade so wings lay flat and avoid crossing the scapula crease which can distort lines with movement. Mistakes include placing overly dense shading where the shoulder rubs against straps, which accelerates softening. For wardrobe pairing try an off-shoulder knit or square-neck top that frames the wing sweep. Session access is straightforward, and touch-up needs are moderate for this zone.
19. Micro Moth Behind the Knee
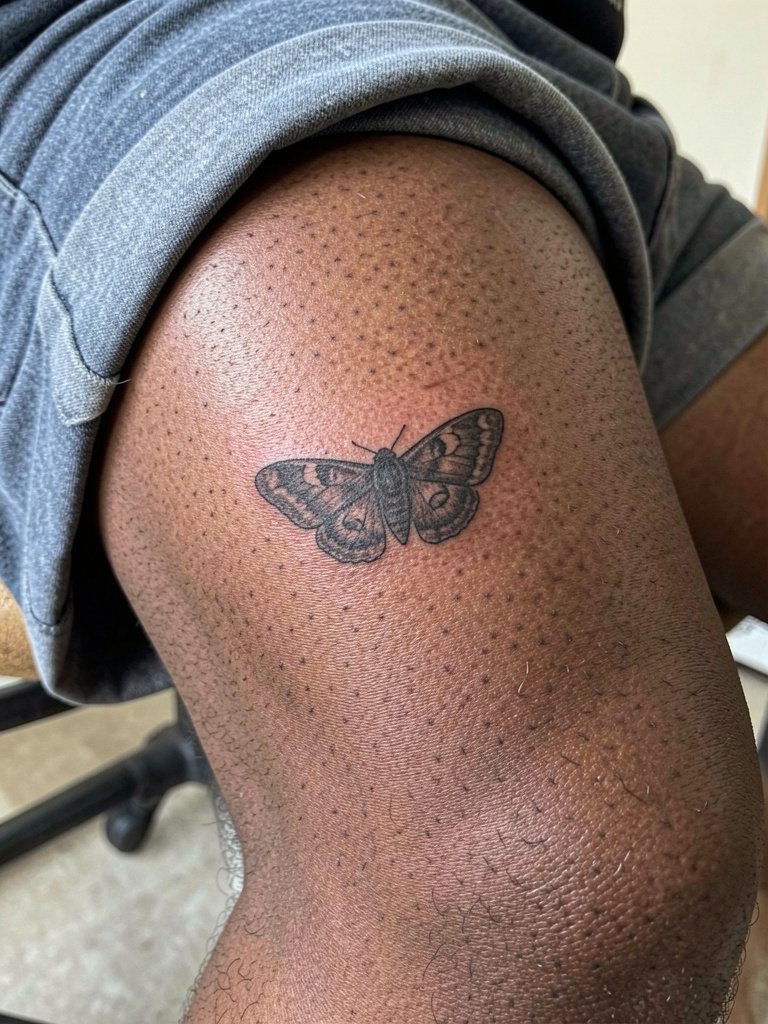
Behind-the-knee tattoos face a lot of bending and stretching, which can cause micro detail to soften quickly. For this placement favor silhouette clarity over tiny veins or tiny stipple. A mistake is using dense dot work at micro scale in a high-movement crease; it usually blurs. For the session wear shorts you can sit comfortably in and avoid tight kneeling positions. Healed results often need touch-ups by year three, so factor that into your plan if you want the tiny look to stay crisp.
20. Thigh Panel Moth with Decorative Negative Space
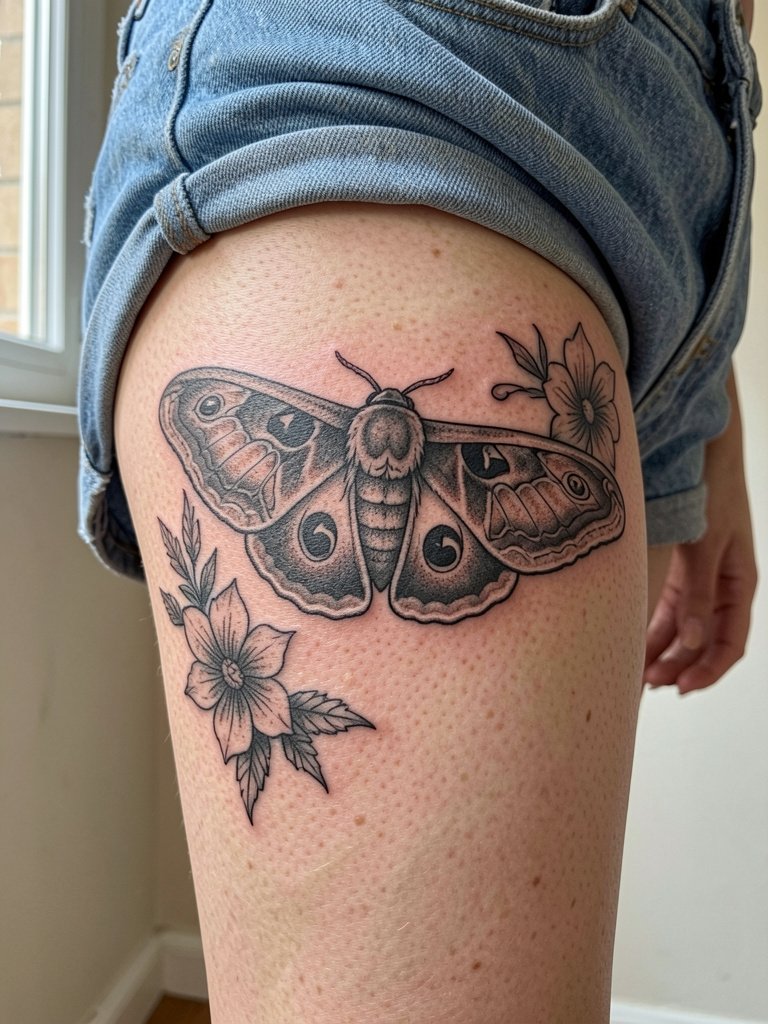
Thigh panels give room for interplay between negative space and ornamentation while staying easy to conceal. Choose spacing that keeps the central moth darker and the decorative negative shapes lighter so the subject stays clear. A common error is filling every nook with pattern which makes the moth compete with itself. For shows off pair the healed piece with a high-waisted short that leaves the mid-thigh visible. Session comfort is high; you can often lie on your side for easier access.
21. Minimalist Moth on the Upper Chest Near the Clavicle
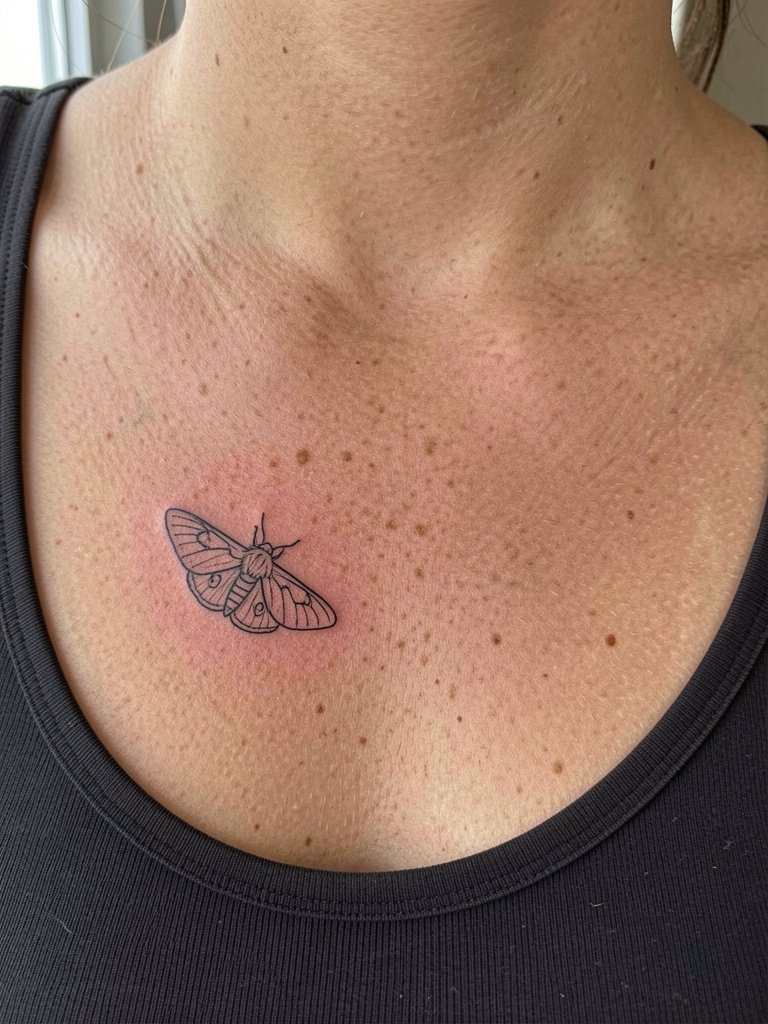
This placement reads intimate and elegant when executed with confident, slightly reinforced contour so the single-stroke line ages into a crisp form. A typical mistake is making the line too thin for the collarbone area which causes early feathering. For session wear a low-neck or wide-strap top and ask the artist to show healed examples in similar skin tones. The collarbone moth pairs nicely with layered thin chains and a scoop-neck tank for subtle daytime display.
22. Full-Back Cabal-Style Death Moth
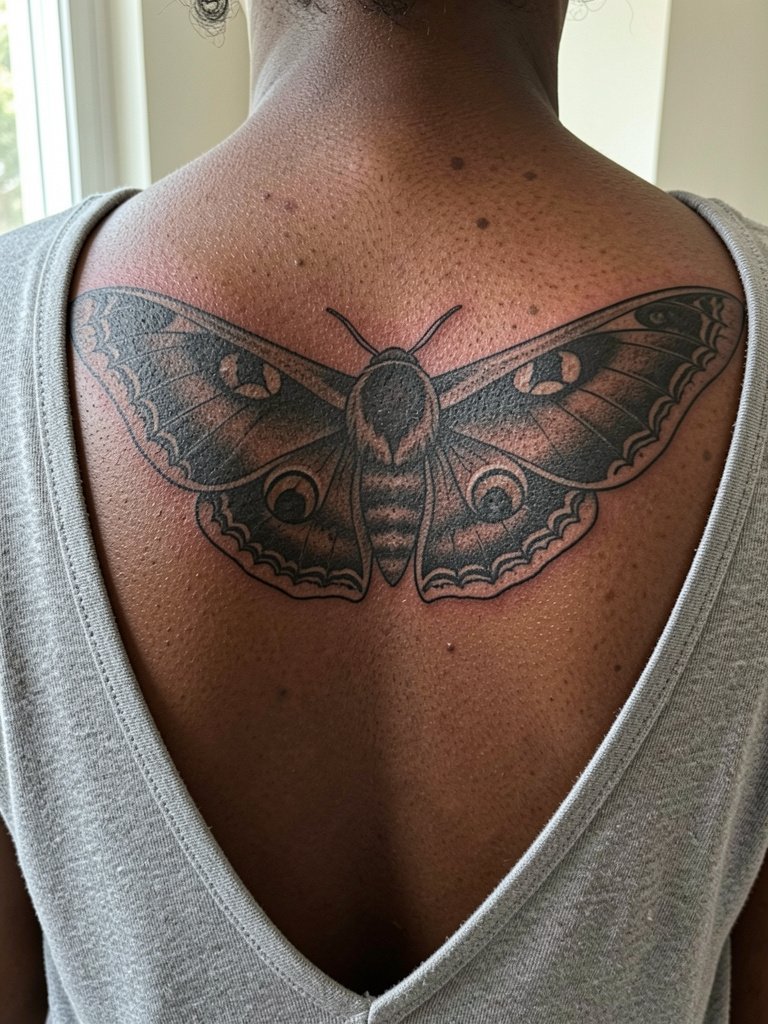
A full-back moth is a major commitment and gives the artist room to use scale to protect detail over time. Ask the artist to map the wing landmarks across the scapula so the design moves with the shoulder rather than against it. A common mistake is adding excessive micro texture in the wing interiors that loses contrast across a broad surface. For session planning wear an open-back top you can remove without wriggling. Touch-ups for a full-back can be scheduled selectively where needed, not necessarily across the whole piece.
23. Pocket-Sized Moth for Finger or Side Thumb
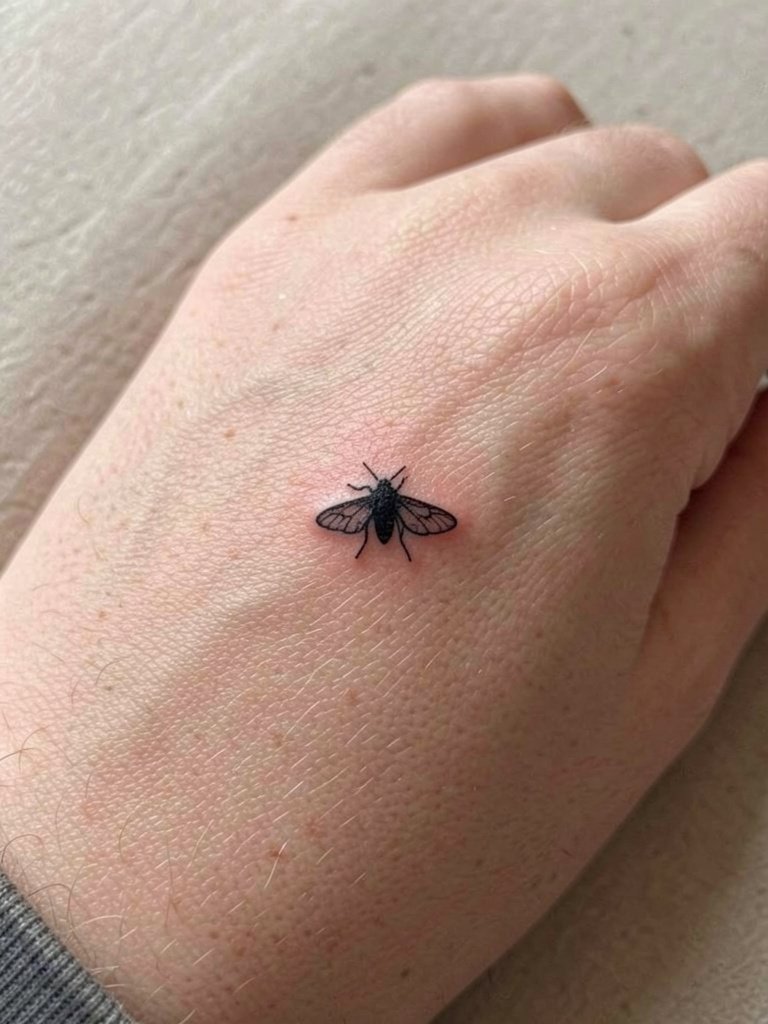
Finger and thumb placements take heavy wear and washing, so silhouette clarity beats micro detail every time. Ask for bold anchor lines and avoid tiny veins or stipple inside the wings. The usual mistake is choosing a highly detailed reference that cannot survive constant hand use. For the session keep the hand clean and avoid rings that might rub the area; after healing the piece pairs well with minimal chain bracelets on the opposite wrist. If you want it to last longer, plan on a touch-up within the first year.
Frequently Asked Questions
Q: How do I choose between black-and-grey and muted color for a death moth?
A: Black-and-grey keeps contrast high and tends to age with more predictable readability, which is why many collectors choose it for central motifs. Muted color accents can help separate wings and decorative elements, but ask the artist to use color sparingly and avoid dense color packing near the skull area so the main shape stays legible.
Q: Are fine-line death moths risky on high-movement areas like ribs and inner wrist?
A: Fine line can blur faster on high-movement or thin-skin areas if the spacing is too tight. One approach is to increase line weight slightly and give each vein room; that preserves the delicate look while improving longevity. Expect touch-ups sooner than for bold blackwork.
Q: What should I wear to a session for placements I can’t easily reach?
A: Pick clothing that exposes the area in its normal worn position without pulling. For ribs or side torso choose an oversized button-down, for sternum a button-front or sports bra, and for thigh or calf wear shorts with a comfortable hem. A second shirt to change into after the session is useful.
Q: Where can I find healed examples and local artists who do death moths?
A: Search visual platforms with hashtags like #deathmothtattoo and #blackworktattoo then use location filters to narrow to nearby portfolios. Pinterest is good for style aggregation but verify that images link back to artist portfolios. Reddit threads in r/tattoos and r/tattooadvice are practical for healed photos and session stories.
Q: How often will a death moth need touch-ups?
A: Touch-up frequency depends on placement and style. Bold blackwork in mid-arm or back areas can go several years before a touch-up, while single-needle or finger pieces commonly need a touch-up inside one to two years. Plan touch-ups into maintenance if you value crisp linework long-term.
