

Fine-line wrist scripts that get the most likes often blur faster than small bold florals, and that surprise trips up a lot of first-timers. I focus on designs that read well after healing, not just on the appointment day. Expect practical notes on placement pain, realistic touch-up timelines, and what to wear so the artist can work without tugging fabric. Start with the tiny moons that tend to hold their shape.
1. Fine Line Crescent Moon on the Wrist
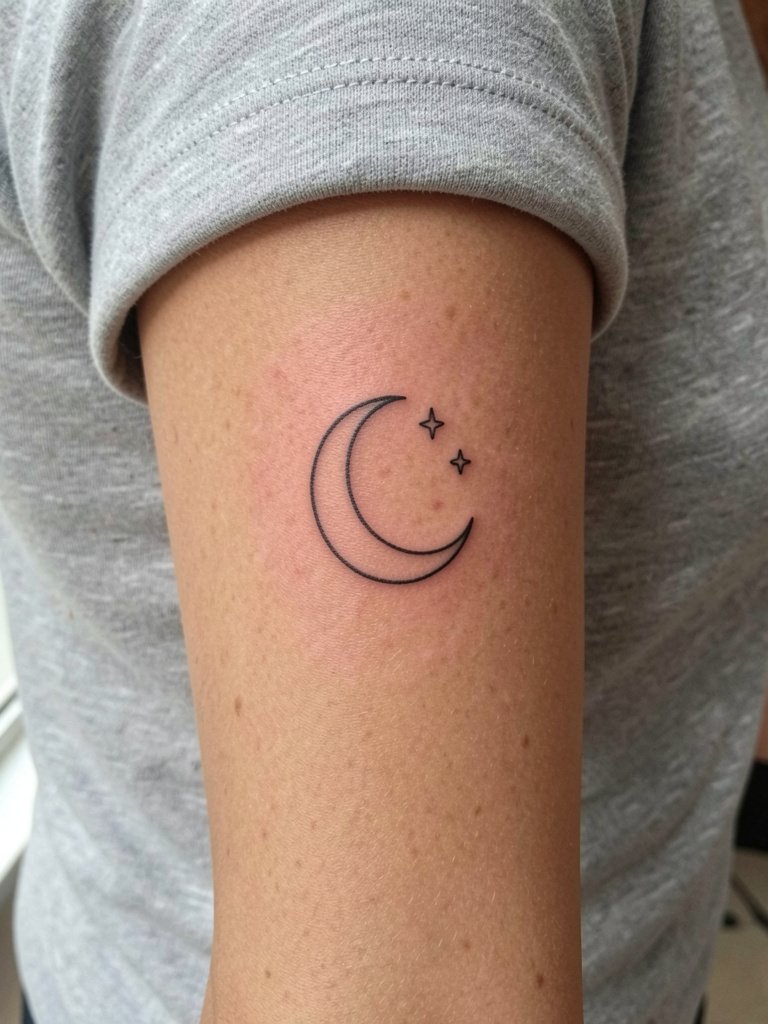
A one-inch crescent with micro stars reads like jewelry on the wrist and works for single-session bookings. Artists disagree on fine line longevity on high-motion spots. One camp says ultra-thin strokes blur within two years on the wrist. The other camp argues that slightly heavier single-needle weight and tiny spacing help lines settle and remain legible for much longer. For a moon that holds, ask for a hair heavier line weight than the softest reference and clear spacing between stars. Styling tip: pair this with a thin chain bracelet set on the opposite wrist so the tattoo reads as a curated accessory during warm months.
2. Botanical Sprig Along the Inner Forearm
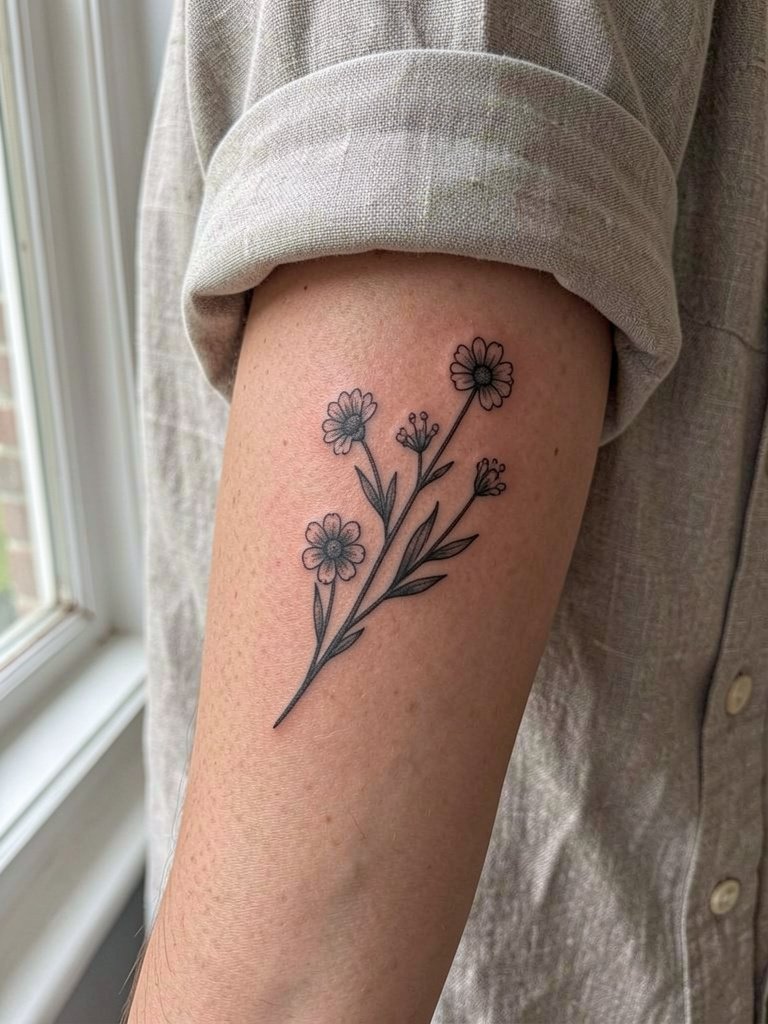
A vertical sprig reads beautifully on the palm-up surface because the design follows the arm’s natural line. Common mistake is asking for ultra-tiny petals that merge after six months. Request slightly separated petals and soft stipple shading in the consult so the flower holds when healed. Touch-up timeline for this style is often a single small session at 12 to 18 months if any fading shows. For session wear bring a linen button down shirt you can roll up, and skip tight cuffs that rub the fresh ink.
3. Small Rose with Classic Shading on the Shoulder
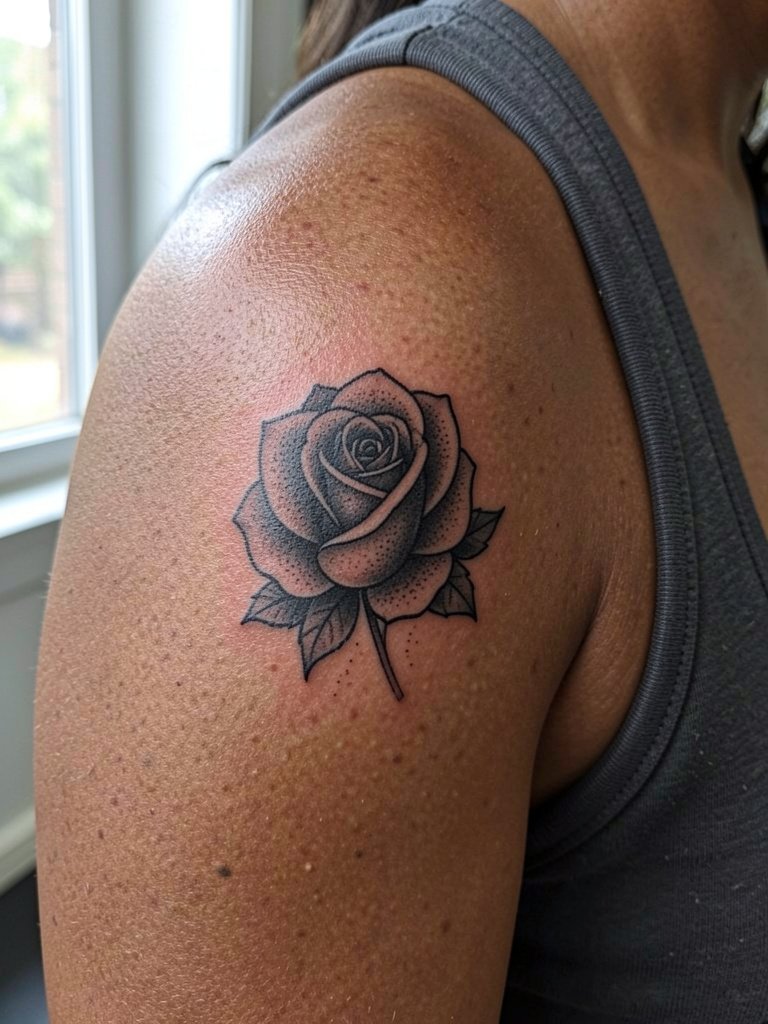
A compact rose with confident outlines ages better than a faint outline with tiny shading. The color versus black and gray debate splits people. One camp prefers black and gray because it generally retains contrast and clarity longer. The other camp favors color for personality and impact, accepting more maintenance down the road. If you want longevity, ask for bold contour lines and layered shading rather than a fragile outline. Session time for a small shoulder rose is usually under an hour. Show-off pairing: sleeveless tanks or a cropped denim jacket frame the piece, try a racerback tank top for easy showing.
4. Winding Snake Around the Inner Forearm
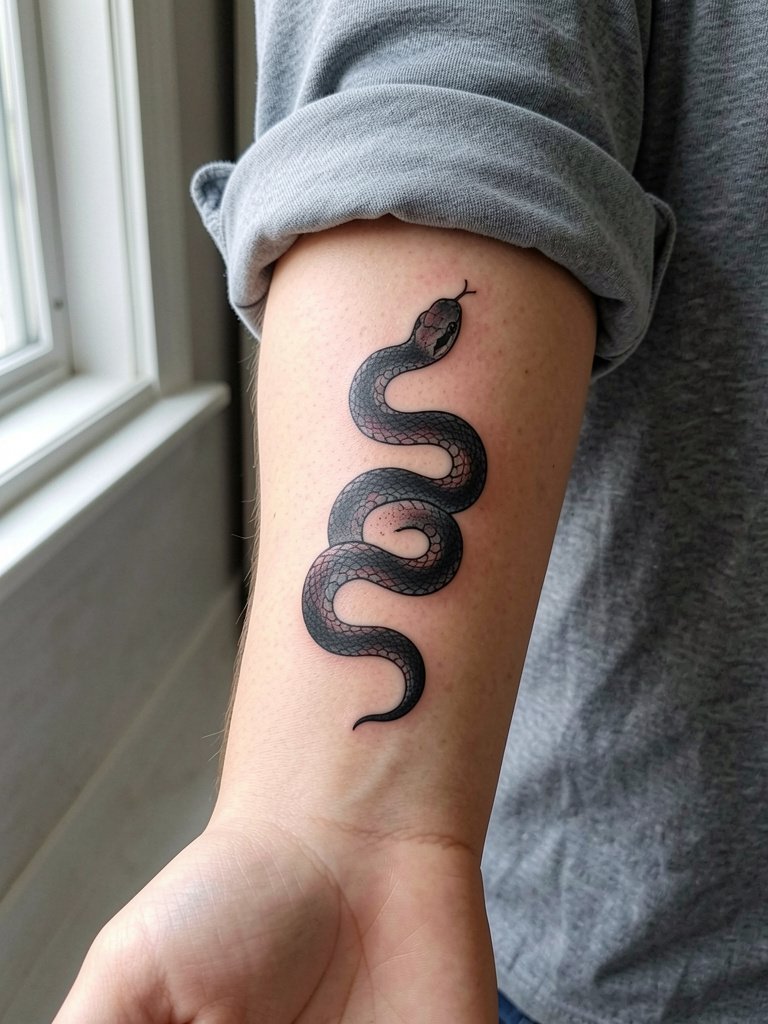
A snake lets you combine sinuous linework and small scale texture. Mistakes happen when clients insist on too many thin internal scales for a one-inch tattoo. The fix is to increase the overall size by an inch so details keep breathing. Pain on the inner forearm is typically lower than ribs, and most of these fit into a single appointment. For the session wear a loose button-down so the artist can roll the sleeve without tugging. For showing off, a dainty dainty gold bracelet keeps focus on the coil.
5. Micro-Realism Butterfly on the Ankle
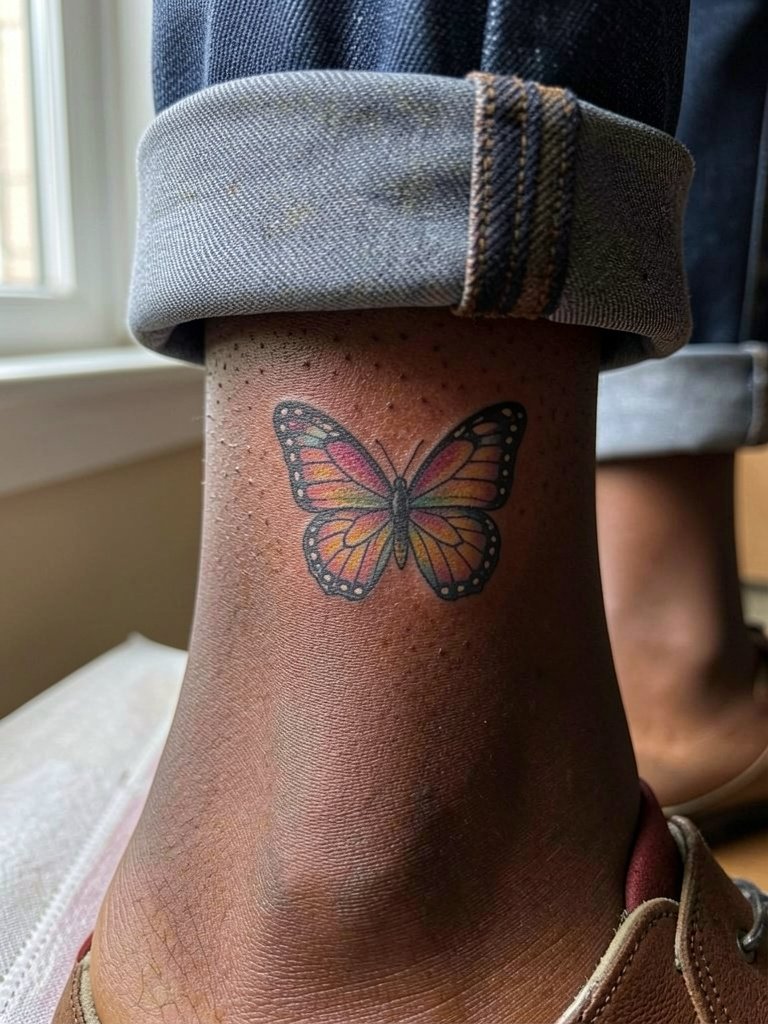
Tiny butterflies look classic but they need breathing room to avoid mushy wing veins over time. The common error is scaling down a medium reference to thumb-size. For micro-realism, aim for slightly larger wings or simplify the veinwork. An ankle placement faces shoe-friction, so healing can be bumpier during the first week. Session wear is easy roll-up pants and low-cut sneakers. To highlight the piece pair it with strappy sandals when healed.
6. Script Single Word Along the Collarbone
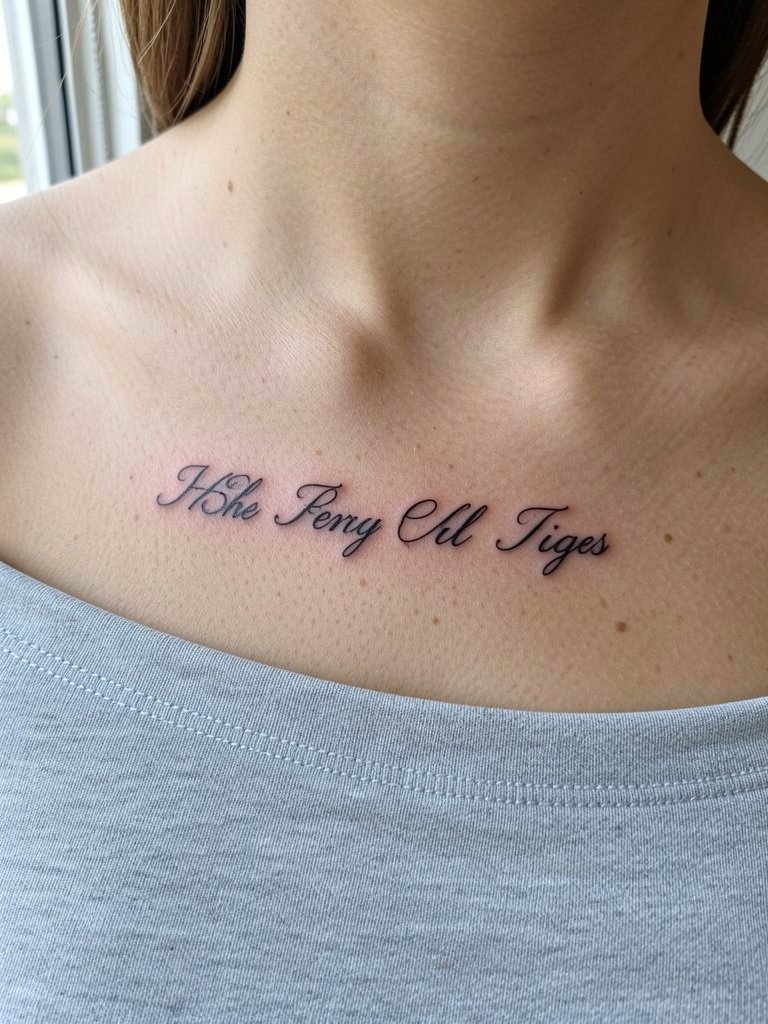
Short script across the collarbone reads like a trim necklace when the lettering is sized correctly. The common mistake is choosing an ultra-thin script with tight connections that fill in as skin moves. Ask for slightly increased spacing and a thicker downstroke on the letters so the word keeps contrast at 6 and 18 months. Sternum and chest areas can stretch with weight changes so plan placement slightly higher or lower if you expect body shifts. Wear a scoop neck blouse to frame the piece after it heals.
Before You Book
The wrist, forearm, and collarbone pieces above behave differently when healing. These small placements benefit from a few specific items that make the first week cleaner and less prone to snagging.
-
Aveeno-style fragrance-free lotion. A lighter daily moisturizer that keeps fine line work from cracking after the initial scab phase without leaving a greasy film.
-
Cetaphil-type gentle cleanser. A non-foaming, fragrance-free wash is easier on sensitive healing skin, so you avoid irritation during daily rinses.
-
Bepanthen-style aftercare ointment. For people who do better with a thin protective balm on day one, this kind of ointment helps until the skin starts to matt over.
-
Fragrance-free sunscreen for healed tattoos. Once closed, a mineral sunscreen protects fine line and color work from fading in sunny months.
-
Second skin style adhesive bandage roll. Useful for locations that rub clothing, it reduces friction and keeps the area cleaner for the first 24 to 72 hours depending on your artist's plan.
7. Lotus Mandala on the Sternum
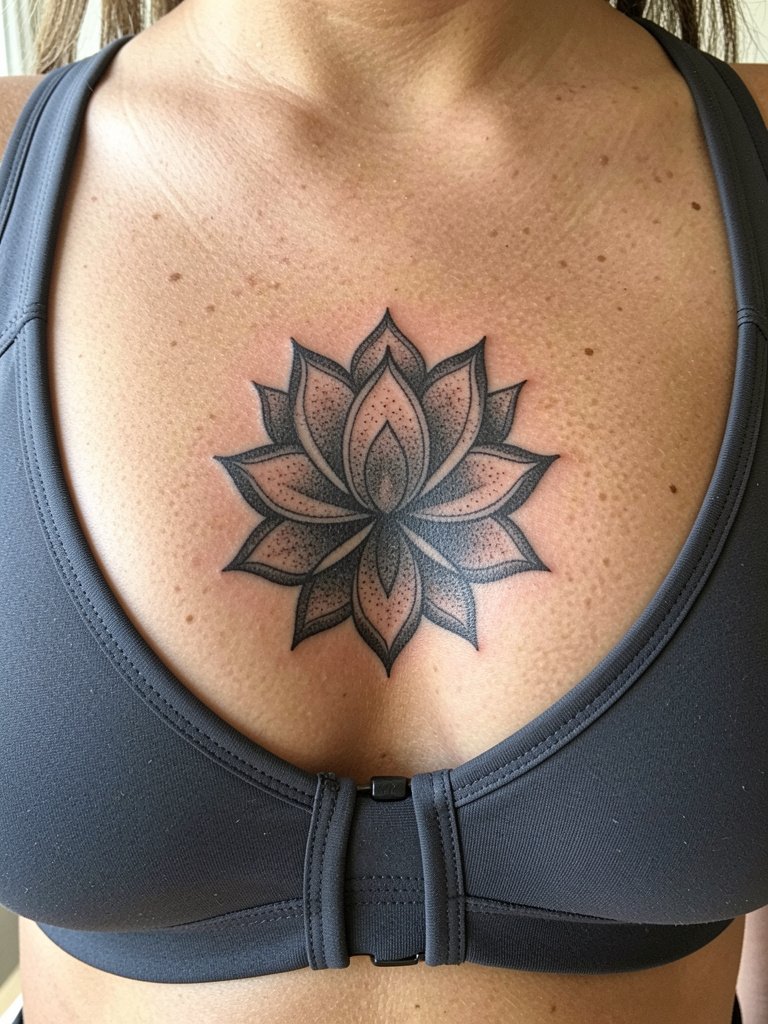
Sternum work reads best when the design has a clear center and slightly bolder outer lines. Pain is commonly higher on the sternum, so plan for breaks and realistic session pacing. The typical mistake is cramming a highly detailed mandala into a very small space which blurs as the skin moves. Ask the artist to map the design at the size you intend to wear it, and plan for a two-part session if needed. Session wear: a front-clasp bralette or loose top so you can move fabric without tugging the fresh area.
8. Delicate Floral Garland Across the Collarbone
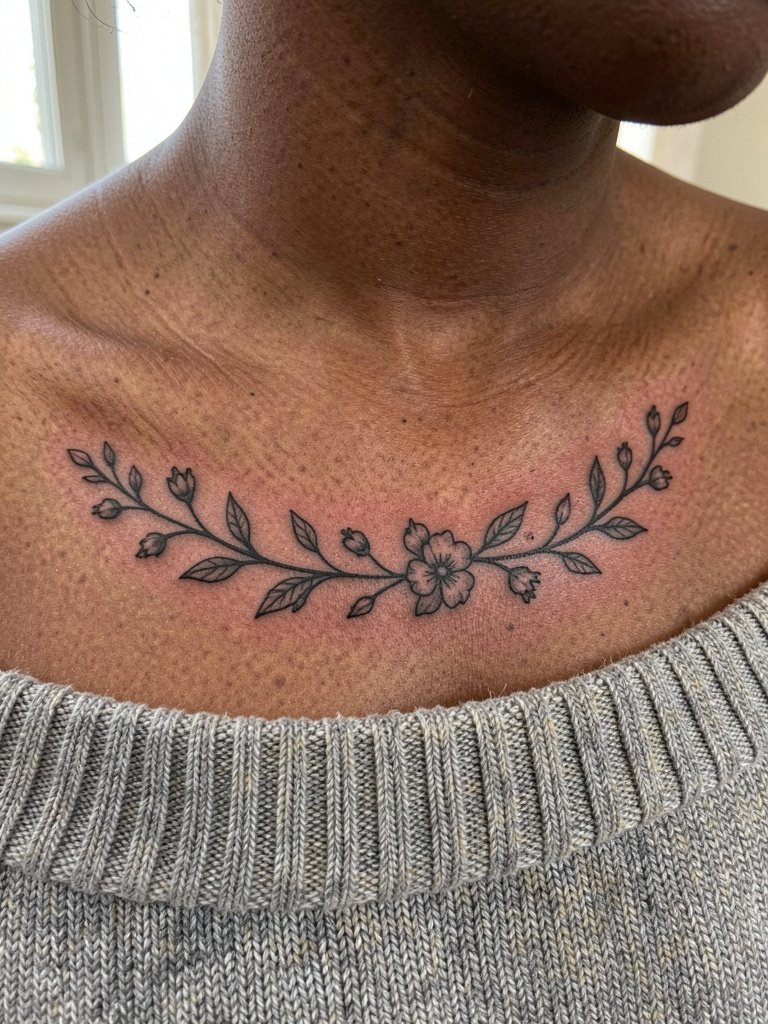
A garland that follows the collarbone benefits from asymmetric spacing so it complements the natural dip of the bone. New clients often request a perfect mirror image which can look stiff on real bodies. For longevity, keep the stems slightly thicker than the thinnest reference and choose dot shading rather than flat grey fills. The piece pairs with layered necklaces and an off-shoulder top when you want to show it.
9. Ornamental Hand Piece or Finger-Adjacent Vine
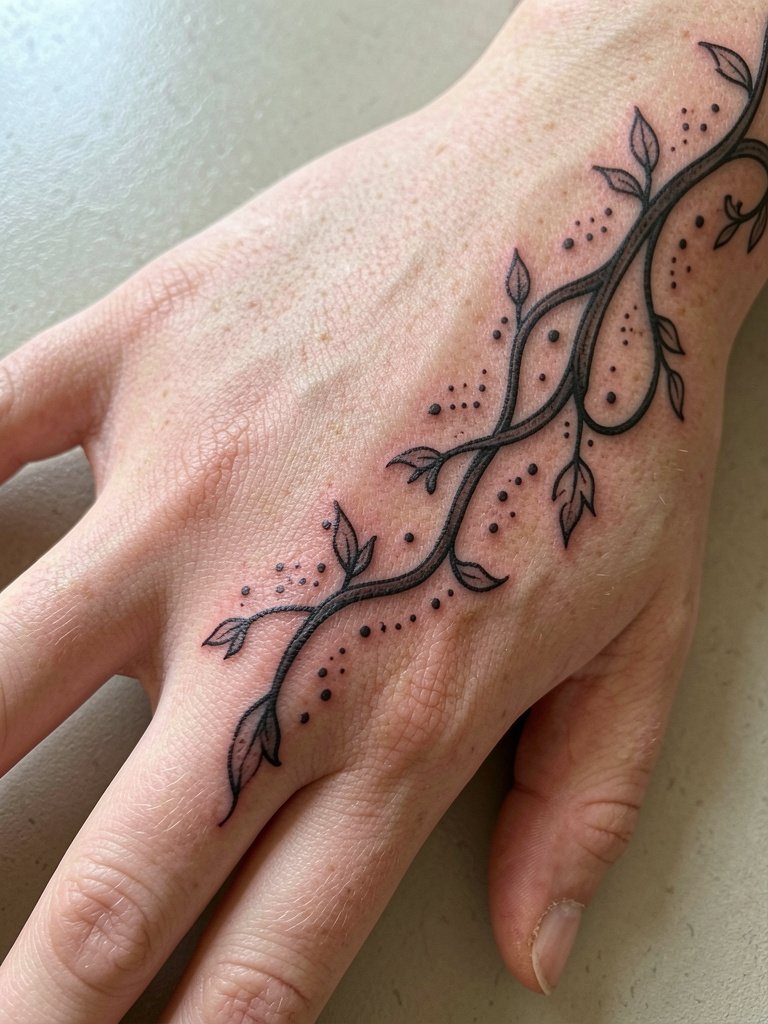
Hand and finger tattoos become part of everyday wear so plan for earlier touch-ups. The biggest mistake is insisting on extremely thin decorative lines on the hand where superficial blowout is more likely. Choose slightly bolder linework and expect a touch-up within 12 months. For the session avoid rings and wear short sleeves. To style during the healed months try simple stack rings on the opposite hand rather than the tattooed fingers.
10. Small Shoulder Floral or Celestial Accent
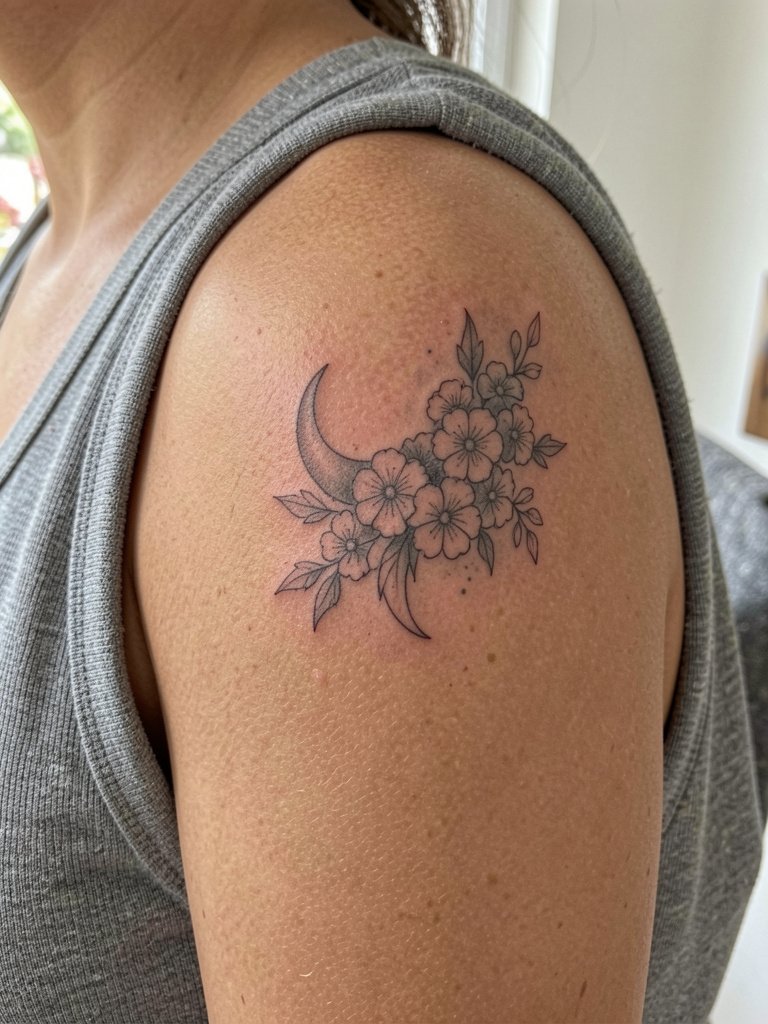
Shoulder accents are a safe starting place for first-timers because they hide easily and expand well into larger work. People sometimes ask for very faint watercolour washes that lose contrast quickly. A better approach is crisp linework with targeted soft shading to keep depth. Session time is usually under an hour. Show-off pairing includes cropped denim jackets or racerback tanks. For ease of access wear a tank top to the appointment.
11. Patchwork Collection Starter on the Forearm
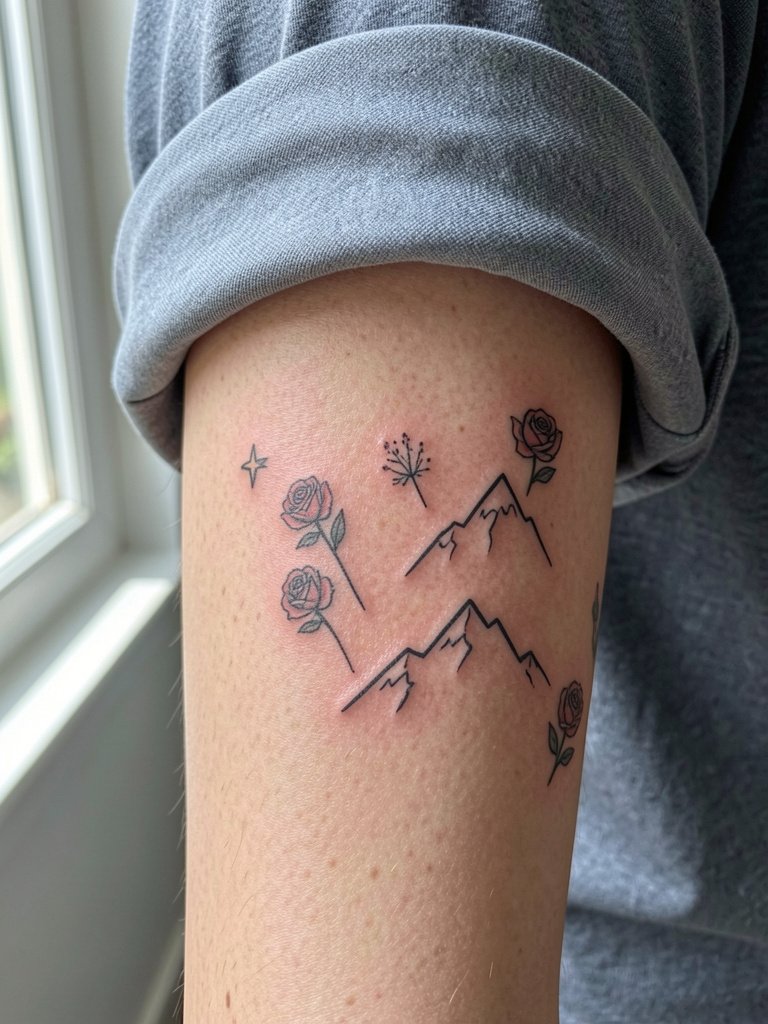
A patchwork approach lets you build over time instead of committing to one big image. Mistake patterns include using the same scale for every piece which creates crowding. Plan a layout with negative space so new flash or custom pieces have room. Touch-up rhythm varies by piece but expect small touch-ups as the collection grows. Session wear: a loose button-down works well. For styling, rolled-up linen shirts keep the forearm central and visible; try a rolled sleeve shirt for show-off moments.
12. Tiny Geometric Star Set for Matching Ankles
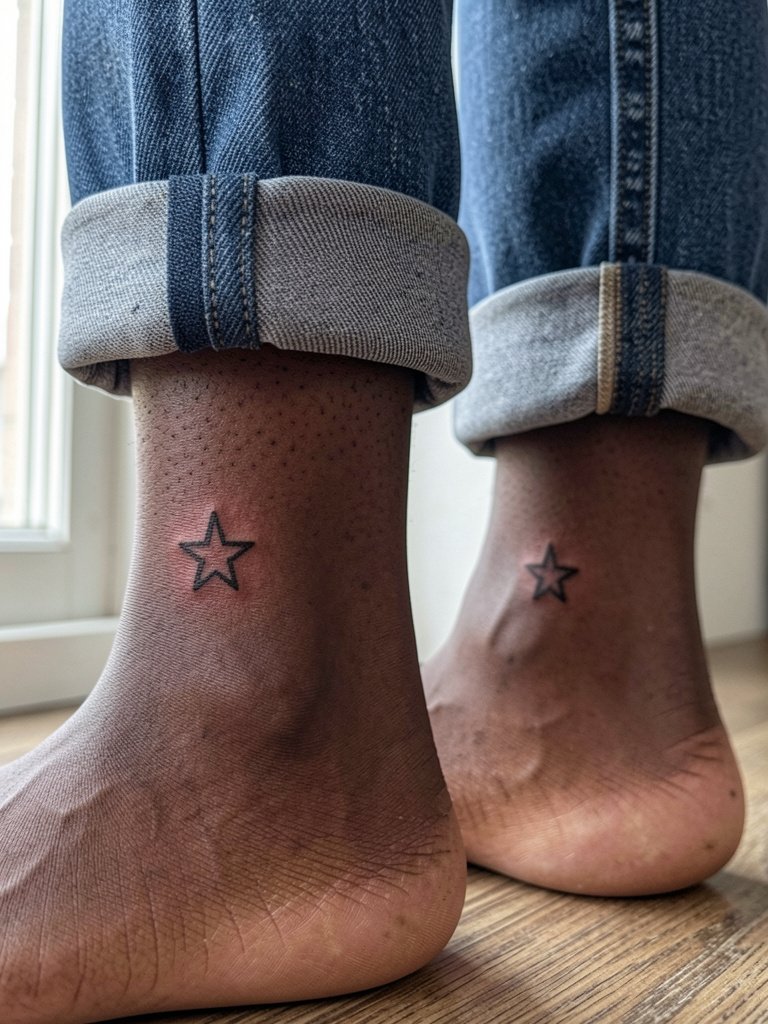
Micro symbol sets are popular for friends or solo pairs, and they work best when the line weight is deliberately heavier than a hairline. Small stars on the ankle face shoe plus sock friction while healing, so protect them with a breathable bandage on day one. A common styling move is low-cut sneakers and cropped trousers. Bring pants that roll up easily for the session and consider cropped straight leg pants afterward to show the placement.
13. Neo-Traditional Medusa Portrait on the Outer Upper Arm
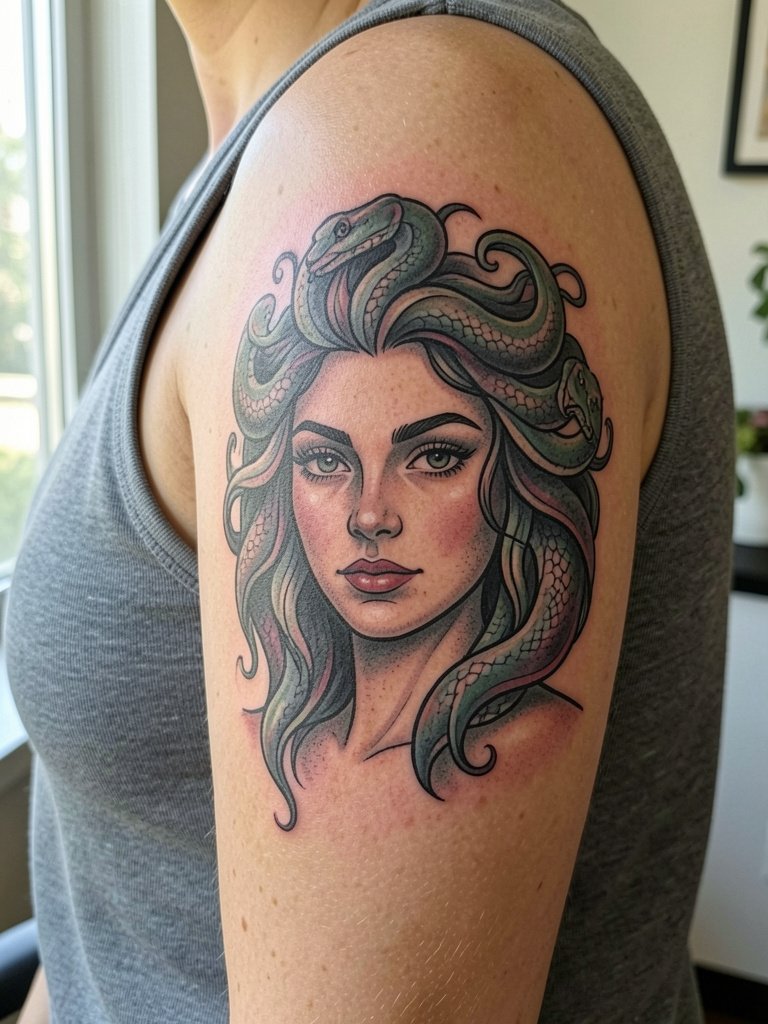
A Medusa-style portrait is a medium piece that rewards studio time. The main mistake is compressing too many facial details into a small area which confuses the portrait after healing. Plan for 2 to 3 sessions depending on color saturation. Outer upper arm pain is moderate and allows comfortable breaks. Styling-wise, sleeveless tanks and cropped jackets show the art well, try a cropped denim jacket for framing.
14. Phoenix on the Outer Thigh
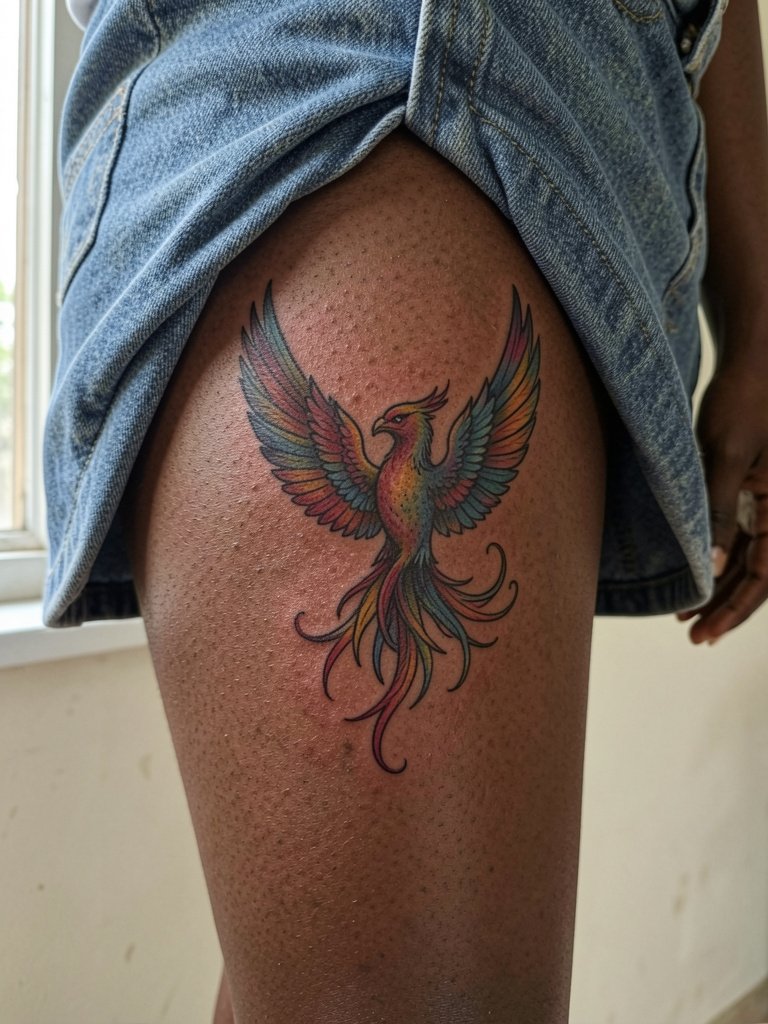
Larger symbolic pieces like phoenixes need motion in the composition so feathers read even at a distance. People sometimes try to cram a full-color realism reference into a single three-hour session which leaves saturation patchy. Expect 2 to 4 sessions for full color and flow. The thigh is forgiving for touch-ups and for hiding between appointments. For showing off pair with bike shorts or a high-slit skirt and consider biker shorts for casual reveals.
15. Minimalist Heart or Star Set on the Fingers
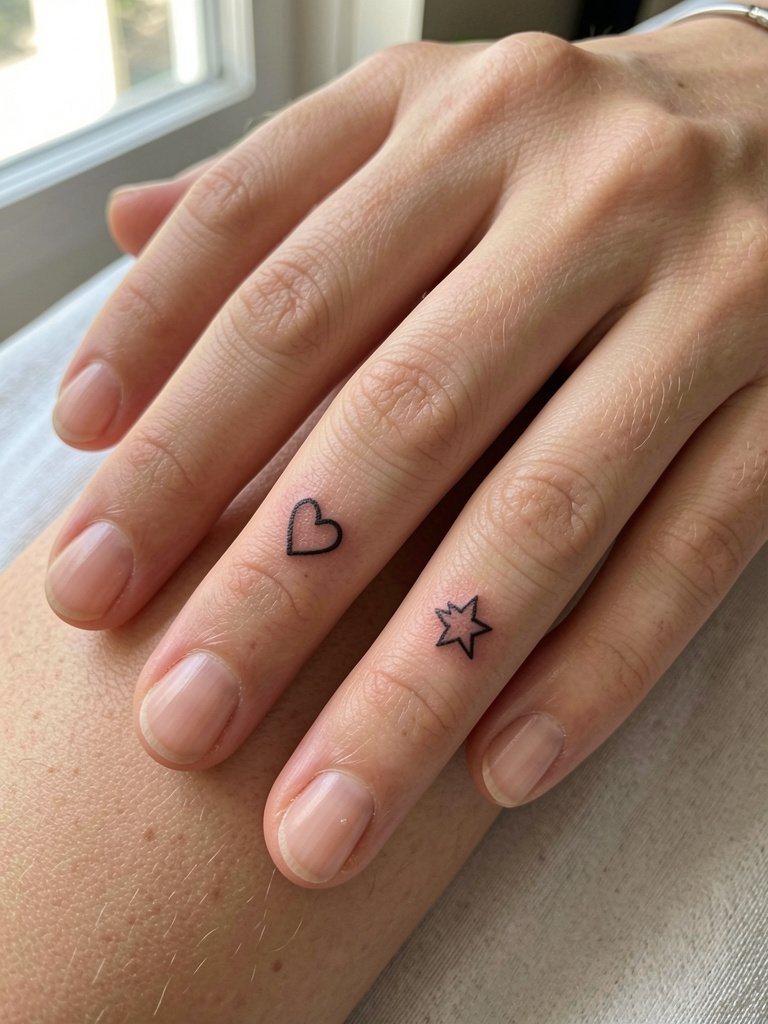
Finger and knuckle placements age differently and often need more frequent touch-ups because of daily washing and hand use. The common error is expecting a single session to last for years without maintenance. Plan for a touch-up within 6 to 12 months. For the session keep hands ring-free and wear short sleeves. Styling suggestion: simple rings on non-tattooed fingers or a clean manicure to let the micro symbols read clearly. Try clean manicure press on nails for short-term styling.
16. Lateral Hip Snake or Floral Trail
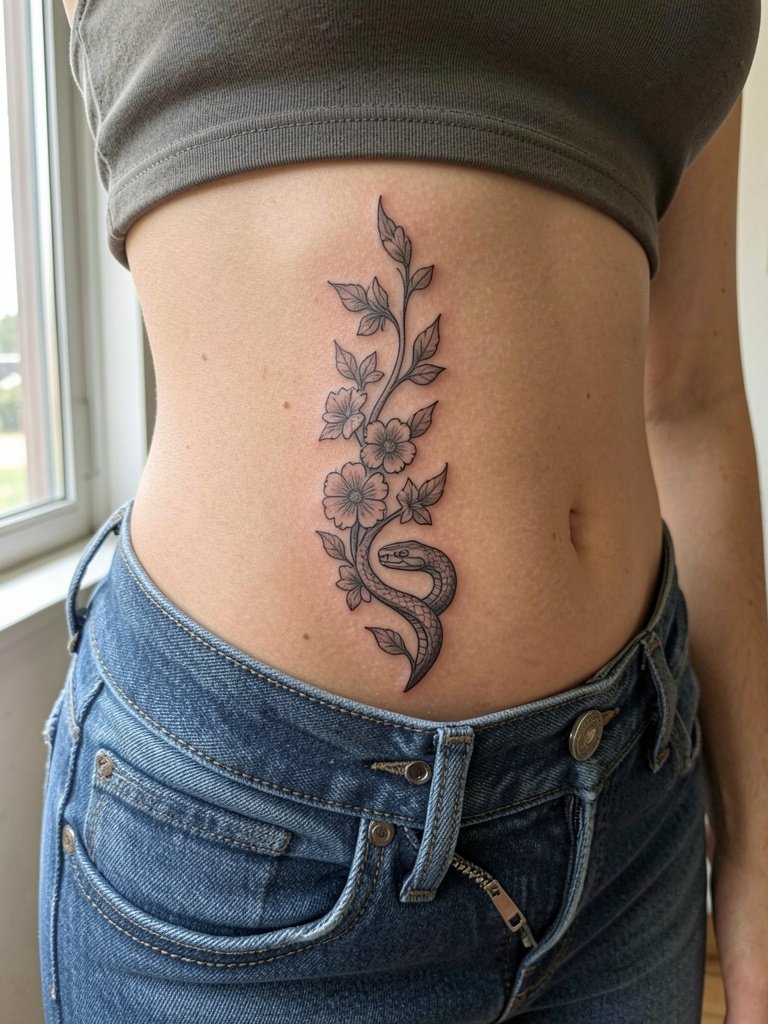
Hip placements are great for seasonal reveals but they can shift with weight changes. The common mistake is placing a long trail too close to the waistband which causes distortion when clothes sit higher. Ask the artist to map the piece while you wear your usual jeans so placement reads as expected. Session wear should be loose pants that can be lowered slightly without exposing underwear. For showing off choose high-rise bottoms or bikini styles; try high rise bikini bottom looks for summer.
17. Botanical Cluster on the Outer Upper Arm
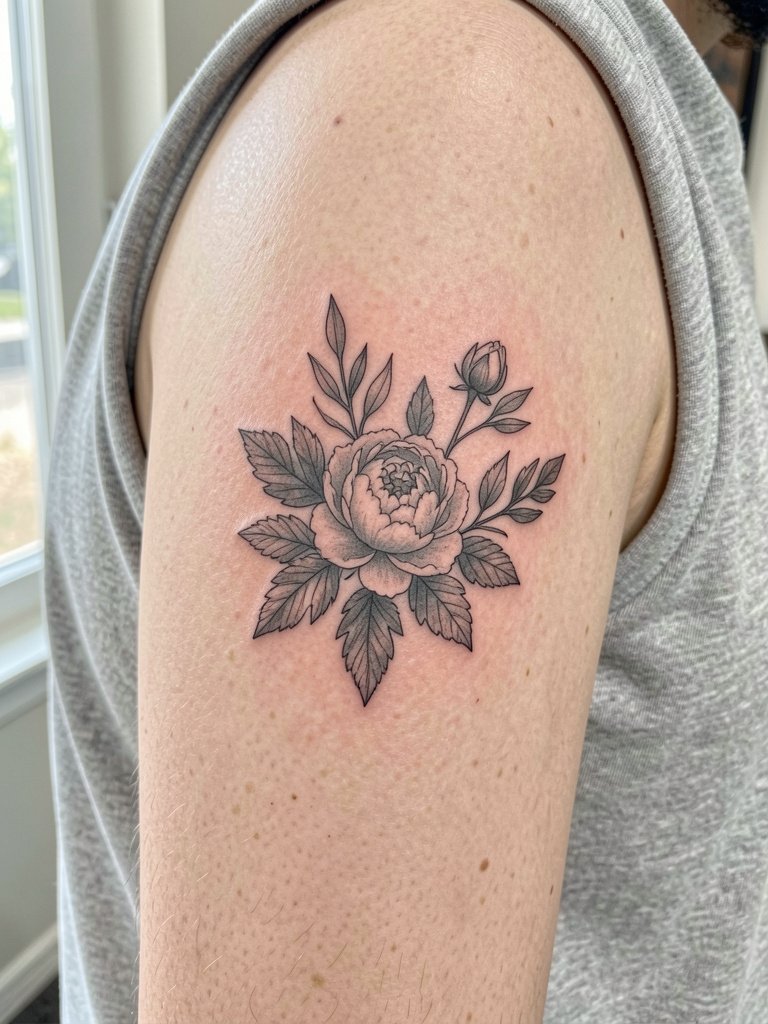
Outer upper arm florals are forgiving and good for first larger pieces because they offer expansion room. A typical misstep is requesting extremely faint color washes that disappear on darker skin. If you want color ask for slightly higher saturation and test healed examples on similar tones. Expect one to two sessions depending on size. Style with racerback tops or cropped denim jackets. For appointments pick an oversized tee that slides away from the arm cleanly.
18. Stipple-Shaded Tiny Moon Behind the Ear
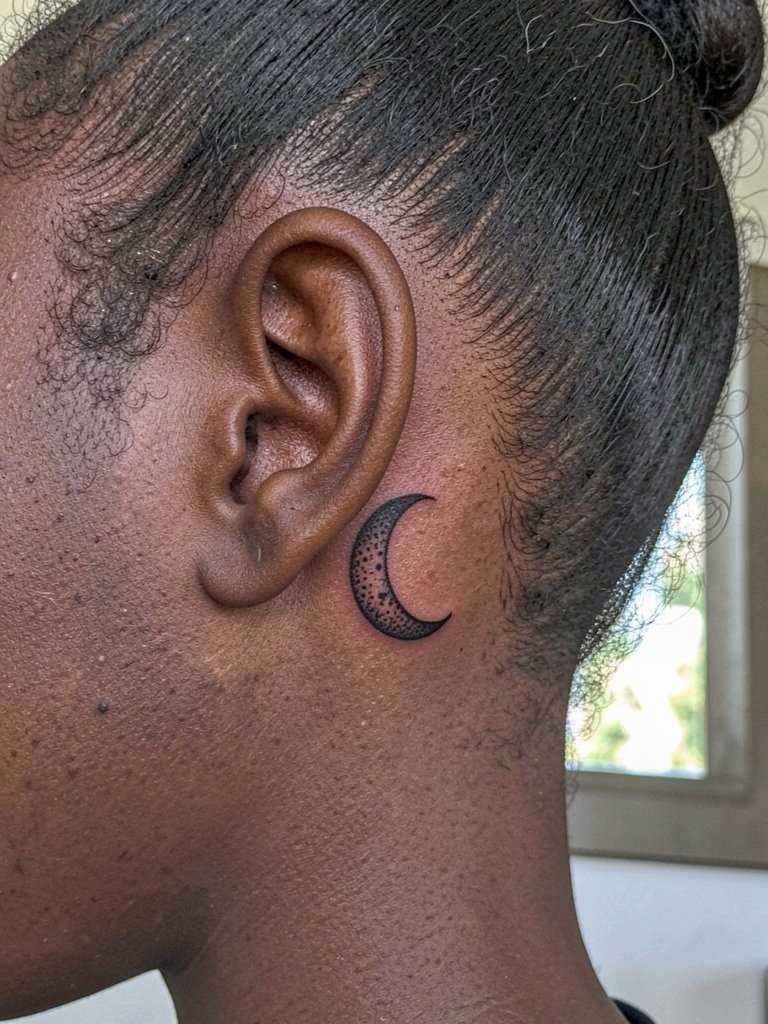
Behind-the-ear tattoos are discreet and low-pain but require precise placement. The most common issue is asking for dense detail in a tiny mastoid patch which can blur as the skin there settles. Ask for simple silhouettes or dotwork rather than dense line detail. Session wear: hair up in a clip so the artist can access the area without tugging. When healed the look pairs well with minimalist stud earrings and a neat updo.
19. Inner Bicep Wildflower Sprig
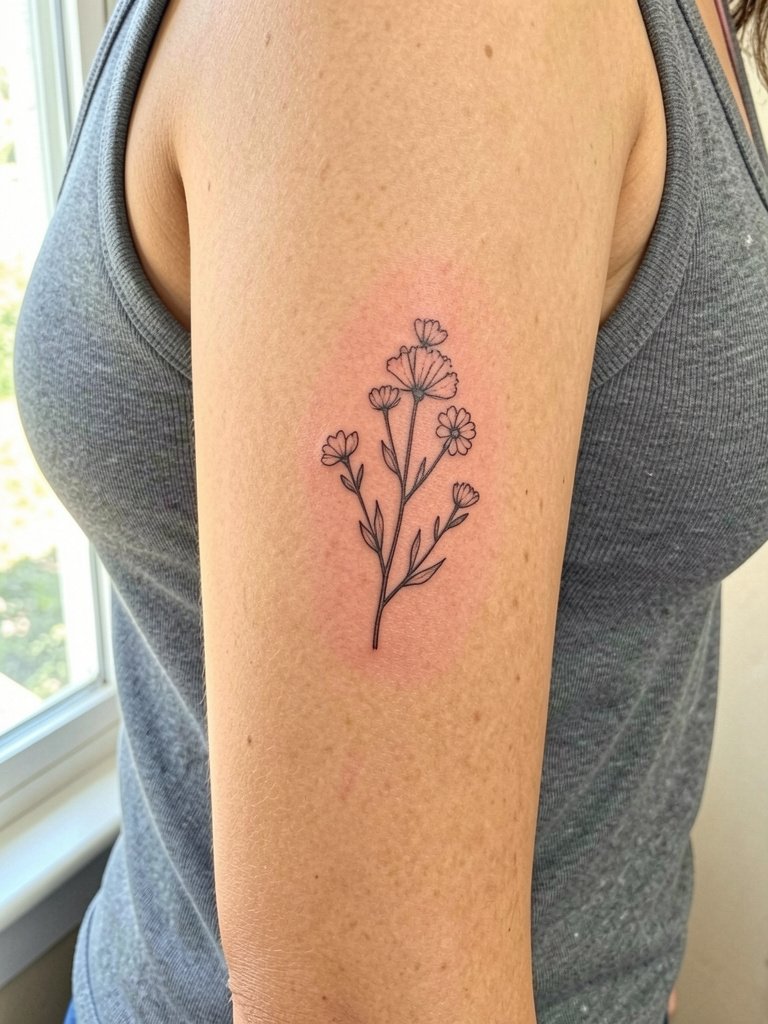
The inner bicep is a softer canvas but not an armpit placement. A frequent mistake is asking for hairline detail that disappears when the arm rests. For longevity, choose slightly stronger linework and a modest scale increase. Pain is moderate to high depending on sensitivity and the skin's stretch. For session wear bring a tank top so the artist can access the inner surface easily. After healing the piece looks great with rolled sleeves and a dainty gold bracelet on the opposite arm.
20. Small Geometric Mandala on the Nape
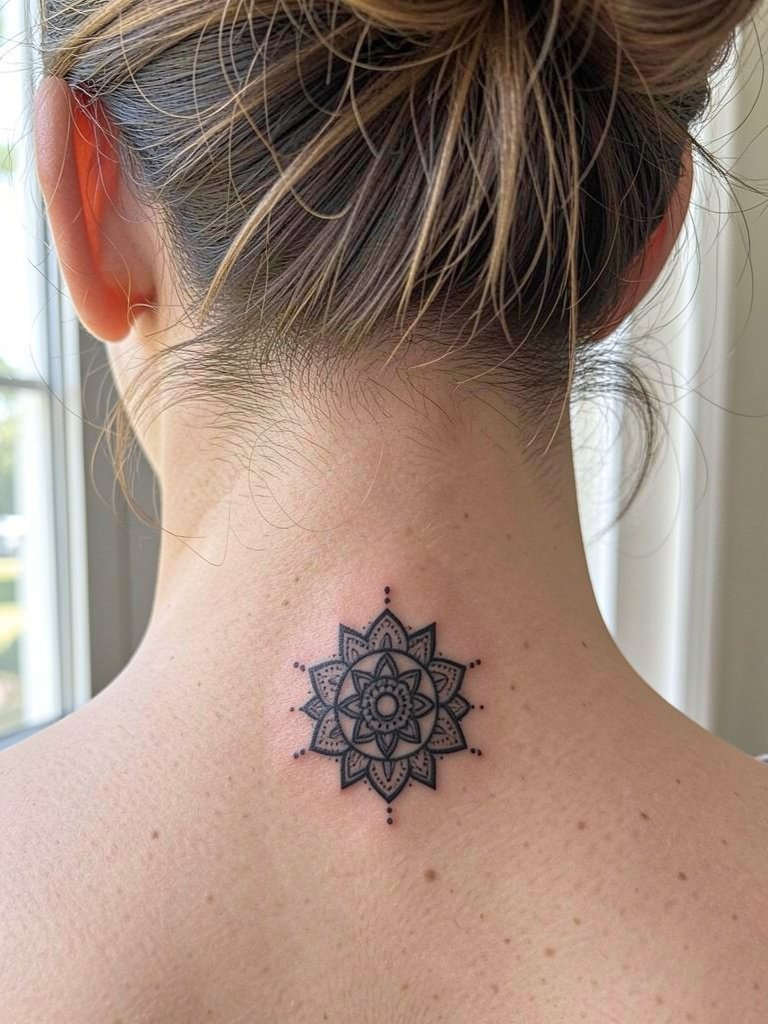
Nape placements are subtle and accessibly hidden under hair when you want privacy. A common error is over-detailing for a very small nape piece which blurs as the skin shifts. Keep the negative space and use dot shading for texture. Session wear: hair tied up and a wide-neck top that the artist can move without touching hair. For styling pair with hair-ups and minimalist studs so the mandala becomes a quiet accent.
21. Classic Stipple Lotus on the Inner Forearm
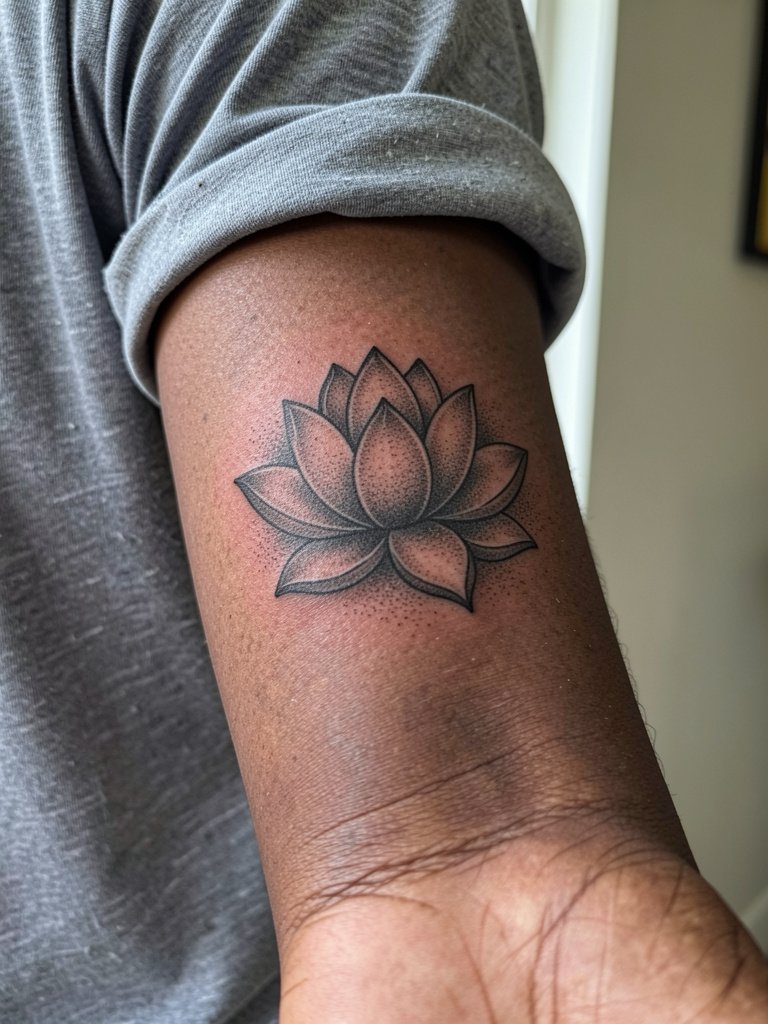
A stipple lotus provides rich texture while keeping overall contrast. The mistake to avoid is tiny stipple areas packed too close which read as grey blobs later. Ask the artist to plan dot density across a few reference photos so you know how the shading will heal. Inner forearm sessions are low to moderate pain and often finish in a single visit. For showing off try rolled-up linen shirts and a dainty gold bracelet.
22. Slim Crescent and Ornament Behind the Ear
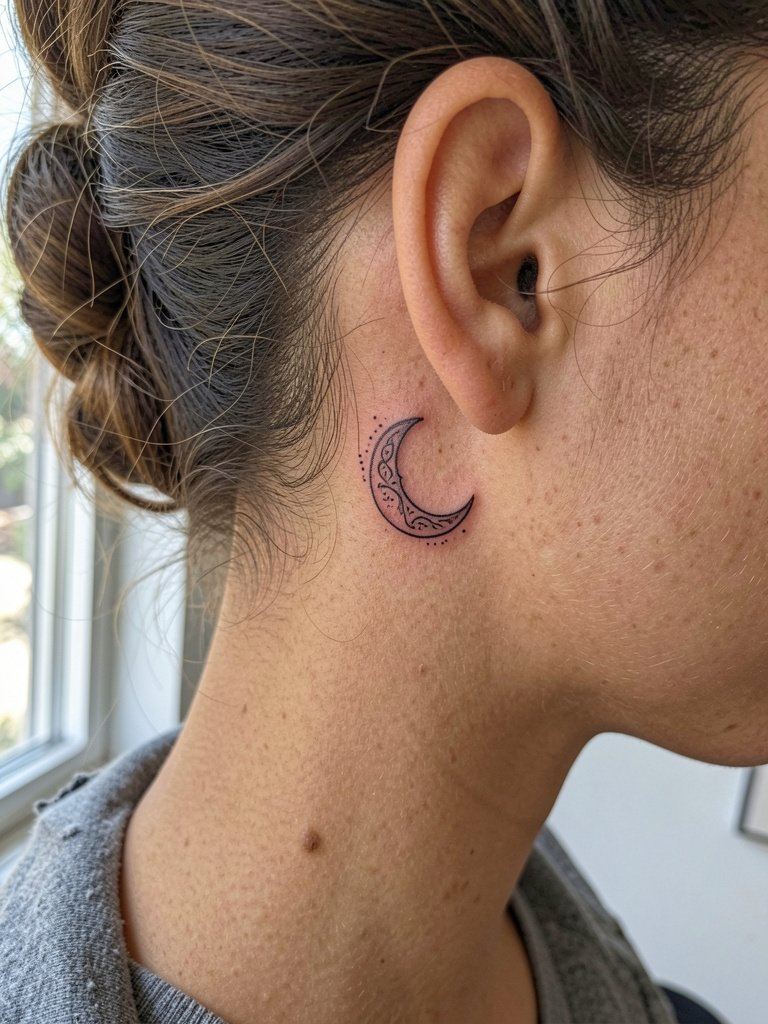
Tiny ornamental combos behind the ear read best when the lines are spaced and the negative areas are intentional. The main mistake is crowding extra filigree into the space which ages into blur. Keep the ornamentation simple and allow the moon to sit as the focal point. Session wear: hair up and clothes that do not brush the area. After healing the look pairs with minimalist stud earrings and neat bun styles.
23. Simple Wave Line Along the Ribcage
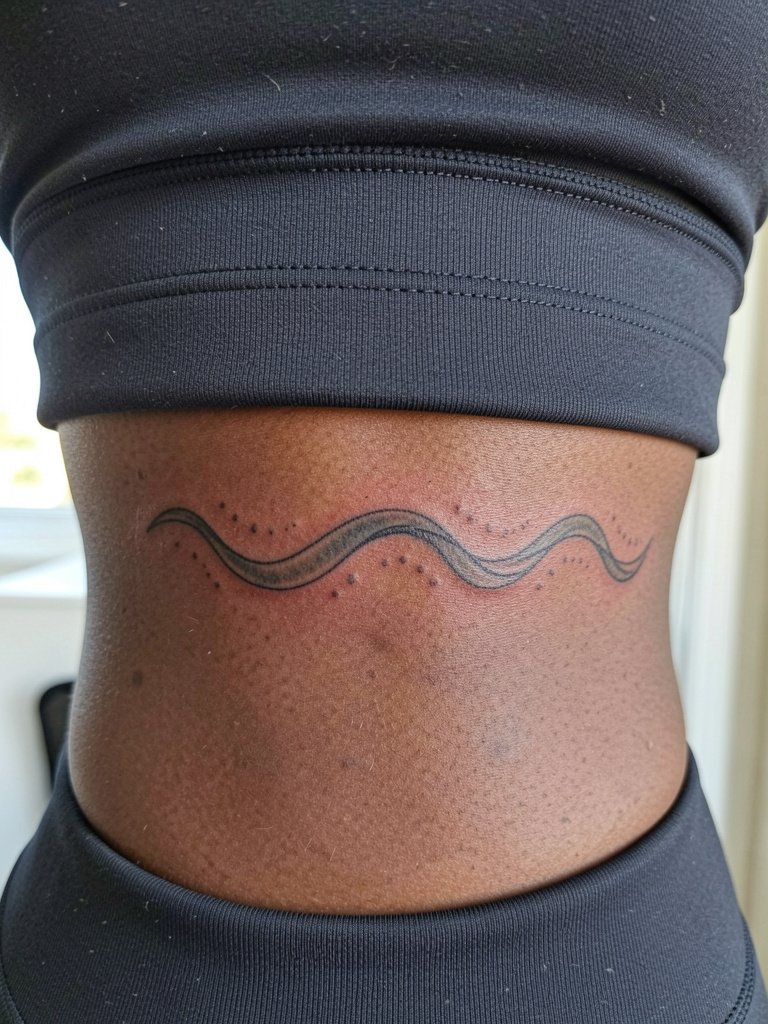
Ribcage pieces are beautiful but painful for many. People often pick ultra-fine scripts for ribs and then regret how tender the session is. Also fine-line on ribs divides artists. One camp insists ribs stretch and cause thin strokes to blur quickly. The other camp says correct needle depth and slight spacing allow fine line to settle properly even on ribs. If you choose ribs, bring a plan for breaks and pack snacks. For session wear bring a sports bra or a top that the artist can move without tugging.
24. Tiny Constellation on the Collarbone
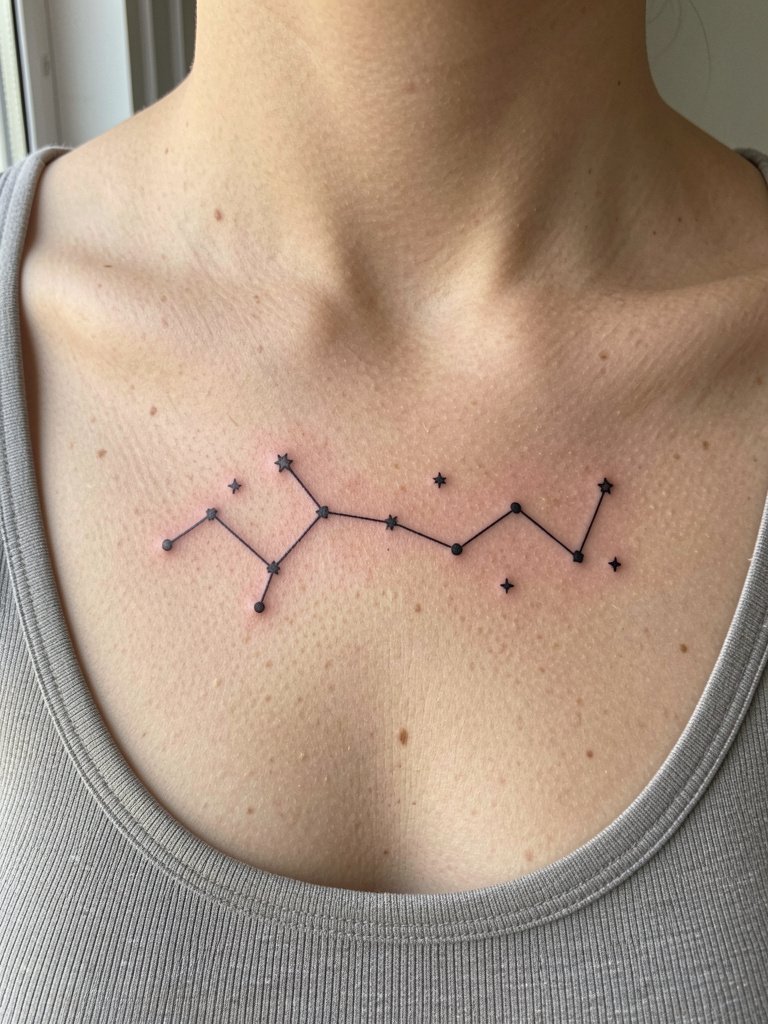
Constellation pieces need precise spacing so the pattern still reads at six months. The usual error is clustering dots too close or using unevenly weighted stars. Ask the artist to mark the exact distances on your skin before they begin. Touch-ups are rare for simple dot-and-line constellations if the spacing is correct. Pair with layered necklaces and scoop neck shirts. For show-off try a layered necklace set.
25. Single Tiny Star Behind the Ankle
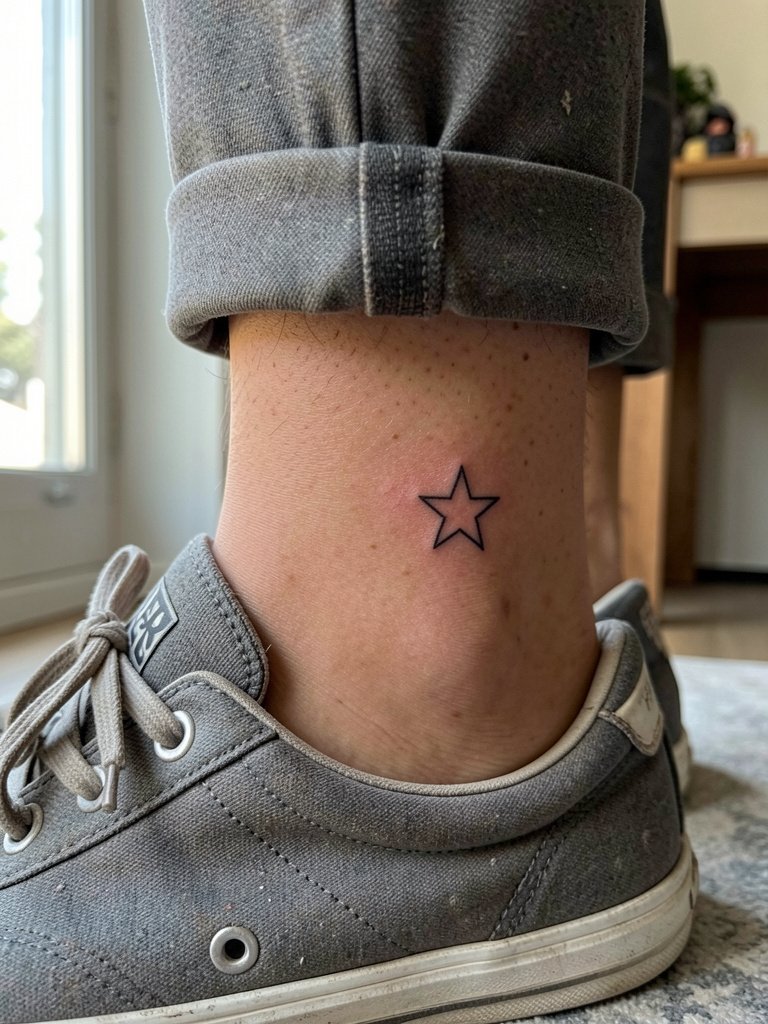
Ankle symbols get rubbed by socks and shoes during the first week so protection matters. The typical mistake is placing the piece where shoe collars consistently rub. Choose a spot just above the shoe line and expect delicate touch on day one. Session wear is easy-roll pants and low sneakers. For wearing out pair with strappy sandals or cropped trousers and keep the ankle visible.
26. Petite Decorative Sternum Medallion
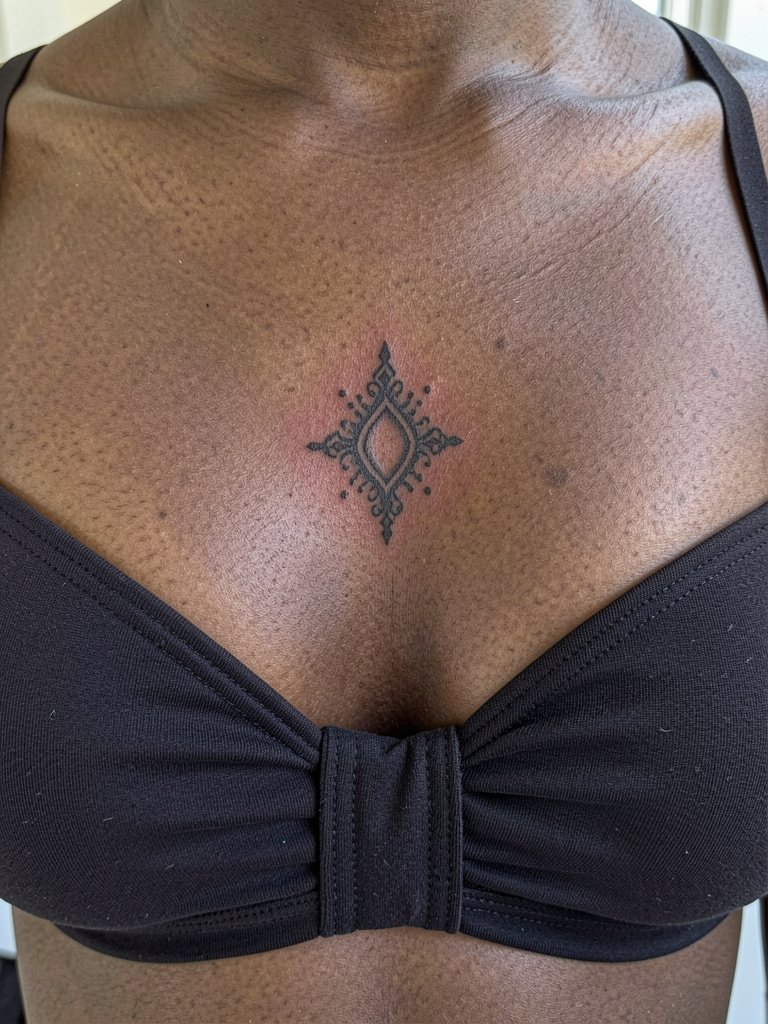
Sternum medallions are visually striking but sit on a high-movement area for some body types. A common error is expecting extremely fine filigree to survive heavy activity or pressure from clothing. Ask the artist for a slightly bolder outline so the medallion remains defined at six months. Session wear should allow the artist to move fabric without grabbing. For staged reveals, deep V-neck tops and layered chokers complement the placement.
27. Patchwork Sleeve Planning for a Forearm Collection
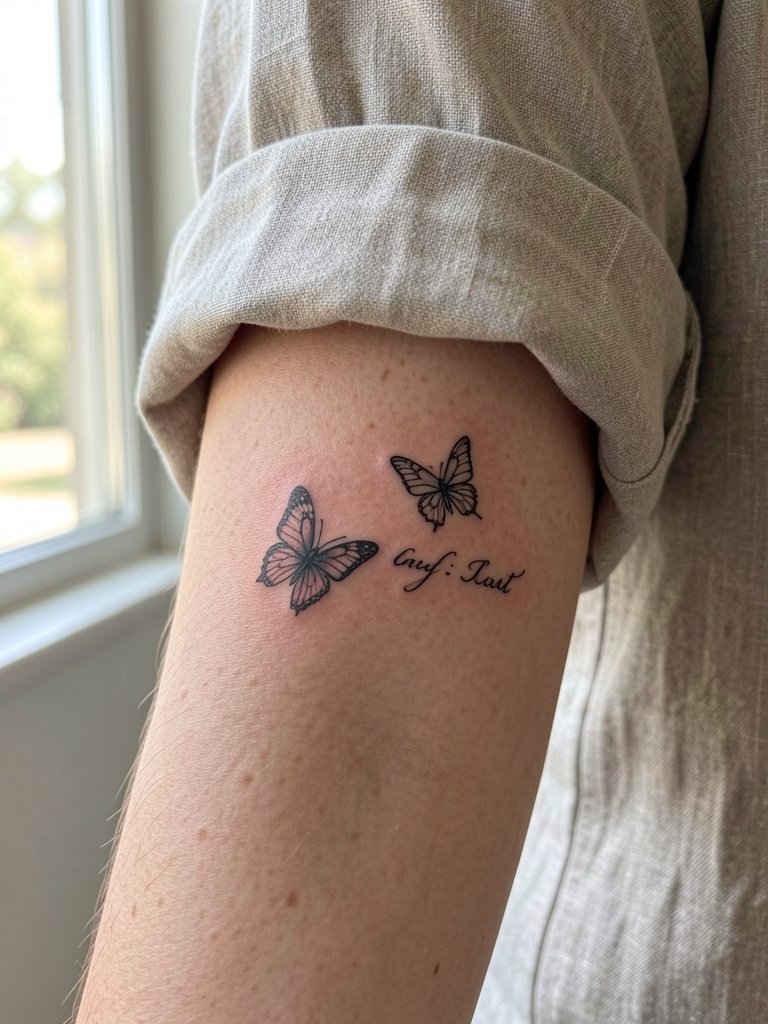
If you plan to build slowly, think about an arm-wide composition from the start so future pieces do not feel crowded. The frequent mistake is adding random scales and styles without an anchor motif which makes patchwork look disjointed. Map out one or two anchor pieces in conversation with the artist and keep alternate spots free for smaller flash. Touch-up frequency depends on each element. For showing off your slow-build arm, rolled-up linen shirts and dainty stacked rings help the overall narrative; try stacked ring set.
Frequently Asked Questions
Q: How much should I realistically budget for a small feminine tattoo?
A: Expect shop minimums to put many tiny pieces into the 100 to 300 range, because artists charge for setup and studio time even on tiny work. Budgeting in that range helps you prioritize healed-quality photos over the cheapest booking.
Q: How do I find healed portfolios and artists who show work on deeper skin tones?
A: Search hashtags like #femininetattoo and #finelinetattoo on Instagram and TikTok and apply location filters. Browse directory sites that let you filter by style and city, then look specifically for healed posts or captions that say "6 months" or "1 year" healed. Reddit threads can point to real healed shots and practical timelines.
Q: Does fine line always fade faster than bold line on small pieces?
A: The debate is active. One side argues that thin hairline strokes are more prone to blur and fade, especially on high-motion or sun-exposed spots. The other side says correctly sized fine line with thoughtful spacing and placement will heal clean and last if touched up when needed.
Q: Should I use second-skin or do dry healing for a fresh tattoo?
A: Opinions split into two camps. Many people find second-skin easier because it protects against friction and makes the first day simpler. Others prefer dry healing or light ointment if they have sensitive skin or an adhesive reaction risk. If you have reactive skin, test the bandage on a small area first or ask for a short trial.
Q: What should I wear to my session by placement?
A: Match clothing to the placement so the artist has clear access. For wrist and forearm bring short sleeves or a loose button-down. For shoulder use a tank top. For sternum or ribs choose a front-closure bra or a top that sits normally without being pulled. Pack easy clothing that stays in a normal worn state so the studio can work without fabric tugging.
