

Fine line florals and tiny script dominate saved boards, but the arm is a different animal. Sun, motion, and daily friction change what reads crisp at six months into a soft blur by year three. This guide focuses on arm-friendly options that still look intentional as they heal and age, with clear wardrobe tips for showing them off and realistic expectations for touch-ups and session time.
1. Fine Line Floral on the Inner Forearm
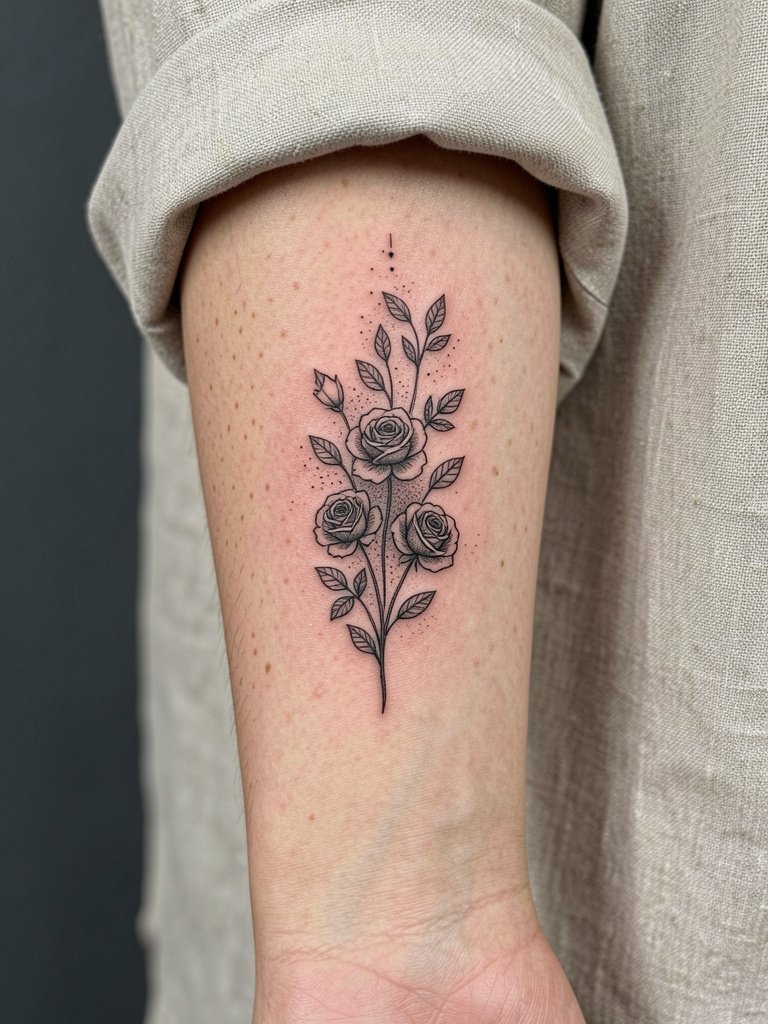
A vertical fine line floral reads elegant on the inner forearm when the artist spaces elements so each petal has room to breathe. One common mistake is asking for single-needle lines at postcard scale. Add slightly heavier outer contour lines and keep inner details airy so the composition retains contrast at two and five years healed. Pain on the inner forearm is usually mild to moderate. For the appointment, wear a rolled sleeve linen shirt so the artist can easily expose the palm-up surface without fabric tugging.
2. Tiny Script at the Wrist
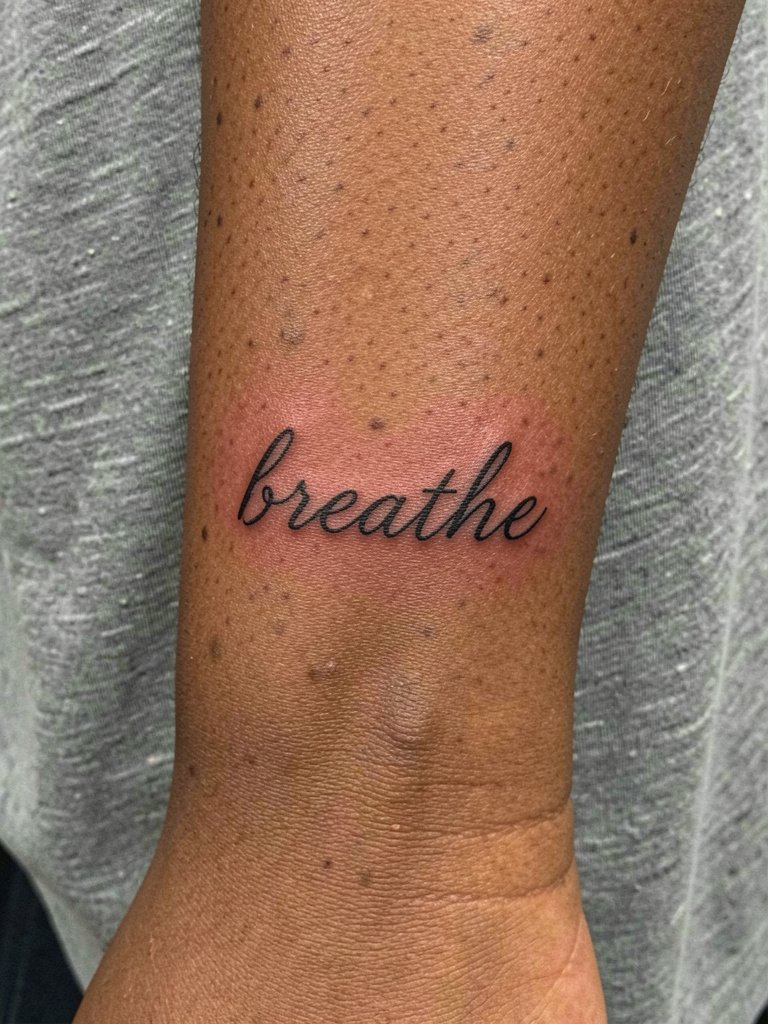
Wrist script is high-visibility and high-use. The common regret is keeping the letters too thin. Ask for slightly bolder downstrokes so the word still reads after daily handwashing. Sessions are short, often under 30 minutes. Remove watches and bracelets before arrival and consider pairing the final piece with a thin chain bracelet on the opposite wrist for balance.
3. Lotus on the Inner Forearm
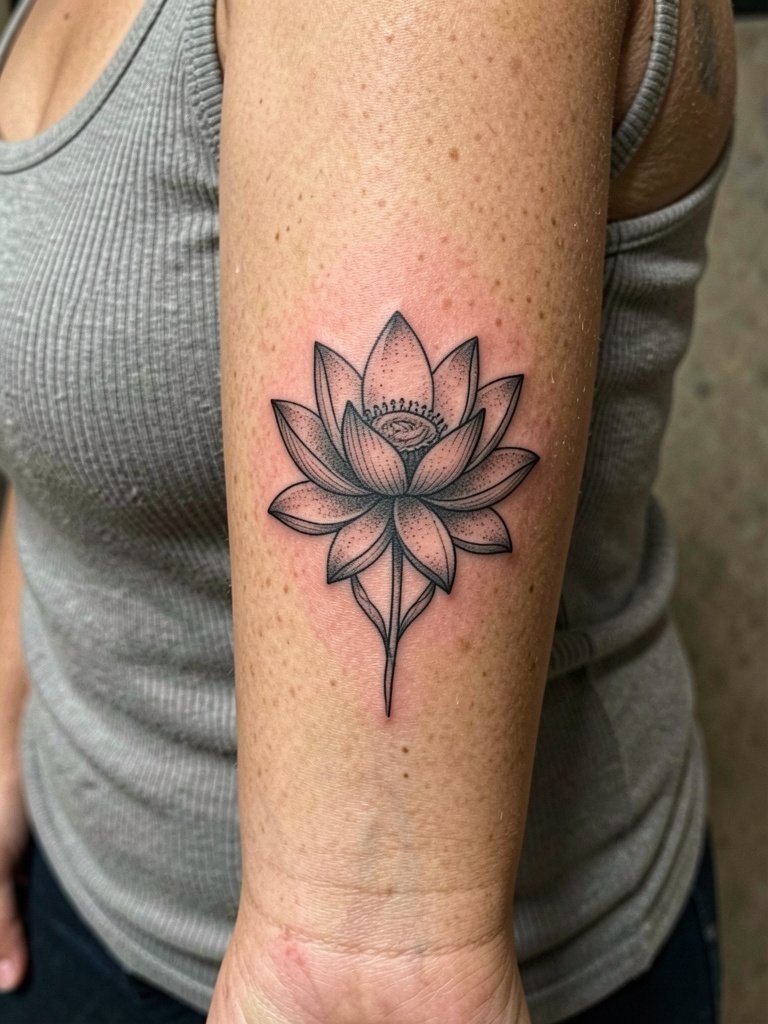
A lotus fits the palm-up forearm because its vertical shape matches the limb. Healed photos show that soft color washes fade faster than the black linework. Expect one session for modest sizes and a touch-up at the one- to two-year mark for any color refresh. Talk specifics about spacing and saturation so the central stipple shading does not merge into a solid fill over time. Wear a ribbed tank top on session day so the artist can place the stencil without fabric interference.
4. Sunflower on the Upper Arm
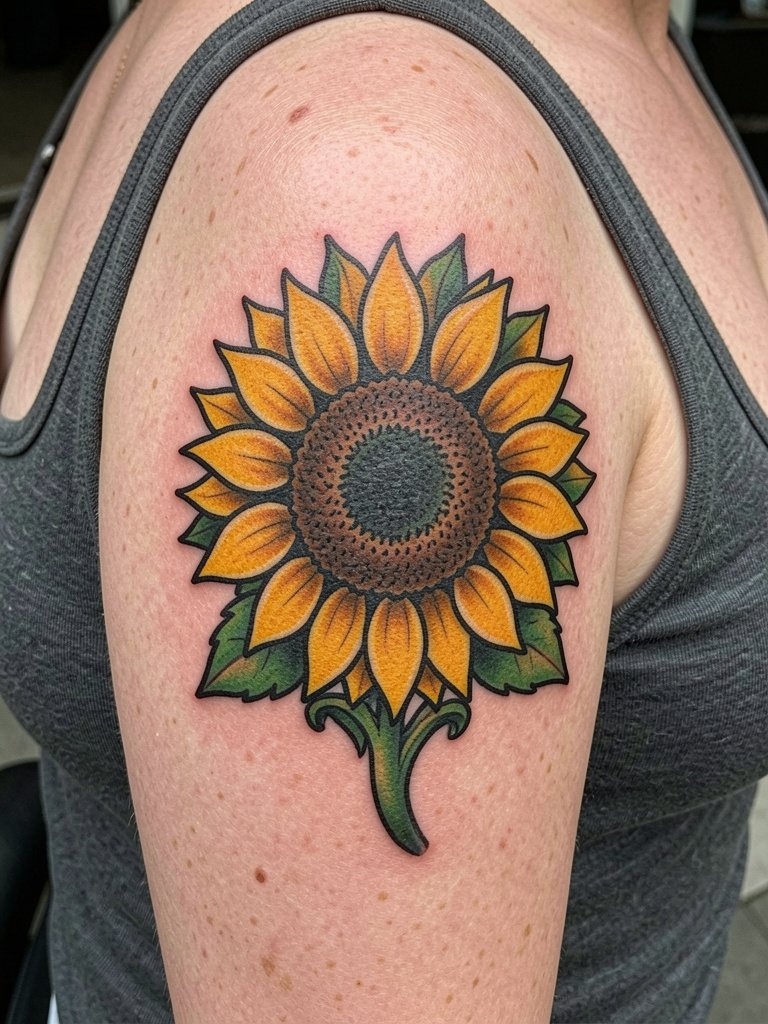
Upper arm color pieces are some of the least painful placements and they hold pigment well because the skin is thicker. If you want bright yellow saturation, plan for one to two sessions depending on size. A common mistake is expecting single-session saturation for larger blossoms. Sessions can run from one to three hours. Show-off pairing for a fresh sunflower is a square-neck tank top that frames the placement without covering it.
5. Small Inner Upper Arm Symbol
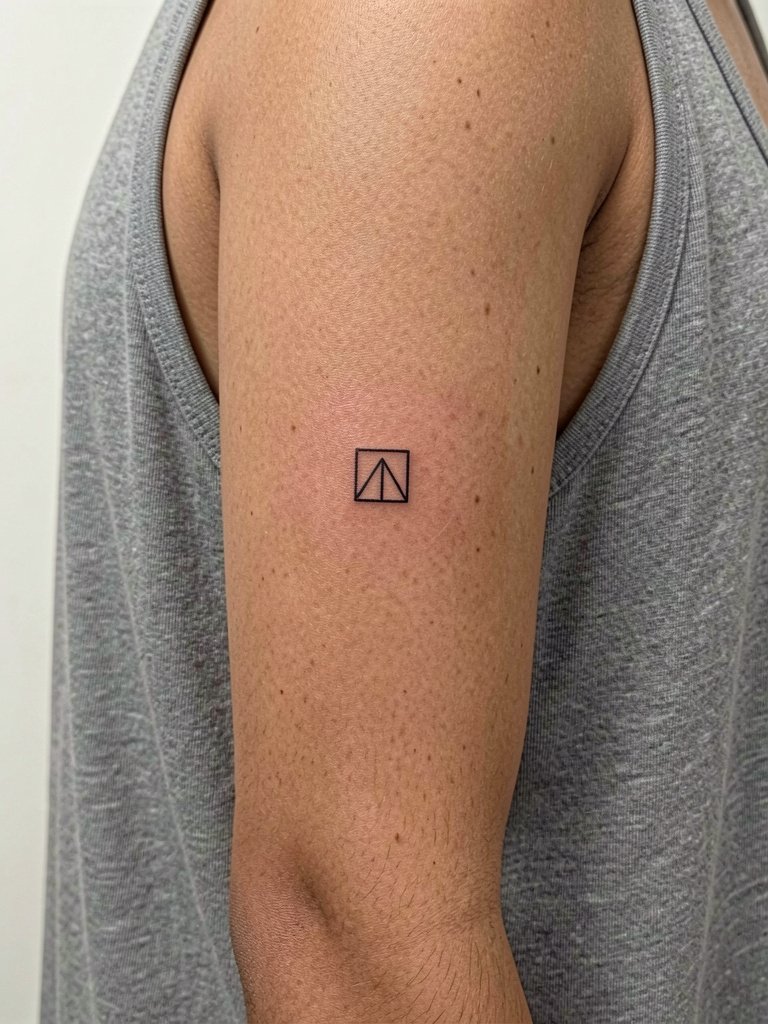
The inner upper arm is a private spot and often the most concealed on the arm. Because the skin is softer, single-needle micro-symbols risk blowout if placed too small. Increase the symbol size slightly and use crisp contour linework for longevity. Session time is usually short and pain is moderate. For the appointment wear a loose tank top so the artist can access the area without fabric bunching.
6. Floral Sleeve Starter Piece
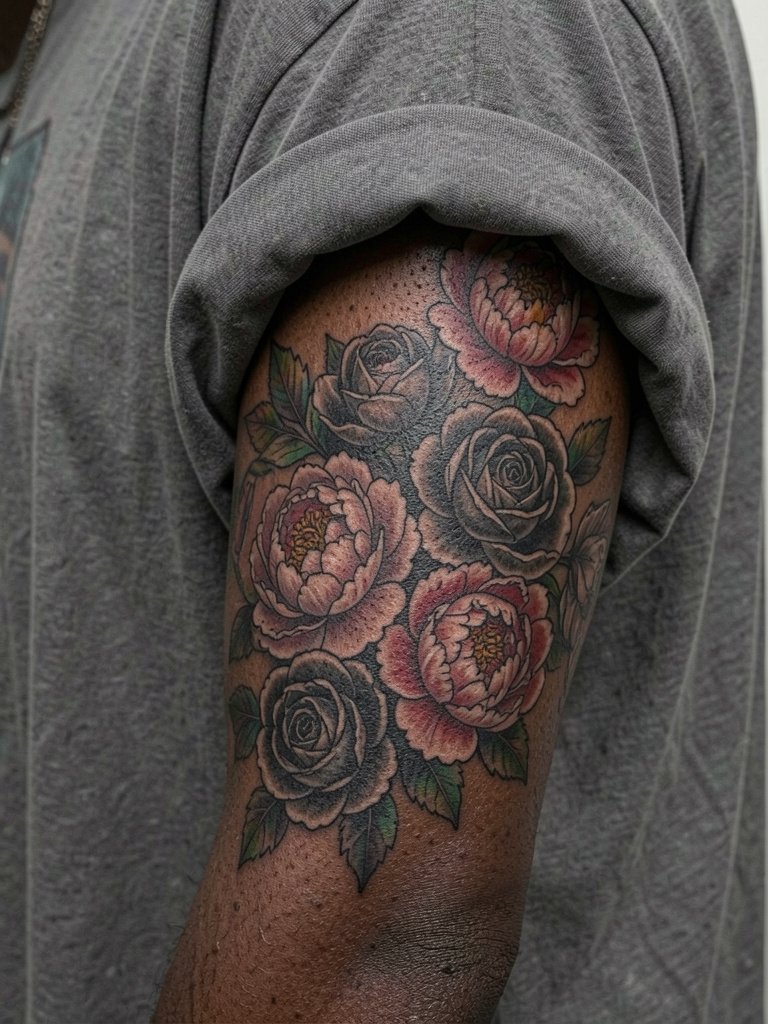
A partial sleeve is how many collectors start a larger arm project. Plan for composition that connects later pieces. A mistake is choosing isolated motifs that do not share a flow, which makes future fills look glued on. Expect multiple sessions and keep budget and time flexible. During long session days, wear a button-down shirt you can move without rubbing the fresh piece.
Session Day Picks
The forearm and upper arm examples above cover quick sessions and multi-hour panels. These items smooth the day-of logistics for placements discussed in the first six ideas.
-
Indie aftercare balm sample set. Small-batch balms often have thinner textures than big-name ointments, which is helpful on forearms where heavy greases feel sticky against clothing.
-
Fragrance-free sensitive-skin body lotion. A gentle lotion is useful after the first week when you need moisture without added fragrances that can irritate healing skin.
-
Breathable loose button-down shirt women. Button-downs let you expose the upper arm or forearm without tugging fabric over the fresh tattoo.
-
Mineral sunscreen SPF 50+ stick. A physical mineral stick protects forearm and upper arm tattoos from daily UV, which slows fading and preserves saturation.
-
Second-skin protective bandage. Second-skin can speed the first-week protection against friction, especially on wrist and forearm placements, though some people prefer dry healing.
7. Traditional Flash Rose on the Outer Forearm
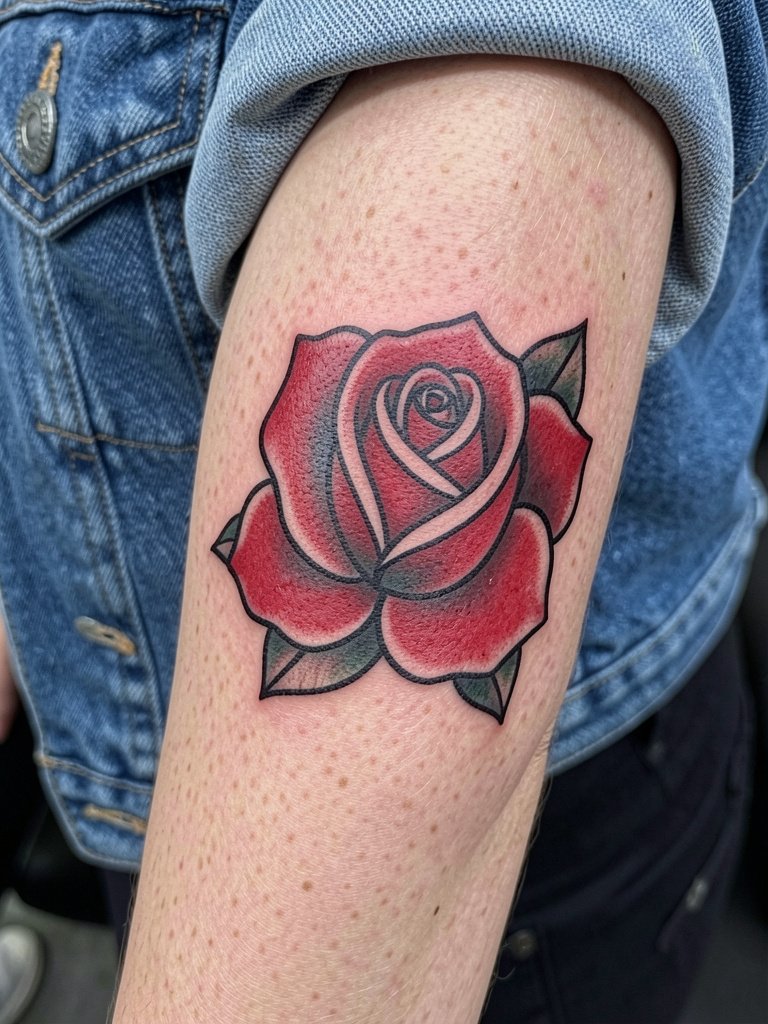
Traditional flash pieces use bold linework and heavy saturation, which helps them age well on the forearm. A common mistake is asking for too many fine interior details. Bold outlines keep shapes readable at a distance and across touch-ups. The session is usually moderate in length. Pair this piece with a cropped denim jacket when you want the tattoo to anchor an outfit.
8. Blackwork Botanical on the Outer Forearm
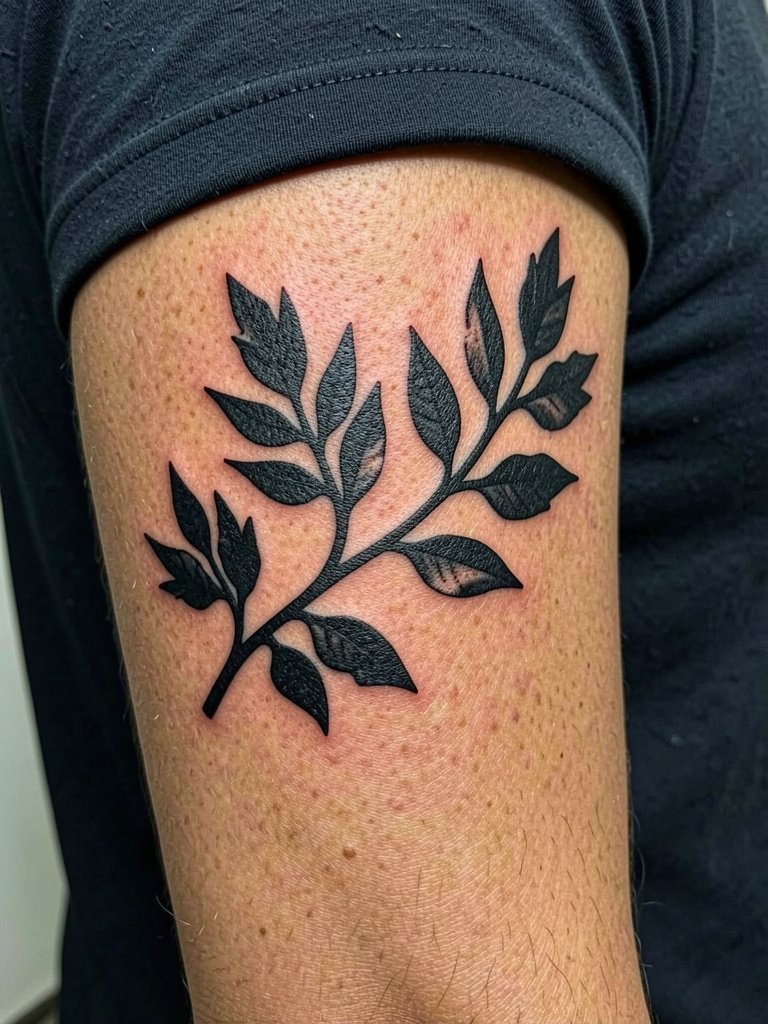
Blackwork reads strongly from a distance and tends to age predictably because saturation carries. If you plan for longevity, use solid fills and avoid tiny interior dotwork that can soften. Expect one to three sessions depending on coverage. For a bold botanical, consider simple jewelry like chunky rings on the opposite hand to balance the heavier silhouette.
9. Forearm Quote in Script
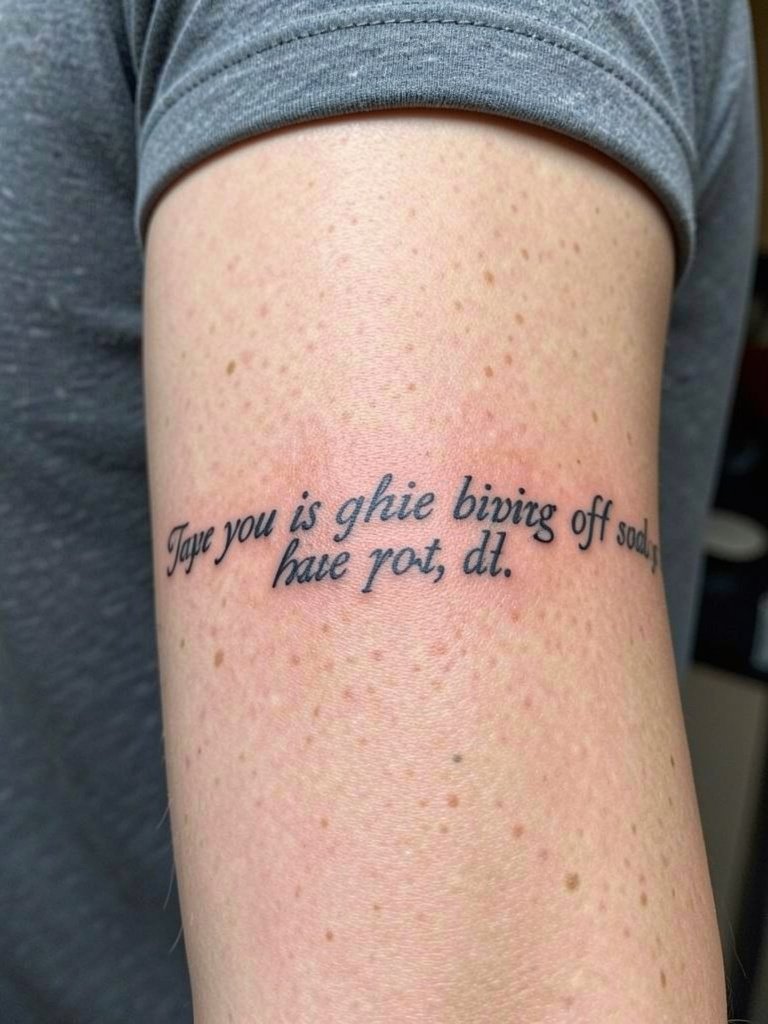
Text tattoos on the forearm are highly visible and personal. The mistake people make is choosing fonts that look great on a stencil but are too thin for hand motion and sun exposure. Choose a medium-weight script and see a healed example from portfolios before booking. Session time is brief. Show it off with a fitted short sleeve tee tucked into jeans so the arm sits cleanly against the silhouette.
10. Anime-Inspired Panel on the Upper Arm
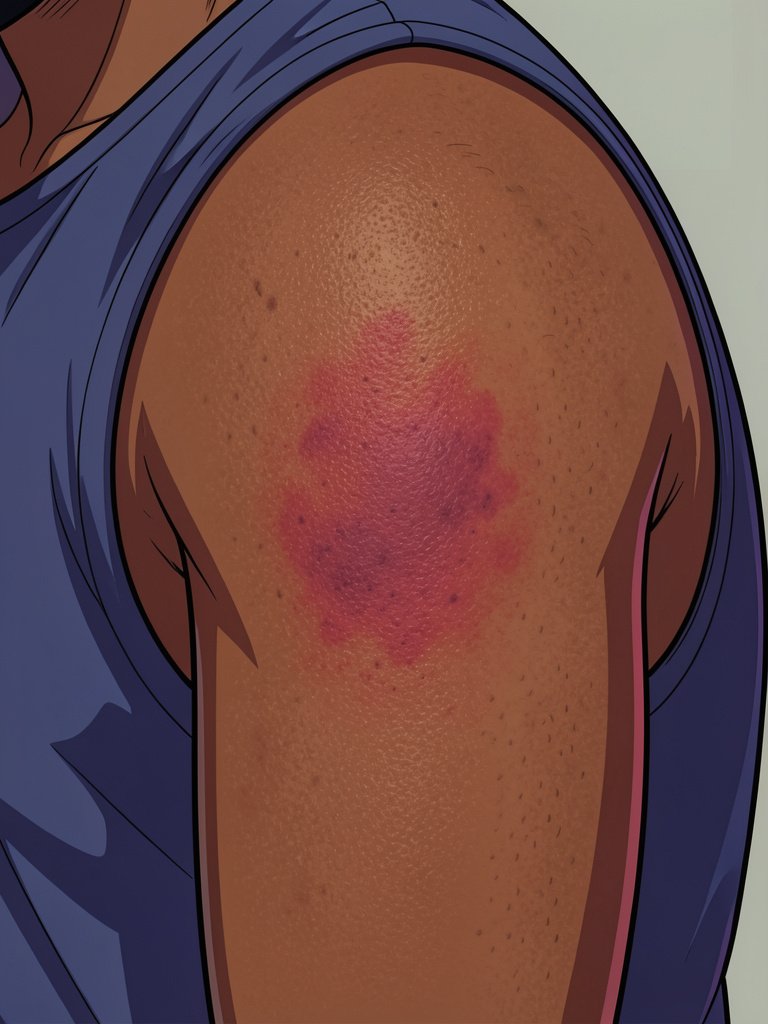
Anime-inspired pieces are often color-heavy and need crisp outlines for panel clarity. The session can be long if saturation and layering are required. Expect touch-ups for color work after the first year. When planning, provide panel-scale references so the artist can translate character energy into readable forearm or upper-arm blocks. For the session consider a sleeveless top that gives easy access without shifting.
11. Mandala Armband on the Upper Arm
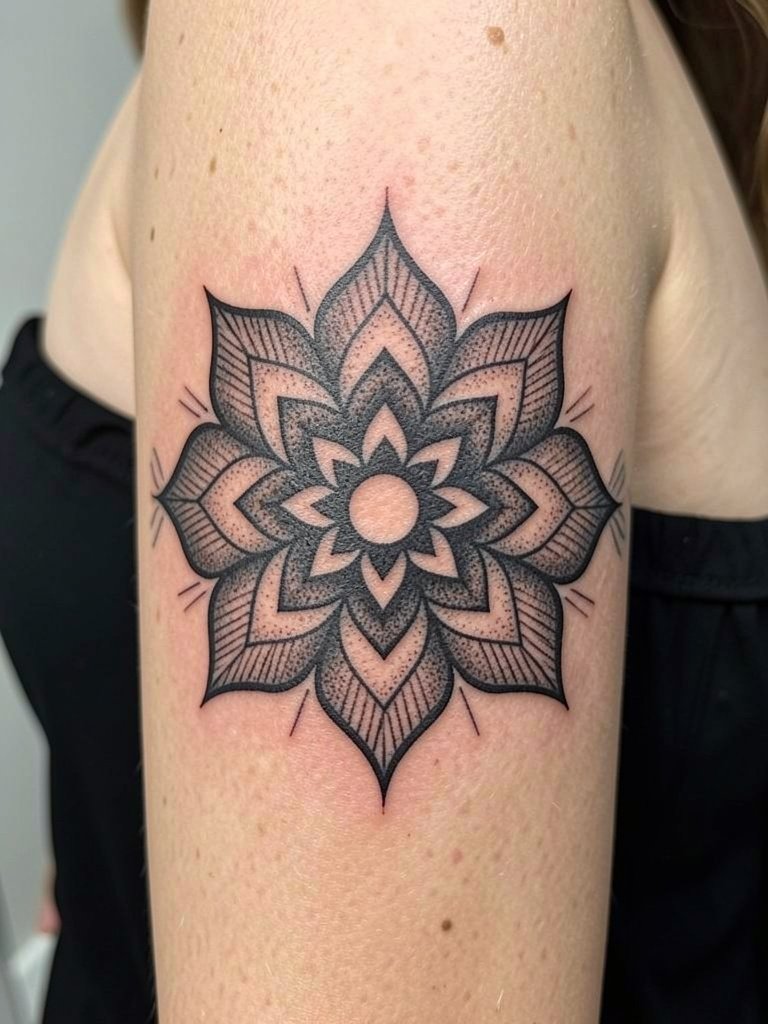
Armband mandalas create a jewelry effect and work well on upper arm contours. A frequent error is expecting ultra-fine radial lines without enough spacing. Mandalas need breathing room to prevent radial blur. One to three sessions depending on complexity. Style it with strapless or sleeveless tops so the band reads like a real accessory. Try a strapless top for evenings out.
12. Side-Arm Linear Composition
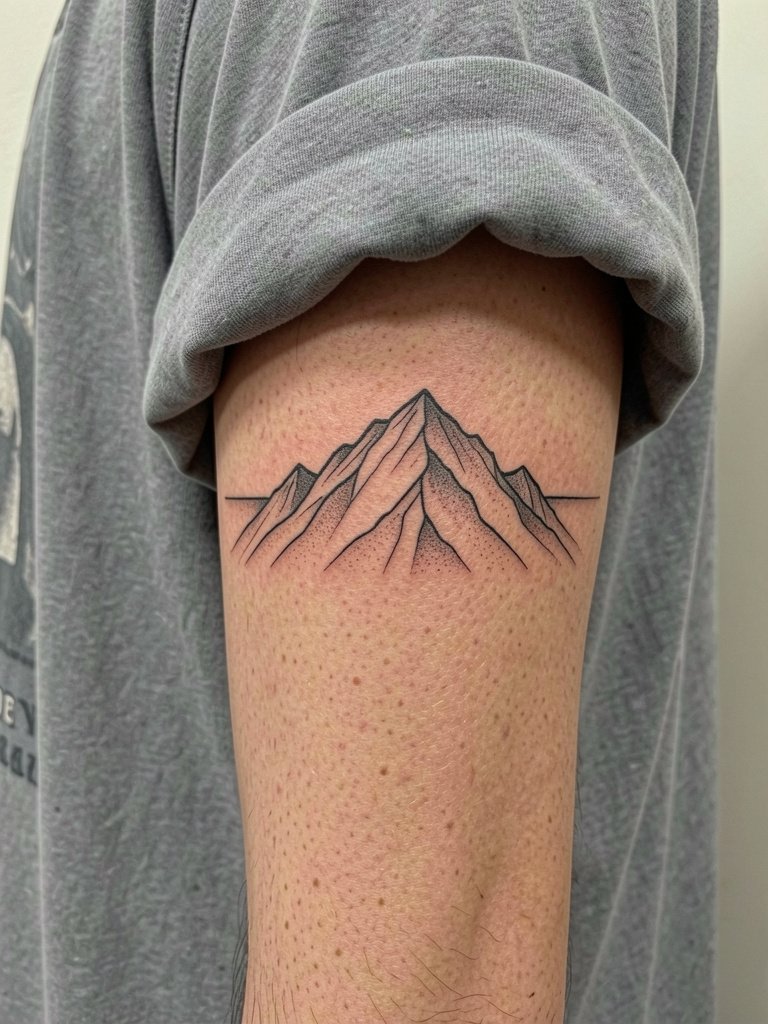
Side-arm compositions take advantage of the arm's length for a flowing narrative. A common mistake is packing too many tiny elements vertically. Keep the main motif stretched and let negative space guide the eye. The session is moderate. For a casual showcase, an oversized tee with rolled sleeves frames the side arm without competing.
13. Patchwork Collection on Forearm
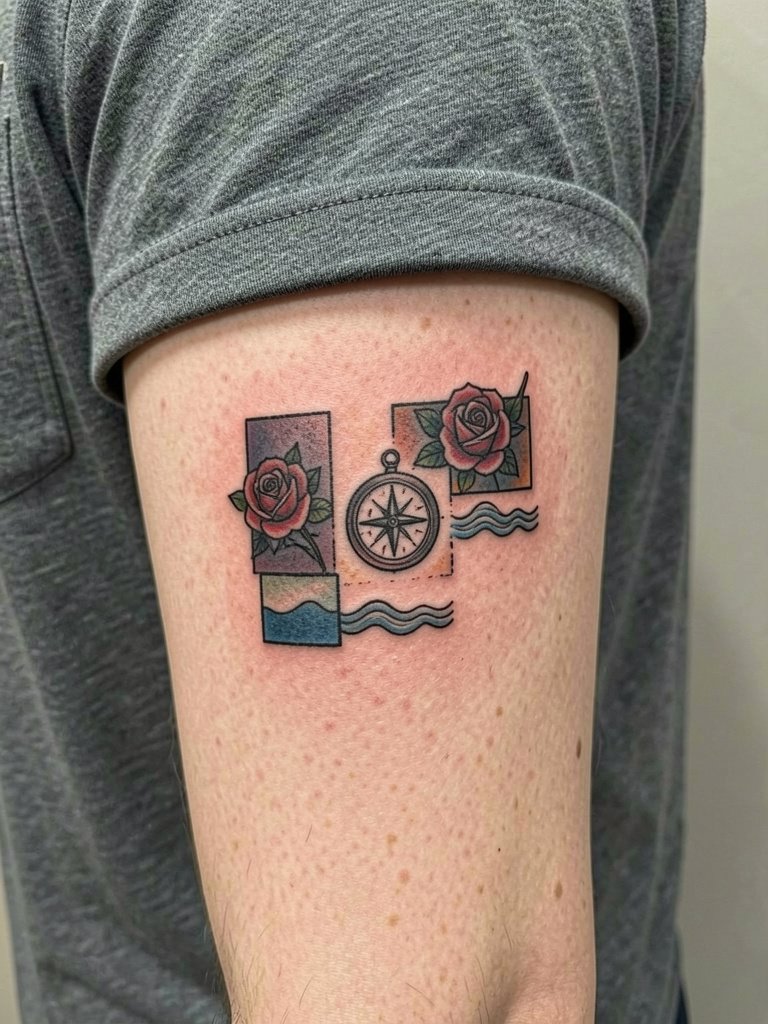
Patchwork lets you build a sleeve over time. The oversight is adding stickers that do not share a visual language. Pick a consistent contour weight or recurring color to tie pieces together. Sessions are staggered and budgets should reflect cumulative time. Let small elements breathe to avoid overcrowding. Rings and stacked bracelets can help the arm read intentional while the sleeve grows.
14. Bold Upper Arm Statement Piece
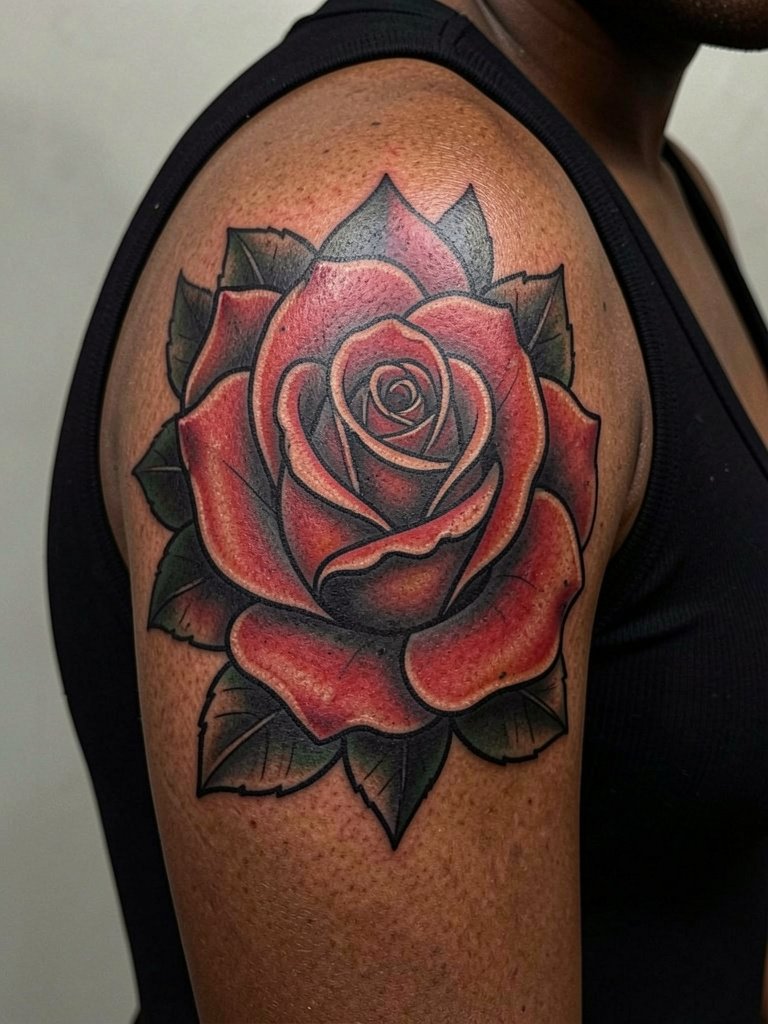
Upper arm pieces tolerate bold approaches well because the skin there keeps saturation. If you want a dramatic visual, choose heavy contour lines and solid black patches to preserve silhouette as the piece ages. Sessions are longer and may require breaks. Pair a bold upper arm with a sleeveless bodysuit when you want the work to be the focal point.
15. Micro-Realism Portrait on the Forearm
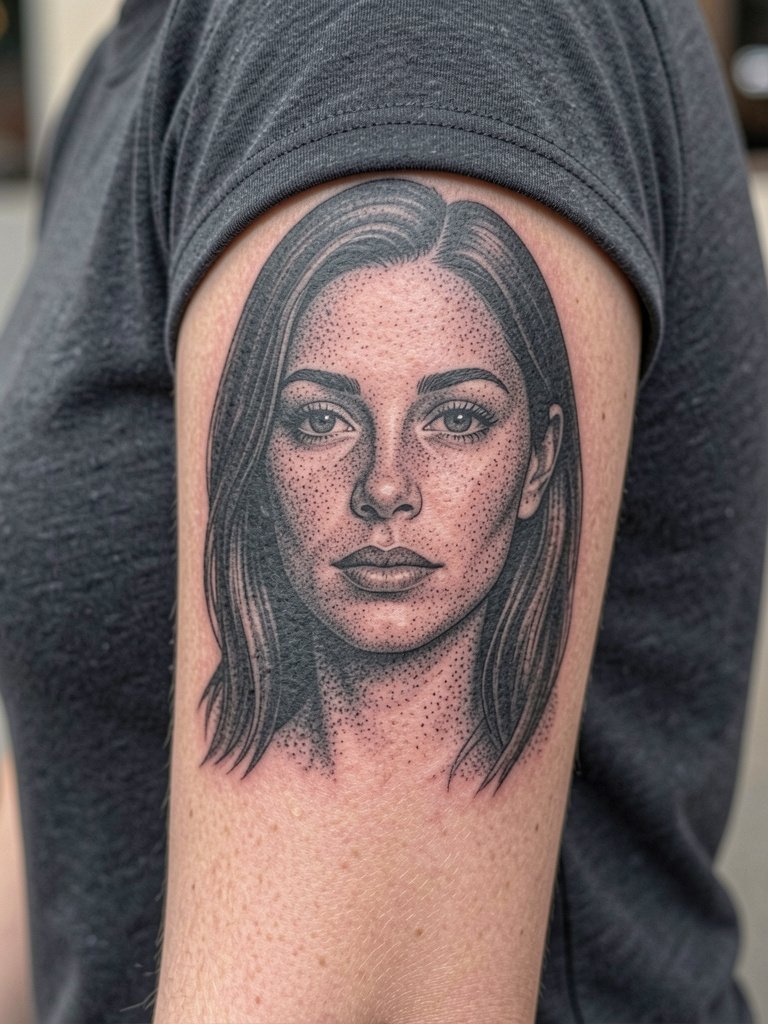
Micro-realism demands careful planning for scale. Too small and the shading collapses into gray patches. Request healed photos of similar portraits on comparable skin tone to set expectations. Sessions can be long and delicate. Expect a touch-up after healing to clarify tiny highlights.
16. Geometric Mandala on the Inner Forearm
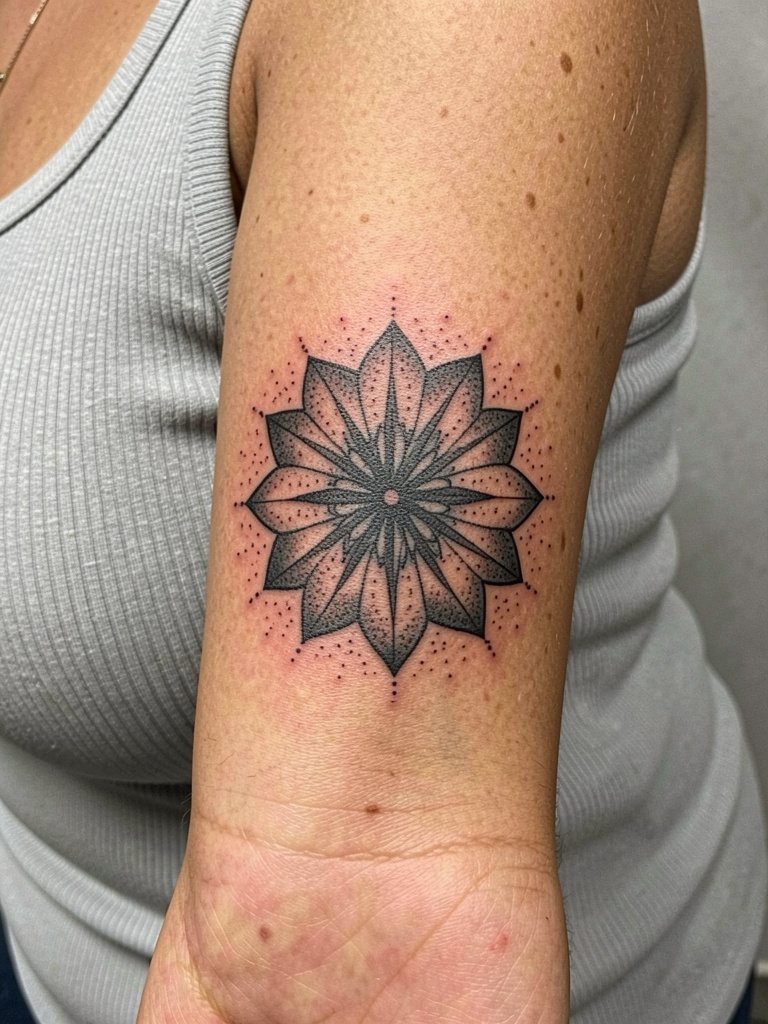
Mandala geometry needs even spacing. A mistake is requesting ultra-fine concentric lines too close together. Ask to map the radius on your actual forearm so circles remain crisp at two years. Pain is low to moderate on the inner forearm. Show it off with a ribbed tank that keeps the area visible without bulk.
17. Minimalist Mountain Range on the Outer Forearm
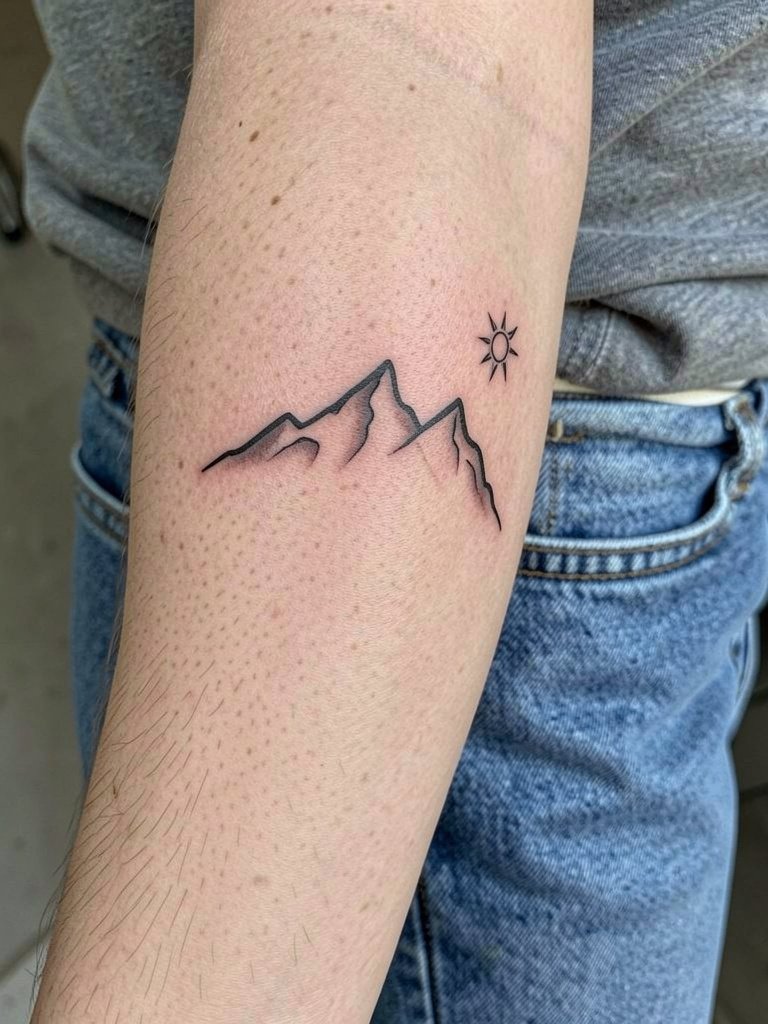
Clean contour lines make minimalist landscapes readable over time. The common error is too-thin continuous lines that soften with motion and sunlight. Opt for a slightly heavier primary contour and restrained inner detail. Sessions are short. Pair with a tucked tee and jeans when you want the arm to be the casual focal point.
18. Snake and Floral Wrap on the Forearm
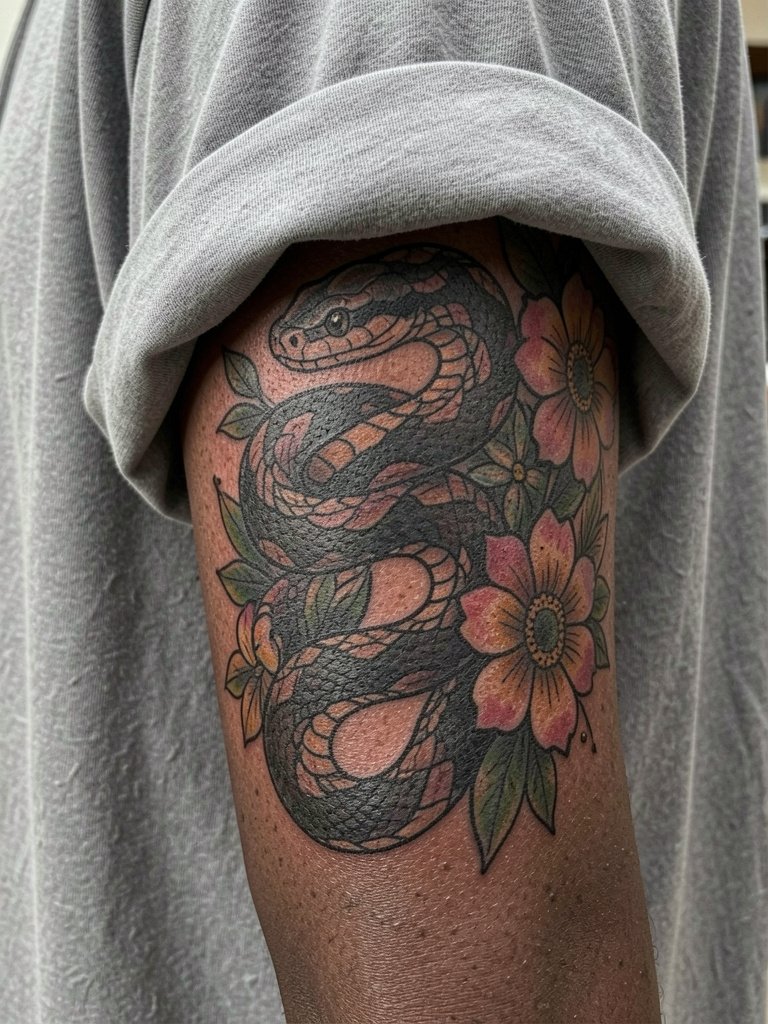
Intertwining motifs need deliberate negative space to avoid visual muddle as the arm moves. Designers often crowd detail in the hope it looks richer. Instead, ask for scale separation so the snake reads at a glance even after years. Expect moderate pain and a one- to two-session plan. For framing, an oversized tee with rolled sleeves gives the wrap room to be seen.
19. Fine Line Side-Bicep Script
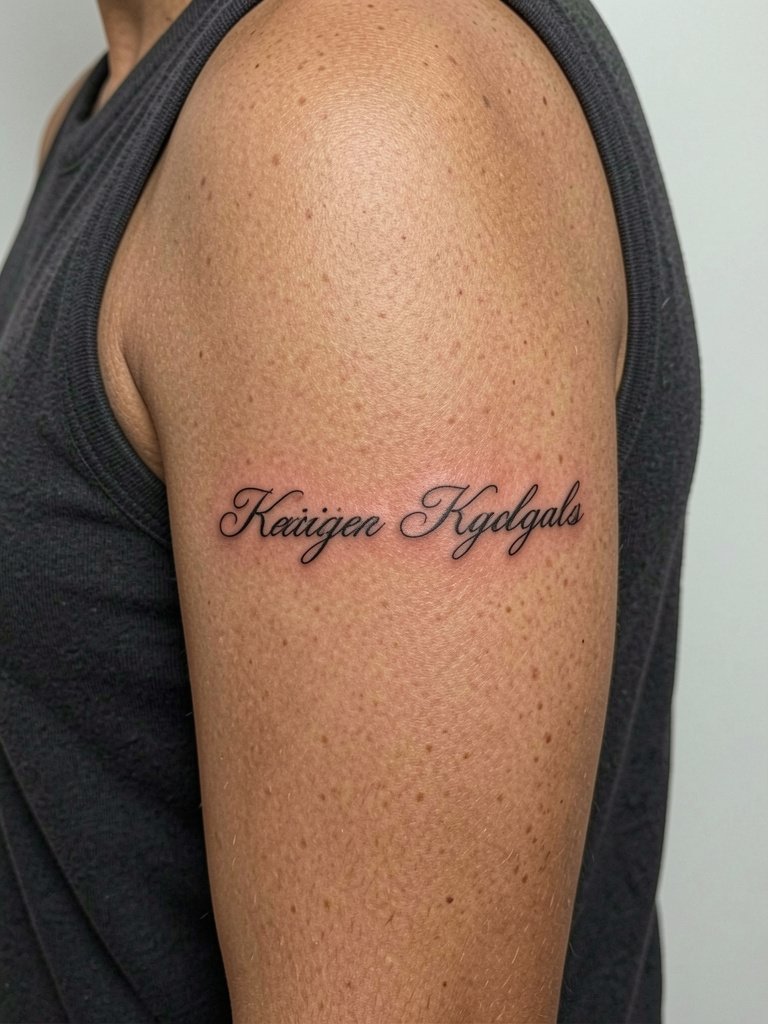
Side-bicep script is intimate and easy to conceal. The risk is choosing a font so thin it blurs when the skin stretches. Have the artist mock the line weight on your arm to see how it holds. Sessions are short and pain is milder than inner forearm. Wear a top with a natural armhole so the artist can position the stencil without fabric tugging.
20. Bold Black Forearm Panel
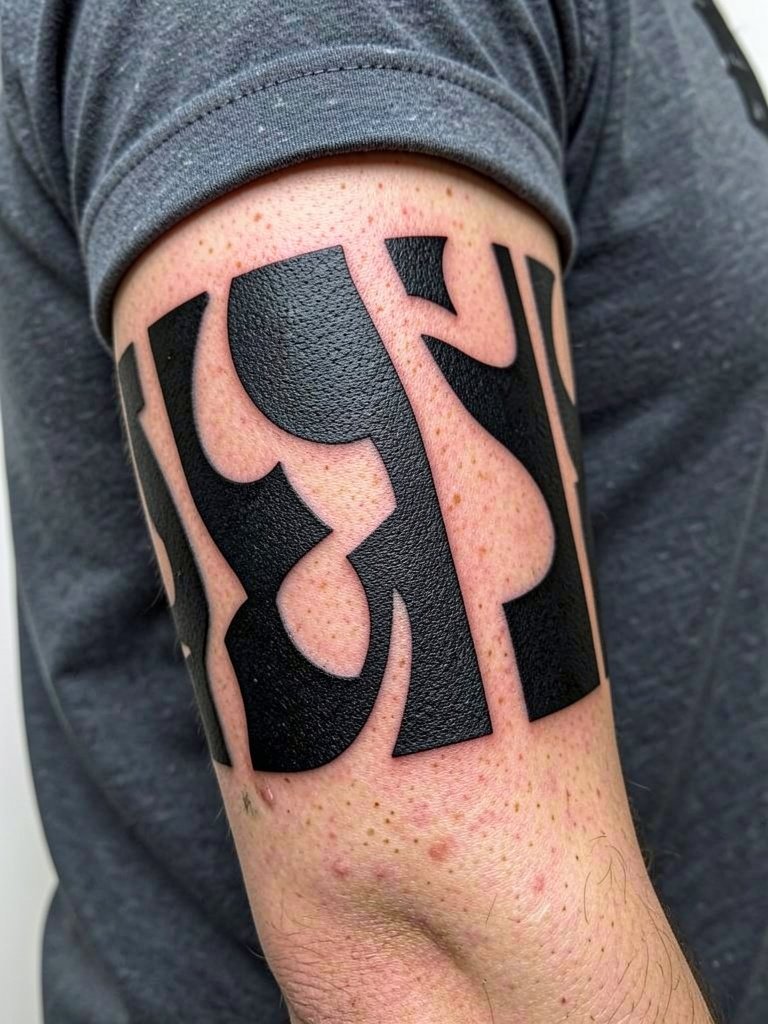
Black panels are longevity-conscious because dense saturation resists loss of contrast. The mistake is expecting fast sessions for large fills. Plan multiple appointments and longer recovery between passes. Touch-ups may be needed for uniform saturation. For wardrobe, a short sleeve tee keeps the panel visible without fabric interference.
21. Single Needle Constellation on the Wrist
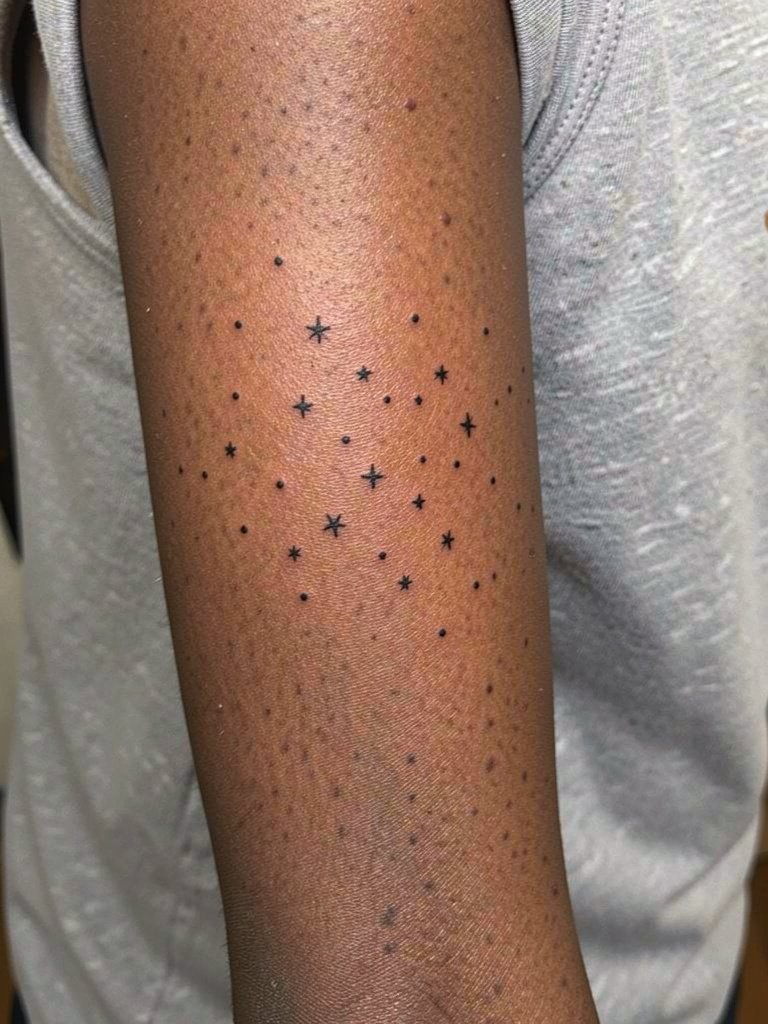
Single-needle tiny dots on the wrist are delicate. The inner-wrist and lateral-wrist areas can soften fine detail. Increase spacing and favor slightly bolder anchors so the constellation reads as it heals. Sessions are quick but the downside is frequent touch-ups for single-needle work. Remove jewelry and bring wrist to the artist bare.
22. Watercolor Floral Accent on the Upper Arm
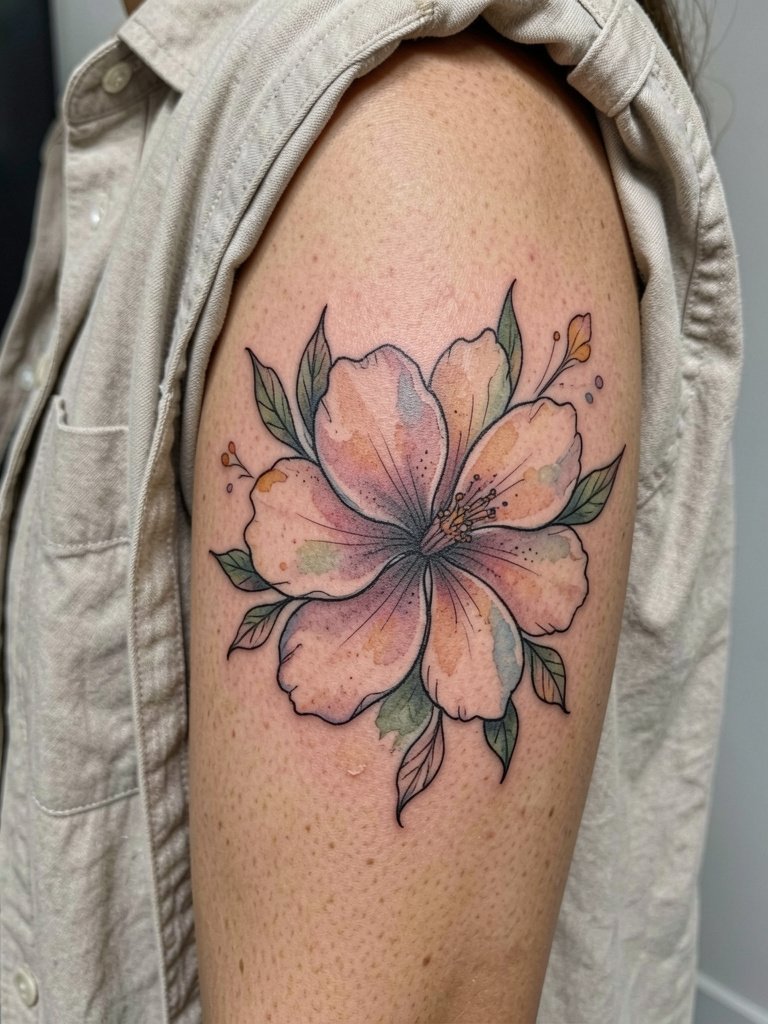
Watercolor elements look lovely but they fade faster than saturated blackline. One camp favors color for its immediate visual payoff. The other camp argues that black and grey ages more predictably and requires fewer touch-ups. Choose a mix: anchor the composition with clear black outlines and use watercolor washes sparingly as accents. Wear an open overshirt to show off the color without overwhelming the outfit.
23. Floral Half-Sleeve Panel on the Upper Arm
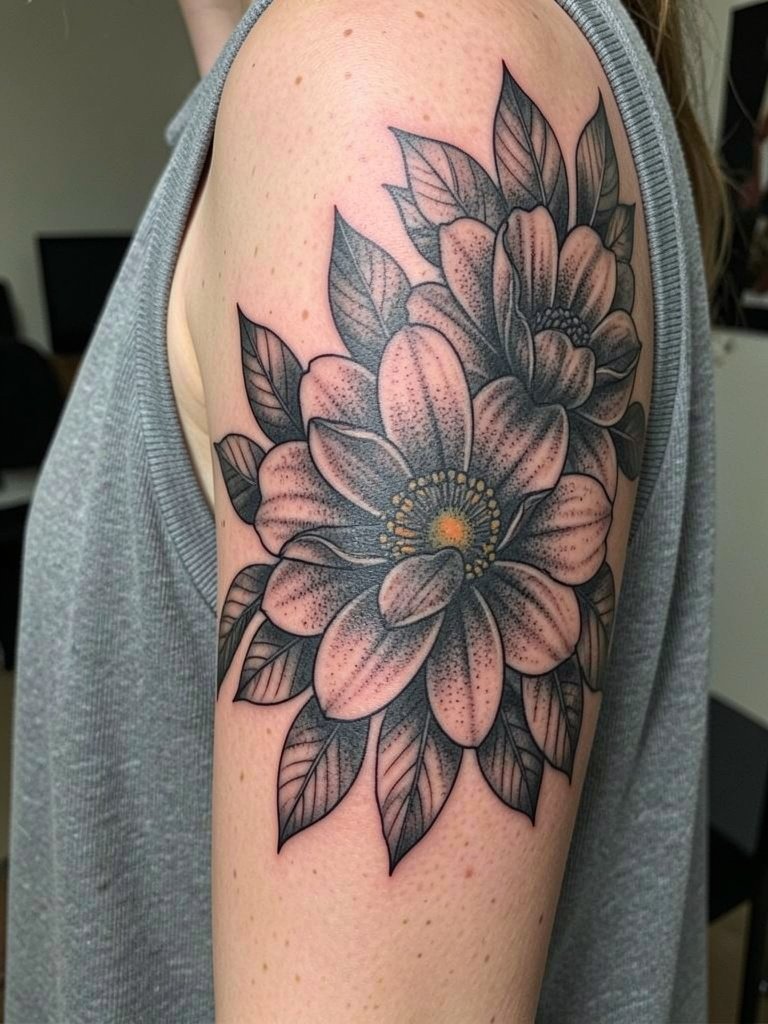
Half-sleeve work requires composition planning so the pieces read as a single unit. People often underestimate session counts for layered florals. Expect multiple sittings. For comfort during long sessions wear button-downs or zip hoodies you can move without rubbing the fresh ink.
24. Tiny Compass Inner Wrist
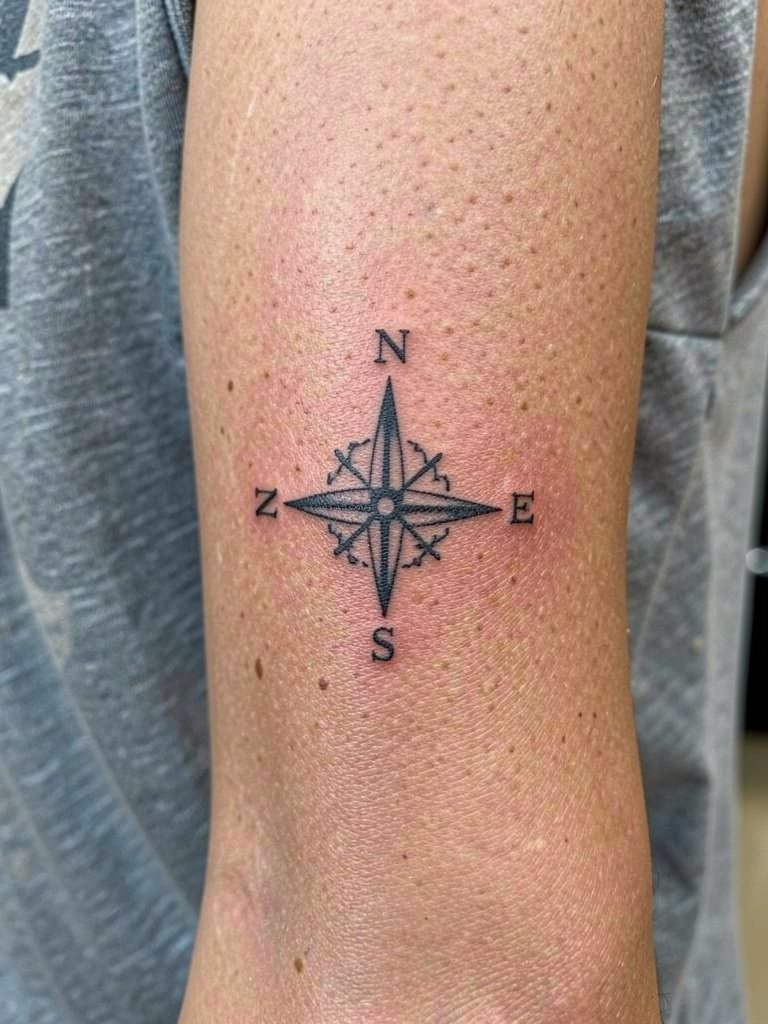
A compact compass is easy to place but needs definite contour lines to prevent softening. Make sure the crossbars are slightly thicker than you'd pick on screen. Sessions for tiny wrist symbols are brief. For a minimalist finish, wear a thin chain bracelet on the opposite wrist so the new ink is the visual anchor.
25. Medusa or Empowerment Motif on the Outer Forearm
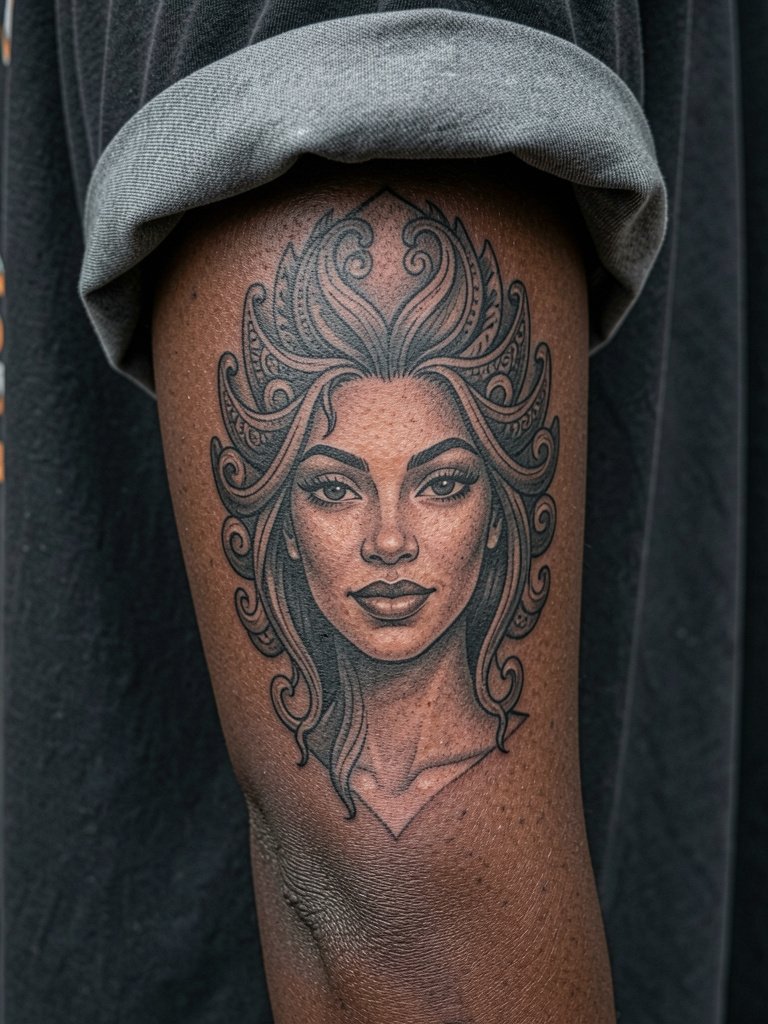
Symbolic empowerment designs often use bold facial silhouettes and ornamental hair to read across the arm. The common mistake is filling hair with excessive tiny detail that blurs. Opt for strong contrast and defined facial planes. Sessions are moderate and may need a separate appointment for shading. Consider casual open-layer outfits like an oversized tee to keep the piece visible without fuss.
26. Patchwork Sleeve Planning Element
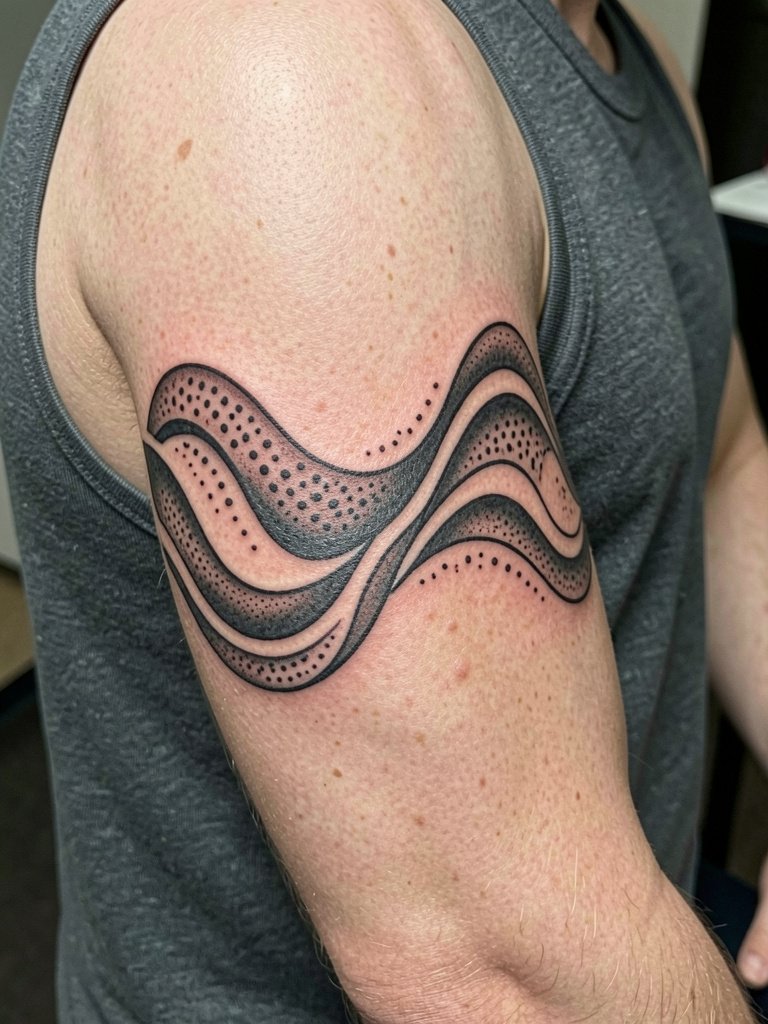
If you want to build a sleeve over years, plan connector pieces now so later additions do not feel glued on. The mistake is picking random flash without thinking about flow. Discuss scale, recurring motifs, and a shared contour weight so the arm reads cohesive. For long sessions wear a sleeveless muscle tank to stay comfortable and keep access open.
27. Tiny Wrist Symbol with Bracelet Pairing
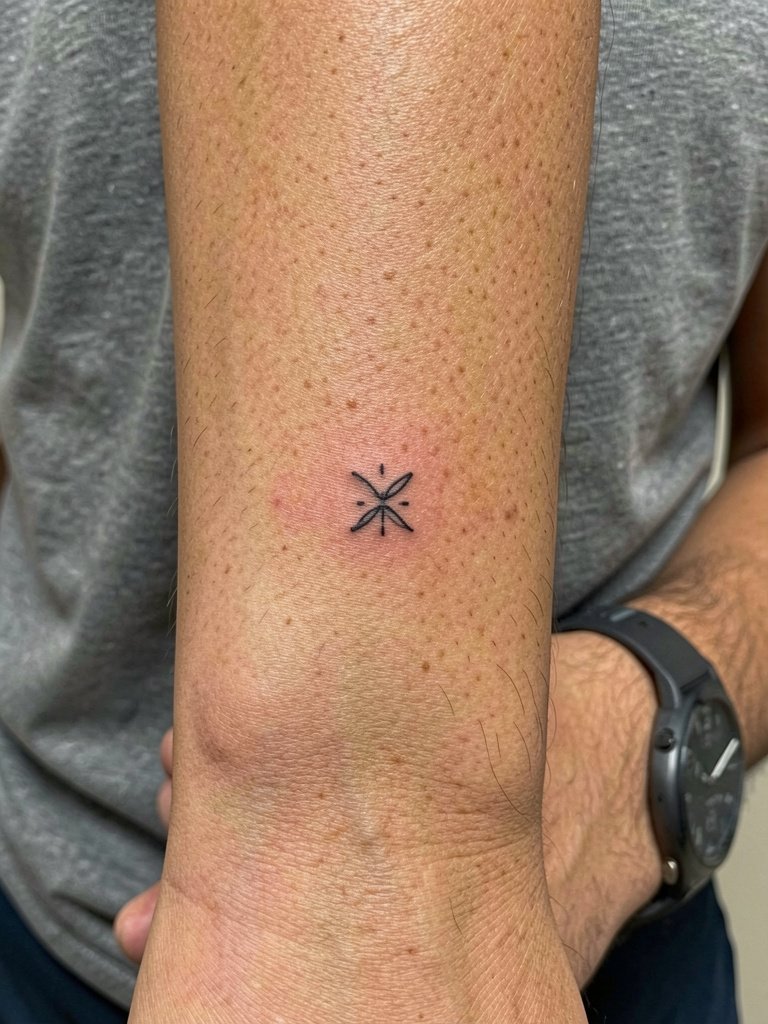
Tiny wrist symbols are a great low-commitment option but they are constantly exposed to sun and hand friction. Increase the anchor line weight slightly and expect a touch-up around the one-year mark. Session time is very short and pain is usually low. For everyday styling, balance the new symbol with a minimal watch or thin bracelet on the opposite wrist.
Frequently Asked Questions
Q: How do I know whether to pick inner forearm or outer forearm for a floral piece?
A: Inner forearm gives a more private, palm-up view and is excellent for text and vertical layouts. Outer forearm shows more naturally and gives linework a longer visual runway for horizontal or panel designs. Think about how often you want the piece visible and whether you need to hide it at work.
Q: Does single-needle fine line really vanish after a couple years?
A: Artists and collectors split into two camps. One camp says single-needle fine line blurs and fades faster on forearms because of sun, motion, and thinner line depth. The other camp says properly spaced and slightly heavier single-needle contours settle cleanly, and they will show healed shots to demonstrate. For anyone leaning fine line, ask the artist to show healed examples on similar skin tones and request slightly bolder anchors if you plan to skip frequent touch-ups.
Q: What should I wear to a forearm or upper arm appointment?
A: For inner forearm work wear a rolled sleeve linen shirt or a ribbed tank so the artist can access the palm-up surface without tugging. For upper arm sessions a sleeveless top or button-down is easiest. Avoid tight cuffs and layered bracelets on the tattoo arm the day of.
Q: Where can I find healed examples and local artists without relying on individual names?
A: Search hashtags like #womensarmtattoo, #finelinetattoo, #forearmtattoo, #blackworktattoo, and #floraltattoo on Instagram and TikTok and use location filters to narrow results. Browse style-specific portfolios on platforms that let you filter by keywords and check Reddit communities for peer-shared healed shots and booking experience notes. Convention guest-spot calendars are also useful for finding short-term visits from niche specialists.
Q: Is Saniderm better than dry healing for arm tattoos?
A: The community is divided. One group prefers second-skin products because they protect fresh work from friction and contamination during the early healing window. The other group favors a wash-and-moisturize routine because adhesives can irritate sensitive skin and some people react to the film. Consider your skin sensitivity and ask your studio how they handle cases with adhesive reactions.
Q: How should I plan touch-ups and budget for a sleeve built over time?
A: Build a long-term plan with a rough session count in mind and a standing budget for touch-ups. Expect custom panels and black saturation to require multiple hours and to need follow-ups at the one- to two-year mark for color or single-needle refresh. Keep records of healed photos so you and the artist can map continuity across sessions.
