

Blackwork stands out because it reads clearly from a distance and ages into strong contrast, not a whisper of detail. Many guys chase the latest fragile single-needle trends online and then watch fine strokes blur into a gray haze. This collection favors bold silhouettes, saturated fills, and compositions that keep their form at year five, so the pieces still look intentional when you roll up your sleeve.
1. Bold Geometric Sleeve Anchor on the Upper Arm
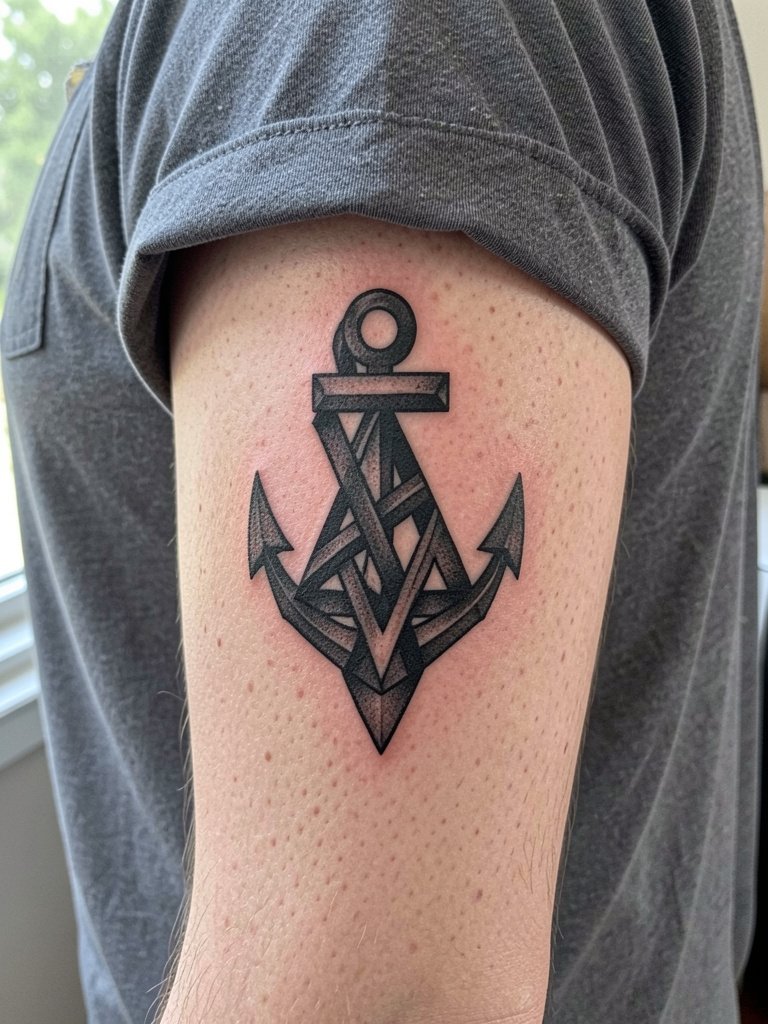
Start with a strong geometric anchor when you want a sleeve that reads as a single form at a distance. The upper arm tolerates heavier saturation so the black fills stay rich as the piece heals. For the consultation bring a scaled reference and ask for 2mm minimum spacing between major lines, the extra breathing room reduces blowout risk. Session time for a three-inch anchor can run 60 to 90 minutes depending on saturation. Expect the first touch-up around six months for even saturation, and a small touch-up again at two years if your skin tends to fade.
2. Solid Black Band Around the Forearm
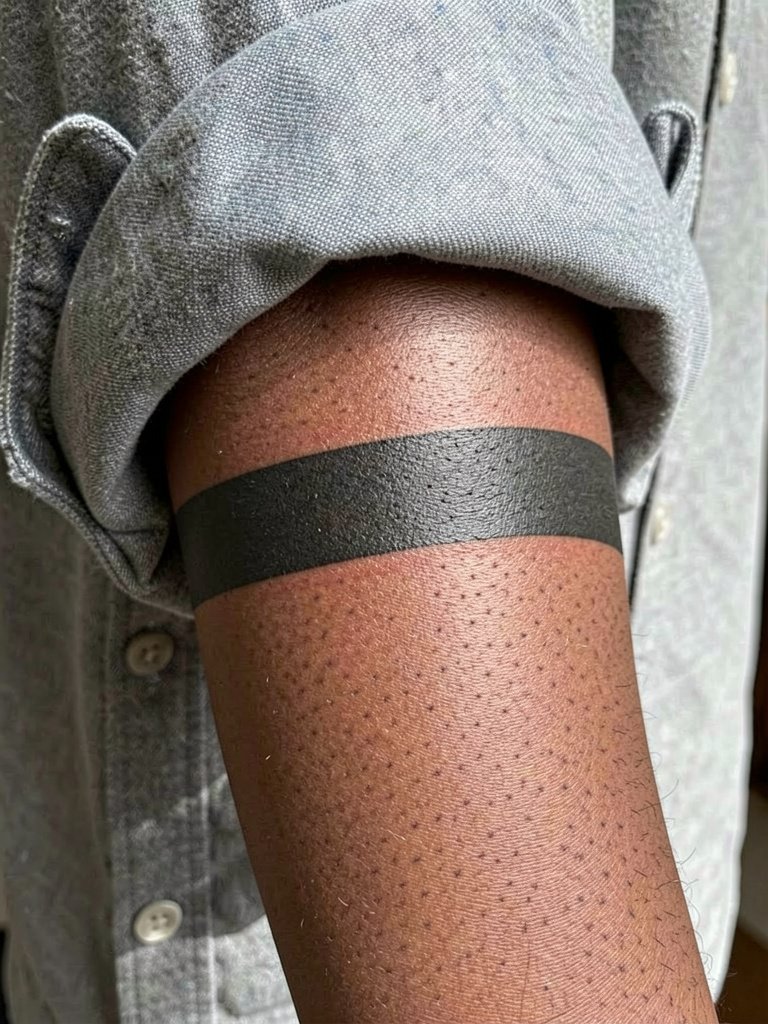
A filled forearm band makes a clean statement with almost zero detail to worry about. The inner forearm placement keeps linework away from constant sun exposure and reduces grit during healing. Tell the artist you want crisp negative-space edges and steady needle passes rather than speed shading, that control ensures even saturation across the circumference. Pain is low to moderate and a single session usually does the job if the artist layers saturation correctly. At six months re-evaluate for patchy saturation, and plan a quick touch-up if any thin spots appear.
3. Blackwork Botanical Sleeve Panel on the Inner Forearm
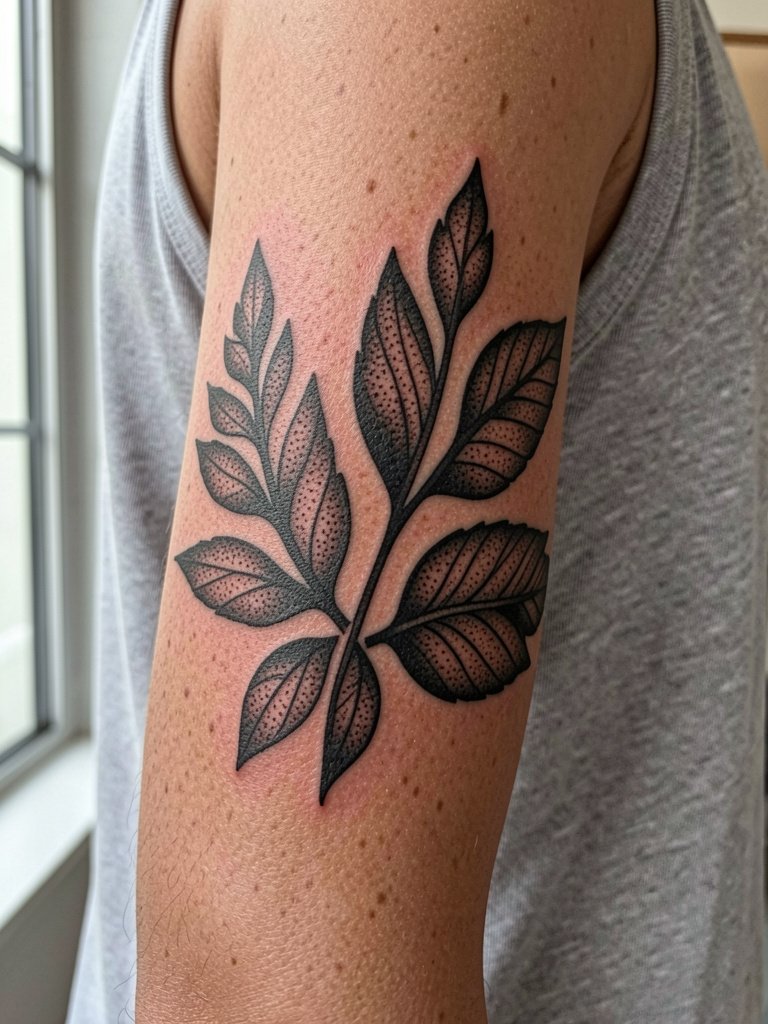
Botanical silhouettes in heavy blackwork survive abrasion and still read after years of wear. The inner forearm is forgiving for bold silhouettes but it can consume very fine detail. Specify stipple shading rather than hairline veins if you want texture that ages without smudging. Session time for a medium panel is one to two hours and the pain level stays moderate. A common mistake is asking for tiny leaf veins, those disappear by year two. For show-off styling pair this with rolled linen short sleeves for men to reveal the panel without overwhelming it.
4. Solid Black Chest Panel Under the Collarbone
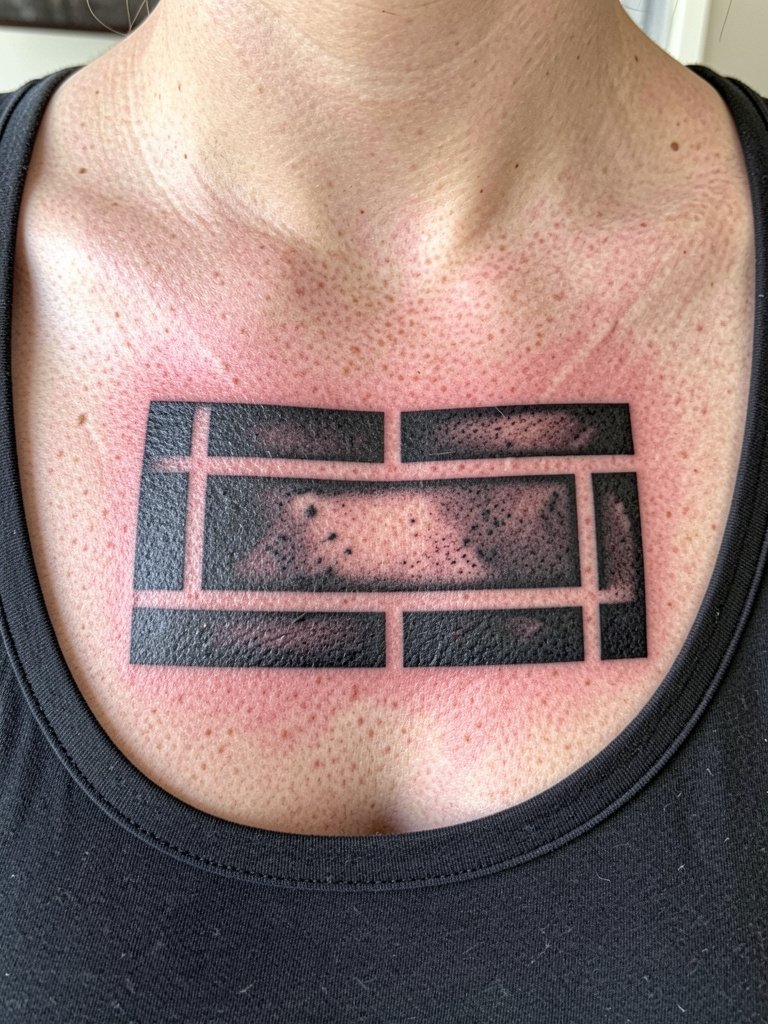
A dense chest panel reads well under shirts and looks intentional with open-neck tops. The chest is a moderate to high pain area depending on sternum proximity, so book a session with planned breaks. Communicate that you want deep saturation and tell the artist to sit the black slightly shallower across the sternum area, that helps prevent overworking sensitive skin. Expect the area to darken in the first week and mellow by the six-month check. For wardrobe, pair this piece with open-neck linen shirts that frame the collarbone without hiding the panel.
5. Tribal-Inspired Solid Shoulder Cap
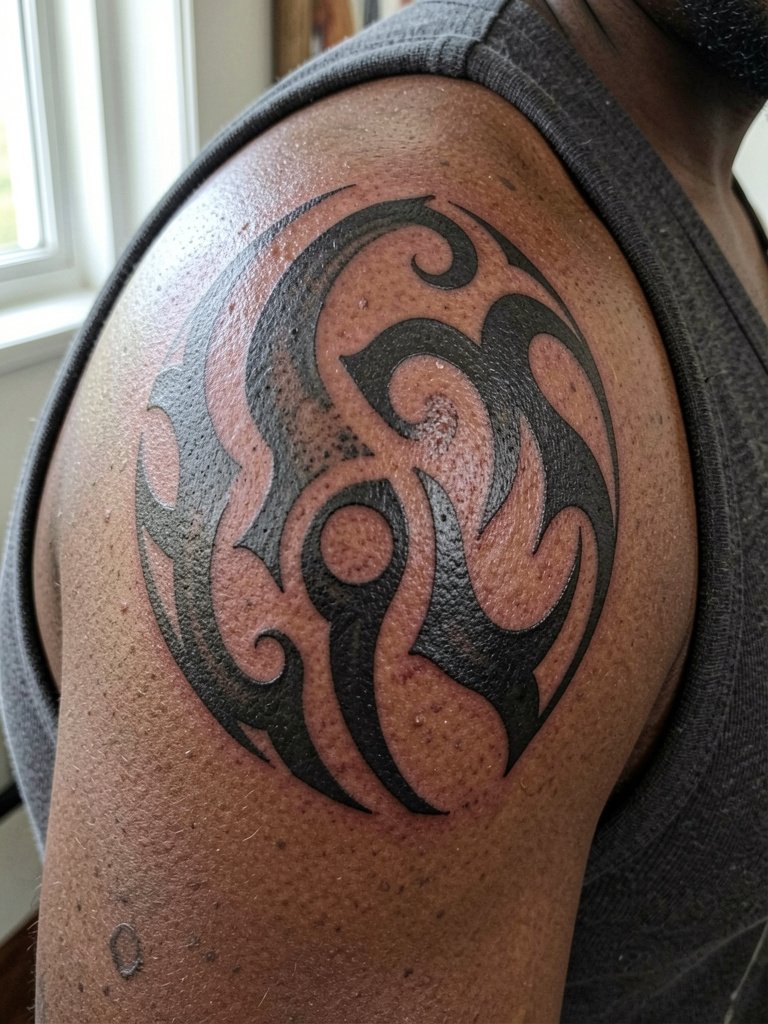
Tribal forms translated into modern blackwork work because they rely on silhouette and negative space. On the shoulder cap the skin handles heavy saturation well and the piece will age into a strong shape. During the consult provide full-body photos so the artist can align the cap to muscle lines and shoulder movement, alignment reduces distortion when you raise your arm. Session time for a shoulder cap is typically 90 to 150 minutes. Avoid asking for tiny inward details, the typical mistake is making motifs too small for the curvature.
6. Heavy Dot-Work Mandala on the Upper Back
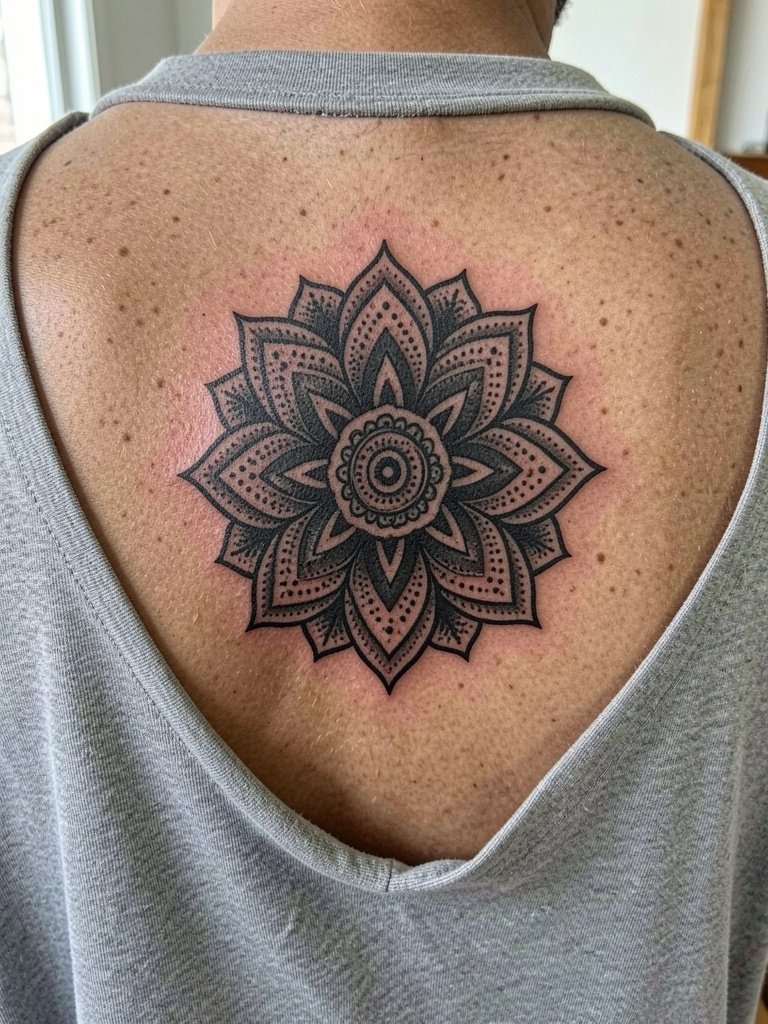
A dense dot-work mandala on the upper back stays readable because the central shapes are large and the stippling creates texture. The upper back tolerates longer sessions and lower pain than ribs. During the layout stage request a centered alignment with the spine as a visual axis, that keeps the piece balanced when you move. Expect a multi-hour session split into two visits for saturation and then refining the stipple. Small gaps between dots can fill in slightly over time, so ask for slightly wider spacing between high-contrast points to preserve definition.
Session Day Picks
These items smooth out common issues from the shoulder, forearm, and chest pieces above and make the appointment and first week easier.
-
Stencil transfer paper kit. Lets you test composition on the skin before the needle, helpful for aligning the mandala and shoulder cap.
-
Fast-acting topical numbing cream. Applied per instructions it eases shoulder and chest sensitivity so you can stay in the chair longer.
-
Thin protective film roll for small areas. Useful after dense black fills on forearms where friction from clothing is an issue.
-
Fragrance-free gentle body wash. Cleans the healing skin without stripping saturation during the first week.
-
Aquaphor healing ointment. A thin layer helps lock in moisture for dense black fills without clogging the needle channels.
7. Blackout Pocket Patch on the Ribcage
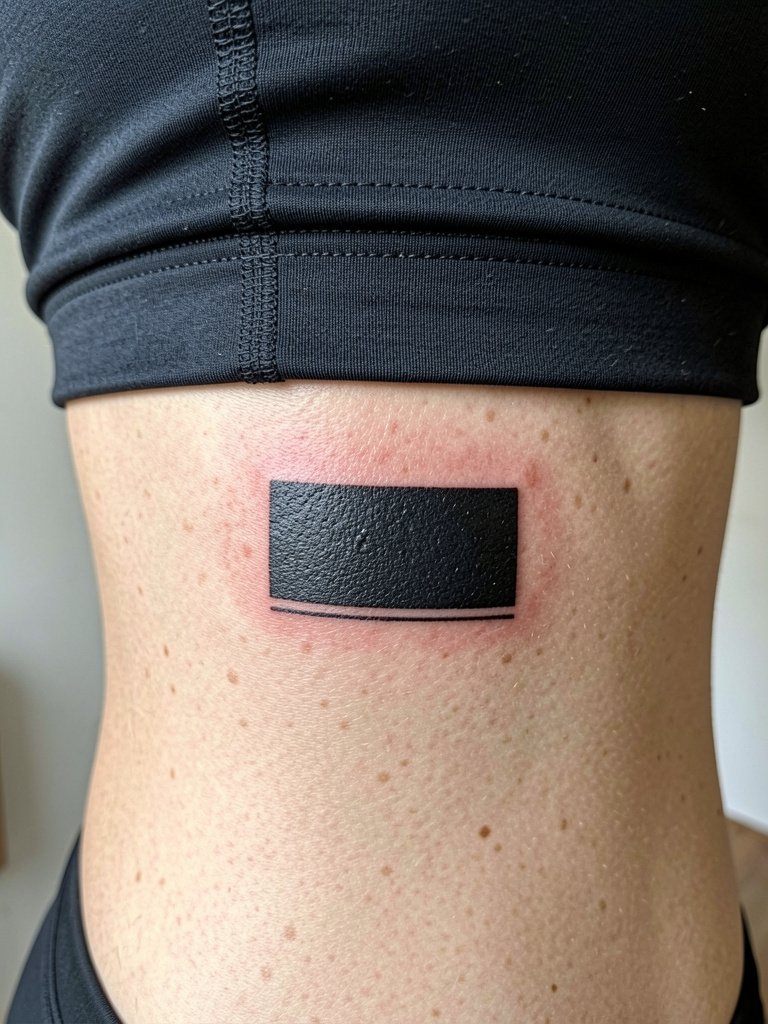
Rib blackout patches read as bold jewelry under shirts but the area is high on the pain scale. Warn that the ribs are a sensitive placement and plan for shorter sessions with breaks. Artists split these into multiple passes to avoid overworking the skin. Some artists argue fine line on ribs blurs within two years, while others say slightly deeper needle placement and wider spacing lets fine work hold. One camp argues ribs' motion makes lines soften quickly. The other camp says with correct depth and spacing it can settle well. If you want to show it off, wear a cropped top with a high-waist trouser to frame the negative-space border.
8. Solid Black Calf Panel
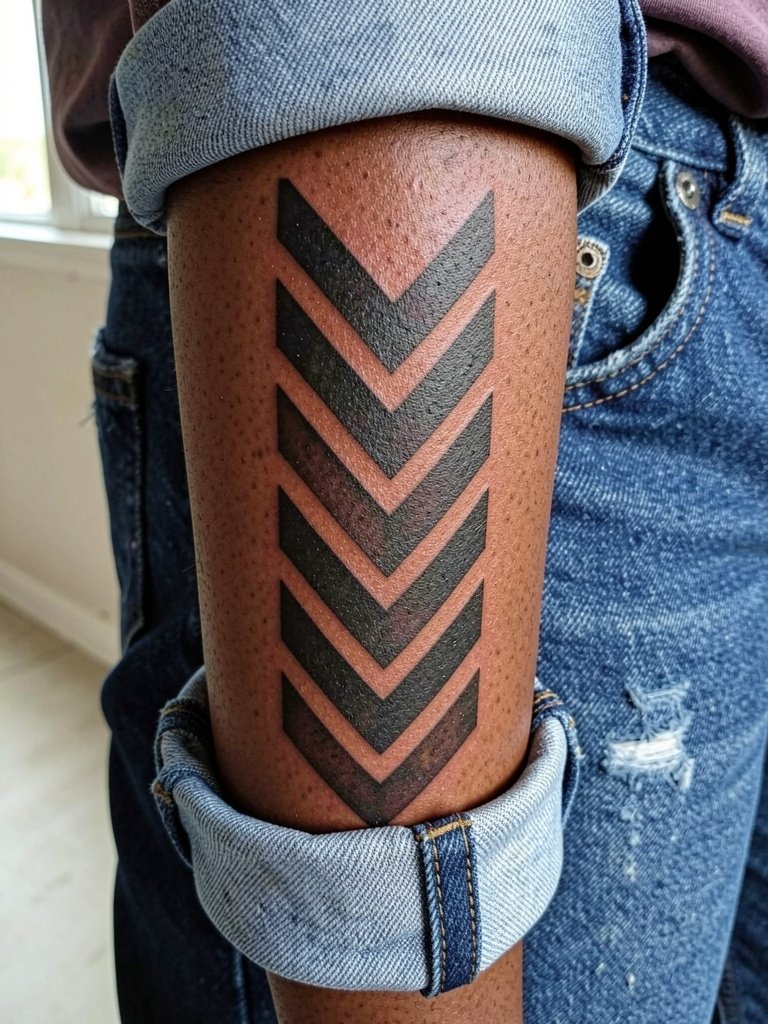
Calf panels display well in shorts and keep large fields of saturation away from joints, which reduces distortion. The outer calf is moderate pain and holds saturation consistently, so expect one long session for a medium panel. During consultation specify the outer edge curvature to align with the muscle, that prevents unexpected warping when you walk. For showing it off pair the piece with rolled denim shorts so the chevrons remain visible without cutting into the silhouette.
9. Thick-Line Neo-Tribal Neck Band
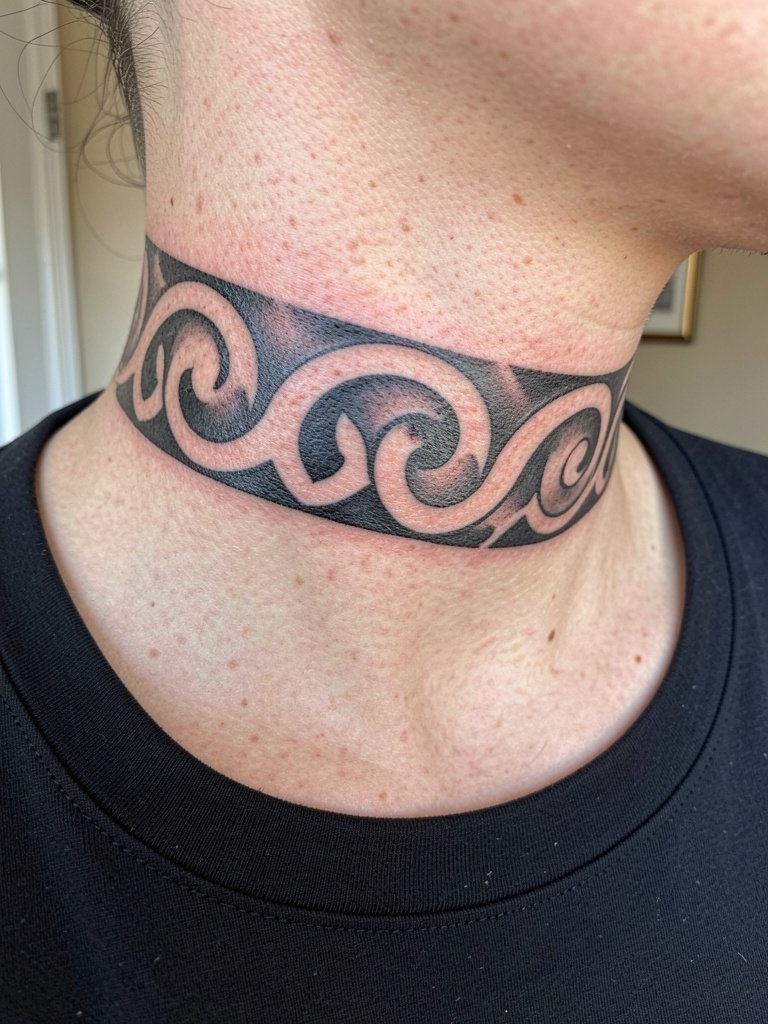
Neck bands are visible and carry social consequences, so weigh aesthetic goals before committing. The side neck accepts heavy blackwork, but the skin is thin so the artist must manage needle depth carefully. One camp warns that neck tattoos can complicate certain jobs and public impressions. Another camp says a neat, well-placed band can read like jewelry and be covered with a high collar when needed. Session time is short but the pain is high. Ask the artist to preview healed photos on similar neck placements and plan a single precise session rather than multiple rushed passes.
10. Hand-Side Blackwork Script Block
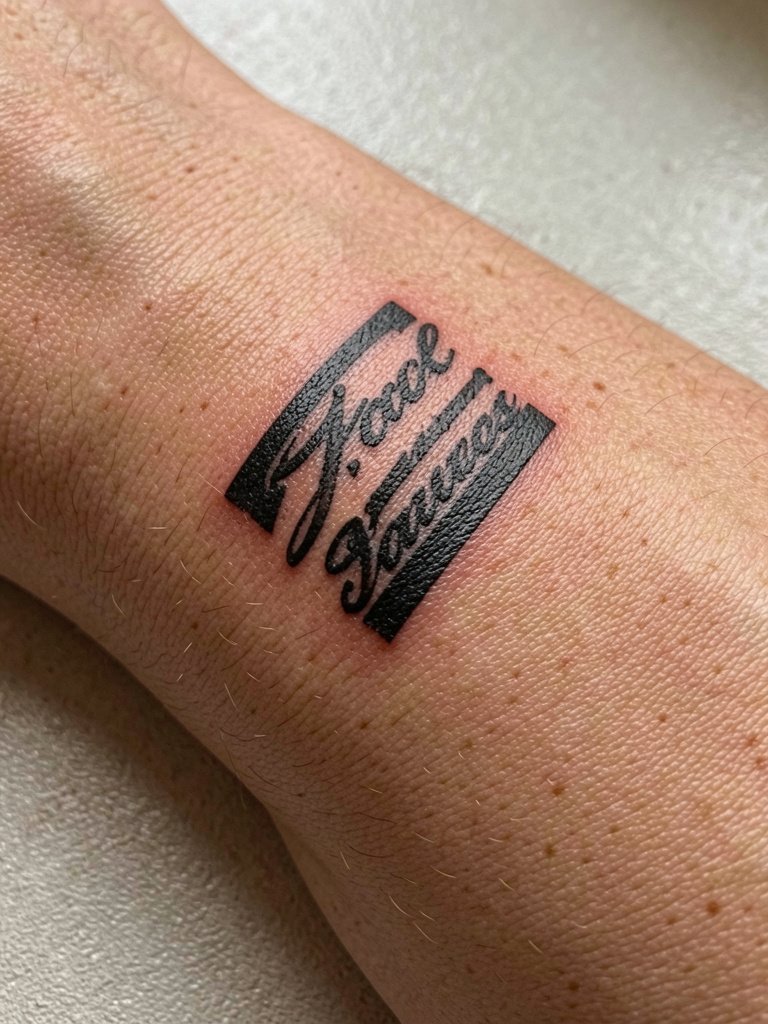
Hands age differently because of constant washing and friction, and black blocks survive better than micro script there. Specify the exact lettering weight and ask for slightly bolder strokes than your reference because the skin on the hand often spreads ink over time. Pain is high and touch-ups are common; expect a touch-up around three to six months. For wear-day styling keep rings minimal so the block reads clearly, and try a thin cotton glove during heavy chores while the area heals.
11. Solid Black Geometric Sternum Piece
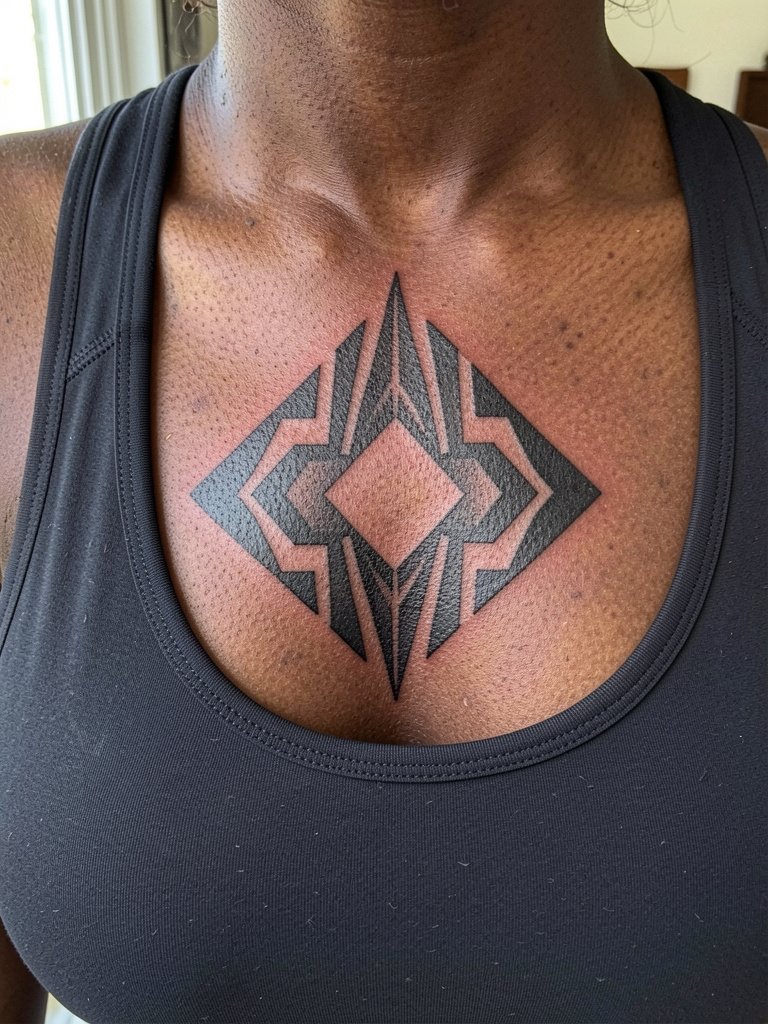
Sternum pieces make a strong central statement and the mirrored geometry reads well with bold black fills. The sternum is high on the pain scale and requires careful session planning with breaks. A frequent mistake is compressing too much detail into that narrow vertical strip. Specify that the artist increases spacing between motifs so shapes hold as the skin moves. Expect heavier scabbing in the first week and plan a follow-up at six months to address any uneven saturation along the sternum crease.
12. Solid Black Ribband Around the Waist
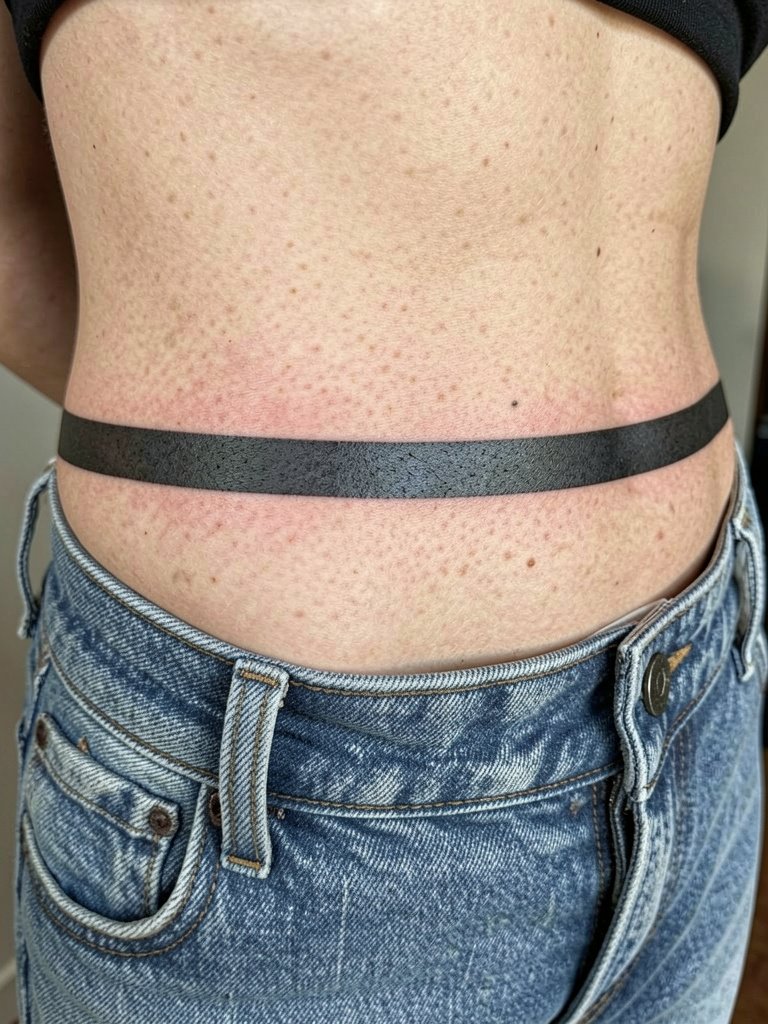
Bands that wrap near the waist read like a belt and survive because they avoid tiny interior detail. Because the area brushes against clothing pick fabric with a soft edge during healing. During the consult indicate how low your jeans sit so the band aligns when you wear your usual waistline. Pain ranges moderate to high depending on proximity to bone. Schedule a short touch-up once the initial swelling settles to even out saturation along the circumference.
13. Dense Blackwork Skull Silhouette on the Upper Arm
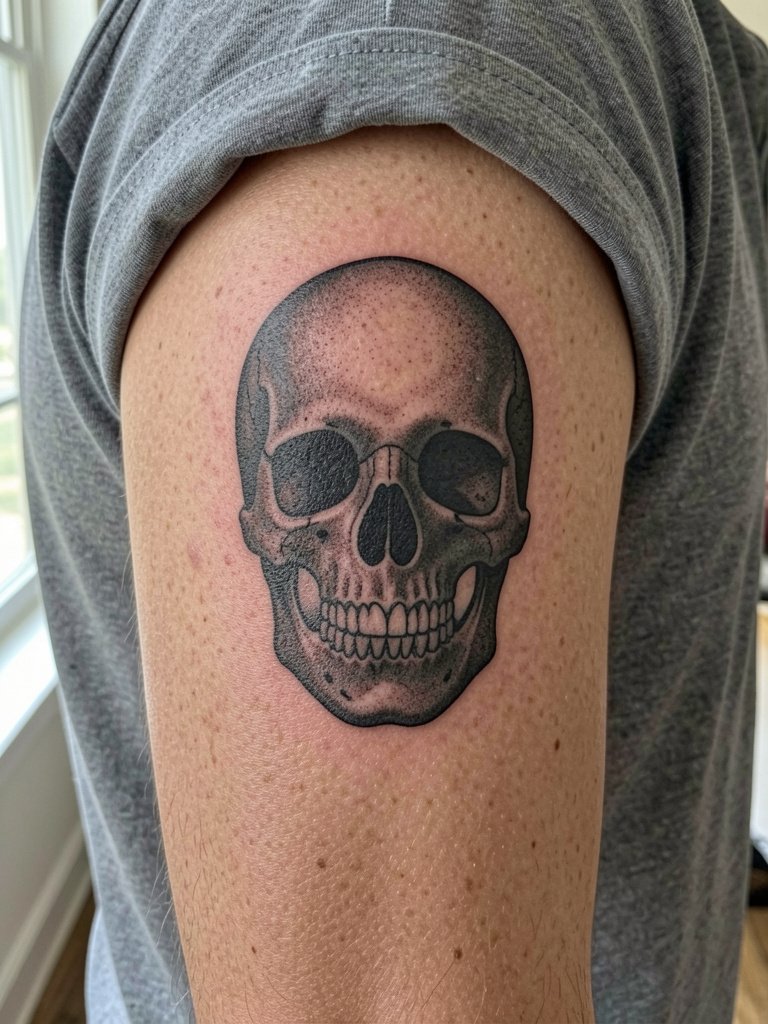
A silhouette focuses the design on contours rather than detail which helps in high-contrast blackwork. For a skull silhouette discuss negative-space placement for the eye sockets so the piece retains a face-like read. The outer arm tolerates longer sessions and hits low-to-moderate pain. A common error is shrinking the silhouette too small. If you want to show it off, wear short-sleeve textured tees that frame the outer arm without hiding the silhouette.
14. Thick-Lined Geometric Thigh Panel
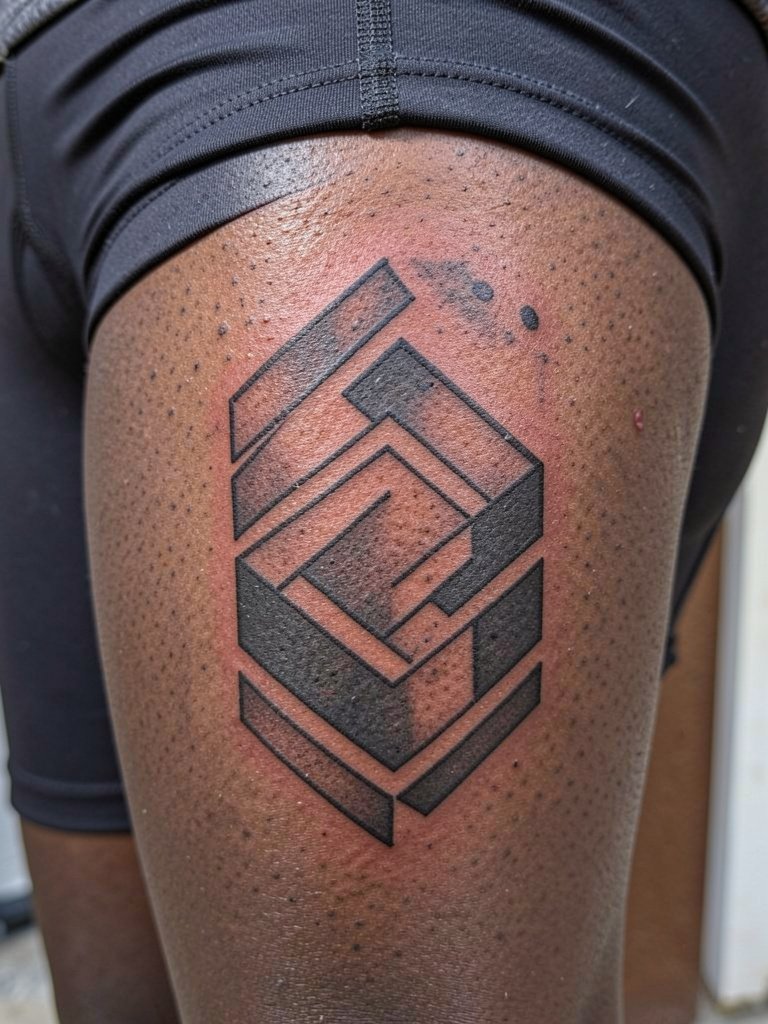
Thigh panels let you keep scale bold without exposing it constantly. The front outer thigh is a lower pain placement that accepts heavy saturation well. During consultation ask for muscle-aware flow so the chevrons sit naturally when you walk and sit, that alignment prevents odd-looking distortion. Session times vary, expect two to three hours for a medium panel. For showing it off select tailored shorts with a slightly higher hem that frames the top of the panel.
15. Solid Black Geometric Elbow Patch
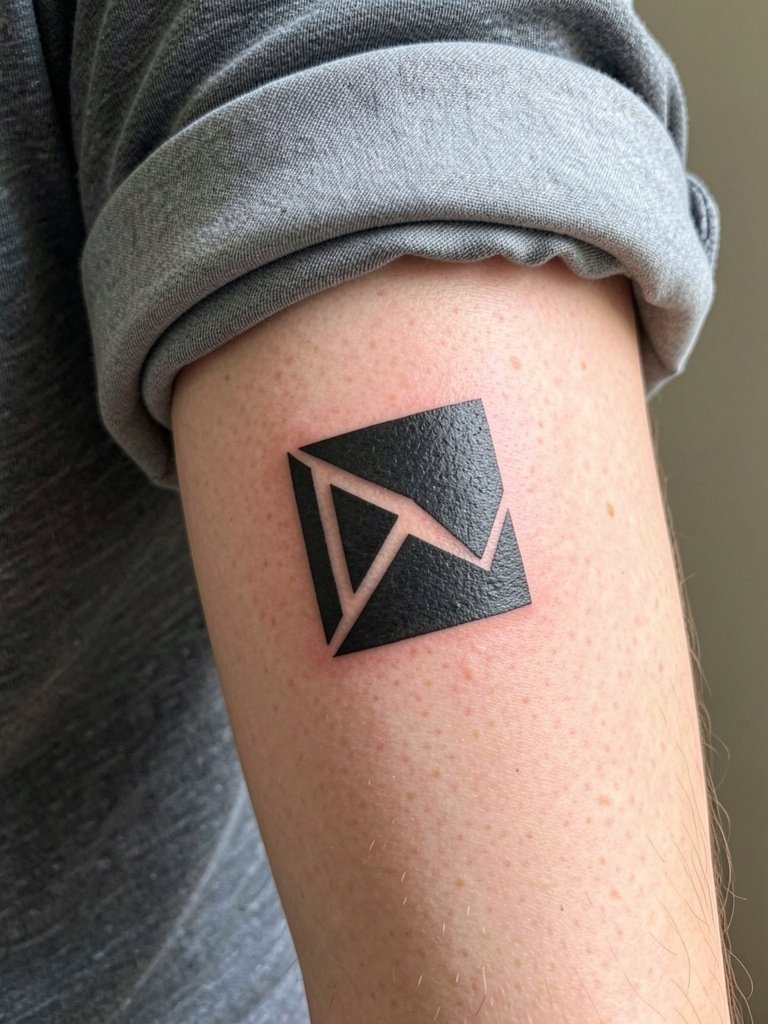
Elbow patches must account for constant folding; heavy fills can crack if the artist places too much depth into creasing skin. Tell the artist to plan slightly smaller scale and allow for skin movement in the layout. Pain at the elbow tip is high and sessions are intermittent. For practical wear choose shirts with sleeves that roll cleanly so the patch is visible without friction during healing. Expect a touch-up within six months to refresh any thin areas caused by elbow motion.
16. Heavy Blackwork Compass on the Upper Chest
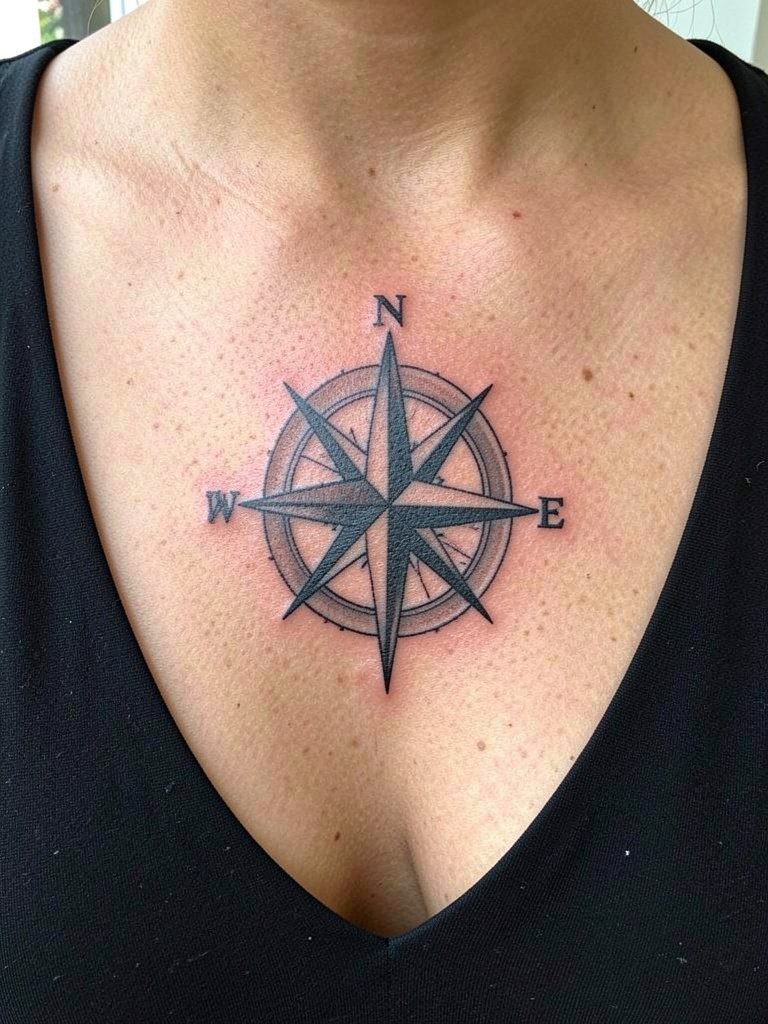
A compass with thick black elements stays visually distinct under shirts. The upper chest is less painful than the sternum but still sensitive. Ask for the cardinal points to be slightly overscaled relative to the center so they remain legible as the piece ages. Session time depends on size, but a medium compass runs one to two hours with a possible touch-up at six months. For an outfit pairing try a structured short-sleeve button shirt to frame the compass when you want it visible.
17. Bold Blackwork Wolf Silhouette on the Bicep
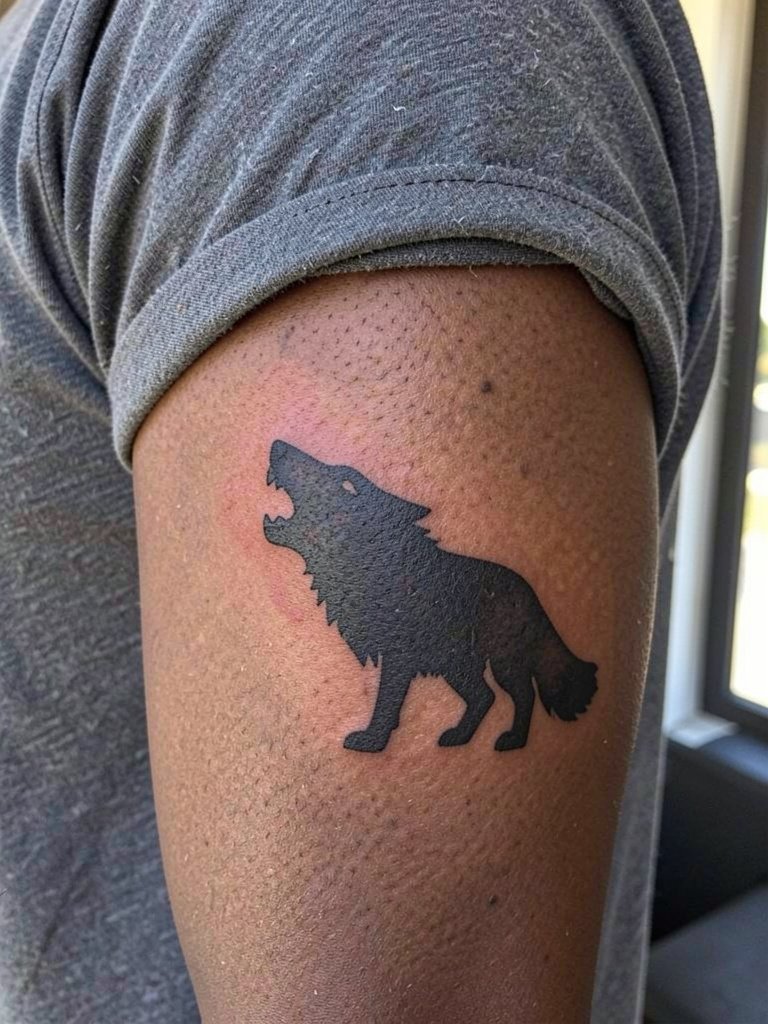
Silhouettes of animals read well and allow for dramatic negative space. On the bicep the muscle gives the design a natural curve and the pain is moderate. Ask the artist to test a live wrap placement so the silhouette flows with your flex, that prevents odd bending when you move. A single session often suffices for a medium silhouette; expect a six-month check for saturation balance. For everyday wear this pairs naturally with short-sleeve Henleys that let the bicep peek without exposing the whole arm.
18. Blackwork Chevron Rib Panel
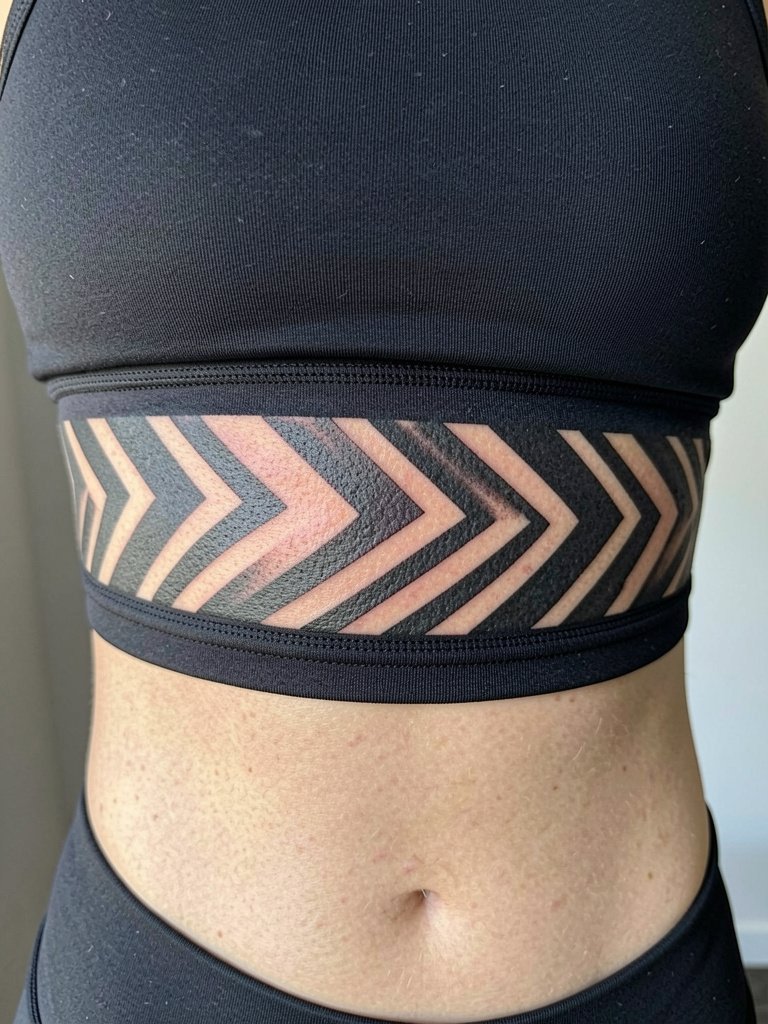
Chevron stacks on the ribs create a graphic ribbon that follows your torso shape. Because ribs see a lot of motion, ask for slightly wider gaps between chevrons so the pattern keeps contrast as the skin moves. Pain is high and sessions should be planned with rest breaks. Artists differ on whether very tight blackwork on ribs blurred faster than on thicker areas. One camp says the motion and thin skin causes lines to spread. The other camp says increased spacing and solid passes preserve the pattern. Expect a touch-up at six months to restore edge crispness.
19. Heavy Blackwork Anchor on the Wrist
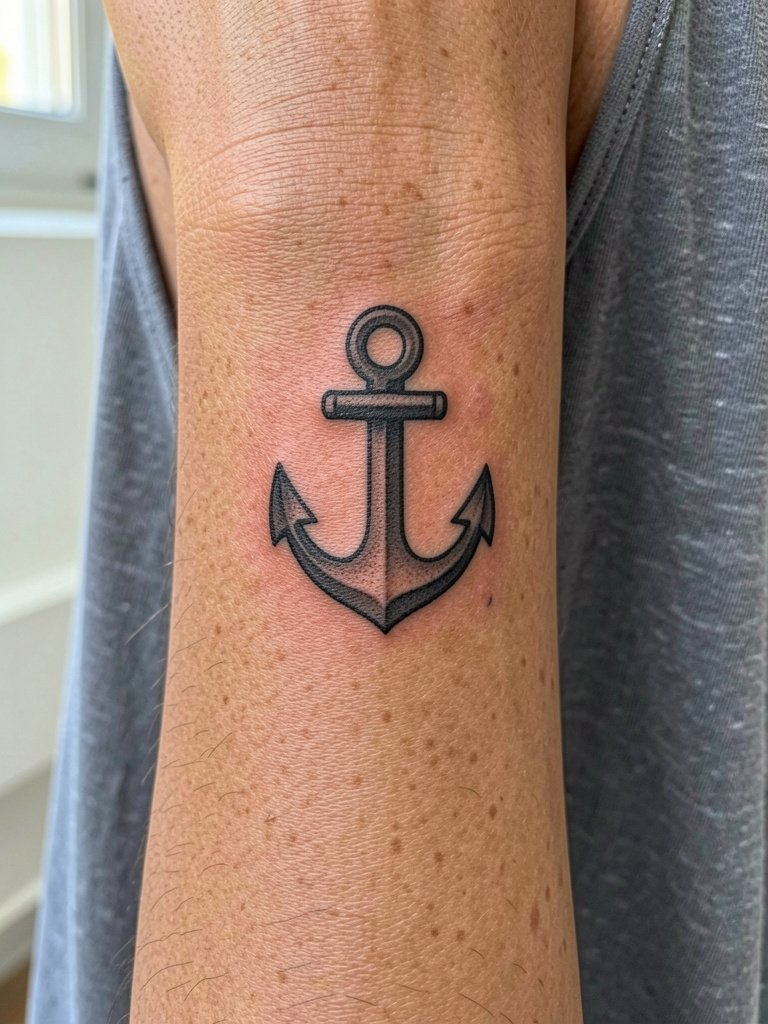
Wrist anchors survive longer when they are bold and compact rather than elongated. The inner wrist has thinner skin and higher visibility, so specify a slightly heavier line weight than your reference to counteract future softening. Pain is low to moderate. Hands-on work and frequent washing accelerate fading, so plan for a touch-up within the first year. For sessions wear a short-sleeve shirt so the artist can access the wrist without fabric tugging, and for showing the piece off try minimal leather bracelets that frame the anchor without covering it.
20. Dense Blackwork Compass on the Calf
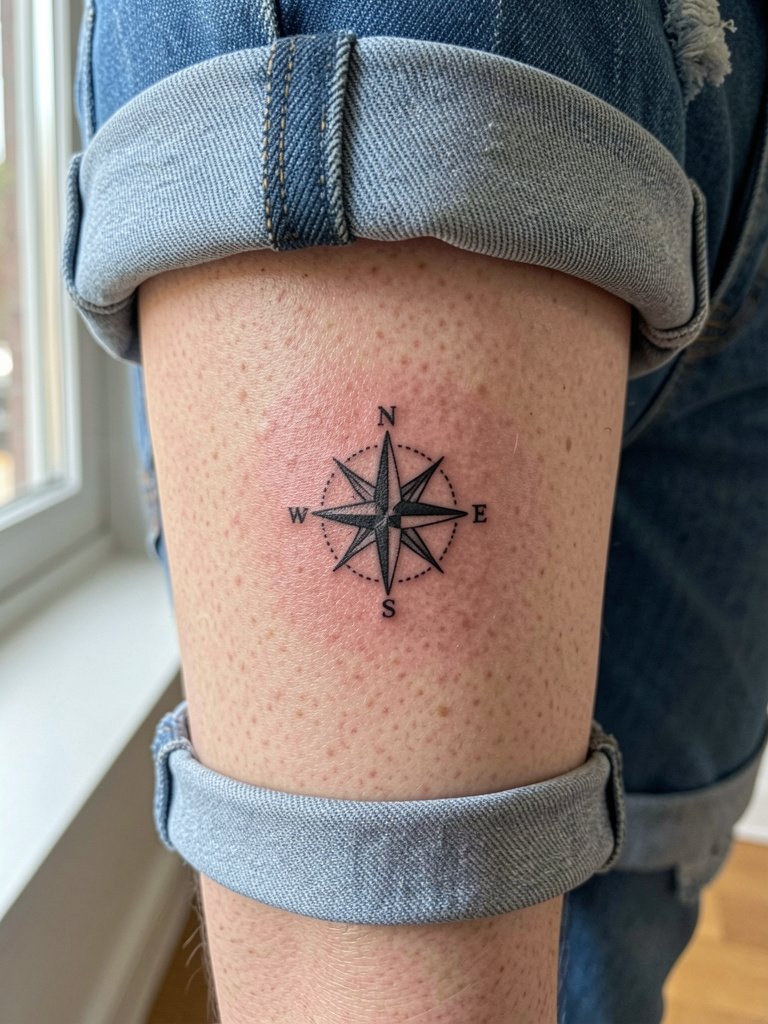
Calf compasses combine portability with durability because they avoid joint creasing and sun exposure when covered. Tell the artist to center the compass on the muscle belly for consistent reading while you stand or walk. Session time is short and pain is low to moderate. A common mistake is using too many fine rays; request fewer primary rays with heavier fill to preserve the motif. For outings pair this with rolled denim or tailored shorts that reveal the compass cleanly.
21. Heavy Blackwork Cross on the Forearm
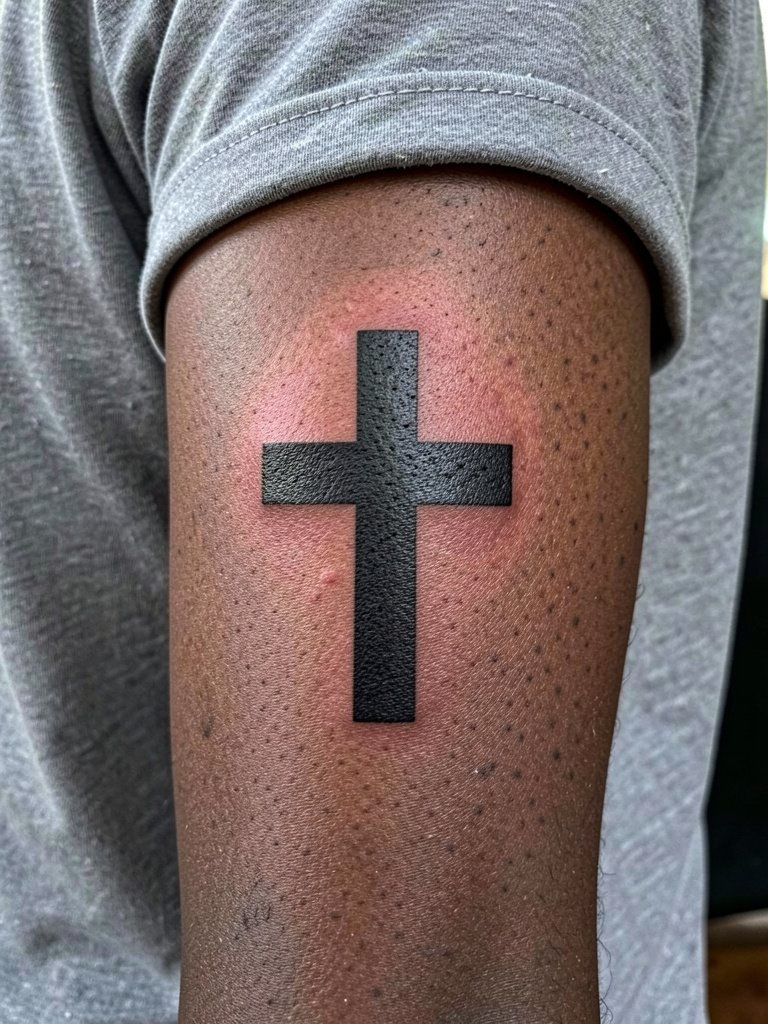
A bold cross on the forearm reads as a single form and pairs with layered wristwear for a framed look. The forearm accepts saturation well, but if you want crisp corners tell the artist to square off the edges slightly more than your reference. Session time is moderate and the area heals with less scabbing than ribs or chest. For styling wear textured bracelets that sit below the cross so the symbol remains visible and the accessories complement it.
22. Solid Black Geometric Collarbone Motif
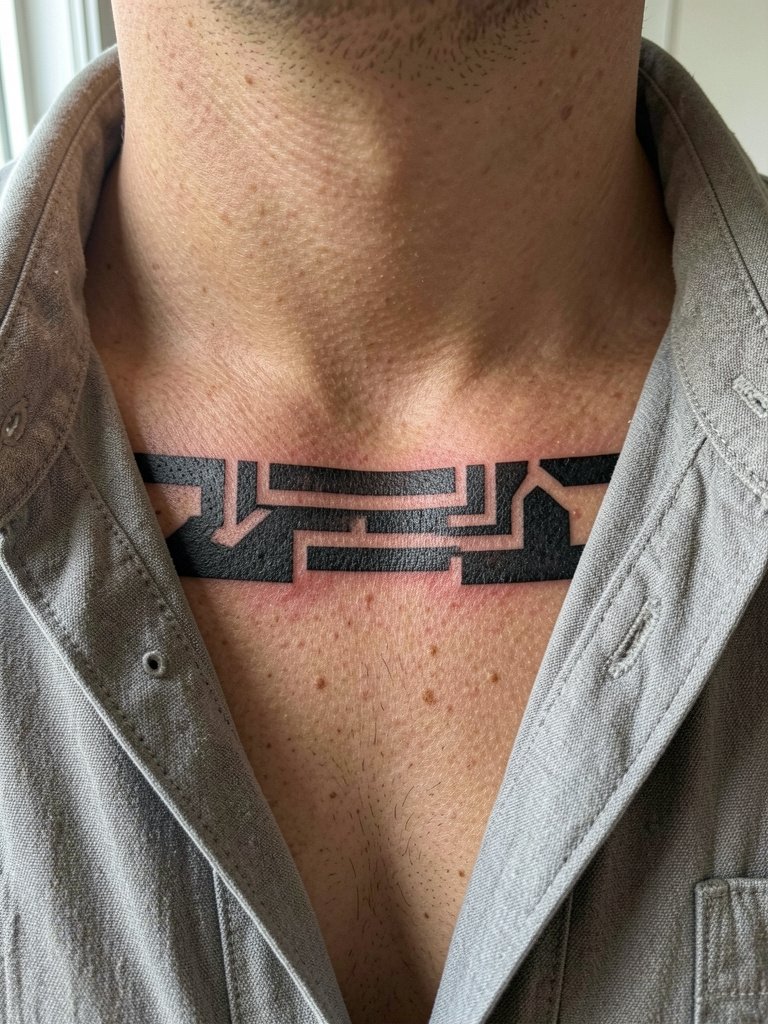
Collarbone motifs work well when they follow the bone line and use bold geometry. Because the area moves with your shoulders make sure the artist positions the motif in a way that mirrors your natural posture. Pain is moderate, with sensitive spots over the clavicle itself. A common mistake is forcing tiny decorative bits into the collarbone gap, those do not hold. For outfit pairing choose a wide-collar open shirt that frames the motif without covering it.
23. Thick-Lined Blackwork Panther Silhouette on the Thigh
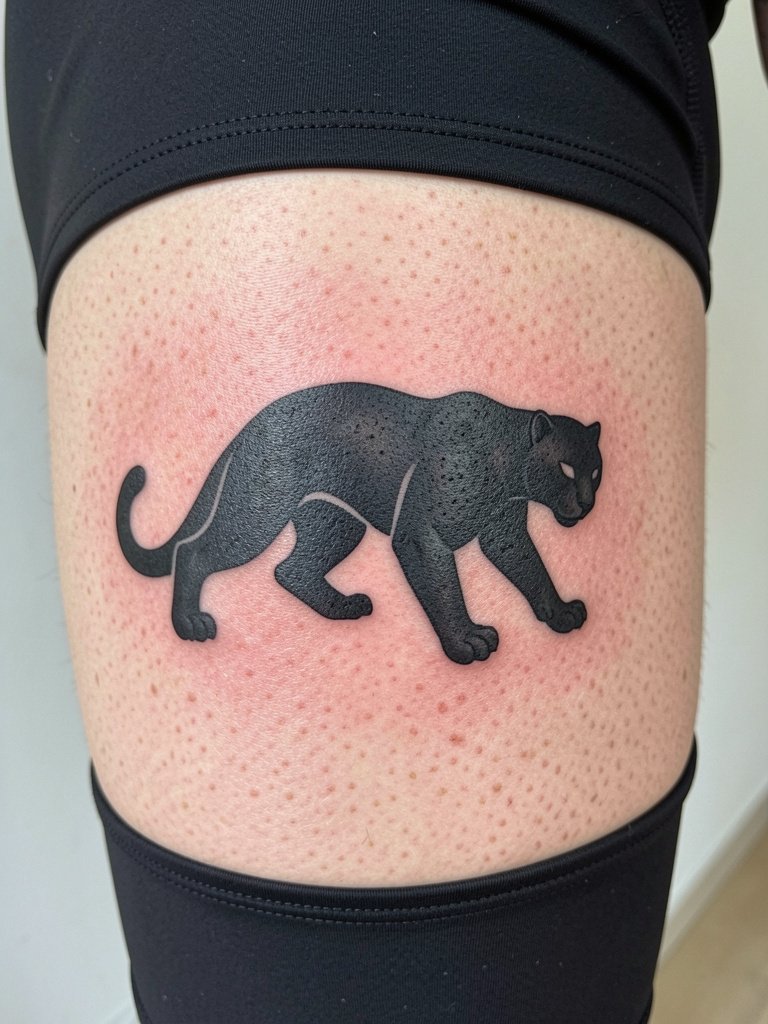
A solid animal silhouette on the thigh gives you scale and boldness with low visibility day to day. The outer thigh is forgiving and holds saturation well, so expect a single long session. During the layout stage verify how the silhouette sits when muscles flex so the pose reads naturally. Touch-ups at six months are common to even out saturation. For occasional reveal pair this with tailored shorts that keep the top of the silhouette visible.
24. Heavy Blackwork Hourglass Rib Panel
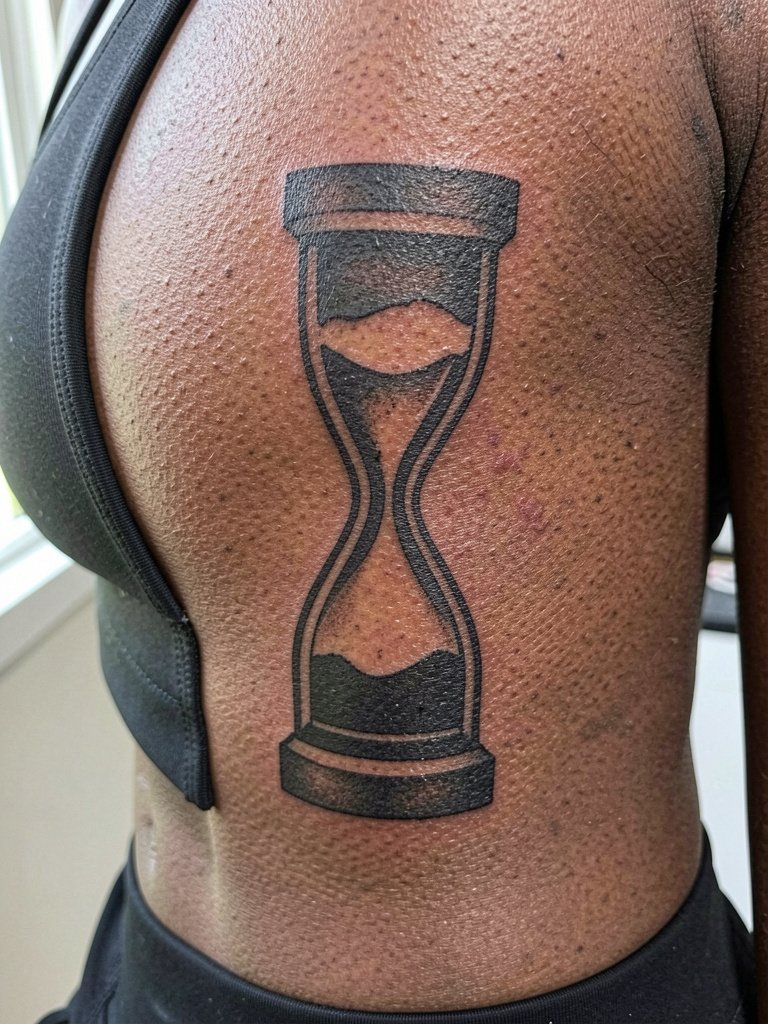
Hourglass panels follow body contours and keep focus on shape over detail. Ribs move with breathing so request slightly larger negative-space centers to preserve the silhouette. Pain is high and sessions should be conservative to avoid overworking the skin. A common mistake is trying to cram intricate interior patterns into the hourglass; the busy detail often smudges. Plan a single six-month check to touch up any edge softening.
25. Solid Black Geometric Hand-Palm Accent
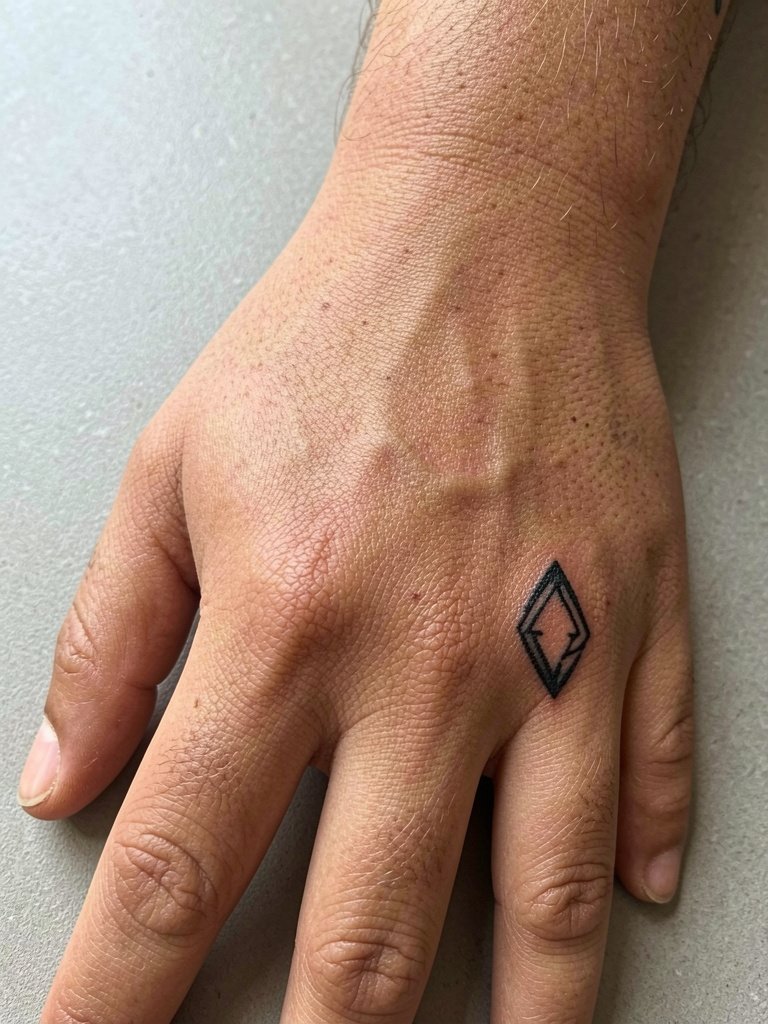
Palm-side placements face heavy friction so keep motifs compact and bold. The skin there sheds differently and touch-ups are more likely. During the consult indicate your daily hand use so the artist can choose needle passes that minimize overworking. Expect multiple short sessions and a likely touch-up at three to six months. For everyday hand protection during healing wear thin cotton gloves when doing heavy cleaning to reduce rubbing on the new saturation.
26. Dense Blackwork Arrow Column on the Spine
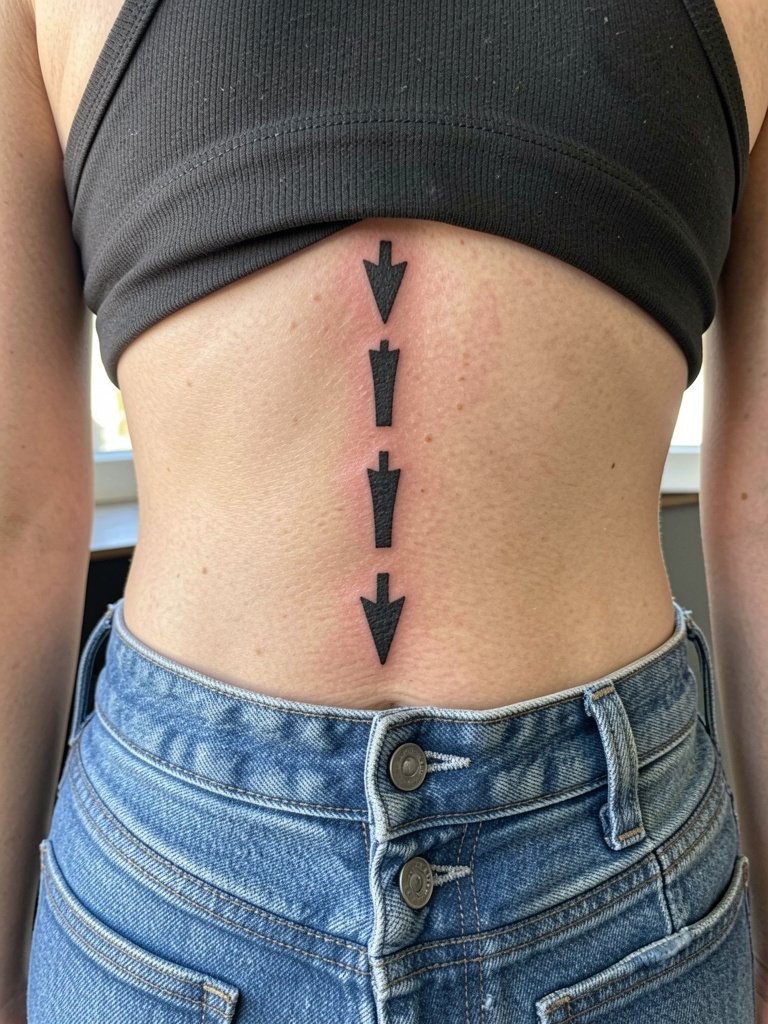
Spine columns read as architectural forms and the lower back takes solid fills well. Because the spine area sees compression from clothing choose jeans that sit below the tattoo during healing. During layout confirm the vertical axis lines up with your natural posture to avoid perceived tilt when you stand. Pain is moderate to high near the lower vertebrae. A touch-up at six months evens any slight fade where fabric rubbed against the area.
27. Full Blackwork Back Panel with Negative Space Lines
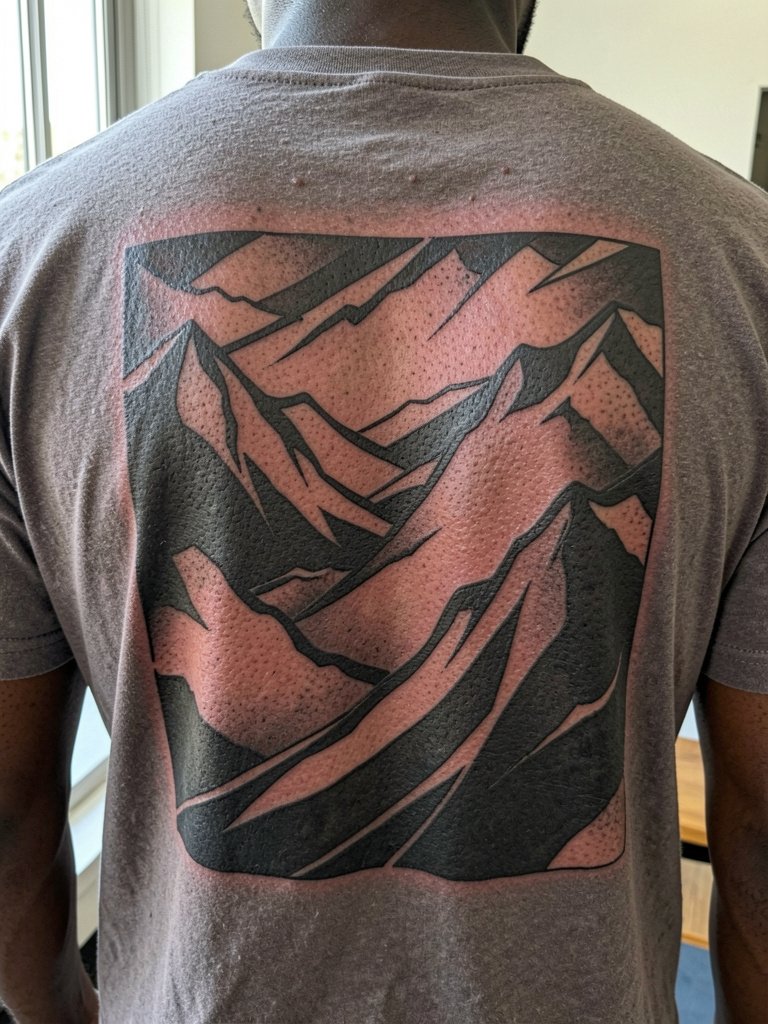
Full back panels let you use negative space as a design element across a large canvas. For a back panel plan multiple sessions and ask the artist to map negative-space lines to scapula movement so the piece keeps flow when you move. Pain levels vary across the back, expect some high-sensitivity zones near the spine. A staged schedule with saturation passes and later refining is common. Ask for a six-month touch-up window to correct any areas that healed lighter than intended.
Frequently Asked Questions
Q: How does blackwork compare to fine-line pieces for longevity?
A: In my experience dense blackwork holds contrast far longer than ultra-fine lines, because heavy saturation resists fading into a uniform gray. Some artists insist that precise single-needle work can last if the placement and spacing are ideal. The practical takeaway is choose scale with an eye to how visible you want the piece at year three and beyond.
Q: Are there placement-specific pain expectations for these bold designs?
A: Yes. Expect higher pain at ribs, sternum, and the inner elbow tip, and lower pain on the calf, outer thigh, and upper arm. Break sessions into shorter passes on high-pain zones and schedule a follow-up touch-up once swelling and scabbing have fully resolved.
Q: Where can I find healed blackwork portfolios and community examples without naming artists?
A: Search social platforms with tags like #BlackworkHealed and #BoldBlackwork, filter location on image apps to your region, and browse tattoo forum threads for healed shots on different skin tones. Tattoo community subreddits and portfolio search pages often have collections labeled "healed" or "12-month healed" that give realistic expectations.
Q: What should I wear to the session and for first-week comfort?
A: Wear clothing that gives the artist unobstructed access to the placement in its normal worn state, for example a loose tank for shoulders and a fitted cropped top for sternum work. For longer sessions bring breathable layers and a zip-up hoodie you can remove without pulling anything over the freshly tattooed area.
Q: Do bold black pieces require different touch-up timelines than fine detail pieces?
A: Yes. Bold black fills often need a single touch-up at six months to even saturation and another touch-up only if fading accelerates. Fine-line work tends to require more frequent refreshes because thin strokes can lose definition faster. Plan touch-ups as part of the long-term maintenance rather than an emergency fix.
