

I spent months chasing floral tattoo ideas before I realized my real problem. I could find pretty photos, but not the versions that age well on real skin. These 21 floral tattoos each hide a story. I picked styles I’ve seen last on actual skin, placements that make sense long term, and a few under-covered ideas artists are starting to push in 2026.
This list focuses on floral tattoos in fine line, traditional, blackwork, watercolor, and micro-realism. I wrote placement notes for forearms, ribs, legs, and spots people often worry about. From what I’ve seen, artists are favoring slightly bolder lines for longevity, and small fills that age better than delicate all-fine-line pieces.
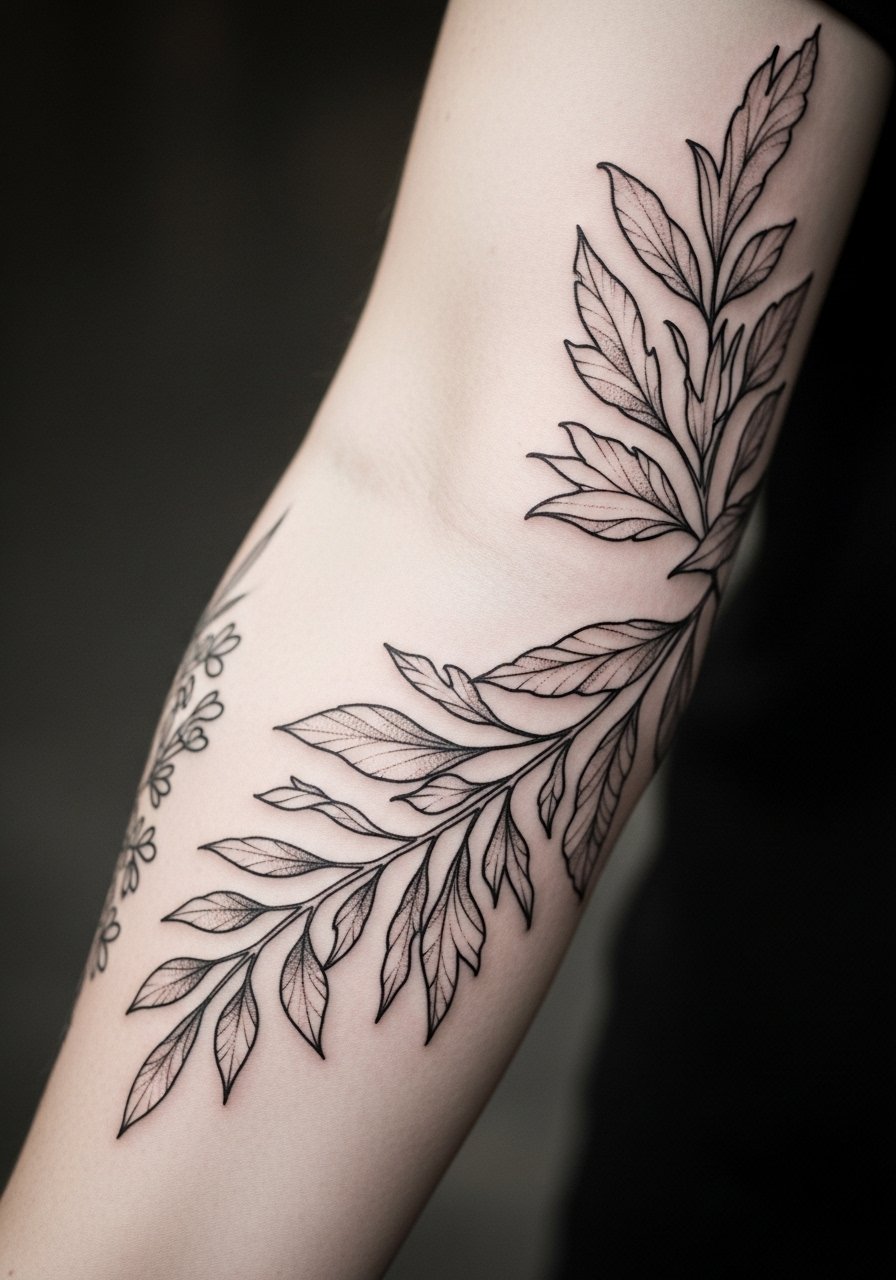
1. Fine Line Floral Sleeve on Inner Forearm
I first saw a forearm sleeve like this at a convention and the linework still read clean after two years. Fine line botanical work looks delicate and personal. For a sleeve, ask your artist to include slightly varied line weights so details don’t blur together as the skin moves. Expect moderate pain on the inner forearm. Sessions usually run two to three hours each. Healing takes about two weeks for the surface and three months for lines to settle. A common mistake is going too tiny with repetitive stems. Tell your artist you want room between elements and ask how fine lines age on similar skin. I've noticed fine line sleeves on pale skin soften faster than on medium tones. For consult photos bring close-ups of healed fine-line pieces you like.
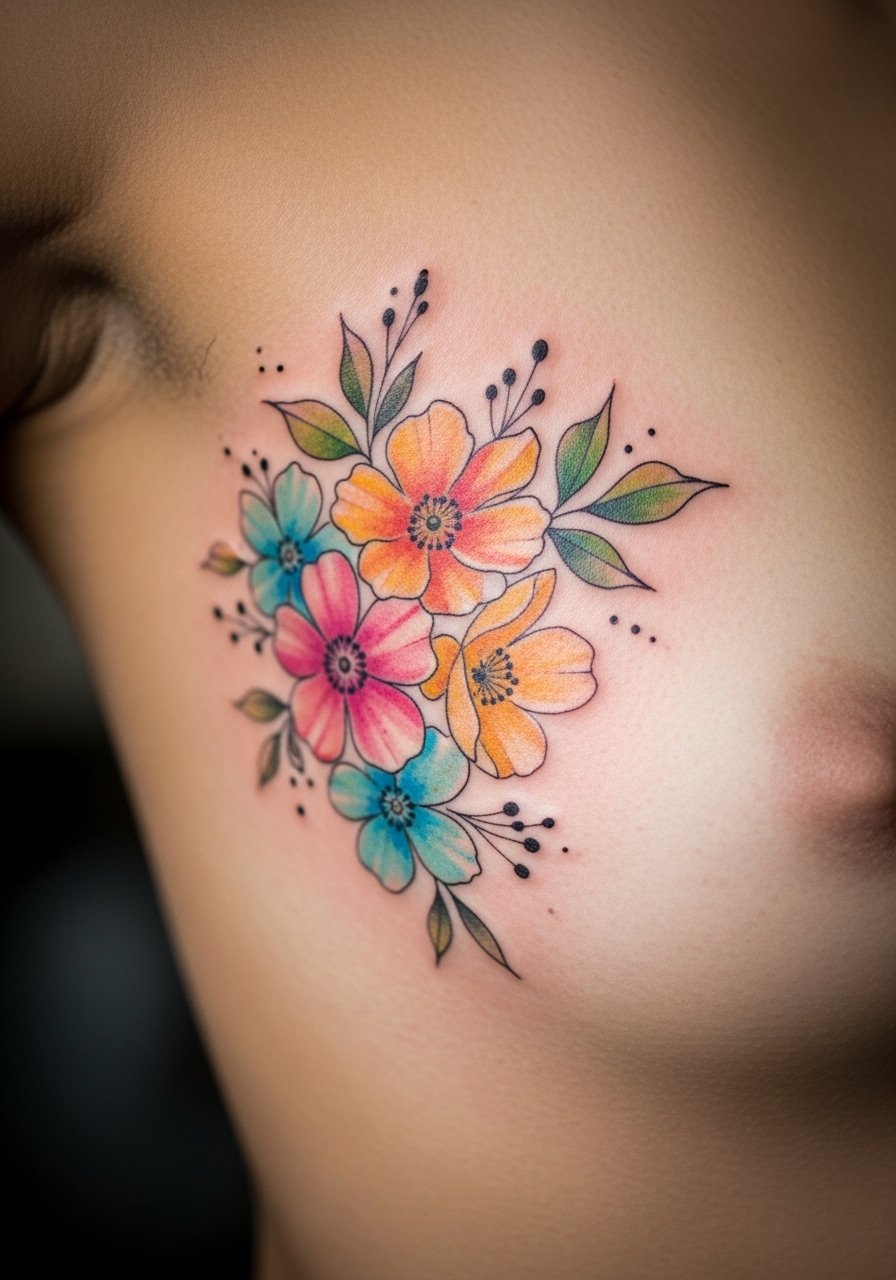
2. Watercolor Bloom Cluster on Ribcage
Fair warning, the ribcage stings. It is a high-pain spot, but the visual payoff is cinematic. I recommend watercolor floral clusters here when you want color that feels painterly. Session time varies, often multiple shorter sessions because the area is sensitive. From what I've gathered, watercolor color spreads more with time, so ask for a slightly stronger initial saturation and subtle outlines to preserve shape as it heals. A mistake I see is no contrast, which makes blooms look like bruises after a year. Tell your artist to keep some thin outlines or micro-realistic dots to anchor the color. Saniderm works well on the ribcage for the first 48 to 72 hours. Expect the piece to soften at six months, but a touch-up keeps vibrancy.
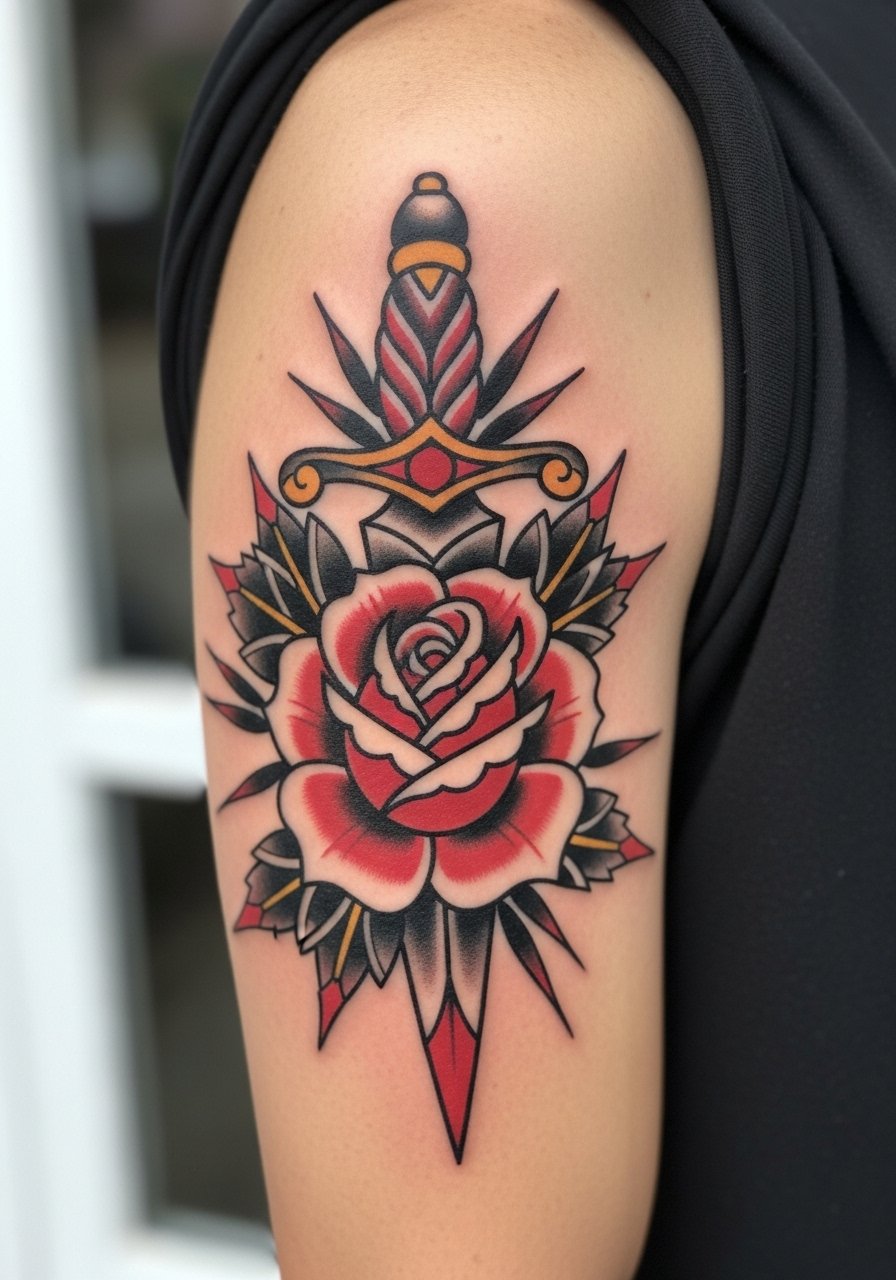
3. Traditional Rose and Dagger on Upper Arm
There is a reason traditional roses last. Bold black outlines and saturated fills stand up to fading. I saw this style in a shop flash wall and copied the composition for my own upper arm. Pain is low to moderate on the deltoid. One session of two to four hours usually covers it. Healed color stays readable after years if the black outlines are strong. Watch out for artists who try to miniaturize traditional shading. Ask for solid outlines and classic color blocking during consultation. If you want a hidden story, tuck initials or a tiny date into the dagger shaft. In my experience, bold traditional pieces withstand sun exposure better than soft pastels.
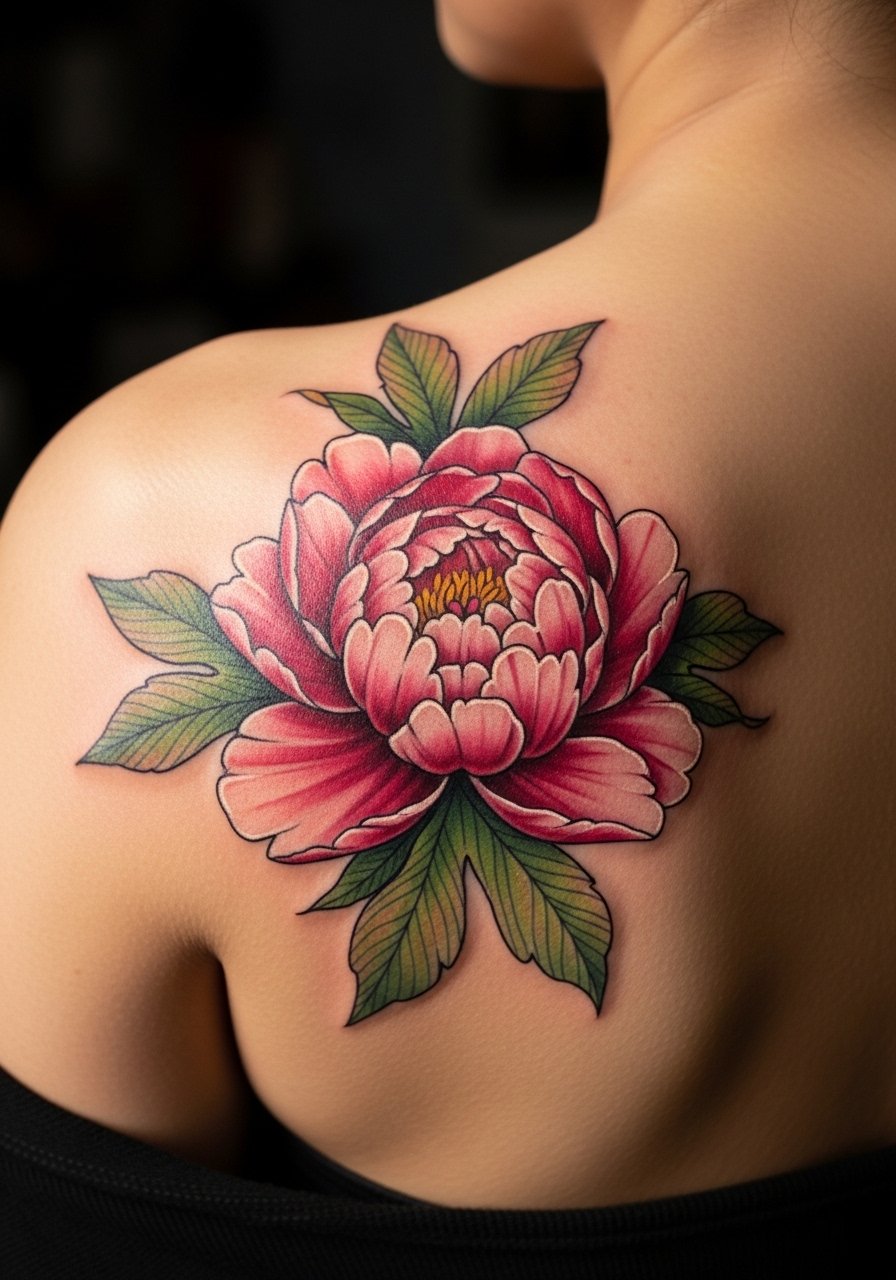
4. Micro-Realism Peony on Shoulder Blade
I love how micro-realism reads like a small photograph. I discovered this style on an artist’s portfolio and later saw the same peony crisp after a year. Placement on the shoulder blade allows for a rounded composition that moves with clothing. Pain is low to moderate. Sessions are detail-heavy and can take three hours for a single flower. Micro shading blurs faster than solid color, so ask for slightly stronger contrast at the start. A common error is requesting the tiniest version. If you want longevity, scale up slightly. I tell people to expect softer edges at two years. Ask your artist for healed photos of micro realism on similar skin tones during the consult.
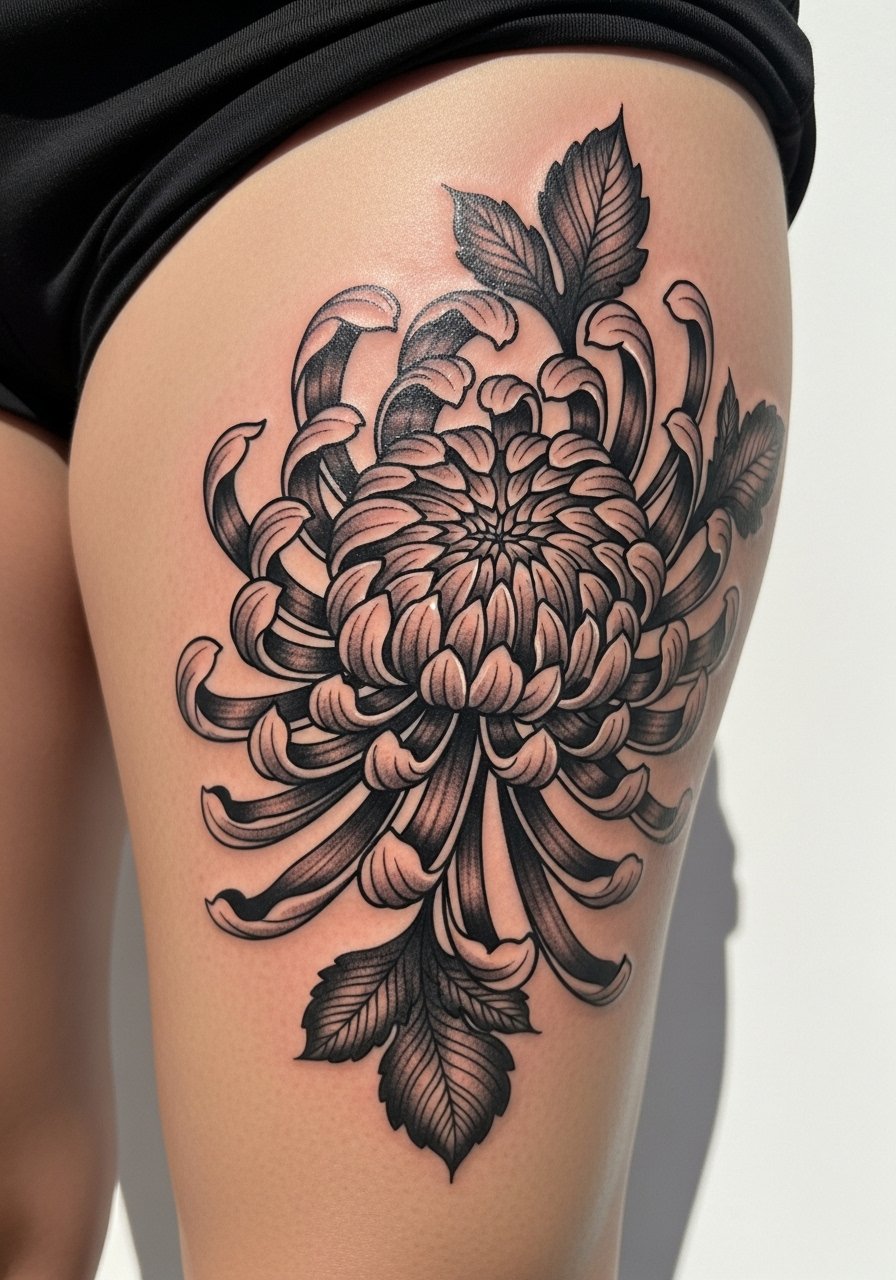
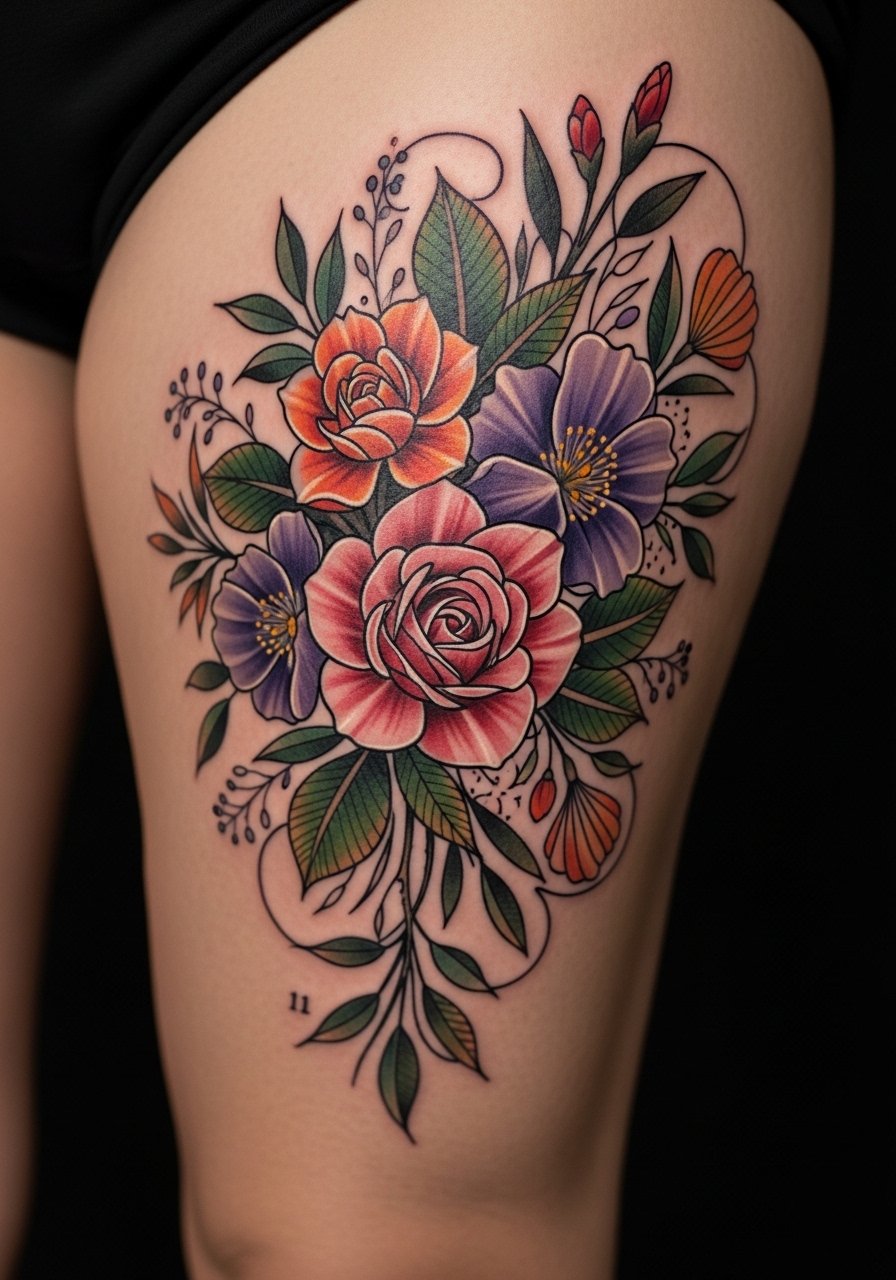
5. Blackwork Chrysanthemum on Thigh
The visual impact of heavy black petals reads from across a room. I first noticed this as a trend in 2024 and it’s still solid. The thigh is forgiving for large blackwork. Pain is low to medium and session times can be long, four to six hours for a big piece. Blackwork tends to hold its graphic look years into healing. One mistake I see is over-texturing small areas that later look muddy. Tell your artist you want clear negative space between petals and ask how bold to make the blacks for a two- to five-year horizon. For stretch-prone areas like the outer thigh, slightly larger shapes help maintain form.
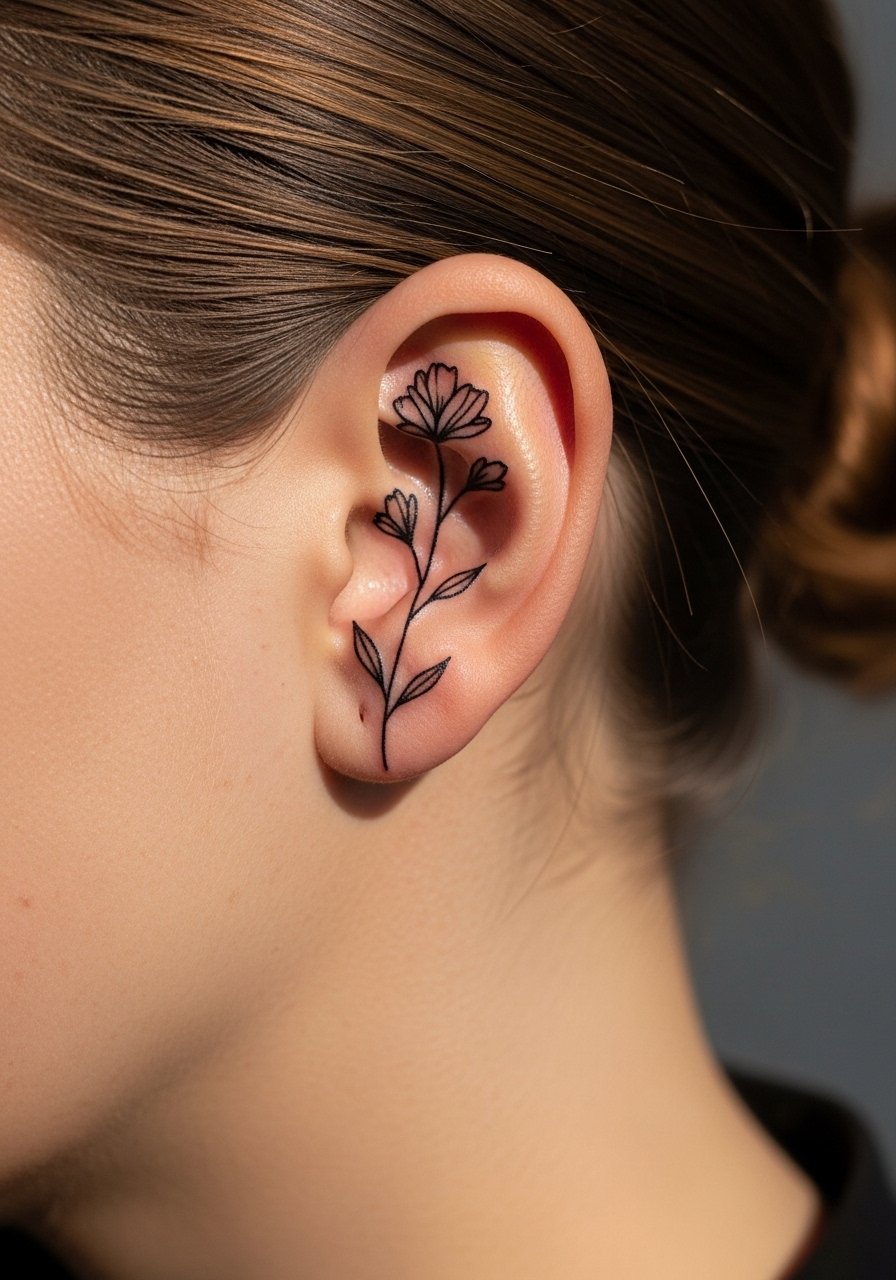
6. Minimalist Single Stem Behind Ear
If pain is your concern, behind the ear is quick but sharp. I got a tiny stem there and it was done in under 30 minutes. Minimalist linework behind the ear reads intimate. Healing is fast, about a week to close up and a month for settling. Avoid asking for ultra-fine single lines with no backup. I recommend a slightly bolder stem and tiny leaves so the shape holds. During consult ask for healed examples of similar placements. Numbing creams can help if you are anxious. From what I've seen, minimal stems behind the ear can blur into a dot if drawn too thin.
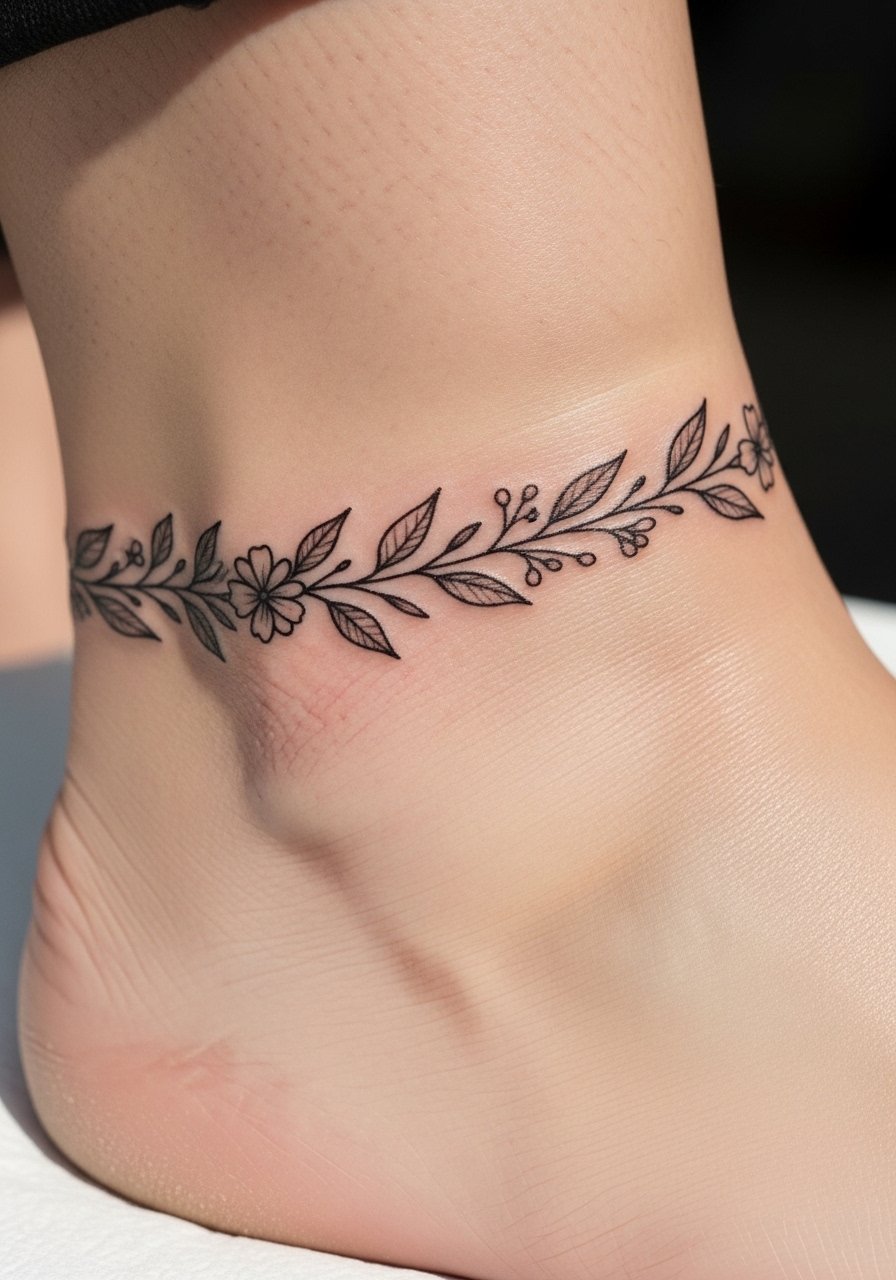
7. Botanical Ankle Band in Fine Line
Ankle bands feel charming and wear well if planned right. I first considered this after seeing a botanical band that still looked crisp after a year. The ankle is a medium-pain area, with sessions often under an hour for thin bands. Avoid wrapping tiny repeating details around the ankle. Movement and footwear cause friction. I tell artists to leave small gaps between motifs and to use slightly stronger line weights on the inner curve. Healed bands at six months can show softer lines on the lateral ankle. If you want to add color later, plan where fills will sit against the skin texture.
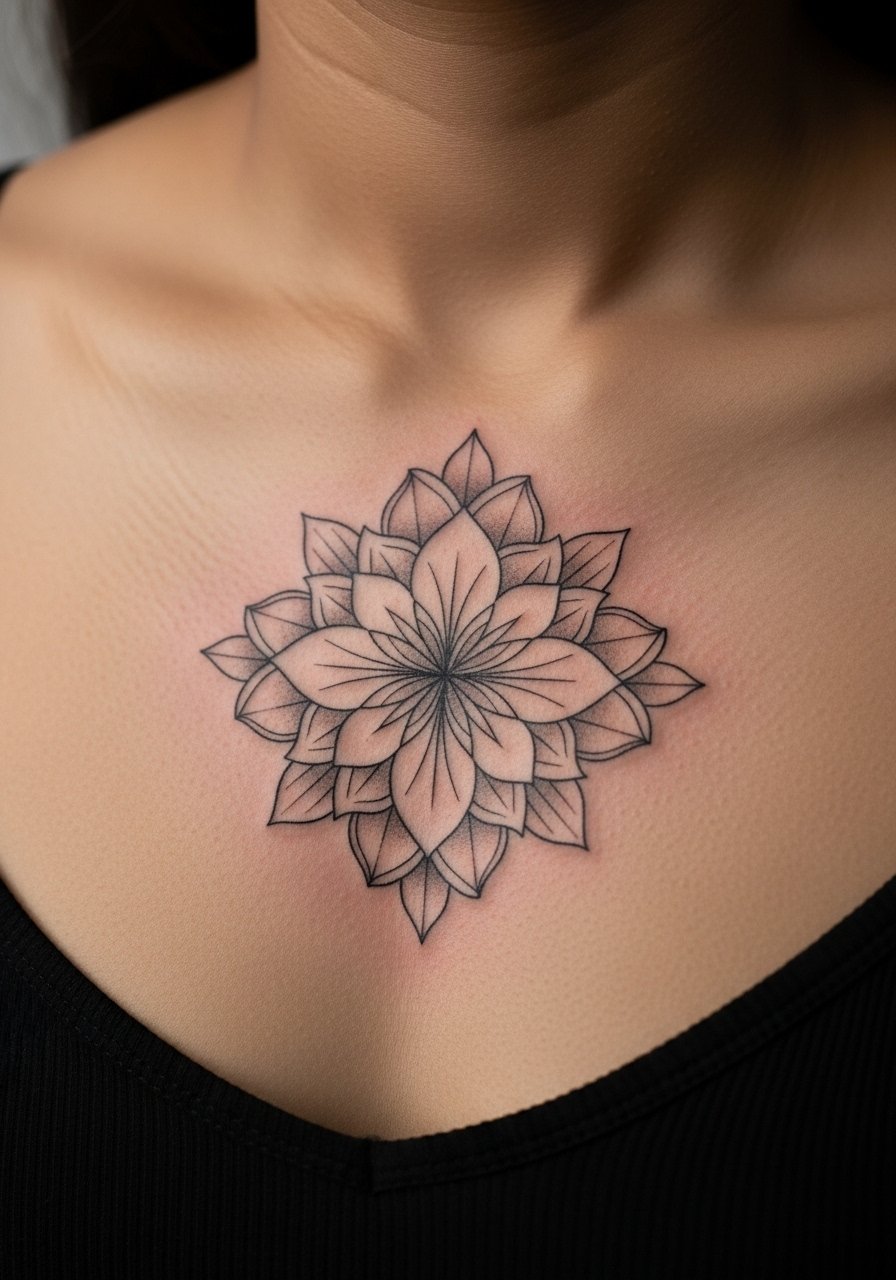
8. Geometric Floral Mandala on Sternum
Sternum pieces make a statement and they age interestingly. I first saw a floral mandala like this on a client who said it helped cover a scar. Pain is high on the sternum because the area sits over bone. Sessions are often in two parts. Geometric structure helps the floral elements look intentional longer. One common mistake is too much tiny detail near the center. Ask your artist to build radial spacing that lets lines breathe. At six months the edges soften, so plan for a touch-up around the one-year mark. Tell your artist where you want the center point to sit relative to your collarbones during the consult.
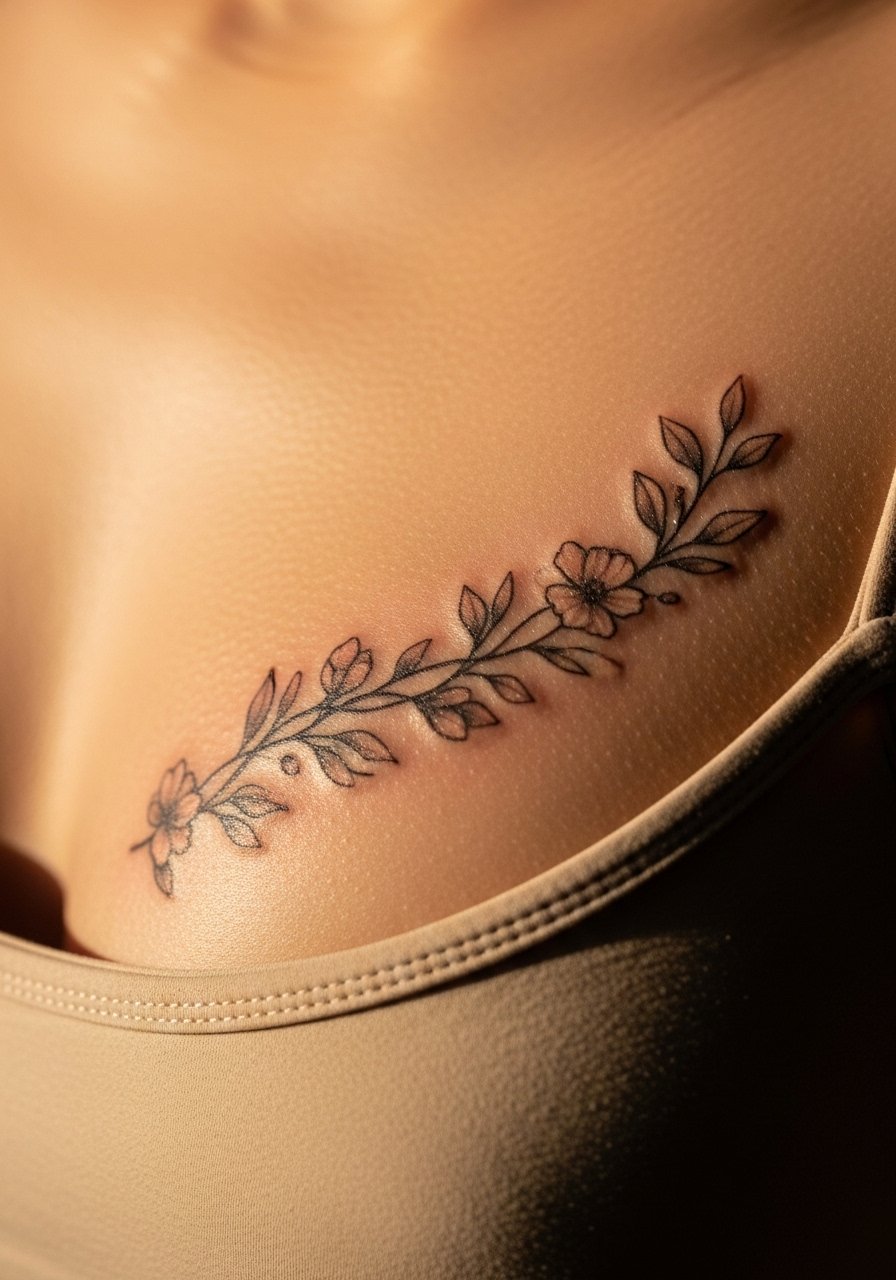
9. Hidden Florals Under Breast On Ribcage
I’ve seen people choose this placement to keep a tattoo private but meaningful. Under-breast florals can peek out with certain tops, so think about that during consultation. Pain ranges from moderate to high. The curvature of tissue affects line placement, so ask your artist to map the design in standing and seated positions. Healing can be tricky because of friction with clothing. I recommend Saniderm for the first day if your artist approves. Avoid too many tiny dots near the inframammary fold. Over time the piece will spread slightly, especially at the edges. Bring bras or tops you’ll wear post-session to check placement during your consult.
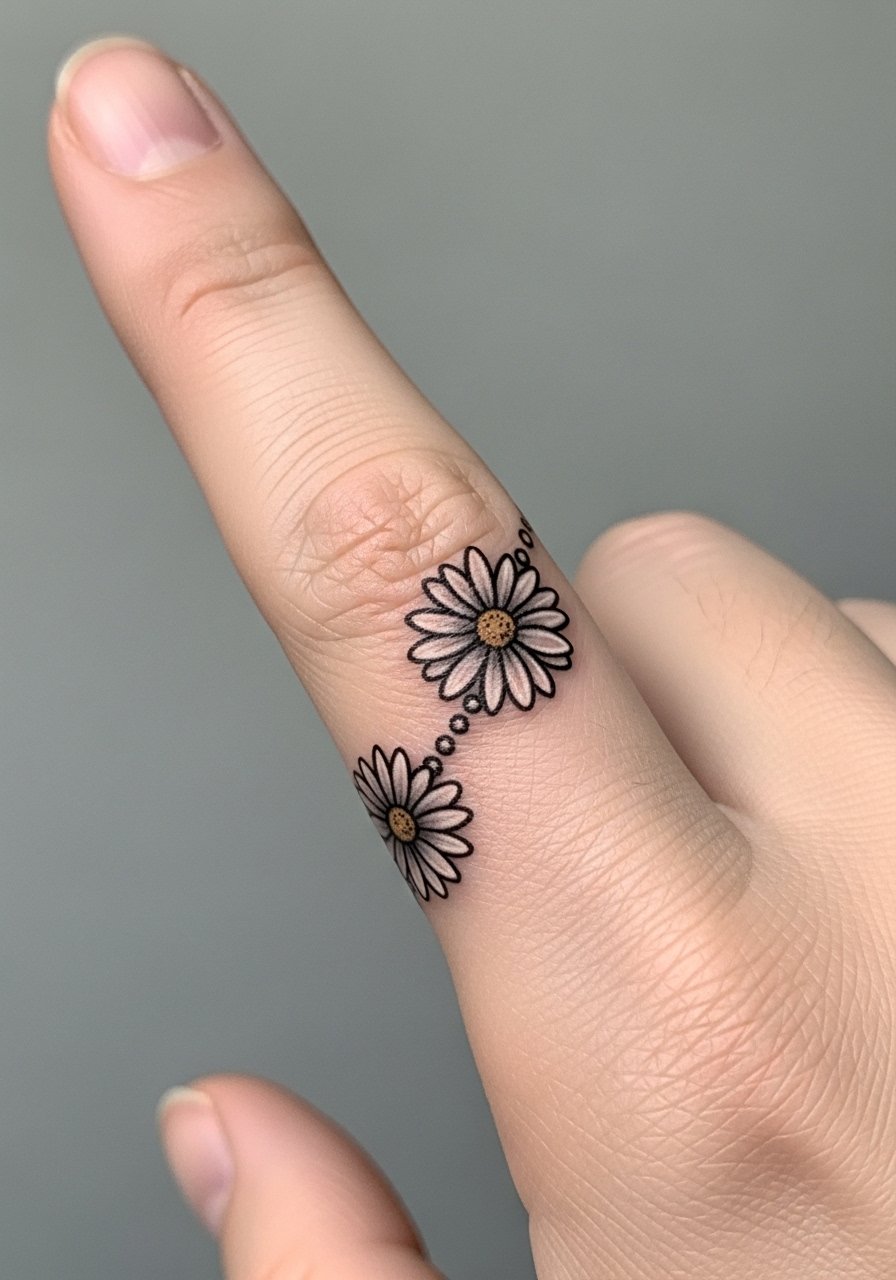
10. Tiny Daisy Chain on Fingers
Finger tattoos are a quick commitment but they often need maintenance. I got a small chain on my ring finger and had touch-ups at one year. Pain is sharp but brief. Sessions are short, often 15 to 30 minutes. Fingers heal differently because of constant use and hand washing. The big mistake is expecting fine script-level detail to last without retouch. For a daisy chain ask for slightly heavier petal outlines and spacing between blooms. Tell your artist you accept potential yearly touch-ups. From what I've seen, white ink on fingers fades fastest.
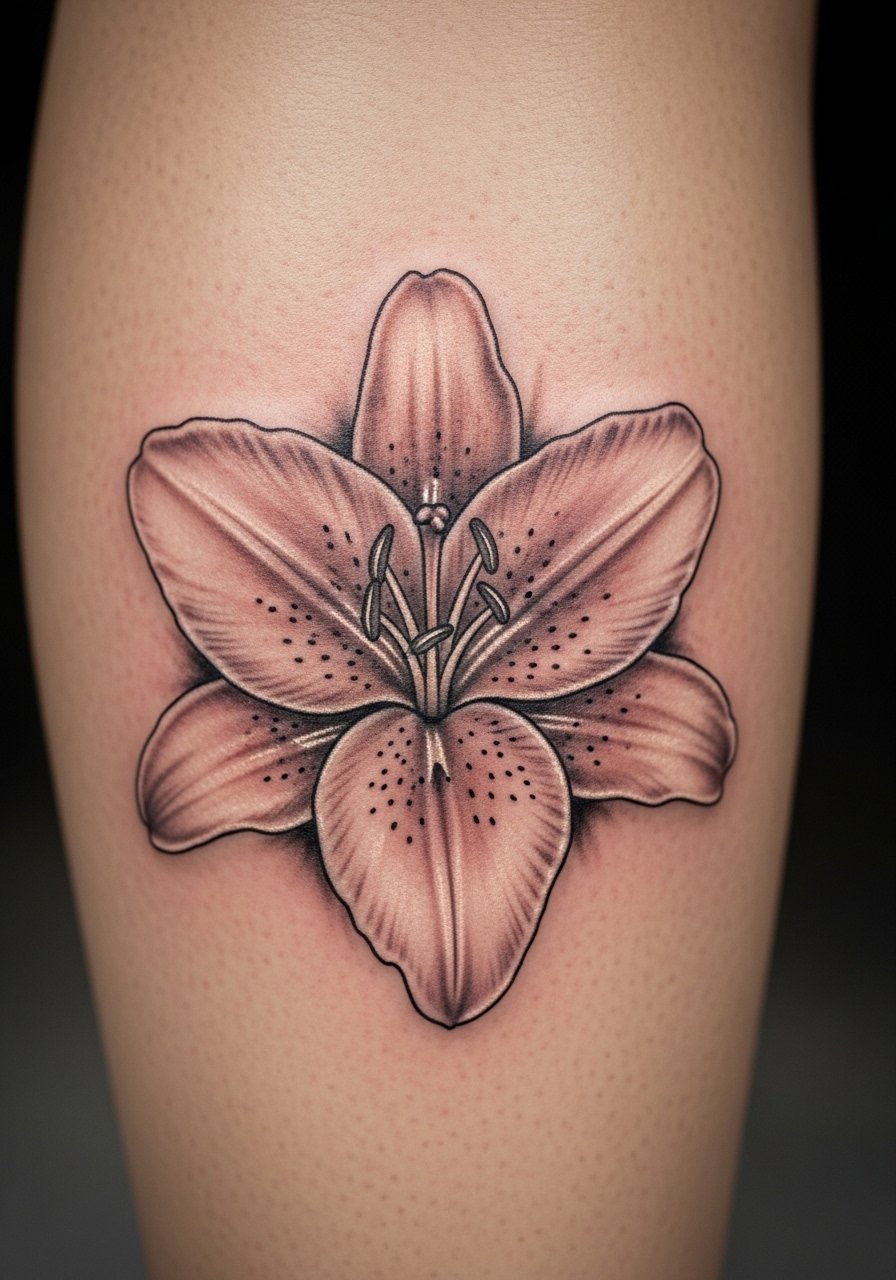
11. Realistic Lily on Calf
Calf placements let realism breathe. I first loved a calf lily because it read like a photograph while walking. Pain is low to moderate and session time is two to three hours. Calf skin holds shading well, and healed realism often keeps depth at one year. A common error is compressing too many blooms into a small vertical space. Ask for composition tests on your calf during consult. If you plan tall boots, discuss how the image will peek out. Expect softer edges by two years. I recommend Hustle Butter during healing if your artist approves it.
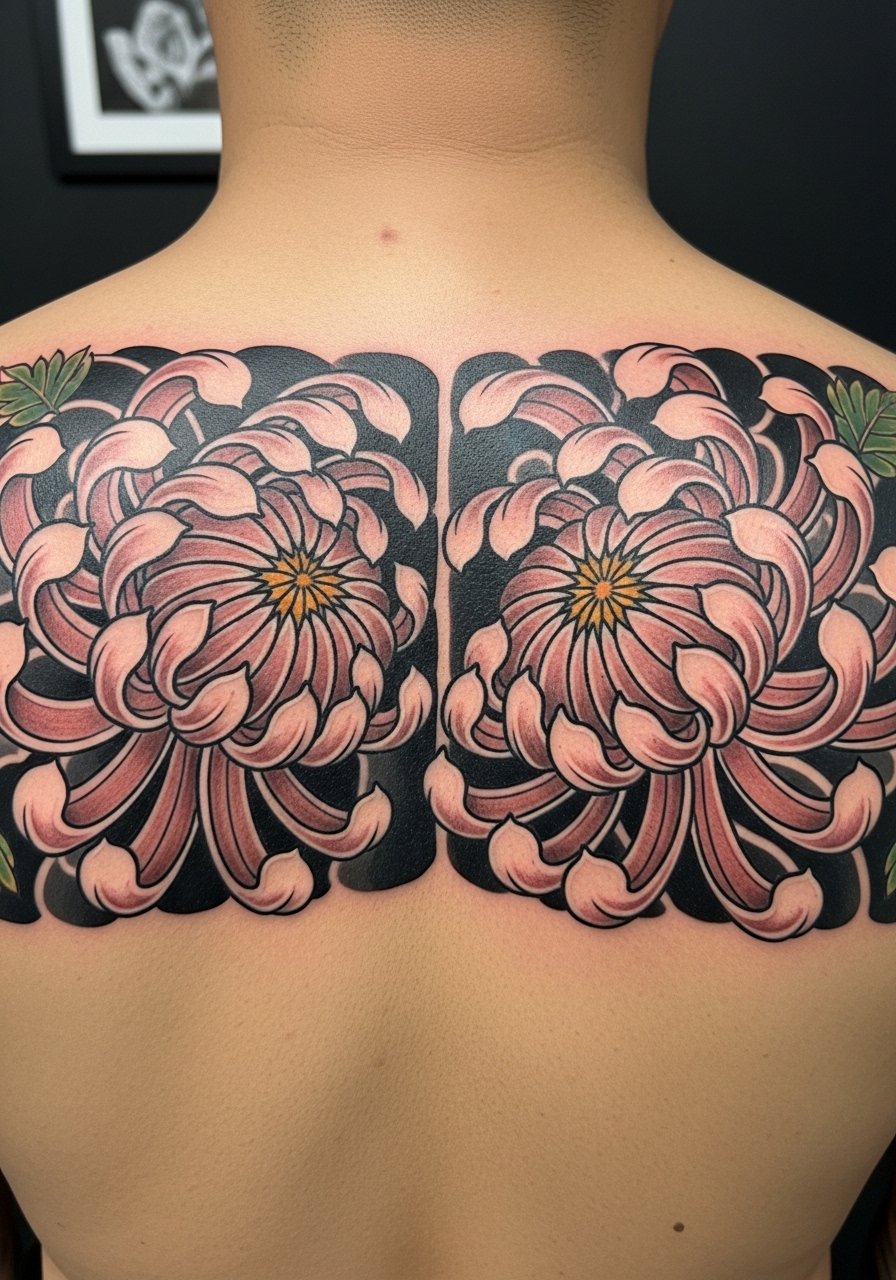
12. Japanese Kiku Panel Across Upper Back
Japanese chrysanthemum panels are timeless for a reason. I saw a full upper-back kiku that still looked bold after four years. The upper back takes large sessions well and pain is low to medium. Traditional Japanese shading styles hold up because of the mix of strong outlines and textured fills. A mistake I notice is trying to cram western realism into this genre without respecting flow. During consult ask about negative space to let the piece breathe across shoulders. Healed panels can shift subtly with muscle and posture changes. Plan your kimono or strap lines if you often wear them, so nothing bisects key motifs.
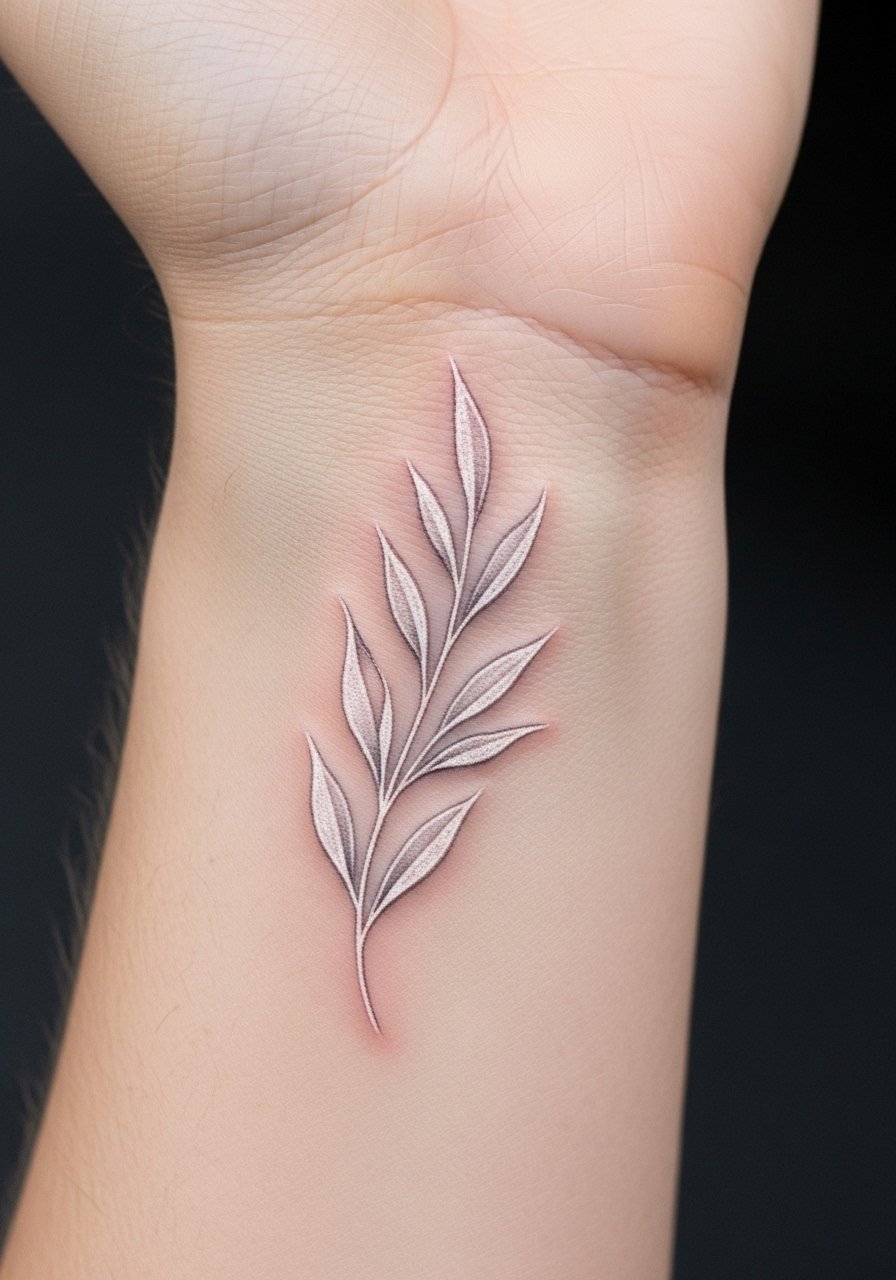
13. White Ink Garden on Inner Wrist
White ink can be delicate and ethereal. I got small white accents on a wrist piece and they looked subtle after six months. Pain on the inner wrist is moderate. White ink tends to fade faster and can go chalky if overexposed to sun. If you want a white garden, ask for a mix of white highlights with soft gray shading underneath. That helps the detail remain visible as white softens. A common mistake is expecting bright white forever. I use a conscience of regular SPF and a maintenance balm like Mad Rabbit to keep contrast. Expect touch-ups earlier than with black or color.
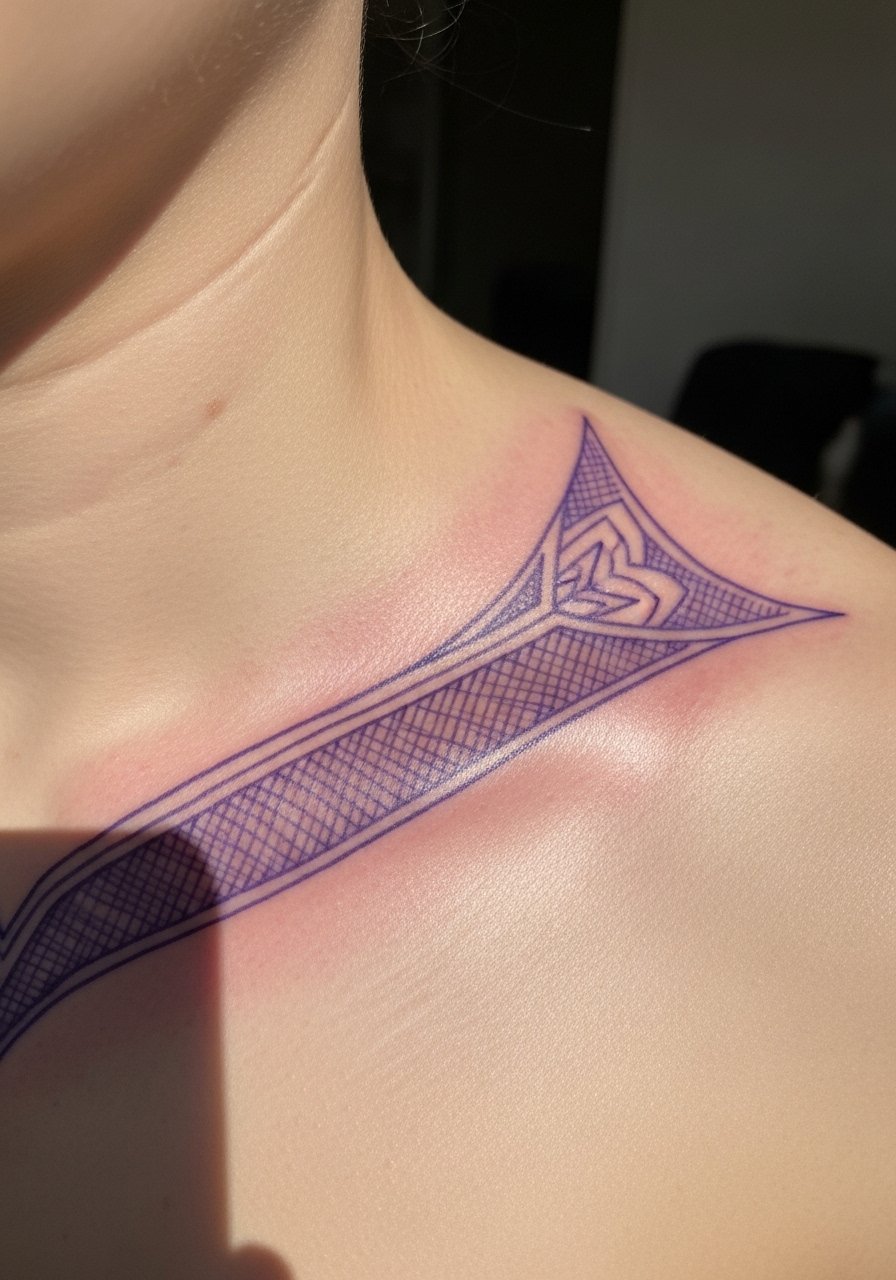
14. Etching-Style Violet on Collarbone
Etching-style florals mimic old prints and age into an organic look. I found an etching violet that read beautifully against collarbone anatomy. Collarbone tattoos can sting and sessions are short but focused. The advantage of etching is the intentional grain, which masks some blurring. Tell your artist you want visible hatch marks and slightly heavier main lines. A frequent mistake is over-smoothing the hatchwork which removes the etching character. At six months the texture softens but still reads as an illustration. Bring photos showing healed etching work on collarbones during your consult.
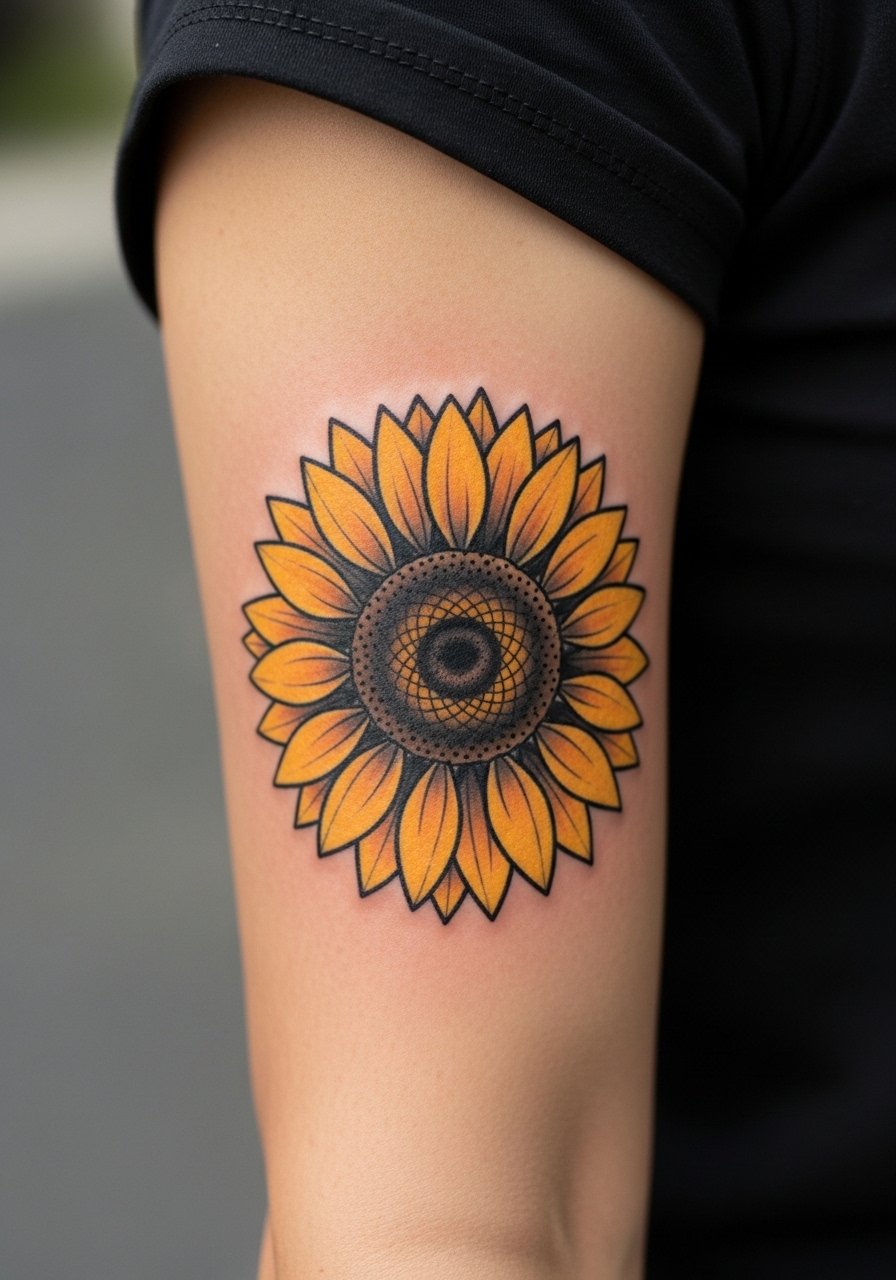
15. Neo-Traditional Sunflower on Outer Arm
Neo-traditional florals mix bold outlines with modern palettes. I admired a sunflower like this on an artist’s IG and it stayed bright after two years. The outer arm is a forgiving placement. Pain is mild and sessions can be one to two hours. Neo-traditional shading and crisp outlines age well if the outlines are slightly thicker than pure fine line work. A rule I've used is asking for solid anchor lines and mid-tone fills. The common mistake is tiny decorative details that vanish. Ask to preview how the piece looks with everyday movement.
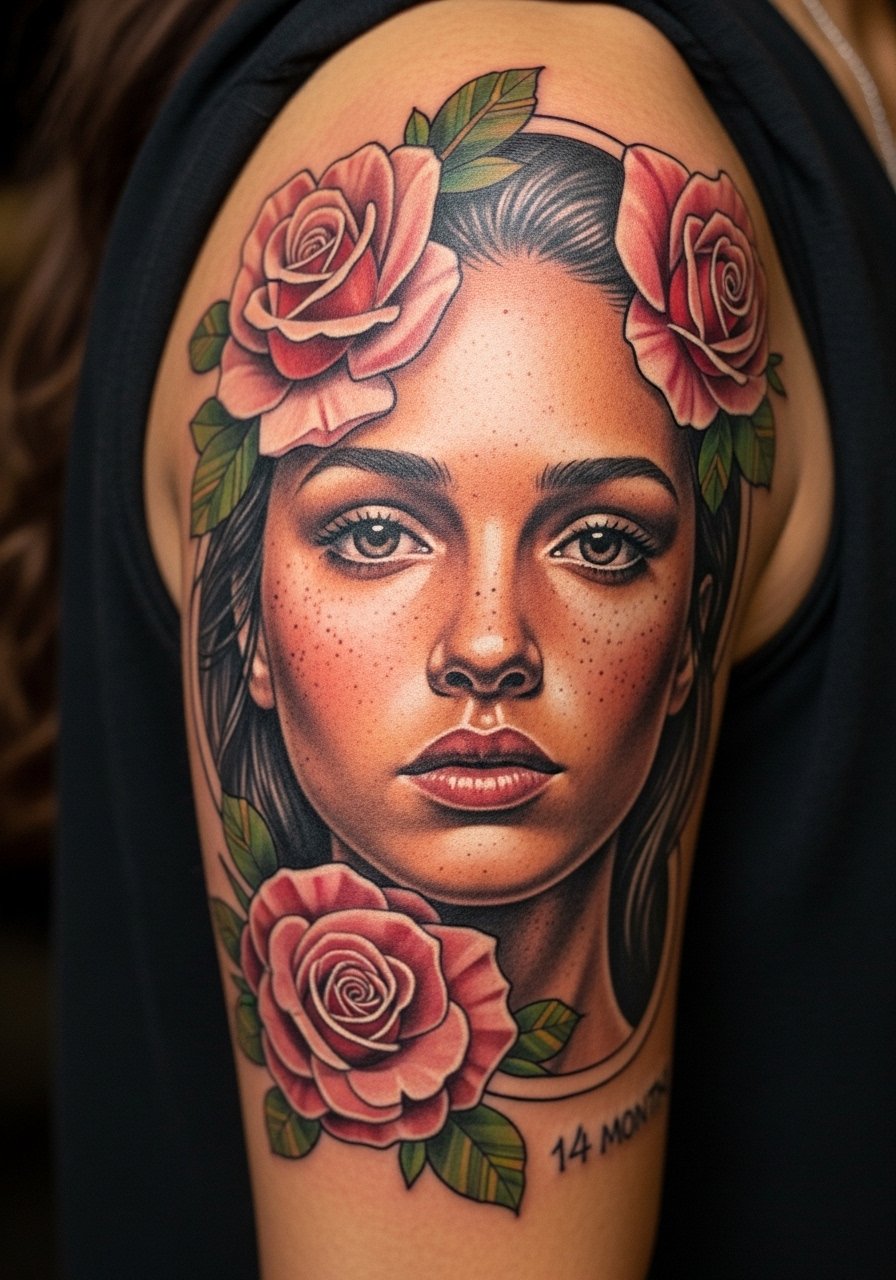
16. Floral Portrait Sleeve on Upper Arm
Combining a portrait with floral elements creates narrative pieces. I’ve seen memorial sleeves where flowers frame the face and still read after years. Upper-arm sleeves are moderate pain and often completed over multiple sessions. The floral elements help transition portrait edges into skin. A common error is using the same detail level for face and florals. Tell your artist you want softer floral edges and slightly higher contrast on the portrait. Healed tattoos at one year usually lose some fine texture, so plan touch-ups for facial detail. Bring portrait references and floral placement ideas to the consult.
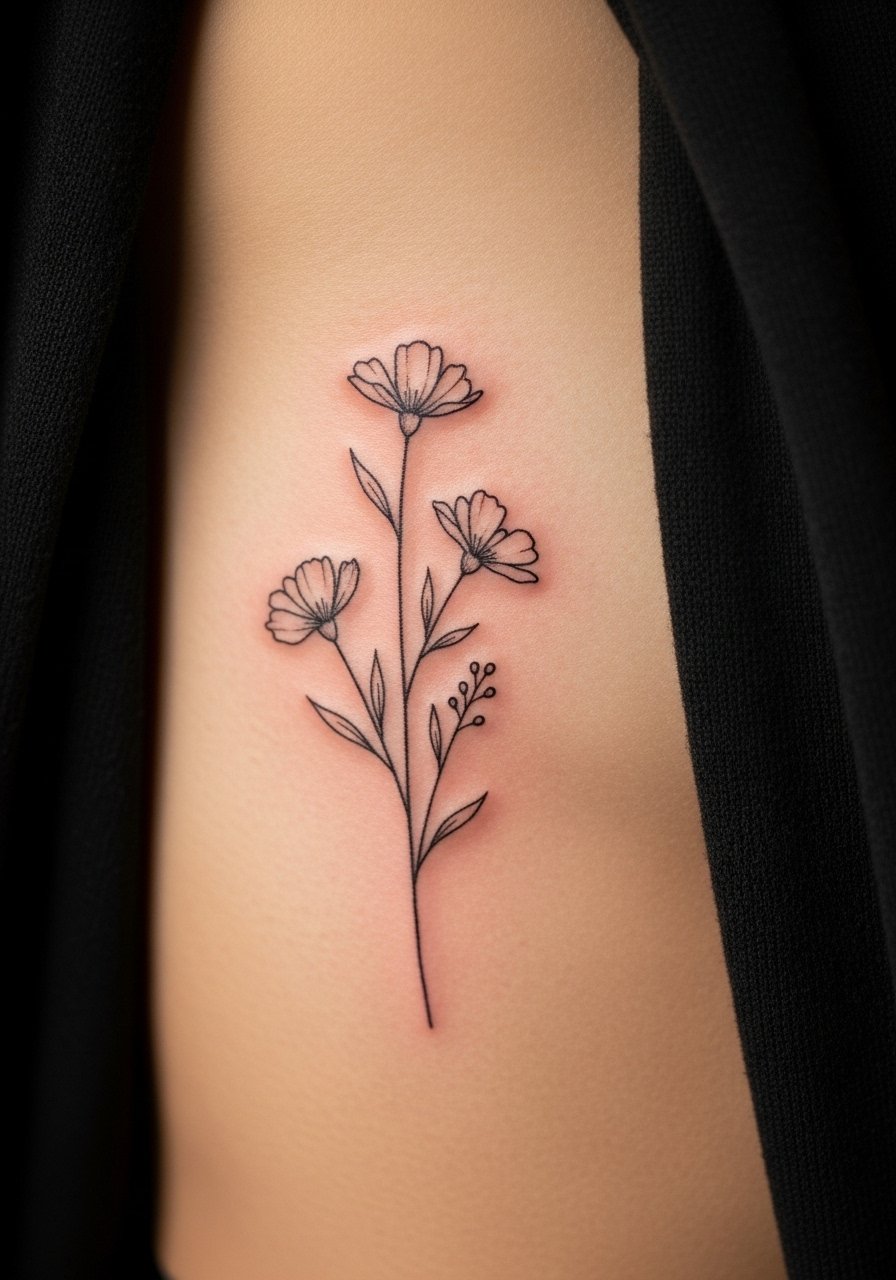
17. Linework Wildflower on Side Ribcage
I recommend wildflowers on the side rib if you want something raw and organic. Pain is high for ribs. Sessions are often split into short appointments because of sensitivity. Linework wildflowers can last well if you avoid extreme fineness. One mistake is too much cross-hatching in that area. Ask your artist for open stems and selective shading that follows your rib curve. Healing is impacted by breathing and posture. Expect the piece to soften at six months and to schedule a touch-up around the year mark if lines lose definition.
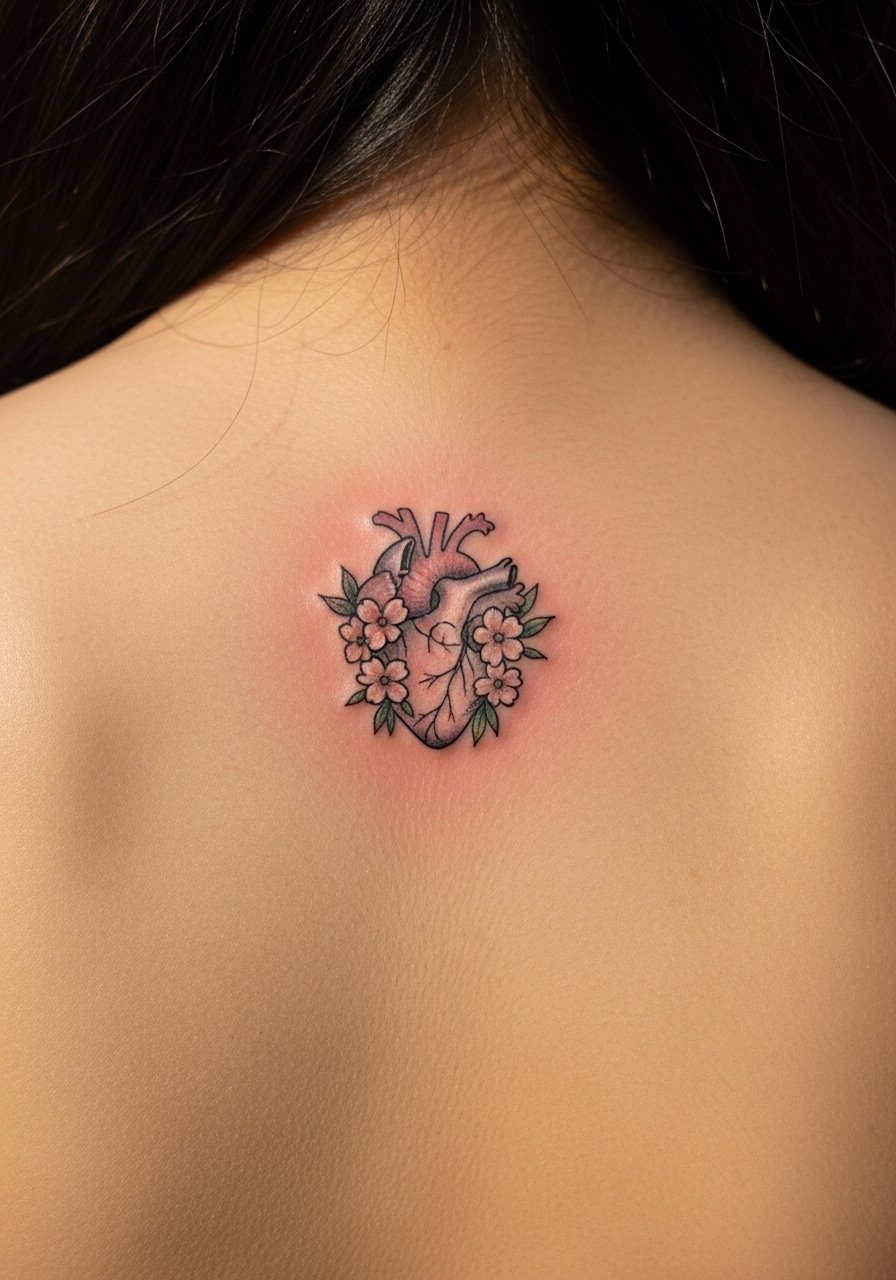
18. Blooming Heart Between Shoulders
A floral heart between the shoulders is subtle and sits flat against muscle. I chose this placement once to celebrate a relationship and it felt private. Pain is low to medium. Sessions are often one to two hours. The area moves with shoulder blades, so symmetry matters. One common mistake is centering badly relative to the spine. Ask your artist to check placement while you move arms. Over time the center lines may soften, so plan for a light retouch if you want crisp symmetry after a couple of years. This spot responds well to medium weight outlines and gentle color fills.
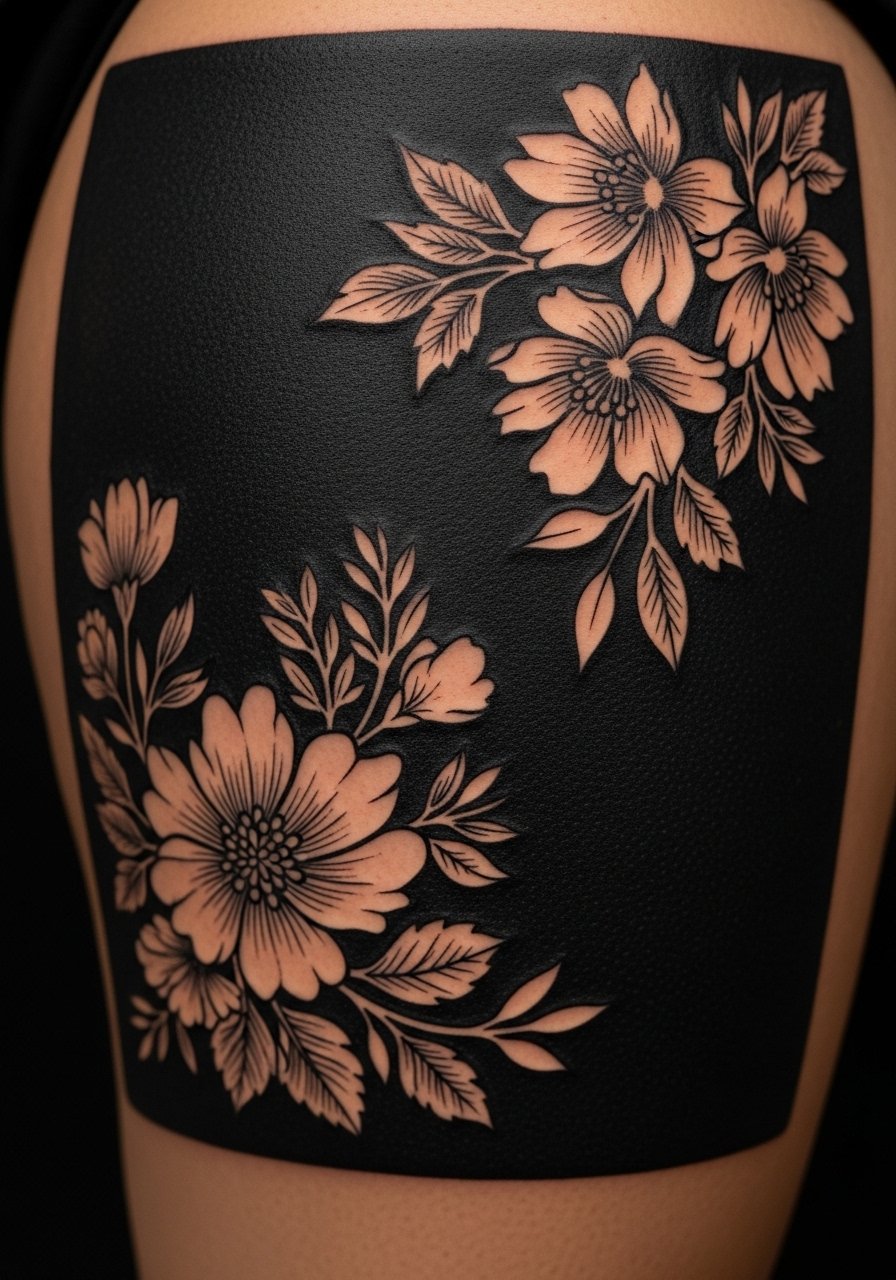
19. Blackout Floral Negative Space on Thigh
I first saw a creative blackout piece that left flowers as negative space and it looked dramatic even after three years. The thigh is perfect for large blackout works. Pain is moderate and sessions can be long. Blackout masks aging by keeping a consistent block of ink, while the negative floral shapes remain crisp. A frequent error is trying to do too much fine detail inside the negative space. Ask for clear silhouette shapes and discuss future additions. For maintenance use an SPF 50 stick on healed skin to protect the black. Expect the black to remain stable, but plan touch-ups for edges if the piece rubs.
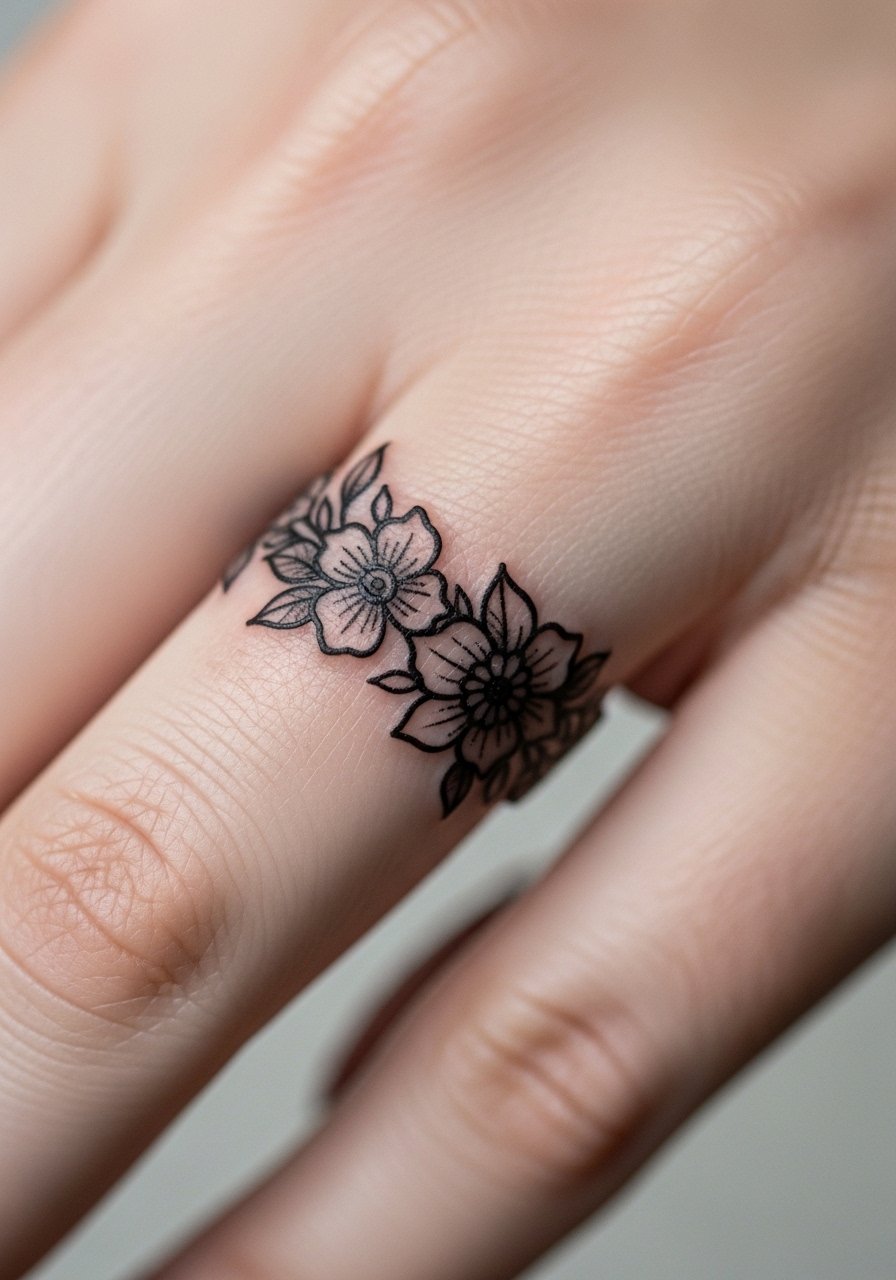
20. Ornamental Floral Ring Around Finger
Rings are intimate and visible. I got a small ornamental ring and learned to expect touch-ups. Finger skin is mobile and often needs more attention. Pain is sharp and quick. Keep the design simple. Ornamental floral rings with bold outlines and eased spacing last longer than complex lace. During consult ask your artist about line thickness and how often they typically retouch finger pieces. After a year most finger rings show soft edges. Consider placement on less active fingers for longevity.
21. Mixed-Style Bouquet on Thigh-Groin Transition
This placement hides meaning and can be sensual. I noticed more collectors choosing the thigh-groin transition for mixed-style bouquets that combine realism, fine line, and block color. Pain varies because the groin area is sensitive. Sessions are usually split. The mix of styles helps parts age differently, which can be intentional. One mistake is placing small delicate bits too close to areas that rub. Tell your artist where clothing will contact the piece and plan for a protective recovery period. Expect some softening in the first two years and budget for blending touch-ups to keep the overall composition cohesive.
Tattoo Prep and Aftercare Essentials
Aftercare supplies I actually use and recommend. Every artist I’ve talked to agrees on basics but has personal preferences. Grouped below by when you need them. All links use the item search so you can see options. Replace YOURTAG in the URL with my tag already set.
Aftercare Essentials:
- Aquaphor Healing Ointment, 14oz tube. Industry standard for the first three to five days. I use a thin layer at night
- Saniderm Transparent Adhesive Bandage, 6-inch roll. Second skin healing method. Every artist I know recommends it for the first 24 to 72 hours
- CeraVe Fragrance-Free Moisturizing Lotion, 16 oz pump. Daily moisturizer from day four to day 30. I prefer the pump bottle for hygiene
- Dr. Bronner's Unscented Castile Soap, 32 oz. Gentle cleanser for rinsing twice daily the first week. Dilute a small drop with water
Before Your Appointment:
- Professional Numbing Cream with 5% Lidocaine, 30g. Apply 30 to 45 minutes before your session only if your artist approves. Some artists prefer no numbing
- Tattoo Stencil Transfer Paper, A4 Pack. Useful to test placement at home before your appointment
Long-Term Maintenance:
- SPF 50 Sunscreen Stick for Tattoos, Travel Size. Use on healed tattoos whenever they see sun. I carry one for beach days
- Mad Rabbit Tattoo Balm, 2 oz. Long-term maintenance for vibrancy. Artists I know recommend it for healed pieces
- Hustle Butter Deluxe, 5 oz. Vegan option that works during healing and after. Smells better than many alternatives
Optional Comfort and Supplies:
- Tattoo Numbing Spray, 4 oz. Handy for mid-session top-ups if your artist approves
- Hydrocolloid Bandages, Large Size Pack. Good alternative to Saniderm for small to medium tattoos
Every artist I’ve worked with had slightly different preferences, so bring one or two of these items and ask which they recommend for your specific design and placement.
Frequently Asked Questions
Q: Will fine line floral sleeves blur together over time?
A: From what I’ve seen, when fine line sleeves are done with varied line weight and strategic spacing, they age much better. Ask your artist to use slightly bolder anchor lines around focal blooms. Also request healed photos of similar sleeves on comparable skin tones. If you want extra protection in the first 48 hours, Saniderm helps control scabbing.
Q: Do watercolor-style floral tattoos need different aftercare than traditional color?
A: In my experience watercolor pieces need slightly more initial attention because washes can spread during healing. I recommend keeping the area clean with a gentle soap and using a thin layer of Aquaphor for the first few nights if your artist approves. Avoid heavy friction and strong sun for the first three months. Consider a touch-up around six to twelve months if colors soften.
Q: Are finger and ankle floral tattoos worth it given frequent fading?
A: If you want a visible small piece, yes, but expect maintenance. Fingers and ankles rub and heal differently. Tell your artist you accept potential yearly touch-ups. For fingers, ask for bold outlines and less interior detail. For ankles, plan placement away from boot edges. A travel SPF stick helps preserve healed ink.
Q: How should I prep for a ribcage watercolor floral to make healing smoother?
A: Prepare by sleeping on your back the first 48 to 72 hours, and bring loose clothing to the session. I’ve found Saniderm is useful on the ribs when your artist approves it. Also bring snacks and plan for short breaks. If you use a numbing product, confirm the specific 5% lidocaine cream brand with your artist before applying.
Q: Is white ink worth the extra care for a wrist floral?
A: White ink can look beautiful and subtle but it requires guarding against sun and abrasion. From what I’ve seen, mixing white highlights with soft gray underneath gives longer legibility. Use broad spectrum SPF on healed white pieces and a maintenance balm like Mad Rabbit to keep contrast.
Q: How long before I can swim after getting a floral tattoo on the thigh?
A: In my experience you should wait at least two weeks before pools, and longer for saltwater or lakes until the skin fully closes. Keep daily showers short and avoid soaking. Use a gentle soap like Dr. Bronner’s diluted for cleaning. If you plan beach trips after healing, carry an SPF 50 stick.
Q: Can mixed-style bouquets across the thigh and groin be hidden from clothing irritation?
A: Yes, but plan placement carefully. Ask your artist to map the design while sitting and standing so high-friction zones avoid tiny details. I recommend protective, breathable clothing for the first two weeks. Hydrocolloid bandages are handy for small areas that rub during recovery.
