
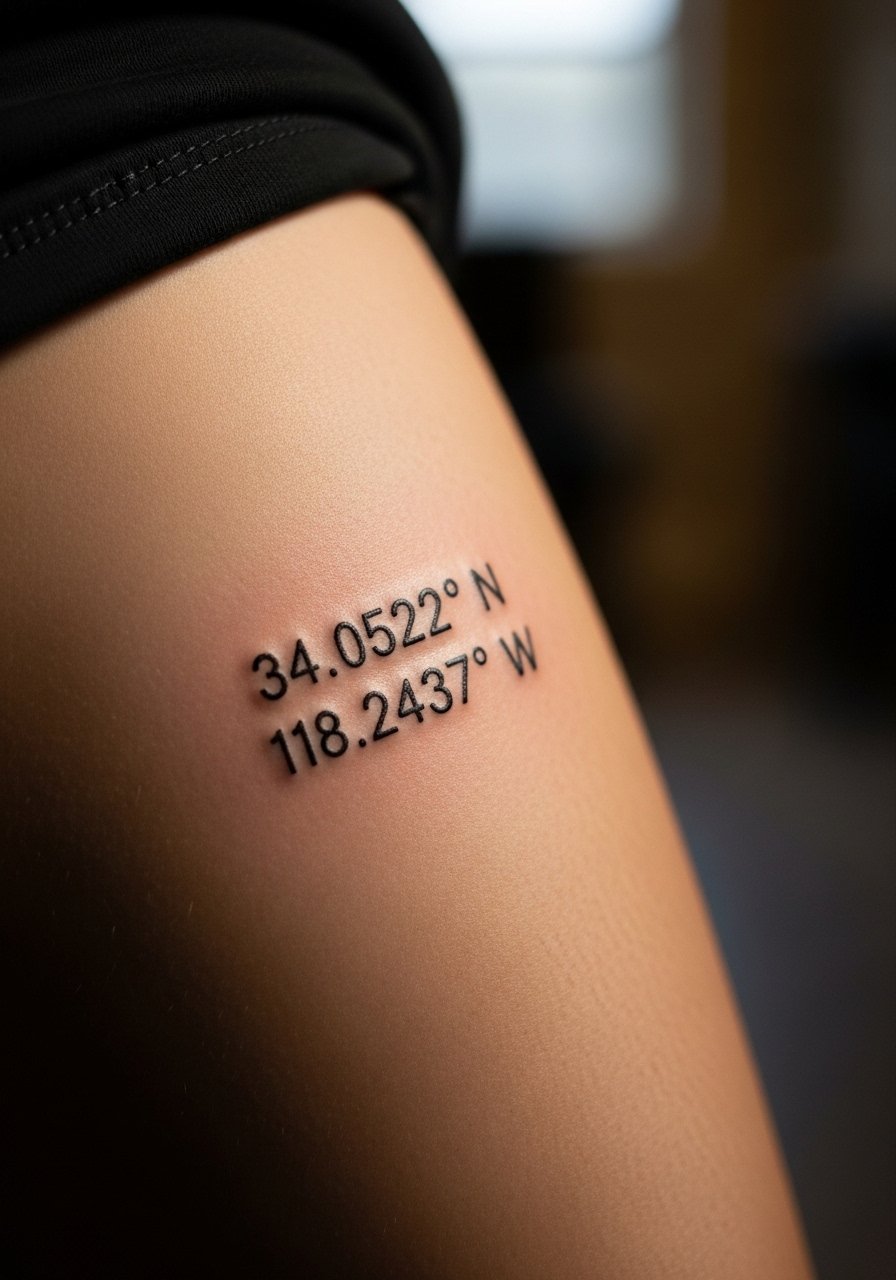
I spent months collecting coordinate tattoos from friends, old travel maps, and tattoo threads before I realized the real question: how will a simple set of numbers look healed, and what placement actually keeps that memory private or proudly visible? These coordinate ideas are rooted in styles I’ve seen hold up over time—and the ones that don’t.
This list focuses on coordinates as meaningful, minimalist marks—fine line, micro-realism, and blackwork mainly. These work well on wrists, ribs, ankles, and behind the ear. From what I’ve seen in 2026 trends, clean numeric placements and tiny compass accents are the most timeless options.
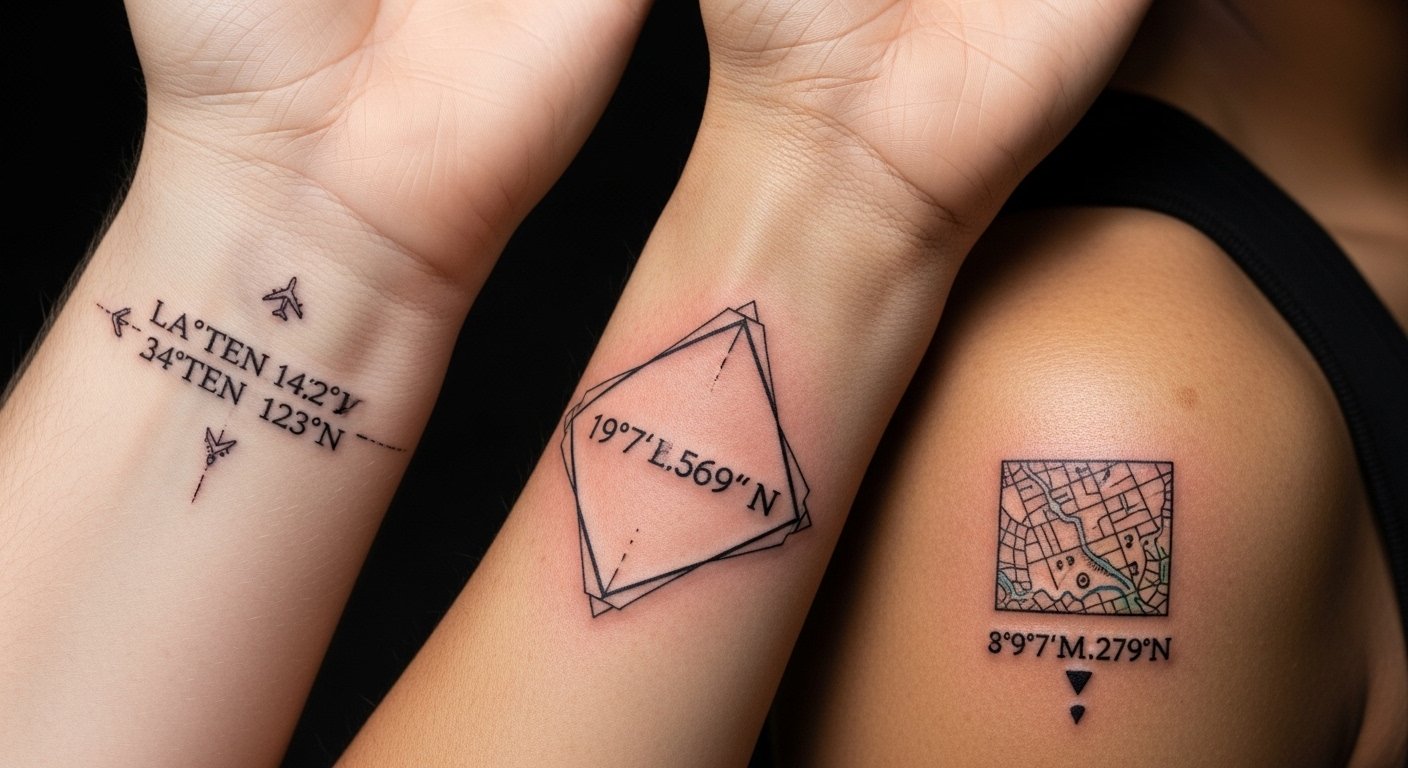
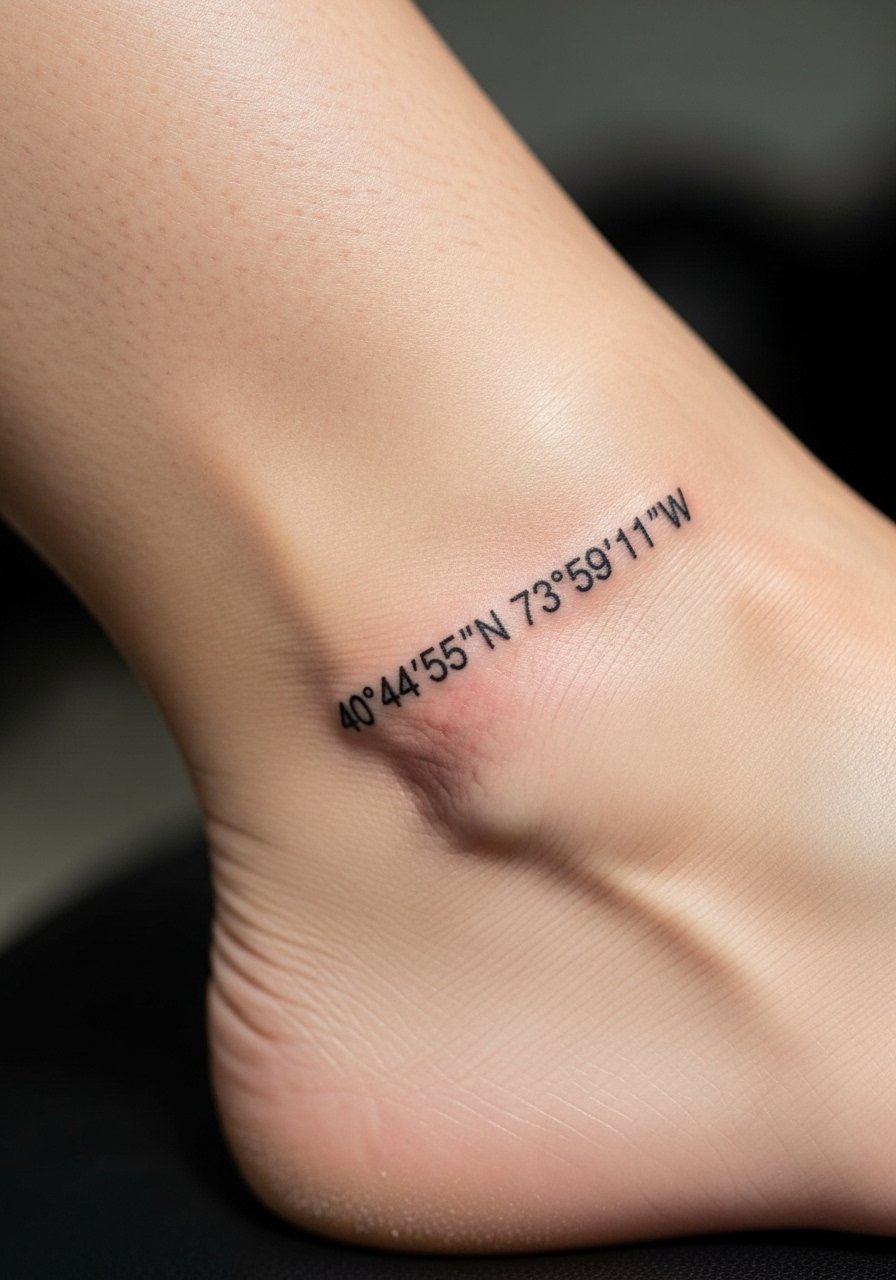
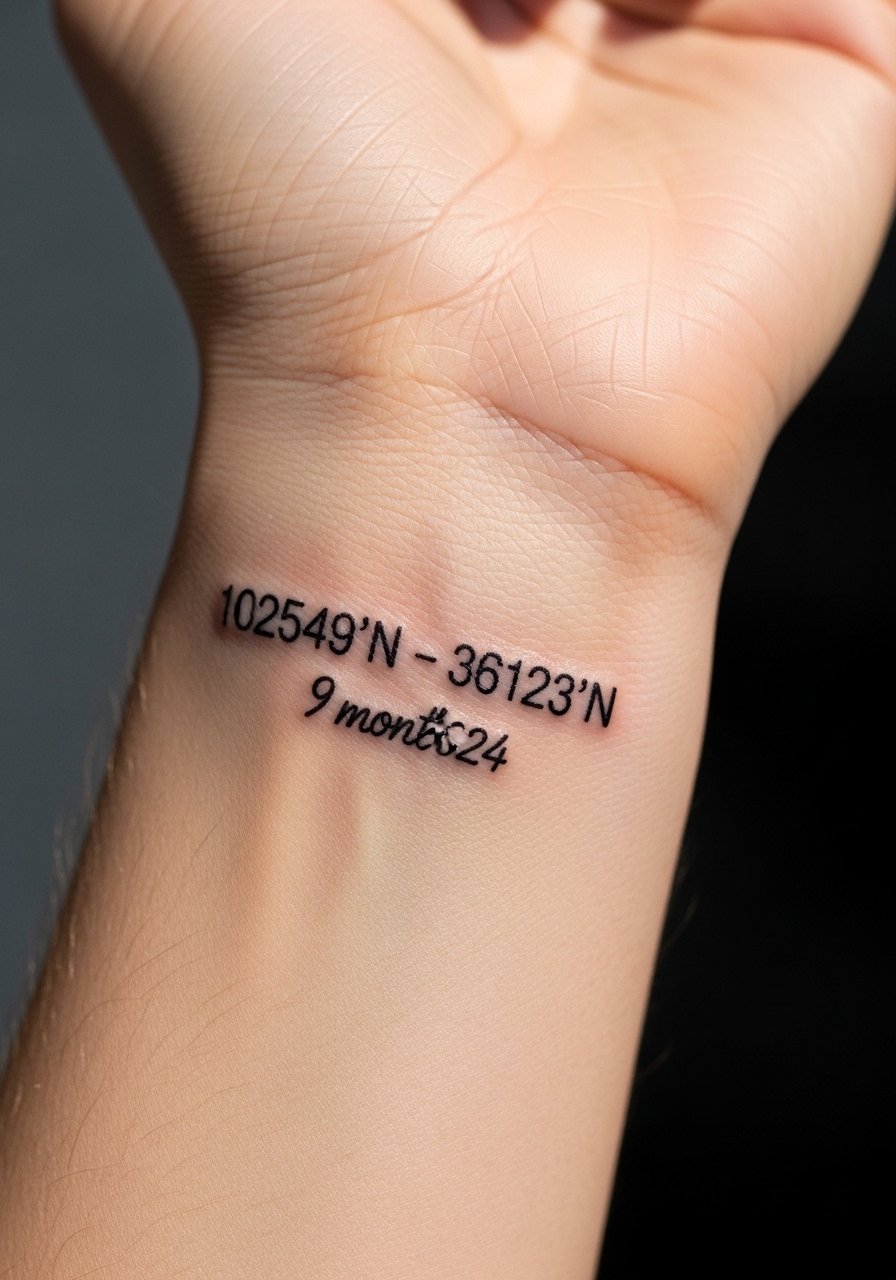
1. Fine Line Coordinates on Inner Wrist
Style/Technique: Fine Line / Minimalist
Pain Level: Low-Medium (3-4/10)
Session Time: 30–90 minutes
Best For: First tattoo, easily hidden with watches
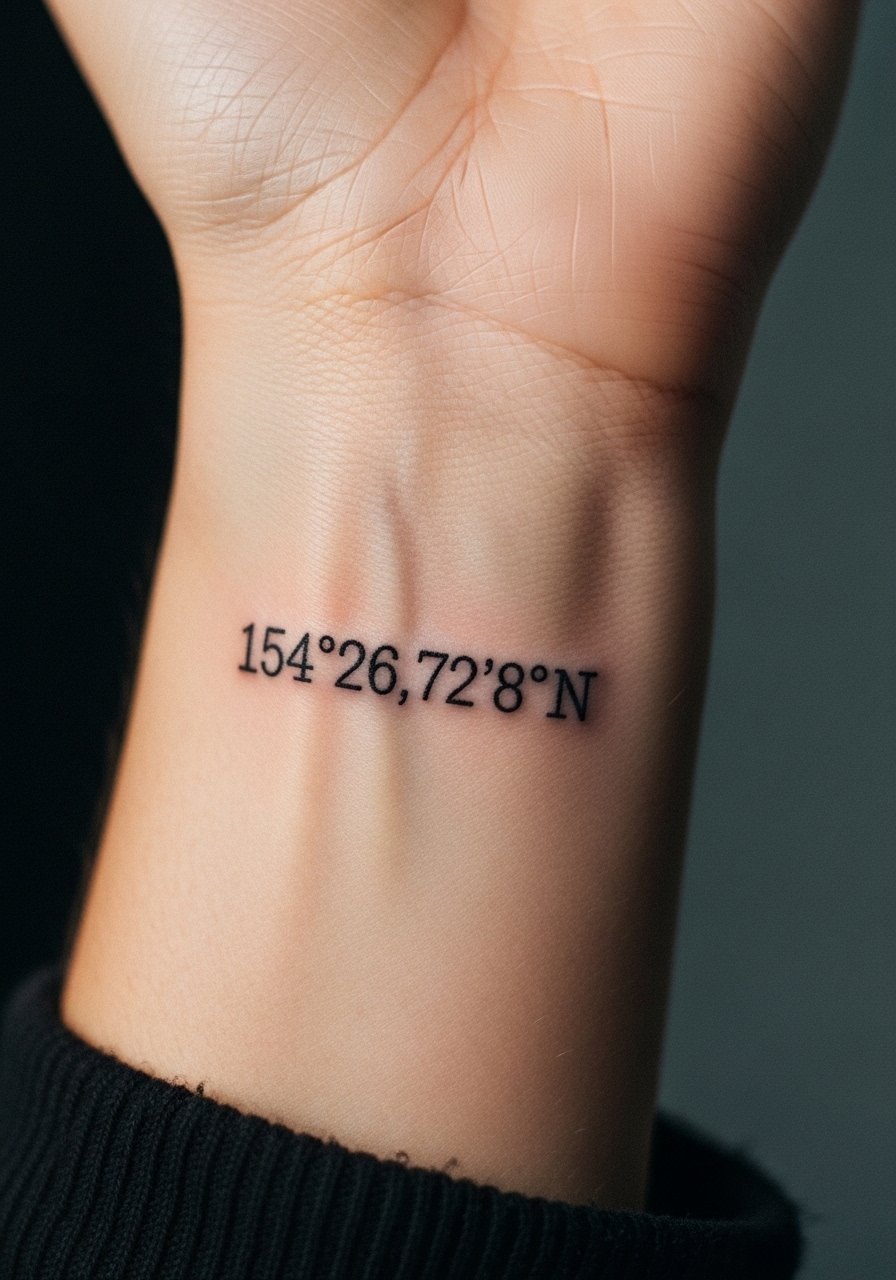
I got a small wrist coordinates piece to mark a city I lived in. Fine line keeps it subtle and intimate. The inner wrist shows the number alignment nicely but expect some early blur after a year if lines are too thin. Pain is short-lived—more annoying than intense. Healing is about 2 weeks for surface, full settling in 2–3 months. Avoid lines thinner than 0.3mm; ask for slightly bolder numbers for longevity. Saniderm or Aquaphor in the first days helps prevent scabbing and loss of crispness.
2. Blackwork Coordinates on Outer Forearm
Style/Technique: Blackwork / Bold Minimalist
Pain Level: Low (2-3/10)
Session Time: 30–90 minutes
Best For: High visibility, clear longevity
Blackwork coordinates use thicker lines and strong black ink so the digits stay readable for years. Outer forearm is forgiving: low pain and easy aftercare. This placement shows off the meaning and ages well because bold digits resist blurring. Common mistake: too-spaced numerals that look disconnected; ask your artist for consistent kerning. Expect surface healing in 1–2 weeks. Keep it out of direct sun and use SPF 50 stick when exposed.
3. Micro-Realism Coordinates with Tiny Map on Ribcage
Style/Technique: Micro-Realism / Petite Illustration
Pain Level: High (7-8/10)
Session Time: 1–3 hours
Best For: Private, intimate pieces

I saw this on a friend who wanted the exact beach we met. Ribcage placements hold detail but hurt more and take longer to sit through. Micro-realism needs a skilled artist; tiny map elements can blur if done too faintly. Healing requires avoiding tight clothing rubbing the area. Expect peeling and dullness mid-heal; colors and black sharpen after full recovery. Ask for slightly heavier contrast than you want fresh—healed results look softer.
4. Minimalist Coordinates Behind Ear
Style/Technique: Minimalist / Micro Script
Pain Level: Medium (4-5/10)
Session Time: 15–45 minutes
Best For: Hidden, subtle reminders
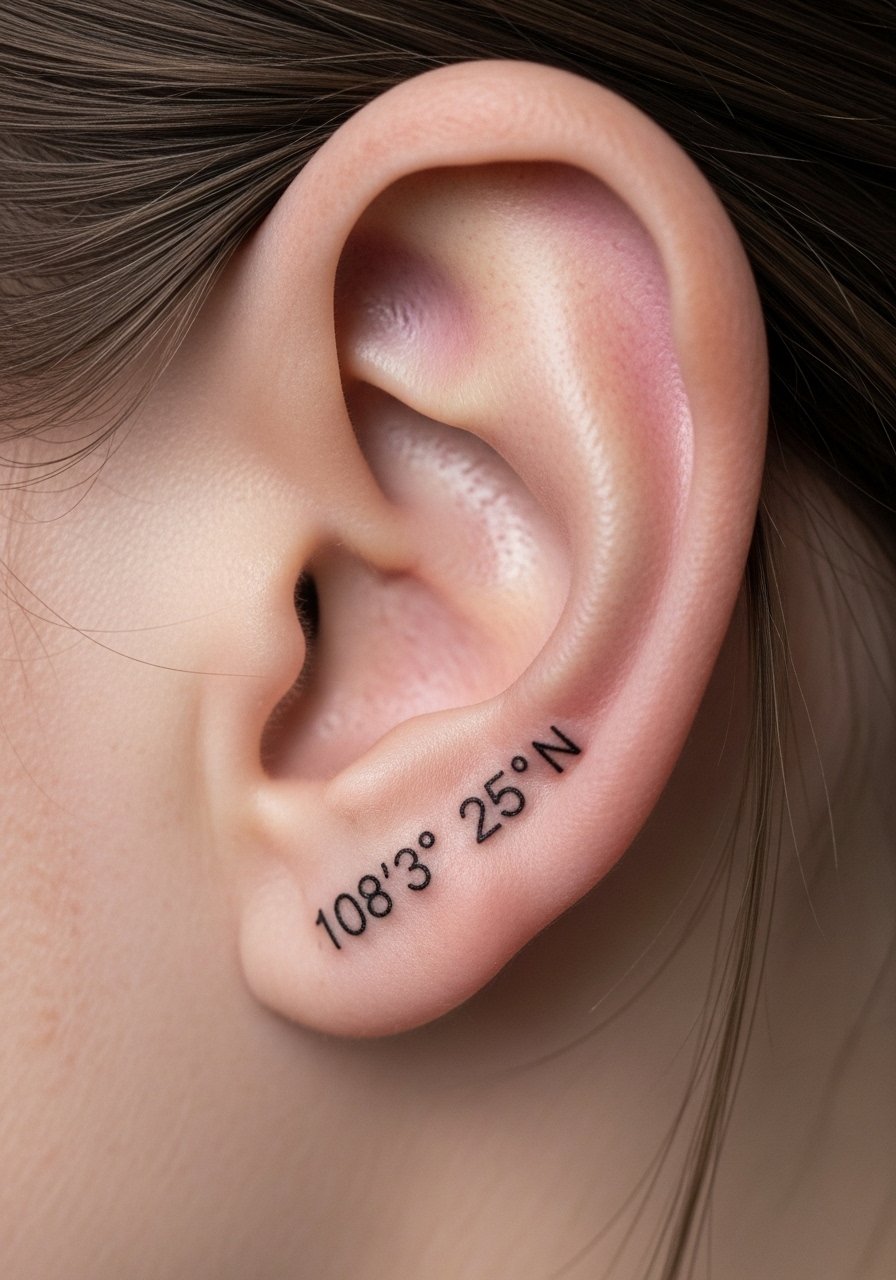
Behind-the-ear coordinates are discreet and personal. The area is bony-ish so pain is brief but sharp. Keep the design tiny—fine line numerals near hairline look clean but risk blurring if too thin. Healing is quick but watch hair oils and shampoo. This placement is great if you want a private memory that only shows in certain hairstyles. Ask your artist for healed examples in similar placement.
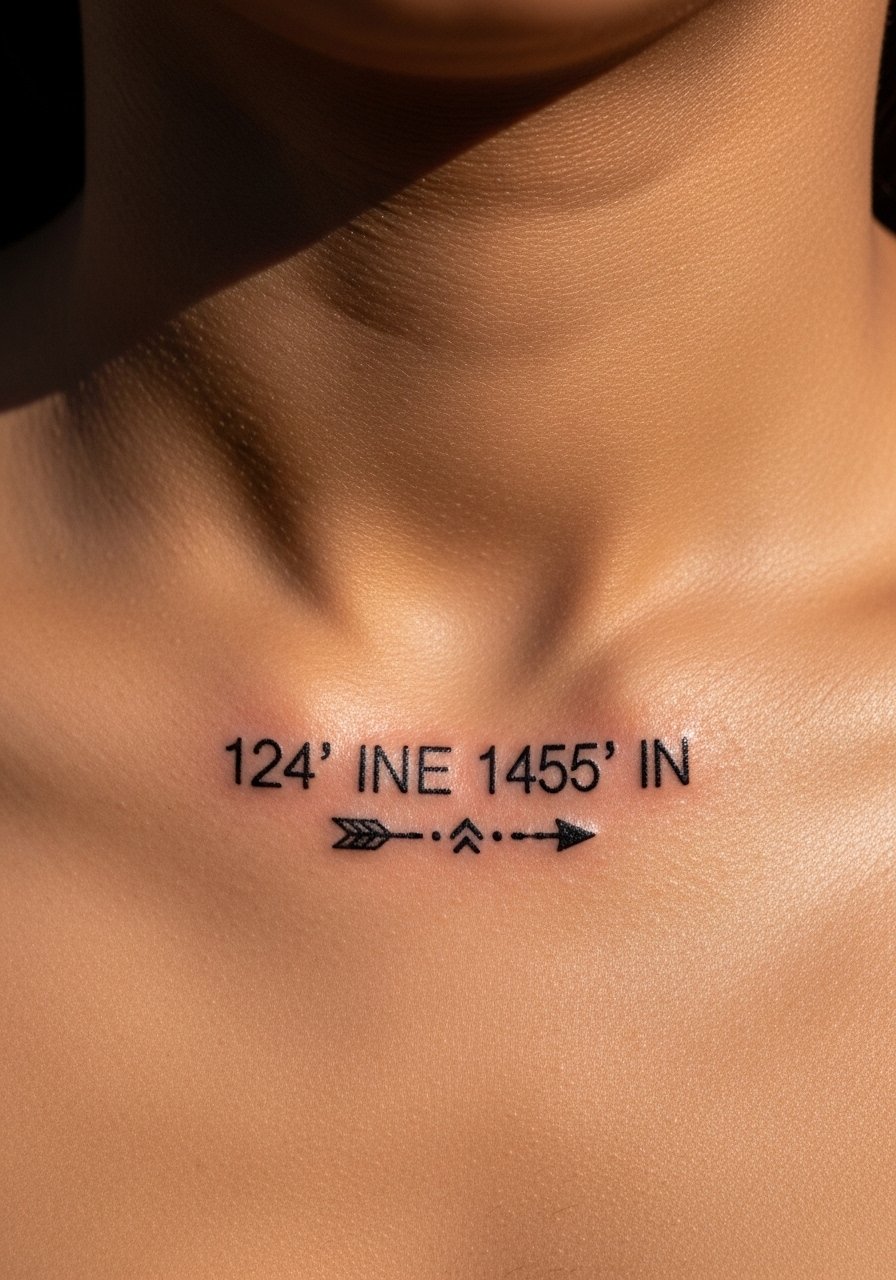
5. Coordinates Integrated into Compass on Upper Chest
Style/Technique: Neo-Traditional / Decorative
Pain Level: Medium (4-5/10)
Session Time: 1–2 hours
Best For: Statement with symbolism
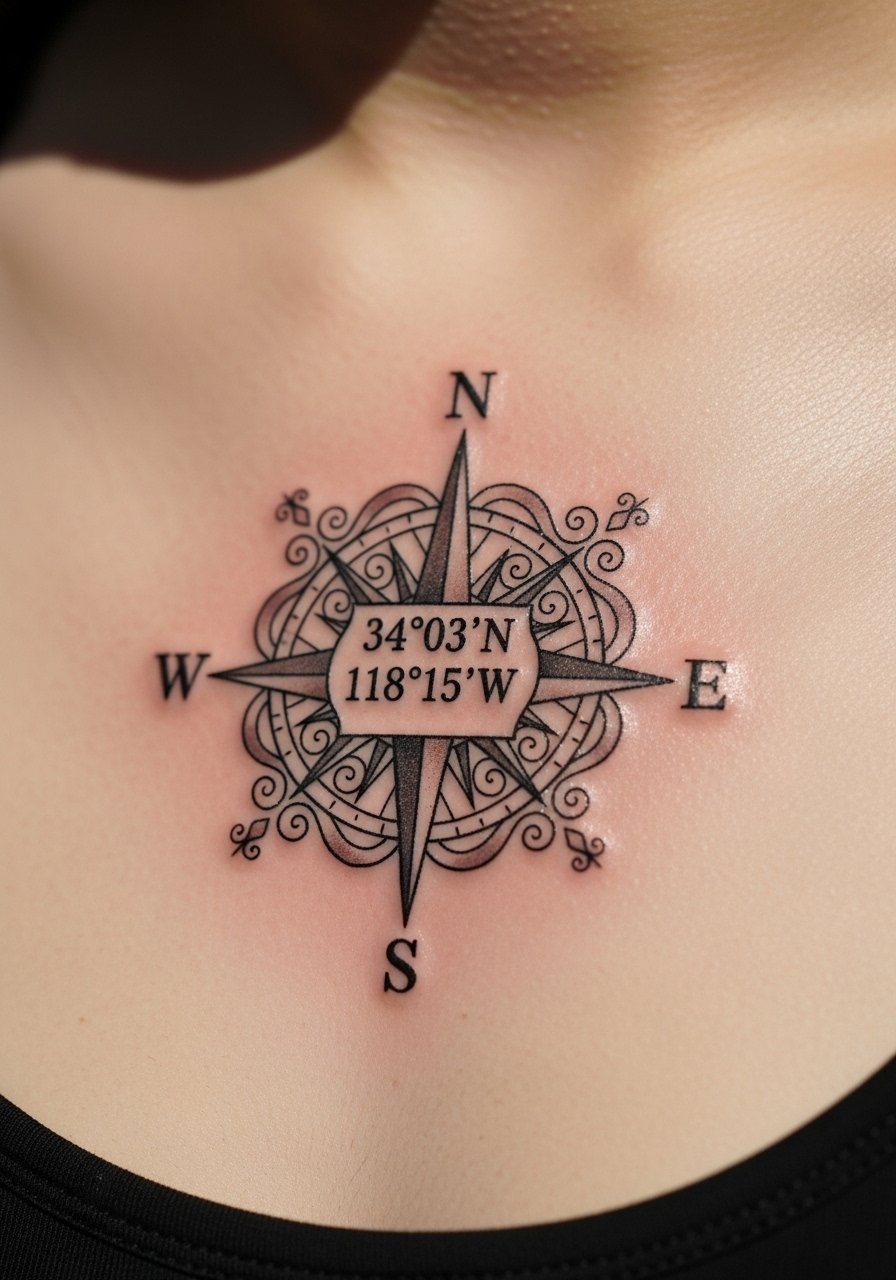
Combining coordinates with a tiny compass gives direction to the memory. Upper chest placement reads like a badge of significance—visible with low necklines and easy to cover. This style benefits from bold outlines so numbers don’t blur into decorative elements. Pain is manageable; breathing with movement can feel odd during the session. Aftercare: keep shirts soft and loose while healing. A common mistake is overcrowding the compass—leave space around numbers for clarity.
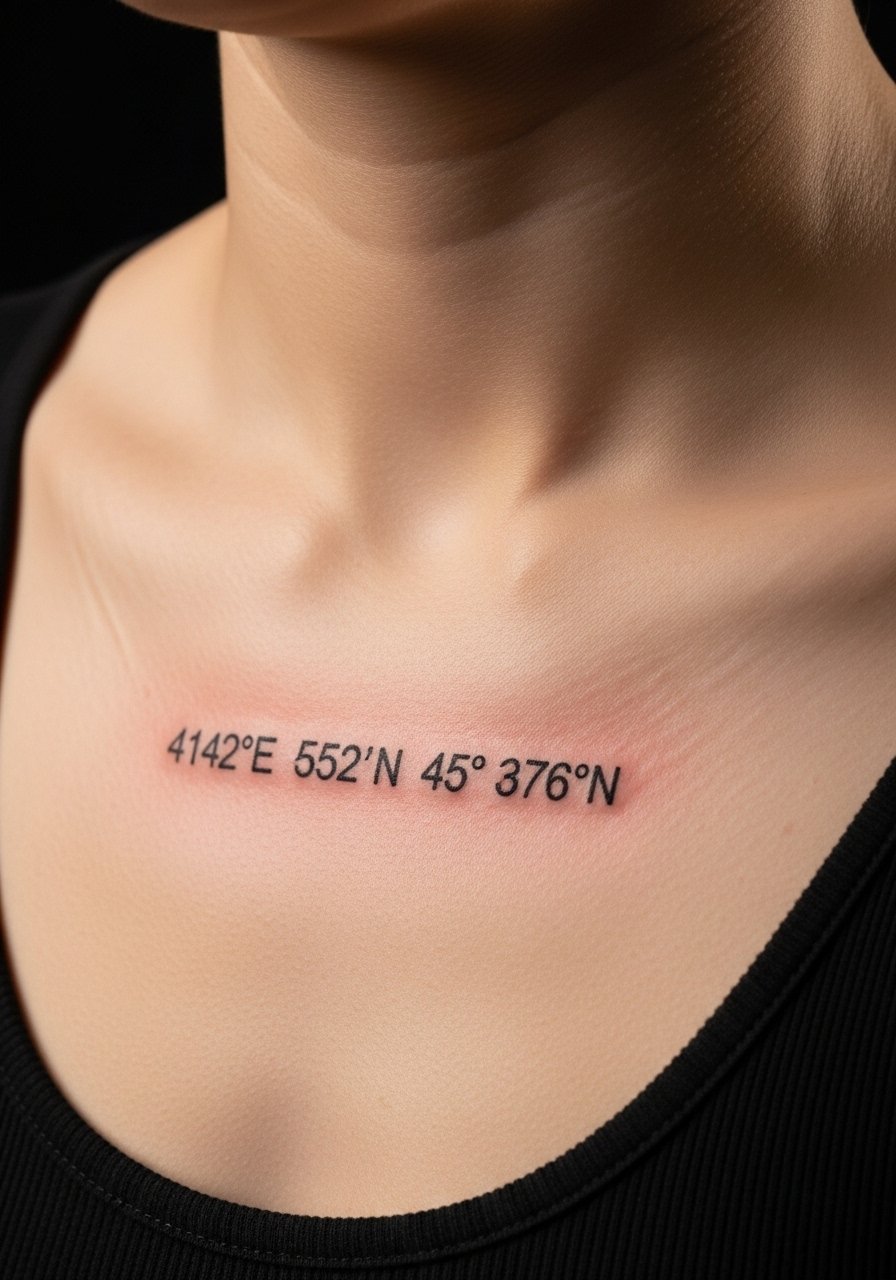
6. Fine Line Coordinates Along Collarbone
Style/Technique: Fine Line / Scripted Numerals
Pain Level: Medium (4/5)
Session Time: 30–60 minutes
Best For: Elegant, visible placement
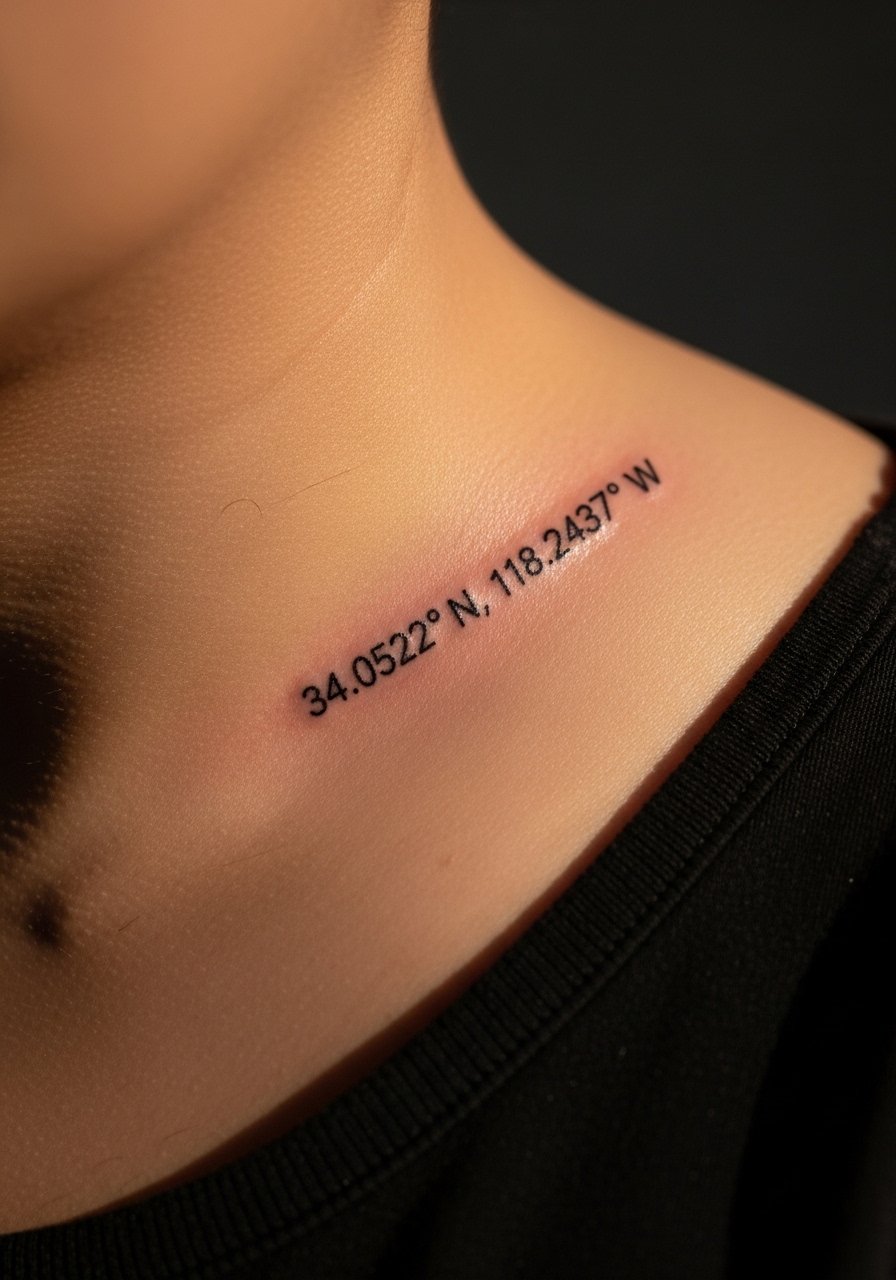
Coordinates along the collarbone look like jewelry—minimal and intentional. Expect stinging near the bone; pain is short. Fine line works here but ask for slightly bolder numerals to avoid fading into creases. Healing needs gentle clothing and pillow positioning at night. This placement photographs nicely and feels like a wearable memory.
7. Minimalist Coordinates on Side Rib
Style/Technique: Minimalist / Single-Line
Pain Level: High (7/8/10)
Session Time: 30–90 minutes
Best For: Private, dramatic reveal
Rib tattoos are meaningful and private but painful. Numerals look elegant in a vertical or horizontal single-line format. Expect longer healing due to clothing rubbing and movement. From what I’ve seen, ribs can soften faster because of stretch and friction—ask your artist to use clean, slightly heavier digits. Plan rest and Saniderm for the first 48 hours if recommended.
8. Coordinates with Tiny Heart on Inner Bicep
Style/Technique: Neo-Traditional / Small Accent
Pain Level: Low-Medium (3-4/10)
Session Time: 30–60 minutes
Best For: Visible when flexing, sentimental
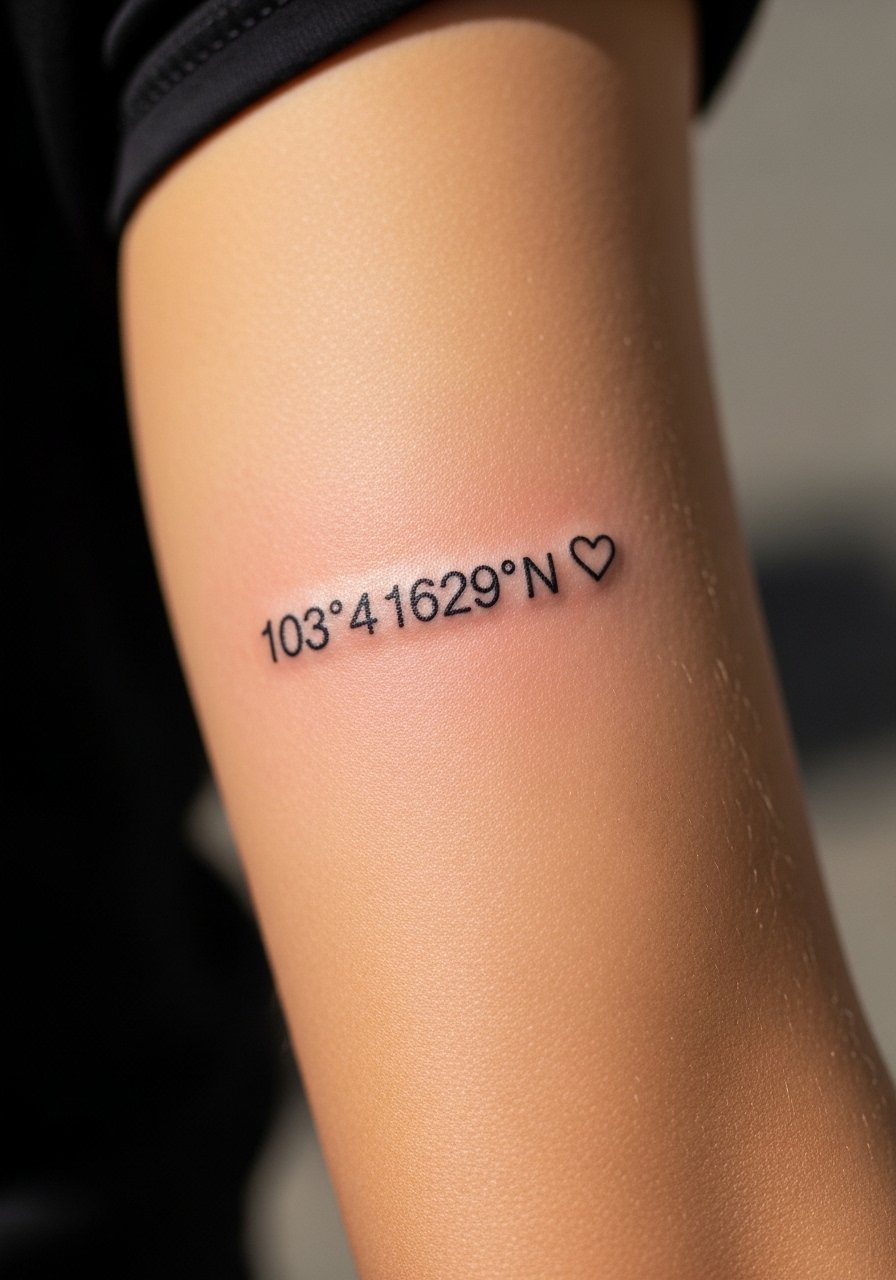
Inner bicep is a forgiving canvas that hides well and hurts less than ribs. Adding a tiny heart or dot anchors the memory visually. This area sees moderate movement, so avoid super-thin lines. Healing is straightforward—moisturize and avoid heavy sweat for the first week. Artists I follow often recommend inner bicep for first sentimental pieces.
9. Coordinates Tattooed Around Ankle Bone
Style/Technique: Minimalist / Circular Placement
Pain Level: Medium (5/6/10)
Session Time: 30–60 minutes
Best For: Travel memories, wearable subtlety
Ankle coordinates look like little talismans. The area moves and flexes, so thin numbers can blur into lines over time. Pain is higher near the bone but brief. Expect longer touch-up needs if placed directly on the joint. Seal with good aftercare and minimize tight footwear during healing. I’d ask the artist for slightly larger numerals and heavier ink saturation here.
10. Tiny Coordinates on Finger Side
Style/Technique: Micro Script / Line Work
Pain Level: High (6-7/10)
Session Time: 15–45 minutes
Best For: Super-subtle, symbolic marks
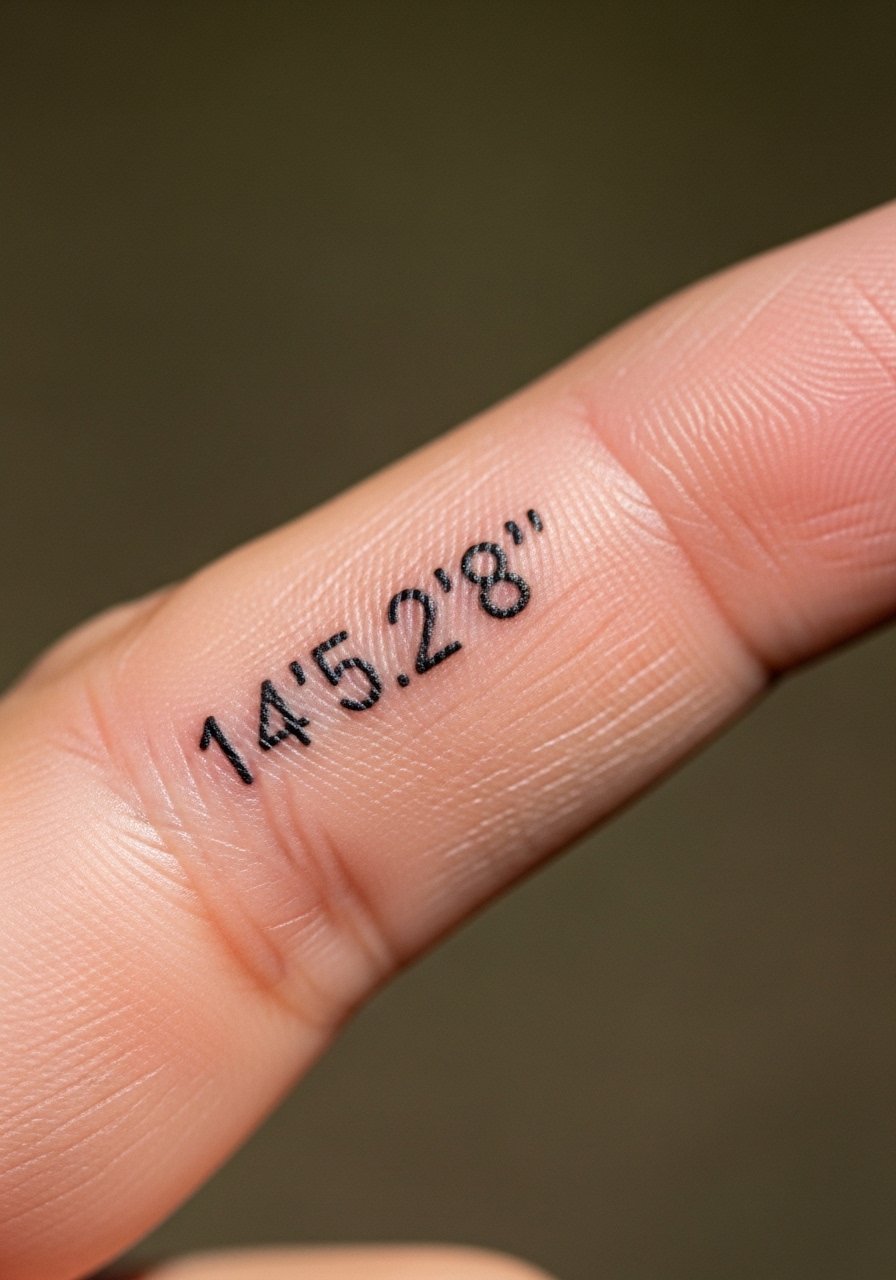
Finger tattoos are tempting but notoriously prone to fading and blur because of constant washing and skin turnover. I only recommend numeric finger tattoos if you accept possible touch-ups. Pain is sharp and quick. For longevity, place on the side rather than pad and go slightly bolder. Keep expectations realistic: fingers rarely hold tiny fine lines long-term.
11. Coordinates in Roman Numerals on Upper Back
Style/Technique: Minimalist / Roman Numeral Conversion
Pain Level: Low-Medium (3-4/10)
Session Time: 30–90 minutes
Best For: Classic, timeless look
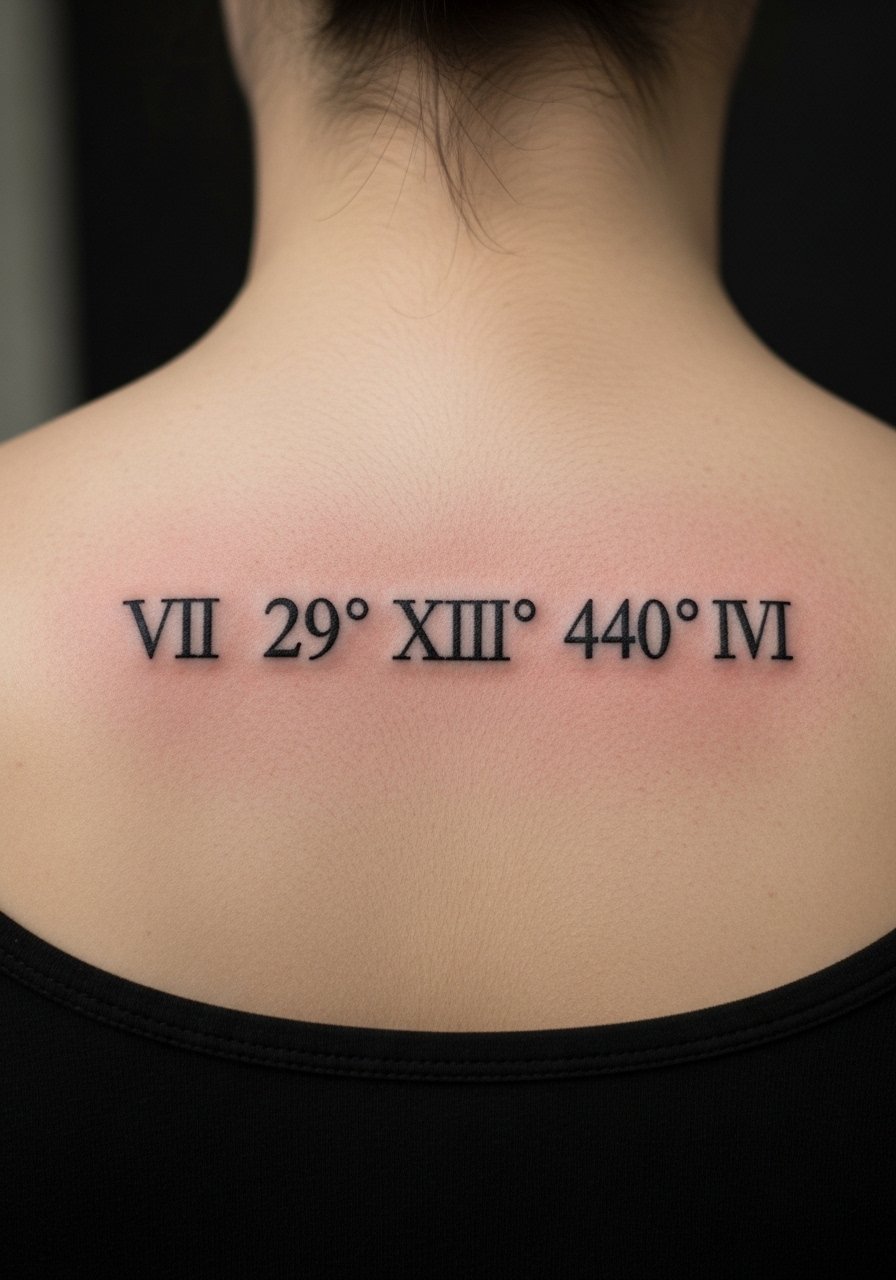
Translating coordinates into Roman numerals adds a timeless feel and hides the literal numbers for privacy. Upper back is low pain with roomy canvas, so spacing is easy. This style ages well as bold numerals hold. If you want a subtle reveal, place beneath hairline or between shoulder blades. Check stencil spacing carefully—Roman numerals need consistent weight.
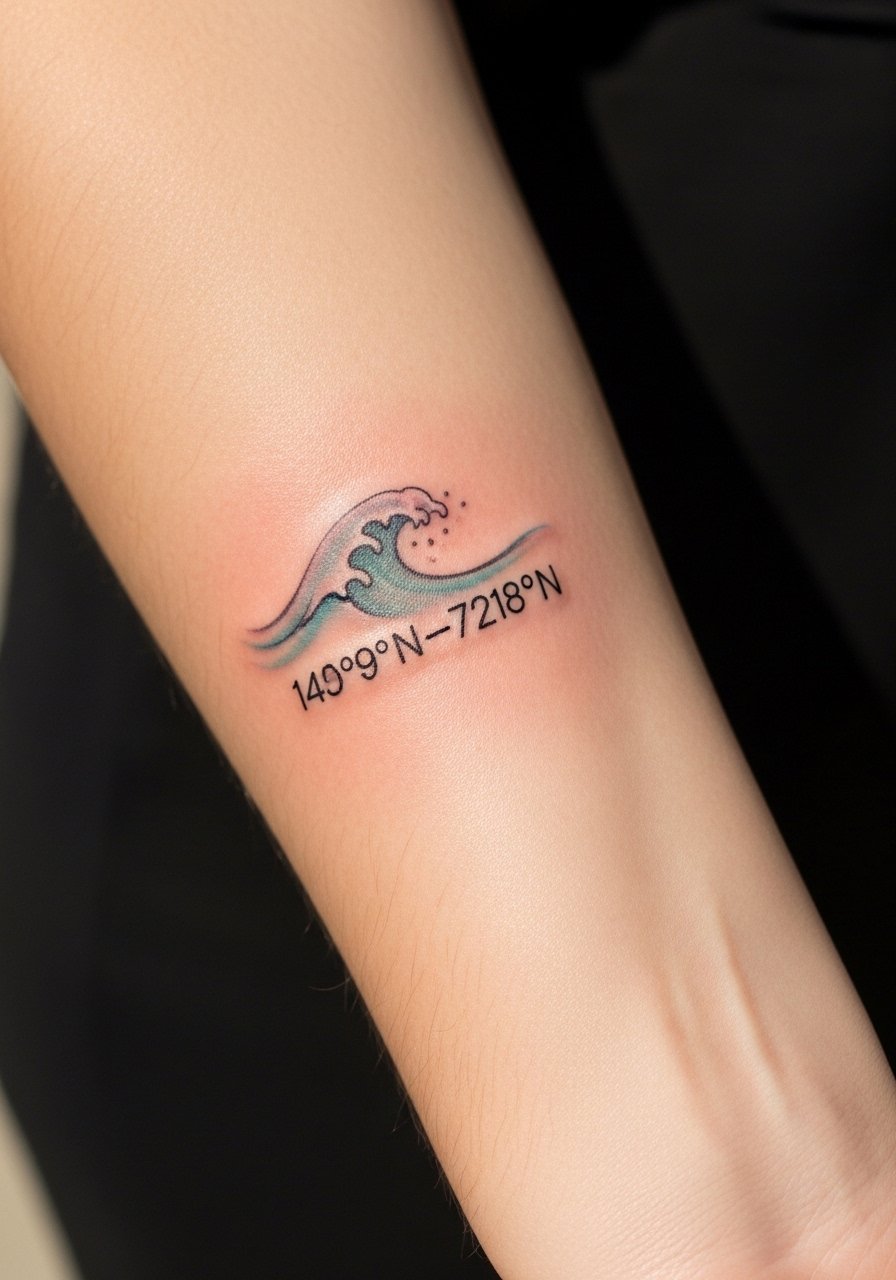
12. Coordinates Embedded in Wave Line on Ankle
Style/Technique: Minimalist + Illustrative / Wave Accent
Pain Level: Medium (4-5/10)
Session Time: 45–90 minutes
Best For: Beach memories, travel mementos
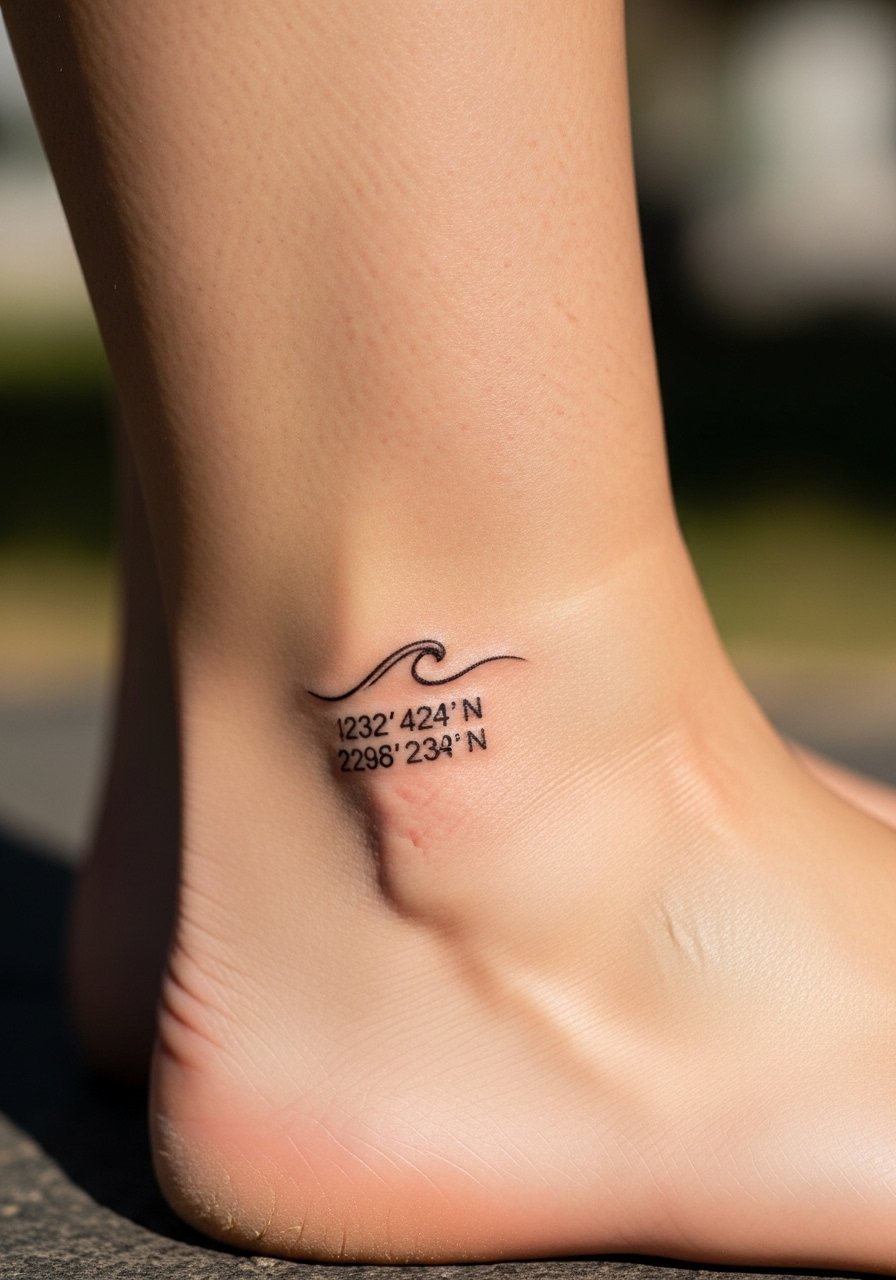
I love seeing coordinates tucked into a simple wave—the icon points to a place and feeling. The ankle is visible with shoes off and looks delicate with a small illustrative flourish. Avoid over-detailing; tiny waves plus numbers can get muddy. Pain is brief but stinging on the bone. Keep footwear loose during the first week.
13. Vertical Coordinates Down Spine
Style/Technique: Fine Line / Vertical Script
Pain Level: High (7-8/10)
Session Time: 1–2 hours
Best For: Strong personal statement, elongating the back
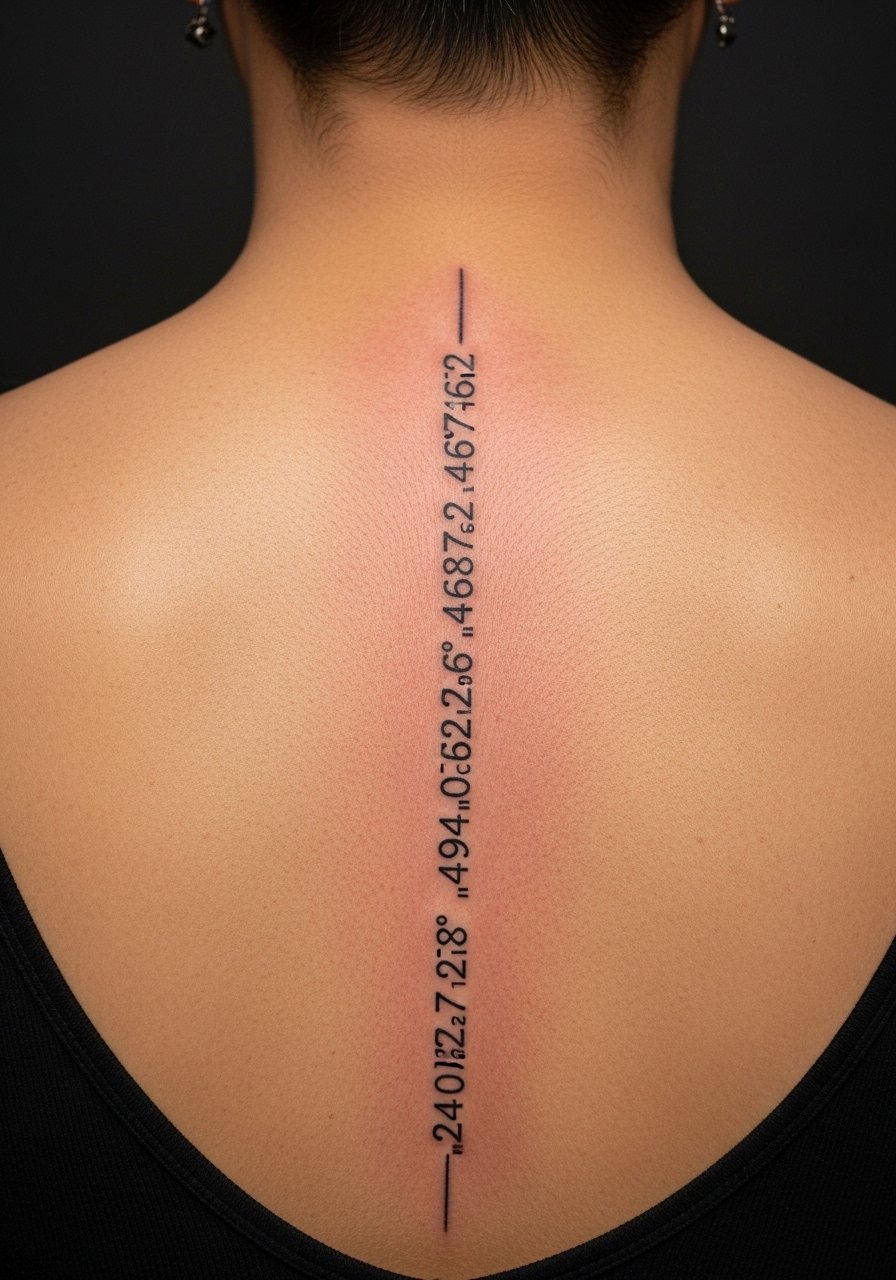
Spine placements are striking and private. They require endurance: pain is significant, especially near bone. Fine vertical numbers read like a secret code. Because the spine moves, expect slight shifting; heavier numerals last better. Ask for balanced spacing to avoid numbers crowding. Healing is slower—avoid heavy lifting the first week.
14. Coordinates on Upper Thigh
Style/Technique: Minimalist / Hidden Canvas
Pain Level: Low-Medium (3-4/10)
Session Time: 30–90 minutes
Best For: Private keepsake, larger designs possible
Upper thigh is great for larger coordinate designs or combining coordinates with small images. Pain is moderate and easy to manage. Skin stretch is a factor; avoid extremely fine numbers that could warp with weight changes. This placement heals well since clothing covers it—just keep fabrics soft and avoid friction during the critical first week.
15. Coordinates with Tiny Mountain on Calf
Style/Technique: Minimalist + Tiny Illustration / Mountain Accent
Pain Level: Low (3/4)
Session Time: 45–90 minutes
Best For: Adventure memories, visible on shorts
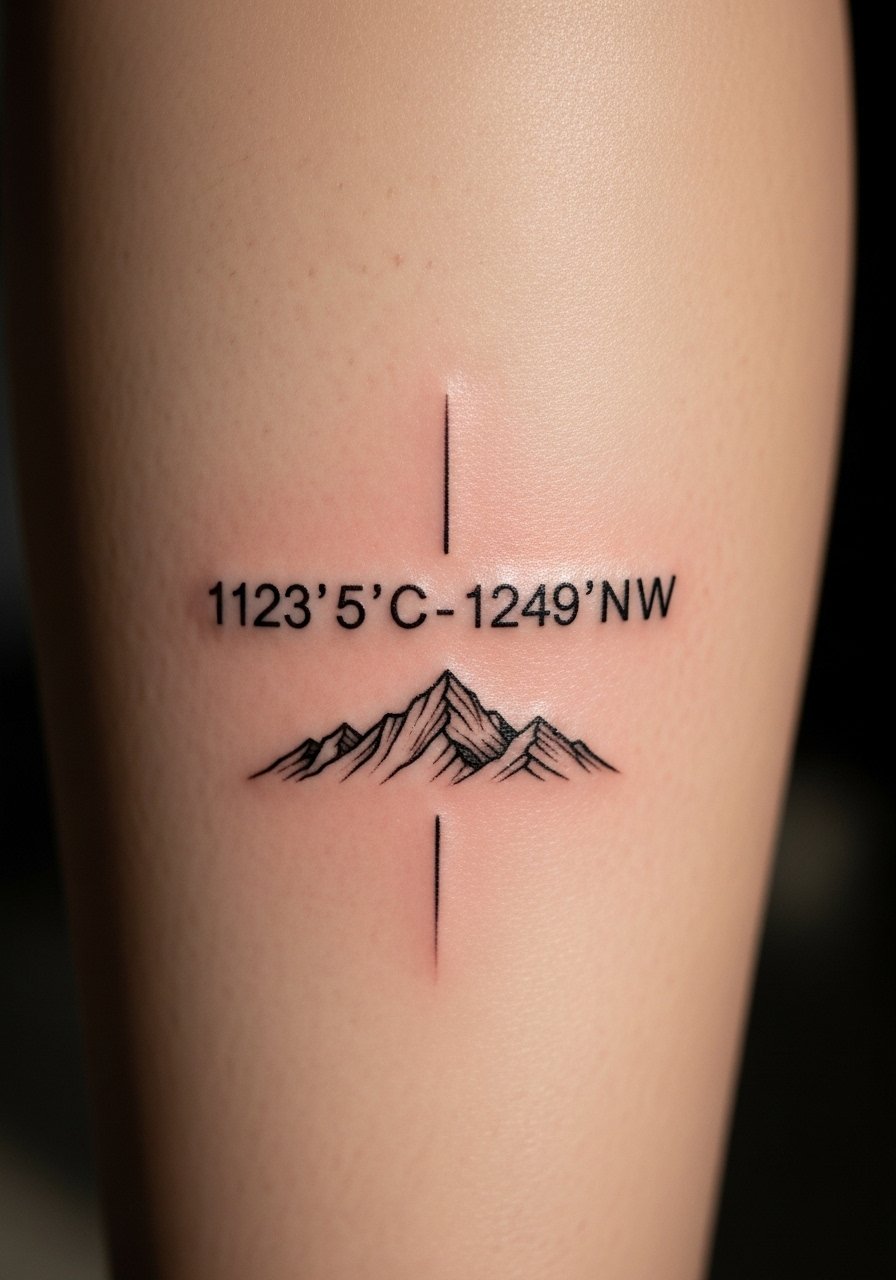
I recommend calf placements for outdoor memories—visibility is easy and pain is mild. Combining coordinates with a tiny mountain or peak graphic anchors the memory. Heals reliably if you avoid tight pants early on. Over-detailing the mountain at a very small scale is a common mistake; keep it iconic and bold.
16. Coordinates in Circle on Back of Neck
Style/Technique: Blackwork / Circular Layout
Pain Level: Medium (4-5/10)
Session Time: 30–60 minutes
Best For: Subtle statement, easy to hide with hair
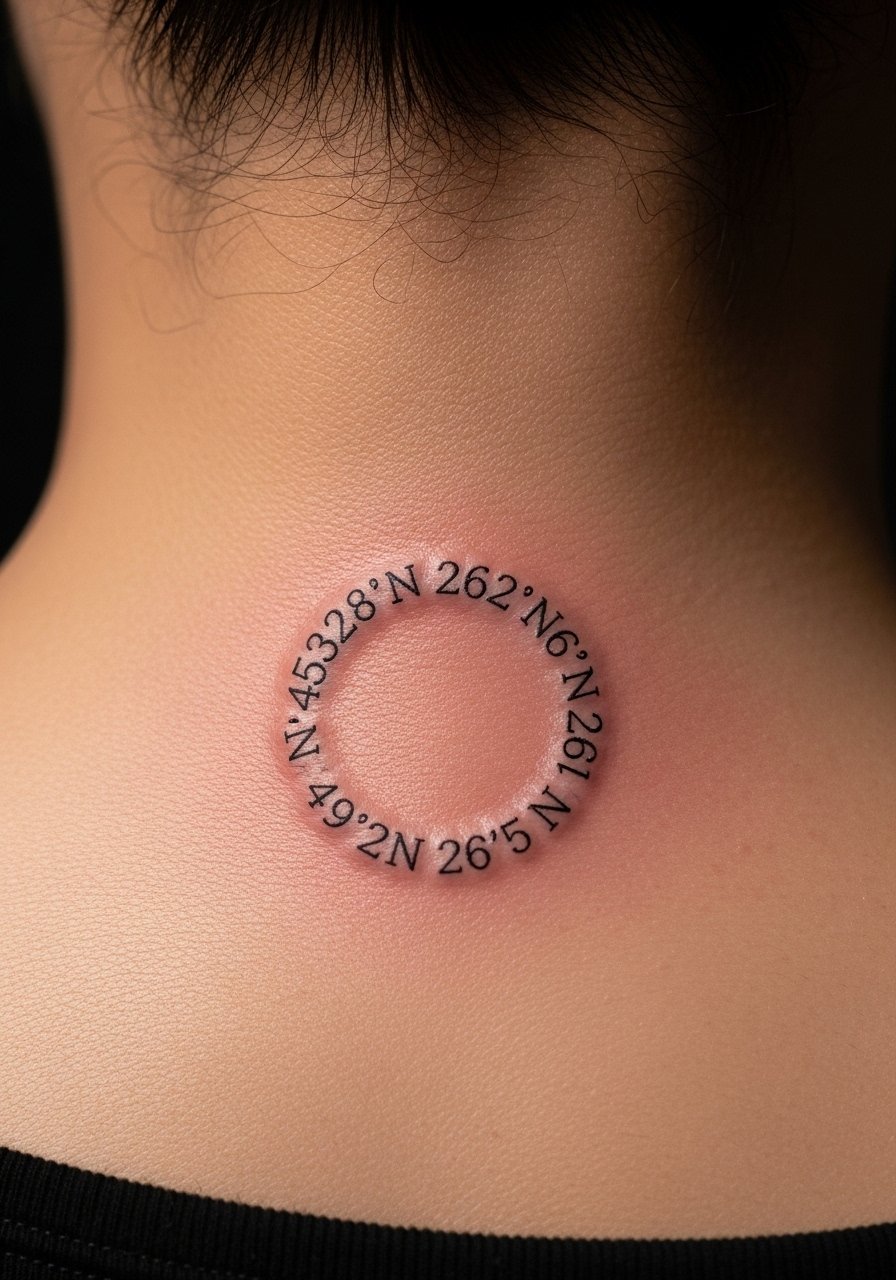
A circular layout around a dot or micro-compass looks modern and balanced. Back-of-neck tattoos are easily hidden with hair and are low maintenance. Expect skin movement and some fading over time; slightly bolder numerals resist this. Avoid too many tiny details in the circle—clarity is king.
17. Coordinates with Date Script on Wrist
Style/Technique: Fine Line / Numeric + Script
Pain Level: Low-Medium (3-4/10)
Session Time: 30–60 minutes
Best For: Anniversary or birthplaces
Pairing coordinates with a date script adds context to the memory—great for births or milestones. I’ve seen simple wrist pairings hold up well if the script is medium-weight. Tiny cursive can blur; prefer readable numerals and slightly bolder date letters. Healing needs sunscreen later to prevent fading.
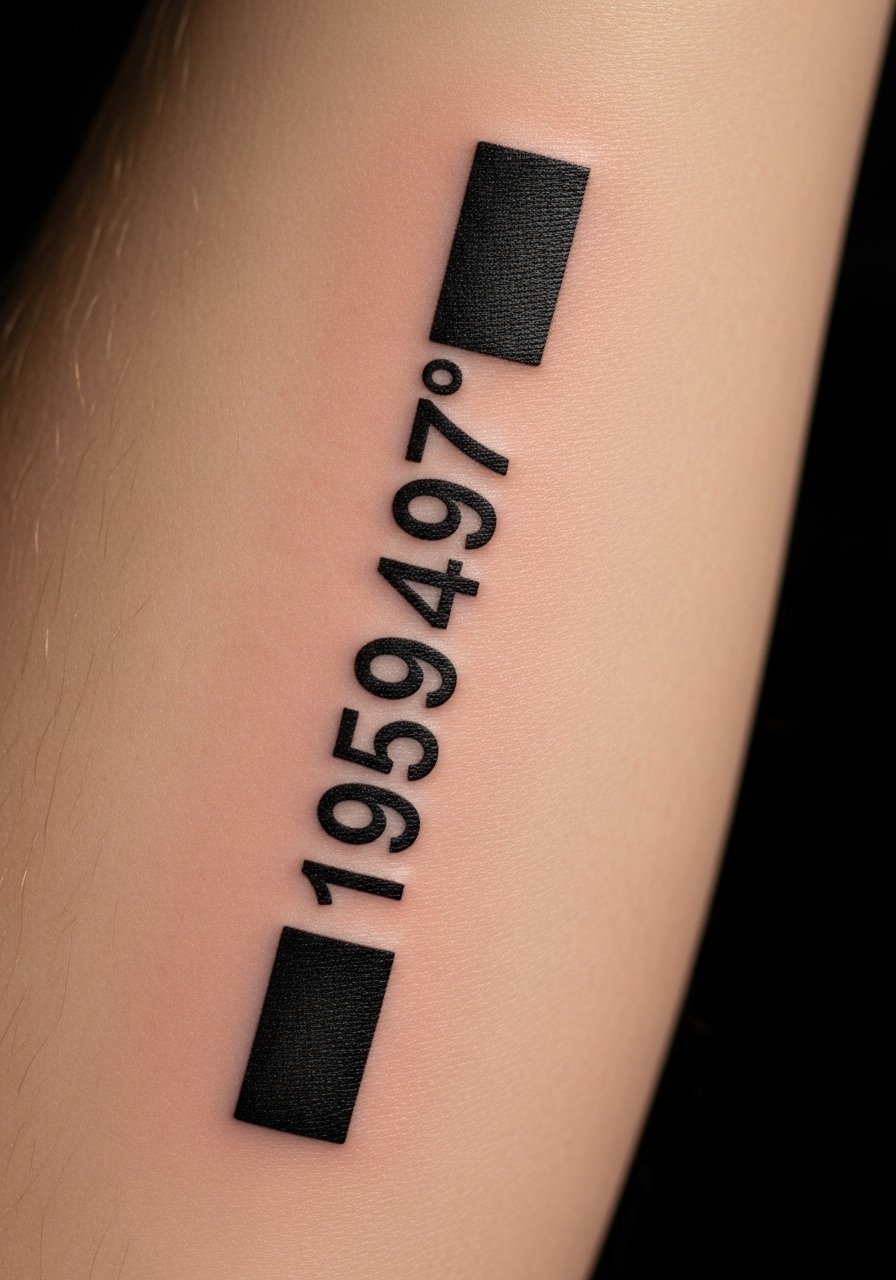
18. Coordinates as Bar Code on Forearm
Style/Technique: Blackwork / Graphic Barcode
Pain Level: Low (2-4/10)
Session Time: 1–2 hours
Best For: Modern, graphic statement
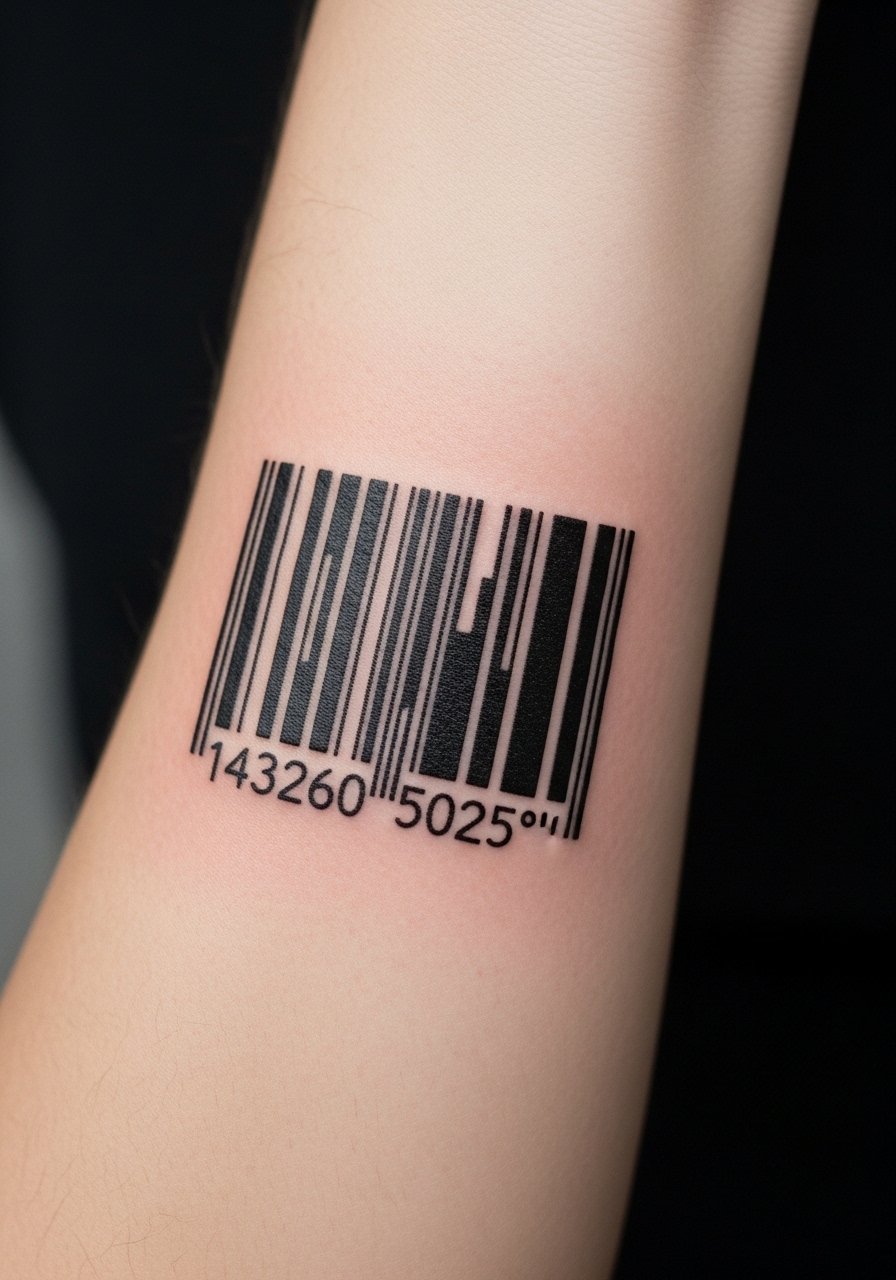
A barcode treatment turns coordinates into a modern graphic. Forearm placement is forgiving and low pain. The trick is keeping line weight balanced so the barcode read remains legible and doesn’t blur into blocks. This look ages well if lines are consistent and bold. Ask for a test stencil to ensure visual flow.
19. Coordinates with Tiny Star Cluster on Shoulder Blade
Style/Technique: Minimalist + Micro-Illustration / Celestial Accent
Pain Level: Low-Medium (3-4/10)
Session Time: 30–60 minutes
Best For: Subtle but romantic placements
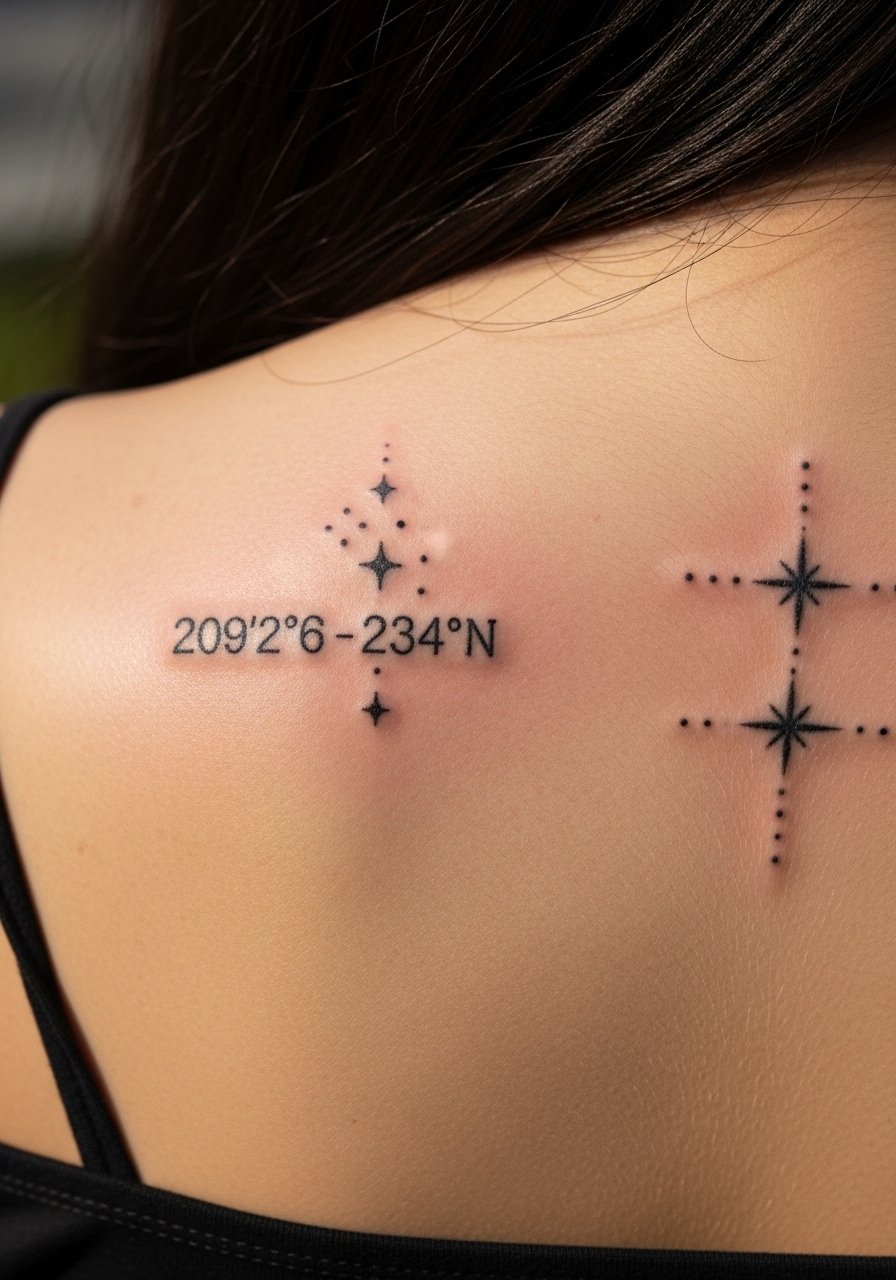
Shoulder blade coordinates are private and photograph nicely. Adding a tiny star cluster suggests a moment that felt cosmic. This area tolerates fine lines but avoid ultra-thin digits. Healing is calm—just watch straps and bras during the first week. Artists I follow say healed references for shoulder blade pieces are essential to understand how lines soften.
20. Coordinates Hidden in Floral Outline on Ribcage
Style/Technique: Fine Line + Floral / Hidden Detail
Pain Level: High (7-8/10)
Session Time: Multiple short sessions
Best For: Romantic, concealed pieces
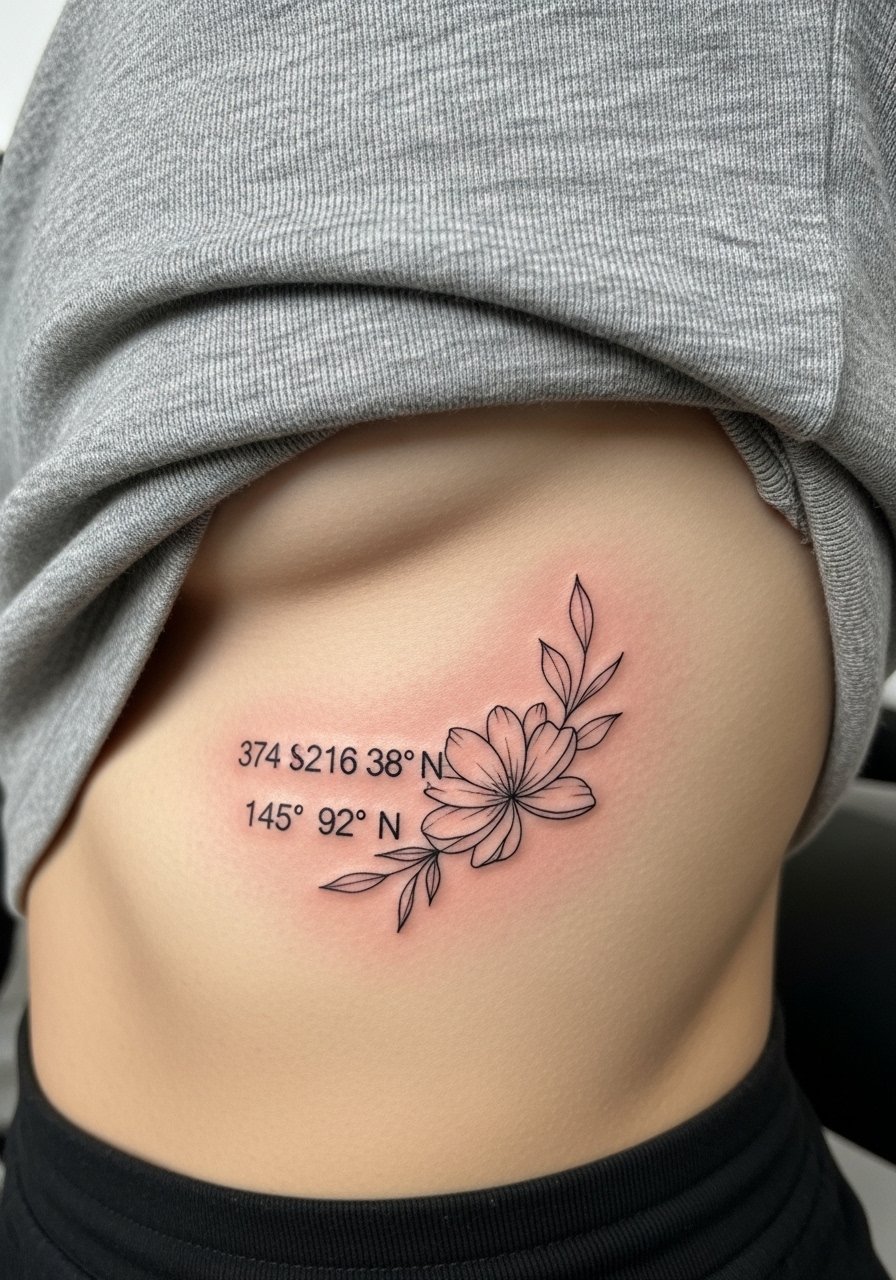
Hiding coordinates inside a floral silhouette creates a secret message within a pretty piece. Ribcage pain is intense but the result is personal. Keep the numerals slightly bolder than the floral lines to keep readability over time. Avoid overcrowding the flower—legibility is easy to lose in tiny petals.
21. Coordinates on Collar Bone with Dot Accents
Style/Technique: Minimalist / Dotwork Accent
Pain Level: Medium (4-5/10)
Session Time: 30–60 minutes
Best For: Delicate jewelry-like placement

Dot accents bookend the coordinates like punctuation. Collar bone is stylish and relatively low pain but trees of thin lines can fade into creases. I recommend medium-weight numerals and small but bold dots. Keep shirts soft while healing.
22. Coordinates Inside Tiny Compass on Finger Base
Style/Technique: Micro-Realism / Tiny Compass
Pain Level: High (6-7/10)
Session Time: 30–60 minutes
Best For: Micro-symbolic pieces

Tiny finger compasses are charming but expect touch-ups. The base of the finger holds slightly better than the pad, but skin turnover remains high. If you love the idea, accept likely future maintenance. Ask your artist about placement that avoids constant friction.
23. Split Coordinates Across Both Ankles
Style/Technique: Minimalist / Symmetrical Placement
Pain Level: Medium (4-6/10)
Session Time: 30–90 minutes (both)
Best For: Paired memories or two cities
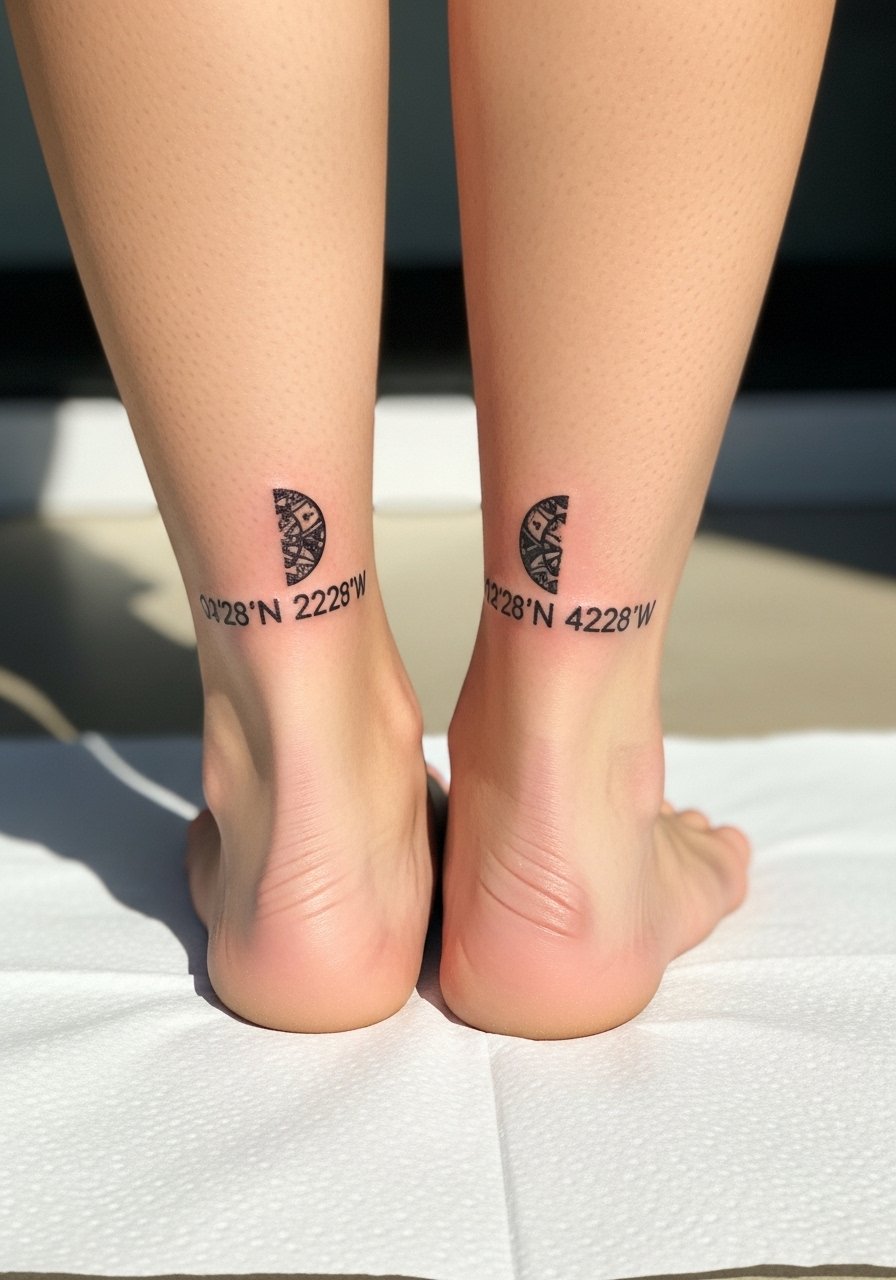
Splitting coordinates across ankles reads as a complete thought when legs are together—cute and playful. Ankles can blur faster due to movement; ensure digits are bold. Pain near bone spikes but is manageable. Keep ankle straps off during healing.
24. Coordinates with Wave Watercolor Accent on Forearm
Style/Technique: Watercolor Accent / Minimalist Numbers
Pain Level: Low-Medium (3-4/10)
Session Time: 1–2 hours
Best For: Color lovers, beach memories
Watercolor adds personality, but colors (especially light blues) fade faster than black. Forearm placement shows color well and is easy to protect with sunscreen. I recommend black numerals with a muted color wash behind—keeps readability and visual interest. Ask for healed color photos from the artist.
25. Coordinates Carved into Tree Trunk on Upper Arm
Style/Technique: Neo-Traditional / Illustrative Accent
Pain Level: Low (3-4/10)
Session Time: 1–2 hours
Best For: Nature-themed memories, larger canvas
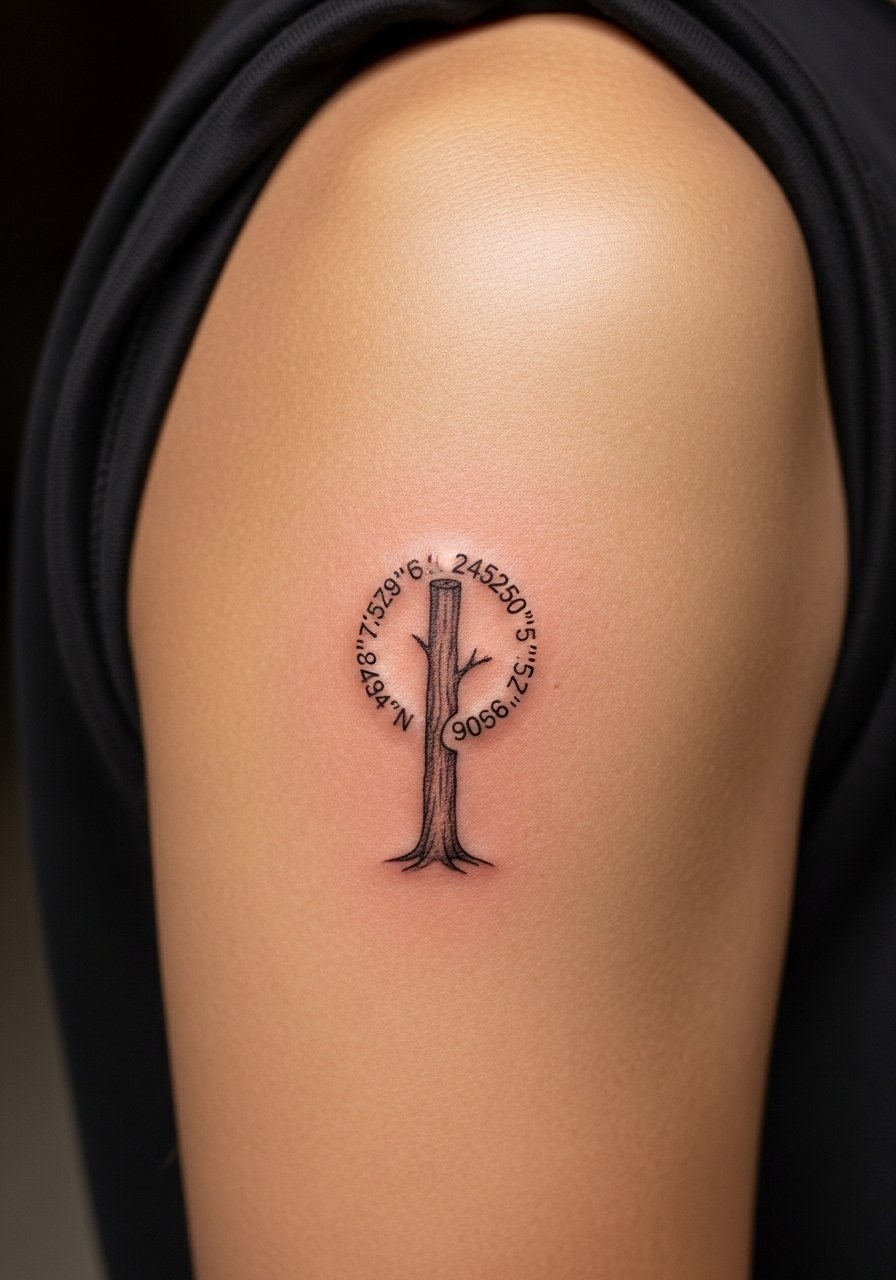
An upper-arm tree trunk with coordinates etched makes the memory feel rooted. Upper arm is forgiving: low pain and strong healing. Keep lines bold within the bark to avoid blurring. This approach reads well healed because texture hides minor softening.
26. Coordinates as Tiny Morse Code on Wrist
Style/Technique: Minimalist / Dot-and-Dash Morse
Pain Level: Low (2-4/10)
Session Time: 30–60 minutes
Best For: Coded, private messages
I love coded options for privacy—morse-style dots and dashes translate numerals into a subtle pattern. Wrist placement is visible and low pain. Ensure spacing is consistent so the pattern reads clearly even after healing. Discuss longevity with your artist; slightly larger dots help.
27. Coordinates Below Clavicle with Tiny Arrow
Style/Technique: Fine Line / Arrow Accent
Pain Level: Medium (4-5/10)
Session Time: 30–60 minutes
Best For: Directional symbolism, visible neckline
A tiny arrow gives motion to coordinates—great if the place changed your direction in life. Clavicle hurts a bit due to bone proximity but sessions are quick. Keep numerals medium-weight to survive natural skin movement and clothing friction.
28. Coordinates Inside Small Anchor on Ankle
Style/Technique: Traditional / Tiny Anchor Accent
Pain Level: Medium (4-5/10)
Session Time: 30–90 minutes
Best For: Nautical memories, symbolic anchors
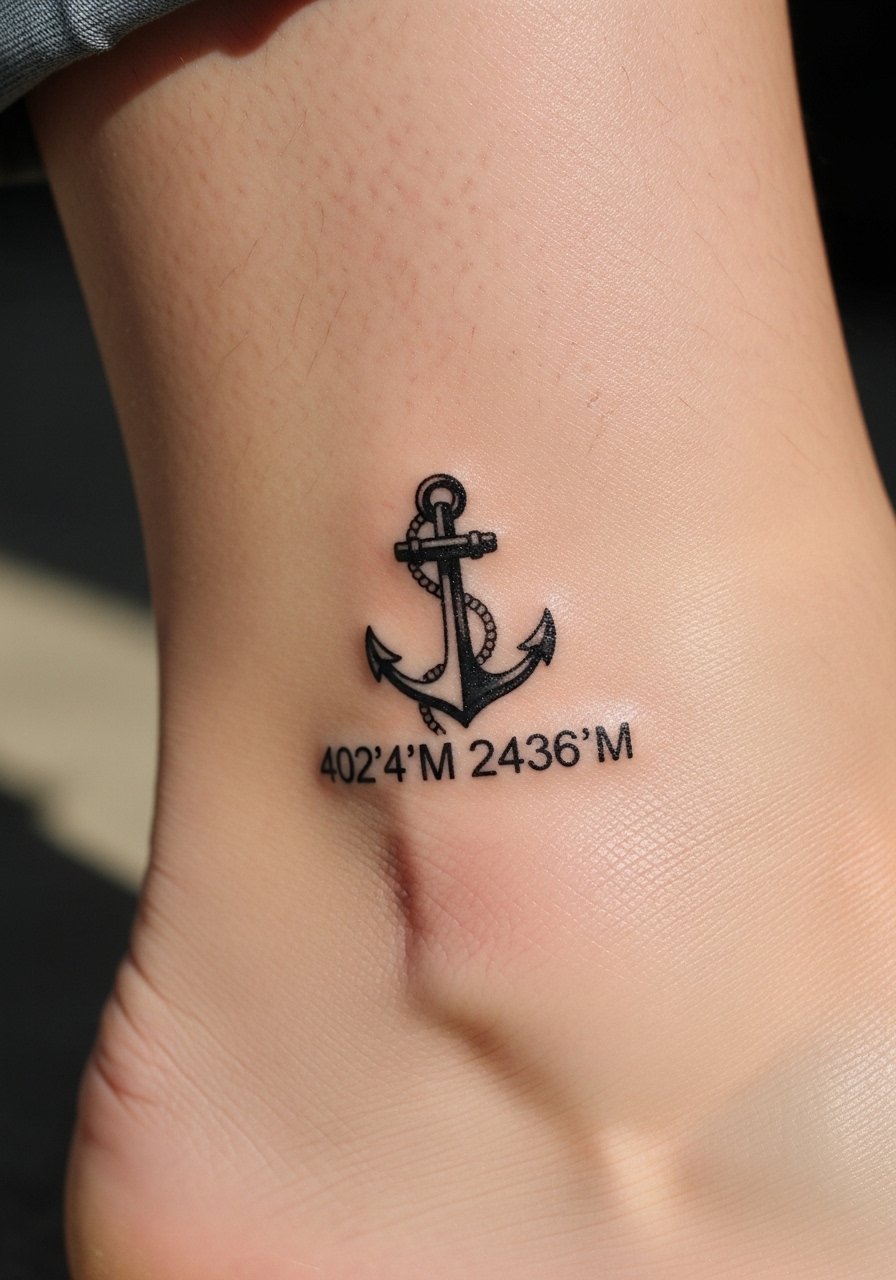
Anchors pair naturally with coastal coordinates. Choose bold lines for the anchor and slightly heavier numerals to prevent smudge near the joint. Ankle pain is brief but noticeable. Artists usually recommend a solid outline for anchors to keep the tiny design readable long-term.
29. Coordinates Tattooed Across Sternum
Style/Technique: Fine Line / Centered Script
Pain Level: High (8/9/10)
Session Time: 1–2 hours
Best For: Intense personal statements
Sternum placements are bold and intense. Pain is significant—expect heavy vibration and pressure in the area. The result is visually striking and private under clothing. Due to movement and stretching, opt for medium-weight numerals to maintain clarity. Healing needs care with tight clothing and sleep positions.
Tattoo Prep and Aftercare Essentials
Aftercare Essentials:
- Aquaphor Healing Ointment, 14oz tube — Industry standard first 3–5 days
- Saniderm Transparent Adhesive Bandage, 6-inch roll — Second skin method for early protection
- CeraVe Fragrance-Free Moisturizing Lotion — Daily moisturizer days 4–30
- Dr. Bronner's Unscented Castile Soap, 32oz — Gentle cleaning during first week
- Hustle Butter Deluxe, 8oz — Vegan option for healing and long-term care
Before Your Appointment:
- Tattoo Numbing Cream with 5% Lidocaine — Use only if your artist approves; apply 30–45 mins prior
- Tattoo Stencil Transfer Paper, 50 Sheets — Handy if you work on layouts at home
Long-Term Maintenance:
- SPF 50 Sunscreen Stick for Tattoos — Daily protection to prevent fading
- Mad Rabbit Tattoo Balm, 2oz — Keeps healed color vibrant
- Hydrocolloid Bandages (Large) — For small spot protection during peeling
Optional Comfort Items:
- Tattoo Numbing Spray — For touch-ups or sensitive areas
- Soft Pillowcase (Set of 2) — Keeps fresh tattoos from catching on rough fabric
From what I’ve gathered, artists really back Saniderm or light emollients initially and then a fragrance-free lotion. Avoid heavy perfumes on new ink and always protect with SPF once healed.
Frequently Asked Questions
Q: How bad does a tattoo actually hurt?
A: Pain depends on placement and your tolerance. Outer forearm or upper arm tends to be 2–4/10. Ribcage, sternum, and spine land around 7–9/10. It’s usually a strong buzzing or scratching more than sharp stabbing. For sensitive spots, consider asking about a numbing cream with 5% lidocaine—it helps but won’t erase feeling.
Q: How long will a tiny coordinates tattoo take to heal?
A: Surface healing is 1–2 weeks; full skin regeneration takes 2–3 months. Expect peeling around day 3–7. Keep it clean with a gentle soap like Dr. Bronner's Unscented Castile Soap and moisturize with Aquaphor for the first few days, then switch to a fragrance-free lotion.
Q: Will coordinates stay readable over time?
A: Bold black numerals hold best. Fine lines can blur, especially on hands, fingers, and ankles. From what I’ve seen, slightly heavier numerals and good sun protection maintain readability. Use an SPF 50 sunscreen stick on exposed pieces.
Q: Can I work out after getting a tattoo?
A: Wait at least 48–72 hours before returning to sweaty workouts, longer if the tattoo is in a flex or rubbing area (shoulders, ribs, knees). Sweat can introduce bacteria and force scabs to form. If you must exercise, pick low-sweat activities and keep the tattoo clean.
Q: What’s the best way to prevent fading?
A: Sunscreen all year. From what I’ve noticed, UV exposure is the top cause of fading. Moisturize regularly with a fragrance-free lotion like CeraVe Fragrance-Free Moisturizing Lotion to keep skin healthy and colorful.
Q: Do tattoos look different on different skin tones?
A: Yes. Black and gray translate beautifully across tones. Bright colors can read differently—reds and yellows may not pop as much on deeper skin. I always ask artists for healed photos on similar skin tones. For small numeric work, stick to black for consistency.
Q: Should I expect touch-ups for tiny coordinate tattoos?
A: Often, yes—especially for fingers, toes, and high-friction sites. If you want long-term crisp numerals, plan for a touch-up within the first year if needed. Using Saniderm early and sunscreen later reduces how often you’ll need one.
Q: What if I regret the placement later?
A: Think about visibility and lifestyle before committing. If you’re uncertain, choose a hidden spot like upper thigh or ribs to test the idea. Laser removal exists but it’s a long process—better to place thoughtfully from the start.
