
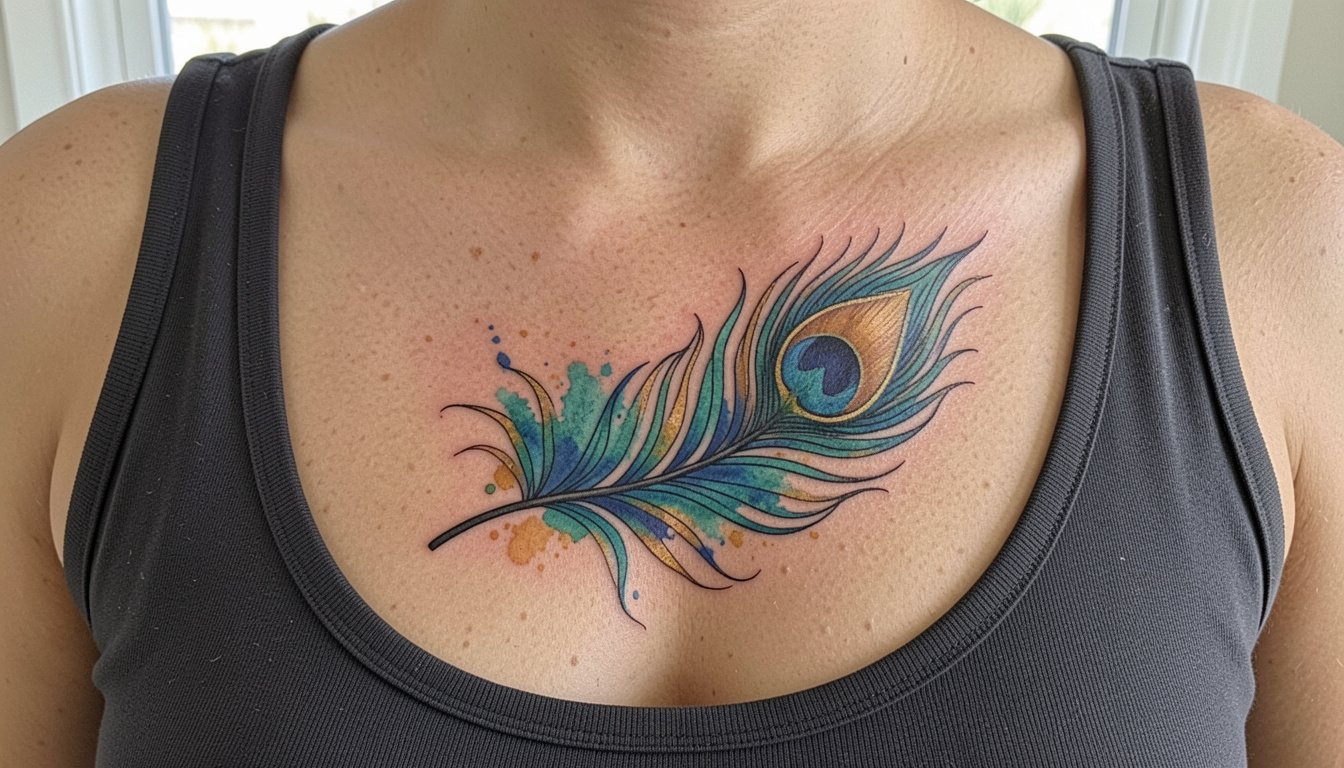
The bright peacock feather that still looks crisp after five years usually started as a plan, not a mood-board bookmark. I see two common missteps: tiny watercolor strokes that bleed into each other, and oversized, dense panels that lose the feather’s lightness. This list focuses on colorful peacock feather options that balance saturated pigments with clear linework so the eye spots the eye, and the plume reads long after the touch-up window.
1. Fine Line Feather on the Inner Forearm
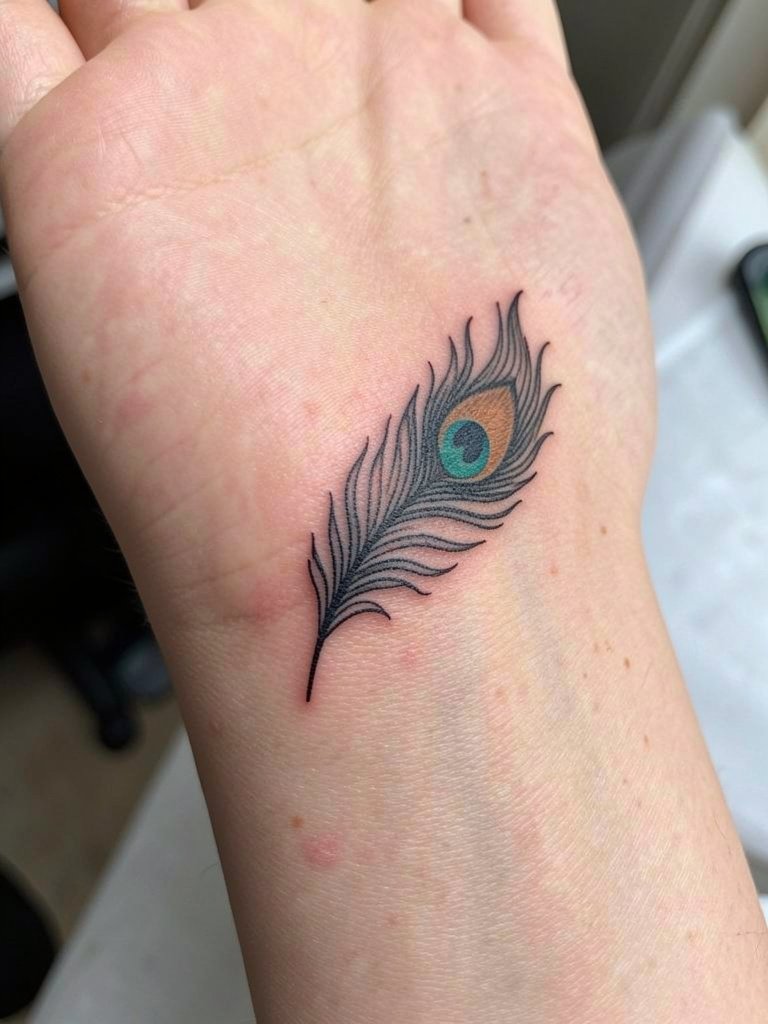
A narrow, fine line feather on the inner forearm reads like wearable jewelry when spaced at three to five inches. Recommend slightly heavier linework for the shaft so the barbs keep separation at year two. Common mistake is requesting single-needle hairlines across the entire feather; the thin barbs will blur into a gray haze on this inner-forearm skin. Session time is usually an hour to ninety minutes and sits at low to moderate pain. Expect a light touch-up at year two for color saturation. For dressing, show it off with rolled-up linen shirts in cream or olive so the colored eye pops.
2. Stipple-Shaded Eye on the Shoulder Blade
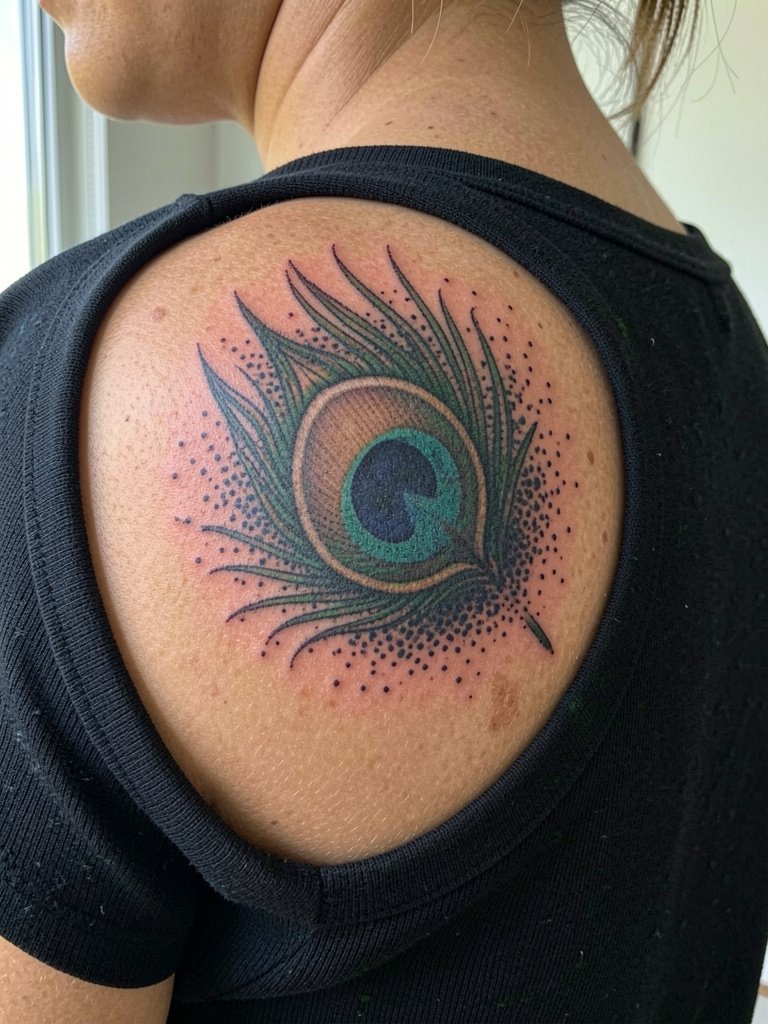
The shoulder blade gives room for stipple shading that keeps the feather’s eye looking dimensional without heavy outlines. I recommend asking for dot density in the first consultation so the artist spaces the stipple to age into soft gradients, not blotches. A mistake is over-saturating the entire eye with heavy packed color, which flattens after a year. Session time ranges from 90 minutes to two hours depending on size, and the area is low blowout risk because it has firm underlying tissue. Pair the piece with open-back midi dresses for evenings when you want the feather framed.
3. Small Ankle Accent in Neo-Traditional Color
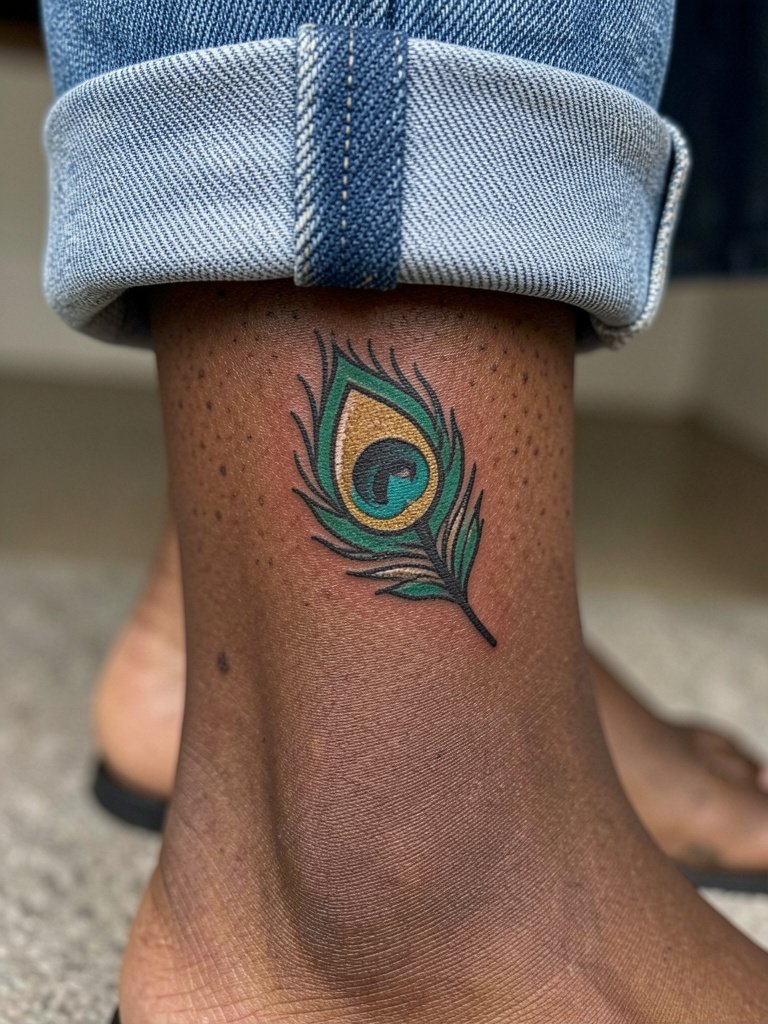
Ankle placements favor neo-traditional bold outlines because the constant friction from shoes and socks will dull fine detail fastest. If you want longevity, pick saturated flat fills and a clean outline rather than tiny filigree. The session is short but can feel scratchy near bone. Avoid tiny feather tips that run into shoe straps. For showing off after healing, ankle chains or low-rise sandals with a thin strap frame the feather well and a pair of leather ankle boots also keeps that visual focus.
4. Watercolor Plume Along the Ribcage
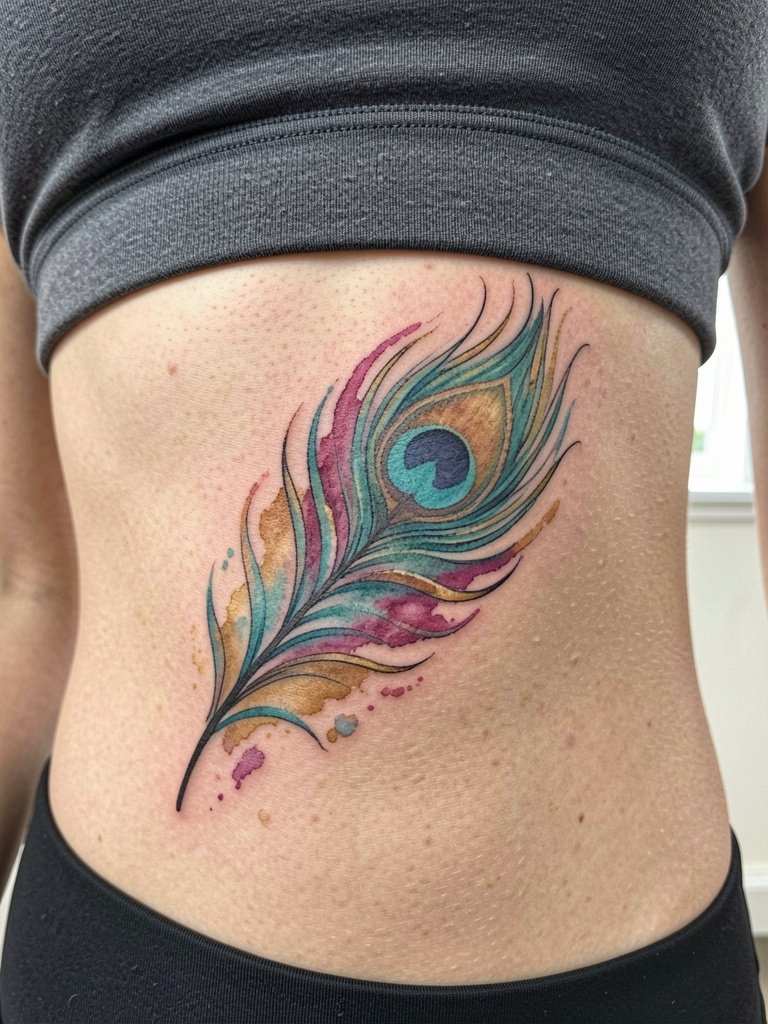
Ribcage watercolor divisions split artists into two camps. One camp argues that the thin, fluid washes on ribs spread and blur within two years because of skin movement and friction. The other camp maintains that with slightly more pigment saturation at the start and careful spacing the washes can hold as an elegant blur. If you pick watercolor here, expect higher pain and a longer session that may require a break. A frequent error is requesting an extremely loose wash without any defined eye; that fades into a faint bruise. For the session wear, a fitted sports bra in its normal position lets the artist access the ribs without fabric interference.
5. Minimalist Single-Quill Behind the Ear
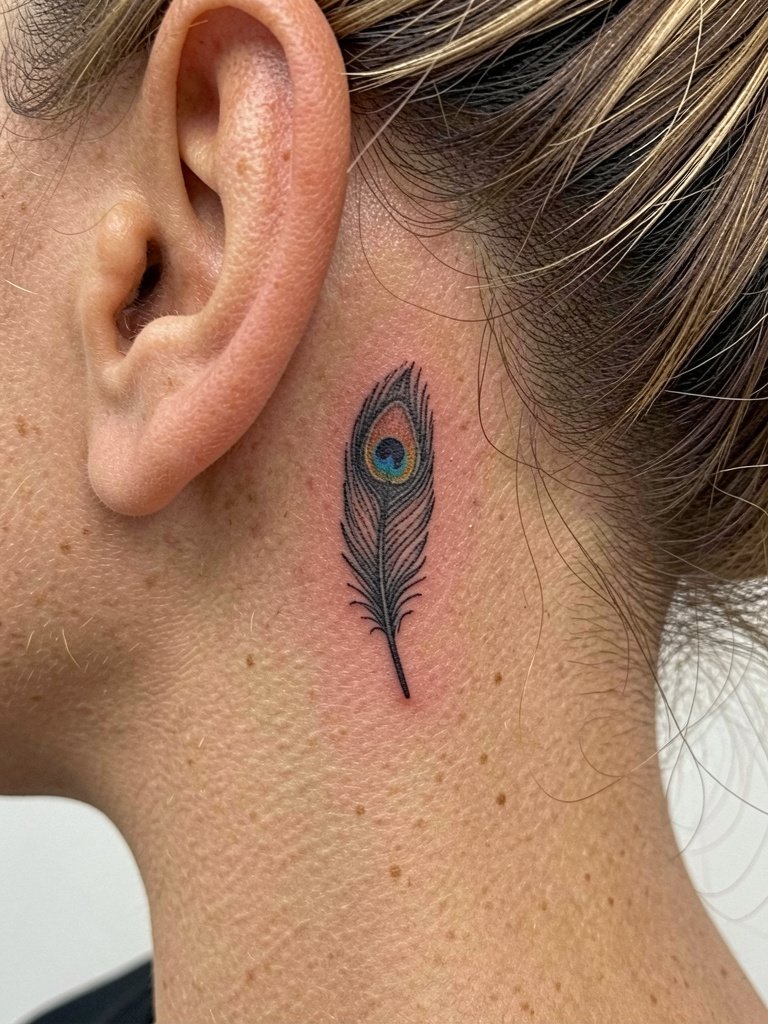
Behind-the-ear tattoos read as delicate details and suit a single quill. The area heals quickly but requires a specialist who knows how to stop at the correct needle depth to avoid blowout. A common mistake is asking for too many micro details; the tiny skin surface here loses them faster than flatter areas. Session time is short and pain is low to moderate. For daily wear, an unobtrusive updo shows it; I like pairing with minimalist stud earrings and recommend checking healed photos on similar skin tones so you set realistic expectations.
6. Full-Sweep Shoulder-to-Arm Plume
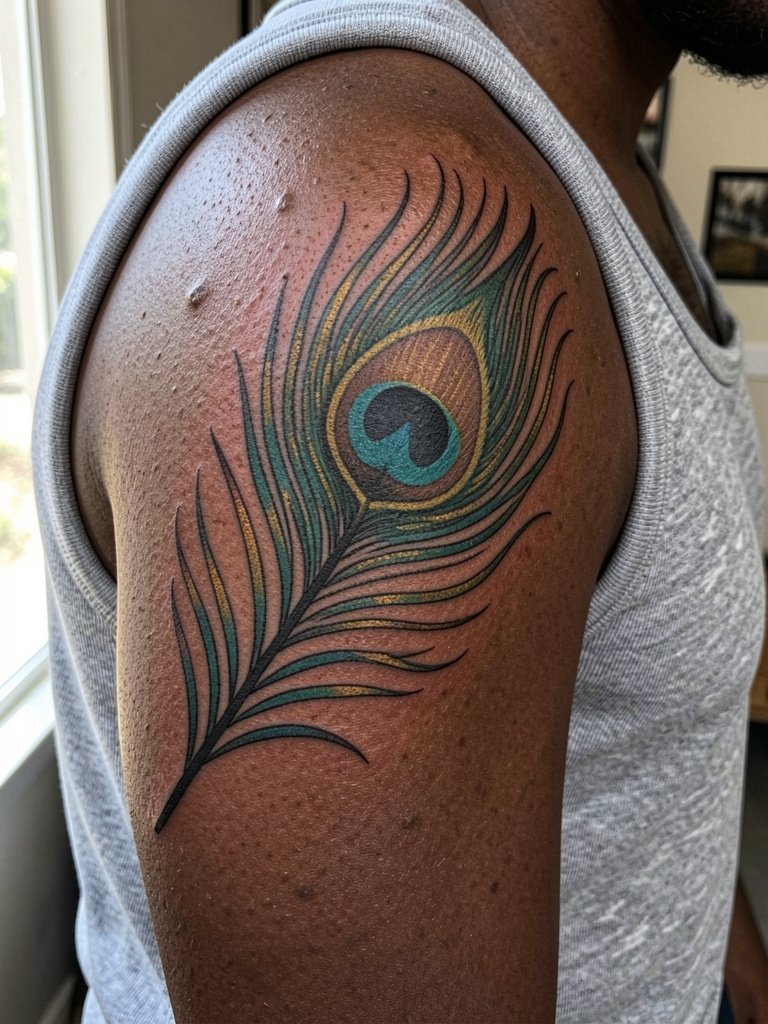
A shoulder-to-arm sweep gives the feather natural motion across contour and lets the artist use stronger outlines where needed. Ask for mapped spacing so the barbs sit well when the arm moves. People often make the mistake of compressing the whole feather into a narrow band which makes the eye appear squashed. Session time runs two to four hours depending on shading. Expect a touch-up at year two if you want the colors bright; the outer arm is low blowout risk. For showing it off, sleeveless tops or loose tank tops keep the visual line clear.
Session Day Picks
The upper-arm and shoulder pieces above benefit from garments that provide easy access and minimal fabric movement while the artist works.
- Transfer stencil paper kit. Lets you preview how the feather will sit on the shoulder and along the curve of the arm before the needle starts.
- Topical numbing cream. Apply about forty-five minutes before a high-pain ribcage or long session to help get through the first pass.
- Thin protective film roll. Useful for ankle and hand placements where friction and washing are frequent in the first week.
- Fragrance-free gentle body wash. Keeps the healing area clean without stripping color or irritating delicate linework.
- Aquaphor healing ointment. A mainstream balm option for the initial thin layer during the first few days to maintain moisture.
7. Geometric Eye on the Inner Thigh
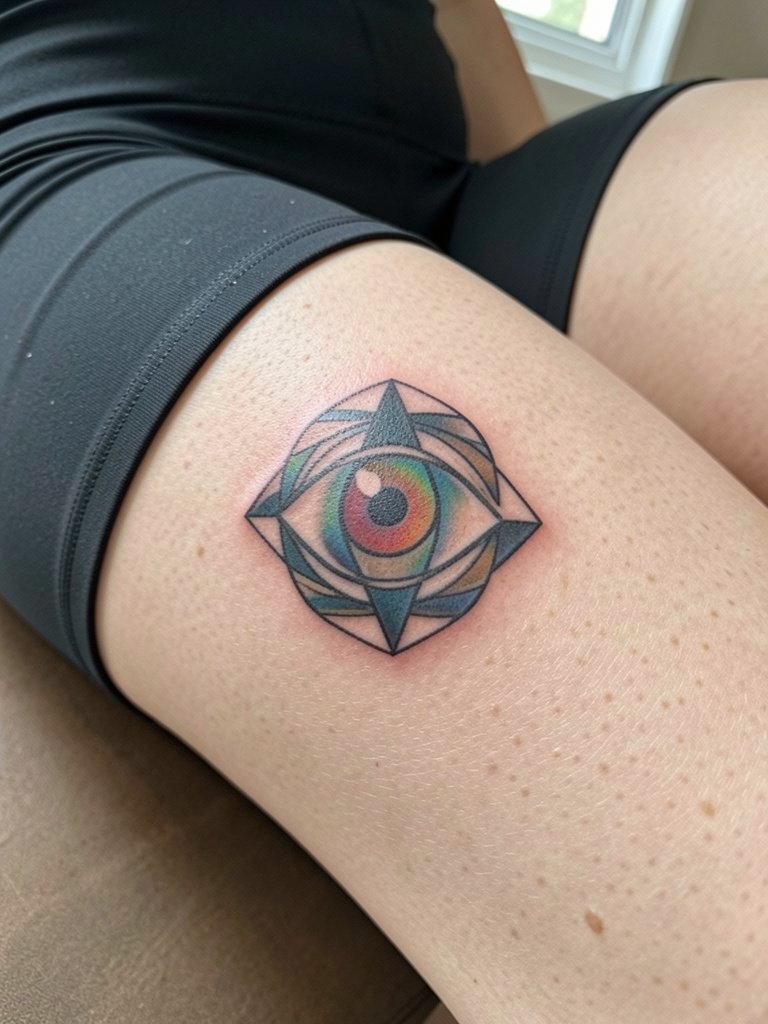
Inner-thigh placements let geometric compositions breathe. Choose crisp negative space and slightly wider line spacing to reduce the risk of merger over time. A real mistake is compressing detailed geometry into a small square; the skin there moves and breaks up too-fine elements. Sessions can be moderately painful for those sensitive to muscle depth, and they need careful aftercare to avoid excess friction. If you want to keep the piece private yet deliberate, the thigh is a good canvas. For session comfort, wear fitted bike shorts so the leg is accessible without constant readjusting.
8. Full-Color Fan Along the Collarbone
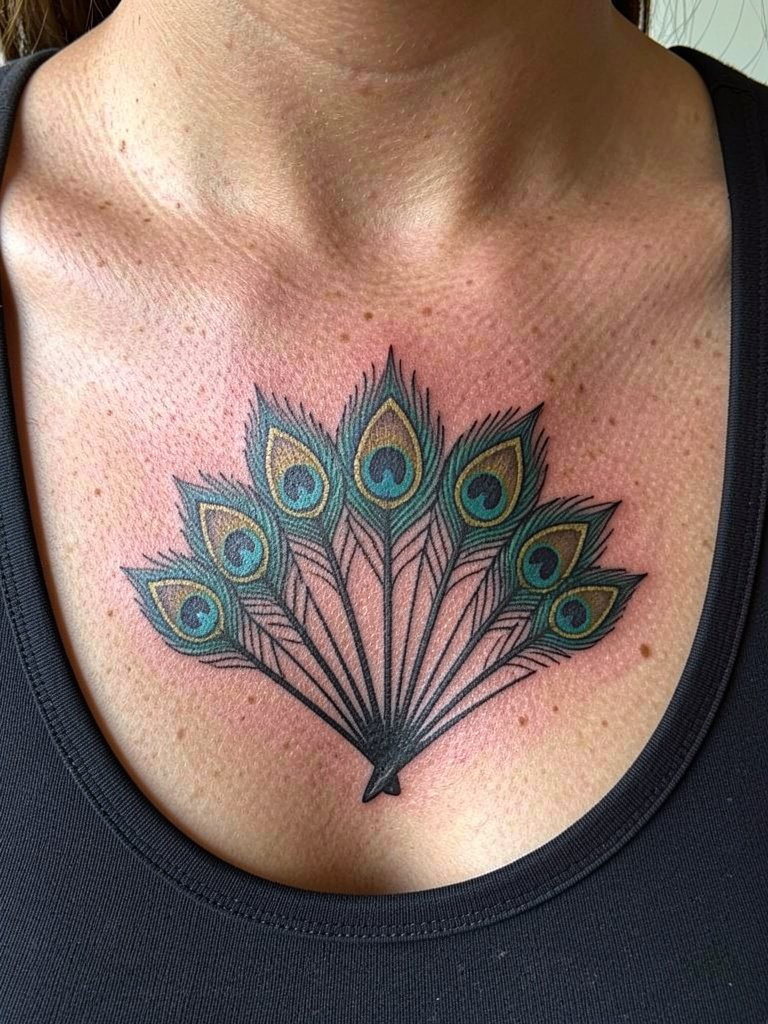
Collarbone fans read well when the artist plans the curve to follow the bone. Ask for slightly increased color saturation in the eye area so the pigments remain visible under sun exposure. A common mistake is making the entire fan too low-contrast; the collarbone area reflects light and makes weak colors disappear. Session time is often one to two hours and pain is mild to moderate. For showing the piece, open-neck tops work best. Try pairing with wide V-neck blouses that let the fan sit in the neckline.
9. Micro-Realism Eye on the Wrist
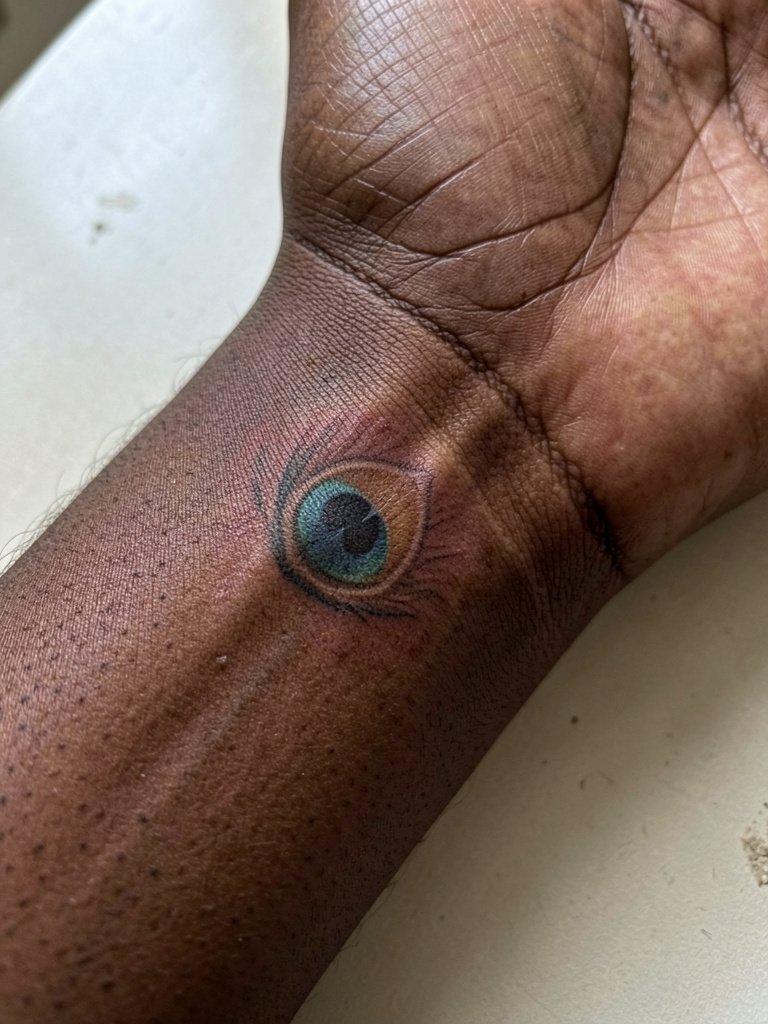
Wrist micro-realism looks precious at first but can blur if the shading is too soft. I recommend requesting slightly more contrast in the central pupil and a thin protective outline around the eye so it reads at six months. The most common issue is placing micro shading too close to the wrist crease, where repeated washing accelerates fading. Sessions are short and the pain is usually mild but sharp. Expect touch-ups earlier than with larger work, often within a year. For display, delicate bracelets or a rolled cuff on shirts frame the wrist and the small eye.
10. Abstract Plume Back Piece with Negative Space
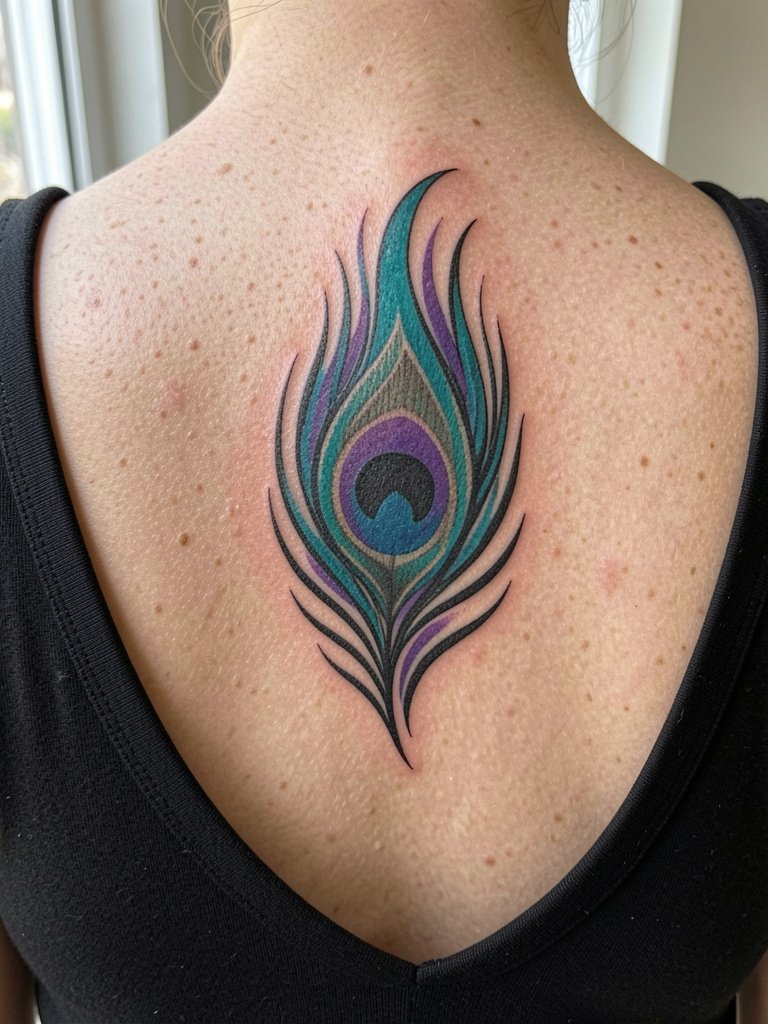
Large back pieces are forgiving for color transitions and let negative space do the heavy lifting. For longevity, request stronger saturation near edges so the negative areas retain crisp separation. People often try to cram too many small eyes into a back piece; it dilutes the motion. Expect multiple sessions and moderate pain when shading near the spine. The area has low blowout risk but needs careful aftercare because scabbing over a large field can be uneven. When healed, back pieces pair well with low-back dresses or open-back tops for statement reveals, try open-back evening tops.
11. Tiny Finger Eye with Bold Outline
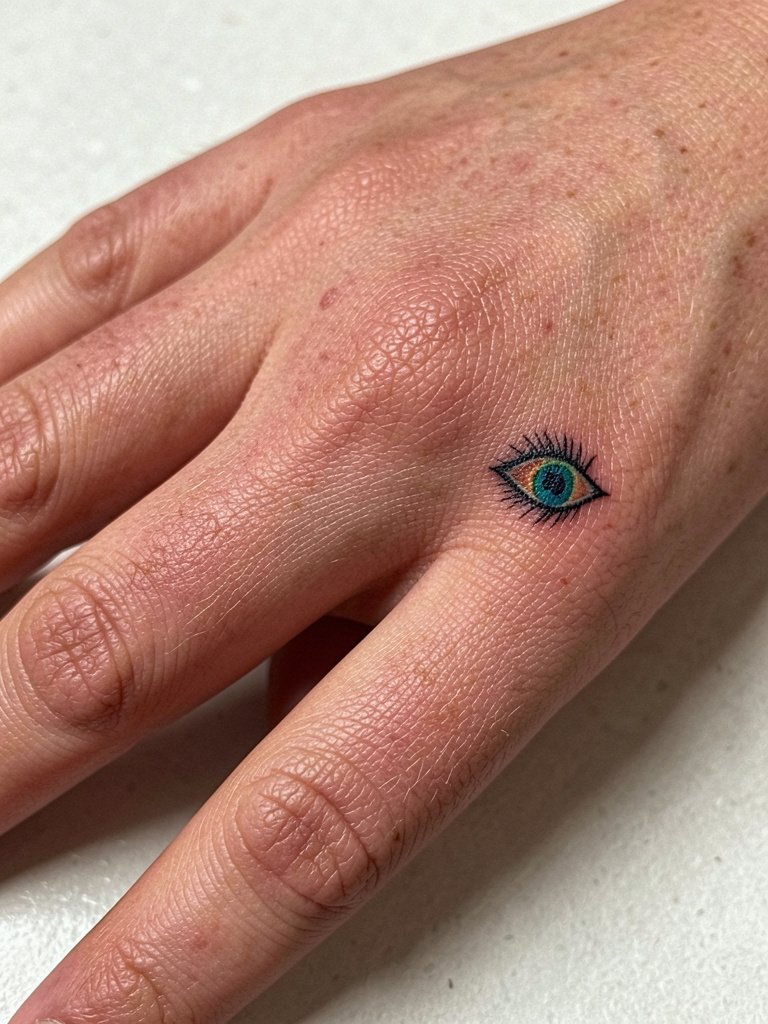
Finger tattoos are high maintenance. Artists split into two camps about color on fingers. One camp says color will not hold and that bold black outlines are the only reliable option. The other camp accepts periodic fading as the trade-off for color and will plan touch-ups into your maintenance schedule. For this tiny eye, insist on a bolder outline and expect annual touch-ups. The most frequent mistake is asking for gradient shading across a tiny surface; the gradients flatten fast. If you want it visible while working, stack thin rings or wear a single statement band.
12. Gradient Neck Nape Feather
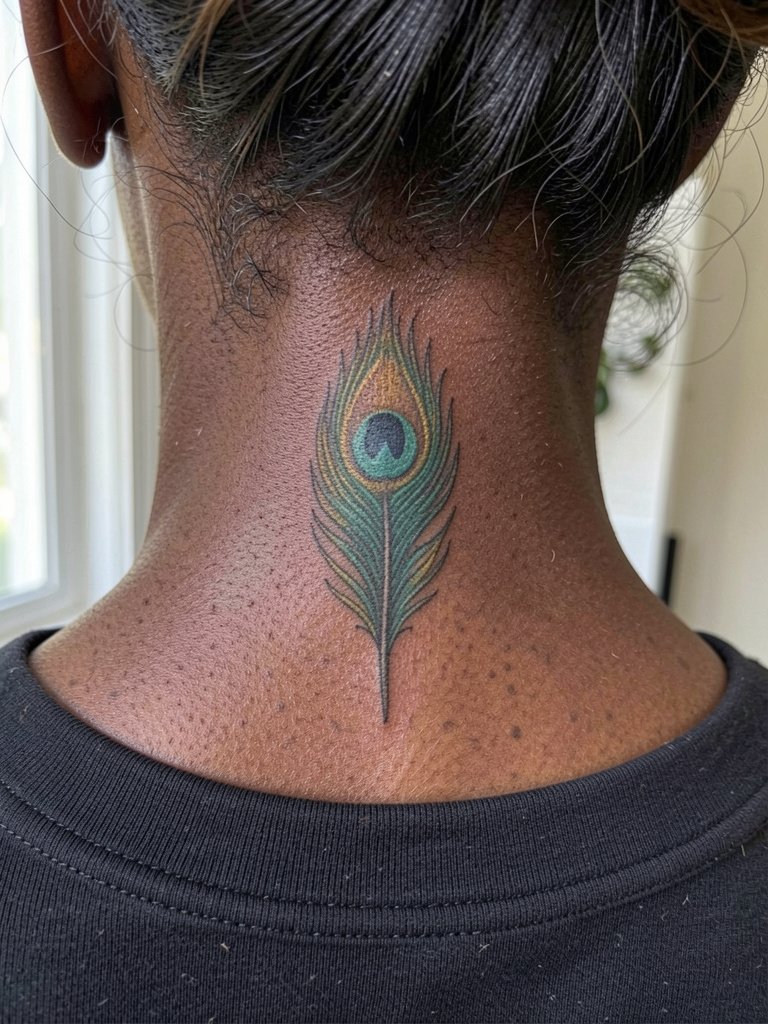
Nape placements soothe the eye with vertical motion and seldom face heavy abrasion. Ask for slightly tighter color transitions near the hairline so the gradient does not read patchy after hair rubs against it. A common error is expecting extremely subtle watercolor there; hair movement and shampooing can diffuse faint washes. Sessions are moderate pain and heal predictably. Also check that your stylist uses a hygienic barrier for hair contact during the session. For styling, short updos and low ponytails keep the nape visible without constantly rubbing the area.
13. Oversized Retro-Style Fan on the Thigh
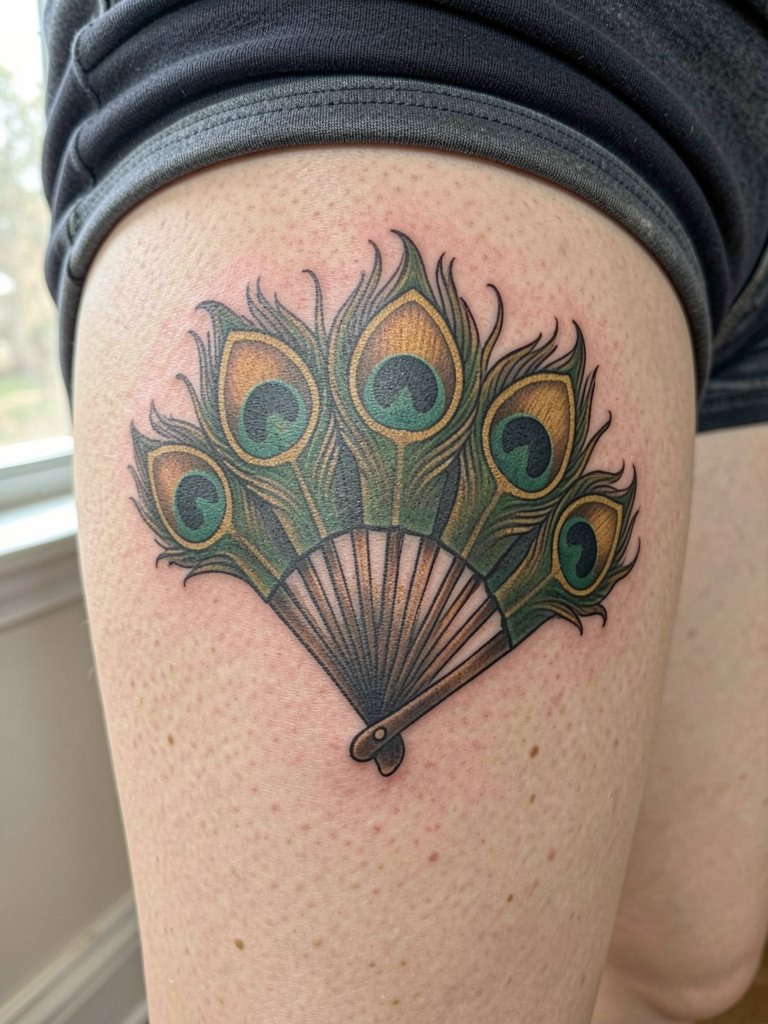
The outer thigh is excellent for oversized fan pieces because it tolerates broad saturation without blowout. Discuss how the design flows with natural leg movement so barbs do not appear distorted when you walk. A frequent mistake is compressing large color fields toward the groin line where friction from clothing causes extra wear. Sessions can be lengthy and moderately painful when the shading reaches deeper tissue. Touch-ups are usually at year two for color boost. For showing it off, pair with midi skirts or high-slit dresses and consider flowing wrap skirts that let the fan breathe.
14. Single Bold Quill on the Rib Flank
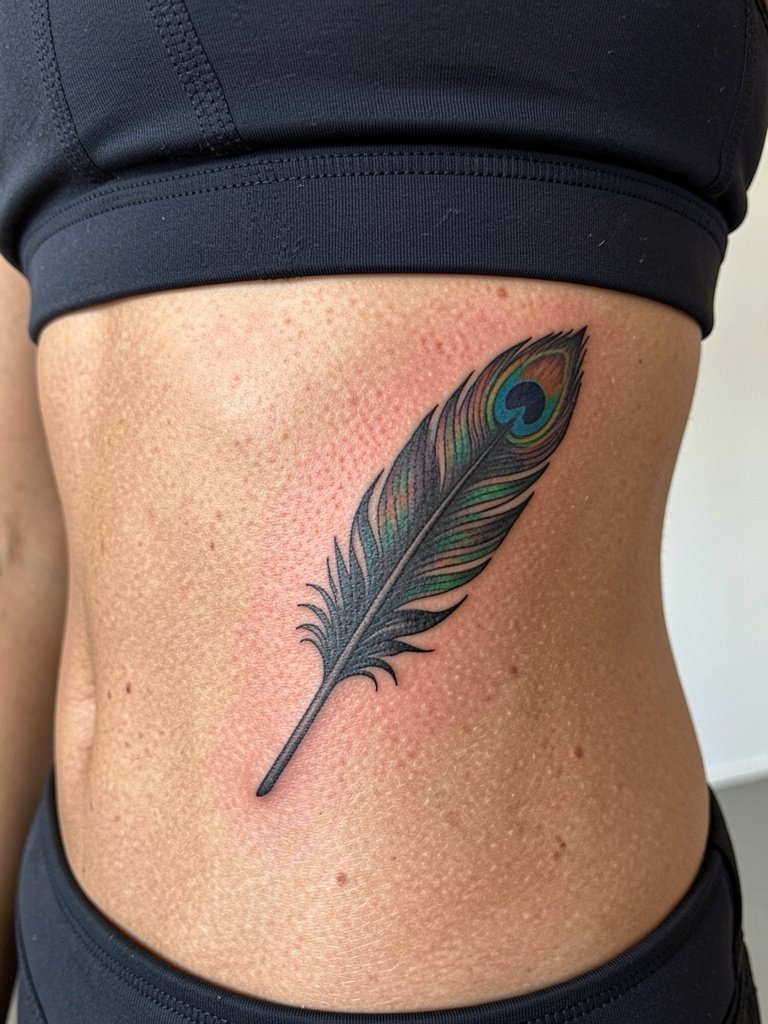
A bold single quill along the flank reads clean and dramatic when the stem is slightly thicker than you might expect. The key consultation point is spacing between the stem and the colored barbs so the piece breathes as your torso moves. Many clients request ultra-thin shafts here and later regret the early softening. The session is painful for most, and a staged appointment with a break is normal. For session wear, a fitted sports bra that stays in place is the easiest option so you do not need to shift clothing mid-session.
15. Mini Mandala Eye at the Center Back
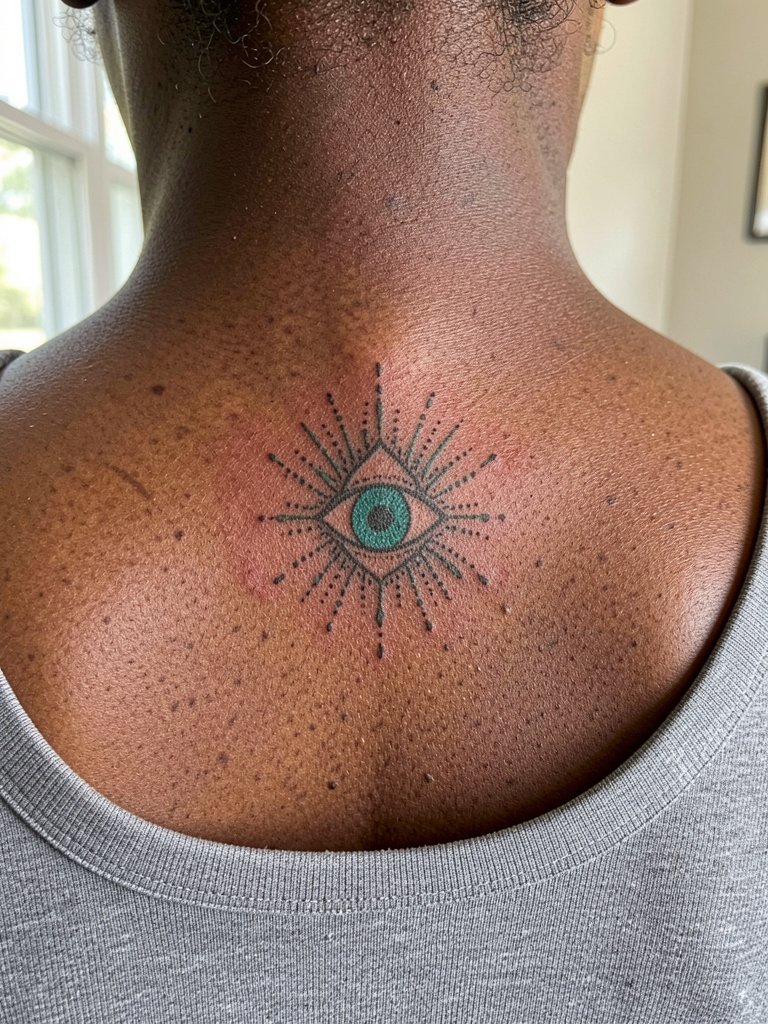
Center-back mandala eyes combine symmetry and color pop in a compact area. Ask for mirrored reference photos so the artist matches spine alignment and keeps the mandala centered. A common issue is slight lateral offset during stencil placement that becomes obvious once healed. Sessions are moderate and can be done in a single sitting for small pieces. The spot has low blowout risk but can pick up sun faster, so plan for sun protection after healing. To show it occasionally, opt for backs that reveal with a low-cut top and try a scoop-back dress.
16. Painterly Side-Sweep Over the Hip
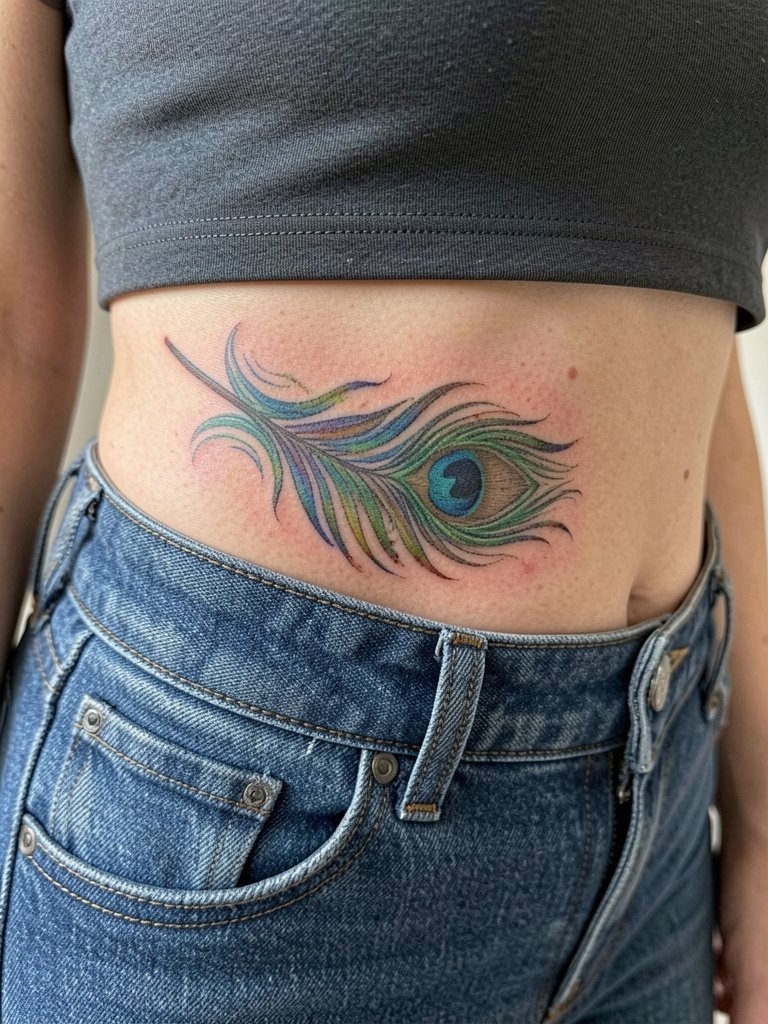
Hips handle painterly sweeps well but are prone to friction from waistbands if placed too low. Confirm exact placement relative to your jeans’ waistband so the design sits above or below it as you prefer. The common mistake is letting the stencil land within the waistband zone where regular rubbing will dull the color. Session time is moderate and pain is variable. For showing the work, crop tops or low-rise styles keep the sweep visible; a pair of low-rise jeans that sit just below the tattoo area presents the work cleanly.
17. Laced Fan Around the Calf
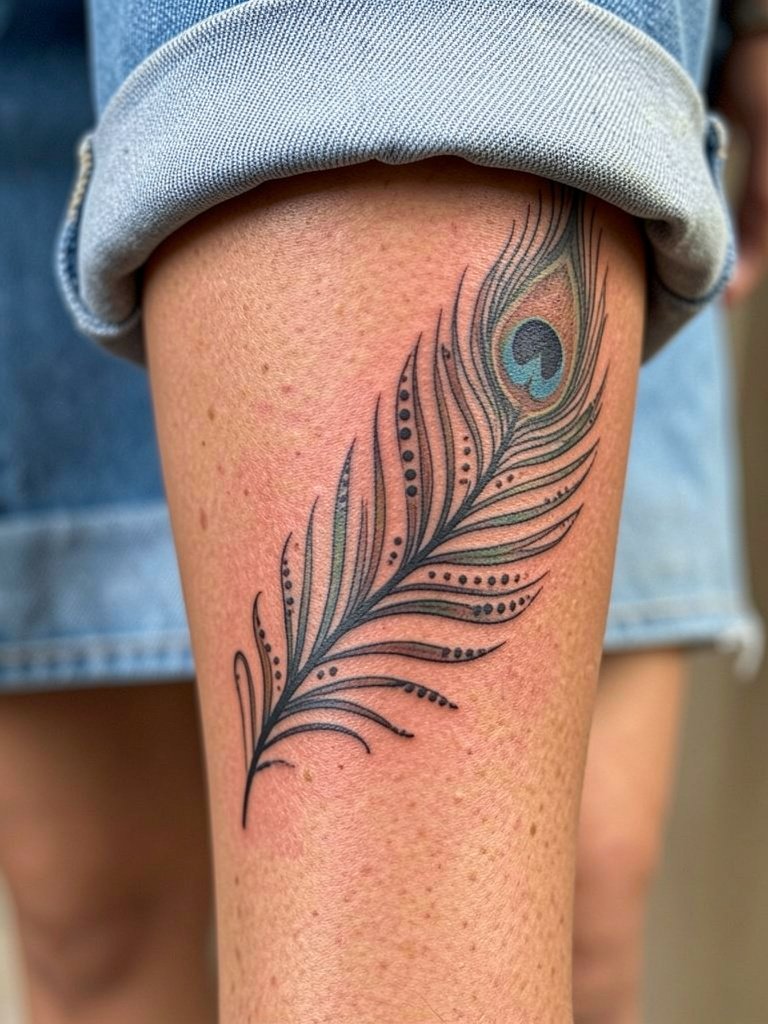
Calf pieces let you wrap a laced fan without worrying about constant friction. Ask the artist to map the curve so the fan reads when standing and when seated. People sometimes place the fan too low on the Achilles area where boot friction causes premature fading. Sessions are comfortable and healing is straightforward. For styling, mid-calf boots or cropped trousers highlight the curve; try pairing with rolled-cuff jeans to keep the fan visible.
18. Tiny Keyhole Eye at the Sternum
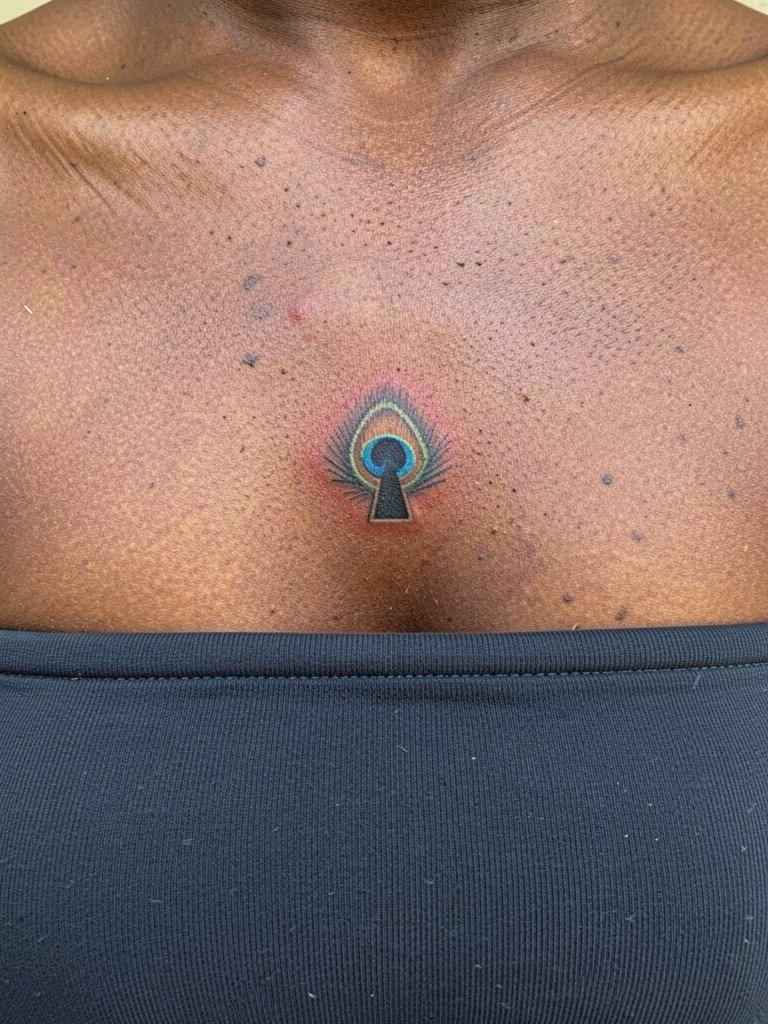
Sternum placements are intimate and demand an artist experienced with chest curvature. Be explicit about how the eye centers between the breastline so it does not drift during placement. The major mistake is choosing intricate filigree on a mobile surface; it softens faster than bold shapes. Sessions are notably more painful for many people and often done with breaks. If visibility is your concern, bandeaus and low-cut tops display the piece delicately.
19. Layered Short-Sleeve Plume on the Bicep
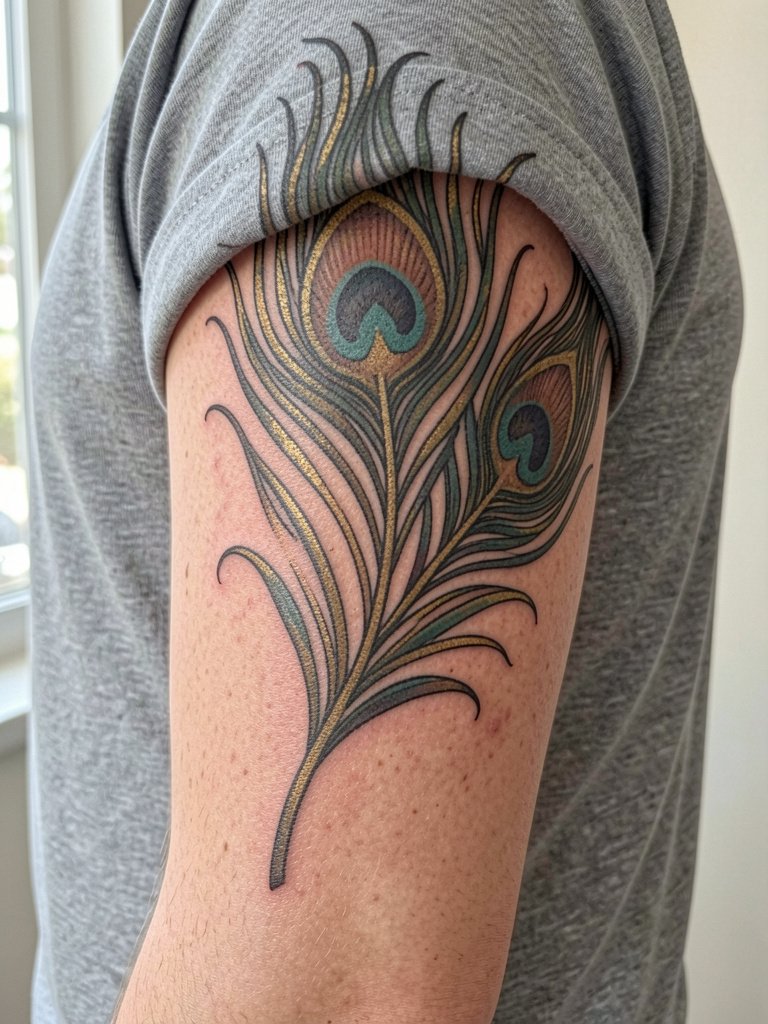
Outer bicep pieces are forgiving and show well with short sleeves. Ask for a staging photo with the arm both at rest and tensed so the artist adjusts flow for both states. A typical error is centering the plume where sleeve seams sit, which leads to partial concealment. Sessions are moderate and the area has low blowout risk. For a casual show-off, short-sleeve tees, especially in neutral tones, frame the plume and keep the focus; consider pairing with classic white tees.
20. Tiny Constellation of Mini Eyes on the Collarbone Arch
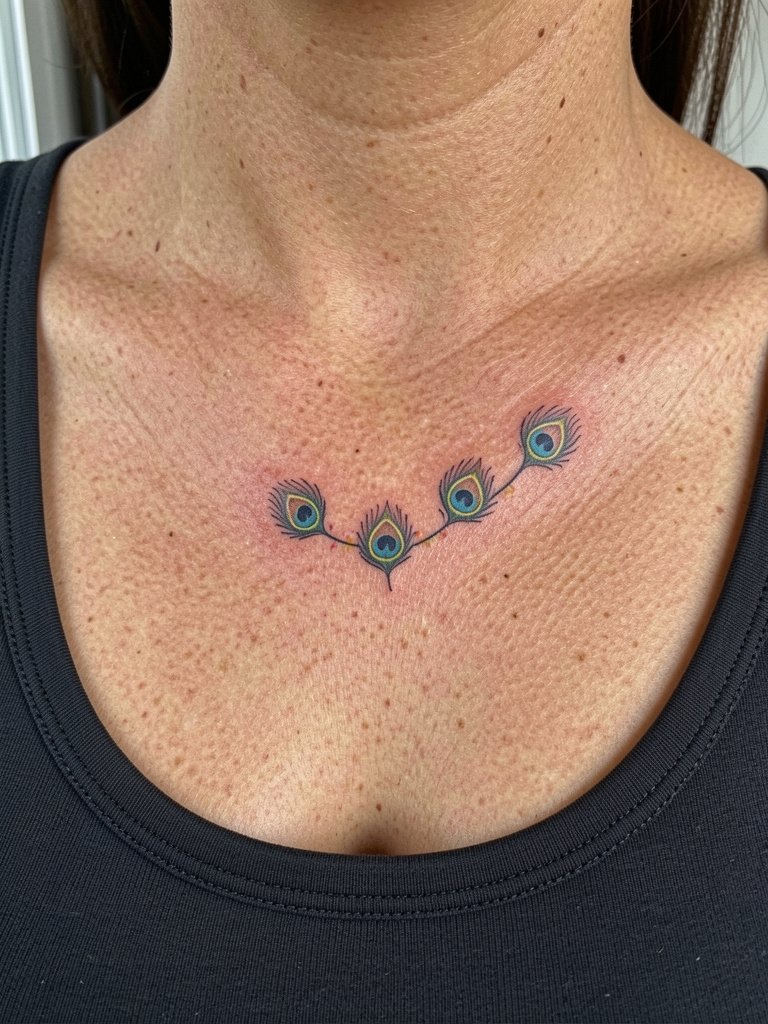
Small constellation arrangements give a rhythmic feel across the collarbone. Have the artist sketch the exact spacing on you in standing and sitting positions so the pieces line up with movement. The main error is imaging equal spacing off the template; human posture changes the visual. Sessions are short and pain is mild. Expect light touch-ups for color brightness after a year. For nighttime looks, open-back or low neckline tops work, and a simple pendant never competes with the eyes.
21. Bold Folk-Art Feather on the Upper Arm
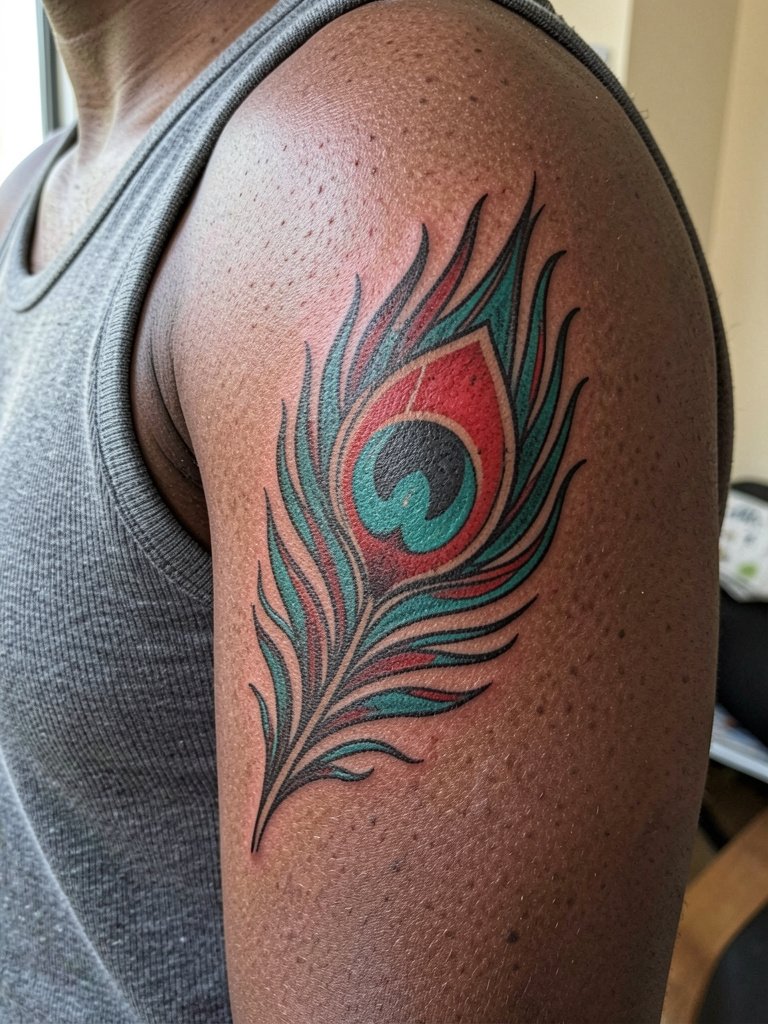
Folk-art feathers let you use bolder motifs and unique color choices that age well because they rely on strong outlines. Ask the artist to plan line thickness variation so the decorative elements stay readable. A common mistake is forcing tiny ornamental details into a compact space where they will merge. Sessions are comfortable and the upper arm tolerates saturation well. When you want to show it off, short sleeves or rolled cuffs combined with beaded bracelets create a crafted look.
22. Soft Pastel Fringe on the Lower Leg
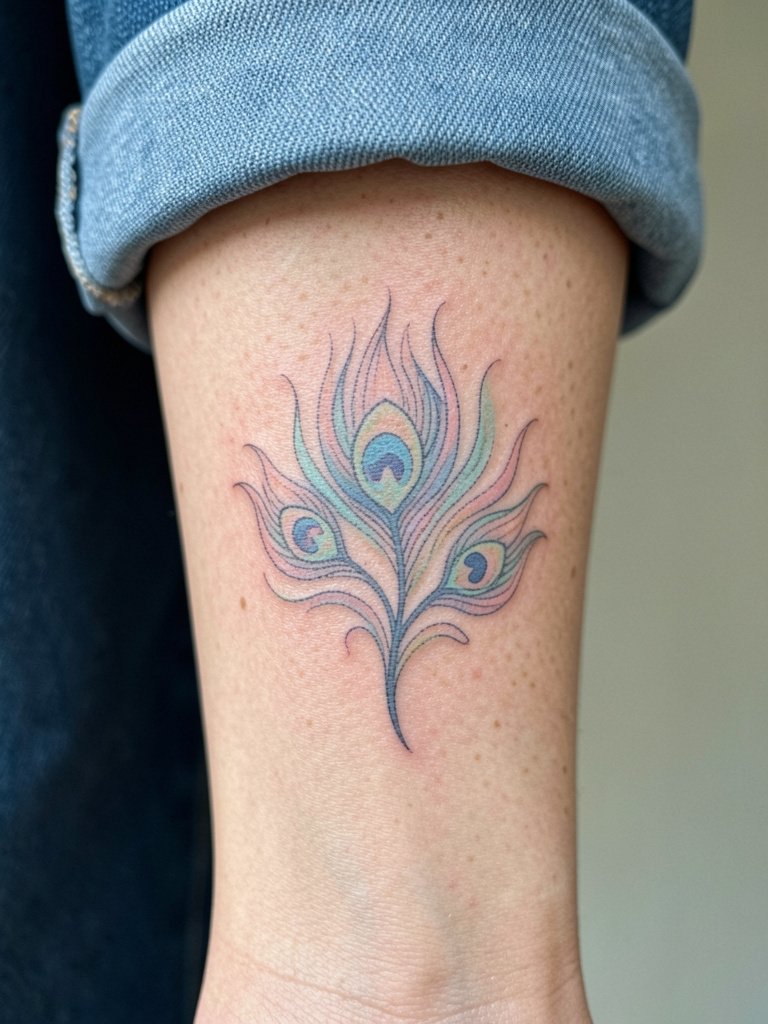
Pastel fringes are flattering but require initial saturation that respects the softer palette so the colors do not vanish into the skin. Ask for slightly stronger pigment levels at first and plan a touch-up. The mistake is assuming pastels will behave like saturated colors; they need more maintenance. Sessions are short and the area is prone to sun exposure, so long-term color retention depends on sun protection. For footwear pairings, sandals and low-top sneakers that show the area let the fringe breathe visually.
23. Scripted One-Word Eye with Tiny Feather Tail on the Wrist
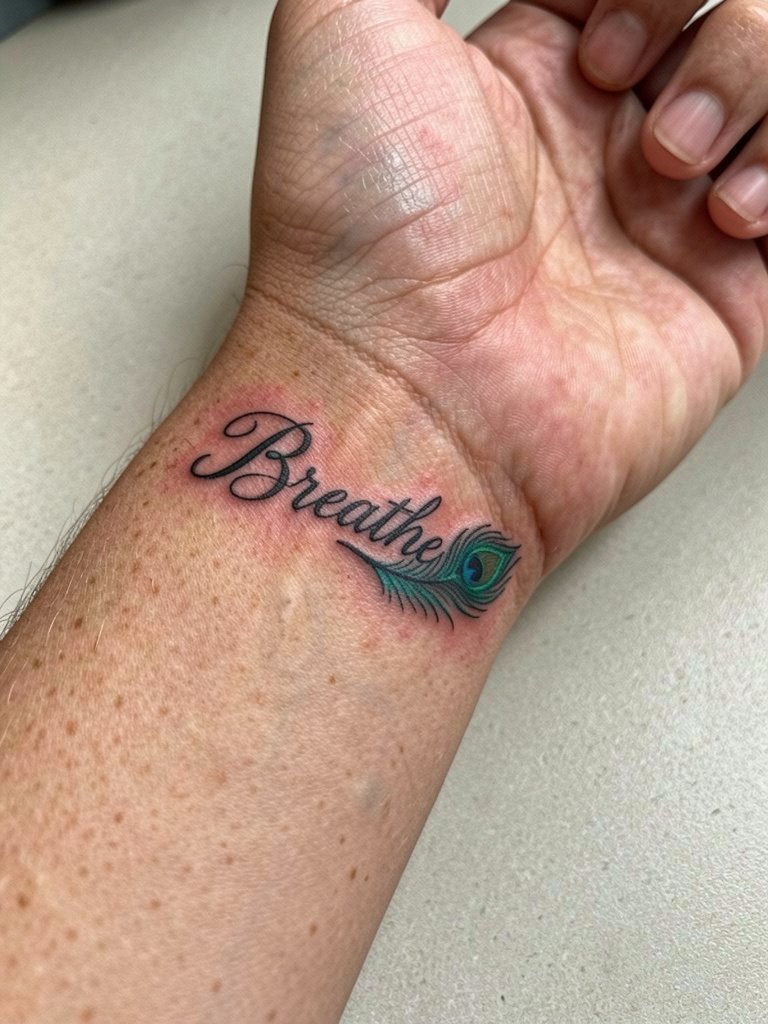
Combining script with a tiny feather tail on the wrist is popular because the text anchors the piece while the tail adds color. Make sure the script is sized so the artist can match the thickness of the lines to the feather tail; otherwise the text may blur into a thin line. A typical error is requesting ultra-tiny cursive that looks great in a photo but softens within months. Sessions are short and the wrist sees lots of washing, so plan for an early touch-up. Bracelets and watch bands can either spotlight or obscure this placement; thin cuff bracelets tend to complement it best.
Frequently Asked Questions
Q: How do colorful peacock feather tattoos hold up on different skin tones?
A: In my experience, saturated colors like teal and gold read well across skin tones when the artist starts with higher initial saturation and plans touch-ups. Medium and darker skin tones often need stronger contrast in the outlines so the eye stays visible, while lighter skin can show subtle gradients more easily. Always review healed photo sets on similar skin tones before booking.
Q: How painful are ribcage and sternum peacock feather placements and what helps during the session?
A: Ribcage and sternum placements rank higher on pain for most people because of thin tissue over bone. Numbing cream applied about forty-five minutes beforehand can reduce the sting, and scheduling short breaks during long shading passes keeps things manageable. Wear a fitted top that gives the artist access without needing to lift or shift fabric.
Q: Where can I find healed portfolio examples and discovery pathways without naming specific artists?
A: Try searching location-filtered hashtags on Instagram and TikTok like #PeacockFeatherTattoo and #ColorFeatherInk, and use portfolio platforms with keyword filters for "peacock feather healed" to see different skin tones and styles. Reddit tattoo threads and community galleries often show long-term healed shots that help you judge aging and touch-up timelines.
Q: How often should I expect touch-ups for colorful feather work?
A: Touch-up timelines depend on placement and saturation. Visible wrist and finger pieces commonly need touch-ups within twelve to eighteen months, while larger shoulder and back pieces often go two to three years before a color refresh. Plan touch-ups into your schedule if you want the colors to stay vivid.
Q: What should I wear to the studio for a shoulder-to-arm sweep or a hip-side placement?
A: For shoulder-to-arm work, a loose tank top lets the artist access both shoulder and upper arm without fabric interference. For hip-side placements, low-rise jeans or fitted shorts that sit below the planned tattoo area keep the artist from having to reposition clothing. I recommend bringing a loose cover-up to stay comfortable between passes.
