
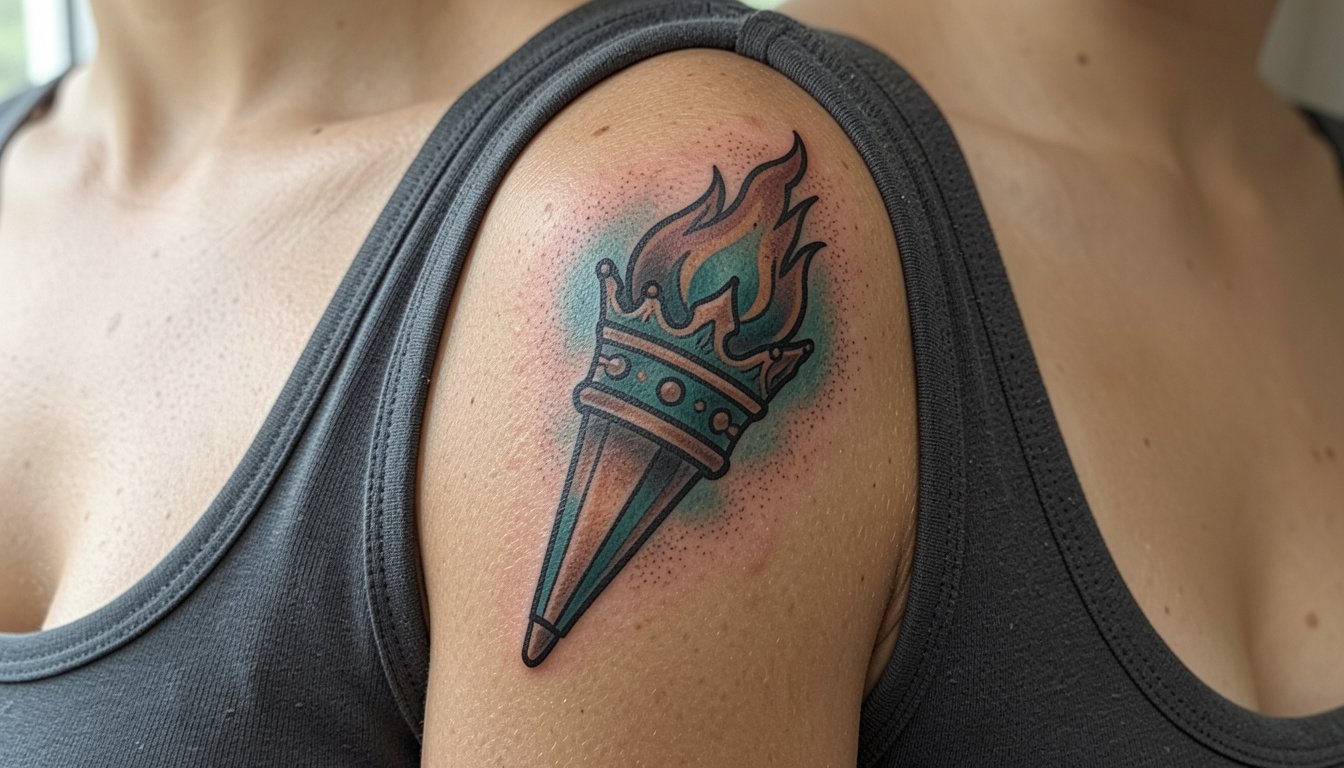
Bold line weight often outlasts delicate single-needle sketches when the subject is a complex monument. Fine single-needle Lady Liberty pieces can look razor-sharp at first and then soften faster than expected on high-motion spots. This list focuses on Statue of Liberty motifs that read clearly from day one and still hold character five years later, with practical notes on placement, aging, session feel, and wardrobe that helps each style show off.
1. Fine-Line Liberty Outline on Inner Forearm
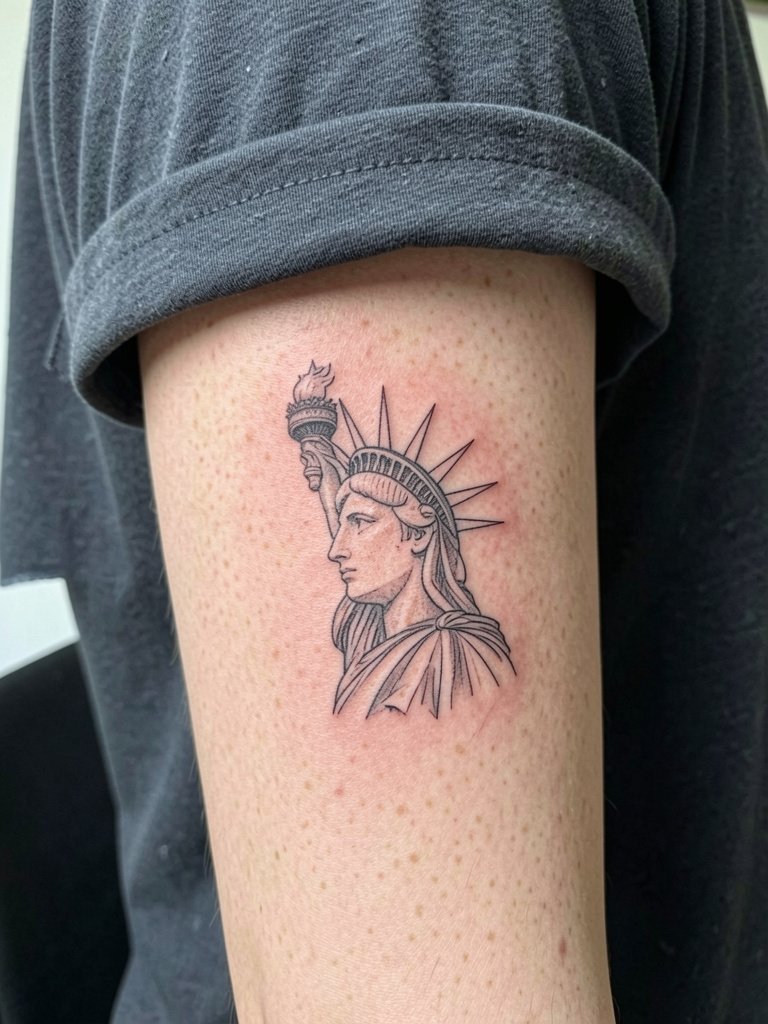
This small forearm outline is the right pick when you want a clear symbol without covering a large area. I recommend this version over micro-realism because the inner forearm moves a lot and single-needle detail can blur with time. Ask your artist to bump the primary contour up a hair from single-needle thickness so the silhouette still reads at year three. Expect a one-hour session for placement and stencil tweaks, mild vibration during needle passes, and a touch-up within the first 12 to 18 months for optimal saturation. A common mistake is asking for extra interior detail in a design that only has two to three inches of real estate. For show-off styling, this pairs with rolled-up linen sleeves and a relaxed cuffed short-sleeve shirt so the forearm stays visible without strain.
2. Small Crown Silhouette Behind the Ear
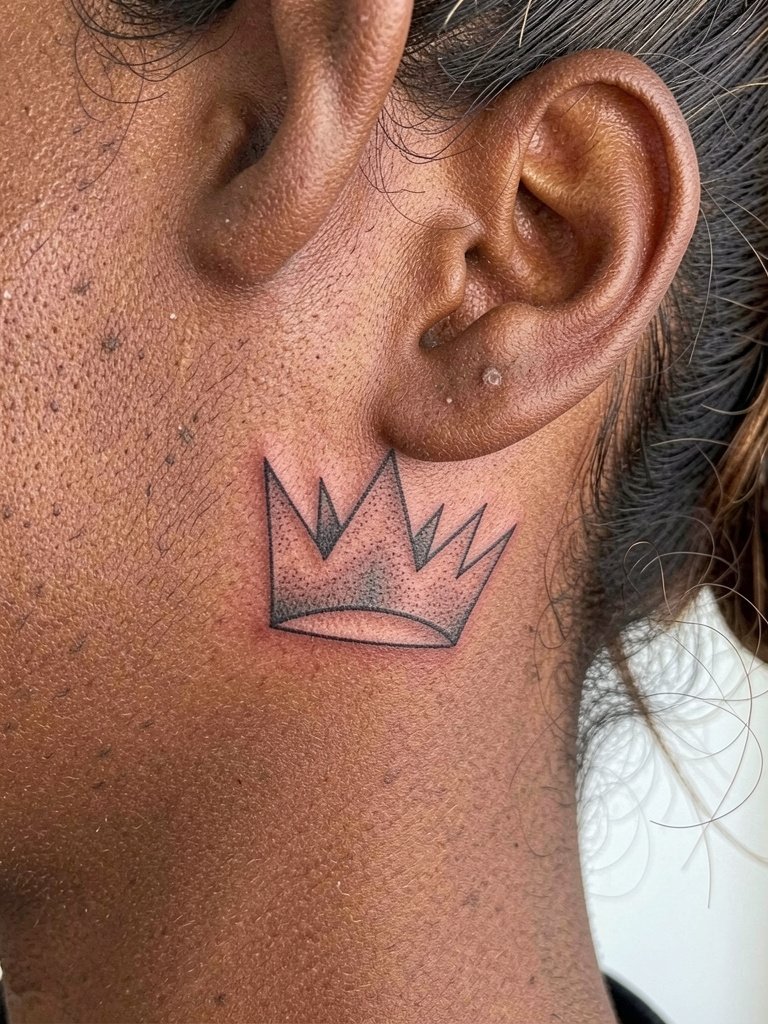
Behind-ear crowns are subtle and great for someone who wants a Liberty hint rather than a statement. The spot favors smaller, higher-contrast shapes because hair and neck movement can soften tiny loops. Plan on a short session under 45 minutes, and mention to your artist that the spikes should be slightly thicker than your reference to account for natural spread. The main risk is blowout if the needle goes too deep near the thin mastoid skin, so moderate depth and crisp linework are what you should request. If you like showing it occasionally, pair it with lightweight hoop earrings that frame the area without covering the ink. This placement requires an experienced hand because the skin there is delicate.
3. Neo-Traditional Liberty Head on Upper Arm
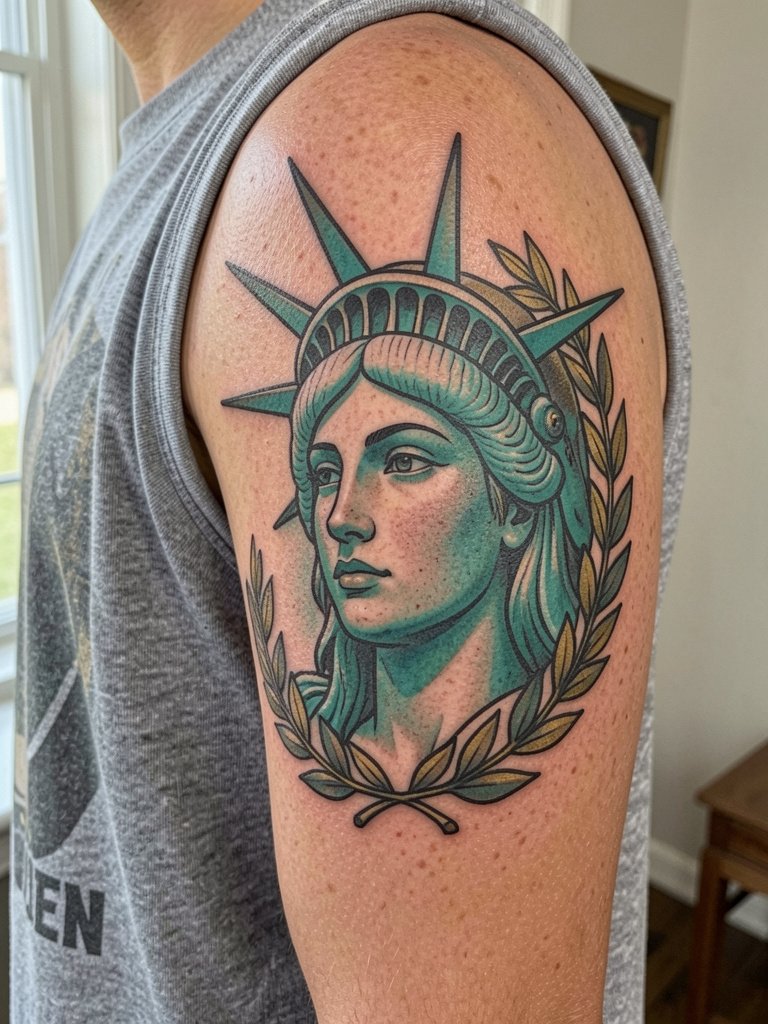
The neo-traditional head gives the monument personality while keeping the linework bold enough to age gracefully. I recommend it over an extremely small portrait because faces demand space for features to hold. Discuss reference photos showing the angle you want and specify that the artist use saturated flat fills for longevity. Sessions are often two to three hours for proper shading and color layering, and touch-up at year two is common to refresh saturation. A common misstep is shrinking a head image into a three-inch patch. For evening wear, this placement looks great with sleeveless satin tops that let the deltoid sit in view.
4. Torch and Flag Sleeve Accent on Outer Forearm
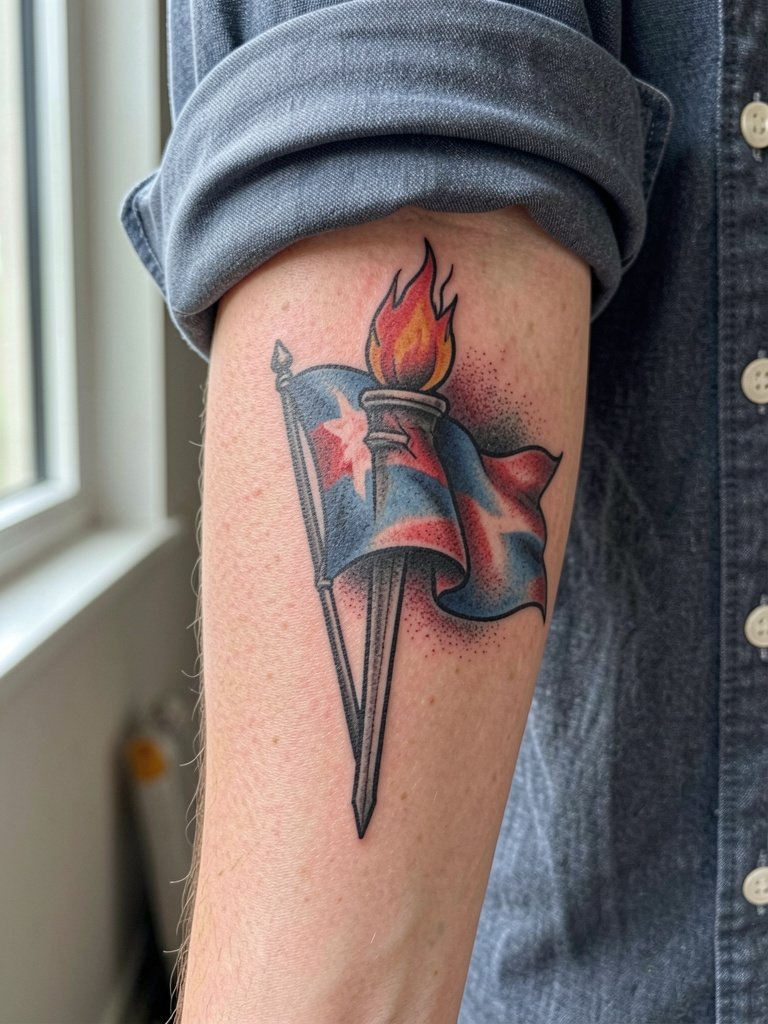
This forearm piece works when you want patriotic imagery that still reads at distance. I favor a torch with flag panels because the combined shapes let color saturation do the heavy lifting instead of tiny detail. Ask the artist to map out the flag folds on your arm while your wrist is neutral so the flow looks natural with movement. Sessions run two to three hours depending on color layers, and touch-up around year two maintains saturation where sunlight hits. A common mistake is asking for micro-detail in the flag stripes, which washes out with hand motions and washing. For daytime outfits, pairing this with rolled-up chambray shirts frames the artwork without hiding it.
5. Negative-Space New York Skyline with Mini Liberty
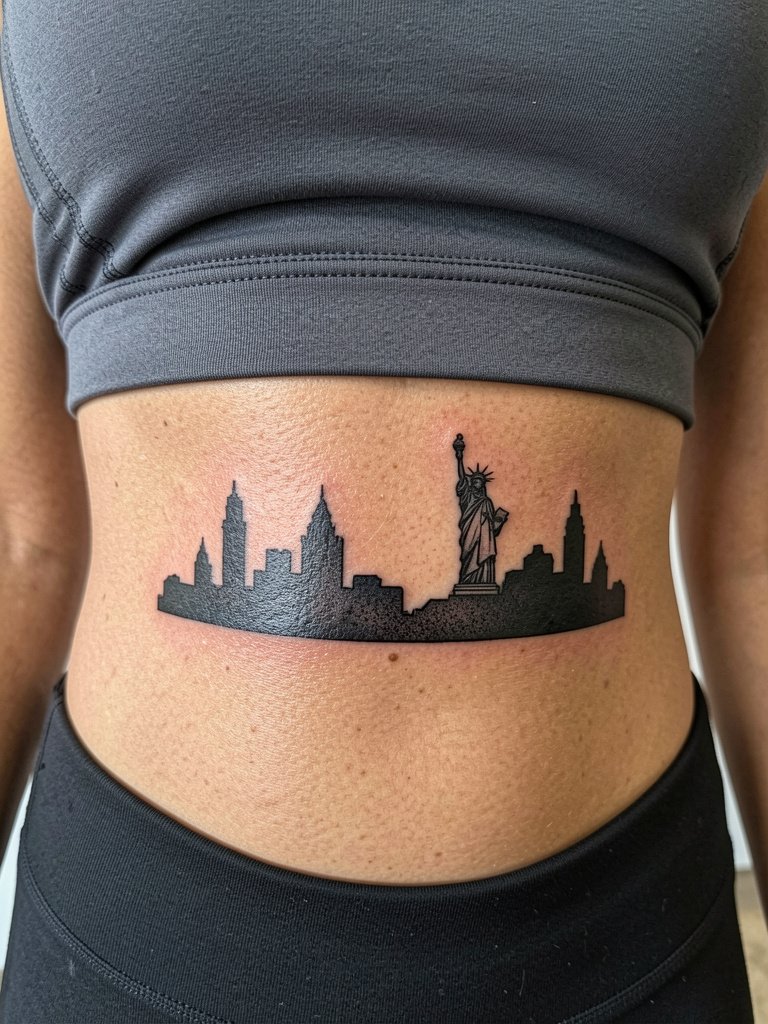
Negative-space skyline compositions are a smart way to suggest Liberty without dense detail. This version holds up because the silhouette reads even as fine elements soften. For the ribcage, expect higher pain and longer heals. Tell your artist you want clear spacing between buildings and the mini-figure, and ask for slightly wider negative gaps than the reference. Artists split on fine line on ribs. One camp argues the skin stretch blurs detail within two years, especially near the breast crease. The other camp says with proper needle depth and wider spacing it settles well, and they will show healed photos to support that approach. For session wear, pick a fitted sports bra or bandeau so the artist can access the side without fabric shifting.
6. Art Deco Crown with Dot Work on Collarbone
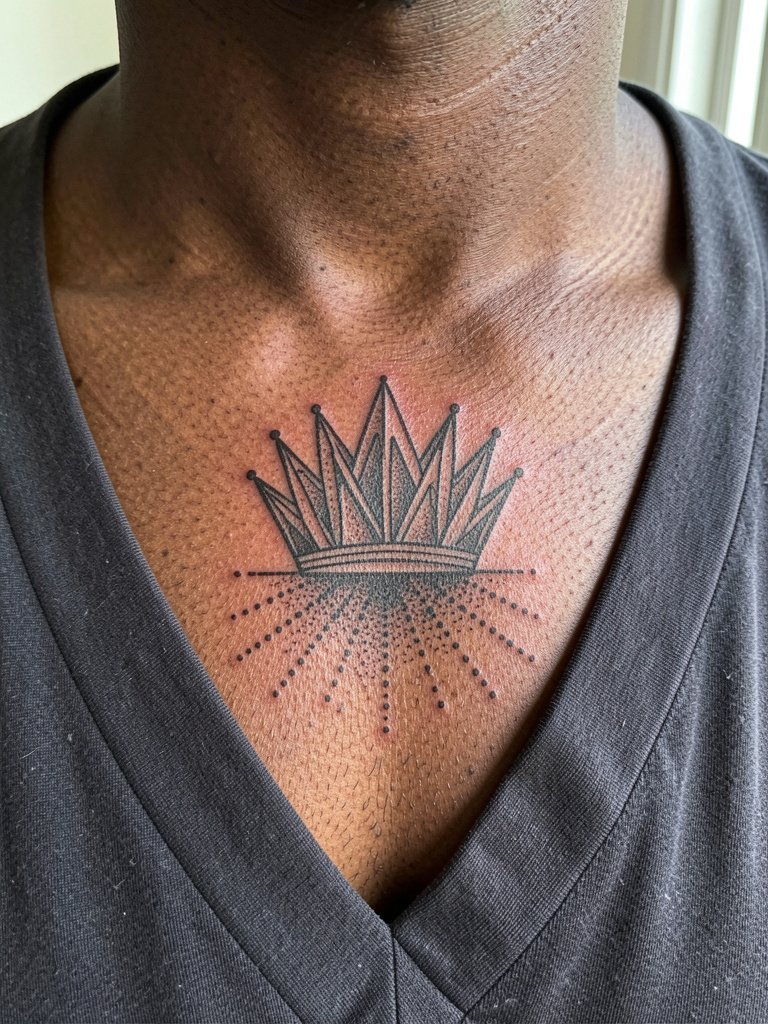
A collarbone Art Deco crown reads like jewelry and keeps monument motifs elegant. I recommend dot work radiating below because stipple ages subtly and keeps contrast long term. Ask the artist to preview the spacing with a stencil while you stand so collarbone contours are respected. Sessions are often 60 to 90 minutes and clients report higher sensitivity along the bone, so plan breaks. A common mistake is compressing the crown too close to the clavicle line; the piece needs a bit of breathing room to avoid migration into creases. Pair this with open-neck blouses for effortless framing during show-off moments.
Session Day Picks
The forearm, rib, and collarbone pieces above each have different access needs and aftercare concerns. These items smooth the session and the first few days of healing.
-
Stencil transfer paper kit. Lets you preview precise placement for the skyline and crown pieces so the stencil sits right on curved areas like the ribs and clavicle.
-
Topical numbing cream. Applied 30 to 45 minutes before short collarbone or rib sessions can make those minutes more manageable without affecting linework.
-
Thin protective film roll. Useful for protecting finger and wrist work from friction during the first 48 hours of heavy use.
-
Fragrance-free gentle body wash. Cleans healing areas without irritating delicate linework on forearms and torso.
-
Aquaphor healing ointment. Thin layers for the initial days help seal fine-line work while allowing pores to breathe during early healing.
7. Pocket-Size Liberty on the Ankle
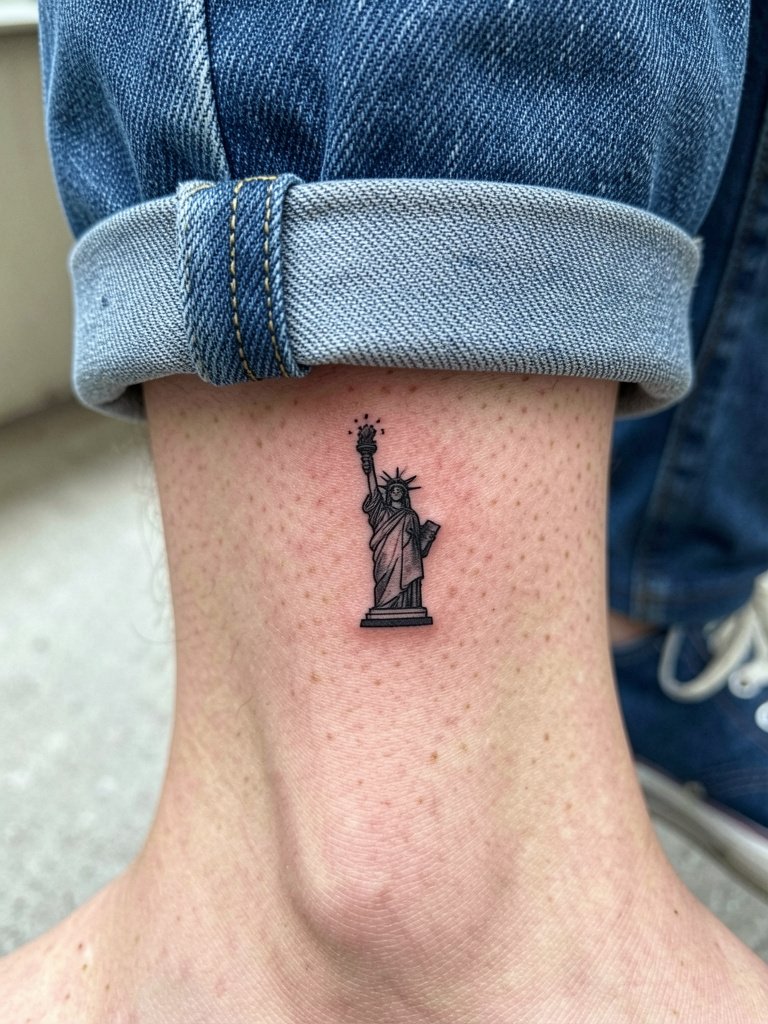
Ankle minis are discreet and travel well with most wardrobes. I prefer a bolder filled silhouette for ankles because the area gets abrasion from socks and shoes during the first healing week. Tell the artist you want a single pass of solid saturation and plan for a 30 to 45 minute session. The common mistake is trying to cram interior detail into a one-inch space, which blurs after a few months. For showing it off, pair the piece with delicate ankle strap sandals or roll-your-jeans styling that keeps the area visible without rubbing.
8. Micro-Realism Torch Portrait on Upper Thigh
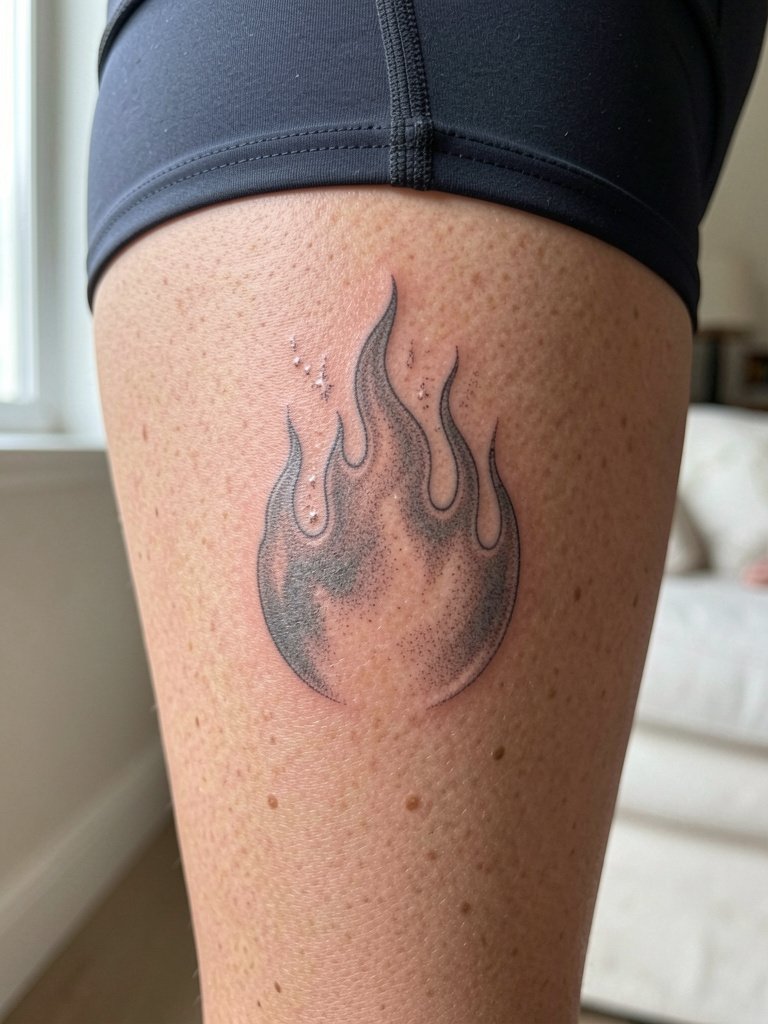
Micro-realism lets the torch look photographic when size allows, and the upper thigh is forgiving for fine shading. I recommend this for someone comfortable with a longer session and a one- to two-hour shading block. Discuss with the artist how the flame's brightest highlights will need slightly higher saturation to stay visible after one year. Expect medium pain and a longer touch-up window because shaded greys soften with friction from clothing. The common error is choosing micro-realism for very small thumbnails of the torch. For session comfort, wear loose shorts like breathable bike shorts that allow easy access without irritation.
9. Split-Image Liberty and Eagle Half-Sleeve
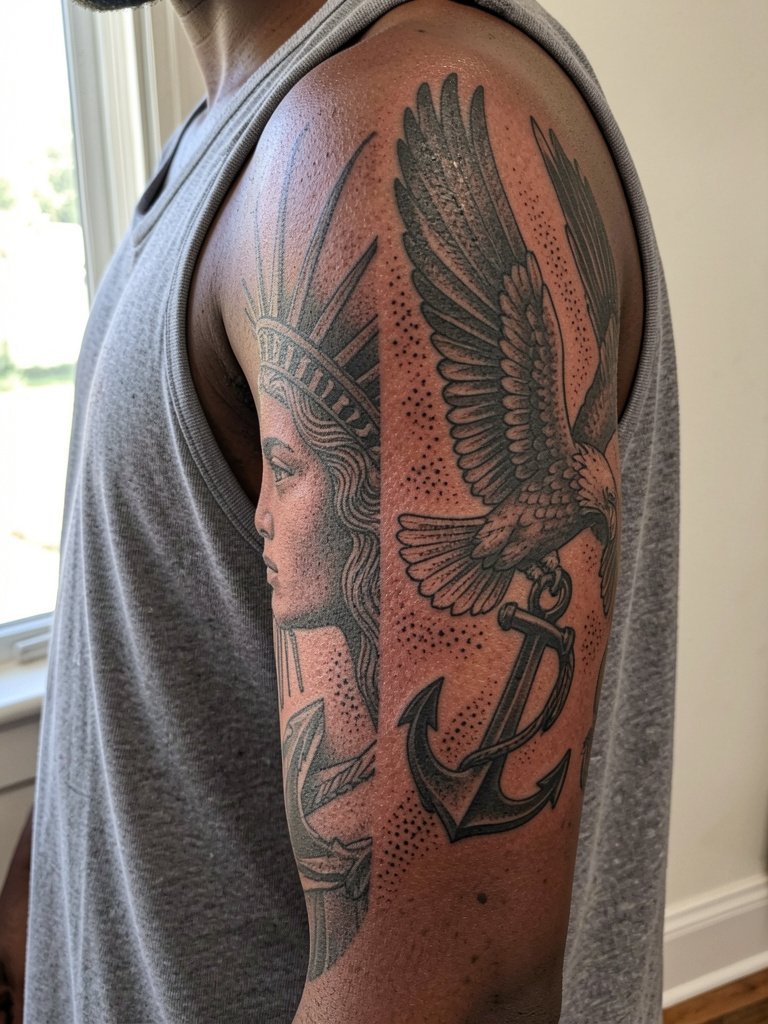
A split-image sleeve is theatrical and an excellent choice if you want a larger patriotic tableau. The design benefits from bold anchors so interior detail remains legible as it heals. Tell the artist which side of your arm you want most visible when you gesture so the focal points land where you see them. Sessions are multi-visit, each three to five hours depending on color and layering, and multiple touch-ups over the first two years are normal to maintain saturation. A typical mistake is starting with tiny feather detail rather than locking in strong outlines first. For show-off looks, short-sleeve button-ups or muscle tank tops keep the sleeve visible without constraining the arm.
10. Geometric Crown with Negative Space on Chest
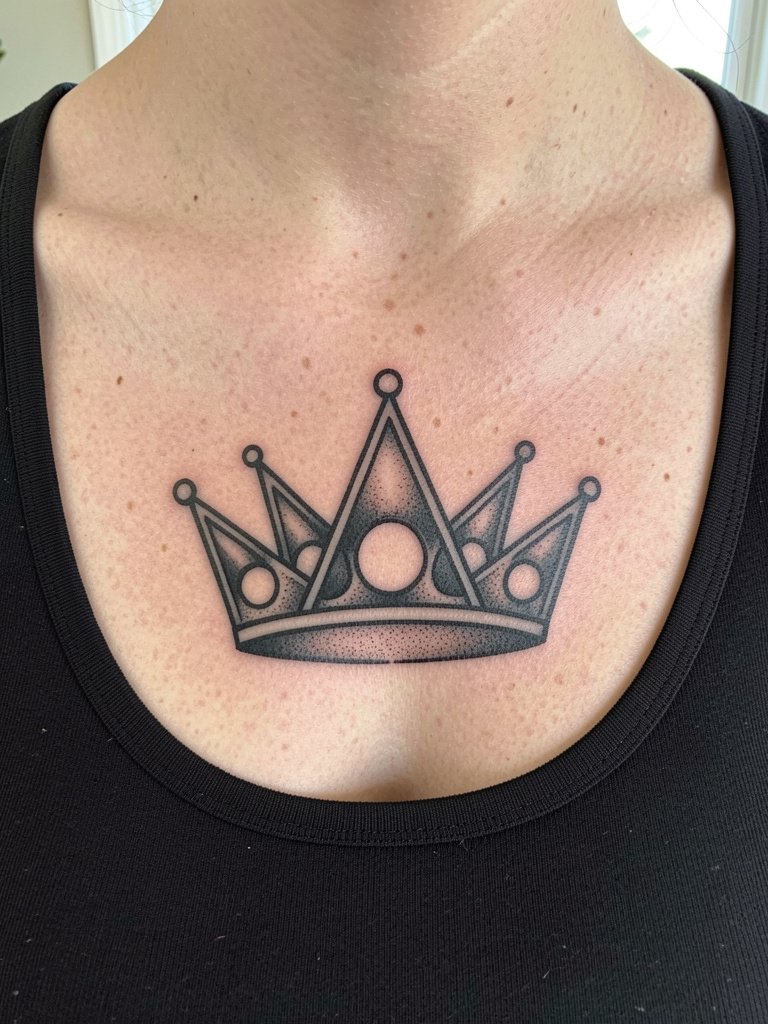
Geometric crown pieces read as contemporary jewelry and are forgiving of small shifts in line. I favor high-contrast negative areas here because they keep the motif distinct on the chest where light and body contours change. Discuss stencil placement while sitting to ensure the rays align with collarbone landmarks. Sessions are around 60 to 120 minutes depending on size and may require a touch-up at one year to keep lines crisp. A common mistake is overcomplicating geometry in a small chest stamp. For evening outfits, a wide scoop-neck camisole frames the design without competing.
11. Traditional Head with Banner on Bicep
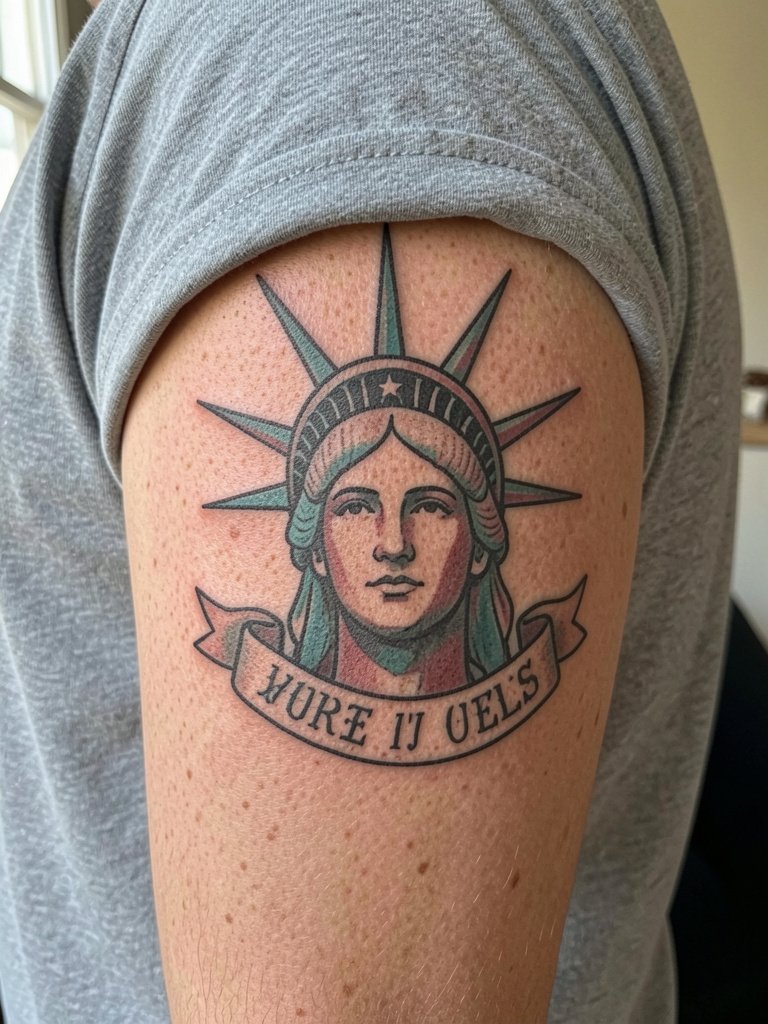
Traditional styles are dependable because heavy outlines and saturated fills maintain visual clarity for years. I recommend the banner only if you want a short, meaningful word that survives touch-ups. Specify the exact word and font size to the artist so letterforms remain legible over time. The session is moderate and often fits into a two-hour block. The mistake I see most is asking for tiny script inside a narrow banner. For casual show-off, roll sleeves and wear a classic crew tee that keeps the bicep exposed.
12. Medallion Liberty with Floral Surround on Back Shoulder
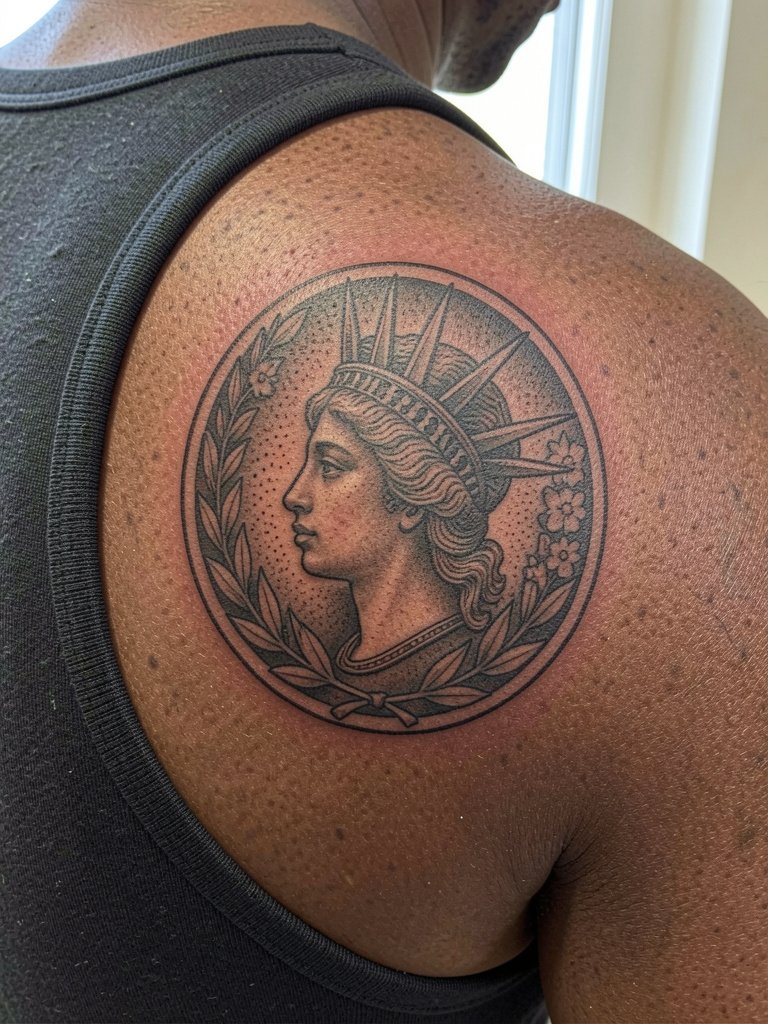
A medallion reads like a badge and suits the upper back because the flat surface keeps circular forms intact as you move. I recommend stipple shading in the background to prevent heavy solid blacks that can look patchy on curved shoulder blades. Talk to the artist about the outer ring thickness to prevent migration into the surrounding skin over years. Sessions are two to four hours with a likely touch-up at year one for even saturation. A common error is crowding too many florals into the medallion margin. For show-off styling, open-back tops or strappy tank dresses let the medallion peek through without stretching the skin.
13. Minimalist Torch Wrist Band
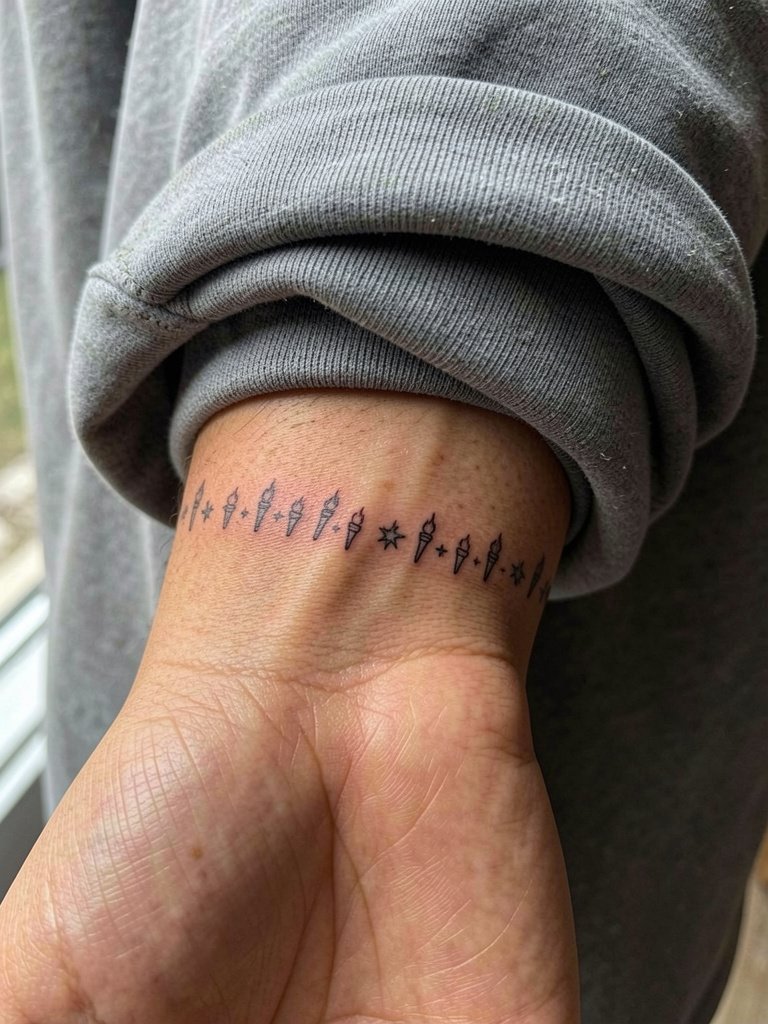
Wrist bands with repeated torch motifs are quiet and wearable, and the inner wrist lets the design be visible while typing or gesturing. Ask the artist to space the repeats slightly wider than reference because wrists are high-motion and small icons can bleed together. Sessions are short but the area is sensitive so expect stinging around bone and tendons. The common mistake is using hairline weight for band repeats. For accessories, slim metallic bracelets or a thin cuff bracelet complement the band without covering the ink.
14. Watercolor Torch Splash on Calf
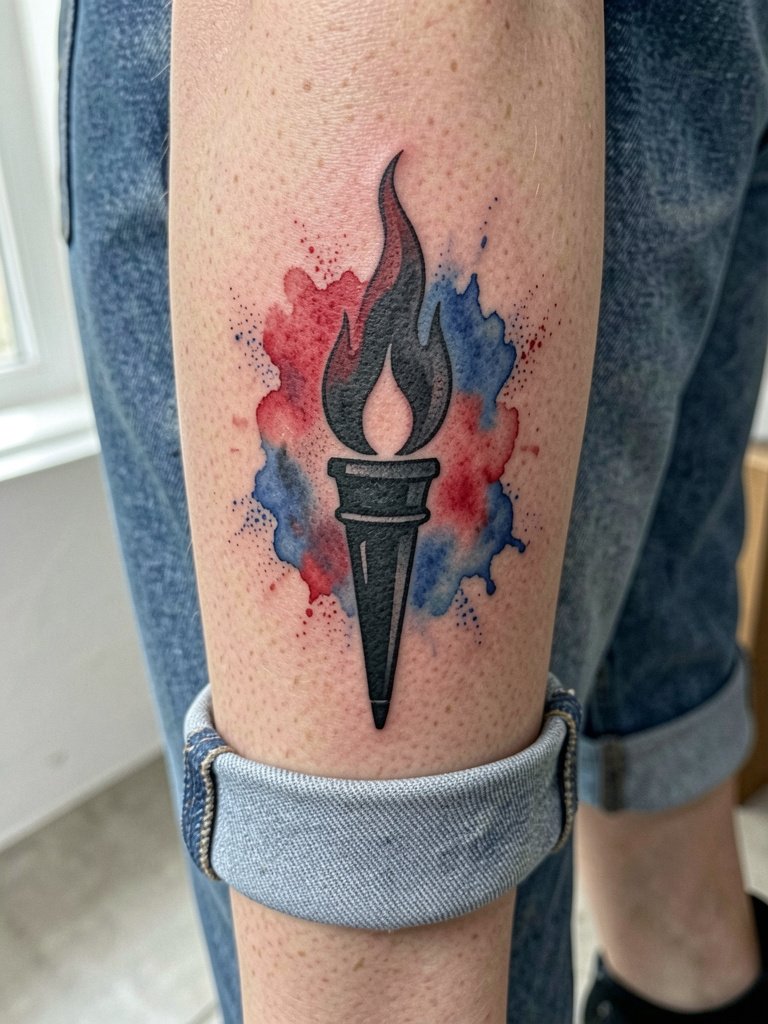
Watercolor splashes add motion and color without demanding tight linework, and the calf is a forgiving canvas for saturation. I recommend anchoring the torch with heavy black outlines so the watercolor cannot wash away the form over time. Discuss pigment placement with the artist so the splash reads in motion when you walk. Sessions vary from 90 minutes to three hours depending on layering. A frequent mistake is relying on watercolor alone for definition. For warm-weather outfits, pair with cropped denim shorts that keep the calf visible and reduce sock friction during healing.
15. Dot-Work Liberty Mandala on Sternum
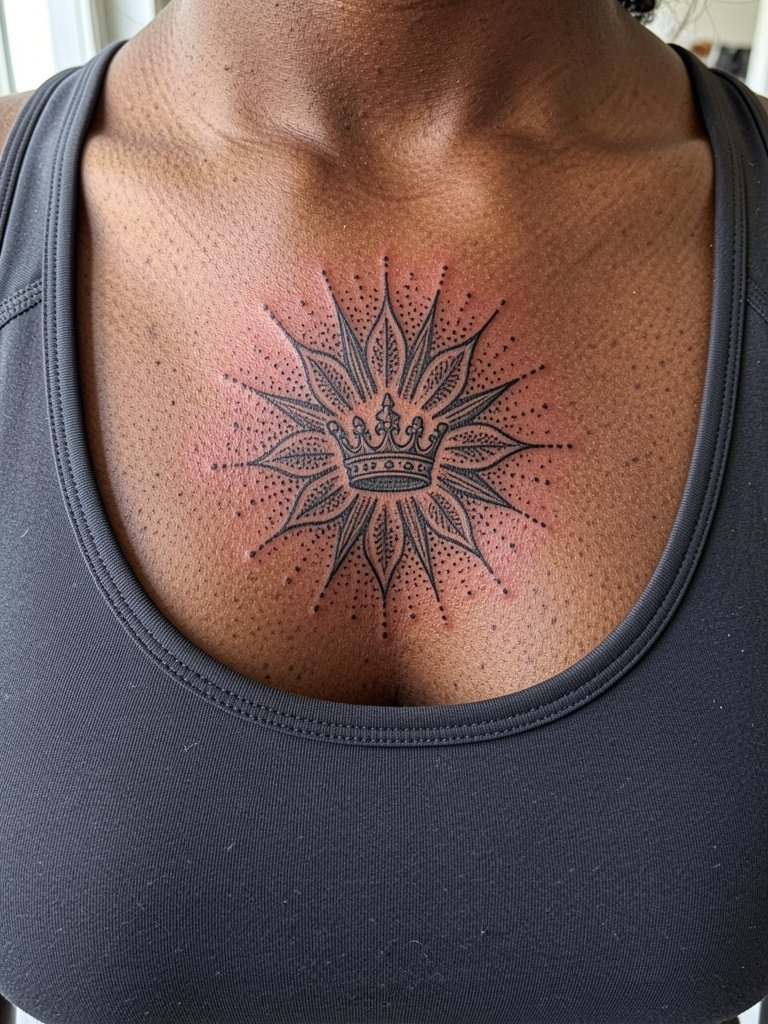
Sternum mandalas centered on a Liberty motif are dramatic but sit in a high-motion, delicate zone. This placement needs an artist experienced with chest work because the skin there shifts with breathing. I advise asking the artist to map the radial spacing while you lie flat and then again seated so placement reads in both positions. Sessions can be intense and often broken into two sittings, with a recommended touch-up at the one-year mark to even out dot density. The main mistake is underestimating sensitivity and booking a single long session. Because this is an intimate area, seek a specialist who works on chest and sternum regularly.
Frequently Asked Questions
Q: Which Statue of Liberty style holds up best on high-motion areas like the wrist and ribcage?
A: Bold silhouettes and designs with heavier outlines tend to age better on wrists and ribs because they resist early blur from motion and washing. For ribs, ask for slightly wider spacing between lines and expect a higher chance of touch-up within the first two years. For wrists, filled silhouettes or small anchors work better than tiny script or micro-detail.
Q: How should I plan clothing for a session on the collarbone, sternum, or upper arm?
A: Wear clothing that gives the artist clear access without pulling or shifting fabric. For collarbone or sternum sessions pick a fitted scoop or wide V-neck top that sits naturally and for upper arm work wear a loose tank. A few useful items include wide scoop-neck camisoles that expose the collarbone while keeping you comfortable.
Q: I want a tiny Liberty tattoo but love micro-realism. Is that a bad fit?
A: Micro-realism needs space to breathe, so very small Liberty portraits often lose detail after healing. If you want a tiny piece, choose a bold silhouette or simplified portrait and plan for a possible touch-up to sharpen tiny highlights.
Q: Where can I find healed examples and portfolios without naming specific artists?
A: Search platform hashtags that combine monument and style words, use location filters on TikTok and Instagram to find nearby healed shots, and browse community threads on Reddit that focus on healed tattoos. Look for hashtags like #StatueOfLibertyTattoo and #LibertyBlackwork and add "healed" or "year2" to narrow results.
Q: Are there political or cultural controversies I should consider when getting a Liberty tattoo?
A: Yes. One camp treats the Statue of Liberty imagery as a neutral national symbol of welcome and resilience, and they favor straightforward patriotic renderings. The other camp sees such imagery as capable of political messaging depending on context and styling, and they recommend careful composition to avoid unintended associations. If you are concerned, discuss symbolism and placement choices to make sure the finished design matches your intent.
