
Fine geometric line work can read like precise architecture one month and like a soft wash of ink five years later if the spacing and line weight are wrong. Small, single-needle motifs that look delicate today often need slightly more breathing room to stay legible on textured or sun-exposed skin. These 23 designs prioritize clear geometry, realistic aging, and outfit pairings so your lines still read as intended after multiple touch-ups.
1. Minimalist Arrow on Inner Forearm
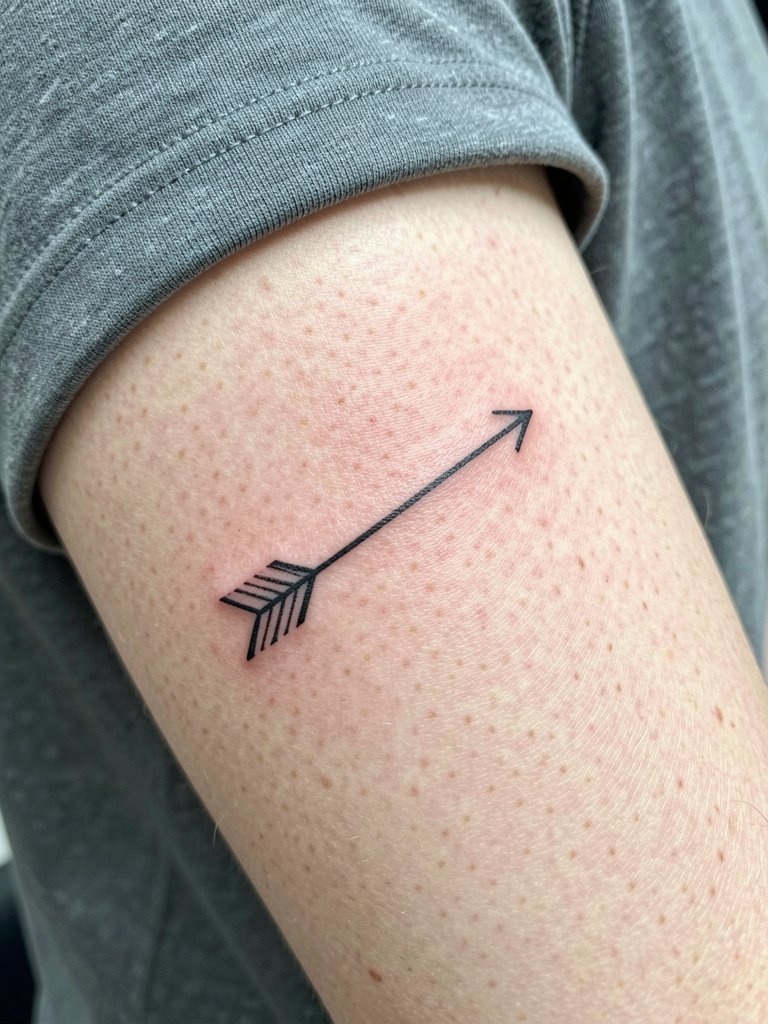
A narrow inner forearm arrow is a low-commitment geometric piece that reads well from close range. I recommend slightly thicker single-needle weight than the Instagram micro references, because the inner forearm swallows the thinnest contour lines by year two. Bring two scale references to your consultation so the artist can show how the arrow reads at three inches versus five. Expect a one-session sitting under an hour, mild buzzing with short breaks, and a likely touch-up around the nine to eighteen month mark if you want the point to stay crisp. For showing it off, roll the sleeves of a linen short-sleeve shirt so the forearm sits in natural light.
2. Concentric Triangle Stack on Wrist
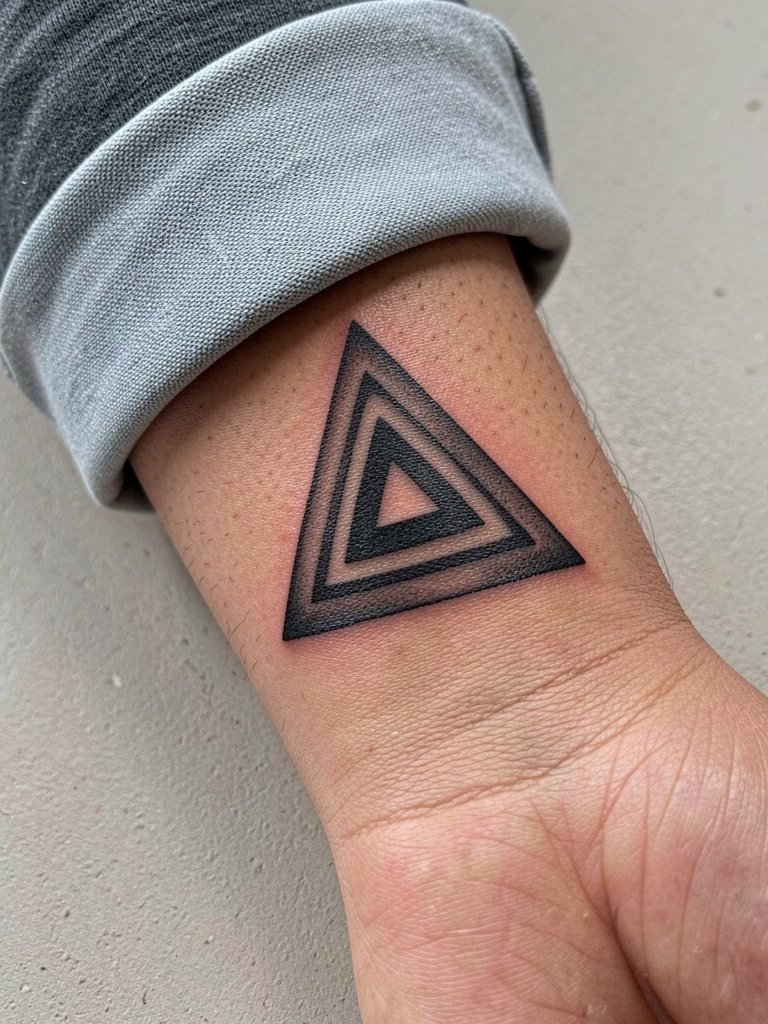
Tiny concentric triangles make a bold statement on the wrist, but they are a high-friction zone. The common mistake is going too small with ultra-fine single-needle lines and expecting long-term clarity. For this placement ask the artist to slightly increase spacing between triangles and to emphasize the outer triangle with a hair heavier line so the silhouette survives daily washing and bracelets. The session feels like light vibration with frequent breaks for repositioning. Plan for a protective film in the first week and a possible touch-up at year one. Pair this wrist placement with a slim minimal leather bracelet when you want to frame the geometry.
3. Stacked Dots Constellation on Ankle
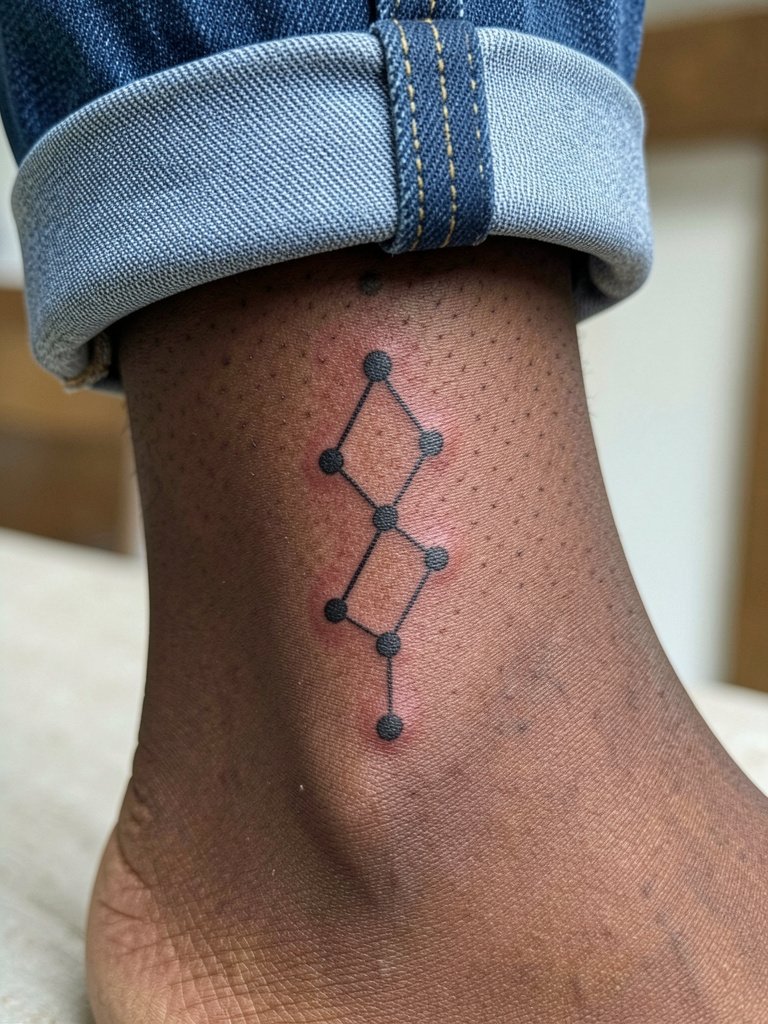
Dot stacks are organic with geometry and ankle placement gives them room to breathe while staying subtle. The biggest aging issue is blowout from thin dots too close together. Ask the artist to space the dot work at least three times the dot diameter, and to show a healed reference on similar skin tone. Session time is brief and the ankle can feel slightly sharp during needle passes. Expect to avoid soaking the area for the first week and to trade sandals for closed shoes on the day of the appointment. Wear rolled cuff jeans to the shop so your ankle is accessible without fabric tugging.
4. Linear Mountain Range on Outer Bicep
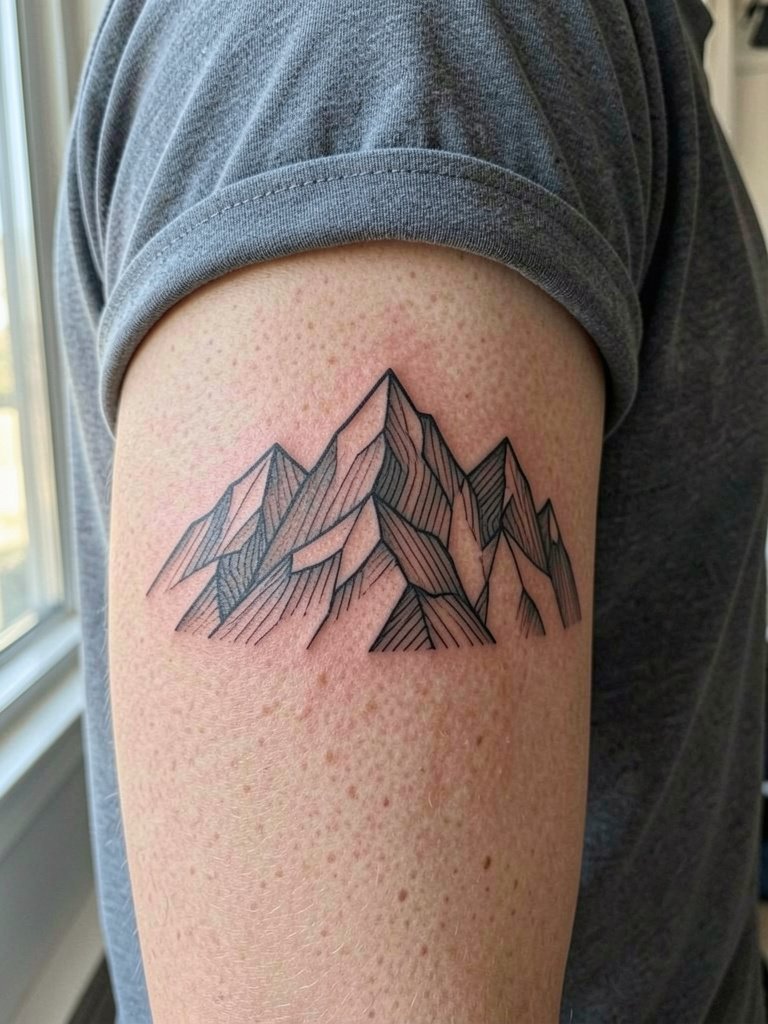
Outer bicep geometry reads well at a distance and is forgiving on line weight. I recommend slightly denser contour lines for the peaks if you want the range to stay legible through summer sun. If you plan a sleeve later, map this mountain so negative spaces align with future work. The session is moderate in length, often a single two-hour block, and pain is low. The most common mistake is asking for too many micro lines in a small band. For casual wear this placement pairs with rolled short sleeves or a sleeveless linen top that lets the silhouette show.
5. Interlocking Circles on Collarbone
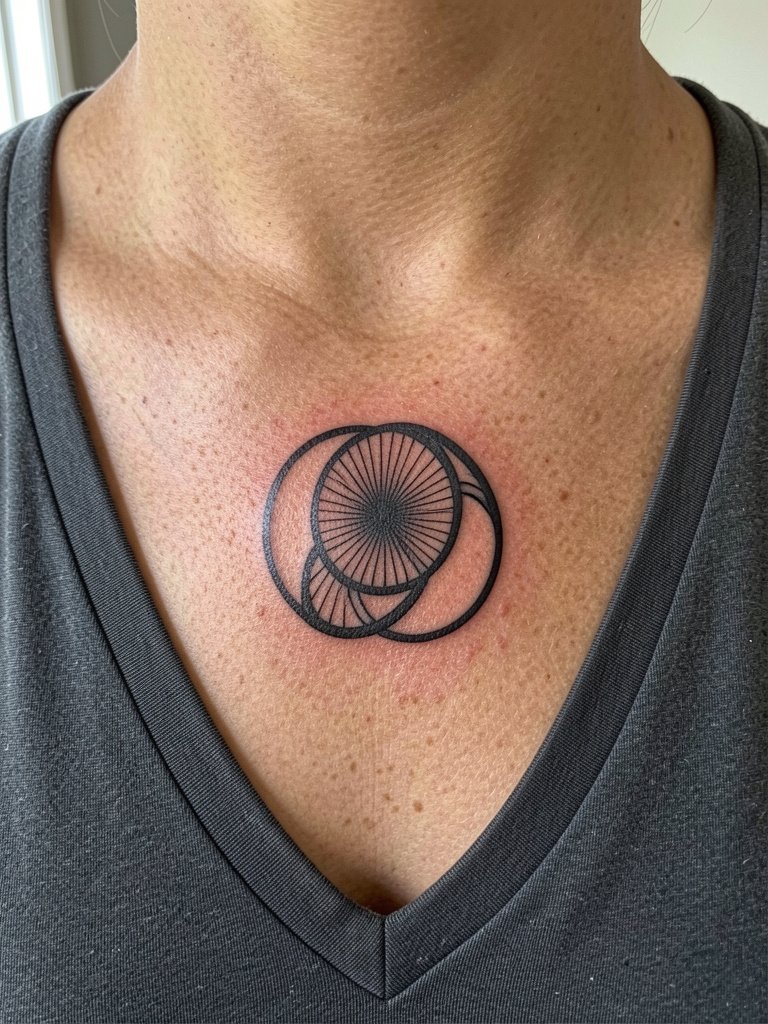
Collarbone pieces look refined but this is a thin-skinned area that shows movement. The aging reality is that overly fine radial lines can blur where the skin flexes with shoulder motion. When you book, ask for slightly heavier anchor lines on the overlap and show a posture photo so the artist places the intersection where the skin is most stable. Expect higher sensitivity during the session and a one to two hour appointment. For evenings out this pair of circles looks balanced with open-back blouses that frame the collarbone without rubbing the ink.
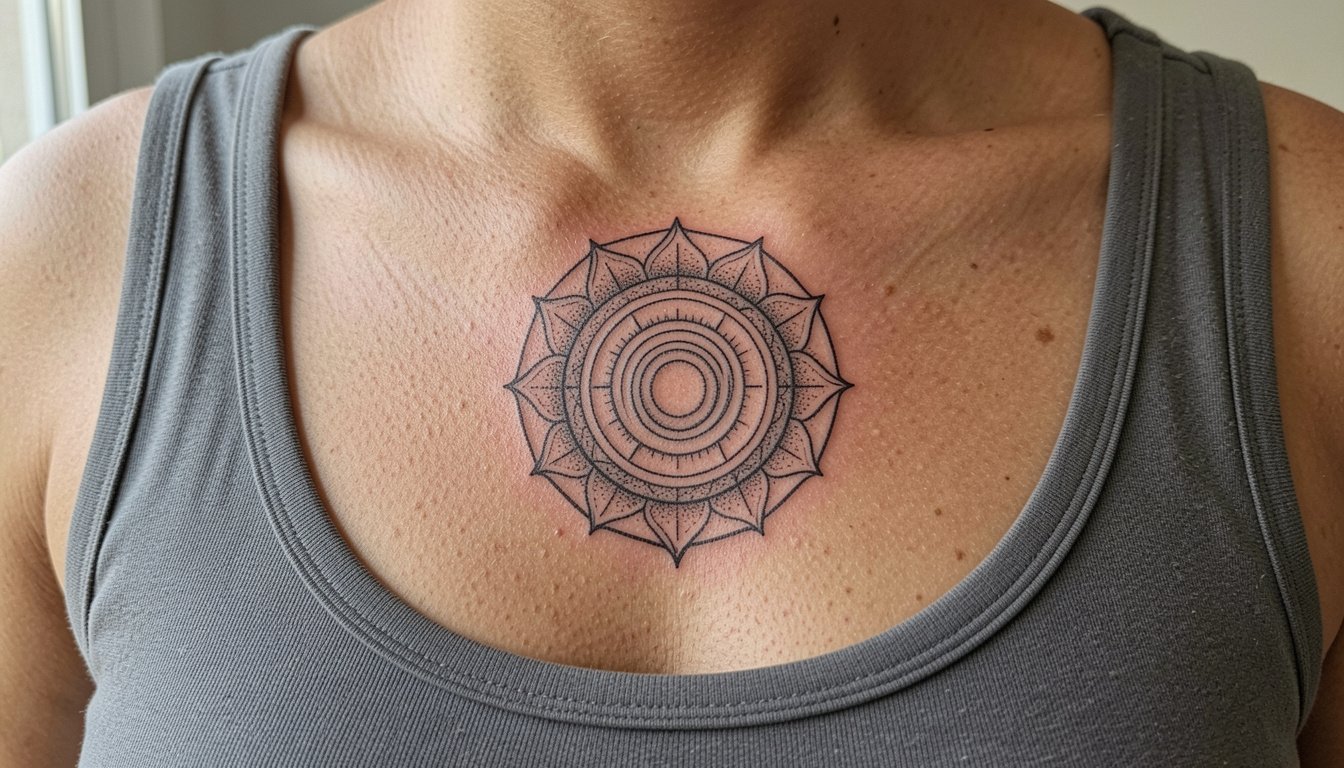
6. Geometric Mandala on Sternum
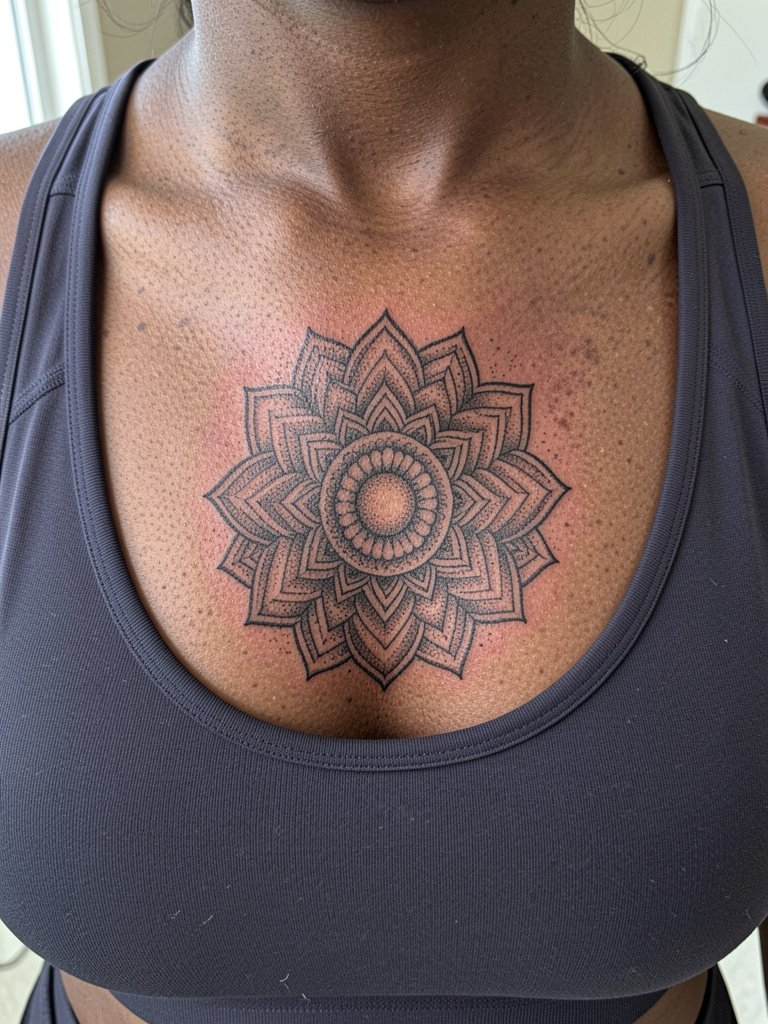
Sternum geometry creates a centered, architectural focal point. Be explicit with the artist about spacing and negative space because the sternum shifts with breathing. The controversy here is cultural origin and symbolic use. One camp argues mandalas and sacred circular motifs need cultural permission and context. The other camp says geometric mandalas can be adapted respectfully if you credit the tradition and avoid sacred symbols that are restricted. Include an origin-respect sentence in your brief and be prepared to accept the artist's edits. Pain is higher and session time depends on diameter, often two to four hours with breaks. Wear a fitted sports bra for easy access and comfort.
Before You Book
These first six placements test both small details and chest-centered geometry. A few session and first-week items smooth the process for wrists, ankles, and sternum work.
-
Stencil transfer paper kit. Lets you preview line spacing on actual skin which is crucial for the wrist and inner forearm ideas above.
-
Topical numbing cream. Applied as advised eases the sternum and ankle passes so you can sit through longer geometry layouts.
-
Thin protective film roll. Useful for keeping ankle and wrist pieces clean during the early healing days of the dotted and concentric designs.
-
Fragrance-free body wash. Gentle cleansing helps all fine line work avoid irritation while the skin re-epithelializes.
-
Aquaphor healing ointment. A widely used option for the initial few days that helps keep fine line work supple without heavy occlusion.
7. Chain-Link Geometry Along the Spine
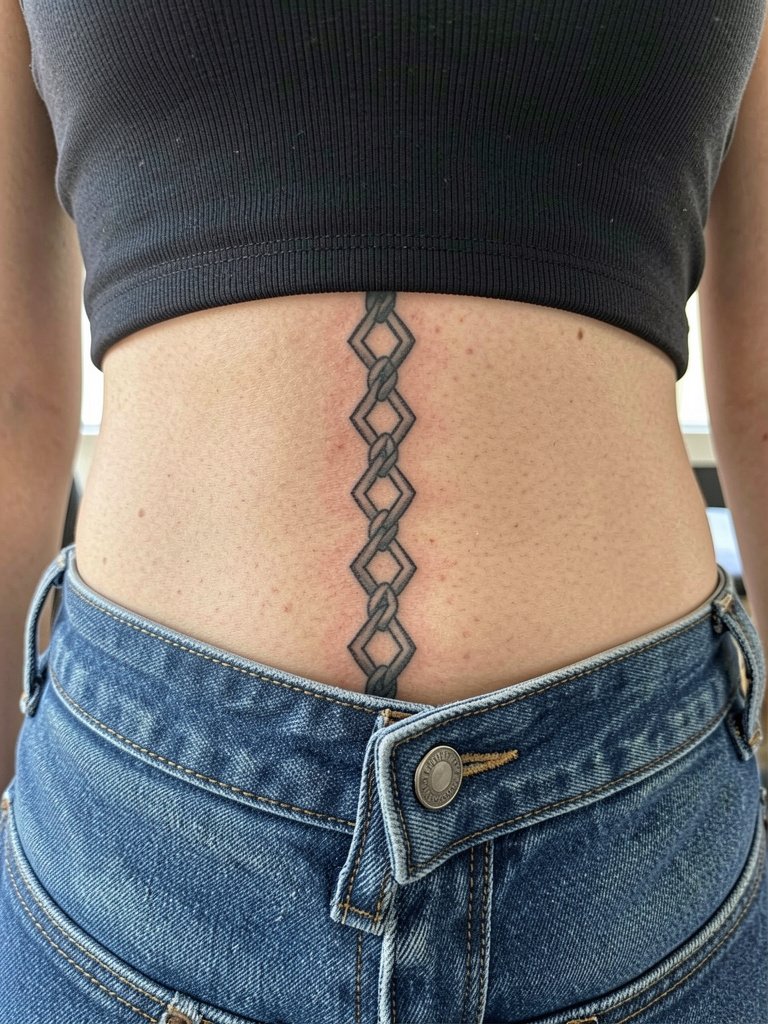
Spine-aligned geometry needs precise centering and symmetry. The common mistake is letting the stencil wander off the midline. Bring a tight-fitting top photo so the artist can mark the spinous processes and line everything up. Expect moderate discomfort with a steady pressure sensation over bone. Session time varies with length, but plan on multiple shorter passes rather than one long block. This placement pairs with low-rise denim and cropped tanks for evenings when you want the vertical chain revealed.
8. Micro Hex Grid on Back of Hand
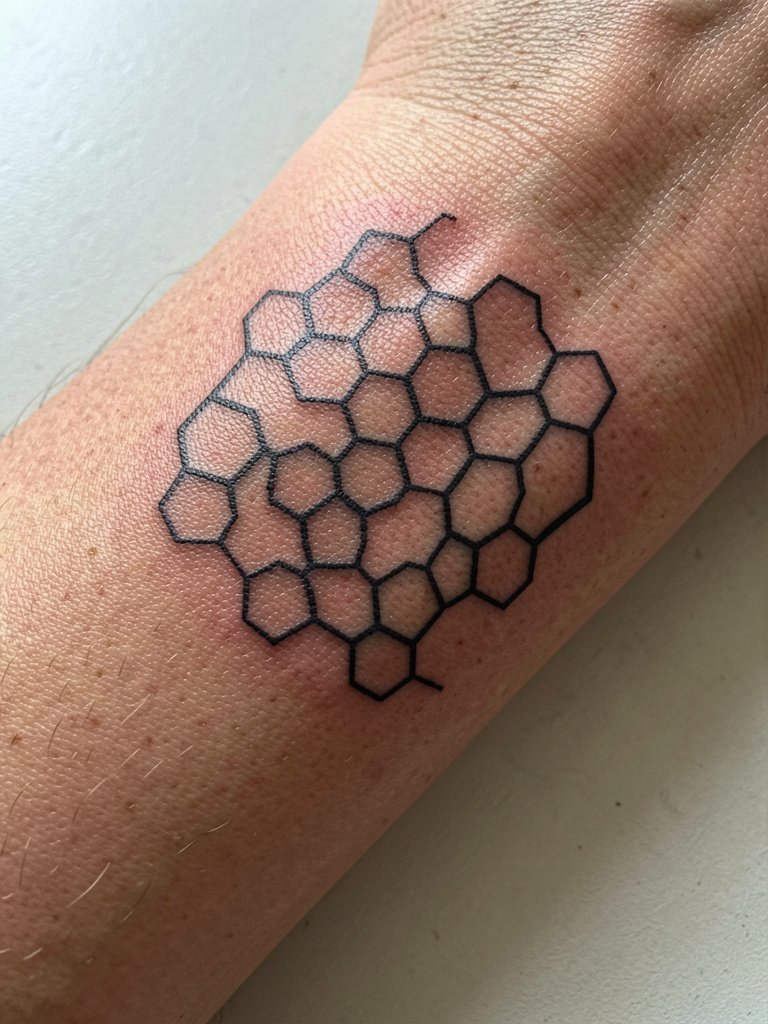
Hand and knuckle geometry face heavy wear and early fade from washing and sun. One camp warns against intricate micro grids there because they blur rapidly. The other camp maintains that with bolder cell outlines and planned negative space you can keep the pattern readable for years. If you want the grid, ask the artist to thicken cell borders and to avoid filling tiny cells near the knuckles. Expect a stingier session and a realistic touch-up window around six to twelve months. For display, a low-profile ring stack and a delicate chain bracelet frame the back-of-hand work without rubbing the dermis.
9. Intersecting Lines Sleeve Accent on Upper Arm
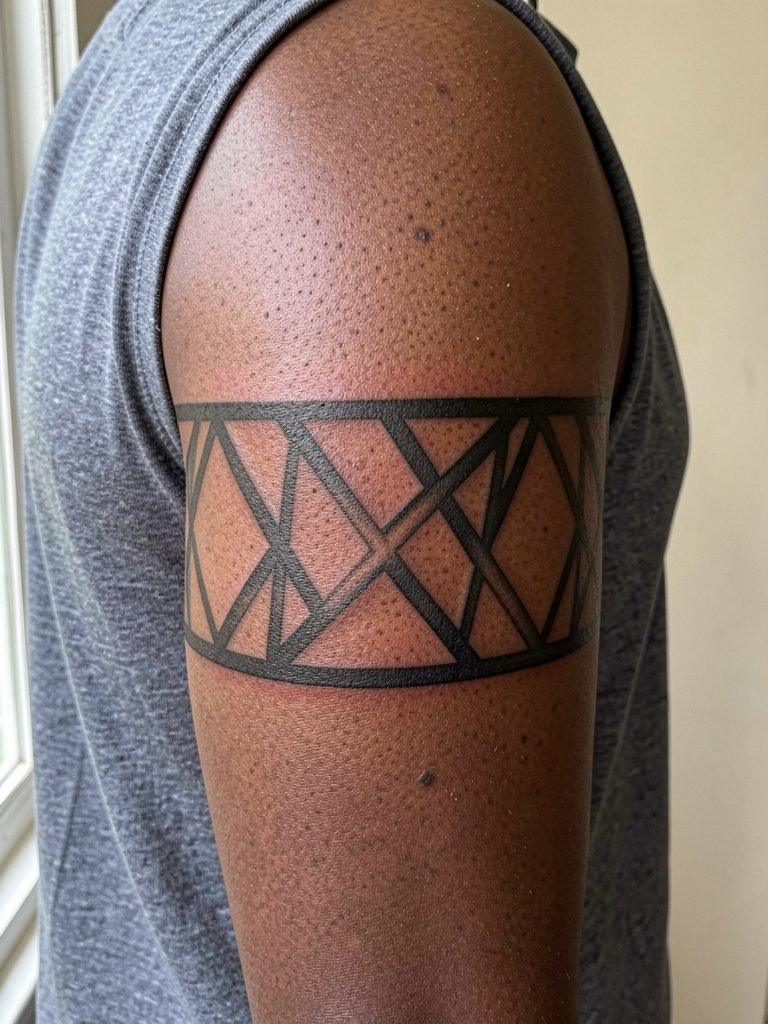
An upper arm band of intersecting geometry is a strong anchor for future sleeve work. Designers often over-detail the band and then struggle to integrate it. When you plan this, bring sleeve and negative-space photos so the artist can slot the band into a larger composition. Expect a one to three hour session depending on band width and detail density. Blowout risk is minimal here compared with wrists and hands, and touch-up is usually at year two if you want to keep the black saturated. Pair it with a linen button-up shirt with sleeves you can roll to show the band.
10. Radial Compass on Calf
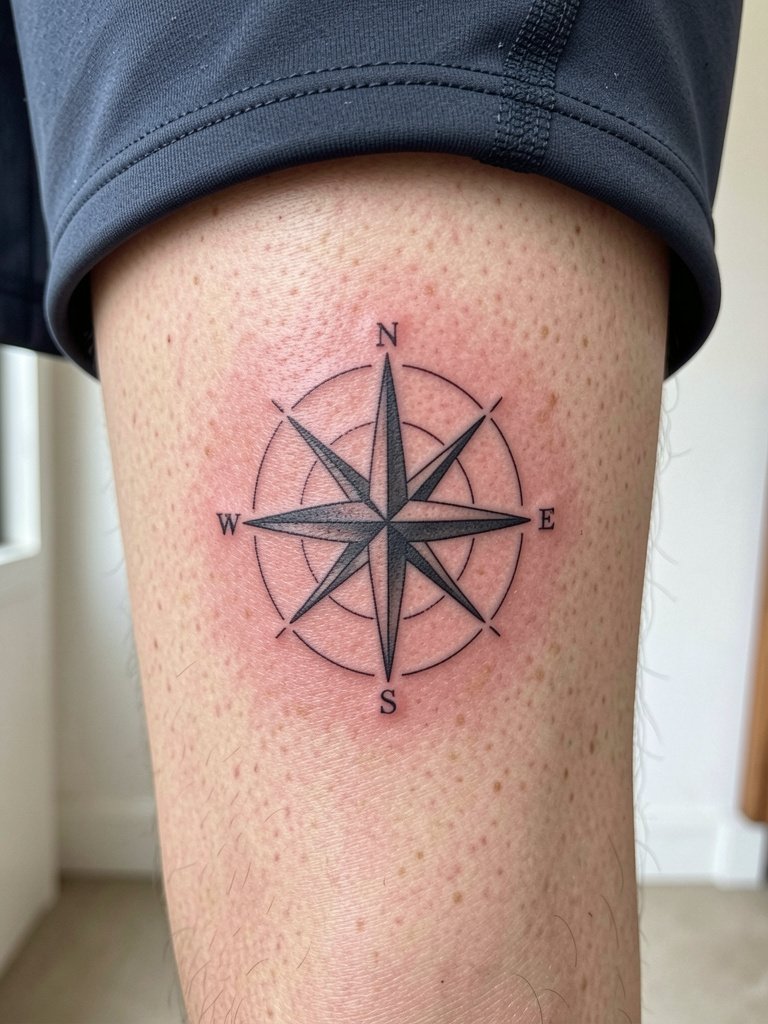
Calf geometry takes well to radial symmetry and keeps clarity over time compared with thin-rolled areas. The typical mistake is overfilling the inner circle with tiny linework that softens into a blob. Ask the artist to preserve a clear negative core and to show a healed reference of radial work on a similar calf shape. Pain is tolerable and sessions commonly run an hour to two. For showing the piece, wear mid-length athletic shorts that let the radial points be visible when you walk.
11. Negative Space Arrowhead on Thigh
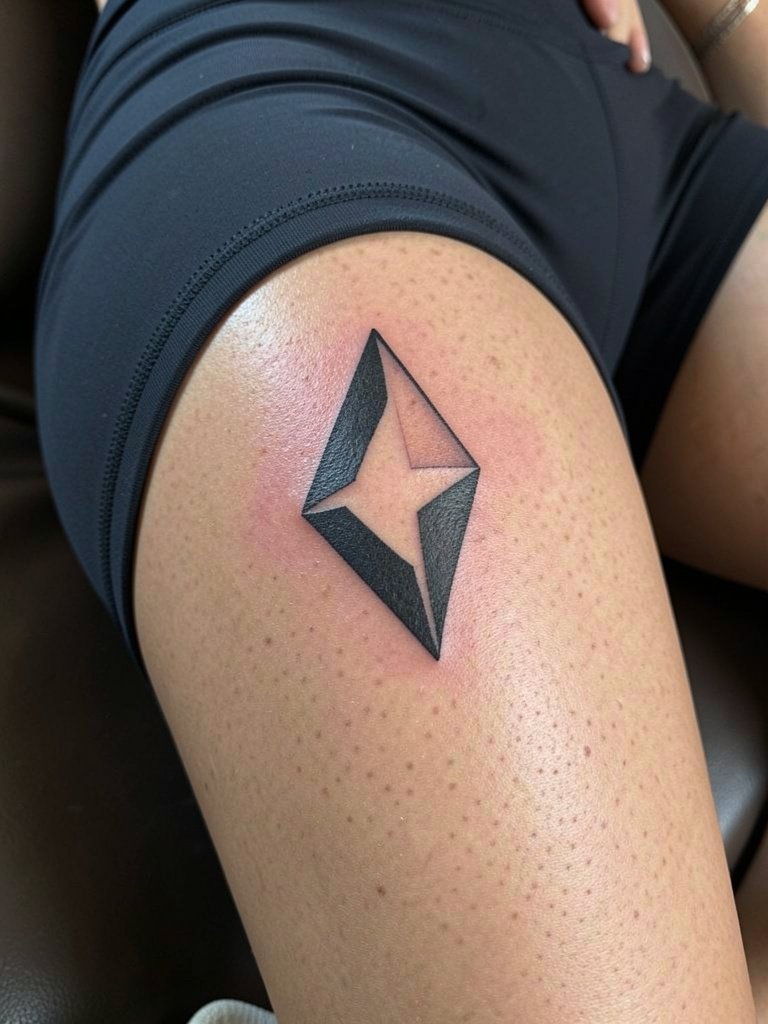
The upper thigh is forgiving for negative-space geometry and allows larger compositions that age well. A common misstep is placing too much micro detail near the groin where friction is higher. Specify exact boundaries during consultation so the arrowhead sits on stable thigh tissue. Sessions are comfortable for most people and often completed in a single two-hour window. The inner thigh is less sun-exposed so linework fades more slowly. For reveal, mid-thigh lengths and wrap skirts showcase the shape without risking constant rubbing.
12. Offset Squares on Outer Wrist
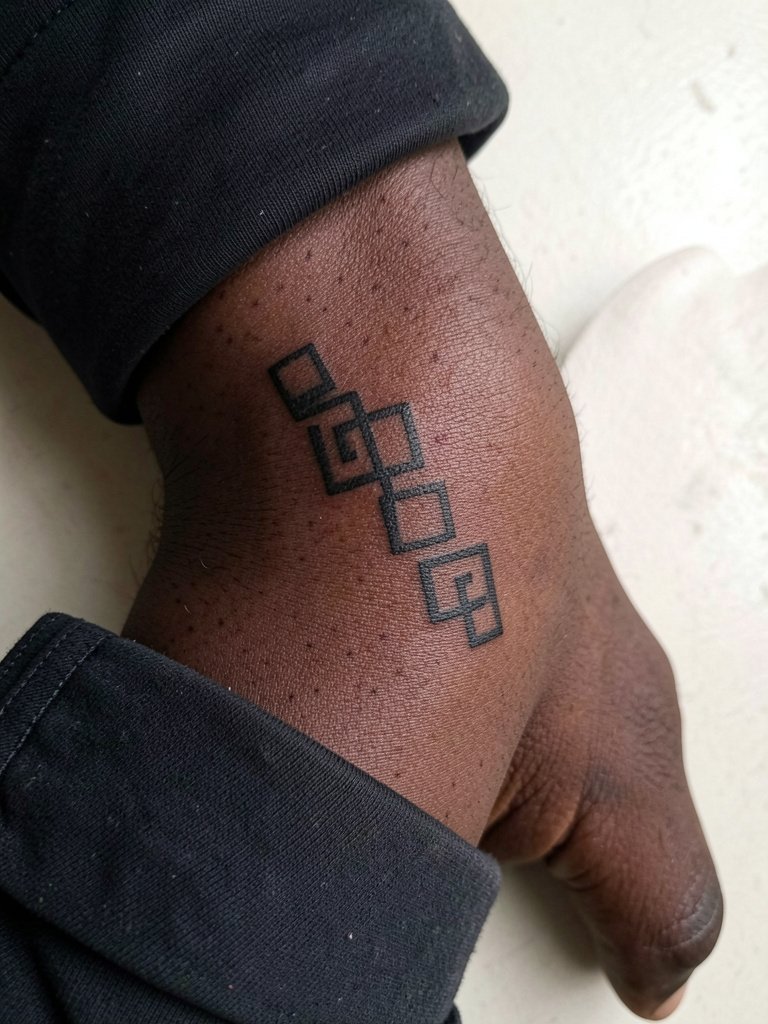
Outer wrist geometry sees more sun and abrasion than inner wrist placements. The outer wrist often benefits from bolder outer squares and thinner internal lines so the pattern keeps its read at arm's length. Ask for placement photos with your watch and bracelet in natural wear so the composition avoids hardware overlap. Sessions are short but the area can be sensitive over bone. To frame this pattern, try a slim mesh watch band that complements the staggered squares without rubbing.
13. Minimalist Geometric Ear Behind-Accent
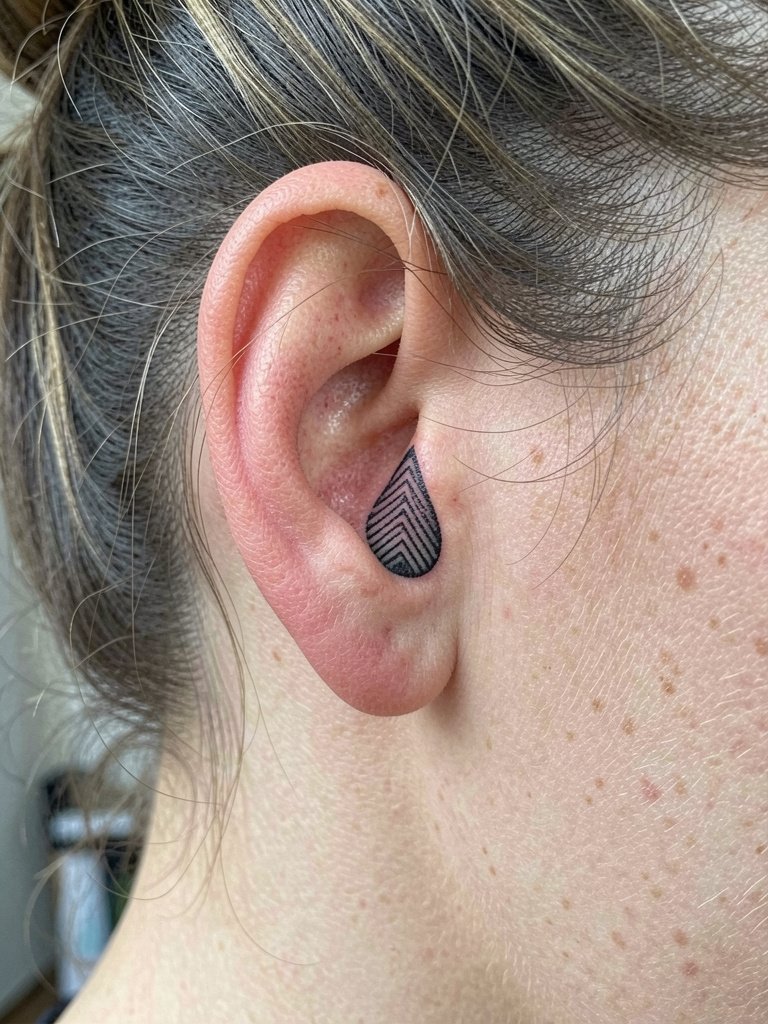
Behind-ear geometric accents are discrete and read like jewelry. The region heals differently because of hair and frequent shampooing. The practical mistake people make is asking for micro-detailed fills that do not survive repeated washing. Request a simple outline with minimal interior work and a touch-up plan at six to twelve months. Session time is brief but the area is sensitive. If you want to show it without cutting your hair, choose an updo or a small hair claw clip that keeps hair off the mastoid area for the first week.
14. Asymmetric Polygon Pack on Shoulder Blade
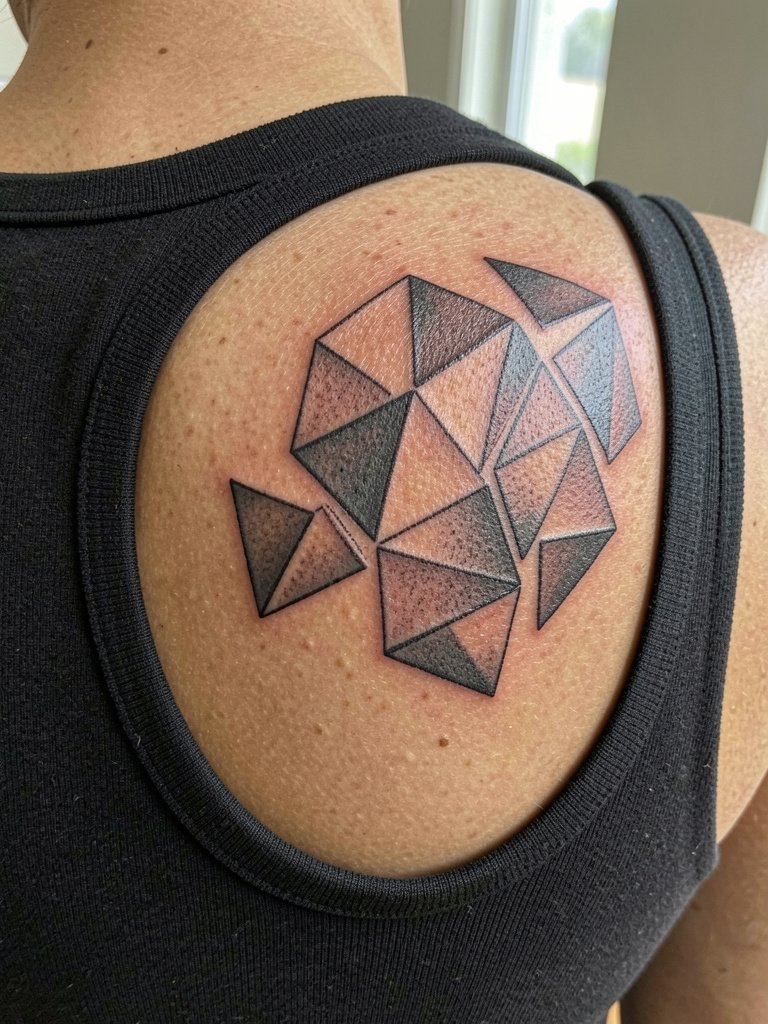
Shoulder blade geometry benefits from contour-aware placement so polygons read with movement. The slip is over-centering a cluster which then appears off when you move. Show the artist jacket and shirt silhouettes you wear most so they can position the cluster to peek from collars or straps. Pain here is minimal and sessions usually fall in the one to two hour window. For partial visibility pair this area with wide-neck tops that reveal the blade without fabric rubbing.
15. Linear City Grid on Ribcage
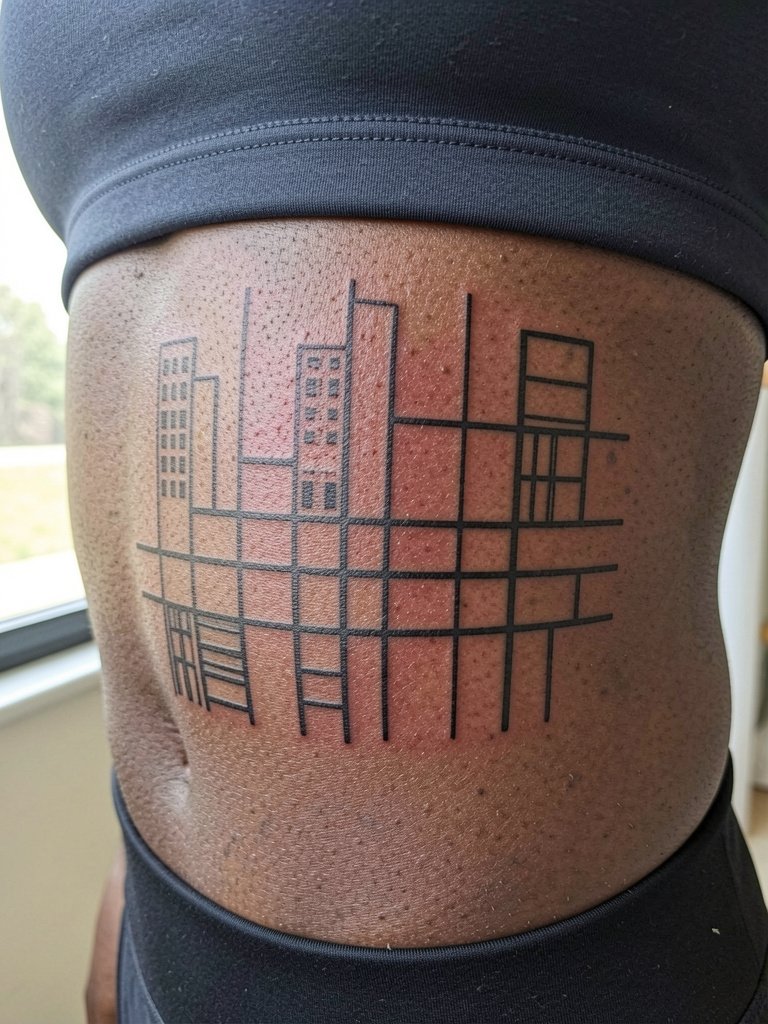
Ribcage geometry is one of the most debated areas for fine line work. One camp argues fine single-needle lines on the ribs blur within two years because the skin flexes and stretches. The other camp insists that slightly heavier line weight and increased spacing let fine work settle cleanly even in that area. If you consider rib geometry be specific about spacing and ask for a healed portfolio shot from the artist on a similar torso. The session is longer and more painful, so plan breaks and numbing strategies. For appointment comfort wear a fitted cropped top that the artist can move around without pulling fabric.
16. Fractal Leaf Pattern on Inner Bicep
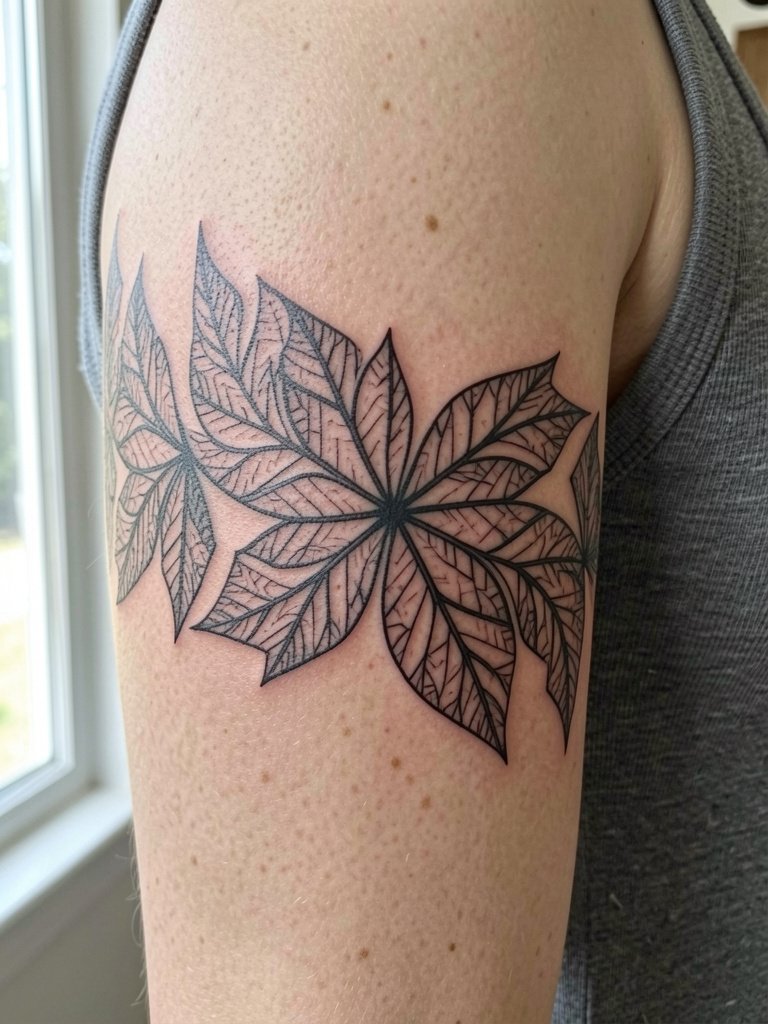
Inner bicep geometry looks private and elegant but the skin there can blur fine veins of linework if placed too thin. The frequent mistake is expecting single-needle filigree to time-proof itself. Ask the artist to map the fractal across the inner arm and to recommend a slightly heavier backbone line where the pattern overlaps a vein. Sessions are moderate in length and can feel tender when the needle runs near muscle. For session wear choose a loose tank so the artist can access the inner arm without you pulling fabric. Pair this piece with soft cotton tanks when you want it visible.
17. Collapsed Cube on Outer Thigh
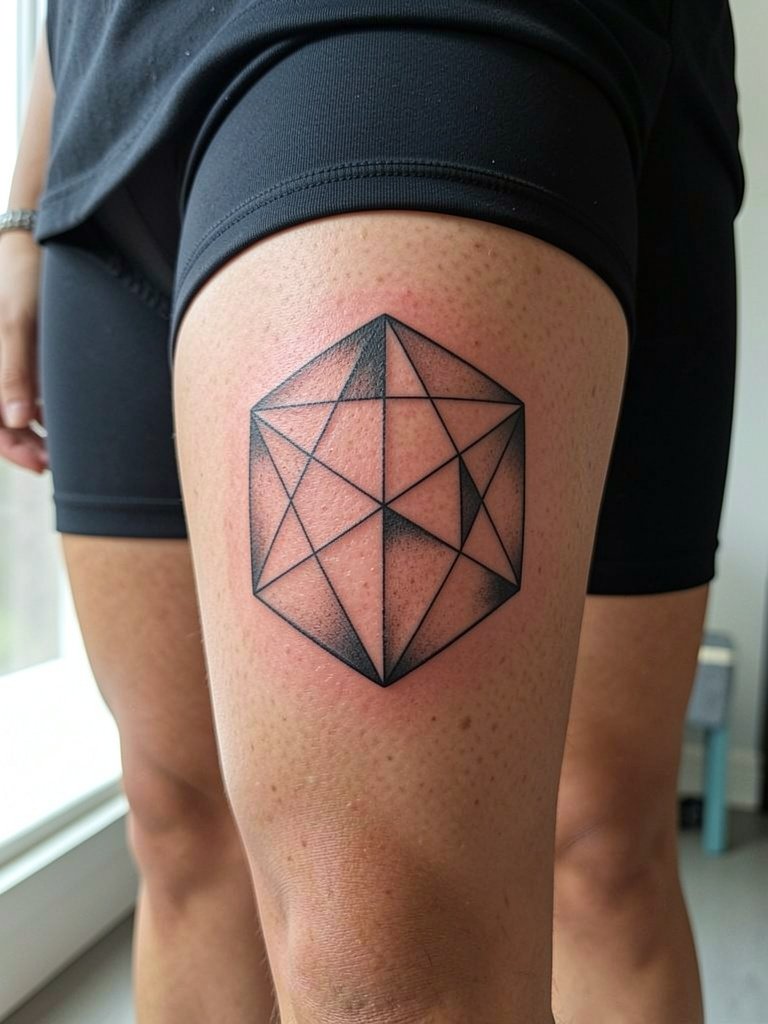
Outer thigh geometry allows depth and optical play without too much risk of blowout. The typical mistake is compressing too many plane lines into a small square which then blurs into a gray patch. Ask for wider negative spaces between planes and a healed example of similar three-dimensional work. Sessions are comfortable and you can usually sit through a two to three hour block. For showing the cube, try a mid-thigh skirt or high-waisted shorts that reveal the piece without constant chafing.
18. Mirror Line Bracelet Around Wrist
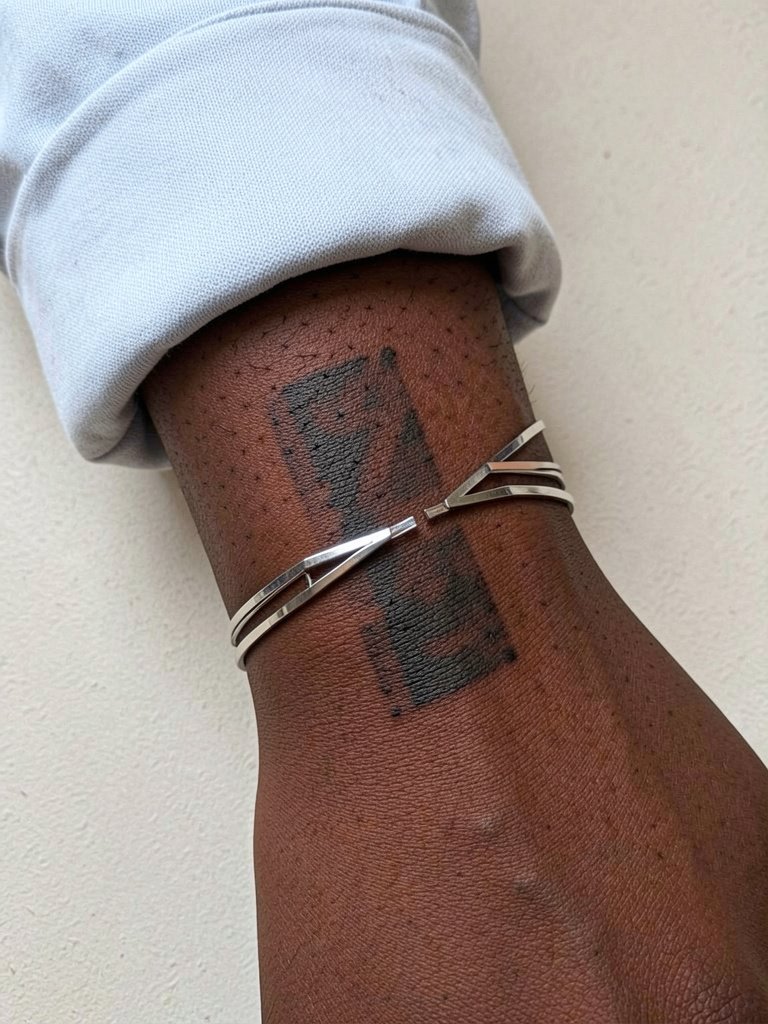
Wrist bracelets in ink are intimate and wear at a high rate. Small mirrored lines need spacing so they do not merge under daily movement. Specify a tiny open gap rather than a complete closed ring if you want less rubbing against watches. Sessions take under an hour usually, but expect sensitivity over the wrist bone. For styling choose thin stackable bracelets like a woven bracelet set to echo the mirrored lines without scuffing the skin.
19. Geometric Fox Head on Calf Wrap
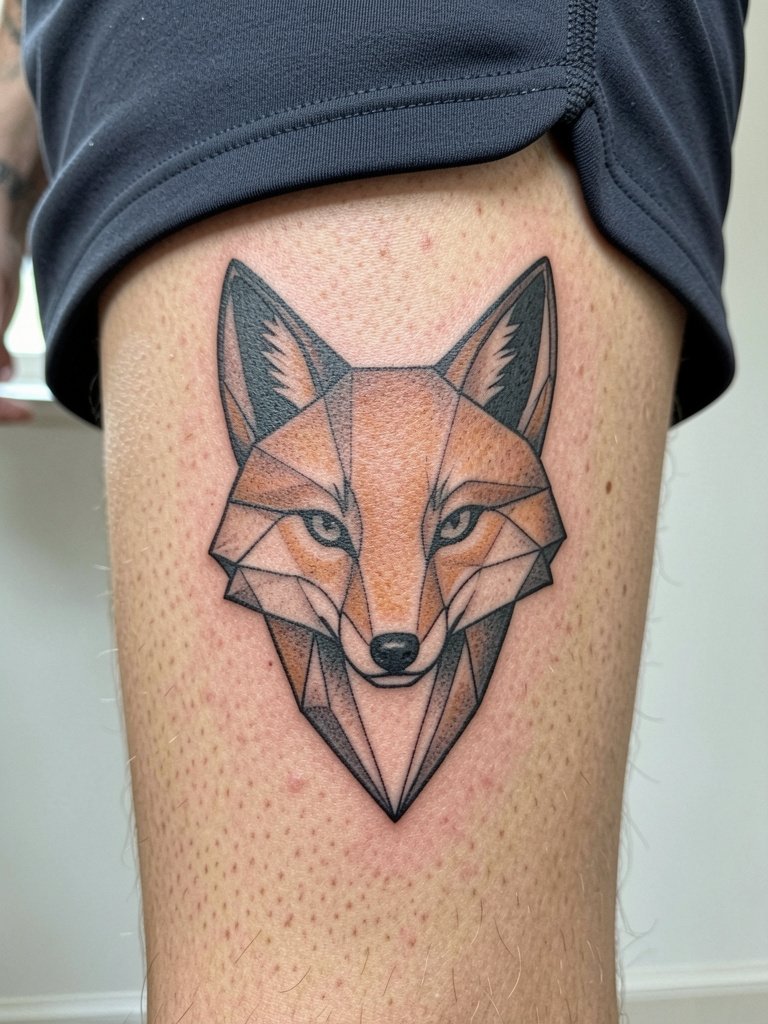
Animal geometry lets you suggest form with planes rather than full realism. The common error is over-detailing the polygon edges which creates a muddle on skin that stretches when walking. Ask the artist to anchor the jaw and eye with slightly heavier lines so the silhouette remains recognizable long term. Sessions often last one to two hours. For display try cropped trousers or a sport short to let the wrap be visible in motion.
20. Split Hexagon Sternum Accent
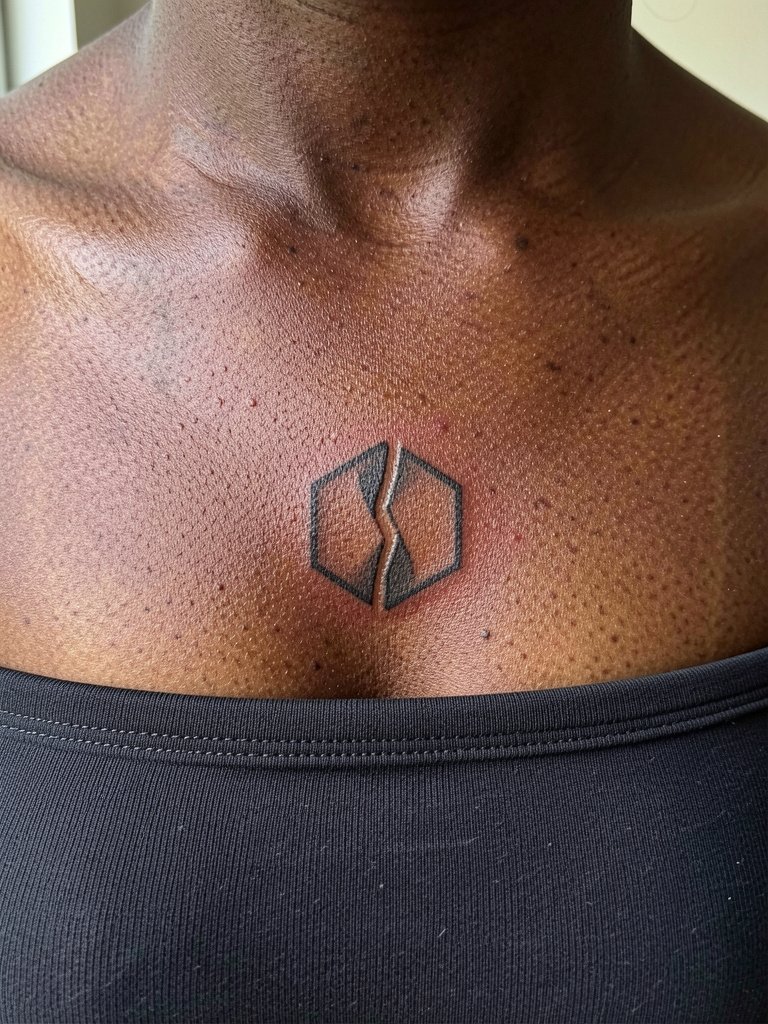
A small sternum-centered hexagon is graphic and intimate. The sternum flex makes ultra-thin interior lines risky. Request a strong outer frame and minimal interior detail so the break in the hexagon keeps its shape. Sessions can be uncomfortable and require steady breathing, so plan for an assistant to help you relax between passes. Because this is near the sternum, check cultural and personal symbolism before committing. For reveal try tops with a fitted bandeau or a strapless dress so the geometry sits naturally against the skin.
21. Tessellated Wing on Shoulder Cap
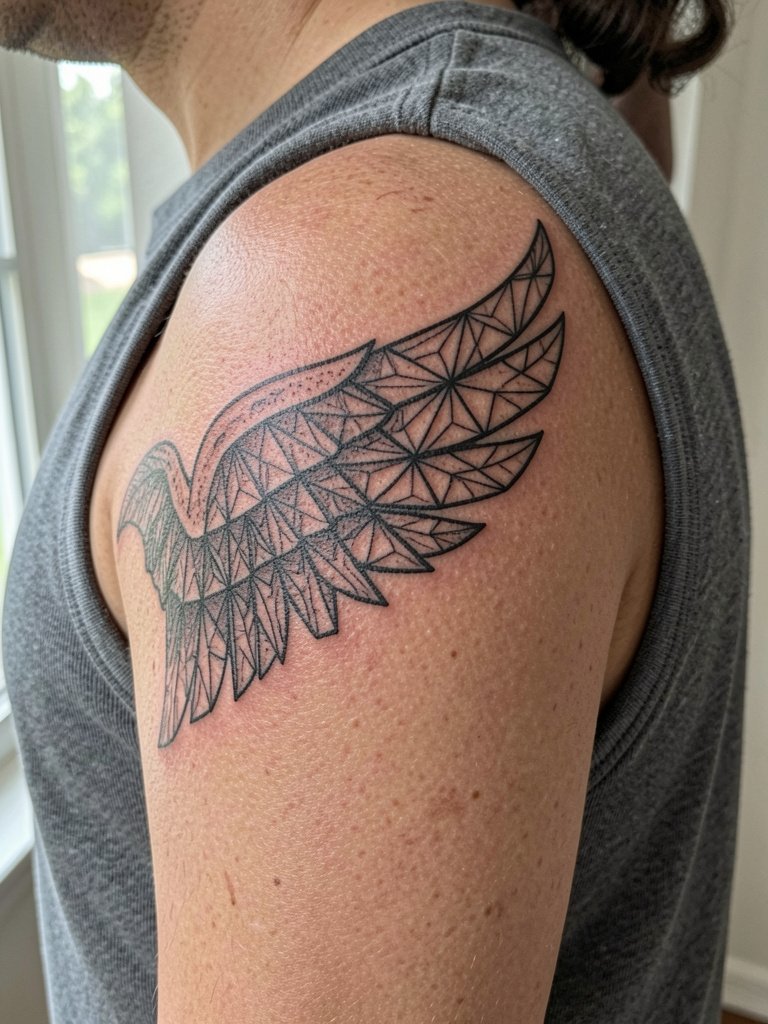
Shoulder cap tessellation reads well and resists blowout because the area is muscular and less sun-exposed. The mistake is shrinking the tessellation so individual shapes merge. Ask the artist to map the wing across motion ranges so the tessellation stays coherent when you raise your arm. Sessions are low pain and often done in a single two-hour slot. For showing off use a sleeveless blouse that keeps the shoulder cap visible.
22. Optical Illusion Rhombus on Forearm
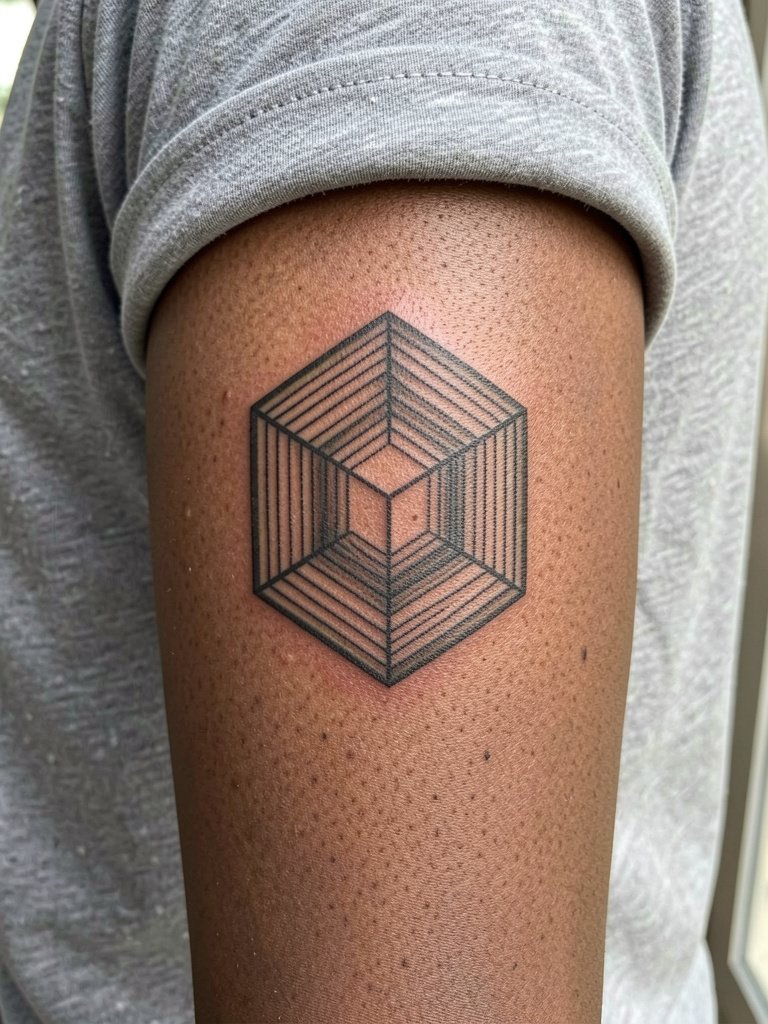
Forearm optical geometry relies on tight parallelism and clean linework. The problem arises when clients ask for the tiniest interior lines which soften with daily movement. Ask the artist to set a minimum interior line thickness and to show a healed shot of similar optical pieces. Sessions are moderate and the forearm tolerates detail well, but expect a touch-up at the two-year mark if you want high contrast maintained. To frame the optical effect, wear a rolled-sleeve tee that keeps the mid-forearm visible.
23. Nested Diamonds Behind the Knee
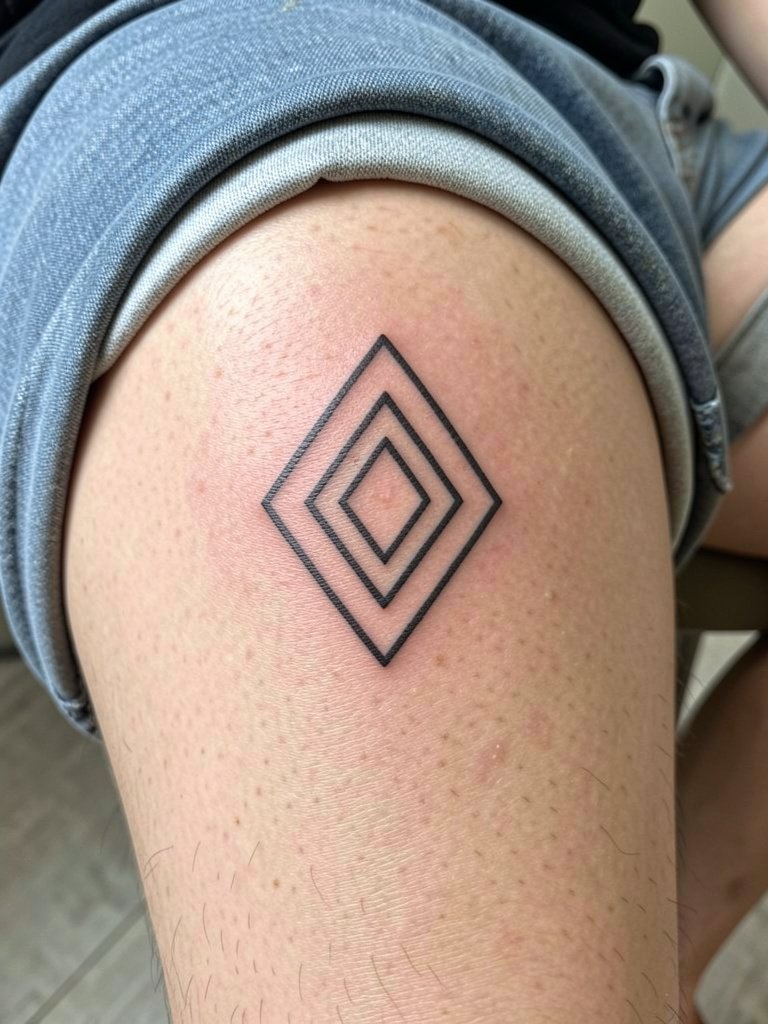
Behind-knee geometry sits on a high-motion crease that can break up thin lines. The most common mistake is packing tiny nested shapes too close to the crease which then disperse into a soft patch. When you consult, ask the artist to place the largest nested diamonds off the exact crease and to demonstrate healed examples of crease-area work. Sessions are more uncomfortable due to movement and may require short breaks. For visibility pick shorts or skirts and a mid-thigh short that keeps the area exposed without compressing it.
Frequently Asked Questions
Q: How do I find healed examples and portfolios for geometric line art without naming artists directly?
A: Search platform tags and keywords that match the style and placement you want, like #geometriclinework, #finegeometry, and placement keywords such as "sternum healed" or "wrist healed" on image-focused platforms. Filter by location and use portfolio directories so you can compare healed shots across skin tones. Reddit threads that collect healed images also help when you want multiple examples in one place.
Q: Will single-needle geometry last, or should I choose bolder lines for longevity?
A: It depends on placement and your daily exposure. On high-motion, high-friction areas like fingers and ribs single-needle work often softens faster. On lower-friction areas like calves or thighs single-needle can hold well if spacing and depth are adjusted. Ask the artist to show healed work on similar placements and skin tones so you set expectations for touch-up timelines.
Q: Are there cultural or ethical considerations with mandalas, compass roses, or other symbolic geometry?
A: Yes, some people feel strongly that sacred or culturally specific patterns should not be used without permission. One camp says these motifs require context and credit to the originating tradition. The other camp accepts adapted geometric language when it is clearly respectful and not a sacred sign used out of context. Be transparent about inspiration with your artist and be open to their guidance on respectful adaptation.
Q: What should I wear to the appointment for different placements?
A: For chest and sternum pieces a fitted sports bra or bandeau makes access clean. For inner arm and shoulder pieces a loose tank works best. For hip and thigh work choose low-rise jeans or bike shorts so the area is visible without tugging. If you need specific session wear, a fitted sports bra and bike shorts are practical choices.
Q: How often should I expect to need touch-ups for geometric line art?
A: Touch-up timing varies by placement and lifestyle. Visible high-friction areas often need attention at six to twelve months. Lower-friction areas commonly hold for two to three years before contrast reduction prompts a touch-up. Plan for an initial touch-up within the first year to refine any softened points and ask your artist for a realistic schedule based on your specific piece.
