
The Armor of God pieces that still look sharp after five years usually start with a simple principle: give the design room and respect the skin. I've watched tiny helmet scripts blur where they were cramped, and watched bold chest panels keep their definition because the artist allowed spacing and heavier linework up front. Read on for fifteen realistic Armor of God concepts that balance meaning, placement, and how they actually age.
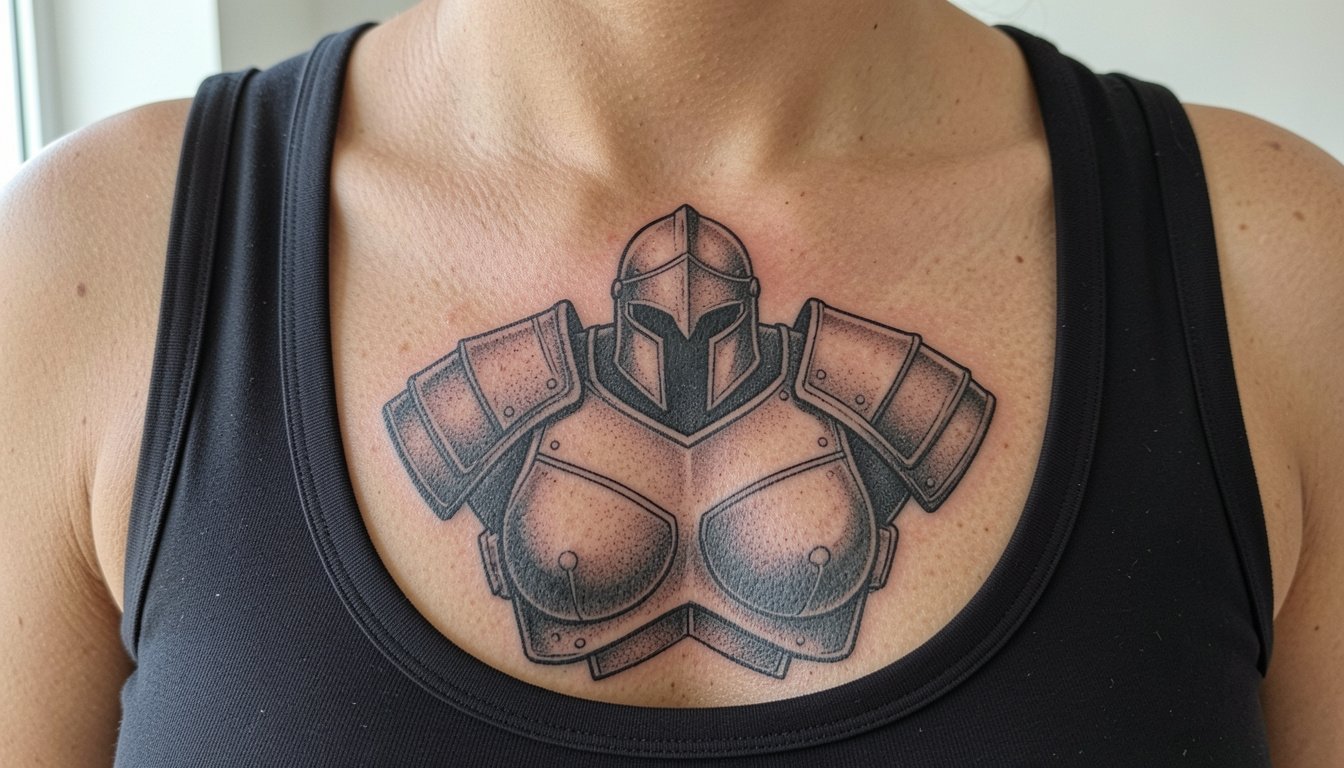
1. Full Armor Chest Panel
This is the full statement option for someone ready to commit to multiple sessions. Expect two to five sessions depending on coverage and saturation. The main failure I see is trying to cram the entire passage into a narrow chest strip, which makes lettering unreadable after a couple years. Plan the spacing first, bring scaled references showing the verse at three and six inches, and ask for heavier linework on the breastplate edges so the forms hold once the skin softens. For session wear, a button-down or zip hoodie that opens fully keeps the artist from tugging at the collar. If you want the piece to peek through shirts, try pairing it with an open-front overshirt for casual showing without constant exposure.
2. Helmet of Salvation on the Forearm
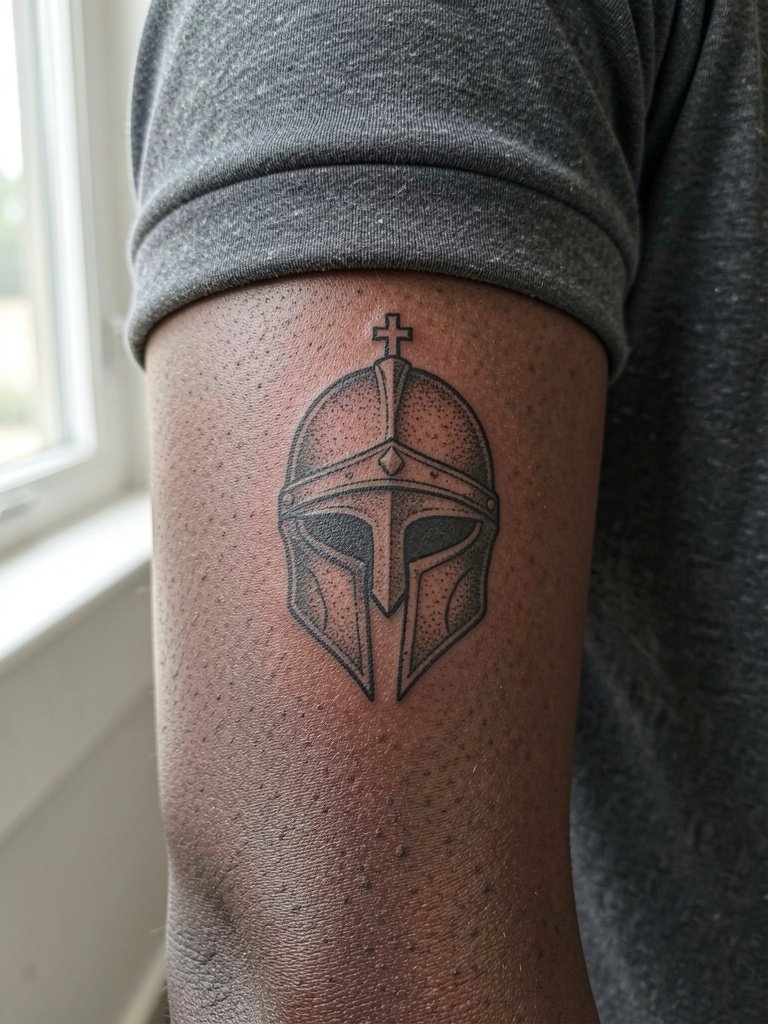
The helmet reads well on the inner forearm because that flat, palm-up surface preserves linework. Common mistakes include requesting ultra-thin single-needle lines then placing the piece near the wrist where detail dissipates. Ask for slightly heavier line weight around the helmet rim and stipple shading inside the crest so the contrast survives touch. Plan a one-session piece that runs 60 to 120 minutes. For showing it off, roll a cuff and wear a rolled-sleeve oxford shirt to let the piece sit in the open without looking like a flyer.
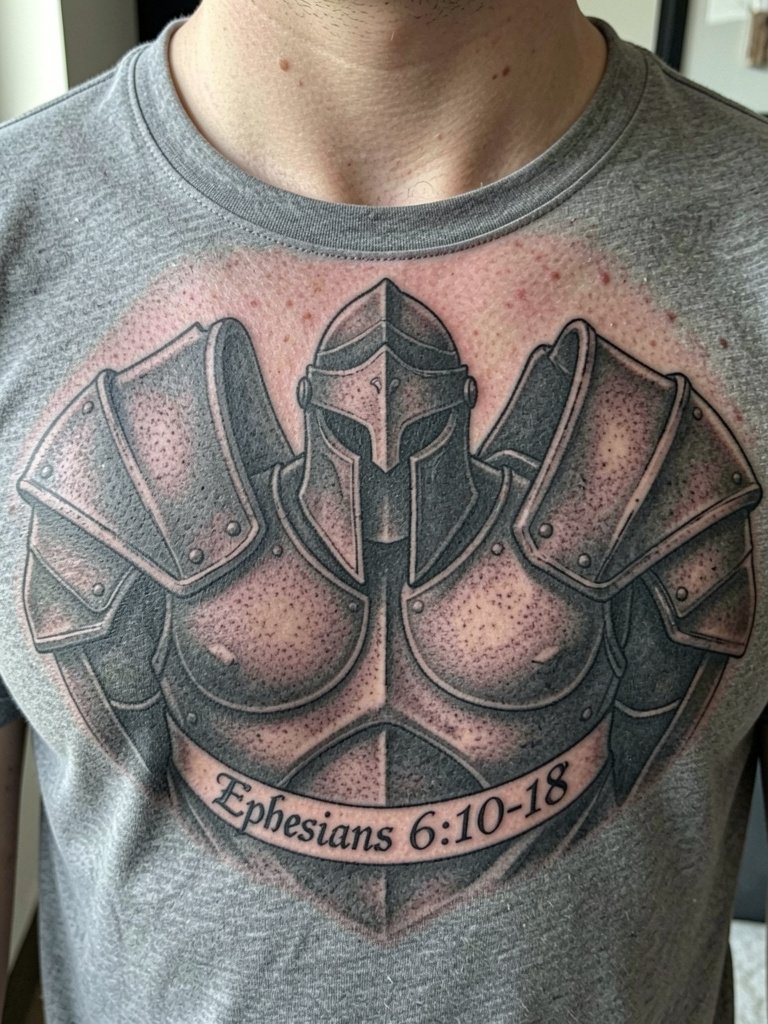
3. Breastplate of Righteousness Sternum Panel
This layout hugs the body and works best when the plate curves with the chest anatomy. Sternum work tends to be higher on the pain chart, so plan for a longer single session or two shorter ones. A common aging problem is over-detailing at small sizes; the fix is to increase panel spacing and strengthen outer contours. When you book, bring photos that show how the plates align to collarbone and sternum so the artist can draft a composition that reads both close up and at a distance. For session comfort, wear a top that can be opened or removed without rubbing the new ink, and consider an open front overshirt to get to the area without pulling clothes over your head.
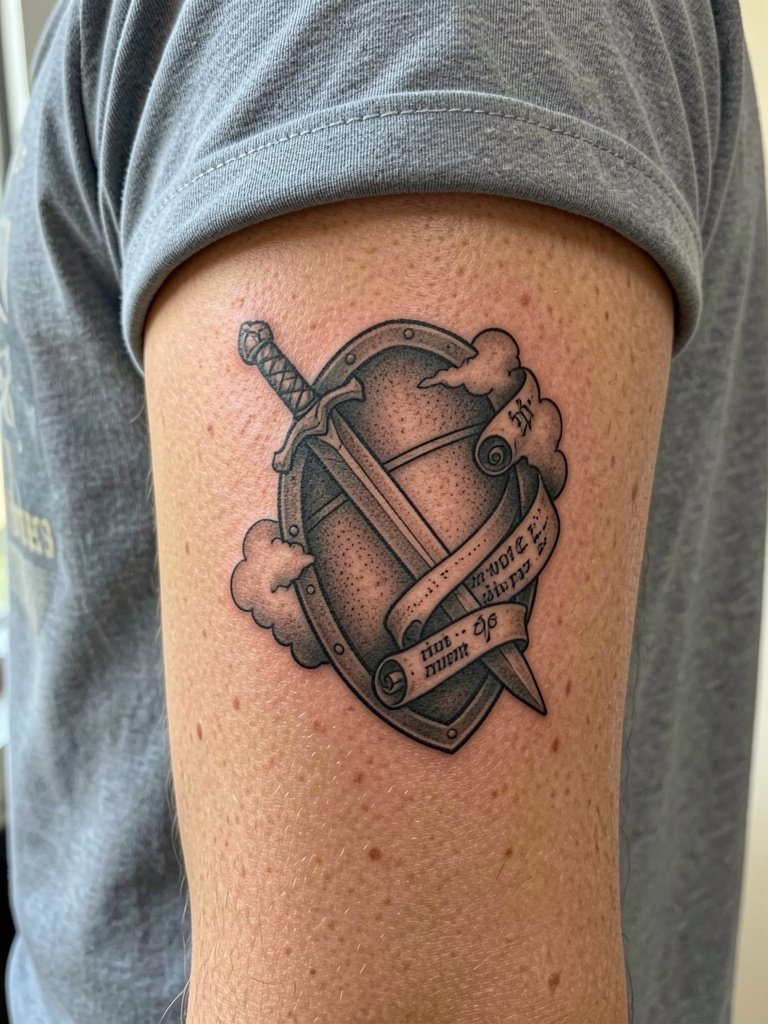
4. Shield of Faith on the Inner Forearm
A shield reads as a vertical anchor on the forearm and is forgiving when scaled. The usual error is adding tiny script inside the shield; the letters merge with stipple and age into smudges. Instead, place any reference or verse on an external scroll or on the opposite forearm. Forearm work is lower on the pain scale and typically finishes in one session. If you want to show the shield without going shirtless, roll your sleeves or pair it with a field jacket with sleeves that push up neatly. For touch-up planning, expect minor feathering after two to three years on the edges if the shield is very thin.
5. Sword of the Spirit Along the Outer Forearm
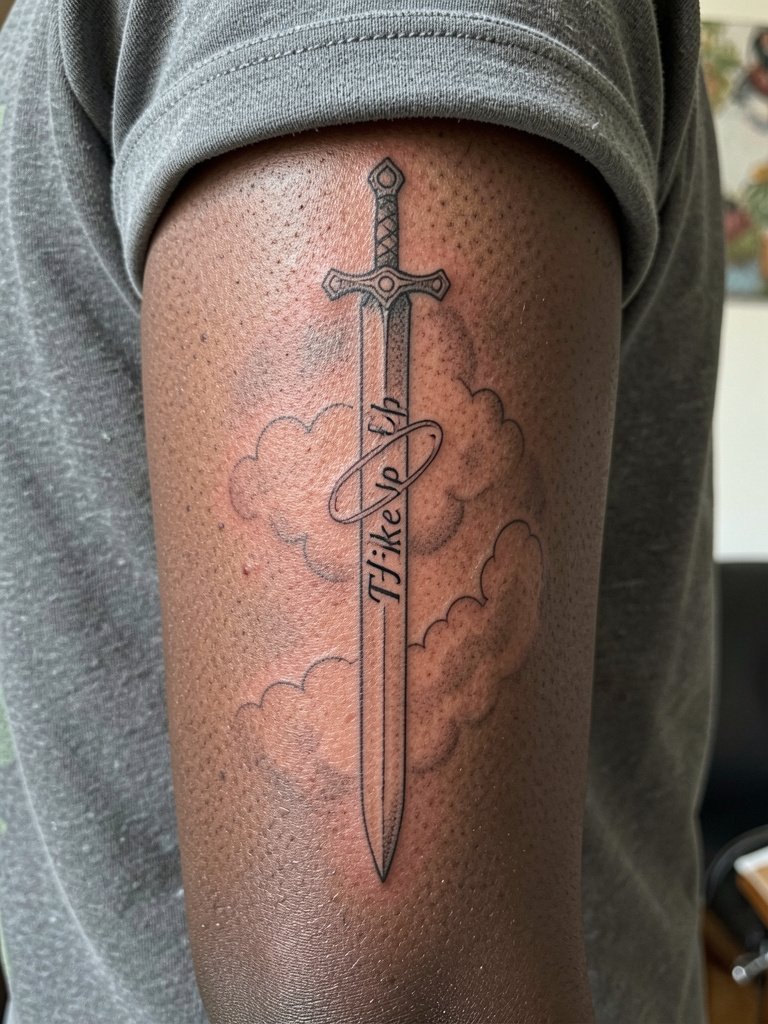
A vertical sword plays to the forearm's natural length and helps integrate script without crowding. People often ask for razor-thin script alongside the blade and then need a touch-up when letters blur. Ask for the lettering at a slightly larger scale than the design mockup so each character retains space. Sessions for this piece usually run 60 to 150 minutes depending on detail. For wearing afterward, cuff-rolled shirts or a minimalist bracelet on the opposite wrist keeps attention on the ink without rubbing the fresh area.
6. Minimalist Icon Row on the Inner Forearm
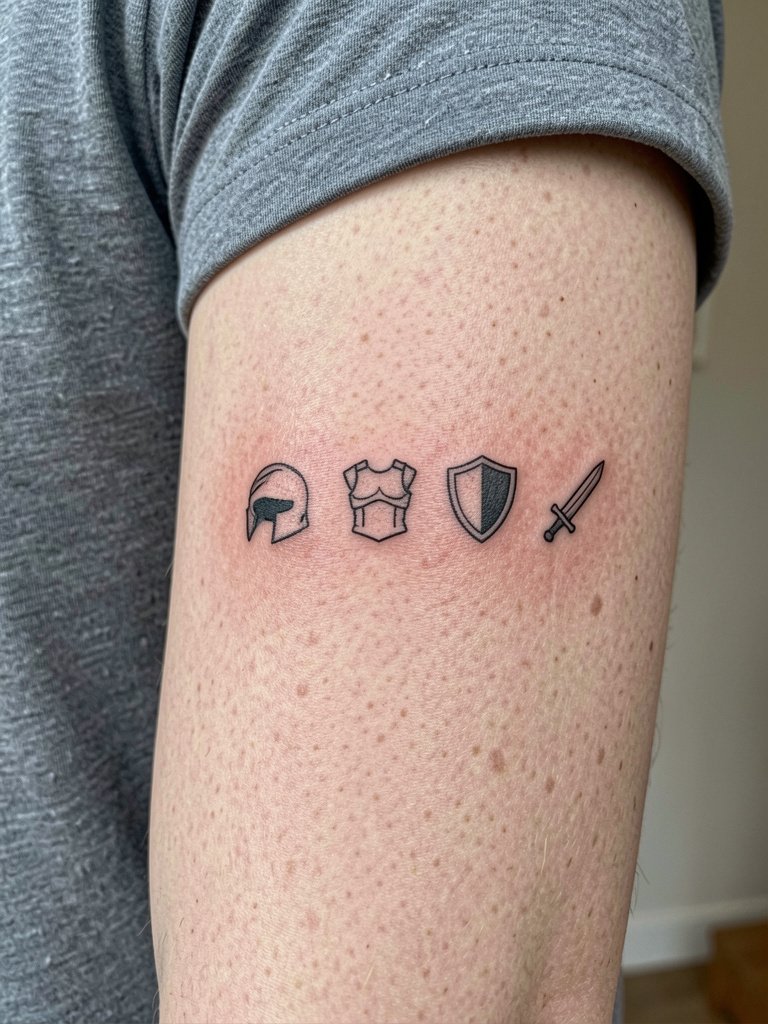
This is the starter route when you want the full metaphor but not a full panel. The biggest mistake here is making each icon too small and placing them with no breathing room. Space them at roughly one inch apart at your chosen scale and request slightly heavier outer lines so the row keeps its silhouette. It is an ideal single-session job for first-timers who want low recovery time. For showing it without exposing a lot of skin, roll the sleeves of an oxford shirt to mid-forearm and let the icons peek out casually.
Before You Book
The chest, forearm, and sternum pieces above have different healing profiles, so a compact kit for session day and the first week makes everything easier.
-
Silicone tattoo healing bandages. Protects larger chest or sternum panels from friction while sleep and early movement are highest, which helps avoid scabbing that pulls ink.
-
Fragrance-free moisturizing balm. A light balm keeps fine line forearm icons supple during the first two weeks without leaving a greasy film that traps bacteria.
-
Mineral SPF 50 sunscreen stick. Healed Armor of God work benefits from immediate sun protection; a stick is easy to apply to chest panels when you plan to be outside.
-
Gentle antibacterial body wash, fragrance free. Useful for rinsing the area clean without scented detergents that can irritate fresh ink.
-
Aquaphor Healing Ointment. Thin layers across the first few days lock in moisture for fine line work without clogging delicate needle channels.
7. Micro Helmet with Verse Reference on the Wrist
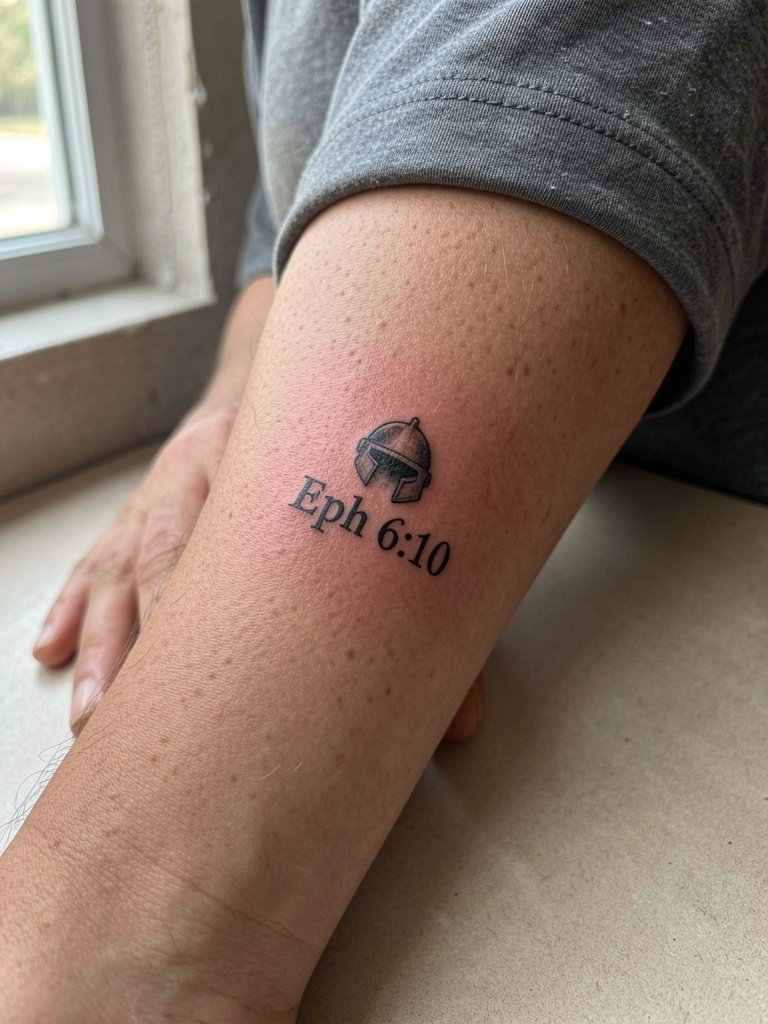
Micro pieces are tempting, but the wrist takes a beating from watches and washing. The usual regret is requesting delicate single-needle icons on the very proximal wrist band where details blur fast. Instead, ask for a slightly bolder helmet outline and put the verse reference in clear serif type spaced from the icon. Appointment time is commonly 30 to 60 minutes. For the day of, avoid wearing a watch on the tattooed wrist and bring a short sleeve tee that slips past the elbow comfortably. After a year, many micro wrists need a small touch-up if you want razor-sharp text.
8. Black and Grey Realism Half Sleeve Panel

Black and grey sleeves give you room to combine armor elements with devotional imagery. There is a known split on color here. One camp argues black and grey ages best and keeps the armor reverent and legible. Another camp favors selective color to make shields or flames pop and to give scenes a fresh look. Name both viewpoints when deciding your palette. If longevity is your priority, request strong saturation and fewer small color fills. Half sleeves typically require multiple sessions and consistent shading plans so future sleeve work integrates cleanly. For casual showing, pair the panel with a men's tank top that lets the sleeve read as one connected piece.
9. Dove Plus Armor Hybrid on Upper Back
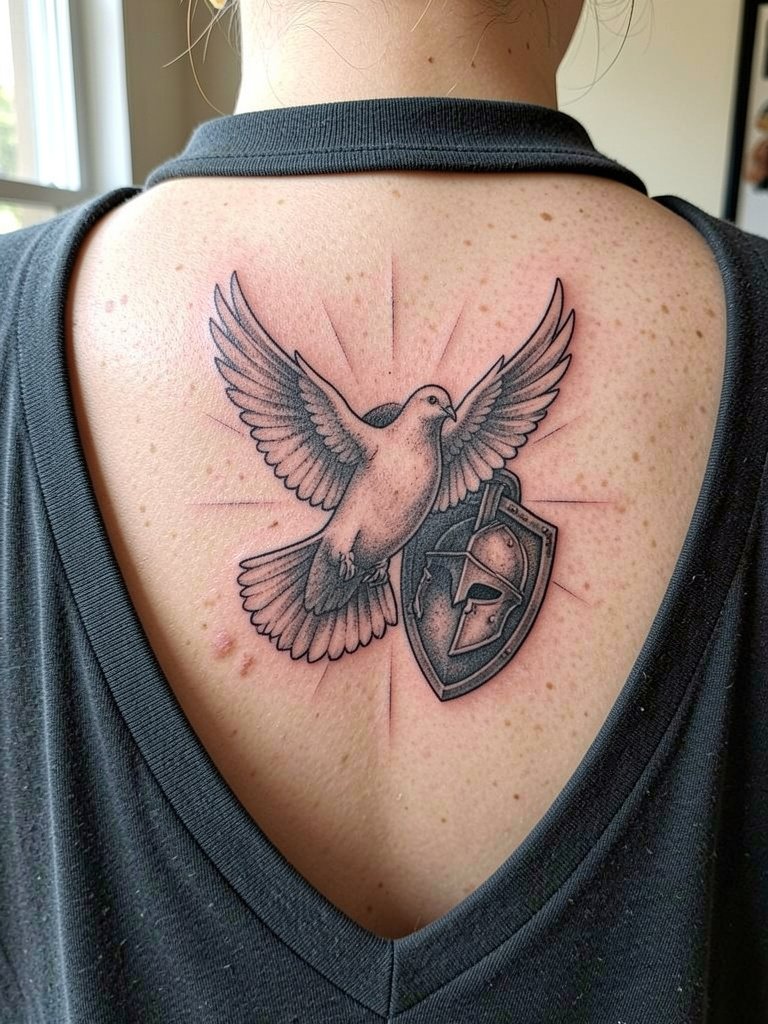
Combining a dove softens martial imagery and helps the piece feel devotional rather than aggressive for some viewers. A common execution error is overly detailed wings placed too close to armor plates, creating visual noise. The solution is to use open negative space and let the dove breathe away from heavy metal textures. Upper back pieces allow for larger scale and usually finish in two to three sessions. For wardrobe, an unbuttoned overshirt or a camp collar shirt frames the upper back well while keeping most of the area covered.
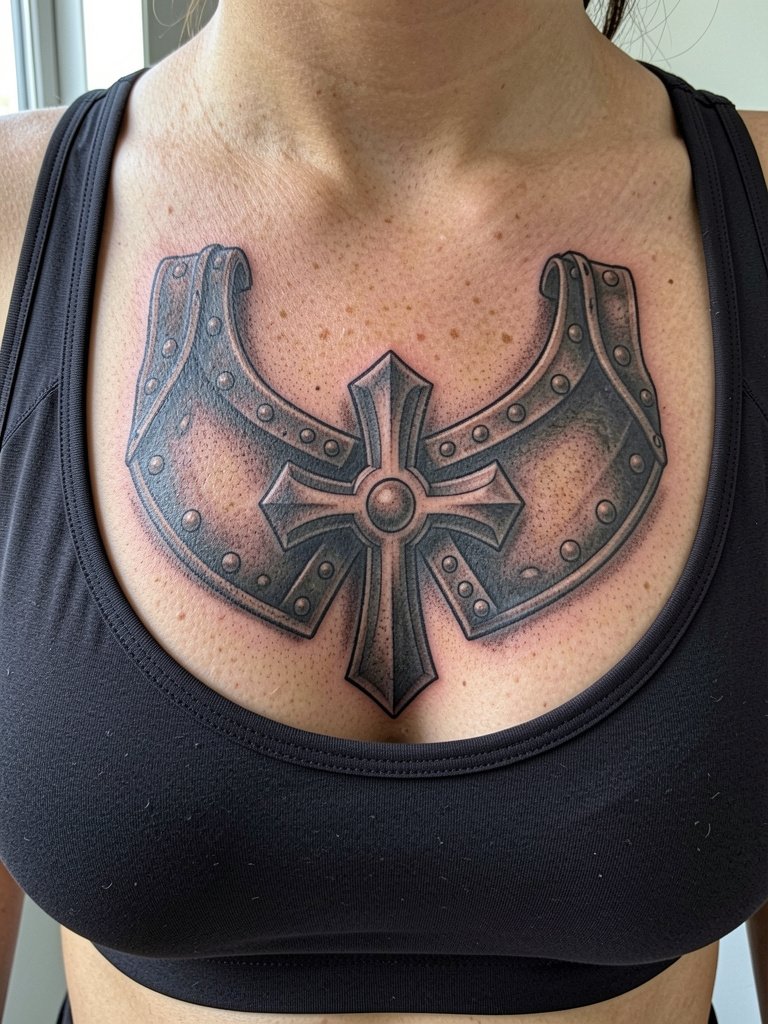
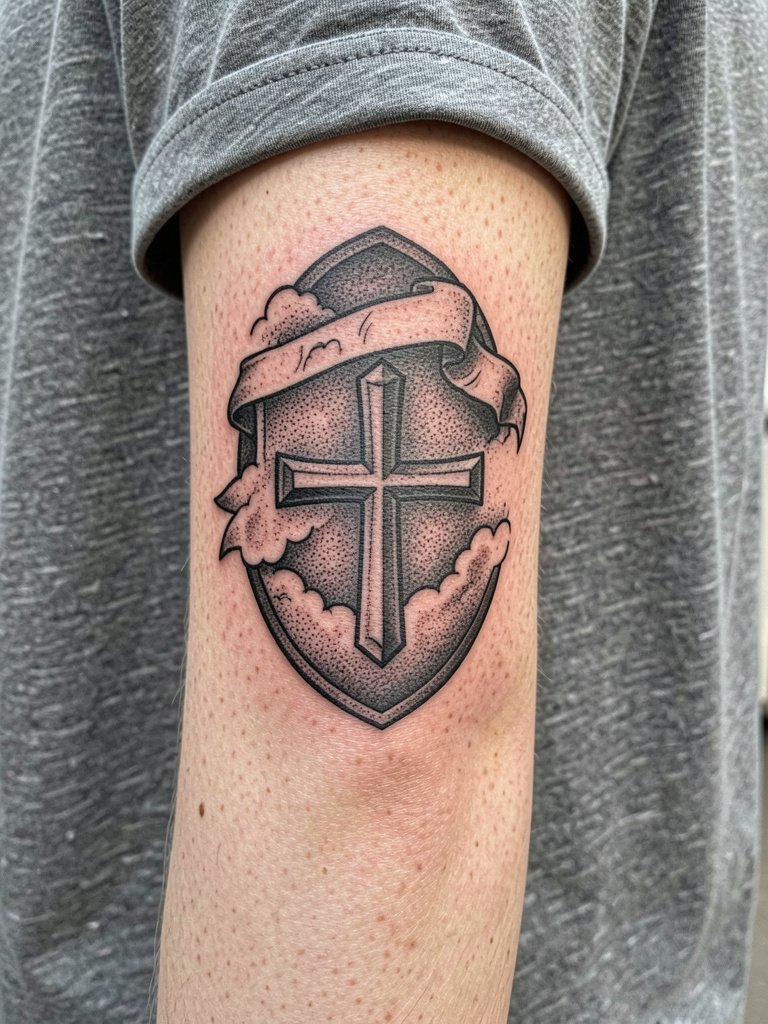
10. Cross-Centered Fragment Composition on the Upper Arm
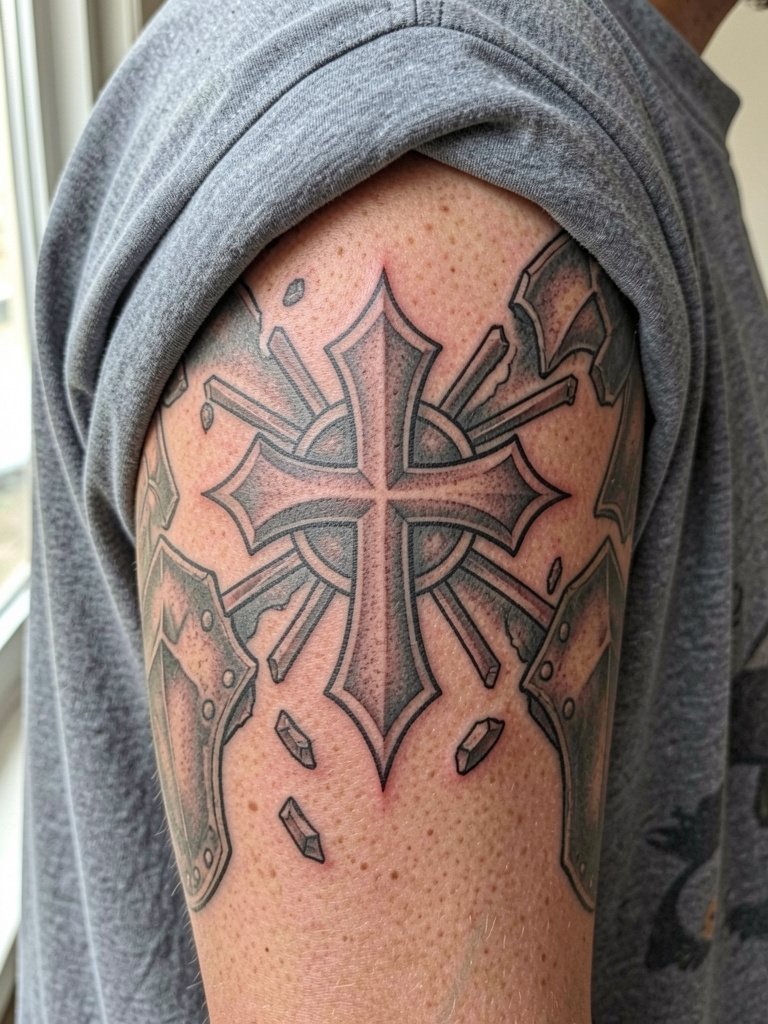
A cross at the center keeps the symbolism obvious and scalable. The pitfall is trying to extend the fragments too far without planning for future sleeve work, which creates mismatched textures when you add pieces later. Ask the artist to leave consistent negative bands for future connectors. Session time is commonly 90 to 180 minutes depending on shading. For showing the upper arm without stripping, wear a fitted short sleeve or a workout sleeveless shirt that frames the bicep.
11. Helmet and Little Script Micro-Piece on the Inner Bicep
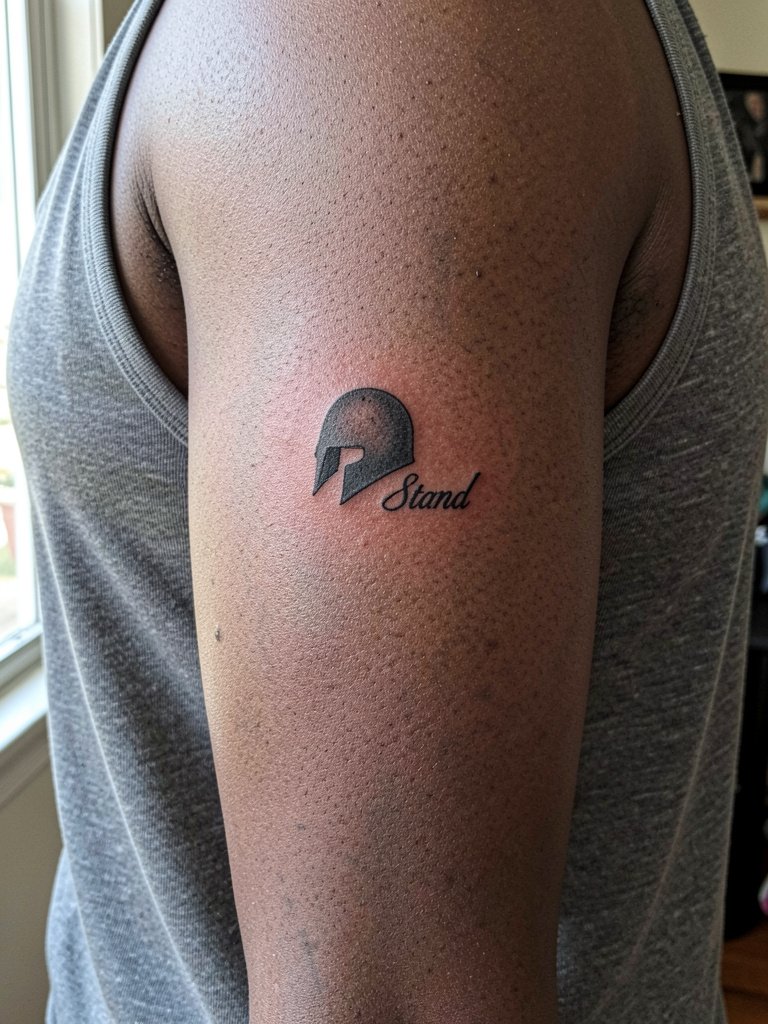
The inner bicep is intimate and looks great when the design contours to the medial arm. A caution: the inner bicep skin can stretch and the armpit area causes thin lines to diffuse. To avoid blowout risk, request slightly heavier outer lines and avoid tiny interior lettering. These micro inner bicep pieces take 45 to 120 minutes depending on placement precision. For session comfort, wear a sleeveless top that does not ride into the axilla and bring a loose zip hoodie to stay warm afterward.
12. Arm Band of Armor Motifs Around the Bicep
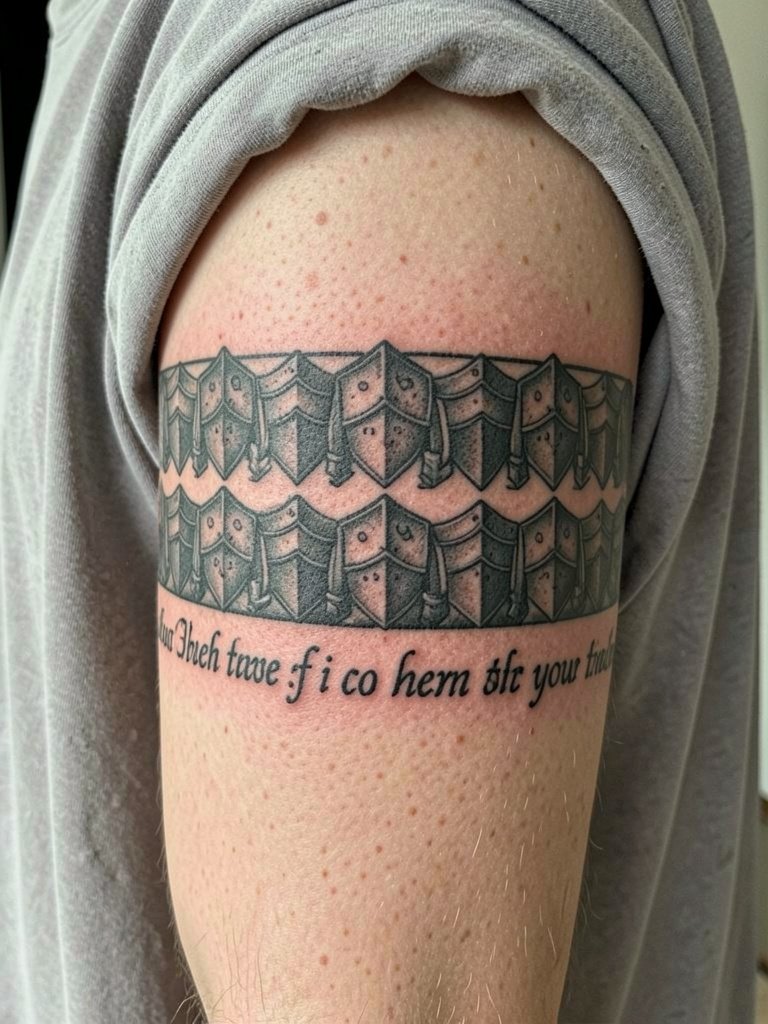
A wraparound band reads like literal armament and is a great option for someone who wants visual impact without a sleeve. The main mistake I see is uneven spacing that makes the band gape when the arm moves. Make sure the artist shows the wrap mockup on the arm at full circumference before inking to avoid misaligned repeats. A band is usually done in one to three sessions. For showing it in everyday wear, sleeveless tees or fitted short sleeves help the band read as a defined element.
13. Sword and Shield Half Sleeve Combo
Combining a sword and shield balances masculine geometry with motion. A common error is heavy detail in the middle that competes with the line of the arm. The better approach is to let the sword blade travel with the arm line and keep the shield as the anchor. Expect two to four sessions and discuss where the scroll and lettering will sit so it does not warp over muscle changes. For casual showing, athletic tanks or cuff-rolled tees present the half sleeve cleanly and keep the piece from looking like a patchwork.
14. Vertical Scripture Column on the Ribcage
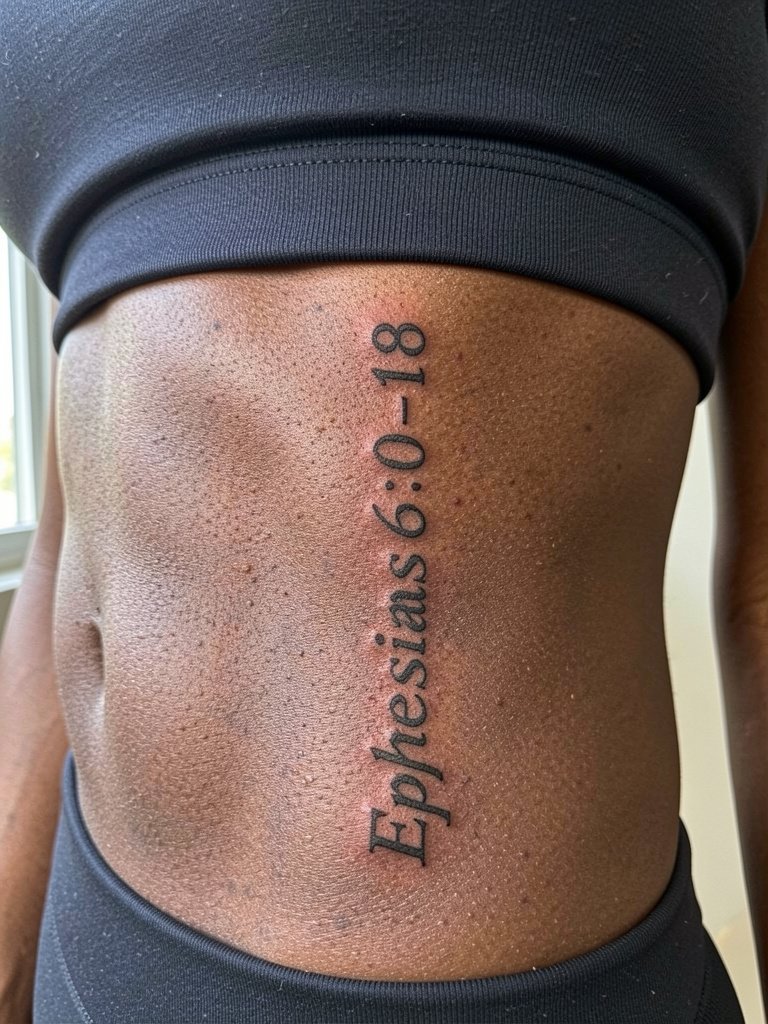
Long scripture on the ribs divides opinion. One camp wants the full passage because it leaves no ambiguity about the meaning. The other prefers a reference to avoid clutter and prevent long lines of text from becoming unreadable on curved, mobile skin. State both positions to yourself before booking. Ribs are a higher pain zone and the skin there can shift with breathing, so plan for a slower session and expect the artist to advise slightly larger letterforms for longevity. Wear loose clothing that lifts easily without friction for the appointment.
15. Calf Vertical Sword and Verse

The calf is forgiving for vertical compositions and is often underrated for readability and scale. People sometimes pick a font that looks good on a mockup but shrinks too small on the curved calf, so ask the artist to show the verse at the real-life height you want. A calf session is moderate on pain and can usually be completed in one sitting. For showing it in warm months, pair the piece with athletic shorts cuffed above the calf so the sword reads end to end.
Frequently Asked Questions
Q: How do I decide between a full Armor of God chest piece and a small helmet on the forearm?
A: If you want a large devotional statement that reads from a distance and includes script, a chest panel is the right route and often requires multiple sessions. If you prefer a subtler reminder that is easier to conceal or touch up, the forearm helmet or a minimalist icon row is better. Think about how visible you want the art in daily clothes and whether you prefer a phased build over time.
Q: Will black and grey always age better than color for these designs?
A: Many people prefer black and grey because it tends to fade into pleasing contrast over years, especially for script and metallic textures. Others choose selective color to highlight shields or rays for immediate impact. Both positions are valid. If durability is your priority, ask the artist for heavier linework and conservative, well-saturated fills rather than tiny color details.
Q: Where can I find healed examples and local artists who do Christian-themed tattoos without naming specific shops?
A: Search Instagram and TikTok with tags like #armorofgodtattoo, #christiantattoo, #blackandgreytattoo and use location filters to narrow to studios near you. Tattoo directories and community forums can show portfolios and healed photos. Look for healed shots rather than fresh ink to judge how lettering and fine elements settle on skin over time.
Q: How should I dress for a chest, forearm, or ribcage session?
A: For chest or sternum work, wear a button-down or an open-front overshirt that exposes the area without being pulled over the head. For forearm pieces, choose short sleeves or a sleeve that can be rolled above the elbow. For ribs, wear a loose tee or fitted cropped top that lifts cleanly without fabric rubbing the fresh ink. Comfortable, easy-to-remove clothing speeds the setup and reduces fabric contact after the session.
Q: What touch-up timeline should I expect for script-heavy versus bold shield designs?
A: Script-heavy pieces often need a light touch-up within one to three years if the letters were small or closely spaced. Bold shields and heavier blackwork commonly hold longer and may not need attention until three to five years. Plan touch-ups as part of long-term care, not as a failure of the initial work.
